The OpenVPN community project team is proud to release OpenVPN 2.6.0. This is a new stable release with some major new features.
For details see: Changes.rst
The Changes document also contains a section with workarounds for common problems encountered when using OpenVPN with OpenSSL 3.
New features and improvements in 2.6.0 compared to 2.5.8:
- Data Channel Offload (DCO) kernel acceleration support for Windows, Linux, and FreeBSD.
- OpenSSL 3 support.
- Improved handling of tunnel MTU, including support for pushable MTU.
- Outdated cryptographic algorithms disabled by default, but there are options to override if necessary.
- Reworked TLS handshake, making OpenVPN immune to replay-packet state exhaustion attacks.
- Added —peer-fingerprint mode for a more simplistic certificate setup and verification.
- Added Pre-Logon Access Provider support to OpenVPN GUI for Windows.
- Improved protocol negotiation, leading to faster connection setup.
- Included openvpn-gui updated to 11.36.0.0. See CHANGES.rst.
- Updated easy-rsa3 bundled with the installer on Windows.
- Various bug fixes.
Windows 64-bit MSI installer |
GnuPG Signature | OpenVPN-2.6.0-I003-amd64.msi |
Windows ARM64 MSI installer |
GnuPG Signature | OpenVPN-2.6.0-I003-arm64.msi |
Windows 32-bit MSI installer |
GnuPG Signature | OpenVPN-2.6.0-I003-x86.msi |
Source zip |
GnuPG Signature | openvpn-2.6.0.tar.gz |
The OpenVPN community project team is proud to release OpenVPN 2.5.4. This release include a number of fixes and small improvements. One of the fixes is to password prompting on windows console when stderr redirection is in use — this breaks 2.5.x on Win11/ARM, and might also break on Win11/amd64. Windows executable and libraries are now built natively on Windows using MSVC, not cross-compiled on Linux as with earlier 2.5 releases. Windows installers include updated OpenSSL and new OpenVPN GUI. The latter includes several improvements, the most important of which is the ability to import profiles from URLs where available. Installer version I602 fixes loading of pkcs11 files on Windows. Installer version I603 fixes a bug in the version number as seen by Windows (was 2.5..4, not 2.5.4). Installer I604 fixes some small Windows issues.
Source tarball (gzip) |
GnuPG Signature | openvpn-2.5.4.tar.gz |
Source tarball (xz) |
GnuPG Signature | openvpn-2.5.4.tar.xz |
Source zip |
GnuPG Signature | openvpn-2.5.4.zip |
Windows 32-bit MSI installer |
GnuPG Signature | OpenVPN-2.5.4-I604-x86.msi |
Windows 64-bit MSI installer |
GnuPG Signature | OpenVPN-2.5.4-I604-amd64.msi |
Windows ARM64 MSI installer |
GnuPG Signature | OpenVPN-2.5.4-I604-arm64.msi |
Overview of changes since OpenVPN 2.4
Faster connections
Crypto specific changes
- ChaCha20-Poly1305 cipher in the OpenVPN data channel (Requires OpenSSL 1.1.0 or newer)
- Improved TLS 1.3 support when using OpenSSL 1.1.1 or newer
- Client-specific tls-crypt keys (—tls-crypt-v2)
- Improved Data channel cipher negotiation
- Removal of BF-CBC support in default configuration (see below for possible incompatibilities)
Server-side improvements
- HMAC based auth-token support for seamless reconnects to standalone servers or a group of servers.
- Asynchronous (deferred) authentication support for auth-pam plugin
- Asynchronous (deferred) support for client-connect scripts and plugins
Network-related changes
- Support IPv4 configs with /31 netmasks now
- 802.1q VLAN support on TAP servers
- IPv6-only tunnels
- New option —block-ipv6 to reject all IPv6 packets (ICMPv6)
Linux-specific features
- VRF support
- Netlink integration (OpenVPN no longer needs to execute ifconfig/route or ip commands)
Windows-specific features
- Wintun driver support, a faster alternative to tap-windows6
- Setting tun/tap interface MTU
- Setting DHCP search domain
- Allow unicode search string in —cryptoapicert option
- EasyRSA3, a modern take on OpenVPN CA management
- MSI installer
Important notices
BF-CBC cipher is no longer the default
Cipher handling for the data channel cipher has been significantly changed between OpenVPN 2.3/2.4 and v2.5, most notably there are no «default cipher BF-CBC» anymore because it is no longer considered a reasonable default. BF-CBC is still available, but it needs to be explicitly configured now.
For connections between OpenVPN 2.4 and v2.5 clients and servers, both ends will be able to negotiate a better cipher than BF-CBC. By default they will select one of the AES-GCM ciphers, but this can be influenced using the —data-ciphers setting.
Connections between OpenVPN 2.3 and v2.5 that have no —cipher setting in the config (= defaulting to BF-CBC and not being negotiation-capable) must be updated. Unless BF-CBC is included in —data-ciphers or there is a «—cipher BF-CBC» in the OpenVPN 2.5 config, a v2.5 client or server will refuse to talk to a v2.3 server or client, because it has no common data channel cipher and negotiating a cipher is not possible. Generally, we recommend upgrading such setups to OpenVPN 2.4 or v2.5. If upgrading is not possible we recommend adding data-ciphers AES-256-GCM:AES-128-GCM:AES-128-CBC (for v2.5+) or cipher AES-128-CBC (v2.4.x and older) to the configuration of all clients and servers.
If you really need to use an unsupported OpenVPN 2.3 (or even older) release and need to stay on BF-CBC (not recommended), the OpenVPN 2.5 based client will need a config file change to re-enable BF-CBC. But be warned that BF-CBC and other related weak ciphers will be removed in coming OpenVPN major releases.
Connectivity to some VPN service provider may break
Connecting with an OpenVPN 2.5 client to at least one commercial VPN service that
implemented their own cipher negotiation method that always reports back that it is using BF-CBC to the client is broken in v2.5. This has always caused warning about mismatch ciphers. We have been in contact with some service providers and they are looking into it. This is not something the OpenVPN community can fix. If your commercial VPN does not work with a v2.5 client, complain to the VPN service provider.
More details on these new features as well as a list of deprecated features and user-visible changes are available in Changes.rst.
The OpenVPN community project team is proud to release OpenVPN 2.5.3. Besides a number of small improvements and bug fixes, this release fixes a possible security issue with OpenSSL config autoloading on Windows (CVE-2021-3606). Updated OpenVPN GUI is also included in Windows installers.
Source tarball (gzip) |
GnuPG Signature | openvpn-2.5.3.tar.gz |
Source tarball (xz) |
GnuPG Signature | openvpn-2.5.3.tar.xz |
Source zip |
GnuPG Signature | openvpn-2.5.3.zip |
Windows 32-bit MSI installer |
GnuPG Signature | OpenVPN-2.5.3-I601-x86.msi |
Windows 64-bit MSI installer |
GnuPG Signature | OpenVPN-2.5.3-I601-amd64.msi |
Windows ARM64 MSI installer |
GnuPG Signature | OpenVPN-2.5.3-I601-arm64.msi |
Overview of changes since OpenVPN 2.4
Faster connections
- Connections setup is now much faster
Crypto specific changes
- ChaCha20-Poly1305 cipher in the OpenVPN data channel (Requires OpenSSL 1.1.0 or newer)
- Improved TLS 1.3 support when using OpenSSL 1.1.1 or newer
- Client-specific tls-crypt keys (—tls-crypt-v2)
- Improved Data channel cipher negotiation
- Removal of BF-CBC support in default configuration (see below for possible incompatibilities)
Server-side improvements
- HMAC based auth-token support for seamless reconnects to standalone servers or a group of servers.
- Asynchronous (deferred) authentication support for auth-pam plugin
- Asynchronous (deferred) support for client-connect scripts and plugins
Network-related changes
- Support IPv4 configs with /31 netmasks now
- 802.1q VLAN support on TAP servers
- IPv6-only tunnels
- New option —block-ipv6 to reject all IPv6 packets (ICMPv6)
Linux-specific features
- VRF support
- Netlink integration (OpenVPN no longer needs to execute ifconfig/route or ip commands)
Windows-specific features
- Wintun driver support, a faster alternative to tap-windows6
- Setting tun/tap interface MTU
- Setting DHCP search domain
- Allow unicode search string in —cryptoapicert option
- EasyRSA3, a modern take on OpenVPN CA management
- MSI installer
Important notices
BF-CBC cipher is no longer the default
Cipher handling for the data channel cipher has been significantly changed between OpenVPN 2.3/2.4 and v2.5, most notably there are no «default cipher BF-CBC» anymore because it is no longer considered a reasonable default. BF-CBC is still available, but it needs to be explicitly configured now.
For connections between OpenVPN 2.4 and v2.5 clients and servers, both ends will be able to negotiate a better cipher than BF-CBC. By default they will select one of the AES-GCM ciphers, but this can be influenced using the —data-ciphers setting.
Connections between OpenVPN 2.3 and v2.5 that have no —cipher setting in the config (= defaulting to BF-CBC and not being negotiation-capable) must be updated. Unless BF-CBC is included in —data-ciphers or there is a «—cipher BF-CBC» in the OpenVPN 2.5 config, a v2.5 client or server will refuse to talk to a v2.3 server or client, because it has no common data channel cipher and negotiating a cipher is not possible. Generally, we recommend upgrading such setups to OpenVPN 2.4 or v2.5. If upgrading is not possible we recommend adding data-ciphers AES-256-GCM:AES-128-GCM:AES-128-CBC (for v2.5+) or cipher AES-128-CBC (v2.4.x and older) to the configuration of all clients and servers.
If you really need to use an unsupported OpenVPN 2.3 (or even older) release and need to stay on BF-CBC (not recommended), the OpenVPN 2.5 based client will need a config file change to re-enable BF-CBC. But be warned that BF-CBC and other related weak ciphers will be removed in coming OpenVPN major releases.
Connectivity to some VPN service provider may break
Connecting with an OpenVPN 2.5 client to at least one commercial VPN service that
implemented their own cipher negotiation method that always reports back that it is using BF-CBC to the client is broken in v2.5. This has always caused warning about mismatch ciphers. We have been in contact with some service providers and they are looking into it. This is not something the OpenVPN community can fix. If your commercial VPN does not work with a v2.5 client, complain to the VPN service provider.
More details on these new features as well as a list of deprecated features and user-visible changes are available in Changes.rst.
The OpenVPN community project team is proud to release OpenVPN 2.5.2. It fixes two related security vulnerabilities (CVE-2020-15078) which under very specific circumstances allow tricking a server using delayed authentication (plugin or management) into returning a PUSH_REPLY before the AUTH_FAILED message, which can possibly be used to gather information about a VPN setup. In combination with «—auth-gen-token» or a user-specific token auth solution it can be possible to get access to a VPN with an otherwise-invalid account. OpenVPN 2.5.2 also includes other bug fixes and improvements. Updated OpenSSL and OpenVPN GUI are included in Windows installers.
Source tarball (gzip) |
GnuPG Signature | openvpn-2.5.2.tar.gz |
Source tarball (xz) |
GnuPG Signature | openvpn-2.5.2.tar.xz |
Source zip |
GnuPG Signature | openvpn-2.5.2.zip |
Windows 32-bit MSI installer |
GnuPG Signature | OpenVPN-2.5.2-I601-x86.msi |
Windows 64-bit MSI installer |
GnuPG Signature | OpenVPN-2.5.2-I601-amd64.msi |
Overview of changes since OpenVPN 2.4
Faster connections
- Connections setup is now much faster
Crypto specific changes
- ChaCha20-Poly1305 cipher in the OpenVPN data channel (Requires OpenSSL 1.1.0 or newer)
- Improved TLS 1.3 support when using OpenSSL 1.1.1 or newer
- Client-specific tls-crypt keys (—tls-crypt-v2)
- Improved Data channel cipher negotiation
- Removal of BF-CBC support in default configuration (see below for possible incompatibilities)
Server-side improvements
- HMAC based auth-token support for seamless reconnects to standalone servers or a group of servers.
- Asynchronous (deferred) authentication support for auth-pam plugin
- Asynchronous (deferred) support for client-connect scripts and plugins
Network-related changes
- Support IPv4 configs with /31 netmasks now
- 802.1q VLAN support on TAP servers
- IPv6-only tunnels
- New option —block-ipv6 to reject all IPv6 packets (ICMPv6)
Linux-specific features
- VRF support
- Netlink integration (OpenVPN no longer needs to execute ifconfig/route or ip commands)
Windows-specific features
- Wintun driver support, a faster alternative to tap-windows6
- Setting tun/tap interface MTU
- Setting DHCP search domain
- Allow unicode search string in —cryptoapicert option
- EasyRSA3, a modern take on OpenVPN CA management
- MSI installer
Important notices
BF-CBC cipher is no longer the default
Cipher handling for the data channel cipher has been significantly changed between OpenVPN 2.3/2.4 and v2.5, most notably there are no «default cipher BF-CBC» anymore because it is no longer considered a reasonable default. BF-CBC is still available, but it needs to be explicitly configured now.
For connections between OpenVPN 2.4 and v2.5 clients and servers, both ends will be able to negotiate a better cipher than BF-CBC. By default they will select one of the AES-GCM ciphers, but this can be influenced using the —data-ciphers setting.
Connections between OpenVPN 2.3 and v2.5 that have no —cipher setting in the config (= defaulting to BF-CBC and not being negotiation-capable) must be updated. Unless BF-CBC is included in —data-ciphers or there is a «—cipher BF-CBC» in the OpenVPN 2.5 config, a v2.5 client or server will refuse to talk to a v2.3 server or client, because it has no common data channel cipher and negotiating a cipher is not possible. Generally, we recommend upgrading such setups to OpenVPN 2.4 or v2.5. If upgrading is not possible we recommend adding data-ciphers AES-256-GCM:AES-128-GCM:AES-128-CBC (for v2.5+) or cipher AES-128-CBC (v2.4.x and older) to the configuration of all clients and servers.
If you really need to use an unsupported OpenVPN 2.3 (or even older) release and need to stay on BF-CBC (not recommended), the OpenVPN 2.5 based client will need a config file change to re-enable BF-CBC. But be warned that BF-CBC and other related weak ciphers will be removed in coming OpenVPN major releases.
Connectivity to some VPN service provider may break
Connecting with an OpenVPN 2.5 client to at least one commercial VPN service that
implemented their own cipher negotiation method that always reports back that it is using BF-CBC to the client is broken in v2.5. This has always caused warning about mismatch ciphers. We have been in contact with some service providers and they are looking into it. This is not something the OpenVPN community can fix. If your commercial VPN does not work with a v2.5 client, complain to the VPN service provider.
More details on these new features as well as a list of deprecated features and user-visible changes are available in Changes.rst.
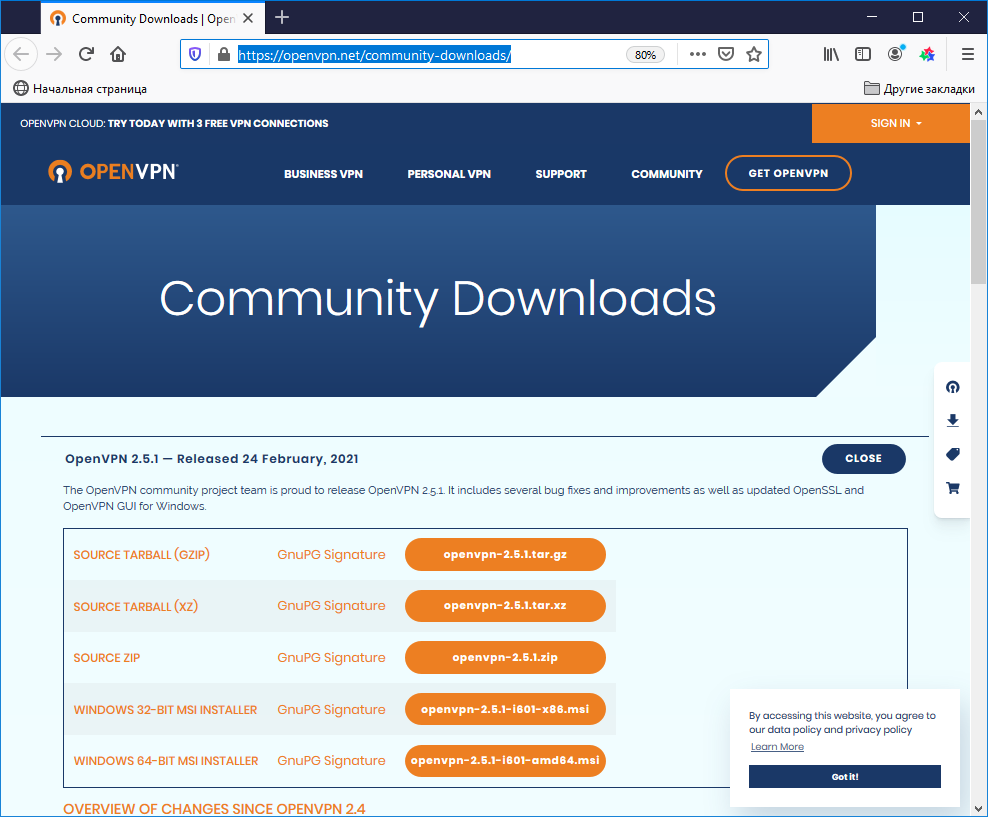
The OpenVPN community project team is proud to release OpenVPN 2.5.1. It includes several bug fixes and improvements as well as updated OpenSSL and OpenVPN GUI for Windows.
Source tarball (gzip) |
GnuPG Signature | openvpn-2.5.1.tar.gz |
Source tarball (xz) |
GnuPG Signature | openvpn-2.5.1.tar.xz |
Source zip |
GnuPG Signature | openvpn-2.5.1.zip |
Windows 32-bit MSI installer |
GnuPG Signature | OpenVPN-2.5.1-I601-x86.msi |
Windows 64-bit MSI installer |
GnuPG Signature | OpenVPN-2.5.1-I601-amd64.msi |
Overview of changes since OpenVPN 2.4
Faster connections
- Connections setup is now much faster
Crypto specific changes
- ChaCha20-Poly1305 cipher in the OpenVPN data channel (Requires OpenSSL 1.1.0 or newer)
- Improved TLS 1.3 support when using OpenSSL 1.1.1 or newer
- Client-specific tls-crypt keys (—tls-crypt-v2)
- Improved Data channel cipher negotiation
- Removal of BF-CBC support in default configuration (see below for possible incompatibilities)
Server-side improvements
- HMAC based auth-token support for seamless reconnects to standalone servers or a group of servers.
- Asynchronous (deferred) authentication support for auth-pam plugin
- Asynchronous (deferred) support for client-connect scripts and plugins
Network-related changes
- Support IPv4 configs with /31 netmasks now
- 802.1q VLAN support on TAP servers
- IPv6-only tunnels
- New option —block-ipv6 to reject all IPv6 packets (ICMPv6)
Linux-specific features
- VRF support
- Netlink integration (OpenVPN no longer needs to execute ifconfig/route or ip commands)
Windows-specific features
- Wintun driver support, a faster alternative to tap-windows6
- Setting tun/tap interface MTU
- Setting DHCP search domain
- Allow unicode search string in —cryptoapicert option
- EasyRSA3, a modern take on OpenVPN CA management
- MSI installer
Important notices
BF-CBC cipher is no longer the default
Cipher handling for the data channel cipher has been significantly changed between OpenVPN 2.3/2.4 and v2.5, most notably there are no «default cipher BF-CBC» anymore because it is no longer considered a reasonable default. BF-CBC is still available, but it needs to be explicitly configured now.
For connections between OpenVPN 2.4 and v2.5 clients and servers, both ends will be able to negotiate a better cipher than BF-CBC. By default they will select one of the AES-GCM ciphers, but this can be influenced using the —data-ciphers setting.
Connections between OpenVPN 2.3 and v2.5 that have no —cipher setting in the config (= defaulting to BF-CBC and not being negotiation-capable) must be updated. Unless BF-CBC is included in —data-ciphers or there is a «—cipher BF-CBC» in the OpenVPN 2.5 config, a v2.5 client or server will refuse to talk to a v2.3 server or client, because it has no common data channel cipher and negotiating a cipher is not possible. Generally, we recommend upgrading such setups to OpenVPN 2.4 or v2.5. If upgrading is not possible we recommend adding data-ciphers AES-256-GCM:AES-128-GCM:AES-128-CBC (for v2.5+) or cipher AES-128-CBC (v2.4.x and older) to the configuration of all clients and servers.
If you really need to use an unsupported OpenVPN 2.3 (or even older) release and need to stay on BF-CBC (not recommended), the OpenVPN 2.5 based client will need a config file change to re-enable BF-CBC. But be warned that BF-CBC and other related weak ciphers will be removed in coming OpenVPN major releases.
Connectivity to some VPN service provider may break
Connecting with an OpenVPN 2.5 client to at least one commercial VPN service that
implemented their own cipher negotiation method that always reports back that it is using BF-CBC to the client is broken in v2.5. This has always caused warning about mismatch ciphers. We have been in contact with some service providers and they are looking into it. This is not something the OpenVPN community can fix. If your commercial VPN does not work with a v2.5 client, complain to the VPN service provider.
More details on these new features as well as a list of deprecated features and user-visible changes are available in Changes.rst.
The OpenVPN community project team is proud to release OpenVPN 2.5.0 which is a new major release with many new features.
Source tarball (gzip) |
GnuPG Signature | openvpn-2.5.0.tar.gz |
Source tarball (xz) |
GnuPG Signature | openvpn-2.5.0.tar.xz |
Source zip |
GnuPG Signature | openvpn-2.5.0.zip |
Windows 32-bit MSI installer |
GnuPG Signature | OpenVPN-2.5.0-I601-x86.msi |
Windows 64-bit MSI installer |
GnuPG Signature | OpenVPN-2.5.0-I601-amd64.msi |
Overview of changes since OpenVPN 2.4
Faster connections
- Connections setup is now much faster
Crypto specific changes
- ChaCha20-Poly1305 cipher in the OpenVPN data channel (Requires OpenSSL 1.1.0 or newer)
- Improved TLS 1.3 support when using OpenSSL 1.1.1 or newer
- Client-specific tls-crypt keys (—tls-crypt-v2)
- Improved Data channel cipher negotiation
- Removal of BF-CBC support in default configuration (see below for possible incompatibilities)
Server-side improvements
- HMAC based auth-token support for seamless reconnects to standalone servers or a group of servers.
- Asynchronous (deferred) authentication support for auth-pam plugin
- Asynchronous (deferred) support for client-connect scripts and plugins
Network-related changes
- Support IPv4 configs with /31 netmasks now
- 802.1q VLAN support on TAP servers
- IPv6-only tunnels
- New option —block-ipv6 to reject all IPv6 packets (ICMPv6)
Linux-specific features
- VRF support
- Netlink integration (OpenVPN no longer needs to execute ifconfig/route or ip commands)
Windows-specific features
- Wintun driver support, a faster alternative to tap-windows6
- Setting tun/tap interface MTU
- Setting DHCP search domain
- Allow unicode search string in —cryptoapicert option
- EasyRSA3, a modern take on OpenVPN CA management
- MSI installer
Important notices
BF-CBC cipher is no longer the default
Cipher handling for the data channel cipher has been significantly changed between OpenVPN 2.3/2.4 and v2.5, most notably there are no «default cipher BF-CBC» anymore because it is no longer considered a reasonable default. BF-CBC is still available, but it needs to be explicitly configured now.
For connections between OpenVPN 2.4 and v2.5 clients and servers, both ends will be able to negotiate a better cipher than BF-CBC. By default they will select one of the AES-GCM ciphers, but this can be influenced using the —data-ciphers setting.
Connections between OpenVPN 2.3 and v2.5 that have no —cipher setting in the config (= defaulting to BF-CBC and not being negotiation-capable) must be updated. Unless BF-CBC is included in —data-ciphers or there is a «—cipher BF-CBC» in the OpenVPN 2.5 config, a v2.5 client or server will refuse to talk to a v2.3 server or client, because it has no common data channel cipher and negotiating a cipher is not possible. Generally, we recommend upgrading such setups to OpenVPN 2.4 or v2.5. If upgrading is not possible we recommend adding data-ciphers AES-256-GCM:AES-128-GCM:AES-128-CBC (for v2.5+) or cipher AES-128-CBC (v2.4.x and older) to the configuration of all clients and servers.
If you really need to use an unsupported OpenVPN 2.3 (or even older) release and need to stay on BF-CBC (not recommended), the OpenVPN 2.5 based client will need a config file change to re-enable BF-CBC. But be warned that BF-CBC and other related weak ciphers will be removed in coming OpenVPN major releases.
Connectivity to some VPN service provider may break
Connecting with an OpenVPN 2.5 client to at least one commercial VPN service that
implemented their own cipher negotiation method that always reports back that it is using BF-CBC to the client is broken in v2.5. This has always caused warning about mismatch ciphers. We have been in contact with some service providers and they are looking into it. This is not something the OpenVPN community can fix. If your commercial VPN does not work with a v2.5 client, complain to the VPN service provider.
More details on these new features as well as a list of deprecated features and user-visible changes are available in Changes.rst.
The OpenVPN community project team is proud to release OpenVPN 2.4.11. It fixes two related security vulnerabilities (CVE-2020-15078) which under very specific circumstances allow tricking a server using delayed authentication (plugin or management) into returning a PUSH_REPLY before the AUTH_FAILED message, which can possibly be used to gather information about a VPN setup. This release also includes other bug fixes and improvements. The I602 Windows installers fix a possible security issue with OpenSSL config autoloading on Windows (CVE-2021-3606). Updated OpenSSL and OpenVPN GUI are included in Windows installers.
Source Tarball (gzip) |
GnuPG Signature | openvpn-2.4.11.tar.gz |
Source Tarball (xz) |
GnuPG Signature | openvpn-2.4.11.tar.xz |
Source Zip |
GnuPG Signature | openvpn-2.4.11.zip |
Windows 7/8/8.1/Server 2012r2 installer (NSIS) |
GnuPG Signature | openvpn-install-2.4.11-I602-Win7.exe |
Windows 10/Server 2016/Server 2019 installer (NSIS) |
GnuPG Signature | openvpn-install-2.4.11-I602-Win10.exe |
A summary of the changes is available in Changes.rst, and a full list of changes is available here.
Please note that LibreSSL is not a supported crypto backend. We accept patches and we do test on OpenBSD 6.0 which comes with LibreSSL, but if newer versions of LibreSSL break API compatibility we do not take responsibility to fix that.
Also note that Windows installers have been built with NSIS version that has been patched against several NSIS installer code execution and privilege escalation problems. Based on our testing, though, older Windows versions such as Windows 7 might not benefit from these fixes. We thus strongly encourage you to always move NSIS installers to a non-user-writeable location before running them.
Please note that OpenVPN 2.4 installers will not work on Windows XP. The last OpenVPN version that supports Windows XP is 2.3.18, which is downloadable as 32-bit and 64-bit versions.
If you find a bug in this release, please file a bug report to our Trac bug tracker. In uncertain cases please contact our developers first, either using the openvpn-devel mailinglist or the developer IRC channel (#openvpn-devel at irc.libera.chat). For generic help take a look at our official documentation, wiki, forums, openvpn-users mailing list and user IRC channel (#openvpn at irc.libera.chat).
Important: you will need to use the correct installer for your operating system. The Windows 10 installer works on Windows 10 and Windows Server 2016/2019. The Windows 7 installer will work on Windows 7/8/8.1/Server 2012r2. This is because of Microsoft’s driver signing requirements are different for kernel-mode devices drivers, which in our case affects OpenVPN’s tap driver (tap-windows6).
This is primarily a maintenance release with bugfixes and small improvements. Windows installers include the latest OpenSSL version (1.1.1i) which includes security fixes.
A summary of the changes is available in Changes.rst, and a full list of changes is available here.
Please note that LibreSSL is not a supported crypto backend. We accept patches and we do test on OpenBSD 6.0 which comes with LibreSSL, but if newer versions of LibreSSL break API compatibility we do not take responsibility to fix that.
Also note that Windows installers have been built with NSIS version that has been patched against several NSIS installer code execution and privilege escalation problems. Based on our testing, though, older Windows versions such as Windows 7 might not benefit from these fixes. We thus strongly encourage you to always move NSIS installers to a non-user-writeable location before running them.
Please note that OpenVPN 2.4 installers will not work on Windows XP. The last OpenVPN version that supports Windows XP is 2.3.18, which is downloadable as 32-bit and 64-bit versions.
If you find a bug in this release, please file a bug report to our Trac bug tracker. In uncertain cases please contact our developers first, either using the openvpn-devel mailinglist or the developer IRC channel (#openvpn-devel at irc.libera.chat). For generic help take a look at our official documentation, wiki, forums, openvpn-users mailing list and user IRC channel (#openvpn at irc.libera.chat).
Important: you will need to use the correct installer for your operating system. The Windows 10 installer works on Windows 10 and Windows Server 2016/2019. The Windows 7 installer will work on Windows 7/8/8.1/Server 2012r2. This is because of Microsoft’s driver signing requirements are different for kernel-mode devices drivers, which in our case affects OpenVPN’s tap driver (tap-windows6).
Source Tarball (gzip) |
GnuPG Signature | openvpn-2.4.10.tar.gz |
Source Tarball (xz) |
GnuPG Signature | openvpn-2.4.10.tar.xz |
Source Zip |
GnuPG Signature | openvpn-2.4.10.zip |
Windows 7/8/8.1/Server 2012r2 installer (NSIS) |
GnuPG Signature | openvpn-install-2.4.10-I601-Win7.exe |
Windows 10/Server 2016/Server 2019 installer (NSIS) |
GnuPG Signature | openvpn-install-2.4.10-I601-Win10.exe |
Instructions for verifying the signatures are available here.
This release is also available in our own software repositories for Debian and Ubuntu, Supported architectures are i386 and amd64. For details. look here.
The Windows installers are bundled with OpenVPN-GUI — its source code is available on its project page and as tarballs on our alternative download server.
This is primarily a maintenance release with bugfixes and improvements. This release also fixes a security issue (CVE-2020-11810, trac #1272) which allows disrupting service of a freshly connected client that has not yet not negotiated session keys. The vulnerability cannot be used to inject or steal VPN traffic.
A summary of the changes is available in Changes.rst, and a full list of changes is available here.
Please note that LibreSSL is not a supported crypto backend. We accept patches and we do test on OpenBSD 6.0 which comes with LibreSSL, but if newer versions of LibreSSL break API compatibility we do not take responsibility to fix that.
Also note that Windows installers have been built with NSIS version that has been patched against several NSIS installer code execution and privilege escalation problems. Based on our testing, though, older Windows versions such as Windows 7 might not benefit from these fixes. We thus strongly encourage you to always move NSIS installers to a non-user-writeable location before running them. We are moving to MSI installers in OpenVPN 2.5, but OpenVPN 2.4.x will remain NSIS-only.
Compared to OpenVPN 2.3 this is a major update with a large number of new features, improvements and fixes. Some of the major features are AEAD (GCM) cipher and Elliptic Curve DH key exchange support, improved IPv4/IPv6 dual stack support and more seamless connection migration when client’s IP address changes (Peer-ID). Also, the new —tls-crypt feature can be used to increase users’ connection privacy.
OpenVPN GUI bundled with the Windows installer has a large number of new features compared to the one bundled with OpenVPN 2.3. One of major features is the ability to run OpenVPN GUI without administrator privileges. For full details, see the changelog. The new OpenVPN GUI features are documented here.
Please note that OpenVPN 2.4 installers will not work on Windows XP. The last OpenVPN version that supports Windows XP is 2.3.18, which is downloadable as 32-bit and 64-bit versions.
If you find a bug in this release, please file a bug report to our Trac bug tracker. In uncertain cases please contact our developers first, either using the openvpn-devel mailinglist or the developer IRC channel (#openvpn-devel at irc.libera.chat). For generic help take a look at our official documentation, wiki, forums, openvpn-users mailing list and user IRC channel (#openvpn at irc.libera.chat).
Important: you will need to use the correct installer for your operating system. The Windows 10 installer works on Windows 10 and Windows Server 2016/2019. The Windows 7 installer will work on Windows 7/8/8.1/Server 2012r2. This is because of Microsoft’s driver signing requirements are different for kernel-mode devices drivers, which in our case affects OpenVPN’s tap driver (tap-windows6).
Source Tarball (gzip) |
GnuPG Signature | openvpn-2.4.9.tar.gz |
Source Tarball (xz) |
GnuPG Signature | openvpn-2.4.9.tar.xz |
Source Zip |
GnuPG Signature | openvpn-2.4.9.zip |
Windows 7/8/8.1/Server 2012r2 installer (NSIS) |
GnuPG Signature | openvpn-install-2.4.9-I601-Win7.exe |
Windows 10/Server 2016/Server 2019 installer (NSIS) |
GnuPG Signature | openvpn-install-2.4.9-I601-Win10.exe |
NOTE: the GPG key used to sign the release files has been changed since OpenVPN 2.4.0. Instructions for verifying the signatures, as well as the new GPG public key are available here.
We also provide static URLs pointing to latest releases to ease automation. For a list of files look here.
This release is also available in our own software repositories for Debian and Ubuntu, Supported architectures are i386 and amd64. For details. look here.
You can use EasyRSA 2 or EasyRSA 3 for generating your own certificate authority. The former is bundled with Windows installers. The latter is a more modern alternative for UNIX-like operating systems.
The Windows installers are bundled with OpenVPN-GUI — its source code is available on its project page and as tarballs on our alternative download server.
This is primarily a maintenance release with bugfixes and improvements. The Windows installers (I601) have several improvements compared to the previous release:
- New tap-windows6 driver (9.24.2) which fixes some suspend and resume issues
- Latest OpenVPN-GUI
- Considerable performance boost due to new compiler optimization flags
A summary of the changes is available in Changes.rst, and a full list of changes is available here.
Please note that LibreSSL is not a supported crypto backend. We accept patches and we do test on OpenBSD 6.0 which comes with LibreSSL, but if newer versions of LibreSSL break API compatibility we do not take responsibility to fix that.
Also note that Windows installers have been built with NSIS version that has been patched against several NSIS installer code execution and privilege escalation problems. Based on our testing, though, older Windows versions such as Windows 7 might not benefit from these fixes. We thus strongly encourage you to always move NSIS installers to a non-user-writeable location before running them. We are moving to MSI installers in OpenVPN 2.5, but OpenVPN 2.4.x will remain NSIS-only.
Compared to OpenVPN 2.3 this is a major update with a large number of new features, improvements and fixes. Some of the major features are AEAD (GCM) cipher and Elliptic Curve DH key exchange support, improved IPv4/IPv6 dual stack support and more seamless connection migration when client’s IP address changes (Peer-ID). Also, the new —tls-crypt feature can be used to increase users’ connection privacy.
OpenVPN GUI bundled with the Windows installer has a large number of new features compared to the one bundled with OpenVPN 2.3. One of major features is the ability to run OpenVPN GUI without administrator privileges. For full details, see the changelog. The new OpenVPN GUI features are documented here.
Please note that OpenVPN 2.4 installers will not work on Windows XP. The last OpenVPN version that supports Windows XP is 2.3.18, which is downloadable as 32-bit and 64-bit versions.
If you find a bug in this release, please file a bug report to our Trac bug tracker. In uncertain cases please contact our developers first, either using the openvpn-devel mailinglist or the developer IRC channel (#openvpn-devel at irc.libera.chat). For generic help take a look at our official documentation, wiki, forums, openvpn-users mailing list and user IRC channel (#openvpn at irc.libera.chat).
Important: you will need to use the correct installer for your operating system. The Windows 10 installer works on Windows 10 and Windows Server 2016/2019. The Windows 7 installer will work on Windows 7/8/8.1/Server 2012r2. This is because of Microsoft’s driver signing requirements are different for kernel-mode devices drivers, which in our case affects OpenVPN’s tap driver (tap-windows6).
Source Tarball (gzip) |
GnuPG Signature | openvpn-2.4.8.tar.gz |
Source Tarball (xz) |
GnuPG Signature | openvpn-2.4.8.tar.xz |
Source Zip |
GnuPG Signature | openvpn-2.4.8.zip |
Windows 7/8/8.1/Server 2012r2 installer (NSIS) |
GnuPG Signature | openvpn-install-2.4.8-I602-Win7.exe |
Windows 10/Server 2016/Server 2019 installer (NSIS) |
GnuPG Signature | openvpn-install-2.4.8-I602-Win10.exe |
NOTE: the GPG key used to sign the release files has been changed since OpenVPN 2.4.0. Instructions for verifying the signatures, as well as the new GPG public key are available here.
We also provide static URLs pointing to latest releases to ease automation. For a list of files look here.
This release is also available in our own software repositories for Debian and Ubuntu, Supported architectures are i386 and amd64. For details. look here.
You can use EasyRSA 2 or EasyRSA 3 for generating your own certificate authority. The former is bundled with Windows installers. The latter is a more modern alternative for UNIX-like operating systems.
The Windows installers are bundled with OpenVPN-GUI — its source code is available on its project page and as tarballs on our alternative download server.
This is primarily a maintenance release with bugfixes and improvements. One of the big things is enhanced TLS 1.3 support. A summary of the changes is available in Changes.rst, and a full list of changes is available here.
Please note that LibreSSL is not a supported crypto backend. We accept patches and we do test on OpenBSD 6.0 which comes with LibreSSL, but if newer versions of LibreSSL break API compatibility we do not take responsibility to fix that.
Also note that Windows installers have been built with NSIS version that has been patched against several NSIS installer code execution and privilege escalation problems. Based on our testing, though, older Windows versions such as Windows 7 might not benefit from these fixes. We thus strongly encourage you to always move NSIS installers to a non-user-writeable location before running them. We are moving to MSI installers in OpenVPN 2.5, but OpenVPN 2.4.x will remain NSIS-only.
Compared to OpenVPN 2.3 this is a major update with a large number of new features, improvements and fixes. Some of the major features are AEAD (GCM) cipher and Elliptic Curve DH key exchange support, improved IPv4/IPv6 dual stack support and more seamless connection migration when client’s IP address changes (Peer-ID). Also, the new —tls-crypt feature can be used to increase users’ connection privacy.
OpenVPN GUI bundled with the Windows installer has a large number of new features compared to the one bundled with OpenVPN 2.3. One of major features is the ability to run OpenVPN GUI without administrator privileges. For full details, see the changelog. The new OpenVPN GUI features are documented here.
Please note that OpenVPN 2.4 installers will not work on Windows XP. The last OpenVPN version that supports Windows XP is 2.3.18, which is downloadable as 32-bit and 64-bit versions.
If you find a bug in this release, please file a bug report to our Trac bug tracker. In uncertain cases please contact our developers first, either using the openvpn-devel mailinglist or the developer IRC channel (#openvpn-devel at irc.libera.chat). For generic help take a look at our official documentation, wiki, forums, openvpn-users mailing list and user IRC channel (#openvpn at irc.libera.chat).
Important: you will need to use the correct installer for your operating system. The Windows 10 installer will not work on Windows 7/8/8.1/Server 2012r2. This is because Microsoft’s driver signing requirements and tap-windows6. For the same reason you need to use an older installer with Windows Server 2016. This older installer has a local privilege escalation vulnerability issue which we cannot resolve for Windows Server 2016 until tap-windows6 passes the HLK test suite on that platform. In the meanwhile we recommend Windows Server 2016 users to avoid installing OpenVPN/tap-windows6 driver on hosts where all users can’t be trusted. Users of Windows 7-10 and Server 2012r2 are recommended to update to latest installers as soon as possible.
Source Tarball (gzip) |
GnuPG Signature | openvpn-2.4.7.tar.gz |
Source Tarball (xz) |
GnuPG Signature | openvpn-2.4.7.tar.xz |
Source Zip |
GnuPG Signature | openvpn-2.4.7.zip |
Windows 7/8/8.1/Server 2012r2 installer (NSIS) |
GnuPG Signature | openvpn-install-2.4.7-I607-Win7.exe |
Windows 10 installer (NSIS) |
GnuPG Signature | openvpn-install-2.4.7-I607-Win10.exe |
Windows Server 2016 installer (NSIS) |
GnuPG Signature | openvpn-install-2.4.7-I603.exe |
NOTE: the GPG key used to sign the release files has been changed since OpenVPN 2.4.0. Instructions for verifying the signatures, as well as the new GPG public key are available here.
We also provide static URLs pointing to latest releases to ease automation. For a list of files look here.
This release is also available in our own software repositories for Debian and Ubuntu, Supported architectures are i386 and amd64. For details. look here.
You can use EasyRSA 2 or EasyRSA 3 for generating your own certificate authority. The former is bundled with Windows installers. The latter is a more modern alternative for UNIX-like operating systems.
The Windows installers are bundled with OpenVPN-GUI — its source code is available on its project page and as tarballs on our alternative download server.
This is primarily a maintenance release with minor bugfixes and improvements, and one security relevant fix for the Windows Interactive Service. Windows installer includes updated OpenVPN GUI and OpenSSL. Installer I601 included tap-windows6 driver 9.22.1 which had one security fix and dropped Windows Vista support. However, in installer I602 we had to revert back to tap-windows 9.21.2 due to driver getting reject on freshly installed Windows 10 rev 1607 and later when Secure Boot was enabled. The failure was due to the new, more strict driver signing requirements. The 9.22.1 version of the driver is in the process of getting approved and signed by Microsoft and will be bundled in an upcoming Windows installer.
Please note that LibreSSL is not a supported crypto backend. We accept patches and we do test on OpenBSD 6.0 which comes with LibreSSL, but if newer versions of LibreSSL break API compatibility we do not take responsibility to fix that.
Also note that Windows installers have been built with NSIS version that has been patched against several NSIS installer code execution and privilege escalation problems. Based on our testing, though, older Windows versions such as Windows 7 might not benefit from these fixes. We thus strongly encourage you to always move NSIS installers to a non-user-writeable location before running them. Our long-term plan is to migrate to using MSI installers instead.
Compared to OpenVPN 2.3 this is a major update with a large number of new features, improvements and fixes. Some of the major features are AEAD (GCM) cipher and Elliptic Curve DH key exchange support, improved IPv4/IPv6 dual stack support and more seamless connection migration when client’s IP address changes (Peer-ID). Also, the new —tls-crypt feature can be used to increase users’ connection privacy.
A summary of the changes is available in Changes.rst, and a full list of changes is available here.
OpenVPN GUI bundled with the Windows installer has a large number of new features compared to the one bundled with OpenVPN 2.3. One of major features is the ability to run OpenVPN GUI without administrator privileges. For full details, see the changelog. The new OpenVPN GUI features are documented here.
Please note that OpenVPN 2.4 installers will not work on Windows XP.
If you find a bug in this release, please file a bug report to our Trac bug tracker. In uncertain cases please contact our developers first, either using the openvpn-devel mailinglist or the developha er IRC channel (#openvpn-devel at irc.libera.chat). For generic help take a look at our official documentation, wiki, forums, openvpn-users mailing list and user IRC channel (#openvpn at irc.libera.chat).
Source Tarball (gzip) |
GnuPG Signature | openvpn-2.4.6.tar.gz |
Source Tarball (xz) |
GnuPG Signature | openvpn-2.4.6.tar.xz |
Source Zip |
GnuPG Signature | openvpn-2.4.6.zip |
Windows installer (NSIS) |
GnuPG Signature | openvpn-install-2.4.6-I602.exe |
NOTE: the GPG key used to sign the release files has been changed since OpenVPN 2.4.0. Instructions for verifying the signatures, as well as the new GPG public key are available here.
We also provide static URLs pointing to latest releases to ease automation. For a list of files look here.
This release is also available in our own software repositories for Debian and Ubuntu, Supported architectures are i386 and amd64. For details. look here.
You can use EasyRSA 2 or EasyRSA 3 for generating your own certificate authority. The former is bundled with Windows installers. The latter is a more modern alternative for UNIX-like operating systems.
The Windows installers are bundled with OpenVPN-GUI — its source code is available on its project page and as tarballs on our alternative download server.
You can download Windows developments snapshots (MSI installers) from here (Index of /downloads/snapshots/github-actions/openvpn2/ ). Those are automatically built from commits to OpenVPN master branch and include functionality which will be available in the next release. Development snapshots are less stable than releases, so use at your own risk.
Вчера обнаружил, что на мой домашний сервер пытаются подобрать пароль к RDP. Спросил наших безопасников с работы, да, порт сканировали, но пароль подбирают не они… Надо что-то делать с этим, и я даже знаю что.
Ударим шифрованием по злобным брутфорсерам! Ставим OpenVPN 2.5.1 сервер на Windows Server 2016.
- Встретимся с Easy-RSA 3.
- Решим неочевидный баг с директорией временных файлов.
- Освоим OpenVPN Connect, в том числе на Android.
- Запилим адаптер OpenVPN WinTun.
Установка OpenVPN Server
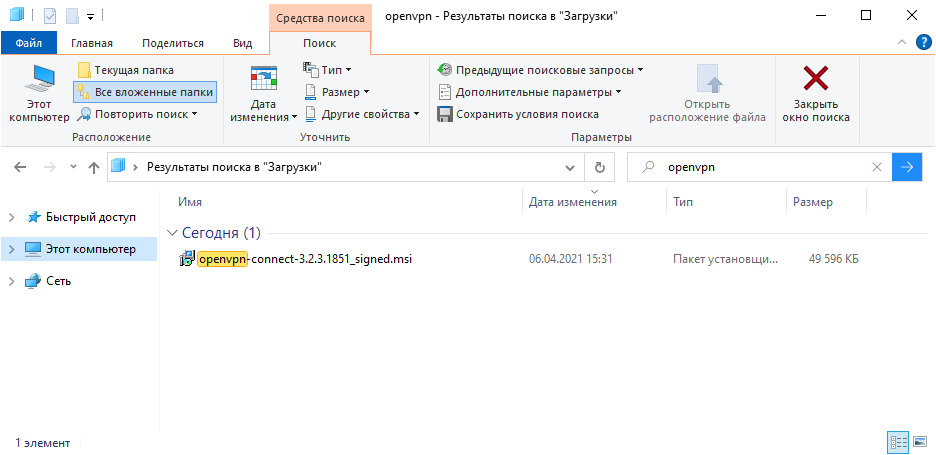
Скачиваем дистрибутив для установки OpenVPN:
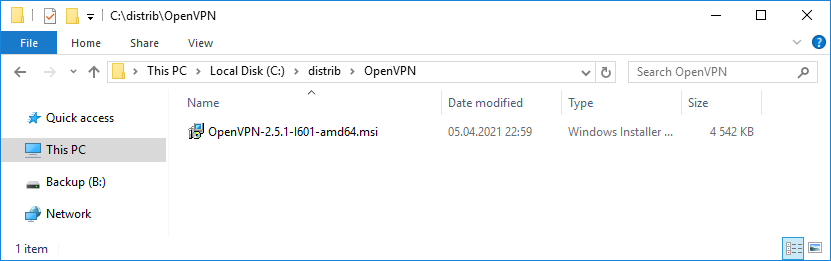
Доступна версия OpenVPN 2.5.1. Скачиваю Windows 64-bit MSI installer, файл OpenVPN-2.5.1-I601-amd64.msi.
Запускаем инсталлятор OpenVPN.
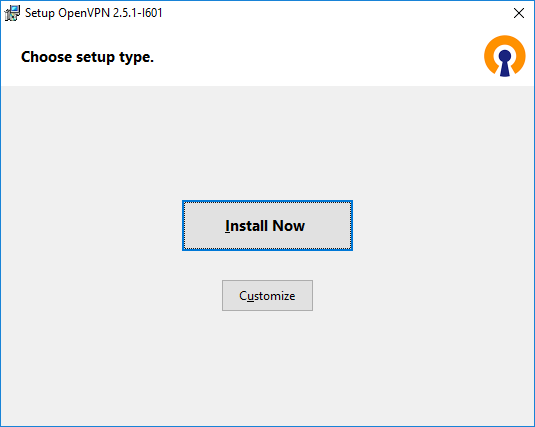
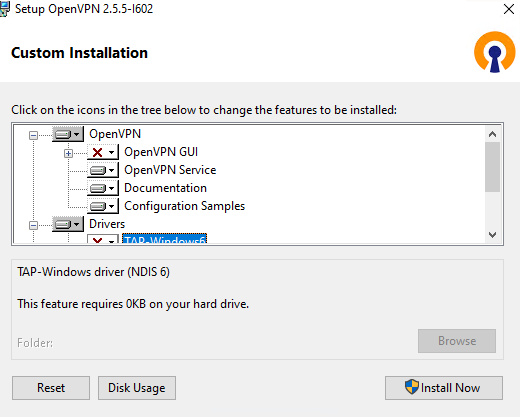
Открывается мастер установки, предлагают выбрать тип установки, естественно, нажимаем Customize. Установка по умолчанию нас не устроит.
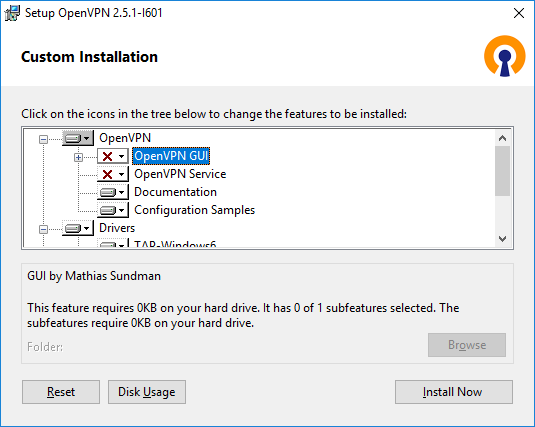
OpenVPN GUI отключаю. Мне нужно, чтобы OpenVPN на сервере работал автоматически.
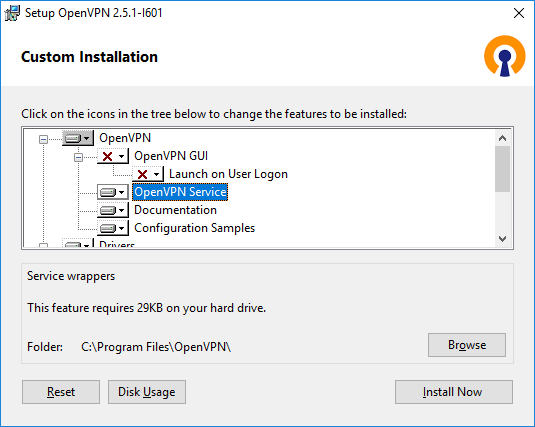
А OpenVPN Service, наоборот, включаю. OpenVPN у меня будет работать как служба Windows.
Документацию и примеры конфигурации оставляю. Конфигурационные примеры будут использоваться в качестве шаблонов.

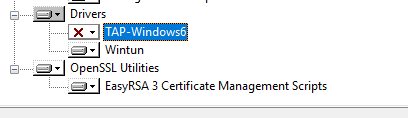
Начиная с версии OpenVPN 2.5 появилась поддержка драйвера WinTUN от разработчиков WireGuard. Говорят, что работает быстрее чем TAP-Windows6. Поэтому драйвер TAP-Windows6 отключаю и включаю Wintun.
ПРИМЕЧАНИЕ: для включения драйвера Wintun необходимо в файле конфигурации сервера включить параметр:
windows-driver wintun
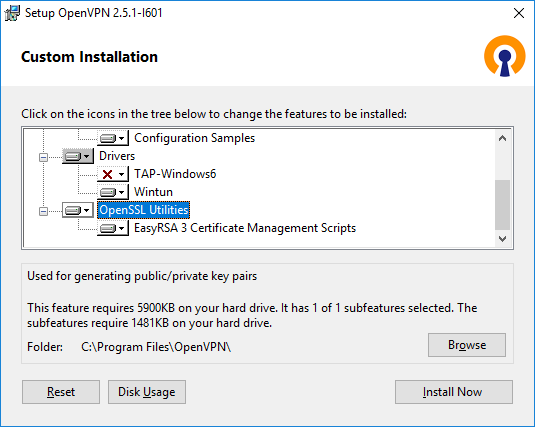
Утилиты OpenSSL EasyRSA 3 Certificate Management Scripts включаю. Install Now.
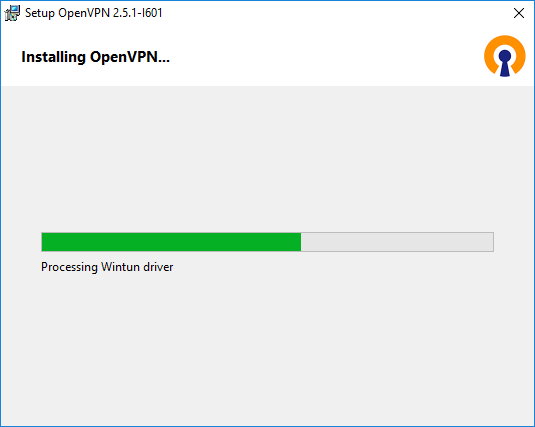
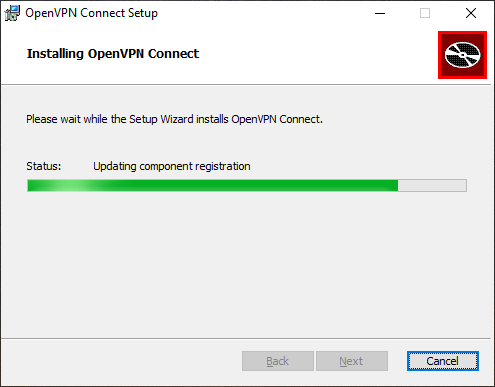
Начинается процесс установки OpenVPN.
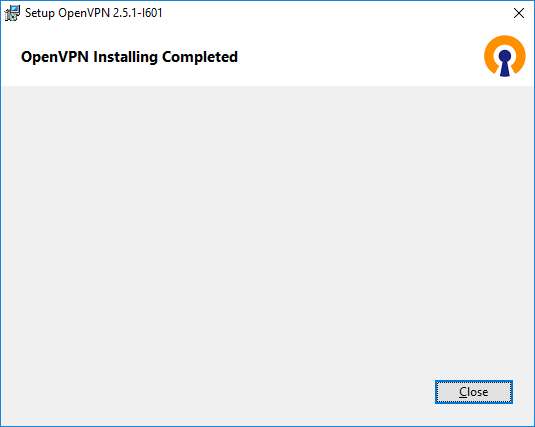
Установка успешно завершена. Close.
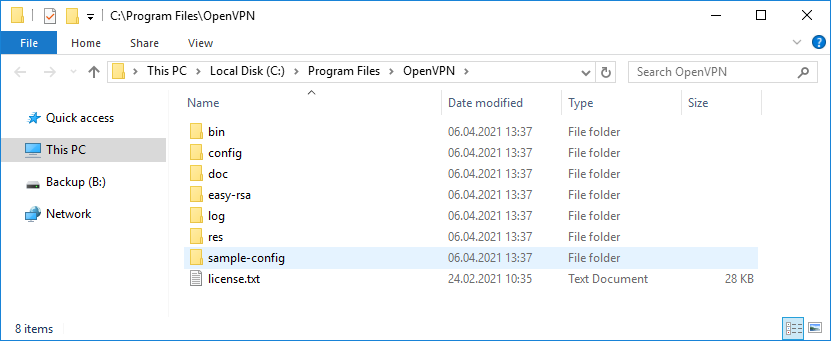
Установка выполнена в директорию C:Program FilesOpenVPN.
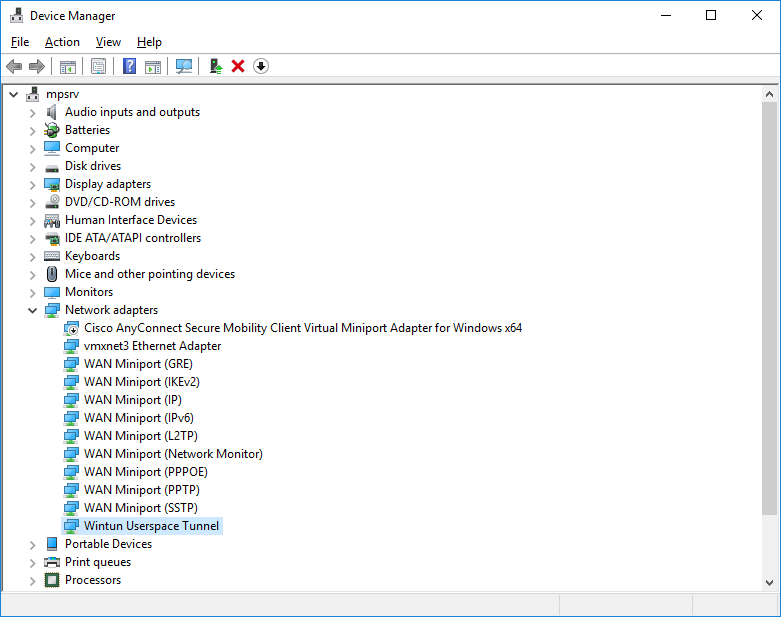
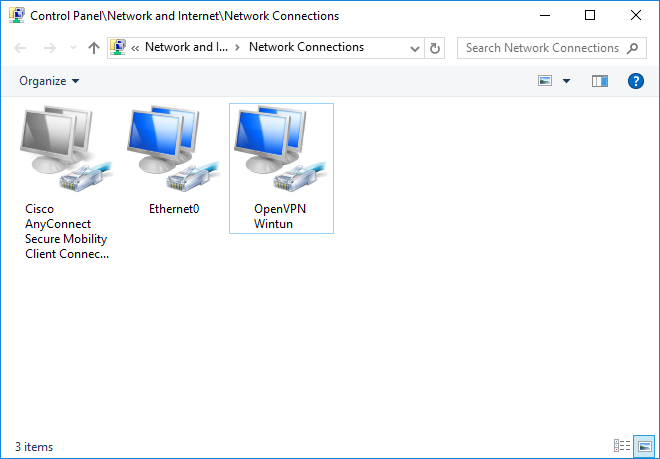
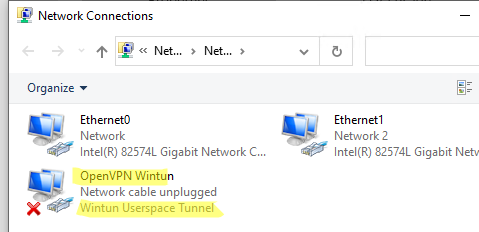
После установки у нас появляется новый сетевой адаптер Wintun Userspace Tunnel.
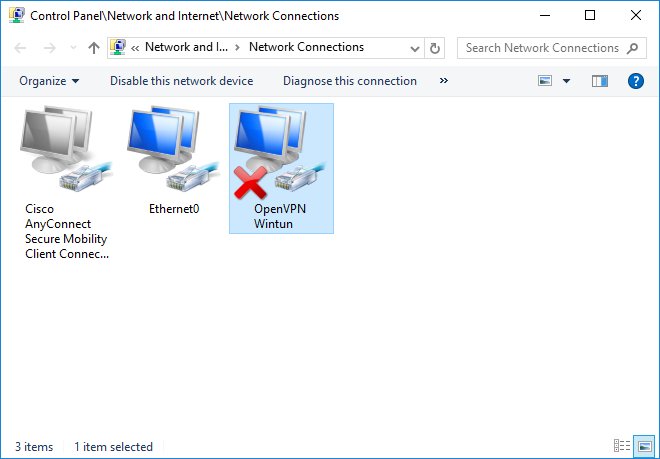
Адаптер отключён.
Создание ключей и сертификатов
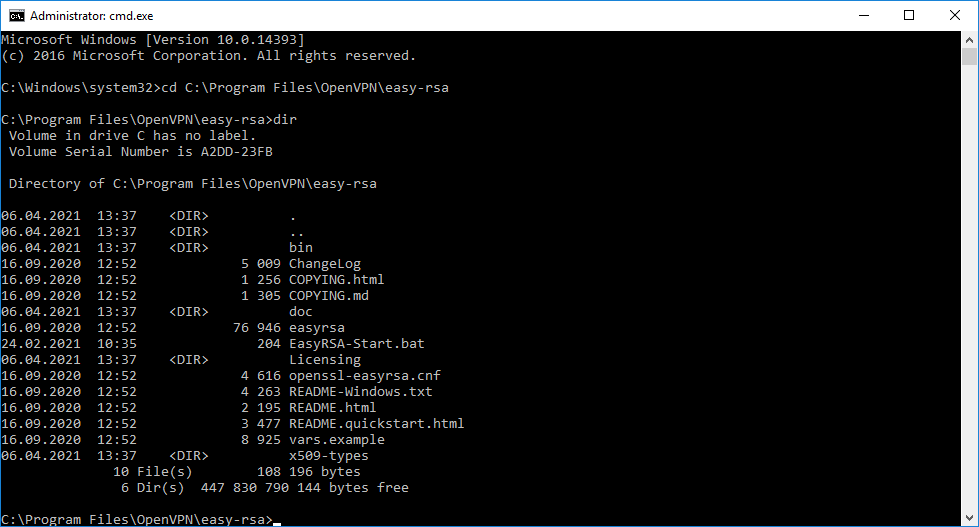
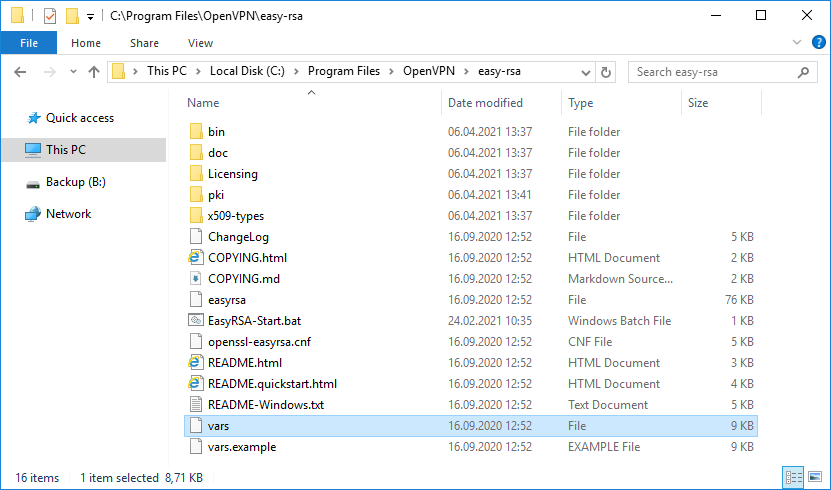
Запускаем командную строку под администратором и переходим в рабочую директорию C:Program FilesOpenVPNeasy-rsa.
cd C:Program FilesOpenVPNeasy-rsaВ этой папке есть всё необходимое для генерации сертификатов.
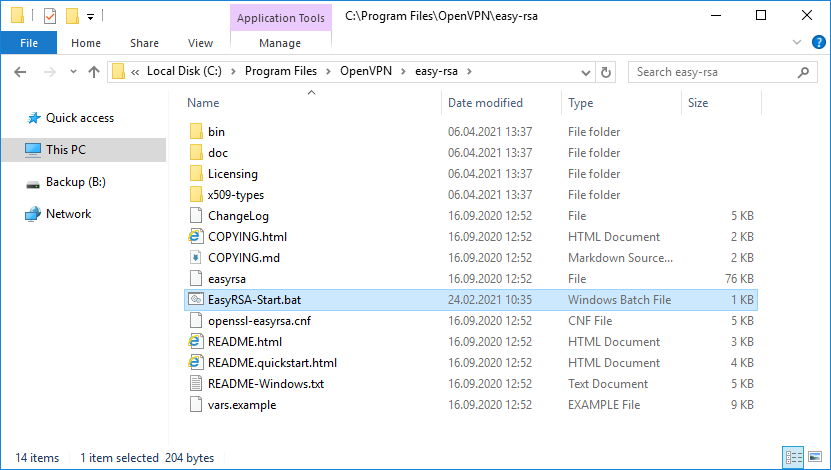
Для работы в Windows нас интересует файл EasyRSA-Start.bat.
Выполняем EasyRSA-Start.bat.

Запускается оболочка EasyRSA Shell.
Инициализируем новую конфигурацию:
./easyrsa init-pki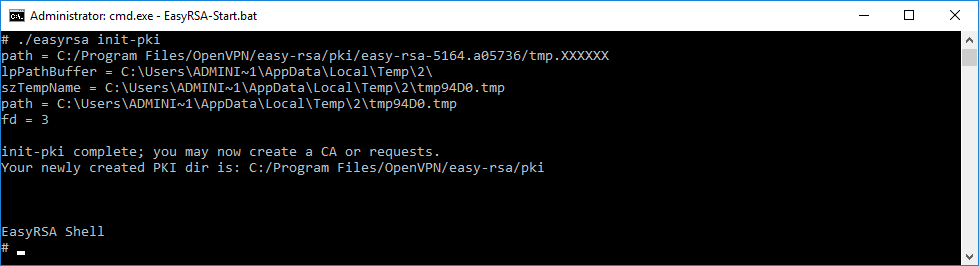
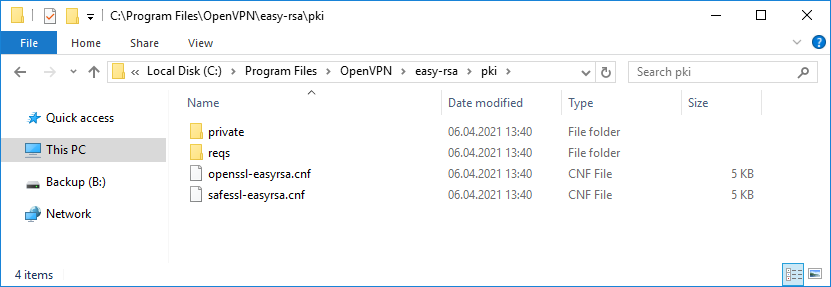
Появляется новая директория C:Program FilesOpenVPNeasy-rsapki.
Генерируем ключ и сертификат центра сертификации. Внимание, сейчас мы наступим на грабли, исправим ошибку и снова вернёмся к генерации файлов для центра сертификации.
./easyrsa build-caНас попросят для раза ввести пароль. Придумываем и вводим.
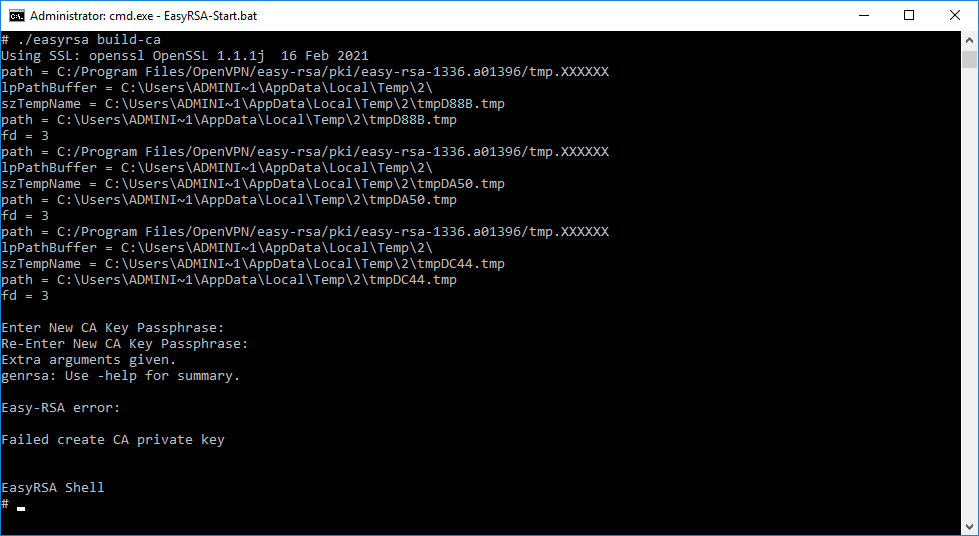
Получаем ошибку.
Extra arguments given.
genrsa: Use -help for summary.Easy-RSA error:
Failed create CA private key
Исправим этот баг. Мне не совсем понятно, почему нельзя было всё сделать сразу по-человечески, чтобы люди не встречали эту ошибку. Копируем файл C:Program FilesOpenVPNeasy-rsavars.example, называем копию C:Program FilesOpenVPNeasy-rsavars.
Редактируем C:Program FilesOpenVPNeasy-rsavars. В данном файле можно много чего прописать, но я не буду на этом сейчас останавливаться подробно. Находим строку:
#set_var EASYRSA_TEMP_DIR "$EASYRSA_PKI"И заменяем её на:
set_var EASYRSA_TEMP_DIR "$EASYRSA_PKI/temp"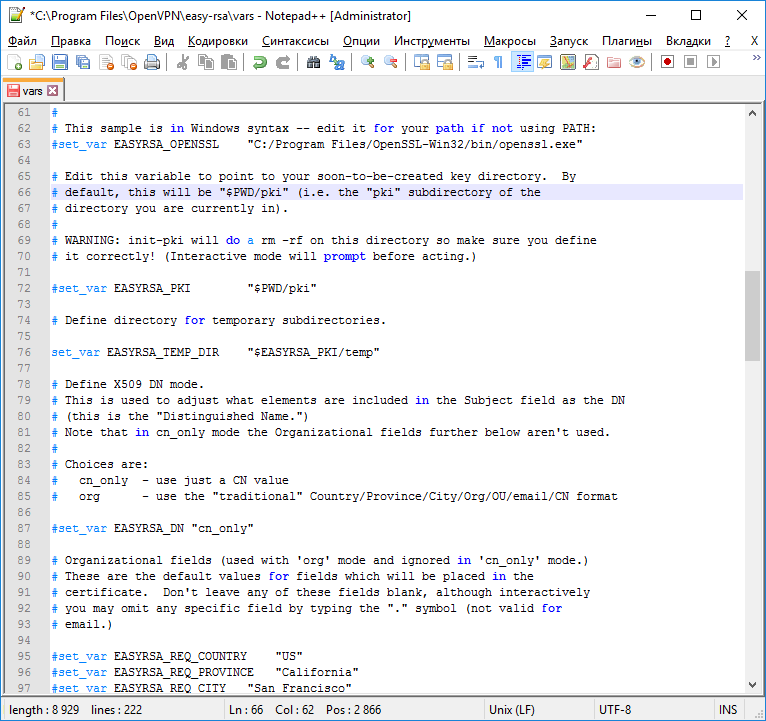
Собственно, ошибка и заключалась в том, что оболочка по какой-то причине не могла создать временный файл.
Генерируем ключ и сертификат центра сертификации:
./easyrsa build-caНас попросят для раза ввести пароль. Придумываем и вводим. После нас просят указать Common Name для центра сертификации, указываю «internet-lab.ru».
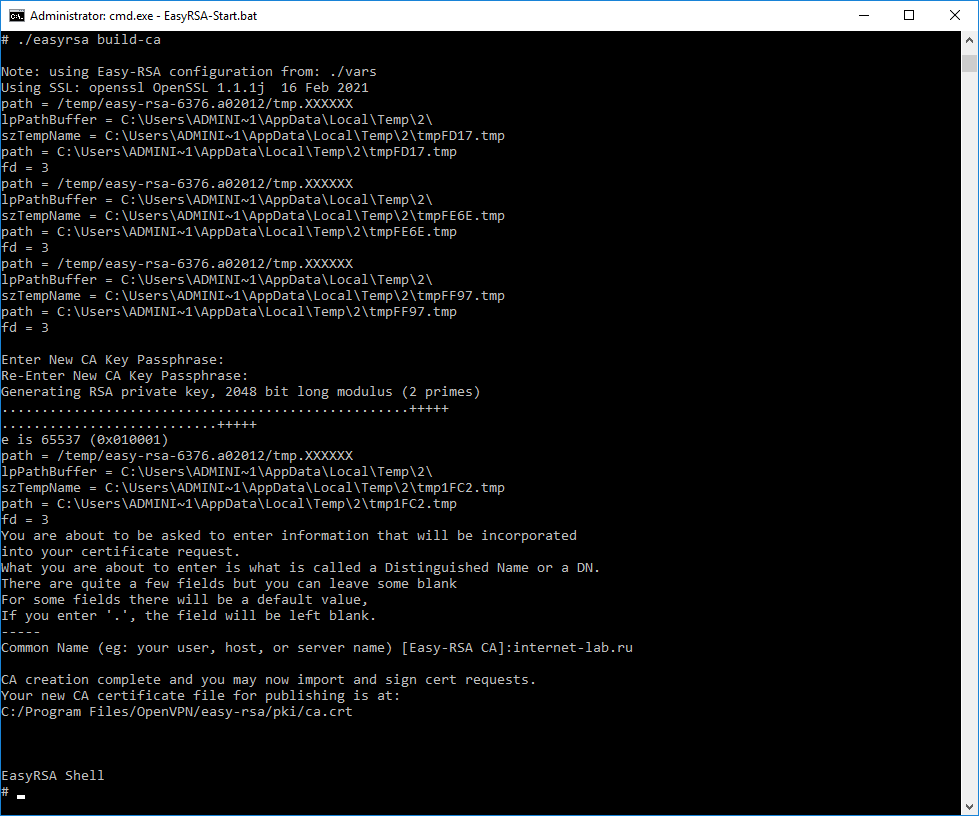
Операция проходит успешно.
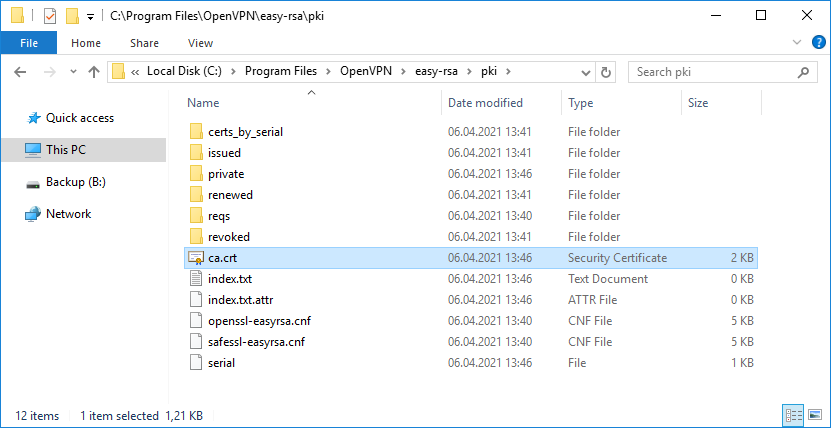
Создаётся сертификат центра сертификации:
- C:Program FilesOpenVPNeasy-rsapkica.crt
Сертификат создаётся на 10 лет, это значение можно переопределить в файле vars.
И ключ центра сертификации:
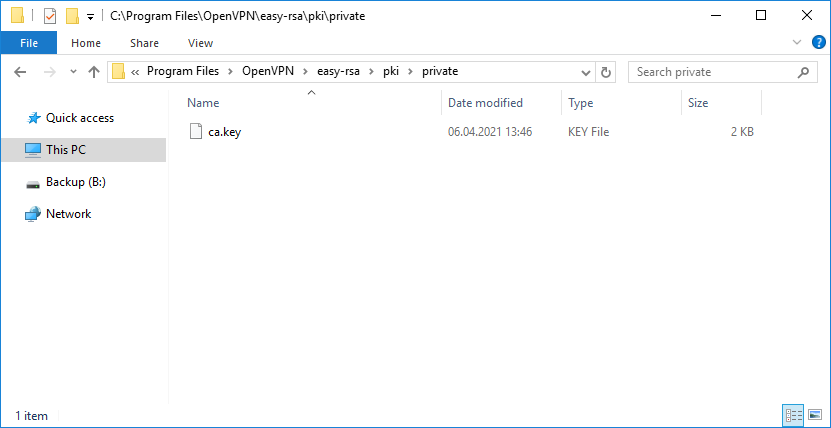
- C:Program FilesOpenVPNeasy-rsapkiprivateca.key
Ключ секретный, никому не показываем. он будет храниться на сервере.
Генерируем ключ и запрос на сертификат сервера, назовём сервер именем «server«:
./easyrsa gen-req server nopassНас просят указать Common Name для сервера, указываю «internet-lab.ru».

Операция проходит успешно.
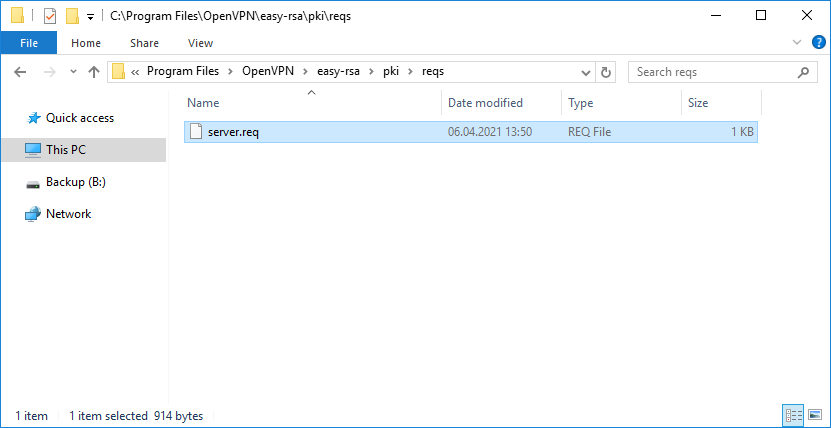
Создаётся запрос на сертификат сервера:
- C:Program FilesOpenVPNeasy-rsapkireqsserver.req

И ключ сервера:
- C:Program FilesOpenVPNeasy-rsapkiprivateserver.key
Ключ секретный, никому не показываем. он будет храниться на сервере.
Для создания сертификата сервера нужно подписать запрос на сертификат:
./easyrsa sign-req server serverДля подписи нужно ввести слово «yes» и указать пароль от центра сертификации.
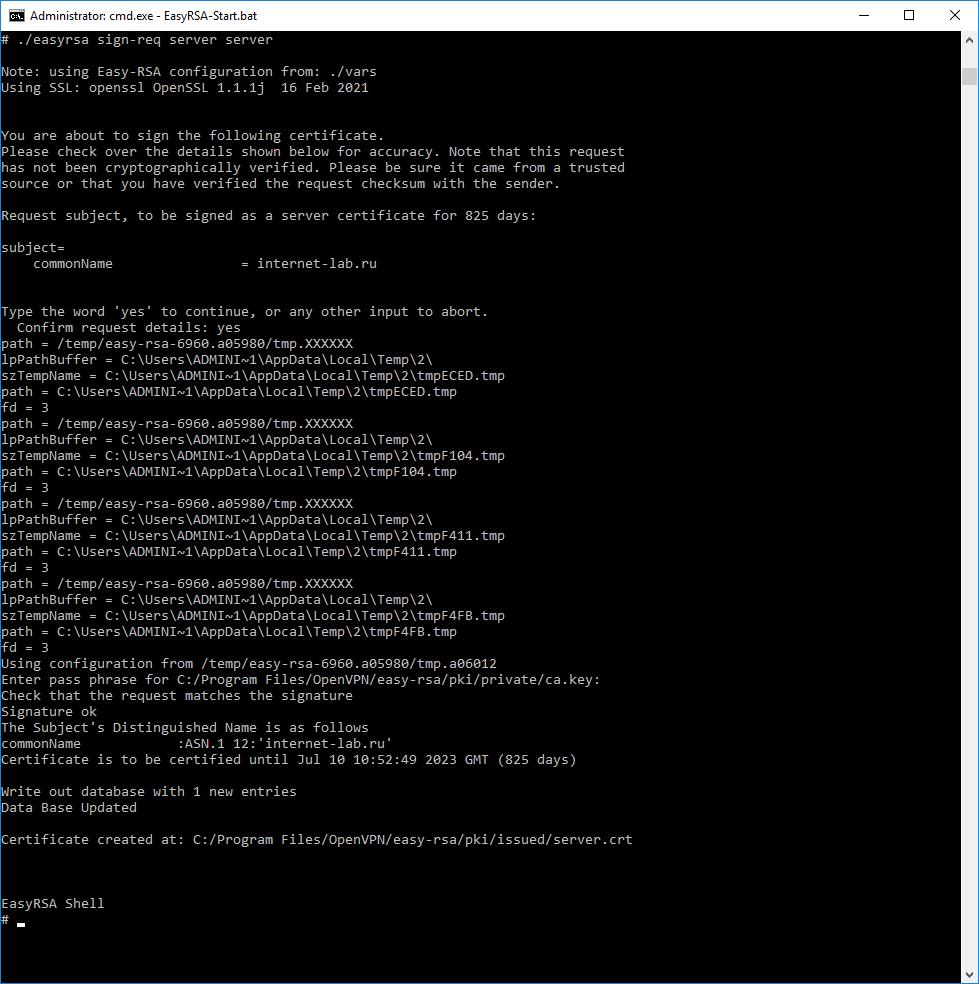
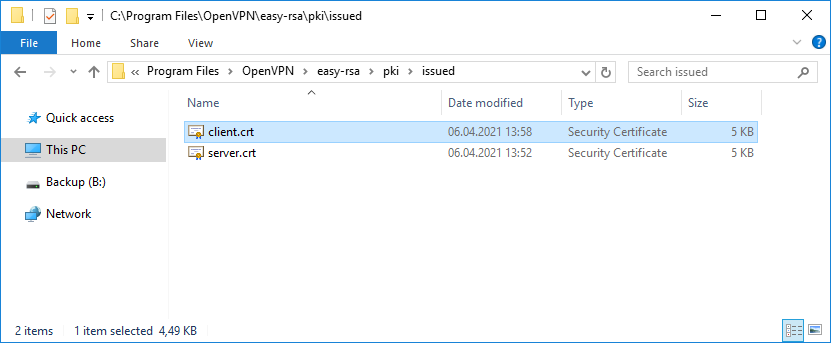
Создаётся сертификат сервера:
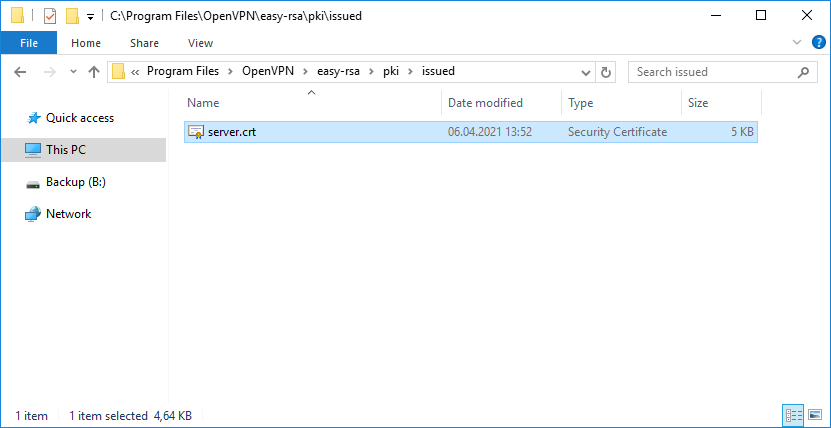
- C:Program FilesOpenVPNeasy-rsapkiissuedserver.crt
Сертификат сервера создаётся на 825 дней, это значение можно переопределить в файле vars.
Теперь создадим клиентский сертификат. По хорошему клиентский ключ следует запаролить, чтобы исключить утечку при передаче. Для этого есть несколько способов.
Первый
-
На клиентской машине генерируем запрос на сертификат клиента и ключ без пароля:
./easyrsa init-pki ./easyrsa gen-req client nopass - Переносим REQ файл запроса на сертификат клиента на машину с нашим CA, импортируем, подписываем, отсылаем сгенерированный сертификат CRT обратно клиенту:
./easyrsa import-req /path/to/client.req client
./easyrsa sign-req client client
Второй
-
а машине с CA генерируем сертификат клиента и ключ с паролем:
./easyrsa gen-req client ./easyrsa sign-req client client - Переносим файлы клиенту, сообщаем пароль. Клиент снимает пароль с полученного ключа:
openssl rsa -in client.key -out clientnew.key
Третий
Но поскольку я генерирую ключ сам для себя, то воспользуюсь небезопасным третьим способом.
Генерируем ключ и запрос на сертификат клиента, назовём клиента именем «client«:
./easyrsa gen-req client nopassНас просят указать Common Name для клиента, указываю «v.pupkin».

Операция проходит успешно.
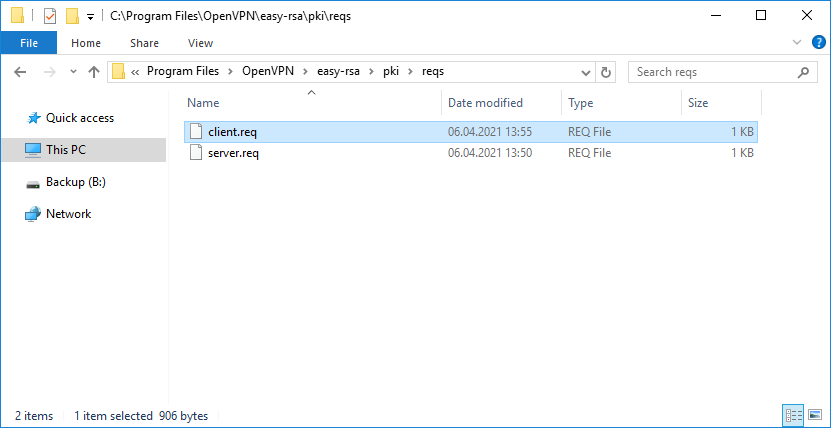
Создаётся запрос на сертификат клиента:
- C:Program FilesOpenVPNeasy-rsapkireqsclient.req
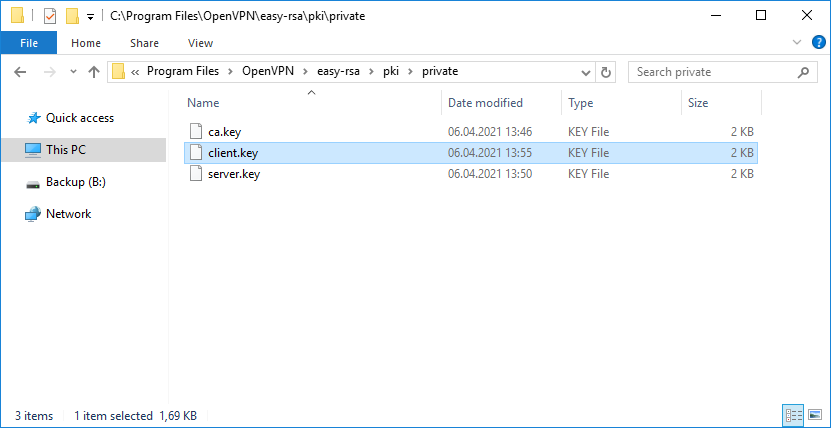
И ключ клиента:
- C:Program FilesOpenVPNeasy-rsapkiprivateclient.key
Для создания сертификата клиента нужно подписать запрос на сертификат:
./easyrsa sign-req client clientДля подписи нужно ввести слово «yes» и указать пароль от центра сертификации.
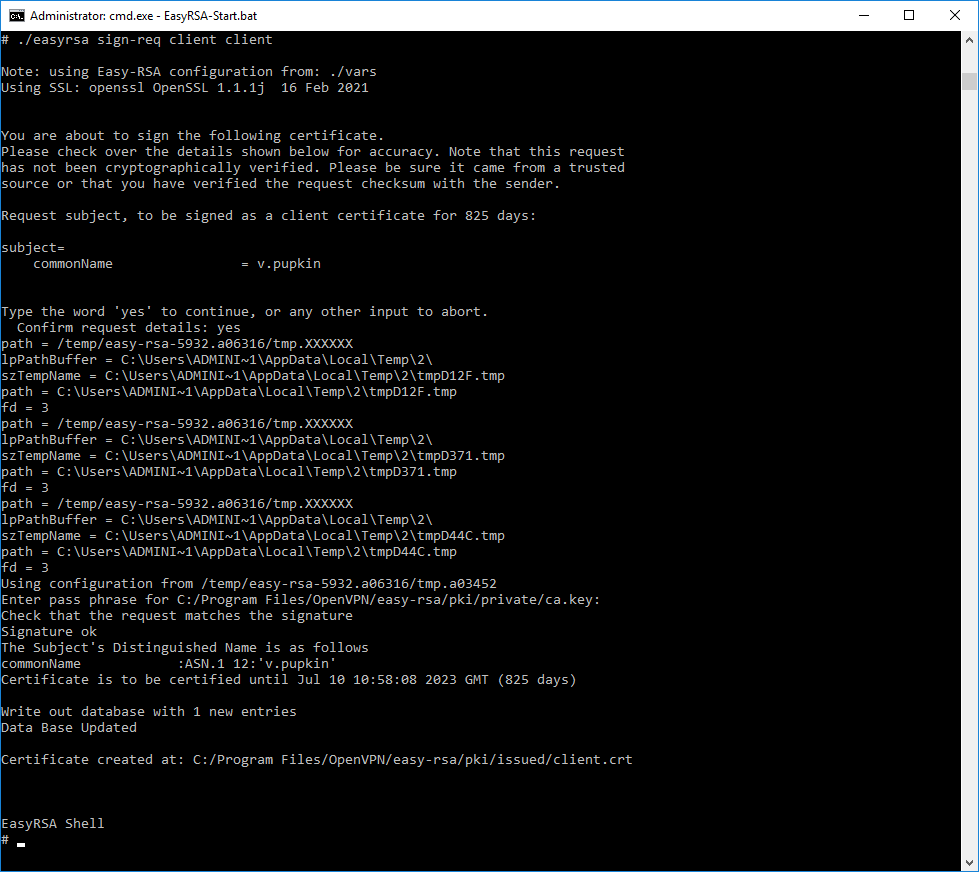
Создаётся сертификат клиента:
- C:Program FilesOpenVPNeasy-rsapkiissuedclient.crt
Сертификат сервера создаётся на 825 дней, это значение можно переопределить в файле vars.
Генерируем ключ Диффи-Хеллмана:
./easyrsa gen-dh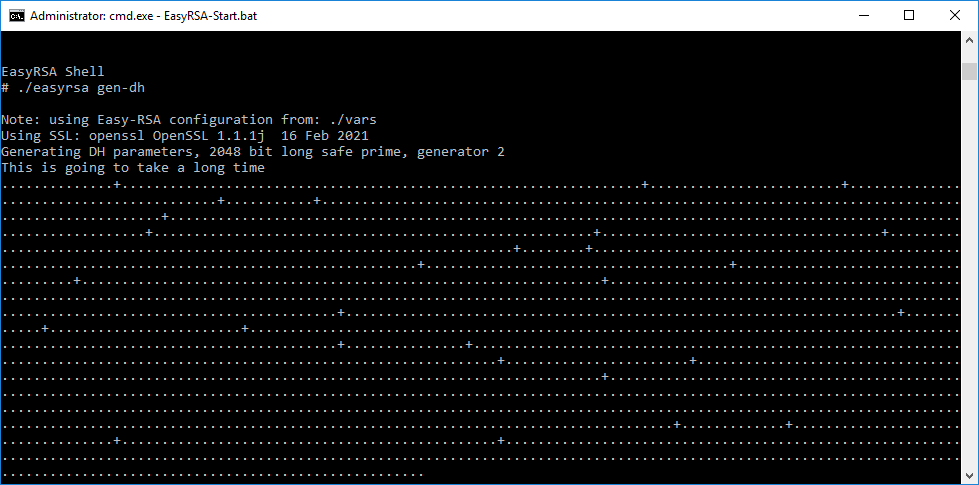
Операция займёт некоторое время.
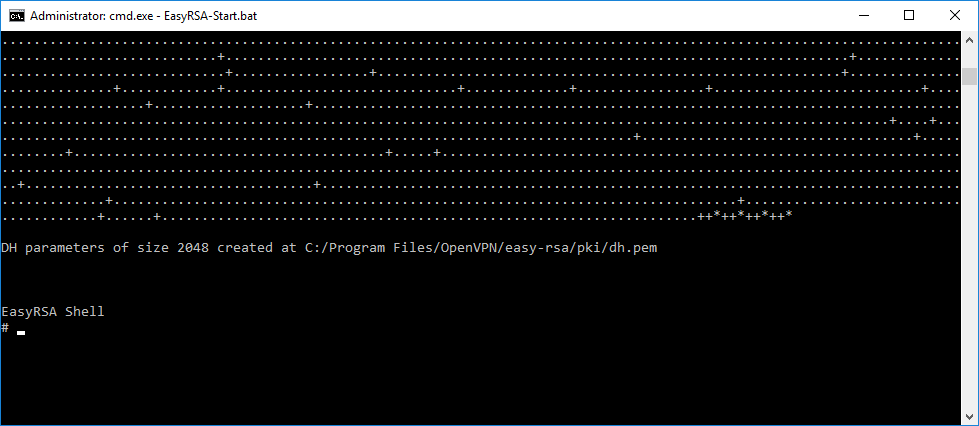
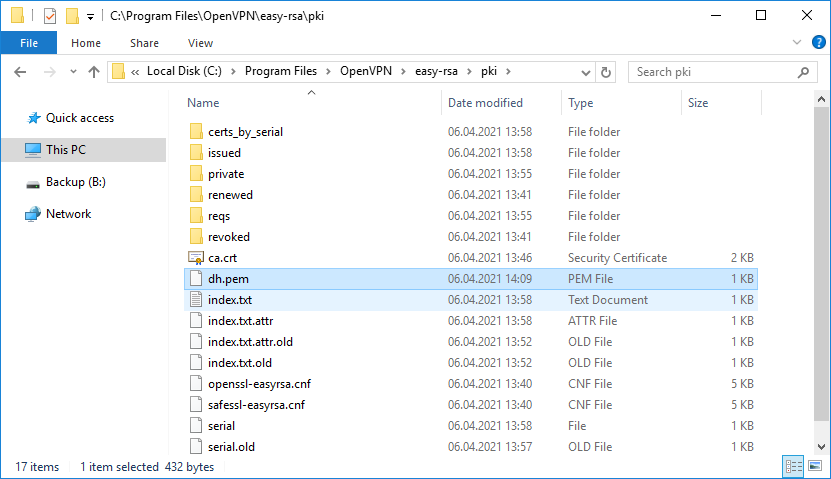
Создаётся файл:
- C:Program FilesOpenVPNeasy-rsapkidh.pem
Я на сервере собираюсь использовать tls-auth для дополнительной проверки целостности, это обеспечит дополнительный уровень безопасности протокола SSL/TLS при создании соединения:
- Сканирование прослушиваемых VPN-сервером портов
- Инициация SSL/TLS-соединения несанкционированной машиной на раннем этапе
- DoS-атаки и флуд на порты OpenVPN
- Переполнение буфера SSL/TLS
При использовании tls-auth на клиенте не понадобится ключ Диффи-Хеллмана, но пусть будет. Генерируем ключ tls-auth. Для этого запускаем командную строку под администратором и выполняем:
cd C:Program FilesOpenVPNbin
openvpn --genkey secret ta.key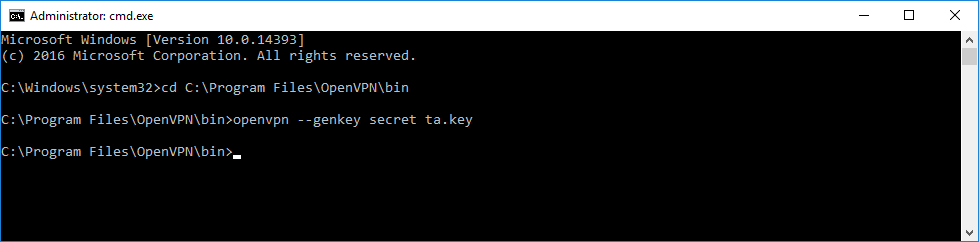
В папке C:Program FilesOpenVPNbin создаётся файл ta.key.
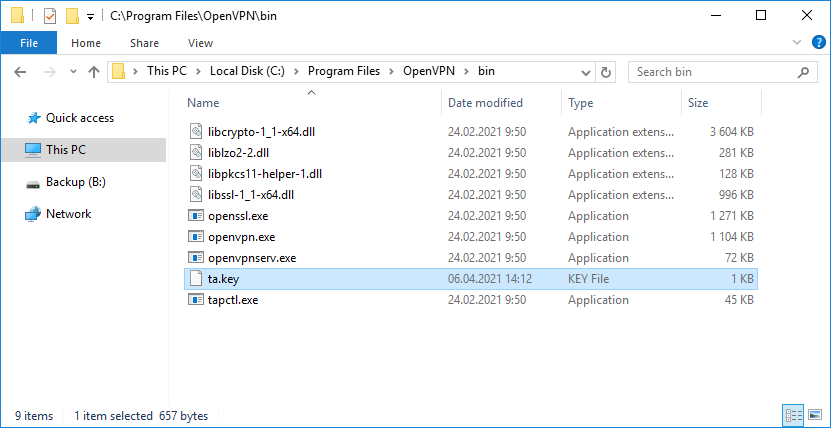
Переносим его в папку C:Program FilesOpenVPNeasy-rsapki.
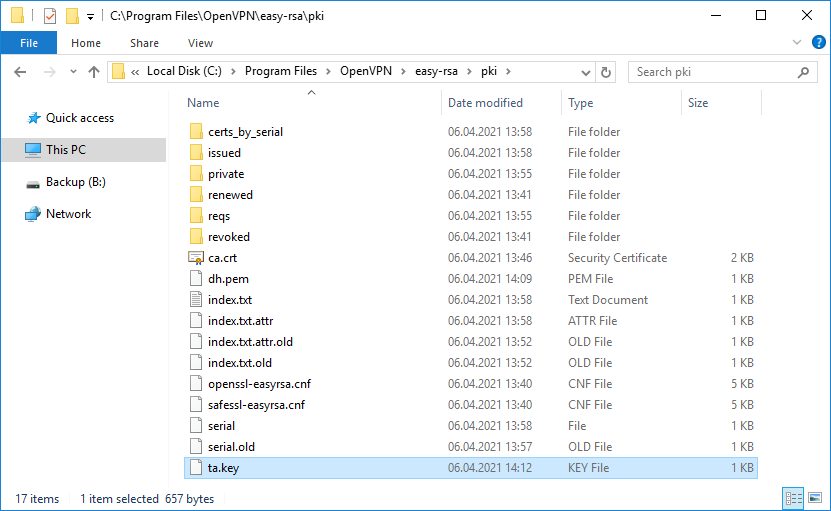
Минимальный набор сертификатов сгенерирован.
Настройка OpenVPN сервера
Создадим конфигурационный файл сервера C:Program FilesOpenVPNconfig-autoserver.ovpn:
copy "C:Program FilesOpenVPNsample-configserver.ovpn" "C:Program FilesOpenVPNconfig-autoserver.ovpn"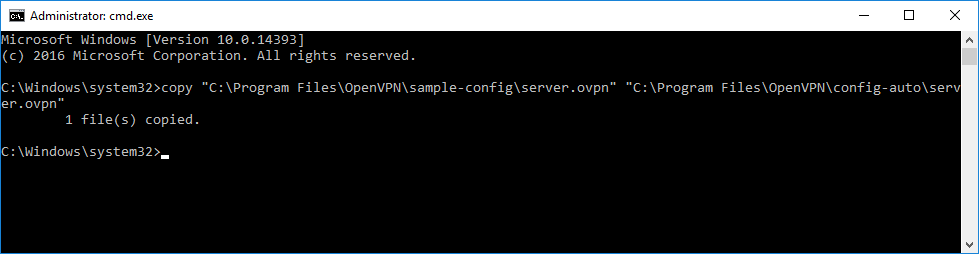
Открываем блокнотом и редактируем:
notepad "C:Program FilesOpenVPNconfig-autoserver.ovpn"Лучше изучить конфигурационный файл, я предлагаю свой вариант конфига:
port 1194
proto tcp
dev tun
ca "C:\Program Files\OpenVPN\easy-rsa\pki\ca.crt"
cert "C:\Program Files\OpenVPN\easy-rsa\pki\issued\server.crt"
key "C:\Program Files\OpenVPN\easy-rsa\pki\private\server.key"  # This file should be kept secret
dh "C:\Program Files\OpenVPN\easy-rsa\pki\dh.pem"
server 10.8.0.0 255.255.255.0
ifconfig-pool-persist ipp.txt
duplicate-cn
keepalive 10 120
tls-auth "C:\Program Files\OpenVPN\easy-rsa\pki\ta.key" 0 # This file is secret
cipher AES-256-GCM
persist-key
persist-tun
status "C:\Program Files\OpenVPN\log\status.log"
log         "C:\Program Files\OpenVPN\log\openvpn.log"
verb 4
mute 20
windows-driver wintun
У меня здесь указаны пути к ключам и сертификатам, используется порт TCP 1194. Параметр duplicate-cn позволяет подключаться всем клиентам по одному общему сертификату, но это небезопасно и не рекомендуется. Используйте только в тестовых целях. Я использую для того, чтобы с помощью одного и того же сертификата подключиться к OpenVPN серверу и с клиентской машины и со смартфона. Параметр windows-driver wintun подключает использование драйвера WinTun. И что им стоило этот параметр указать в примере конфигурации? Остальное по умолчанию.
ВНИМАНИЕ: в конфигурационных файлах допускается в путях использование прямого слеша:
ca «C:/Program Files/OpenVPN/easy-rsa/pki/ca.crt»
или двойного обратного слеша:
ca «C:\Program Files\OpenVPN\easy-rsa\pki\ca.crt»
Запуск OpenVPN сервера
Переходим к службам:
services.msc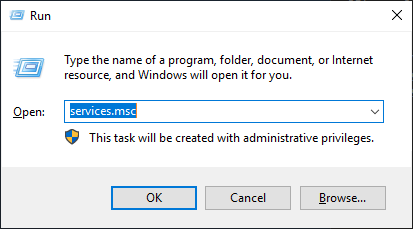
Находим службу OpenVPNService.
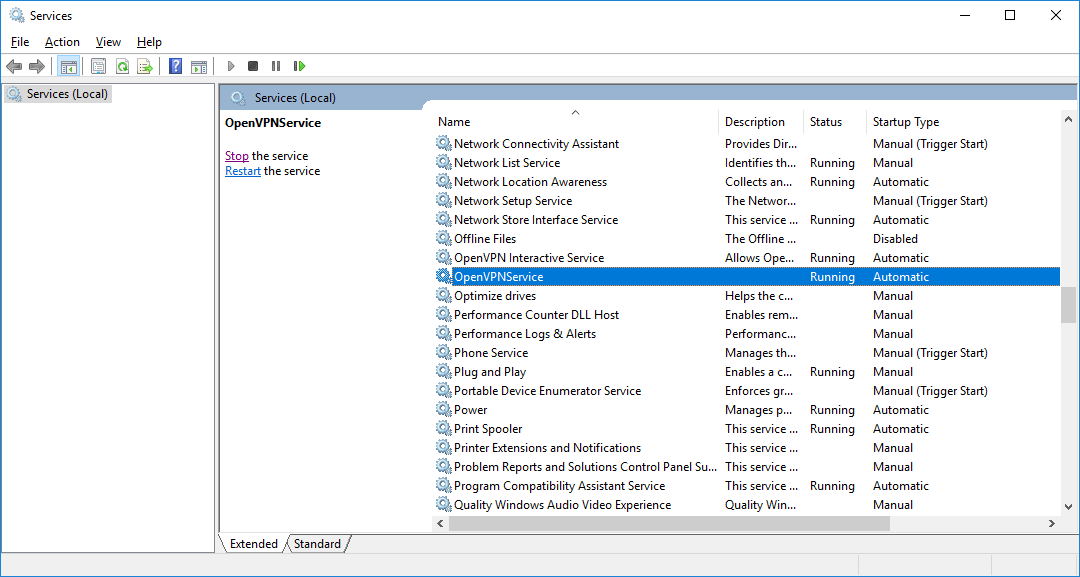
Настраиваем на автоматический запуск при загрузке сервера.
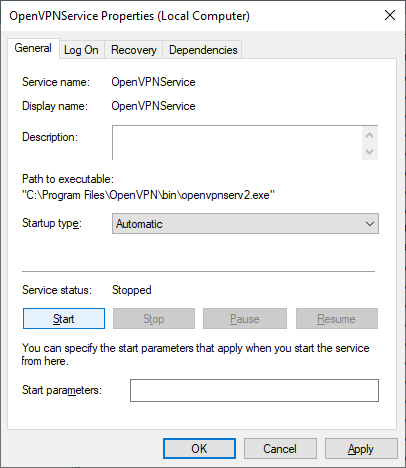
Запускаем (перезапускаем) службу.
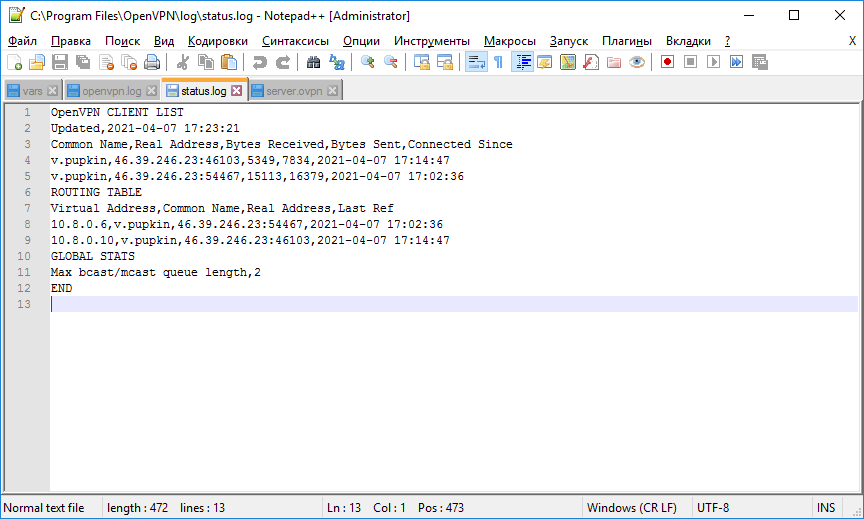
Согласно настройкам сервера в папке C:Program FilesOpenVPNlog должны появиться логи. Это один из инструментов администратора OpenVPN сервера.

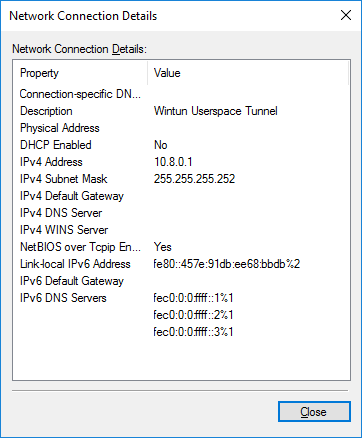
Активировался сетевой адаптер OpenVPN Wintun.
Согласно настройкам сервера IP адрес 10.8.0.1.
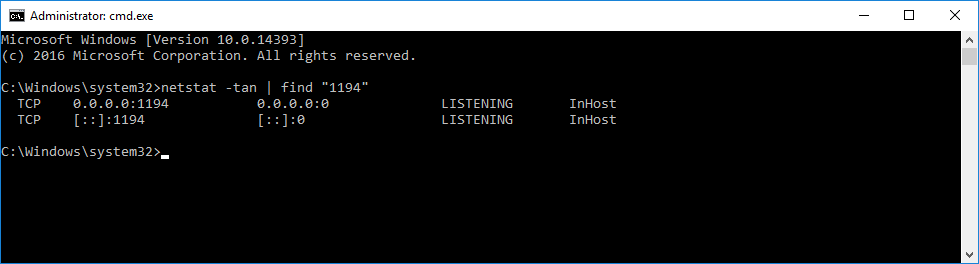
Проверяем поднялся ли порт tcp 1194:
netstat -tan | find "1194"Порт должен прослушиваться.
Настройка firewall
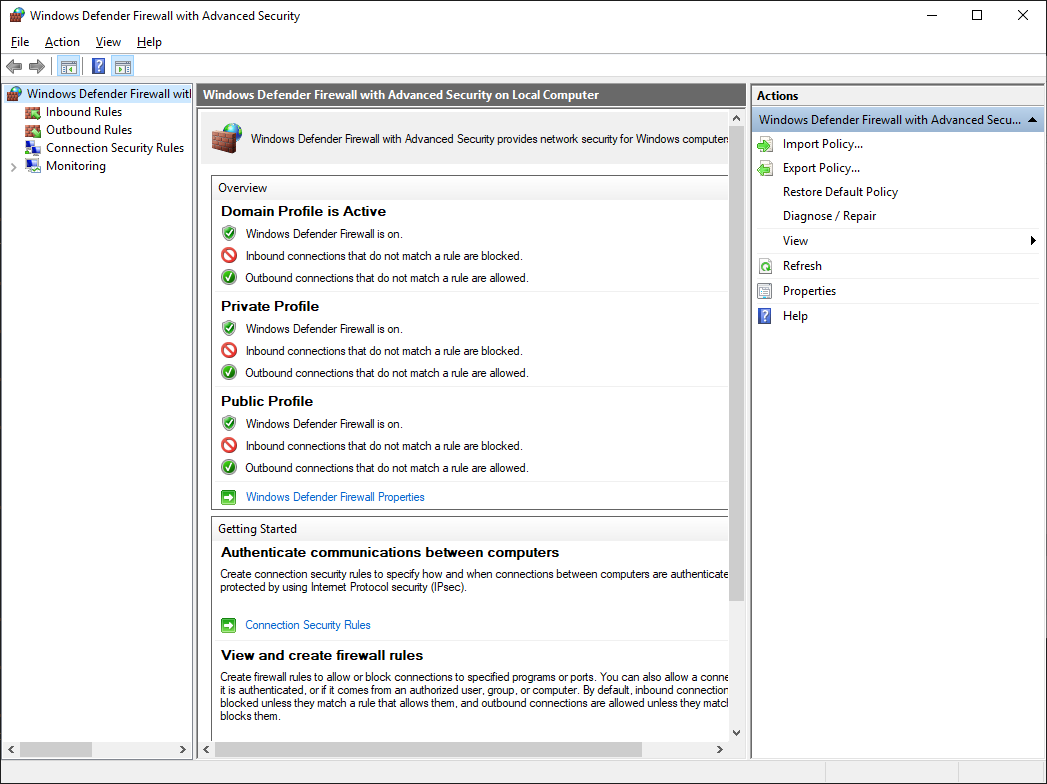
Теперь нужно настроить firewall. Открываем Windows Defender Firewall with Advanced Security.
Переходим в Inbound Rules.
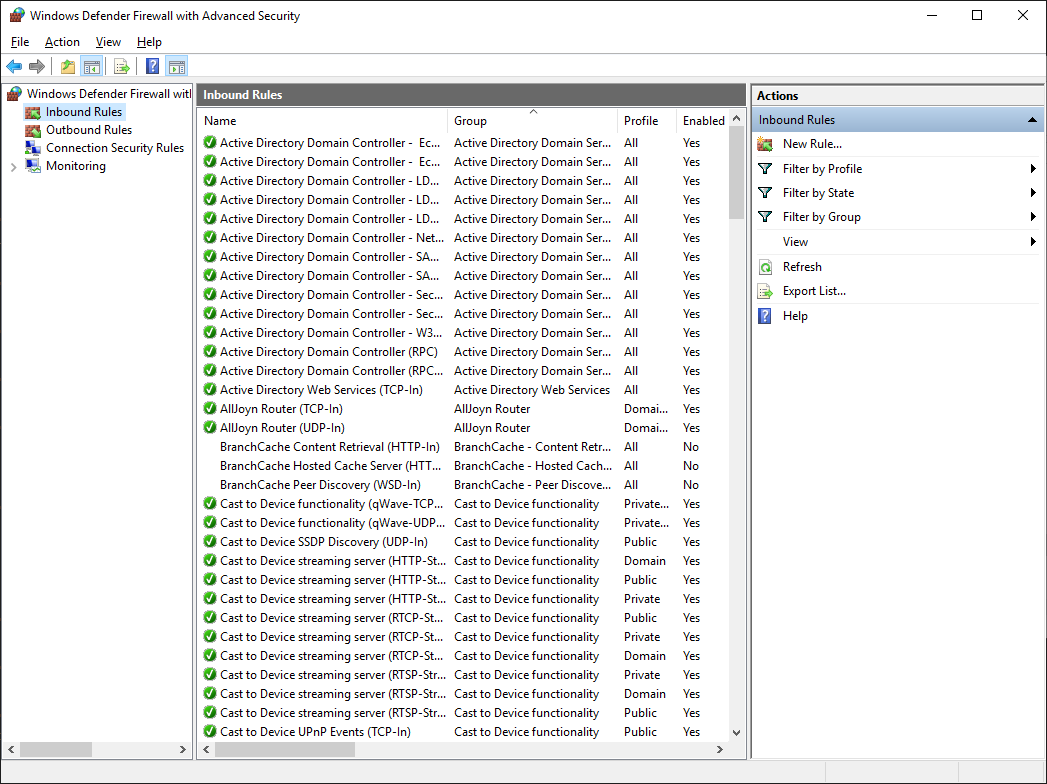
Создаём правило — New Rule…
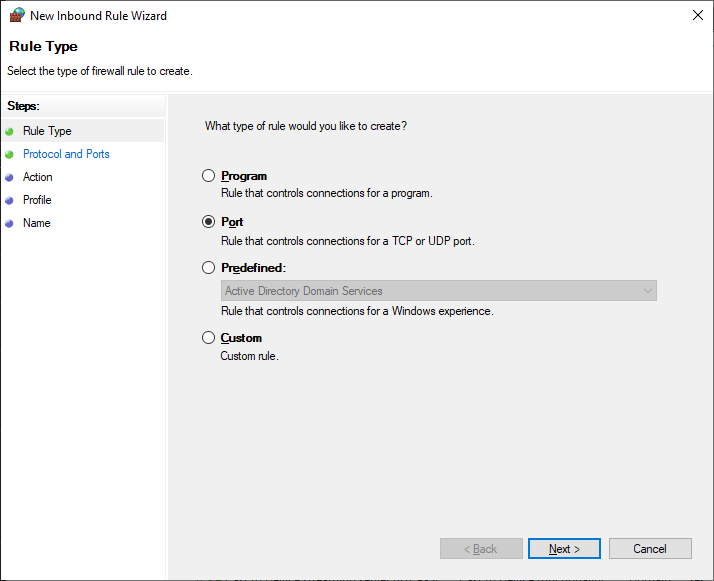
Тип правила — Port. Next.

Протоколы и порты — TCP 1194. Как в настройках сервера. Next.
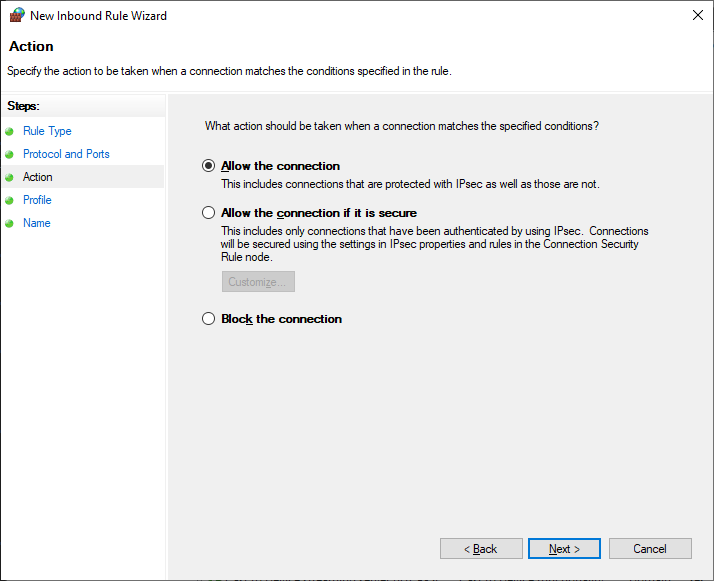
Действия — Allow the connection. Next.
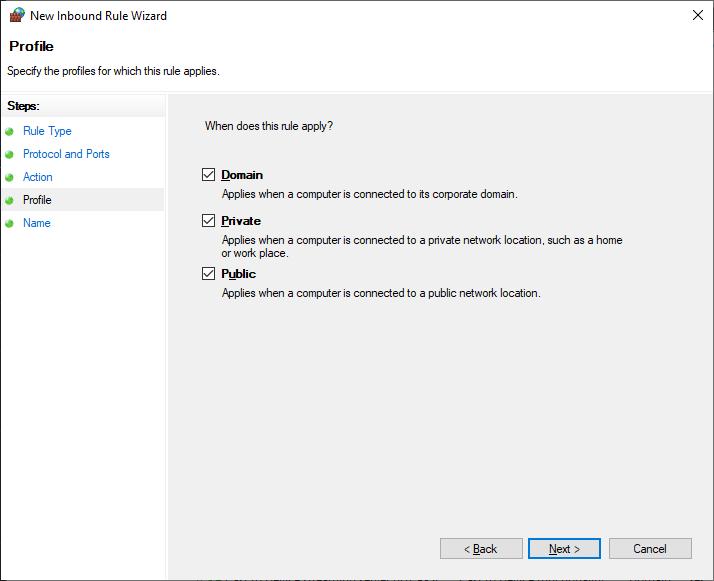
Для всех сетей. Next.
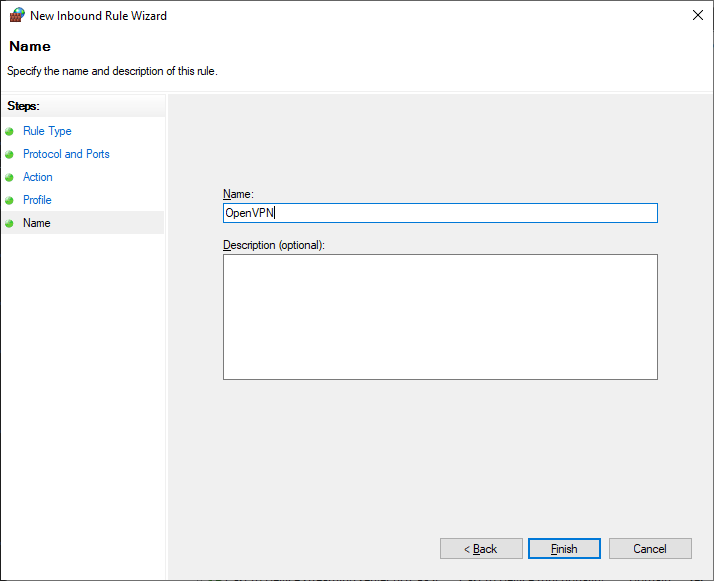
Указываем название правила — OpenVPN. Next.
Правило создано, теперь firewall не блокирует входящие TCP соединения на 1194 порту.
Настройка OpenVPN клиента на ПК Windows
На компьютере клиента устанавливаем OpenVPN Connect.
Я скачиваю версию для Windows.
Запускаем установку.
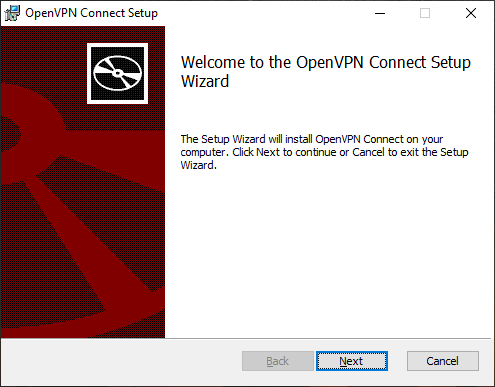
Next.
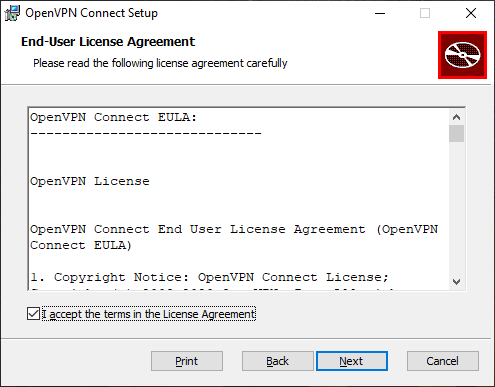
Принимаем лицензионное соглашение. Next.
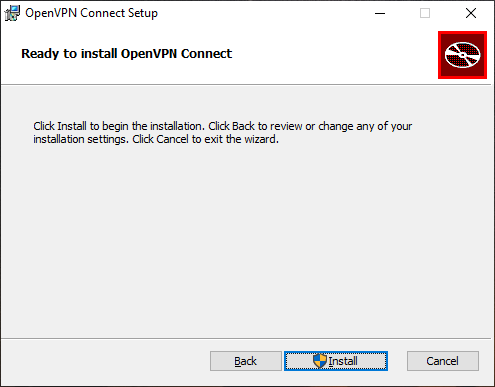
Install.
OpenVPN Connect устанавливается.
Установка завершена. Finish.
На рабочем столе появляется иконка OpenVPN Connect.
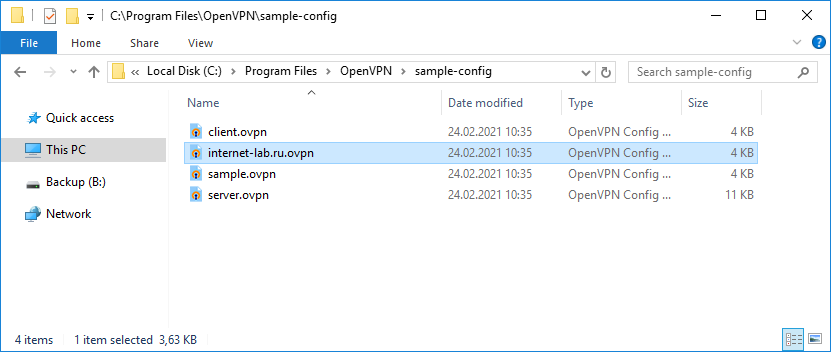
На сервере файл примера конфигурации client.ovpn копируем как internet-lab.ru.ovpn.
И редактируем:
client
dev tun
proto tcp
remote internet-lab.ru 1194
resolv-retry infinite
nobind
persist-key
persist-tun
ca ca.crt
cert client.crt
key client.key
remote-cert-tls server
tls-auth ta.key 1
cipher AES-256-GCM
verb 0
connect-retry-max 25
Здесь нужно указать протокол, порт адрес сервера и прочие параметры. Пути к ключам и сертификатам относительные.
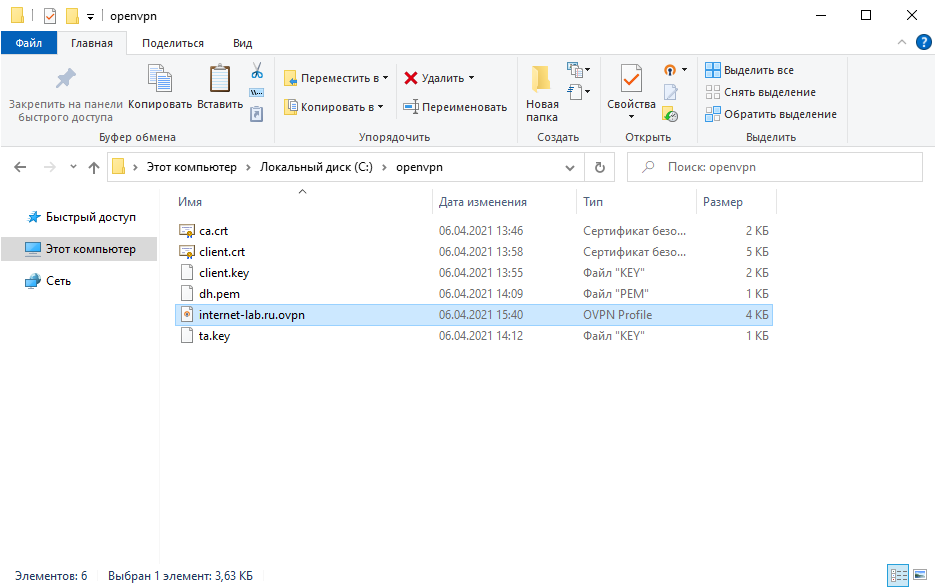
Создаём директорию, например, C:openvpn. Копируем в неё с сервера файлы:
- ca.crt
- client.crt
- client.key
- dh.pem
- ta.key
- internet-lab.ru.ovpn
Запускаем OpenVPN Connect.
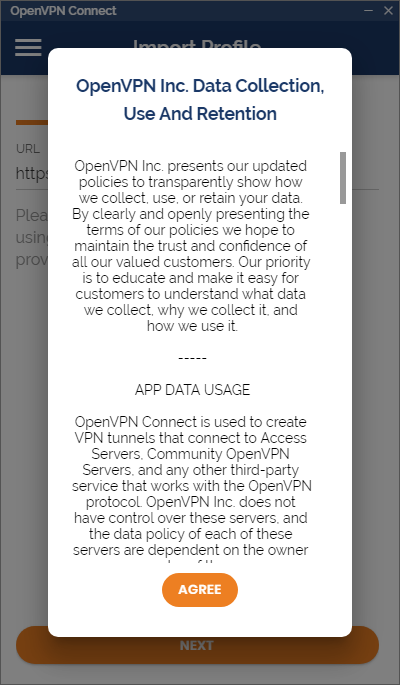
Agree. Переключаемся на File.
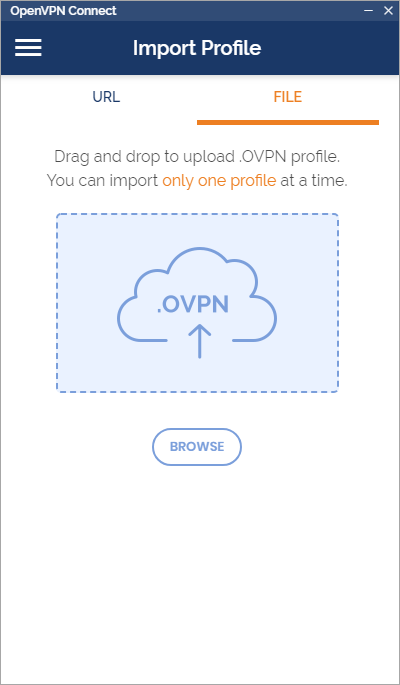
Перетаскиваем мышкой в окно файл C:openvpninternet-lab.ru.ovpn, или указываем через кнопку Browse.

Ставим галку «Connect after import».

Коннектимся.
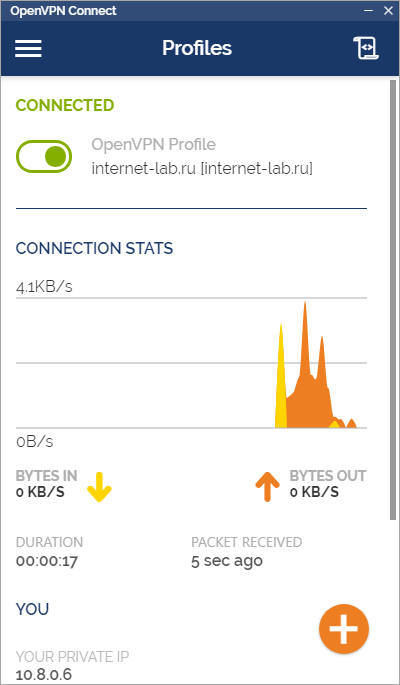
Соединение с OpenVPN сервером установлено.

В логах сервера видим, что соединился юзер v.pupkin.
Настройка OpenVPN клиента на смартфоне Android
Копируем на телефон все те же файлы, что и для клиента.

Устанавливаем приложение OpenVPN Connect.

Запускаем.
Agree.
Выбираем File. Указываем путь к файлу internet-lab.ru.ovpn.
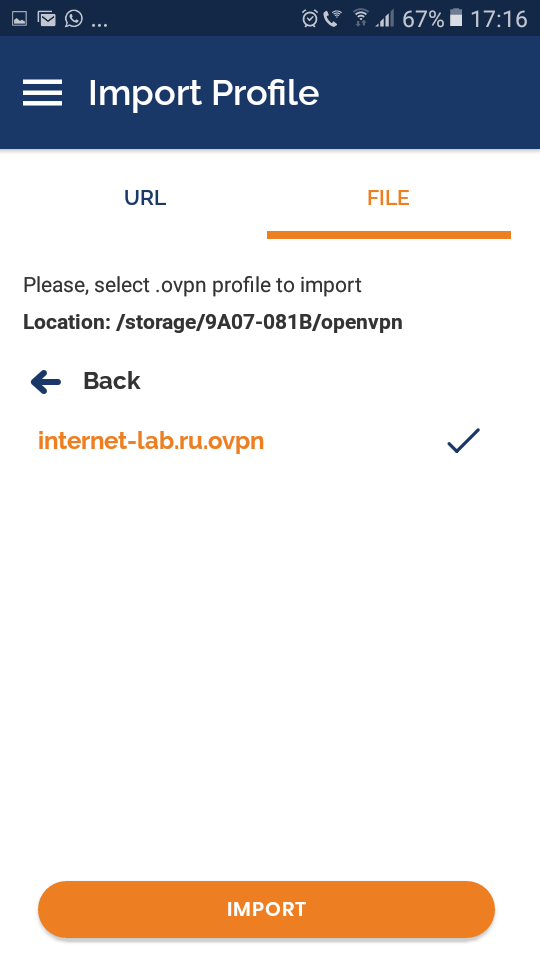
Import.

Ставим галку «Connect after import».
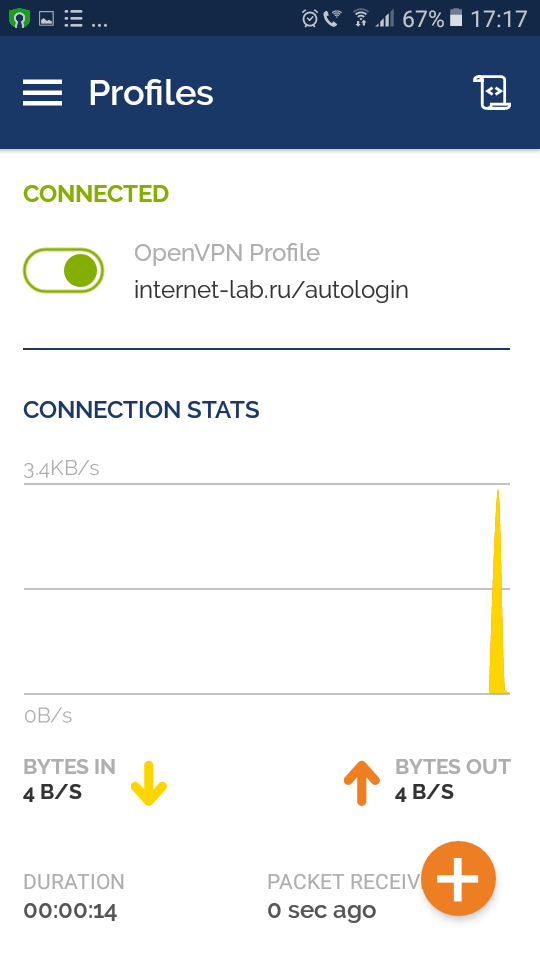
Соединение с OpenVPN сервером установлено.
В логах сервера видим, что соединился второй юзер v.pupkin.
Отзыв сертификата
cd C:Program FilesOpenVPNeasy-rsa
EasyRSA-Start.bat
./easyrsa revoke client
Ссылки
Установка OpenVPN сервера на Windows
OpenVPN – это набор open source программ, который заслуженно является одним из самых популярных и легких решений для реализации защищенной VPN сети. OpenVPN позволяет объединить в единую сеть сервер и клиентов (даже находящиеся за NAT или файерволами), или объединить сети удаленных офисов. Серверную часть OpenVPN можно развернуть практически на всех доступных операционных системах (пример настройки OpenVPN на Linux). Вы можете установить OpenVPN сервер даже на обычный компьютер с десктопной редакцией Windows 10.
В этой статье, мы покажем, как установить OpenVPN сервер на компьютер с Windows 10, настроить OpenVPN клиент на другом Windows хосте и установить защищенное VPN подключение.
Содержание:
- Установка службы OpenVPN сервера в Windows
- Создаем ключи шифрования и сертификаты для OpenVPN
- Конфигурационный файл OpenVPN сервера в Windows
- Настройка OpenVPN клиента в Windows
Установка службы OpenVPN сервера в Windows
Скачайте MSI установщик OpenVPN для вашей версии Windows с официального сайта (https://openvpn.net/community-downloads/). В нашем случае это OpenVPN-2.5.5-I602-amd64.msi (https://swupdate.openvpn.org/community/releases/OpenVPN-2.5.5-I602-amd64.msi).
Запустите установку.
Если вы планируете, OpenVPN сервер работал в автоматическом режиме, можно не устанавливать OpenVPN GUI. Обязательно установите OpenVPN Services.
Начиная с версии OpenVPN 2.5, поддерживается драйвер WinTun от разработчиков WireGuard. Считается, что этот драйвер работает быстрее чем классический OpenVPN драйвер TAP. Установите драйвер Wintun, откажитесь от установки TAP-Windows6.
Установите OpenSSL утилиту EasyRSA Certificate Management Scripts.
Запустите установку.
По умолчанию OpenVPN устаналивается в каталог C:Program FilesOpenVPN.
После окончания установки появится новый сетевой адаптер типа Wintun Userspace Tunnel. Этот адаптер отключен, если служба OpenVPN не запущена.
Создаем ключи шифрования и сертификаты для OpenVPN
OpenVPN основан на шифровании OpenSSL. Это означает, что для обмена трафиком между клиентом и серверов VPN нужно сгенерировать ключи и сертификаты с использованием RSA3.
Откройте командную строку и перейдите в каталог easy-rsa:
cd C:Program FilesOpenVPNeasy-rsa
Создайте копию файла:
copy vars.example vars
Откройте файл vars с помощью любого текстового редактора. Проверьте пути к рабочим директориям.
Обязательно поправьте переменную EASYRSA_TEMP_DIR следующим образом:
set_var EASYRSA_TEMP_DIR "$EASYRSA_PKI/temp"

Можете заполнить поля для сертификатов (опционально)
set_var EASYRSA_REQ_COUNTRY "RU"
set_var EASYRSA_REQ_PROVINCE "MSK"
set_var EASYRSA_REQ_CITY "MSK"
set_var EASYRSA_REQ_ORG "IT-Company"
set_var EASYRSA_REQ_EMAIL " [email protected] "
set_var EASYRSA_REQ_OU " IT department "

Срок действия сертификатов задается с помощью:
#set_var EASYRSA_CA_EXPIRE 3650
#set_var EASYRSA_CERT_EXPIRE 825
Сохраните файл и выполните команду:
EasyRSA-Start.bat
Следующие команды выполняются в среде EasyRSA Shell:
Инициализация PKI:
./easyrsa init-pki
Должна появится надпись:
init-pki complete; you may now create a CA or requests.
Your newly created PKI dir is: C:/Program Files/OpenVPN/easy-rsa/pki
Теперь нужно сгенерировать корневой CA:
./easyrsa build-ca
Задайте дважды пароль для CA:
CA creation complete and you may now import and sign cert requests.
Данная команда сформировала:
- Корневой сертификат центра сертификации: «C:Program FilesOpenVPNeasy-rsapkica.crt»
- Ключ центра сертификации «C:Program FilesOpenVPNeasy-rsapkiprivateca.key»
Теперь нужно сгенерировать запрос сертификата и ключ для вашего сервера OpenVPN:
./easyrsa gen-req server nopass
Утилита сгенерирует два файла:
req: C:/Program Files/OpenVPN/easy-rsa/pki/reqs/server.req
key: C:/Program Files/OpenVPN/easy-rsa/pki/private/server.key
Подпишем запрос на выпуск сертификата сервера с помощью нашего CA:
./easyrsa sign-req server server
Подтвердите правильность данных, набрав yes.
Затем введите пароль CA от корневого CA.
В каталоге issued появится сертификат сервера («C:Program FilesOpenVPNeasy-rsapkiissuedserver.crt»)

Теперь можно создать ключи Диффи-Хеллмана (займет длительное время):
./easyrsa gen-dh
Для дополнительной защиты VPN сервера желательно включить tls-auth. Данная технология позволяет использовать подписи HMAC к handshake-пакетам SSL/TLS, инициируя дополнительную проверку целостности. Пакеты без такой подписи будут отбрасываться VPN сервером. Это защитит вас от сканирования порта VPN сервера, DoS атак, переполнения буфера SSL/TLS.
Сгенерируйте ключ tls-auth:
cd C:Program FilesOpenVPNbin
openvpn --genkey secret ta.key
Должен появиться файл «C:Program FilesOpenVPNbinta.key». Переместите его в каталог C:Program FilesOpenVPNeasy-rsapki
Теперь можно сформировать ключи для клиентов OpenVPN. Для каждого клиента, который будет подключаться к вашему серверу нужно создать собственные ключи.
Есть несколько способов генерации ключей и передачи их клиентам. В следующем примере, мы создадим на сервере ключ клиента и защитим его паролем:
./easyrsa gen-req kbuldogov
./easyrsa sign-req client kbuldogov

Данный ключ («C:Program FilesOpenVPNeasy-rsapkiprivatekbuldogov.key») нужно передать клиенту и сообщить пароль. Клиент может снять защиту паролем для ключа:
openssl rsa -in "C:Program FilesOpenVPNeasy-rsapkiprivatekbuldogov.key"-out "C:Program FilesOpenVPNeasy-rsapkiprivatekbuldogov_use.key"

Если вы хотите сгенерировать ключ, не защищенный паролем, нужно выполнить команду:
./easyrsa gen-req имяклиента nopass
На сервере с OpenVPN вы можете создать неограниченное количество ключей и сертификатов для пользователей. Аналогичным образом сформируйте ключи и сертфикаты для других клиентов.
Вы можете отохвать скомпрометированные сертификаты клиентов:
cd C:Program FilesOpenVPNeasy-rsa
EasyRSA-Start.bat
./easyrsa revoke kbuldogov
Итак, мы сгенерировали набор ключей и сертификатов для OpenVPN сервера. Теперь можно настроить и запустить службу OpenVPN.
Конфигурационный файл OpenVPN сервера в Windows
Скопируйте типовой конфигурационный файл OpenVPN сервера:
copy "C:Program FilesOpenVPNsample-configserver.ovpn" "C:Program FilesOpenVPNconfig-autoserver.ovpn"
Откройте файл server.ovpn в любом текстовом редакторе и внесите свои настройки. Я использую следующий конфиг для OpenVPN:
# Указываем порт, протокол и устройство
port 1194
proto udp
dev tun
# Указываем пути к сертификатам сервера
ca "C:\Program Files\OpenVPN\easy-rsa\pki\ca.crt"
cert "C:\Program Files\OpenVPN\easy-rsa\pki\issued\server.crt"
key "C:\Program Files\OpenVPN\easy-rsa\pki\private\server.key"
dh "C:\Program Files\OpenVPN\easy-rsa\pki\dh.pem"
# Указываем настройки IP сети, адреса из которой будет будут получать VPN клиенты
server 10.24.1.0 255.255.255.0
#если нужно разрешить клиентам подключаться под одним ключом, нужвно включить опцию duplicate-cn (не рекомендуется)
#duplicate-cn
# TLS защита
tls-auth "C:\Program Files\OpenVPN\easy-rsa\pki\ta.key" 0
cipher AES-256-GCM
# Другая параметры
keepalive 20 60
persist-key
persist-tun
status "C:\Program Files\OpenVPN\log\status.log"
log "C:\Program Files\OpenVPN\log\openvpn.log"
verb 3
mute 20
windows-driver wintun
Сохраните файл.
OpenVPN позволяет использовать как TCP, так и UDP для подключения. В этом примере я запустил OpenVPN на 1194 UDP. Рекомендуется использовать протокол UDP, это оптимально как с точки зрения производительности, так и безопасности.
Не забудьте открыть на файерволе порты для указанного вами порта OpenVPN на клиенте и на сервере. Можно открыть порты в Windows Defender с помощью PowerShell.
Правило для сервера:
New-NetFirewallRule -DisplayName "AllowOpenVPN-In" -Direction Inbound -Protocol UDP –LocalPort 1194 -Action Allow
Правило для клиента:
New-NetFirewallRule -DisplayName "AllowOpenVPN-Out" -Direction Outbound -Protocol UDP –LocalPort 1194 -Action Allow
Теперь нужно запустить службу OpenVPN и изменить тип ее запуска на автоматический. Воспользуйтесь таким командами PowerShell, чтобы включить службу:
Set-Service OpenVPNService –startuptype automatic –passthru
Get-Service OpenVPNService| Start-Service
Откройте панель управления, и убедитесь, что виртуальный сетевой адаптер OpenVPN Wintun теперь активен. Если нет, смотрите лог «C:Program FilesOpenVPNlogserver.log»
Если при запуске OpenVPN вы видите в логе ошибку:
Options error: In C:Program FilesOpenVPNconfig-autoserver.ovpn:1: Maximum option line length (256) exceeded, line starts with..
Смените в файле server.ovpn символы переноса строки на Windows CRLF (в notepad++ нужно выбрать Edit -> EOL Conversion -> Windows CR LF). Сохраните файл, перезапустите службу OpevVPNService.
Данный конфиг позволит удаленным клиентам получить доступ только к серверу, но другие компьютеры и сервисы в локальной сети сервера для них недоступны. Чтобы разрешить клиентам OpenVPN получить доступ к внутренней сети нужно:
Включить опцию IPEnableRouter в реестре (включает IP маршрутизацию в Windows, в том числе включает маршрутизацию меду сетями Hyper-V): reg add «HKLMSYSTEMCurrentControlSetServicesTcpipParameters» /v IPEnableRouter /t REG_DWORD /d 1 /f
Добавьте в конфгурационный файл сервера OpenVPN маршруты до внутренней IP сети:
push "route 10.24.1.0 255.255.255.0"
push "route 192.168.100.0 255.255.255.0"
Если нужно, назначьте клиенту адреса DNS серверов:
push "dhcp-option DNS 192.168.100.11"
push "dhcp-option DNS 192.168.100.12"
Если нужно завернуть все запросы клиента (в том числе Интернет трафик) на ваш OpenVPN сервер, добавьте опцию:
push "redirect-gateway def1"
Настройка OpenVPN клиента в Windows
Создайте на сервере шаблонный конфигурационный файла для клиента VPN (на базе iшаблона client.ovpn) со следующими параметрами (имя файла kbuldovov.ovpn)
client
dev tun
proto udp
remote your_vpn_server_address 1194
resolv-retry infinite
nobind
persist-key
persist-tun
ca ca.crt
cert kbuldogov.crt
key kbuldogov.key
remote-cert-tls server
tls-auth ta.key 1
cipher AES-256-GCM
connect-retry-max 25
verb 3
В директиве remote указывается публичный IP адрес или DNS имя вашего сервера OpenVPN.
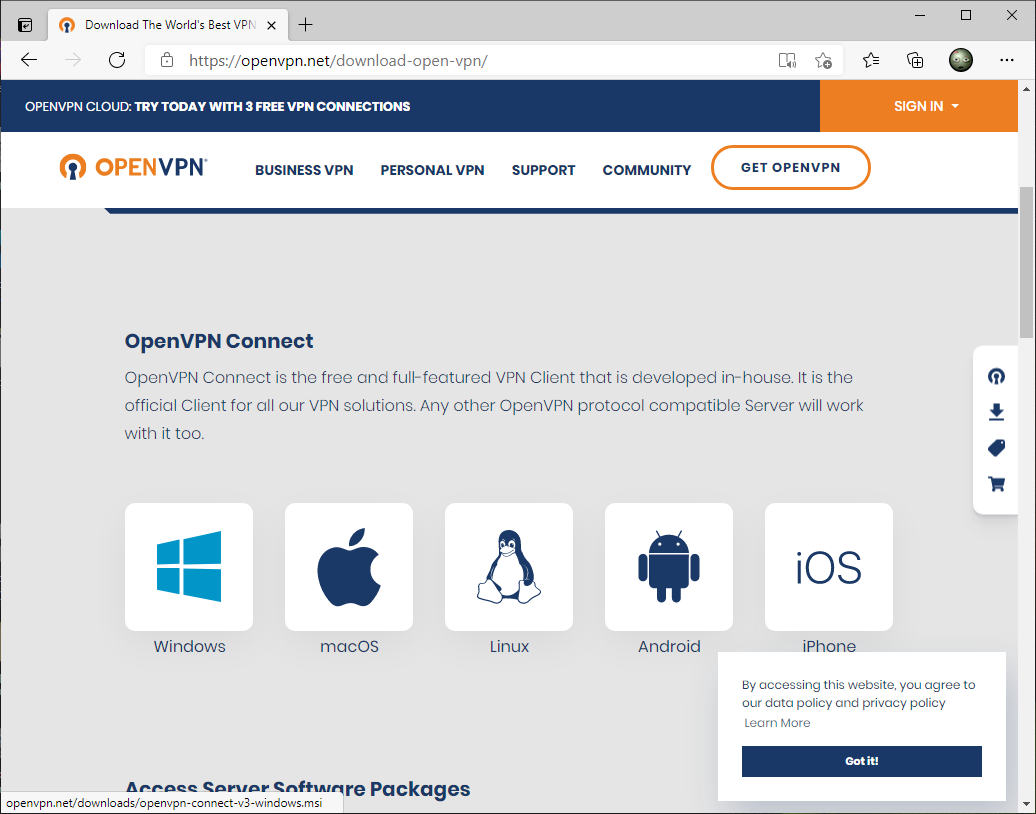
Скачайте и установите клиент OpenVPN Connect для Windows (https://openvpn.net/downloads/openvpn-connect-v3-windows.msi).
Теперь на компьютер с клиентом OpenVPN нужно с сервера скопировать файлы:
- ca.crt
- kbuldogov.crt
- kbuldogov.key
- dh.pem
- ta.key
- kbuldogov.ovpn

Теперь импортируйте файл с профилем *.ovpn и попробуйте подключиться к вашему VPN серверу.
Если все настроено правильно, появится такая картинка. 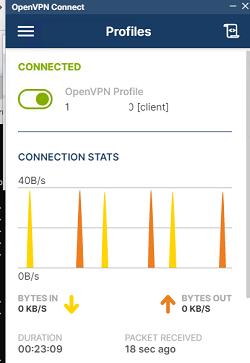
Проверьте теперь лог OpenVPN на клиенте «C:Program FilesOpenVPN Connectagent.log»
Mon Dec 27 08:09:30 2021 proxy_auto_config_url
Mon Dec 27 08:09:31 2021 TUN SETUP
TAP ADAPTERS:
guid='{25EE4A55-BE90-45A0-88A1-8FA8FEF24C42}' index=22 name='Local Area Connection'
Open TAP device "Local Area Connection" PATH="\.Global{25EE4A55-BE90-45A0-88A1-8FA8FEF24C42}.tap" SUCCEEDED
TAP-Windows Driver Version 9.24
ActionDeleteAllRoutesOnInterface iface_index=22
netsh interface ip set interface 22 metric=1
Ok.
netsh interface ip set address 22 static 10.24.1.6 255.255.255.252 gateway=10.24.1.5 store=active
IPHelper: add route 10.24.1.1/32 22 10.24.1.5 metric=-1
Клиент успешно подключится к OpenVPN серверу и получил IP адрес 10.24.1.6.
Проверьте теперь лог на сервере («C:Program FilesOpenVPNlogopenvpn.log»). Здесь также видно, что клиент с сертификатом kbuldogov успешно подключится к вашему серверу.
2021-12-27 08:09:35 192.168.13.202:55648 [kbuldogov] Peer Connection Initiated with [AF_INET6]::ffff:192.168.13.202:55648
2021-12-27 08:09:35 kbuldogov/192.168.13.202:55648 MULTI_sva: pool returned IPv4=10.24.1.6, IPv6=(Not enabled)
2021-12-27 08:09:35 kbuldogov/192.168.13.202:55648 MULTI: Learn: 10.24.1.6 -> kbuldogov/192.168.13.202:55648
2021-12-27 08:09:35 kbuldogov/192.168.13.202:55648 MULTI: primary virtual IP for kbuldogov/192.168.13.202:55648: 10.24.1.6


Рекомендуем популярное
![]() Tor Browser 12.0.2
Tor Browser 12.0.2
Предоставляет надежную защиту персональной информации и конфиденциальности, которая…
![]() Windscribe 2.5.17
Windscribe 2.5.17
Удобное решение, которое представляет собой набор инструментов, которые работают вместе…
![]() AdGuard VPN 2.0.1
AdGuard VPN 2.0.1
Удобный инструмент для интернет-безопасности и защиты конфиденциальности в Сети,…
![]() Planet VPN 1.4.05.01
Planet VPN 1.4.05.01
Бесплатный VPN с возможностями, функционалом и защищенностью на уровне топовых платных…
![]() DNS Jumper 2.2
DNS Jumper 2.2
DNS Jumper — небольшое бесплатное приложение для быстрого переключения DNS на ПК для повышения уровня безопасности или увеличения скорости работы в Интернете…
OpenVPN — это полнофункциональное SSL VPN решение с открытым исходным кодом, которое предоставляет доступ к широкому спектру всевозможных конфигураций, предназначенных для создания виртуальных сетей между компьютерами, получения удалённого доступа к другим ПК, а также защиты передаваемых данных.
Описание OpenVPN:
Эта программа предлагает лёгкую и экономичную альтернативу прочим VPN-сервисам и предназначена, в первую очередь, для малого и среднего бизнеса. Тем не менее, она прекрасно найдет себе применение и при использовании простыми пользователями. Главными особенностями программы можно назвать относительную простоту настройки и использования, высокую стабильность и масштабируемость для огромного количества клиентов.
Программа позволяет создавать зашифрованные каналы двух типов: «Сервер-Клиент» и «Точка-Точка». Первый тип подразумевает подключение к удалённому серверу для работы в сети, а второй — создание прямого виртуального частного туннеля между определёнными машинами. При этом, ОпенВПН позволит установить соединение между компьютерами, находящимися за NAT и сетевым экраном, без необходимости изменения их настроек.
Поддерживаемые методы аутентификации:
- Предустановленный ключ.
- Сертификатная аутентификация.
- При помощи логина и пароля.
Возможно, вас также заинтересует OpenVPN Connect для Android и OpenVPN Connect для iOS.
С нашего сайта вы можете скачать OpenVPN бесплатно, на высокой скорости.
 Обновлено: 04.01.2023
Опубликовано: 25.01.2017
OpenVPN позволяет настроить VPN-сервер как на платформе Windows Server, так и версии для рабочего компьютера (Windows 10, 8, 7).
Установка сервера
Создание сертификатов
Настройка OpenVPN
Настройка клиента
Доступ к локальной сети
Решение проблем
Установка OpenVPN Server
Переходим на официальный сайт OpenVPN и скачиваем последнюю версию программы для соответствующей версии Windows:

Запускаем скачанный файл — нажимаем Next — I Agree — и выставляем галочку EasyRSA 2/3 Certificate Management Scripts (нужен для возможности сгенерировать сертификаты):

* интерфейсы для старой версии OpenVPN и новой немного различаются. Нам нужно выбрать для установки все пункты.
… снова Next и Install — начнется установка. В процессе мастер может выдать запрос на подтверждение установки виртуального сетевого адаптера — соглашаемся (Install/Установить).
После завершения нажимаем Next — снимаем галочку Show Readme — Finish.
Создание сертификатов
Новая версия OpenVPN позволяет создавать сертификаты на основе Easy RSA 3, старая работает на базе 2-й версии. Наши действия будут различаться в зависимости от данной версии. Рассмотрим процесс формирования сертификата с использованием как RSA3, так и RSA2.
а) Создание сертификатов с RSA 3
1. Переходим в папку установки OpenVPN (по умолчанию, C:Program FilesOpenVPN) и создаем каталог ssl.
2. После переходим в папку C:Program FilesOpenVPNeasy-rsa, переименовываем файл vars.example в vars, открываем его на редактирование и правим одну строку:
set_var EASYRSA_TEMP_DIR «$EASYRSA_PKI/temp»
* мы снимаем комментарий и добавляем temp в конце $EASYRSA_PKI. Если это не сделать, то при попытке сформировать корневого сертификата мы получим ошибку Failed create CA private key.
3. Запускаем командную строку от имени администратора:

4. Переходим в каталог easy-rsa:
cd %ProgramFiles%OpenVPNeasy-rsa
5. Запускаем команду:
EasyRSA-Start.bat
Мы окажемся в среде EasyRSA Shell.
6. Инициализируем PKI:
./easyrsa init-pki
Если система вернет ошибку, выходим из оболочки EasyRSA Shell:
exit
И заходим снова:
EasyRSA-Start.bat
Мы должны увидеть:
init-pki complete; you may now create a CA or requests.
Your newly created PKI dir is: C:/Program Files/OpenVPN/easy-rsa/pki
7. Генерируем корневой сертификат (CA):
./easyrsa build-ca
… после ввода Enter обязательно задаем пароль дважды. На запрос ввести Common Name можно просто нажать ввод или написать свое имя:
Common Name (eg: your user, host, or server name) [Easy-RSA CA]:
8. Создаем ключ Диффи-Хеллмана:
./easyrsa gen-dh
9. Для создания сертификата сервера необходимо сначала создать файл запроса:
./easyrsa gen-req cert nopass
* на запрос ввода Common Name просто вводим Enter.
… и на его основе — сам сертификат:
./easyrsa sign-req server cert
После ввода команды подтверждаем правильность данных, введя yes:
Confirm request details: yes
… и вводим пароль, который указывали при создании корневого сертификата.
10. Сертификаты сервера готовы и находятся в каталоге pki. Переносим в C:Program FilesOpenVPNssl следующие файлы:
- ca.crt
- issued/cert.crt
- private/cert.key
- dh.pem
б) Создание сертификатов с RSA 2 (для старых версий OpenVPN)
1. Переходим в папку установки OpenVPN (по умолчанию, C:Program FilesOpenVPN) и создаем каталог ssl.
2. После переходим в папку C:Program FilesOpenVPNeasy-rsa, создаем файл vars.bat, открываем его на редактирование и приводим к следующему виду:
set «PATH=%PATH%;%ProgramFiles%OpenVPNbin»
set HOME=%ProgramFiles%OpenVPNeasy-rsa
set KEY_CONFIG=openssl-1.0.0.cnf
set KEY_DIR=keys
set KEY_SIZE=2048
set KEY_COUNTRY=RU
set KEY_PROVINCE=Sankt-Petersburg
set KEY_CITY=Sankt-Petersburg
set KEY_ORG=Organization
set KEY_EMAIL=master@dmosk.ru
set KEY_CN=DMOSK
set KEY_OU=DMOSK
set KEY_NAME=server.domain.ru
set PKCS11_MODULE_PATH=DMOSK
set PKCS11_PIN=12345678
* в каталоге easy-rsa уже есть файл vars.bat.sample — можно переименовать и использовать его.
** значение HOME не меняем, если оставили путь установки программы по умолчанию; KEY_DIR — каталог, куда будут генерироваться сертификаты; KEY_CONFIG может быть разным — его лучше посмотреть в файле vars.bat.sample или по названию соответствующего файла в папке easy-rsa; KEY_NAME желательно, чтобы соответствовал полному имени VPN-сервера; остальные опции можно заполнить произвольно.
3. Запускаем командную строку от имени администратора:
4. Переходим в каталог easy-rsa:
cd %ProgramFiles%OpenVPNeasy-rsa
4. Запускаем vars.bat:
vars.bat
5. Чистим каталоги от устаревшей информации:
clean-all.bat
* данная команда выполняется один раз, когда на сервере нет информации по ранее созданным сертификатам.
6. Снова запускаем vars.bat (после clean переопределяются некоторые переменные):
vars.bat
Переходим к созданию ключей.
7. Генерируем последовательность центра сертификации:
build-ca.bat
На все запросы нажимаем Enter.
8. Запускаем build-dh.bat (сертификат с использованием алгоритма Диффи-Хеллмана):
openssl dhparam -out keysdh.pem 2048
* команда может выполняться долго — это нормально.
9. Генерируем сертификат для сервера:
build-key-server.bat cert
* где cert — имя сертификата; на все запросы нажимаем Enter. В конце подтверждаем два раза корректность информации вводом y.
10. После переносим из папки C:Program FilesOpenVPNeasy-rsakeys в C:Program FilesOpenVPNssl следующие файлы:
- ca.crt
- cert.crt
- cert.key
- dh.pem
Настройка сервера
Переходим в папку C:Program FilesOpenVPNconfig-auto (или для старой версии C:Program FilesOpenVPNconfig) и создаем файл server.ovpn. Открываем его на редактирование и приводим к следующему виду:
port 443
proto udp
dev tun
dev-node «VPN Server»
dh «C:\Program Files\OpenVPN\ssl\dh.pem»
ca «C:\Program Files\OpenVPN\ssl\ca.crt»
cert «C:\Program Files\OpenVPN\ssl\cert.crt»
key «C:\Program Files\OpenVPN\ssl\cert.key»
server 172.16.10.0 255.255.255.0
max-clients 32
keepalive 10 120
client-to-client
compress
fast-io
cipher AES-256-GCM
persist-key
persist-tun
status «C:\Program Files\OpenVPN\log\status.log»
log «C:\Program Files\OpenVPN\log\openvpn.log»
verb 4
mute 20
* где port — сетевой порт (443 позволит избежать проблем при использовании Интернета в общественных местах, но может быть любым из свободных, например 1194, занятые порты в Windows можно посмотреть командой netstat -a); dev-node — название сетевого интерфейса; server — подсеть, в которой будут работать как сам сервер, так и подключенные к нему клиенты.
** так как в некоторых путях есть пробелы, параметр заносится в кавычках.
*** при использовании другого порта необходимо проверить, что он открыт в брандмауэре или на время тестирования отключить его.
В сетевых подключениях Windows открываем управление адаптерами — TAP-адаптер переименовываем в «VPN Server» (как у нас указано в конфигурационном файле, разделе dev-node):

Теперь открываем службы Windows и находим «OpenVpnService». Открываем ее, настраиваем на автозапуск и включаем:

Если служба в запущенном состоянии, то перезапускаем ее.
Ранее переименованный сетевой интерфейс должен включиться:

VPN-сервер работает. Проверьте, что сетевой адаптер VPN Server получил IP 172.16.10.1. Если он получает что-то, на подобие, 169.254…, выключаем сетевой адаптер — перезапускаем службу OpenVpnService и снова включаем сетевой адаптер.
Если в нашей системе включен брандмауэр, необходимо открыть порт для OpenVPN. Это быстрее всего сделать из командной строки — открываем ее от администратора и вводим:
netsh advfirewall firewall add rule name=»ALLOW OpenVPN» dir=in action=allow protocol=UDP localport=443
* где 443 — наш порт, который мы решили задействовать под OpenVPN; UDP — протокол, который мы настроили в конфигурационном файле сервера.
Настройка клиента
На сервере
На сервере генерируем сертификат для клиента. Для этого сначала чистим файл index.txt в папке C:Program FilesOpenVPNeasy-rsakeys.
Затем запускаем командную строку от имени администратора:
Переходим в каталог easy-rsa:
cd %ProgramFiles%OpenVPNeasy-rsa
Далее наши действия зависят от версии RSA.
а) Создание сертификатов с RSA 3
Запускаем команду:
EasyRSA-Start.bat
Мы окажемся в среде EasyRSA Shell.
Создаем клиентский сертификат:
./easyrsa gen-req client1 nopass
./easyrsa sign-req client client1
Мы должны увидеть запрос на подтверждение намерения выпустить сертификат — вводим yes:
Confirm request details: yes
* в данном примере будет создан сертификат для client1.
После вводим пароль, который указывали при создании корневого сертификата.
Теперь из папки pki копируем файлы:
- issued/client1.crt
- private/client1.key
- ca.crt
- dh.pem
… и переносим их на клиентский компьютер.
б) Создание сертификатов с RSA 2 (для очень старых версий OpenVPN)
Запускаем vars.bat:
vars.bat
И генерируем сертификат первого пользователя:
build-key.bat client1
* на все запросы наживаем Enter, кроме Common Name — в данном поле вводим имя клиента (в нашем случае, просто client1). В конце подтверждаем введенную информацию — y.
** На каждого клиента нужно сгенерировать свой сертификат, в противном случае, им будет присваиваться один и тот же IP-адрес, что будет приводить к конфликту.
Получиться, что-то на подобие:
Country Name (2 letter code) [RU]:
State or Province Name (full name) [Sankt-Petersburg]:
Locality Name (eg, city) [Sankt-Petersburg]:
Organization Name (eg, company) [Organization]:
Organizational Unit Name (eg, section) [DMOSK]:
Common Name (eg, your name or your server’s hostname) [DMOSK]:client1
Name [server.domain.ru]:
Email Address [master@dmosk.ru]:
По умолчанию, для Common Name будет подставляться значение из vars.bat — но с ним сертификат не будет создаваться. Необходимо при создании каждого ключа подставлять значение, равное имени сертификата. Например, как выше — подставлено client1.
Теперь из папки keys копируем файлы:
- client1.crt
- client1.key
- ca.crt
- dh.pem
… и переносим их на клиентский компьютер.
На клиенте
Заходим на официальную страницу загрузки openvpn и скачиваем клиента для Windows:
* по сути, это тот же файл, который скачивался для сервера.
Запускаем скачанный файл и устанавливаем программу, нажимая «Далее».
Переходим в папку C:Program FilesOpenVPNconfig. И копируем в нее сертификаты, которые перенесли с сервера.
Теперь открываем блокнот от имени администратора и вставляем следующие строки:
client
resolv-retry infinite
nobind
remote 192.168.0.15 443
proto udp
dev tun
compress
fast-io
cipher AES-256-GCM
ca ca.crt
cert client1.crt
key client1.key
dh dh.pem
float
keepalive 10 120
persist-key
persist-tun
verb 0
* где 192.168.0.15 443 — IP-адрес OpenVPN-сервера и порт, на котором он принимает запросы. Для боевой среды это будет внешний адрес.
Сохраняем файл с именем config.ovpn в папке C:Program FilesOpenVPNconfig.
Запускаем с рабочего стола программу «OpenVPN GUI» от имени администратора (это важно).
Нажимаем правой кнопкой по появившемуся в трее значку и выбираем «Подключиться»:

Произойдет подключение и значок поменяет цвет с серого/желтого на зеленый.
Доступ к локальной сети
По инструкции выше мы сможем получить доступ только к серверу, на котором установлен OpenVPN. Для получения доступа ко всей внутренней сети, выполним следующие шаги.
1. Настройка реестра
Для включения IP маршрутизации в Windows необходимо в ветке реестра HKEY_LOCAL_MACHINESYSTEMCurrentControlSetServicesTcpipParameters найти параметр IPEnableRouter и задать ему значение 1. Это можно сделать в утилите редактирования реестра (regedit) или командой:
reg add «HKLMSYSTEMCurrentControlSetServicesTcpipParameters» /v IPEnableRouter /t REG_DWORD /d 1 /f
* командную строку необходимо запускать от администратора.
2. Настройка OpenVPN Server
В конфигурационный файл OpenVPN добавим:
push «route 172.16.10.0 255.255.255.0»
push «route 192.168.2.0 255.255.255.0»
* где 172.16.10.0 — VPN сеть; 192.168.2.0 — локальная сеть, в которую необходимо «попасть» пользователям openvpn.
При необходимости использовать DNS внутренней сети также добавим:
push «dhcp-option DNS 192.168.0.15»
push «dhcp-option DNS 192.168.0.16»
push «dhcp-option DOMAIN dmosk.local»
* где 192.168.0.15 и 192.168.0.16 — внутренние DNS-серверы; dmosk.local — домен, который будет добавляться к узлам, обращение к которым идет по неполному имени.
Если нам нужно, чтобы все запросы клиента (в том числе, Интернет) ходили через сервер OpenVPN, добавляем:
push «redirect-gateway def1»
* в таком случае, нам не обязательно добавлять push route, который мы использовали выше.
Перезагружаем службу OpenVpnService.
3. Разрешаем доступ к локальной сети
Заходим в управление сетевыми подключениями (Панель управленияСеть и ИнтернетСетевые подключения). Кликаем правой кнопкой мыши по адаптеру локальной сети — Свойства:

На вкладке Доступ ставим галочку Разрешить другим пользователям сети использовать подключение к Интернету данного компьютера:

… и сохраняем настройки.
Возможные проблемы
Большая часть проблем решается при помощи логов, которые находятся в папке C:Program FilesOpenVPNlog. Уровень детализации лога контролируется параметром verb в конфигурационном файле сервера или клиента.
Также возможны следующие часто возникающие проблемы:
- Проблема: клиент постоянно пытается подключиться к серверу, но соединения не происходит или подключение зависает.
Причина: сервер блокирует подключения по настроенному порту VPN (в нашем примере, 443).
Решение: на сервере необходимо добавить 443 порт в исключения брандмауэра или отключить последний.
- Проблема: при попытке подключиться к серверу выскакивает ошибка «Не удалось подключиться к config».
Причина: ошибка в настройках.
Решение: перепроверьте каждую строчку файла конфигурации. Проверьте наличие всех файлов, на которые ссылаетесь в настройках.
- Проблема: клиенты получают одинаковые IP-адреса.
Причина: подключение выполняется под одним и тем же пользователем.
Решение: сервер выдает одинаковые адреса одинаковым клиентам. Необходимо настроить авторизацию на сервере и выдать каждому клиенту индивидуальные настройки.
- Проблема: соединение происходит, но через несколько минут связь прерывается.
Причина: дублирование IP-адресов.
Решение: данная проблема описана выше (пункт 3).
Возможно, Вы это тоже захотите попробовать
- Настройка OpenVPN-сервера с аутентификацией через LDAP (Active Directory) на Ubuntu Server
- Установка и настройка OpenVPN на Linux CentOS 7
![]()
Отечественный браузер, включающий в себя все современные достижения в области
![]()
Торрент-клиент, предназначенный для загрузки медиа, документов и
![]()
(Туннель бир) VPN-сервис, создающий надежную точку доступа для анонимного серфинга в
![]()
Бесплатная программа для записи видео и организации прямых трансляций.
![]()
Бесплатный лаунчер, разработанный одноименной компанией. Все игры от Epic
![]()
Утилита для дистанционного доступа к другим компьютерам, которая позволяет

Бесплатная клиентская программа, предназначенная для работы с рядом протоколов,

Частично бесплатный VPN-сервис, который позволяет анонимно пользоваться

Утилита для просмотра тв-каналов через интернет или с

Бесплатный веб-браузер, оптимизированный для операционной системы Windows. Основан на

Бесплатный веб-браузер с открытым исходным кодом. Является вольной

Приложение с открытым кодом, предназначенное для голосового общения в сети.

Бесплатный сервис с открытым кодом для создания зашифрованных каналов доступа. Позволяет

Бесплатный файлообменник, предназначенный для передачи документов, аудио, видео и других

Бесплатное облачное хранилище, разработанное российской компанией Mail.ru Group.

Условно-бесплатное офисное приложение для создания, редактирования и хранения заметок. С

Бесплатная утилита, предназначенная для изменения голоса с микрофона в режиме реального

Менеджер закачек, обеспечивающий быструю загрузку файлов из

Проигрыватель, предназначенный для воспроизведения программам

Программа для прослушивания радиопередач в интернете. Обеспечивает

Браузер на движке WebKit, обеспечивает ускоренную загрузку страниц и высокую

Это продвинутый майнер, отличающийся простым и понятным интерфейсом и

Программное обеспечение, позволяющее мониторить весь http-трафик между

Программа, обеспечивающая взаимодействие с одноименным облачным

Это мультивалютный официальный кошелек сети Bitcoin, позволяющий

Консольный клиент, предназначенный для майнинга криптовалюты. Позволяет управлять

Программа, обеспечивающая доступ к облачному хранилищу с тем же названием.

Бесплатная утилита для организации раздачи Wi-Fi с ПК или

Браузер, созданный на движке Chromium. Корректно отображает любые веб-страницы,

Свободно распространяемый графический клиент SFTP, предназначенный для установки на

Бесплатная утилита для создания беспроводных сетей Wi-Fi. Формирует защищенную

Бесплатная программа, предназначенная для видеообщения в режиме реального времени.

Браузерный плагин, предназначенный запуска приложений с элементами

Программа, позволяющая скачать видео с YouTube бесплатно. Проста в установке и

Программное обеспечение, предназначенное для организации точки доступа Wi-Fi

Бесплатное кроссплатформенное программное обеспечение, предназначенное для

Бесплатный мультиплатформенный BitTorrent-клиент. В приложении реализован собственный

Бесплатный кроссплатформенный браузер, работающий на движке Webkit или Trident

Менеджер загрузок для компьютеров,

Программа для поиска и скачивания торрент-файлов. Подходит для работы со множеством различных

Интернет-браузер, работающий на движке Blink от Google. Дизайн приложения

Программа для доступа и администрирования одной или нескольких удаленных машин.

Клиент для мгновенного обмена сообщениями. Позиционируется разработчиками как решение,

Бесплатное программное обеспечение, предназначенное для навигации по городу. В

Бесплатный мессенджер для обмена текстовыми и голосовыми сообщениями, а также

Почтовый клиент с широкими возможностями автоматизации действий.

Программа, которая предназначена для организации виртуальной частной

Бесплатный почтовый клиент от компании Mozilla.

Игровой движок, позволяющий играть в браузерные 3D-игры,

Программа для сохранения аудио- и видеозаписей из ВКонтакте. Отличается

Бесплатная программа, позволяющая обмениваться файлами по сети и общаться с

Бесплатный клиент для многопользовательских игр в онлайн-режиме. Программа

Бесплатный клиент для сети Direct Connect, позволяющий обмениваться музыкой,
![]()
Первое торрент-приложение, позволяющее пользователям обмениваться файлами

Легкий браузер для операционной системы Windows, основанный на движках
![]()
Программа для организации группового голосового общения. Применяется в
![]()
Бесплатная программа, позволяющая найти и скачать музыку и видеофайлы из

Официальный клиент для обмена текстовыми сообщениями и файлами посредством сети интернет.

Удобный и простой мессенджер, составляющий реальную конкуренцию популярному ICQ. Программа

Программное обеспечение, предназначенное для голосового общения в реальном

Интернет-браузер, установленный по умолчанию в операционных системах от компании

Интернет-браузер от компании Mail.Ru Group. Разрабатывается с использованием открытого

Удобный бесплатный FTP-клиент, распространяемый по лицензии GNU GPL.

Программа от корпорации Google, которая представляет собой

Утилита, выполняющая функции файрвола для почтовых серверов и прокси. Работа

Браузер для Windows, работающий сразу после установки