-
Partition Wizard
-
Partition Magic
- How to Enable Remote Desktop Windows 10 via CMD and PowerShell
By Vicky | Follow |
Last Updated December 02, 2020
Is Remote Desktop free? Is it secure? How do you know if Remote Desktop is enabled? In this post, MiniTool answers all the above questions. Furthermore, MiniTool also shows you how to enable this feature via Command Prompt and Windows PowerShell.
Windows 10 Remote Desktop
Remote Desktop is a feature that you can use to connect two computers or other devices so that you can access another computer remotely. With this feature, you can control other’s computer as if you have local access to the system in which you can move the mouse cursor, open programs, transfer files, and so on.
The Remote Desktop feature is quite useful if you run into some computer issues and you can ask help for your friends or other people to perform troubleshooting on your system without letting them visit your place.
But there is a pithy that this feature is unavailable on Windows 10 Home, but you can find it on Windows 10 Pro and Enterprise editions.
Is Remote Desktop Free and Secure?
The good news is that Microsoft asks for no charge of this feature. In terms of security, it can be said that the Remote Desktop feature offered by Microsoft is a perfectly viable option if you want to access other’s computer.
How to Know if Remote Desktop Is Enabled?
To check whether the Remote Desktop is enabled, you just need to complete the following steps.
Step 1: Right-click This PC or My Computer on your desktop and then select Properties from the menu.
Step 2: On the Properties window, click Remote settings on the left pane.
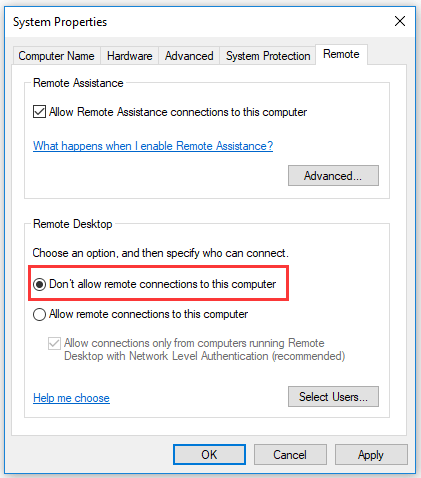
Step 3: Under the Remote tab, see if the box next to Don’t allow connections to this computer is checked to check if the Remote Desktop feature is enabled.
How to Enable Remote Desktop Windows 10?
If your Remote Desktop is not enabled on Windows 10, you can enable it now. You can enable this feature via Windows Settings, but some users ran into Windows Setting not working. So, in this post, I would like to show you how to enable Remote Desktop in two different ways, namely using Command Prompt and Windows PowerShell.
Enable Remote Desktop via Command Prompt
Step 1: Run Command Prompt as administrator.
- Type Command Prompt on the Cortana’s search bar.
- Right-click the result and then select Run as administrator.
Step 2: Type the following command on the Command Prompt window and then hit the Enter to run this command.
reg add «HKLMSYSTEMCurrentControlSetControlTerminal Server» /v fDenyTSConnections /t REG_DWORD /d 0 /f
Step 3: When the above command has been executed, you need to run another command and hit Enter to execute it. This command will add and update rules in the Firewall and after that, you can use Remote Desktop.
netsh advfirewall firewall set rule group=»remote desktop» new enable=yes
Enable Remote Desktop via Windows PowerShell
Step 1: Run Windows PowerShell as administrator.
- Type Windows PowerShell on the Cortana’s search bar.
- Right-click the result and then select Run as administrator.
Step 2: Type the following command and then hit the Enter key to run it.
Set-ItemProperty -Path ‘HKLM:SystemCurrentControlSetControlTerminal Server’-name «fDenyTSConnections» -Value 0
Step 3: Type another key and hit Enter.
Enable-NetFirewallRule -DisplayGroup «Remote Desktop»
If you want to disable the Remote Desktop feature on Windows 10, you can also run the following commands in Command Prompt and Windows PowerShell. Please do not forget to hit the Enter key after typing each command.
Disable Remote Desktop via Command Desktop:
- reg add «HKLMSYSTEMCurrentControlSetControlTerminal Server» /v fDenyTSConnections /t REG_DWORD /d 1 /f
- netsh advfirewall firewall set rule group=»remote desktop» new enable=No
Disable Remote Desktop via Windows PowerShell:
- Set-ItemProperty -Path ‘HKLM:SystemCurrentControlSetControlTerminal Server’-name «fDenyTSConnections» -Value 1
- Disable-NetFirewallRule -DisplayGroup «Remote Desktop»
About The Author

Position: Columnist
Vicky is a website editor who has been writing tech articles since she was graduated from university. Most of her articles talk about Windows PC and hard disk issues. Some of her articles also touch on YouTube usage and issues.
During her spare time, she likes to spend time reading, watching videos, and sitting on her Yoga mat to relax.
-
Partition Wizard
-
Partition Magic
- How to Enable Remote Desktop Windows 10 via CMD and PowerShell
By Vicky | Follow |
Last Updated December 02, 2020
Is Remote Desktop free? Is it secure? How do you know if Remote Desktop is enabled? In this post, MiniTool answers all the above questions. Furthermore, MiniTool also shows you how to enable this feature via Command Prompt and Windows PowerShell.
Windows 10 Remote Desktop
Remote Desktop is a feature that you can use to connect two computers or other devices so that you can access another computer remotely. With this feature, you can control other’s computer as if you have local access to the system in which you can move the mouse cursor, open programs, transfer files, and so on.
The Remote Desktop feature is quite useful if you run into some computer issues and you can ask help for your friends or other people to perform troubleshooting on your system without letting them visit your place.
But there is a pithy that this feature is unavailable on Windows 10 Home, but you can find it on Windows 10 Pro and Enterprise editions.
Is Remote Desktop Free and Secure?
The good news is that Microsoft asks for no charge of this feature. In terms of security, it can be said that the Remote Desktop feature offered by Microsoft is a perfectly viable option if you want to access other’s computer.
How to Know if Remote Desktop Is Enabled?
To check whether the Remote Desktop is enabled, you just need to complete the following steps.
Step 1: Right-click This PC or My Computer on your desktop and then select Properties from the menu.
Step 2: On the Properties window, click Remote settings on the left pane.
Step 3: Under the Remote tab, see if the box next to Don’t allow connections to this computer is checked to check if the Remote Desktop feature is enabled.
How to Enable Remote Desktop Windows 10?
If your Remote Desktop is not enabled on Windows 10, you can enable it now. You can enable this feature via Windows Settings, but some users ran into Windows Setting not working. So, in this post, I would like to show you how to enable Remote Desktop in two different ways, namely using Command Prompt and Windows PowerShell.
Enable Remote Desktop via Command Prompt
Step 1: Run Command Prompt as administrator.
- Type Command Prompt on the Cortana’s search bar.
- Right-click the result and then select Run as administrator.
Step 2: Type the following command on the Command Prompt window and then hit the Enter to run this command.
reg add «HKLMSYSTEMCurrentControlSetControlTerminal Server» /v fDenyTSConnections /t REG_DWORD /d 0 /f
Step 3: When the above command has been executed, you need to run another command and hit Enter to execute it. This command will add and update rules in the Firewall and after that, you can use Remote Desktop.
netsh advfirewall firewall set rule group=»remote desktop» new enable=yes
Enable Remote Desktop via Windows PowerShell
Step 1: Run Windows PowerShell as administrator.
- Type Windows PowerShell on the Cortana’s search bar.
- Right-click the result and then select Run as administrator.
Step 2: Type the following command and then hit the Enter key to run it.
Set-ItemProperty -Path ‘HKLM:SystemCurrentControlSetControlTerminal Server’-name «fDenyTSConnections» -Value 0
Step 3: Type another key and hit Enter.
Enable-NetFirewallRule -DisplayGroup «Remote Desktop»
If you want to disable the Remote Desktop feature on Windows 10, you can also run the following commands in Command Prompt and Windows PowerShell. Please do not forget to hit the Enter key after typing each command.
Disable Remote Desktop via Command Desktop:
- reg add «HKLMSYSTEMCurrentControlSetControlTerminal Server» /v fDenyTSConnections /t REG_DWORD /d 1 /f
- netsh advfirewall firewall set rule group=»remote desktop» new enable=No
Disable Remote Desktop via Windows PowerShell:
- Set-ItemProperty -Path ‘HKLM:SystemCurrentControlSetControlTerminal Server’-name «fDenyTSConnections» -Value 1
- Disable-NetFirewallRule -DisplayGroup «Remote Desktop»
About The Author
Position: Columnist
Vicky is a website editor who has been writing tech articles since she was graduated from university. Most of her articles talk about Windows PC and hard disk issues. Some of her articles also touch on YouTube usage and issues.
During her spare time, she likes to spend time reading, watching videos, and sitting on her Yoga mat to relax.
Windows 10
- 28.03.2020
- 21 297
- 5
- 01.09.2021
- 12
- 11
- 1
- Содержание статьи
- Включение удаленного доступа через Параметры
- Включение удаленного доступа через Свойства системы
- Включение удаленного доступа через командную строку
- Включение удаленного доступа через PowerShell
- Комментарии к статье ( 5 шт )
- Добавить комментарий
Возможность организовать подключение к компьютеру через удаленный рабочий стол есть только в следующих редакциях Windows 10 — Pro и Коорпоративная (Enterprise). Если Вам нужно настроить подключение к удаленному рабочему столу к другим редакциям Windows 10, то воспользуйтесь RDP Wrapper.
Включение удаленного доступа через Параметры
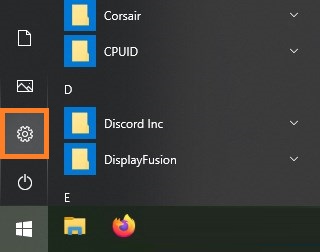
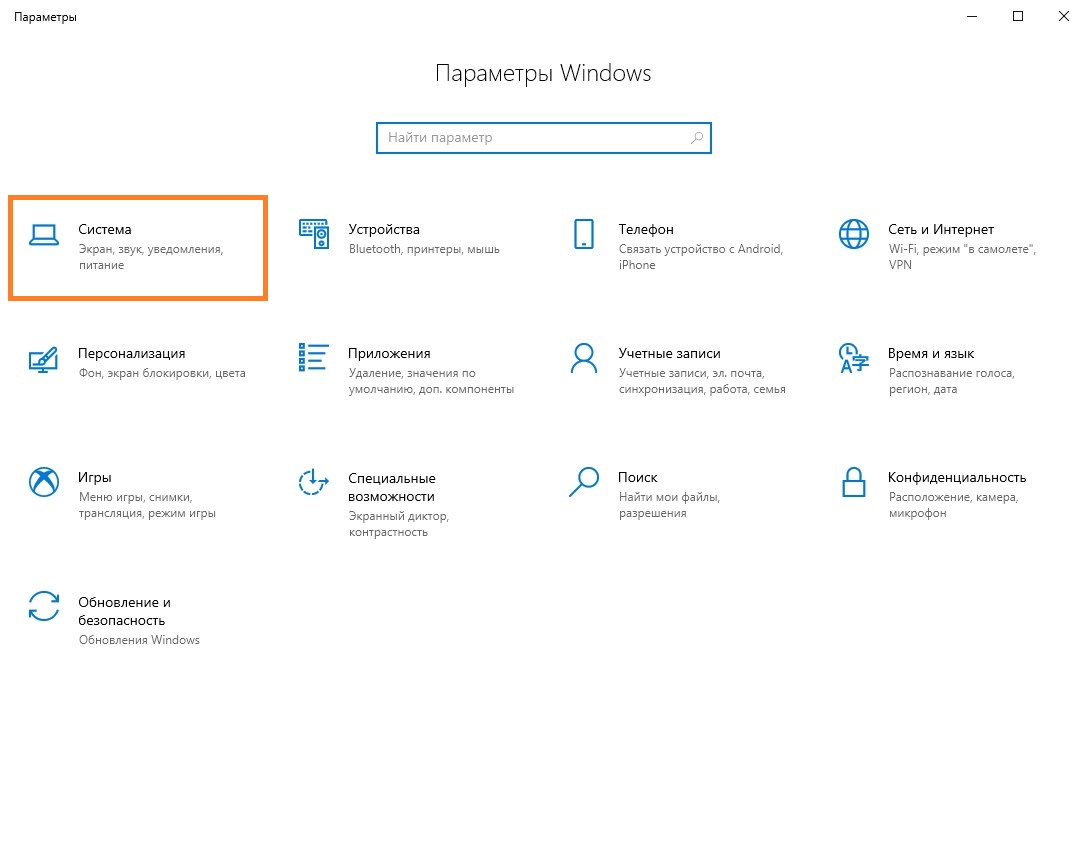
- Открываем меню Пуск, и нажимаем на кнопку «Параметры» (иконка в виде шестеренки).

- В окне параметров выбираем пункт «Система».

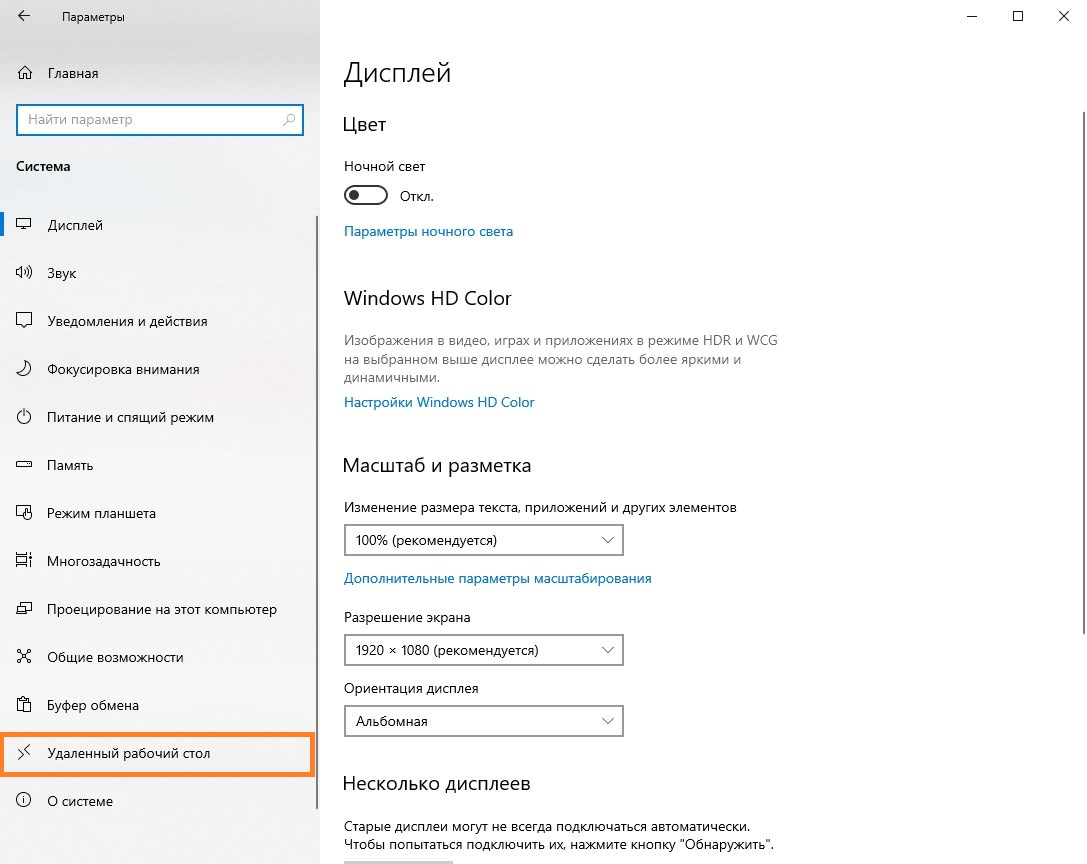
- Далее переходим на вкладку «Удаленный рабочий стол».
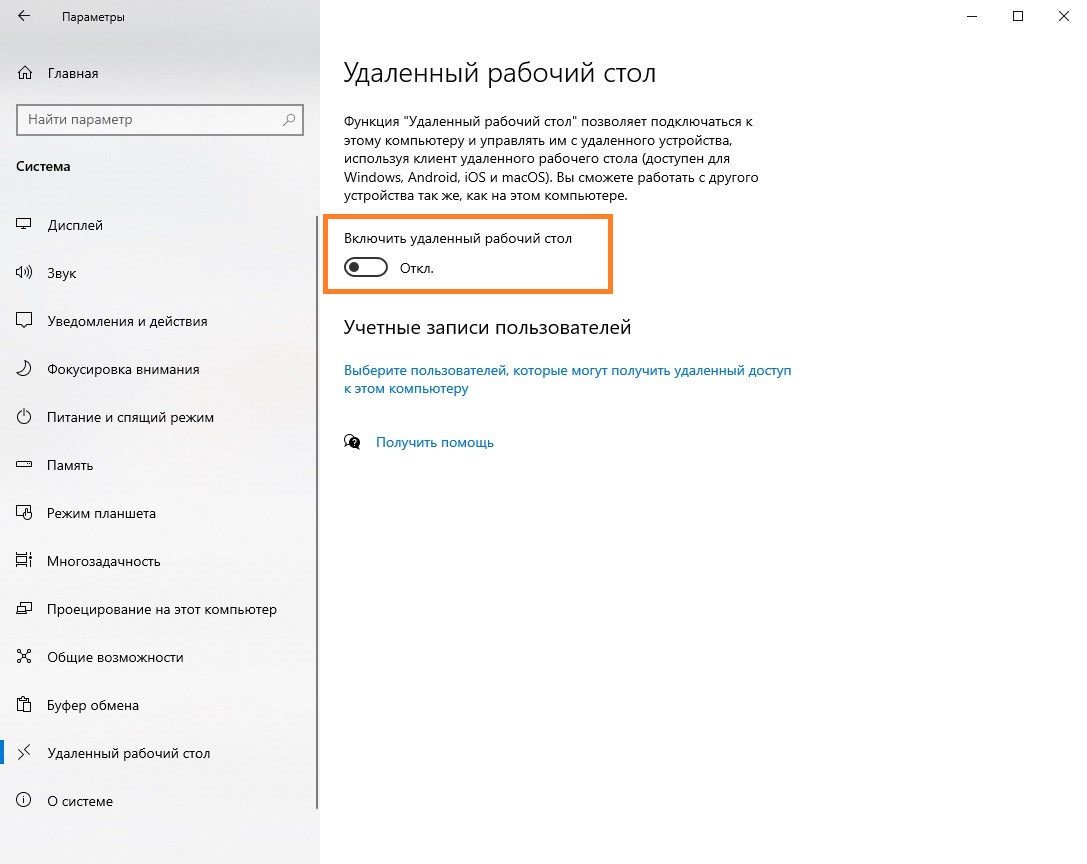
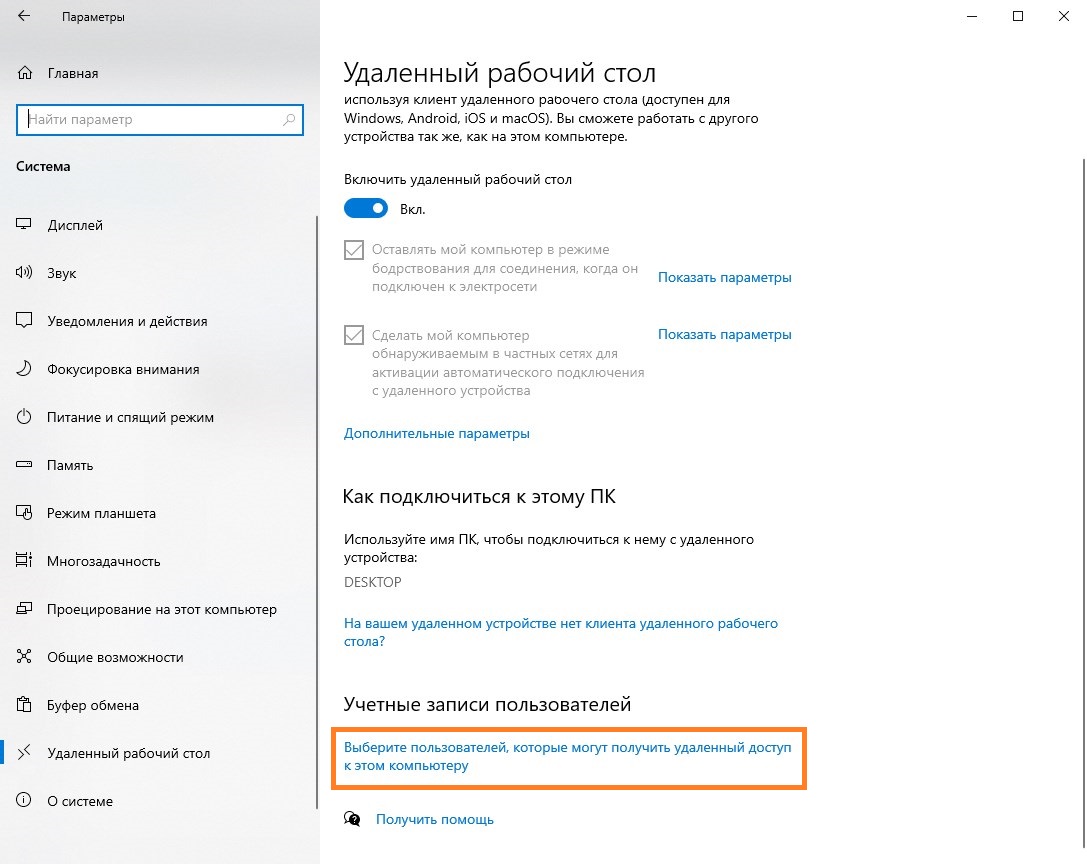
- Здесь нужно переключить единственный переключатель «Включить удаленный рабочий стол» со значения «Откл.» в значение «Вкл.».
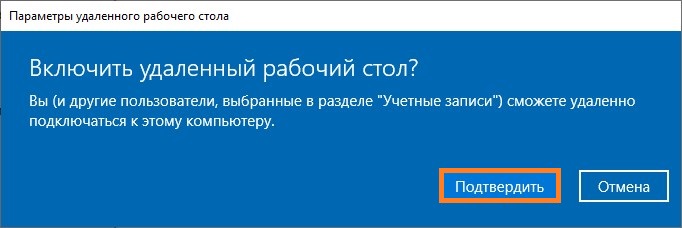
- Появится окошко, в котором Вас попросят подтвердить, действительно ли вы хотите включить удаленный рабочий стол. Поскольку, именно это и стоит целью данной статьи, то нажать нужно «Подтвердить».

- После этого к компьютеру смогут подключаться по удаленному рабочему столу все пользователи, которые входят в группу «Администраторы». Для того, чтобы добавить пользователей, которые смогут подключаться к удаленному рабочему столу, и которые при этом не имеют прав администратора, нужно пролистать окно настроек удаленного рабочего стола в самый низ, и там нажать на надпись «Выберите пользователей, которые могут получить удаленный доступ к этому компьютеру«.
В открывшемся окне достаточно будет нажать на кнопку «Добавить» и ввести логин или имя пользователя компьютера (для сверки корректности введенных данных можно нажать на кнопку «Проверить имена».


Включение удаленного доступа через Свойства системы
Как и в предыдущих версиях Windows, в десятой версии данной операционной системы, можно управлять доступом к удаленному рабочему столу через свойства системы.
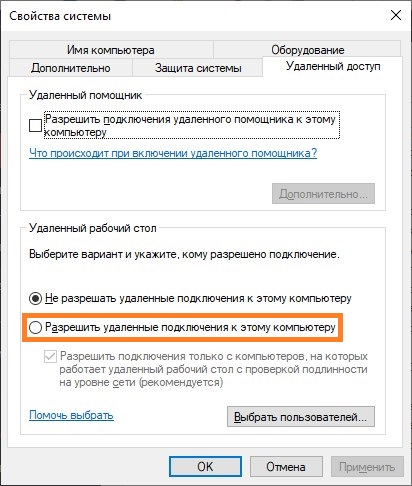
- Для использования этого метода нужно открыть Свойства системы — проще всего это сделать, нажав на клавиши Win + R и выполнить там команду
SystemPropertiesRemote. После выполнения этой команды откроется окошко Свойств системы с настройками удаленного доступа.

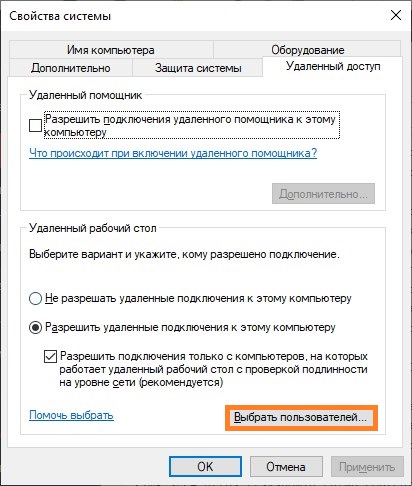
- В данном окне нужно отметить пункт «Разрешить удаленные подключения к этому компьютеру», и нажать «Применить». После этого, компьютер будет готов к подключениям по удаленному рабочему столу. Подключаться смогут только пользователи, которые состоят в группе «Администраторы». Для того, чтобы это исправить, необходимо нажать на кнопку «Выбрать пользователей».
- Откроется окно, где будет доступна кнопка «Добавить», с помощью которой можно добавить пользователей в список тех, кому доступен доступ к компьютеру через удаленный рабочий стол. Вписывать туда стоит логин или имя пользователя, для проверки корректности ввода воспользовавшись кнопкой «Проверить имена».
Включение удаленного доступа через командную строку
Кроме описанных выше способов, можно включить удаленный доступ к компьютеру, выполнив всего одну команду в командной строке. Для этого, нужно запустить командную строку от имени администратора, и выполнить следующую команду:
reg add "HKEY_LOCAL_MACHINESYSTEMCurrentControlSetControlTerminal Server" /v fDenyTSConnections /t REG_DWORD /d 0 /fВ итоге, удаленный рабочий стол на компьютере заработает, но доступ к нему будут иметь только пользователи с правами администратора. Чтобы разрешить доступ обычным пользователям, нужно их добавить в группу «Пользователи удаленного рабочего стола». Сделать это можно с помощью следующей команды:
net localgroup "Пользователи удаленного рабочего стола" "[ИМЯ ПОЛЬЗОВАТЕЛЯ]" /addТо есть, для того, чтобы добавить пользователя с именем Вася, нужно ввести команду:
net localgroup "Пользователи удаленного рабочего стола" "Вася" /addВ английской версии Windows, данная группа называется «Remote Desktop Users».
Включение удаленного доступа через PowerShell
Как и в случае с командной строкой, включить удаленный доступ можно и через PowerShell. Для этого, нужно выполнить команду в оболочке PowerShell, запущенной с правами администратора:
Set-ItemProperty -Path 'HKLM:SystemCurrentControlSetControlTerminal Server' -name "fDenyTSConnections" -value 0Для того, чтобы пользователь мог получить доступ к удаленному рабочему столу (по умолчанию, он доступен только пользователям с правами администратора), нужно выполнить следующую команду:
Add-LocalGroupMember -Group "Пользователи удаленного рабочего стола" -Member "[ИМЯ ПОЛЬЗОВАТЕЛЯ]"То есть, для добавления пользователя с именем Вася, команда будет иметь следующий вид:
Add-LocalGroupMember -Group "Пользователи удаленного рабочего стола" -Member "Вася"В английской версии Windows, данная группа называется «Remote Desktop Users».
The Remote Desktop Connection (RDC) tool, also known as Microsoft Terminal Services Client (MSTSC), allows a user to connect to another computer remotely over the network using the Remote Desktop Protocol (RDP). Most users use this tool via its Graphical User Interface (GUI) which is convenient to use, but this article focuses on using the Remote Desktop via the command line.
Connecting to other computers using RDC through the command line allows you to control different settings and preferences of the connection. Windows allows a user to use certain switches to predefine the settings before the connection is made. For example, you can define the name or IP address of the remote computer, or adjust the RDC window size even before running the tool.
Learn how to enable RDC in Windows 11.
Table of contents
- MSTSC commands and switches
- Launch RDC from Run
- Use RDC to connect via console
- Launch RDC with IP address
- Launch RDC with computer name
- Launch RDC in full-screen mode
- MSTSC commands and switches
- Troubleshoot RDC via command line
- Check if RDP is enabled from Command prompt
- Check if RDP is enabled from PowerShell
- Frequently Asked Questions
- What is MSTSC?
- How to open Remote Desktop from the command line?
- How to add username and password to mstsc command line?
- Is the RDP and RDC the same?
Let us help you become aware of the switch options and how you can use them to configure your RDC connections.
MSTSC commands and switches
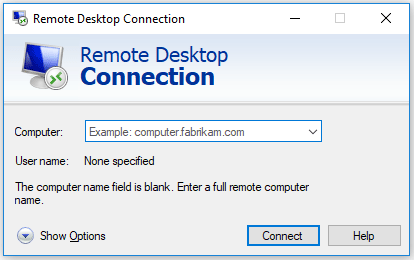
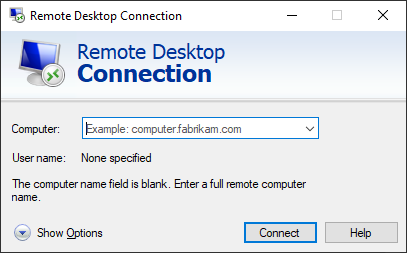
The conventional way to open the RDC in Windows is by searching for “Remote Desktop Connection” or “RDC” in Run and open the tool.
 using Command Line 2")
This then opens the RDC tool where you can enter the name of IP address with port number (optional) of the remote computer that you want to connect to.
 using Command Line 3")
Most of you would already be aware of this method.
This section covers the possible commands and switches that you can use with RDC via the command line. We shall start with the most basic ones and then continue.
Launch RDC from Run
The very basic command to run Remote Desktop Connection from the command line is via Run. Simply type in the following in Run and hit Enter.
mstsc
 using Command Line 4")
Running this will open the RDC with a blank text field. However, with the addition of a few switches, you can change the settings and preferences of the RDC connection. Let us continue forward with a few examples.
Use RDC to connect via console
Although RDC fully supports GUI, you can also connect to remote machines through a console. This will help in case you wish to continue the session that you got disconnected from earlier. In contrast, a regular GUI-based RDC session creates a new session each time you connect to the same machine.
Use the following command to connect to a remote computer via console:
mstsc /console
 using Command Line 5")
Launch RDC with IP address
You can also launch RDC along with the IP address of the machine to connect it with. If the port on the machine is changed from the default value, you can also add the port number. Use the following commands to do so:
mstsc /v:IPAddress
mstsc /v:IPAddress:PortNumber
Replace IPAddress with the complete IP address of the remote computer that you want to connect with, and PortNumber with the port number if changed from its default value.
 using Command Line 6")
Launch RDC with computer name
You can also connect to the remote computer by its unique computer name. The switch used for this is the same one used with the IP address and port number in the steps above.
mstsc /v:ComputerName
Replace ComputerName with the unique name of the remote device that you can find in its settings or properties.
 using Command Line 7")
Launch RDC in full-screen mode
You can also launch the RDC connection in full-screen mode. Here is how:
mstsc /f
 using Command Line 8")
These switches can be combined into a single command to execute an RDC connection to your preferences. Here is an example:
mstsc /f /v:192.168.10.122:8002
 using Command Line 9")
MSTSC commands and switches
There are more commands and switches you can use with mstsc command-line to adjust your settings for the connection beforehand. Here is the complete list:
| <connectionfile> | For a .rdp file required to make a connection (if applicable). |
| /v: | IP Address or computer name of the remote computer. |
| /g: | IP Address or device name of a Remote Gateway Server (if applicable). |
| /admin | To establish a connection with administrative privileges. |
| /f | View the Remote Desktop Window in full-screen mode. |
| /w: | To specify the width of the Remote Desktop Window. |
| /h: | To specify the height of the Remote Desktop Window. |
| /public | Run the Remote Desktop Connection publicly (less secure). |
| /span | To match the width and height of the Remote Desktop with the local desktop. |
| /edit <connectionfile> | To edit a .rdp file. |
| /multimonTo make the monitor layout of the Remote Desktop Services session identical to the client-side configuration. | |
| /restrictedAdmin | Connect to the remote PC in Restricted Administration mode. The credentials are not sent to the remote PC in this mode, protecting you if you connect to a compromised PC. |
| /remoteGuard | Connect your device to a remote device using the Remote Guard, which prevents sending credentials to a remote PC. |
| /prompt | To prompt you to put in credentials to connect to the remote PC. |
| /shadow: | The ID of the session that you want to connect to. |
| /control | Give control of the session when shadowing. |
| /noConsentPrompt | To allow shadowing without user consent. |
| /migrate | Migrate legacy connection files created with Client Connection Manager to new .rdp connection files. |
| /? | To get help in the command prompt. |
These switches can have the following syntax in either Run or the Command Prompt:
mstsc [<connection file>] [/v:<server[:port]>] [/g:<gateway>]
[/admin] [/f] [/w:<width> /h:<height>] [/public] |
[/span] [/multimon] [/edit "connection file"] [/restrictedAdmin]
[/remoteGuard] [/prompt] [/shadow:<sessionID> [/control][/noConsentPrompt]]
The parameters in the alligator brackets (< and >) are variables that you can adjust according to your preferences.
Troubleshoot RDC via command line
You can also troubleshoot Remote Desktop services through the command line. For example, if you are unable to connect to a device using the GUI RDC but have access via console, you can check whether there are any configurations to be made that will connect you via GUI successfully.
Check if RDP is enabled from Command prompt
Learn how to enable RDP remotely.
You can run the following command to check the status of your device if RDP is enabled or disabled:
netstat /p tcp /a | findstr 3389
 using Command Line 10")
If the results come back as “Listening,” it means that RDP is enabled.
Check if RDP is enabled from PowerShell
Another method to check whether RDP is enabled is through Windows PowerShell. You can run the following commands in PowerShell and it will tell you whether the service is available or not.
if ((Get-ItemProperty "hklm:SystemCurrentControlSetControlTerminal Server").fDenyTSConnections -eq 0) { write-host "RDP is Enabled" } else { write-host "RDP is NOT enabled" }
 using Command Line 11")
If the script returns “RDP is enabled,” it means that it is.
Frequently Asked Questions
What is MSTSC?
Microsoft Terminal Services Client (MSTSC) is a tool that allows a user to remotely connect to another device over the network as if they were physically present on the remote device.
How to open Remote Desktop from the command line?
You can open the Remote Desktop Connection window from Run or Command Prompt using mstsc. You may also add switches like /v and /f to control the connection’s arguments.
How to add username and password to mstsc command line?
You cannot add a username or password directly to the mstsc command. However, you can store the credentials in a generic key against the machine you want to connect to using these 2 commands:cmdkey /generic:"<server>" /user:"<user>" /pass:"<password>"
mstsc /v:"<server>"
Is the RDP and RDC the same?
Remote Desktop Connection (RDC) is a tool used to establish a remote connection between devices. Remote Desktop Protocol (RDP) is the technology that RDC uses to create this remote connection.
Also see:
Subhan Zafar is an established IT professional with interests in Windows and Server infrastructure testing and research, and is currently working with Itechtics as a research consultant. He has studied Electrical Engineering and is also certified by Huawei (HCNA & HCNP Routing and Switching).
The Remote Desktop Connection (RSD) feature has been active in the Windows operating system since Windows NT Server 4.0; though as a Terminal Server. Come the Windows 10, RSD now exists as an inbuilt standalone app that can be accessed from not only Windows 10 computers but from major mobile and computer OS like Android, iOS, Linux, and Mac. RSD has been used by many companies and firms to control and operate computers in its network remotely. It is also essential for solving problems on devices you can’t access physically.
What is a Remote Desktop Connection?
Remote Desktop Connection (RSD), which is often shortened to Remote Desktop, is a feature created by Microsoft that allows a local computer to control a remote PC after connecting to it over the internet or a network.
Simply put, Remote Desktop Connection is the ability to connect and use another computer from your computer.
Before we proceed note, any edition of Windows can act as a Remote Desktop Client. But to host a remote season, you need a PC running Windows 10 Pro or Enterprise.
We have already seen the different ways to enable Remote Desktop Connection in Windows 10. Today, we will take a look at some command-line options for using RDP. Instead of starting Remote Desktop Connection from the Start menu, Windows 10/8/7 allows you to start it from the search box, from the Run dialog box, or from a command line. With these methods, you can use additional command line parameters to control how Remote Desktop Connection looks or behaves.
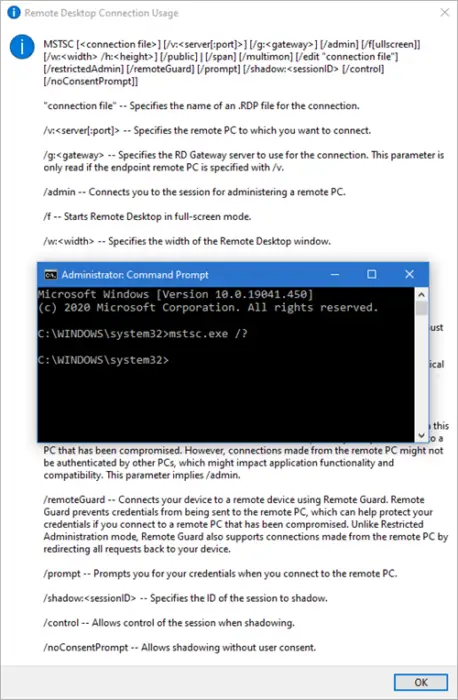
From the Run dialogue box or the Command Prompt, we can carry so many instructions easily. To see all the possible commands and a brief description you can access, copy and paste any of the commands below:
mstsc.exe /?
This is the syntax-
MSTSC [<connection file>] [/v:<server[:port]>] [/g:<gateway>] [/admin] [/f[ullscreen]] [/w:<width> /h:<height>] [/public] | [/span] [/multimon] [/edit "connection file"] [/restrictedAdmin] [/remoteGuard] [/prompt] [/shadow:<sessionID> [/control] [/noConsentPrompt]]
Continue reading to see a few descriptions:
- Whenever you connect to the server, Windows opens a new user session. You can avoid this by opening a connection to the console. Add /console to the mstsc
mstsc /console
- To open remote desktop session in full screen, run the command below (/f);
mstsc /f
- To specify the remote computer name from the command, use the command below (/v);
mstsc /v:computername
Brief description of the Syntax above
"connection file" – Specifies the name of an .RDP file for the connection.
/v:<server[:port]> – Specifies the remote PC to which you want to connect.
/g:<gateway> – Specifies the RD Gateway server to use for the connection. This parameter is only read if the endpoint remote PC is specified with /v.
/admin – Connects you to the session for administering a remote PC.
In this version of Remote Desktop Connection, if the Remote Desktop Session Host role service is installed on the remote computer, running mstsc /admin will do the following (for the current connection only):
- Disable Remote Desktop Services client access licensing
- Disable time zone redirection
- Disable RD Connection Broker redirection
- Disable Remote Desktop Easy Print
- Disables Plug and Play device redirection for this connection only.
- Changes the remote session theme to Windows Classic View (if it’s available) for this connection only.
/f – Starts Remote Desktop in full-screen mode.
/w:<width> – Specifies the width of the Remote Desktop window.
/h:<height> – Specifies the height of the Remote Desktop window.
/public– Runs Remote Desktop in public mode.
/span – Matches the remote desktop width and height with the local virtual desktop, spanning across multiple monitors, if necessary. To span across monitors, the monitors must be arranged to form a rectangle.
/multimon – Configures the Remote Desktop Services session monitor layout to be identical to the current client-side configuration.
/edit – Opens the specified .RDP connection file for editing.
With the Remote Desktop Connection, you have access to only computers in your network. You can use only one remote desktop connection on Windows 10 at a time, i.e., one remote user per Windows.
However, a PC running Windows 10 server edition can run remote Sessions for different users at the same time.
Read next: How to use Windows 10 Remote Desktop in Windows Home (RDP).
The Remote Desktop Connection (RSD) feature has been active in the Windows operating system since Windows NT Server 4.0; though as a Terminal Server. Come the Windows 10, RSD now exists as an inbuilt standalone app that can be accessed from not only Windows 10 computers but from major mobile and computer OS like Android, iOS, Linux, and Mac. RSD has been used by many companies and firms to control and operate computers in its network remotely. It is also essential for solving problems on devices you can’t access physically.
What is a Remote Desktop Connection?
Remote Desktop Connection (RSD), which is often shortened to Remote Desktop, is a feature created by Microsoft that allows a local computer to control a remote PC after connecting to it over the internet or a network.
Simply put, Remote Desktop Connection is the ability to connect and use another computer from your computer.
Before we proceed note, any edition of Windows can act as a Remote Desktop Client. But to host a remote season, you need a PC running Windows 10 Pro or Enterprise.
We have already seen the different ways to enable Remote Desktop Connection in Windows 10. Today, we will take a look at some command-line options for using RDP. Instead of starting Remote Desktop Connection from the Start menu, Windows 10/8/7 allows you to start it from the search box, from the Run dialog box, or from a command line. With these methods, you can use additional command line parameters to control how Remote Desktop Connection looks or behaves.
From the Run dialogue box or the Command Prompt, we can carry so many instructions easily. To see all the possible commands and a brief description you can access, copy and paste any of the commands below:
mstsc.exe /?
This is the syntax-
MSTSC [<connection file>] [/v:<server[:port]>] [/g:<gateway>] [/admin] [/f[ullscreen]] [/w:<width> /h:<height>] [/public] | [/span] [/multimon] [/edit "connection file"] [/restrictedAdmin] [/remoteGuard] [/prompt] [/shadow:<sessionID> [/control] [/noConsentPrompt]]
Continue reading to see a few descriptions:
- Whenever you connect to the server, Windows opens a new user session. You can avoid this by opening a connection to the console. Add /console to the mstsc
mstsc /console
- To open remote desktop session in full screen, run the command below (/f);
mstsc /f
- To specify the remote computer name from the command, use the command below (/v);
mstsc /v:computername
Brief description of the Syntax above
"connection file" – Specifies the name of an .RDP file for the connection.
/v:<server[:port]> – Specifies the remote PC to which you want to connect.
/g:<gateway> – Specifies the RD Gateway server to use for the connection. This parameter is only read if the endpoint remote PC is specified with /v.
/admin – Connects you to the session for administering a remote PC.
In this version of Remote Desktop Connection, if the Remote Desktop Session Host role service is installed on the remote computer, running mstsc /admin will do the following (for the current connection only):
- Disable Remote Desktop Services client access licensing
- Disable time zone redirection
- Disable RD Connection Broker redirection
- Disable Remote Desktop Easy Print
- Disables Plug and Play device redirection for this connection only.
- Changes the remote session theme to Windows Classic View (if it’s available) for this connection only.
/f – Starts Remote Desktop in full-screen mode.
/w:<width> – Specifies the width of the Remote Desktop window.
/h:<height> – Specifies the height of the Remote Desktop window.
/public– Runs Remote Desktop in public mode.
/span – Matches the remote desktop width and height with the local virtual desktop, spanning across multiple monitors, if necessary. To span across monitors, the monitors must be arranged to form a rectangle.
/multimon – Configures the Remote Desktop Services session monitor layout to be identical to the current client-side configuration.
/edit – Opens the specified .RDP connection file for editing.
With the Remote Desktop Connection, you have access to only computers in your network. You can use only one remote desktop connection on Windows 10 at a time, i.e., one remote user per Windows.
However, a PC running Windows 10 server edition can run remote Sessions for different users at the same time.
Read next: How to use Windows 10 Remote Desktop in Windows Home (RDP).
Access Remote Desktop Via Commandline
Command line syntax for Remote Desktop Connection
| Syntax |
|---|
|
mstsc [<connection file>] [/v:<server[:port]>] [/admin] [/f[ullscreen]] [/w:<width>] [/h:<height>] [/public] | [/span] [/edit «connection file»] [/migrate] [/?] |
Command line parameters for Remote Desktop Connection
| Parameter | Description |
|---|---|
|
/v:<server[:port]> |
Specifies the remote computer you want to connect to. |
|
/admin |
Is used for administration of a terminal server. In this version of Remote Desktop Connection, if the Terminal Server role service is installed on the remote computer, running mstsc /admin will do the following (for the current connection only):
/admin also does the following on connections to Windows Server 2008 with the Terminal Server role service installed:
To connect to a remote computer with the Terminal Server role service installed, follow these steps:
|
|
/f |
Starts Remote Desktop Connection in full-screen mode. |
|
/w:<width> |
Specifies the width of the Remote Desktop Connection window. |
|
/h:<height> |
Specifies the height of the Remote Desktop window. |
|
/public |
Runs Remote Desktop Connection in public mode. |
|
/span |
Matches the remote desktop width and height with the local virtual desktop, spanning across multiple monitors if necessary. To span across monitors, the monitors must all have the same height and be aligned side by side. |
|
/edit «connection file» |
Opens the specified .rdp connection file for editing. |
|
/migrate |
Migrates older connection files that were created with Client Connection Manager to new .rdp connection files. |
|
/? |
Lists these parameters. |


Comments
-
30 Aug 2011 11:58 AM
Hi Arposh — Was checking MSTSC here and fouind your above help as is on my Vista-32, my Win7-64 also adds: [/multimon] and changes some text, eg ‘Migrates older’ is now ‘Migrates legacy’.. regds, pkn
-
31 Aug 2011 1:22 PM
pkn2011, You might want to mention that in the article. Thanks!
-
31 Aug 2011 3:20 PM
Hi, I’ve added a link to this page as a comment already as Arposh has added extra info here on Terminal server admin too. rgds, pkn