Project description
Beautiful Soup is a library that makes it easy to scrape information
from web pages. It sits atop an HTML or XML parser, providing Pythonic
idioms for iterating, searching, and modifying the parse tree.
Quick start
>>> from bs4 import BeautifulSoup
>>> soup = BeautifulSoup("<p>Some<b>bad<i>HTML")
>>> print(soup.prettify())
<html>
 <body>
  <p>
   Some
   <b>
    bad
    <i>
     HTML
    </i>
   </b>
  </p>
 </body>
</html>
>>> soup.find(text="bad")
'bad'
>>> soup.i
<i>HTML</i>
#
>>> soup = BeautifulSoup("<tag1>Some<tag2/>bad<tag3>XML", "xml")
#
>>> print(soup.prettify())
<?xml version="1.0" encoding="utf-8"?>
<tag1>
 Some
 <tag2/>
 bad
 <tag3>
  XML
 </tag3>
</tag1>
To go beyond the basics, comprehensive documentation is available.
Links
- Homepage
- Documentation
- Discussion group
- Development
- Bug tracker
- Complete changelog
Note on Python 2 sunsetting
Beautiful Soup’s support for Python 2 was discontinued on December 31,
2020: one year after the sunset date for Python 2 itself. From this
point onward, new Beautiful Soup development will exclusively target
Python 3. The final release of Beautiful Soup 4 to support Python 2
was 4.9.3.
Supporting the project
If you use Beautiful Soup as part of your professional work, please consider a
Tidelift subscription.
This will support many of the free software projects your organization
depends on, not just Beautiful Soup.
If you use Beautiful Soup for personal projects, the best way to say
thank you is to read
Tool Safety, a zine I
wrote about what Beautiful Soup has taught me about software
development.
Building the documentation
The bs4/doc/ directory contains full documentation in Sphinx
format. Run make html in that directory to create HTML
documentation.
Running the unit tests
Beautiful Soup supports unit test discovery using Pytest:
$ pytest
Download files
Download the file for your platform. If you’re not sure which to choose, learn more about installing packages.
Source Distribution
Built Distribution

Beautiful Soup — это
библиотека Python для извлечения данных из файлов HTML и XML. Она работает
с вашим любимым парсером, чтобы дать вам естественные способы навигации,
поиска и изменения дерева разбора. Она обычно экономит программистам
часы и дни работы.
Эти инструкции иллюстрируют все основные функции Beautiful Soup 4
на примерах. Я покажу вам, для чего нужна библиотека, как она работает,
как ее использовать, как заставить ее делать то, что вы хотите, и что нужно делать, когда она
не оправдывает ваши ожидания.
Примеры в этой документации работают одинаково на Python 2.7
и Python 3.2.
Возможно, вы ищете документацию для Beautiful Soup 3.
Если это так, имейте в виду, что Beautiful Soup 3 больше не
развивается, и что поддержка этой версии будет прекращена
31 декабря 2020 года или немногим позже. Если вы хотите узнать о различиях между Beautiful Soup 3
и Beautiful Soup 4, читайте раздел Перенос кода на BS4.
Эта документация переведена на другие языки
пользователями Beautiful Soup:
- 这篇文档当然还有中文版.
- このページは日本語で利用できます(外部リンク)
- 이 문서는 한국어 번역도 가능합니다.
- Este documento também está disponível em Português do Brasil.
Быстрый старт
Вот HTML-документ, который я буду использовать в качестве примера в этой
документации. Это фрагмент из «Алисы в стране чудес»:
html_doc = """
<html><head><title>The Dormouse's story</title></head>
<body>
<p class="title"><b>The Dormouse's story</b></p>

<p class="story">Once upon a time there were three little sisters; and their names were
<a href="http://example.com/elsie" class="sister" id="link1">Elsie</a>,
<a href="http://example.com/lacie" class="sister" id="link2">Lacie</a> and
<a href="http://example.com/tillie" class="sister" id="link3">Tillie</a>;
and they lived at the bottom of a well.</p>

<p class="story">...</p>
"""
Прогон документа через Beautiful Soup дает нам
объект BeautifulSoup, который представляет документ в виде
вложенной структуры данных:
from bs4 import BeautifulSoup
soup = BeautifulSoup (html_doc, 'html.parser')

print(soup.prettify())
# <html>
#  <head>
#   <title>
#    The Dormouse's story
#   </title>
#  </head>
#  <body>
#   <p class="title">
#    <b>
#     The Dormouse's story
#    </b>
#   </p>
#   <p class="story">
#    Once upon a time there were three little sisters; and their names were
#    <a class="sister" href="http://example.com/elsie" id="link1">
#     Elsie
#    </a>
#    ,
#    <a class="sister" href="http://example.com/lacie" id="link2">
#     Lacie
#    </a>
#    and
#    <a class="sister" href="http://example.com/tillie" id="link3">
#     Tillie
#    </a>
#    ; and they lived at the bottom of a well.
#   </p>
#   <p class="story">
#    ...
#   </p>
#  </body>
# </html>
Вот несколько простых способов навигации по этой структуре данных:
soup.title
# <title>The Dormouse's story</title>

soup.title.name
# u'title'

soup.title.string
# u'The Dormouse's story'

soup.title.parent.name
# u'head'

soup.p
# <p class="title"><b>The Dormouse's story</b></p>

soup.p['class']
# u'title'

soup.a
# <a class="sister" href="http://example.com/elsie" id="link1">Elsie</a>

soup.find_all('a')
# [<a class="sister" href="http://example.com/elsie" id="link1">Elsie</a>,
#  <a class="sister" href="http://example.com/lacie" id="link2">Lacie</a>,
#  <a class="sister" href="http://example.com/tillie" id="link3">Tillie</a>]

soup.find(id="link3")
# <a class="sister" href="http://example.com/tillie" id="link3">Tillie</a>
Одна из распространенных задач — извлечь все URL-адреса, найденные на странице в тегах <a>:
for link in soup.find_all('a'):
    print(link.get('href'))
# http://example.com/elsie
# http://example.com/lacie
# http://example.com/tillie
Другая распространенная задача — извлечь весь текст со страницы:
print(soup.get_text())
# The Dormouse's story
#
# The Dormouse's story
#
# Once upon a time there were three little sisters; and their names were
# Elsie,
# Lacie and
# Tillie;
# and they lived at the bottom of a well.
#
# ...
Это похоже на то, что вам нужно? Если да, продолжайте читать.
Установка Beautiful Soup
Если вы используете последнюю версию Debian или Ubuntu Linux, вы можете
установить Beautiful Soup с помощью системы управления пакетами:
$ apt-get install python-bs4 (для Python 2)
$ apt-get install python3-bs4 (для Python 3)
Beautiful Soup 4 публикуется через PyPi, поэтому, если вы не можете установить библиотеку
с помощью системы управления пакетами, можно установить с помощью easy_install или
pip. Пакет называется beautifulsoup4. Один и тот же пакет
работает как на Python 2, так и на Python 3. Убедитесь, что вы используете версию
pip или easy_install, предназначенную для вашей версии Python (их можно назвать
pip3 и easy_install3 соответственно, если вы используете Python 3).
$ easy_install beautifulsoup4
$ pip install beautifulsoup4
(BeautifulSoup — это, скорее всего, не тот пакет, который вам нужен. Это
предыдущий основной релиз, Beautiful Soup 3. Многие программы используют
BS3, так что он все еще доступен, но если вы пишете новый код,
нужно установить beautifulsoup4.)
Если у вас не установлены easy_install или pip, вы можете
скачать архив с исходным кодом Beautiful Soup 4 и
установить его с помощью setup.py.
$ python setup.py install
Если ничего не помогает, лицензия на Beautiful Soup позволяет
упаковать библиотеку целиком вместе с вашим приложением. Вы можете скачать
tar-архив, скопировать из него в кодовую базу вашего приложения каталог bs4
и использовать Beautiful Soup, не устанавливая его вообще.
Я использую Python 2.7 и Python 3.2 для разработки Beautiful Soup, но библиотека
должна работать и с более поздними версиями Python.
Проблемы после установки
Beautiful Soup упакован как код Python 2. Когда вы устанавливаете его для
использования с Python 3, он автоматически конвертируется в код Python 3. Если
вы не устанавливаете библиотеку в виде пакета, код не будет сконвертирован. Были
также сообщения об установке неправильной версии на компьютерах с
Windows.
Если выводится сообщение ImportError “No module named HTMLParser”, ваша
проблема в том, что вы используете версию кода на Python 2, работая на
Python 3.
Если выводится сообщение ImportError “No module named html.parser”, ваша
проблема в том, что вы используете версию кода на Python 3, работая на
Python 2.
В обоих случаях лучше всего полностью удалить Beautiful
Soup с вашей системы (включая любой каталог, созданный
при распаковке tar-архива) и запустить установку еще раз.
Если выводится сообщение SyntaxError “Invalid syntax” в строке
ROOT_TAG_NAME = u'[document]', вам нужно конвертировать код из Python 2
в Python 3. Вы можете установить пакет:
$ python3 setup.py install
или запустить вручную Python-скрипт 2to3
в каталоге bs4:
$ 2to3-3.2 -w bs4
Установка парсера
Beautiful Soup поддерживает парсер HTML, включенный в стандартную библиотеку Python,
а также ряд сторонних парсеров на Python.
Одним из них является парсер lxml. В зависимости от ваших настроек,
вы можете установить lxml с помощью одной из следующих команд:
$ apt-get install python-lxml
$ easy_install lxml
$ pip install lxml
Другая альтернатива — написанный исключительно на Python парсер html5lib, который разбирает HTML таким же образом,
как это делает веб-браузер. В зависимости от ваших настроек, вы можете установить html5lib
с помощью одной из этих команд:
$ apt-get install python-html5lib
$ easy_install html5lib
$ pip install html5lib
Эта таблица суммирует преимущества и недостатки каждого парсера:
| Парсер | Типичное использование | Преимущества | Недостатки |
| html.parser от Python | BeautifulSoup(markup, "html.parser") |
|
|
| HTML-парсер в lxml | BeautifulSoup(markup, "lxml") |
|
|
| XML-парсер в lxml | BeautifulSoup(markup, "lxml-xml")BeautifulSoup(markup, "xml") |
|
|
| html5lib | BeautifulSoup(markup, "html5lib") |
|
|
Я рекомендую по возможности установить и использовать lxml для быстродействия. Если вы
используете версию Python 2 более раннюю, чем 2.7.3, или версию Python 3
более раннюю, чем 3.2.2, необходимо установить lxml или
html5lib, потому что встроенный в Python парсер HTML просто недостаточно хорош в старых
версиях.
Обратите внимание, что если документ невалиден, различные парсеры будут генерировать
дерево Beautiful Soup для этого документа по-разному. Ищите подробности в разделе Различия
между парсерами.
Приготовление супа
Чтобы разобрать документ, передайте его в
конструктор BeautifulSoup. Вы можете передать строку или открытый дескриптор файла:
from bs4 import BeautifulSoup

with open("index.html") as fp:
    soup = BeautifulSoup(fp)

soup = BeautifulSoup("<html>data</html>")
Первым делом документ конвертируется в Unicode, а HTML-мнемоники
конвертируются в символы Unicode:
BeautifulSoup("Sacré bleu!")
<html><head></head><body>Sacré bleu!</body></html>
Затем Beautiful Soup анализирует документ, используя лучший из доступных
парсеров. Библиотека будет использовать HTML-парсер, если вы явно не укажете,
что нужно использовать XML-парсер. (См. Разбор XML.)
Виды объектов
Beautiful Soup превращает сложный HTML-документ в сложное дерево
объектов Python. Однако вам придется иметь дело только с четырьмя
видами объектов: Tag, NavigableString, BeautifulSoup
и Comment.
Tag
Объект Tag соответствует тегу XML или HTML в исходном документе:
soup = BeautifulSoup('<b class="boldest">Extremely bold</b>')
tag = soup.b
type(tag)
# <class 'bs4.element.Tag'>
У объекта Tag (далее «тег») много атрибутов и методов, и я расскажу о большинстве из них
в разделах Навигация по дереву и Поиск по дереву. На данный момент наиболее
важными особенностями тега являются его имя и атрибуты.
Имя
У каждого тега есть имя, доступное как .name:
Если вы измените имя тега, это изменение будет отражено в любой HTML-
разметке, созданной Beautiful Soup:
tag.name = "blockquote"
tag
# <blockquote class="boldest">Extremely bold</blockquote>
Атрибуты
У тега может быть любое количество атрибутов. Тег <b имеет атрибут “id”, значение которого равно
id = "boldest">
“boldest”. Вы можете получить доступ к атрибутам тега, обращаясь с тегом как
со словарем:
Вы можете получить доступ к этому словарю напрямую как к .attrs:
tag.attrs
# {u'id': 'boldest'}
Вы можете добавлять, удалять и изменять атрибуты тега. Опять же, это
делается путем обращения с тегом как со словарем:
tag['id'] = 'verybold'
tag['another-attribute'] = 1
tag
# <b another-attribute="1" id="verybold"></b>

del tag['id']
del tag['another-attribute']
tag
# <b></b>

tag['id']
# KeyError: 'id'
print(tag.get('id'))
# None
Многозначные атрибуты
В HTML 4 определено несколько атрибутов, которые могут иметь множество значений. В HTML 5
пара таких атрибутов удалена, но определено еще несколько. Самый распространённый из
многозначных атрибутов — это class (т. е. тег может иметь более
одного класса CSS). Среди прочих rel, rev, accept-charset,
headers и accesskey. Beautiful Soup представляет значение(я)
многозначного атрибута в виде списка:
css_soup = BeautifulSoup('<p class="body"></p>')
css_soup.p['class']
# ["body"]

css_soup = BeautifulSoup('<p class="body strikeout"></p>')
css_soup.p['class']
# ["body", "strikeout"]
Если атрибут выглядит так, будто он имеет более одного значения, но это не
многозначный атрибут, определенный какой-либо версией HTML-
стандарта, Beautiful Soup оставит атрибут как есть:
id_soup = BeautifulSoup('<p id="my id"></p>')
id_soup.p['id']
# 'my id'
Когда вы преобразовываете тег обратно в строку, несколько значений атрибута
объединяются:
rel_soup = BeautifulSoup('<p>Back to the <a rel="index">homepage</a></p>')
rel_soup.a['rel']
# ['index']
rel_soup.a['rel'] = ['index', 'contents']
print(rel_soup.p)
# <p>Back to the <a rel="index contents">homepage</a></p>
Вы можете отключить объединение, передав multi_valued_attributes = None в качестве
именованного аргумента в конструктор BeautifulSoup:
no_list_soup = BeautifulSoup('<p class="body strikeout"></p>', 'html', multi_valued_attributes=None)
no_list_soup.p['class']
# u'body strikeout'
Вы можете использовать get_attribute_list, того чтобы получить значение в виде списка,
независимо от того, является ли атрибут многозначным или нет:
id_soup.p.get_attribute_list('id')
# ["my id"]
Если вы разбираете документ как XML, многозначных атрибутов не будет:
xml_soup = BeautifulSoup('<p class="body strikeout"></p>', 'xml')
xml_soup.p['class']
# u'body strikeout'
Опять же, вы можете поменять настройку, используя аргумент multi_valued_attributes:
class_is_multi= { '*' : 'class'}
xml_soup = BeautifulSoup('<p class="body strikeout"></p>', 'xml', multi_valued_attributes=class_is_multi)
xml_soup.p['class']
# [u'body', u'strikeout']
Вряд ли вам это пригодится, но если все-таки будет нужно, руководствуйтесь значениями
по умолчанию. Они реализуют правила, описанные в спецификации HTML:
from bs4.builder import builder_registry
builder_registry.lookup('html').DEFAULT_CDATA_LIST_ATTRIBUTES
NavigableString
Строка соответствует фрагменту текста в теге. Beautiful Soup
использует класс NavigableString для хранения этих фрагментов текста:
tag.string
# u'Extremely bold'
type(tag.string)
# <class 'bs4.element.NavigableString'>
NavigableString похожа на строку Unicode в Python, не считая того,
что она также поддерживает некоторые функции, описанные в
разделах Навигация по дереву и Поиск по дереву. Вы можете конвертировать
NavigableString в строку Unicode с помощью unicode():
unicode_string = unicode(tag.string)
unicode_string
# u'Extremely bold'
type(unicode_string)
# <type 'unicode'>
Вы не можете редактировать строку непосредственно, но вы можете заменить одну строку
другой, используя replace_with():
tag.string.replace_with("No longer bold")
tag
# <blockquote>No longer bold</blockquote>
NavigableString поддерживает большинство функций, описанных в
разделах Навигация по дереву и Поиск по дереву, но
не все. В частности, поскольку строка не может ничего содержать (в том смысле,
в котором тег может содержать строку или другой тег), строки не поддерживают
атрибуты .contents и .string или метод find().
Если вы хотите использовать NavigableString вне Beautiful Soup,
вам нужно вызвать метод unicode(), чтобы превратить ее в обычную для Python
строку Unicode. Если вы этого не сделаете, ваша строка будет тащить за собой
ссылку на все дерево разбора Beautiful Soup, даже когда вы
закончите использовать Beautiful Soup. Это большой расход памяти.
BeautifulSoup
Объект BeautifulSoup представляет разобранный документ как единое
целое. В большинстве случаев вы можете рассматривать его как объект
Tag. Это означает, что он поддерживает большинство методов, описанных
в разделах Навигация по дереву и Поиск по дереву.
Вы также можете передать объект BeautifulSoup в один из методов,
перечисленных в разделе Изменение дерева, по аналогии с передачей объекта Tag. Это
позволяет вам делать такие вещи, как объединение двух разобранных документов:
doc = BeautifulSoup("<document><content/>INSERT FOOTER HERE</document", "xml")
footer = BeautifulSoup("<footer>Here's the footer</footer>", "xml")
doc.find(text="INSERT FOOTER HERE").replace_with(footer)
# u'INSERT FOOTER HERE'
print(doc)
# <?xml version="1.0" encoding="utf-8"?>
# <document><content/><footer>Here's the footer</footer></document>
Поскольку объект BeautifulSoup не соответствует действительному
HTML- или XML-тегу, у него нет имени и атрибутов. Однако иногда
бывает полезно взглянуть на .name объекта BeautifulSoup, поэтому ему было присвоено специальное «имя»
.name “[document]”:
soup.name
# u'[document]'
Комментарии и другие специфичные строки
Tag, NavigableString и BeautifulSoup охватывают почти
все, с чем вы столкнётесь в файле HTML или XML, но осталось
ещё немного. Пожалуй, единственное, о чем стоит волноваться,
это комментарий:
markup = "<b><!--Hey, buddy. Want to buy a used parser?--></b>"
soup = BeautifulSoup(markup)
comment = soup.b.string
type(comment)
# <class 'bs4.element.Comment'>
Объект Comment — это просто особый тип NavigableString:
comment
# u'Hey, buddy. Want to buy a used parser'
Но когда он появляется как часть HTML-документа, Comment
отображается со специальным форматированием:
print(soup.b.prettify())
# <b>
#  <!--Hey, buddy. Want to buy a used parser?-->
# </b>
Beautiful Soup определяет классы для всего, что может появиться в
XML-документе: CData, ProcessingInstruction,
Declaration и Doctype. Как и Comment, эти классы
являются подклассами NavigableString, которые добавляют что-то еще к
строке. Вот пример, который заменяет комментарий блоком
CDATA:
from bs4 import CData
cdata = CData("A CDATA block")
comment.replace_with(cdata)

print(soup.b.prettify())
# <b>
#  <![CDATA[A CDATA block]]>
# </b>
Навигация по дереву
Вернемся к HTML-документу с фрагментом из «Алисы в стране чудес»:
html_doc = """
<html><head><title>The Dormouse's story</title></head>
<body>
<p class="title"><b>The Dormouse's story</b></p>

<p class="story">Once upon a time there were three little sisters; and their names were
<a href="http://example.com/elsie" class="sister" id="link1">Elsie</a>,
<a href="http://example.com/lacie" class="sister" id="link2">Lacie</a> and
<a href="http://example.com/tillie" class="sister" id="link3">Tillie</a>;
and they lived at the bottom of a well.</p>

<p class="story">...</p>
"""

from bs4 import BeautifulSoup
soup = BeautifulSoup (html_doc, 'html.parser')
Я буду использовать его в качестве примера, чтобы показать, как перейти от одной части
документа к другой.
Проход сверху вниз
Теги могут содержать строки и другие теги. Эти элементы являются
дочерними (children) для тега. Beautiful Soup предоставляет множество различных атрибутов для
навигации и перебора дочерних элементов.
Обратите внимание, что строки Beautiful Soup не поддерживают ни один из этих
атрибутов, потому что строка не может иметь дочерних элементов.
Навигация с использованием имен тегов
Самый простой способ навигации по дереву разбора — это указать имя
тега, который вам нужен. Если вы хотите получить тег <head>, просто напишите soup.head:
soup.head
# <head><title>The Dormouse's story</title></head>

soup.title
# <title>The Dormouse's story</title>
Вы можете повторять этот трюк многократно, чтобы подробнее рассмотреть определенную часть
дерева разбора. Следующий код извлекает первый тег <b> внутри тега <body>:
soup.body.b
# <b>The Dormouse's story</b>
Использование имени тега в качестве атрибута даст вам только первый тег с таким
именем:
soup.a
# <a class="sister" href="http://example.com/elsie" id="link1">Elsie</a>
Если вам нужно получить все теги <a> или что-нибудь более сложное,
чем первый тег с определенным именем, вам нужно использовать один из
методов, описанных в разделе Поиск по дереву, такой как find_all():
soup.find_all('a')
# [<a class="sister" href="http://example.com/elsie" id="link1">Elsie</a>,
#  <a class="sister" href="http://example.com/lacie" id="link2">Lacie</a>,
#  <a class="sister" href="http://example.com/tillie" id="link3">Tillie</a>]
.contents и .children
Дочерние элементы доступны в списке под названием .contents:
head_tag = soup.head
head_tag
# <head><title>The Dormouse's story</title></head>

head_tag.contents
[<title>The Dormouse's story</title>]

title_tag = head_tag.contents[0]
title_tag
# <title>The Dormouse's story</title>
title_tag.contents
# [u'The Dormouse's story']
Сам объект BeautifulSoup имеет дочерние элементы. В этом случае
тег <html> является дочерним для объекта BeautifulSoup:
len(soup.contents)
# 1
soup.contents[0].name
# u'html'
У строки нет .contents, потому что она не может содержать
ничего:
text = title_tag.contents[0]
text.contents
# AttributeError: У объекта 'NavigableString' нет атрибута 'contents'
Вместо того, чтобы получать дочерние элементы в виде списка, вы можете перебирать их
с помощью генератора .children:
for child in title_tag.children:
    print(child)
# The Dormouse's story
.descendants
Атрибуты .contents и .children применяются только в отношении
непосредственных дочерних элементов тега. Например, тег <head> имеет только один непосредственный
дочерний тег <title>:
head_tag.contents
# [<title>The Dormouse's story</title>]
Но у самого тега <title> есть дочерний элемент: строка “The Dormouse’s
story”. В некотором смысле эта строка также является дочерним элементом
тега <head>. Атрибут .descendants позволяет перебирать все
дочерние элементы тега рекурсивно: его непосредственные дочерние элементы, дочерние элементы
дочерних элементов и так далее:
for child in head_tag.descendants:
    print(child)
# <title>The Dormouse's story</title>
# The Dormouse's story
У тега <head> есть только один дочерний элемент, но при этом у него два потомка:
тег <title> и его дочерний элемент. У объекта BeautifulSoup
только один прямой дочерний элемент (тег <html>), зато множество
потомков:
len(list(soup.children))
# 1
len(list(soup.descendants))
# 25
.string
Если у тега есть только один дочерний элемент, и это NavigableString,
его можно получить через .string:
title_tag.string
# u'The Dormouse's story'
Если единственным дочерним элементом тега является другой тег, и у этого другого тега есть строка
.string, то считается, что родительский тег содержит ту же строку
.string, что и дочерний тег:
head_tag.contents
# [<title>The Dormouse's story</title>]

head_tag.string
# u'The Dormouse's story'
Если тег содержит больше чем один элемент, то становится неясным, какая из строк
.string относится и к родительскому тегу, поэтому .string родительского тега имеет значение
None:
print(soup.html.string)
# None
.strings и .stripped_strings
Если внутри тега есть более одного элемента, вы все равно можете посмотреть только на
строки. Используйте генератор .strings:
for string in soup.strings:
    print(repr(string))
# u"The Dormouse's story"
# u'nn'
# u"The Dormouse's story"
# u'nn'
# u'Once upon a time there were three little sisters; and their names weren'
# u'Elsie'
# u',n'
# u'Lacie'
# u' andn'
# u'Tillie'
# u';nand they lived at the bottom of a well.'
# u'nn'
# u'...'
# u'n'
В этих строках много лишних пробелов, которые вы можете
удалить, используя генератор .stripped_strings:
for string in soup.stripped_strings:
    print(repr(string))
# u"The Dormouse's story"
# u"The Dormouse's story"
# u'Once upon a time there were three little sisters; and their names were'
# u'Elsie'
# u','
# u'Lacie'
# u'and'
# u'Tillie'
# u';nand they lived at the bottom of a well.'
# u'...'
Здесь строки, состоящие исключительно из пробелов, игнорируются, а
пробелы в начале и конце строк удаляются.
Проход снизу вверх
В продолжение аналогии с «семейным деревом», каждый тег и каждая строка имеет
родителя (parent): тег, который его содержит.
.parent
Вы можете получить доступ к родительскому элементу с помощью атрибута .parent. В
примере документа с фрагментом из «Алисы в стране чудес» тег <head> является родительским
для тега <title>:
title_tag = soup.title
title_tag
# <title>The Dormouse's story</title>
title_tag.parent
# <head><title>The Dormouse's story</title></head>
Строка заголовка сама имеет родителя: тег <title>, содержащий
ее:
title_tag.string.parent
# <title>The Dormouse's story</title>
Родительским элементом тега верхнего уровня, такого как <html>, является сам объект
BeautifulSoup:
html_tag = soup.html
type(html_tag.parent)
# <class 'bs4.BeautifulSoup'>
И .parent объекта BeautifulSoup определяется как None:
print(soup.parent)
# None
.parents
Вы можете перебрать всех родителей элемента с помощью
.parents. В следующем примере .parents используется для перемещения от тега <a>,
закопанного глубоко внутри документа, до самого верха документа:
link = soup.a
link
# <a class="sister" href="http://example.com/elsie" id="link1">Elsie</a>
for parent in link.parents:
    if parent is None:
        print(parent)
    else:
        print(parent.name)
# p
# body
# html
# [document]
# None
Перемещение вбок
Рассмотрим простой документ:
sibling_soup = BeautifulSoup("<a><b>text1</b><c>text2</c></b></a>")
print(sibling_soup.prettify())
# <html>
#  <body>
#   <a>
#    <b>
#     text1
#    </b>
#    <c>
#     text2
#    </c>
#   </a>
#  </body>
# </html>
Тег <b> и тег <c> находятся на одном уровне: они оба непосредственные
дочерние элементы одного и того же тега. Мы называем их одноуровневые. Когда документ
красиво отформатирован, одноуровневые элементы выводятся с одинаковым отступом. Вы
также можете использовать это отношение в написанном вами коде.
.next_sibling и .previous_sibling
Вы можете использовать .next_sibling и .previous_sibling для навигации
между элементами страницы, которые находятся на одном уровне дерева разбора:
sibling_soup.b.next_sibling
# <c>text2</c>

sibling_soup.c.previous_sibling
# <b>text1</b>
У тега <b> есть .next_sibling, но нет .previous_sibling,
потому что нет ничего до тега <b> на том же уровне
дерева. По той же причине у тега <c> есть .previous_sibling,
но нет .next_sibling:
print(sibling_soup.b.previous_sibling)
# None
print(sibling_soup.c.next_sibling)
# None
Строки “text1” и “text2” не являются одноуровневыми, потому что они не
имеют общего родителя:
sibling_soup.b.string
# u'text1'

print(sibling_soup.b.string.next_sibling)
# None
В реальных документах .next_sibling или .previous_sibling
тега обычно будет строкой, содержащей пробелы. Возвращаясь к
фрагменту из «Алисы в стране чудес»:
<a href="http://example.com/elsie" class="sister" id="link1">Elsie</a>
<a href="http://example.com/lacie" class="sister" id="link2">Lacie</a>
<a href="http://example.com/tillie" class="sister" id="link3">Tillie</a>
Вы можете подумать, что .next_sibling первого тега <a>
должен быть второй тег <a>. Но на самом деле это строка: запятая и
перевод строки, отделяющий первый тег <a> от второго:
link = soup.a
link
# <a class="sister" href="http://example.com/elsie" id="link1">Elsie</a>

link.next_sibling
# u',n'
Второй тег <a> на самом деле является .next_sibling запятой
link.next_sibling.next_sibling
# <a class="sister" href="http://example.com/lacie" id="link2">Lacie</a>
.next_siblings и .previous_siblings
Вы можете перебрать одноуровневые элементы данного тега с помощью .next_siblings или
.previous_siblings:
for sibling in soup.a.next_siblings:
    print(repr(sibling))
# u',n'
# <a class="sister" href="http://example.com/lacie" id="link2">Lacie</a>
# u' andn'
# <a class="sister" href="http://example.com/tillie" id="link3">Tillie</a>
# u'; and they lived at the bottom of a well.'
# None

for sibling in soup.find(id="link3").previous_siblings:
    print(repr(sibling))
# ' andn'
# <a class="sister" href="http://example.com/lacie" id="link2">Lacie</a>
# u',n'
# <a class="sister" href="http://example.com/elsie" id="link1">Elsie</a>
# u'Once upon a time there were three little sisters; and their names weren'
# None
Проход вперед и назад
Взгляните на начало фрагмента из «Алисы в стране чудес»:
<html><head><title>The Dormouse's story</title></head>
<p class="title"><b>The Dormouse's story</b></p>
HTML-парсер берет эту строку символов и превращает ее в
серию событий: “открыть тег <html>”, “открыть тег <head>”, “открыть
тег <html>”, “добавить строку”, “закрыть тег <title>”, “открыть
тег <p>” и так далее. Beautiful Soup предлагает инструменты для реконструирование
первоначального разбора документа.
.next_element и .previous_element
Атрибут .next_element строки или тега указывает на то,
что было разобрано непосредственно после него. Это могло бы быть тем же, что и
.next_sibling, но обычно результат резко отличается.
Возьмем последний тег <a> в фрагменте из «Алисы в стране чудес». Его
.next_sibling является строкой: конец предложения, которое было
прервано началом тега <a>:
last_a_tag = soup.find("a", id="link3")
last_a_tag
# <a class="sister" href="http://example.com/tillie" id="link3">Tillie</a>

last_a_tag.next_sibling
# '; and they lived at the bottom of a well.'
Но .next_element этого тега <a> — это то, что было разобрано
сразу после тега <a>, не остальная часть этого предложения:
это слово “Tillie”:
last_a_tag.next_element
# u'Tillie'
Это потому, что в оригинальной разметке слово «Tillie» появилось
перед точкой с запятой. Парсер обнаружил тег <a>, затем
слово «Tillie», затем закрывающий тег </a>, затем точку с запятой и оставшуюся
часть предложения. Точка с запятой находится на том же уровне, что и тег <a>, но
слово «Tillie» встретилось первым.
Атрибут .previous_element является полной противоположностью
.next_element. Он указывает на элемент, который был встречен при разборе
непосредственно перед текущим:
last_a_tag.previous_element
# u' andn'
last_a_tag.previous_element.next_element
# <a class="sister" href="http://example.com/tillie" id="link3">Tillie</a>
.next_elements и .previous_elements
Вы уже должны были уловить идею. Вы можете использовать их для перемещения
вперед или назад по документу, в том порядке, в каком он был разобран парсером:
for element in last_a_tag.next_elements:
    print(repr(element))
# u'Tillie'
# u';nand they lived at the bottom of a well.'
# u'nn'
# <p class="story">...</p>
# u'...'
# u'n'
# None
Поиск по дереву
Beautiful Soup определяет множество методов поиска по дереву разбора,
но они все очень похожи. Я буду долго объяснять, как работают
два самых популярных метода: find() и find_all(). Прочие
методы принимают практически те же самые аргументы, поэтому я расскажу
о них вкратце.
И опять, я буду использовать фрагмент из «Алисы в стране чудес» в качестве примера:
html_doc = """
<html><head><title>The Dormouse's story</title></head>
<body>
<p class="title"><b>The Dormouse's story</b></p>

<p class="story">Once upon a time there were three little sisters; and their names were
<a href="http://example.com/elsie" class="sister" id="link1">Elsie</a>,
<a href="http://example.com/lacie" class="sister" id="link2">Lacie</a> and
<a href="http://example.com/tillie" class="sister" id="link3">Tillie</a>;
and they lived at the bottom of a well.</p>

<p class="story">...</p>
"""

from bs4 import BeautifulSoup
soup = BeautifulSoup (html_doc, 'html.parser')
Передав фильтр в аргумент типа find_all(), вы можете
углубиться в интересующие вас части документа.
Виды фильтров
Прежде чем подробно рассказывать о find_all() и подобных методах, я
хочу показать примеры различных фильтров, которые вы можете передать в эти
методы. Эти фильтры появляются снова и снова в
поисковом API. Вы можете использовать их для фильтрации по имени тега,
по его атрибутам, по тексту строки или по некоторой их
комбинации.
Строка
Самый простой фильтр — это строка. Передайте строку в метод поиска, и
Beautiful Soup выполнит поиск соответствия этой строке. Следующий
код находит все теги <b> в документе:
soup.find_all('b')
# [<b>The Dormouse's story</b>]
Если вы передадите байтовую строку, Beautiful Soup будет считать, что строка
кодируется в UTF-8. Вы можете избежать этого, передав вместо нее строку Unicode.
Регулярное выражение
Если вы передадите объект с регулярным выражением, Beautiful Soup отфильтрует результаты
в соответствии с этим регулярным выражением, используя его метод search(). Следующий код
находит все теги, имена которых начинаются с буквы “b”; в нашем
случае это теги <body> и <b>:
import re
for tag in soup.find_all(re.compile("^b")):
    print(tag.name)
# body
# b
Этот код находит все теги, имена которых содержат букву “t”:
for tag in soup.find_all(re.compile("t")):
    print(tag.name)
# html
# title
Список
Если вы передадите список, Beautiful Soup разрешит совпадение строк
с любым элементом из этого списка. Следующий код находит все теги <a>
и все теги <b>:
soup.find_all(["a", "b"])
# [<b>The Dormouse's story</b>,
#  <a class="sister" href="http://example.com/elsie" id="link1">Elsie</a>,
#  <a class="sister" href="http://example.com/lacie" id="link2">Lacie</a>,
#  <a class="sister" href="http://example.com/tillie" id="link3">Tillie</a>]
True
Значение True подходит везде, где возможно.. Следующий код находит все
теги в документе, но не текстовые строки:
for tag in soup.find_all(True):
    print(tag.name)
# html
# head
# title
# body
# p
# b
# p
# a
# a
# a
# p
Функция
Если ничто из перечисленного вам не подходит, определите функцию, которая
принимает элемент в качестве единственного аргумента. Функция должна вернуть
True, если аргумент подходит, и False, если нет.
Вот функция, которая возвращает True, если в теге определен атрибут “class”,
но не определен атрибут “id”:
def has_class_but_no_id(tag):
    return tag.has_attr('class') and not tag.has_attr('id')
Передайте эту функцию в find_all(), и вы получите все
теги <p>:
soup.find_all(has_class_but_no_id)
# [<p class="title"><b>The Dormouse's story</b></p>,
#  <p class="story">Once upon a time there were...</p>,
#  <p class="story">...</p>]
Эта функция выбирает только теги <p>. Она не выбирает теги <a>,
поскольку в них определены и атрибут “class” , и атрибут “id”. Она не выбирает
теги вроде <html> и <title>, потому что в них не определен атрибут
“class”.
Если вы передаете функцию для фильтрации по определенному атрибуту, такому как
href, аргументом, переданным в функцию, будет
значение атрибута, а не весь тег. Вот функция, которая находит все теги a,
у которых атрибут href не соответствует регулярному выражению:
def not_lacie(href):
    return href and not re.compile("lacie").search(href)
soup.find_all(href=not_lacie)
# [<a class="sister" href="http://example.com/elsie" id="link1">Elsie</a>,
#  <a class="sister" href="http://example.com/tillie" id="link3">Tillie</a>]
Функция может быть настолько сложной, насколько вам нужно. Вот
функция, которая возвращает True, если тег окружен строковыми
объектами:
from bs4 import NavigableString
def surrounded_by_strings(tag):
    return (isinstance(tag.next_element, NavigableString)
            and isinstance(tag.previous_element, NavigableString))

for tag in soup.find_all(surrounded_by_strings):
    print tag.name
# p
# a
# a
# a
# p
Теперь мы готовы подробно рассмотреть методы поиска.
find_all()
Сигнатура: find_all(name, attrs, recursive, string, limit, **kwargs)
Метод find_all() просматривает потомков тега и
извлекает всех потомков, которые соответствую вашим фильтрам. Я привел несколько
примеров в разделе Виды фильтров, а вот еще несколько:
soup.find_all("title")
# [<title>The Dormouse's story</title>]

soup.find_all("p", "title")
# [<p class="title"><b>The Dormouse's story</b></p>]

soup.find_all("a")
# [<a class="sister" href="http://example.com/elsie" id="link1">Elsie</a>,
#  <a class="sister" href="http://example.com/lacie" id="link2">Lacie</a>,
#  <a class="sister" href="http://example.com/tillie" id="link3">Tillie</a>]

soup.find_all(id="link2")
# [<a class="sister" href="http://example.com/lacie" id="link2">Lacie</a>]

import re
soup.find(string=re.compile("sisters"))
# u'Once upon a time there were three little sisters; and their names weren'
Кое-что из этого нам уже знакомо, но есть и новое. Что означает
передача значения для string или id? Почему
find_all ("p", "title") находит тег <p> с CSS-классом “title”?
Давайте посмотрим на аргументы find_all().
Аргумент name
Передайте значение для аргумента name, и вы скажете Beautiful Soup
рассматривать только теги с определенными именами. Текстовые строки будут игнорироваться, так же как и
теги, имена которых не соответствуют заданным.
Вот простейший пример использования:
soup.find_all("title")
# [<title>The Dormouse's story</title>]
В разделе Виды фильтров говорилось, что значением name может быть
строка, регулярное выражение, список, функция или
True.
Именованные аргументы
Любой нераспознанный аргумент будет превращен в фильтр
по атрибуту тега. Если вы передаете значение для аргумента с именем id,
Beautiful Soup будет фильтровать по атрибуту “id” каждого тега:
soup.find_all(id='link2')
# [<a class="sister" href="http://example.com/lacie" id="link2">Lacie</a>]
Если вы передадите значение для href, Beautiful Soup отфильтрует
по атрибуту “href” каждого тега:
soup.find_all(href=re.compile("elsie"))
# [<a class="sister" href="http://example.com/elsie" id="link1">Elsie</a>]
Для фильтрации по атрибуту может использоваться строка, регулярное
выражение, список, функция или значение True.
Следующий код находит все теги, атрибут id которых имеет значение,
независимо от того, что это за значение:
soup.find_all(id=True)
# [<a class="sister" href="http://example.com/elsie" id="link1">Elsie</a>,
#  <a class="sister" href="http://example.com/lacie" id="link2">Lacie</a>,
#  <a class="sister" href="http://example.com/tillie" id="link3">Tillie</a>]
Вы можете отфильтровать несколько атрибутов одновременно, передав более одного
именованного аргумента:
soup.find_all(href=re.compile("elsie"), id='link1')
# [<a class="sister" href="http://example.com/elsie" id="link1">three</a>]
Некоторые атрибуты, такие как атрибуты data-* в HTML 5, имеют имена, которые
нельзя использовать в качестве имен именованных аргументов:
data_soup = BeautifulSoup('<div data-foo="value">foo!</div>')
data_soup.find_all(data-foo="value")
# SyntaxError: keyword can't be an expression
Вы можете использовать эти атрибуты в поиске, поместив их в
словарь и передав словарь в find_all() как
аргумент attrs:
data_soup.find_all(attrs={"data-foo": "value"})
# [<div data-foo="value">foo!</div>]
Нельзя использовать именованный аргумент для поиска в HTML по элементу “name”,
потому что Beautiful Soup использует аргумент name для имени
самого тега. Вместо этого вы можете передать элемент “name” вместе с его значением в
составе аргумента attrs:
name_soup = BeautifulSoup('<input name="email"/>')
name_soup.find_all(name="email")
# []
name_soup.find_all(attrs={"name": "email"})
# [<input name="email"/>]
Поиск по классу CSS
Очень удобно искать тег с определенным классом CSS, но
имя атрибута CSS, “class”, является зарезервированным словом в
Python. Использование class в качестве именованного аргумента приведет к синтаксической
ошибке. Начиная с Beautiful Soup 4.1.2, вы можете выполнять поиск по классу CSS, используя
именованный аргумент class_:
soup.find_all("a", class_="sister")
# [<a class="sister" href="http://example.com/elsie" id="link1">Elsie</a>,
#  <a class="sister" href="http://example.com/lacie" id="link2">Lacie</a>,
#  <a class="sister" href="http://example.com/tillie" id="link3">Tillie</a>]
Как и с любым именованным аргументом, вы можете передать в качестве значения class_ строку, регулярное
выражение, функцию или True:
soup.find_all(class_=re.compile("itl"))
# [<p class="title"><b>The Dormouse's story</b></p>]

def has_six_characters(css_class):
    return css_class is not None and len(css_class) == 6

soup.find_all(class_=has_six_characters)
# [<a class="sister" href="http://example.com/elsie" id="link1">Elsie</a>,
#  <a class="sister" href="http://example.com/lacie" id="link2">Lacie</a>,
#  <a class="sister" href="http://example.com/tillie" id="link3">Tillie</a>]
Помните, что один тег может иметь несколько значений
для атрибута “class”. Когда вы ищете тег, который
соответствует определенному классу CSS, вы ищете соответствие любому из его
классов CSS:
css_soup = BeautifulSoup('<p class="body strikeout"></p>')
css_soup.find_all("p", class_="strikeout")
# [<p class="body strikeout"></p>]

css_soup.find_all("p", class_="body")
# [<p class="body strikeout"></p>]
Можно искать точное строковое значение атрибута class:
css_soup.find_all("p", class_="body strikeout")
# [<p class="body strikeout"></p>]
Но поиск вариантов строкового значения не сработает:
css_soup.find_all("p", class_="strikeout body")
# []
Если вы хотите искать теги, которые соответствуют двум или более классам CSS,
следует использовать селектор CSS:
css_soup.select("p.strikeout.body")
# [<p class="body strikeout"></p>]
В старых версиях Beautiful Soup, в которых нет ярлыка class_
можно использовать трюк с аргументом attrs, упомянутый выше. Создайте
словарь, значение которого для “class” является строкой (или регулярным
выражением, или чем угодно еще), которую вы хотите найти:
soup.find_all("a", attrs={"class": "sister"})
# [<a class="sister" href="http://example.com/elsie" id="link1">Elsie</a>,
#  <a class="sister" href="http://example.com/lacie" id="link2">Lacie</a>,
#  <a class="sister" href="http://example.com/tillie" id="link3">Tillie</a>]
Аргумент string
С помощью string вы можете искать строки вместо тегов. Как и в случае с
name и именованными аргументами, передаваться может строка,
регулярное выражение, список, функция или значения True.
Вот несколько примеров:
soup.find_all(string="Elsie")
# [u'Elsie']

soup.find_all(string=["Tillie", "Elsie", "Lacie"])
# [u'Elsie', u'Lacie', u'Tillie']

soup.find_all(string=re.compile("Dormouse"))
[u"The Dormouse's story", u"The Dormouse's story"]

def is_the_only_string_within_a_tag(s):
    """Return True if this string is the only child of its parent tag."""
    return (s == s.parent.string)

soup.find_all(string=is_the_only_string_within_a_tag)
# [u"The Dormouse's story", u"The Dormouse's story", u'Elsie', u'Lacie', u'Tillie', u'...']
Хотя значение типа string предназначено для поиска строк, вы можете комбинировать его с
аргументами, которые находят теги: Beautiful Soup найдет все теги, в которых
.string соответствует вашему значению для string. Следующий код находит все теги <a>,
у которых .string равно “Elsie”:
soup.find_all("a", string="Elsie")
# [<a href="http://example.com/elsie" class="sister" id="link1">Elsie</a>]
Аргумент string — это новое в Beautiful Soup 4.4.0. В ранних
версиях он назывался text:
soup.find_all("a", text="Elsie")
# [<a href="http://example.com/elsie" class="sister" id="link1">Elsie</a>]
Аргумент limit
find_all() возвращает все теги и строки, которые соответствуют вашим
фильтрам. Это может занять некоторое время, если документ большой. Если вам не
нужны все результаты, вы можете указать их предельное число — limit. Это
работает так же, как ключевое слово LIMIT в SQL. Оно говорит Beautiful Soup
прекратить собирать результаты после того, как их найдено определенное количество.
В фрагменте из «Алисы в стране чудес» есть три ссылки, но следующий код
находит только первые две:
soup.find_all("a", limit=2)
# [<a class="sister" href="http://example.com/elsie" id="link1">Elsie</a>,
#  <a class="sister" href="http://example.com/lacie" id="link2">Lacie</a>]
Аргумент recursive
Если вы вызовете mytag.find_all(), Beautiful Soup проверит всех
потомков mytag: его дочерние элементы, дочерние элементы дочерних элементов, и
так далее. Если вы хотите, чтобы Beautiful Soup рассматривал только непосредственных потомков (дочерние элементы),
вы можете передать recursive = False. Оцените разницу:
soup.html.find_all("title")
# [<title>The Dormouse's story</title>]

soup.html.find_all("title", recursive=False)
# []
Вот эта часть документа:
<html>
 <head>
  <title>
   The Dormouse's story
  </title>
 </head>
...
Тег <title> находится под тегом <html>, но не непосредственно
под тегом <html>: на пути встречается тег <head>. Beautiful Soup
находит тег <title>, когда разрешено просматривать всех потомков
тега <html>, но когда recursive=False ограничивает поиск
только непосредстввенно дочерними элементами, Beautiful Soup ничего не находит.
Beautiful Soup предлагает множество методов поиска по дереву (они рассмотрены ниже),
и они в основном принимают те же аргументы, что и find_all(): name,
attrs, string, limit и именованные аргументы. Но
с аргументом recursive все иначе: find_all() и find() —
это единственные методы, которые его поддерживают. От передачи recursive=False в
метод типа find_parents() не очень много пользы.
Вызов тега похож на вызов find_all()
Поскольку find_all() является самым популярным методом в Beautiful
Soup API, вы можете использовать сокращенную запись. Если относиться к
объекту BeautifulSoup или объекту Tag так, будто это
функция, то это похоже на вызов find_all()
с этим объектом. Эти две строки кода эквивалентны:
soup.find_all("a")
soup("a")
Эти две строки также эквивалентны:
soup.title.find_all(string=True)
soup.title(string=True)
find()
Сигнатура: find(name, attrs, recursive, string, **kwargs)
Метод find_all() сканирует весь документ в поиске
всех результатов, но иногда вам нужен только один. Если вы знаете,
что в документе есть только один тег <body>, нет смысла сканировать
весь документ в поиске остальных. Вместо того, чтобы передавать limit=1
каждый раз, когда вы вызываете find_all(), используйте
метод find(). Эти две строки кода эквивалентны:
soup.find_all('title', limit=1)
# [<title>The Dormouse's story</title>]

soup.find('title')
# <title>The Dormouse's story</title>
Разница лишь в том, что find_all() возвращает список, содержащий
единственный результат, а find() возвращает только сам результат.
Если find_all() не может ничего найти, он возвращает пустой список. Если
find() не может ничего найти, он возвращает None:
print(soup.find("nosuchtag"))
# None
Помните трюк с soup.head.title из раздела
Навигация с использованием имен тегов? Этот трюк работает на основе неоднократного вызова find():
soup.head.title
# <title>The Dormouse's story</title>

soup.find("head").find("title")
# <title>The Dormouse's story</title>
find_parents() и find_parent()
Сигнатура: find_parents(name, attrs, string, limit, **kwargs)
Сигнатура: find_parent(name, attrs, string, **kwargs)
Я долго объяснял, как работают find_all() и
find(). Beautiful Soup API определяет десяток других методов для
поиска по дереву, но пусть вас это не пугает. Пять из этих методов
в целом похожи на find_all(), а другие пять в целом
похожи на find(). Единственное различие в том, по каким частям
дерева они ищут.
Сначала давайте рассмотрим find_parents() и
find_parent(). Помните, что find_all() и find() прорабатывают
дерево сверху вниз, просматривая теги и их потомков. find_parents() и find_parent()
делают наоборот: они идут снизу вверх, рассматривая
родительские элементы тега или строки. Давайте испытаем их, начав со строки,
закопанной глубоко в фрагменте из «Алисы в стране чудес»:
a_string = soup.find(string="Lacie")
a_string
# u'Lacie'

a_string.find_parents("a")
# [<a class="sister" href="http://example.com/lacie" id="link2">Lacie</a>]

a_string.find_parent("p")
# <p class="story">Once upon a time there were three little sisters; and their names were
#  <a class="sister" href="http://example.com/elsie" id="link1">Elsie</a>,
#  <a class="sister" href="http://example.com/lacie" id="link2">Lacie</a> and
#  <a class="sister" href="http://example.com/tillie" id="link3">Tillie</a>;
#  and they lived at the bottom of a well.</p>

a_string.find_parents("p", class_="title")
# []
Один из трех тегов <a> является прямым родителем искомой строки,
так что наш поиск находит его. Один из трех тегов <p> является
непрямым родителем строки, и наш поиск тоже его
находит. Где-то в документе есть тег <p> с классом CSS “title”,
но он не является родительским для строки, так что мы не можем найти
его с помощью find_parents().
Вы могли заметить связь между find_parent(),
find_parents() и атрибутами .parent и .parents,
упомянутыми ранее. Связь очень сильная. Эти методы поиска
на самом деле используют .parents, чтобы перебрать все родительские элементы и проверить
каждый из них на соответствие заданному фильтру.
find_next_siblings() и find_next_sibling()
Сигнатура: find_next_siblings(name, attrs, string, limit, **kwargs)
Сигнатура: find_next_sibling(name, attrs, string, **kwargs)
Эти методы используют .next_siblings для
перебора одноуровневых элементов для данного элемента в дереве. Метод
find_next_siblings() возвращает все подходящие одноуровневые элементы,
а find_next_sibling() возвращает только первый из них:
first_link = soup.a
first_link
# <a class="sister" href="http://example.com/elsie" id="link1">Elsie</a>

first_link.find_next_siblings("a")
# [<a class="sister" href="http://example.com/lacie" id="link2">Lacie</a>,
#  <a class="sister" href="http://example.com/tillie" id="link3">Tillie</a>]

first_story_paragraph = soup.find("p", "story")
first_story_paragraph.find_next_sibling("p")
# <p class="story">...</p>
find_previous_siblings() и find_previous_sibling()
Сигнатура: find_previous_siblings(name, attrs, string, limit, **kwargs)
Сигнатура: find_previous_sibling(name, attrs, string, **kwargs)
Эти методы используют .previous_siblings для перебора тех одноуровневых элементов,
которые предшествуют данному элементу в дереве разбора. Метод find_previous_siblings()
возвращает все подходящие одноуровневые элементы,, а
а find_next_sibling() только первый из них:
last_link = soup.find("a", id="link3")
last_link
# <a class="sister" href="http://example.com/tillie" id="link3">Tillie</a>

last_link.find_previous_siblings("a")
# [<a class="sister" href="http://example.com/lacie" id="link2">Lacie</a>,
#  <a class="sister" href="http://example.com/elsie" id="link1">Elsie</a>]

first_story_paragraph = soup.find("p", "story")
first_story_paragraph.find_previous_sibling("p")
# <p class="title"><b>The Dormouse's story</b></p>
find_all_next() и find_next()
Сигнатура: find_all_next(name, attrs, string, limit, **kwargs)
Сигнатура: find_next(name, attrs, string, **kwargs)
Эти методы используют .next_elements для
перебора любых тегов и строк, которые встречаются в документе после
элемента. Метод find_all_next() возвращает все совпадения, а
find_next() только первое:
first_link = soup.a
first_link
# <a class="sister" href="http://example.com/elsie" id="link1">Elsie</a>

first_link.find_all_next(string=True)
# [u'Elsie', u',n', u'Lacie', u' andn', u'Tillie',
#  u';nand they lived at the bottom of a well.', u'nn', u'...', u'n']

first_link.find_next("p")
# <p class="story">...</p>
В первом примере нашлась строка “Elsie”, хотя она
содержится в теге <a>, с которого мы начали. Во втором примере
нашелся последний тег <p>, хотя он находится
в другой части дерева, чем тег <a>, с которого мы начали. Для этих
методов имеет значение только то, что элемент соответствует фильтру и
появляется в документе позже, чем тот элемент, с которого начали поиск.
find_all_previous() и find_previous()
Сигнатура: find_all_previous(name, attrs, string, limit, **kwargs)
Сигнатура: find_previous(name, attrs, string, **kwargs)
Эти методы используют .previous_elements для
перебора любых тегов и строк, которые встречаются в документе до
элемента. Метод find_all_previous() возвращает все совпадения, а
find_previous() только первое:
first_link = soup.a
first_link
# <a class="sister" href="http://example.com/elsie" id="link1">Elsie</a>

first_link.find_all_previous("p")
# [<p class="story">Once upon a time there were three little sisters; ...</p>,
#  <p class="title"><b>The Dormouse's story</b></p>]

first_link.find_previous("title")
# <title>The Dormouse's story</title>
Вызов find_all_previous ("p") нашел первый абзац в
документе (тот, который с class = "title"), но он также находит
второй абзац, а именно тег <p>, содержащий тег <a>, с которого мы
начали. Это не так уж удивительно: мы смотрим на все теги,
которые появляются в документе раньше, чем тот, с которого мы начали. Тег
<p>, содержащий тег <a>, должен был появиться до тега <a>, который
в нем содержится.
Селекторы CSS
Начиная с версии 4.7.0, Beautiful Soup поддерживает большинство селекторов CSS4 благодаря
проекту SoupSieve. Если вы установили Beautiful Soup через pip, одновременно должен был установиться SoupSieve,
так что вам больше ничего не нужно делать.
В BeautifulSoup есть метод .select(), который использует SoupSieve, чтобы
запустить селектор CSS и вернуть все
подходящие элементы. Tag имеет похожий метод, который запускает селектор CSS
в отношении содержимого одного тега.
(В более ранних версиях Beautiful Soup тоже есть метод .select(),
но поддерживаются только наиболее часто используемые селекторы CSS.)
В документации SoupSieve перечислены все
селекторы CSS, которые поддерживаются на данный момент, но вот некоторые из основных:
Вы можете найти теги:
soup.select("title")
# [<title>The Dormouse's story</title>]

soup.select("p:nth-of-type(3)")
# [<p class="story">...</p>]
Найти теги под другими тегами:
soup.select("body a")
# [<a class="sister" href="http://example.com/elsie" id="link1">Elsie</a>,
#  <a class="sister" href="http://example.com/lacie"  id="link2">Lacie</a>,
#  <a class="sister" href="http://example.com/tillie" id="link3">Tillie</a>]

soup.select("html head title")
# [<title>The Dormouse's story</title>]
Найти теги непосредственно под другими тегами:
soup.select("head > title")
# [<title>The Dormouse's story</title>]

soup.select("p > a")
# [<a class="sister" href="http://example.com/elsie" id="link1">Elsie</a>,
#  <a class="sister" href="http://example.com/lacie"  id="link2">Lacie</a>,
#  <a class="sister" href="http://example.com/tillie" id="link3">Tillie</a>]

soup.select("p > a:nth-of-type(2)")
# [<a class="sister" href="http://example.com/lacie" id="link2">Lacie</a>]

soup.select("p > #link1")
# [<a class="sister" href="http://example.com/elsie" id="link1">Elsie</a>]

soup.select("body > a")
# []
Найти одноуровневые элементы тега:
soup.select("#link1 ~ .sister")
# [<a class="sister" href="http://example.com/lacie" id="link2">Lacie</a>,
#  <a class="sister" href="http://example.com/tillie"  id="link3">Tillie</a>]

soup.select("#link1 + .sister")
# [<a class="sister" href="http://example.com/lacie" id="link2">Lacie</a>]
Найти теги по классу CSS:
soup.select(".sister")
# [<a class="sister" href="http://example.com/elsie" id="link1">Elsie</a>,
#  <a class="sister" href="http://example.com/lacie" id="link2">Lacie</a>,
#  <a class="sister" href="http://example.com/tillie" id="link3">Tillie</a>]

soup.select("[class~=sister]")
# [<a class="sister" href="http://example.com/elsie" id="link1">Elsie</a>,
#  <a class="sister" href="http://example.com/lacie" id="link2">Lacie</a>,
#  <a class="sister" href="http://example.com/tillie" id="link3">Tillie</a>]
Найти теги по ID:
soup.select("#link1")
# [<a class="sister" href="http://example.com/elsie" id="link1">Elsie</a>]

soup.select("a#link2")
# [<a class="sister" href="http://example.com/lacie" id="link2">Lacie</a>]
Найти теги, которые соответствуют любому селектору из списка:
soup.select("#link1,#link2")
# [<a class="sister" href="http://example.com/elsie" id="link1">Elsie</a>,
#  <a class="sister" href="http://example.com/lacie" id="link2">Lacie</a>]
Проверка на наличие атрибута:
soup.select('a[href]')
# [<a class="sister" href="http://example.com/elsie" id="link1">Elsie</a>,
#  <a class="sister" href="http://example.com/lacie" id="link2">Lacie</a>,
#  <a class="sister" href="http://example.com/tillie" id="link3">Tillie</a>]
Найти теги по значению атрибута:
soup.select('a[href="http://example.com/elsie"]')
# [<a class="sister" href="http://example.com/elsie" id="link1">Elsie</a>]

soup.select('a[href^="http://example.com/"]')
# [<a class="sister" href="http://example.com/elsie" id="link1">Elsie</a>,
#  <a class="sister" href="http://example.com/lacie" id="link2">Lacie</a>,
#  <a class="sister" href="http://example.com/tillie" id="link3">Tillie</a>]

soup.select('a[href$="tillie"]')
# [<a class="sister" href="http://example.com/tillie" id="link3">Tillie</a>]

soup.select('a[href*=".com/el"]')
# [<a class="sister" href="http://example.com/elsie" id="link1">Elsie</a>]
Есть также метод select_one(), который находит только
первый тег, соответствующий селектору:
soup.select_one(".sister")
# <a class="sister" href="http://example.com/elsie" id="link1">Elsie</a>
Если вы разобрали XML, в котором определены пространства имен, вы можете использовать их в
селекторах CSS:
from bs4 import BeautifulSoup
xml = """<tag xmlns:ns1="http://namespace1/" xmlns:ns2="http://namespace2/">
 <ns1:child>I'm in namespace 1</ns1:child>
 <ns2:child>I'm in namespace 2</ns2:child>
</tag> """
soup = BeautifulSoup(xml, "xml")

soup.select("child")
# [<ns1:child>I'm in namespace 1</ns1:child>, <ns2:child>I'm in namespace 2</ns2:child>]

soup.select("ns1|child", namespaces=namespaces)
# [<ns1:child>I'm in namespace 1</ns1:child>]
При обработке селектора CSS, который использует пространства имен, Beautiful Soup
использует сокращения пространства имен, найденные при разборе
документа. Вы можете заменить сокращения своими собственными, передав словарь
сокращений:
namespaces = dict(first="http://namespace1/", second="http://namespace2/")
soup.select("second|child", namespaces=namespaces)
# [<ns1:child>I'm in namespace 2</ns1:child>]
Все эти селекторы CSS удобны для тех, кто уже
знаком с синтаксисом селекторов CSS. Вы можете сделать все это с помощью
Beautiful Soup API. И если CSS селекторы — это все, что вам нужно, вам следует
использовать парсер lxml: так будет намного быстрее. Но вы можете
комбинировать селекторы CSS с Beautiful Soup API.
Изменение дерева
Основная сила Beautiful Soup в поиске по дереву разбора, но вы
также можете изменить дерево и записать свои изменения в виде нового HTML или
XML-документа.
Изменение имен тегов и атрибутов
Я говорил об этом раньше, в разделе Атрибуты, но это стоит повторить. Вы
можете переименовать тег, изменить значения его атрибутов, добавить новые
атрибуты и удалить атрибуты:
soup = BeautifulSoup('<b class="boldest">Extremely bold</b>')
tag = soup.b

tag.name = "blockquote"
tag['class'] = 'verybold'
tag['id'] = 1
tag
# <blockquote class="verybold" id="1">Extremely bold</blockquote>

del tag['class']
del tag['id']
tag
# <blockquote>Extremely bold</blockquote>
Изменение .string
Если вы замените значение атрибута .string новой строкой, содержимое тега будет
заменено на эту строку:
markup = '<a href="http://example.com/">I linked to <i>example.com</i></a>'
soup = BeautifulSoup(markup)

tag = soup.a
tag.string = "New link text."
tag
# <a href="http://example.com/">New link text.</a>
Будьте осторожны: если тег содержит другие теги, они и все их
содержимое будет уничтожено.
append()
Вы можете добавить содержимое тега с помощью Tag.append(). Это работает
точно так же, как .append() для списка в Python:
soup = BeautifulSoup("<a>Foo</a>")
soup.a.append("Bar")

soup
# <html><head></head><body><a>FooBar</a></body></html>
soup.a.contents
# [u'Foo', u'Bar']
extend()
Начиная с версии Beautiful Soup 4.7.0, Tag также поддерживает метод
.extend(), который работает так же, как вызов .extend() для
списка в Python:
soup = BeautifulSoup("<a>Soup</a>")
soup.a.extend(["'s", " ", "on"])

soup
# <html><head></head><body><a>Soup's on</a></body></html>
soup.a.contents
# [u'Soup', u''s', u' ', u'on']
NavigableString() и .new_tag()
Если вам нужно добавить строку в документ, нет проблем — вы можете передать
строку Python в append() или вызвать
конструктор NavigableString:
soup = BeautifulSoup("<b></b>")
tag = soup.b
tag.append("Hello")
new_string = NavigableString(" there")
tag.append(new_string)
tag
# <b>Hello there.</b>
tag.contents
# [u'Hello', u' there']
Если вы хотите создать комментарий или другой подкласс
NavigableString, просто вызовите конструктор:
from bs4 import Comment
new_comment = Comment("Nice to see you.")
tag.append(new_comment)
tag
# <b>Hello there<!--Nice to see you.--></b>
tag.contents
# [u'Hello', u' there', u'Nice to see you.']
(Это новая функция в Beautiful Soup 4.4.0.)
Что делать, если вам нужно создать совершенно новый тег? Наилучшим решением будет
вызвать фабричный метод BeautifulSoup.new_tag():
soup = BeautifulSoup("<b></b>")
original_tag = soup.b

new_tag = soup.new_tag("a", href="http://www.example.com")
original_tag.append(new_tag)
original_tag
# <b><a href="http://www.example.com"></a></b>

new_tag.string = "Link text."
original_tag
# <b><a href="http://www.example.com">Link text.</a></b>
Нужен только первый аргумент, имя тега.
insert()
Tag.insert() похож на Tag.append(), за исключением того, что новый элемент
не обязательно добавляется в конец родительского
.contents. Он добавится в любое место, номер которого
вы укажете. Это работает в точности как .insert() в списке Python:
markup = '<a href="http://example.com/">I linked to <i>example.com</i></a>'
soup = BeautifulSoup(markup)
tag = soup.a

tag.insert(1, "but did not endorse ")
tag
# <a href="http://example.com/">I linked to but did not endorse <i>example.com</i></a>
tag.contents
# [u'I linked to ', u'but did not endorse', <i>example.com</i>]
insert_before() и insert_after()
Метод insert_before() вставляет теги или строки непосредственно
перед чем-то в дереве разбора:
soup = BeautifulSoup("<b>stop</b>")
tag = soup.new_tag("i")
tag.string = "Don't"
soup.b.string.insert_before(tag)
soup.b
# <b><i>Don't</i>stop</b>
Метод insert_after() вставляет теги или строки непосредственно
после чего-то в дереве разбора:
div = soup.new_tag('div')
div.string = 'ever'
soup.b.i.insert_after(" you ", div)
soup.b
# <b><i>Don't</i> you <div>ever</div> stop</b>
soup.b.contents
# [<i>Don't</i>, u' you', <div>ever</div>, u'stop']
clear()
Tag.clear() удаляет содержимое тега:
markup = '<a href="http://example.com/">I linked to <i>example.com</i></a>'
soup = BeautifulSoup(markup)
tag = soup.a

tag.clear()
tag
# <a href="http://example.com/"></a>
decompose()
Tag.decompose() удаляет тег из дерева, а затем полностью
уничтожает его вместе с его содержимым:
markup = '<a href="http://example.com/">I linked to <i>example.com</i></a>'
soup = BeautifulSoup(markup)
a_tag = soup.a

soup.i.decompose()

a_tag
# <a href="http://example.com/">I linked to</a>
replace_with()
PageElement.extract() удаляет тег или строку из дерева
и заменяет его тегом или строкой по вашему выбору:
markup = '<a href="http://example.com/">I linked to <i>example.com</i></a>'
soup = BeautifulSoup(markup)
a_tag = soup.a

new_tag = soup.new_tag("b")
new_tag.string = "example.net"
a_tag.i.replace_with(new_tag)

a_tag
# <a href="http://example.com/">I linked to <b>example.net</b></a>
replace_with() возвращает тег или строку, которые были заменены, так что
вы можете изучить его или добавить его обратно в другую часть дерева.
wrap()
PageElement.wrap() обертывает элемент в указанный вами тег. Он
возвращает новую обертку:
soup = BeautifulSoup("<p>I wish I was bold.</p>")
soup.p.string.wrap(soup.new_tag("b"))
# <b>I wish I was bold.</b>

soup.p.wrap(soup.new_tag("div")
# <div><p><b>I wish I was bold.</b></p></div>
Это новый метод в Beautiful Soup 4.0.5.
unwrap()
Tag.unwrap() — это противоположность wrap(). Он заменяет весь тег на
его содержимое. Этим методом удобно очищать разметку:
markup = '<a href="http://example.com/">I linked to <i>example.com</i></a>'
soup = BeautifulSoup(markup)
a_tag = soup.a

a_tag.i.unwrap()
a_tag
# <a href="http://example.com/">I linked to example.com</a>
Как и replace_with(), unwrap() возвращает тег,
который был заменен.
smooth()
После вызова ряда методов, которые изменяют дерево разбора, у вас может оказаться несколько объектов NavigableString подряд. У Beautiful Soup с этим нет проблем, но поскольку такое не случается со свежеразобранным документом, вам может показаться неожиданным следующее поведение:
soup = BeautifulSoup("<p>A one</p>")
soup.p.append(", a two")

soup.p.contents
# [u'A one', u', a two']

print(soup.p.encode())
# <p>A one, a two</p>

print(soup.p.prettify())
# <p>
#  A one
#  , a two
# </p>
Вы можете вызвать Tag.smooth(), чтобы очистить дерево разбора путем объединения смежных строк:
soup.smooth()

soup.p.contents
# [u'A one, a two']

print(soup.p.prettify())
# <p>
#  A one, a two
# </p>
smooth() — это новый метод в Beautiful Soup 4.8.0.
Вывод
Красивое форматирование
Метод prettify() превратит дерево разбора Beautiful Soup в
красиво отформатированную строку Unicode, где каждый
тег и каждая строка выводятся на отдельной строчке:
markup = '<a href="http://example.com/">I linked to <i>example.com</i></a>'
soup = BeautifulSoup(markup)
soup.prettify()
# '<html>n <head>n </head>n <body>n  <a href="http://example.com/">n...'

print(soup.prettify())
# <html>
#  <head>
#  </head>
#  <body>
#   <a href="http://example.com/">
#    I linked to
#    <i>
#     example.com
#    </i>
#   </a>
#  </body>
# </html>
Вы можете вызвать prettify() для объекта BeautifulSoup верхнего уровня
или для любого из его объектов Tag:
print(soup.a.prettify())
# <a href="http://example.com/">
#  I linked to
#  <i>
#   example.com
#  </i>
# </a>
Без красивого форматирования
Если вам нужна просто строка, без особого форматирования, вы можете вызвать
unicode() или str() для объекта BeautifulSoup или объекта Tag
внутри:
str(soup)
# '<html><head></head><body><a href="http://example.com/">I linked to <i>example.com</i></a></body></html>'

unicode(soup.a)
# u'<a href="http://example.com/">I linked to <i>example.com</i></a>'
Функция str() возвращает строку, кодированную в UTF-8. Для получения более подробной информации см.
Кодировки.
Вы также можете вызвать encode() для получения байтовой строки, и decode(),
чтобы получить Unicode.
Средства форматирования вывода
Если вы дадите Beautiful Soup документ, который содержит HTML-мнемоники, такие как
“&lquot;”, они будут преобразованы в символы Unicode:
soup = BeautifulSoup("“Dammit!” he said.")
unicode(soup)
# u'<html><head></head><body>u201cDammit!u201d he said.</body></html>'
Если затем преобразовать документ в строку, символы Unicode
будет кодироваться как UTF-8. Вы не получите обратно HTML-мнемоники:
str(soup)
# '<html><head></head><body>xe2x80x9cDammit!xe2x80x9d he said.</body></html>'
По умолчанию единственные символы, которые экранируются при выводе — это чистые
амперсанды и угловые скобки. Они превращаются в «&», «<»
и “>”, чтобы Beautiful Soup случайно не сгенерировал
невалидный HTML или XML:
soup = BeautifulSoup("<p>The law firm of Dewey, Cheatem, & Howe</p>") soup.p # <p>The law firm of Dewey, Cheatem, & Howe</p> soup = BeautifulSoup('<a href="http://example.com/?foo=val1&bar=val2">A link</a>') soup.a # <a href="http://example.com/?foo=val1&bar=val2">A link</a>
Вы можете изменить это поведение, указав для
аргумента formatter одно из значений: prettify(), encode() или
decode(). Beautiful Soup распознает пять возможных значений
formatter.
Значение по умолчанию — formatter="minimal". Строки будут обрабатываться
ровно настолько, чтобы Beautiful Soup генерировал валидный HTML / XML:
french = "<p>Il a dit <<Sacré bleu!>></p>" soup = BeautifulSoup(french) print(soup.prettify(formatter="minimal")) # <html> # <body> # <p> # Il a dit <<Sacré bleu!>> # </p> # </body> # </html>
Если вы передадите formatter = "html", Beautiful Soup преобразует
символы Unicode в HTML-мнемоники, когда это возможно:
print(soup.prettify(formatter="html")) # <html> # <body> # <p> # Il a dit <<Sacré bleu!>> # </p> # </body> # </html>
Если вы передаете formatter="html5", это то же самое, что
formatter="html", только Beautiful Soup будет
пропускать закрывающую косую черту в пустых тегах HTML, таких как “br”:
soup = BeautifulSoup("<br>")

print(soup.encode(formatter="html"))
# <html><body><br/></body></html>

print(soup.encode(formatter="html5"))
# <html><body><br></body></html>
Если вы передадите formatter=None, Beautiful Soup вообще не будет менять
строки на выходе. Это самый быстрый вариант, но он может привести
к тому, что Beautiful Soup будет генерировать невалидный HTML / XML:
print(soup.prettify(formatter=None))
# <html>
#  <body>
#   <p>
#    Il a dit <<Sacré bleu!>>
#   </p>
#  </body>
# </html>

link_soup = BeautifulSoup('<a href="http://example.com/?foo=val1&bar=val2">A link</a>')
print(link_soup.a.encode(formatter=None))
# <a href="http://example.com/?foo=val1&bar=val2">A link</a>
Если вам нужен более сложный контроль над выводом, вы можете
использовать класс Formatter из Beautiful Soup. Вот как можно
преобразовать строки в верхний регистр, независимо от того, находятся ли они в текстовом узле или в
значении атрибута:
from bs4.formatter import HTMLFormatter
def uppercase(str):
    return str.upper()
formatter = HTMLFormatter(uppercase)

print(soup.prettify(formatter=formatter))
# <html>
#  <body>
#   <p>
#    IL A DIT <<SACRÉ BLEU!>>
#   </p>
#  </body>
# </html>

print(link_soup.a.prettify(formatter=formatter))
# <a href="HTTP://EXAMPLE.COM/?FOO=VAL1&BAR=VAL2">
#  A LINK
# </a>
Подклассы HTMLFormatter или XMLFormatter дают еще
больший контроль над выводом. Например, Beautiful Soup сортирует
атрибуты в каждом теге по умолчанию:
attr_soup = BeautifulSoup(b'<p z="1" m="2" a="3"></p>')
print(attr_soup.p.encode())
# <p a="3" m="2" z="1"></p>
Чтобы выключить сортировку по умолчанию, вы можете создать подкласс на основе метода Formatter.attributes(),
который контролирует, какие атрибуты выводятся и в каком
порядке. Эта реализация также отфильтровывает атрибут с именем “m”,
где бы он ни появился:
class UnsortedAttributes(HTMLFormatter):
    def attributes(self, tag):
        for k, v in tag.attrs.items():
            if k == 'm':
                continue
            yield k, v
print(attr_soup.p.encode(formatter=UnsortedAttributes()))
# <p z="1" a="3"></p>
Последнее предостережение: если вы создаете объект CData, текст внутри
этого объекта всегда представлен как есть, без какого-либо
форматирования. Beautiful Soup вызовет вашу функцию для замены мнемоник,
на тот случай, если вы написали функцию, которая подсчитывает
все строки в документе или что-то еще, но он будет игнорировать
возвращаемое значение:
from bs4.element import CData
soup = BeautifulSoup("<a></a>")
soup.a.string = CData("one < three")
print(soup.a.prettify(formatter="xml"))
# <a>
#  <![CDATA[one < three]]>
# </a>
get_text()
Если вам нужна только текстовая часть документа или тега, вы можете использовать
метод get_text(). Он возвращает весь текст документа или
тега в виде единственной строки Unicode:
markup = '<a href="http://example.com/">nI linked to <i>example.com</i>n</a>'
soup = BeautifulSoup(markup)

soup.get_text()
u'nI linked to example.comn'
soup.i.get_text()
u'example.com'
Вы можете указать строку, которая будет использоваться для объединения текстовых фрагментов
в единую строку:
# soup.get_text("|")
u'nI linked to |example.com|n'
Вы можете сказать Beautiful Soup удалять пробелы в начале и
конце каждого текстового фрагмента:
# soup.get_text("|", strip=True)
u'I linked to|example.com'
Но в этом случае вы можете предпочесть использовать генератор .stripped_strings
и затем обработать текст самостоятельно:
[text for text in soup.stripped_strings]
# [u'I linked to', u'example.com']
Указание парсера
Если вам нужно просто разобрать HTML, вы можете скинуть разметку в
конструктор BeautifulSoup, и, скорее всего, все будет в порядке. Beautiful
Soup подберет для вас парсер и проанализирует данные. Но есть
несколько дополнительных аргументов, которые вы можете передать конструктору, чтобы изменить
используемый парсер.
Первым аргументом конструктора BeautifulSou является строка или
открытый дескриптор файла — сама разметка, которую вы хотите разобрать. Второй аргумент — это
как вы хотите, чтобы разметка была разобрана.
Если вы ничего не укажете, будет использован лучший HTML-парсер из тех,
которые установлены. Beautiful Soup оценивает парсер lxml как лучший, за ним идет
html5lib, затем встроенный парсер Python. Вы можете переопределить используемый парсер,
указав что-то из следующего:
- Какой тип разметки вы хотите разобрать. В данный момент поддерживаются:
“html”, “xml” и “html5”. - Имя библиотеки парсера, которую вы хотите использовать. В данный момент поддерживаются
“lxml”, “html5lib” и “html.parser” (встроенный в Python
парсер HTML).
В разделе Установка парсера вы найдете сравнительную таблицу поддерживаемых парсеров.
Если у вас не установлен соответствующий парсер, Beautiful Soup
проигнорирует ваш запрос и выберет другой парсер. На текущий момент единственный
поддерживаемый парсер XML — это lxml. Если у вас не установлен lxml, запрос на
парсер XML ничего не даст, и запрос “lxml” тоже
не сработает.
Различия между парсерами
Beautiful Soup представляет один интерфейс для разных
парсеров, но парсеры неодинаковы. Разные парсеры создадут
различные деревья разбора из одного и того же документа. Самые большие различия будут
между парсерами HTML и парсерами XML. Вот короткий
документ, разобранный как HTML:
BeautifulSoup("<a><b /></a>")
# <html><head></head><body><a><b></b></a></body></html>
Поскольку пустой тег <b /> не является валидным кодом HTML, парсер превращает его в
пару тегов <b></b>.
Вот тот же документ, который разобран как XML (для его запуска нужно, чтобы был
установлен lxml). Обратите внимание, что пустой тег <b /> остается, и
что в документ добавляется объявление XML вместо
тега <html>:
BeautifulSoup("<a><b /></a>", "xml")
# <?xml version="1.0" encoding="utf-8"?>
# <a><b/></a>
Есть также различия между парсерами HTML. Если вы даете Beautiful
Soup идеально оформленный документ HTML, эти различия не будут
иметь значения. Один парсер будет быстрее другого, но все они будут давать
структуру данных, которая выглядит точно так же, как оригинальный
документ HTML.
Но если документ оформлен неидеально, различные парсеры
дадут разные результаты. Вот короткий невалидный документ, разобранный с помощью
HTML-парсера lxml. Обратите внимание, что висячий тег </p> просто
игнорируется:
BeautifulSoup("<a></p>", "lxml")
# <html><body><a></a></body></html>
Вот тот же документ, разобранный с помощью html5lib:
BeautifulSoup("<a></p>", "html5lib")
# <html><head></head><body><a><p></p></a></body></html>
Вместо того, чтобы игнорировать висячий тег </p>, html5lib добавляет
открывающй тег <p>. Этот парсер также добавляет пустой тег <head> в
документ.
Вот тот же документ, разобранный с помощью встроенного в Python
парсера HTML:
BeautifulSoup("<a></p>", "html.parser")
# <a></a>
Как и html5lib, этот парсер игнорирует закрывающий тег </p>. В отличие от
html5lib, этот парсер не делает попытки создать правильно оформленный HTML-
документ, добавив тег <body>. В отличие от lxml, он даже не
добавляет тег <html>.
Поскольку документ <a></p> невалиден, ни один из этих способов
нельзя назвать “правильным”. Парсер html5lib использует способы,
которые являются частью стандарта HTML5, поэтому он может претендовать на то, что его подход
самый “правильный”, но правомерно использовать любой из трех методов.
Различия между парсерами могут повлиять на ваш скрипт. Если вы планируете
распространять ваш скрипт или запускать его на нескольких
машинах, вам нужно указать парсер в
конструкторе BeautifulSoup. Это уменьшит вероятность того, что ваши пользователи при разборе
документа получат результат, отличный от вашего.
Кодировки
Любой документ HTML или XML написан в определенной кодировке, такой как ASCII
или UTF-8. Но когда вы загрузите этот документ в Beautiful Soup, вы
обнаружите, что он был преобразован в Unicode:
markup = "<h1>Sacrxc3xa9 bleu!</h1>"
soup = BeautifulSoup(markup)
soup.h1
# <h1>Sacré bleu!</h1>
soup.h1.string
# u'Sacrxe9 bleu!'
Это не волшебство. (Хотя это было бы здорово, конечно.) Beautiful Soup использует
подбиблиотеку под названием Unicode, Dammit для определения кодировки документа
и преобразования ее в Unicode. Кодировка, которая была автоматически определена, содержится в значении
атрибута .original_encoding объекта BeautifulSoup:
soup.original_encoding
'utf-8'
Unicode, Dammit чаще всего угадывает правильно, но иногда
делает ошибки. Иногда он угадывает правильно только после
побайтового поиска по документу, что занимает очень много времени. Если
вы вдруг уже знаете кодировку документа, вы можете избежать
ошибок и задержек, передав кодировку конструктору BeautifulSoup
как аргумент from_encoding.
Вот документ, написанный на ISO-8859-8. Документ настолько короткий, что
Unicode, Dammit не может разобраться и неправильно идентифицирует кодировку как
ISO-8859-7:
markup = b"<h1>xedxe5xecxf9</h1>"
soup = BeautifulSoup(markup)
soup.h1
<h1>νεμω</h1>
soup.original_encoding
'ISO-8859-7'
Мы можем все исправить, передав правильный from_encoding:
soup = BeautifulSoup(markup, from_encoding="iso-8859-8")
soup.h1
<h1>םולש</h1>
soup.original_encoding
'iso8859-8'
Если вы не знаете правильную кодировку, но видите, что
Unicode, Dammit определяет ее неправильно, вы можете передать ошибочные варианты в
exclude_encodings:
soup = BeautifulSoup(markup, exclude_encodings=["ISO-8859-7"])
soup.h1
<h1>םולש</h1>
soup.original_encoding
'WINDOWS-1255'
Windows-1255 не на 100% подходит, но это совместимое
надмножество ISO-8859-8, так что догадка почти верна. (exclude_encodings
— это новая функция в Beautiful Soup 4.4.0.)
В редких случаях (обычно когда документ UTF-8 содержит текст в
совершенно другой кодировке) единственным способом получить Unicode может оказаться
замена некоторых символов специальным символом Unicode
“REPLACEMENT CHARACTER” (U+FFFD, �). Если Unicode, Dammit приходится это сделать,
он установит атрибут .contains_replacement_characters
в True для объектов UnicodeDammit или BeautifulSoup. Это
даст понять, что представление в виде Unicode не является точным
представление оригинала, и что некоторые данные потерялись. Если документ
содержит �, но .contains_replacement_characters равен False,
вы будете знать, что � был в тексте изначально (как в этом
параграфе), а не служит заменой отсутствующим данным.
Кодировка вывода
Когда вы пишете документ из Beautiful Soup, вы получаете документ в UTF-8,
даже если он изначально не был в UTF-8. Вот
документ в кодировке Latin-1:
markup = b'''
 <html>
  <head>
   <meta content="text/html; charset=ISO-Latin-1" http-equiv="Content-type" />
  </head>
  <body>
   <p>Sacrxe9 bleu!</p>
  </body>
 </html>
'''

soup = BeautifulSoup(markup)
print(soup.prettify())
# <html>
#  <head>
#   <meta content="text/html; charset=utf-8" http-equiv="Content-type" />
#  </head>
#  <body>
#   <p>
#    Sacré bleu!
#   </p>
#  </body>
# </html>
Обратите внимание, что тег <meta> был переписан, чтобы отразить тот факт, что
теперь документ кодируется в UTF-8.
Если вы не хотите кодировку UTF-8, вы можете передать другую в prettify():
print(soup.prettify("latin-1"))
# <html>
#  <head>
#   <meta content="text/html; charset=latin-1" http-equiv="Content-type" />
# ...
Вы также можете вызвать encode() для объекта BeautifulSoup или любого
элемента в супе, как если бы это была строка Python:
soup.p.encode("latin-1")
# '<p>Sacrxe9 bleu!</p>'

soup.p.encode("utf-8")
# '<p>Sacrxc3xa9 bleu!</p>'
Любые символы, которые не могут быть представлены в выбранной вами кодировке, будут
преобразованы в числовые коды мнемоник XML. Вот документ,
который включает в себя Unicode-символ SNOWMAN (снеговик):
markup = u"<b>N{SNOWMAN}</b>"
snowman_soup = BeautifulSoup(markup)
tag = snowman_soup.b
Символ SNOWMAN может быть частью документа UTF-8 (он выглядит
так: ☃), но в ISO-Latin-1 или
ASCII нет представления для этого символа, поэтому для этих кодировок он конвертируется в “☃”:
print(tag.encode(“utf-8”))
# <b>☃</b>print tag.encode(“latin-1”)
# <b>☃</b>print tag.encode(“ascii”)
# <b>☃</b>
Unicode, Dammit
Вы можете использовать Unicode, Dammit без Beautiful Soup. Он полезен в тех случаях.
когда у вас есть данные в неизвестной кодировке, и вы просто хотите, чтобы они
преобразовались в Unicode:
from bs4 import UnicodeDammit
dammit = UnicodeDammit("Sacrxc3xa9 bleu!")
print(dammit.unicode_markup)
# Sacré bleu!
dammit.original_encoding
# 'utf-8'
Догадки Unicode, Dammit станут намного точнее, если вы установите
библиотеки Python chardet или cchardet. Чем больше данных вы
даете Unicode, Dammit, тем точнее он определит кодировку. Если у вас есть
собственные предположения относительно возможных кодировок, вы можете передать
их в виде списка:
dammit = UnicodeDammit("Sacrxe9 bleu!", ["latin-1", "iso-8859-1"])
print(dammit.unicode_markup)
# Sacré bleu!
dammit.original_encoding
# 'latin-1'
В Unicode, Dammit есть две специальные функции, которые Beautiful Soup не
использует.
Парные кавычки
Вы можете использовать Unicode, Dammit, чтобы конвертировать парные кавычки (Microsoft smart quotes) в
мнемоники HTML или XML:
markup = b"<p>I just x93lovex94 Microsoft Wordx92s smart quotes</p>" UnicodeDammit(markup, ["windows-1252"], smart_quotes_to="html").unicode_markup # u'<p>I just “love” Microsoft Word’s smart quotes</p>' UnicodeDammit(markup, ["windows-1252"], smart_quotes_to="xml").unicode_markup # u'<p>I just “love” Microsoft Word’s smart quotes</p>'
Вы также можете конвертировать парные кавычки в обычные кавычки ASCII:
UnicodeDammit(markup, ["windows-1252"], smart_quotes_to="ascii").unicode_markup
# u'<p>I just "love" Microsoft Word's smart quotes</p>'
Надеюсь, вы найдете эту функцию полезной, но Beautiful Soup не
использует ее. Beautiful Soup по умолчанию
конвертирует парные кавычки в символы Unicode, как и
все остальное:
UnicodeDammit(markup, ["windows-1252"]).unicode_markup
# u'<p>I just u201cloveu201d Microsoft Wordu2019s smart quotes</p>'
Несогласованные кодировки
Иногда документ кодирован в основном в UTF-8, но содержит символы Windows-1252,
такие как, опять-таки, парные кавычки. Такое бывает,
когда веб-сайт содержит данные из нескольких источников. Вы можете использовать
UnicodeDammit.detwingle(), чтобы превратить такой документ в чистый
UTF-8. Вот простой пример:
snowmen = (u"N{SNOWMAN}" * 3)
quote = (u"N{LEFT DOUBLE QUOTATION MARK}I like snowmen!N{RIGHT DOUBLE QUOTATION MARK}")
doc = snowmen.encode("utf8") + quote.encode("windows_1252")
В этом документе бардак. Снеговики в UTF-8, а парные кавычки
в Windows-1252. Можно отображать или снеговиков, или кавычки, но не
то и другое одновременно:
print(doc)
# ☃☃☃�I like snowmen!�

print(doc.decode("windows-1252"))
# ☃☃☃“I like snowmen!”
Декодирование документа как UTF-8 вызывает UnicodeDecodeError, а
декодирование его как Windows-1252 выдаст тарабарщину. К счастью,
UnicodeDammit.detwingle() преобразует строку в чистый UTF-8,
позволяя затем декодировать его в Unicode и отображать снеговиков и кавычки
одновременно:
new_doc = UnicodeDammit.detwingle(doc)
print(new_doc.decode("utf8"))
# ☃☃☃“I like snowmen!”
UnicodeDammit.detwingle() знает только, как обрабатывать Windows-1252,
встроенный в UTF-8 (и наоборот, мне кажется), но это наиболее
общий случай.
Обратите внимание, что нужно вызывать UnicodeDammit.detwingle() для ваших данных
перед передачей в конструктор BeautifulSoup или
UnicodeDammit. Beautiful Soup предполагает, что документ имеет единую
кодировку, какой бы она ни была. Если вы передадите ему документ, который
содержит как UTF-8, так и Windows-1252, скорее всего, он решит, что весь
документ кодируется в Windows-1252, и это будет выглядеть как
☃☃☃“I like snowmen!”.
UnicodeDammit.detwingle() — это новое в Beautiful Soup 4.1.0.
Нумерация строк
Парсеры html.parser и html5lib могут отслеживать, где в
исходном документе был найден каждый тег. Вы можете получить доступ к этой
информации через Tag.sourceline (номер строки) и Tag.sourcepos
(позиция начального тега в строке):
markup = "<pn>Paragraph 1</p>n    <p>Paragraph 2</p>"
soup = BeautifulSoup(markup, 'html.parser')
for tag in soup.find_all('p'):
    print(tag.sourceline, tag.sourcepos, tag.string)
# (1, 0, u'Paragraph 1')
# (2, 3, u'Paragraph 2')
Обратите внимание, что два парсера понимают
sourceline и sourcepos немного по-разному. Для html.parser эти числа
представляет позицию начального знака “<”. Для html5lib
эти числа представляют позицию конечного знака “>”:
soup = BeautifulSoup(markup, 'html5lib')
for tag in soup.find_all('p'):
    print(tag.sourceline, tag.sourcepos, tag.string)
# (2, 1, u'Paragraph 1')
# (3, 7, u'Paragraph 2')
Вы можете отключить эту функцию, передав store_line_numbers = False
в конструктор BeautifulSoup:
markup = "<pn>Paragraph 1</p>n    <p>Paragraph 2</p>"
soup = BeautifulSoup(markup, 'html.parser', store_line_numbers=False)
soup.p.sourceline
# None
Эта функция является новой в 4.8.1, и парсеры, основанные на lxml, не
поддерживают ее.
Проверка объектов на равенство
Beautiful Soup считает, что два объекта NavigableString или Tag
равны, если они представлены в одинаковой разметке HTML или XML. В этом
примере два тега <b> рассматриваются как равные, даже если они находятся
в разных частях дерева объекта, потому что они оба выглядят как
<b>pizza</b>:
markup = "<p>I want <b>pizza</b> and more <b>pizza</b>!</p>"
soup = BeautifulSoup(markup, 'html.parser')
first_b, second_b = soup.find_all('b')
print first_b == second_b
# True

print first_b.previous_element == second_b.previous_element
# False
Если вы хотите выяснить, указывают ли две переменные на один и тот же
объект, используйте is:
print first_b is second_b
# False
Копирование объектов Beautiful Soup
Вы можете использовать copy.copy() для создания копии любого Tag или
NavigableString:
import copy
p_copy = copy.copy(soup.p)
print p_copy
# <p>I want <b>pizza</b> and more <b>pizza</b>!</p>
Копия считается равной оригиналу, так как у нее
такая же разметка, что и у оригинала, но это другой объект:
print soup.p == p_copy
# True

print soup.p is p_copy
# False
Единственная настоящая разница в том, что копия полностью отделена от
исходного дерева объекта Beautiful Soup, как если бы в отношении нее вызвали
метод extract():
print p_copy.parent
# None
Это потому, что два разных объекта Tag не могут занимать одно и то же
пространство в одно и то же время.
Разбор части документа
Допустим, вы хотите использовать Beautiful Soup, чтобы посмотреть на
теги <a> в документе. Было бы бесполезной тратой времени и памяти разобирать весь документ и
затем снова проходить по нему в поисках тегов <a>. Намного быстрее
изначательно игнорировать все, что не является тегом <a>. Класс
SoupStrainer позволяет выбрать, какие части входящего
документ разбирать. Вы просто создаете SoupStrainer и передаете его в
конструктор BeautifulSoup в качестве аргумента parse_only.
(Обратите внимание, что эта функция не будет работать, если вы используете парсер html5lib.
Если вы используете html5lib, будет разобран весь документ, независимо
от обстоятельств. Это потому что html5lib постоянно переставляет части дерева разбора
в процессе работы, и если какая-то часть документа не
попала в дерево разбора, все рухнет. Чтобы избежать путаницы, в
примерах ниже я принудительно использую встроенный в Python
парсер HTML.)
SoupStrainer
Класс SoupStrainer принимает те же аргументы, что и типичный
метод из раздела Поиск по дереву: name, attrs, string и **kwargs. Вот
три объекта SoupStrainer:
from bs4 import SoupStrainer

only_a_tags = SoupStrainer("a")

only_tags_with_id_link2 = SoupStrainer(id="link2")

def is_short_string(string):
    return len(string) < 10

only_short_strings = SoupStrainer(string=is_short_string)
Вернемся к фрагменту из «Алисы в стране чудес»
и увидим, как выглядит документ, когда он разобран с этими
тремя объектами SoupStrainer:
html_doc = """
<html><head><title>The Dormouse's story</title></head>
<body>
<p class="title"><b>The Dormouse's story</b></p>

<p class="story">Once upon a time there were three little sisters; and their names were
<a href="http://example.com/elsie" class="sister" id="link1">Elsie</a>,
<a href="http://example.com/lacie" class="sister" id="link2">Lacie</a> and
<a href="http://example.com/tillie" class="sister" id="link3">Tillie</a>;
and they lived at the bottom of a well.</p>

<p class="story">...</p>
"""

print(BeautifulSoup(html_doc, "html.parser", parse_only=only_a_tags).prettify())
# <a class="sister" href="http://example.com/elsie" id="link1">
#  Elsie
# </a>
# <a class="sister" href="http://example.com/lacie" id="link2">
#  Lacie
# </a>
# <a class="sister" href="http://example.com/tillie" id="link3">
#  Tillie
# </a>

print(BeautifulSoup(html_doc, "html.parser", parse_only=only_tags_with_id_link2).prettify())
# <a class="sister" href="http://example.com/lacie" id="link2">
#  Lacie
# </a>

print(BeautifulSoup(html_doc, "html.parser", parse_only=only_short_strings).prettify())
# Elsie
# ,
# Lacie
# and
# Tillie
# ...
#
Вы также можете передать SoupStrainer в любой из методов. описанных в разделе
Поиск по дереву. Может, это не безумно полезно, но я
решил упомянуть:
soup = BeautifulSoup(html_doc)
soup.find_all(only_short_strings)
# [u'nn', u'nn', u'Elsie', u',n', u'Lacie', u' andn', u'Tillie',
#  u'nn', u'...', u'n']
Устранение неисправностей
diagnose()
Если у вас возникли проблемы с пониманием того, что Beautiful Soup делает с
документом, передайте документ в функцию Diagnose(). (Новое в
Beautiful Soup 4.2.0.) Beautiful Soup выведет отчет, показывающий,
как разные парсеры обрабатывают документ, и сообщит вам, если
отсутствует парсер, который Beautiful Soup мог бы использовать:
from bs4.diagnose import diagnose
with open("bad.html") as fp:
    data = fp.read()
diagnose(data)

# Diagnostic running on Beautiful Soup 4.2.0
# Python version 2.7.3 (default, Aug  1 2012, 05:16:07)
# I noticed that html5lib is not installed. Installing it may help.
# Found lxml version 2.3.2.0
#
# Trying to parse your data with html.parser
# Here's what html.parser did with the document:
# ...
Простой взгляд на вывод diagnose() может показать, как решить
проблему. Если это и не поможет, вы можете скопировать вывод Diagnose(), когда
обратитесь за помощью.
Ошибки при разборе документа
Существует два вида ошибок разбора. Есть сбои,
когда вы подаете документ в Beautiful Soup, и это поднимает
исключение, обычно HTMLParser.HTMLParseError. И есть
неожиданное поведение, когда дерево разбора Beautiful Soup сильно
отличается от документа, использованного для создания дерева.
Практически никогда источником этих проблемы не бывает Beautiful
Soup. Это не потому, что Beautiful Soup так прекрасно
написан. Это потому, что Beautiful Soup не содержит
кода, который бы разбирал документ. Beautiful Soup опирается на внешние парсеры. Если один парсер
не подходит для разбора документа, лучшим решением будет попробовать
другой парсер. В разделе Установка парсера вы найдете больше информации
и таблицу сравнения парсеров.
Наиболее распространенные ошибки разбора — это HTMLParser.HTMLParseError: и
malformed start tagHTMLParser.HTMLParseError: bad end. Они оба генерируются встроенным в Python парсером HTML,
tag
и решением будет установить lxml или
html5lib.
Наиболее распространенный тип неожиданного поведения — когда вы не можете найти
тег, который точно есть в документе. Вы видели его на входе, но
find_all() возвращает [], или find() возвращает None. Это
еще одна распространенная проблема со встроенным в Python парсером HTML, который
иногда пропускает теги, которые он не понимает. Опять же, решение заключается в
установке lxml или html5lib.
Проблемы несоответствия версий
SyntaxError: Invalid syntax(в строкеROOT_TAG_NAME =) — вызвано запуском версии Beautiful Soup на Python 2
u'[document]'
под Python 3 без конвертации кода.ImportError: No module named HTMLParser— вызвано запуском
версия Beautiful Soup на Python 3 под Python 2.ImportError: No module named html.parser— вызвано запуском
версия Beautiful Soup на Python 2 под Python 3.ImportError: No module named BeautifulSoup— вызвано запуском
кода Beautiful Soup 3 в системе, где BS3
не установлен. Или код писали на Beautiful Soup 4, не зная, что
имя пакета сменилось наbs4.ImportError: No module named bs4— вызвано запуском
кода Beautiful Soup 4 в системе, где BS4 не установлен.
Разбор XML
По умолчанию Beautiful Soup разбирает документы как HTML. Чтобы разобрать
документ в виде XML, передайте “xml” в качестве второго аргумента
в конструктор BeautifulSoup:
soup = BeautifulSoup(markup, "xml")
Вам также нужно будет установить lxml.
Другие проблемы с парсерами
- Если ваш скрипт работает на одном компьютере, но не работает на другом, или работает в одной
виртуальной среде, но не в другой, или работает вне виртуальной
среды, но не внутри нее, это, вероятно, потому что в двух
средах разные библиотеки парсеров. Например,
вы могли разработать скрипт на компьютере с установленным lxml,
а затем попытались запустить его на компьютере, где установлен только
html5lib. Читайте в разделе Различия между парсерами, почему это
важно, и исправляйте проблемы, указывая конкретную библиотеку парсера
в конструктореBeautifulSoup. - Поскольку HTML-теги и атрибуты нечувствительны к регистру, все три HTML-
парсера конвертируют имена тегов и атрибутов в нижний регистр. Таким образом,
разметка <TAG></TAG> преобразуется в <tag></tag>. Если вы хотите
сохранить смешанный или верхний регистр тегов и атрибутов, вам нужно
разобрать документ как XML.
Прочие ошибки
UnicodeEncodeError: 'charmap' codec can't encode character(или практически любая другая ошибка
u'xfoo' in position bar
UnicodeEncodeError) — это не проблема с Beautiful Soup.
Эта проблема проявляется в основном в двух ситуациях. Во-первых, когда вы пытаетесь
вывести символ Unicode, который ваша консоль не может отобразить, потому что не знает, как.
(Смотрите эту страницу в Python вики.) Во-вторых, когда
вы пишете в файл и передаете символ Unicode, который
не поддерживается вашей кодировкой по умолчанию. В этом случае самым простым
решением будет явное кодирование строки Unicode в UTF-8 с помощью
u.encode("utf8").KeyError: [attr]— вызывается при обращении кtag['attr'], когда
в искомом теге не определен атрибутattr. Наиболее
типичны ошибкиKeyError: 'href'иKeyError:. Используйте
'class'tag.get('attr'), если вы не уверены, чтоattr
определен — так же, как если бы вы работали со словарем Python.AttributeError: 'ResultSet' object has no attribute 'foo'— это
обычно происходит тогда, когда вы ожидаете, чтоfind_all()вернет
один тег или строку. Ноfind_all()возвращает список тегов
и строк в объектеResultSet. Вам нужно перебрать
список и поискать.fooв каждом из элементов. Или, если вам действительно
нужен только один результат, используйтеfind()вместо
find_all().AttributeError: 'NoneType' object has no attribute 'foo'— это
обычно происходит, когда вы вызываетеfind()и затем пытаетесь
получить доступ к атрибуту.foo. Но в вашем случае
find()не нашел ничего, поэтому вернулNoneвместо
того, чтобы вернуть тег или строку. Вам нужно выяснить, почему
find()ничего не возвращает.
Повышение производительности
Beautiful Soup никогда не будет таким же быстрым, как парсеры, на основе которых он
работает. Если время отклика критично, если вы платите за компьютерное время
по часам, или если есть какая-то другая причина, почему компьютерное время
важнее программистского, стоит забыть о Beautiful Soup
и работать непосредственно с lxml.
Тем не менее, есть вещи, которые вы можете сделать, чтобы ускорить Beautiful Soup. Если
вы не используете lxml в качестве основного парсера, самое время
начать. Beautiful Soup разбирает документы
значительно быстрее с lxml, чем с html.parser или html5lib.
Вы можете значительно ускорить распознавание кодировок, установив
библиотеку cchardet.
Разбор части документа не сэкономит много времени в процессе разбора,
но может сэкономить много памяти, что сделает
поиск по документу намного быстрее.
Beautiful Soup 3
Beautiful Soup 3 — предыдущая версия, и она больше
активно не развивается. На текущий момент Beautiful Soup 3 поставляется со всеми основными
дистрибутивами Linux:
$ apt-get install python-beautifulsoup
Он также публикуется через PyPi как BeautifulSoup:
$ easy_install BeautifulSoup
$ pip install BeautifulSoup
Вы можете скачать tar-архив Beautiful Soup 3.2.0.
Если вы запустили easy_install beautifulsoup или easy_install, но ваш код не работает, значит, вы ошибочно установили Beautiful
BeautifulSoup
Soup 3. Вам нужно запустить easy_install beautifulsoup4.
Архивная документация для Beautiful Soup 3 доступна онлайн.
Перенос кода на BS4
Большая часть кода, написанного для Beautiful Soup 3, будет работать и в Beautiful
Soup 4 с одной простой заменой. Все, что вам нужно сделать, это изменить
имя пакета c BeautifulSoup на bs4. Так что это:
from BeautifulSoup import BeautifulSoup
становится этим:
from bs4 import BeautifulSoup
- Если выводится сообщение
ImportError“No module named BeautifulSoup”, ваша
проблема в том, что вы пытаетесь запустить код Beautiful Soup 3, в то время как
у вас установлен Beautiful Soup 4. - Если выводится сообщение
ImportError“No module named bs4”, ваша проблема
в том, что вы пытаетесь запустить код Beautiful Soup 4, в то время как
у вас установлен Beautiful Soup 3.
Хотя BS4 в основном обратно совместим с BS3, большинство
методов BS3 устарели и получили новые имена, чтобы соответствовать PEP 8. Некоторые
из переименований и изменений нарушают обратную совместимость.
Вот что нужно знать, чтобы перейти с BS3 на BS4:
Вам нужен парсер
Beautiful Soup 3 использовал модуль Python SGMLParser, который теперь
устарел и был удален в Python 3.0. Beautiful Soup 4 по умолчанию использует
html.parser, но вы можете подключить lxml или html5lib
вместо него. Вы найдете таблицу сравнения парсеров в разделе Установка парсера.
Поскольку html.parser — это не то же, что SGMLParser, вы
можете обнаружить, что Beautiful Soup 4 дает другое дерево разбора, чем
Beautiful Soup 3. Если вы замените html.parser
на lxml или html5lib, может оказаться, что дерево разбора опять
изменилось. Если такое случится, вам придется обновить код,
чтобы разобраться с новым деревом.
Имена методов
renderContents->encode_contentsreplaceWith->replace_withreplaceWithChildren->unwrapfindAll->find_allfindAllNext->find_all_nextfindAllPrevious->find_all_previousfindNext->find_nextfindNextSibling->find_next_siblingfindNextSiblings->find_next_siblingsfindParent->find_parentfindParents->find_parentsfindPrevious->find_previousfindPreviousSibling->find_previous_siblingfindPreviousSiblings->find_previous_siblingsgetText->get_textnextSibling->next_siblingpreviousSibling->previous_sibling
Некоторые аргументы конструктора Beautiful Soup были переименованы по
той же причине:
BeautifulSoup(parseOnlyThese=...)->BeautifulSoup(parse_only=...)BeautifulSoup(fromEncoding=...)->BeautifulSoup(from_encoding=...)
Я переименовал один метод для совместимости с Python 3:
Tag.has_key()->Tag.has_attr()
Я переименовал один атрибут, чтобы использовать более точную терминологию:
Tag.isSelfClosing->Tag.is_empty_element
Я переименовал три атрибута, чтобы избежать использования зарезервированных слов
в Python. В отличие от других, эти изменения не являются обратно
совместимыми. Если вы использовали эти атрибуты в BS3, ваш код не сработает
на BS4, пока вы их не измените.
UnicodeDammit.unicode->UnicodeDammit.unicode_markupTag.next->Tag.next_elementTag.previous->Tag.previous_element
Генераторы
Я дал генераторам PEP 8-совместимые имена и преобразовал их в
свойства:
childGenerator()->childrennextGenerator()->next_elementsnextSiblingGenerator()->next_siblingspreviousGenerator()->previous_elementspreviousSiblingGenerator()->previous_siblingsrecursiveChildGenerator()->descendantsparentGenerator()->parents
Так что вместо этого:
for parent in tag.parentGenerator(): ...
Вы можете написать это:
for parent in tag.parents: ...
(Хотя старый код тоже будет работать.)
Некоторые генераторы выдавали None после их завершения и
останавливались. Это была ошибка. Теперь генераторы просто останавливаются.
Добавились два генератора: .strings и
.stripped_strings.
.strings выдает
объекты NavigableString, а .stripped_strings выдает строки Python,
у которых удалены пробелы.
XML
Больше нет класса BeautifulStoneSoup для разбора XML. Чтобы
разобрать XML, нужно передать “xml” в качестве второго аргумента
в конструктор BeautifulSoup. По той же причине
конструктор BeautifulSoup больше не распознает
аргумент isHTML.
Улучшена обработка пустых тегов
XML. Ранее при разборе XML нужно было явно указать,
какие теги считать пустыми элементами. Аргумент SelfClosingTags
больше не распознается. Вместо этого
Beautiful Soup считает пустым элементом любой тег без содержимого. Если
вы добавляете в тег дочерний элемент, тег больше не считается
пустым элементом.
Мнемоники
Входящие мнемоники HTML или XML всегда преобразуются в
соответствующие символы Unicode. В Beautiful Soup 3 было несколько
перекрывающих друг друга способов взаимодействия с мнемониками. Эти способы
удалены. Конструктор BeautifulSoup больше не распознает
аргументы smartQuotesTo и convertEntities. (В Unicode,
Dammit все еще присутствует smart_quotes_to, но по умолчанию парные кавычки
преобразуются в Unicode). Константы HTML_ENTITIES,
XML_ENTITIES и XHTML_ENTITIES были удалены, так как они
служили для настройки функции, которой больше нет (преобразование отдельных мнемоник в
символы Unicode).
Если вы хотите на выходе преобразовать символы Unicode обратно в мнемоники HTML,
а не превращать Unicode в символы UTF-8, вам нужно
использовать средства форматирования вывода.
Прочее
Tag.string теперь работает рекурсивно. Если тег А
содержит только тег B и ничего больше, тогда значение A.string будет таким же, как
B.string. (Раньше это был None.)
Многозначные атрибуты, такие как class, теперь в качестве значений имеют списки строк,
а не строки. Это может повлиять на поиск
по классу CSS.
Если вы передадите в один из методов find* одновременно string и
специфичный для тега аргумент, такой как name, Beautiful Soup будет
искать теги, которые, во-первых, соответствуют специфичным для тега критериям, и, во-вторых, имеют
Tag.string, соответствующий заданному вами значению string. Beautiful Soup не найдет сами строки. Ранее
Beautiful Soup игнорировал аргументы, специфичные для тегов, и искал
строки.
Конструктор BeautifulSoup больше не распознает
аргумент markupMassage. Теперь это задача парсера —
обрабатывать разметку правильно.
Редко используемые альтернативные классы парсеров, такие как
ICantBelieveItsBeautifulSoup и BeautifulSOAP,
удалены. Теперь парсер решает, что делать с неоднозначной
разметкой.
Метод prettify() теперь возвращает строку Unicode, а не байтовую строку.
Перевод документации
Переводы документации Beautiful Soup очень
приветствуются. Перевод должен быть лицензирован по лицензии MIT,
так же, как сам Beautiful Soup и англоязычная документация к нему.
Есть два способа передать ваш перевод:
- Создайте ветку репозитория Beautiful Soup, добавьте свой
перевод и предложите слияние с основной веткой — так же,
как вы предложили бы изменения исходного кода. - Отправьте в дискуссионную группу Beautiful Soup
сообщение со ссылкой на
ваш перевод, или приложите перевод к сообщению.
Используйте существующие переводы документации на китайский или португальский в качестве образца. В
частности, переводите исходный файл doc/source/index.rst вместо
того, чтобы переводить HTML-версию документации. Это позволяет
публиковать документацию в разных форматах, не
только в HTML.
Improve Article
Save Article
Improve Article
Save Article
Beautiful Soup is a Python library for pulling data out of HTML and XML files. It works with your favorite parser to provide idiomatic ways of navigating, searching, and modifying the parse tree. It commonly saves programmers hours or days of work. The latest Version of Beautifulsoup is v4.9.3 as of now.
Prerequisites
- Python
- Pip
How to install Beautifulsoup?
To install Beautifulsoup on Windows, Linux, or any operating system, one would need pip package. To check how to install pip on your operating system, check out – PIP Installation – Windows || Linux.
Now, run a simple command,
pip install beautifulsoup4
Wait and relax, Beautifulsoup would be installed shortly.
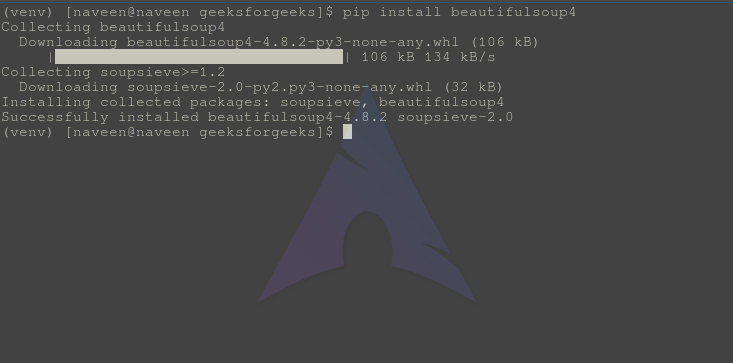
Install Beautifulsoup4 using Source code
One can install beautifulsoup, using source code directly, install beautifulsoup tarball from here – download the Beautiful Soup 4 source tarball
after downloading cd into the directory and run,
Python setup.py install
Verifying Installation
To check whether the installation is complete or not, let’s try implementing it using python

As BeautifulSoup is not a standard python library, we need to install it first. We are going to install the BeautifulSoup 4 library (also known as BS4), which is the latest one.
To isolate our working environment so as not to disturb the existing setup, let us first create a virtual environment.
Creating a virtual environment (optional)
A virtual environment allows us to create an isolated working copy of python for a specific project without affecting the outside setup.
Best way to install any python package machine is using pip, however, if pip is not installed already (you can check it using – “pip –version” in your command or shell prompt), you can install by giving below command −
Linux environment
$sudo apt-get install python-pip
Windows environment
To install pip in windows, do the following −
-
Download the get-pip.py from https://bootstrap.pypa.io/get-pip.py or from the github to your computer.
-
Open the command prompt and navigate to the folder containing get-pip.py file.
-
Run the following command −
>python get-pip.py
That’s it, pip is now installed in your windows machine.
You can verify your pip installed by running below command −
>pip --version pip 19.2.3 from c:usersyadurappdatalocalprogramspythonpython37libsite-packagespip (python 3.7)
Installing virtual environment
Run the below command in your command prompt −
>pip install virtualenv
After running, you will see the below screenshot −

Below command will create a virtual environment (“myEnv”) in your current directory −
>virtualenv myEnv
Screenshot

To activate your virtual environment, run the following command −
>myEnvScriptsactivate

In the above screenshot, you can see we have “myEnv” as prefix which tells us that we are under virtual environment “myEnv”.
To come out of virtual environment, run deactivate.
(myEnv) C:Usersyadur>deactivate C:Usersyadur>
As our virtual environment is ready, now let us install beautifulsoup.
Installing BeautifulSoup
As BeautifulSoup is not a standard library, we need to install it. We are going to use the BeautifulSoup 4 package (known as bs4).
Linux Machine
To install bs4 on Debian or Ubuntu linux using system package manager, run the below command −
$sudo apt-get install python-bs4 (for python 2.x) $sudo apt-get install python3-bs4 (for python 3.x)
You can install bs4 using easy_install or pip (in case you find problem in installing using system packager).
$easy_install beautifulsoup4 $pip install beautifulsoup4
(You may need to use easy_install3 or pip3 respectively if you’re using python3)
Windows Machine
To install beautifulsoup4 in windows is very simple, especially if you have pip already installed.
>pip install beautifulsoup4
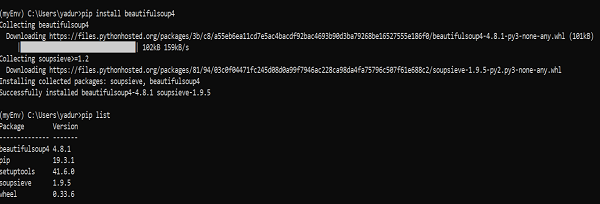
So now beautifulsoup4 is installed in our machine. Let us talk about some problems encountered after installation.
Problems after installation
On windows machine you might encounter, wrong version being installed error mainly through −
-
error: ImportError “No module named HTMLParser”, then you must be running python 2 version of the code under Python 3.
-
error: ImportError “No module named html.parser” error, then you must be running Python 3 version of the code under Python 2.
Best way to get out of above two situations is to re-install the BeautifulSoup again, completely removing existing installation.
If you get the SyntaxError “Invalid syntax” on the line ROOT_TAG_NAME = u’[document]’, then you need to convert the python 2 code to python 3, just by either installing the package −
$ python3 setup.py install
or by manually running python’s 2 to 3 conversion script on the bs4 directory −
$ 2to3-3.2 -w bs4
Installing a Parser
By default, Beautiful Soup supports the HTML parser included in Python’s standard library, however it also supports many external third party python parsers like lxml parser or html5lib parser.
To install lxml or html5lib parser, use the command −
Linux Machine
$apt-get install python-lxml $apt-get insall python-html5lib
Windows Machine
$pip install lxml $pip install html5lib

Generally, users use lxml for speed and it is recommended to use lxml or html5lib parser if you are using older version of python 2 (before 2.7.3 version) or python 3 (before 3.2.2) as python’s built-in HTML parser is not very good in handling older version.
Running Beautiful Soup
It is time to test our Beautiful Soup package in one of the html pages (taking web page – https://www.tutorialspoint.com/index.htm, you can choose any-other web page you want) and extract some information from it.
In the below code, we are trying to extract the title from the webpage −
from bs4 import BeautifulSoup import requests url = "https://www.tutorialspoint.com/index.htm" req = requests.get(url) soup = BeautifulSoup(req.text, "html.parser") print(soup.title)
Output
<title>H2O, Colab, Theano, Flutter, KNime, Mean.js, Weka, Solidity, Org.Json, AWS QuickSight, JSON.Simple, Jackson Annotations, Passay, Boon, MuleSoft, Nagios, Matplotlib, Java NIO, PyTorch, SLF4J, Parallax Scrolling, Java Cryptography</title>
One common task is to extract all the URLs within a webpage. For that we just need to add the below line of code −
for link in soup.find_all('a'):
print(link.get('href'))
Output
https://www.tutorialspoint.com/index.htm https://www.tutorialspoint.com/about/about_careers.htm https://www.tutorialspoint.com/questions/index.php https://www.tutorialspoint.com/online_dev_tools.htm https://www.tutorialspoint.com/codingground.htm https://www.tutorialspoint.com/current_affairs.htm https://www.tutorialspoint.com/upsc_ias_exams.htm https://www.tutorialspoint.com/tutor_connect/index.php https://www.tutorialspoint.com/whiteboard.htm https://www.tutorialspoint.com/netmeeting.php https://www.tutorialspoint.com/index.htm https://www.tutorialspoint.com/tutorialslibrary.htm https://www.tutorialspoint.com/videotutorials/index.php https://store.tutorialspoint.com https://www.tutorialspoint.com/gate_exams_tutorials.htm https://www.tutorialspoint.com/html_online_training/index.asp https://www.tutorialspoint.com/css_online_training/index.asp https://www.tutorialspoint.com/3d_animation_online_training/index.asp https://www.tutorialspoint.com/swift_4_online_training/index.asp https://www.tutorialspoint.com/blockchain_online_training/index.asp https://www.tutorialspoint.com/reactjs_online_training/index.asp https://www.tutorix.com https://www.tutorialspoint.com/videotutorials/top-courses.php https://www.tutorialspoint.com/the_full_stack_web_development/index.asp …. …. https://www.tutorialspoint.com/online_dev_tools.htm https://www.tutorialspoint.com/free_web_graphics.htm https://www.tutorialspoint.com/online_file_conversion.htm https://www.tutorialspoint.com/netmeeting.php https://www.tutorialspoint.com/free_online_whiteboard.htm http://www.tutorialspoint.com https://www.facebook.com/tutorialspointindia https://plus.google.com/u/0/+tutorialspoint Tweets by tutorialspoint http://www.linkedin.com/company/tutorialspoint https://www.youtube.com/channel/UCVLbzhxVTiTLiVKeGV7WEBg https://www.tutorialspoint.com/index.htm /about/about_privacy.htm#cookies /about/faq.htm /about/about_helping.htm /about/contact_us.htm
Similarly, we can extract useful information using beautifulsoup4.
Now let us understand more about “soup” in above example.
Beautifulsoup is a python package that is useful in scrapping web content from a particular URL. It parses HTML and XML documents and creates a parse tree that is used to extract data from HTML. But how you will install it in your system. In this entire tutorial you will know how to pip install Beautifulsoup, means how to install Beautifulsoup using the pip command.
Steps to Install Beautifulsoup using PIP
In this section, you will know all the steps required to install beautifulsoup in your system. I will tell you how to install in both windows and linux operating system.
Install Beautifulsoup on Windows
Step 1: Open your command prompt
Step 2: Check the version of the python by typing the following command.
python --version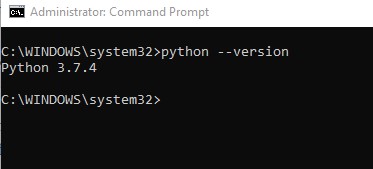
Step 3: Install the beautifulsoup using pip
After checking the version of the python now you can install beautifusoup for different python versions.
For python 3.xx
pip3 install beautifulsoup4For python 2.xx
pip install beautifulsoup4In my system, the python version is 3.xx. So I will use the pip3 command.

Install Beautifulsoup on Linux
Now let’s install Beautifulsoup on Linux. You have to follow the below steps to install it.
Step 1: Update the Linux
To update the Linux use the following command.
sudo apt-get update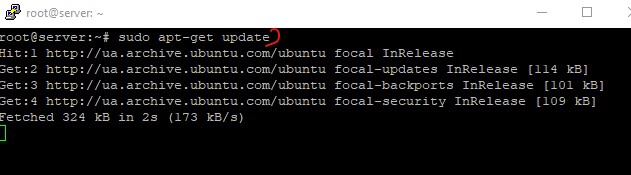
Step 2: Check the python version
To check the python version. If it is installed then you will get the version number. And if are getting the following error then you have to install it.
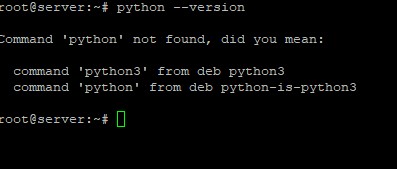
To install python use the pip3 command.
pip3 install pythonIt will install the python 3.xx version.
Step 3: Install the Beautifulsoup
After the installation of the python install the Beautifulsoup using the pip command. Run the following bash command to install it.
pip3 install beautifulsoup4It will successfully install the beautifulsoup on the Linux OS.
Conclusion
If you want to make your own scrapper then beautifulsoup python package is very useful. These are the steps to install beautifulsoup using the pip command for Linux and Window OS. Hope this tutorial has solved your queries. If you want to get more help then you can contact us anytime. We are always ready to help you. Apart from installation, there are so many operations you should explore with beautifulsoap package like extracting data using findall() function , parsing HTML and select.
Source:
Beautifulsoup documentation

Join our list
Subscribe to our mailing list and get interesting stuff and updates to your email inbox.
We respect your privacy and take protecting it seriously
Thank you for signup. A Confirmation Email has been sent to your Email Address.
Something went wrong.
Beautiful Soup Documentation

Beautiful Soup is a
Python library for pulling data out of HTML and XML files. It works
with your favorite parser to provide idiomatic ways of navigating,
searching, and modifying the parse tree. It commonly saves programmers
hours or days of work.
These instructions illustrate all major features of Beautiful Soup 4,
with examples. I show you what the library is good for, how it works,
how to use it, how to make it do what you want, and what to do when it
violates your expectations.
The examples in this documentation should work the same way in Python
2.7 and Python 3.2.
You might be looking for the documentation for Beautiful Soup 3.
If so, you should know that Beautiful Soup 3 is no longer being
developed, and that Beautiful Soup 4 is recommended for all new
projects. If you want to learn about the differences between Beautiful
Soup 3 and Beautiful Soup 4, see Porting code to BS4.
This documentation has been translated into other languages by its users.
- 이 문서는 한국어 번역도 가능합니다. (외부 링크)
Getting help
If you have questions about Beautiful Soup, or run into problems,
send mail to the discussion group. If
your problem involves parsing an HTML document, be sure to mention
:ref:`what the diagnose() function says <diagnose>` about
that document.
Quick Start
Here’s an HTML document I’ll be using as an example throughout this
document. It’s part of a story from Alice in Wonderland:
html_doc = """ <html><head><title>The Dormouse's story</title></head> <body> <p class="title"><b>The Dormouse's story</b></p> <p class="story">Once upon a time there were three little sisters; and their names were <a href="http://example.com/elsie" class="sister" id="link1">Elsie</a>, <a href="http://example.com/lacie" class="sister" id="link2">Lacie</a> and <a href="http://example.com/tillie" class="sister" id="link3">Tillie</a>; and they lived at the bottom of a well.</p> <p class="story">...</p> """
Running the «three sisters» document through Beautiful Soup gives us a
BeautifulSoup object, which represents the document as a nested
data structure:
from bs4 import BeautifulSoup soup = BeautifulSoup(html_doc) print(soup.prettify()) # <html> # <head> # <title> # The Dormouse's story # </title> # </head> # <body> # <p class="title"> # <b> # The Dormouse's story # </b> # </p> # <p class="story"> # Once upon a time there were three little sisters; and their names were # <a class="sister" href="http://example.com/elsie" id="link1"> # Elsie # </a> # , # <a class="sister" href="http://example.com/lacie" id="link2"> # Lacie # </a> # and # <a class="sister" href="http://example.com/tillie" id="link2"> # Tillie # </a> # ; and they lived at the bottom of a well. # </p> # <p class="story"> # ... # </p> # </body> # </html>
Here are some simple ways to navigate that data structure:
soup.title
# <title>The Dormouse's story</title>
soup.title.name
# u'title'
soup.title.string
# u'The Dormouse's story'
soup.title.parent.name
# u'head'
soup.p
# <p class="title"><b>The Dormouse's story</b></p>
soup.p['class']
# u'title'
soup.a
# <a class="sister" href="http://example.com/elsie" id="link1">Elsie</a>
soup.find_all('a')
# [<a class="sister" href="http://example.com/elsie" id="link1">Elsie</a>,
# <a class="sister" href="http://example.com/lacie" id="link2">Lacie</a>,
# <a class="sister" href="http://example.com/tillie" id="link3">Tillie</a>]
soup.find(id="link3")
# <a class="sister" href="http://example.com/tillie" id="link3">Tillie</a>
One common task is extracting all the URLs found within a page’s <a> tags:
for link in soup.find_all('a'):
print(link.get('href'))
# http://example.com/elsie
# http://example.com/lacie
# http://example.com/tillie
Another common task is extracting all the text from a page:
print(soup.get_text()) # The Dormouse's story # # The Dormouse's story # # Once upon a time there were three little sisters; and their names were # Elsie, # Lacie and # Tillie; # and they lived at the bottom of a well. # # ...
Does this look like what you need? If so, read on.
Installing Beautiful Soup
If you’re using a recent version of Debian or Ubuntu Linux, you can
install Beautiful Soup with the system package manager:
$ apt-get install python-bs4
Beautiful Soup 4 is published through PyPi, so if you can’t install it
with the system packager, you can install it with easy_install or
pip. The package name is beautifulsoup4, and the same package
works on Python 2 and Python 3.
$ easy_install beautifulsoup4
$ pip install beautifulsoup4
(The BeautifulSoup package is probably not what you want. That’s
the previous major release, Beautiful Soup 3. Lots of software uses
BS3, so it’s still available, but if you’re writing new code you
should install beautifulsoup4.)
If you don’t have easy_install or pip installed, you can
download the Beautiful Soup 4 source tarball and
install it with setup.py.
$ python setup.py install
If all else fails, the license for Beautiful Soup allows you to
package the entire library with your application. You can download the
tarball, copy its bs4 directory into your application’s codebase,
and use Beautiful Soup without installing it at all.
I use Python 2.7 and Python 3.2 to develop Beautiful Soup, but it
should work with other recent versions.
Problems after installation
Beautiful Soup is packaged as Python 2 code. When you install it for
use with Python 3, it’s automatically converted to Python 3 code. If
you don’t install the package, the code won’t be converted. There have
also been reports on Windows machines of the wrong version being
installed.
If you get the ImportError «No module named HTMLParser», your
problem is that you’re running the Python 2 version of the code under
Python 3.
If you get the ImportError «No module named html.parser», your
problem is that you’re running the Python 3 version of the code under
Python 2.
In both cases, your best bet is to completely remove the Beautiful
Soup installation from your system (including any directory created
when you unzipped the tarball) and try the installation again.
If you get the SyntaxError «Invalid syntax» on the line
ROOT_TAG_NAME = u'[document]', you need to convert the Python 2
code to Python 3. You can do this either by installing the package:
$ python3 setup.py install
or by manually running Python’s 2to3 conversion script on the
bs4 directory:
$ 2to3-3.2 -w bs4
Installing a parser
Beautiful Soup supports the HTML parser included in Python’s standard
library, but it also supports a number of third-party Python parsers.
One is the lxml parser. Depending on your setup,
you might install lxml with one of these commands:
$ apt-get install python-lxml
$ easy_install lxml
$ pip install lxml
Another alternative is the pure-Python html5lib parser, which parses HTML the way a
web browser does. Depending on your setup, you might install html5lib
with one of these commands:
$ apt-get install python-html5lib
$ easy_install html5lib
$ pip install html5lib
This table summarizes the advantages and disadvantages of each parser library:
| Parser | Typical usage | Advantages | Disadvantages |
| Python’s html.parser | BeautifulSoup(markup, "html.parser") |
|
|
| lxml’s HTML parser | BeautifulSoup(markup, "lxml") |
|
|
| lxml’s XML parser | BeautifulSoup(markup, ["lxml", "xml"])BeautifulSoup(markup, "xml") |
|
|
| html5lib | BeautifulSoup(markup, "html5lib") |
|
|
If you can, I recommend you install and use lxml for speed. If you’re
using a version of Python 2 earlier than 2.7.3, or a version of Python
3 earlier than 3.2.2, it’s essential that you install lxml or
html5lib—Python’s built-in HTML parser is just not very good in older
versions.
Note that if a document is invalid, different parsers will generate
different Beautiful Soup trees for it. See Differences
between parsers for details.
Making the soup
To parse a document, pass it into the BeautifulSoup
constructor. You can pass in a string or an open filehandle:
from bs4 import BeautifulSoup
soup = BeautifulSoup(open("index.html"))
soup = BeautifulSoup("<html>data</html>")
First, the document is converted to Unicode, and HTML entities are
converted to Unicode characters:
BeautifulSoup("Sacré bleu!")
<html><head></head><body>Sacré bleu!</body></html>
Beautiful Soup then parses the document using the best available
parser. It will use an HTML parser unless you specifically tell it to
use an XML parser. (See Parsing XML.)
Kinds of objects
Beautiful Soup transforms a complex HTML document into a complex tree
of Python objects. But you’ll only ever have to deal with about four
kinds of objects.
Tag
A Tag object corresponds to an XML or HTML tag in the original document:
soup = BeautifulSoup('<b class="boldest">Extremely bold</b>')
tag = soup.b
type(tag)
# <class 'bs4.element.Tag'>
Tags have a lot of attributes and methods, and I’ll cover most of them
in Navigating the tree and Searching the tree. For now, the most
important features of a tag are its name and attributes.
Name
Every tag has a name, accessible as .name:
tag.name # u'b'
If you change a tag’s name, the change will be reflected in any HTML
markup generated by Beautiful Soup:
tag.name = "blockquote" tag # <blockquote class="boldest">Extremely bold</blockquote>
Attributes
A tag may have any number of attributes. The tag <b has an attribute «class» whose value is
class="boldest">
«boldest». You can access a tag’s attributes by treating the tag like
a dictionary:
tag['class'] # u'boldest'
You can access that dictionary directly as .attrs:
tag.attrs
# {u'class': u'boldest'}
You can add, remove, and modify a tag’s attributes. Again, this is
done by treating the tag as a dictionary:
tag['class'] = 'verybold'
tag['id'] = 1
tag
# <blockquote class="verybold" id="1">Extremely bold</blockquote>
del tag['class']
del tag['id']
tag
# <blockquote>Extremely bold</blockquote>
tag['class']
# KeyError: 'class'
print(tag.get('class'))
# None
Multi-valued attributes
HTML 4 defines a few attributes that can have multiple values. HTML 5
removes a couple of them, but defines a few more. The most common
multi-valued attribute is class (that is, a tag can have more than
one CSS class). Others include rel, rev, accept-charset,
headers, and accesskey. Beautiful Soup presents the value(s)
of a multi-valued attribute as a list:
css_soup = BeautifulSoup('<p class="body strikeout"></p>')
css_soup.p['class']
# ["body", "strikeout"]
css_soup = BeautifulSoup('<p class="body"></p>')
css_soup.p['class']
# ["body"]
If an attribute looks like it has more than one value, but it’s not
a multi-valued attribute as defined by any version of the HTML
standard, Beautiful Soup will leave the attribute alone:
id_soup = BeautifulSoup('<p id="my id"></p>')
id_soup.p['id']
# 'my id'
When you turn a tag back into a string, multiple attribute values are
consolidated:
rel_soup = BeautifulSoup('<p>Back to the <a rel="index">homepage</a></p>')
rel_soup.a['rel']
# ['index']
rel_soup.a['rel'] = ['index', 'contents']
print(rel_soup.p)
# <p>Back to the <a rel="index contents">homepage</a></p>
If you parse a document as XML, there are no multi-valued attributes:
xml_soup = BeautifulSoup('<p class="body strikeout"></p>', 'xml')
xml_soup.p['class']
# u'body strikeout'
NavigableString
A string corresponds to a bit of text within a tag. Beautiful Soup
uses the NavigableString class to contain these bits of text:
tag.string # u'Extremely bold' type(tag.string) # <class 'bs4.element.NavigableString'>
A NavigableString is just like a Python Unicode string, except
that it also supports some of the features described in Navigating
the tree and Searching the tree. You can convert a
NavigableString to a Unicode string with unicode():
unicode_string = unicode(tag.string) unicode_string # u'Extremely bold' type(unicode_string) # <type 'unicode'>
You can’t edit a string in place, but you can replace one string with
another, using :ref:`replace_with`:
tag.string.replace_with("No longer bold")
tag
# <blockquote>No longer bold</blockquote>
NavigableString supports most of the features described in
Navigating the tree and Searching the tree, but not all of
them. In particular, since a string can’t contain anything (the way a
tag may contain a string or another tag), strings don’t support the
.contents or .string attributes, or the find() method.
If you want to use a NavigableString outside of Beautiful Soup,
you should call unicode() on it to turn it into a normal Python
Unicode string. If you don’t, your string will carry around a
reference to the entire Beautiful Soup parse tree, even when you’re
done using Beautiful Soup. This is a big waste of memory.
BeautifulSoup
The BeautifulSoup object itself represents the document as a
whole. For most purposes, you can treat it as a :ref:`Tag`
object. This means it supports most of the methods described in
Navigating the tree and Searching the tree.
Since the BeautifulSoup object doesn’t correspond to an actual
HTML or XML tag, it has no name and no attributes. But sometimes it’s
useful to look at its .name, so it’s been given the special
.name «[document]»:
soup.name # u'[document]'
Comments and other special strings
Tag, NavigableString, and BeautifulSoup cover almost
everything you’ll see in an HTML or XML file, but there are a few
leftover bits. The only one you’ll probably ever need to worry about
is the comment:
markup = "<b><!--Hey, buddy. Want to buy a used parser?--></b>" soup = BeautifulSoup(markup) comment = soup.b.string type(comment) # <class 'bs4.element.Comment'>
The Comment object is just a special type of NavigableString:
comment # u'Hey, buddy. Want to buy a used parser'
But when it appears as part of an HTML document, a Comment is
displayed with special formatting:
print(soup.b.prettify()) # <b> # <!--Hey, buddy. Want to buy a used parser?--> # </b>
Beautiful Soup defines classes for anything else that might show up in
an XML document: CData, ProcessingInstruction,
Declaration, and Doctype. Just like Comment, these classes
are subclasses of NavigableString that add something extra to the
string. Here’s an example that replaces the comment with a CDATA
block:
from bs4 import CData
cdata = CData("A CDATA block")
comment.replace_with(cdata)
print(soup.b.prettify())
# <b>
# <![CDATA[A CDATA block]]>
# </b>
Navigating the tree
Here’s the «Three sisters» HTML document again:
html_doc = """ <html><head><title>The Dormouse's story</title></head> <p class="title"><b>The Dormouse's story</b></p> <p class="story">Once upon a time there were three little sisters; and their names were <a href="http://example.com/elsie" class="sister" id="link1">Elsie</a>, <a href="http://example.com/lacie" class="sister" id="link2">Lacie</a> and <a href="http://example.com/tillie" class="sister" id="link3">Tillie</a>; and they lived at the bottom of a well.</p> <p class="story">...</p> """ from bs4 import BeautifulSoup soup = BeautifulSoup(html_doc)
I’ll use this as an example to show you how to move from one part of
a document to another.
Going down
Tags may contain strings and other tags. These elements are the tag’s
children. Beautiful Soup provides a lot of different attributes for
navigating and iterating over a tag’s children.
Note that Beautiful Soup strings don’t support any of these
attributes, because a string can’t have children.
Navigating using tag names
The simplest way to navigate the parse tree is to say the name of the
tag you want. If you want the <head> tag, just say soup.head:
soup.head # <head><title>The Dormouse's story</title></head> soup.title # <title>The Dormouse's story</title>
You can do use this trick again and again to zoom in on a certain part
of the parse tree. This code gets the first <b> tag beneath the <body> tag:
soup.body.b # <b>The Dormouse's story</b>
Using a tag name as an attribute will give you only the first tag by that
name:
soup.a # <a class="sister" href="http://example.com/elsie" id="link1">Elsie</a>
If you need to get all the <a> tags, or anything more complicated
than the first tag with a certain name, you’ll need to use one of the
methods described in Searching the tree, such as find_all():
soup.find_all('a')
# [<a class="sister" href="http://example.com/elsie" id="link1">Elsie</a>,
# <a class="sister" href="http://example.com/lacie" id="link2">Lacie</a>,
# <a class="sister" href="http://example.com/tillie" id="link3">Tillie</a>]
.contents and .children
A tag’s children are available in a list called .contents:
head_tag = soup.head head_tag # <head><title>The Dormouse's story</title></head> head_tag.contents [<title>The Dormouse's story</title>] title_tag = head_tag.contents[0] title_tag # <title>The Dormouse's story</title> title_tag.contents # [u'The Dormouse's story']
The BeautifulSoup object itself has children. In this case, the
<html> tag is the child of the BeautifulSoup object.:
len(soup.contents) # 1 soup.contents[0].name # u'html'
A string does not have .contents, because it can’t contain
anything:
text = title_tag.contents[0] text.contents # AttributeError: 'NavigableString' object has no attribute 'contents'
Instead of getting them as a list, you can iterate over a tag’s
children using the .children generator:
for child in title_tag.children:
print(child)
# The Dormouse's story
.descendants
The .contents and .children attributes only consider a tag’s
direct children. For instance, the <head> tag has a single direct
child—the <title> tag:
head_tag.contents # [<title>The Dormouse's story</title>]
But the <title> tag itself has a child: the string «The Dormouse’s
story». There’s a sense in which that string is also a child of the
<head> tag. The .descendants attribute lets you iterate over all
of a tag’s children, recursively: its direct children, the children of
its direct children, and so on:
for child in head_tag.descendants:
print(child)
# <title>The Dormouse's story</title>
# The Dormouse's story
The <head> tag has only one child, but it has two descendants: the
<title> tag and the <title> tag’s child. The BeautifulSoup object
only has one direct child (the <html> tag), but it has a whole lot of
descendants:
len(list(soup.children)) # 1 len(list(soup.descendants)) # 25
.string
If a tag has only one child, and that child is a NavigableString,
the child is made available as .string:
title_tag.string # u'The Dormouse's story'
If a tag’s only child is another tag, and that tag has a
.string, then the parent tag is considered to have the same
.string as its child:
head_tag.contents # [<title>The Dormouse's story</title>] head_tag.string # u'The Dormouse's story'
If a tag contains more than one thing, then it’s not clear what
.string should refer to, so .string is defined to be
None:
print(soup.html.string) # None
.strings and stripped_strings
If there’s more than one thing inside a tag, you can still look at
just the strings. Use the .strings generator:
for string in soup.strings:
print(repr(string))
# u"The Dormouse's story"
# u'nn'
# u"The Dormouse's story"
# u'nn'
# u'Once upon a time there were three little sisters; and their names weren'
# u'Elsie'
# u',n'
# u'Lacie'
# u' andn'
# u'Tillie'
# u';nand they lived at the bottom of a well.'
# u'nn'
# u'...'
# u'n'
These strings tend to have a lot of extra whitespace, which you can
remove by using the .stripped_strings generator instead:
for string in soup.stripped_strings:
print(repr(string))
# u"The Dormouse's story"
# u"The Dormouse's story"
# u'Once upon a time there were three little sisters; and their names were'
# u'Elsie'
# u','
# u'Lacie'
# u'and'
# u'Tillie'
# u';nand they lived at the bottom of a well.'
# u'...'
Here, strings consisting entirely of whitespace are ignored, and
whitespace at the beginning and end of strings is removed.
Going up
Continuing the «family tree» analogy, every tag and every string has a
parent: the tag that contains it.
.parent
You can access an element’s parent with the .parent attribute. In
the example «three sisters» document, the <head> tag is the parent
of the <title> tag:
title_tag = soup.title title_tag # <title>The Dormouse's story</title> title_tag.parent # <head><title>The Dormouse's story</title></head>
The title string itself has a parent: the <title> tag that contains
it:
title_tag.string.parent # <title>The Dormouse's story</title>
The parent of a top-level tag like <html> is the BeautifulSoup object
itself:
html_tag = soup.html type(html_tag.parent) # <class 'bs4.BeautifulSoup'>
And the .parent of a BeautifulSoup object is defined as None:
print(soup.parent) # None
.parents
You can iterate over all of an element’s parents with
.parents. This example uses .parents to travel from an <a> tag
buried deep within the document, to the very top of the document:
link = soup.a
link
# <a class="sister" href="http://example.com/elsie" id="link1">Elsie</a>
for parent in link.parents:
if parent is None:
print(parent)
else:
print(parent.name)
# p
# body
# html
# [document]
# None
Going sideways
Consider a simple document like this:
sibling_soup = BeautifulSoup("<a><b>text1</b><c>text2</c></b></a>")
print(sibling_soup.prettify())
# <html>
# <body>
# <a>
# <b>
# text1
# </b>
# <c>
# text2
# </c>
# </a>
# </body>
# </html>
The <b> tag and the <c> tag are at the same level: they’re both direct
children of the same tag. We call them siblings. When a document is
pretty-printed, siblings show up at the same indentation level. You
can also use this relationship in the code you write.
.next_sibling and .previous_sibling
You can use .next_sibling and .previous_sibling to navigate
between page elements that are on the same level of the parse tree:
sibling_soup.b.next_sibling # <c>text2</c> sibling_soup.c.previous_sibling # <b>text1</b>
The <b> tag has a .next_sibling, but no .previous_sibling,
because there’s nothing before the <b> tag on the same level of the
tree. For the same reason, the <c> tag has a .previous_sibling
but no .next_sibling:
print(sibling_soup.b.previous_sibling) # None print(sibling_soup.c.next_sibling) # None
The strings «text1» and «text2» are not siblings, because they don’t
have the same parent:
sibling_soup.b.string # u'text1' print(sibling_soup.b.string.next_sibling) # None
In real documents, the .next_sibling or .previous_sibling of a
tag will usually be a string containing whitespace. Going back to the
«three sisters» document:
<a href="http://example.com/elsie" class="sister" id="link1">Elsie</a> <a href="http://example.com/lacie" class="sister" id="link2">Lacie</a> <a href="http://example.com/tillie" class="sister" id="link3">Tillie</a>
You might think that the .next_sibling of the first <a> tag would
be the second <a> tag. But actually, it’s a string: the comma and
newline that separate the first <a> tag from the second:
link = soup.a link # <a class="sister" href="http://example.com/elsie" id="link1">Elsie</a> link.next_sibling # u',n'
The second <a> tag is actually the .next_sibling of the comma:
link.next_sibling.next_sibling # <a class="sister" href="http://example.com/lacie" id="link2">Lacie</a>
.next_siblings and .previous_siblings
You can iterate over a tag’s siblings with .next_siblings or
.previous_siblings:
for sibling in soup.a.next_siblings:
print(repr(sibling))
# u',n'
# <a class="sister" href="http://example.com/lacie" id="link2">Lacie</a>
# u' andn'
# <a class="sister" href="http://example.com/tillie" id="link3">Tillie</a>
# u'; and they lived at the bottom of a well.'
# None
for sibling in soup.find(id="link3").previous_siblings:
print(repr(sibling))
# ' andn'
# <a class="sister" href="http://example.com/lacie" id="link2">Lacie</a>
# u',n'
# <a class="sister" href="http://example.com/elsie" id="link1">Elsie</a>
# u'Once upon a time there were three little sisters; and their names weren'
# None
Going back and forth
Take a look at the beginning of the «three sisters» document:
<html><head><title>The Dormouse's story</title></head> <p class="title"><b>The Dormouse's story</b></p>
An HTML parser takes this string of characters and turns it into a
series of events: «open an <html> tag», «open a <head> tag», «open a
<title> tag», «add a string», «close the <title> tag», «open a <p>
tag», and so on. Beautiful Soup offers tools for reconstructing the
initial parse of the document.
.next_element and .previous_element
The .next_element attribute of a string or tag points to whatever
was parsed immediately afterwards. It might be the same as
.next_sibling, but it’s usually drastically different.
Here’s the final <a> tag in the «three sisters» document. Its
.next_sibling is a string: the conclusion of the sentence that was
interrupted by the start of the <a> tag.:
last_a_tag = soup.find("a", id="link3")
last_a_tag
# <a class="sister" href="http://example.com/tillie" id="link3">Tillie</a>
last_a_tag.next_sibling
# '; and they lived at the bottom of a well.'
But the .next_element of that <a> tag, the thing that was parsed
immediately after the <a> tag, is not the rest of that sentence:
it’s the word «Tillie»:
last_a_tag.next_element # u'Tillie'
That’s because in the original markup, the word «Tillie» appeared
before that semicolon. The parser encountered an <a> tag, then the
word «Tillie», then the closing </a> tag, then the semicolon and rest of
the sentence. The semicolon is on the same level as the <a> tag, but the
word «Tillie» was encountered first.
The .previous_element attribute is the exact opposite of
.next_element. It points to whatever element was parsed
immediately before this one:
last_a_tag.previous_element # u' andn' last_a_tag.previous_element.next_element # <a class="sister" href="http://example.com/tillie" id="link3">Tillie</a>
.next_elements and .previous_elements
You should get the idea by now. You can use these iterators to move
forward or backward in the document as it was parsed:
for element in last_a_tag.next_elements:
print(repr(element))
# u'Tillie'
# u';nand they lived at the bottom of a well.'
# u'nn'
# <p class="story">...</p>
# u'...'
# u'n'
# None
Searching the tree
Beautiful Soup defines a lot of methods for searching the parse tree,
but they’re all very similar. I’m going to spend a lot of time explaining
the two most popular methods: find() and find_all(). The other
methods take almost exactly the same arguments, so I’ll just cover
them briefly.
Once again, I’ll be using the «three sisters» document as an example:
html_doc = """ <html><head><title>The Dormouse's story</title></head> <p class="title"><b>The Dormouse's story</b></p> <p class="story">Once upon a time there were three little sisters; and their names were <a href="http://example.com/elsie" class="sister" id="link1">Elsie</a>, <a href="http://example.com/lacie" class="sister" id="link2">Lacie</a> and <a href="http://example.com/tillie" class="sister" id="link3">Tillie</a>; and they lived at the bottom of a well.</p> <p class="story">...</p> """ from bs4 import BeautifulSoup soup = BeautifulSoup(html_doc)
By passing in a filter to an argument like find_all(), you can
zoom in on the parts of the document you’re interested in.
Kinds of filters
Before talking in detail about find_all() and similar methods, I
want to show examples of different filters you can pass into these
methods. These filters show up again and again, throughout the
search API. You can use them to filter based on a tag’s name,
on its attributes, on the text of a string, or on some combination of
these.
A string
The simplest filter is a string. Pass a string to a search method and
Beautiful Soup will perform a match against that exact string. This
code finds all the <b> tags in the document:
soup.find_all('b')
# [<b>The Dormouse's story</b>]
If you pass in a byte string, Beautiful Soup will assume the string is
encoded as UTF-8. You can avoid this by passing in a Unicode string instead.
A regular expression
If you pass in a regular expression object, Beautiful Soup will filter
against that regular expression using its match() method. This code
finds all the tags whose names start with the letter «b»; in this
case, the <body> tag and the <b> tag:
import re
for tag in soup.find_all(re.compile("^b")):
print(tag.name)
# body
# b
This code finds all the tags whose names contain the letter ‘t’:
for tag in soup.find_all(re.compile("t")):
print(tag.name)
# html
# title
A list
If you pass in a list, Beautiful Soup will allow a string match
against any item in that list. This code finds all the <a> tags
and all the <b> tags:
soup.find_all(["a", "b"]) # [<b>The Dormouse's story</b>, # <a class="sister" href="http://example.com/elsie" id="link1">Elsie</a>, # <a class="sister" href="http://example.com/lacie" id="link2">Lacie</a>, # <a class="sister" href="http://example.com/tillie" id="link3">Tillie</a>]
True
The value True matches everything it can. This code finds all
the tags in the document, but none of the text strings:
for tag in soup.find_all(True):
print(tag.name)
# html
# head
# title
# body
# p
# b
# p
# a
# a
# a
# p
A function
If none of the other matches work for you, define a function that
takes an element as its only argument. The function should return
True if the argument matches, and False otherwise.
Here’s a function that returns True if a tag defines the «class»
attribute but doesn’t define the «id» attribute:
def has_class_but_no_id(tag):
return tag.has_attr('class') and not tag.has_attr('id')
Pass this function into find_all() and you’ll pick up all the <p>
tags:
soup.find_all(has_class_but_no_id) # [<p class="title"><b>The Dormouse's story</b></p>, # <p class="story">Once upon a time there were...</p>, # <p class="story">...</p>]
This function only picks up the <p> tags. It doesn’t pick up the <a>
tags, because those tags define both «class» and «id». It doesn’t pick
up tags like <html> and <title>, because those tags don’t define
«class».
Here’s a function that returns True if a tag is surrounded by
string objects:
from bs4 import NavigableString
def surrounded_by_strings(tag):
return (isinstance(tag.next_element, NavigableString)
and isinstance(tag.previous_element, NavigableString))
for tag in soup.find_all(surrounded_by_strings):
print tag.name
# p
# a
# a
# a
# p
Now we’re ready to look at the search methods in detail.
find_all()
Signature: find_all(:ref:`name <name>`, :ref:`attrs <attrs>`, :ref:`recursive
<recursive>`, :ref:`text <text>`, :ref:`limit <limit>`, :ref:`**kwargs <kwargs>`)
The find_all() method looks through a tag’s descendants and
retrieves all descendants that match your filters. I gave several
examples in Kinds of filters, but here are a few more:
soup.find_all("title")
# [<title>The Dormouse's story</title>]
soup.find_all("p", "title")
# [<p class="title"><b>The Dormouse's story</b></p>]
soup.find_all("a")
# [<a class="sister" href="http://example.com/elsie" id="link1">Elsie</a>,
# <a class="sister" href="http://example.com/lacie" id="link2">Lacie</a>,
# <a class="sister" href="http://example.com/tillie" id="link3">Tillie</a>]
soup.find_all(id="link2")
# [<a class="sister" href="http://example.com/lacie" id="link2">Lacie</a>]
import re
soup.find(text=re.compile("sisters"))
# u'Once upon a time there were three little sisters; and their names weren'
Some of these should look familiar, but others are new. What does it
mean to pass in a value for text, or id? Why does
find_all("p", "title") find a <p> tag with the CSS class «title»?
Let’s look at the arguments to find_all().
The name argument
Pass in a value for name and you’ll tell Beautiful Soup to only
consider tags with certain names. Text strings will be ignored, as
will tags whose names that don’t match.
This is the simplest usage:
soup.find_all("title")
# [<title>The Dormouse's story</title>]
Recall from Kinds of filters that the value to name can be a
string, a regular expression, a list, a function, or the value
True.
The keyword arguments
Any argument that’s not recognized will be turned into a filter on one
of a tag’s attributes. If you pass in a value for an argument called id,
Beautiful Soup will filter against each tag’s ‘id’ attribute:
soup.find_all(id='link2') # [<a class="sister" href="http://example.com/lacie" id="link2">Lacie</a>]
If you pass in a value for href, Beautiful Soup will filter
against each tag’s ‘href’ attribute:
soup.find_all(href=re.compile("elsie"))
# [<a class="sister" href="http://example.com/elsie" id="link1">Elsie</a>]
You can filter an attribute based on a string, a regular
expression, a list, a function, or the value True.
This code finds all tags whose id attribute has a value,
regardless of what the value is:
soup.find_all(id=True) # [<a class="sister" href="http://example.com/elsie" id="link1">Elsie</a>, # <a class="sister" href="http://example.com/lacie" id="link2">Lacie</a>, # <a class="sister" href="http://example.com/tillie" id="link3">Tillie</a>]
You can filter multiple attributes at once by passing in more than one
keyword argument:
soup.find_all(href=re.compile("elsie"), id='link1')
# [<a class="sister" href="http://example.com/elsie" id="link1">three</a>]
Some attributes, like the data-* attributes in HTML 5, have names that
can’t be used as the names of keyword arguments:
data_soup = BeautifulSoup('<div data-foo="value">foo!</div>')
data_soup.find_all(data-foo="value")
# SyntaxError: keyword can't be an expression
You can use these attributes in searches by putting them into a
dictionary and passing the dictionary into find_all() as the
attrs argument:
data_soup.find_all(attrs={"data-foo": "value"})
# [<div data-foo="value">foo!</div>]
Searching by CSS class
It’s very useful to search for a tag that has a certain CSS class, but
the name of the CSS attribute, «class», is a reserved word in
Python. Using class as a keyword argument will give you a syntax
error. As of Beautiful Soup 4.1.2, you can search by CSS class using
the keyword argument class_:
soup.find_all("a", class_="sister")
# [<a class="sister" href="http://example.com/elsie" id="link1">Elsie</a>,
# <a class="sister" href="http://example.com/lacie" id="link2">Lacie</a>,
# <a class="sister" href="http://example.com/tillie" id="link3">Tillie</a>]
As with any keyword argument, you can pass class_ a string, a regular
expression, a function, or True:
soup.find_all(class_=re.compile("itl"))
# [<p class="title"><b>The Dormouse's story</b></p>]
def has_six_characters(css_class):
return css_class is not None and len(css_class) == 6
soup.find_all(class_=has_six_characters)
# [<a class="sister" href="http://example.com/elsie" id="link1">Elsie</a>,
# <a class="sister" href="http://example.com/lacie" id="link2">Lacie</a>,
# <a class="sister" href="http://example.com/tillie" id="link3">Tillie</a>]
:ref:`Remember <multivalue>` that a single tag can have multiple
values for its «class» attribute. When you search for a tag that
matches a certain CSS class, you’re matching against any of its CSS
classes:
css_soup = BeautifulSoup('<p class="body strikeout"></p>')
css_soup.find_all("p", class_="strikeout")
# [<p class="body strikeout"></p>]
css_soup.find_all("p", class_="body")
# [<p class="body strikeout"></p>]
You can also search for the exact string value of the class attribute:
css_soup.find_all("p", class_="body strikeout")
# [<p class="body strikeout"></p>]
But searching for variants of the string value won’t work:
css_soup.find_all("p", class_="strikeout body")
# []
If you want to search for tags that match two or more CSS classes, you
should use a CSS selector:
css_soup.select("p.strikeout.body")
# [<p class="body strikeout"></p>]
In older versions of Beautiful Soup, which don’t have the class_
shortcut, you can use the attrs trick mentioned above. Create a
dictionary whose value for «class» is the string (or regular
expression, or whatever) you want to search for:
soup.find_all("a", attrs={"class": "sister"})
# [<a class="sister" href="http://example.com/elsie" id="link1">Elsie</a>,
# <a class="sister" href="http://example.com/lacie" id="link2">Lacie</a>,
# <a class="sister" href="http://example.com/tillie" id="link3">Tillie</a>]
The text argument
With text you can search for strings instead of tags. As with
name and the keyword arguments, you can pass in a string, a
regular expression, a list, a function, or the value True.
Here are some examples:
soup.find_all(text="Elsie")
# [u'Elsie']
soup.find_all(text=["Tillie", "Elsie", "Lacie"])
# [u'Elsie', u'Lacie', u'Tillie']
soup.find_all(text=re.compile("Dormouse"))
[u"The Dormouse's story", u"The Dormouse's story"]
def is_the_only_string_within_a_tag(s):
"""Return True if this string is the only child of its parent tag."""
return (s == s.parent.string)
soup.find_all(text=is_the_only_string_within_a_tag)
# [u"The Dormouse's story", u"The Dormouse's story", u'Elsie', u'Lacie', u'Tillie', u'...']
Although text is for finding strings, you can combine it with
arguments that find tags: Beautiful Soup will find all tags whose
.string matches your value for text. This code finds the <a>
tags whose .string is «Elsie»:
soup.find_all("a", text="Elsie")
# [<a href="http://example.com/elsie" class="sister" id="link1">Elsie</a>]
The limit argument
find_all() returns all the tags and strings that match your
filters. This can take a while if the document is large. If you don’t
need all the results, you can pass in a number for limit. This
works just like the LIMIT keyword in SQL. It tells Beautiful Soup to
stop gathering results after it’s found a certain number.
There are three links in the «three sisters» document, but this code
only finds the first two:
soup.find_all("a", limit=2)
# [<a class="sister" href="http://example.com/elsie" id="link1">Elsie</a>,
# <a class="sister" href="http://example.com/lacie" id="link2">Lacie</a>]
The recursive argument
If you call mytag.find_all(), Beautiful Soup will examine all the
descendants of mytag: its children, its children’s children, and
so on. If you only want Beautiful Soup to consider direct children,
you can pass in recursive=False. See the difference here:
soup.html.find_all("title")
# [<title>The Dormouse's story</title>]
soup.html.find_all("title", recursive=False)
# []
Here’s that part of the document:
<html> <head> <title> The Dormouse's story </title> </head> ...
The <title> tag is beneath the <html> tag, but it’s not directly
beneath the <html> tag: the <head> tag is in the way. Beautiful Soup
finds the <title> tag when it’s allowed to look at all descendants of
the <html> tag, but when recursive=False restricts it to the
<html> tag’s immediate children, it finds nothing.
Beautiful Soup offers a lot of tree-searching methods (covered below),
and they mostly take the same arguments as find_all(): name,
attrs, text, limit, and the keyword arguments. But the
recursive argument is different: find_all() and find() are
the only methods that support it. Passing recursive=False into a
method like find_parents() wouldn’t be very useful.
Calling a tag is like calling find_all()
Because find_all() is the most popular method in the Beautiful
Soup search API, you can use a shortcut for it. If you treat the
BeautifulSoup object or a Tag object as though it were a
function, then it’s the same as calling find_all() on that
object. These two lines of code are equivalent:
soup.find_all("a")
soup("a")
These two lines are also equivalent:
soup.title.find_all(text=True) soup.title(text=True)
find()
Signature: find(:ref:`name <name>`, :ref:`attrs <attrs>`, :ref:`recursive
<recursive>`, :ref:`text <text>`, :ref:`**kwargs <kwargs>`)
The find_all() method scans the entire document looking for
results, but sometimes you only want to find one result. If you know a
document only has one <body> tag, it’s a waste of time to scan the
entire document looking for more. Rather than passing in limit=1
every time you call find_all, you can use the find()
method. These two lines of code are nearly equivalent:
soup.find_all('title', limit=1)
# [<title>The Dormouse's story</title>]
soup.find('title')
# <title>The Dormouse's story</title>
The only difference is that find_all() returns a list containing
the single result, and find() just returns the result.
If find_all() can’t find anything, it returns an empty list. If
find() can’t find anything, it returns None:
print(soup.find("nosuchtag"))
# None
Remember the soup.head.title trick from Navigating using tag
names? That trick works by repeatedly calling find():
soup.head.title
# <title>The Dormouse's story</title>
soup.find("head").find("title")
# <title>The Dormouse's story</title>
find_parents() and find_parent()
Signature: find_parents(:ref:`name <name>`, :ref:`attrs <attrs>`, :ref:`text <text>`, :ref:`limit <limit>`, :ref:`**kwargs <kwargs>`)
Signature: find_parent(:ref:`name <name>`, :ref:`attrs <attrs>`, :ref:`text <text>`, :ref:`**kwargs <kwargs>`)
I spent a lot of time above covering find_all() and
find(). The Beautiful Soup API defines ten other methods for
searching the tree, but don’t be afraid. Five of these methods are
basically the same as find_all(), and the other five are basically
the same as find(). The only differences are in what parts of the
tree they search.
First let’s consider find_parents() and
find_parent(). Remember that find_all() and find() work
their way down the tree, looking at tag’s descendants. These methods
do the opposite: they work their way up the tree, looking at a tag’s
(or a string’s) parents. Let’s try them out, starting from a string
buried deep in the «three daughters» document:
a_string = soup.find(text="Lacie")
a_string
# u'Lacie'
a_string.find_parents("a")
# [<a class="sister" href="http://example.com/lacie" id="link2">Lacie</a>]
a_string.find_parent("p")
# <p class="story">Once upon a time there were three little sisters; and their names were
# <a class="sister" href="http://example.com/elsie" id="link1">Elsie</a>,
# <a class="sister" href="http://example.com/lacie" id="link2">Lacie</a> and
# <a class="sister" href="http://example.com/tillie" id="link3">Tillie</a>;
# and they lived at the bottom of a well.</p>
a_string.find_parents("p", class="title")
# []
One of the three <a> tags is the direct parent of the string in
question, so our search finds it. One of the three <p> tags is an
indirect parent of the string, and our search finds that as
well. There’s a <p> tag with the CSS class «title» somewhere in the
document, but it’s not one of this string’s parents, so we can’t find
it with find_parents().
You may have made the connection between find_parent() and
find_parents(), and the .parent and .parents attributes
mentioned earlier. The connection is very strong. These search methods
actually use .parents to iterate over all the parents, and check
each one against the provided filter to see if it matches.
find_next_siblings() and find_next_sibling()
Signature: find_next_siblings(:ref:`name <name>`, :ref:`attrs <attrs>`, :ref:`text <text>`, :ref:`limit <limit>`, :ref:`**kwargs <kwargs>`)
Signature: find_next_sibling(:ref:`name <name>`, :ref:`attrs <attrs>`, :ref:`text <text>`, :ref:`**kwargs <kwargs>`)
These methods use :ref:`.next_siblings <sibling-generators>` to
iterate over the rest of an element’s siblings in the tree. The
find_next_siblings() method returns all the siblings that match,
and find_next_sibling() only returns the first one:
first_link = soup.a
first_link
# <a class="sister" href="http://example.com/elsie" id="link1">Elsie</a>
first_link.find_next_siblings("a")
# [<a class="sister" href="http://example.com/lacie" id="link2">Lacie</a>,
# <a class="sister" href="http://example.com/tillie" id="link3">Tillie</a>]
first_story_paragraph = soup.find("p", "story")
first_story_paragraph.find_next_sibling("p")
# <p class="story">...</p>
find_previous_siblings() and find_previous_sibling()
Signature: find_previous_siblings(:ref:`name <name>`, :ref:`attrs <attrs>`, :ref:`text <text>`, :ref:`limit <limit>`, :ref:`**kwargs <kwargs>`)
Signature: find_previous_sibling(:ref:`name <name>`, :ref:`attrs <attrs>`, :ref:`text <text>`, :ref:`**kwargs <kwargs>`)
These methods use :ref:`.previous_siblings <sibling-generators>` to iterate over an element’s
siblings that precede it in the tree. The find_previous_siblings()
method returns all the siblings that match, and
find_previous_sibling() only returns the first one:
last_link = soup.find("a", id="link3")
last_link
# <a class="sister" href="http://example.com/tillie" id="link3">Tillie</a>
last_link.find_previous_siblings("a")
# [<a class="sister" href="http://example.com/lacie" id="link2">Lacie</a>,
# <a class="sister" href="http://example.com/elsie" id="link1">Elsie</a>]
first_story_paragraph = soup.find("p", "story")
first_story_paragraph.find_previous_sibling("p")
# <p class="title"><b>The Dormouse's story</b></p>
find_all_next() and find_next()
Signature: find_all_next(:ref:`name <name>`, :ref:`attrs <attrs>`, :ref:`text <text>`, :ref:`limit <limit>`, :ref:`**kwargs <kwargs>`)
Signature: find_next(:ref:`name <name>`, :ref:`attrs <attrs>`, :ref:`text <text>`, :ref:`**kwargs <kwargs>`)
These methods use :ref:`.next_elements <element-generators>` to
iterate over whatever tags and strings that come after it in the
document. The find_all_next() method returns all matches, and
find_next() only returns the first match:
first_link = soup.a
first_link
# <a class="sister" href="http://example.com/elsie" id="link1">Elsie</a>
first_link.find_all_next(text=True)
# [u'Elsie', u',n', u'Lacie', u' andn', u'Tillie',
# u';nand they lived at the bottom of a well.', u'nn', u'...', u'n']
first_link.find_next("p")
# <p class="story">...</p>
In the first example, the string «Elsie» showed up, even though it was
contained within the <a> tag we started from. In the second example,
the last <p> tag in the document showed up, even though it’s not in
the same part of the tree as the <a> tag we started from. For these
methods, all that matters is that an element match the filter, and
show up later in the document than the starting element.
find_all_previous() and find_previous()
Signature: find_all_previous(:ref:`name <name>`, :ref:`attrs <attrs>`, :ref:`text <text>`, :ref:`limit <limit>`, :ref:`**kwargs <kwargs>`)
Signature: find_previous(:ref:`name <name>`, :ref:`attrs <attrs>`, :ref:`text <text>`, :ref:`**kwargs <kwargs>`)
These methods use :ref:`.previous_elements <element-generators>` to
iterate over the tags and strings that came before it in the
document. The find_all_previous() method returns all matches, and
find_previous() only returns the first match:
first_link = soup.a
first_link
# <a class="sister" href="http://example.com/elsie" id="link1">Elsie</a>
first_link.find_all_previous("p")
# [<p class="story">Once upon a time there were three little sisters; ...</p>,
# <p class="title"><b>The Dormouse's story</b></p>]
first_link.find_previous("title")
# <title>The Dormouse's story</title>
The call to find_all_previous("p") found the first paragraph in
the document (the one with class=»title»), but it also finds the
second paragraph, the <p> tag that contains the <a> tag we started
with. This shouldn’t be too surprising: we’re looking at all the tags
that show up earlier in the document than the one we started with. A
<p> tag that contains an <a> tag must have shown up before the <a>
tag it contains.
CSS selectors
Beautiful Soup supports the most commonly-used CSS selectors. Just pass a string into
the .select() method of a Tag object or the BeautifulSoup
object itself.
You can find tags:
soup.select("title")
# [<title>The Dormouse's story</title>]
soup.select("p nth-of-type(3)")
# [<p class="story">...</p>]
Find tags beneath other tags:
soup.select("body a")
# [<a class="sister" href="http://example.com/elsie" id="link1">Elsie</a>,
# <a class="sister" href="http://example.com/lacie" id="link2">Lacie</a>,
# <a class="sister" href="http://example.com/tillie" id="link3">Tillie</a>]
soup.select("html head title")
# [<title>The Dormouse's story</title>]
Find tags directly beneath other tags:
soup.select("head > title")
# [<title>The Dormouse's story</title>]
soup.select("p > a")
# [<a class="sister" href="http://example.com/elsie" id="link1">Elsie</a>,
# <a class="sister" href="http://example.com/lacie" id="link2">Lacie</a>,
# <a class="sister" href="http://example.com/tillie" id="link3">Tillie</a>]
soup.select("p > a:nth-of-type(2)")
# [<a class="sister" href="http://example.com/lacie" id="link2">Lacie</a>]
soup.select("p > #link1")
# [<a class="sister" href="http://example.com/elsie" id="link1">Elsie</a>]
soup.select("body > a")
# []
Find the siblings of tags:
soup.select("#link1 ~ .sister")
# [<a class="sister" href="http://example.com/lacie" id="link2">Lacie</a>,
# <a class="sister" href="http://example.com/tillie" id="link3">Tillie</a>]
soup.select("#link1 + .sister")
# [<a class="sister" href="http://example.com/lacie" id="link2">Lacie</a>]
Find tags by CSS class:
soup.select(".sister")
# [<a class="sister" href="http://example.com/elsie" id="link1">Elsie</a>,
# <a class="sister" href="http://example.com/lacie" id="link2">Lacie</a>,
# <a class="sister" href="http://example.com/tillie" id="link3">Tillie</a>]
soup.select("[class~=sister]")
# [<a class="sister" href="http://example.com/elsie" id="link1">Elsie</a>,
# <a class="sister" href="http://example.com/lacie" id="link2">Lacie</a>,
# <a class="sister" href="http://example.com/tillie" id="link3">Tillie</a>]
Find tags by ID:
soup.select("#link1")
# [<a class="sister" href="http://example.com/elsie" id="link1">Elsie</a>]
soup.select("a#link2")
# [<a class="sister" href="http://example.com/lacie" id="link2">Lacie</a>]
Test for the existence of an attribute:
soup.select('a[href]')
# [<a class="sister" href="http://example.com/elsie" id="link1">Elsie</a>,
# <a class="sister" href="http://example.com/lacie" id="link2">Lacie</a>,
# <a class="sister" href="http://example.com/tillie" id="link3">Tillie</a>]
Find tags by attribute value:
soup.select('a[href="http://example.com/elsie"]')
# [<a class="sister" href="http://example.com/elsie" id="link1">Elsie</a>]
soup.select('a[href^="http://example.com/"]')
# [<a class="sister" href="http://example.com/elsie" id="link1">Elsie</a>,
# <a class="sister" href="http://example.com/lacie" id="link2">Lacie</a>,
# <a class="sister" href="http://example.com/tillie" id="link3">Tillie</a>]
soup.select('a[href$="tillie"]')
# [<a class="sister" href="http://example.com/tillie" id="link3">Tillie</a>]
soup.select('a[href*=".com/el"]')
# [<a class="sister" href="http://example.com/elsie" id="link1">Elsie</a>]
Match language codes:
multilingual_markup = """
<p lang="en">Hello</p>
<p lang="en-us">Howdy, y'all</p>
<p lang="en-gb">Pip-pip, old fruit</p>
<p lang="fr">Bonjour mes amis</p>
"""
multilingual_soup = BeautifulSoup(multilingual_markup)
multilingual_soup.select('p[lang|=en]')
# [<p lang="en">Hello</p>,
# <p lang="en-us">Howdy, y'all</p>,
# <p lang="en-gb">Pip-pip, old fruit</p>]
This is a convenience for users who know the CSS selector syntax. You
can do all this stuff with the Beautiful Soup API. And if CSS
selectors are all you need, you might as well use lxml directly,
because it’s faster. But this lets you combine simple CSS selectors
with the Beautiful Soup API.
Modifying the tree
Beautiful Soup’s main strength is in searching the parse tree, but you
can also modify the tree and write your changes as a new HTML or XML
document.
Changing tag names and attributes
I covered this earlier, in Attributes, but it bears repeating. You
can rename a tag, change the values of its attributes, add new
attributes, and delete attributes:
soup = BeautifulSoup('<b class="boldest">Extremely bold</b>')
tag = soup.b
tag.name = "blockquote"
tag['class'] = 'verybold'
tag['id'] = 1
tag
# <blockquote class="verybold" id="1">Extremely bold</blockquote>
del tag['class']
del tag['id']
tag
# <blockquote>Extremely bold</blockquote>
Modifying .string
If you set a tag’s .string attribute, the tag’s contents are
replaced with the string you give:
markup = '<a href="http://example.com/">I linked to <i>example.com</i></a>' soup = BeautifulSoup(markup) tag = soup.a tag.string = "New link text." tag # <a href="http://example.com/">New link text.</a>
Be careful: if the tag contained other tags, they and all their
contents will be destroyed.
append()
You can add to a tag’s contents with Tag.append(). It works just
like calling .append() on a Python list:
soup = BeautifulSoup("<a>Foo</a>")
soup.a.append("Bar")
soup
# <html><head></head><body><a>FooBar</a></body></html>
soup.a.contents
# [u'Foo', u'Bar']
BeautifulSoup.new_string() and .new_tag()
If you need to add a string to a document, no problem—you can pass a
Python string in to append(), or you can call the factory method
BeautifulSoup.new_string():
soup = BeautifulSoup("<b></b>")
tag = soup.b
tag.append("Hello")
new_string = soup.new_string(" there")
tag.append(new_string)
tag
# <b>Hello there.</b>
tag.contents
# [u'Hello', u' there']
If you want to create a comment or some other subclass of
NavigableString, pass that class as the second argument to
new_string():
from bs4 import Comment
new_comment = soup.new_string("Nice to see you.", Comment)
tag.append(new_comment)
tag
# <b>Hello there<!--Nice to see you.--></b>
tag.contents
# [u'Hello', u' there', u'Nice to see you.']
(This is a new feature in Beautiful Soup 4.2.1.)
What if you need to create a whole new tag? The best solution is to
call the factory method BeautifulSoup.new_tag():
soup = BeautifulSoup("<b></b>")
original_tag = soup.b
new_tag = soup.new_tag("a", href="http://www.example.com")
original_tag.append(new_tag)
original_tag
# <b><a href="http://www.example.com"></a></b>
new_tag.string = "Link text."
original_tag
# <b><a href="http://www.example.com">Link text.</a></b>
Only the first argument, the tag name, is required.
insert()
Tag.insert() is just like Tag.append(), except the new element
doesn’t necessarily go at the end of its parent’s
.contents. It’ll be inserted at whatever numeric position you
say. It works just like .insert() on a Python list:
markup = '<a href="http://example.com/">I linked to <i>example.com</i></a>' soup = BeautifulSoup(markup) tag = soup.a tag.insert(1, "but did not endorse ") tag # <a href="http://example.com/">I linked to but did not endorse <i>example.com</i></a> tag.contents # [u'I linked to ', u'but did not endorse', <i>example.com</i>]
insert_before() and insert_after()
The insert_before() method inserts a tag or string immediately
before something else in the parse tree:
soup = BeautifulSoup("<b>stop</b>")
tag = soup.new_tag("i")
tag.string = "Don't"
soup.b.string.insert_before(tag)
soup.b
# <b><i>Don't</i>stop</b>
The insert_after() method moves a tag or string so that it
immediately follows something else in the parse tree:
soup.b.i.insert_after(soup.new_string(" ever "))
soup.b
# <b><i>Don't</i> ever stop</b>
soup.b.contents
# [<i>Don't</i>, u' ever ', u'stop']
clear()
Tag.clear() removes the contents of a tag:
markup = '<a href="http://example.com/">I linked to <i>example.com</i></a>' soup = BeautifulSoup(markup) tag = soup.a tag.clear() tag # <a href="http://example.com/"></a>
extract()
PageElement.extract() removes a tag or string from the tree. It
returns the tag or string that was extracted:
markup = '<a href="http://example.com/">I linked to <i>example.com</i></a>' soup = BeautifulSoup(markup) a_tag = soup.a i_tag = soup.i.extract() a_tag # <a href="http://example.com/">I linked to</a> i_tag # <i>example.com</i> print(i_tag.parent) None
At this point you effectively have two parse trees: one rooted at the
BeautifulSoup object you used to parse the document, and one rooted
at the tag that was extracted. You can go on to call extract on
a child of the element you extracted:
my_string = i_tag.string.extract() my_string # u'example.com' print(my_string.parent) # None i_tag # <i></i>
decompose()
Tag.decompose() removes a tag from the tree, then completely
destroys it and its contents:
markup = '<a href="http://example.com/">I linked to <i>example.com</i></a>' soup = BeautifulSoup(markup) a_tag = soup.a soup.i.decompose() a_tag # <a href="http://example.com/">I linked to</a>
replace_with()
PageElement.replace_with() removes a tag or string from the tree,
and replaces it with the tag or string of your choice:
markup = '<a href="http://example.com/">I linked to <i>example.com</i></a>'
soup = BeautifulSoup(markup)
a_tag = soup.a
new_tag = soup.new_tag("b")
new_tag.string = "example.net"
a_tag.i.replace_with(new_tag)
a_tag
# <a href="http://example.com/">I linked to <b>example.net</b></a>
replace_with() returns the tag or string that was replaced, so
that you can examine it or add it back to another part of the tree.
wrap()
PageElement.wrap() wraps an element in the tag you specify. It
returns the new wrapper:
soup = BeautifulSoup("<p>I wish I was bold.</p>")
soup.p.string.wrap(soup.new_tag("b"))
# <b>I wish I was bold.</b>
soup.p.wrap(soup.new_tag("div")
# <div><p><b>I wish I was bold.</b></p></div>
This method is new in Beautiful Soup 4.0.5.
unwrap()
Tag.unwrap() is the opposite of wrap(). It replaces a tag with
whatever’s inside that tag. It’s good for stripping out markup:
markup = '<a href="http://example.com/">I linked to <i>example.com</i></a>' soup = BeautifulSoup(markup) a_tag = soup.a a_tag.i.unwrap() a_tag # <a href="http://example.com/">I linked to example.com</a>
Like replace_with(), unwrap() returns the tag
that was replaced.
Output
Pretty-printing
The prettify() method will turn a Beautiful Soup parse tree into a
nicely formatted Unicode string, with each HTML/XML tag on its own line:
markup = '<a href="http://example.com/">I linked to <i>example.com</i></a>' soup = BeautifulSoup(markup) soup.prettify() # '<html>n <head>n </head>n <body>n <a href="http://example.com/">n...' print(soup.prettify()) # <html> # <head> # </head> # <body> # <a href="http://example.com/"> # I linked to # <i> # example.com # </i> # </a> # </body> # </html>
You can call prettify() on the top-level BeautifulSoup object,
or on any of its Tag objects:
print(soup.a.prettify()) # <a href="http://example.com/"> # I linked to # <i> # example.com # </i> # </a>
Non-pretty printing
If you just want a string, with no fancy formatting, you can call
unicode() or str() on a BeautifulSoup object, or a Tag
within it:
str(soup) # '<html><head></head><body><a href="http://example.com/">I linked to <i>example.com</i></a></body></html>' unicode(soup.a) # u'<a href="http://example.com/">I linked to <i>example.com</i></a>'
The str() function returns a string encoded in UTF-8. See
Encodings for other options.
You can also call encode() to get a bytestring, and decode()
to get Unicode.
Output formatters
If you give Beautiful Soup a document that contains HTML entities like
«&lquot;», they’ll be converted to Unicode characters:
soup = BeautifulSoup("“Dammit!” he said.")
unicode(soup)
# u'<html><head></head><body>u201cDammit!u201d he said.</body></html>'
If you then convert the document to a string, the Unicode characters
will be encoded as UTF-8. You won’t get the HTML entities back:
str(soup) # '<html><head></head><body>xe2x80x9cDammit!xe2x80x9d he said.</body></html>'
By default, the only characters that are escaped upon output are bare
ampersands and angle brackets. These get turned into «&», «<»,
and «>», so that Beautiful Soup doesn’t inadvertently generate
invalid HTML or XML:
soup = BeautifulSoup("<p>The law firm of Dewey, Cheatem, & Howe</p>")
soup.p
# <p>The law firm of Dewey, Cheatem, & Howe</p>
soup = BeautifulSoup('<a href="http://example.com/?foo=val1&bar=val2">A link</a>')
soup.a
# <a href="http://example.com/?foo=val1&bar=val2">A link</a>
You can change this behavior by providing a value for the
formatter argument to prettify(), encode(), or
decode(). Beautiful Soup recognizes four possible values for
formatter.
The default is formatter="minimal". Strings will only be processed
enough to ensure that Beautiful Soup generates valid HTML/XML:
french = "<p>Il a dit <<Sacré bleu!>></p>" soup = BeautifulSoup(french) print(soup.prettify(formatter="minimal")) # <html> # <body> # <p> # Il a dit <<Sacré bleu!>> # </p> # </body> # </html>
If you pass in formatter="html", Beautiful Soup will convert
Unicode characters to HTML entities whenever possible:
print(soup.prettify(formatter="html")) # <html> # <body> # <p> # Il a dit <<Sacré bleu!>> # </p> # </body> # </html>
If you pass in formatter=None, Beautiful Soup will not modify
strings at all on output. This is the fastest option, but it may lead
to Beautiful Soup generating invalid HTML/XML, as in these examples:
print(soup.prettify(formatter=None))
# <html>
# <body>
# <p>
# Il a dit <<Sacré bleu!>>
# </p>
# </body>
# </html>
link_soup = BeautifulSoup('<a href="http://example.com/?foo=val1&bar=val2">A link</a>')
print(link_soup.a.encode(formatter=None))
# <a href="http://example.com/?foo=val1&bar=val2">A link</a>
Finally, if you pass in a function for formatter, Beautiful Soup
will call that function once for every string and attribute value in
the document. You can do whatever you want in this function. Here’s a
formatter that converts strings to uppercase and does absolutely
nothing else:
def uppercase(str):
return str.upper()
print(soup.prettify(formatter=uppercase))
# <html>
# <body>
# <p>
# IL A DIT <<SACRÉ BLEU!>>
# </p>
# </body>
# </html>
print(link_soup.a.prettify(formatter=uppercase))
# <a href="HTTP://EXAMPLE.COM/?FOO=VAL1&BAR=VAL2">
# A LINK
# </a>
If you’re writing your own function, you should know about the
EntitySubstitution class in the bs4.dammit module. This class
implements Beautiful Soup’s standard formatters as class methods: the
«html» formatter is EntitySubstitution.substitute_html, and the
«minimal» formatter is EntitySubstitution.substitute_xml. You can
use these functions to simulate formatter=html or
formatter==minimal, but then do something extra.
Here’s an example that replaces Unicode characters with HTML entities
whenever possible, but also converts all strings to uppercase:
from bs4.dammit import EntitySubstitution
def uppercase_and_substitute_html_entities(str):
return EntitySubstitution.substitute_html(str.upper())
print(soup.prettify(formatter=uppercase_and_substitute_html_entities))
# <html>
# <body>
# <p>
# IL A DIT <<SACRÉ BLEU!>>
# </p>
# </body>
# </html>
One last caveat: if you create a CData object, the text inside
that object is always presented exactly as it appears, with no
formatting. Beautiful Soup will call the formatter method, just in
case you’ve written a custom method that counts all the strings in the
document or something, but it will ignore the return value:
from bs4.element import CData
soup = BeautifulSoup("<a></a>")
soup.a.string = CData("one < three")
print(soup.a.prettify(formatter="xml"))
# <a>
# <![CDATA[one < three]]>
# </a>
get_text()
If you only want the text part of a document or tag, you can use the
get_text() method. It returns all the text in a document or
beneath a tag, as a single Unicode string:
markup = '<a href="http://example.com/">nI linked to <i>example.com</i>n</a>' soup = BeautifulSoup(markup) soup.get_text() u'nI linked to example.comn' soup.i.get_text() u'example.com'
You can specify a string to be used to join the bits of text
together:
# soup.get_text("|")
u'nI linked to |example.com|n'
You can tell Beautiful Soup to strip whitespace from the beginning and
end of each bit of text:
# soup.get_text("|", strip=True)
u'I linked to|example.com'
But at that point you might want to use the :ref:`.stripped_strings <string-generators>`
generator instead, and process the text yourself:
[text for text in soup.stripped_strings] # [u'I linked to', u'example.com']
Specifying the parser to use
If you just need to parse some HTML, you can dump the markup into the
BeautifulSoup constructor, and it’ll probably be fine. Beautiful
Soup will pick a parser for you and parse the data. But there are a
few additional arguments you can pass in to the constructor to change
which parser is used.
The first argument to the BeautifulSoup constructor is a string or
an open filehandle—the markup you want parsed. The second argument is
how you’d like the markup parsed.
If you don’t specify anything, you’ll get the best HTML parser that’s
installed. Beautiful Soup ranks lxml’s parser as being the best, then
html5lib’s, then Python’s built-in parser. You can override this by
specifying one of the following:
- What type of markup you want to parse. Currently supported are
«html», «xml», and «html5». - The name of the parser library you want to use. Currently supported
options are «lxml», «html5lib», and «html.parser» (Python’s
built-in HTML parser).
The section Installing a parser contrasts the supported parsers.
If you don’t have an appropriate parser installed, Beautiful Soup will
ignore your request and pick a different parser. Right now, the only
supported XML parser is lxml. If you don’t have lxml installed, asking
for an XML parser won’t give you one, and asking for «lxml» won’t work
either.
Differences between parsers
Beautiful Soup presents the same interface to a number of different
parsers, but each parser is different. Different parsers will create
different parse trees from the same document. The biggest differences
are between the HTML parsers and the XML parsers. Here’s a short
document, parsed as HTML:
BeautifulSoup("<a><b /></a>")
# <html><head></head><body><a><b></b></a></body></html>
Since an empty <b /> tag is not valid HTML, the parser turns it into a
<b></b> tag pair.
Here’s the same document parsed as XML (running this requires that you
have lxml installed). Note that the empty <b /> tag is left alone, and
that the document is given an XML declaration instead of being put
into an <html> tag.:
BeautifulSoup("<a><b /></a>", "xml")
# <?xml version="1.0" encoding="utf-8"?>
# <a><b/></a>
There are also differences between HTML parsers. If you give Beautiful
Soup a perfectly-formed HTML document, these differences won’t
matter. One parser will be faster than another, but they’ll all give
you a data structure that looks exactly like the original HTML
document.
But if the document is not perfectly-formed, different parsers will
give different results. Here’s a short, invalid document parsed using
lxml’s HTML parser. Note that the dangling </p> tag is simply
ignored:
BeautifulSoup("<a></p>", "lxml")
# <html><body><a></a></body></html>
Here’s the same document parsed using html5lib:
BeautifulSoup("<a></p>", "html5lib")
# <html><head></head><body><a><p></p></a></body></html>
Instead of ignoring the dangling </p> tag, html5lib pairs it with an
opening <p> tag. This parser also adds an empty <head> tag to the
document.
Here’s the same document parsed with Python’s built-in HTML
parser:
BeautifulSoup("<a></p>", "html.parser")
# <a></a>
Like html5lib, this parser ignores the closing </p> tag. Unlike
html5lib, this parser makes no attempt to create a well-formed HTML
document by adding a <body> tag. Unlike lxml, it doesn’t even bother
to add an <html> tag.
Since the document «<a></p>» is invalid, none of these techniques is
the «correct» way to handle it. The html5lib parser uses techniques
that are part of the HTML5 standard, so it has the best claim on being
the «correct» way, but all three techniques are legitimate.
Differences between parsers can affect your script. If you’re planning
on distributing your script to other people, or running it on multiple
machines, you should specify a parser in the BeautifulSoup
constructor. That will reduce the chances that your users parse a
document differently from the way you parse it.
Encodings
Any HTML or XML document is written in a specific encoding like ASCII
or UTF-8. But when you load that document into Beautiful Soup, you’ll
discover it’s been converted to Unicode:
markup = "<h1>Sacrxc3xa9 bleu!</h1>" soup = BeautifulSoup(markup) soup.h1 # <h1>Sacré bleu!</h1> soup.h1.string # u'Sacrxe9 bleu!'
It’s not magic. (That sure would be nice.) Beautiful Soup uses a
sub-library called Unicode, Dammit to detect a document’s encoding
and convert it to Unicode. The autodetected encoding is available as
the .original_encoding attribute of the BeautifulSoup object:
soup.original_encoding 'utf-8'
Unicode, Dammit guesses correctly most of the time, but sometimes it
makes mistakes. Sometimes it guesses correctly, but only after a
byte-by-byte search of the document that takes a very long time. If
you happen to know a document’s encoding ahead of time, you can avoid
mistakes and delays by passing it to the BeautifulSoup constructor
as from_encoding.
Here’s a document written in ISO-8859-8. The document is so short that
Unicode, Dammit can’t get a good lock on it, and misidentifies it as
ISO-8859-7:
markup = b"<h1>xedxe5xecxf9</h1>" soup = BeautifulSoup(markup) soup.h1 <h1>νεμω</h1> soup.original_encoding 'ISO-8859-7'
We can fix this by passing in the correct from_encoding:
soup = BeautifulSoup(markup, from_encoding="iso-8859-8") soup.h1 <h1>םולש</h1> soup.original_encoding 'iso8859-8'
In rare cases (usually when a UTF-8 document contains text written in
a completely different encoding), the only way to get Unicode may be
to replace some characters with the special Unicode character
«REPLACEMENT CHARACTER» (U+FFFD, �). If Unicode, Dammit needs to do
this, it will set the .contains_replacement_characters attribute
to True on the UnicodeDammit or BeautifulSoup object. This
lets you know that the Unicode representation is not an exact
representation of the original—some data was lost. If a document
contains �, but .contains_replacement_characters is False,
you’ll know that the � was there originally (as it is in this
paragraph) and doesn’t stand in for missing data.
Output encoding
When you write out a document from Beautiful Soup, you get a UTF-8
document, even if the document wasn’t in UTF-8 to begin with. Here’s a
document written in the Latin-1 encoding:
markup = b''' <html> <head> <meta content="text/html; charset=ISO-Latin-1" http-equiv="Content-type" /> </head> <body> <p>Sacrxe9 bleu!</p> </body> </html> ''' soup = BeautifulSoup(markup) print(soup.prettify()) # <html> # <head> # <meta content="text/html; charset=utf-8" http-equiv="Content-type" /> # </head> # <body> # <p> # Sacré bleu! # </p> # </body> # </html>
Note that the <meta> tag has been rewritten to reflect the fact that
the document is now in UTF-8.
If you don’t want UTF-8, you can pass an encoding into prettify():
print(soup.prettify("latin-1"))
# <html>
# <head>
# <meta content="text/html; charset=latin-1" http-equiv="Content-type" />
# ...
You can also call encode() on the BeautifulSoup object, or any
element in the soup, just as if it were a Python string:
soup.p.encode("latin-1")
# '<p>Sacrxe9 bleu!</p>'
soup.p.encode("utf-8")
# '<p>Sacrxc3xa9 bleu!</p>'
Any characters that can’t be represented in your chosen encoding will
be converted into numeric XML entity references. Here’s a document
that includes the Unicode character SNOWMAN:
markup = u"<b>N{SNOWMAN}</b>"
snowman_soup = BeautifulSoup(markup)
tag = snowman_soup.b
The SNOWMAN character can be part of a UTF-8 document (it looks like
☃), but there’s no representation for that character in ISO-Latin-1 or
ASCII, so it’s converted into «☃» for those encodings:
print(tag.encode("utf-8"))
# <b>☃</b>
print tag.encode("latin-1")
# <b>☃</b>
print tag.encode("ascii")
# <b>☃</b>
Unicode, Dammit
You can use Unicode, Dammit without using Beautiful Soup. It’s useful
whenever you have data in an unknown encoding and you just want it to
become Unicode:
from bs4 import UnicodeDammit
dammit = UnicodeDammit("Sacrxc3xa9 bleu!")
print(dammit.unicode_markup)
# Sacré bleu!
dammit.original_encoding
# 'utf-8'
Unicode, Dammit’s guesses will get a lot more accurate if you install
the chardet or cchardet Python libraries. The more data you
give Unicode, Dammit, the more accurately it will guess. If you have
your own suspicions as to what the encoding might be, you can pass
them in as a list:
dammit = UnicodeDammit("Sacrxe9 bleu!", ["latin-1", "iso-8859-1"])
print(dammit.unicode_markup)
# Sacré bleu!
dammit.original_encoding
# 'latin-1'
Unicode, Dammit has two special features that Beautiful Soup doesn’t
use.
Smart quotes
You can use Unicode, Dammit to convert Microsoft smart quotes to HTML or XML
entities:
markup = b"<p>I just x93lovex94 Microsoft Wordx92s smart quotes</p>" UnicodeDammit(markup, ["windows-1252"], smart_quotes_to="html").unicode_markup # u'<p>I just “love” Microsoft Word’s smart quotes</p>' UnicodeDammit(markup, ["windows-1252"], smart_quotes_to="xml").unicode_markup # u'<p>I just “love” Microsoft Word’s smart quotes</p>'
You can also convert Microsoft smart quotes to ASCII quotes:
UnicodeDammit(markup, ["windows-1252"], smart_quotes_to="ascii").unicode_markup # u'<p>I just "love" Microsoft Word's smart quotes</p>'
Hopefully you’ll find this feature useful, but Beautiful Soup doesn’t
use it. Beautiful Soup prefers the default behavior, which is to
convert Microsoft smart quotes to Unicode characters along with
everything else:
UnicodeDammit(markup, ["windows-1252"]).unicode_markup # u'<p>I just u201cloveu201d Microsoft Wordu2019s smart quotes</p>'
Inconsistent encodings
Sometimes a document is mostly in UTF-8, but contains Windows-1252
characters such as (again) Microsoft smart quotes. This can happen
when a website includes data from multiple sources. You can use
UnicodeDammit.detwingle() to turn such a document into pure
UTF-8. Here’s a simple example:
snowmen = (u"N{SNOWMAN}" * 3)
quote = (u"N{LEFT DOUBLE QUOTATION MARK}I like snowmen!N{RIGHT DOUBLE QUOTATION MARK}")
doc = snowmen.encode("utf8") + quote.encode("windows_1252")
This document is a mess. The snowmen are in UTF-8 and the quotes are
in Windows-1252. You can display the snowmen or the quotes, but not
both:
print(doc)
# ☃☃☃�I like snowmen!�
print(doc.decode("windows-1252"))
# ☃☃☃“I like snowmen!”
Decoding the document as UTF-8 raises a UnicodeDecodeError, and
decoding it as Windows-1252 gives you gibberish. Fortunately,
UnicodeDammit.detwingle() will convert the string to pure UTF-8,
allowing you to decode it to Unicode and display the snowmen and quote
marks simultaneously:
new_doc = UnicodeDammit.detwingle(doc)
print(new_doc.decode("utf8"))
# ☃☃☃“I like snowmen!”
UnicodeDammit.detwingle() only knows how to handle Windows-1252
embedded in UTF-8 (or vice versa, I suppose), but this is the most
common case.
Note that you must know to call UnicodeDammit.detwingle() on your
data before passing it into BeautifulSoup or the UnicodeDammit
constructor. Beautiful Soup assumes that a document has a single
encoding, whatever it might be. If you pass it a document that
contains both UTF-8 and Windows-1252, it’s likely to think the whole
document is Windows-1252, and the document will come out looking like
` ☃☃☃“I like snowmen!”`.
UnicodeDammit.detwingle() is new in Beautiful Soup 4.1.0.
Parsing only part of a document
Let’s say you want to use Beautiful Soup look at a document’s <a>
tags. It’s a waste of time and memory to parse the entire document and
then go over it again looking for <a> tags. It would be much faster to
ignore everything that wasn’t an <a> tag in the first place. The
SoupStrainer class allows you to choose which parts of an incoming
document are parsed. You just create a SoupStrainer and pass it in
to the BeautifulSoup constructor as the parse_only argument.
(Note that this feature won’t work if you’re using the html5lib parser.
If you use html5lib, the whole document will be parsed, no
matter what. This is because html5lib constantly rearranges the parse
tree as it works, and if some part of the document didn’t actually
make it into the parse tree, it’ll crash. To avoid confusion, in the
examples below I’ll be forcing Beautiful Soup to use Python’s
built-in parser.)
SoupStrainer
The SoupStrainer class takes the same arguments as a typical
method from Searching the tree: :ref:`name <name>`, :ref:`attrs
<attrs>`, :ref:`text <text>`, and :ref:`**kwargs <kwargs>`. Here are
three SoupStrainer objects:
from bs4 import SoupStrainer
only_a_tags = SoupStrainer("a")
only_tags_with_id_link2 = SoupStrainer(id="link2")
def is_short_string(string):
return len(string) < 10
only_short_strings = SoupStrainer(text=is_short_string)
I’m going to bring back the «three sisters» document one more time,
and we’ll see what the document looks like when it’s parsed with these
three SoupStrainer objects:
html_doc = """ <html><head><title>The Dormouse's story</title></head> <p class="title"><b>The Dormouse's story</b></p> <p class="story">Once upon a time there were three little sisters; and their names were <a href="http://example.com/elsie" class="sister" id="link1">Elsie</a>, <a href="http://example.com/lacie" class="sister" id="link2">Lacie</a> and <a href="http://example.com/tillie" class="sister" id="link3">Tillie</a>; and they lived at the bottom of a well.</p> <p class="story">...</p> """ print(BeautifulSoup(html_doc, "html.parser", parse_only=only_a_tags).prettify()) # <a class="sister" href="http://example.com/elsie" id="link1"> # Elsie # </a> # <a class="sister" href="http://example.com/lacie" id="link2"> # Lacie # </a> # <a class="sister" href="http://example.com/tillie" id="link3"> # Tillie # </a> print(BeautifulSoup(html_doc, "html.parser", parse_only=only_tags_with_id_link2).prettify()) # <a class="sister" href="http://example.com/lacie" id="link2"> # Lacie # </a> print(BeautifulSoup(html_doc, "html.parser", parse_only=only_short_strings).prettify()) # Elsie # , # Lacie # and # Tillie # ... #
You can also pass a SoupStrainer into any of the methods covered
in Searching the tree. This probably isn’t terribly useful, but I
thought I’d mention it:
soup = BeautifulSoup(html_doc) soup.find_all(only_short_strings) # [u'nn', u'nn', u'Elsie', u',n', u'Lacie', u' andn', u'Tillie', # u'nn', u'...', u'n']
Troubleshooting
diagnose()
If you’re having trouble understanding what Beautiful Soup does to a
document, pass the document into the diagnose() function. (New in
Beautiful Soup 4.2.0.) Beautiful Soup will print out a report showing
you how different parsers handle the document, and tell you if you’re
missing a parser that Beautiful Soup could be using:
from bs4.diagnose import diagnose
data = open("bad.html").read()
diagnose(data)
# Diagnostic running on Beautiful Soup 4.2.0
# Python version 2.7.3 (default, Aug 1 2012, 05:16:07)
# I noticed that html5lib is not installed. Installing it may help.
# Found lxml version 2.3.2.0
#
# Trying to parse your data with html.parser
# Here's what html.parser did with the document:
# ...
Just looking at the output of diagnose() may show you how to solve the
problem. Even if not, you can paste the output of diagnose() when
asking for help.
Errors when parsing a document
There are two different kinds of parse errors. There are crashes,
where you feed a document to Beautiful Soup and it raises an
exception, usually an HTMLParser.HTMLParseError. And there is
unexpected behavior, where a Beautiful Soup parse tree looks a lot
different than the document used to create it.
Almost none of these problems turn out to be problems with Beautiful
Soup. This is not because Beautiful Soup is an amazingly well-written
piece of software. It’s because Beautiful Soup doesn’t include any
parsing code. Instead, it relies on external parsers. If one parser
isn’t working on a certain document, the best solution is to try a
different parser. See Installing a parser for details and a parser
comparison.
The most common parse errors are HTMLParser.HTMLParseError: and
malformed start tagHTMLParser.HTMLParseError: bad end. These are both generated by Python’s built-in HTML parser
tag
library, and the solution is to :ref:`install lxml or
html5lib. <parser-installation>`
The most common type of unexpected behavior is that you can’t find a
tag that you know is in the document. You saw it going in, but
find_all() returns [] or find() returns None. This is
another common problem with Python’s built-in HTML parser, which
sometimes skips tags it doesn’t understand. Again, the solution is to
:ref:`install lxml or html5lib. <parser-installation>`
Version mismatch problems
SyntaxError: Invalid syntax(on the lineROOT_TAG_NAME =): Caused by running the Python 2 version of
u'[document]'
Beautiful Soup under Python 3, without converting the code.ImportError: No module named HTMLParser— Caused by running the
Python 2 version of Beautiful Soup under Python 3.ImportError: No module named html.parser— Caused by running the
Python 3 version of Beautiful Soup under Python 2.ImportError: No module named BeautifulSoup— Caused by running
Beautiful Soup 3 code on a system that doesn’t have BS3
installed. Or, by writing Beautiful Soup 4 code without knowing that
the package name has changed tobs4.ImportError: No module named bs4— Caused by running Beautiful
Soup 4 code on a system that doesn’t have BS4 installed.
Parsing XML
By default, Beautiful Soup parses documents as HTML. To parse a
document as XML, pass in «xml» as the second argument to the
BeautifulSoup constructor:
soup = BeautifulSoup(markup, "xml")
You’ll need to :ref:`have lxml installed <parser-installation>`.
Other parser problems
- If your script works on one computer but not another, it’s probably
because the two computers have different parser libraries
available. For example, you may have developed the script on a
computer that has lxml installed, and then tried to run it on a
computer that only has html5lib installed. See Differences between
parsers for why this matters, and fix the problem by mentioning a
specific parser library in theBeautifulSoupconstructor. - Because HTML tags and attributes are case-insensitive, all three HTML
parsers convert tag and attribute names to lowercase. That is, the
markup <TAG></TAG> is converted to <tag></tag>. If you want to
preserve mixed-case or uppercase tags and attributes, you’ll need to
:ref:`parse the document as XML. <parsing-xml>`
Miscellaneous
UnicodeEncodeError: 'charmap' codec can't encode character(or just about any other
u'xfoo' in position bar
UnicodeEncodeError) — This is not a problem with Beautiful Soup.
This problem shows up in two main situations. First, when you try to
print a Unicode character that your console doesn’t know how to
display. (See this page on the Python wiki for help.) Second, when
you’re writing to a file and you pass in a Unicode character that’s
not supported by your default encoding. In this case, the simplest
solution is to explicitly encode the Unicode string into UTF-8 with
u.encode("utf8").KeyError: [attr]— Caused by accessingtag['attr']when the
tag in question doesn’t define theattrattribute. The most
common errors areKeyError: 'href'andKeyError:. Use
'class'tag.get('attr')if you’re not sureattris
defined, just as you would with a Python dictionary.AttributeError: 'ResultSet' object has no attribute 'foo'— This
usually happens because you expectedfind_all()to return a
single tag or string. Butfind_all()returns a _list_ of tags
and strings—aResultSetobject. You need to iterate over the
list and look at the.fooof each one. Or, if you really only
want one result, you need to usefind()instead of
find_all().AttributeError: 'NoneType' object has no attribute 'foo'— This
usually happens because you calledfind()and then tried to
access the .foo` attribute of the result. But in your case,
find()didn’t find anything, so it returnedNone, instead of
returning a tag or a string. You need to figure out why your
find()call isn’t returning anything.
Improving Performance
Beautiful Soup will never be as fast as the parsers it sits on top
of. If response time is critical, if you’re paying for computer time
by the hour, or if there’s any other reason why computer time is more
valuable than programmer time, you should forget about Beautiful Soup
and work directly atop lxml.
That said, there are things you can do to speed up Beautiful Soup. If
you’re not using lxml as the underlying parser, my advice is to
:ref:`start <parser-installation>`. Beautiful Soup parses documents
significantly faster using lxml than using html.parser or html5lib.
You can speed up encoding detection significantly by installing the
cchardet library.
Parsing only part of a document won’t save you much time parsing
the document, but it can save a lot of memory, and it’ll make
searching the document much faster.
Beautiful Soup 3
Beautiful Soup 3 is the previous release series, and is no longer
being actively developed. It’s currently packaged with all major Linux
distributions:
$ apt-get install python-beautifulsoup
It’s also published through PyPi as BeautifulSoup.:
$ easy_install BeautifulSoup
$ pip install BeautifulSoup
You can also download a tarball of Beautiful Soup 3.2.0.
If you ran easy_install beautifulsoup or easy_install, but your code doesn’t work, you installed Beautiful
BeautifulSoup
Soup 3 by mistake. You need to run easy_install beautifulsoup4.
The documentation for Beautiful Soup 3 is archived online. If
your first language is Chinese, it might be easier for you to read
the Chinese translation of the Beautiful Soup 3 documentation,
then read this document to find out about the changes made in
Beautiful Soup 4.
Porting code to BS4
Most code written against Beautiful Soup 3 will work against Beautiful
Soup 4 with one simple change. All you should have to do is change the
package name from BeautifulSoup to bs4. So this:
from BeautifulSoup import BeautifulSoup
becomes this:
from bs4 import BeautifulSoup
- If you get the
ImportError«No module named BeautifulSoup», your
problem is that you’re trying to run Beautiful Soup 3 code, but you
only have Beautiful Soup 4 installed. - If you get the
ImportError«No module named bs4», your problem
is that you’re trying to run Beautiful Soup 4 code, but you only
have Beautiful Soup 3 installed.
Although BS4 is mostly backwards-compatible with BS3, most of its
methods have been deprecated and given new names for PEP 8 compliance. There are numerous other
renames and changes, and a few of them break backwards compatibility.
Here’s what you’ll need to know to convert your BS3 code and habits to BS4:
You need a parser
Beautiful Soup 3 used Python’s SGMLParser, a module that was
deprecated and removed in Python 3.0. Beautiful Soup 4 uses
html.parser by default, but you can plug in lxml or html5lib and
use that instead. See Installing a parser for a comparison.
Since html.parser is not the same parser as SGMLParser, it
will treat invalid markup differently. Usually the «difference» is
that html.parser crashes. In that case, you’ll need to install
another parser. But sometimes html.parser just creates a different
parse tree than SGMLParser would. If this happens, you may need to
update your BS3 scraping code to deal with the new tree.
Method names
renderContents->encode_contentsreplaceWith->replace_withreplaceWithChildren->unwrapfindAll->find_allfindAllNext->find_all_nextfindAllPrevious->find_all_previousfindNext->find_nextfindNextSibling->find_next_siblingfindNextSiblings->find_next_siblingsfindParent->find_parentfindParents->find_parentsfindPrevious->find_previousfindPreviousSibling->find_previous_siblingfindPreviousSiblings->find_previous_siblingsnextSibling->next_siblingpreviousSibling->previous_sibling
Some arguments to the Beautiful Soup constructor were renamed for the
same reasons:
BeautifulSoup(parseOnlyThese=...)->BeautifulSoup(parse_only=...)BeautifulSoup(fromEncoding=...)->BeautifulSoup(from_encoding=...)
I renamed one method for compatibility with Python 3:
Tag.has_key()->Tag.has_attr()
I renamed one attribute to use more accurate terminology:
Tag.isSelfClosing->Tag.is_empty_element
I renamed three attributes to avoid using words that have special
meaning to Python. Unlike the others, these changes are not backwards
compatible. If you used these attributes in BS3, your code will break
on BS4 until you change them.
UnicodeDammit.unicode->UnicodeDammit.unicode_markupTag.next->Tag.next_elementTag.previous->Tag.previous_element
Generators
I gave the generators PEP 8-compliant names, and transformed them into
properties:
childGenerator()->childrennextGenerator()->next_elementsnextSiblingGenerator()->next_siblingspreviousGenerator()->previous_elementspreviousSiblingGenerator()->previous_siblingsrecursiveChildGenerator()->descendantsparentGenerator()->parents
So instead of this:
for parent in tag.parentGenerator():
    ...
You can write this:
for parent in tag.parents:
    ...
(But the old code will still work.)
Some of the generators used to yield None after they were done, and
then stop. That was a bug. Now the generators just stop.
There are two new generators, :ref:`.strings and
.stripped_strings <string-generators>`. .strings yields
NavigableString objects, and .stripped_strings yields Python
strings that have had whitespace stripped.
XML
There is no longer a BeautifulStoneSoup class for parsing XML. To
parse XML you pass in «xml» as the second argument to the
BeautifulSoup constructor. For the same reason, the
BeautifulSoup constructor no longer recognizes the isHTML
argument.
Beautiful Soup’s handling of empty-element XML tags has been
improved. Previously when you parsed XML you had to explicitly say
which tags were considered empty-element tags. The selfClosingTags
argument to the constructor is no longer recognized. Instead,
Beautiful Soup considers any empty tag to be an empty-element tag. If
you add a child to an empty-element tag, it stops being an
empty-element tag.
Entities
An incoming HTML or XML entity is always converted into the
corresponding Unicode character. Beautiful Soup 3 had a number of
overlapping ways of dealing with entities, which have been
removed. The BeautifulSoup constructor no longer recognizes the
smartQuotesTo or convertEntities arguments. (Unicode,
Dammit still has smart_quotes_to, but its default is now to turn
smart quotes into Unicode.) The constants HTML_ENTITIES,
XML_ENTITIES, and XHTML_ENTITIES have been removed, since they
configure a feature (transforming some but not all entities into
Unicode characters) that no longer exists.
If you want to turn Unicode characters back into HTML entities on
output, rather than turning them into UTF-8 characters, you need to
use an :ref:`output formatter <output_formatters>`.
Miscellaneous
:ref:`Tag.string <.string>` now operates recursively. If tag A
contains a single tag B and nothing else, then A.string is the same as
B.string. (Previously, it was None.)
Multi-valued attributes like class have lists of strings as
their values, not strings. This may affect the way you search by CSS
class.
If you pass one of the find* methods both :ref:`text <text>` and
a tag-specific argument like :ref:`name <name>`, Beautiful Soup will
search for tags that match your tag-specific criteria and whose
:ref:`Tag.string <.string>` matches your value for :ref:`text
<text>`. It will not find the strings themselves. Previously,
Beautiful Soup ignored the tag-specific arguments and looked for
strings.
The BeautifulSoup constructor no longer recognizes the
markupMassage argument. It’s now the parser’s responsibility to
handle markup correctly.
The rarely-used alternate parser classes like
ICantBelieveItsBeautifulSoup and BeautifulSOAP have been
removed. It’s now the parser’s decision how to handle ambiguous
markup.
The prettify() method now returns a Unicode string, not a bytestring.
If you’re using a recent version of Debian or Ubuntu Linux, you can
install Beautiful Soup with the system package manager:
$ apt-get install python-bs4
Beautiful Soup 4 is published through PyPi, so if you can’t install it
with the system packager, you can install it with easy_install or
pip. The package name is beautifulsoup4, and the same package
works on Python 2 and Python 3.
$ easy_install beautifulsoup4
$ pip install beautifulsoup4
(The BeautifulSoup package is probably not what you want. That’s
the previous major release, Beautiful Soup 3.
Lots of software uses
BS3, so it’s still available, but if you’re writing new code you
should install beautifulsoup4.)
If you don’t have easy_install or pip installed, you can
download the Beautiful Soup 4 source tarball and
install it with setup.py.
$ python setup.py install
If all else fails, the license for Beautiful Soup allows you to
package the entire library with your application. You can download the
tarball, copy its bs4 directory into your application’s codebase,
and use Beautiful Soup without installing it at all.
I use Python 2.7 and Python 3.2 to develop Beautiful Soup, but it
should work with other recent versions.
2.1. Problems after installation
Beautiful Soup is packaged as Python 2 code. When you install it for
use with Python 3, it’s automatically converted to Python 3 code. If
you don’t install the package, the code won’t be converted. There have
also been reports on Windows machines of the wrong version being
installed.
If you get the ImportError “No module named HTMLParser”, your
problem is that you’re running the Python 2 version of the code under
Python 3.
If you get the ImportError “No module named html.parser”, your
problem is that you’re running the Python 3 version of the code under
Python 2.
In both cases, your best bet is to completely remove the Beautiful
Soup installation from your system (including any directory created
when you unzipped the tarball) and try the installation again.
If you get the SyntaxError “Invalid syntax” on the line
ROOT_TAG_NAME = u'[document]', you need to convert the Python 2
code to Python 3. You can do this either by installing the package:
$ python3 setup.py install
or by manually running Python’s 2to3 conversion script on the
bs4 directory:
$ 2to3-3.2 -w bs4
2.2. Installing a parser
Beautiful Soup supports the HTML parser included in Python’s standard
library, but it also supports a number of third-party Python parsers.
One is the lxml parser. Depending on your setup,
you might install lxml with one of these commands:
$ apt-get install python-lxml
$ easy_install lxml
$ pip install lxml
Another alternative is the pure-Python html5lib parser, which parses HTML the way a
web browser does. Depending on your setup, you might install html5lib
with one of these commands:
$ apt-get install python-html5lib
$ easy_install html5lib
$ pip install html5lib
This table summarizes the advantages and disadvantages of each parser library:
| Parser | Typical usage | Advantages | Disadvantages |
| Python’s html.parser | BeautifulSoup(markup, "html.parser") |
|
|
| lxml’s HTML parser | BeautifulSoup(markup, "lxml") |
|
|
| lxml’s XML parser | BeautifulSoup(markup, ["lxml", "xml"])BeautifulSoup(markup, "xml") |
|
|
| html5lib | BeautifulSoup(markup, "html5lib") |
|
|
If you can, I recommend you install and use lxml for speed. If you’re
using a version of Python 2 earlier than 2.7.3, or a version of Python
3 earlier than 3.2.2, it’s essential that you install lxml or
html5lib–Python’s built-in HTML parser is just not very good in older
versions.
Note that if a document is invalid, different parsers will generate
different Beautiful Soup trees for it. See Differences between parsers for details.
Summary: To install BeautifulSoup in WIndows use the command: pip install beautifulsoup4. To install it in Linux use the command: sudo apt-get install python3-bs4.
Aim: In this tutorial we will discuss how to to install BeautifulSoup?
Since BeautifulSoup is not a Python standard library we need to install it before we can use it to scrape websites. Hence, we will have a look at the steps to install the BeautifulSoup 4 package (also called bs4) and also discuss some of the problems that come up after the installation.
Note: The current release is Beautiful Soup 4.9.3 (October 3, 2020).
❂ Installing BeautifulSoup In Linux Machine
❖ Platform: Debian or Ubuntu
If you are using Python in a Debian or Ubuntu-based OS, you need to install Beautiful Soup with the help of the system package manager using the following command:
✻ For Python 2.x
$sudo apt-get install python-bs4
✻ For Python 3.x
$sudo apt-get install python3-bs4
In case you do not want to use the system package manager, you can use easy_install or pip to install bs4.
✻ Command to install bs4 using easy_install:
$easy_install beautifulsoup4
✻ Command to install bs4 using pip:
$pip install beautifulsoup4
# Note: If you are using Python3, you might need to install easy_install3 or pip3 respectively before you can use them.
❖ Platform: Windows
Installing bs4 in Windows is a one step process and is very easy. Use the following command to install it using your command line interface.
pip install beautifulsoup4

❂ Some Common Problems After Installation
You might encounter an error if there’s a wrong version being installed. Let us have a look at the reason behind the errors!
❖ Error: ImportError “No module named HTMLParser”
Reason: The error occurs because you are using Python 2 version of the code in Python 3.
❖ Error: ImportError “No module named html.parser”
Reason: The error occurs because you are using Python 3 version of the code in Python 2.
Solution: Remove existing installation and re-install BeautifulSoup.
❖ Error: SyntaxError “Invalid syntax” on the line ROOT_TAG_NAME = u’[document]’
Solution: Convert Python 2 version of the code to Python 3 by either:
- Installing the package −
python3 setup.py install
- Manually running Python 2 to Python 3 conversion script (in the bs4 director) –
2to3-3.2 -w bs4
❂ Installing The Parser
Beautiful Soup supports the HTML parser by defaultwhich is included in the Python’s standard library. However it also supports other external or third party Python parsers as shown in the table below:
| Parser | Typical usage | Advantages | Disadvantages |
| Python’s html.parser | BeautifulSoup(markup, "html.parser") |
Batteries includedDecent speedLenient (As of Python 2.7.3 and 3.2.) | Not as fast as lxml, less lenient than html5lib. |
| lxml’s HTML parser | BeautifulSoup(markup, "lxml") |
Very fastLenient | External C dependency |
| lxml’s XML parser | BeautifulSoup(markup, "lxml-xml") BeautifulSoup(markup, "xml") |
Very fastThe only currently supported XML parser | External C dependency |
| html5lib | BeautifulSoup(markup, "html5lib") |
Extremely lenientParses pages the same way a web browser doesCreates valid HTML5 | Very slowExternal Python dependency |
Use the following commands to install the lxml or the html5lib parser,
Linux:
$apt-get install python-lxml $apt-get insall python-html5lib
Windows:
$pip install lxml $pip install html5lib

Conclusion
With that, we come to the end of this crisp tutorial on how to install the BeautifulSoup library. Please feel free to follow the steps and install it in your system. If you want to learn how to use the BeautifulSoup library and scrape a webpage, please follow this TUTORIAL and have a look at the step by step guide to scrape your webpage.
Please subscribe and stay tuned for more interesting articles!
Where to Go From Here?
Enough theory. Let’s get some practice!
Coders get paid six figures and more because they can solve problems more effectively using machine intelligence and automation.
To become more successful in coding, solve more real problems for real people. That’s how you polish the skills you really need in practice. After all, what’s the use of learning theory that nobody ever needs?
You build high-value coding skills by working on practical coding projects!
Do you want to stop learning with toy projects and focus on practical code projects that earn you money and solve real problems for people?
🚀 If your answer is YES!, consider becoming a Python freelance developer! It’s the best way of approaching the task of improving your Python skills—even if you are a complete beginner.
If you just want to learn about the freelancing opportunity, feel free to watch my free webinar “How to Build Your High-Income Skill Python” and learn how I grew my coding business online and how you can, too—from the comfort of your own home.
Join the free webinar now!

I am a professional Python Blogger and Content creator. I have published numerous articles and created courses over a period of time. Presently I am working as a full-time freelancer and I have experience in domains like Python, AWS, DevOps, and Networking.
You can contact me @:
UpWork
LinkedIn
Автор оригинала: Shubham Sayon.
Резюме: Чтобы установить BeautifulSoup в Windows Используйте команду: PIP Установите BeautifulSoup4 Отказ Чтобы установить его в Linux, используйте команду: sudo apt-get install python3-bs4 Отказ
Цель : В этом руководстве мы обсудим, как установить BeautifulSoup ?
Поскольку BeautifulSoup не является стандартной библиотекой Python, нам нужно установить его, прежде чем мы сможем использовать его, чтобы соскрести сайты. Следовательно, мы посмотрим на шаги для установки пакета Boysuous 4 (также называемого BS4), а также обсуждают некоторые из проблем, которые придумывают после установки.
Примечание: Текущий релиз это Красивый суп 4.9.3 (3 октября 2020 года).
❂ Установка красивыхsoup В машине Linux
❖ Платформа: Debian или Ubuntu
Если вы используете Python в ОС на основе Debian или Ubuntu, вам необходимо установить красивый суп с помощью менеджера системного пакета, используя следующую команду:
✻ для Python 2.x.
$sudo apt-get install python-bs4
✻ для Python 3.x.
$sudo apt-get install python3-bs4
Если вы не хотите использовать диспетчер пакетов системы, вы можете использовать easy_install или пипс установить BS4.
✻ Команда для установки BS4 Использование easy_install :
$easy_install beautifulsoup4
✻ Команда для установки BS4 Использование Пип :
$pip install beautifulsoup4
# Примечание: Если вы используете Python3, вам может потребоваться установить easy_install3. или PIP3 соответственно, прежде чем вы сможете их использовать.
❖ Платформа: Windows
Установка BS4 В Windows является одним из шагов и очень прост. Используйте следующую команду, чтобы установить его, используя интерфейс командной строки.
pip install beautifulsoup4
❂ Некоторые распространенные проблемы после установки
Вы можете столкнуться с ошибкой, если установлена неправильная версия. Давайте посмотрим на причину ошибок!
❖ Ошибка : ImportError «Нет модуля по имени HTMLParser»
Причина: Ошибка возникает, потому что вы используете версию Python 2 в Python 3.
❖ Ошибка : ImportError «Нет модуля по имени HTML.Parser»
Причина: Ошибка возникает, потому что вы используете версию Python 3 в Python 2.
Решение: Удалите существующую установку и переустановите BeautifulSoup.
❖ Ошибка .: SyntaxError “Неверный синтаксис” на линии «[документ]»
Решение: Конвертировать Python 2 версии кода в Python 3 с помощью:
- Установка пакета –
python3 setup.py. установить
- Вручную бегущий Python 2 к скрипту преобразования Python 3 (в режиссере BS4) –
2To3-3,2 -W BS4
❂ Установка парсера
Красивый суп поддерживает Parser HTML по умолчанию, которое включено в стандартную библиотеку Python. Однако он также поддерживает другую внешнюю или стороннюю парсеров Python, как показано в таблице ниже:
| Анализатор | Типичное использование | Преимущества | Недостатки |
| Python HTML.Parser. | BeautifulSoupsup (Markup, «HTML.Parser») | Аккумуляторы в комплекте удерживают Speedlenient (как на Python 2.7.3 и 3.2.) | Не так быстро, как lxml, менее снисходительно, чем html5lib. |
| HTML Parser LXML | CountrySoup (разметки, “lxml”) | Очень Fastlenient | Внешняя зависимость |
| XML Parser LXML | Beautifulsoup (Markup, «LXML-XML») BeautifulSoup (Markup, «XML») | Очень быстро Только в настоящее время поддерживается XML Parser | Внешняя зависимость |
| HTML5LIB | BeautifulSoup (Markup, «HTML5LIB») | Чрезвычайно lenientparses страниц так же, как веб-браузер делает Valid HTML5 | Очень замедленная зависимость Python |
Используйте следующие команды для установки lxml или HTML5LIB парсер,
Linux:
$apt-get install python-lxml $apt-get insall python-html5lib
Windows:
$pip install lxml $pip install html5lib
Заключение
С этим мы дойдем до конца этого хрустящего урока о том, как установить Beautifulsoup библиотека. Пожалуйста, не стесняйтесь следить за шагами и установить его в свою систему. Если вы хотите узнать, как использовать библиотеку BeautifulSoup и Scrape веб-страницу, пожалуйста, следуйте за Это руководство И посмотрите на шаг за шагом руководство, чтобы соскрести свою веб-страницу.
Пожалуйста, подпишитесь и оставайтесь настроенными для более интересных статей!
Куда пойти отсюда?
Достаточно теории, давайте познакомимся!
Чтобы стать успешным в кодировке, вам нужно выйти туда и решать реальные проблемы для реальных людей. Вот как вы можете легко стать шестифункциональным тренером. И вот как вы польские навыки, которые вам действительно нужны на практике. В конце концов, что такое использование теории обучения, что никто никогда не нуждается?
Практические проекты – это то, как вы обостряете вашу пилу в кодировке!
Вы хотите стать мастером кода, сосредоточившись на практических кодовых проектах, которые фактически зарабатывают вам деньги и решают проблемы для людей?
Затем станьте питоном независимым разработчиком! Это лучший способ приближения к задаче улучшения ваших навыков Python – даже если вы являетесь полным новичком.
Присоединяйтесь к моему бесплатным вебинаре «Как создать свой навык высокого дохода Python» и посмотреть, как я вырос на моем кодированном бизнесе в Интернете и как вы можете, слишком от комфорта вашего собственного дома.
Присоединяйтесь к свободному вебинару сейчас!
Я профессиональный Python Blogger и Content Creator. Я опубликовал многочисленные статьи и создал курсы в течение определенного периода времени. В настоящее время я работаю полный рабочий день, и у меня есть опыт в областях, таких как Python, AWS, DevOps и Networking.
Вы можете связаться со мной @:
- Заработка
- Linkedin.
Оригинал: “https://blog.finxter.com/installing-beautiful-soup/”