
PyInstaller bundles a Python application and all its dependencies into a single
package. The user can run the packaged app without installing a Python
interpreter or any modules.
- Documentation:
-
https://pyinstaller.org/
- Code:
-
https://github.com/pyinstaller/pyinstaller
PyInstaller reads a Python script written by you. It analyzes your code
to discover every other module and library your script needs in order to
execute. Then it collects copies of all those files – including the active
Python interpreter! – and puts them with your script in a single folder, or
optionally in a single executable file.
PyInstaller is tested against Windows, macOS, and GNU/Linux.
However, it is not a cross-compiler:
to make a Windows app you run PyInstaller in Windows; to make
a GNU/Linux app you run it in GNU/Linux, etc.
PyInstaller has been used successfully
with AIX, Solaris, FreeBSD and OpenBSD,
but is not tested against them as part of the continuous integration tests.
Main Advantages
-
Works out-of-the-box with any Python version 3.7-3.11.
-
Fully multi-platform, and uses the OS support to load the dynamic libraries,
thus ensuring full compatibility. -
Correctly bundles the major Python packages such as numpy, PyQt5,
PySide2, PyQt6, PySide6, wxPython, matplotlib and others out-of-the-box. -
Compatible with many 3rd-party packages out-of-the-box. (All the required
tricks to make external packages work are already integrated.) -
Works with code signing on macOS.
-
Bundles MS Visual C++ DLLs on Windows.
Installation
PyInstaller is available on PyPI. You can install it through pip:
pip install pyinstallerRequirements and Tested Platforms
-
- Python:
-
-
3.7-3.11. Note that Python 3.10.0 contains a bug making it unsupportable by
PyInstaller. PyInstaller will also not work with beta releases of Python
3.12.
-
-
- Windows (32bit/64bit):
-
-
PyInstaller should work on Windows 7 or newer, but we only officially support Windows 8+.
-
Support for Python installed from the Windows store without using virtual
environments requires PyInstaller 4.4 or later. -
Note that Windows on arm64 is not yet supported. If you have such a
device and want to help us add arm64 support then please let us know on
our issue tracker.
-
-
- Linux:
-
-
GNU libc based distributions on architectures x86_64, aarch64,
i686, ppc64le, s390x. -
musl libc based distributions on architectures x86_64, aarch64.
-
ldd: Console application to print the shared libraries required
by each program or shared library. This typically can be found in
the distribution-package glibc or libc-bin. -
objdump: Console application to display information from
object files. This typically can be found in the
distribution-package binutils. -
objcopy: Console application to copy and translate object files.
This typically can be found in the distribution-package binutils,
too. -
Raspberry Pi users on armv5—armv7 should add piwheels as an extra
index url then pip install pyinstaller
as usual.
-
-
- macOS (x86_64 or arm64):
-
-
macOS 10.15 (Catalina) or newer.
-
Supports building universal2 applications provided that your installation
of Python and all your dependencies are also compiled universal2.
-
Usage
Basic usage is very simple, just run it against your main script:
pyinstaller /path/to/yourscript.pyFor more details, see the manual.
Untested Platforms
The following platforms have been contributed and any feedback or
enhancements on these are welcome.
-
- FreeBSD
-
-
ldd
-
-
- Solaris
-
-
ldd
-
objdump
-
-
- AIX
-
-
AIX 6.1 or newer. PyInstaller will not work with statically
linked Python libraries. -
ldd
-
-
Linux on any other libc implementation/architecture combination not listed
above.
Before using any contributed platform, you need to build the PyInstaller
bootloader. This will happen automatically when you pip install pyinstaller provided that you have an appropriate C compiler (typically
either gcc or clang) and zlib’s development headers already installed.
Support
-
Official debugging guide: https://pyinstaller.org/en/v5.7.0/when-things-go-wrong.html
-
Assorted user contributed help topics: https://github.com/pyinstaller/pyinstaller/wiki
-
Web based Q&A forums: https://github.com/pyinstaller/pyinstaller/discussions
-
Email based Q&A forums: https://groups.google.com/g/pyinstaller
Changes in this Release
You can find a detailed list of changes in this release
in the Changelog section of the manual.
How to Install PyInstaller
PyInstaller is available as a regular Python package.
The source archives for released versions are available from PyPi_,
but it is easier to install the latest version using pip_:
pip install pyinstaller
To upgrade existing PyInstaller installation to the latest version, use:
pip install --upgrade pyinstaller
To install the current development version, use:
pip install https://github.com/pyinstaller/pyinstaller/tarball/develop
To install directly using pip’s built-in git checkout support, use:
pip install git+https://github.com/pyinstaller/pyinstaller
or to install specific branch (e.g., develop):
pip install git+https://github.com/pyinstaller/pyinstaller@develop
Installing from the source archive
The source code archive for released versions of PyInstaller are
available at PyPI_ and on `PyInstaller Downloads`_ page.
Note
Even though the source archive provides the setup.py script,
installation via python setup.py install has been deprecated
and should not be used anymore. Instead, run pip install . from
the unpacked source directory, as described below.
- The installation procedure is:
-
- Unpack the source archive.
- Move into the unpacked source directory.
- Run
pip install .from the unpacked source directory. If
installing into system-wide python installation, administrator
privilege is required.
The same procedure applies to installing from manual git checkout:
git clone https://github.com/pyinstaller/pyinstaller
cd pyinstaller
pip install .
If you intend to make changes to the source code and want them to take
effect immediately, without re-installing the package each time, you
can install it in editable mode:
pip install -e .
For platforms other than Windows, GNU/Linux and macOS, you must first
build the bootloader for your platform: see :ref:`Building the Bootloader`.
After the bootloader has been built, use the pip install . command
to complete the installation.
Verifying the installation
On all platforms, the command pyinstaller should now exist on the
execution path. To verify this, enter the command:
pyinstaller --version
The result should resemble 4.n for a released version,
and 4.n.dev0-xxxxxx for a development branch.
If the command is not found, make sure the execution path includes
the proper directory:
- Windows:
C:PythonXYScriptswhere XY stands for the
major and minor Python version number,
for exampleC:Python38Scriptsfor Python 3.8) - GNU/Linux:
/usr/bin/ - macOS (using the default Apple-supplied Python)
/usr/bin - macOS (using Python installed by homebrew)
/usr/local/bin - macOS (using Python installed by macports)
/opt/local/bin
To display the current path in Windows the command is echo %path%
and in other systems, echo $PATH.
Note
If you cannot use the pyinstaller command due to the scripts
directory not being in PATH, you can instead invoke the
PyInstaller module, by running python -m PyInstaller
(pay attention to the module name, which is case sensitive).
This form of invocation is also useful when you have PyInstaller
installed in multiple python environments, and you cannot be sure
from which installation the pyinstaller command will be ran.
Installed commands
The complete installation places these commands on the execution path:
pyinstalleris the main command to build a bundled application.
See :ref:`Using PyInstaller`.pyi-makespecis used to create a spec file. See :ref:`Using Spec Files`.pyi-archive_vieweris used to inspect a bundled application.
See :ref:`Inspecting Archives`.pyi-bindependis used to display dependencies of an executable.
See :ref:`Inspecting Executables`.pyi-grab_versionis used to extract a version resource from a Windows
executable. See :ref:`Capturing Windows Version Data`.pyi-set_versioncan be used to apply previously-extracted version
resource to an existing Windows executable.
Введение
Примеры
Установка и настройка
PyInstaller — обычный пакет python. Он может быть установлен с использованием pip:
pip install pyinstallerУстановка в Windows:
Для Windows установка pywin32 или pypiwin32 — обязательное условие. Когда pyinstaller устанавливается с помощью pip, то pypiwin32 устанавливается автоматически.
Установка в Mac OS X:
PyInstaller работает с Python 2.7 по умолчанию в текущей Mac OS X. Однако, если вы планируете использовать более позднюю версию Python или если вы используете какой-либо из основных пакетов, таких как PyQt, Numpy, Matplotlib, Scipy и т. п. Мы настоятельно рекомендуем установить их с помощью MacPorts, либо Homebrew.
Установка из архива:
Если установка c помощью pip недоступна, загрузите сжатый архив из PyPI .
Чтобы протестировать версию, которая находится на стадии разработки, вы можете загрузить сжатый архив из раздела разработки страницы загрузки PyInstaller.
Распакуйте архив и найдите скрипт setup.py.Выполните python setup.py install с правами администратора для установки или обновления PyInstaller.
Проверка установки
Команда pyinstaller должна присутствовать в системном пути для всех платформ после успешной установки.
Это можно проверить, набрав pyinstaller —version в командной строке.
Использование Pyinstaller
Перейдите к каталогу, в котором находится ваш файл и введите:
pyinstaller myfile.pyPyinstaller анализирует файл и создает:
Файл myfile.spec в том же каталоге, что и myfile.py
Папку сборки в том же каталоге, что и myfile.py
Папку dist в том же каталоге, что и myfile.py
Файлы журналов в папке сборки
Само приложение можно будет найти вложенным в папку dist
Объединение в одну папку
Если PyInstaller запускается без каких-либо параметров для myscript.py, то по умолчанию на выход получаем одну папку (с именем myscript). Она содержит файл с именем myscript (myscript.exe в Windows) вместе со всеми необходимыми зависимостями.
Приложение можно пересылать, сжав папку в zip-файл.
Режим «One Folder» можно установить с помощью опции -D или --onedir
pyinstaller myscript.py -DПреимущества:
Одно из основных преимуществ упаковки в папку — легче отлаживать проблемы. Если какие-либо модули не импортируются, их можно проверить в папке.
Если в коде несколько изменений, но используемые зависимости точно совпадают, дистрибуторы могут просто отправить один исполняемый файл (который обычно меньше всей папки).
Недостатки:
Единственный недостаток этого метода — пользователи должны искать исполняемый файл в большом количестве файлов.
Также пользователи могут удалять/изменять другие файлы — это может привести к неправильной работе приложения.
Объединение в один файл
pyinstaller myscript.py -FФлаг -F или --onefile определяет, что все будет упаковано в единый исполняемый файл myscript.exe.
Одиночный файл будет работать медленнее, чем при упаковке в папку. Также одиночные файлы сложнее отлаживать.
Синтаксис
pyinstaller [options] script [script ...] | specfile
Параметры
Примечания
PyInstaller собирает python-приложение и все зависимости в один пакет. Пользователь может запускать приложение без установки интерпретатора python или каких-либо модулей. Pyinstaller поддерживает python 2.7 и python 3.3+ и такие библиотеки как: numpy, Django, OpenCv и другие.
Важные моменты, о которых следует помнить:
Pyinstaller поддерживает Python 2.7 и Python 3.3+
Pyinstaller был протестирован на Windows, Linux и Mac OS X.
Pyinstaller НЕ поддерживает кросс компиляцию из одной платформы для всех возможных (т.е. вы не можете создать исполняемый файл для одной операционной системы из другой операционной системы)
Установка PyInstaller не отличается от установки любой другой библиотеки Python.
pip install PyInstaller
Вот так можно проверить версию PyInstaller.
pyinstaller --versionЯ использую PyInstaller версии 4.2.
Создание exe файла с помощью PyInstaller
PyInstaller собирает в один пакет Python-приложение и все необходимые ему библиотеки следующим образом:
- Считывает файл скрипта.
- Анализирует код для выявления всех зависимостей, необходимых для работы.
- Создает файл spec, который содержит название скрипта, библиотеки-зависимости, любые файлы, включая те параметры, которые были переданы в команду PyInstaller.
- Собирает копии всех библиотек и файлов вместе с активным интерпретатором Python.
- Создает папку BUILD в папке со скриптом и записывает логи вместе с рабочими файлами в BUILD.
- Создает папку DIST в папке со скриптом, если она еще не существует.
- Записывает все необходимые файлы вместе со скриптом или в одну папку, или в один исполняемый файл.
Если использовать параметр команды onedir или -D при генерации исполняемого файла, тогда все будет помещено в одну папку. Это поведение по умолчанию. Если же использовать параметр onefile или -F, то все окажется в одном исполняемом файле.
Возьмем в качестве примера простейший скрипт на Python c названием simple.py, который содержит такой код.
import time
name = input("Введите ваше имя ")
print("Ваше имя ", name)
time.sleep(5)
Создадим один исполняемый файл. В командной строке введите:
pyinstaller --onefile simple.py
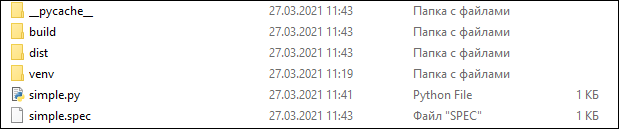
После завершения установки будет две папки, BUILD и DIST, а также новый файл с расширением .spec. Spec-файл будет называться так же, как и файл скрипта.
Python создает каталог распространения, который содержит основной исполняемый файл, а также все динамические библиотеки.
Вот что произойдет после запуска файла.
Добавление файлов с данными, которые будут использоваться exe-файлом
Есть CSV-файл netflix_titles.csv, и Python-script, который считывает количество записей в нем. Теперь нужно добавить этот файл в бандл с исполняемым файлом. Файл Python-скрипта назовем просто simple1.py.
import time
# pip install pandas
import pandas as pd


def count_records():
    data = pd.read_csv('netflix_titles.csv')
    print("Всего фильмов:", data.shape[0])


if __name__ == "__main__":
    count_records()
    time.sleep(5)
Создадим исполняемый файл с данными в папке.
pyinstaller --add-data "netflix_titles.csv;." simple1.py
Параметр --add-data позволяет добавить файлы с данными, которые нужно сохранить в одном бандле с исполняемым файлом. Этот параметр можно применить много раз.
Синтаксис add-data:
- add-data — Windows.
- add-data — Linux.
Можно увидеть, что файл теперь добавляется в папку DIST вместе с исполняемым файлом.
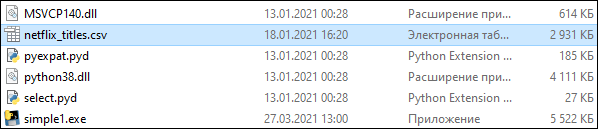
Также, открыв spec-файл, можно увидеть раздел datas, в котором указывается, что файл netflix_titles.csv копируется в текущую директорию.
...
a = Analysis(['simple1.py'],
pathex=['E:\myProject\pyinstaller-tutorial'],
binaries=[],
datas=[('netflix_titles.csv', '.')],
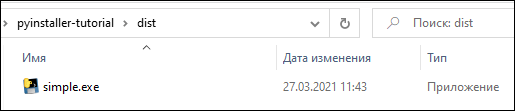
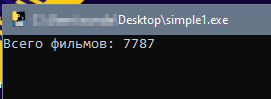
...Запустим файл simple1.exe, появится консоль с выводом: Всего фильмов: 7787.
Добавление файлов с данными и параметр onefile
Если задать параметр --onefile, то PyInstaller распаковывает все файлы в папку TEMP, выполняет скрипт и удаляет TEMP. Если вместе с add-data указать onefile, то нужно считать данные из папки. Путь папки меняется и похож на «_MEIxxxxxx-folder».
import time
import sys
import os
# pip install pandas
import pandas as pd


def count_records():
    os.chdir(sys._MEIPASS)
    data = pd.read_csv('netflix_titles.csv')
    print("Всего фильмов:", data.shape[0])


if __name__ == "__main__":
    count_records()
    time.sleep(5)
Скрипт обновлен для чтения папки TEMP и файлов с данными. Создадим exe-файл с помощью onefile и add-data.
pyinstaller --onefile --add-data "netflix_titles.csv;." simple1.pyПосле успешного создания файл simple1.exe появится в папке DIST.
Можно скопировать исполняемый файл на рабочий стол и запустить, чтобы убедиться, что нет никакой ошибки, связанной с отсутствием файла.
Дополнительные импорты с помощью Hidden Imports
Исполняемому файлу требуются все импорты, которые нужны Python-скрипту. Иногда PyInstaller может пропустить динамические импорты или импорты второго уровня, возвращая ошибку ImportError: No module named…
Для решения этой ошибки нужно передать название недостающей библиотеки в hidden-import.
Например, чтобы добавить библиотеку os, нужно написать вот так:
pyinstaller --onefile --add-data "netflix_titles.csv;." — hidden-import "os" simple1.pyФайл spec
Файл spec — это первый файл, который PyInstaller создает, чтобы закодировать содержимое скрипта Python вместе с параметрами, переданными при запуске.
PyInstaller считывает содержимое файла для создания исполняемого файла, определяя все, что может понадобиться для него.
Файл с расширением .spec сохраняется по умолчанию в текущей директории.
Если у вас есть какое-либо из нижеперечисленных требований, то вы можете изменить файл спецификации:
- Собрать в один бандл с исполняемым файлы данных.
- Включить другие исполняемые файлы: .dll или .so.
- С помощью библиотек собрать в один бандл несколько программы.
Например, есть скрипт simpleModel.py, который использует TensorFlow и выводит номер версии этой библиотеки.
import time
import tensorflow as tf


def view_model():
    print(tf.__version__)


if __name__ == "__main__" :
    model = view_model()
    time.sleep(5)
Компилируем модель с помощью PyInstaller:
pyinstaller -F simpleModel.pyПосле успешной компиляции запускаем исполняемый файл, который возвращает следующую ошибку.
...
File "site-packagestensorflow_corepython_init_.py", line 49, in ImportError: cannot import name 'pywrap_tensorflow' from 'tensorflow_core.python'
Исправим ее, обновив файл spec. Одно из решений — создать файл spec.
$ pyi-makespec simpleModel.py -F
wrote E:pyinstaller-tutorialsimpleModel.spec
now run pyinstaller.py to build the executable
Команда pyi-makespec создает spec-файл по умолчанию, содержащий все параметры, которые можно указать в командной строке. Файл simpleModel.spec создается в текущей директории.
Поскольку был использован параметр --onefile, то внутри файла будет только раздел exe.
...
exe = EXE(pyz,
          a.scripts,
          a.binaries,
          a.zipfiles,
          a.datas,
          [],
          name='simpleModel',
          debug=False,
          bootloader_ignore_signals=False,
          strip=False,
          upx=True,
          upx_exclude=[],
          runtime_tmpdir=None,
          console=True )
Если использовать параметр по умолчанию или onedir, то вместе с exe-разделом будет также и раздел collect.
Можно открыть simpleModel.spec и добавить следующий текст для создания хуков.
# -*- mode: python ; coding: utf-8 -*-

block_cipher = None
import os
spec_root = os.path.realpath(SPECPATH)
options = []
from PyInstaller.utils.hooks import collect_submodules, collect_data_files
tf_hidden_imports = collect_submodules('tensorflow_core')
tf_datas = collect_data_files('tensorflow_core', subdir=None, include_py_files=True)

a = Analysis(['simpleModel.py'],
             pathex=['E:\myProject\pyinstaller-tutorial'],
             binaries=[],
             datas=tf_datas + [],
             hiddenimports=tf_hidden_imports + [],
             hookspath=[],
...
Создаем хуки и добавляем их в hidden imports и раздел данных.
Хуки
Файлы хуков расширяют возможность PyInstaller обрабатывать такие требования, как необходимость включать дополнительные данные или импортировать динамические библиотеки.
Обычно пакеты Python используют нормальные методы для импорта своих зависимостей, но в отдельных случаях, как например TensorFlow, существует необходимость импорта динамических библиотек. PyInstaller не может найти все библиотеки, или же их может быть слишком много. В таком случае рекомендуется использовать вспомогательный инструмент для импорта из PyInstaller.utils.hooks и собрать все подмодули для библиотеки.
Скомпилируем модель после обновления файла simpleModel.spec.
pyinstaller simpleModel.spec
Скопируем исполняемый файл на рабочий стол и увидим, что теперь он корректно отображает версию TensorFlow.
Вывод:
PyInstaller предлагает несколько вариантов создания простых и сложных исполняемых файлов из Python-скриптов:
- Исполняемый файл может собрать в один бандл все требуемые данные с помощью параметра
--add-data. - Исполняемый файл и зависимые данные с библиотеками можно собрать в один файл или папку с помощью
--onefileили--onedirсоответственно. - Динамические импорты и библиотеки второго уровня можно включить с помощью
hidden-imports. - Файл spec позволяет создать исполняемый файл для обработки скрытых импортов и других файлов данных с помощью хуков.
Are you jealous of Go developers building an executable and easily shipping it to users? Wouldn’t it be great if your users could run your application without installing anything? That is the dream, and PyInstaller is one way to get there in the Python ecosystem.
There are countless tutorials on how to set up virtual environments, manage dependencies, avoid dependency pitfalls, and publish to PyPI, which is useful when you’re creating Python libraries. There is much less information for developers building Python applications. This tutorial is for developers who want to distribute applications to users who may or may not be Python developers.
In this tutorial, you’ll learn the following:
- How PyInstaller can simplify application distribution
- How to use PyInstaller on your own projects
- How to debug PyInstaller errors
- What PyInstaller can’t do
PyInstaller gives you the ability to create a folder or executable that users can immediately run without any extra installation. To fully appreciate PyInstaller’s power, it’s useful to revisit some of the distribution problems PyInstaller helps you avoid.
Distribution Problems
Setting up a Python project can be frustrating, especially for non-developers. Often, the setup starts with opening a Terminal, which is a non-starter for a huge group of potential users. This roadblock stops users even before the installation guide delves into the complicated details of virtual environments, Python versions, and the myriad of potential dependencies.
Think about what you typically go through when setting up a new machine for Python development. It probably goes something like this:
- Download and install a specific version of Python
- Set up pip
- Set up a virtual environment
- Get a copy of your code
- Install dependencies
Stop for a moment and consider if any of the above steps make any sense if you’re not a developer, let alone a Python developer. Probably not.
These problems explode if your user is lucky enough to get to the dependencies portion of the installation. This has gotten much better in the last few years with the prevalence of wheels, but some dependencies still require C/C++ or even FORTRAN compilers!
This barrier to entry is way too high if your goal is to make an application available to as many users as possible. As Raymond Hettinger often says in his excellent talks, “There has to be a better way.”
PyInstaller
PyInstaller abstracts these details from the user by finding all your dependencies and bundling them together. Your users won’t even know they’re running a Python project because the Python Interpreter itself is bundled into your application. Goodbye complicated installation instructions!
PyInstaller performs this amazing feat by introspecting your Python code, detecting your dependencies, and then packaging them into a suitable format depending on your Operating System.
There are lots of interesting details about PyInstaller, but for now you’ll learn the basics of how it works and how to use it. You can always refer to the excellent PyInstaller docs if you want more details.
In addition, PyInstaller can create executables for Windows, Linux, or macOS. This means Windows users will get a .exe, Linux users get a regular executable, and macOS users get a .app bundle. There are some caveats to this. See the limitations section for more information.
Preparing Your Project
PyInstaller requires your application to conform to some minimal structure, namely that you have a CLI script to start your application. Often, this means creating a small script outside of your Python package that simply imports your package and runs main().
The entry-point script is a Python script. You can technically do anything you want in the entry-point script, but you should avoid using explicit relative imports. You can still use relative imports throughout the rest your application if that’s your preferred style.
You can give this a try with your own project or follow along with the Real Python feed reader project. For more detailed information on the reader project, check out the the tutorial on Publishing a Package on PyPI.
The first step to building an executable version of this project is to add the entry-point script. Luckily, the feed reader project is well structured, so all you need is a short script outside the package to run it. For example, you can create a file called cli.py alongside the reader package with the following code:
from reader.__main__ import main

if __name__ == '__main__':
    main()
This cli.py script calls main() to start up the feed reader.
Creating this entry-point script is straightforward when you’re working on your own project because you’re familiar with the code. However, it’s not as easy to find the entry-point of another person’s code. In this case, you can start by looking at the setup.py file in the third-party project.
Look for a reference to the entry_points argument in the project’s setup.py. For example, here’s the reader project’s setup.py:
setup(
    name="realpython-reader",
    version="1.0.0",
    description="Read the latest Real Python tutorials",
    long_description=README,
    long_description_content_type="text/markdown",
    url="https://github.com/realpython/reader",
    author="Real Python",
    author_email="info@realpython.com",
    license="MIT",
    classifiers=[
        "License :: OSI Approved :: MIT License",
        "Programming Language :: Python",
        "Programming Language :: Python :: 2",
        "Programming Language :: Python :: 3",
    ],
    packages=["reader"],
    include_package_data=True,
    install_requires=[
        "feedparser", "html2text", "importlib_resources", "typing"
    ],
    entry_points={"console_scripts": ["realpython=reader.__main__:main"]},
)
As you can see, the entry-point cli.py script calls the same function mentioned in the entry_points argument.
After this change, the reader project directory should look like this, assuming you checked it out into a folder called reader:
reader/
|
├── reader/
|   ├── __init__.py
|   ├── __main__.py
|   ├── config.cfg
|   ├── feed.py
|   └── viewer.py
|
├── cli.py
├── LICENSE
├── MANIFEST.in
├── README.md
├── setup.py
└── tests
Notice there is no change to the reader code itself, just a new file called cli.py. This entry-point script is usually all that’s necessary to use your project with PyInstaller.
However, you’ll also want to look out for uses of __import__() or imports inside of functions. These are referred to as hidden imports in PyInstaller terminology.
You can manually specify the hidden imports to force PyInstaller to include those dependencies if changing the imports in your application is too difficult. You’ll see how to do this later in this tutorial.
Once you can launch your application with a Python script outside of your package, you’re ready to give PyInstaller a try at creating an executable.
Using PyInstaller
The first step is to install PyInstaller from PyPI. You can do this using pip like other Python packages:
$ pip install pyinstaller
pip will install PyInstaller’s dependencies along with a new command:
pyinstaller. PyInstaller can be imported in your Python code and used as a library, but you’ll likely only use it as a CLI tool.
You’ll use the library interface if you create your own hook files.
You’ll increase the likelihood of PyInstaller’s defaults creating an executable if you only have pure Python dependencies. However, don’t stress too much if you have more complicated dependencies with C/C++ extensions.
PyInstaller supports lots of popular packages like NumPy, PyQt, and Matplotlib without any additional work from you. You can see more about the list of packages that PyInstaller officially supports by referring to the PyInstaller documentation.
Don’t worry if some of your dependencies aren’t listed in the official docs. Many Python packages work fine. In fact, PyInstaller is popular enough that many projects have explanations on how to get things working with PyInstaller.
In short, the chances of your project working out of the box are high.
To try creating an executable with all the defaults, simply give PyInstaller the name of your main entry-point script.
First, cd in the folder with your entry-point and pass it as an argument to the pyinstaller command that was added to your PATH when PyInstaller was installed.
For example, type the following after you cd into the top-level reader directory if you’re following along with the feed reader project:
Don’t be alarmed if you see a lot of output while building your executable. PyInstaller is verbose by default, and the verbosity can be cranked way up for debugging, which you’ll see later.
Digging Into PyInstaller Artifacts
PyInstaller is complicated under the hood and will create a lot of output. So, it’s important to know what to focus on first. Namely, the executable you can distribute to your users and potential debugging information. By default, the pyinstaller command will create a few things of interest:
- A
*.specfile - A
build/folder - A
dist/folder
Spec File
The spec file will be named after your CLI script by default. Sticking with our previous example, you’ll see a file called cli.spec. Here’s what the default spec file looks like after running PyInstaller on the cli.py file:
# -*- mode: python -*-

block_cipher = None

a = Analysis(['cli.py'],
             pathex=['/Users/realpython/pyinstaller/reader'],
             binaries=[],
             datas=[],
             hiddenimports=[],
             hookspath=[],
             runtime_hooks=[],
             excludes=[],
             win_no_prefer_redirects=False,
             win_private_assemblies=False,
             cipher=block_cipher,
             noarchive=False)
pyz = PYZ(a.pure, a.zipped_data,
             cipher=block_cipher)
exe = EXE(pyz,
          a.scripts,
          [],
          exclude_binaries=True,
          name='cli',
          debug=False,
          bootloader_ignore_signals=False,
          strip=False,
          upx=True,
          console=True )
coll = COLLECT(exe,
               a.binaries,
               a.zipfiles,
               a.datas,
               strip=False,
               upx=True,
               name='cli')
This file will be automatically created by the pyinstaller command. Your version will have different paths, but the majority should be the same.
Don’t worry, you don’t need to understand the above code to effectively use PyInstaller!
This file can be modified and re-used to create executables later. You can make future builds a bit faster by providing this spec file instead of the entry-point script to the pyinstaller command.
There are a few specific use-cases for PyInstaller spec files. However, for simple projects, you won’t need to worry about those details unless you want to heavily customize how your project is built.
Build Folder
The build/ folder is where PyInstaller puts most of the metadata and internal bookkeeping for building your executable. The default contents will look something like this:
build/
|
└── cli/
    ├── Analysis-00.toc
    ├── base_library.zip
    ├── COLLECT-00.toc
    ├── EXE-00.toc
    ├── PKG-00.pkg
    ├── PKG-00.toc
    ├── PYZ-00.pyz
    ├── PYZ-00.toc
    ├── warn-cli.txt
    └── xref-cli.html
The build folder can be useful for debugging, but unless you have problems, this folder can largely be ignored. You’ll learn more about debugging later in this tutorial.
Dist Folder
After building, you’ll end up with a dist/ folder similar to the following:
The dist/ folder contains the final artifact you’ll want to ship to your users. Inside the dist/ folder, there is a folder named after your entry-point. So in this example, you’ll have a dist/cli folder that contains all the dependencies and executable for our application. The executable to run is dist/cli/cli or dist/cli/cli.exe if you’re on Windows.
You’ll also find lots of files with the extension .so, .pyd, and .dll depending on your Operating System. These are the shared libraries that represent the dependencies of your project that PyInstaller created and collected.
You’ll want to distribute the entire dist/cli folder, but you can rename cli to anything that suits you.
At this point you can try running the dist/cli/cli executable if you’re following along with the feed reader example.
You’ll notice that running the executable results in errors mentioning the version.txt file. This is because the feed reader and its dependencies require some extra data files that PyInstaller doesn’t know about. To fix that, you’ll have to tell PyInstaller that version.txt is required, which you’ll learn about when testing your new executable.
Customizing Your Builds
PyInstaller comes with lots of options that can be provided as spec files or normal CLI options. Below, you’ll find some of the most common and useful options.
--name
Change the name of your executable.
This is a way to avoid your executable, spec file, and build artifact folders being named after your entry-point script. --name is useful if you have a habit of naming your entry-point script something like cli.py, as I do.
You can build an executable called realpython from the cli.py script with a command like this:
$ pyinstaller cli.py --name realpython
--onefile
Package your entire application into a single executable file.
The default options create a folder of dependencies and and executable, whereas --onefile keeps distribution easier by creating only an executable.
This option takes no arguments. To bundle your project into a single file, you can build with a command like this:
$ pyinstaller cli.py --onefile
With the above command, your dist/ folder will only contain a single executable instead of a folder with all the dependencies in separate files.
--hidden-import
List multiple top-level imports that PyInstaller was unable to detect automatically.
This is one way to work around your code using import inside functions and __import__(). You can also use --hidden-import multiple times in the same command.
This option requires the name of the package that you want to include in your executable. For example, if your project imported the requests library inside of a function, then PyInstaller would not automatically include requests in your executable. You could use the following command to force requests to be included:
$ pyinstaller cli.py --hiddenimport=requests
You can specify this multiple times in your build command, once for each hidden import.
--add-data and --add-binary
Instruct PyInstaller to insert additional data or binary files into your build.
This is useful when you want to bundle in configuration files, examples, or other non-code data. You’ll see an example of this later if you’re following along with the feed reader project.
--exclude-module
Exclude some modules from being included with your executable
This is useful to exclude developer-only requirements like testing frameworks. This is a great way to keep the artifact you give users as small as possible. For example, if you use pytest, you may want to exclude this from your executable:
$ pyinstaller cli.py --exclude-module=pytest
-w
Avoid automatically opening a console window for
stdoutlogging.
This is only useful if you’re building a GUI-enabled application. This helps your hide the details of your implementation by allowing users to never see a terminal.
Similar to the --onefile option, -w takes no arguments:
.spec file
As mentioned earlier, you can reuse the automatically generated .spec file to further customize your executable. The .spec file is a regular Python script that implicitly uses the PyInstaller library API.
Since it’s a regular Python script, you can do almost anything inside of it. You can refer to the official PyInstaller Spec file documentation for more information on that API.
Testing Your New Executable
The best way to test your new executable is on a new machine. The new machine should have the same OS as your build machine. Ideally, this machine should be as similar as possible to what your users use. That may not always be possible, so the next best thing is testing on your own machine.
The key is to run the resulting executable without your development environment activated. This means run without virtualenv, conda, or any other environment that can access your Python installation. Remember, one of the main goals of a PyInstaller-created executable is for users to not need anything installed on their machine.
Picking up with the feed reader example, you’ll notice that running the default cli executable in the dist/cli folder fails. Luckily the error points you to the problem:
FileNotFoundError: 'version.txt' resource not found in 'importlib_resources'
[15110] Failed to execute script cli
The importlib_resources package requires a version.txt file. You can add this file to the build using the --add-data option. Here’s an example of how to include the required version.txt file:
$ pyinstaller cli.py
    --add-data venv/reader/lib/python3.6/site-packages/importlib_resources/version.txt:importlib_resources
This command tells PyInstaller to include the version.txt file in the importlib_resources folder in a new folder in your build called importlib_resources.
You’ll want to adjust the path in the above command to match where you installed the feed reader dependencies.
Now running the new executable will result in a new error about a config.cfg file.
This file is required by the feed reader project, so you’ll need to make sure to include it in your build:
$ pyinstaller cli.py
    --add-data venv/reader/lib/python3.6/site-packages/importlib_resources/version.txt:importlib_resources
    --add-data reader/config.cfg:reader
Again, you’ll need to adjust the path to the file based on where you have the feed reader project.
At this point, you should have a working executable that can be given directly to users!
Debugging PyInstaller Executables
As you saw above, you might encounter problems when running your executable. Depending on the complexity of your project, the fixes could be as simple as including data files like the feed reader example. However, sometimes you need more debugging techniques.
Below are a few common strategies that are in no particular order. Often times one of these strategies or a combination will lead to a break-through in tough debugging sessions.
Use the Terminal
First, try running the executable from a terminal so you can see all the output.
Remember to remove the -w build flag to see all the stdout in a console window. Often, you’ll see ImportError exceptions if a dependency is missing.
Debug Files
Inspect the build/cli/warn-cli.txt file for any problems. PyInstaller creates lots of output to help you understand exactly what it’s creating. Digging around in the build/ folder is a great place to start.
Single Directory Builds
Use the --onedir distribution mode of creating distribution folder instead of a single executable. Again, this is the default mode. Building with --onedir gives you the opportunity to inspect all the dependencies included instead of everything being hidden in a single executable.
--onedir is useful for debugging, but --onefile is typically easier for
users to comprehend. After debugging you may want to switch to --onefile mode to simplify distribution.
Additional CLI Options
PyInstaller also has options to control the amount of information printed during the build process. Rebuild the executable with the --log-level=DEBUG option to PyInstaller and review the output.
PyInstaller will create a lot of output when increasing the verbosity with --log-level=DEBUG. It’s useful to save this output to a file you can refer to later instead of scrolling in your Terminal. To do this, you can use your shell’s redirection functionality. Here’s an example:
$ pyinstaller --log-level=DEBUG cli.py 2> build.txt
By using the above command, you’ll have a file called build.txt containing lots of additional DEBUG messages.
Here’s a sample of what your build.txt file might look like:
67 INFO: PyInstaller: 3.4
67 INFO: Python: 3.6.6
73 INFO: Platform: Darwin-18.2.0-x86_64-i386-64bit
74 INFO: wrote /Users/realpython/pyinstaller/reader/cli.spec
74 DEBUG: Testing for UPX ...
77 INFO: UPX is not available.
78 DEBUG: script: /Users/realptyhon/pyinstaller/reader/cli.py
78 INFO: Extending PYTHONPATH with paths
['/Users/realpython/pyinstaller/reader',
 '/Users/realpython/pyinstaller/reader']
This file will have a lot of detailed information about what was included in your build, why something was not included, and how the executable was packaged.
You can also rebuild your executable using the --debug option in addition to using the --log-level option for even more information.
Additional PyInstaller Docs
The PyInstaller GitHub Wiki has lots of useful links and debugging tips. Most notably are the sections on making sure everything is packaged correctly and what to do if things go wrong.
Assisting in Dependency Detection
The most common problem you’ll see is ImportError exceptions if PyInstaller couldn’t properly detect all your dependencies. As mentioned before, this can happen if you’re using __import__(), imports inside functions, or other types of hidden imports.
Many of these types of problems can be resolved by using the --hidden-import PyInstaller CLI option. This tells PyInstaller to include a module or package even if it doesn’t automatically detect it. This is the easiest way to work around lots of dynamic import magic in your application.
Another way to work around problems is hook files. These files contain additional information to help PyInstaller package up a dependency. You can write your own hooks and tell PyInstaller to use them with the --additional-hooks-dir CLI option.
Hook files are how PyInstaller itself works internally so you can find lots of example hook files in the PyInstaller source code.
Limitations
PyInstaller is incredibly powerful, but it does have some limitations. Some of the limitations were discussed previously: hidden imports and relative imports in entry-point scripts.
PyInstaller supports making executables for Windows, Linux, and macOS, but it cannot cross compile. Therefore, you cannot make an executable targeting one Operating System from another Operating System. So, to distribute executables for multiple types of OS, you’ll need a build machine for each supported OS.
Related to the cross compile limitation, it’s useful to know that PyInstaller does not technically bundle absolutely everything your application needs to run. Your executable is still dependent on the users’ glibc. Typically, you can work around the glibc limitation by building on the oldest version of each OS you intend to target.
For example, if you want to target a wide array of Linux machines, then you can build on an older version of CentOS. This will give you compatibility with most versions newer than the one you build on. This is the same strategy described in PEP 0513 and is what the PyPA recommends for building compatible wheels.
In fact, you might want to investigate using the PyPA’s manylinux docker image for your Linux build environment. You could start with the base image then install PyInstaller along with all your dependencies and have a build image that supports most variants of Linux.
Conclusion
PyInstaller can help make complicated installation documents unnecessary. Instead, your users can simply run your executable to get started as quickly as possible. The PyInstaller workflow can be summed up by doing the following:
- Create an entry-point script that calls your main function.
- Install PyInstaller.
- Run PyInstaller on your entry-point.
- Test your new executable.
- Ship your resulting
dist/folder to users.
Your users don’t have to know what version of Python you used or that your application uses Python at all!
(I’m on Windows.)
I want to use PyInstaller. I could always create bin files with pyinstaller.py [args].
- It’s not a package with an
__init__.pyfile, - it has no
setup.py - and it doesn’t work to create a folder, put it in my PYTHONPATH, put
pyinstaller[files]in that folder and then make a call topython pyinstallerpyinstaller.py.
pyinstaller.org only tells me something with Configure.py.
So now I’m out of ideas how to install PyInstaller so that I don’t have to work with absolute paths. Do you have any ideas?
asked May 26, 2012 at 14:18
![]()
ryndrynd
1,8255 gold badges22 silver badges24 bronze badges
4
To install PyInstaller:
- Go to your command prompt (Start -> Run -> cmd)
- type the following command
cd c:python27scriptspress enter,
this should be where your pip.exe file is located. - Once you are in this directory type
pip install pyinstallerpress enter
Message should read Successfully installed pyinstaller.
![]()
Mathias711
6,5584 gold badges41 silver badges58 bronze badges
answered Jan 8, 2014 at 16:13
![]()
DeveloperDeveloper
7417 silver badges12 bronze badges
4
To install pyInstaller you must first run python Configure.py in the pyInstaller directory. To create an exe you must copy the script to the pyInstaller directory, and run python Makespec.py script.py after you have run that run python Build.py script/script.spec (these commands assume you have the python directory in your path, the command prompt is in the pyInstaller directory and that your script is called script.py.)
answered Aug 11, 2012 at 8:11
![]()
Python KidPython Kid
3132 gold badges8 silver badges19 bronze badges
3
I was able to install PyInstaller using pip.
pip install pyinstaller
answered Dec 12, 2013 at 17:24
![]()
dmdeweydmdewey
1991 silver badge6 bronze badges
0
You have just created an awesome new application. Maybe it’s a game or maybe it’s an image viewer. Whatever your application is, you want to share it with your friend or a family member. However, you know they won’t know how to install Python or any of the dependencies. What do you do? You need something that will transform your code into an executable!
Python has many different tools you can use to convert your Python code into a Windows executable. Here are a few different tools you can use:
- PyInstaller
- py2exe
- cx_freeze
- Nuitka
- Briefcase
These various tools can all be used to create executables for Windows. They work slightly differently, but the end result is that you will have an executable and perhaps some other files that you need to distribute too.
PyInstaller and Briefcase can be used to create Windows and MacOS executables. Nuitka is a little different in that it turns your Python code into C code before converting it into an executable. What this means is that the result ends up much smaller than PyInstaller’s executable.
However, for this article, you will focus on PyInstaller. It is one of the most popular packages for this purpose and has a lot of support. PyInstaller also has good documentation and there are many tutorials available for it.
In this article, you will learn about:
- Installing PyInstaller
- Creating an Executable for a Command-Line Application
- Creating an Executable for a GUI
Let’s transform some code into a Windows executable!
Installing PyInstaller
To get started, you will need to install PyInstaller. Fortunately, PyInstaller is a Python package that can be easily installed using pip:
python -m pip install pyinstaller
This command will install PyInstaller and any dependencies that it needs on your machine. You should now be ready to create an executable with PyInstaller!
Creating an Executable for a Command-Line Application
The next step is to pick some code that you want to turn into an executable. You can use the PySearch utility from chapter 32 of my book, Python 101: 2nd Edition, and turn it into a binary. Here is the code:
# pysearch.py

import argparse
import pathlib

def search_folder(path, extension, file_size=None):
    """
    Search folder for files
    """
    folder = pathlib.Path(path)
    files = list(folder.rglob(f'*.{extension}'))

    if not files:
        print(f'No files found with {extension=}')
        return

    if file_size is not None:
        files = [f for f in files
                 if f.stat().st_size > file_size]

    print(f'{len(files)} *.{extension} files found:')
    for file_path in files:
        print(file_path)


def main():
    parser = argparse.ArgumentParser(
        'PySearch',
        description='PySearch - The Python Powered File Searcher')
    parser.add_argument('-p', '--path',
                        help='The path to search for files',
                        required=True,
                        dest='path')
    parser.add_argument('-e', '--ext',
                        help='The extension to search for',
                        required=True,
                        dest='extension')
    parser.add_argument('-s', '--size',
                        help='The file size to filter on in bytes',
                        type=int,
                        dest='size',
                        default=None)

    args = parser.parse_args()
    search_folder(args.path, args.extension, args.size)

if __name__ == '__main__':
    main()
Next, open up a Command Prompt (cmd.exe) in Windows and navigate to the folder that has your pysearch.py file in it. To turn the Python code into a binary executable, you need to run the following command:
pyinstaller pysearch.py
If Python isn’t on your Windows path, you may need to type out the full path to pyinstaller to get it to run. It will be located in a Scripts folder wherever your Python is installed on your system.
When you run that command, you will see some output that will look similar to the following:
6531 INFO: PyInstaller: 3.6
6576 INFO: Python: 3.8.2
6707 INFO: Platform: Windows-10-10.0.10586-SP0
6828 INFO: wrote C:UsersmikeAppDataLocalProgramsPythonPython38-32pysearch.spec
6880 INFO: UPX is not available.
7110 INFO: Extending PYTHONPATH with paths
['C:\Users\mike\AppData\Local\Programs\Python\Python38-32',
 'C:\Users\mike\AppData\Local\Programs\Python\Python38-32']
7120 INFO: checking Analysis
7124 INFO: Building Analysis because Analysis-00.toc is non existent
7128 INFO: Initializing module dependency graph...
7153 INFO: Caching module graph hooks...
7172 INFO: Analyzing base_library.zip ...
PyInstaller is very verbose and will print out a LOT of output. When it is finished, you will have a dist folder with a pysearch folder inside of it. Within the pysearch folder are many other files, including one called pysearch.exe. You can try navigating to the pysearch folder in your Command Prompt and then run pysearch.exe:
C:UsersmikeAppDataLocalProgramsPythonPython38-32distpysearch>pysearch.exe
usage: PySearch [-h] -p PATH -e EXTENSION [-s SIZE]
PySearch: error: the following arguments are required: -p/--path, -e/--ext
That looks like a pretty successful build! However, if you want to give the executable to your friends, you will have to give them the entire pysearch folder as all those other files in there are also required.
You can fix that issue by passing the --onefile flag, like this:
pyinstaller pysearch.py --onefile
The output from that command is similar to the first command. This time when you go into the dist folder though, you will find a single file in there called pysearch.exe instead of a folder full of files.
Creating an Executable for a GUI
Creating an executable for a GUI is slightly different than it is for a command-line application. The reason is that the GUI is the main interface and PyInstaller’s default is that the user will be using a Command Prompt or console window. If you run either of the PyInstaller commands that you learned about in the previous section, it will successfully create your executable. However, when you go to use your executable, you will see a Command Prompt appear in addition to your GUI.
You usually don’t want that. To suppress the Command Prompt, you need to use the --noconsole flag.
To test out how this would work, grab the code for the image viewer that was created with wxPython from chapter 42 of Python 101: 2nd Edition. Here is the code again for your convenience:
# image_viewer.py

import wx

class ImagePanel(wx.Panel):

    def __init__(self, parent, image_size):
        super().__init__(parent)
        self.max_size = 240

        img = wx.Image(*image_size)
        self.image_ctrl = wx.StaticBitmap(self,
                                          bitmap=wx.Bitmap(img))

        browse_btn = wx.Button(self, label='Browse')
        browse_btn.Bind(wx.EVT_BUTTON, self.on_browse)

        self.photo_txt = wx.TextCtrl(self, size=(200, -1))

        main_sizer = wx.BoxSizer(wx.VERTICAL)
        hsizer = wx.BoxSizer(wx.HORIZONTAL)

        main_sizer.Add(self.image_ctrl, 0, wx.ALL, 5)
        hsizer.Add(browse_btn, 0, wx.ALL, 5)
        hsizer.Add(self.photo_txt, 0, wx.ALL, 5)
        main_sizer.Add(hsizer, 0, wx.ALL, 5)

        self.SetSizer(main_sizer)
        main_sizer.Fit(parent)
        self.Layout()

    def on_browse(self, event):
        """
        Browse for an image file
        @param event: The event object
        """
        wildcard = "JPEG files (*.jpg)|*.jpg"
        with wx.FileDialog(None, "Choose a file",
                           wildcard=wildcard,
                           style=wx.ID_OPEN) as dialog:
            if dialog.ShowModal() == wx.ID_OK:
                self.photo_txt.SetValue(dialog.GetPath())
                self.load_image()

    def load_image(self):
        """
        Load the image and display it to the user
        """
        filepath = self.photo_txt.GetValue()
        img = wx.Image(filepath, wx.BITMAP_TYPE_ANY)

        # scale the image, preserving the aspect ratio
        W = img.GetWidth()
        H = img.GetHeight()
        if W > H:
            NewW = self.max_size
            NewH = self.max_size * H / W
        else:
            NewH = self.max_size
            NewW = self.max_size * W / H
        img = img.Scale(NewW,NewH)

        self.image_ctrl.SetBitmap(wx.Bitmap(img))
        self.Refresh()


class MainFrame(wx.Frame):

    def __init__(self):
        super().__init__(None, title='Image Viewer')
        panel = ImagePanel(self, image_size=(240,240))
        self.Show()


if __name__ == '__main__':
    app = wx.App(redirect=False)
    frame = MainFrame()
    app.MainLoop()
To turn this into an executable, you would run the following PyInstaller command:
pyinstaller.exe image_viewer.py --noconsole
Note that you are not using the --onefile flag here. Windows Defender will flag GUIs that are created with the --onefile as malware and remove it. You can get around that by not using the --onefile flag or by digitally signing the executable. Starting in Windows 10, all GUI applications need to be signed or they are considered malware.
Microsoft has a Sign Tool you can use, but you will need to purchase a digital certificate or create a self-signed certificate with Makecert, a .NET tool or something similar.
Wrapping Up
There are lots of different ways to create an executable with Python. In this article, you used PyInstaller. You learned about the following topics:
- Installing PyInstaller
- Creating an Executable for a Command-Line Application
- Creating an Executable for a GUI
PyInstaller has many other flags that you can use to modify its behavior when generating executables. If you run into issues with PyInstaller, there is a mailing list that you can turn to. Or you can search with Google and on StackOverflow. Most of the common issues that crop up are covered either in the PyInstaller documentation or are easily discoverable through searching online.
 |
Would you like to learn more about Python?
Python 101 – 2nd EditionPurchase now on Leanpub or Amazon |
Написав программу на языке программирования Python мы начинаем думать: «А как собрать нашу программу в файл и запускать на любом компьютере без установки интерпретатора Python?». В этой статье мы разберемся в этом вопросе.
Существует большое количество библиотек, позволяющих это сделать, среди которых самые популярные: cx_Freeze, py2exe, nuitka, PyInstaller и др.
В данной статье мы подробно рассмотрим установку библиотеки PyInstaller и собрание проекта на операционной системе Windows, а это означает, что мы будем собирать проект в «.exe» файл.
На официальном сайте библиотеки PyInstaller вы можете изучить документацию по другим операционным системам.
Установка PyInstaller
Чтобы установить PyInstaller необходимо сначала установить Python. В статье «Установка Python» вы можете подробно изучить установку Python на Windows.
Для корректной работы PyInstaller рекомендуется установить версию Python 3.7.6 т.к. на данный момент (Февраль 2020) библиотека корректно работает с данной версией Python, а с самой новой версией не работает.
Для установки библиотеки запустите командную строку от имени администратора:

Установим необходимую библиотеку pypiwin32. В командной строке напишите строку:
pip install pypiwin32

Если у вас выйдет строка «WARNING», как на картинке ниже, тогда необходимо обновить «pip» до последней версии. Код:
pip install --upgrade pip

После того, как обновите pip вводим строку для загрузки библиотеки:
pip install pyinstaller

После загрузки библиотеки проверьте её версию:
pyinstaller --version

Проверим все установленные библиотеки с помощью кода:
pip list

Все необходимые библиотеки мы установили. Если вы все сделали по описанию, тогда у вас должно быть как на изображении.
Собрание проекта
В статье «Библиотека Tkinter в Python» мы создали небольшое графическое приложение. Для примера возьмем это приложение и соберем в .exe файл (приложение имеет имя: form.py).
В папке с проектом запускаем командную строку (cmd):

Прописываем код:
pyinstaller form.py

Это и есть простейшая команда, которая соберет наш проект.
PyInstaller анализирует файл form.py и делает следующее:
- Пишет файл form.spec в той же папке, где находится скрипт.
- Создает папку build в той же папке, где находится скрипт.
- Записывает некоторые логи и рабочие файлы в папку build.
- Создает папку dist в той же папке, где находится скрипт.
- Пишет исполняемый файл в папку dist.
После работы программы вы найдете две папки: dist и build. В папке dist и находится наше приложение. Впоследствии папку build можно спокойно удалить, она не влияет на работоспособность приложения.

Наиболее часто используемые опции:
—onefile — сборка в один файл, т.е. файлы .dll не пишутся.
—windowed -при запуске приложения, будет появляться консоль.
—noconsole — при запуске приложения, консоль появляться не будет.
—icon=app.ico — добавляем иконку в окно.
—paths — возможность вручную прописать путь к необходимым файлам, если pyinstaller не может их найти(например: —paths D:python35Libsite-packagesPyQt5Qtbin).
Синтаксис команды pyinstaller:
pyinstaller [options] script [script ...] | specfile
Используем опцию —onefile для сборки нашего проекта в один файл.
Можете взять другой проект или удалить все файлы проекта созданные библиотекой pyinstaller и собрать его заново. Код:
pyinstaller --onefile form.py

После работы программы вы найдете две папки: dist и build. В папке dist и находится наше приложение. Теперь наш проект собран в одном файле:

Запустите собранный .exe файл проекта и проверьте его работоспособность. На этом наша статья подходит к завершению. В комментариях вы можете задавать интересующие вопросы.
Видео по копированию проекта в «.exe»:
Introduction
PyInstaller can be used to create .exe
files for Windows, .app files for Mac, and distributable packages for Linux.
Optionally, it can create a single file which is more convenient for
distributing, but takes slightly longer to start because it unzip itself.
This tutorial walks through the process of installing and using PyInstaller
to create distributable packages.
Installation
To install PyInstaller, use pip and install the pyinstaller package.
pip install pyinstaller
Simple build
PyInstaller is not a cross-compiler, so it will only build a package
for your current system. So, you must build Windows from Windows, Mac from
Mac, and Linux from Linux.
# Build the .exe, .app, or linux executable distribution
pyinstaller hello.py

# Create only a single file (slower to run, easier to distribute)
pyinstaller hello.py -F

# Tell application not to launch console (e.g. PyQt5, GTK+, tkinter GUIs)
pyinstaller hello.py --noconsole

# Specify the icon file to use
pyinstaller hello.py --icon=path/to/icon.ico
The output will be in a folder named dist/.
Build with .spec file
For more complex builds, it can help to first create a .spec file which
defines all the files that should be included and any other settings.
You can read more about spec files at https://pythonhosted.org/PyInstaller/spec-files.html.
Generate the .spec file
To generate a .spec file, use pyi-makespec which comes with the pyinstaller
package. Provide pyi-makespec the Python file/application you want to
package and it will generate the spec file.
Note that you can pass all the regular command-line flags that you would
pass to pyinstaller to pyi-makespec and it will include those options
in the spec file.
# Create a spec file with all defaults
pyi-makespec myapp.py
# Or, if you want the final distributable package to be a single file
pyi-makespec myapp.py -F
# To set the icon
pyi-makespec myapp.py --icon=icon.ico
# To disable console
pyi-makespec myapp.py --noconsole
# Combined
pyi-makespec myapp.py -F --icon=icon.ico --noconsole
Tweak the .spec file
Modify the .spec file to meet your needs.
This may include adding resource files like images, icons, configuration
files, or the Designer .ui templates. Additionally, you might want
to disable the console if it is a GUI application.
Include files
To add arbitrary files, modify the line in the .spec file that
contains datas=[]. It should contain a list of tuples.
Each tuple should contain two values, the file(s) to include,
and the target directory. For example, to include all .ui files
in your templates/ directory in to a templates/ directory of your
final distributable package, modify the spec file like this:
# Change `datas=[]` to this:
    # ...
    datas=[('templates/*.ui', 'templates')],
    # ...
Disable console
If you have a GUI application, such as a PyQt5, Tkinter, PyGame,
or GTK+ application, you might want to disable the console so a window
with the command prompt does not show up in addition to the regular
desired GUI window. You can disable the console by changing Console=True
in the .spec file to Console=False like this:
# Change `console=True` to False in the `exe` object
    # ...
        console=False
    # ...
Change the file icon
If you need to create a .ico icon file, you could use one of the following:
- Inedo’s Icon Maker
- Icoconvert.com
Inedo’s Icon Maker can be downloaded from the GitHub releases as a .zip file.
Unzip the file to get IconMaker.exe. Run it, and drag your image file in to
the window. It accepts up to 256×256 pixel images.
Icoconvert.com allows you to upload an image and get a .ico file back.
To change the icon that the .exe has, you can pass the --icon=icon.ico
to the pyi-makespec command or modify the .spec file yourself by altering
the exe object to add the argument icon='icon.ico'.
# Change or add `icon='icon.ico'` to `exe` object
    # ...
        icon='path/to/icon.ico'
    # ...
Build the package
Once the .spec file is up to your standards, use pyinstaller and pass
it the .spec file as the first argument. It will use the information
specified in the file to create the final distributable package.
pyinstaller myapp.spec
The output will be in the dist/ folder the same as building without
the .spec file.
Conclusion
After reading this tutorial, you should be able to create distributable
Python applications using PyInstaller.
References
- https://www.pyinstaller.org/
- https://pythonhosted.org/PyInstaller/spec-files.html