 Проверка целостности системных файлов Windows 10 может пригодиться в том случае, если у вас есть основания полагать, что такие файлы были повреждены или же возникли подозрения о том, что какая-либо программа могла изменить системные файлы операционной системы.
В Windows 10 присутствует два инструмента для проверки целостности защищенных системных файлов и их автоматического восстановления при обнаружении повреждений — SFC.exe и DISM.exe, а также команда Repair-WindowsImage для Windows PowerShell (использующая DISM для работы). Вторая утилита служит дополнением первой, в случае, если SFC не удается восстановить поврежденные файлы.
Примечание: описываемые в инструкции действия безопасны, однако, в том случае, если до этого вы проделывали какие-либо операции, связанные с заменой или изменением системных файлов (например, для возможности установки сторонних тем и т.п.), в результате восстановления системных файлов, эти изменения будут отменены.
Использование SFC для проверки целостности и исправления системных файлов Windows 10
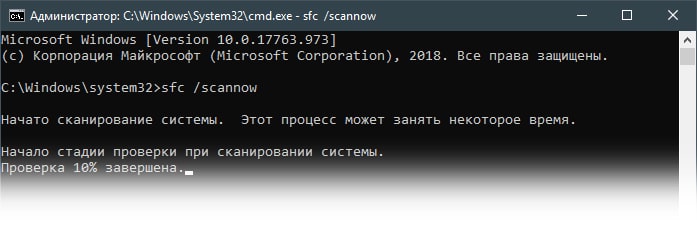
Многим пользователям знакома команда проверки целостности системных файлов sfc /scannow которая автоматически проверяет и исправляет защищенные системные файлы Windows 10.
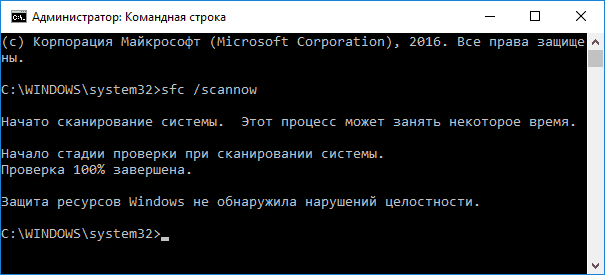
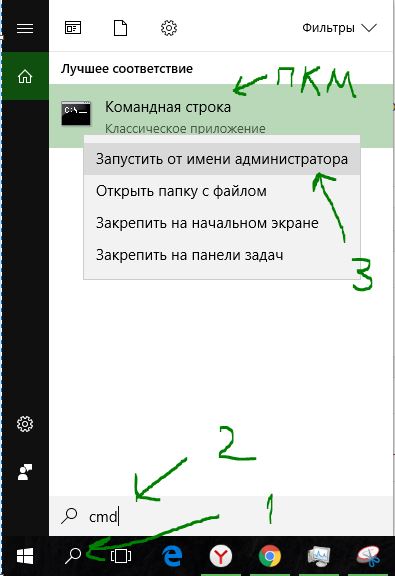
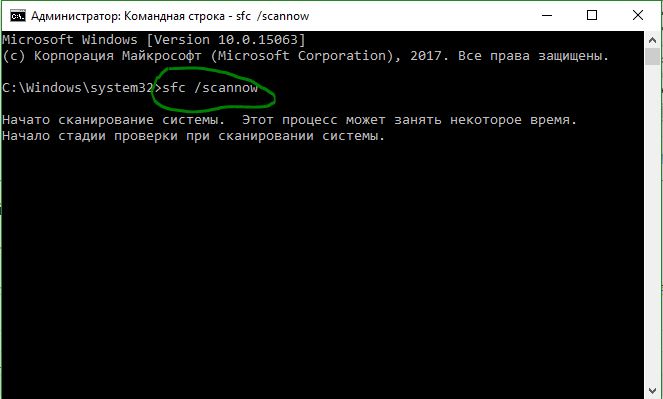
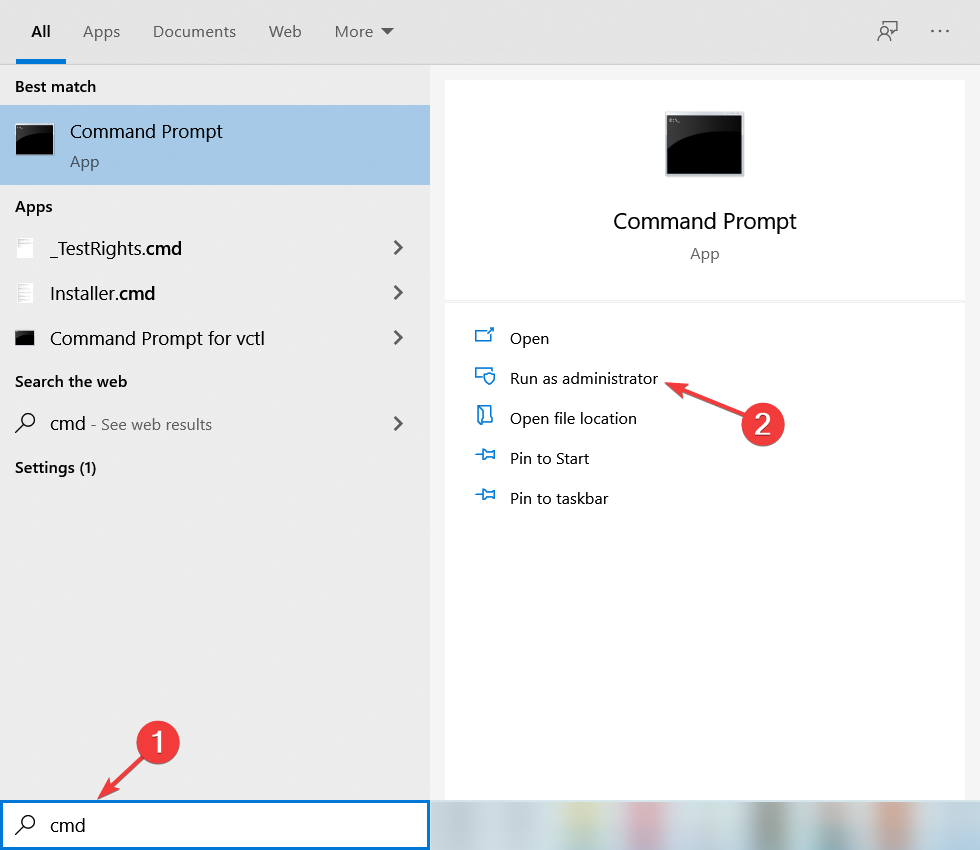
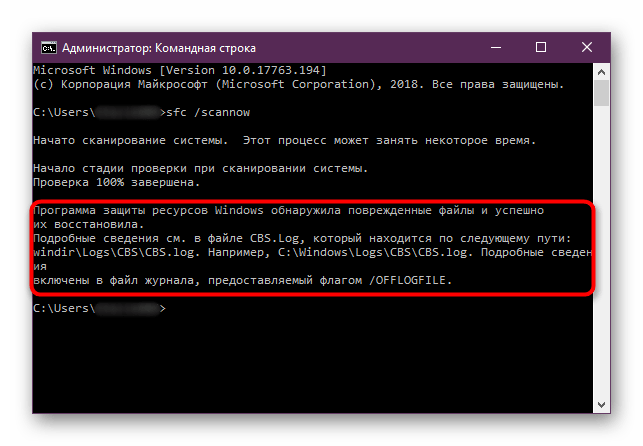
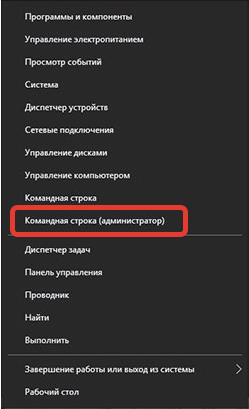
Для запуска команды стандартно используется командная строка, запущенная от имени администратора (запустить командную строку от администратора в Windows 10 можно, введя «Командная строка» в поиске в панели задач, затем — правый клик по найденному результату — Запуск от имени администратора), вводим в нее sfc /scannow и нажимаем Enter.
После ввода команды, начнется проверка системы, по результатам которой найденные ошибки целостности, которые можно исправить (о том, какие нельзя — далее) будут автоматически исправлены с сообщением «Программа защиты ресурсов Windows обнаружила поврежденные файлы и успешно их восстановила», а в случае их отсутствия вы получите сообщение о том, что «Защита ресурсов Windows не обнаружила нарушений целостности».
Также имеется возможность проверить целостность конкретного системного файла, для этого можно использовать команду
sfc /scanfile="путь_к_файлу"
Однако при использовании команды есть один нюанс: SFC не может исправить ошибки целостности для тех системных файлов, которые используются в настоящий момент времени. Чтобы решить проблему, можно запустить SFC через командную строку в среде восстановления Windows 10.
Запуск проверки целостности Windows 10 с помощью SFC в среде восстановления
Для того, чтобы загрузиться в среде восстановления Windows 10, вы можете использовать следующие способы:
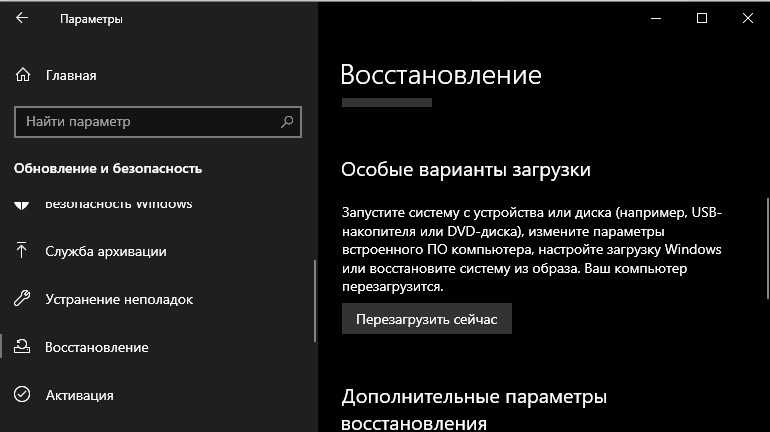
- Зайти в Параметры — Обновление и безопасность — Восстановление — Особые варианты загрузки — Перезагрузить сейчас. (Если пункт отсутствует, то вы можете также использовать такой метод: на экране входа в систему, кликните по значку «вкл» справа внизу, а затем, удерживая Shift, нажмите «Перезагрузка»).
- Загрузиться с заранее созданного диска восстановления Windows.
- Загрузиться с установочного диска или загрузочной флешки с дистрибутивом Windows 10, а в программе установки, на экране после выбора языка, слева внизу выбрать «Восстановление системы».

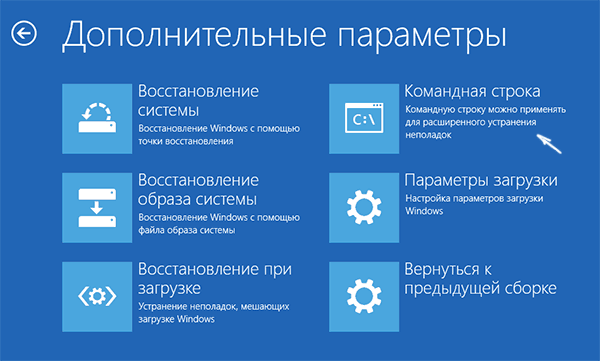
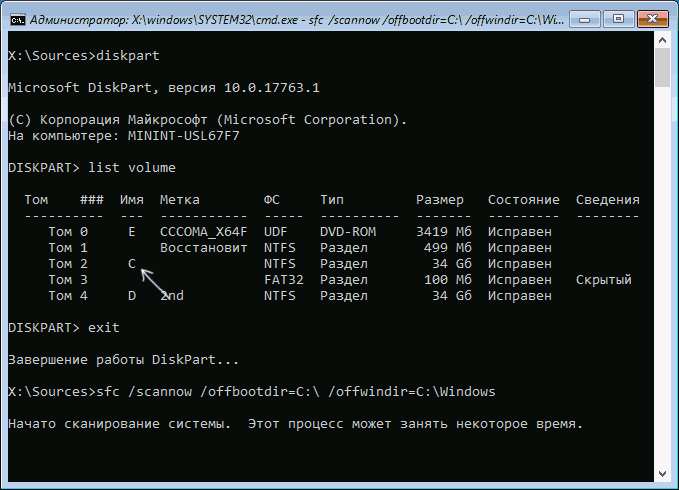
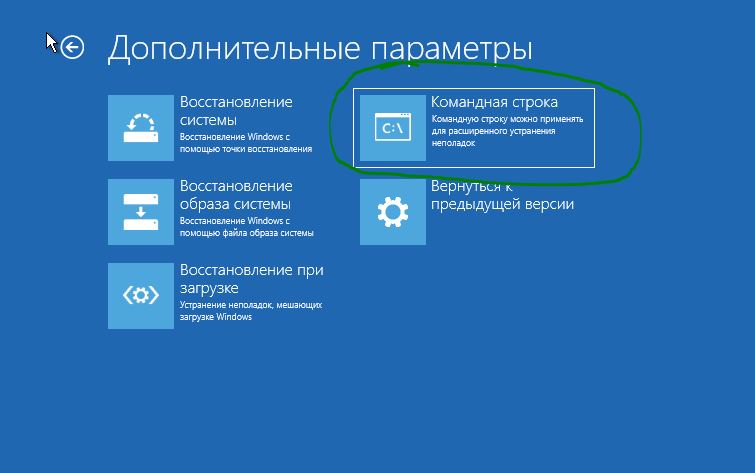
- После этого, зайдите в «Поиск и устранение неисправностей» — «Дополнительные параметры» — «Командная строка» (в случае если вы использовали первый из указанных выше способов, вам также потребуется ввести пароль администратора Windows 10). В командной строке по порядку используйте следующие команды:
- diskpart
- list volume
- exit
- sfc /scannow /offbootdir=C: /offwindir=C:Windows (где C — раздел с установленной системой, а C:Windows — путь к папке Windows 10, у вас буквы могут отличаться).

- Запустится сканирование целостности системных файлов операционной системы, при этом в этот раз команде SFC будет доступно восстановление всех файлов, при условии, что не повреждено хранилище ресурсов Windows.
Сканирование может продолжаться в течение значительного времени — пока мигает указатель подчеркивания, ваш компьютер или ноутбук не завис. По завершении закройте командную строку и перезагрузите компьютер в обычном режиме.
Восстановление хранилища компонентов Windows 10 с помощью DISM.exe
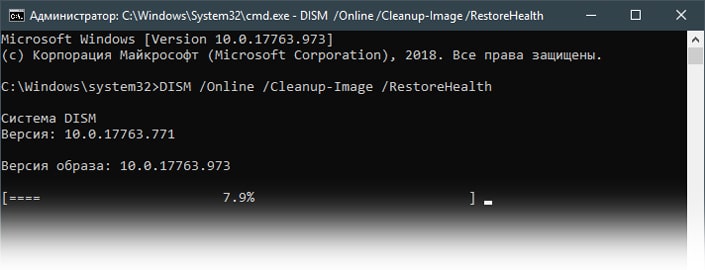
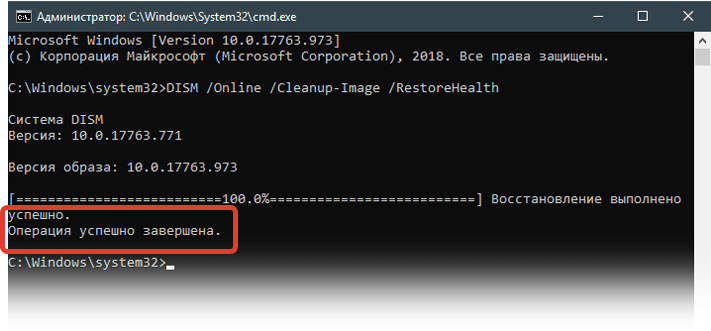
Утилита для развертывания и обслуживания образов Windows DISM.exe позволяет выявить и исправить те проблемы с хранилищем системных компонентов Windows 10, откуда при проверке и исправлении целостности системных файлов копируются оригинальные их версии. Это может быть полезным в тех ситуациях, когда защита ресурсов Windows не может выполнить восстановление файлов, несмотря на найденные повреждения. В этом случае сценарий будет следующим: восстанавливаем хранилище компонентов, а после этого снова прибегаем к использованию sfc /scannow.
Для использования DISM.exe, запустите командную строку от имени администратора. После чего можно использовать следующие команды:
Примечание: в случае, если команда восстановления хранилища компонентов не работает по той или иной причине, вы можете использовать файл install.wim (или esd) со смонтированного ISO образа Windows 10 (Как скачать Windows 10 ISO с сайта Microsoft) в качестве источника файлов, требующих восстановления (содержимое образа должно соответствовать установленной системе). Сделать это можно с помощью команды:
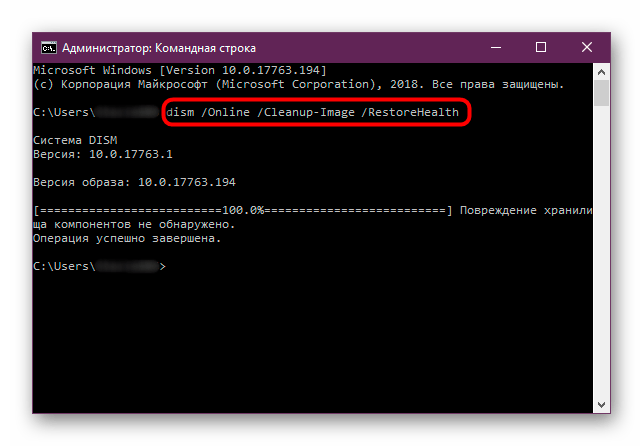
dism /Online /Cleanup-Image /RestoreHealth /Source:wim:путь_к_файлу_wim:1 /limitaccess
Вместо .wim можно использовать файл .esd тем же образом, заменив в команде все wim на esd.
При использовании указанных команд, журнал выполненных действий сохраняется в WindowsLogsCBSCBS.log и WindowsLogsDISMdism.log.
DISM.exe также можно использовать в Windows PowerShell, запущенном от имени администратора (запустить можно из меню правого клика по кнопке Пуск) с помощью команды Repair-WindowsImage. Примеры команд:
- Repair-WindowsImage -Online -ScanHealth — проверка наличия повреждений системных файлов.
- Repair-WindowsImage -Online -RestoreHealth — проверка и исправление повреждений.
Дополнительные методы восстановления хранилища компонентов, если описанные выше не срабатывают: Восстановление хранилища компонентов Windows 10.
Как видите, проверка целостности файлов в Windows 10 — не такая уж и сложная задача, которая порой может помочь исправить самые разные проблемы с ОС. Если не смогла, возможно, вам поможет что-то из вариантов в инструкции Восстановление Windows 10.
Как проверить целостность системных файлов Windows 10 — видео
Также предлагаю ознакомиться с видео, где использование основных команд проверки целостности показано наглядно с некоторыми пояснениями.
Дополнительная информация
Если sfc /scannow сообщает о том, что защите системы не удалось выполнить восстановление системных файлов, а восстановление хранилища компонентов (с последующим повторным запуском sfc) не помогло решить проблему, вы можете просмотреть, какие именно системные файлы были повреждены, обратившись к журналу CBS.log. Для того, чтобы экспортировать нужные сведения из журнала в текстовый файл sfc на рабочем столе, используйте команду:
findstr /c:"[SR]" %windir%LogsCBSCBS.log > "%userprofile%Desktopsfc.txt"
Также, по некоторым отзывам, проверка целостности с помощью SFC в Windows 10 может обнаруживать повреждения сразу после установки обновления с новой сборкой системы (без возможности исправить их, не установив новую сборку «начисто»), а также для некоторых версий драйверов видеокарт (в данном случае ошибка находится для файла opencl.dll. Если что-то из этих вариантов случилось и у вас, возможно, не следует предпринимать никаких действий.
Всякий раз, когда что-то идет не так с компьютером или ноутбуком, есть ряд инструментов для устранения неполадок, которые вы можете выполнить, чтобы попытаться устранить проблему. В Windows 10/8/7 есть несколько встроенных команд, которые можно использовать для проверки и восстановления поврежденных системных файлов, которые со временем вызывают проблемы при изменении.
Одним из способов устранения неполадок, связанных с Windows, является проверка системы и восстановление системных файлов. Это может помочь во всех типах проблем, таких как медленная система, синий экран смерти, внезапные сбои питания и сбои системы.
SFC и DISM — Средство проверки системных файлов, которое сканирует компьютер на предмет любого повреждения или изменений в системных файлах, которые в противном случае могли бы помешать нормальной работе вашего ПК. Инструменты заменяет файл правильной версией, чтобы обеспечить бесперебойную работу. С помощью командной строки можно попытаться сканировать и восстановить системные файлы поздних операционных систем, как Windows 10/8/7 /Vista.
Проверка и Восстановление системных файлов
Чтобы правильно и корректно проверить и восстановить системные файлы в Windows 10, запустите командную строку от имени администратора и введите ниже команды по очереди:
chkdsk c: /f /rsfc /scannowDISM /Online /Cleanup-Image /RestoreHealth
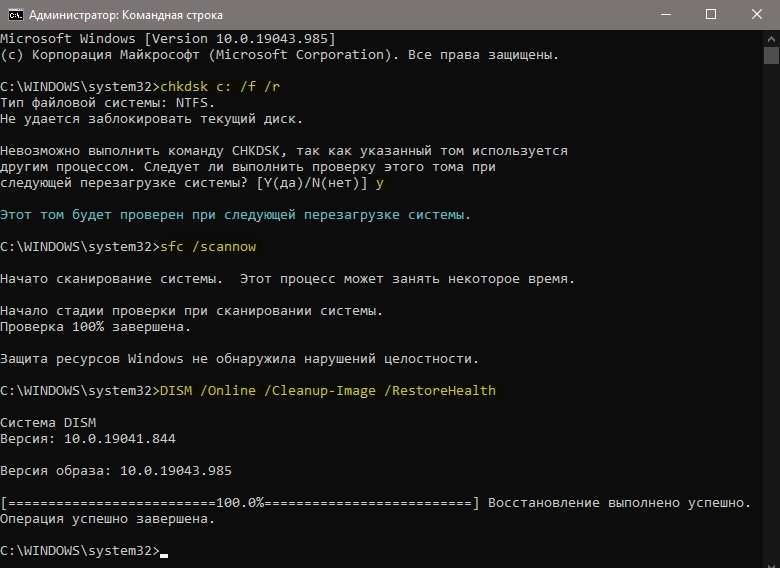
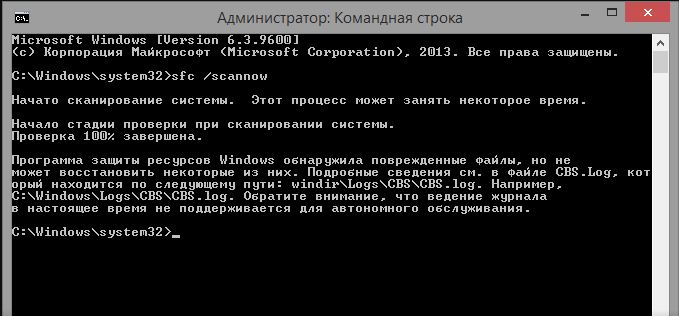
Ниже разберем более подробно команды, что делать с ошибками при вводе команд, как использовать SFC и DISM из образа и дополнительных параметров и, как прочесть файл CBS.log, когда появляется ошибка «Программа защиты ресурсов Windows обнаружила поврежденные файлы и не смогла восстановить. Подробные сведения в файле CBS.Log, который находится по пути: C:WindowsLogsCBSCBS.log«.

1. Использование инструмента System File Checker (SFC)
Запустите командную строку (CMD) от имени администратора. Нажмите «поиск» и напишите просто «cmd» или «командная строка», далее по ней правой кнопкой мыши и запуск от имени админа.
Задайте ниже команду и дождитесь окончания процесса:
sfc /scannow
Примечание: После сканирования вашей системы будет выдан один из трех результатов:
- Ошибок системных файлов не будет.
- Будут ошибки системных файлов и Windows восстановит их автоматически.
- Windows обнаружила ошибки, но не может восстановить некоторые из них.
Если у вас показывает вариант 3, что ошибка обнаружена и система не может восстановить, то загрузитесь в безопасном режиме и проделайте заново процедуру. Советую отключить шифрование EFS и Bitlocker, если они были включены. Если SFC все ровно не смог восстановить файлы, то попробуйте ниже способ через дополнительные параметры и прибегните к способу 2 (DISM).
Запуск SFC через дополнительные параметры
Если инструмент SFC не смог восстановить системный файл, значит может быть, что он работают в данный момент и инструмент не сможет его заменить на новый. В данном случае, придется загрузиться в дополнительные параметры и запустить командную строку.
- Откройте «Параметры» > «Обновления и безопасность» > «Восстановление«.
- Справа найдите «Особые варианты загрузки» и нажмите «Перезагрузить сейчас».
В дополнительных параметрах перейдите «Поиск и устранение неисправностей» > «Дополнительные параметры» > «Командная строка».
Далее задайте команду:
sfc /scannow /offbootdir=C: /offwindir=C:Windows

2. Использование инструмента Deployment Image and Service Management (DISM)
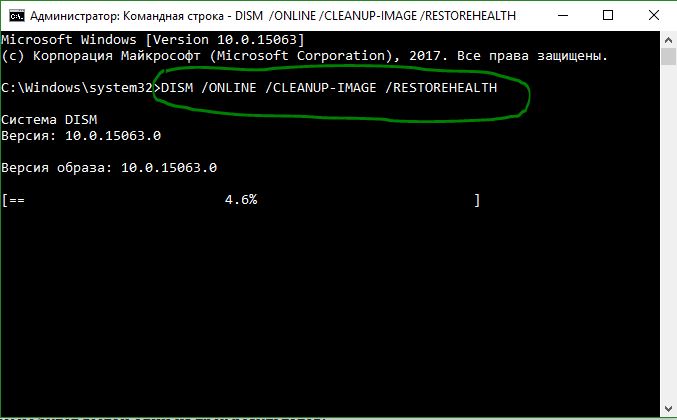
Если вышеуказанное не работает, есть один последний способ проверить повреждение в системных файлах и исправить их. Используем инструмент Deployment Image and Service Management (DISM). Команда работает с системами Windows 8/8.1/10. Откройте обратно командную строку от имени администратора и используйте следующую команду:
DISM /ONLINE /CLEANUP-IMAGE /RESTOREHEALTH
Процесс может занять длительное время с зависанием процентной шкалы. Закончив работу, перезагрузите компьютер и запустите обратно sfc /scannow, чтобы убедиться, что ошибок нет или ошибка пропала.
Запуск DISM из образа Windows
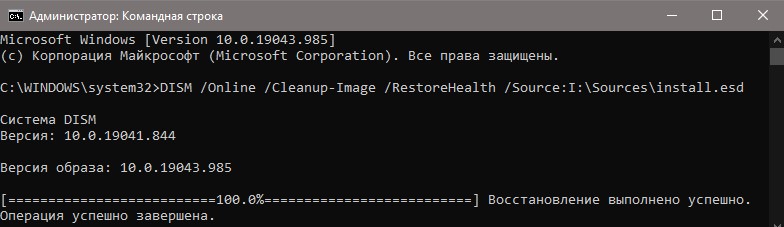
Если выше команда DISM выдает ошибку повреждения компонентов хранилища, то можно восстановить файлы из ISO образа. Смонтируйте ISO образ Windows 10 в проводнике.
Примечание: Лучше, чтобы версия, язык и архитектура монтируемого образа, совпадала с текущей Windows 10, которая установлена.

Далее введите ниже команду и замените букву I на подключаемый образ. Откройте проводник (этот компьютер) и посмотрите букву диска.
DISM /Online /Cleanup-Image /RestoreHealth /Source:I:Sourcesinstall.esd
Анализ лога CBS, какие файлы не удалось восстановить
Если после сканирования системных файлов, программа защиты ресурсов Windows обнаружила поврежденные файлы, но не может восстановить некоторые из них, лог файл CBS может помочь определить, какие именно файлы повреждены. Для этого:
- Перейдите по пути C:WindowsLogsCBS
- Откройте файл CBS.log в блокноте или текстовом редакторе
- В блокноте нажмите Ctrl+F, чтобы вызвать поиск
- В поиске напишите Cannot repair member file, чтобы найти файлы, которые не удается восстановить
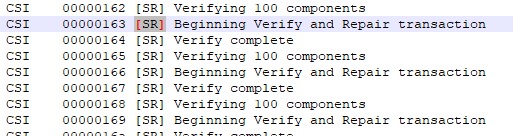
- Если поиск не дал результатов, то найдите записи [SR] и вы обнаружите, что все они одинаковы 100 components
- Ищите листая вручную любые изменения, отличные от 100 components, где вы и найдете поврежденный файл или указание
- Ориентируетесь по времени, когда вы примерно запускали сканирование SFC, так как лог может быть и за вчерашний день
Примечание: Лог журнала DISM находятся по пути C:WindowsLogsDISM (dism.log).
Смотрите еще:
- Не работает кнопка Пуск в Windows 10?
- Почему Пропал и Не Работает Звук в Windows 10?
- 9 Причин Почему Компьютер с Windows Зависает
- Диск загружен на 100% в диспетчере задач Windows 10
- Ускоренная загрузка windows, настройка windows для быстрой работы
[ Telegram | Поддержать ]
Check expert solutions to eliminate or replace corrupt files
by Milan Stanojevic
Milan has been enthusiastic about technology ever since his childhood days, and this led him to take interest in all PC-related technologies. He’s a PC enthusiast and he… read more
Updated on October 25, 2022
Reviewed by
Vlad Turiceanu

Passionate about technology, Windows, and everything that has a power button, he spent most of his time developing new skills and learning more about the tech world. Coming… read more
- You can use the Windows built-in tools to repair corrupted files.
- There’s the option to remove the corrupted system files from Windows 10 or repair them.
- Some of the solutions for Windows 10 also work on Windows 11.
XINSTALL BY CLICKING THE DOWNLOAD FILE
This software will repair common computer errors, protect you from file loss, malware, hardware failure and optimize your PC for maximum performance. Fix PC issues and remove viruses now in 3 easy steps:
- Download Restoro PC Repair Tool that comes with Patented Technologies (patent available here).
- Click Start Scan to find Windows issues that could be causing PC problems.
- Click Repair All to fix issues affecting your computer’s security and performance
- Restoro has been downloaded by 0 readers this month.
Many computer problems are caused by corrupted or damaged system files, and the Windows installation process is not an exception.
Fortunately, there are a few ways to fix corrupted system files on your system, and today we’re going to show you how to repair Windows 10 & 11 with ease, and how to prevent these types of problems from occurring again.
What causes corrupt system files in Windows 10?
A system file plays an important role in the operating system and when it gets damaged and cannot complete its function, it may be called corrupt.
All the programs can end up having corrupted files but when these files are part of the operating system, things can get a little bit more complicated. Some of the common causes include:
There are a lot of other possible reasons for which your Windows files or system files can become corrupted, but here are some of those:
- Viruses and malware – Viruses and malware will sometimes cause system files to get corrupted. This occurrence is not very common as the main goal of a virus or malware is to gather important data, so crashing your system would not meet its end goal. But, if you spot a .djvu file extension, it is most likely a virus, so learn all the ways to remove it and secure your system. To keep yourself away from all the trouble, also check our curated list of the best antiviruses.
- Power outages – These can happen randomly and without any telltale sign, and they can cause a lot of problems with your hard disk. If the part of the storage that contains your system installation is affected, the files that allow your OS to run normally may become corrupt. Do not hesitate to check the best UPS to keep your system up and running even in case of a power failure.
- System crashes – System crashes may occur because of hardware or software problems and in turn, they may produce the corruption of system files. Check this guide to find out how to eliminate issues causing the system to crash in Windows 11.
- Update errors – Update errors are pretty common and they often create problems with the system files and BSOD errors, which can lead to system file corruption. Check the linked guides for the best solutions to the following Windows Update error codes:
- 0x800703f1
- 0x8024ce0e
- 0x80080008
- Hardware problems – When the hard drive starts having problems reading and writing data, bad sectors and corrupt files can start occurring. Find out the best tools for hardware diagnostics in Windows.
Apart from the reasons listed above, there are various corrupted file generator tools that could have been used. If that’s the case, head to that very tool or website for the solution.
Of course, to avoid system corruption, you should keep your system updated and maintain your hard drive as clean as possible. But if you still run into trouble, our solutions below will definitely help you.
How do I fix corrupted files on Windows 10?
1. Use the SFC tool
1.1 Run System File Checker
1. Press the Windows key to open the Windows Search box.
2. Type cmd in the search box and click on Run as Administrator to open an elevated Command Prompt window.
3. Input the following command: sfc /scannow
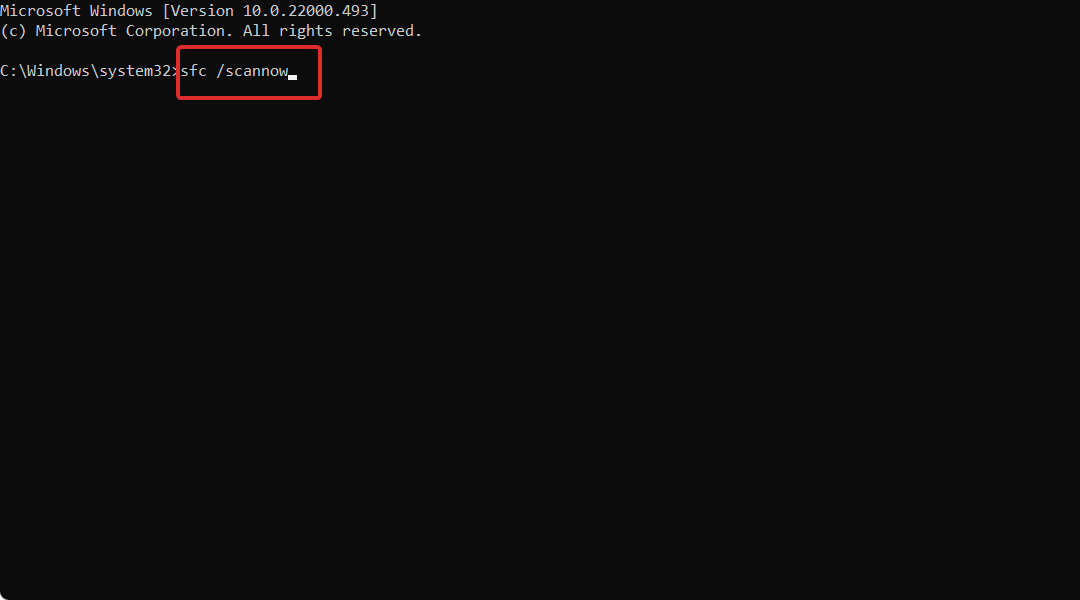
4. Press Enter to run the command. The repair process will begin.
5. Don’t close Command Prompt or interrupt the repair process. It can take a while, so wait patiently while it completes.
If you want to repair corrupted files on your Windows 10 device, you need to perform an SFC (System File Checker) scan. It can be done easily with a command-line tool such as Command Prompt.
When you run the SFC scan, it will identify the problems and repair missing or corrupted system files in Windows 10. Also, it can easily take care of issues when the C drive is corrupted in Windows 10.
After the repair process is finished, if your system files are not corrupted, you’ll see the message Windows Resource Protection did not find any integrity violations.
However, the System File Checker tool can’t always fix corrupted files, so keep that in mind.
1.2 Check the SFC log
- Enter cmd in the Windows Search Bar and click on Run as administrator to open Command Prompt with full rights.

- Enter the following command and press Enter (By doing this, you’ll create a sfclogs.txt file on your Desktop):
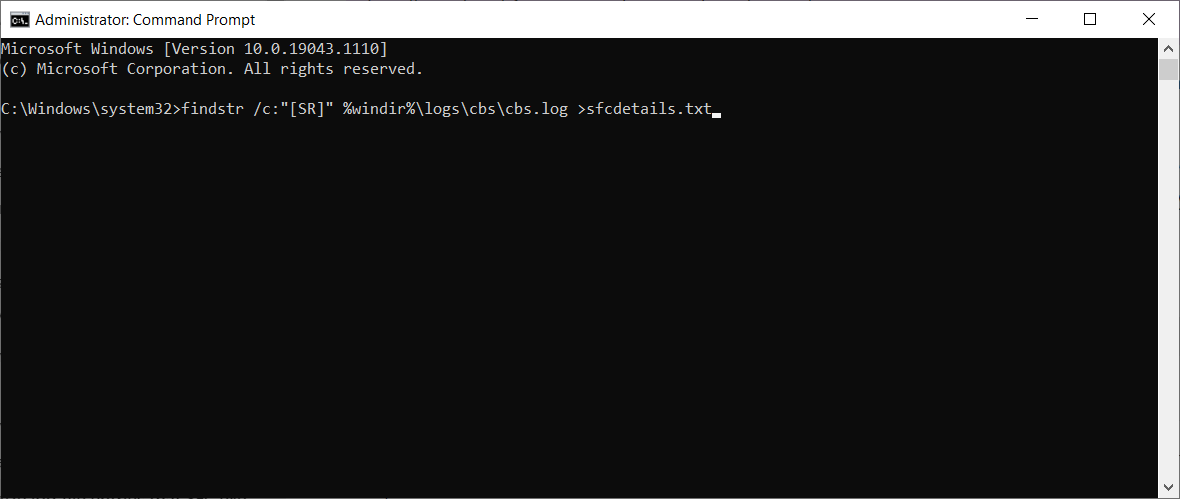
findstr /c:"[SR]" %windir%logscbscbs.log >sfcdetails.txt
- Open the sfcdetails.txt and check the results of SFC scan.

Keep in mind that this log file contains only information related to the SFC scan that is performed in Windows. Using the two methods listed above, you can easily do a CMD scan and repair.
2. Use the DISM tool
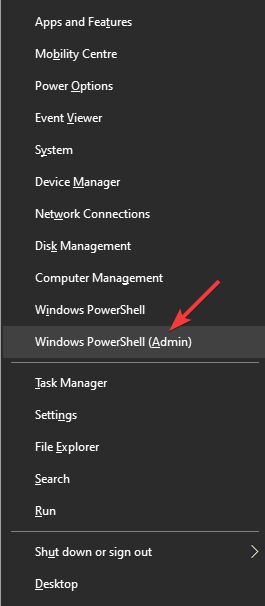
- Press the Windows key + X and click on Windows PowerShell (Admin) or Command Prompt (Admin) to open the app with administrative privileges.

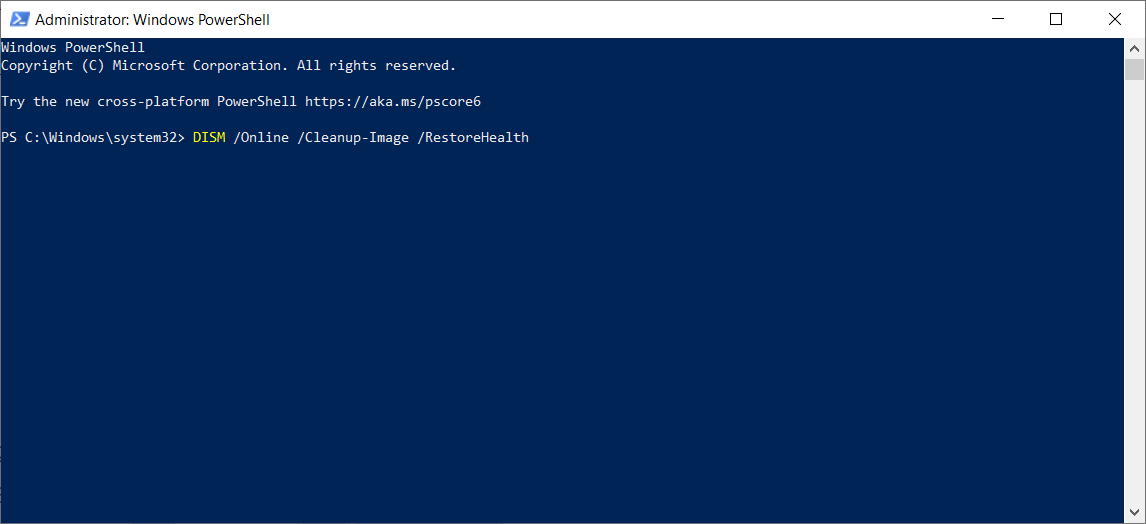
- Type/paste the following command and press Enter:
DISM /Online /Cleanup-Image /RestoreHealth
- The repair process can take 10 minutes or more, so be patient and don’t interrupt it.
- After DISM tool repairs your files, restart your PC.
DISM stands for Deployment Image Servicing & Management, and it’s used to fix any corruption problems that can prevent the SFC tool from running optimally. Also, this tool will help if the Windows 11 installation file is corrupted.
3. Run a SFC scan from Safe Mode
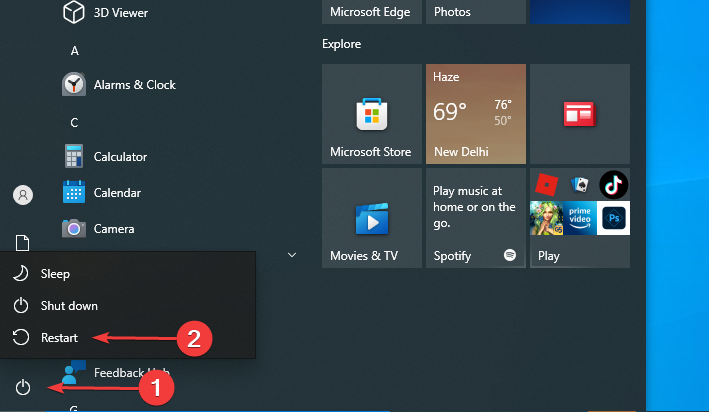
- Press the Windows key to launch the Start menu, click on the Power button, and while holding the Shift key, select Restart.

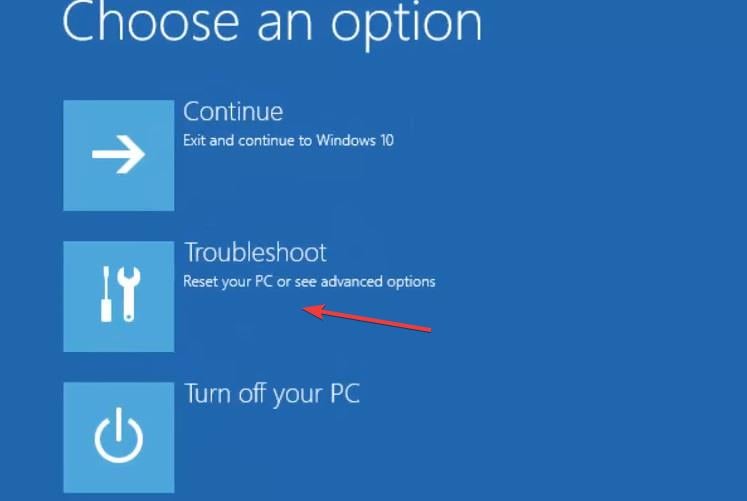
- You’ll see three options available. Select Troubleshoot.

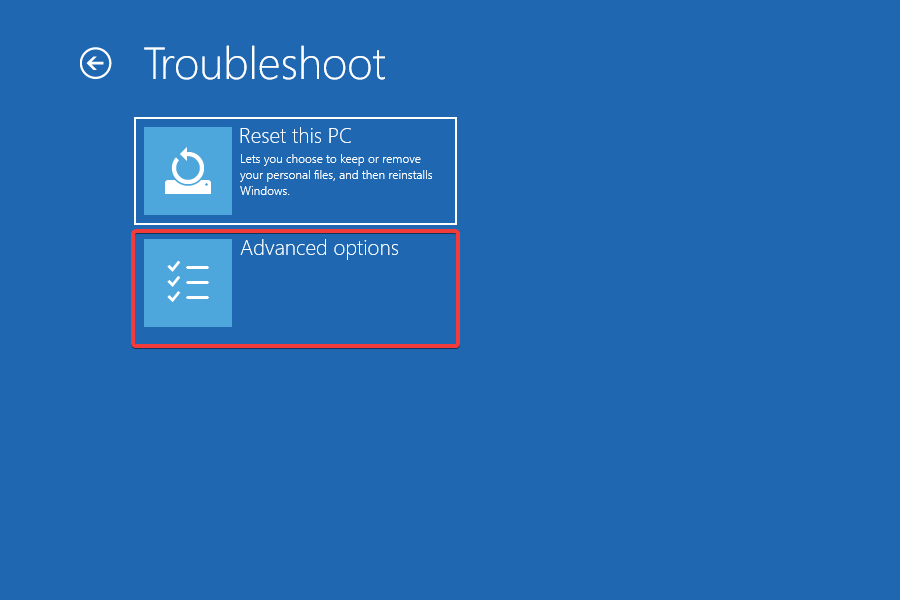
- Select Advanced options.

- Next, click Startup Settings.
- Click the Restart button.
- When your PC restarts, you’ll see a list of options. Select any version of Safe Mode by pressing the appropriate key.

When Safe Mode starts, repeat the steps from Solution 1 to perform an SFC scan.
Sometimes, an SFC scan can’t repair your files by running Windows normally, but if that happens, you can try running the SFC tool in Safe Mode.
Safe Mode is a special mode that uses only default drivers and applications and by using it, you’ll eliminate any possible interference from third-party apps.
4. Perform a SFC scan before Windows 10 starts
- Press the Power button to turn on the system, and as soon as the Windows logo appears, hold it to turn off the computer.
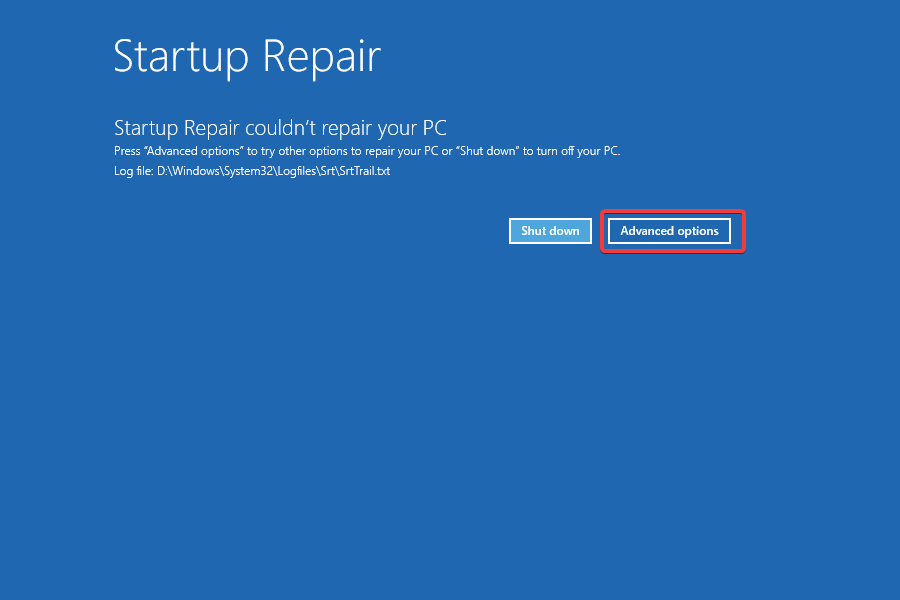
- Repeat the same process thrice, and on the fourth attempt, Windows will automatically perform a Startup repair.
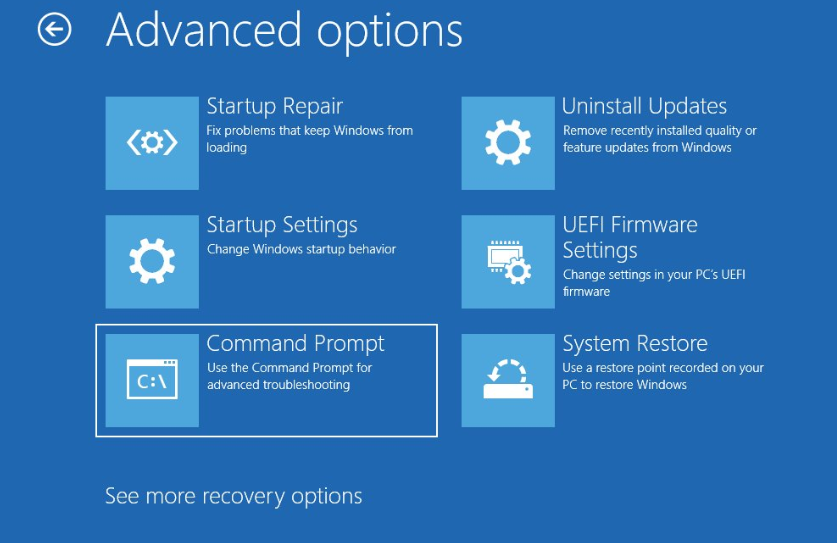
- Once the process is complete, click on Advanced options.
- When the list of options appears, select Troubleshoot.
- Choose Advanced options and select Command Prompt.

- When your PC restarts, you might be asked to enter your username and password, so be sure to do that.
- Find the letter of your Windows 10 drive. To do that, enter the following command and press Enter:
wmic logicaldisk get deviceid, volumename, description
- Pay attention to Volume Name. In most cases Windows Volume Name will be assigned to the letter D. This is perfectly normal if you start Command Prompt before starting Windows, so no need to worry about it.
- Also check System Reserved drive. In most cases, it should be C.
- Enter the following command and press Enter (Be sure to use the letters that you got from the previous steps):
sfc /scannow /offbootdir=C: /offwindir=D:Windows - Wait while your system files are scanned.
- After the scan is completed, close Command Prompt and start Windows 10 normally.


Sometimes you need to scan and repair protected system files, but you can’t do that by running Windows 10 normally.
To scan protected system files you’ll have to run an SFC scan before Windows 10 starts as shown above in this solution.
5. Replace the files manually
- Press the Windows key + X combination and select Windows PowerShell (Admin) or Command Prompt (Admin), depending on your system’s settings.
- Paste or type the following command and press Enter:
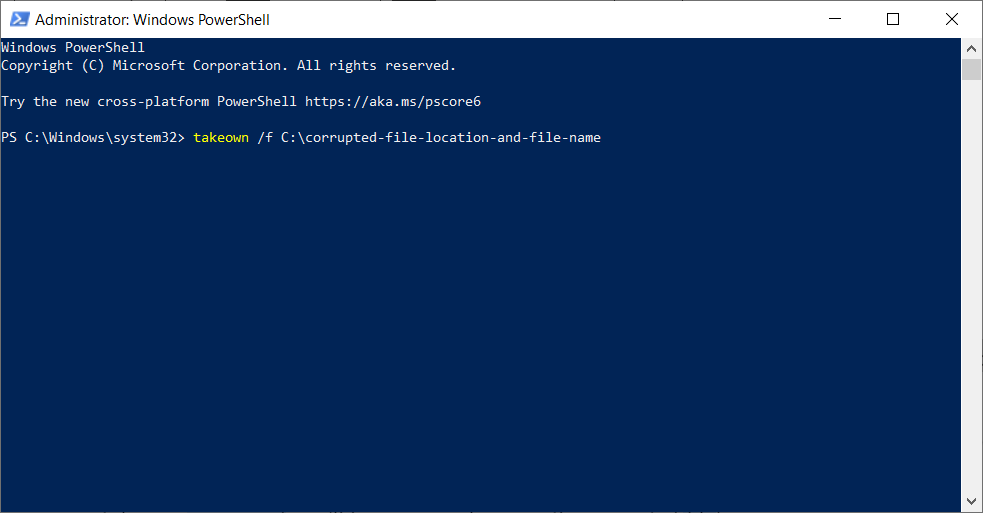
takeown /f C:corrupted-file-location-and-file-name
- Remember to replace corrupted-file-location-and-file-name with the actual location of the corrupted file. You need to include both the file name and extension and not just the location of the directory (By running the takeown command you’ll have ownership over the corrupted file).
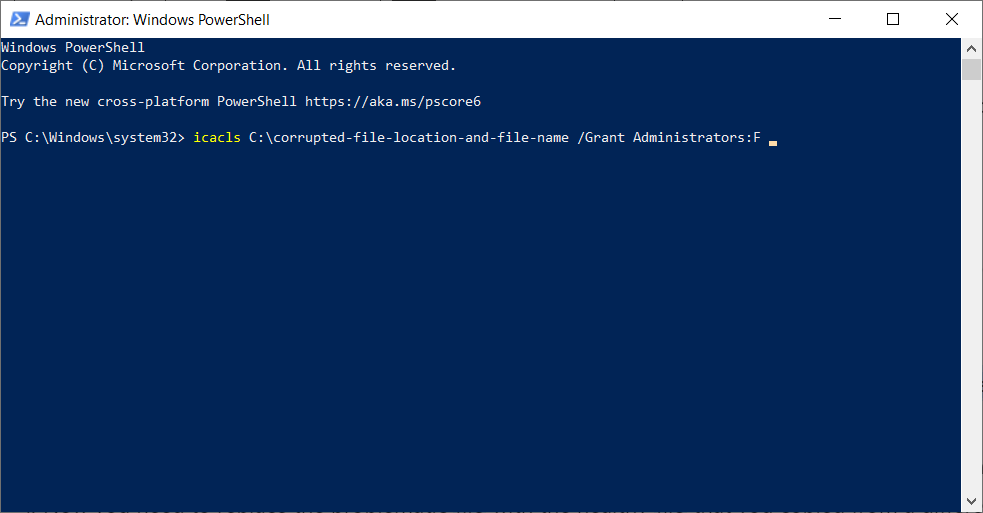
- Include the following command to gain full administrator privileges over the file and press Enter:
icacls C:corrupted-file-location-and-file-name /Grant Administrators:F
- Once again, replace the corrupted-file-location-and-file-name with the actual location of the file.
- Now you need to replace the problematic file with the healthy file that you copied from a different PC.
- Paste the following command and press Enter:
copy C:location-of-healthy-file C:corrupted-file-location-and-file-name - Enter Yes if you’re asked whether you want to overwrite the file.
- Repeat these steps for all corrupted files.
- After all corrupted files are replaced, run the following command to verify if the problem with corrupted files is fixed:
SFC /verifyonly


NOTE
This is one of the more advanced solutions, so be sure to follow it exactly. We also advise you to be extra cautious while performing the steps, as getting them wrong could cause system instability.
First, you need to open your SFC log and check which corrupted files can’t be repaired. We already explained how to view the SFC log file in Solution 1, so be sure to check it out for instructions.
After you find the corrupted file, you need to transfer a healthy version of that file from another PC to your PC. Keep in mind that both PCs have to use the same version of Windows 10.
6. Use the System Restore feature
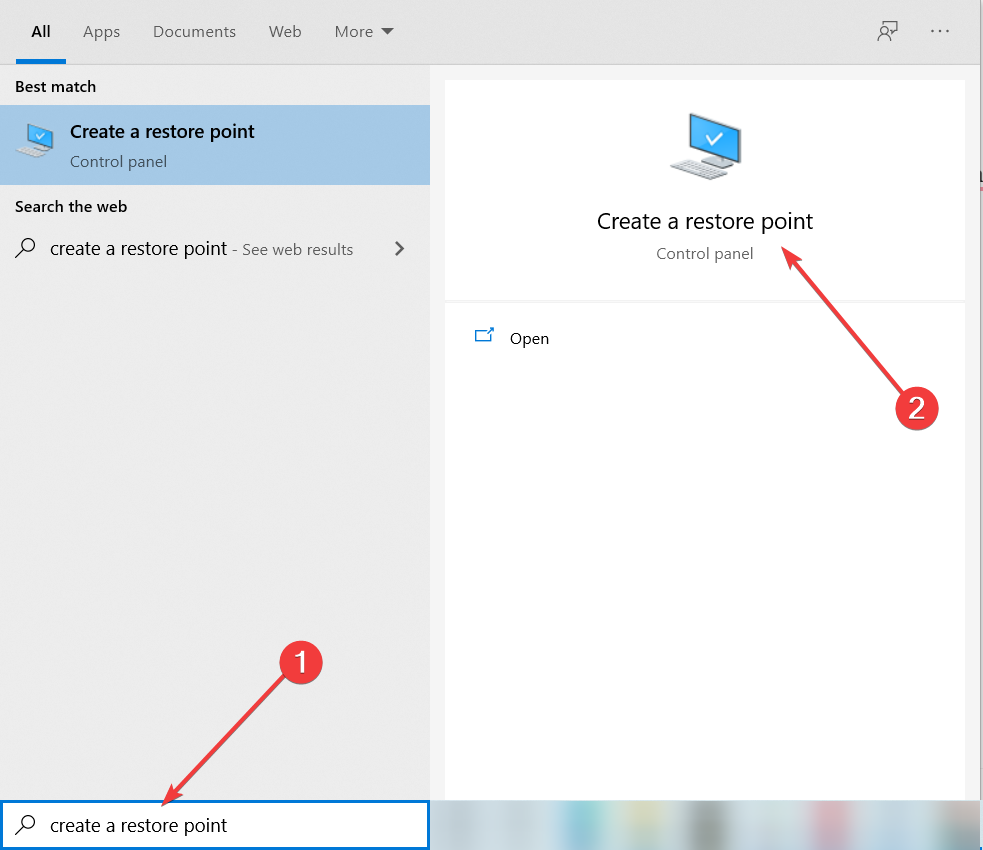
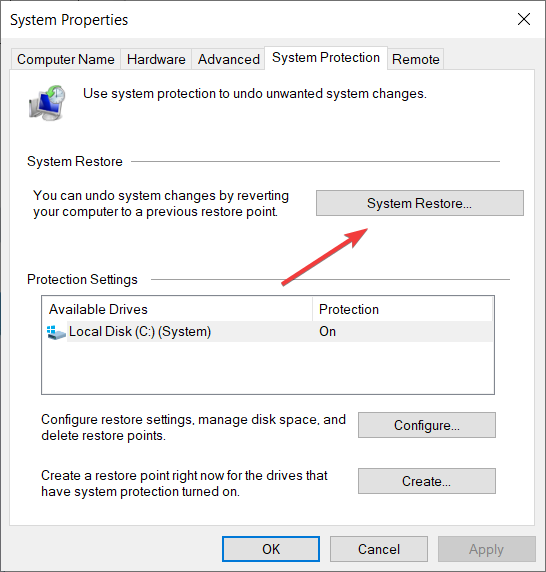
- Press Windows Key + S, type create a restore point, and select the option from the results.

- Click on the System Restore button.

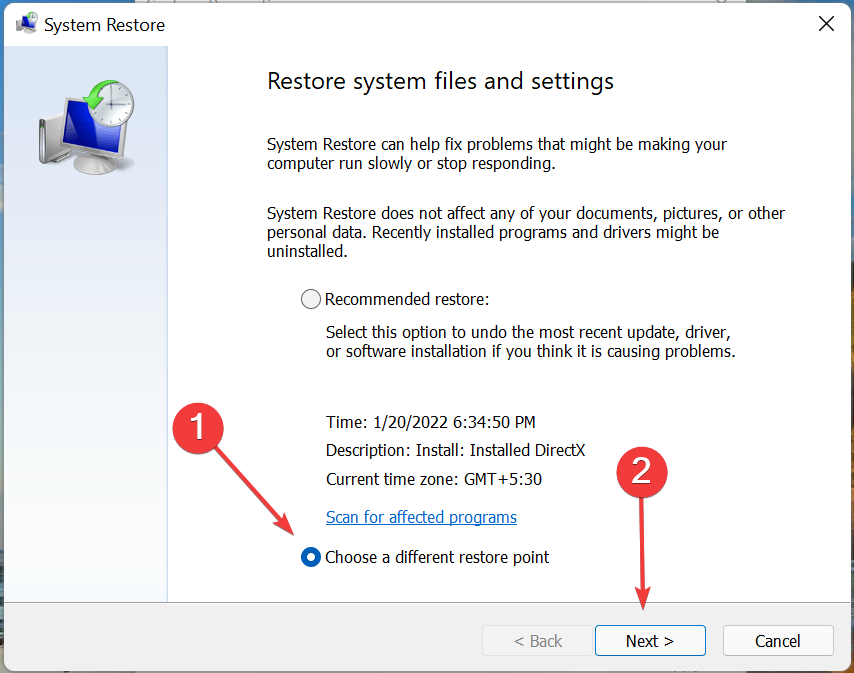
- You will be recommended the latest restore point, but you can click on Choose a different restore point and hit the Next button to select a previously created one.

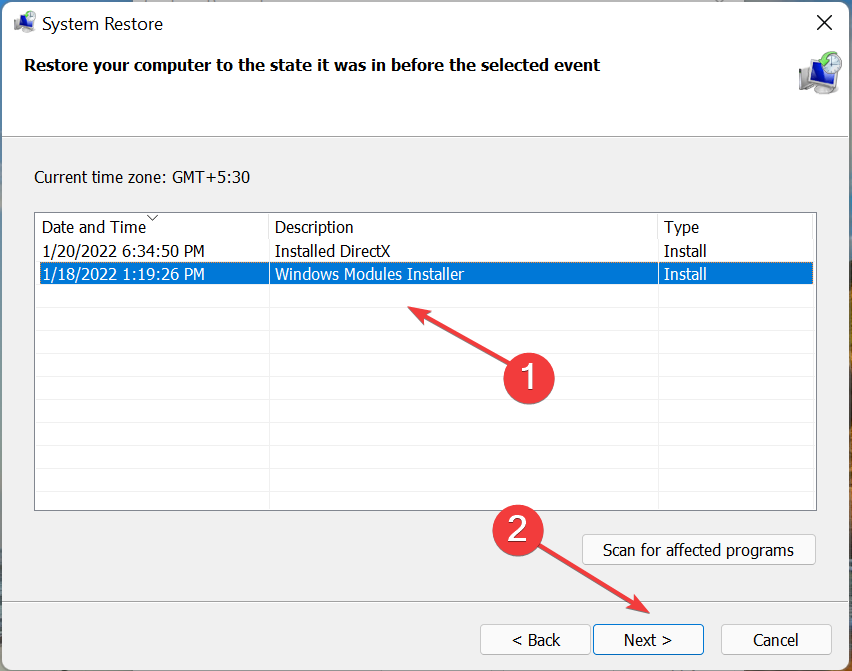
- Select the desired restore point and click Next.

- Follow the instructions on the screen to perform the restoration.
After the process is complete, system files should be restored to the previous healthy version.
System Restore is a useful feature that will restore your system to an earlier state. If you are unable to fix corrupted files, you might want to consider performing System Restore.
If all these steps seem a bit too complicated for you, you could also use an automated Windows 10 repair tool in order to perform the same actions without any worries.
We recommend using a professional program that restores system values to their default version automatically, without affecting personal files or data.
Restoring your system to a previous state can fix a number of system issues. A simpler way to safely restore your system is using a specialized tool that can do all the work for you.
Restoro will automatically scan your PC for problematic files and will replace all critical Windows system files that are malfunctioning with previous versions that are working perfectly.
Here’s how you can perform this action:
- Download and install Restoro.
- Launch the application.
- Wait for it to find any system stability issues.
- Press Start Repair.
- Restart your PC for all the changes to take effect.
The built-in system restoration tool will revert your Windows to a previous version, therefore you can lose some precious data that was saved after the restoration point was made. You can always return your system to its pre-repair condition.
⇒ Get Restoro
Disclaimer: This program needs to be upgraded from the free version in order to perform some specific actions.
7. Reset corrupted Windows 10
- Press the Windows key to open the Start Menu.
- Then, click the Power button, press and hold the Shift key, and select the Restart option.
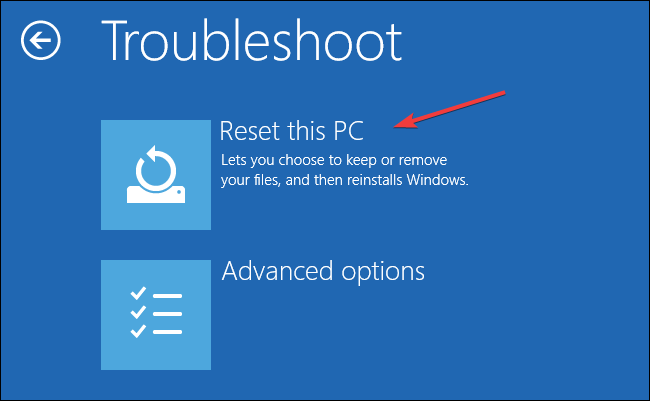
- Choose Troubleshoot and select Reset this PC.

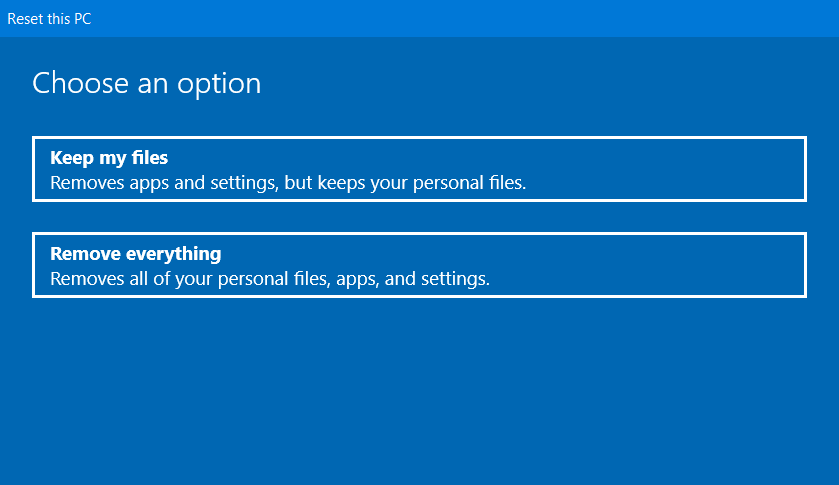
- You have two options available:

- Keep my files will reinstall Windows 10, but it will keep your personal files and settings.
- Remove everything will remove both personal files and settings (Keep in mind that third-party applications and downloaded files will be removed by performing the reset).
- If asked whether you want to clean the drive, choose the Just remove my files option.
- Choose your username and enter its password (If you’re asked to insert Windows 10 installation media, be sure to do so).
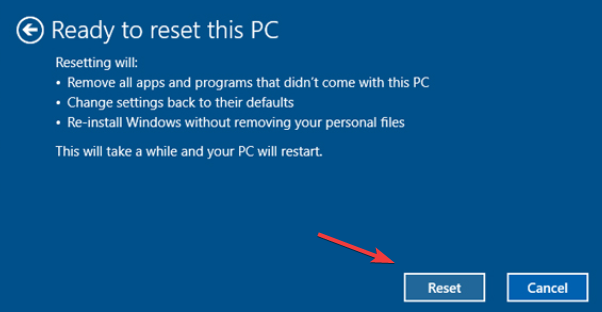
- Select your version of Windows and click the Reset button to start.

- Follow the instructions on the screen to complete the process.
If everything else fails, you might have to reset your Windows 10. This process will remove your installed apps and files, so be sure to back up important files.
You might need a Windows 10 installation media to perform this process, so be sure to create one using a bootable USB flash drive. Once done, you can repair Windows 10 system files from USB.
If the reset process didn’t fix the problem, repeat it, but choose the second option, Remove everything. Then select the Only the drive where Windows is installed option and finally select the Just remove my files option.
If that doesn’t fix the problem, perform a clean install of Windows 10 by using our comprehensive guide. With this, you will be able to reset corrupted Windows 10.
Some PC issues are hard to tackle, especially when it comes to corrupted repositories or missing Windows files. If you are having troubles fixing an error, your system may be partially broken.
We recommend installing Restoro, a tool that will scan your machine and identify what the fault is.
Click here to download and start repairing.
After going through all these methods, you know how to get rid of corrupted files in Windows 10. Also, you are now aware of how to recover corrupted files in Windows 10.
There are also great third-party software that can help you repair easily the majority of Windows 10/11 problems you may encounter, check out this guide and learn more.
Besides many of you might be wondering how to fix corrupted files in Windows 7? And you will certainly be pleased with the answer. The methods listed above will work as effectively and fix corrupted files in this OS as well.
- Sfc /scannow stops on Windows 10/11 [BEST SOLUTIONS]
- 5+ best Windows update repair tools for Windows 10/11
- Fix: Restart to repair drive errors on Windows 10/11
- Windows 10/11 Update Error 0x800703f1 [FIX]
- How to fix Logilda.dll error/not found on Windows 10/11
How to fix corrupted files in Windows 11 using Startup Repair?
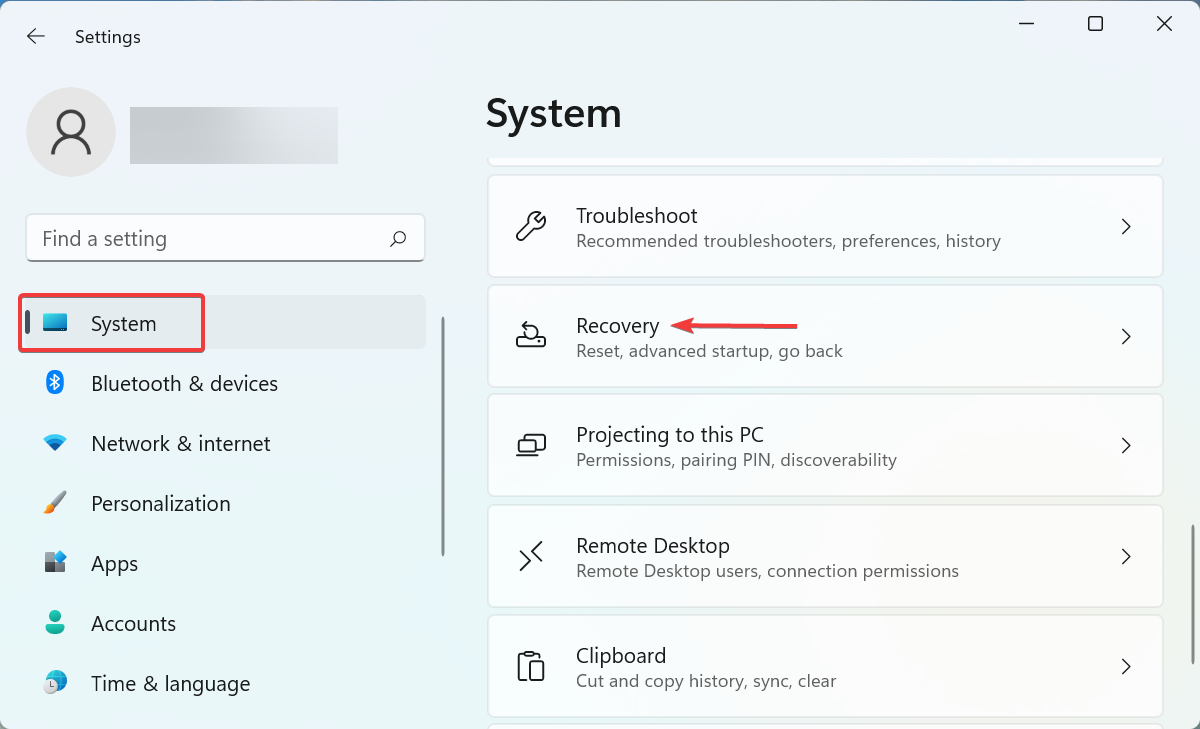
- Press Windows + I to launch the Settings app, and click on Recovery on the right in the System tab.

- Click on the Restart now button next to Advanced startup.
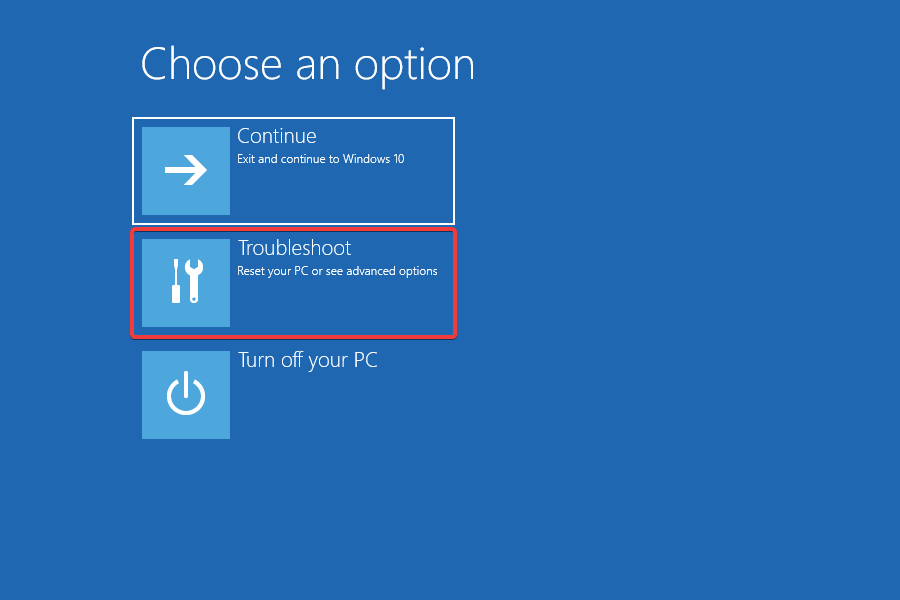
- Once your computer enter the Windows RE (Recovery Environment), click on Troubleshoot.
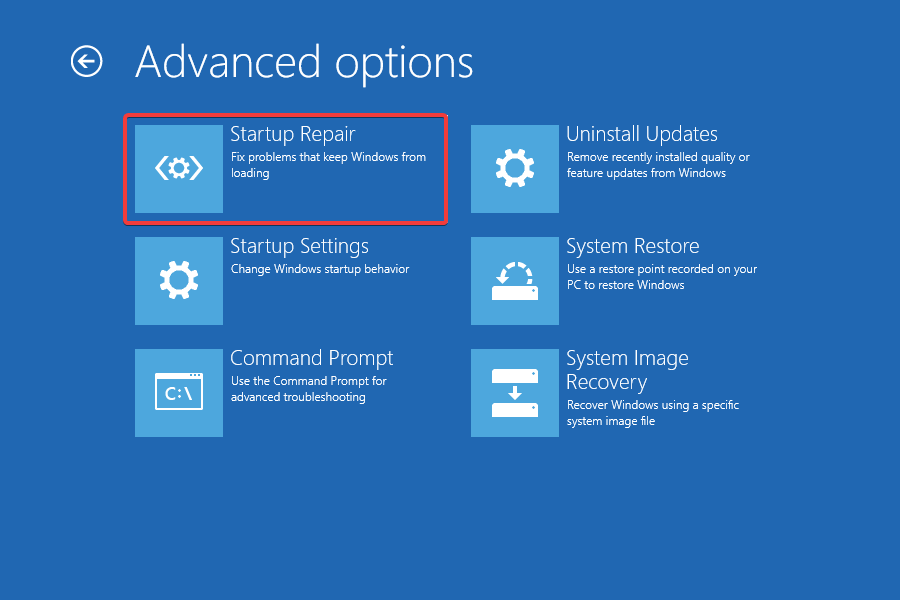
- Next, click on Advanced options.
- Now, select Startup repair from the options listed here.
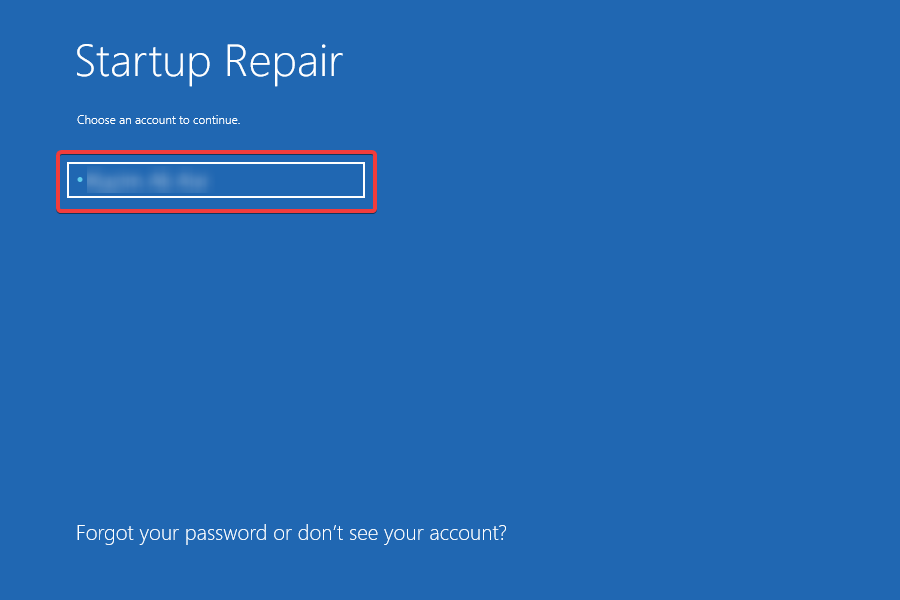
- Select your user account.
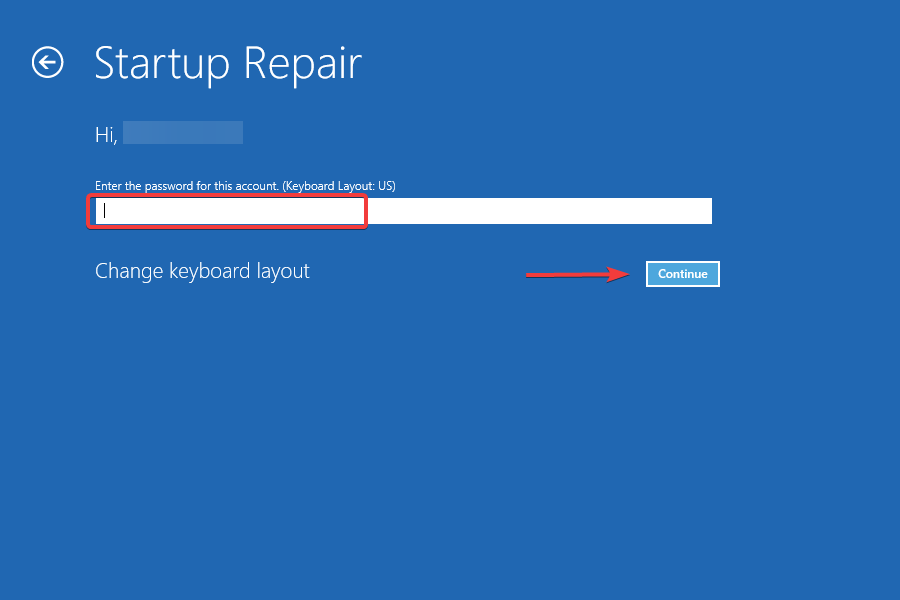
- Enter the password for your user account, if you have set one, and click on Continue to start the Startup Repair.


The Startup Repair tool helps repair issues preventing OS from booting effectively. And this is most likely due to the presence of corrupt system files in Windows 11 or the complete absence of certain critical system files.
It will automatically scan for corrupt files, and either replace or remove them, thus eliminating the problem. The tool may sometimes take a while to run, but it’s recommended that you let the process complete and not terminate it mid-way.
Also, bear in mind that the method listed above is in addition to the ones in the previous section. You can try those as well to get rid of corrupt files in Windows 11.
For those of you trying to learn how to fix corrupted files in Mac, the process may be different but the idea is pretty much the same.
How to find corrupted files in Windows 10?
The process itself is not tricky but will require you to be attentive to minute details. If it’s the corrupt system files in Windows 10 or 11, you will notice performance-related issues, or may not be able to use certain features.
In the worst case, the OS won’t boot at all, which can be fixed by running the DISM tool, SFC scan, or the Startup Repair tool from the Recovery Environment, as discussed in the previous sections.
In the case of corrupted files on SSD, you might not be able to access these or they may crash soon after launch. The same is the case for an SD card, so if you have been wondering how to fix corrupted files on an SD card, just try the methods listed earlier, or use a dedicated third-party tool.
Many users believe in the idea of a corrupted files virus since they are unable to use these files. But that’s not the case, and you should never delete them. Instead, go with the troubleshooting to repair these.
Until now, we have discussed a particular segment or location of the corrupted files, but certain formats may also corrupt.
Several users have reported coming across corrupted PDF files, corrupted Word files, corrupted GIF files, corrupted JPEG files, or corrupted PNG files, and you can check the best ways to fix them in the linked guides.
Apart from these, if you want to learn how to fix missing or corrupted DLL files in Windows 10, check this guide.
How to fix corrupted game files on Windows 10 PCs?
In the case of corrupt game files, that particular game will crash frequently or it may fail to run altogether. Several platforms, such as Steam and Xbox, have a built-in feature to replace or repair corrupted game files.
Also, the Repair and Reset feature built-in with Windows allows users to easily fix corrupted game file issues in Windows. The option can be found in the Apps settings. But, do keep in mind that you will not find the option for all apps installed on the computer.
So, if you made any changes or were trying to get a cheat code to work, it might corrupt game files and call for repair in Windows 10. Apart from that, downloading applications from unreliable sources is also known to cause issues with the files.
Be it the League of Legends corrupted files, Valorant corrupted files, Minecraft corrupted files, Forza Horizon 5 corrupted files, GT5 corrupted files, Civ 5 corrupted files, or any other game for that matter, you could easily go ahead with the corrupted files replacements using the dedicated platform.
How can I prevent file system corruption?
We’ve already explained why this problem occurs and how can you fix it but if you’re not careful, it can happen again.
Of course, not all the issues can be avoided but we can supply a couple of tips that will help with corrupted files prevention in Windows.
➡ Protect your PC with an antivirus
Viruses and malware are some of the main causes of system corruption, so it’s reasonable to start thinking about protecting your PC with an antivirus.
Windows Defender, the built-in antivirus can do a great job but if you like to live more dangerous and visit untrusted websites, you can also pick one of the best antiviruses for Windows 11 from our list to make things safer.
We are using the powerful Eset Smart Security Premium to protect our PCs, which offers great scanning options.

The possibility to pause its protection for a specified amount of time is extremely useful, and the fact that it contains a Gaming mode ensures that you won’t be bothered while gaming.
➡ Maintain your hard-drive
HDDs are more vulnerable than SSDs when it comes to physical damage and their resilience over time.
After a while, an HDD can develop bad sectors simply from normal usage and if you add power surges, power outages, or drops, you can get serious problems.
You can prevent power-related issues by getting an uninterruptable power supply, a device that acts as a buffer between your PC and the outlet and mitigates any such issues.
Also, you can also maintain your hard drive in good condition by defragmenting it and checking for errors by using the system tools.
But, do remember to never defragment an SSD since it has no real benefit and can actually harm the health of the drive and reduce its life.
Here is how you can easily perform defragmentation of your HDD in Windows 10:
- Click on the Search button on your taskbar, and type defrag.
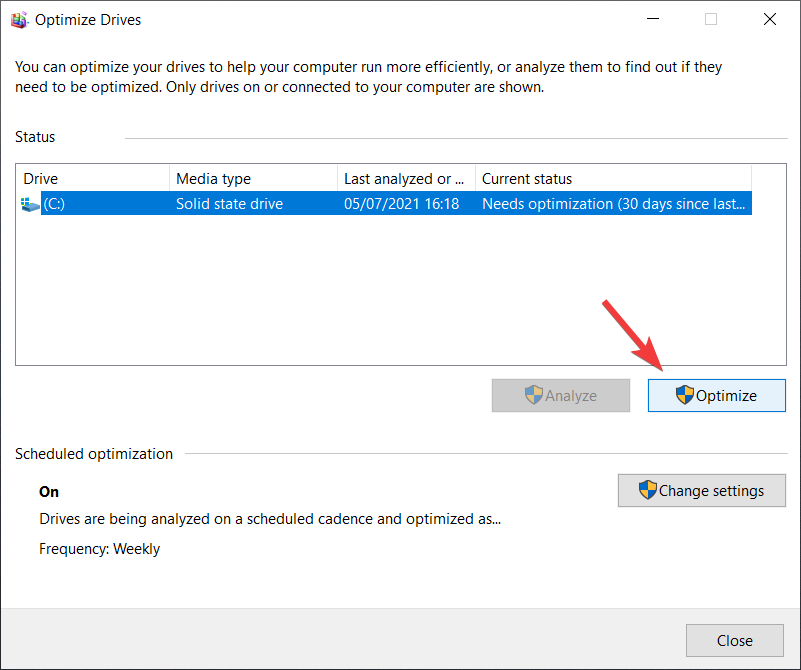
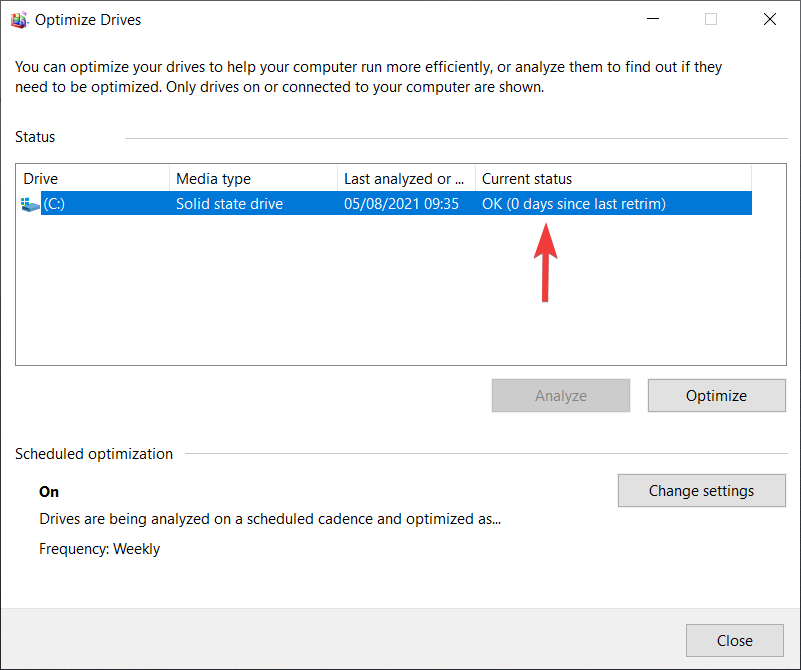
- Select Defragment and Optimize Drives.

- Choose the drive you want to optimize and click the Optimize button to initiate the process.

- As soon as the process is finished, you will see that the Current status section has changed.

➡ Other useful tips
- Shut down and restart your computer properly by using the standard methods and not the physical power button
- Always ensure that you meet the requirements when updating your system and installing software
- Remove external drives safely; use the option from the system tray or from File Explorer, don’t just remove the drive from the port
- Avoid interrupting any system process when you are performing a SFC, DISM, CHKDSK or any other system scan
- Don’t delete any system files without knowing exactly what you’re doing
Sometimes, you will find a file unreadable even after following the steps listed above. That doesn’t mean that it’s still corrupt, but it’s simply unreadable. To fix that, check the best tools to make corrupted files readable after recovery.
Also, you may come across ads claiming to excel at Windows 10 online repair, but it’s recommended that you first check the source and verify that they are not malware or virus disguised as a repair tool.
We hope that our guide helped you repair corrupted files in Windows 10 and that your PC is now in perfect working order.
Fixing corrupted system files is sometimes difficult, and if you can’t repair the files with the SFC tool, you’ll need to use the DISM tool instead. If issues persist, you’ll have to reset your PC or perform a clean install, but all these methods will help fix corrupted files free of cost.
You should also try a third-party tool. We’ve got an excellent list including the best repair tools that will fix corrupted files in Windows 10.
If you have any other suggestions or questions, you can write them in the comment section below.
Still having issues? Fix them with this tool:
SPONSORED
If the advices above haven’t solved your issue, your PC may experience deeper Windows problems. We recommend downloading this PC Repair tool (rated Great on TrustPilot.com) to easily address them. After installation, simply click the Start Scan button and then press on Repair All.
![]()
Newsletter
Check expert solutions to eliminate or replace corrupt files
by Milan Stanojevic
Milan has been enthusiastic about technology ever since his childhood days, and this led him to take interest in all PC-related technologies. He’s a PC enthusiast and he… read more
Updated on October 25, 2022
Reviewed by
Vlad Turiceanu
Passionate about technology, Windows, and everything that has a power button, he spent most of his time developing new skills and learning more about the tech world. Coming… read more
- You can use the Windows built-in tools to repair corrupted files.
- There’s the option to remove the corrupted system files from Windows 10 or repair them.
- Some of the solutions for Windows 10 also work on Windows 11.
XINSTALL BY CLICKING THE DOWNLOAD FILE
This software will repair common computer errors, protect you from file loss, malware, hardware failure and optimize your PC for maximum performance. Fix PC issues and remove viruses now in 3 easy steps:
- Download Restoro PC Repair Tool that comes with Patented Technologies (patent available here).
- Click Start Scan to find Windows issues that could be causing PC problems.
- Click Repair All to fix issues affecting your computer’s security and performance
- Restoro has been downloaded by 0 readers this month.
Many computer problems are caused by corrupted or damaged system files, and the Windows installation process is not an exception.
Fortunately, there are a few ways to fix corrupted system files on your system, and today we’re going to show you how to repair Windows 10 & 11 with ease, and how to prevent these types of problems from occurring again.
What causes corrupt system files in Windows 10?
A system file plays an important role in the operating system and when it gets damaged and cannot complete its function, it may be called corrupt.
All the programs can end up having corrupted files but when these files are part of the operating system, things can get a little bit more complicated. Some of the common causes include:
There are a lot of other possible reasons for which your Windows files or system files can become corrupted, but here are some of those:
- Viruses and malware – Viruses and malware will sometimes cause system files to get corrupted. This occurrence is not very common as the main goal of a virus or malware is to gather important data, so crashing your system would not meet its end goal. But, if you spot a .djvu file extension, it is most likely a virus, so learn all the ways to remove it and secure your system. To keep yourself away from all the trouble, also check our curated list of the best antiviruses.
- Power outages – These can happen randomly and without any telltale sign, and they can cause a lot of problems with your hard disk. If the part of the storage that contains your system installation is affected, the files that allow your OS to run normally may become corrupt. Do not hesitate to check the best UPS to keep your system up and running even in case of a power failure.
- System crashes – System crashes may occur because of hardware or software problems and in turn, they may produce the corruption of system files. Check this guide to find out how to eliminate issues causing the system to crash in Windows 11.
- Update errors – Update errors are pretty common and they often create problems with the system files and BSOD errors, which can lead to system file corruption. Check the linked guides for the best solutions to the following Windows Update error codes:
- 0x800703f1
- 0x8024ce0e
- 0x80080008
- Hardware problems – When the hard drive starts having problems reading and writing data, bad sectors and corrupt files can start occurring. Find out the best tools for hardware diagnostics in Windows.
Apart from the reasons listed above, there are various corrupted file generator tools that could have been used. If that’s the case, head to that very tool or website for the solution.
Of course, to avoid system corruption, you should keep your system updated and maintain your hard drive as clean as possible. But if you still run into trouble, our solutions below will definitely help you.
How do I fix corrupted files on Windows 10?
1. Use the SFC tool
1.1 Run System File Checker
1. Press the Windows key to open the Windows Search box.
2. Type cmd in the search box and click on Run as Administrator to open an elevated Command Prompt window.
3. Input the following command: sfc /scannow
4. Press Enter to run the command. The repair process will begin.
5. Don’t close Command Prompt or interrupt the repair process. It can take a while, so wait patiently while it completes.
If you want to repair corrupted files on your Windows 10 device, you need to perform an SFC (System File Checker) scan. It can be done easily with a command-line tool such as Command Prompt.
When you run the SFC scan, it will identify the problems and repair missing or corrupted system files in Windows 10. Also, it can easily take care of issues when the C drive is corrupted in Windows 10.
After the repair process is finished, if your system files are not corrupted, you’ll see the message Windows Resource Protection did not find any integrity violations.
However, the System File Checker tool can’t always fix corrupted files, so keep that in mind.
1.2 Check the SFC log
- Enter cmd in the Windows Search Bar and click on Run as administrator to open Command Prompt with full rights.
- Enter the following command and press Enter (By doing this, you’ll create a sfclogs.txt file on your Desktop):
findstr /c:"[SR]" %windir%logscbscbs.log >sfcdetails.txt - Open the sfcdetails.txt and check the results of SFC scan.
Keep in mind that this log file contains only information related to the SFC scan that is performed in Windows. Using the two methods listed above, you can easily do a CMD scan and repair.
2. Use the DISM tool
- Press the Windows key + X and click on Windows PowerShell (Admin) or Command Prompt (Admin) to open the app with administrative privileges.
- Type/paste the following command and press Enter:
DISM /Online /Cleanup-Image /RestoreHealth - The repair process can take 10 minutes or more, so be patient and don’t interrupt it.
- After DISM tool repairs your files, restart your PC.
DISM stands for Deployment Image Servicing & Management, and it’s used to fix any corruption problems that can prevent the SFC tool from running optimally. Also, this tool will help if the Windows 11 installation file is corrupted.
3. Run a SFC scan from Safe Mode
- Press the Windows key to launch the Start menu, click on the Power button, and while holding the Shift key, select Restart.
- You’ll see three options available. Select Troubleshoot.
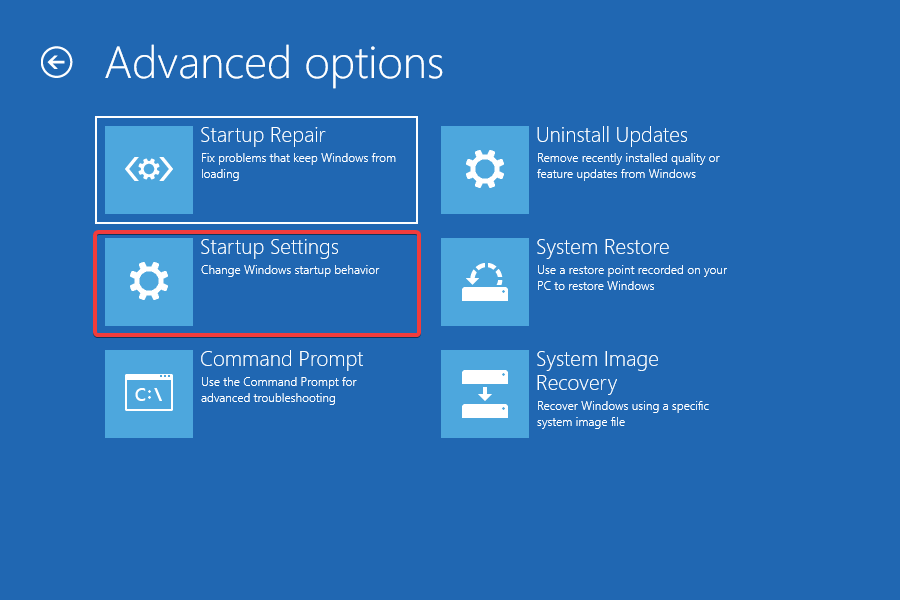
- Select Advanced options.
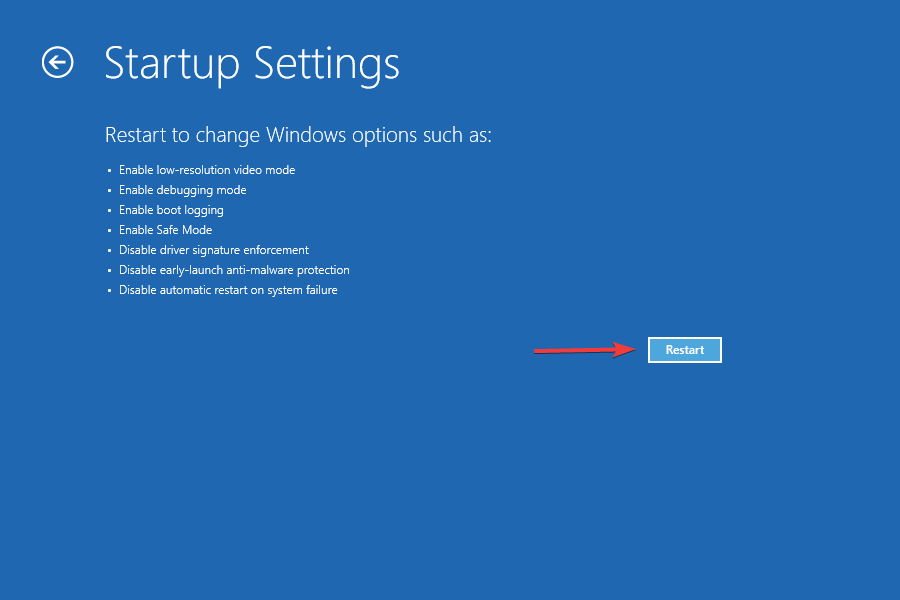
- Next, click Startup Settings.
- Click the Restart button.
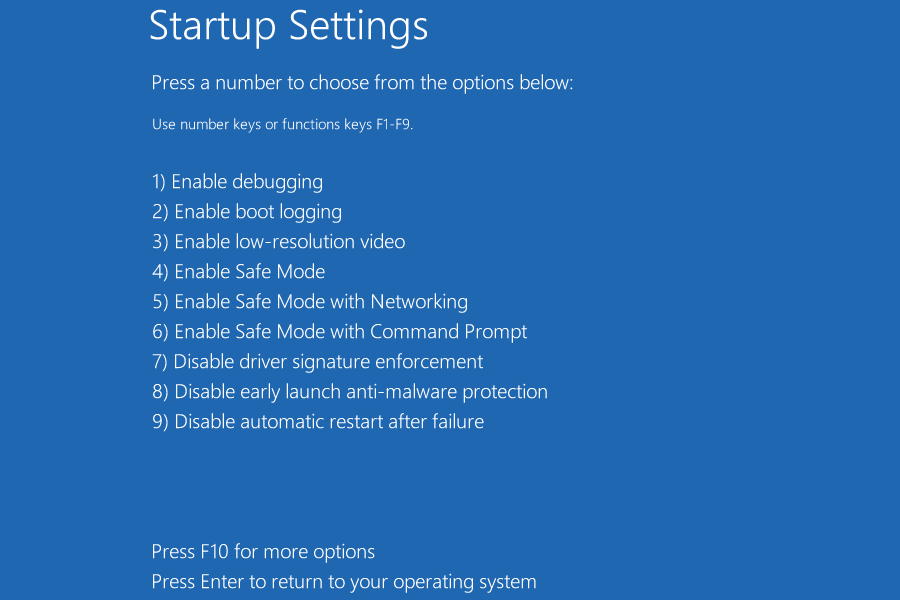
- When your PC restarts, you’ll see a list of options. Select any version of Safe Mode by pressing the appropriate key.
When Safe Mode starts, repeat the steps from Solution 1 to perform an SFC scan.
Sometimes, an SFC scan can’t repair your files by running Windows normally, but if that happens, you can try running the SFC tool in Safe Mode.
Safe Mode is a special mode that uses only default drivers and applications and by using it, you’ll eliminate any possible interference from third-party apps.
4. Perform a SFC scan before Windows 10 starts
- Press the Power button to turn on the system, and as soon as the Windows logo appears, hold it to turn off the computer.
- Repeat the same process thrice, and on the fourth attempt, Windows will automatically perform a Startup repair.
- Once the process is complete, click on Advanced options.
- When the list of options appears, select Troubleshoot.
- Choose Advanced options and select Command Prompt.
- When your PC restarts, you might be asked to enter your username and password, so be sure to do that.
- Find the letter of your Windows 10 drive. To do that, enter the following command and press Enter:
wmic logicaldisk get deviceid, volumename, description - Pay attention to Volume Name. In most cases Windows Volume Name will be assigned to the letter D. This is perfectly normal if you start Command Prompt before starting Windows, so no need to worry about it.
- Also check System Reserved drive. In most cases, it should be C.
- Enter the following command and press Enter (Be sure to use the letters that you got from the previous steps):
sfc /scannow /offbootdir=C: /offwindir=D:Windows - Wait while your system files are scanned.
- After the scan is completed, close Command Prompt and start Windows 10 normally.
Sometimes you need to scan and repair protected system files, but you can’t do that by running Windows 10 normally.
To scan protected system files you’ll have to run an SFC scan before Windows 10 starts as shown above in this solution.
5. Replace the files manually
- Press the Windows key + X combination and select Windows PowerShell (Admin) or Command Prompt (Admin), depending on your system’s settings.
- Paste or type the following command and press Enter:
takeown /f C:corrupted-file-location-and-file-name
- Remember to replace corrupted-file-location-and-file-name with the actual location of the corrupted file. You need to include both the file name and extension and not just the location of the directory (By running the takeown command you’ll have ownership over the corrupted file).
- Include the following command to gain full administrator privileges over the file and press Enter:
icacls C:corrupted-file-location-and-file-name /Grant Administrators:F
- Once again, replace the corrupted-file-location-and-file-name with the actual location of the file.
- Now you need to replace the problematic file with the healthy file that you copied from a different PC.
- Paste the following command and press Enter:
copy C:location-of-healthy-file C:corrupted-file-location-and-file-name - Enter Yes if you’re asked whether you want to overwrite the file.
- Repeat these steps for all corrupted files.
- After all corrupted files are replaced, run the following command to verify if the problem with corrupted files is fixed:
SFC /verifyonly
NOTE
This is one of the more advanced solutions, so be sure to follow it exactly. We also advise you to be extra cautious while performing the steps, as getting them wrong could cause system instability.
First, you need to open your SFC log and check which corrupted files can’t be repaired. We already explained how to view the SFC log file in Solution 1, so be sure to check it out for instructions.
After you find the corrupted file, you need to transfer a healthy version of that file from another PC to your PC. Keep in mind that both PCs have to use the same version of Windows 10.
6. Use the System Restore feature
- Press Windows Key + S, type create a restore point, and select the option from the results.
- Click on the System Restore button.
- You will be recommended the latest restore point, but you can click on Choose a different restore point and hit the Next button to select a previously created one.
- Select the desired restore point and click Next.
- Follow the instructions on the screen to perform the restoration.
After the process is complete, system files should be restored to the previous healthy version.
System Restore is a useful feature that will restore your system to an earlier state. If you are unable to fix corrupted files, you might want to consider performing System Restore.
If all these steps seem a bit too complicated for you, you could also use an automated Windows 10 repair tool in order to perform the same actions without any worries.
We recommend using a professional program that restores system values to their default version automatically, without affecting personal files or data.
Restoring your system to a previous state can fix a number of system issues. A simpler way to safely restore your system is using a specialized tool that can do all the work for you.
Restoro will automatically scan your PC for problematic files and will replace all critical Windows system files that are malfunctioning with previous versions that are working perfectly.
Here’s how you can perform this action:
- Download and install Restoro.
- Launch the application.
- Wait for it to find any system stability issues.
- Press Start Repair.
- Restart your PC for all the changes to take effect.
The built-in system restoration tool will revert your Windows to a previous version, therefore you can lose some precious data that was saved after the restoration point was made. You can always return your system to its pre-repair condition.
⇒ Get Restoro
Disclaimer: This program needs to be upgraded from the free version in order to perform some specific actions.
7. Reset corrupted Windows 10
- Press the Windows key to open the Start Menu.
- Then, click the Power button, press and hold the Shift key, and select the Restart option.
- Choose Troubleshoot and select Reset this PC.
- You have two options available:
- Keep my files will reinstall Windows 10, but it will keep your personal files and settings.
- Remove everything will remove both personal files and settings (Keep in mind that third-party applications and downloaded files will be removed by performing the reset).
- If asked whether you want to clean the drive, choose the Just remove my files option.
- Choose your username and enter its password (If you’re asked to insert Windows 10 installation media, be sure to do so).
- Select your version of Windows and click the Reset button to start.
- Follow the instructions on the screen to complete the process.
If everything else fails, you might have to reset your Windows 10. This process will remove your installed apps and files, so be sure to back up important files.
You might need a Windows 10 installation media to perform this process, so be sure to create one using a bootable USB flash drive. Once done, you can repair Windows 10 system files from USB.
If the reset process didn’t fix the problem, repeat it, but choose the second option, Remove everything. Then select the Only the drive where Windows is installed option and finally select the Just remove my files option.
If that doesn’t fix the problem, perform a clean install of Windows 10 by using our comprehensive guide. With this, you will be able to reset corrupted Windows 10.
Some PC issues are hard to tackle, especially when it comes to corrupted repositories or missing Windows files. If you are having troubles fixing an error, your system may be partially broken.
We recommend installing Restoro, a tool that will scan your machine and identify what the fault is.
Click here to download and start repairing.
After going through all these methods, you know how to get rid of corrupted files in Windows 10. Also, you are now aware of how to recover corrupted files in Windows 10.
There are also great third-party software that can help you repair easily the majority of Windows 10/11 problems you may encounter, check out this guide and learn more.
Besides many of you might be wondering how to fix corrupted files in Windows 7? And you will certainly be pleased with the answer. The methods listed above will work as effectively and fix corrupted files in this OS as well.
- Sfc /scannow stops on Windows 10/11 [BEST SOLUTIONS]
- 5+ best Windows update repair tools for Windows 10/11
- Fix: Restart to repair drive errors on Windows 10/11
- Windows 10/11 Update Error 0x800703f1 [FIX]
- How to fix Logilda.dll error/not found on Windows 10/11
How to fix corrupted files in Windows 11 using Startup Repair?
- Press Windows + I to launch the Settings app, and click on Recovery on the right in the System tab.
- Click on the Restart now button next to Advanced startup.
- Once your computer enter the Windows RE (Recovery Environment), click on Troubleshoot.
- Next, click on Advanced options.
- Now, select Startup repair from the options listed here.
- Select your user account.
- Enter the password for your user account, if you have set one, and click on Continue to start the Startup Repair.
The Startup Repair tool helps repair issues preventing OS from booting effectively. And this is most likely due to the presence of corrupt system files in Windows 11 or the complete absence of certain critical system files.
It will automatically scan for corrupt files, and either replace or remove them, thus eliminating the problem. The tool may sometimes take a while to run, but it’s recommended that you let the process complete and not terminate it mid-way.
Also, bear in mind that the method listed above is in addition to the ones in the previous section. You can try those as well to get rid of corrupt files in Windows 11.
For those of you trying to learn how to fix corrupted files in Mac, the process may be different but the idea is pretty much the same.
How to find corrupted files in Windows 10?
The process itself is not tricky but will require you to be attentive to minute details. If it’s the corrupt system files in Windows 10 or 11, you will notice performance-related issues, or may not be able to use certain features.
In the worst case, the OS won’t boot at all, which can be fixed by running the DISM tool, SFC scan, or the Startup Repair tool from the Recovery Environment, as discussed in the previous sections.
In the case of corrupted files on SSD, you might not be able to access these or they may crash soon after launch. The same is the case for an SD card, so if you have been wondering how to fix corrupted files on an SD card, just try the methods listed earlier, or use a dedicated third-party tool.
Many users believe in the idea of a corrupted files virus since they are unable to use these files. But that’s not the case, and you should never delete them. Instead, go with the troubleshooting to repair these.
Until now, we have discussed a particular segment or location of the corrupted files, but certain formats may also corrupt.
Several users have reported coming across corrupted PDF files, corrupted Word files, corrupted GIF files, corrupted JPEG files, or corrupted PNG files, and you can check the best ways to fix them in the linked guides.
Apart from these, if you want to learn how to fix missing or corrupted DLL files in Windows 10, check this guide.
How to fix corrupted game files on Windows 10 PCs?
In the case of corrupt game files, that particular game will crash frequently or it may fail to run altogether. Several platforms, such as Steam and Xbox, have a built-in feature to replace or repair corrupted game files.
Also, the Repair and Reset feature built-in with Windows allows users to easily fix corrupted game file issues in Windows. The option can be found in the Apps settings. But, do keep in mind that you will not find the option for all apps installed on the computer.
So, if you made any changes or were trying to get a cheat code to work, it might corrupt game files and call for repair in Windows 10. Apart from that, downloading applications from unreliable sources is also known to cause issues with the files.
Be it the League of Legends corrupted files, Valorant corrupted files, Minecraft corrupted files, Forza Horizon 5 corrupted files, GT5 corrupted files, Civ 5 corrupted files, or any other game for that matter, you could easily go ahead with the corrupted files replacements using the dedicated platform.
How can I prevent file system corruption?
We’ve already explained why this problem occurs and how can you fix it but if you’re not careful, it can happen again.
Of course, not all the issues can be avoided but we can supply a couple of tips that will help with corrupted files prevention in Windows.
➡ Protect your PC with an antivirus
Viruses and malware are some of the main causes of system corruption, so it’s reasonable to start thinking about protecting your PC with an antivirus.
Windows Defender, the built-in antivirus can do a great job but if you like to live more dangerous and visit untrusted websites, you can also pick one of the best antiviruses for Windows 11 from our list to make things safer.
We are using the powerful Eset Smart Security Premium to protect our PCs, which offers great scanning options.
The possibility to pause its protection for a specified amount of time is extremely useful, and the fact that it contains a Gaming mode ensures that you won’t be bothered while gaming.
➡ Maintain your hard-drive
HDDs are more vulnerable than SSDs when it comes to physical damage and their resilience over time.
After a while, an HDD can develop bad sectors simply from normal usage and if you add power surges, power outages, or drops, you can get serious problems.
You can prevent power-related issues by getting an uninterruptable power supply, a device that acts as a buffer between your PC and the outlet and mitigates any such issues.
Also, you can also maintain your hard drive in good condition by defragmenting it and checking for errors by using the system tools.
But, do remember to never defragment an SSD since it has no real benefit and can actually harm the health of the drive and reduce its life.
Here is how you can easily perform defragmentation of your HDD in Windows 10:
- Click on the Search button on your taskbar, and type defrag.
- Select Defragment and Optimize Drives.
- Choose the drive you want to optimize and click the Optimize button to initiate the process.
- As soon as the process is finished, you will see that the Current status section has changed.
➡ Other useful tips
- Shut down and restart your computer properly by using the standard methods and not the physical power button
- Always ensure that you meet the requirements when updating your system and installing software
- Remove external drives safely; use the option from the system tray or from File Explorer, don’t just remove the drive from the port
- Avoid interrupting any system process when you are performing a SFC, DISM, CHKDSK or any other system scan
- Don’t delete any system files without knowing exactly what you’re doing
Sometimes, you will find a file unreadable even after following the steps listed above. That doesn’t mean that it’s still corrupt, but it’s simply unreadable. To fix that, check the best tools to make corrupted files readable after recovery.
Also, you may come across ads claiming to excel at Windows 10 online repair, but it’s recommended that you first check the source and verify that they are not malware or virus disguised as a repair tool.
We hope that our guide helped you repair corrupted files in Windows 10 and that your PC is now in perfect working order.
Fixing corrupted system files is sometimes difficult, and if you can’t repair the files with the SFC tool, you’ll need to use the DISM tool instead. If issues persist, you’ll have to reset your PC or perform a clean install, but all these methods will help fix corrupted files free of cost.
You should also try a third-party tool. We’ve got an excellent list including the best repair tools that will fix corrupted files in Windows 10.
If you have any other suggestions or questions, you can write them in the comment section below.
Still having issues? Fix them with this tool:
SPONSORED
If the advices above haven’t solved your issue, your PC may experience deeper Windows problems. We recommend downloading this PC Repair tool (rated Great on TrustPilot.com) to easily address them. After installation, simply click the Start Scan button and then press on Repair All.
![]()
Newsletter
Содержание
- Варианты восстановления системных файлов в Windows 10
- Способ 1: Проверка и восстановление целостности системных файлов
- Способ 2: Запуск точки восстановления
- Способ 3: Сброс Windows
- Вопросы и ответы
Нередки случаи, когда Windows 10 начинает работать некорректно, с ошибками и сбоями. Часто это происходит из-за вмешательства пользователя в системные файлы, но иногда неполадки случаются и без его ведома. Проявляется это порой не сразу, а при попытке запуска какого-то инструмента, напрямую или косвенно отвечающего за то действие, которое хотел выполнить юзер. К счастью, есть сразу несколько способов того, как вернуть работоспособность операционной системе.
Повреждения системных файлов происходят после попытки пользователя кастомизировать внешний вид ОС, удалить важные системные файлы или установки сомнительных программ, модифицирующих файлы Windows.
Варианты восстановления Виндовс 10 существуют разные, и отличаются они по сложности, а также по конечному результату. Так, в одних ситуациях на местах останутся все пользовательские файлы, а в других удалено будет все, а Windows будет чистой как изначально, но без ручной переустановки с флешки. Разберем их все, начиная с наиболее простых.
Способ 1: Проверка и восстановление целостности системных файлов
Когда появляются сообщения о повреждении системных файлов или различные ошибки, связанные с системными компонентами Windows, проще всего начать процедуру исправления их состояния через «Командную строку». Есть сразу два компонента, которые помогут вернуть работоспособность отдельным файлам или даже восстановить запуск самой Виндовс.
Инструмент SFC восстанавливает системные файлы, которые не защищены от изменения в данный момент. Он работает даже при наличии серьезных повреждений, из-за которых Виндовс даже не может загрузиться. Однако тут все же потребуется наличие флешки, с которой можно загрузиться просто чтобы перейти в режим восстановления.
В более сложных ситуациях, когда восстановить системные файлы не удается даже из резервного хранилища SFC, понадобится прибегнуть к его восстановлению. Это делается через инструмент DISM. Описание и принцип работы обеих команд описан в отдельной статье на нашем сайте.
Подробнее: Инструменты проверки целостности системных файлов в Windows 10
Способ 2: Запуск точки восстановления
Способ актуален, но с оговорками — только для тех, у кого восстановление системы уже было включено. Даже если вы самостоятельно не создавали никаких точек, но данная возможность у вас все же включена, это могли сделать другие программы или сама Windows.

При запуске этого стандартного инструмента не будут удалены никакие ваши пользовательские файлы типа игр, программ, документов. Однако все же в некоторые файлы будут внесены изменения, но вы сможете без труда узнать об этом, запустив окно с точками восстановления и нажав на кнопку «Поиск затрагиваемых программ».
Прочитать о том, как восстановить Виндовс через резервную точку, вы можете из материала по ссылке ниже.
Подробнее: Создание и использование точки восстановления в Windows 10

Способ 3: Сброс Windows
В начале статьи мы сказали о том, что в «десятке» есть несколько вариантов сброса его состояния. Благодаря этому произвести восстановление удастся в большинстве случаев, даже при невозможности запуска ОС. Чтобы не повторяться, мы сразу же предлагаем перейти к другой нашей статье, в которой мы обобщили все способы переустановки Win 10 и объяснили их преимущества и различия.
Подробнее: Способы переустановки операционной системы Windows 10
Мы рассмотрели способы восстановления системных файлов в Виндовс 10. Как вы видите, для удобства пользователя есть различные варианты того, как вернуть работоспособность операционной системе после возникновения неполадок. Если у вас по-прежнему остаются какие-либо вопросы, пишите свой комментарий.
Многие проблемы с компьютером вызваны повреждением системных файлов. Если ваша установка Windows 10 повреждена, вы столкнетесь с проблемами нестабильности и многими другими проблемами.
К счастью, есть несколько способов восстановить поврежденные системные файлы в Windows 10, и сегодня мы покажем вам, как это сделать.
Оглавление:
![]() Используйте инструмент SFC
Используйте инструмент SFC
![]() Используйте инструмент DISM
Используйте инструмент DISM
![]() Запустите сканирование SFC из безопасного режима
Запустите сканирование SFC из безопасного режима
![]() Выполните сканирование SFC перед запуском Windows 10
Выполните сканирование SFC перед запуском Windows 10
![]() Заменить файлы вручную
Заменить файлы вручную
![]() Использовать восстановление системы
Использовать восстановление системы
![]() Сбросить Windows 10
Сбросить Windows 10
Почему повреждены системные файлы
Повреждение файлов системы — это распространенная ситуация среди юзеров Windows 10. Очень часто она угрожает всей работоспособности компьютера. Поэтому, если операционная посылает вам уведомление о возникшем сбое, необходимо это учесть и принять необходимые меры.
По умолчанию файлы ядра Windows скрыты. Дело в том, что в желании очистить больше пространства для установки какой-то новой программы, пользователь может вместе с не особо важными файлами удалить 1 важный. Такие поспешные действия неизбежно приведут к краху ОС. Именно поэтому Microsoft скрыли системные файлы.
Системный файл был удален
Удаление всего одного файла в цепочке слаженно работающих служб может привести к краху всей операционной системы.
Заражение вредоносным программным обеспечением
Каждый вирус работает по принципу внедрения в процесс программы и модификации ее функционала под свои нужды. В некоторых случаях, они могут подменять те или иные файлы. Как следствие, нужный документ исчезает и под прикрытием его имени, вредоносное ПО начинает убивать функционал системы.
Повреждение системного диска
Если вы под Windows используете HDD, то при несоблюдении осторожного обращения с устройством, он может повредиться. Если поврежденным оказался сектор с системным файлом, это может сказаться как на производительности, так и на работоспособности ПК в целом.
Внутренняя ошибка
Процессы любой операционной системы, не застрахованы от багов. Возможно произошел какой-то глюк и какая-то одна из служб вышла из строя. Такая неполадка лечится очень просто, и сейчас мы посмотрим как выполнить данное восстановление.
Мы назвали четыре причины. Но самые распространенные из них последние две. Если у вас возникли подозрения, что системный диск был поражен вирусом, нужно провести сканирование компьютера любым антивирусом.
Решение 1. Используйте утилиту SFC
Если вы сомневаетесь, что системные файлы повреждены, вы можете восстановить их с помощью утилиты SFC.
SFC (System File Checker) — это еще один инструмент Windows, в задачи которого входит сканирование компьютера на наличие поврежденных файлов и их восстановление. Вы можете воспользоваться им, применив следующую инструкцию:
- Запустите командную строку от имени администратора.

2. Введите команду sfc /scannow и нажмите клавишу Enter
Начнется процесс сканирование и ремонта. Не закрывайте командную строку и не прерывайте процесс восстановления. Процесс восстановления может занять некоторое время, поэтому терпеливо дождитесь его завершения.
Когда сканирование и ремонт завершатся, вы получите одно из следующих сообщений:
Защита ресурсов Windows не обнаружила нарушений целостности.
Хороший звоночек. Это сообщение говорит о том, что инструмент SFC не нашел ни одного поврежденного файла в вашей системе. Windows находится в отличном состоянии.
Защита ресурсов Windows не может выполнить запрошенную операцию.
Получив данное сообщение, не стоит впадать в панику. Повторите операцию в безопасном режиме Windows.
Защита ресурсов Windows обнаружила поврежденные файлы и успешно их восстановила. Сведения см. в журнале CBS.Log %WinDir%LogsCBSCBS.log.
Сообщение, которое говорит о том, что все имевшиеся в системе ошибки были исправлены.
Защита ресурсов Windows обнаружила поврежденные файлы, но не может восстановить некоторые из них. Сведения см. в журнале CBS.Log %WinDir%LogsCBSCBS.log.
Утилита обнаружила ошибки, но восстановить их не смогла. В этом случае у вас не будет ничего другого, кроме как вручную заменить поврежденные файлы на новые.
Если вы хотите просмотреть журнал SFC, вы можете это сделать. Для этого выполните следующие действия:
- Откройте командную строку от имени администратора.
- Введите команду findstr / c: «[SR]»% windir% LogsCBSCBS.log> «% userprofile% Desktopsfclogs.txt» и нажмите Enter. Это создаст файл sfclogs.txt на вашем рабочем столе.
- Откройте sfclogs.txt и проверьте результаты сканирования SFC.
Обратите внимание, что этот файл журнала содержит только информацию, относящуюся к сканированию Windows SFC.
Решение 2. Используйте утилиту DISM
Если вы не можете запустить инструмент SFC или если SFC не может решить проблему, вы можете попробовать вместо этого использовать инструмент DISM. DISM означает средство управления службой образов развертывания, которое используется для устранения проблем с повреждением, и именно эти повреждения могут препятствовать запуску SFC.
Как и SFC, DISM — это утилита командной строки для восстановления системных файлов. Для его запуска необходимо выполнить следующие действия:
- Запустите командную строку от имени администратора. (смотрите изображение выше)

- В открывшемся окне введите команду DISM /Online /Cleanup-Image /RestoreHealth и нажмите Enter

3. Дождитесь завершения операции. Это может занять несколько минут времени.
4. После того, как DISM восстановит файлы, перезагрузите компьютер.
После перезагрузки компьютера необходимо проверить, решена ли проблема. Если проблема не исчезнет, снова запустите сканирование SFC.
Решение 3. Запустите сканирование SFC из безопасного режима
Иногда сканирование SFC не может восстановить файлы из Windows, но если это так, вы можете попробовать запустить инструмент SFC из безопасного режима. Безопасный режим — это особый режим, в котором используются только драйверы и приложения по умолчанию.
Используя безопасный режим, вы исключите любые возможные помехи со стороны сторонних приложений. Чтобы загрузиться в безопасном режиме в Windows 10, выполните следующие действия:
- Откройте меню «Пуск».
- Нажмите кнопку питания .
- Удерживая нажатой клавишу Shift, выберите параметр « Перезагрузить» .
- Вы увидите три доступных варианта. Выберите Устранение неполадок .
- Перейдите в Дополнительные параметры> Параметры запуска . Нажмите кнопку « Перезагрузить» .
- После перезагрузки компьютера вы увидите список опций. Выберите любую версию безопасного режима, нажав соответствующую клавишу F.
После запуска безопасного режима повторите шаги из Решения 1, чтобы выполнить сканирование SFC.
Решение 4. Выполните сканирование SFC перед запуском Windows 10
Иногда вам нужно просканировать и восстановить защищенные системные файлы, но вы не можете сделать это в Windows 10. Чтобы сканировать защищенные системные файлы, вам необходимо запустить сканирование SFC до Windows 10. Для этого выполните следующие действия:
- Перезагрузите компьютер, выполнив первые три шага из предыдущего решения.
- Когда появится список параметров, выберите Устранение неполадок .
- Выберите Дополнительные параметры> Командная строка .
- После перезагрузки компьютера вас могут попросить ввести имя пользователя и пароль, поэтому обязательно сделайте это.
- Теперь вам нужно найти букву диска Windows 10. Для этого введите wmic logicdisk get deviceid, volumename, description command и нажмите Enter для запуска.
- Обратите внимание на название тома. В большинстве случаев имя тома Windows будет присвоено повторно в списке. Это совершенно нормально, если вы запускаете командную строку до запуска Windows, поэтому вам не нужно об этом беспокоиться. Помимо проверки диска Windows, вы также должны проверить системный зарезервированный диск.
Решение 5. Восстановление при запуске Windows
Такой способ сможет решить и проблему с поврежденным системным файлом, и проблему низкой скорости запуска. Но имейте ввиду, что она не поможет в случае, если снижение производительности вызвано не системными ошибками.
- Откройте меню Пуск.
- Щелкните по клавише Перезагрузка с зажатой кнопкой Shift.
3. Перед вами появится синий экран путеводителя по меню восстановления. Щелкните по клавише Диагностика и далее откройте Дополнительные параметры.

4. Теперь выберите параметр Восстановление при загрузке
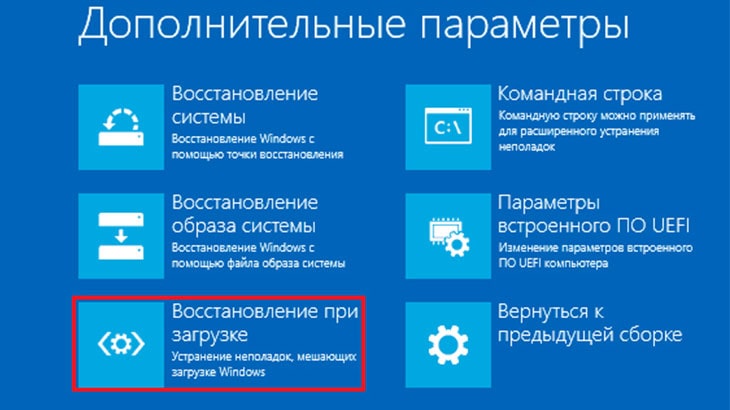
Процесс восстановления Windows 10 может отнять некоторое время.Подождите немного. Если же результат восстановительных работ сообщает вам о том, что не смог решить проблему, возможно Windows вовсе и не была повреждена.
Решение 6. Восстановление операционной системы
Если вы используете точки восстановления Windows 10, то это ваше везение. В этом случае вы можете легко и быстро вернуть операционную систему к тому состоянию, в котором она находилась до сбоя. Если у вас нет точек восстановления, тогда единственный вариант, кроме полной переустановки Windows — это откат системы к ее исходному состоянию. При этом вы сможете сохранить или удалить личные файлы, которые не относятся к ОС.
Сделать это просто:
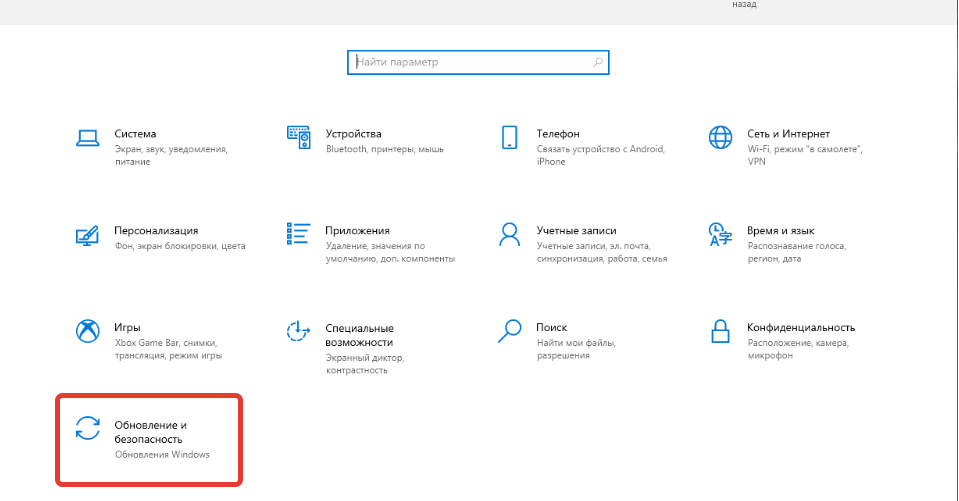
- Откройте Параметры Windows с помощью комбинации клавиш Windows + I
2. Перейдите в раздел Обновление и безопасность
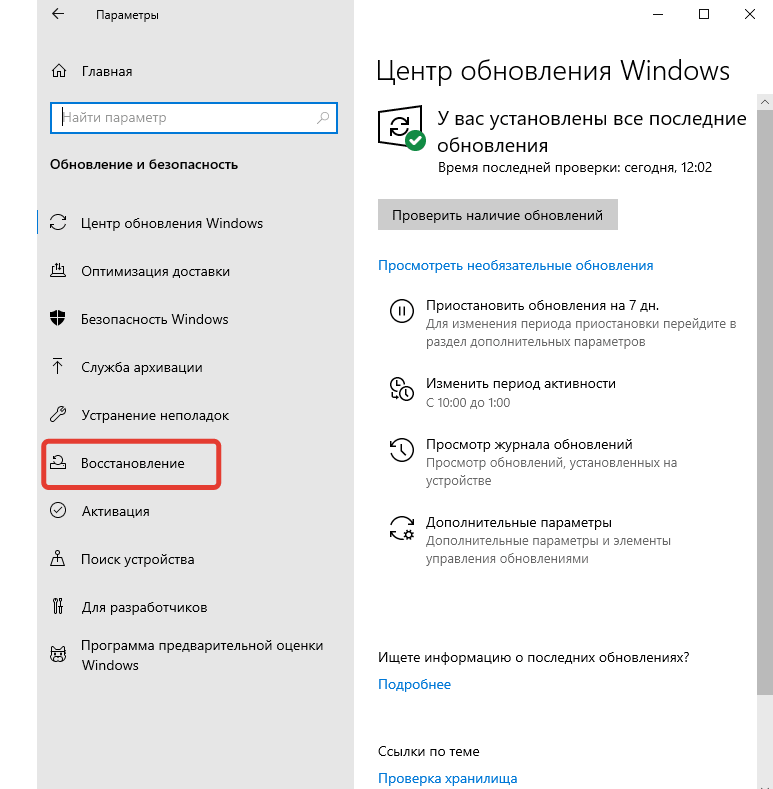
3. Откройте вкладку Восстановление
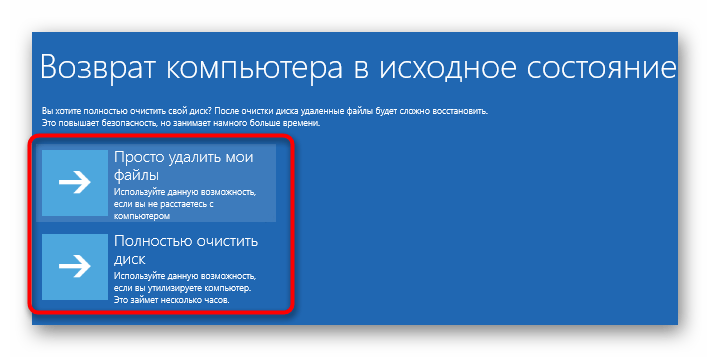
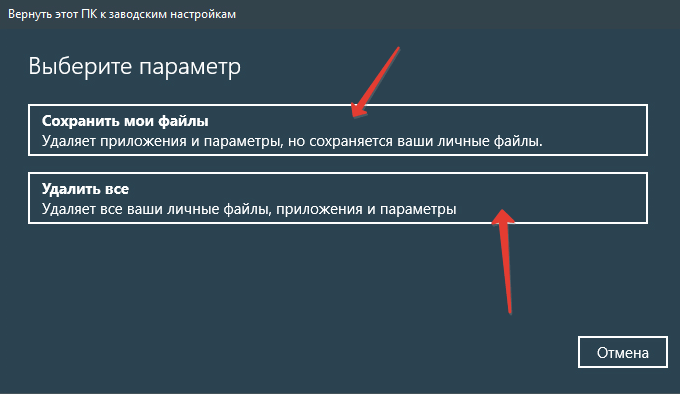
- Найдите блок под названием Вернуть компьютер в исходное состояние и нажмите клавишу Начать.

- Выберите действие, которое будет выполнять операционная система относительно ваших личных файлов.

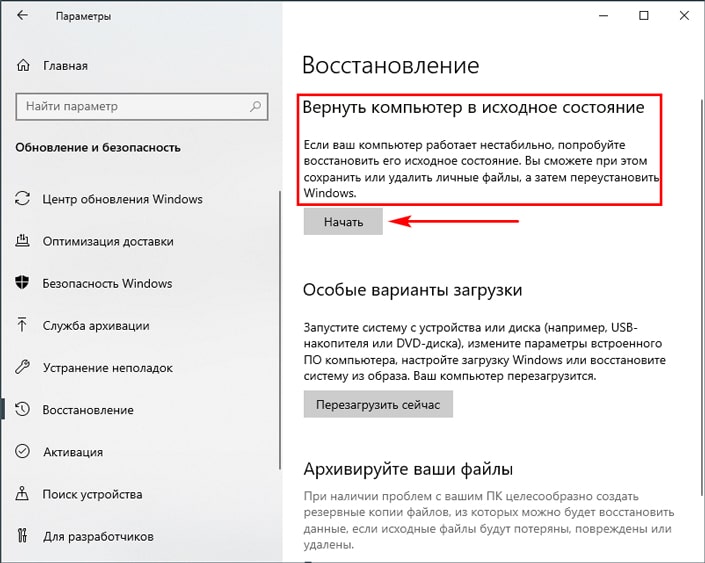
6. Вы увидите окно со списком программ, которые будут удалены в любом случае.
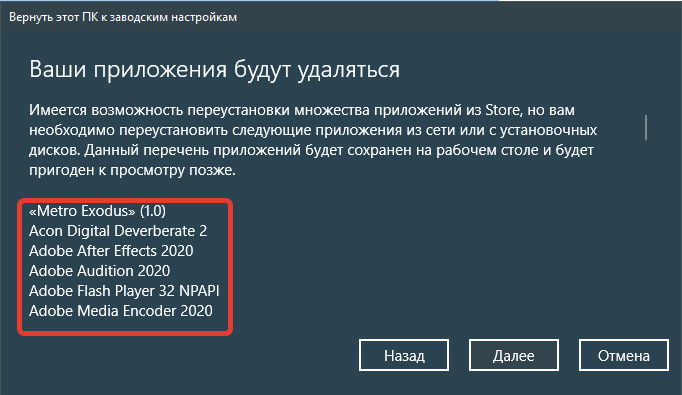
Если вы соглашаетесь с условиями, нажмите Далее.
7. Подтвердите действие, нажав клавишу Заводской.
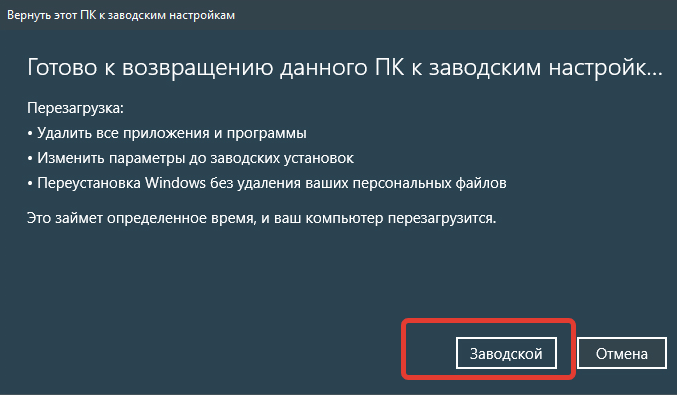
Восстановление отнимет некоторое время.
Решение7. Переустановка Windows
Восстановление поврежденных системных файлов иногда бывает непростым делом, и если вы не можете восстановить файлы с помощью утилиты SFC, вам придется вместо этого использовать утилиту DISM. Если проблема не исчезнет, необходимо перезагрузить компьютер или выполнить чистую установку.
Сделав это, вы вернете компьютер к заводскому состоянию в котором нет никаких повреждений. Но вот только все ваши программы и приложения будут удалены.
Здравствуйте админ, буду краток — не загружается ноутбук с Windows 10, ошибки при загрузке выходят разные, а то и просто чёрный экран. Создал загрузочную флешку Windows 10 и загрузил с неё ноутбук, зашёл в «Дополнительные параметры» и выбрал восстановление системы, но оно оказалось отключено. В безопасный режим войти не могу.
Пробовал искать ответы в интернете, все советуют произвести восстановление системных файлов Windows 10 с помощью sfc /scannow, а как это можно сделать, если сама винда не грузится?
Как произвести восстановление целостности системных файлов, если Windows 10 не загружается
Привет друзья! В сегодняшней статье мы рассмотрим довольно сложный случай восстановления Windows 10, во-первых система не загружается, а во-вторых, когда мы загрузились в среду восстановления и попытались запустить средство проверки системных файлов sfc /scannow, у нас вышла ошибка.
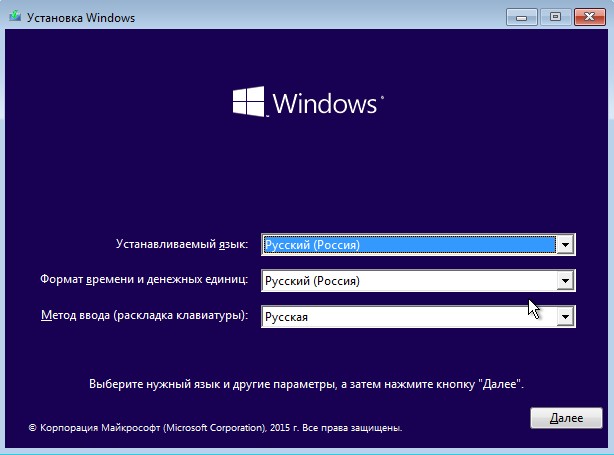
Если ваша Windows 10 отказывается загружаться, то вполне возможно, это происходит из-за нарушения целостности системных файлов операционной системы и нужно просто произвести их восстановление, при этом повреждённые файлы будут заменены работоспособными версиями из хранилища компонентов Windows (папка C:WindowsWinSxS) и система должна загрузиться. Сделать это можно даже том в случае, если Windows не загружается, нужно всего лишь создать загрузочную флешку с Win 10 и загрузить с неё Ваш ноутбук.
В начальном окне установки Windows 10 жмём клавиатурное сочетание «Shift + F10»— запускается командная строка.
Для начала определяем букву раздела с установленной Win 10, для этого водим команду notepad. Откроется блокнот, затем Файл->Открыть.
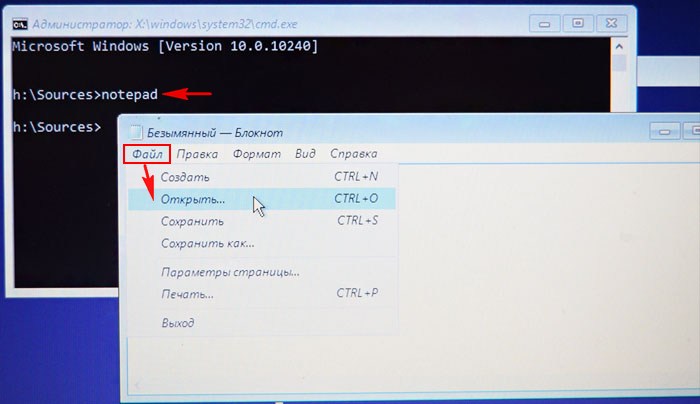
Заходим в Компьютер и определяем букву диска с установленной Windows 10, в моём случае раздел (E:)

Закрываем блокнот и вводим в командной строке команду
sfc /scannow /offbootdir=E: /offwindir=E:Windows
Где:
offbootdir=E: раздел, содержащий папку WinSxS с хранилищем оригинальных компонентов Windows, (папка C:WindowsWinSxS).
offwindir=E:Windows — раздел с установленной операционной системой.
жмём Enter.
Начинается сканирование повреждённых файлов Windows.
На компьютере с исправной операционной системой программа защиты ресурсов Windows скорее всего не обнаружит повреждённые системные файлы и выдаст сообщение: «Защита ресурсов Windows не обнаружила нарушений целостности»
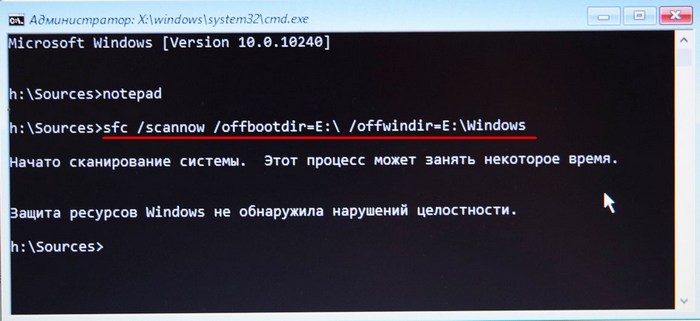
Если повреждения будут обнаружены, то результат будет таким: «Защита ресурсов Windows обнаружила поврежденные файлы и успешно их восстановила»
Вот и всё. Перезагружаемся и пробуем войти в операционную систему.

Но при тяжёлых системных сбоях, вызванных различными причинами, сообщение будет таким «Программа защиты ресурсов Windows обнаружила повреждённые файлы, но не может восстановить некоторые из них»
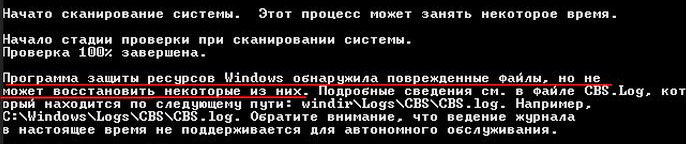
Что делать, если восстановление повреждённых системных файлов Windows 10 заканчивается неудачей, например ошибкой — «Программа защиты ресурсов Windows обнаружила повреждённые файлы, но не может восстановить некоторые из них»
Друзья, данная ошибка обозначает, что само хранилище оригинальных компонентов системы повреждено и сначала нужно восстановить его, а затем запускать sfc /scannow. Вот здесь начинается самое интересное, чтобы восстановить хранилище компонентов нужно выполнить команду Dism /Online /Cleanup-Image /RestoreHealth (подробно команда описывается в здесь), но в среде восстановления эта команда не работает, так как использует для восстановления Центр обновления Windows и у вас в итоге выйдет ошибка. Короче проблема получается такая, что sfc /scannow просто негде взять оригинальные компоненты для замещения неисправных системных файлов.
В этом случае поступают так — запускают команду sfc /scannow с определённым ключом указывающим на то, что в случае обнаружения нарушений в системных файлах для восстановления нужно использовать другой источник, например файлы из дистрибутива Windows 10. Как это сделать.
Найдите исправный компьютер с установленной Windows 7, 8.1, 10.
Скачайте на сайте Майкрософт ISO образ Windows 10,
присоедините его к виртуальному дисководу, потом войдите в папку Sources и найдите там файл образ install.wim, его нужно разархивировать в папку с произвольным названием (например repair) на переносной жёсткий диск USB или обычную флешку объёмом не менее 16 Гб.
Затем, подсоедините переносной жёсткий диск USB к ноутбуку, на котором не загружается Windows 10, загрузите ноутбук с загрузочной флешки Windows 10, войдите в среду восстановления, откройте командную строку и выполните команду sfc /scannow с определённым ключом указывающим на то, что в случае обнаружения нарушений в системных файлах для восстановления нужно использовать папку repair с файлами Windows 10 на переносном жёстком диске.
Теперь обо всём подробно!
В первую очередь нам понадобится компьютер с установленной Windows 7, 8.1, 10.
Подсоединяем образ системы к виртуальному дисководу (в моём случае E:). Файлы в дистрибутиве Windows 10 сжаты и находятся в файл-образе install.wim, а тот, в свою очередь, находится в папке sources.
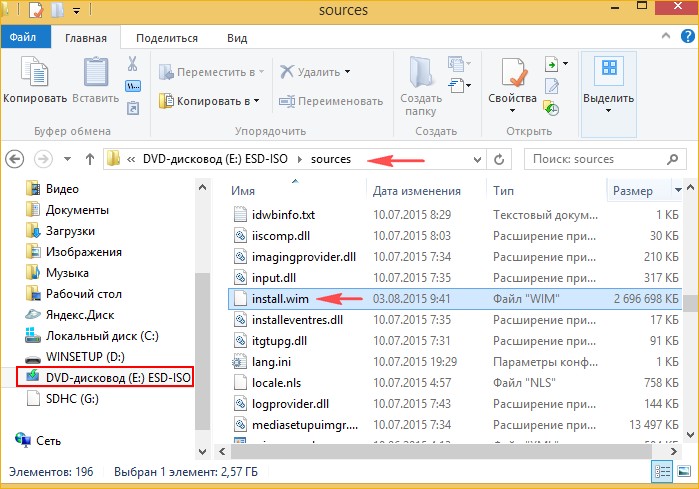
Примечание: Если вам понадобится восстановить таким же образом Windows 8.1, то вы соответственно скачаете ISO-образ Windows 8.1, но в этом образе вместо файла install.wim будет файл install.esd, разницы абсолютно никакой и делать дальше нужно одно и тоже.
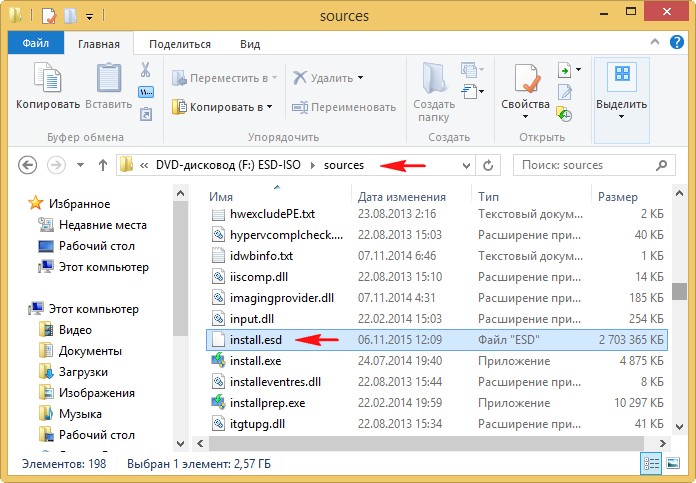
Откроем и скопируем из образа install.wim или install.esd все файлы на переносной винчестер, сделать это проще всего в программе 7-Zip.
Скачиваем бесплатную программу 7-Zip, устанавливаем и запускаем.
Официальный сайт программы
http://www.7-zip.org/
В главном окне программы (представляющей из себя обычный проводник) открываем виртуальный диск с файлами Windows 10 (в моём случае E:), идём в папку Sources, щёлкаем левой мышью на файле install.wim и выбираем «Извлечь»
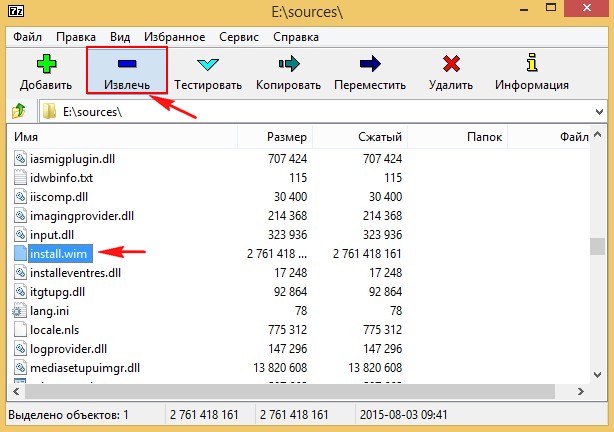
В открывшемся проводнике указываем путь к нашему переносному жёсткому диску USB (буква F:) и папке repair, жмём ОК.
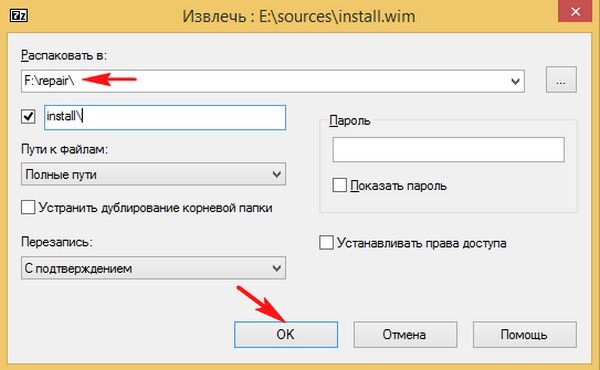
Начинается процесс извлечения файлов Windows 10 в папку repair переносного жёсткого диска USB (буква F:).
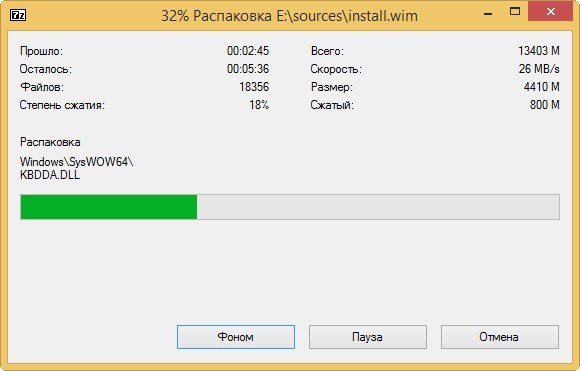
Закрыть
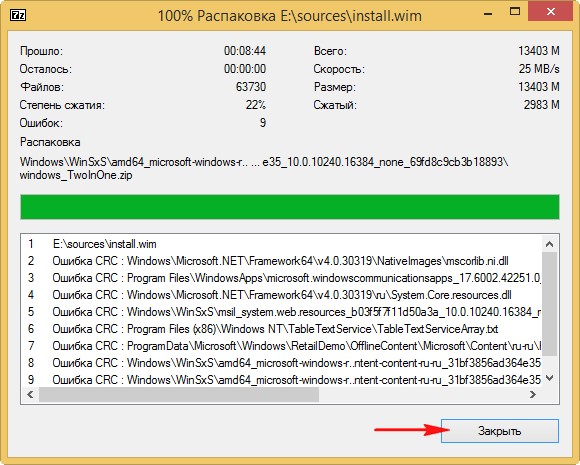
Папка с распакованными файлами Win 10 находится на переносном жёстком диске USB (F:)
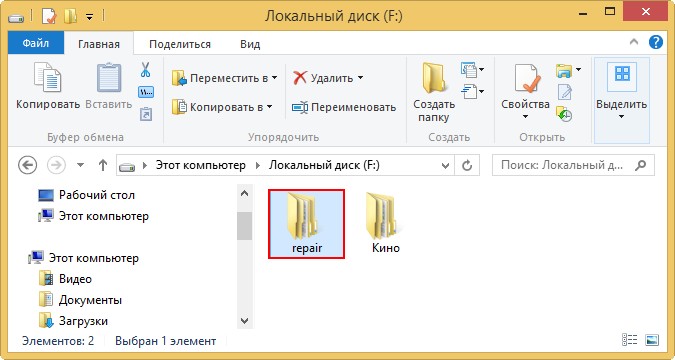
и занимает объём 13 Гб.
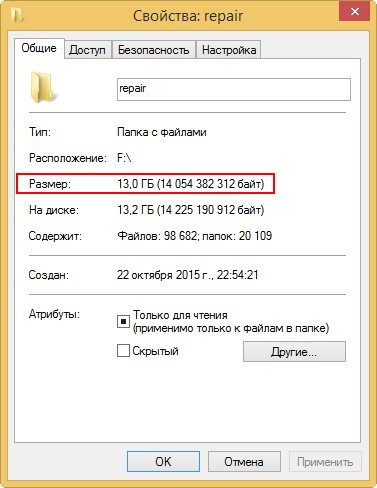
Идём к ноутбуку, на котором не загружается из-за ошибок Windows 10
Подсоединяем к нему переносной жёсткий диск USB с папкой repair.
Загружаем ноутбук с загрузочной флешки Windows 10.
В начальном окне установки системы жмём клавиатурное сочетание «Shift + F10» — запускается командная строка.
Определяем букву раздела с установленной Win 10 и букву переносного жёсткого диска USB с файлами Windows 10, для этого водим команду notepad. Откроется блокнот, затем Файл->Открыть.
Видим, что буква (E:) присвоена разделу с установленной Windows 10.
А буква (J:) присвоена — переносному жёсткому диску USB c папкой repair, где находятся системные файлы ISO-образа Windows 10.
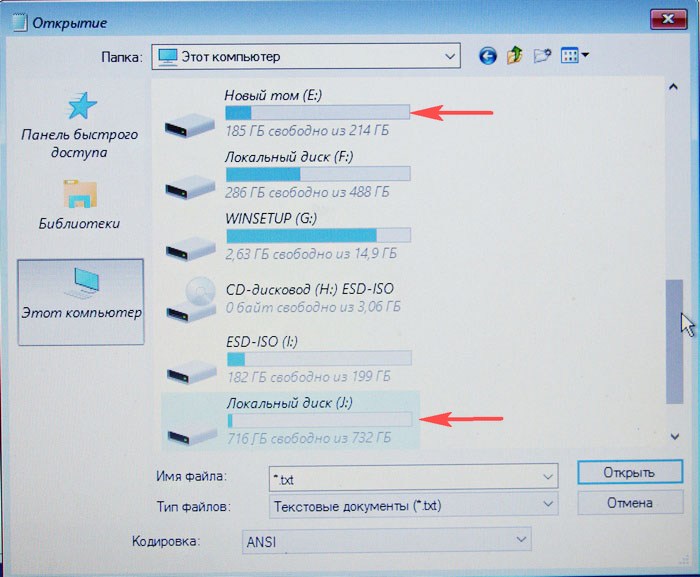
Выполняем в командной строке команду:
sfc /scannow /offbootdir=J:repair /offwindir=E:Windows
Где:
offbootdir=J:repair — переносной жёсткий диск USB c папкой repair, где находятся системные файлы ISO-образа Windows 10.
offwindir=E:Windows — раздел с установленной Windows 10.
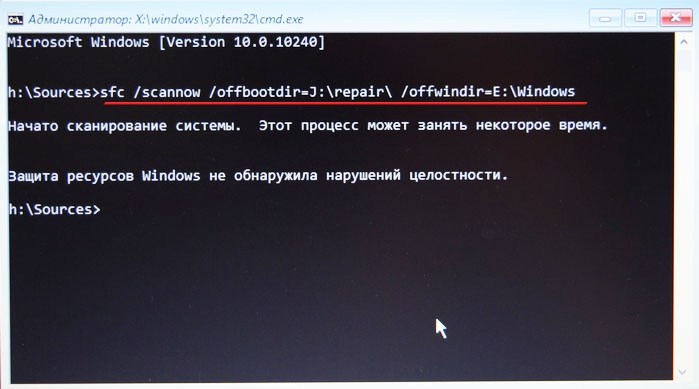
Друзья, я ввожу команду на ноутбуке с исправной Windows 10, поэтому нарушений целостности системных файлов в моём случае не обнаружено.
Если ваша операционная система неисправна, то вполне возможно средству sfc /scannow удастся восстановить повреждённые компоненты и ваша Windows 10 загрузится.
Статьи по теме:
- Восстановление повреждённого хранилища компонентов Windows 10 в Среде предустановки Windows (Windows PE) с помощью дистрибутива Win 10, а также виртуального диска VHD
- Что делать, если при запуске sfc/scannow выдается ошибка «Защита ресурсов Windows не может выполнить запрошенную операцию»
- Как конвертировать файл install.esd в install.wim.