Содержание
- Powershell экспорт и запись в CSV файл
- about_Character_Encoding
- Short description
- Long description
- The byte-order-mark
- Character encoding in Windows PowerShell
- Character encoding in PowerShell
- Changing the default encoding
- О кодировке символов
- Краткое описание
- Подробное описание
- Пометка порядка байтов
- Кодировка символов в Windows PowerShell
- Кодировка символов в PowerShell
- Изменение кодировки по умолчанию
- Export-Csv
- Syntax
- Description
- Examples
- Example 1: Export process properties to a CSV file
- Example 2: Export processes to a comma-delimited file
- Example 3: Export processes to a semicolon delimited file
- Example 4: Export processes using the current culture’s list separator
- Example 5: Export processes with type information
- Example 6: Export and append objects to a CSV file
- Example 7: Format cmdlet within a pipeline creates unexpected results
- Example 8: Using the Force parameter to overwrite read-only files
- Example 9: Using the Force parameter with Append
- Example 10: Export to CSV with quotes around two columns
- Example 11: Export to CSV with quotes only when needed
- Parameters
- Inputs
- Outputs
- Notes
Powershell экспорт и запись в CSV файл

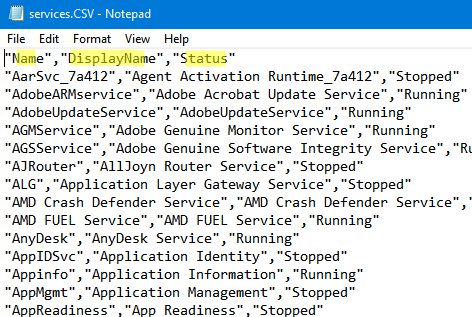
Сам CSV подразумевает что это текстовый файл или просто тип записи, где значения разделены запятыми. При этом не всегда значение разделяются запятыми, это могут быть и двоеточия, или точки запятыми и т.д. Сам выгруженный CSV файл выглядит так:

Для того, что бы узнать какие командлеты есть для работы с csv в Powershell нужно выполнить команду:
Export-CSV тот командлет, который выгрузит все в нужный для нас формат. Для этого получим любые данные с Powershell. Я хочу получить список запущенных процессов:
По умолчанию данные экспортируются с разделителем в виде запятой. Сам разделитель называется делиметром и если мы планируем открывать файл в какой-то программе, например экспортируем для Excel, может потребоваться другой делимитер. Например Excel берет делимитер из региональных настроек:

Или мы можем узнать его с помощью командлета:
Изменять системный делимитер я бы не советовал, а вот экспортировать данные в нужном формате можно так:
Если мы будем запускать такой экспорт на многих удаленных компьютерах, то можно подставить делимитер у каждого свой. Просто объявим переменную:
Или аналогичный командлет для примера:
Формат вывода csv в powershell, по умолчанию, в виде листа. Для того что бы сделать вывод в формате таблицы добавим pipeline и команду Format-Table (алиас ft ). Пример:
Теперь рассмотрим вариант, который я буду применять в работе. Я хочу следить за динамикой роста занятого места на диске что бы вовремя его расширить или принять меры что бы освободить место. Для того что бы получить такие данные я использую:
Меня интересует только буква диска, занятое место, и сколько всего места. Добавляем конвейер с выбором нужных колонок:
Меня не интересуют значения в гигабайтах. Вычисляю эти значения:
При этом я должен знать дату, когда значения получены:
Объявляем все это в переменные:
Добавляю дату к колонкам информации о дисках:
Проверяю что переменная выводит то, что нужно:
И заношу все это в файл:
У нас осталось еще два похожих командлета. Они, в отличие от предыдущих, не записывают данные в файл, а выводят на экран. Для того что бы преобразовать в формат CSV:
Для того что бы выполнить обратное преобразование:
Остальные варианты выполнения этих комманд можно получить через справку:
Источник
about_Character_Encoding
Short description
Describes how PowerShell uses character encoding for input and output of string data.
Long description
Unicode is a worldwide character-encoding standard. The system uses Unicode exclusively for character and string manipulation. For a detailed description of all aspects of Unicode, refer to The Unicode Standard.
Windows supports Unicode and traditional character sets. Traditional character sets, such as Windows code pages, use 8-bit values or combinations of 8-bit values to represent the characters used in a specific language or geographical region settings.
PowerShell uses a Unicode character set by default. However, several cmdlets have an Encoding parameter that can specify encoding for a different character set. This parameter allows you to choose the specific the character encoding you need for interoperability with other systems and applications.
The following cmdlets have the Encoding parameter:
The byte-order-mark
The byte-order-mark (BOM) is a Unicode signature in the first few bytes of a file or text stream that indicate which Unicode encoding used for the data. For more information, see the Byte order mark documentation.
For best overall compatibility, avoid using BOMs in UTF-8 files. Unix platforms and Unix-heritage utilities also used on Windows Platforms don’t support BOMs.
Similarly, UTF7 encoding should be avoided. UTF-7 is not a standard Unicode encoding and is written without a BOM in all versions of PowerShell.
Character encoding in Windows PowerShell
In PowerShell 5.1, the Encoding parameter supports the following values:
In general, Windows PowerShell uses the Unicode UTF-16LE encoding by default. However, the default encoding used by cmdlets in Windows PowerShell is not consistent.
For cmdlets that write output to files:
New-ModuleManifest and Export-CliXml also create UTF-16LE files.
When the target file is empty or doesn’t exist, Set-Content and Add-Content use Default encoding. Default is the encoding specified by the active system locale’s ANSI legacy code page.
Export-Csv creates Ascii files but uses different encoding when using Append parameter (see below).
Export-PSSession creates UTF-8 files with BOM by default.
Send-MailMessage uses Default encoding by default.
Start-Transcript creates Utf8 files with a BOM. When the Append parameter is used, the encoding can be different (see below).
For commands that append to an existing file:
For cmdlets that read string data in the absence of a BOM:
Get-Content and Import-PowerShellDataFile uses the Default ANSI encoding. ANSI is also what the PowerShell engine uses when it reads source code from files.
Character encoding in PowerShell
In PowerShell (v6 and higher), the Encoding parameter supports the following values:
PowerShell defaults to utf8NoBOM for all output.
Changing the default encoding
PowerShell has two default variables that can be used to change the default encoding behavior.
Use the following statement to change the default encoding for all cmdlets that have the Encoding parameter.
Putting this command in your PowerShell profile makes the preference a session-global setting that affects all commands and scripts that do not explicitly specify an encoding.
Similarly, you should include such commands in your scripts or modules that you want to behave the same way. Using these commands ensure that cmdlets behave the same way even when run by another user, on a different computer, or in a different version of PowerShell.
Источник
О кодировке символов
Краткое описание
Описывает, как PowerShell использует кодировку символов для ввода и вывода строковых данных.
Подробное описание
Юникод — это мировой стандарт кодировки символов. Система использует Юникод исключительно для обработки символов и строк. Подробное описание всех аспектов Юникода см. в стандарте Юникода.
Windows поддерживает юникод и традиционные кодировки. традиционные кодировки, такие как Windows кодовые страницы, используют 8-разрядные значения или сочетания 8-разрядных значений для представления символов, используемых в параметрах определенного языка или географического региона.
Следующие командлеты имеют параметр Encoding :
Пометка порядка байтов
Для обеспечения оптимальной совместимости Избегайте использования спецификаций в файлах UTF-8. платформы unix и служебные программы unix-heritage, также используемые на платформах Windows, не поддерживают спецификации.
Аналогичным образом UTF7 следует избегать кодирования. UTF-7 не является стандартной кодировкой Юникода и записывается без спецификации во всех версиях PowerShell.
Кодировка символов в Windows PowerShell
В PowerShell 5,1 параметр Encoding поддерживает следующие значения:
Для командлетов, записывающих выходные данные в файлы:
New-ModuleManifest а Export-CliXml также создавать файлы UTF-16LE.
Если целевой файл пуст или не существует, Set-Content и Add-Content Используйте Default кодировку. Default — это кодировка, определяемая кодовой страницей устаревшей версии ANSI на языке активного системы.
Export-Csv создает Ascii файлы, но использует другую кодировку при использовании параметра append (см. ниже).
Export-PSSession по умолчанию создает файлы UTF-8 с BOM.
Send-MailMessage по Default умолчанию использует кодировку.
Start-Transcript создает Utf8 файлы с помощью спецификации. При использовании параметра append кодировка может отличаться (см. ниже).
Для команд, которые добавляют к существующему файлу:
Для командлетов, считывающих строковые данные в отсутствие спецификации:
Get-Content и Import-PowerShellDataFile использует Default кодировку ANSI. ANSI также используется механизмом PowerShell при чтении исходного кода из файлов.
Кодировка символов в PowerShell
В PowerShell (V6 и более поздних версий) параметр Encoding поддерживает следующие значения:
По умолчанию PowerShell принимает значение utf8NoBOM для всех выходных данных.
Изменение кодировки по умолчанию
В PowerShell есть две переменные по умолчанию, которые можно использовать для изменения поведения кодировки по умолчанию.
Дополнительные сведения см. в разделе about_Preference_Variables.
При размещении этой команды в профиле PowerShell предпочтение влияет на глобальные параметры сеанса, влияющие на все команды и скрипты, которые явно не задают кодировку.
Аналогичным образом следует включить такие команды в скрипты или модули, которые должны вести себя одинаково. Использование этих команд гарантирует, что командлеты ведут себя одинаково даже при запуске другого пользователя, на другом компьютере или в другой версии PowerShell.
Источник
Export-Csv
Converts objects into a series of comma-separated value (CSV) strings and saves the strings to a file.
Syntax
Description
The Export-CSV cmdlet creates a CSV file of the objects that you submit. Each object is a row that includes a comma-separated list of the object’s property values. You can use the Export-CSV cmdlet to create spreadsheets and share data with programs that accept CSV files as input.
Do not format objects before sending them to the Export-CSV cmdlet. If Export-CSV receives formatted objects the CSV file contains the format properties rather than the object properties. To export only selected properties of an object, use the Select-Object cmdlet.
Examples
Example 1: Export process properties to a CSV file
This example selects Process objects with specific properties, exports the objects to a CSV file.
The Get-Process cmdlet gets the Process objects. The Name parameter filters the output to include only the WmiPrvSE process objects. The process objects are sent down the pipeline to the Select-Object cmdlet. Select-Object uses the Property parameter to select a subset of process object properties. The process objects are sent down the pipeline to the Export-Csv cmdlet. Export-Csv converts the process objects to a series of CSV strings. The Path parameter specifies that the WmiData.csv file is saved in the current directory. The NoTypeInformation parameter removes the #TYPE information header from the CSV output and is not required in PowerShell 6. The Import-Csv cmdlet uses the Path parameter to display the file located in the current directory.
Example 2: Export processes to a comma-delimited file
This example gets Process objects and exports the objects to a CSV file.
The Get-Process cmdlet gets Process objects. The process objects are sent down the pipeline to the Export-Csv cmdlet. Export-Csv converts the process objects to a series of CSV strings. The Path parameter specifies that the Processes.csv file is saved in the current directory. The NoTypeInformation parameter removes the #TYPE information header from the CSV output and is not required in PowerShell 6. The Get-Content cmdlet uses the Path parameter to display the file located in the current directory.
Example 3: Export processes to a semicolon delimited file
This example gets Process objects and exports the objects to a file with a semicolon delimiter.
The Get-Process cmdlet gets Process objects. The process objects are sent down the pipeline to the Export-Csv cmdlet. Export-Csv converts the process objects to a series of CSV strings. The Path parameter specifies that the Processes.csv file is saved in the current directory. The Delimiter parameter specifies a semicolon to separate the string values. The NoTypeInformation parameter removes the #TYPE information header from the CSV output and is not required in PowerShell 6. The Get-Content cmdlet uses the Path parameter to display the file located in the current directory.
Example 4: Export processes using the current culture’s list separator
This example gets Process objects and exports the objects to a file. The delimiter is the current culture’s list separator.
The Get-Culture cmdlet uses the nested properties TextInfo and ListSeparator and displays the current culture’s default list separator. The Get-Process cmdlet gets Process objects. The process objects are sent down the pipeline to the Export-Csv cmdlet. Export-Csv converts the process objects to a series of CSV strings. The Path parameter specifies that the Processes.csv file is saved in the current directory. The UseCulture parameter uses the current culture’s default list separator as the delimiter. The NoTypeInformation parameter removes the #TYPE information header from the CSV output and is not required in PowerShell 6. The Get-Content cmdlet uses the Path parameter to display the file located in the current directory.
Example 5: Export processes with type information
This example explains how to include the #TYPE header information in a CSV file. The #TYPE header is the default in versions prior to PowerShell 6.0.
The Get-Process cmdlet gets Process objects. The process objects are sent down the pipeline to the Export-Csv cmdlet. Export-Csv converts the process objects to a series of CSV strings. The Path parameter specifies that the Processes.csv file is saved in the current directory. The IncludeTypeInformation includes the #TYPE information header in the CSV output. The Get-Content cmdlet uses the Path parameter to display the file located in the current directory.
Example 6: Export and append objects to a CSV file
This example describes how to export objects to a CSV file and use the Append parameter to add objects to an existing file.
Example 7: Format cmdlet within a pipeline creates unexpected results
This example shows why it is important not to use a format cmdlet within a pipeline. When unexpected output is received, troubleshoot the pipeline syntax.
The Get-Date cmdlet gets the DateTime object. The object is sent down the pipeline to the Select-Object cmdlet. Select-Object uses the Property parameter to select a subset of object properties. The object is sent down the pipeline to the Export-Csv cmdlet. Export-Csv converts the object to a CSV format. The Path parameter specifies that the DateTime.csv file is saved in the current directory. The NoTypeInformation parameter removes the #TYPE information header from the CSV output and is not required in PowerShell 6. The Get-Content cmdlet uses the Path parameter to display the CSV file located in the current directory.
When the Format-Table cmdlet is used within the pipeline to select properties unexpected results are received. Format-Table sends table format objects down the pipeline to the Export-Csv cmdlet rather than the DateTime object. Export-Csv converts the table format objects to a series of CSV strings. The Get-Content cmdlet displays the CSV file which contains the table format objects.
Example 8: Using the Force parameter to overwrite read-only files
This example creates an empty, read-only file and uses the Force parameter to update the file.
The New-Item cmdlet uses the Path and ItemType parameters to create the ReadOnly.csv file in the current directory. The Set-ItemProperty cmdlet uses the Name and Value parameters to change the file’s IsReadOnly property to true. The Get-Process cmdlet gets Process objects. The process objects are sent down the pipeline to the Export-Csv cmdlet. Export-Csv converts the process objects to a series of CSV strings. The Path parameter specifies that the ReadOnly.csv file is saved in the current directory. The NoTypeInformation parameter removes the #TYPE information header from the CSV output and is not required in PowerShell 6. The output shows that the file is not written because access is denied.
The Force parameter is added to the Export-Csv cmdlet to force the export to write to the file. The Get-Content cmdlet uses the Path parameter to display the file located in the current directory.
Example 9: Using the Force parameter with Append
This example shows how to use the Force and Append parameters. When these parameters are combined, mismatched object properties can be written to a CSV file.
The Export-Csv cmdlet Force parameter is used to force the export to write to the file. The Edition property is discarded. The Import-Csv cmdlet uses the Path parameter to display the file located in the current directory.
Example 10: Export to CSV with quotes around two columns
This example converts a DateTime object to a CSV string.
Example 11: Export to CSV with quotes only when needed
This example converts a DateTime object to a CSV string.
Parameters
Use this parameter so that Export-CSV adds CSV output to the end of the specified file. Without this parameter, Export-CSV replaces the file contents without warning.
This parameter was introduced in Windows PowerShell 3.0.
| Type: | SwitchParameter |
| Position: | Named |
| Default value: | None |
| Accept pipeline input: | False |
| Accept wildcard characters: | False |
Prompts you for confirmation before running the cmdlet.
| Type: | SwitchParameter |
| Aliases: | cf |
| Position: | Named |
| Default value: | False |
| Accept pipeline input: | False |
| Accept wildcard characters: | False |
| Type: | Char |
| Position: | 1 |
| Default value: | comma (,) |
| Accept pipeline input: | False |
| Accept wildcard characters: | False |
The acceptable values for this parameter are as follows:
UTF-7* is no longer recommended to use. As of PowerShell 7.1, a warning is written if you specify utf7 for the Encoding parameter.
| Type: | Encoding |
| Accepted values: | ASCII, BigEndianUnicode, BigEndianUTF32, OEM, Unicode, UTF7, UTF8, UTF8BOM, UTF8NoBOM, UTF32 |
| Position: | Named |
| Default value: | UTF8NoBOM |
| Accept pipeline input: | False |
| Accept wildcard characters: | False |
This parameter allows Export-Csv to overwrite files with the Read Only attribute.
When Force and Append parameters are combined, objects that contain mismatched properties can be written to a CSV file. Only the properties that match are written to the file. The mismatched properties are discarded.
| Type: | SwitchParameter |
| Position: | Named |
| Default value: | None |
| Accept pipeline input: | False |
| Accept wildcard characters: | False |
When this parameter is used the first line of the CSV output contains #TYPE followed by the fully qualified name of the object type. For example, #TYPE System.Diagnostics.Process.
This parameter was introduced in PowerShell 6.0.
| Type: | SwitchParameter |
| Aliases: | ITI |
| Position: | Named |
| Default value: | #TYPE |
| Accept pipeline input: | False |
| Accept wildcard characters: | False |
| Type: | PSObject |
| Position: | Named |
| Default value: | None |
| Accept pipeline input: | True |
| Accept wildcard characters: | False |
Specifies the path to the CSV output file. Unlike Path, the value of the LiteralPath parameter is used exactly as it is typed. No characters are interpreted as wildcards. If the path includes escape characters, use single quotation marks. Single quotation marks tell PowerShell not to interpret any characters as escape sequences.
| Type: | String |
| Aliases: | PSPath, LP |
| Position: | Named |
| Default value: | None |
| Accept pipeline input: | False |
| Accept wildcard characters: | False |
Use this parameter so that Export-CSV does not overwrite an existing file. By default, if the file exists in the specified path, Export-CSV overwrites the file without warning.
| Type: | SwitchParameter |
| Aliases: | NoOverwrite |
| Position: | Named |
| Default value: | None |
| Accept pipeline input: | False |
| Accept wildcard characters: | False |
Removes the #TYPE information header from the output. This parameter became the default in PowerShell 6.0 and is included for backwards compatibility.
| Type: | SwitchParameter |
| Aliases: | NTI |
| Position: | Named |
| Default value: | None |
| Accept pipeline input: | False |
| Accept wildcard characters: | False |
A required parameter that specifies the location to save the CSV output file.
| Type: | String |
| Position: | |
| Default value: | None |
| Accept pipeline input: | False |
| Accept wildcard characters: | False |
Specifies the names of the columns that should be quoted. When this parameter is used, only the specified columns are quoted. This parameter was added in PowerShell 7.0.
| Type: | String [ ] |
| Aliases: | QF |
| Position: | Named |
| Default value: | None |
| Accept pipeline input: | False |
| Accept wildcard characters: | False |
| Type: | SwitchParameter |
| Position: | Named |
| Default value: | None |
| Accept pipeline input: | False |
| Accept wildcard characters: | False |
Specifies when quotes are used in the CSV files. Possible values are:
This parameter was added in PowerShell 7.0.
| Type: | Microsoft.PowerShell.Commands.BaseCsvWritingCommand+QuoteKind |
| Aliases: | UQ |
| Position: | Named |
| Default value: | Always |
| Accept pipeline input: | False |
| Accept wildcard characters: | False |
Prevents the cmdlet from being processed or making changes. The output shows what would happen if the cmdlet were run.
| Type: | SwitchParameter |
| Aliases: | wi |
| Position: | Named |
| Default value: | False |
| Accept pipeline input: | False |
| Accept wildcard characters: | False |
Inputs
Outputs
The CSV list is sent to the file designated in the Path parameter.
Notes
The CSV strings are output as follows:
Beginning with PowerShell 6.0 the default behavior of Export-CSV is to not include the #TYPE information in the CSV and NoTypeInformation is implied. IncludeTypeInformation can be used to include the #TYPE Information and emulate the default behavior of Export-CSV prior to PowerShell 6.0.
You can use the Import-Csv cmdlet to recreate objects from the CSV strings in the files. The resulting objects are CSV versions of the original objects that consist of string representations of the property values and no methods.
Источник
В PowerShell для экспорта массивов данных в CSV файлы можно использовать командлет Export-CSV. В этой статье мы покажем, как экспортировать данные в CSV файл и добавить в него дополнительные строки.
CSV формат представляет собой текстовый файл для хранения табличных данных, в котором значения разделены специальным символом-разделителем. Командлет Export-CSV преобразует полученный объект PowerShell в список строк с разделителями и сохраняет эти строки в указанный файл.
Следующая команда экспортирует список служб Windows в CSV файл:
Get-Service |select-object Name,DisplayName,Status | Export-CSV "C:PSservices.CSV" -NoTypeInformation -Encoding UTF8
Откройте полученный CSV файл с помощью любого текстового редактора. Как вы видите, в первой строке указаны названия столбцов (атрибуты объекта PowerShell, в нашем примере вы выбрали определенные поля с помощью select-object), и далее построчно идут данные, разделенные запятыми.
По-умолчанию в качестве разделителя (делиметера) в CSV используется запятая. Вы можете задать другой разделитель (точку с запятой, двоеточие и т.д.) с помощью параметра –Delimiter.
Например, укажем что в качестве разделителя нужно использовать точку с запятой:
Get-Service | Export-CSV "C:PSservices.CSV" -NoTypeInformation -Encoding UTF8 -Delimiter ";"
Вы можете использовать разделитель в зависимости от региональных настроек Windows. Для этого используется параметр -UseCulture.
Get-Process | Export-Csv "c:psprocess.csv" -UseCulture
Вы можете также получить разделитель по-умолчанию из региональных настроек Windows:
(Get-Culture).TextInfo.ListSeparator
По умолчанию командлет Export-CSV создает новый CSV файл (если файл уже существует, он перезаписывается/заменяется новым). Если вы хотите добавить новые строки в уже существующий CSV файл, нужно использовать параметр -Append.
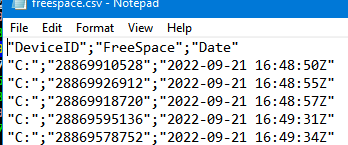
Например, вы хотите по расписанию запускать PowerShell скрипт, который проверяет свободное место на диске и добавляет текущее значение в CSV файл:
$cur_time=get-date -Format u
$freedisksize=Get-CimInstance -Class Win32_LogicalDisk |Where-Object {$_.DeviceID -eq "C:"} |select DeviceID,FreeSpace
Теперь нужно добавить дату в таблицу (объект) в качестве одного из полей:
$freedisksize| add-member -membertype NoteProperty -name Date -value $cur_time
Экспорт объекта PowerShell в CSV файл:
$freedisksize| Export-Csv -Path C:psfreespace.csv -Delimiter ";" -NoTypeInformation -Append
Также вы можете использовать следующие дополнительные параметры Export-CSV:
- -Encoding – позволяет указать кодировку CSV файла (по умолчанию используется utf8NOBOM). В большинстве случае я указываю тут UTF8;
- -Force – перезапишет доступный на чтение файл;
- -NoClobber – не перезаписывать файл, если он существует;
- -Header – добавить заголовок в CSV файл (если он отсутствует);
- -IncludeTypeInformation/-NoTypeInformation –добавить/не добавлять в заголовок файла строку #TYPE с информацией о типе объекта (например,
#TYPE System.Diagnostics.Process
или
#TYPE System.Service.ServiceController
). Начиная с PowerShell 6 информация TYPE в заголовке не выводится по-умолчанию; - —UseQuotes (появился в версии PowerShell Core 7.x) – нужно ли заключать значения в кавычки или нет (AsNeeded/ Always (default)/Never)
В дальнейшем вы можете обрабатывать полученный CSV файл в Excel или других программах.
Командлет Export-CSV часто используется для построения различных табличных выгрузок и отчетов. Ниже несколько примеров полезных отчетов для системного администратора, которые можно сформировать с помощью Export-CSV:
- Сформировать список компьютеров в AD c помощью Get-ADComputer
- Получить информацию о пользователях через Get-ADUser
- Найти неактивных пользователей/компьютеры в домене
- Выгрузить информацию о входах пользователей в Azure
- Экспортировать историю (логи) RDP подключений
- Создать отчет со статусом активации Windows на компьютерах в домене.
Для загрузки (импорта) данных из CSV файла в PowerShell используется командлет Import-CSV.
Note:
-
The next section applies primarily to Windows PowerShell.
- See the section after it for the cross-platform PowerShell Core (v6+) edition.
-
In both cases, the information applies to making PowerShell use UTF-8 for reading and writing files.
- By contrast, for information on how to send and receive UTF-8-encoded strings to and from external programs, see this answer.
-
A system-wide switch to UTF-8 is possible nowadays (since recent versions of Windows 10): see this answer, but note the following caveats:
- The feature has far-reaching consequences, because both the OEM and the ANSI code page are then set to
65001, i.e. UTF-8; also the feature is still considered a beta feature as of this writing. - In Windows PowerShell, this takes effect only for those cmdlets that default to the ANSI code page, notably
Set-Content, but notOut-File/>, and it also applies to reading files, notably includingGet-Contentand how PowerShell itself reads source code.
- The feature has far-reaching consequences, because both the OEM and the ANSI code page are then set to
The Windows PowerShell perspective:
-
In PSv5.1 or higher, where
>and>>are effectively aliases ofOut-File, you can set the default encoding for>/>>/Out-Filevia the$PSDefaultParameterValuespreference variable:$PSDefaultParameterValues['Out-File:Encoding'] = 'utf8'- Note:
-
In Windows PowerShell (the legacy edition whose latest and final version is v5.1), this invariably creates UTF-8 file with a (pseudo) BOM.
- Many Unix-based utilities do not recognize this BOM (see bottom); see this post for workarounds that create BOM-less UTF-8 files.
-
In PowerShell (Core) v6+, BOM-less UTF-8 is the default (see next section), but if you do want a BOM there, you can use
'utf8BOM'
-
-
In PSv5.0 or below, you cannot change the encoding for
>/>>, but, on PSv3 or higher, the above technique does work for explicit calls toOut-File.
(The$PSDefaultParameterValuespreference variable was introduced in PSv3.0). -
In PSv3.0 or higher, if you want to set the default encoding for all cmdlets that support
an-Encodingparameter (which in PSv5.1+ includes>and>>), use:$PSDefaultParameterValues['*:Encoding'] = 'utf8'
If you place this command in your $PROFILE, cmdlets such as Out-File and Set-Content will use UTF-8 encoding by default, but note that this makes it a session-global setting that will affect all commands / scripts that do not explicitly specify an encoding via their -Encoding parameter.
Similarly, be sure to include such commands in your scripts or modules that you want to behave the same way, so that they indeed behave the same even when run by another user or a different machine; however, to avoid a session-global change, use the following form to create a local copy of $PSDefaultParameterValues:
$PSDefaultParameterValues = @{ '*:Encoding' = 'utf8' }
For a summary of the wildly inconsistent default character encoding behavior across many of the Windows PowerShell standard cmdlets, see the bottom section.
The automatic $OutputEncoding variable is unrelated, and only applies to how PowerShell communicates with external programs (what encoding PowerShell uses when sending strings to them) — it has nothing to do with the encoding that the output redirection operators and PowerShell cmdlets use to save to files.
Optional reading: The cross-platform perspective: PowerShell Core:
PowerShell is now cross-platform, via its PowerShell Core edition, whose encoding — sensibly — defaults to BOM-less UTF-8, in line with Unix-like platforms.
-
This means that source-code files without a BOM are assumed to be UTF-8, and using
>/Out-File/Set-Contentdefaults to BOM-less UTF-8; explicit use of theutf8-Encodingargument too creates BOM-less UTF-8, but you can opt to create files with the pseudo-BOM with theutf8bomvalue. -
If you create PowerShell scripts with an editor on a Unix-like platform and nowadays even on Windows with cross-platform editors such as Visual Studio Code and Sublime Text, the resulting
*.ps1file will typically not have a UTF-8 pseudo-BOM:- This works fine on PowerShell Core.
- It may break on Windows PowerShell, if the file contains non-ASCII characters; if you do need to use non-ASCII characters in your scripts, save them as UTF-8 with BOM.
Without the BOM, Windows PowerShell (mis)interprets your script as being encoded in the legacy «ANSI» codepage (determined by the system locale for pre-Unicode applications; e.g., Windows-1252 on US-English systems).
-
Conversely, files that do have the UTF-8 pseudo-BOM can be problematic on Unix-like platforms, as they cause Unix utilities such as
cat,sed, andawk— and even some editors such asgedit— to pass the pseudo-BOM through, i.e., to treat it as data.- This may not always be a problem, but definitely can be, such as when you try to read a file into a string in
bashwith, say,text=$(cat file)ortext=$(<file)— the resulting variable will contain the pseudo-BOM as the first 3 bytes.
- This may not always be a problem, but definitely can be, such as when you try to read a file into a string in
Inconsistent default encoding behavior in Windows PowerShell:
Regrettably, the default character encoding used in Windows PowerShell is wildly inconsistent; the cross-platform PowerShell Core edition, as discussed in the previous section, has commendably put and end to this.
Note:
-
The following doesn’t aspire to cover all standard cmdlets.
-
Googling cmdlet names to find their help topics now shows you the PowerShell Core version of the topics by default; use the version drop-down list above the list of topics on the left to switch to a Windows PowerShell version.
-
Historically, the documentation frequently incorrectly claimed that ASCII is the default encoding in Windows PowerShell; fortunately, this has since been corrected.
Cmdlets that write:
Out-File and > / >> create «Unicode» — UTF-16LE — files by default — in which every ASCII-range character (too) is represented by 2 bytes — which notably differs from Set-Content / Add-Content (see next point); New-ModuleManifest and Export-CliXml also create UTF-16LE files.
Set-Content (and Add-Content if the file doesn’t yet exist / is empty) uses ANSI encoding (the encoding specified by the active system locale’s ANSI legacy code page, which PowerShell calls Default).
Export-Csv indeed creates ASCII files, as documented, but see the notes re -Append below.
Export-PSSession creates UTF-8 files with BOM by default.
New-Item -Type File -Value currently creates BOM-less(!) UTF-8.
The Send-MailMessage help topic also claims that ASCII encoding is the default — I have not personally verified that claim.
Start-Transcript invariably creates UTF-8 files with BOM, but see the notes re -Append below.
Re commands that append to an existing file:
>> / Out-File -Append make no attempt to match the encoding of a file’s existing content.
That is, they blindly apply their default encoding, unless instructed otherwise with -Encoding, which is not an option with >> (except indirectly in PSv5.1+, via $PSDefaultParameterValues, as shown above).
In short: you must know the encoding of an existing file’s content and append using that same encoding.
Add-Content is the laudable exception: in the absence of an explicit -Encoding argument, it detects the existing encoding and automatically applies it to the new content.Thanks, js2010. Note that in Windows PowerShell this means that it is ANSI encoding that is applied if the existing content has no BOM, whereas it is UTF-8 in PowerShell Core.
This inconsistency between Out-File -Append / >> and Add-Content, which also affects PowerShell Core, is discussed in GitHub issue #9423.
Export-Csv -Append partially matches the existing encoding: it blindly appends UTF-8 if the existing file’s encoding is any of ASCII/UTF-8/ANSI, but correctly matches UTF-16LE and UTF-16BE.
To put it differently: in the absence of a BOM, Export-Csv -Append assumes UTF-8 is, whereas Add-Content assumes ANSI.
Start-Transcript -Append partially matches the existing encoding: It correctly matches encodings with BOM, but defaults to potentially lossy ASCII encoding in the absence of one.
Cmdlets that read (that is, the encoding used in the absence of a BOM):
Get-Content and Import-PowerShellDataFile default to ANSI (Default), which is consistent with Set-Content.
ANSI is also what the PowerShell engine itself defaults to when it reads source code from files.
By contrast, Import-Csv, Import-CliXml and Select-String assume UTF-8 in the absence of a BOM.
Export-Csv [[-Path] <String>] [[-Delimiter] <Char>] [-Append] [-Confirm] [-Encoding {Unicode | UTF7 | UTF8 | ASCII| UTF32 | BigEndianUnicode | Default | OEM}] [-Force] -InputObject* <PSObject> [-LiteralPath <String>] [-NoClobber][-NoTypeInformation] [-WhatIf] [<CommonParameters>]Export-Csv [[-Path] <String>] [-Append] [-Confirm] [-Encoding {Unicode | UTF7 | UTF8 | ASCII | UTF32 |BigEndianUnicode | Default | OEM}] [-Force] -InputObject* <PSObject> [-LiteralPath <String>] [-NoClobber][-NoTypeInformation] [-UseCulture] [-WhatIf] [<CommonParameters>]The Export-CSV cmdlet creates a CSV file of the objects that you submit. Each object is represented as a line or row of the CSV. The row consists of a comma-separated list of the values of object properties. You can use this cmdlet to create spreadsheets and share data with programs that take CSV files as input.
Do not format objects before sending them to the Export-CSV cmdlet. If you do, the format properties are represented in the CSV file, instead of the properties of the original objects. To export only selected properties of an object, use the Select-Object cmdlet.
Parameters
-Append [<SwitchParameter>]
- Default value is False
- Accepts pipeline input False
Indicates that this cmdlet adds the CSV output to the end of the specified file. Without this parameter, Export-CSV replaces the file contents without warning.
This parameter was introduced in Windows PowerShell 3.0.
-Confirm [<SwitchParameter>]
- Default value is False
- Accepts pipeline input False
Prompts you for confirmation before running the cmdlet.
-Delimiter <Char>
- Default value is None
- Accepts pipeline input False
Specifies a delimiter to separate the property values. The default is a comma (,). Enter a character, such as a colon (:). To specify a semicolon (;), enclose it in quotation marks.
-Encoding <String>
- Default value is None
- Accepts pipeline input False
Specifies the encoding for the exported CSV file. The acceptable values for this parameter are:
— Unicode
— UTF7
— UTF8
— ASCII
— UTF32
— BigEndianUnicode
— Default
— OEM
The default value is ASCII.
-Force [<SwitchParameter>]
- Default value is False
- Accepts pipeline input False
Forces the command to run without asking for user confirmation.
-InputObject <PSObject>
- This value is required
- Default value is None
- Accepts pipeline input ByPropertyName
Specifies the objects to export as CSV strings. Enter a variable that contains the objects or type a command or expression that gets the objects. You can also pipe objects to Export-CSV .
-LiteralPath <String>
- Default value is None
- Accepts pipeline input False
Specifies the path to the CSV output file. Unlike Path , the value of the LiteralPath parameter is used exactly as it is typed. No characters are interpreted as wildcards. If the path includes escape characters, enclose it in single quotation marks. Single quotation marks tell Windows PowerShell not to interpret any characters as escape sequences.
-NoClobber [<SwitchParameter>]
- Default value is False
- Accepts pipeline input False
Indicates that this cmdlet does not overwrite of an existing file. By default, if a file exists in the specified path, Export-CSV overwrites the file without warning.
-NoTypeInformation [<SwitchParameter>]
- Default value is False
- Accepts pipeline input False
Indicates that this cmdlet omits the type information from the CSV file. By default, the first line of the CSV file contains #TYPE followed by the fully-qualified name of the type of the object.
-Path <String>
- Default value is None
- Accepts pipeline input False
Specifies the path to the CSV output file. This parameter is required.
-UseCulture [<SwitchParameter>]
- Default value is False
- Accepts pipeline input False
Indicates that this cmdlet uses the list separator for the current culture as the item delimiter. The default is a comma (,).
This parameter is very useful in scripts that are being distributed to users worldwide. To find the list separator for a culture, use the following command: `(Get-Culture).TextInfo.ListSeparator`.
-WhatIf [<SwitchParameter>]
- Default value is False
- Accepts pipeline input False
Shows what would happen if the cmdlet runs. The cmdlet is not run.
<CommonParameters>
This cmdlet supports the common parameters: Verbose, Debug,ErrorAction, ErrorVariable, WarningAction, WarningVariable,OutBuffer, PipelineVariable, and OutVariable.
Inputs
System.Management.Automation.PSObject
You can pipe any object with an Extended Type System (ETS) adapter to Export-CSV .
Outputs
System.String
The CSV list is sent to the file designated in the Path parameter.
Examples
- Export process properties:
PS C:> Get-Process wmiprvse | Select-Object basePriority,ID,SessionID,WorkingSet | Export-Csv -Path "data.csv"This command selects a few properties of the WmiPrvse process and exports them to a CSV file named Data.csv.
- Export processes to a comma-delimited file:
PS C:> Get-Process | Export-Csv -Path "processes.csv"
# In processes.csv
#TYPE System.Diagnostics.Process
__NounName,Name,Handles,VM,WS,PM,NPM,Path,Company,CPU,FileVersion,... Process,powershell,626,201666560,76058624,61943808,11960,C:WINDOWS... Process,powershell,257,151920640,38322176,37052416,7836,C:WINDOWS...
This command exports objects representing the processes on the computer to the Processes.csv file in the current directory. Because it does not specify a delimiter, a comma (,) is used to separate the fields in the file.
- Export processes to a semicolon-delimited file:
PS C:> Get-Process | Export-Csv -Path "processes.csv" -Delimiter ";"
# In processes.csv
#TYPE System.Diagnostics.Process
__NounName;Name;Handles;VM;WS;PM;NPM;Path;Company;CPU;FileVersion;... Process;powershell;626;201666560;76058624;61943808;11960;C:WINDOWS... Process;powershell;257;151920640;38322176;37052416;7836;C:WINDOWS...
This command exports objects representing the processes on the computer to the Processes.csv file in the current directory. It uses the Delimiter parameter to specify the semicolon (;). As a result, the fields in the file are separated by semicolons.
- Export using the list separator of the current culture:
PS C:> Get-Process | Export-Csv -Path "processes.csv" -UseCultureThis command exports objects representing the processes on the computer to the Processes.csv file in the current directory. It uses the UseCulture parameter to direct Export-CSV to use the delimiter specified by the ListSeparator property of the current culture.
- Export processes without type information:
PS C:> Get-Process | Export-Csv -Path "processes.csv" -NoTypeInformation
# In processes.csv
__NounName,Name,Handles,VM,WS,PM,NPM,Path,Company,CPU,FileVersion,... Process,powershell,626,201666560,76058624,61943808,11960,C:WINDOWS... Process,powershell,257,151920640,38322176,37052416,7836,C:WINDOWS...
This command exports objects representing the processes on the computer to the Processes.csv file in the current directory. It uses the NoTypeInformation parameter to suppress the type information in the file.
- Export and append script properties:
- The second command uses the Select-Object cmdlet to select the relevant properties of the script files:
PS C:> $ScriptFiles = Get-ChildItem D:* -Include *.ps1 -Recurse | Where-Object {$_.creationtime -gt "01/01/2011"}

PS C:> $ScriptFiles = $ScriptFiles | Select-Object -Property Name, CreationTime, LastWriteTime, IsReadOnly
It saves the revised results in the ScriptFiles variable.
- The third command uses a pipeline operator (|) to send the script file information in the ScriptFiles variable to the **Export-CSV** cmdlet:
PS C:> $ScriptFiles | Export-Csv -Append -Path "\Archive01ScriptsScripts.csv"The command uses the Path parameter to specify the output file and the *Append* parameter to add the new script data to the end of the output file, instead of replacing the existing file contents.These commands add information about new Windows PowerShell scripts to a script inventory file.
The first command uses the Get-ChildItem cmdlet to do a recursive search in the D: drive for files with the .ps1 file name extension. It uses a pipeline operator to sends the results to the Where-Object cmdlet, which gets only files that were created after January 1, 2011, and then saves them in the $ScriptFiles variable.
- The second command uses the Select-Object cmdlet to select the relevant properties of the script files:
- Select properties to export:
- The first command shows how to select properties of an object and export them to a CSV file:
PS C:> Get-Date | Select-Object -Property DateTime, Day, DayOfWeek, DayOfYear | Export-Csv -Path Date.csv
#In Date.csv:"DateTime","Day","DayOfWeek","DayOfYear""Tuesday, October 05, 2010 2:45:13 PM","5","Tuesday","278"
This command uses the Get-Date cmdlet to get the current date and time. It uses the **Select-Object** cmdlet to select the desired properties, and the **Export-CSV** cmdlet to export the object and its properties to the Date.csv file. The output shows the expected content in the Date.csv file.
- The second command shows that when you use the **Format-Table** cmdlet to format your data before exporting it, the output is not useful:
PS C:> Get-Date | Format-Table -Property DateTime, Day, DayOfWeek, DayOfYear | Export-Csv -Path Date.csv
#In Date.csv: "ClassId2e4f51ef21dd47e99d3c952918aff9cd","pageHeaderEntry","pageFooterEntry","autosizeInfo","shapeIn
fo","groupingEntry"
"033ecb2bc07a4d43b5ef94ed5a35d280",,,,"Microsoft.PowerShell.Commands.Internal.Format.TableHeaderInfo","9e210fe47d09
416682b841769c78b8a3"
,,,,,"27c87ef9bbda4f709f6b4002fa4af63c",,,,,"4ec4f0187cb04f4cb6973460dfe252df",,,,,"cf522b78d86c486691226b40aa69e95
c",,,,,
This example demonstrates one of most common problems that users encounter when using the Export-CSV cmdlet. It explains how to recognize and avoid this error.
Because a CSV file has a table format, it might seem natural to use the Format-Table cmdlet to format the data in a table to prepare it for export as a CSV file. Also, the Format-Table cmdlet allows you to select object properties easily.
However, when you format the data in a table and then export it, you are exporting a table object, not your original data object. The resulting CSV file is not useful.
This example shows how to select object properties by using the Select-Object cmdlet, and it shows the Export-CSV formats the data correctly in a CSV file without any preparatory formatting by another cmdlet.
- The first command shows how to select properties of an object and export them to a CSV file:
Additional Notes
 The Export-CSV cmdlet converts the objects that you submit into a series of CSV variable-length strings and
 saves them in the specified text file. You can use Export-CSV * to save objects in a CSV file and then use the
 Import-Csv cmdlet to create objects from the text in the CSV file.

 In the CSV file, each object is represented by a comma-separated list of the property values of the object.
 The property values are converted to strings (by using the ToString() method of the object), so they are
 generally represented by the name of the property value. Export-CSV does not export the methods of the object.

 The format of an exported file is as follows:

 - The first line of the CSV file contains the string #TYPE followed by the fully qualified name of the object,
 such as `#TYPE System.Diagnostics.Process`. To suppress this line, use the NoTypeInformation parameter.

 - The next line of the CSV file represents the column headers. It contains a comma-separated list of the names
 of all the properties of the first object.

 - Additional lines of the file consist of comma-separated lists of the property values of each object. When
 you submit multiple objects to Export-CSV , Export-CSV * organizes the file based on the properties of the
 first object that you submit. If the remaining objects do not have one of the specified properties, the
 property value of that object is null, as represented by two consecutive commas. If the remaining objects have
 additional properties, those property values are not included in the file.

 * You can use the Import-Csv cmdlet to re-create objects from the CSV strings in the files. The resulting
 objects are CSV versions of the original objects that consist of string representations of the property values
 and no methods. The ConvertTo-Csv and ConvertFrom-Csv cmdlets to convert objects to CSV strings (and back).
 Export-CSV is the same as ConvertTo-CSV *, except that it saves the CSV strings in a file.
This work is licensed under a Creative Commons Attribution 4.0 International. It is attributed to Microsoft Corporation and can be found here.
PowerShell Commands
![]()
Сообщение от KDE777

для того, чтобы из xlsx-файла создать csv, который в свою очередь нужно будет передать утилите Csvde для создания AD-пользователей. И всё это из-за нежелания, полученный csv использовать дальше в PowerShell с New-ADUse
Я обязательно отработаю и этот вариант, стараюсь все советы прорабатывать, но раз начал уже с csdve , не хочу на полпути бросать, тем более полученные знания с форматированием и импортом, все равно пригодятся
Добавлено через 4 часа 33 минуты
Вот один из ваших ответов, скрипт работает…
Кликните здесь для просмотра всего текста
| PowerShell | ||
|
Добавлено через 3 минуты
![]()
Сообщение от greg zakharov
цель:
Некоторые значения, которые содержат пробелы, или несколько аргументов через запятую в каком-то поле, должны быть
заключены в кавычки, иначе импорт данных в AD не получиться.
Добавлено через 11 минут
Не смог только уловить логику
Зачем
| PowerShell | ||
|
в эту переменную по идее тогда занесется только 1 строка файла .
Но на выходе почему то она не в кавычках
Ведь для командлета все равно какие строки обрабатывать, тогда он должен был и шапку
отформатировать ?
Добавлено через 6 минут
Следующий скрипт
Здесь все значения полей берутся в кавычки и даже название полей (заголовки), в этой команде нет избирательности,хотя она проще в несколько раз, если бы еще она могла кавычки ставить только на значения определенного поля и не более, и заголовки не форматировала
| PowerShell | ||
|
0
If you’ve ever exported data using Export-Csv PowerShell cmdlet and noticed question-marks (?) instead of data, then you need to use the “encoding” parameter.
Encoding PowerShell exports and imports
I recently migrated user data from a Japanese tenant to a European tenant, and needed to use PowerShell encoding to preserve Japanese characters. PowerShell allows you to export/import while encoding Unicode, UTF7, UTF8, ASCII, UTF32, BigEndianUnicode, Default, and OEM. The default is ASCII.

I used UTF8 to preserve Japanese characters in my export. For example add “-encoding UTF8”.
|
Get-Mailbox -resultsize Unlimited | Export-Csv c:tempmailbox_export.csv -Encoding UTF8 |
Then you can import the Japanese Characters also using “-encoding UTF8”.
|
$newusers = Import-Csv c:tempmailbox_export.csv -Encoding UTF8 $newusers | % {New-Mailbox -Name $_.Name ……… etc. } |
Modify CSV PowerShell files that are encoded
If you only need to export and import, that’s easy. However what if you want to modify the export-csv-file before you import? If you’ve tried to modify an encoded csv file in Excel before, you’ll know the difficulties you can run into – Excel can basically ruin your csv file. Below is the process I’ve used to get around this.
After you have made changes to your CSV file (using Excel) and are ready to save, do the following.
In Microsoft Excel (save as Unicode text)
Click Menu | Save As | choose “Unicode Text (*.txt)”

In Notepad (replace tabs with commas)
Open the Unicode text file (Some characters can look like a box, this is because Notepad can’t display some Unicode characters, you can ignore this).
Replace tabs with a commas (,). Do this by highlighting a tab character between two column headers and press ctrl+c.

Replace all tab characters with comma using Replace function ctrl+H. Paste in “Find what:” and add a comma (,) in the “Replace with:”. Click “Replace All” .

Click Save As. Then change file extension to *.csv, and type to “all files types”, and change Encoding to “UTF-8”.

In Microsoft Excel (verify data)
Open the newly saved CSV file and verify the data is okay.
Import
Now you’re ready to use this file to import. Remember to use “encoding” parameter when importing.
|
$newusers = Import-Csv c:tempmailbox_export_modified.csv -Encoding UTF8 $newusers | % {New-Mailbox -Name $_.Name ……… etc. } |