Qemu (short form for Quick Emulator) is an open source hypervisor that emulates a
physical computer. From the perspective of the host system where Qemu is
running, Qemu is a user program which has access to a number of local resources
like partitions, files, network cards which are then passed to an
emulated computer which sees them as if they were real devices.
A guest operating system running in the emulated computer accesses these
devices, and runs as if it were running on real hardware. For instance, you can pass
an ISO image as a parameter to Qemu, and the OS running in the emulated computer
will see a real CD-ROM inserted into a CD drive.
Qemu can emulate a great variety of hardware from ARM to Sparc, but Proxmox VE is
only concerned with 32 and 64 bits PC clone emulation, since it represents the
overwhelming majority of server hardware. The emulation of PC clones is also one
of the fastest due to the availability of processor extensions which greatly
speed up Qemu when the emulated architecture is the same as the host
architecture.
|
|
You may sometimes encounter the term KVM (Kernel-based Virtual Machine). It means that Qemu is running with the support of the virtualization processor extensions, via the Linux KVM module. In the context of Proxmox VE Qemu and KVM can be used interchangeably, as Qemu in Proxmox VE will always try to load the KVM module. |
Qemu inside Proxmox VE runs as a root process, since this is required to access block
and PCI devices.
Emulated devices and paravirtualized devices
The PC hardware emulated by Qemu includes a mainboard, network controllers,
SCSI, IDE and SATA controllers, serial ports (the complete list can be seen in
the kvm(1) man page) all of them emulated in software. All these devices
are the exact software equivalent of existing hardware devices, and if the OS
running in the guest has the proper drivers it will use the devices as if it
were running on real hardware. This allows Qemu to runs unmodified operating
systems.
This however has a performance cost, as running in software what was meant to
run in hardware involves a lot of extra work for the host CPU. To mitigate this,
Qemu can present to the guest operating system paravirtualized devices, where
the guest OS recognizes it is running inside Qemu and cooperates with the
hypervisor.
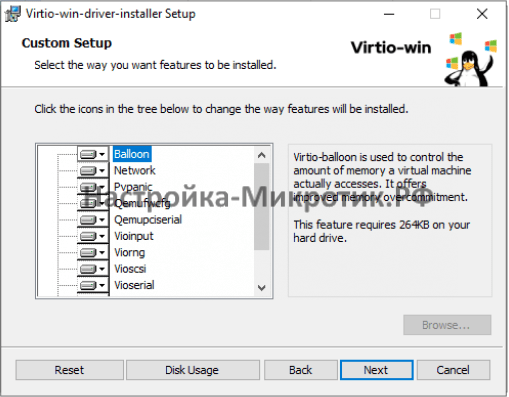
Qemu relies on the virtio virtualization standard, and is thus able to present
paravirtualized virtio devices, which includes a paravirtualized generic disk
controller, a paravirtualized network card, a paravirtualized serial port,
a paravirtualized SCSI controller, etc …
It is highly recommended to use the virtio devices whenever you can, as they
provide a big performance improvement. Using the virtio generic disk controller
versus an emulated IDE controller will double the sequential write throughput,
as measured with bonnie++(8). Using the virtio network interface can deliver
up to three times the throughput of an emulated Intel E1000 network card, as
measured with iperf(1).
[See this benchmark on the KVM wiki
https://www.linux-kvm.org/page/Using_VirtIO_NIC]
Virtual Machines Settings
Generally speaking Proxmox VE tries to choose sane defaults for virtual machines
(VM). Make sure you understand the meaning of the settings you change, as it
could incur a performance slowdown, or putting your data at risk.
General Settings
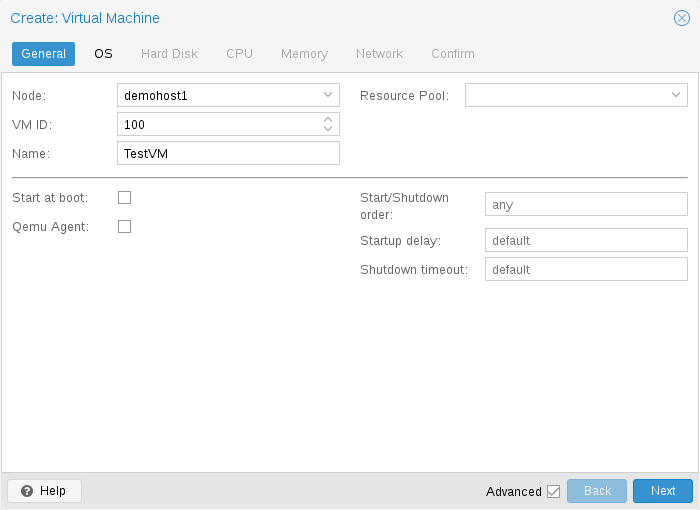
General settings of a VM include
-
the Node : the physical server on which the VM will run
-
the VM ID: a unique number in this Proxmox VE installation used to identify your VM
-
Name: a free form text string you can use to describe the VM
-
Resource Pool: a logical group of VMs
OS Settings
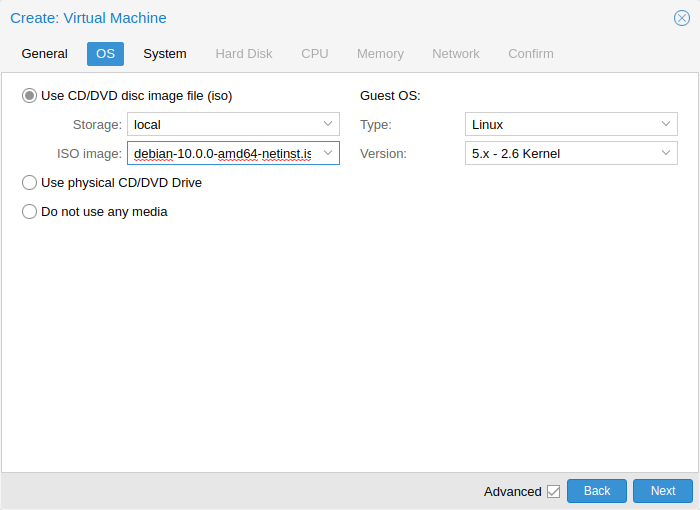
When creating a virtual machine (VM), setting the proper Operating System(OS)
allows Proxmox VE to optimize some low level parameters. For instance Windows OS
expect the BIOS clock to use the local time, while Unix based OS expect the
BIOS clock to have the UTC time.
System Settings
On VM creation you can change some basic system components of the new VM. You
can specify which display type you want to use.
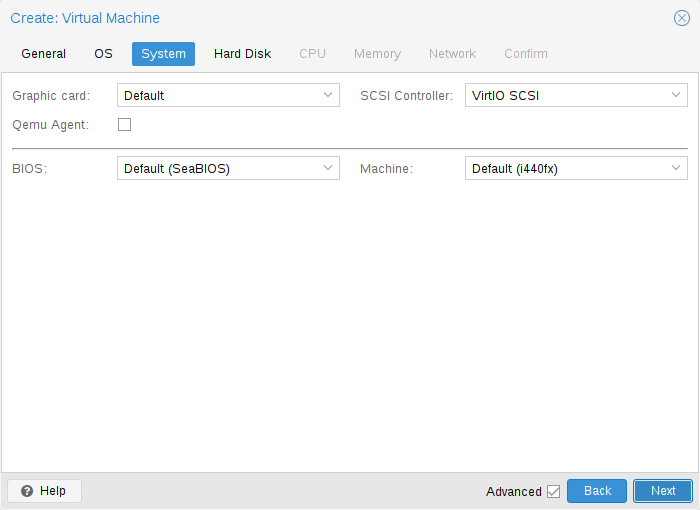
Additionally, the SCSI controller can be changed.
If you plan to install the QEMU Guest Agent, or if your selected ISO image
already ships and installs it automatically, you may want to tick the Qemu
Agent box, which lets Proxmox VE know that it can use its features to show some
more information, and complete some actions (for example, shutdown or
snapshots) more intelligently.
Proxmox VE allows to boot VMs with different firmware and machine types, namely
SeaBIOS and OVMF. In most cases you want to switch from
the default SeaBIOS to OVMF only if you plan to use
PCIe pass through. A VMs Machine Type defines the
hardware layout of the VM’s virtual motherboard. You can choose between the
default Intel 440FX or the
Q35
chipset, which also provides a virtual PCIe bus, and thus may be desired if
one wants to pass through PCIe hardware.
Hard Disk
Bus/Controller
Qemu can emulate a number of storage controllers:
-
the IDE controller, has a design which goes back to the 1984 PC/AT disk
controller. Even if this controller has been superseded by recent designs,
each and every OS you can think of has support for it, making it a great choice
if you want to run an OS released before 2003. You can connect up to 4 devices
on this controller. -
the SATA (Serial ATA) controller, dating from 2003, has a more modern
design, allowing higher throughput and a greater number of devices to be
connected. You can connect up to 6 devices on this controller. -
the SCSI controller, designed in 1985, is commonly found on server grade
hardware, and can connect up to 14 storage devices. Proxmox VE emulates by default a
LSI 53C895A controller.A SCSI controller of type VirtIO SCSI is the recommended setting if you aim for
performance and is automatically selected for newly created Linux VMs since
Proxmox VE 4.3. Linux distributions have support for this controller since 2012, and
FreeBSD since 2014. For Windows OSes, you need to provide an extra iso
containing the drivers during the installation.If you aim at maximum performance, you can select a SCSI controller of type
VirtIO SCSI single which will allow you to select the IO Thread option.
When selecting VirtIO SCSI single Qemu will create a new controller for
each disk, instead of adding all disks to the same controller. -
The VirtIO Block controller, often just called VirtIO or virtio-blk,
is an older type of paravirtualized controller. It has been superseded by the
VirtIO SCSI Controller, in terms of features.
Image Format
On each controller you attach a number of emulated hard disks, which are backed
by a file or a block device residing in the configured storage. The choice of
a storage type will determine the format of the hard disk image. Storages which
present block devices (LVM, ZFS, Ceph) will require the raw disk image format,
whereas files based storages (Ext4, NFS, CIFS, GlusterFS) will let you to choose
either the raw disk image format or the QEMU image format.
-
the QEMU image format is a copy on write format which allows snapshots, and
thin provisioning of the disk image. -
the raw disk image is a bit-to-bit image of a hard disk, similar to what
you would get when executing the dd command on a block device in Linux. This
format does not support thin provisioning or snapshots by itself, requiring
cooperation from the storage layer for these tasks. It may, however, be up to
10% faster than the QEMU image format.
[See this benchmark for details
https://events.static.linuxfound.org/sites/events/files/slides/CloudOpen2013_Khoa_Huynh_v3.pdf]
-
the VMware image format only makes sense if you intend to import/export the
disk image to other hypervisors.
Cache Mode
Setting the Cache mode of the hard drive will impact how the host system will
notify the guest systems of block write completions. The No cache default
means that the guest system will be notified that a write is complete when each
block reaches the physical storage write queue, ignoring the host page cache.
This provides a good balance between safety and speed.
If you want the Proxmox VE backup manager to skip a disk when doing a backup of a VM,
you can set the No backup option on that disk.
If you want the Proxmox VE storage replication mechanism to skip a disk when starting
a replication job, you can set the Skip replication option on that disk.
As of Proxmox VE 5.0, replication requires the disk images to be on a storage of type
zfspool, so adding a disk image to other storages when the VM has replication
configured requires to skip replication for this disk image.
Trim/Discard
If your storage supports thin provisioning (see the storage chapter in the
Proxmox VE guide), you can activate the Discard option on a drive. With Discard
set and a TRIM-enabled guest OS
[TRIM, UNMAP, and discard
https://en.wikipedia.org/wiki/Trim_%28computing%29]
, when the VM’s filesystem
marks blocks as unused after deleting files, the controller will relay this
information to the storage, which will then shrink the disk image accordingly.
For the guest to be able to issue TRIM commands, you must enable the Discard
option on the drive. Some guest operating systems may also require the
SSD Emulation flag to be set. Note that Discard on VirtIO Block drives is
only supported on guests using Linux Kernel 5.0 or higher.
If you would like a drive to be presented to the guest as a solid-state drive
rather than a rotational hard disk, you can set the SSD emulation option on
that drive. There is no requirement that the underlying storage actually be
backed by SSDs; this feature can be used with physical media of any type.
Note that SSD emulation is not supported on VirtIO Block drives.
IO Thread
The option IO Thread can only be used when using a disk with the
VirtIO controller, or with the SCSI controller, when the emulated controller
type is VirtIO SCSI single.
With this enabled, Qemu creates one I/O thread per storage controller,
rather than a single thread for all I/O. This can increase performance when
multiple disks are used and each disk has its own storage controller.
CPU
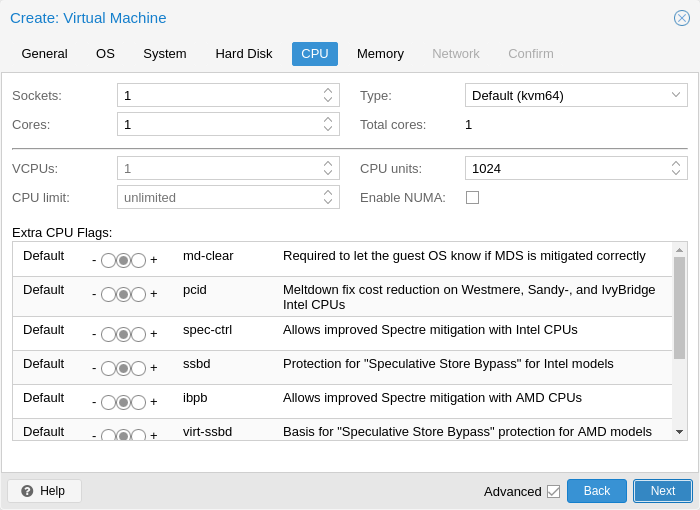
A CPU socket is a physical slot on a PC motherboard where you can plug a CPU.
This CPU can then contain one or many cores, which are independent
processing units. Whether you have a single CPU socket with 4 cores, or two CPU
sockets with two cores is mostly irrelevant from a performance point of view.
However some software licenses depend on the number of sockets a machine has,
in that case it makes sense to set the number of sockets to what the license
allows you.
Increasing the number of virtual CPUs (cores and sockets) will usually provide a
performance improvement though that is heavily dependent on the use of the VM.
Multi-threaded applications will of course benefit from a large number of
virtual CPUs, as for each virtual cpu you add, Qemu will create a new thread of
execution on the host system. If you’re not sure about the workload of your VM,
it is usually a safe bet to set the number of Total cores to 2.
|
|
It is perfectly safe if the overall number of cores of all your VMs is greater than the number of cores on the server (for example, 4 VMs each with 4 cores (= total 16) on a machine with only 8 cores). In that case the host system will balance the QEMU execution threads between your server cores, just like if you were running a standard multi-threaded application. However, Proxmox VE will prevent you from starting VMs with more virtual CPU cores than physically available, as this will only bring the performance down due to the cost of context switches. |
Resource Limits
In addition to the number of virtual cores, you can configure how much resources
a VM can get in relation to the host CPU time and also in relation to other
VMs.
With the cpulimit (“Host CPU Time”) option you can limit how much CPU time
the whole VM can use on the host. It is a floating point value representing CPU
time in percent, so 1.0 is equal to 100%, 2.5 to 250% and so on. If a
single process would fully use one single core it would have 100% CPU Time
usage. If a VM with four cores utilizes all its cores fully it would
theoretically use 400%. In reality the usage may be even a bit higher as Qemu
can have additional threads for VM peripherals besides the vCPU core ones.
This setting can be useful if a VM should have multiple vCPUs, as it runs a few
processes in parallel, but the VM as a whole should not be able to run all
vCPUs at 100% at the same time. Using a specific example: lets say we have a VM
which would profit from having 8 vCPUs, but at no time all of those 8 cores
should run at full load — as this would make the server so overloaded that
other VMs and CTs would get to less CPU. So, we set the cpulimit limit to
4.0 (=400%). If all cores do the same heavy work they would all get 50% of a
real host cores CPU time. But, if only 4 would do work they could still get
almost 100% of a real core each.
|
|
VMs can, depending on their configuration, use additional threads, such as for networking or IO operations but also live migration. Thus a VM can show up to use more CPU time than just its virtual CPUs could use. To ensure that a VM never uses more CPU time than virtual CPUs assigned set the cpulimit setting to the same value as the total core count. |
The second CPU resource limiting setting, cpuunits (nowadays often called CPU
shares or CPU weight), controls how much CPU time a VM gets compared to other
running VMs. It is a relative weight which defaults to 100 (or 1024 if the
host uses legacy cgroup v1). If you increase this for a VM it will be
prioritized by the scheduler in comparison to other VMs with lower weight. For
example, if VM 100 has set the default 100 and VM 200 was changed to 200,
the latter VM 200 would receive twice the CPU bandwidth than the first VM 100.
For more information see man systemd.resource-control, here CPUQuota
corresponds to cpulimit and CPUWeight corresponds to our cpuunits
setting, visit its Notes section for references and implementation details.
The third CPU resource limiting setting, affinity, controls what host cores
the virtual machine will be permitted to execute on. E.g., if an affinity value
of 0-3,8-11 is provided, the virtual machine will be restricted to using the
host cores 0,1,2,3,8,9,10, and 11. Valid affinity values are written in
cpuset List Format. List Format is a comma-separated list of CPU numbers and
ranges of numbers, in ASCII decimal.
|
|
CPU affinity uses the taskset command to restrict virtual machines to a given set of cores. This restriction will not take effect for some types of processes that may be created for IO. CPU affinity is not a security feature. |
For more information regarding affinity see man cpuset. Here the
List Format corresponds to valid affinity values. Visit its Formats
section for more examples.
CPU Type
Qemu can emulate a number different of CPU types from 486 to the latest Xeon
processors. Each new processor generation adds new features, like hardware
assisted 3d rendering, random number generation, memory protection, etc …
Usually you should select for your VM a processor type which closely matches the
CPU of the host system, as it means that the host CPU features (also called CPU
flags ) will be available in your VMs. If you want an exact match, you can set
the CPU type to host in which case the VM will have exactly the same CPU flags
as your host system.
This has a downside though. If you want to do a live migration of VMs between
different hosts, your VM might end up on a new system with a different CPU type.
If the CPU flags passed to the guest are missing, the qemu process will stop. To
remedy this Qemu has also its own CPU type kvm64, that Proxmox VE uses by defaults.
kvm64 is a Pentium 4 look a like CPU type, which has a reduced CPU flags set,
but is guaranteed to work everywhere.
In short, if you care about live migration and moving VMs between nodes, leave
the kvm64 default. If you don’t care about live migration or have a homogeneous
cluster where all nodes have the same CPU, set the CPU type to host, as in
theory this will give your guests maximum performance.
Custom CPU Types
You can specify custom CPU types with a configurable set of features. These are
maintained in the configuration file /etc/pve/virtual-guest/cpu-models.conf by
an administrator. See man cpu-models.conf for format details.
Specified custom types can be selected by any user with the Sys.Audit
privilege on /nodes. When configuring a custom CPU type for a VM via the CLI
or API, the name needs to be prefixed with custom-.
There are several CPU flags related to the Meltdown and Spectre vulnerabilities
[Meltdown Attack https://meltdownattack.com/]
which need to be set
manually unless the selected CPU type of your VM already enables them by default.
There are two requirements that need to be fulfilled in order to use these
CPU flags:
-
The host CPU(s) must support the feature and propagate it to the guest’s virtual CPU(s)
-
The guest operating system must be updated to a version which mitigates the
attacks and is able to utilize the CPU feature
Otherwise you need to set the desired CPU flag of the virtual CPU, either by
editing the CPU options in the WebUI, or by setting the flags property of the
cpu option in the VM configuration file.
For Spectre v1,v2,v4 fixes, your CPU or system vendor also needs to provide a
so-called “microcode update”
[You can use ‘intel-microcode’ /
‘amd-microcode’ from Debian non-free if your vendor does not provide such an
update. Note that not all affected CPUs can be updated to support spec-ctrl.]
for your CPU.
To check if the Proxmox VE host is vulnerable, execute the following command as root:
for f in /sys/devices/system/cpu/vulnerabilities/*; do echo "${f##*/} -" $(cat "$f"); done
A community script is also available to detect is the host is still vulnerable.
[spectre-meltdown-checker https://meltdown.ovh/]
Intel processors
-
pcid
This reduces the performance impact of the Meltdown (CVE-2017-5754) mitigation
called Kernel Page-Table Isolation (KPTI), which effectively hides
the Kernel memory from the user space. Without PCID, KPTI is quite an expensive
mechanism
[PCID is now a critical performance/security feature on x86
https://groups.google.com/forum/m/#!topic/mechanical-sympathy/L9mHTbeQLNU]
.To check if the Proxmox VE host supports PCID, execute the following command as root:
# grep ' pcid ' /proc/cpuinfo
If this does not return empty your host’s CPU has support for pcid.
-
spec-ctrl
Required to enable the Spectre v1 (CVE-2017-5753) and Spectre v2 (CVE-2017-5715) fix,
in cases where retpolines are not sufficient.
Included by default in Intel CPU models with -IBRS suffix.
Must be explicitly turned on for Intel CPU models without -IBRS suffix.
Requires an updated host CPU microcode (intel-microcode >= 20180425). -
ssbd
Required to enable the Spectre V4 (CVE-2018-3639) fix. Not included by default in any Intel CPU model.
Must be explicitly turned on for all Intel CPU models.
Requires an updated host CPU microcode(intel-microcode >= 20180703).
AMD processors
-
ibpb
Required to enable the Spectre v1 (CVE-2017-5753) and Spectre v2 (CVE-2017-5715) fix,
in cases where retpolines are not sufficient.
Included by default in AMD CPU models with -IBPB suffix.
Must be explicitly turned on for AMD CPU models without -IBPB suffix.
Requires the host CPU microcode to support this feature before it can be used for guest CPUs. -
virt-ssbd
Required to enable the Spectre v4 (CVE-2018-3639) fix.
Not included by default in any AMD CPU model.
Must be explicitly turned on for all AMD CPU models.
This should be provided to guests, even if amd-ssbd is also provided, for maximum guest compatibility.
Note that this must be explicitly enabled when when using the «host» cpu model,
because this is a virtual feature which does not exist in the physical CPUs. -
amd-ssbd
Required to enable the Spectre v4 (CVE-2018-3639) fix.
Not included by default in any AMD CPU model. Must be explicitly turned on for all AMD CPU models.
This provides higher performance than virt-ssbd, therefore a host supporting this should always expose this to guests if possible.
virt-ssbd should none the less also be exposed for maximum guest compatibility as some kernels only know about virt-ssbd. -
amd-no-ssb
Recommended to indicate the host is not vulnerable to Spectre V4 (CVE-2018-3639).
Not included by default in any AMD CPU model.
Future hardware generations of CPU will not be vulnerable to CVE-2018-3639,
and thus the guest should be told not to enable its mitigations, by exposing amd-no-ssb.
This is mutually exclusive with virt-ssbd and amd-ssbd.
NUMA
You can also optionally emulate a NUMA
[https://en.wikipedia.org/wiki/Non-uniform_memory_access]
architecture
in your VMs. The basics of the NUMA architecture mean that instead of having a
global memory pool available to all your cores, the memory is spread into local
banks close to each socket.
This can bring speed improvements as the memory bus is not a bottleneck
anymore. If your system has a NUMA architecture
[if the command
numactl —hardware | grep available returns more than one node, then your host
system has a NUMA architecture]
we recommend to activate the option, as this
will allow proper distribution of the VM resources on the host system.
This option is also required to hot-plug cores or RAM in a VM.
If the NUMA option is used, it is recommended to set the number of sockets to
the number of nodes of the host system.
vCPU hot-plug
Modern operating systems introduced the capability to hot-plug and, to a
certain extent, hot-unplug CPUs in a running system. Virtualization allows us
to avoid a lot of the (physical) problems real hardware can cause in such
scenarios.
Still, this is a rather new and complicated feature, so its use should be
restricted to cases where its absolutely needed. Most of the functionality can
be replicated with other, well tested and less complicated, features, see
Resource Limits.
In Proxmox VE the maximal number of plugged CPUs is always cores * sockets.
To start a VM with less than this total core count of CPUs you may use the
vpus setting, it denotes how many vCPUs should be plugged in at VM start.
Currently only this feature is only supported on Linux, a kernel newer than 3.10
is needed, a kernel newer than 4.7 is recommended.
You can use a udev rule as follow to automatically set new CPUs as online in
the guest:
SUBSYSTEM=="cpu", ACTION=="add", TEST=="online", ATTR{online}=="0", ATTR{online}="1"
Save this under /etc/udev/rules.d/ as a file ending in .rules.
Note: CPU hot-remove is machine dependent and requires guest cooperation. The
deletion command does not guarantee CPU removal to actually happen, typically
it’s a request forwarded to guest OS using target dependent mechanism, such as
ACPI on x86/amd64.
Memory
For each VM you have the option to set a fixed size memory or asking
Proxmox VE to dynamically allocate memory based on the current RAM usage of the
host.
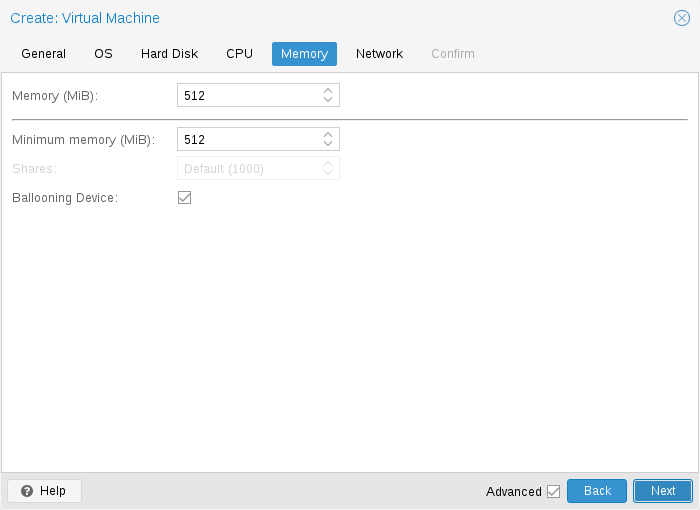
Fixed Memory Allocation
When setting memory and minimum memory to the same amount
Proxmox VE will simply allocate what you specify to your VM.
Even when using a fixed memory size, the ballooning device gets added to the
VM, because it delivers useful information such as how much memory the guest
really uses.
In general, you should leave ballooning enabled, but if you want to disable
it (like for debugging purposes), simply uncheck Ballooning Device or set
in the configuration.
Automatic Memory Allocation
When setting the minimum memory lower than memory, Proxmox VE will make sure that the
minimum amount you specified is always available to the VM, and if RAM usage on
the host is below 80%, will dynamically add memory to the guest up to the
maximum memory specified.
When the host is running low on RAM, the VM will then release some memory
back to the host, swapping running processes if needed and starting the oom
killer in last resort. The passing around of memory between host and guest is
done via a special balloon kernel driver running inside the guest, which will
grab or release memory pages from the host.
[A good explanation of the inner workings of the balloon driver can be found here https://rwmj.wordpress.com/2010/07/17/virtio-balloon/]
When multiple VMs use the autoallocate facility, it is possible to set a
Shares coefficient which indicates the relative amount of the free host memory
that each VM should take. Suppose for instance you have four VMs, three of them
running an HTTP server and the last one is a database server. To cache more
database blocks in the database server RAM, you would like to prioritize the
database VM when spare RAM is available. For this you assign a Shares property
of 3000 to the database VM, leaving the other VMs to the Shares default setting
of 1000. The host server has 32GB of RAM, and is currently using 16GB, leaving 32
* 80/100 — 16 = 9GB RAM to be allocated to the VMs. The database VM will get 9 *
3000 / (3000 + 1000 + 1000 + 1000) = 4.5 GB extra RAM and each HTTP server will
get 1.5 GB.
All Linux distributions released after 2010 have the balloon kernel driver
included. For Windows OSes, the balloon driver needs to be added manually and can
incur a slowdown of the guest, so we don’t recommend using it on critical
systems.
When allocating RAM to your VMs, a good rule of thumb is always to leave 1GB
of RAM available to the host.
Network Device
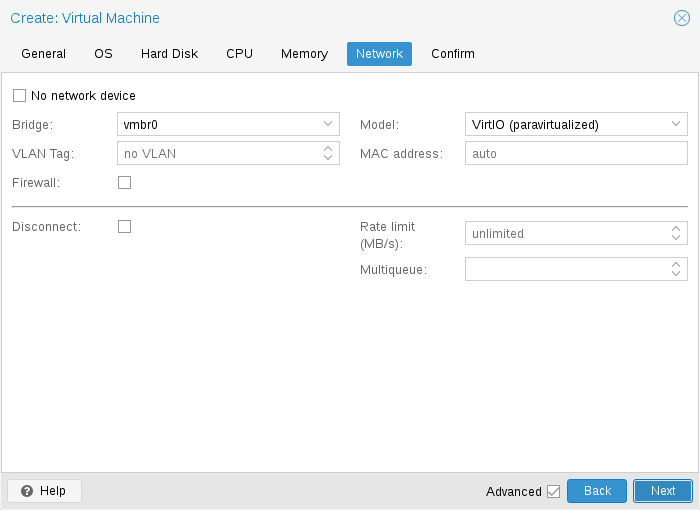
Each VM can have many Network interface controllers (NIC), of four different
types:
-
Intel E1000 is the default, and emulates an Intel Gigabit network card.
-
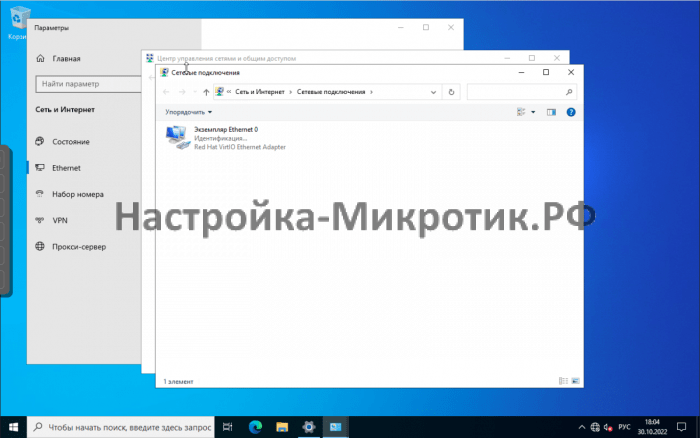
the VirtIO paravirtualized NIC should be used if you aim for maximum
performance. Like all VirtIO devices, the guest OS should have the proper driver
installed. -
the Realtek 8139 emulates an older 100 MB/s network card, and should
only be used when emulating older operating systems ( released before 2002 ) -
the vmxnet3 is another paravirtualized device, which should only be used
when importing a VM from another hypervisor.
Proxmox VE will generate for each NIC a random MAC address, so that your VM is
addressable on Ethernet networks.
The NIC you added to the VM can follow one of two different models:
-
in the default Bridged mode each virtual NIC is backed on the host by a
tap device, ( a software loopback device simulating an Ethernet NIC ). This
tap device is added to a bridge, by default vmbr0 in Proxmox VE. In this mode, VMs
have direct access to the Ethernet LAN on which the host is located. -
in the alternative NAT mode, each virtual NIC will only communicate with
the Qemu user networking stack, where a built-in router and DHCP server can
provide network access. This built-in DHCP will serve addresses in the private
10.0.2.0/24 range. The NAT mode is much slower than the bridged mode, and
should only be used for testing. This mode is only available via CLI or the API,
but not via the WebUI.
You can also skip adding a network device when creating a VM by selecting No
network device.
You can overwrite the MTU setting for each VM network device. The option
mtu=1 represents a special case, in which the MTU value will be inherited
from the underlying bridge.
This option is only available for VirtIO network devices.
Multiqueue
If you are using the VirtIO driver, you can optionally activate the
Multiqueue option. This option allows the guest OS to process networking
packets using multiple virtual CPUs, providing an increase in the total number
of packets transferred.
When using the VirtIO driver with Proxmox VE, each NIC network queue is passed to the
host kernel, where the queue will be processed by a kernel thread spawned by the
vhost driver. With this option activated, it is possible to pass multiple
network queues to the host kernel for each NIC.
When using Multiqueue, it is recommended to set it to a value equal
to the number of Total Cores of your guest. You also need to set in
the VM the number of multi-purpose channels on each VirtIO NIC with the ethtool
command:
ethtool -L ens1 combined X
where X is the number of the number of vcpus of the VM.
You should note that setting the Multiqueue parameter to a value greater
than one will increase the CPU load on the host and guest systems as the
traffic increases. We recommend to set this option only when the VM has to
process a great number of incoming connections, such as when the VM is running
as a router, reverse proxy or a busy HTTP server doing long polling.
Display
QEMU can virtualize a few types of VGA hardware. Some examples are:
-
std, the default, emulates a card with Bochs VBE extensions.
-
cirrus, this was once the default, it emulates a very old hardware module
with all its problems. This display type should only be used if really
necessary
[https://www.kraxel.org/blog/2014/10/qemu-using-cirrus-considered-harmful/
qemu: using cirrus considered harmful]
, for example, if using Windows XP or
earlier -
vmware, is a VMWare SVGA-II compatible adapter.
-
qxl, is the QXL paravirtualized graphics card. Selecting this also
enables SPICE (a remote viewer protocol) for the
VM. -
virtio-gl, often named VirGL is a virtual 3D GPU for use inside VMs that
can offload workloads to the host GPU without requiring special (expensive)
models and drivers and neither binding the host GPU completely, allowing
reuse between multiple guests and or the host.VirGL support needs some extra libraries that aren’t installed by
default due to being relatively big and also not available as open source for
all GPU models/vendors. For most setups you’ll just need to do:
apt install libgl1 libegl1
You can edit the amount of memory given to the virtual GPU, by setting
the memory option. This can enable higher resolutions inside the VM,
especially with SPICE/QXL.
As the memory is reserved by display device, selecting Multi-Monitor mode
for SPICE (such as qxl2 for dual monitors) has some implications:
-
Windows needs a device for each monitor, so if your ostype is some
version of Windows, Proxmox VE gives the VM an extra device per monitor.
Each device gets the specified amount of memory. -
Linux VMs, can always enable more virtual monitors, but selecting
a Multi-Monitor mode multiplies the memory given to the device with
the number of monitors.
Selecting serialX as display type disables the VGA output, and redirects
the Web Console to the selected serial port. A configured display memory
setting will be ignored in that case.
USB Passthrough
There are two different types of USB passthrough devices:
-
Host USB passthrough
-
SPICE USB passthrough
Host USB passthrough works by giving a VM a USB device of the host.
This can either be done via the vendor- and product-id, or
via the host bus and port.
The vendor/product-id looks like this: 0123:abcd,
where 0123 is the id of the vendor, and abcd is the id
of the product, meaning two pieces of the same usb device
have the same id.
The bus/port looks like this: 1-2.3.4, where 1 is the bus
and 2.3.4 is the port path. This represents the physical
ports of your host (depending of the internal order of the
usb controllers).
If a device is present in a VM configuration when the VM starts up,
but the device is not present in the host, the VM can boot without problems.
As soon as the device/port is available in the host, it gets passed through.
|
|
Using this kind of USB passthrough means that you cannot move a VM online to another host, since the hardware is only available on the host the VM is currently residing. |
The second type of passthrough is SPICE USB passthrough. This is useful
if you use a SPICE client which supports it. If you add a SPICE USB port
to your VM, you can passthrough a USB device from where your SPICE client is,
directly to the VM (for example an input device or hardware dongle).
BIOS and UEFI
In order to properly emulate a computer, QEMU needs to use a firmware.
Which, on common PCs often known as BIOS or (U)EFI, is executed as one of the
first steps when booting a VM. It is responsible for doing basic hardware
initialization and for providing an interface to the firmware and hardware for
the operating system. By default QEMU uses SeaBIOS for this, which is an
open-source, x86 BIOS implementation. SeaBIOS is a good choice for most
standard setups.
Some operating systems (such as Windows 11) may require use of an UEFI
compatible implementation instead. In such cases, you must rather use OVMF,
which is an open-source UEFI implementation.
[See the OVMF Project https://github.com/tianocore/tianocore.github.io/wiki/OVMF]
If you want to use OVMF, there are several things to consider:
In order to save things like the boot order, there needs to be an EFI Disk.
This disk will be included in backups and snapshots, and there can only be one.
You can create such a disk with the following command:
# qm set <vmid> -efidisk0 <storage>:1,format=<format>,efitype=4m,pre-enrolled-keys=1
Where <storage> is the storage where you want to have the disk, and
<format> is a format which the storage supports. Alternatively, you can
create such a disk through the web interface with Add → EFI Disk in the
hardware section of a VM.
The efitype option specifies which version of the OVMF firmware should be
used. For new VMs, this should always be 4m, as it supports Secure Boot and
has more space allocated to support future development (this is the default in
the GUI).
pre-enroll-keys specifies if the efidisk should come pre-loaded with
distribution-specific and Microsoft Standard Secure Boot keys. It also enables
Secure Boot by default (though it can still be disabled in the OVMF menu within
the VM).
|
|
If you want to start using Secure Boot in an existing VM (that still uses a 2m efidisk), you need to recreate the efidisk. To do so, delete the old one (qm set <vmid> -delete efidisk0) and add a new one as described above. This will reset any custom configurations you have made in the OVMF menu! |
When using OVMF with a virtual display (without VGA passthrough),
you need to set the client resolution in the OVMF menu (which you can reach
with a press of the ESC button during boot), or you have to choose
SPICE as the display type.
Trusted Platform Module (TPM)
A Trusted Platform Module is a device which stores secret data — such as
encryption keys — securely and provides tamper-resistance functions for
validating system boot.
Certain operating systems (such as Windows 11) require such a device to be
attached to a machine (be it physical or virtual).
A TPM is added by specifying a tpmstate volume. This works similar to an
efidisk, in that it cannot be changed (only removed) once created. You can add
one via the following command:
# qm set <vmid> -tpmstate0 <storage>:1,version=<version>
Where <storage> is the storage you want to put the state on, and <version>
is either v1.2 or v2.0. You can also add one via the web interface, by
choosing Add → TPM State in the hardware section of a VM.
The v2.0 TPM spec is newer and better supported, so unless you have a specific
implementation that requires a v1.2 TPM, it should be preferred.
|
|
Compared to a physical TPM, an emulated one does not provide any real security benefits. The point of a TPM is that the data on it cannot be modified easily, except via commands specified as part of the TPM spec. Since with an emulated device the data storage happens on a regular volume, it can potentially be edited by anyone with access to it. |
Inter-VM shared memory
You can add an Inter-VM shared memory device (ivshmem), which allows one to
share memory between the host and a guest, or also between multiple guests.
To add such a device, you can use qm:
# qm set <vmid> -ivshmem size=32,name=foo
Where the size is in MiB. The file will be located under
/dev/shm/pve-shm-$name (the default name is the vmid).
|
|
Currently the device will get deleted as soon as any VM using it got shutdown or stopped. Open connections will still persist, but new connections to the exact same device cannot be made anymore. |
A use case for such a device is the Looking Glass
[Looking Glass: https://looking-glass.io/]
project, which enables high
performance, low-latency display mirroring between host and guest.
Audio Device
To add an audio device run the following command:
qm set <vmid> -audio0 device=<device>
Supported audio devices are:
-
ich9-intel-hda: Intel HD Audio Controller, emulates ICH9
-
intel-hda: Intel HD Audio Controller, emulates ICH6
-
AC97: Audio Codec ’97, useful for older operating systems like Windows XP
There are two backends available:
-
spice
-
none
The spice backend can be used in combination with SPICE while
the none backend can be useful if an audio device is needed in the VM for some
software to work. To use the physical audio device of the host use device
passthrough (see PCI Passthrough and
USB Passthrough). Remote protocols like Microsoft’s RDP
have options to play sound.
VirtIO RNG
A RNG (Random Number Generator) is a device providing entropy (randomness) to
a system. A virtual hardware-RNG can be used to provide such entropy from the
host system to a guest VM. This helps to avoid entropy starvation problems in
the guest (a situation where not enough entropy is available and the system may
slow down or run into problems), especially during the guests boot process.
To add a VirtIO-based emulated RNG, run the following command:
qm set <vmid> -rng0 source=<source>[,max_bytes=X,period=Y]
source specifies where entropy is read from on the host and has to be one of
the following:
-
/dev/urandom: Non-blocking kernel entropy pool (preferred)
-
/dev/random: Blocking kernel pool (not recommended, can lead to entropy
starvation on the host system) -
/dev/hwrng: To pass through a hardware RNG attached to the host (if multiple
are available, the one selected in
/sys/devices/virtual/misc/hw_random/rng_current will be used)
A limit can be specified via the max_bytes and period parameters, they are
read as max_bytes per period in milliseconds. However, it does not represent
a linear relationship: 1024B/1000ms would mean that up to 1 KiB of data becomes
available on a 1 second timer, not that 1 KiB is streamed to the guest over the
course of one second. Reducing the period can thus be used to inject entropy
into the guest at a faster rate.
By default, the limit is set to 1024 bytes per 1000 ms (1 KiB/s). It is
recommended to always use a limiter to avoid guests using too many host
resources. If desired, a value of 0 for max_bytes can be used to disable
all limits.
Device Boot Order
QEMU can tell the guest which devices it should boot from, and in which order.
This can be specified in the config via the boot property, for example:
boot: order=scsi0;net0;hostpci0
This way, the guest would first attempt to boot from the disk scsi0, if that
fails, it would go on to attempt network boot from net0, and in case that
fails too, finally attempt to boot from a passed through PCIe device (seen as
disk in case of NVMe, otherwise tries to launch into an option ROM).
On the GUI you can use a drag-and-drop editor to specify the boot order, and use
the checkbox to enable or disable certain devices for booting altogether.
|
|
If your guest uses multiple disks to boot the OS or load the bootloader, all of them must be marked as bootable (that is, they must have the checkbox enabled or appear in the list in the config) for the guest to be able to boot. This is because recent SeaBIOS and OVMF versions only initialize disks if they are marked bootable. |
In any case, even devices not appearing in the list or having the checkmark
disabled will still be available to the guest, once it’s operating system has
booted and initialized them. The bootable flag only affects the guest BIOS and
bootloader.
Automatic Start and Shutdown of Virtual Machines
After creating your VMs, you probably want them to start automatically
when the host system boots. For this you need to select the option Start at
boot from the Options Tab of your VM in the web interface, or set it with
the following command:
# qm set <vmid> -onboot 1

Start and Shutdown Order
In some case you want to be able to fine tune the boot order of your
VMs, for instance if one of your VM is providing firewalling or DHCP
to other guest systems. For this you can use the following
parameters:
-
Start/Shutdown order: Defines the start order priority. For example, set it
-
to 1 if
you want the VM to be the first to be started. (We use the reverse startup
order for shutdown, so a machine with a start order of 1 would be the last to
be shut down). If multiple VMs have the same order defined on a host, they will
additionally be ordered by VMID in ascending order. -
Startup delay: Defines the interval between this VM start and subsequent
VMs starts. For example, set it to 240 if you want to wait 240 seconds before
starting other VMs. -
Shutdown timeout: Defines the duration in seconds Proxmox VE should wait
for the VM to be offline after issuing a shutdown command. By default this
value is set to 180, which means that Proxmox VE will issue a shutdown request and
wait 180 seconds for the machine to be offline. If the machine is still online
after the timeout it will be stopped forcefully.
|
|
VMs managed by the HA stack do not follow the start on boot and boot order options currently. Those VMs will be skipped by the startup and shutdown algorithm as the HA manager itself ensures that VMs get started and stopped. |
Please note that machines without a Start/Shutdown order parameter will always
start after those where the parameter is set. Further, this parameter can only
be enforced between virtual machines running on the same host, not
cluster-wide.
If you require a delay between the host boot and the booting of the first VM,
see the section on Proxmox VE Node Management.
Qemu Guest Agent
The Qemu Guest Agent is a service which runs inside the VM, providing a
communication channel between the host and the guest. It is used to exchange
information and allows the host to issue commands to the guest.
For example, the IP addresses in the VM summary panel are fetched via the guest
agent.
Or when starting a backup, the guest is told via the guest agent to sync
outstanding writes via the fs-freeze and fs-thaw commands.
For the guest agent to work properly the following steps must be taken:
-
install the agent in the guest and make sure it is running
-
enable the communication via the agent in Proxmox VE
Install Guest Agent
For most Linux distributions, the guest agent is available. The package is
usually named qemu-guest-agent.
Enable Guest Agent Communication
Communication from Proxmox VE with the guest agent can be enabled in the VM’s
Options panel. A fresh start of the VM is necessary for the changes to take
effect.
It is possible to enable the Run guest-trim option. With this enabled,
Proxmox VE will issue a trim command to the guest after the following
operations that have the potential to write out zeros to the storage:
-
moving a disk to another storage
-
live migrating a VM to another node with local storage
On a thin provisioned storage, this can help to free up unused space.
Troubleshooting
VM does not shut down
Make sure the guest agent is installed and running.
Once the guest agent is enabled, Proxmox VE will send power commands like
shutdown via the guest agent. If the guest agent is not running, commands
cannot get executed properly and the shutdown command will run into a timeout.
SPICE Enhancements
SPICE Enhancements are optional features that can improve the remote viewer
experience.
To enable them via the GUI go to the Options panel of the virtual machine. Run
the following command to enable them via the CLI:
qm set <vmid> -spice_enhancements foldersharing=1,videostreaming=all
|
|
To use these features the Display of the virtual machine must be set to SPICE (qxl). |
Folder Sharing
Share a local folder with the guest. The spice-webdavd daemon needs to be
installed in the guest. It makes the shared folder available through a local
WebDAV server located at http://localhost:9843.
For Windows guests the installer for the Spice WebDAV daemon can be downloaded
from the
official SPICE website.
Most Linux distributions have a package called spice-webdavd that can be
installed.
To share a folder in Virt-Viewer (Remote Viewer) go to File → Preferences.
Select the folder to share and then enable the checkbox.
|
|
Folder sharing currently only works in the Linux version of Virt-Viewer. |
|
|
Experimental! Currently this feature does not work reliably. |
Video Streaming
Fast refreshing areas are encoded into a video stream. Two options exist:
-
all: Any fast refreshing area will be encoded into a video stream.
-
filter: Additional filters are used to decide if video streaming should be
used (currently only small window surfaces are skipped).
A general recommendation if video streaming should be enabled and which option
to choose from cannot be given. Your mileage may vary depending on the specific
circumstances.
Troubleshooting
Shared folder does not show up
Make sure the WebDAV service is enabled and running in the guest. On Windows it
is called Spice webdav proxy. In Linux the name is spice-webdavd but can be
different depending on the distribution.
If the service is running, check the WebDAV server by opening
http://localhost:9843 in a browser in the guest.
It can help to restart the SPICE session.
Migration
If you have a cluster, you can migrate your VM to another host with
# qm migrate <vmid> <target>
There are generally two mechanisms for this
-
Online Migration (aka Live Migration)
-
Offline Migration
Online Migration
If your VM is running and no locally bound resources are configured (such as
passed-through devices), you can initiate a live migration with the —online
flag in the qm migration command evocation. The web-interface defaults to
live migration when the VM is running.
How it works
Online migration first starts a new QEMU process on the target host with the
incoming flag, which performs only basic initialization with the guest vCPUs
still paused and then waits for the guest memory and device state data streams
of the source Virtual Machine.
All other resources, such as disks, are either shared or got already sent
before runtime state migration of the VMs begins; so only the memory content
and device state remain to be transferred.
Once this connection is established, the source begins asynchronously sending
the memory content to the target. If the guest memory on the source changes,
those sections are marked dirty and another pass is made to send the guest
memory data.
This loop is repeated until the data difference between running source VM
and incoming target VM is small enough to be sent in a few milliseconds,
because then the source VM can be paused completely, without a user or program
noticing the pause, so that the remaining data can be sent to the target, and
then unpause the targets VM’s CPU to make it the new running VM in well under a
second.
Requirements
For Live Migration to work, there are some things required:
-
The VM has no local resources that cannot be migrated. For example,
PCI or USB devices that are passed through currently block live-migration.
Local Disks, on the other hand, can be migrated by sending them to the target
just fine. -
The hosts are located in the same Proxmox VE cluster.
-
The hosts have a working (and reliable) network connection between them.
-
The target host must have the same, or higher versions of the
Proxmox VE packages. Although it can sometimes work the other way around, this
cannot be guaranteed. -
The hosts have CPUs from the same vendor with similar capabilities. Different
vendor might work depending on the actual models and VMs CPU type
configured, but it cannot be guaranteed — so please test before deploying
such a setup in production.
Offline Migration
If you have local resources, you can still migrate your VMs offline as long as
all disk are on storage defined on both hosts.
Migration then copies the disks to the target host over the network, as with
online migration. Note that any hardware pass-through configuration may need to
be adapted to the device location on the target host.
Copies and Clones
VM installation is usually done using an installation media (CD-ROM)
from the operating system vendor. Depending on the OS, this can be a
time consuming task one might want to avoid.
An easy way to deploy many VMs of the same type is to copy an existing
VM. We use the term clone for such copies, and distinguish between
linked and full clones.
- Full Clone
-
The result of such copy is an independent VM. The
new VM does not share any storage resources with the original.It is possible to select a Target Storage, so one can use this to
migrate a VM to a totally different storage. You can also change the
disk image Format if the storage driver supports several formats.A full clone needs to read and copy all VM image data. This is
usually much slower than creating a linked clone.Some storage types allows to copy a specific Snapshot, which
defaults to the current VM data. This also means that the final copy
never includes any additional snapshots from the original VM. - Linked Clone
-
Modern storage drivers support a way to generate fast linked
clones. Such a clone is a writable copy whose initial contents are the
same as the original data. Creating a linked clone is nearly
instantaneous, and initially consumes no additional space.They are called linked because the new image still refers to the
original. Unmodified data blocks are read from the original image, but
modification are written (and afterwards read) from a new
location. This technique is called Copy-on-write.This requires that the original volume is read-only. With Proxmox VE one
can convert any VM into a read-only Template). Such
templates can later be used to create linked clones efficiently.You cannot delete an original template while linked clones
exist.It is not possible to change the Target storage for linked clones,
because this is a storage internal feature.
The Target node option allows you to create the new VM on a
different node. The only restriction is that the VM is on shared
storage, and that storage is also available on the target node.
To avoid resource conflicts, all network interface MAC addresses get
randomized, and we generate a new UUID for the VM BIOS (smbios1)
setting.
Virtual Machine Templates
One can convert a VM into a Template. Such templates are read-only,
and you can use them to create linked clones.
|
|
It is not possible to start templates, because this would modify the disk images. If you want to change the template, create a linked clone and modify that. |
VM Generation ID
When creating new VMs, a vmgenid will be automatically generated and saved
in its configuration file.
To create and add a vmgenid to an already existing VM one can pass the
special value ‘1’ to let Proxmox VE autogenerate one or manually set the UUID
[Online GUID generator http://guid.one/]
by using it as value, for
example:
# qm set VMID -vmgenid 1
# qm set VMID -vmgenid 00000000-0000-0000-0000-000000000000
|
|
The initial addition of a vmgenid device to an existing VM, may result in the same effects as a change on snapshot rollback, backup restore, etc., has as the VM can interpret this as generation change. |
In the rare case the vmgenid mechanism is not wanted one can pass ‘0’ for
its value on VM creation, or retroactively delete the property in the
configuration with:
# qm set VMID -delete vmgenid
Importing Virtual Machines and disk images
A VM export from a foreign hypervisor takes usually the form of one or more disk
images, with a configuration file describing the settings of the VM (RAM,
number of cores).
The disk images can be in the vmdk format, if the disks come from
VMware or VirtualBox, or qcow2 if the disks come from a KVM hypervisor.
The most popular configuration format for VM exports is the OVF standard, but in
practice interoperation is limited because many settings are not implemented in
the standard itself, and hypervisors export the supplementary information
in non-standard extensions.
Besides the problem of format, importing disk images from other hypervisors
may fail if the emulated hardware changes too much from one hypervisor to
another. Windows VMs are particularly concerned by this, as the OS is very
picky about any changes of hardware. This problem may be solved by
installing the MergeIDE.zip utility available from the Internet before exporting
and choosing a hard disk type of IDE before booting the imported Windows VM.
Finally there is the question of paravirtualized drivers, which improve the
speed of the emulated system and are specific to the hypervisor.
GNU/Linux and other free Unix OSes have all the necessary drivers installed by
default and you can switch to the paravirtualized drivers right after importing
the VM. For Windows VMs, you need to install the Windows paravirtualized
drivers by yourself.
GNU/Linux and other free Unix can usually be imported without hassle. Note
that we cannot guarantee a successful import/export of Windows VMs in all
cases due to the problems above.
Step-by-step example of a Windows OVF import
Microsoft provides
Virtual Machines downloads
to get started with Windows development.We are going to use one of these
to demonstrate the OVF import feature.
Download the Virtual Machine zip
After getting informed about the user agreement, choose the Windows 10
Enterprise (Evaluation — Build) for the VMware platform, and download the zip.
Using the unzip utility or any archiver of your choice, unpack the zip,
and copy via ssh/scp the ovf and vmdk files to your Proxmox VE host.
Import the Virtual Machine
This will create a new virtual machine, using cores, memory and
VM name as read from the OVF manifest, and import the disks to the local-lvm
storage. You have to configure the network manually.
# qm importovf 999 WinDev1709Eval.ovf local-lvm
The VM is ready to be started.
Adding an external disk image to a Virtual Machine
You can also add an existing disk image to a VM, either coming from a
foreign hypervisor, or one that you created yourself.
Suppose you created a Debian/Ubuntu disk image with the vmdebootstrap tool:
vmdebootstrap --verbose
 --size 10GiB --serial-console
 --grub --no-extlinux
 --package openssh-server
 --package avahi-daemon
 --package qemu-guest-agent
 --hostname vm600 --enable-dhcp
 --customize=./copy_pub_ssh.sh
 --sparse --image vm600.raw
You can now create a new target VM, importing the image to the storage pvedir
and attaching it to the VM’s SCSI controller:
# qm create 600 --net0 virtio,bridge=vmbr0 --name vm600 --serial0 socket
   --boot order=scsi0 --scsihw virtio-scsi-pci --ostype l26
   --scsi0 pvedir:0,import-from=/path/to/dir/vm600.raw
The VM is ready to be started.
Hookscripts
You can add a hook script to VMs with the config property hookscript.
# qm set 100 --hookscript local:snippets/hookscript.pl
It will be called during various phases of the guests lifetime.
For an example and documentation see the example script under
/usr/share/pve-docs/examples/guest-example-hookscript.pl.
Hibernation
You can suspend a VM to disk with the GUI option Hibernate or with
That means that the current content of the memory will be saved onto disk
and the VM gets stopped. On the next start, the memory content will be
loaded and the VM can continue where it was left off.
State storage selection
If no target storage for the memory is given, it will be automatically
chosen, the first of:
-
The storage vmstatestorage from the VM config.
-
The first shared storage from any VM disk.
-
The first non-shared storage from any VM disk.
-
The storage local as a fallback.
Managing Virtual Machines with qm
qm is the tool to manage Qemu/Kvm virtual machines on Proxmox VE. You can
create and destroy virtual machines, and control execution
(start/stop/suspend/resume). Besides that, you can use qm to set
parameters in the associated config file. It is also possible to
create and delete virtual disks.
CLI Usage Examples
Using an iso file uploaded on the local storage, create a VM
with a 4 GB IDE disk on the local-lvm storage
# qm create 300 -ide0 local-lvm:4 -net0 e1000 -cdrom local:iso/proxmox-mailgateway_2.1.iso
Start the new VM
Send a shutdown request, then wait until the VM is stopped.
# qm shutdown 300 && qm wait 300
Same as above, but only wait for 40 seconds.
# qm shutdown 300 && qm wait 300 -timeout 40
Destroying a VM always removes it from Access Control Lists and it always
removes the firewall configuration of the VM. You have to activate
—purge, if you want to additionally remove the VM from replication jobs,
backup jobs and HA resource configurations.
Move a disk image to a different storage.
# qm move-disk 300 scsi0 other-storage
Reassign a disk image to a different VM. This will remove the disk scsi1 from
the source VM and attaches it as scsi3 to the target VM. In the background
the disk image is being renamed so that the name matches the new owner.
# qm move-disk 300 scsi1 --target-vmid 400 --target-disk scsi3
Configuration
VM configuration files are stored inside the Proxmox cluster file
system, and can be accessed at /etc/pve/qemu-server/<VMID>.conf.
Like other files stored inside /etc/pve/, they get automatically
replicated to all other cluster nodes.
|
|
VMIDs < 100 are reserved for internal purposes, and VMIDs need to be unique cluster wide. |
Example VM Configuration
boot: order=virtio0;net0
cores: 1
sockets: 1
memory: 512
name: webmail
ostype: l26
net0: e1000=EE:D2:28:5F:B6:3E,bridge=vmbr0
virtio0: local:vm-100-disk-1,size=32G
Those configuration files are simple text files, and you can edit them
using a normal text editor (vi, nano, …). This is sometimes
useful to do small corrections, but keep in mind that you need to
restart the VM to apply such changes.
For that reason, it is usually better to use the qm command to
generate and modify those files, or do the whole thing using the GUI.
Our toolkit is smart enough to instantaneously apply most changes to
running VM. This feature is called «hot plug», and there is no
need to restart the VM in that case.
File Format
VM configuration files use a simple colon separated key/value
format. Each line has the following format:
# this is a comment
OPTION: value
Blank lines in those files are ignored, and lines starting with a #
character are treated as comments and are also ignored.
Snapshots
When you create a snapshot, qm stores the configuration at snapshot
time into a separate snapshot section within the same configuration
file. For example, after creating a snapshot called “testsnapshot”,
your configuration file will look like this:
VM configuration with snapshot
memory: 512
swap: 512
parent: testsnaphot
...

[testsnaphot]
memory: 512
swap: 512
snaptime: 1457170803
...
There are a few snapshot related properties like parent and
snaptime. The parent property is used to store the parent/child
relationship between snapshots. snaptime is the snapshot creation
time stamp (Unix epoch).
You can optionally save the memory of a running VM with the option vmstate.
For details about how the target storage gets chosen for the VM state, see
State storage selection in the chapter
Hibernation.
Options
- acpi: <boolean> (default = 1)
-
Enable/disable ACPI.
- affinity: <string>
-
List of host cores used to execute guest processes, for example: 0,5,8-11
- agent: [enabled=]<1|0> [,fstrim_cloned_disks=<1|0>] [,type=<virtio|isa>]
-
Enable/disable communication with the Qemu Guest Agent and its properties.
- enabled=<boolean> (default = 0)
-
Enable/disable communication with a Qemu Guest Agent (QGA) running in the VM.
- fstrim_cloned_disks=<boolean> (default = 0)
-
Run fstrim after moving a disk or migrating the VM.
- type=<isa | virtio> (default = virtio)
-
Select the agent type
- arch: <aarch64 | x86_64>
-
Virtual processor architecture. Defaults to the host.
- args: <string>
-
Arbitrary arguments passed to kvm, for example:
args: -no-reboot -no-hpet
this option is for experts only. - audio0: device=<ich9-intel-hda|intel-hda|AC97> [,driver=<spice|none>]
-
Configure a audio device, useful in combination with QXL/Spice.
- device=<AC97 | ich9-intel-hda | intel-hda>
-
Configure an audio device.
- driver=<none | spice> (default = spice)
-
Driver backend for the audio device.
- autostart: <boolean> (default = 0)
-
Automatic restart after crash (currently ignored).
- balloon: <integer> (0 — N)
-
Amount of target RAM for the VM in MB. Using zero disables the ballon driver.
- bios: <ovmf | seabios> (default = seabios)
-
Select BIOS implementation.
- boot: [[legacy=]<[acdn]{1,4}>] [,order=<device[;device…]>]
-
Specify guest boot order. Use the order= sub-property as usage with no key or legacy= is deprecated.
- legacy=<[acdn]{1,4}> (default = cdn)
-
Boot on floppy (a), hard disk (c), CD-ROM (d), or network (n). Deprecated, use order= instead.
- order=<device[;device…]>
-
The guest will attempt to boot from devices in the order they appear here.
Disks, optical drives and passed-through storage USB devices will be directly
booted from, NICs will load PXE, and PCIe devices will either behave like disks
(e.g. NVMe) or load an option ROM (e.g. RAID controller, hardware NIC).Note that only devices in this list will be marked as bootable and thus loaded
by the guest firmware (BIOS/UEFI). If you require multiple disks for booting
(e.g. software-raid), you need to specify all of them here.Overrides the deprecated legacy=[acdn]* value when given.
- bootdisk: (ide|sata|scsi|virtio)d+
-
Enable booting from specified disk. Deprecated: Use boot: order=foo;bar instead.
- cdrom: <volume>
-
This is an alias for option -ide2
- cicustom: [meta=<volume>] [,network=<volume>] [,user=<volume>] [,vendor=<volume>]
-
cloud-init: Specify custom files to replace the automatically generated ones at start.
- meta=<volume>
-
Specify a custom file containing all meta data passed to the VM via»
.» cloud-init. This is provider specific meaning configdrive2 and nocloud differ. - network=<volume>
-
Specify a custom file containing all network data passed to the VM via cloud-init.
- user=<volume>
-
Specify a custom file containing all user data passed to the VM via cloud-init.
- vendor=<volume>
-
Specify a custom file containing all vendor data passed to the VM via cloud-init.
- cipassword: <string>
-
cloud-init: Password to assign the user. Using this is generally not recommended. Use ssh keys instead. Also note that older cloud-init versions do not support hashed passwords.
- citype: <configdrive2 | nocloud | opennebula>
-
Specifies the cloud-init configuration format. The default depends on the configured operating system type (ostype. We use the nocloud format for Linux, and configdrive2 for windows.
- ciuser: <string>
-
cloud-init: User name to change ssh keys and password for instead of the image’s configured default user.
- cores: <integer> (1 — N) (default = 1)
-
The number of cores per socket.
- cpu: [[cputype=]<string>] [,flags=<+FLAG[;-FLAG…]>] [,hidden=<1|0>] [,hv-vendor-id=<vendor-id>] [,phys-bits=<8-64|host>] [,reported-model=<enum>]
-
Emulated CPU type.
- cputype=<string> (default = kvm64)
-
Emulated CPU type. Can be default or custom name (custom model names must be prefixed with custom-).
- flags=<+FLAG[;-FLAG…]>
-
List of additional CPU flags separated by ;. Use +FLAG to enable, -FLAG to disable a flag. Custom CPU models can specify any flag supported by QEMU/KVM, VM-specific flags must be from the following set for security reasons: pcid, spec-ctrl, ibpb, ssbd, virt-ssbd, amd-ssbd, amd-no-ssb, pdpe1gb, md-clear, hv-tlbflush, hv-evmcs, aes
- hidden=<boolean> (default = 0)
-
Do not identify as a KVM virtual machine.
- hv-vendor-id=<vendor-id>
-
The Hyper-V vendor ID. Some drivers or programs inside Windows guests need a specific ID.
- phys-bits=<8-64|host>
-
The physical memory address bits that are reported to the guest OS. Should be smaller or equal to the host’s. Set to host to use value from host CPU, but note that doing so will break live migration to CPUs with other values.
- reported-model=<486 | Broadwell | Broadwell-IBRS | Broadwell-noTSX | Broadwell-noTSX-IBRS | Cascadelake-Server | Cascadelake-Server-noTSX | Conroe | EPYC | EPYC-IBPB | EPYC-Milan | EPYC-Rome | Haswell | Haswell-IBRS | Haswell-noTSX | Haswell-noTSX-IBRS | Icelake-Client | Icelake-Client-noTSX | Icelake-Server | Icelake-Server-noTSX | IvyBridge | IvyBridge-IBRS | KnightsMill | Nehalem | Nehalem-IBRS | Opteron_G1 | Opteron_G2 | Opteron_G3 | Opteron_G4 | Opteron_G5 | Penryn | SandyBridge | SandyBridge-IBRS | Skylake-Client | Skylake-Client-IBRS | Skylake-Client-noTSX-IBRS | Skylake-Server | Skylake-Server-IBRS | Skylake-Server-noTSX-IBRS | Westmere | Westmere-IBRS | athlon | core2duo | coreduo | host | kvm32 | kvm64 | max | pentium | pentium2 | pentium3 | phenom | qemu32 | qemu64> (default = kvm64)
-
CPU model and vendor to report to the guest. Must be a QEMU/KVM supported model. Only valid for custom CPU model definitions, default models will always report themselves to the guest OS.
- cpulimit: <number> (0 — 128) (default = 0)
-
Limit of CPU usage.
If the computer has 2 CPUs, it has total of 2 CPU time. Value 0 indicates no CPU limit. - cpuunits: <integer> (1 — 262144) (default = cgroup v1: 1024, cgroup v2: 100)
-
CPU weight for a VM. Argument is used in the kernel fair scheduler. The larger the number is, the more CPU time this VM gets. Number is relative to weights of all the other running VMs.
- description: <string>
-
Description for the VM. Shown in the web-interface VM’s summary. This is saved as comment inside the configuration file.
- efidisk0: [file=]<volume> [,efitype=<2m|4m>] [,format=<enum>] [,pre-enrolled-keys=<1|0>] [,size=<DiskSize>]
-
Configure a Disk for storing EFI vars.
- efitype=<2m | 4m> (default = 2m)
-
Size and type of the OVMF EFI vars. 4m is newer and recommended, and required for Secure Boot. For backwards compatibility, 2m is used if not otherwise specified.
- file=<volume>
-
The drive’s backing volume.
- format=<cloop | cow | qcow | qcow2 | qed | raw | vmdk>
-
The drive’s backing file’s data format.
- pre-enrolled-keys=<boolean> (default = 0)
-
Use am EFI vars template with distribution-specific and Microsoft Standard keys enrolled, if used with efitype=4m. Note that this will enable Secure Boot by default, though it can still be turned off from within the VM.
- size=<DiskSize>
-
Disk size. This is purely informational and has no effect.
- freeze: <boolean>
-
Freeze CPU at startup (use c monitor command to start execution).
- hookscript: <string>
-
Script that will be executed during various steps in the vms lifetime.
- hostpci[n]: [host=]<HOSTPCIID[;HOSTPCIID2…]> [,device-id=<hex id>] [,legacy-igd=<1|0>] [,mdev=<string>] [,pcie=<1|0>] [,rombar=<1|0>] [,romfile=<string>] [,sub-device-id=<hex id>] [,sub-vendor-id=<hex id>] [,vendor-id=<hex id>] [,x-vga=<1|0>]
-
Map host PCI devices into guest.
This option allows direct access to host hardware. So it is no longer
possible to migrate such machines — use with special care.Experimental! User reported problems with this option. - device-id=<hex id>
-
Override PCI device ID visible to guest
- host=<HOSTPCIID[;HOSTPCIID2…]>
-
Host PCI device pass through. The PCI ID of a host’s PCI device or a list
of PCI virtual functions of the host. HOSTPCIID syntax is:bus:dev.func (hexadecimal numbers)
You can us the lspci command to list existing PCI devices.
- legacy-igd=<boolean> (default = 0)
-
Pass this device in legacy IGD mode, making it the primary and exclusive graphics device in the VM. Requires pc-i440fx machine type and VGA set to none.
- mdev=<string>
-
The type of mediated device to use.
An instance of this type will be created on startup of the VM and
will be cleaned up when the VM stops. - pcie=<boolean> (default = 0)
-
Choose the PCI-express bus (needs the q35 machine model).
- rombar=<boolean> (default = 1)
-
Specify whether or not the device’s ROM will be visible in the guest’s memory map.
- romfile=<string>
-
Custom pci device rom filename (must be located in /usr/share/kvm/).
- sub-device-id=<hex id>
-
Override PCI subsystem device ID visible to guest
- sub-vendor-id=<hex id>
-
Override PCI subsystem vendor ID visible to guest
- vendor-id=<hex id>
-
Override PCI vendor ID visible to guest
- x-vga=<boolean> (default = 0)
-
Enable vfio-vga device support.
- hotplug: <string> (default = network,disk,usb)
-
Selectively enable hotplug features. This is a comma separated list of hotplug features: network, disk, cpu, memory, usb and cloudinit. Use 0 to disable hotplug completely. Using 1 as value is an alias for the default network,disk,usb. USB hotplugging is possible for guests with machine version >= 7.1 and ostype l26 or windows > 7.
- hugepages: <1024 | 2 | any>
-
Enable/disable hugepages memory.
- ide[n]: [file=]<volume> [,aio=<native|threads|io_uring>] [,backup=<1|0>] [,bps=<bps>] [,bps_max_length=<seconds>] [,bps_rd=<bps>] [,bps_rd_max_length=<seconds>] [,bps_wr=<bps>] [,bps_wr_max_length=<seconds>] [,cache=<enum>] [,cyls=<integer>] [,detect_zeroes=<1|0>] [,discard=<ignore|on>] [,format=<enum>] [,heads=<integer>] [,iops=<iops>] [,iops_max=<iops>] [,iops_max_length=<seconds>] [,iops_rd=<iops>] [,iops_rd_max=<iops>] [,iops_rd_max_length=<seconds>] [,iops_wr=<iops>] [,iops_wr_max=<iops>] [,iops_wr_max_length=<seconds>] [,mbps=<mbps>] [,mbps_max=<mbps>] [,mbps_rd=<mbps>] [,mbps_rd_max=<mbps>] [,mbps_wr=<mbps>] [,mbps_wr_max=<mbps>] [,media=<cdrom|disk>] [,model=<model>] [,replicate=<1|0>] [,rerror=<ignore|report|stop>] [,secs=<integer>] [,serial=<serial>] [,shared=<1|0>] [,size=<DiskSize>] [,snapshot=<1|0>] [,ssd=<1|0>] [,trans=<none|lba|auto>] [,werror=<enum>] [,wwn=<wwn>]
-
Use volume as IDE hard disk or CD-ROM (n is 0 to 3).
- aio=<io_uring | native | threads>
-
AIO type to use.
- backup=<boolean>
-
Whether the drive should be included when making backups.
- bps=<bps>
-
Maximum r/w speed in bytes per second.
- bps_max_length=<seconds>
-
Maximum length of I/O bursts in seconds.
- bps_rd=<bps>
-
Maximum read speed in bytes per second.
- bps_rd_max_length=<seconds>
-
Maximum length of read I/O bursts in seconds.
- bps_wr=<bps>
-
Maximum write speed in bytes per second.
- bps_wr_max_length=<seconds>
-
Maximum length of write I/O bursts in seconds.
- cache=<directsync | none | unsafe | writeback | writethrough>
-
The drive’s cache mode
- cyls=<integer>
-
Force the drive’s physical geometry to have a specific cylinder count.
- detect_zeroes=<boolean>
-
Controls whether to detect and try to optimize writes of zeroes.
- discard=<ignore | on>
-
Controls whether to pass discard/trim requests to the underlying storage.
- file=<volume>
-
The drive’s backing volume.
- format=<cloop | cow | qcow | qcow2 | qed | raw | vmdk>
-
The drive’s backing file’s data format.
- heads=<integer>
-
Force the drive’s physical geometry to have a specific head count.
- iops=<iops>
-
Maximum r/w I/O in operations per second.
- iops_max=<iops>
-
Maximum unthrottled r/w I/O pool in operations per second.
- iops_max_length=<seconds>
-
Maximum length of I/O bursts in seconds.
- iops_rd=<iops>
-
Maximum read I/O in operations per second.
- iops_rd_max=<iops>
-
Maximum unthrottled read I/O pool in operations per second.
- iops_rd_max_length=<seconds>
-
Maximum length of read I/O bursts in seconds.
- iops_wr=<iops>
-
Maximum write I/O in operations per second.
- iops_wr_max=<iops>
-
Maximum unthrottled write I/O pool in operations per second.
- iops_wr_max_length=<seconds>
-
Maximum length of write I/O bursts in seconds.
- mbps=<mbps>
-
Maximum r/w speed in megabytes per second.
- mbps_max=<mbps>
-
Maximum unthrottled r/w pool in megabytes per second.
- mbps_rd=<mbps>
-
Maximum read speed in megabytes per second.
- mbps_rd_max=<mbps>
-
Maximum unthrottled read pool in megabytes per second.
- mbps_wr=<mbps>
-
Maximum write speed in megabytes per second.
- mbps_wr_max=<mbps>
-
Maximum unthrottled write pool in megabytes per second.
- media=<cdrom | disk> (default = disk)
-
The drive’s media type.
- model=<model>
-
The drive’s reported model name, url-encoded, up to 40 bytes long.
- replicate=<boolean> (default = 1)
-
Whether the drive should considered for replication jobs.
- rerror=<ignore | report | stop>
-
Read error action.
- secs=<integer>
-
Force the drive’s physical geometry to have a specific sector count.
- serial=<serial>
-
The drive’s reported serial number, url-encoded, up to 20 bytes long.
- shared=<boolean> (default = 0)
-
Mark this locally-managed volume as available on all nodes.
This option does not share the volume automatically, it assumes it is shared already! - size=<DiskSize>
-
Disk size. This is purely informational and has no effect.
- snapshot=<boolean>
-
Controls qemu’s snapshot mode feature. If activated, changes made to the disk are temporary and will be discarded when the VM is shutdown.
- ssd=<boolean>
-
Whether to expose this drive as an SSD, rather than a rotational hard disk.
- trans=<auto | lba | none>
-
Force disk geometry bios translation mode.
- werror=<enospc | ignore | report | stop>
-
Write error action.
- wwn=<wwn>
-
The drive’s worldwide name, encoded as 16 bytes hex string, prefixed by 0x.
- ipconfig[n]: [gw=<GatewayIPv4>] [,gw6=<GatewayIPv6>] [,ip=<IPv4Format/CIDR>] [,ip6=<IPv6Format/CIDR>]
-
cloud-init: Specify IP addresses and gateways for the corresponding interface.
IP addresses use CIDR notation, gateways are optional but need an IP of the same type specified.
The special string dhcp can be used for IP addresses to use DHCP, in which case no explicit
gateway should be provided.
For IPv6 the special string auto can be used to use stateless autoconfiguration. This requires
cloud-init 19.4 or newer.If cloud-init is enabled and neither an IPv4 nor an IPv6 address is specified, it defaults to using
dhcp on IPv4.- gw=<GatewayIPv4>
-
Default gateway for IPv4 traffic.
Requires option(s): ip - gw6=<GatewayIPv6>
-
Default gateway for IPv6 traffic.
Requires option(s): ip6 - ip=<IPv4Format/CIDR> (default = dhcp)
-
IPv4 address in CIDR format.
- ip6=<IPv6Format/CIDR> (default = dhcp)
-
IPv6 address in CIDR format.
- ivshmem: size=<integer> [,name=<string>]
-
Inter-VM shared memory. Useful for direct communication between VMs, or to the host.
- name=<string>
-
The name of the file. Will be prefixed with pve-shm-. Default is the VMID. Will be deleted when the VM is stopped.
- size=<integer> (1 — N)
-
The size of the file in MB.
- keephugepages: <boolean> (default = 0)
-
Use together with hugepages. If enabled, hugepages will not not be deleted after VM shutdown and can be used for subsequent starts.
- keyboard: <da | de | de-ch | en-gb | en-us | es | fi | fr | fr-be | fr-ca | fr-ch | hu | is | it | ja | lt | mk | nl | no | pl | pt | pt-br | sl | sv | tr>
-
Keyboard layout for VNC server. This option is generally not required and is often better handled from within the guest OS.
- kvm: <boolean> (default = 1)
-
Enable/disable KVM hardware virtualization.
- localtime: <boolean>
-
Set the real time clock (RTC) to local time. This is enabled by default if the ostype indicates a Microsoft Windows OS.
- lock: <backup | clone | create | migrate | rollback | snapshot | snapshot-delete | suspended | suspending>
-
Lock/unlock the VM.
- machine: (pc|pc(-i440fx)?-d+(.d+)+(+pved+)?(.pxe)?|q35|pc-q35-d+(.d+)+(+pved+)?(.pxe)?|virt(?:-d+(.d+)+)?(+pved+)?)
-
Specifies the Qemu machine type.
- memory: <integer> (16 — N) (default = 512)
-
Amount of RAM for the VM in MB. This is the maximum available memory when you use the balloon device.
- migrate_downtime: <number> (0 — N) (default = 0.1)
-
Set maximum tolerated downtime (in seconds) for migrations.
- migrate_speed: <integer> (0 — N) (default = 0)
-
Set maximum speed (in MB/s) for migrations. Value 0 is no limit.
- name: <string>
-
Set a name for the VM. Only used on the configuration web interface.
- nameserver: <string>
-
cloud-init: Sets DNS server IP address for a container. Create will automatically use the setting from the host if neither searchdomain nor nameserver are set.
- net[n]: [model=]<enum> [,bridge=<bridge>] [,firewall=<1|0>] [,link_down=<1|0>] [,macaddr=<XX:XX:XX:XX:XX:XX>] [,mtu=<integer>] [,queues=<integer>] [,rate=<number>] [,tag=<integer>] [,trunks=<vlanid[;vlanid…]>] [,<model>=<macaddr>]
-
Specify network devices.
- bridge=<bridge>
-
Bridge to attach the network device to. The Proxmox VE standard bridge
is called vmbr0.If you do not specify a bridge, we create a kvm user (NATed) network
device, which provides DHCP and DNS services. The following addresses
are used:10.0.2.2 Gateway 10.0.2.3 DNS Server 10.0.2.4 SMB Server
The DHCP server assign addresses to the guest starting from 10.0.2.15.
- firewall=<boolean>
-
Whether this interface should be protected by the firewall.
- link_down=<boolean>
-
Whether this interface should be disconnected (like pulling the plug).
- macaddr=<XX:XX:XX:XX:XX:XX>
-
A common MAC address with the I/G (Individual/Group) bit not set.
- model=<e1000 | e1000-82540em | e1000-82544gc | e1000-82545em | e1000e | i82551 | i82557b | i82559er | ne2k_isa | ne2k_pci | pcnet | rtl8139 | virtio | vmxnet3>
-
Network Card Model. The virtio model provides the best performance with very low CPU overhead. If your guest does not support this driver, it is usually best to use e1000.
- mtu=<integer> (1 — 65520)
-
Force MTU, for VirtIO only. Set to 1 to use the bridge MTU
- queues=<integer> (0 — 64)
-
Number of packet queues to be used on the device.
- rate=<number> (0 — N)
-
Rate limit in mbps (megabytes per second) as floating point number.
- tag=<integer> (1 — 4094)
-
VLAN tag to apply to packets on this interface.
- trunks=<vlanid[;vlanid…]>
-
VLAN trunks to pass through this interface.
- numa: <boolean> (default = 0)
-
Enable/disable NUMA.
- numa[n]: cpus=<id[-id];…> [,hostnodes=<id[-id];…>] [,memory=<number>] [,policy=<preferred|bind|interleave>]
-
NUMA topology.
- cpus=<id[-id];…>
-
CPUs accessing this NUMA node.
- hostnodes=<id[-id];…>
-
Host NUMA nodes to use.
- memory=<number>
-
Amount of memory this NUMA node provides.
- policy=<bind | interleave | preferred>
-
NUMA allocation policy.
- onboot: <boolean> (default = 0)
-
Specifies whether a VM will be started during system bootup.
- ostype: <l24 | l26 | other | solaris | w2k | w2k3 | w2k8 | win10 | win11 | win7 | win8 | wvista | wxp>
-
Specify guest operating system. This is used to enable special
optimization/features for specific operating systems:other
unspecified OS
wxp
Microsoft Windows XP
w2k
Microsoft Windows 2000
w2k3
Microsoft Windows 2003
w2k8
Microsoft Windows 2008
wvista
Microsoft Windows Vista
win7
Microsoft Windows 7
win8
Microsoft Windows 8/2012/2012r2
win10
Microsoft Windows 10/2016/2019
win11
Microsoft Windows 11/2022
l24
Linux 2.4 Kernel
l26
Linux 2.6 — 5.X Kernel
solaris
Solaris/OpenSolaris/OpenIndiania kernel
- parallel[n]: /dev/parportd+|/dev/usb/lpd+
-
Map host parallel devices (n is 0 to 2).
This option allows direct access to host hardware. So it is no longer possible to migrate such
machines — use with special care.Experimental! User reported problems with this option. - protection: <boolean> (default = 0)
-
Sets the protection flag of the VM. This will disable the remove VM and remove disk operations.
- reboot: <boolean> (default = 1)
-
Allow reboot. If set to 0 the VM exit on reboot.
- rng0: [source=]</dev/urandom|/dev/random|/dev/hwrng> [,max_bytes=<integer>] [,period=<integer>]
-
Configure a VirtIO-based Random Number Generator.
- max_bytes=<integer> (default = 1024)
-
Maximum bytes of entropy allowed to get injected into the guest every period milliseconds. Prefer a lower value when using /dev/random as source. Use 0 to disable limiting (potentially dangerous!).
- period=<integer> (default = 1000)
-
Every period milliseconds the entropy-injection quota is reset, allowing the guest to retrieve another max_bytes of entropy.
- source=</dev/hwrng | /dev/random | /dev/urandom>
-
The file on the host to gather entropy from. In most cases /dev/urandom should be preferred over /dev/random to avoid entropy-starvation issues on the host. Using urandom does not decrease security in any meaningful way, as it’s still seeded from real entropy, and the bytes provided will most likely be mixed with real entropy on the guest as well. /dev/hwrng can be used to pass through a hardware RNG from the host.
- sata[n]: [file=]<volume> [,aio=<native|threads|io_uring>] [,backup=<1|0>] [,bps=<bps>] [,bps_max_length=<seconds>] [,bps_rd=<bps>] [,bps_rd_max_length=<seconds>] [,bps_wr=<bps>] [,bps_wr_max_length=<seconds>] [,cache=<enum>] [,cyls=<integer>] [,detect_zeroes=<1|0>] [,discard=<ignore|on>] [,format=<enum>] [,heads=<integer>] [,iops=<iops>] [,iops_max=<iops>] [,iops_max_length=<seconds>] [,iops_rd=<iops>] [,iops_rd_max=<iops>] [,iops_rd_max_length=<seconds>] [,iops_wr=<iops>] [,iops_wr_max=<iops>] [,iops_wr_max_length=<seconds>] [,mbps=<mbps>] [,mbps_max=<mbps>] [,mbps_rd=<mbps>] [,mbps_rd_max=<mbps>] [,mbps_wr=<mbps>] [,mbps_wr_max=<mbps>] [,media=<cdrom|disk>] [,replicate=<1|0>] [,rerror=<ignore|report|stop>] [,secs=<integer>] [,serial=<serial>] [,shared=<1|0>] [,size=<DiskSize>] [,snapshot=<1|0>] [,ssd=<1|0>] [,trans=<none|lba|auto>] [,werror=<enum>] [,wwn=<wwn>]
-
Use volume as SATA hard disk or CD-ROM (n is 0 to 5).
- aio=<io_uring | native | threads>
-
AIO type to use.
- backup=<boolean>
-
Whether the drive should be included when making backups.
- bps=<bps>
-
Maximum r/w speed in bytes per second.
- bps_max_length=<seconds>
-
Maximum length of I/O bursts in seconds.
- bps_rd=<bps>
-
Maximum read speed in bytes per second.
- bps_rd_max_length=<seconds>
-
Maximum length of read I/O bursts in seconds.
- bps_wr=<bps>
-
Maximum write speed in bytes per second.
- bps_wr_max_length=<seconds>
-
Maximum length of write I/O bursts in seconds.
- cache=<directsync | none | unsafe | writeback | writethrough>
-
The drive’s cache mode
- cyls=<integer>
-
Force the drive’s physical geometry to have a specific cylinder count.
- detect_zeroes=<boolean>
-
Controls whether to detect and try to optimize writes of zeroes.
- discard=<ignore | on>
-
Controls whether to pass discard/trim requests to the underlying storage.
- file=<volume>
-
The drive’s backing volume.
- format=<cloop | cow | qcow | qcow2 | qed | raw | vmdk>
-
The drive’s backing file’s data format.
- heads=<integer>
-
Force the drive’s physical geometry to have a specific head count.
- iops=<iops>
-
Maximum r/w I/O in operations per second.
- iops_max=<iops>
-
Maximum unthrottled r/w I/O pool in operations per second.
- iops_max_length=<seconds>
-
Maximum length of I/O bursts in seconds.
- iops_rd=<iops>
-
Maximum read I/O in operations per second.
- iops_rd_max=<iops>
-
Maximum unthrottled read I/O pool in operations per second.
- iops_rd_max_length=<seconds>
-
Maximum length of read I/O bursts in seconds.
- iops_wr=<iops>
-
Maximum write I/O in operations per second.
- iops_wr_max=<iops>
-
Maximum unthrottled write I/O pool in operations per second.
- iops_wr_max_length=<seconds>
-
Maximum length of write I/O bursts in seconds.
- mbps=<mbps>
-
Maximum r/w speed in megabytes per second.
- mbps_max=<mbps>
-
Maximum unthrottled r/w pool in megabytes per second.
- mbps_rd=<mbps>
-
Maximum read speed in megabytes per second.
- mbps_rd_max=<mbps>
-
Maximum unthrottled read pool in megabytes per second.
- mbps_wr=<mbps>
-
Maximum write speed in megabytes per second.
- mbps_wr_max=<mbps>
-
Maximum unthrottled write pool in megabytes per second.
- media=<cdrom | disk> (default = disk)
-
The drive’s media type.
- replicate=<boolean> (default = 1)
-
Whether the drive should considered for replication jobs.
- rerror=<ignore | report | stop>
-
Read error action.
- secs=<integer>
-
Force the drive’s physical geometry to have a specific sector count.
- serial=<serial>
-
The drive’s reported serial number, url-encoded, up to 20 bytes long.
- shared=<boolean> (default = 0)
-
Mark this locally-managed volume as available on all nodes.
This option does not share the volume automatically, it assumes it is shared already! - size=<DiskSize>
-
Disk size. This is purely informational and has no effect.
- snapshot=<boolean>
-
Controls qemu’s snapshot mode feature. If activated, changes made to the disk are temporary and will be discarded when the VM is shutdown.
- ssd=<boolean>
-
Whether to expose this drive as an SSD, rather than a rotational hard disk.
- trans=<auto | lba | none>
-
Force disk geometry bios translation mode.
- werror=<enospc | ignore | report | stop>
-
Write error action.
- wwn=<wwn>
-
The drive’s worldwide name, encoded as 16 bytes hex string, prefixed by 0x.
- scsi[n]: [file=]<volume> [,aio=<native|threads|io_uring>] [,backup=<1|0>] [,bps=<bps>] [,bps_max_length=<seconds>] [,bps_rd=<bps>] [,bps_rd_max_length=<seconds>] [,bps_wr=<bps>] [,bps_wr_max_length=<seconds>] [,cache=<enum>] [,cyls=<integer>] [,detect_zeroes=<1|0>] [,discard=<ignore|on>] [,format=<enum>] [,heads=<integer>] [,iops=<iops>] [,iops_max=<iops>] [,iops_max_length=<seconds>] [,iops_rd=<iops>] [,iops_rd_max=<iops>] [,iops_rd_max_length=<seconds>] [,iops_wr=<iops>] [,iops_wr_max=<iops>] [,iops_wr_max_length=<seconds>] [,iothread=<1|0>] [,mbps=<mbps>] [,mbps_max=<mbps>] [,mbps_rd=<mbps>] [,mbps_rd_max=<mbps>] [,mbps_wr=<mbps>] [,mbps_wr_max=<mbps>] [,media=<cdrom|disk>] [,queues=<integer>] [,replicate=<1|0>] [,rerror=<ignore|report|stop>] [,ro=<1|0>] [,scsiblock=<1|0>] [,secs=<integer>] [,serial=<serial>] [,shared=<1|0>] [,size=<DiskSize>] [,snapshot=<1|0>] [,ssd=<1|0>] [,trans=<none|lba|auto>] [,werror=<enum>] [,wwn=<wwn>]
-
Use volume as SCSI hard disk or CD-ROM (n is 0 to 30).
- aio=<io_uring | native | threads>
-
AIO type to use.
- backup=<boolean>
-
Whether the drive should be included when making backups.
- bps=<bps>
-
Maximum r/w speed in bytes per second.
- bps_max_length=<seconds>
-
Maximum length of I/O bursts in seconds.
- bps_rd=<bps>
-
Maximum read speed in bytes per second.
- bps_rd_max_length=<seconds>
-
Maximum length of read I/O bursts in seconds.
- bps_wr=<bps>
-
Maximum write speed in bytes per second.
- bps_wr_max_length=<seconds>
-
Maximum length of write I/O bursts in seconds.
- cache=<directsync | none | unsafe | writeback | writethrough>
-
The drive’s cache mode
- cyls=<integer>
-
Force the drive’s physical geometry to have a specific cylinder count.
- detect_zeroes=<boolean>
-
Controls whether to detect and try to optimize writes of zeroes.
- discard=<ignore | on>
-
Controls whether to pass discard/trim requests to the underlying storage.
- file=<volume>
-
The drive’s backing volume.
- format=<cloop | cow | qcow | qcow2 | qed | raw | vmdk>
-
The drive’s backing file’s data format.
- heads=<integer>
-
Force the drive’s physical geometry to have a specific head count.
- iops=<iops>
-
Maximum r/w I/O in operations per second.
- iops_max=<iops>
-
Maximum unthrottled r/w I/O pool in operations per second.
- iops_max_length=<seconds>
-
Maximum length of I/O bursts in seconds.
- iops_rd=<iops>
-
Maximum read I/O in operations per second.
- iops_rd_max=<iops>
-
Maximum unthrottled read I/O pool in operations per second.
- iops_rd_max_length=<seconds>
-
Maximum length of read I/O bursts in seconds.
- iops_wr=<iops>
-
Maximum write I/O in operations per second.
- iops_wr_max=<iops>
-
Maximum unthrottled write I/O pool in operations per second.
- iops_wr_max_length=<seconds>
-
Maximum length of write I/O bursts in seconds.
- iothread=<boolean>
-
Whether to use iothreads for this drive
- mbps=<mbps>
-
Maximum r/w speed in megabytes per second.
- mbps_max=<mbps>
-
Maximum unthrottled r/w pool in megabytes per second.
- mbps_rd=<mbps>
-
Maximum read speed in megabytes per second.
- mbps_rd_max=<mbps>
-
Maximum unthrottled read pool in megabytes per second.
- mbps_wr=<mbps>
-
Maximum write speed in megabytes per second.
- mbps_wr_max=<mbps>
-
Maximum unthrottled write pool in megabytes per second.
- media=<cdrom | disk> (default = disk)
-
The drive’s media type.
- queues=<integer> (2 — N)
-
Number of queues.
- replicate=<boolean> (default = 1)
-
Whether the drive should considered for replication jobs.
- rerror=<ignore | report | stop>
-
Read error action.
- ro=<boolean>
-
Whether the drive is read-only.
- scsiblock=<boolean> (default = 0)
-
whether to use scsi-block for full passthrough of host block device
can lead to I/O errors in combination with low memory or high memory fragmentation on host - secs=<integer>
-
Force the drive’s physical geometry to have a specific sector count.
- serial=<serial>
-
The drive’s reported serial number, url-encoded, up to 20 bytes long.
- shared=<boolean> (default = 0)
-
Mark this locally-managed volume as available on all nodes.
This option does not share the volume automatically, it assumes it is shared already! - size=<DiskSize>
-
Disk size. This is purely informational and has no effect.
- snapshot=<boolean>
-
Controls qemu’s snapshot mode feature. If activated, changes made to the disk are temporary and will be discarded when the VM is shutdown.
- ssd=<boolean>
-
Whether to expose this drive as an SSD, rather than a rotational hard disk.
- trans=<auto | lba | none>
-
Force disk geometry bios translation mode.
- werror=<enospc | ignore | report | stop>
-
Write error action.
- wwn=<wwn>
-
The drive’s worldwide name, encoded as 16 bytes hex string, prefixed by 0x.
- scsihw: <lsi | lsi53c810 | megasas | pvscsi | virtio-scsi-pci | virtio-scsi-single> (default = lsi)
-
SCSI controller model
- searchdomain: <string>
-
cloud-init: Sets DNS search domains for a container. Create will automatically use the setting from the host if neither searchdomain nor nameserver are set.
- serial[n]: (/dev/.+|socket)
-
Create a serial device inside the VM (n is 0 to 3), and pass through a
host serial device (i.e. /dev/ttyS0), or create a unix socket on the
host side (use qm terminal to open a terminal connection).If you pass through a host serial device, it is no longer possible to migrate such machines —
use with special care.Experimental! User reported problems with this option. - shares: <integer> (0 — 50000) (default = 1000)
-
Amount of memory shares for auto-ballooning. The larger the number is, the more memory this VM gets. Number is relative to weights of all other running VMs. Using zero disables auto-ballooning. Auto-ballooning is done by pvestatd.
- smbios1: [base64=<1|0>] [,family=<Base64 encoded string>] [,manufacturer=<Base64 encoded string>] [,product=<Base64 encoded string>] [,serial=<Base64 encoded string>] [,sku=<Base64 encoded string>] [,uuid=<UUID>] [,version=<Base64 encoded string>]
-
Specify SMBIOS type 1 fields.
- base64=<boolean>
-
Flag to indicate that the SMBIOS values are base64 encoded
- family=<Base64 encoded string>
-
Set SMBIOS1 family string.
- manufacturer=<Base64 encoded string>
-
Set SMBIOS1 manufacturer.
- product=<Base64 encoded string>
-
Set SMBIOS1 product ID.
- serial=<Base64 encoded string>
-
Set SMBIOS1 serial number.
- sku=<Base64 encoded string>
-
Set SMBIOS1 SKU string.
- uuid=<UUID>
-
Set SMBIOS1 UUID.
- version=<Base64 encoded string>
-
Set SMBIOS1 version.
- smp: <integer> (1 — N) (default = 1)
-
The number of CPUs. Please use option -sockets instead.
- sockets: <integer> (1 — N) (default = 1)
-
The number of CPU sockets.
- spice_enhancements: [foldersharing=<1|0>] [,videostreaming=<off|all|filter>]
-
Configure additional enhancements for SPICE.
- foldersharing=<boolean> (default = 0)
-
Enable folder sharing via SPICE. Needs Spice-WebDAV daemon installed in the VM.
- videostreaming=<all | filter | off> (default = off)
-
Enable video streaming. Uses compression for detected video streams.
- sshkeys: <string>
-
cloud-init: Setup public SSH keys (one key per line, OpenSSH format).
- startdate: (now | YYYY-MM-DD | YYYY-MM-DDTHH:MM:SS) (default = now)
-
Set the initial date of the real time clock. Valid format for date are:’now’ or 2006-06-17T16:01:21 or 2006-06-17.
- startup: `[[order=]d+] [,up=d+] [,down=d+] `
-
Startup and shutdown behavior. Order is a non-negative number defining the general startup order. Shutdown in done with reverse ordering. Additionally you can set the up or down delay in seconds, which specifies a delay to wait before the next VM is started or stopped.
- tablet: <boolean> (default = 1)
-
Enable/disable the USB tablet device. This device is usually needed to allow absolute mouse positioning with VNC. Else the mouse runs out of sync with normal VNC clients. If you’re running lots of console-only guests on one host, you may consider disabling this to save some context switches. This is turned off by default if you use spice (qm set <vmid> —vga qxl).
- tags: <string>
-
Tags of the VM. This is only meta information.
- tdf: <boolean> (default = 0)
-
Enable/disable time drift fix.
- template: <boolean> (default = 0)
-
Enable/disable Template.
- tpmstate0: [file=]<volume> [,size=<DiskSize>] [,version=<v1.2|v2.0>]
-
Configure a Disk for storing TPM state. The format is fixed to raw.
- file=<volume>
-
The drive’s backing volume.
- size=<DiskSize>
-
Disk size. This is purely informational and has no effect.
- version=<v1.2 | v2.0> (default = v2.0)
-
The TPM interface version. v2.0 is newer and should be preferred. Note that this cannot be changed later on.
- unused[n]: [file=]<volume>
-
Reference to unused volumes. This is used internally, and should not be modified manually.
- file=<volume>
-
The drive’s backing volume.
- usb[n]: [host=]<HOSTUSBDEVICE|spice> [,usb3=<1|0>]
-
Configure an USB device (n is 0 to 4, for machine version >= 7.1 and ostype l26 or windows > 7, n can be up to 14).
- host=<HOSTUSBDEVICE|spice>
-
The Host USB device or port or the value spice. HOSTUSBDEVICE syntax is:
'bus-port(.port)*' (decimal numbers) or
'vendor_id:product_id' (hexadeciaml numbers) or
'spice'
You can use the lsusb -t command to list existing usb devices.
This option allows direct access to host hardware. So it is no longer possible to migrate such
machines — use with special care.The value spice can be used to add a usb redirection devices for spice.
- usb3=<boolean> (default = 0)
-
Specifies whether if given host option is a USB3 device or port. For modern guests (machine version >= 7.1 and ostype l26 and windows > 7), this flag is irrelevant (all devices are plugged into a xhci controller).
- vcpus: <integer> (1 — N) (default = 0)
-
Number of hotplugged vcpus.
- vga: [[type=]<enum>] [,memory=<integer>]
-
Configure the VGA Hardware. If you want to use high resolution modes (>= 1280x1024x16) you may need to increase the vga memory option. Since QEMU 2.9 the default VGA display type is std for all OS types besides some Windows versions (XP and older) which use cirrus. The qxl option enables the SPICE display server. For win* OS you can select how many independent displays you want, Linux guests can add displays them self.
You can also run without any graphic card, using a serial device as terminal.- memory=<integer> (4 — 512)
-
Sets the VGA memory (in MiB). Has no effect with serial display.
- type=<cirrus | none | qxl | qxl2 | qxl3 | qxl4 | serial0 | serial1 | serial2 | serial3 | std | virtio | virtio-gl | vmware> (default = std)
-
Select the VGA type.
- virtio[n]: [file=]<volume> [,aio=<native|threads|io_uring>] [,backup=<1|0>] [,bps=<bps>] [,bps_max_length=<seconds>] [,bps_rd=<bps>] [,bps_rd_max_length=<seconds>] [,bps_wr=<bps>] [,bps_wr_max_length=<seconds>] [,cache=<enum>] [,cyls=<integer>] [,detect_zeroes=<1|0>] [,discard=<ignore|on>] [,format=<enum>] [,heads=<integer>] [,iops=<iops>] [,iops_max=<iops>] [,iops_max_length=<seconds>] [,iops_rd=<iops>] [,iops_rd_max=<iops>] [,iops_rd_max_length=<seconds>] [,iops_wr=<iops>] [,iops_wr_max=<iops>] [,iops_wr_max_length=<seconds>] [,iothread=<1|0>] [,mbps=<mbps>] [,mbps_max=<mbps>] [,mbps_rd=<mbps>] [,mbps_rd_max=<mbps>] [,mbps_wr=<mbps>] [,mbps_wr_max=<mbps>] [,media=<cdrom|disk>] [,replicate=<1|0>] [,rerror=<ignore|report|stop>] [,ro=<1|0>] [,secs=<integer>] [,serial=<serial>] [,shared=<1|0>] [,size=<DiskSize>] [,snapshot=<1|0>] [,trans=<none|lba|auto>] [,werror=<enum>]
-
Use volume as VIRTIO hard disk (n is 0 to 15).
- aio=<io_uring | native | threads>
-
AIO type to use.
- backup=<boolean>
-
Whether the drive should be included when making backups.
- bps=<bps>
-
Maximum r/w speed in bytes per second.
- bps_max_length=<seconds>
-
Maximum length of I/O bursts in seconds.
- bps_rd=<bps>
-
Maximum read speed in bytes per second.
- bps_rd_max_length=<seconds>
-
Maximum length of read I/O bursts in seconds.
- bps_wr=<bps>
-
Maximum write speed in bytes per second.
- bps_wr_max_length=<seconds>
-
Maximum length of write I/O bursts in seconds.
- cache=<directsync | none | unsafe | writeback | writethrough>
-
The drive’s cache mode
- cyls=<integer>
-
Force the drive’s physical geometry to have a specific cylinder count.
- detect_zeroes=<boolean>
-
Controls whether to detect and try to optimize writes of zeroes.
- discard=<ignore | on>
-
Controls whether to pass discard/trim requests to the underlying storage.
- file=<volume>
-
The drive’s backing volume.
- format=<cloop | cow | qcow | qcow2 | qed | raw | vmdk>
-
The drive’s backing file’s data format.
- heads=<integer>
-
Force the drive’s physical geometry to have a specific head count.
- iops=<iops>
-
Maximum r/w I/O in operations per second.
- iops_max=<iops>
-
Maximum unthrottled r/w I/O pool in operations per second.
- iops_max_length=<seconds>
-
Maximum length of I/O bursts in seconds.
- iops_rd=<iops>
-
Maximum read I/O in operations per second.
- iops_rd_max=<iops>
-
Maximum unthrottled read I/O pool in operations per second.
- iops_rd_max_length=<seconds>
-
Maximum length of read I/O bursts in seconds.
- iops_wr=<iops>
-
Maximum write I/O in operations per second.
- iops_wr_max=<iops>
-
Maximum unthrottled write I/O pool in operations per second.
- iops_wr_max_length=<seconds>
-
Maximum length of write I/O bursts in seconds.
- iothread=<boolean>
-
Whether to use iothreads for this drive
- mbps=<mbps>
-
Maximum r/w speed in megabytes per second.
- mbps_max=<mbps>
-
Maximum unthrottled r/w pool in megabytes per second.
- mbps_rd=<mbps>
-
Maximum read speed in megabytes per second.
- mbps_rd_max=<mbps>
-
Maximum unthrottled read pool in megabytes per second.
- mbps_wr=<mbps>
-
Maximum write speed in megabytes per second.
- mbps_wr_max=<mbps>
-
Maximum unthrottled write pool in megabytes per second.
- media=<cdrom | disk> (default = disk)
-
The drive’s media type.
- replicate=<boolean> (default = 1)
-
Whether the drive should considered for replication jobs.
- rerror=<ignore | report | stop>
-
Read error action.
- ro=<boolean>
-
Whether the drive is read-only.
- secs=<integer>
-
Force the drive’s physical geometry to have a specific sector count.
- serial=<serial>
-
The drive’s reported serial number, url-encoded, up to 20 bytes long.
- shared=<boolean> (default = 0)
-
Mark this locally-managed volume as available on all nodes.
This option does not share the volume automatically, it assumes it is shared already! - size=<DiskSize>
-
Disk size. This is purely informational and has no effect.
- snapshot=<boolean>
-
Controls qemu’s snapshot mode feature. If activated, changes made to the disk are temporary and will be discarded when the VM is shutdown.
- trans=<auto | lba | none>
-
Force disk geometry bios translation mode.
- werror=<enospc | ignore | report | stop>
-
Write error action.
- vmgenid: <UUID> (default = 1 (autogenerated))
-
The VM generation ID (vmgenid) device exposes a 128-bit integer value identifier to the guest OS. This allows to notify the guest operating system when the virtual machine is executed with a different configuration (e.g. snapshot execution or creation from a template). The guest operating system notices the change, and is then able to react as appropriate by marking its copies of distributed databases as dirty, re-initializing its random number generator, etc.
Note that auto-creation only works when done through API/CLI create or update methods, but not when manually editing the config file. - vmstatestorage: <string>
-
Default storage for VM state volumes/files.
- watchdog: [[model=]<i6300esb|ib700>] [,action=<enum>]
-
Create a virtual hardware watchdog device. Once enabled (by a guest action), the watchdog must be periodically polled by an agent inside the guest or else the watchdog will reset the guest (or execute the respective action specified)
- action=<debug | none | pause | poweroff | reset | shutdown>
-
The action to perform if after activation the guest fails to poll the watchdog in time.
- model=<i6300esb | ib700> (default = i6300esb)
-
Watchdog type to emulate.
Locks
Online migrations, snapshots and backups (vzdump) set a lock to prevent
incompatible concurrent actions on the affected VMs. Sometimes you need to
remove such a lock manually (for example after a power failure).
|
|
Only do that if you are sure the action which set the lock is no longer running. |
В этом статье мы покажем, как развернуть виртуальную машину и устанавливать на нее Windows 10/11 на гипервизоре Proxmox Virtual Environment.
Сначала вам нужно:
- Скачать Windows Media Creation Tool (https://www.microsoft.com/en-us/software-download/windows10) и создать ISO файл с установочным образом Windows;
- Также скачайте ISO образ с драйверами VirtIO для WIndows (https://fedorapeople.org/groups/virt/virtio-win/direct-downloads/stable-virtio/virtio-win.iso). Это набор паравиртуализированных драйверов для KVM/Linux, который обеспечит более высокую производительность виртуальных устройств, чем встроенные эмулированные драйвера
Загрузите оба iso файла в хранилище PVE.
Теперь нужно создать новую виртуальную машину Proxmox для развертывания гостевой Windows.
- Откройте веб интерфейс управления Proxmox VE (WAC) и нажмите кнопку Create VM;
- Укажите имя ВМ;
- Затем перейдите на вкладку OS и ваш установочный ISO образ Windows 10, который вы загрузили ранее. Proxmox должен автоматически определить тип ОС в образе и указать тип гостевой ОС виртуальной машины (Microsoft Windows version 10/2016/2019);

- Перейдите на вкладку System и включите опцию Qemu Agent и выберите тип контроллера дисков VirtIO SCSI;

- Затем перейдите на кладку Hard Disk и настройте параметры диска виртуальной машины (Bus/Device: SCSI (по умолчанию используется IDE), Storage: выберите хранилище ProxMox где будет хранится виртуальный диск, укажите размер виртуального диска (не менее 25 Гб). Здесь можно выбрать один из двух типов виртуальный дисков raw (лучшая производительностью) или qcow2 (расширенный функционал и поддержка снапшотов). Также вы можете пробросить физический диск или USB флешку в виртуальную машину Proxmox VE. Здесь можно включить опцию кэширования Write back ->Discard. Это увеличит быстродействие, но есть некоторые риски потери данных;
- На вкладке CPU и Memory укажите количество ядер виртуальной машины вы хотите выделить (не менее 2 vCPu типа kvm64) и размер оперативной памяти (не менее 2Гб);

- Перейдите на вкладку network. Выберите тип виртуальной карты VirtIO (paravirtualized) вместо Intel E1000. Отключите опцию Firewall, если вы будете использовать встроенный Windows Defender Firewall в гостевой ОС;

- Проверьте настройки и нажмите Finish чтобы создать ВМ;
- После того, как вы создали новую виртуальную машину в Proxmox для Windows, откройте ее настройки и добавьте еще один CD/DVD привод. Подключите в него ISO файл с VirtIO драйверами;
- Запустите ВМ, нажав Start. Нажмите кнопку Console чтобы открыть экран виртуальной машины;
- Установка Windows должна запуститься автоматически;
- Windows Setup не сможет найти диски вашей ВМ. Поэтому вам нужно загрузить VirtIO драйвера контроллера;
- Нажмите кнопку Load Driver и укажите путь к каталогу amd64w10 на диске с драйверами VirtIO;

- Установите драйвер Red Hat VirtIO SCSI pass-throught controller (NetKVMw10amd6vioscsi.inf);
- После установки драйвера установщик Windows увидит ваш диск, и вы сможете продолжить установку;
- После окончания установки Windows 10 в виртуальную машину, нужно установить драйвера VirtIO для сетевой карты и других устройств. Для этого откройте диспетчер устройств Windows (devmgmt.msc). Найдите в списке неизвестные устройства. Щелкните по устройству и выберите Update Driver -> Browse my computer for driver software и укажите путь к диску с драйверами VirtIO. Вам нужно установить как минимум следующие драйвера Redhat VirtIO Ethernet Adapter (NetKVMw10amd64), VirtIO Balloon Driver (Balloonw10amd64) Подробнее это описано в статье Установка драйверов KVM VirtIO в виртуальной машине Windows;

- После установки всех драйверов установите VirtIO Агент (guest-agentquemu-ga-x86_64.msi)

- Запустите установку virtio-win-gt-x64.msi из корня диска. Укажите драйвера и службы, которые нужно установить дополнительно.
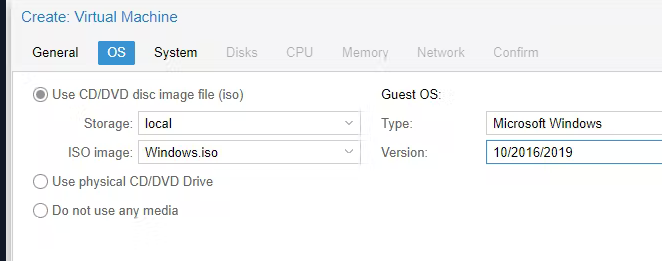
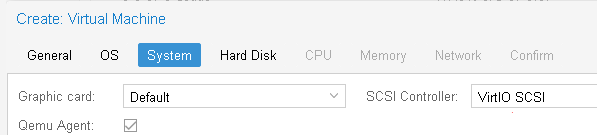
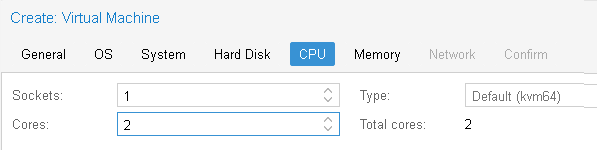
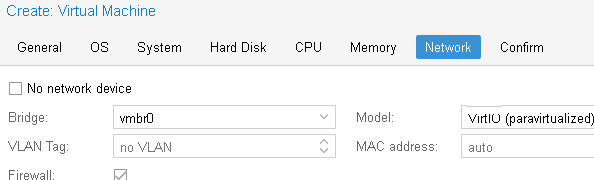
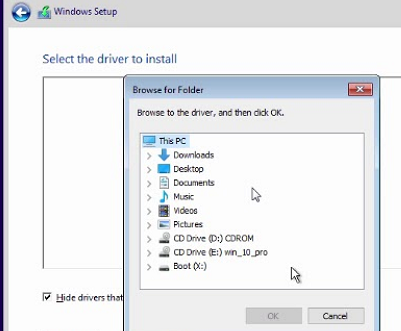
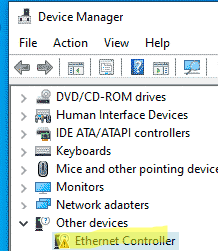
На этом настройка виртуальной машины Windows 10 на Proxmox закончена. Вы можете продолжить настройку параметров Windows в гостевой ОС (имя компьютера, параметры сетевого подключения, установить необходимые программы, добавить в домен Active Directory и т.д.)
В этой статье я покажу тонкости установки Windows 10 в среде виртуализации от ProxMox. Основное внимание будет уделено Virtio драйверам.
Создание виртуальной машины
Про ProxMox VE я уже писал:
- Что такое Proxmox VE?
- Установка Proxmox VE 6.3
Для того чтобы создать новую виртуальную машины для Windows 10, заходим в Web-интерфейс управления ProxMox VE и нажимаем кнопку “Create VM“:
Во-первых придумаем имя для виртуальной машины:
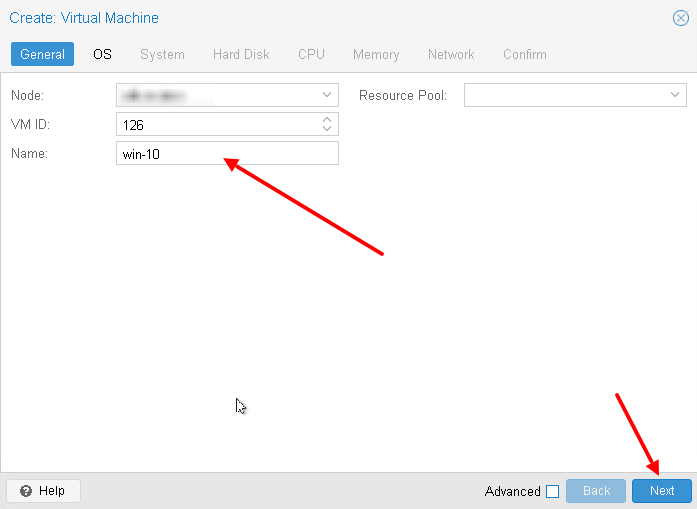
Выберем хранилище на котором лежит нужный образ (iso). Затем выбираем сам образ. Меняем тип гостевой ОС и её подтип:
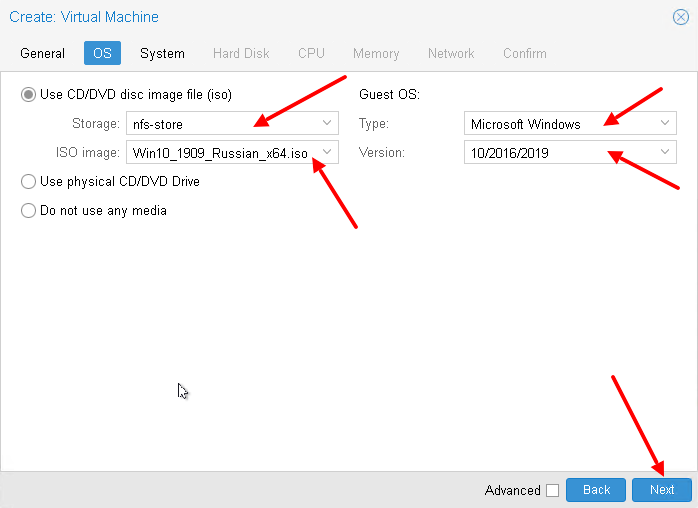
Настроим систему, а именно поставим галочку Qemu Agent (дальше нужно будет установить агента в ОС). А для контролера выбирайте VirtIO SCSI, хотя он и так используется по умолчанию:
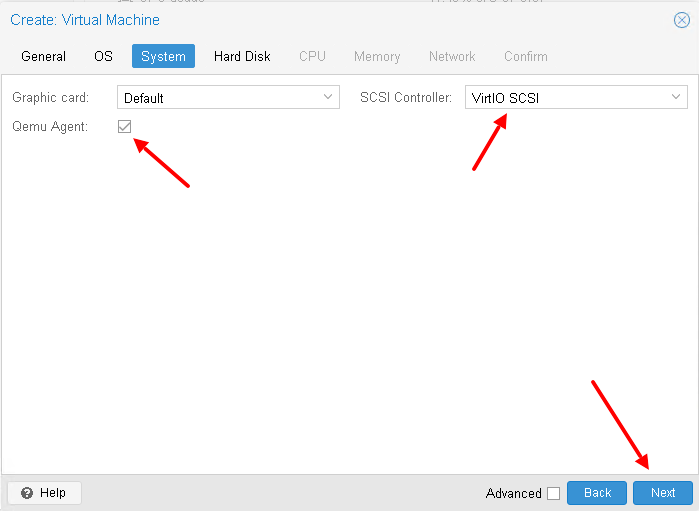
А потом настроим жёсткий диск для виртуальном машины – я использую SCSI (по умолчанию используется IDE). А также нужно выбрать хранилище для жесткого диска и его размер:
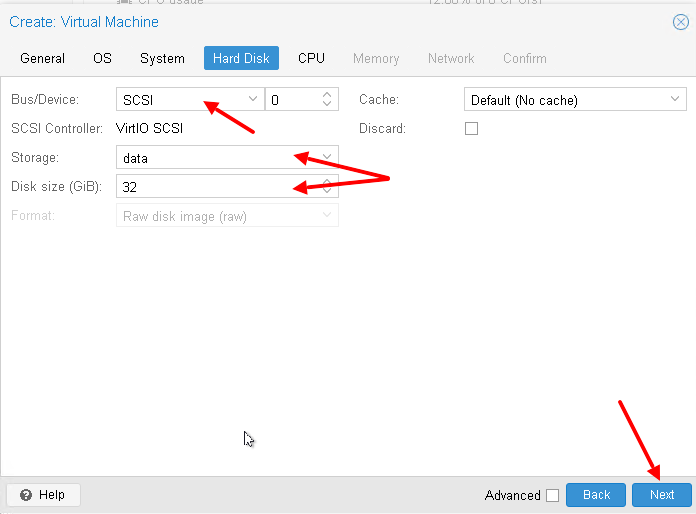
Настроим процессор для виртуальной машины (укажите количество виртуальных ядер):
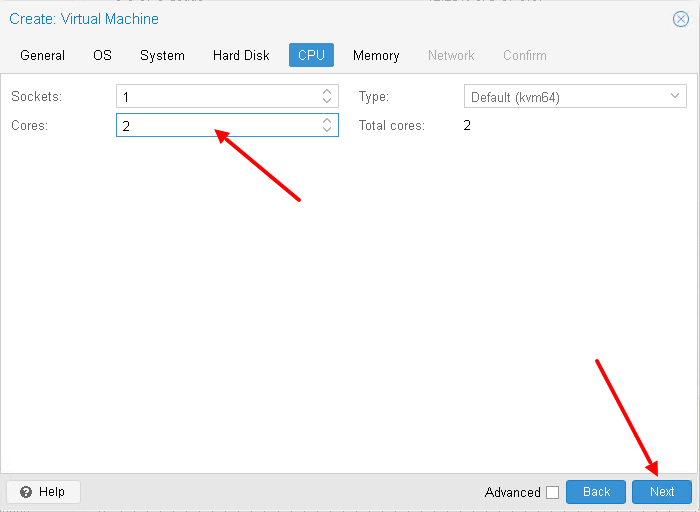
Выделим необходимое количество оперативной памяти:
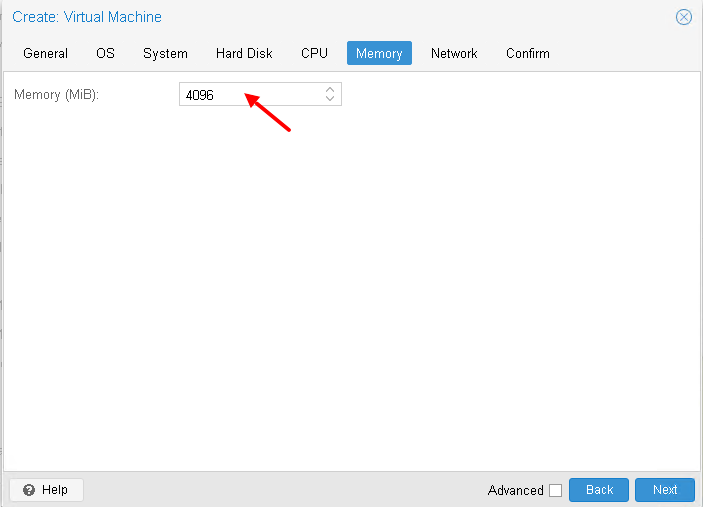
Настроим сетевую карту, я снова использую VirtIO устройство:
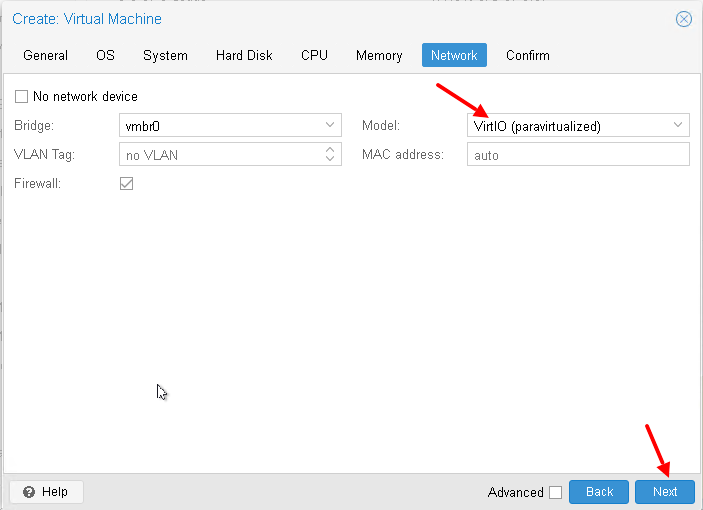
В итоге, после всех настроек, нажмём кнопку “Finish“:
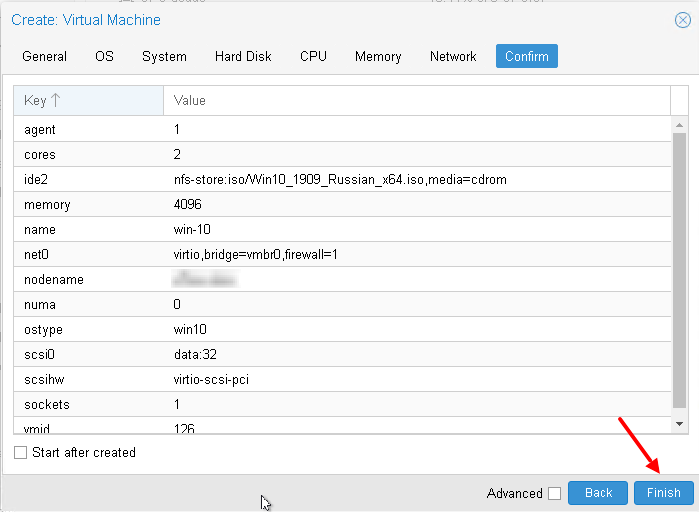
После того, как мы создали виртуальную машину, добавим ей ещё один привод (CD/DVD Drive). Его будем использовать для того, чтобы подключить ещё один образа с VirtIO драйверами:
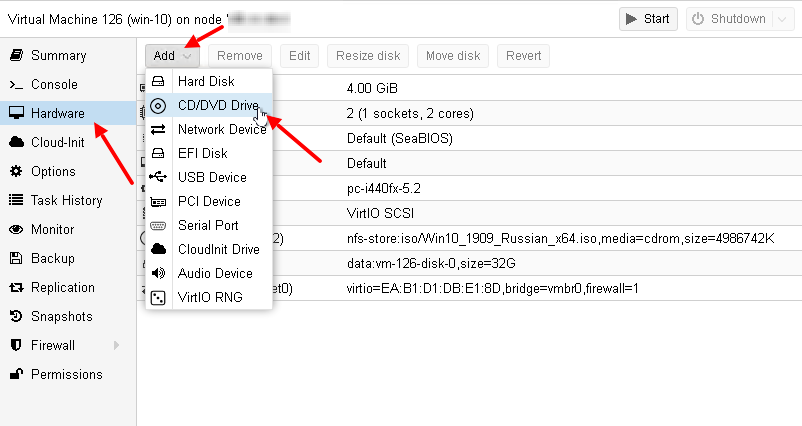
И подключим в новый привод образ с VirtIO драйверами:
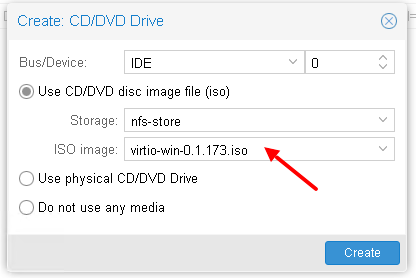
Если у вас ещё нет образа с VirtIO драйверами, то вы можете скачать их от сюда.
А также, почитать про VirtIO драйверы можно в wiki от ProxMox – здесь.
Прежде чем двигаться дальше посмотрим ещё раз на виртуальное оборудование нашей виртуальной машины:

Установка гостевой ОС
Чтобы запустить виртуальную машину, нажмите кнопку “Start“. Затем, чтобы открыть консоль, нажмите кнопку “Console“:

Начнётся процесс установки Windows 10:

Весь процесс показывать не буду, покажу лишь те места, которые связаны с виртуализацией. Вначале вам нужно будет выбрать диск для установки системы, но для этого необходимо загрузить VirtIO драйвера:
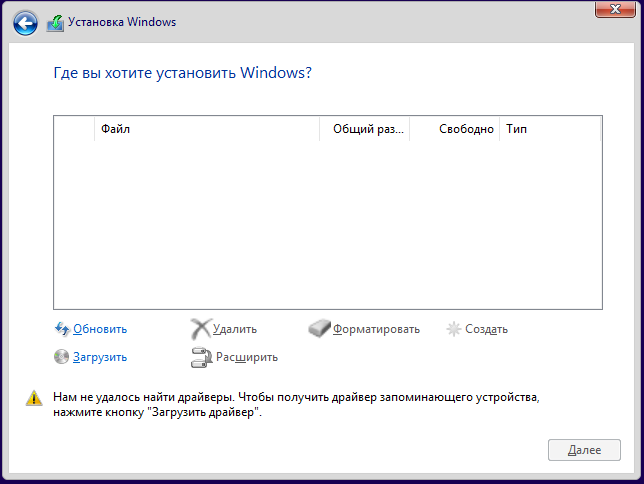
Нажимаем кнопку “Загрузить“:
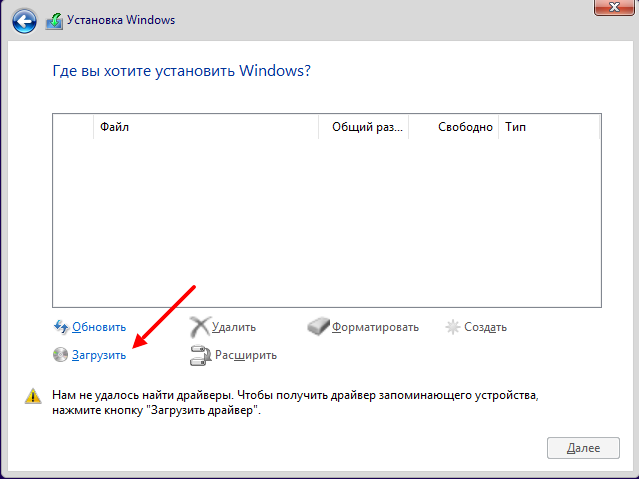
На диске с VirtIO драйверами ищем каталог /amd64/w10/:
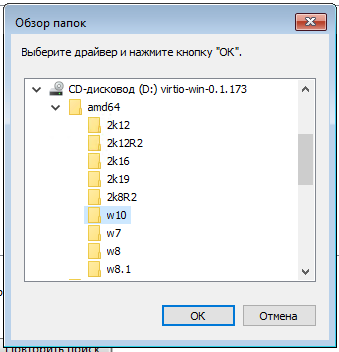
И устанавливаем найденный драйвер:
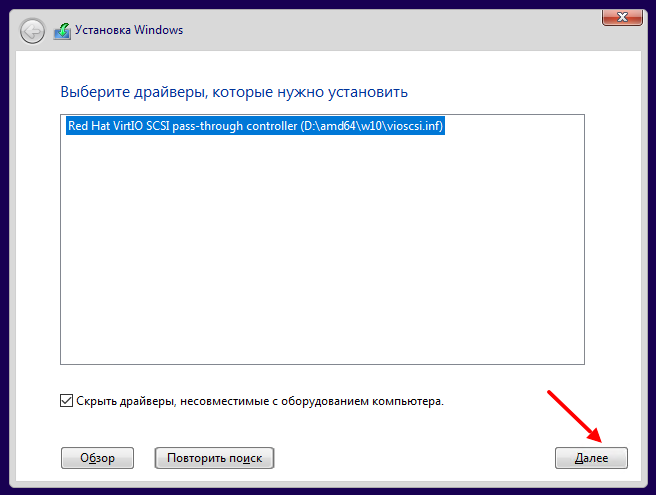
После установки диск в системе должен определиться:
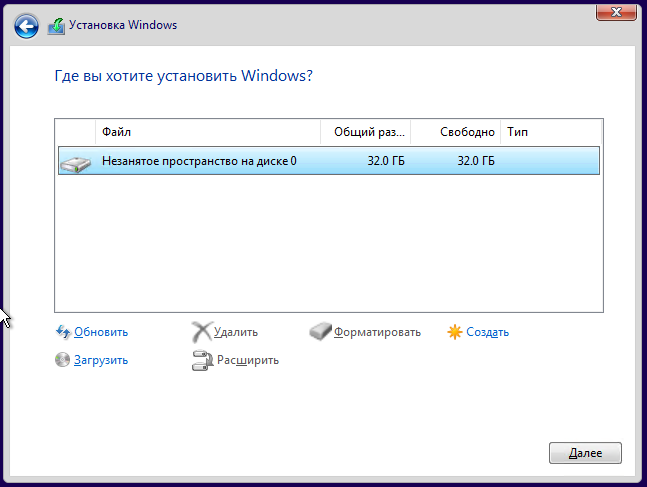
Дальше на найденный диск устанавливаем систему как обычно.
После установки, когда система начнет первоначальную настройку, нажимаем кнопку “У меня нет Интернета“. Это необходимо, так как драйвер VirtIO для сетевого интерфейса мы сможем установить только после первоначальной настройки:

Установка дополнительных VirtIO драйверов
После установки системы, для многих виртуальных устройств не будет найдено драйверов. Чтобы это исправить запускаем “Диспетчер устройств“:
Видим неизвестные устройства:
Нужно для каждого такого устройства установить драйвер с образа диска для VirtIO драйверов. Для этого нажимаем правой кнопкой мышки по устройству и выбираем “Обновить драйвер“:
Затем выбираем пункт меню “Выполнить поиск драйверов на этом компьютере“:
Дальше нажимаем кнопку “Обзор“:
И указываем диск с VirtIO драйверами:
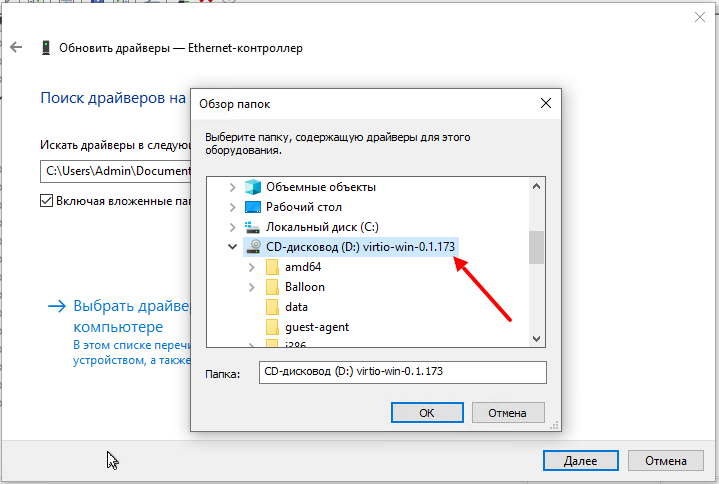
Здесь уже искать драйвера не обязательно, главное указать диск.
Таким образом устанавливаете все остальные драйвера:
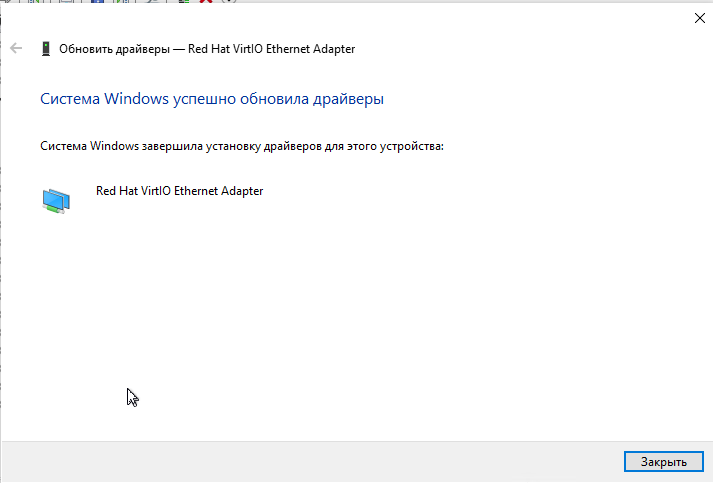
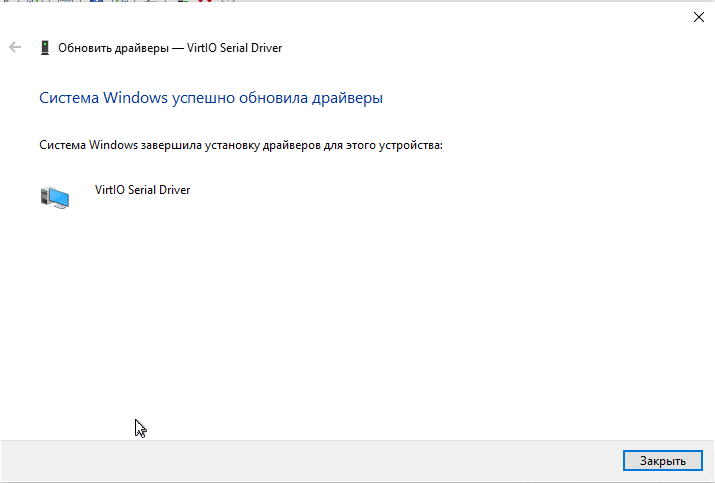
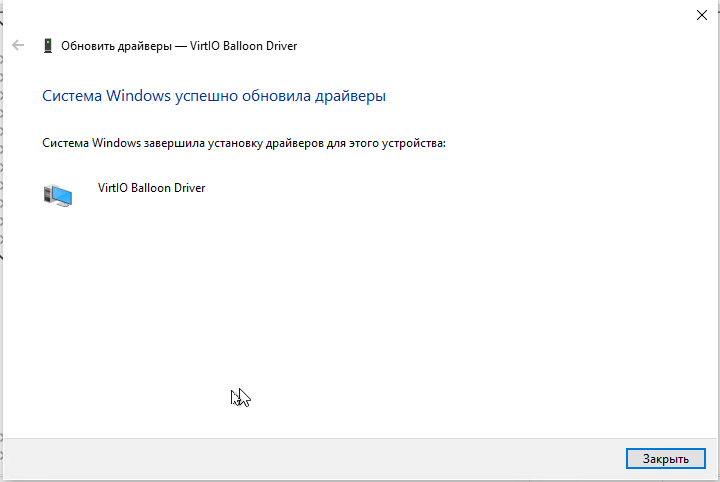
И в самом конце установим VirtIO Агента с этого же образа диска. Для этого на диске ищем каталог guest-agent а в нем запускаем установщик:
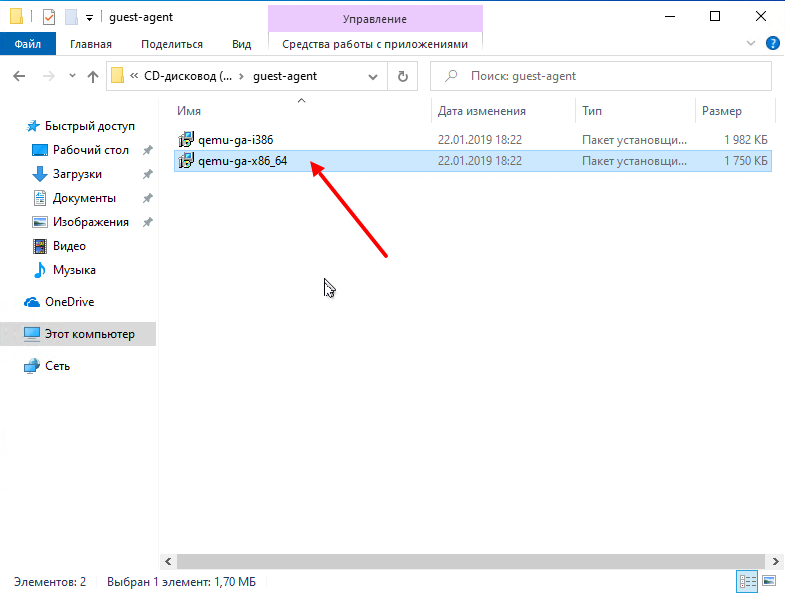
После проделанного вы можете выполнять дополнительные настройки, например:
- настроить сеть;
- изменить имя компьютера или ввести систему в домен;
- обновить систему;
- установить дополнительное ПО;
- и другое.
Итог
В этой статье я показал что в среде виртуализации ProxMox используется специальное VirtIO оборудование и для его использования в Windows нужно устанавливать специальные VirtIO драйвера. Дополнительно в систему можно установить агента (Qemu-guest-agent), чтобы гипервизор получал некоторые сведенья о гостевой системе, например ip-адреса.
Ну а в Linux поддержка VirtIO оборудования уже встроена в ядро. Хотя агента всё-таки придется установить, например таким способом:
# apt-get install qemu-guest-agent
Или
#yum install qemu-guest-agent
Спасибо за внимание!
Сводка

Имя статьи
Установка Windows 10 на ProxMox VE 6
Описание
В этой статье я покажу тонкости установки Windows 10 в среде виртуализации от ProxMox. Основное внимание будет уделено Virtio драйверам
 Обновлено: 25.05.2022
Опубликовано: 30.01.2020
Используемые термины: Proxmox VE, Linux.
В данной инструкции мы пошагово разберем способы установки Proxmox VE, базовую настройку и создание виртуальной машины. Proxmox основан на Debian — поэтому установку будем выполнять на данный дистрибутив Linux. В данной инструкции работа ведется на Proxmox версии 6.
Системные требования
Установка Proxmox
Из готового образа
Установка на Debian
Проверка установки
Базовая настройка
Как загрузить ISO-образ
Создание сетей
Bridge
NAT
Сеть между виртуалками
Создание виртуальной машины
Настройка виртуальной машины
Базовые настройки
Добавление диска
Добавление сетевого адаптера
Установка гостевого агента
Удаление виртуальной машины
Тюнинг Proxmox
Предупреждения об отсутствии подписки
Правильный сертификат
Создание нового пользователя
Ubuntu и CentOS
Системные требования
Требования разделены на минимальные и рекомендованные:
| Минимальные | Рекомендованные | |
|---|---|---|
| Процессор | 64bit с поддержкой технологии виртуализации Intel VT или AMD-V | |
| Память | 1 Гб | 2 Гб для системы + для виртуальных машин. Дополнительно, если используется хранилище Ceph или ZFS, 1 Гб на наждый ТБ данных. |
| Накопитель | HDD | SSD или NVMe |
| Сеть | Сетевой адаптер | Минимум, 2 сетевых адаптера на 10 Гбит/сек. |
Поддержка виртуализации Intel VT или AMD-V может быть отключена на материнской плате. Для проверки заходим в БИОС — находим раздел настройки процессора (как правило, в пункте меню Advanced) — проверяем, что технология виртуализации (Intel VT, AMD-V, Virtualization Technology, VMX) включена (Enabled). Если мы хотим протестировать платформу и устанавливаем ее на виртуальную машину, то в ее настройках включаем поддержку технологии виртуализации. Например, в VMware ESX 6 в настройке виртуальной машины на вкладке Virtual Hardware раскрываем CPU и ставим галочку Expose hardware assisted virtualization to the guest OS:

Установка
Есть два варианта установки Proxmox VE — использовать готовый образ или установка на Debian. Мы рассмотрим оба.
Установка готового образа ISO
1. Переходим на страницу загрузки Proxmox официального сайта. Загружаем дистрибутив, например, Proxmox VE 6.1:

2. Если установка выполняется на виртуальную машину, монтируем образ. Если нет — создаем установочную флешку, например, с помощью WinSetupFromUsb или загрузочный диск с помощью InfraRecorder.
3. Загружаем сервер с установочного ISO — мы увидим окно приветствия Proxmox — выбираем пункт меню Install Proxmox VE:

4. Принимаем лицензионное соглашения, кликнув по I agree.
5. Выбираем диск, на который будет установлена система:

* при необходимости, кликаем по Options и задаем настройки файловой системы и размера раздела.
6. Пишем страну, временную зону, язык раскладки клавиатуры по умолчанию:

7. Вводим дважды пароль, который будет использоваться для пользователя root:

8. Прописываем сетевые настройки:

* где:
- Management Interface: сетевой интерфейс для управления сервером виртуальных машин.
- Hostname (FQDN): имя хоста для сервера.
- IP Address: IP-адрес нашего сервера.
- Netmask: маска подсети для сервера.
- Gateway: шлюз по умолчанию.
- DNS Server: сервер DNS.
9. В окне «Summary» проверяем введенные данные и кликаем по Install. Начнется процесс установки, который займет не более 10 минут.
10. После установки мы должны увидеть «Installation Successful» — перезагружаем сервер, кликнув по кнопке Reboot.
После переходим к проверке установки.
Установка на Debian
Если мы решили установить Proxmox на уже установленный Debian, выполняем следующую инструкцию.
При установке среды виртуализации меняется ядро Linux. Это может привести к потери работоспособности уже установленных сервисов. Таким образом, установку Proxmox следует выполнять на чистый сервер, а не тот, который уже используется для каких-либо задач.
1. Имя сервера должно разрешаться по его IP-адресу. Для этого либо добавляем А-запись в DNS, либо настраиваем на сервере файл hosts:
nano /etc/hosts
… и добавляем:
192.168.1.55 proxmox.dmosk.local proxmox
* где 192.168.1.55 — IP-адрес нашего сервера; proxmox — имя сервера; dmosk.local — наш домен, если используется.
2. Добавляем репозитории, которые будем устанавливать для установки Proxmox PE и дополнительных компонентов:
nano /etc/apt/sources.list
deb http://mirror.yandex.ru/debian/ buster main non-free contrib
deb-src http://mirror.yandex.ru/debian/ buster main non-free contrib
deb http://download.proxmox.com/debian/pve buster pve-no-subscription
Чтобы мы могли работать с репозиторием proxmox добавляем в систему цифровую подпись:
wget http://download.proxmox.com/debian/proxmox-ve-release-6.x.gpg -O /etc/apt/trusted.gpg.d/proxmox-ve-release-6.x.gpg
Обновляем список пакетов:
apt-get update
3. Устанавливаем Proxmox PE и компоненты:
apt-get install proxmox-ve open-iscsi
* где proxmox-ve — собственно, сам гипервизор; open-iscsi — iSCSI-клиент для подключения iSCSI-target-ов.
4. Перезагружаем сервер:
systemctl reboot
Проверка установки
В браузере открываем панель управления системой виртуализации по адресу https://<IP-адрес сервера>:8006. В открывшемся окне выбираем язык, вводим логин и пароль от пользователя root:

Должно открыться окно управления.
Начальная настройка
Чтобы начать использовать Proxmox и создать первую виртуальную машину, внесем небольшие настройки и подготовим гипервизор к работе.
1. Загрузка образов
Кликаем по Датацентр — и дважды по storage:

* мы можем создать отдельное хранилище для образов ISO. Для этого переходим в раздел Датацентр — Хранилище — Создать — Каталог.
Переходим в раздел Содержимое и кликаем по Загрузить:

В открывшемся окне выбираем ISO-образ системы, который будем устанавливать в качестве гостевой и кликаем по Загрузить. Ждем окончания копирования файла на сервер.
2. Создание сети для виртуальных машин
Мы рассмотрим примеры создания 2-х режимов сети — Bridge и NAT.
Независимо от способа установки Proxmox, необходимо подключиться к хосту по SSH и установить пакет ifupdown2 командой:
apt-get install ifupdown2
* ifupdown2 — утилита для конфигурации сетевого интерфейса (по сути, аналог ifupdown, написанный на языке Python).
… в противном случае, при попытке применить сетевые настройки мы получим ошибку you need ifupdown2 to reload networking (500).
Bridge
Сеть, работающая в данном режиме позволяет виртуальной машине видеть локальную сеть, как будто это отдельно стоящее устройство. Данный режим лучше всего подойдет для серверов, стоящих в локальной сети компании.
Работать с режимом Bridge нужно очень осторожно. Любое неправильное действие и удаленный доступ к серверу будет потерян. Если работы ведутся на удаленном сервере, рекомендуется сначала потренироваться на какой-нибудь локальной машине.
Также стоит отметить, что при установке PVE из установочного ISO-образа, один Bridge уже будет создан.
Для создания бриджа в панели управления кликаем по нашему серверу Proxmox — переходим в раздел Система — Сеть — обратите внимание, чтобы в системе не было bridge-интерфейсов:

… иначе, создавать его не обязательно.
Открываем настройки сетевого интерфейса, через который будет работать наш мост и удаляем шлюз:

* если мы не сделаем этого, то при настройке Bridge мы получим ошибку Parameter verification failed. (400). gateway: Default gateway already exists on interface ‘ens160’.
Нажимаем Создать и выбираем Linux Bridge:

В открывшемся окне заполняем поля IPv4/CIDR, Шлюз (IPv4), Порты сетевого моста:

* в данном примере мы задаем IP-адрес, на котором будет работать Proxmox (чтобы ничего не перепутать, можно задать IP-адрес физического интерфейса, который будет задействован под Bridge); маска указывается в нотации CIDR и в нашем примере это 24 или 255.255.255.0; в качестве физического интерфейса наш bridge будет использовать ens160.
… нажимаем Создать.
Кликаем по Apply Configuration, чтобы применить сетевые настройки:

Подтверждаем действия.
NAT
Данный режим сети активно применяется в случае аренды сервера, где количество IP-адресов лимитировано. В данном случае, все виртуальные машины будут находисться за NAT, в качестве которого выступает сам Proxmox.
Сам интерфейс мы делаем из панели управления. Но чтобы виртуальные машины могли выходить в Интернет через сеть NAT, необходимо на самом хосте включить редирект и маскарадинг.
Создание нового bridge-интерфеса
Итак, кликаем по нашему серверу Proxmox — переходим в раздел Система — Сеть — нажимаем Создать и выбираем Linux Bridge:

Оставляем имя vmbr1 или пишем любое другое, прописываем IP-адрес с маской сети, в которой будут находиться серверы за NAT:

Нажимаем Создать. Применяем настройки:

Сеть настроена.
Настройка ядра и брандмауэра
Подключаемся к серверу по SSH. Открываем на редактирование файл настройки ядра:
nano /etc/sysctl.d/99-sysctl.conf
… и добавляем разрешение на редирект:
net.ipv4.ip_forward=1
После применяем настройки:
sysctl -p /etc/sysctl.d/99-sysctl.conf
Добавляем правило в брандмауэр:
iptables -t nat -A POSTROUTING -s ‘192.168.122.0/24’ -o vmbr0 -j MASQUERADE
* в данном примере мы создали правило для маскарадинга всех пакетов из подсети 192.168.122.0/24 и для исходящего интерфейса vmbr0. Обратите внимание, что если у нас будет другая подсеть и исходящий интерфейс для сети Интернет, то нужно будет задать другие значения.
Ставим утилиту для сохранения правил iptables:
apt-get install iptables-persistent
… и сохраняем правила в процессе установки или командой:
netfilter-persistent save
Наш NAT настроен.
Сеть между виртуалками
Данная сеть — частный случай NAT без выхода в Интернет. Мы должны создать бридж с отдельной подсетью без шлюза. При добавлении виртуальным машинам данного сетевого адаптера мы сможем настроить их взаимодействие по внутренней сети.
Создаем бридж, как делали это ранее:
Настраиваем новый интерфейс — задаем имя или оставляем тот, что предложит система, а также указываем IP-адрес:

Создаем интерфейс. Готово — при создании или редактировании виртуалок, мы можем указывать с качестве интерфейса созданный бридж (в данном примере, vmbr2) для изоляции их в отдельную подсеть 192.168.150.0/24.
Создание виртуальной машины
Базовая настройка закончена — можно опробовать наш гипервизор в деле.
В правой верхней части панели управления кликаем по Создать VM:

В открывшемся окне снизу сразу ставим галочку Расширенный:

Задаем имя виртуальной машине и ставим галочку Запуск при загрузке (если хотим, чтобы виртуалка запускалась автоматически с сервером PVE):

* в данном примере мы задали имя FS. При желании, также можно изменить VM ID, но он проставляется автоматически и имеет правильное значение.
Выбираем загруженный нами ISO-образ, с которого будем ставить операционную систему, задаем тип гостевой операционной системы и ее версию:

* в данном примере мы будем устанавливать Linux Ubuntu. Среди списка операционных систем также доступны Microsoft Windows, Solaris и Other.
На вкладке Система можно оставить все значения по умолчанию:

* в некоторых случаях, необходимо выбрать другую видеокарту (при установке систем с GUI), а также особый вариант БИОС.
Задаем размер жесткого диска:

* 16 Гб для Ubuntu достаточно, однако, для наших задач расчет должен быть индивидуальным для каждой создаваемой виртуальной машины.
Мы можем задать количество процессоров и ядер:

* в данном примере мы создаем виртуалку с 2 процессорами, каждый из который с 2 ядрами, итого, 4. Для ненагруженных систем можно оставить значение по умолчанию.
Выделяем память:

* наша Ubuntu будет работать с 2 Гб оперативной памяти.
Выбираем созданный нами бридж — либо для получения прямого адреса из сети, либо для NAT:

* в данном примере, мы указали vmbr0 для подключения к сети напрямую.
Ставим галочку, чтобы виртуальная машина сразу запустилась после создания:

… и нажимаем Готово. Ждем окончания процесса и переходим к консоли:

Мы должны увидеть загрузку с ISO-образа.
Настройка виртуальной машины
После создания виртуальной машины нам может понадобиться ее изменить. Рассмотрим процесс настройки на примере изменения некоторых параметром, а также добавления диска и сетевого адаптера.
Полезные настройки
Для начала, переходим к виртуальной машине — Параметры:

На мой взгляд, чаще всего могут понадобиться следующие настройки:
- Имя — имя виртуальной машины.
- Запуск при загрузке — для серверов данный параметр должен быть активирован.
- Порядок загрузки — позволяет определить, с какого устройства должна запуститься виртуалка в первую очередь.
Для изменения параметра, просто кликаем по нему дважды, меняем значение и нажимаем OK.
Добавление дискового накопителя
Переходим в подраздел Оборудование — кликаем по Добавить и выбираем Жесткий диск:

В открывшемся окне задаем размер диска и нажимаем OK.
Для увеличения размера имеющегося диска устанавливаем на него курсов и кликаем по Изменить размер диска:

В открывшемся окне задаем объем, на который нужно увеличить дисковое пространство.
Добавление сетевого адаптера
Переходим в подраздел Оборудование — кликаем по Добавить и выбираем Сетевое устройство:

Как при создании ВМ, выбираем тип сетевого адаптера (бридж или нат) и нажимаем Добавить.
Установка гостевого агента
Обязательная процедура для повышения производительности и возможностей работы с виртуальной машиной. Настройка выполняется как на гипервизоре, так и в самой виртуальной машине. Рассмотрим пример установки агента на базе системы Linux.
В гипервизоре переходим в Параметры, находим пункт QEMU Guest Agent и кликаем по нему:

Ставим галочку Use QEMU Guest Agent и нажимаем OK:

Для применения настройки нужно выключить и включить виртуальную машину.
Теперь подключаемся к виртуальной машине и устанавливаем утилиту. В зависимости от типа Linux команды будут отличаться.
а) DEB-based:
apt install qemu-guest-agent
б) RPM-based:
yum install qemu-guest-agent
Установка завершена.
Для запуска сервиса выполняем:
systemctl enable qemu-guest-agent —now
В сводке виртуальной машины мы теперь можем увидеть информацию об IP-адресе, которая получена при помощи гостевого агента.
Подробнее процесс описан на странице https://pve.proxmox.com/wiki/Qemu-guest-agent.
Удаление виртуальной машины
Для удаления виртуальной машины, сначала ее отключаем — это можно сделать из операционной системы или из панели управления, нажав на стрелку вниз рядом с Выключить — Остановка:

После кликаем по Дополнительно — Удалить:

В открывшемся окне мы должны подтвердить свои намерения удалить виртуальную машину, вписав ее идентификатор:

* если мы поставим галочку Purge, то виртуальная машина будет удалена полностью вместе с виртуальным диском.
Кликаем по Удалить — готово.
Тюнинг сервера PVE
Внесем несколько изменений, которые сделают работу с Proxmox VE удобнее.
Отключение предупреждения об отсутствии подписки
Каждый раз при заходе в панель управления мы будем видеть такое предупреждение:

Оно говорит нам о том, что мы используем бесплатную версию программного продукта. Чтобы сообщение нас не беспокоило, выполним 2 действия:
- Отключим платный репозиторий для получения пакетов proxmox.
- Отредактируем файл js для отключения данного сообщения.
И так, в SSH открываем на редактирование репозиторий proxmox:
nano /etc/apt/sources.list.d/pve-enterprise.list
Приводим его к виду:
#deb https://enterprise.proxmox.com/debian/pve buster pve-enterprise
deb http://download.proxmox.com/debian/pve stretch pve-no-subscription
* мы закомментировали репозиторий pve-enterprise и добавили pve-no-subscription.
* при большом желании, можно удалить файл репозитория с именем pve-enterprise.list и создать новый — кому как будет удобнее.
После обновим список пакетов:
apt-get update
Последнее — редактируем файл /usr/share/javascript/proxmox-widget-toolkit/proxmoxlib.js:
sed -i «s/getNoSubKeyHtml:/getNoSubKeyHtml_:/» /usr/share/javascript/proxmox-widget-toolkit/proxmoxlib.js
* данной командой мы находим getNoSubKeyHtml в файле /usr/share/javascript/proxmox-widget-toolkit/proxmoxlib.js и меняем на getNoSubKeyHtml_.
Закрываем окно браузера с Proxmox, если оно было открыто и запускаем его снова. Входим в систему — сообщение не должно появиться.
Сертификаты
Сервер PVE устанавливается с самоподписанным сертификатом. Это означает, что при подключении к панели управления мы будем видеть предупреждение от системы безопасности. Чтобы браузер принимал сертификат, он должен соответствовать следующим требованиям:
- Быть выдан доверенным центром сертификации или зарегистрированным в вашей локальной сети, например, локальный AD CS.
- Быть для доменного имени, по которому мы заходим в панель управления.
- Иметь актуальные даты начала действия и окончания.
При этом, мы не должны заходить в панель управления по IP-адресу — в противном случае, независимо от сертификата, мы все-равно, получим предупреждение.
И так, сам сертификат можно купить, запросить бесплатно у Let’s Encrypt или создать с использованием локального центра сертификации, например, по данной инструкции. Получив сертификат, открываем панель управления PVE и переходим к серверу — Система — Сертификаты — кликаем по Загрузить пользовательский сертификат:

В открывшемся окне заполняем поля для закрытого и открытого ключей:

… и нажимаем Загрузить. Система предупредит, что загрузится с новым сертификатом — необходимо закрыть вкладку в браузере и открыть консоль управления снова. Если сертификат загружен правильный, мы не увидим предупреждения.
Создание нового пользователя
При установке PVE создается пользователь root. Рассмотрим процесс добавления еще одного через командную строку.
Подключаемся по SSH или открываем консоль из панели управления. Создаем пользователя в системе:
useradd user
* где user — имя создаваемого пользователя.
После создаем нового пользователя в Proxmox:
pveum useradd user@pam
* в данном примере мы создали пользователя user в области pam.
Задаем пароль:
pveum passwd user@pam
Задаем роль для созданного пользователя, например, административную:
pveum aclmod / -user user@pam -role Administrator
* весь список ролей можно посмотреть в панели администрирования в разделе Датацентр — Разрешения — Роли.
Ubuntu и CentOS
Возможно, кому-то захочется установить Proxmox именно на Ubuntu или CentOS. К сожалению, разработчики остановились на Debian. Возможно, есть неофициальные обходные пути установки Proxmox на другие дистрибутивы Linux, однако такой путь не является приемлемым для продуктивной среды. Для настройка виртуализации на Ubuntu и CentOS предлагаю инструкции:
1. Установка и настройка KVM на CentOS 7
2. Настройка KVM на Ubuntu Server
Installing most operating systems in a virtual machine is pretty straight-forward these days, but for Windows specifically there are a few recommended settings and steps to get the best out of your virtual machine. And as I keep forgetting these steps myself too, I’m jotting them down here for future reference. These should mostly apply in the same way for Windows 10, Windows Server 2016, 2018 and 2019.
Prerequisites
This guide assumes you have already properly set up and configured your Proxmox server, and that you have your Windows installation ISO ready and uploaded to your server. I recommend Windows 10 Pro (non-Pro does not support RDP screen sharing, unfortunately) or Windows 2019 Server. You can download the Windows 10 installation ISO here, or a 180 day evaluation version of the latter here.
You’ll also need to download an ISO containing the VirtIO drivers, which are available from the Fedora project right here. Be sure to download the latest version.

Step 1: VM Settings in Proxmox
While specific settings like how much RAM you would like to allocate to your VM, most of these settings are generally their most recommended from what I have found. Please be sure to adjust things like RAM to your liking, though be sure to set reasonable numbers to ensure performance is good enough.
| Category | Option | Value |
|---|---|---|
| OS | Guest OS | Microsoft Windows (10/2016) |
| CD image | Your downloaded ISO | |
| System | Graphics card | Default |
| SCSI Controller | VirtIO SCSI | |
| Qemu Agent | Enabled | |
| Hard Disk | Bus/Device | VirtIO Block (0) |
| Disk Size | >50GB ideally | |
| Cache | Write Back | |
| CPU | Sockets | 1 (adjust to your needs) |
| Cores | 4 (adjust to your needs) | |
| Type | host | |
| Memory | Memory | 8192 (adjust to your liking) |
| Network | Model | VirtIO (paravirtualized) |
After completing the Create VM wizard, don’t turn on your VM just yet. We have a few more options to set before we can.
In your Proxmox GUI, head to the Hardware view of the newly created VM. Click the Add button, followed by CD/DVD Drive. Select the VirtIO driver ISO you have previously downloaded, and click OK.
We are now ready to start the VM, so go ahead and click Start in the top-right-hand-side of the Proxmox GUI. Click on Console so we can start the Windows Installation.

Step 2: Windows Installation
After the initial few steps, when you reach the step where you should be able to select what hard drive to install Windows to, you’ll notice that there are no drive options available. This is because Windows requires drivers before it can support things VirtIO. Since we’re here anyway, we’ll right away take the opportunity to install all other drivers we need right away.
Note: If you’re installing Windows Server Edition, be sure to select the option with «Desktop Experience.» If you choose the wrong option here there is no way to change this later, and you’ll have to re-install your VM. Don’t ask me how I know this. A friend told me. Ahem.
Click Load Driver in the bottom-left-hand-side of the window, and click Browse in the alert that shows. Now, browse to the VirtIO CD, and for each of the following folders, select the appropriate sub-folder (2kxx if you’re installing Windows Server 2016/2018/2019, w10 if Windows 1o).

You’ll have to revisit this Load driver view for each of the following drivers:
- NetKVM — the VirtIO Ethernet driver
- viostor — the VirtIO block storage driver
- vioscsi — the VirtIO SCSI driver
- qxldod — QXL graphics driver (if installing Windows 7 or earlier, choose qxl instead)
- Balloon — VirtIO memory balloon driver (optional, but recommended unless your server has plenty of RAM)
I believe these drivers are optional, so you only need to install if you have a specific need for them, or if you just want to be on the safe side:
- viorng — VirtIO RNG driver
- vioser — the VirtIO serial driver
- vioinput — VirtIO input driver (note: there are two drivers to install in this folder)
If you don’t get any results when selecting some of these folders (i.e. qxldod), you can (temporarily) uncheck the Hide drivers that aren’t compatible with this computer’s hardware.
It’s a bit clunky to keep having to go back to the Load Driver window like this, but it makes installation a lot smoother if you install all these drivers now instead of after installing Windows.

With these drivers installed, your hard drive should show up now. Select it and click the New button to create the required partitions. Click Next, and the Windows installation will start. Time to grab a coffee refill, this’ll take about 10 minutes or so depending on your hardware.

Step 3: Post-installation
Now that Windows is fully installed, we should install and configure a few more things before we can fully call this done.
Open a Windows Explorer screen and head over to your VirtIO CD. On the CD you’ll find a folder called guest-agent. Install the guest agent now (be sure to choose the x64 installer).
Create a new folder in Program Files called Balloon, and copy the entire contents of your VirtIO CD’s Balloon2k19amd64 folder. Next, launch a command prompt with Administrative permissions ( win+ r, type cmd, hit enter) and cd to the newly created folder. Then, run blnsvr.exe -i. This will install the balloon service. From this point onward it will automatically start upon booting up your VM.
Now go ahead and fully shut down your VM.
In the Proxmox GUI, head on over to the Hardware view of your VM again. You can now fully remove both CD/DVD drives as we don’t need them anymore. Once you’ve done that, you can boot your VM back up. The full shutdown-start cycle should also ensure Proxmox will receive data properly from the qemu-agent. You can verify this by checking the Summary view of your VM in the Proxmox GUI. Next to IPs it should now mention the IPv4 and IPv6 addresses. You’ll also notice that memory usage is showing the same information as what your VM’s task manager shows.

RDP
If you’re planning on using RDP, you should enable this by right clicking on This PC and clicking Properties. Click Remote settings in the sidebar, and then enable remote connections from there. You should now be able to use RDP to access your VM.

Conclusion
The process isn’t too complicated or involved, but as you have noticed involves a few more manual steps than might be obvious at first. Fortunately they’re pretty easy to follow and you’ll have a usable Windows VM in no-time.
Be sure to run Windows Update before you fully start using your VM, as there’s always a gazillion updates available and you don’t want to have to sit around and wait for an unresponsive Windows while it’s downloading these later.
I hope this guide has helped you.
Thank you.
 Proxmox Virtual Environment (Proxmox VE) — система виртуализации с открытым исходным кодом на базе Debian, использующая в качестве гипервизора KVM для виртуальных машин и LXC для контейнеров. Это позволяет запускать в виртуальной среде Linux-системы без потери производительности и остальные, поддерживаемые KVM ОС с минимальными потерями. Кроме того, Proxmox VE позволяет создавать высокодоступные конфигурации с несколькими серверами и распределенными системами хранения.
Научиться настраивать MikroTik с нуля или систематизировать уже имеющиеся знания можно на углубленном курсе по администрированию MikroTik. Автор курса, сертифицированный тренер MikroTik Дмитрий Скоромнов, лично проверяет лабораторные работы и контролирует прогресс каждого своего студента. В три раза больше информации, чем в вендорской программе MTCNA, более 20 часов практики и доступ навсегда.
Получить Proxmox VE можно на официальном сайте, сейчас доступна новая версия 6.0, которую мы и будем устанавливать. Да, это действительно open-source и это бесплатно, корпоративная подписка предоставляет доступ к закрытому репозиторию Proxmox VE Enterprise, который содержит стабильные обновления ПО и обновления безопасности, а также техническую помощь и поддержку. Никаких ограничений функциональности, если вы откажетесь от подписки, нет.
Для установки используется собственный инсталлятор и весь процесс предельно прост, от вас потребуется указать конфигурацию дисковой подсистемы:
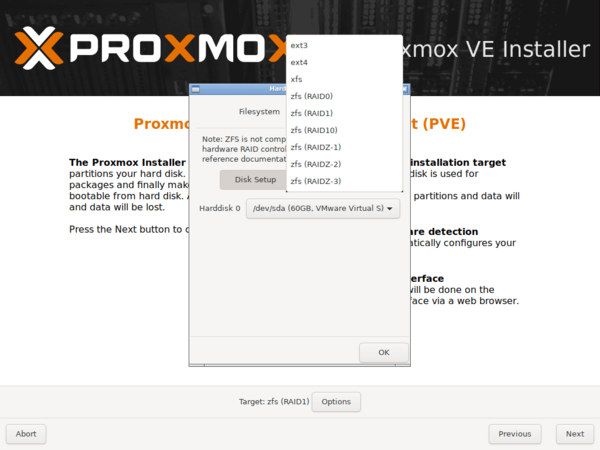 А также пароль суперпользователя, настройки сети, страну и часовой пояс. Потом останется только откинуться в кресле и немного подождать, пока система установится на ваш компьютер. По завершении процесса установки вас встретит приглашение входа в систему, над которым будет указан адрес, который следует набрать в браузере для доступа к консоли управления.
Но не будем спешить. Прежде всего отключим корпоративный репозиторий, на который у нас все равно нет подписки, и подключим вместо него некоммерческий репозиторий Proxmox. Для отключения просто удалим файл репозитория из источников apt:
rm -f /etc/apt/sources.list.d/pve-enterprise.listЗатем создадим свой список:
touch /etc/apt/sources.list.d/pve-no-subscription.listВ который внесем следующие строки:
deb http://download.proxmox.com/debian/pve buster pve-no-subscriptionТеперь можно переходить к консоли управления, откроем браузер и наберем предложенный адрес, консоль управления продуктами Proxmox работает на порту 8006, что следует помнить.
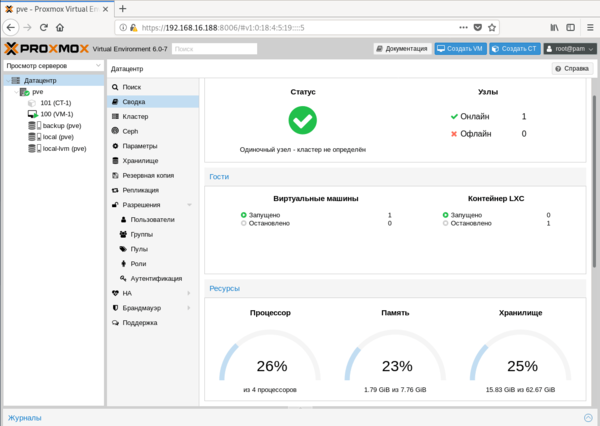 Структура Proxmox VE иерархична, высший уровень составляет Датацентр, здесь есть настройки, применяемые сразу ко всем узлам, например, управление пользователями или хранилищами, настройки резервного копирования и т.д.
 Следующий уровень — настройки узла, здесь доступна подробная статистика и большое количество настроек, которые относятся именно к этому серверу. Мы не будем останавливаться на них подробно, для администратора с достаточным уровнем подготовки разобраться с ними не составит труда.
Но есть и «сложности перевода», так в разделе Обновления, нас ждут две одинаковые кнопки Обновить.
 В английской версии это были Update и Upgrade, а вот здесь перевели как перевели. Первая из них запускает обновление списка пакетов, а вторая запускает само обновление, открывая в отдельном окне консоль сервера.
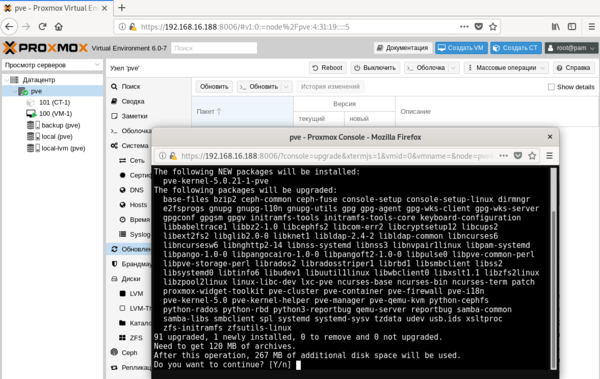 Если вам нужно просто попасть в консоль сервера, можно нажать кнопку Оболочка и перед вами в отдельном окне браузера откроется noVNC-сессия, при этом не требуется ни Flash, ни Java, что позволяет подключаться как к серверу, так и к виртуальным машинам с любого устройства, был бы браузер.
Перед тем, как создавать виртуальные машины и контейнеры, обратимся к Хранилищам, по умолчанию создается два хранилища: local и local-lvm.
 Первое предназначено для хранения ISO-образов и шаблонов контейнеров, а во втором хранятся сами виртуальные машины. Поэтому перед тем, как создать виртуальную машину или контейнер, нам нужно загрузить в хранилище нужный образ диска или шаблон. С образами все просто, нажимаем кнопку Загрузить и указываем нужный нам ISO-образ.
Для получения шаблонов следует нажать кнопку Шаблоны и мы попадем в официальное хранилище шаблонов, здесь мы может сразу загрузить шаблон другого продукта Proxmox — Mail Gateway или шаблоны стандартных Linux-систем.
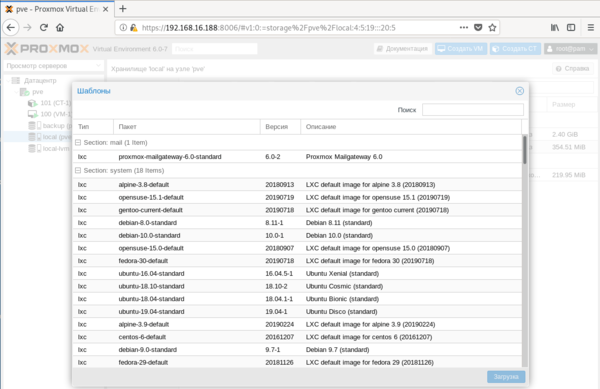 Прокрутив ниже, мы обнаружим шаблоны предварительно настроенных систем практически на все случаи жизни. Использовать их, либо настраивать все самостоятельно — решать вам, в ряде случаев такие шаблоны способны хорошо сэкономить время, особенно при развертывании большого количества однотипных систем.
 Чтобы загрузить выбранный шаблон достаточно нажать кнопку Загрузка внизу окна.
Для создания виртуальной машины нажмем Создать VM. На первом экране укажем имя виртуальной машины:
 Затем укажем тип и версию гостевой ОС и подключим нужный образ из хранилища.

После чего, последовательно перемещаясь по пунктам следует настроить все остальные параметры виртуалки, особых сложностей это составить не должно. Но создав виртуальную машину не спешите ее запускать. Прежде всего перейдем в раздел Оборудование. Здесь можно не только настроить уже подключенное оборудование, но и добавить новое. В отличие от Hyper-V, Proxmoх позволяет пробрасывать внутрь виртуальных машин USB-устройства, что может быть полезным, если вам нужно работать с ключами защиты или USB-токенами.
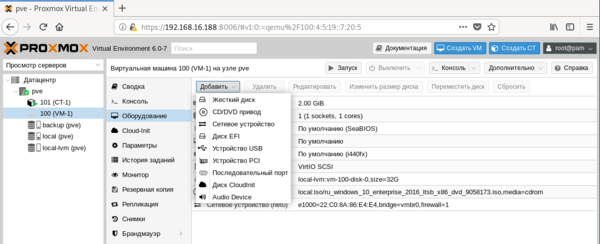 Также не забудьте заглянуть в Параметры, где стоит включить Запуск при загрузке и Агент QEMU. И если с первым пунктом все понятно, то Агент позволяет управлять системой со стороны гипервизора, без него вы, например, не сможете сделать резервную копию без остановки работы машины.
Итак, все настройки закончены, включаем виртуальную машину и переключаемся в консоль. Да, прямо в браузере вы увидите экран вашей виртуалки, при этом ничего не тормозит, работать с системой достаточно комфортно.
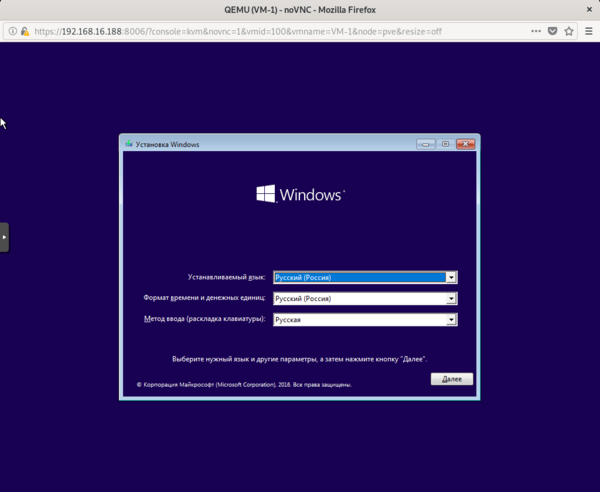 Пока идет установка системы создадим еще новый контейнер, для этого следует нажать кнопку Создать CT в правом верхнем углу консоли управления. В качестве контейнеров могут быть только Linux-системы, на первом экране укажите имя контейнера и задайте пароль root или загрузите публичный SSH-ключ.
 Затем укажите шаблон и следующими шагами сконфигурируйте виртуальное железо.
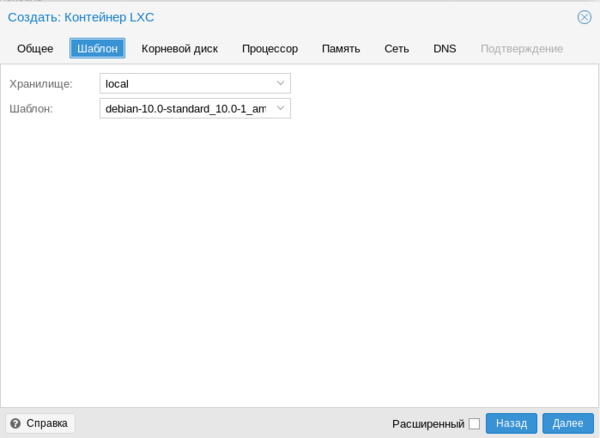 Доступных настроек у контейнеров гораздо меньше, зато они гораздо более экономно расходуют ресурсы.
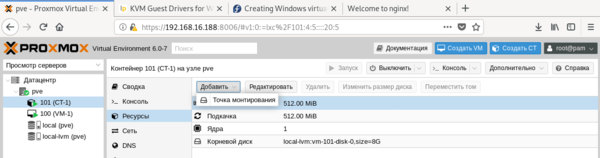 Обратите внимание, что запущенный контейнер с Debian 10 потребляет всего лишь 55,46 МБ оперативной памяти.
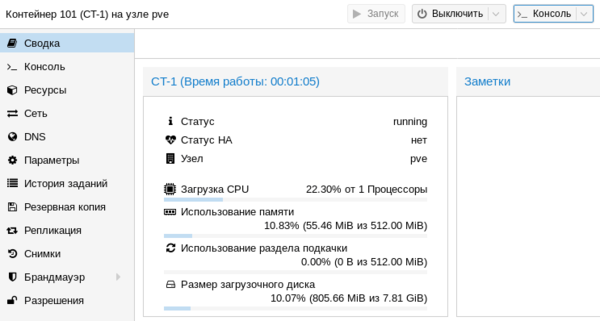 Тем временем, пока мы создавали контейнер, должна была установиться наша виртуальная машина. После установки ВМ потребуется установить в нее QEMU-агента для полноценного взаимодействия с гипервизором. Для Linux систем все просто, на deb-based системах достаточно выполнить:
apt install qemu-guest-agentДля других дистрибутивов следует установить пакет qemu-guest-agent штатным пакетным менеджером.
С Windows все несколько сложнее, прежде всего скачаем и поместим в хранилище Proxmox ISO-образ с virtIO драйверами. Получить его можно со страницы Fedora Project. Затем подключим скачанный образ к виртуальной машине.
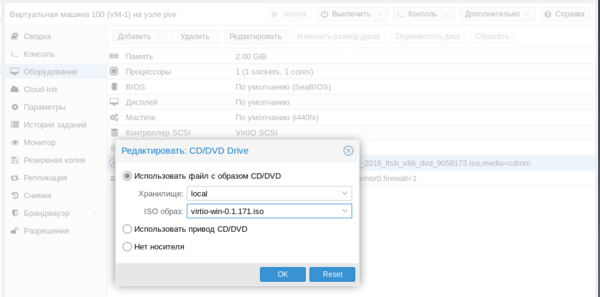 При включенном QEMU-агенте мы увидим три неустановленных устройства.
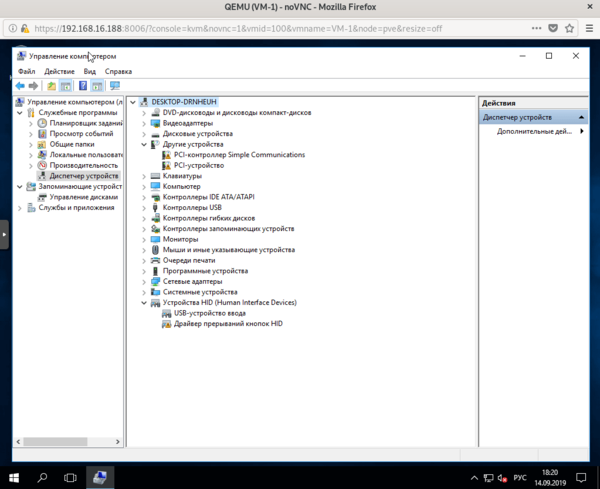 Начнем с последнего, для Драйвера прерываний кнопок HID перейдем в выбор из списка уже установленных драйверов и укажем драйвер Универсальной шины.
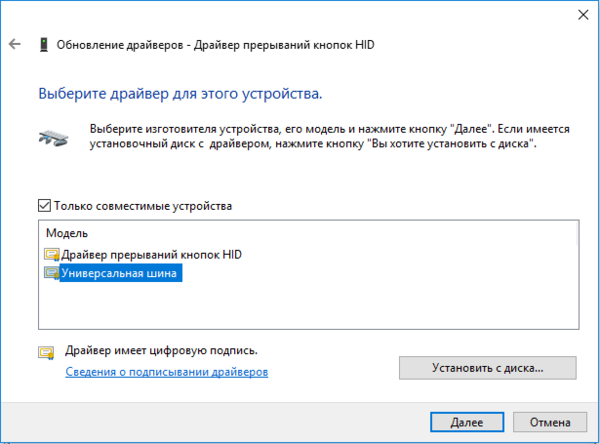 Для двух оставшихся выполним поиск драйверов на смонтированном диске и устанавливаем драйвер VirtIO Serial Driver, который отвечает за работу QEMU-агента:
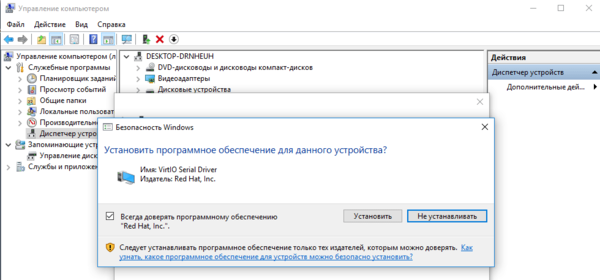 И VirtIO Balloon Driver, который отвечает за динамическое управление памятью. При работающем QEMU-агенте внизу окошка со сведениями о виртуальной машине вы увидите ее IP-адрес, в противном случае там будет сообщение, что QEMU-агент не установлен.
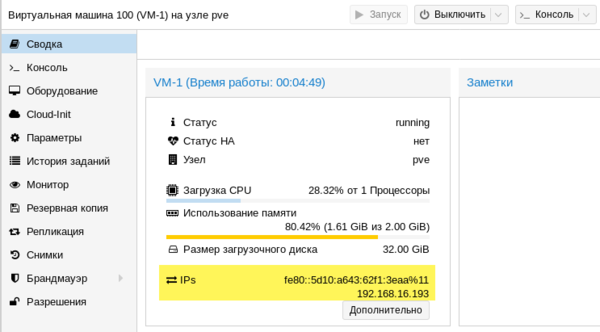 Также вы можете теперь включить для виртуальной машины динамическую память, для этого установите флаг Раздувание памяти и укажите минимальный размер оперативки, с которой начнет работу виртуалка:
 Но придерживайтесь при этом разумных пределов, так вы можете столкнуться с невозможностью запустить современные версии Windows если укажете минимальный размер памяти менее 1 ГБ.
Еще одна важная функция, которая доступна в Proxmox VE — это резервное копирование. Существует хорошая практика — хранить резервные копии за пределами хоста. Поэтому подключим к Proxmox сетевое хранилище, для этого перейдем в Датацентр — Хранилище. Выбор здесь достаточно богатый: iSCSI, NFS, CIFS и прочее.
 В нашем случае мы подключим CIFS (SMB) хранилище.
 Укажите имя хранилища, в нашем случае backup, его IP-адрес или FQDN-имя, доступные ресурсы будут просканированы автоматически и вам останется только выбрать их из списка, в поле Содержимое укажите Резервная копия , а также не забудьте указать максимальное количество резервных копий в хранилище.
Затем перейдем в раздел Резервная копия и создадим новый сценарий резервного копирования:
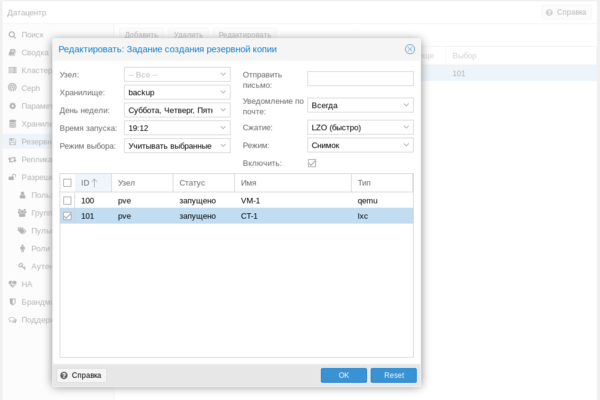 Особых сложностей там нет, выбираете нужные виртуальные машины или контейнеры и задаете расписание копирования. После чего вам только останется проверить, что резервные копии действительно создаются.
Как видим, Proxmox представляет собой вполне серьезный и самодостаточный продукт, способный стать основой вашей системы виртуализации, предоставляя возможности на уровне дорогих коммерческих гипервизоров.
Научиться настраивать MikroTik с нуля или систематизировать уже имеющиеся знания можно на углубленном курсе по администрированию MikroTik. Автор курса, сертифицированный тренер MikroTik Дмитрий Скоромнов, лично проверяет лабораторные работы и контролирует прогресс каждого своего студента. В три раза больше информации, чем в вендорской программе MTCNA, более 20 часов практики и доступ навсегда.

В данной инструкции мы рассмотрим установку Windows Server 2019 на Proxmox.
Нужна помощь? Настройки Windows Server и обслуживание серверов мы осуществляем в рамках услуги ИТ-аутсорсинг. Также возможны разовые проектные работы.
- На ранее подготовленный сервер Proxmox заходим по адресу: https://ip-Proxmox:8006. Вводим учетные данные и входим.
- Далее нажимаем “Загрузить” и выбираем подготовленный образ с Window Server 2019.
- Затем еще раз нажимаем “Загрузить”, происходит процесс загрузки iso-установщика в библиотеку образов Proxmox. Когда образ загружен, можно приступить к созданию виртуальной машины. Нажимаем правой кнопкой мыши на наш сервер и в выпадающем меню выбираем “Создать VM”.
- Далее приступаем непосредственно к настройке параметров виртуальной машины. Выбираем узел, на котором будет размещаться виртуальная машина и вводим её имя, нажимаем “Далее”.
- В данной вкладке выбираем нужный нам образ системы, тип и версию ОС, нажимаем “Далее”.
- В следующей вкладке “Система” оставляем по умолчанию и нажимаем “Далее”. Затем выбираем формат диска виртуальной машины и размер диска, нажимаем “Далее”.
- На следующих 2-х этапах выбираем количество ядер и оперативной памяти, требуемых нашей виртуальной машине, “Далее”. Затем выбираем сетевые настройки, в данном случае выбираем сетевой мост, тем самым сеть на ВМ будет такой же, как на и на самом сервере Proxmox, “Далее”.
- На последнем этапе создания ВМ, проверяем настройки и в подтверждение нажимаем “Далее”.
- Виртуальная машина создана. Выбрав нашу виртуальную машину в просмотре сервера можно просмотреть “Сводку” по ней.
- Перейдем в консоль и запускаем виртуальную машину, при запуске начнется подготовка к установке ОС, далее выбираем нужную редакцию ОС и начинаем установку.
- Установка Windows Server 2019 на Proxmox завершена.

Рисунок 1 — Вызов панели для создания виртуальной машины

Рисунок 2 — Выбор узла и ввод имени виртуальной машины

Рисунок 3 — Выбор ISO-образа для установки на виртуальную машину

Рисунок 4 — Выбор формата и размера диска

Рисунок 5 — Настройка сети виртуальной машины

Рисунок 6 — Подтверждение выбранных настроек

Рисунок 7 — Сводка по созданной виртуальной машине
Не нашли ответа на свой вопрос?
Закажите звонок специалиста!
Закажите звонок специалиста!
Пошаговая установка Windows Server на гипервизор Proxmox с использованием VirtIO Drivers на примере Windows Server 2022
Подготовка к установке
Скачиваем Windows нужной версии, это может быть любой Windows от XP до Server 2022
Скачиваем ISO VirtIO Drivers — https://pve.proxmox.com/wiki/Windows_VirtIO_Drivers#Using_the_ISO
Если не нашли — прямая ссылка https://fedorapeople.org/groups/virt/virtio-win/direct-downloads/stable-virtio/virtio-win.iso
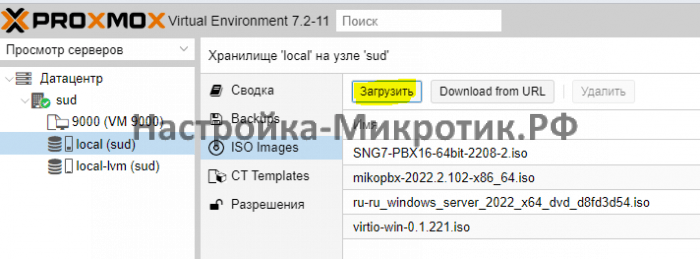
Подготовка к установке
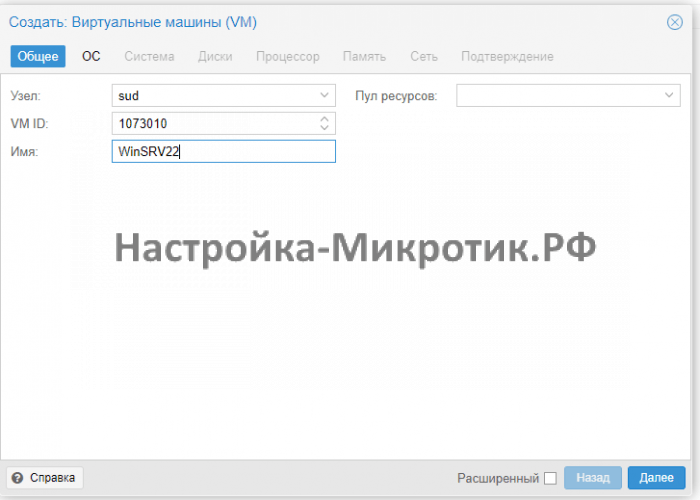
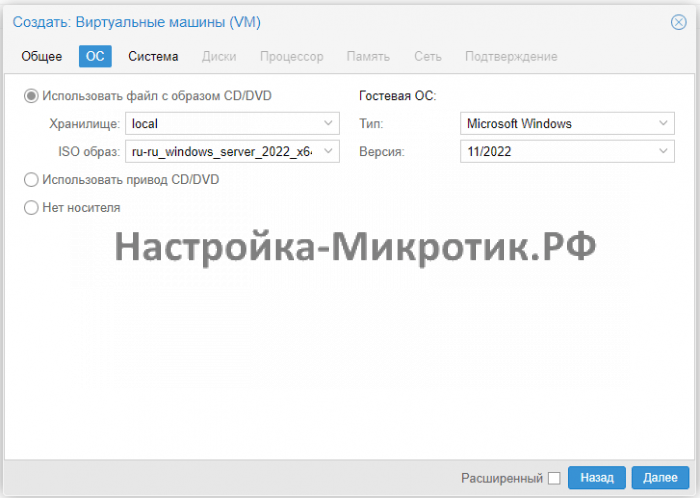
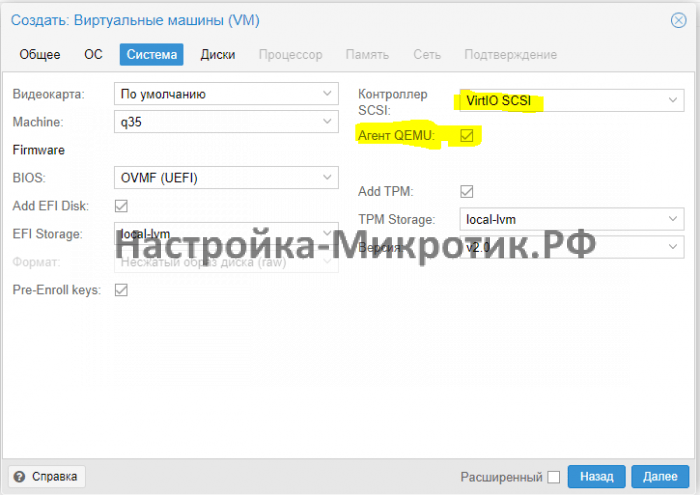
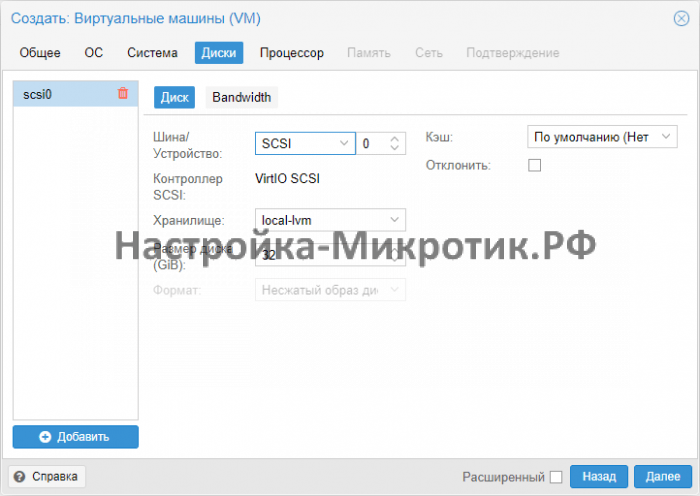
Всегда выбирайте SCSI диск, он самый быстрый из всех. IDE упирается в 40Мб/сек, SATA в 600Мб/сек, а SCSI может выжать всю скорость дисковой системы сервера. Для Linux серверов всегда выбирается VirtIO Block, как полностью совместимый и самый быстрый.
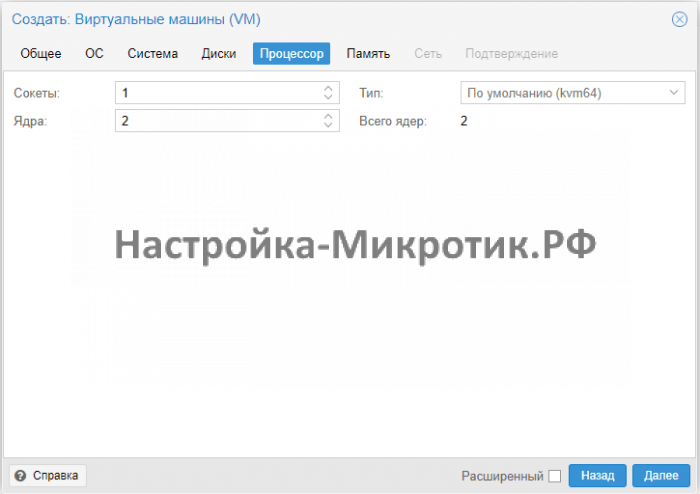
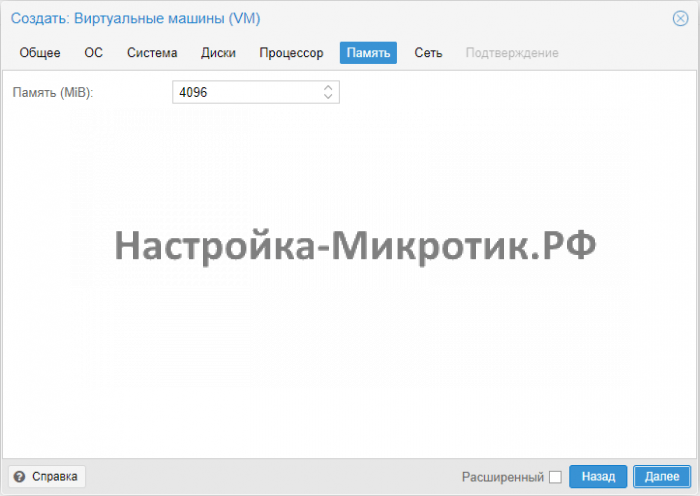
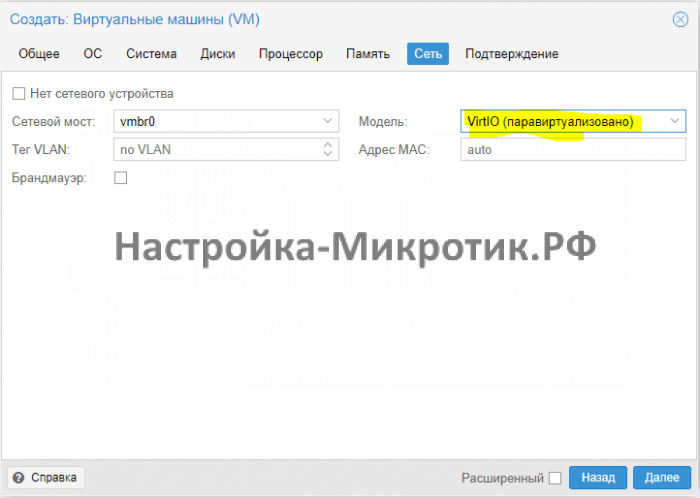
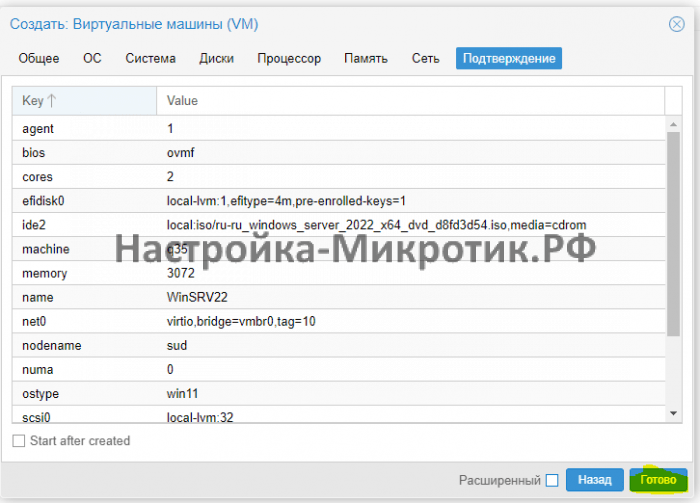
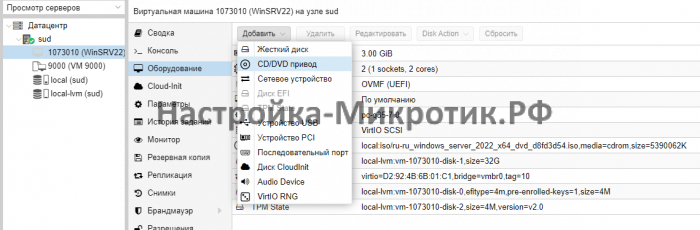
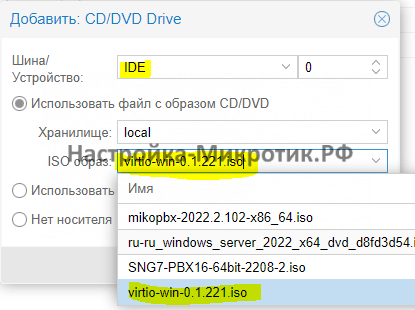
Установка
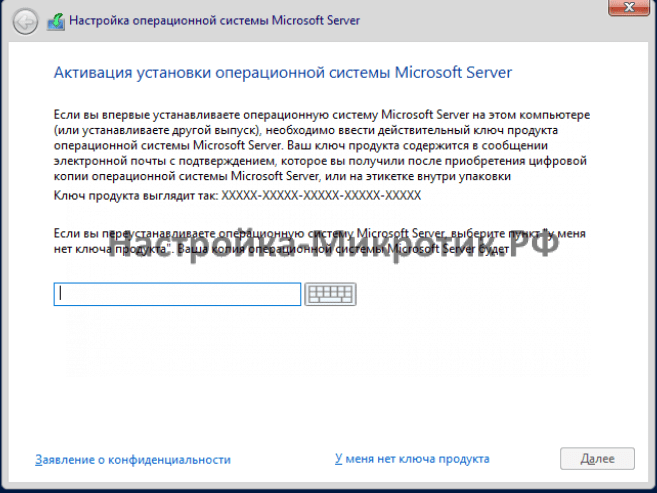
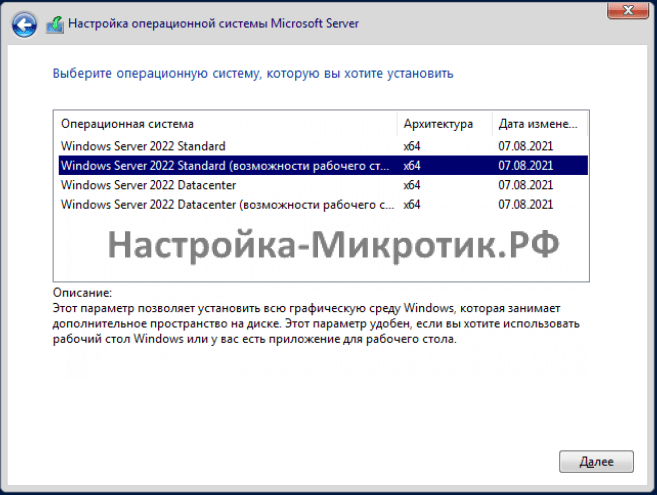
D:vioscsi2k22amd64