As described in the comments on the question, the “PTY allocation request failed” is a red herring with respect to GitHub authentication (it is the result of trying to interactively login to GitHub when the only SSH service they offer is non-interactive Git-over-SSH; the authentication is working, they just do not provide interactive, “shell” service).
The person who asked the question wrote this in a comment:
I guess the related problem is that when I try to create a new repository and «git push origin master» I return the following «Error: Permission to myemail@address.com/myapp denied to myusername. Fatal: the remote end hung up unexpectedly»
This seems more likely to be the actual problem. This seems to indicate that the remote named origin not configured to correctly point to a GitHub repository.
Check the output of git remote show -n origin. Probably the “Fetch URL” and the “Push URL” are the same. They should both look like this:
git@github.com:git-user-name/repository-name
When logging into GitHub on the web you can use either your account’s username or its associated email address. When pushing to repositories (or fetching from private repositories) you have to use your actual username (an email address will not work). It looks you are using your email address in there instead of just your GitHub username. To fix this, reconfigure the remote’s URL:
git remote set-url origin git@github.com:github-username/repository-name
Your username is displayed in many places on the GitHub web pages once you are logged in. The easiest place to find it is between your gravatar and the “Dashboard” link on the page header (you will see a silhouette icon if you do not have a gravatar configured). That same location links to your public profile page; this page’s URL should also end in your username.
Do you have trouble when logging into a server through ssh?
SSH errors are quite frustrating, especially when doing server changes at the last minute.
One such error is the pty allocation request failed on channel 0 error.
At Bobcares, we help server owners resolve SSH errors as part of our Server Management Services.
Today, let’s discuss the pty allocation request failed error and see how our Support Engineers fix it.
What is the pty allocation request failed on channel 0 error?
As the first step, let’s check the details of the error “pty allocation request failed on channel 0“.
It is one of the common errors that happen when we ssh into the server.
The error mainly occurs when the SSH server isn’t assigning a TTY instance for the connection. In simple words, this affects the interactivity in the shell.
This typically happens when SSH command has an alias set on the server.
One of our customers contacted us with a similar error. He was trying to connect to the server through ssh like this:
ssh username@my-server.com -p 22And, it gave the error message as:
PTY allocation request failed on channel 0
shell request failed on channel 0
How we fix the pty allocation error?
Now, we know the scenario that causes this pty allocation request failed error.
Let’s see the major causes and how our Support Engineers fix this error.
1. Incorrect Mount options
One of the top reasons for SSH channel error will be incorrect mount option set for /dev/pts.
The /dev/pts is a virtual filesystem in the kernel for the pseudo-terminal. Usually, init scripts or daemons like systemd takes care of the proper mounting of the devpts filesystem. In general, there is a limit of 256 pseudo terminals on a system. And, when any application running on the server starts leaking pseudo terminals, SSH returns TY allocation failure.
Here, our Support Engineers first check and see what processes have open pseudo-terminals using:
lsof /dev/pts/*
And, fix the error by unmounting and remounting /dev/pts.
For this, we use the command:
$ umount /dev/pts
$ mount devpts /dev/pts -t devpts
And that resolves the error effectively.
In case, if the server becomes inaccessible, we suggest the customers reboot the server to single user mode and add these lines to your /etc/mtab & /etc/fstab entry.
To do this, we open the file /etc/mtab or /etc/fstab. Then after, we add the line into these files.
none /dev/pts devpts defaults 0 0
At last, we reboot the system to make the changes effective.
2. SSH settings
In a similar way, incorrect SSH settings can also trigger this error. For example, when the SSH binary is aliased to ‘ssh –t’ it can result in an error.
Additionally, the same error pops up when access to PTY is prohibited in .ssh/authorized_keys file.
Or when the SSH configuration file holds entries like “PermitTTY yes“, it can even cause the TTY error. Ultimately, this results in a failed login.
Therefore, we edit the configuration and set the entry as:
PermitTTY noThat fixes the problem and makes SSH working again.
[Need help to solve the pty allocation request failed on channel 0 error? We’ll help you.]
Conclusion
In short, the ssh pty allocation request failed on channel 0 error happens when the server isn’t assigning a TTY instance for the connection. Today’s write-up also discussed the reasons for this error and how our Support Engineers fixed it for our customers.
So I googled the error and checked serverfault, but the solutions didn’t fit. Most results were problems with /dev/pts, but that is mounted. Other results are errors with git, but there is no git on the machine.
My account isn’t blocked, I can still log in on the console. Other users also have this problem, so I don’t think it has something to do with something that’s in my .ssh/
I get this response with ssh -vv:
<snip>
debug1: Next authentication method: password
rogier@server's password:
debug2: we sent a password packet, wait for reply
debug1: Authentication succeeded (password).
debug1: channel 0: new [client-session]
debug2: channel 0: send open
debug1: Requesting no-more-sessions@openssh.com
debug1: Entering interactive session.
debug2: callback start
debug2: client_session2_setup: id 0
debug2: channel 0: request pty-req confirm 1
debug1: Sending environment.
debug1: Sending env LANG = en_US.UTF-8
debug2: channel 0: request env confirm 0
debug2: channel 0: request shell confirm 1
debug2: fd 3 setting TCP_NODELAY
debug2: callback done
debug2: channel 0: open confirm rwindow 0 rmax 32768
debug2: channel_input_status_confirm: type 100 id 0
PTY allocation request failed on channel 0
debug2: channel 0: rcvd adjust 2097152
debug2: channel_input_status_confirm: type 99 id 0
debug2: shell request accepted on channel 0
After this the session freezes. Does anyone have any idea what’s going on?
![]()
MadHatter
79k20 gold badges182 silver badges230 bronze badges
asked Jan 18, 2012 at 18:13
![]()
6
Ok, thanks to Tim. umounting /dev/pts and then mount /dev/pts did the trick.
answered Jan 18, 2012 at 20:29
![]()
blauwblaatjeblauwblaatje
9531 gold badge6 silver badges19 bronze badges
5
let me tell you all my experience, I try to connect from linux to windows via ssh, had servers with openssh and others with freessh. When the server has openssh it work fine, but since a time to now it start to present a «shell request failed on channel 0» message when freessh is the service running (it came from one day to another, it use to work better that openssh)
A test made by me was to try stablish conection from another user, as i see that it works fine, I backup my ~/.ssh (the user that present the problem), and after that it works fine.
I think the file involved was known_hosts, the perms looks fine as well as the content, but that was how I fix it.
answered Jan 24, 2013 at 14:30
![]()
Could depend on you LANG and your LC settings, but this works for me:
unset LANG        2>/dev/null
unset LC_MONETARY 2>/dev/null
unset LC_NUMERIC  2>/dev/null
unset LC_MESSAGES 2>/dev/null
unset LC_COLLATE  2>/dev/null
unset LC_CTYPE    2>/dev/null
ssh -l username hostname
![]()
mgorven
30.3k7 gold badges77 silver badges121 bronze badges
answered Feb 24, 2012 at 12:05
![]()
2
In my case, I was connecting to a Windows host (running cygwin and other related softwares) from a Linux box.
Strangely attempts to connect to windows server did work but failed while allocating interactive terminal. Check ssh -vv logs below.
...
Authentication succeeded
...
Entering interactive session
Requesting authentication agent forwarding.
Sending environment.
Sending env LANG = en_US.UTF-8
PTY allocation request failed on channel 4
...
My colleague figured out that it was because of many open processes on windows server which was using the same login credentials as mine and doing some automated batch operation.
Killing it temporarily, did the trick, and allowed my ssh connection successfully.
Most likely, windows + cygwin, had max limit in that regards. Work remains to de-allocate resources correctly when those processes are done running.
![]()
masegaloeh
18.1k10 gold badges56 silver badges105 bronze badges
answered Aug 5, 2015 at 6:38
![]()
I’ve just had this same issue when trying to SSH in to any machine after I had been playing around with generating new SSH certificates. Re-mounting /dev/pts didn’t do anything for me, but clearing the identities from my local ssh-agent did work:
ssh-add -D
answered Apr 21, 2020 at 8:36
![]()
fwgfwg
2411 gold badge3 silver badges5 bronze badges
You can pull my SSL branch as everything works and I rebased it yesterday
on your master.
I was just stuck because of ssh issue and trying to get https only working.
@arnos https://github.com/arnos i just started looking at working on
SSL support today and surprisingly i think i got it working. I am testing
with direct port redirection and also with haproxy. both seem to be working
(still early to say, need to test further).
I had added the http to https redirection in the nginx config and it all
worked fine with the direct host port redirections but not with haproxy.
This server simply redirects HTTP connections to HTTPSserver {
listen *:80 default_server;
server_name {{YOUR_SERVER_FQDN}};
server_tokens off;
rewrite ^ https://$server_name$request_uri? permanent;}
Instead I removed the above and configured nginx to also serve requests on
port 80
server {
listen *:80 default_server; # e.g., listen 192.168.1.1:80; In most cases *:80 is a good idea
server_name {{YOUR_SERVER_FQDN}}; # e.g., server_name source.example.com;
server_tokens off; # don’t show the version number, a security best practice
root /home/git/gitlab/public;
Increase this if you want to upload large attachments
Or if you want to accept large git objects over http
client_max_body_size 20m;
individual nginx logs for this gitlab vhost
access_log /var/log/nginx/gitlab_access.log;
error_log /var/log/nginx/gitlab_error.log;
location / {
# serve static files from defined root folder;.
# @GitLab is a named location for the upstream fallback, see below
try_files $uri $uri/index.html $uri.html @GitLab;
}
if a file, which is not found in the root folder is requested,
then the proxy pass the request to the upsteam (gitlab unicorn)
location @GitLab {
# If you use https make sure you disable gzip compression
# to be safe against BREACH attack
# gzip off;
proxy_read_timeout 300; # Some requests take more than 30 seconds.
proxy_connect_timeout 300; # Some requests take more than 30 seconds.
proxy_redirect     off;

proxy_set_header   X-Forwarded-Proto $scheme;
proxy_set_header   Host              $http_host;
proxy_set_header   X-Real-IP         $remote_addr;
proxy_set_header   X-Forwarded-For   $proxy_add_x_forwarded_for;

proxy_pass http://gitlab;
}
Enable gzip compression as per rails guide: http://guides.rubyonrails.org/asset_pipeline.html#gzip-compression
location ~ ^/(assets)/ {
root /home/git/gitlab/public;
gzip_static on; # to serve pre-gzipped version
expires max;
add_header Cache-Control public;
}
error_page 502 /502.html;}
And surprisingly it works in both cases and the http to https redirection
somehow takes place. But maybe its because of some other fixes I have in
place.
Should I pull your changes and apply my changes on top of it or should i
just publish my work for you to review and test? What do you suggest?
—
Reply to this email directly or view it on GitHubhttps://github.com//issues/53#issuecomment-41463910
.
The company code is on GitLab, ready to upload a project code, operation reference:
https://blog.csdn.net/qq_20663229/article/details/80413188
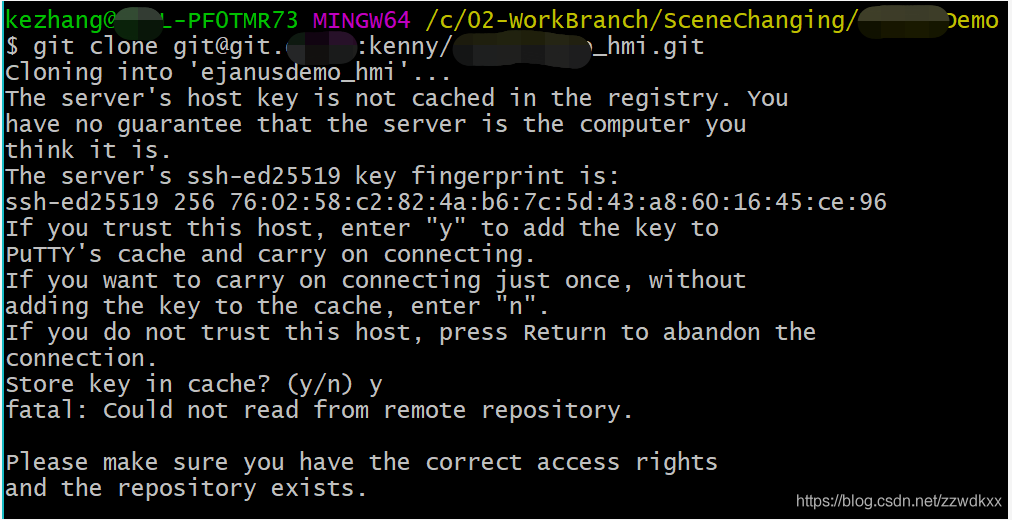
When I submitted the code, I encountered some problems, and solved several problems through Baidu. Finally, I got stuck in two error reports like this:
fatal: Could not read from remote repository
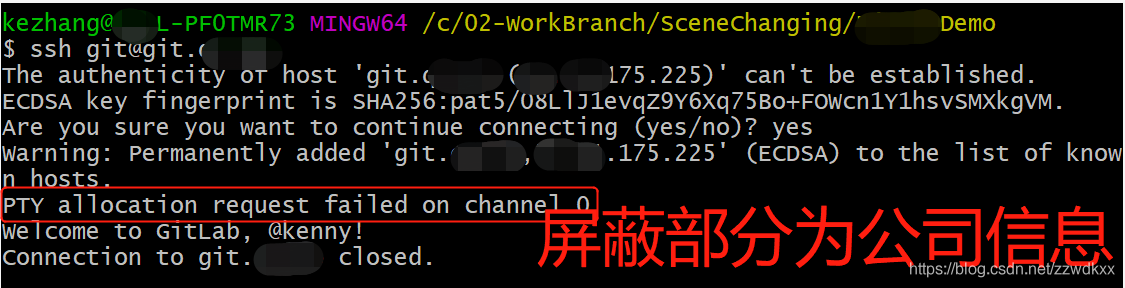
PTY allocation request failed on channel 0
Process screenshot 1:
Process screenshot 2:
Solutions, reference:
https://stackoverflow.com/questions/13509293/git-fatal-could-not-read-from-remote-repository/56264790#56264790
I had this problem using gitbash on windows 10. I tried several things to solve this problem, the major ones being these:
- Recreated my SSH keys and updated to bitbucket. Didn’t helpTurned on debugging using this and found out that I was getting “shell request failed on channel 0” as asked hereRebooted my Windows PC
None of the above helped. I ended up re-installing Git for Windows This took only a few minutes compared to other things I did and it solved the problem!
According to the above steps, I reinstalled Git to solve the problem. When I installed Git, I chose OpenSSH. It is not clear whether it is related to this:

Read More:
когда я хочу подключиться к моему серверу, как это
ssh -a [email protected] -p 22
он дает мне два сообщения об ошибках:
PTY allocation request failed on channel 0
shell request failed on channel 0
когда я использую параметр -T, первое сообщение об ошибке исчезает.
Но как исправить второй?
Я не могу подключиться. На другой сервер я могу подключиться без каких-либо проблем.
Я на MAC OS 10.9
Параметр -v показывает мне этот отладочный вывод:
OpenSSH_6.2p2, OSSLShim 0.9.8r 8 Dec 2011
debug1: Reading configuration data /etc/ssh_config
debug1: /etc/ssh_config line 20: Applying options for *
debug1: Connecting to xxx.your-server.de [188.40.3.15] port 22.
debug1: Connection established.
debug1: identity file /Users/xxx/.ssh/id_rsa type -1
debug1: identity file /Users/xxx/.ssh/id_rsa-cert type -1
debug1: identity file /Users/xxx/.ssh/id_dsa type -1
debug1: identity file /Users/xxx/.ssh/id_dsa-cert type -1
debug1: Enabling compatibility mode for protocol 2.0
debug1: Local version string SSH-2.0-OpenSSH_6.2
debug1: Remote protocol version 2.0, remote software version mod_sftp/0.9.8
debug1: no match: mod_sftp/0.9.8
debug1: SSH2_MSG_KEXINIT sent
debug1: SSH2_MSG_KEXINIT received
debug1: kex: server->client aes128-ctr hmac-md5 none
debug1: kex: client->server aes128-ctr hmac-md5 none
debug1: SSH2_MSG_KEX_DH_GEX_REQUEST(1024<1024<8192) sent
debug1: expecting SSH2_MSG_KEX_DH_GEX_GROUP
debug1: SSH2_MSG_KEX_DH_GEX_INIT sent
debug1: expecting SSH2_MSG_KEX_DH_GEX_REPLY
debug1: Server host key: RSA 55:f5:ca:ca:01:45:0f:7b:71:0a:1f:ba:9e:25:17:fb
debug1: Host 'xxx.your-server.de' is known and matches the RSA host key.
debug1: Found key in /Users/xxx/.ssh/known_hosts:1
debug1: ssh_rsa_verify: signature correct
debug1: SSH2_MSG_NEWKEYS sent
debug1: expecting SSH2_MSG_NEWKEYS
debug1: SSH2_MSG_NEWKEYS received
debug1: Roaming not allowed by server
debug1: SSH2_MSG_SERVICE_REQUEST sent
debug1: SSH2_MSG_SERVICE_ACCEPT received
debug1: Authentications that can continue: publickey,password
debug1: Next authentication method: publickey
debug1: Trying private key: /Users/xxx/.ssh/id_rsa
debug1: Trying private key: /Users/xxx/.ssh/id_dsa
debug1: Next authentication method: password
после ввода пароля я получаю это
debug1: Authentication succeeded (password).
Authenticated to xxx.your-server.de ([xxx.xxx.3.15]:22).
debug1: channel 0: new [client-session]
debug1: Entering interactive session.
debug1: Sending environment.
debug1: Sending env LANG = de_DE.UTF-8
shell request failed on channel 0
Ответ 1
Ошибка передачи PTY на канале 0
В системе существует предел 256 псевдотерминалов. Возможно, у вас есть приложение, которое пропускает псевдотерминалы. Используйте
lsof /dev/pts/*
чтобы узнать, какие процессы имеют открытые псевдотерминалы
запрос оболочки не выполнен на канале 0
Я получал эту ошибку (без ошибки распределения PTY). Оказывается, одно из моих приложений (QtCreator 3.0.?) Просачивало процессы Zombie. Другие пользователи смогли войти в систему, чтобы, возможно, я попадал в мою квоту каждого пользователя (если есть такая вещь). Я обновился до QtCreator 3.3. Пока все хорошо.
Ответ 2
unmount и mount /dev/pts работали для меня
umount /dev/pts

mount devpts /dev/pts -t devpts
Ссылка: http://www.iitk.ac.in/LDP/LDP/lfs/5.0/html/chapter06/proc.html
Ответ 3
Просто добавьте эти строки в ваши /etc/mtab и /etc/fstab и перезагрузите систему.
none /dev/pts devpts defaults 0 0
Ответ 4
У меня была точно такая же ошибка при попытке подключиться через SSH к моему серверу. Как я вижу, вы используете сервер, предоставленный Hetzner, подключающийся к нему через порт 22:
debug1: подключение к порту xxx.your-server.de [188.40.3.15].
Официальная вики/документация от Hetzner гласит:
Протокол для зашифрованной удаленной диагностики для серверов/компьютеров (консолей). Используемый порт SSH — 222.
Таким образом, вы должны подключиться через порт 222:
ssh -p 222 [email protected]server.de
Ответ 5
Я решил аналогичную проблему с одним из наших пользователей, который использовался только для перенаправления портов ssh, поэтому ему не нужно иметь доступ к PTY, и это было запрещено в файле .ssh/authorized_keys:
no-pty ssh-rsa AAA...nUB9 someuser
Итак, когда вы пытались войти в систему этого пользователя, только сообщение
PTY allocation request failed on channel 0
. Поэтому проверьте файл user authorized_keys.
Ответ 6
только что выяснил, в чем была проблема в моем случае (провайдерская страта): у меня была такая же проблема с выводом «запрос оболочки завершился неудачно на канале 0» в конце.
Я должен использовать мастер-пароль с именем веб-домена в качестве логина. (На немецком www.wunschname.de, где wunschname — ваш веб-адрес.)
Вход в систему через ssh с именами пользователей sftp и соответствующими паролями безуспешен. (Хотя scp и sftp работают с этими пользователями sftp!)
Ответ 7
перезагрузка экземпляра из консоли AWS работала для меня. Был сервис, который lsof файловые соединения, которые lsof помог найти.
Ответ 8
Это старый вопрос, но если кто-то попадет сюда, как я…
Это может быть результатом неправильной даты на сервере. Если вы работаете со встроенной системой, это может быть причиной… Так что проверьте свою дату:
$ date
Ответ 9
shell request failed on channel 0
означает, что у вас нет доступа к командной оболочке или удаленным командам, исправьте свое пользовательское разрешение на сервере для доступа к оболочке или если вы просто хотите использовать туннелирование, используйте -N и -T
Ответ 10
Попробуй это:
vi /etc/security/limits.d/20-nproc.conf
*          soft    nproc     4096   # change to 65535
root       soft    nproc     unlimited
Ответ 11
Перемонтирование /dev/pts работает для меня. вы можете сделать это удаленно через ssh, если вы запускаете ssh таким образом на зараженной машине. ssh не запрашивает tty при запуске таких команд, что позволяет удаленно перемонтировать /dev/pts
ssh user @host — ‘mount -o remount, rw/dev/pts’
Ответ 12
Я иногда вижу это, когда раскручиваю виртуальную машину. Наша система автоматизации начинает применять обновления, поэтому в зависимости от времени может произойти обновление критических пакетов.
Upshot — это может произойти, если на целевом компьютере обновляются ssh или другие связанные пакеты.
Ответ 13
Я столкнулся с этой ошибкой при использовании моего git bash. Я смог решить эту проблему, переустановив git для Windows. Подробнее в этом ответе.
Ответ 14
Я также столкнулся с той же проблемой. Просто перезапуск моих серверов решил проблему.
Ответ 15
Если кто-то обнаружит, что читает этот тест, когда он пытается ssh подключить устройство NetGear ReadyNAS, убедитесь, что флажок «только rsync only» un установлен в диалоговом окне для службы ssh в интерфейс администратора.
23.Oct.2018
as always… you should tweak your /etc/ssh/sshd_config for security
only allow password auth temporarily and only use public-key auth. it is easy to setup and no brute-force attack in this world can hack your server.
when you start to edit:
vim /etc/ssh/sshd_config
# tweak save quit
# and restart sshd
systemctl restart sshd
you SHOULD stay logged in, open a second terminal and test if your settings actually work.
DO NOT CLOSE THE CURRENT SESSION!
or you might NOT get back in and need a service-technician to attach a KVM-console (like the LanTronix Spider Duo) to your server or reset your root password X-D

also: DON’T
change this to no:
PermitTTY yes
or you will get:
PTY allocation request failed on channel 0
and can not login.
nothing really usefull in the logs.
- share
- share
- share
- share
- share
- tweet
- share
liked this article?
- only together we can create a truly free world
- plz support dwaves to keep it up & running!
- (yes the info on the internet is (mostly) free but beer is still not free (still have to work on that))
- really really hate advertisement
- contribute: whenever a solution was found, blog about it for others to find!
- talk about, recommend & link to this blog and articles
- thanks to all who contribute!

error: PTY allocation request failed on channel 0
Perfectly normal, expected, and not blocking (ie the ssh operation would pursue)
However, you did the installation as root, which is bad, especially when you consider the ssh Gitolite page:
If you’re installing gitolite, you’re a «system admin», like it or not.
If you’re using the default ssh mode (i.e., not http mode), ssh is a necessary skill. Please take the time to learn at least enough to get passwordless access working.
The key aspect to understand in Gitolite is its usage of forced command, in order to deny interactive shell and to intercept any command (including the git commands), allowing it to enforce access control to Git repos.
That means your ~root/.ssh/authorized_keys file contains line with:
command="/devit_home/users/vobadm/gitpoc/ce7/gitolite/bin/gitolite-shell gitoliteadm",no-port-forwarding,no-X11-for warding,no-agent-forwarding,no-pty ssh-rsa AAAAB3N
The no-port-forwarding is responsible for that warning message «PTY allocation request failed on channel 0«. But that doesn’t prevent Gitolite operations to run properly.
See «how does gitolite use all this ssh magic?».
For ssh issue, look into «SSH troubleshooting».
You need to gain access to your server by another way than ssh, and remove the line beginning by command in ~root/.ssh/authorized_keys.
Do you know how I might use Telnet to redo the gitolite installation process?
Once logged as root:
- remove the line beginning by command in the
~root/.ssh/authorized_keysfile. - make sure your root public key is registered in that same file (so without any ‘
command=‘ in front of it.
That will ensure a root access through ss.
Then redo the installation, but with a sudo git first.
you must be ‘git’ when doing that installation.
You must first generate on the client side an git private ssh key and a git.pub public key.
Copy the public key on the server: you will pass that public key to the gitolite install command.
And as Ryan mentions in his answer, uses
DiskStation> /volume1/homes/git/gitolite/install -ln
(in order to link the installation to ~git/bin instead of the «system path root-protected» /bin directory).