I have Python 3.6.1 and PySerial Installed. I am trying the
I am able to get the list of comports connected. I now want to be able to send data to the COM port and receive responses back. How can I do that? I am not sure of the command to try next.
Code:
import serial.tools.list_ports as port_list
ports = list(port_list.comports())
for p in ports:
    print (p)
Output:
COM7 — Prolific USB-to-Serial Comm Port (COM7)
COM1 — Communications Port (COM1)
I see from the PySerial Documentation that the way to open a COM Port is as below:
import serial
>>> ser = serial.Serial('/dev/ttyUSB0')  # open serial port

>>> print(ser.name)         # check which port was really used

>>> ser.write(b'hello')     # write a string

>>> ser.close()             # close port
I am running on Windows and I get an error for the following line:
ser = serial.Serial(‘/dev/ttyUSB0’)
This is because ‘/dev/ttyUSB0’ makes no sense in Windows. What can I do in Windows?
asked May 18, 2017 at 20:02
![]()
4
This could be what you want. I’ll have a look at the docs on writing.
In windows use COM1 and COM2 etc without /dev/tty/ as that is for unix based systems. To read just use s.read() which waits for data, to write use s.write().
import serial

s = serial.Serial('COM7')
res = s.read()
print(res)
you may need to decode in to get integer values if thats whats being sent.
![]()
answered May 18, 2017 at 20:07
![]()
pointerlesspointerless
74310 silver badges20 bronze badges
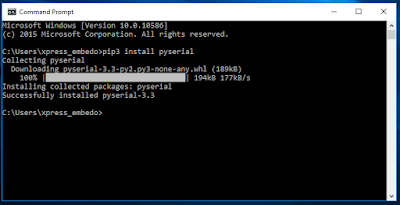
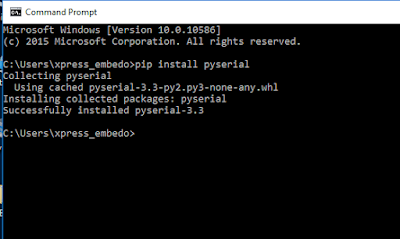
On Windows, you need to install pyserial by running
pip install pyserial
then your code would be
import serial
import time

serialPort = serial.Serial(
    port="COM4", baudrate=9600, bytesize=8, timeout=2, stopbits=serial.STOPBITS_ONE
)
serialString = ""  # Used to hold data coming over UART
while 1:
    # Wait until there is data waiting in the serial buffer
    if serialPort.in_waiting > 0:

        # Read data out of the buffer until a carraige return / new line is found
        serialString = serialPort.readline()

        # Print the contents of the serial data
        try:
            print(serialString.decode("Ascii"))
        except:
            pass
to write data to the port use the following method
serialPort.write(b"Hi How are you rn")
note:b»» indicate that you are sending bytes
answered Feb 15, 2021 at 19:28
![]()
Short introduction
Opening serial ports
Open port at «9600,8,N,1», no timeout:
>>> import serial
>>> ser = serial.Serial('/dev/ttyUSB0')  # open serial port
>>> print(ser.name)         # check which port was really used
>>> ser.write(b'hello')     # write a string
>>> ser.close()             # close port
Open named port at «19200,8,N,1», 1s timeout:
>>> with serial.Serial('/dev/ttyS1', 19200, timeout=1) as ser:
...     x = ser.read()          # read one byte
...     s = ser.read(10)        # read up to ten bytes (timeout)
...     line = ser.readline()   # read a 'n' terminated line
Open port at «38400,8,E,1», non blocking HW handshaking:
>>> ser = serial.Serial('COM3', 38400, timeout=0,
...                     parity=serial.PARITY_EVEN, rtscts=1)
>>> s = ser.read(100)       # read up to one hundred bytes
...                         # or as much is in the buffer
Configuring ports later
Get a Serial instance and configure/open it later:
>>> ser = serial.Serial()
>>> ser.baudrate = 19200
>>> ser.port = 'COM1'
>>> ser
Serial<id=0xa81c10, open=False>(port='COM1', baudrate=19200, bytesize=8, parity='N', stopbits=1, timeout=None, xonxoff=0, rtscts=0)
>>> ser.open()
>>> ser.is_open
True
>>> ser.close()
>>> ser.is_open
False
Also supported with :ref:`context manager <context-manager>`:
with serial.Serial() as ser:
    ser.baudrate = 19200
    ser.port = 'COM1'
    ser.open()
    ser.write(b'hello')
Readline
:meth:`readline` reads up to one line, including the n at the end.
Be careful when using :meth:`readline`. Do specify a timeout when opening the
serial port otherwise it could block forever if no newline character is
received. If the n is missing in the return value, it returned on timeout.
:meth:`readlines` tries to read «all» lines which is not well defined for a
serial port that is still open. Therefore :meth:`readlines` depends on having
a timeout on the port and interprets that as EOF (end of file). It raises an
exception if the port is not opened correctly. The returned list of lines do
not include the n.
Both functions call :meth:`read` to get their data and the serial port timeout
is acting on this function. Therefore the effective timeout, especially for
:meth:`readlines`, can be much larger.
Do also have a look at the example files in the examples directory in the
source distribution or online.
Note
The eol parameter for :meth:`readline` is no longer supported when
pySerial is run with newer Python versions (V2.6+) where the module
:mod:`io` is available.
EOL
To specify the EOL character for :meth:`readline` or to use universal newline
mode, it is advised to use io.TextIOWrapper:
import serial
import io
ser = serial.serial_for_url('loop://', timeout=1)
sio = io.TextIOWrapper(io.BufferedRWPair(ser, ser))

sio.write(unicode("hellon"))
sio.flush() # it is buffering. required to get the data out *now*
hello = sio.readline()
print(hello == unicode("hellon"))
Testing ports
Listing ports
python -m serial.tools.list_ports will print a list of available ports. It
is also possible to add a regexp as first argument and the list will only
include entries that matched.
Note
The enumeration may not work on all operating systems. It may be
incomplete, list unavailable ports or may lack detailed descriptions of the
ports.
Accessing ports
pySerial includes a small console based terminal program called
:ref:`miniterm`. It can be started with python -m serial.tools.miniterm <port_name>
(use option -h to get a listing of all options).
Serial ports are serial communication interfaces through which information is transferred sequentially one bit at a time. Parallel ports, on the other hand, transmit multiple bits simultaneously. The PySerial and functions like python serial read make communication with Serial Ports easier.
About the PySerial Package
Python on a computer with the PySerial package installed can communicate with external hardware. It is a useful package for problem solvers because it facilitates data exchange between computers and external hardware like voltmeters, flow meters, lights, and other devices that send information via ports.
Installing the Module
The PySerial package is NOT part of the Python Standard Library. Therefore, install manually. Anaconda Distributions of Python comes with the package pre-installed.
PIP Installation Command
$ pip install pyserial
Anaconda Prompt Command
> conda install pyserial
Importing the Module + Verifying Installation
After installing, the version can be verified with the following command.
import serial
print(serial.version)
About the Function
serial.read()Arguments – Pass an integer value to specify the number of bytes to be returned.
Returns – Provides us a number of specified bytes
Using the Python serial read function to Fetch Information From Serial Ports
Python serial read is an important function of the module. It allows us to rake in the information that is provided from the ports. Here’s a Python implementation that helps us to do so.
with serial.Serial('/my/sample1', 3443, timeout=1) as serial:
     readOneByte = serial.read()
     readTenByte = serial.read(10)
Explanation
By default, .read() reads one byte at a time. By providing an integer value, you can set how many bytes of information are to be read by the function.
Python Serial Read vs Readline
serial.read() |
serial.readline() |
|---|---|
serial.read() will return one byte at a time. |
serial.readline() will return all bytes until it reaches EOL. |
| If an integer is specified within the function, it will that return that many bytes. Ex: serial.read(20)Will return 20 bytes. |
Instead of using serial.read() over iterations, serial.readline() can be used. |
Using Serial Read + Write on Raspberry Pi
Ensure that your Raspberry Pi is up to date by running the following commands
sudo apt update
sudo apt upgrade
Reading Data
ser = serial.Serial(
        # Serial Port to read the data from
        port='/dev/ttyUSB0',

        #Rate at which the information is shared to the communication channel
        baudrate = 9600,

        #Applying Parity Checking (none in this case)
        parity=serial.PARITY_NONE,

       # Pattern of Bits to be read
        stopbits=serial.STOPBITS_ONE,

        # Total number of bits to be read
        bytesize=serial.EIGHTBITS,

        # Number of serial commands to accept before timing out
        timeout=1
)
# Pause the program for 1 second to avoid overworking the serial port
while 1:
        x=ser.readline()
        print x
Writing Data
import time
import serial

ser = serial.Serial(
        # Serial Port to read the data from
        port='/dev/ttyUSB0',

        #Rate at which the information is shared to the communication channel
        baudrate = 9600,

        #Applying Parity Checking (none in this case)
        parity=serial.PARITY_NONE,

       # Pattern of Bits to be read
        stopbits=serial.STOPBITS_ONE,

        # Total number of bits to be read
        bytesize=serial.EIGHTBITS,

        # Number of serial commands to accept before timing out
        timeout=1
)
counter=0


# Mentions the Current Counter number for each line written
# Pauses for one second each iteration to avoid overworking the port
while 1:
        ser.write("Write counter: %d n"%(counter))
        time.sleep(1)
        counter += 1
Python Serial Read in Hex Format
Using the .hex() function we are storing the byte data in hex format in the variable hexData
import serial

ser = serial.Serial(
    port='/samplePort/ttyUSB1',
    baudrate=115200,
    parity=serial.PARITY_NONE,
    stopbits=serial.STOPBITS_ONE,
    bytesize=serial.EIGHTBITS,
    timeout = None
)

while 1:
    print ser.read()
    hexData= ser.read().hex()
    print hexData
Python pySerial in_waiting Function
This function can be used to retrieve the number of bytes in the input buffer.
Return(s) – Integer
Arguments – None
The function out_waiting() performs similarly. It provides the number of bytes in the output buffer.
Here’s an example program implementing the said function.
import serial
ser = serial.Serial(
    port = '/samplePort/myUSB',
    baudrate = 5000,
    parity = serial.PARITY_NONE,
    stopbits = serial.STOPBITS_ONE,
    bytesize = serial.EIGHTBITS,
    timeout=0.5,
    inter_byte_timeout=0.1
    )

# Reads one byte of information
myBytes = ser.read(1)

# Checks for more bytes in the input buffer
bufferBytes = ser.inWaiting()

# If exists, it is added to the myBytes variable with previously read information
if bufferBytes:
    myBytes = myBytes + ser.read(bufferBytes)
    print(myBytes)
Python pySerial flush() function
flush() eliminates the contents of the internal buffer of a file object. It doesn’t take any arguments nor return anything. There are 2 types of flush functions:
flushInput()– Clears Input BufferflushOutput()– Clears Output Buffer
import serial
ser = serial.Serial('/samplePort/myUSB10')
# Clearing Input Buffer
ser.flushInput()

# Clearing Output Buffer
ser.flushOutput()
ser.write("get")

# Pause for 100 milliseconds
sleep(.1)
print ser.read()
Reading Data From Arduino Boards using Python Serial Read
Arduino is an open-source electronics platform that provides easy-to-use hardware and software. Arduino boards can read inputs from sensors, a finger on a button, or a Twitter message, which they then output in the form of motors, LEDs, or even text.
import serial
import time

ser = serial.Serial('COM4', 9800, timeout=1)
time.sleep(2)

for i in range(50):
    # Reading all bytes available bytes till EOL
    line = ser.readline()
    if line:
        # Converting Byte Strings into unicode strings
        string = line.decode()
        # Converting Unicode String into integer
        num = int(string)
        print(num)

ser.close()
Common Errors
Python AttributeError: 'module' object has no attribute 'Serial'
For this problem, try renaming your project file to ‘serial.py’. Delete serial.pyc if it exists. After that run import serial.
Furthermore, this problem occurs due to the fact that the package you’re importing has the same name as your project file.
FAQs on Python Serial Read
Can we read multiple bytes at a time in serial read?
The .read() function only receives one byte at a time. However, we can iterate the function to receive one byte at a time over multiple loops. This is quite redundant. The .readline() will read a complete set of bytes until EOL is achieved.
Conclusion
We learned that with the help of the PySerial Module and Python Serial Read we are able to handle information from devices via Serial Ports.
Trending Python Articles
-
![[Fixed] Module Seaborn has no Attribute Histplot Error](data:image/svg+xml,%3Csvg%20xmlns='http://www.w3.org/2000/svg'%20viewBox='0%200%200%200'%3E%3C/svg%3E)
[Fixed] Module Seaborn has no Attribute Histplot Error
●January 18, 2023
-
Thonny: Text Wrapping Made Easy
by Rahul Kumar Yadav●January 18, 2023
-
[Fixed] JavaScript error: IPython is Not Defined
by Rahul Kumar Yadav●January 18, 2023
-
[Fixed] “io.unsupportedoperation not readable” Error
by Rahul Kumar Yadav●January 18, 2023
![[Fixed] Module Seaborn has no Attribute Histplot Error](https://www.pythonpool.com/wp-content/uploads/2023/01/Fixed-Module-Seaborn-has-no-Attribute-Histplot-Error-300x157.webp)

![[Fixed] JavaScript error: IPython is Not Defined](https://www.pythonpool.com/wp-content/uploads/2023/01/javascript-error-ipython-is-not-defined-300x157.webp)
![[Fixed] “io.unsupportedoperation not readable” Error](https://www.pythonpool.com/wp-content/uploads/2023/01/io.unsupportedoperation-not-readable--300x157.webp)
Python is a widely used high-level, general-purpose, interpreted, dynamic programming language. Its design philosophy emphasizes code readability, and its syntax allows programmers to express concepts in fewer lines of code than possible in languages such as C++ or Java. The language provides constructs intended to enable clear programs on both a small and large scale.
Python supports multiple programming paradigms, including object-oriented,imperative and functional programming or procedural styles. It features a dynamic type system and automatic memory management and has a large and comprehensive standard library.
Python interpreters are available for many operating systems, allowing Python code to run on a wide variety of systems. Using third-party tools, such as Py2exe or Py installer, Python code can be packaged into stand-alone executable programs for some of the most popular operating systems, so Python-based software can be distributed to, and used on, those environments with no need to install a Python interpreter.
We won’t go in much details, as an Embedded Electronics Engineer serial communication is important to us and in the following section we will see how we can achieve this. The code provided below is self explanatory and can be used as base to do serial communication in Python with your embedded device.
Python doesn’t have any library for serial communication, so before proceeding further we have to install the PySerial package, which can be done easily with the help of few commands.
For Python 3.x:
- Open Command Prompt and type
pip3 install pyserial
This command will download and install the PySerial package from internet.
 |
| Install PySerial for Python 3.x |
For Python 2.7.x:
- Open Command Prompt and type
pip install pyserial
This command will download and install the PySerial package from internet.
 |
| Install PySerial for Python 2.7.x |
Once the PySerial package is installed, open the python GUI (IDLE) and type the command «import serial», if it doesn’t give any error, then it means PySerial library is successfully installed.
Get the List of available Serial Ports:
To get the list of available serial ports, use the following commands from the python terminal and it will gives you the list of all available serial ports on your PC.
Python 3.x:
>>> import serial.tools.list_ports as port_list
>>> ports = list(port_list.comports())
>>> for p in ports: print (p)
COM2 — Communications Port (COM2)
COM1 — ELTIMA Virtual Serial Port (COM1->COM5)
COM5 — ELTIMA Virtual Serial Port (COM5->COM1)
COM3 — ELTIMA Virtual Serial Port (COM3->COM6)
COM6 — ELTIMA Virtual Serial Port (COM6->COM3)
COM4 — ELTIMA Virtual Serial Port (COM4->COM7)
COM7 — ELTIMA Virtual Serial Port (COM7->COM4)
>>>
 |
| List of Ports in Python 3 |
Python 2.7.x:
>>> import serial.tools.list_ports as port_list
>>> ports = list(port_list.comports())
>>> for p in ports: print p
COM2 — Communications Port (COM2)
COM1 — ELTIMA Virtual Serial Port (COM1->COM5)
COM5 — ELTIMA Virtual Serial Port (COM5->COM1)
COM3 — ELTIMA Virtual Serial Port (COM3->COM6)
COM6 — ELTIMA Virtual Serial Port (COM6->COM3)
COM4 — ELTIMA Virtual Serial Port (COM4->COM7)
COM7 — ELTIMA Virtual Serial Port (COM7->COM4)
>>>
 |
| List of Ports in Python 2.7.x |
The following video will demonstrate the results of the code given below.
import serial
#Can be Downloaded from this Link
#https://pypi.python.org/pypi/pyserial
#Global Variables
ser = 0
#Function to Initialize the Serial Port
def init_serial():
COMNUM = 1 #Enter Your COM Port Number Here.
global ser #Must be declared in Each Function
ser = serial.Serial()
ser.baudrate = 9600
ser.port = COMNUM — 1 #COM Port Name Start from 0
#ser.port = ‘/dev/ttyUSB0’ #If Using Linux
#Specify the TimeOut in seconds, so that SerialPort
#Doesn’t hangs
ser.timeout = 10
ser.open() #Opens SerialPort
# print port open or closed
if ser.isOpen():
print ‘Open: ‘ + ser.portstr
#Function Ends Here
#Call the Serial Initilization Function, Main Program Starts from here
init_serial()
temp = raw_input(‘Type what you want to send, hit enter:rn‘)
ser.write(temp) #Writes to the SerialPort
while 1:
bytes = ser.readline() #Read from Serial Port
print ‘You sent: ‘ + bytes #Print What is Read from Port
If you want to use Serial Communication using Python in Linux or on Raspberry Pi, then click here. This tutorial is written for Raspberry Pi and will work for Linux OS.
В настоящее время Arduino является одной из самых мощных и простых в использовании платформ с открытым исходным кодом. Однако тенденции современного мира таковы, что часто электронными платформами необходимо управлять с помощью высокоуровневого общецелевого языка программирования чтобы сделать их более эффективными и дружественными. Одним из таких языков является Python, который представляет собой интерпретируемый, объектно-ориентированный, высокоуровневый язык программирования с динамической семантикой и высокоуровневыми встроенными структурами данных, что делает его весьма привлекательным для быстрой разработки приложений.

Объединение возможностей Arduino и Python открывает двери для множества новых возможностей, поскольку Python имеет повышенную производительность и умеет взаимодействовать с другими платформами, такими как openCV, Matlab и т. д.
В этой статье мы изучим как установить Python на компьютер и как его использовать вместе с Arduino для включения/выключения встроенного в плату Arduino светодиода.

В данном разделе статьи будет рассмотрена установка языка программирования на компьютер с 32 или 64-битной windows. Установка Python на компьютеры под управлением MAC и Linux будет отличаться.
Для установки Python выполните следующую последовательность шагов:
1. Установите 32-битную версию Python 2.7.9 IDLE на ваш компьютер. Не скачивайте 64-битную версию Python или его более свежую версию поскольку они могут быть не совместимы с используемыми нами библиотеками Arduino. Даже если ваш компьютер работает на 64-битной операционной системе, то вы все равно можете использовать на нем 32-битную версию Python.
Примечание: оригинал данной статьи был написан в 2017 году, поэтому, возможно, сейчас Arduino IDE уже поддерживает совместимость с более свежими версиями Python (этот вопрос будет уточняться в дальнейшем).
2. Запустите на выполнение скачанный установочный файл и установите эту версию языка Python на ваш компьютер. Не изменяйте каталог для установки Python, оставьте его по умолчанию — C:Python27.
3. Возможно, во время установки Python на него будет “ругаться” антивирус – не обращайте на это внимание.
После установки Python вы можете проверить действительно ли он установлен на ваш компьютер введя в строке поиска Windows строку “Python IDLE”.

После его запуска вы должны увидеть на экране компьютера “Python shell” (оболочка Python) как показано на следующем рисунке.

Вы можете непосредственно писать программу в этой оболочке или же создать новый файл и писать и проверять программу в нем. Теперь давайте удостоверимся в том, что Python работает. Для этого напечатайте “print (1+1)” и нажмите enter. Вы должны после этого увидеть в оболочке напечатанный результат вычислений – 2.

Установка PySerial в Python
Следующим шагом необходимо установить программу PySerial, которая представляет собой Python API module (модуль прикладного программного интерфейса Python’а), с помощью которого можно считывать и записывать данные в последовательном виде в плату Arduino или любой другой микроконтроллер.
Кликните на Pyserial Windows чтобы скачать PySerial. По приведенной ссылке вы можете скачать установочный файл этого приложения и установить его. Не изменяйте настройки (в том числе и каталог для установки) во время установки приложения – оставьте их по умолчанию.
Теперь давайте убедимся в том, что PySerial корректно установлена и работает. Для этого снова откройте Python Shell и напечатайте в нем “import serial”. Если библиотека успешно установлена, то после этого вы не увидите никаких сообщений об ошибке как показано на следующем рисунке.

Дальнейший материал статьи предполагает что вы хотя бы немного знакомы с платформой Arduino и умеете загружать в нее программы. Если это не так, то советуем ознакомиться с руководством по Arduino для начинающих.
Наша первая совместная программа на Arduino и Python
Как отмечалось ранее, в этой программе мы будем управлять встроенным в плату Arduino светодиодом.
Программа для Arduino
Полный текст программы для платы Arduino приведен в конце статьи, здесь же обсудим наиболее важные его фрагменты.
Внутри функции setup мы инициализируем последовательную связь со скоростью 9600 бод/с и зададим режим работы для контакта, с которого будем управлять светодиодом. Также мы передадим приветственное сообщение в Python при помощи последовательной связи.
|
void setup() { Serial.begin(9600); //инициализируем последовательную связь на COM порту со скоростью 9600 бод/с pinMode(LED_BUILTIN, OUTPUT); //задаем режим работы на вывод данных для контакта 13, к которому подключен светодиод digitalWrite (LED_BUILTIN, LOW); Serial.println(«Hi!, I am Arduino»); // передаем приветственное сообщение } |
Внутри функции loop мы будем проверять поступают ли какие-нибудь данные по последовательному порту и записывать их в переменную “data”. А затем в зависимости от значения этой переменной мы будем включать или выключать светодиод.
|
void loop() { while (Serial.available()){ data = Serial.read(); } if (data == ‘1’) digitalWrite (LED_BUILTIN, HIGH); else if (data == ‘0’) digitalWrite (LED_BUILTIN, LOW); } |
Программа для Python
Полный текст программы для Python приведен в конце статьи, здесь же обсудим наиболее важные его фрагменты.
Откройте Python Shell (Python IDLE) и кликните в ней на File->New. После этого откроется новый текстовый файл, где вы можете писать свою программу. Но перед давайте предварительно сохраним его, нажав Ctrl+S. Введите любое имя для файла и нажмите сохранить. После этого файл автоматически сохранится с расширением “.py”.
После этого вы можете писать в нем свою программу или скопировать текст нашей программы, приведенный в конце статьи.
В нашей программе на Python мы первым делом должны подключить библиотеки для работы с последовательным портом связи и для работы с временем. Библиотека для работы с последовательным портом связи будет использоваться для передачи и приема данных по последовательному порту, а библиотека для работы с временем будет использоваться для создания временных задержек в программе. Эти библиотеки можно подключить с помощью двух следующих строчек кода:
|
import serial #Serial imported for Serial communication import time #Required to use delay functions |
Следующим шагом необходимо инициализировать объект (serial object), использующий нашу библиотеку последовательной связи. В нашей программе мы назвали этот объект “ArduinoSerial”. Также в этой команде необходимо правильно указать COM порт к которому подключена Arduino (можно узнать в диспетчере устройств на вашем компьютере) и задать скорость работы последовательного порта в бодах.
|
ArduinoSerial = serial.Serial(‘com18’,9600) |
После этого в программе необходимо организовать временную задержку на 2 секунды чтобы последовательная связь установилась. Это можно сделать с помощью следующей команды:
Теперь мы можем передавать/принимать данные от платы Arduino. Следующая команда будет считывать какие-нибудь данные, поступающие от платы Arduino и печатать их в окне нашей оболочки Python.
|
print ArduinoSerial.readline() |
Также эти считанные данные вы можете записать в переменную и использовать потом ее в своей программе.
Следующая команда будет передавать строку данных в плату Arduino.
Эта команда передаст ‘1’ в плату Arduino. С помощью этой команды можно передавать что угодно, начиная от десятичных чисел и заканчивая строками.
Теперь в нашей программе внутри бесконечного цикла while мы должны написать следующие строки:
|
var = raw_input() #получаем данные от пользователя print «you entered», var #печатаем что ввел пользователь if (var == ‘1’): # если значение равно 1 ArduinoSerial.write(‘1’) # передаем 1 print («LED turned ON») time.sleep(1) if (var == ‘0’): # если значение равно 0 ArduinoSerial.write(‘0’) # передаем 0 print («LED turned OFF») time.sleep(1) |
Команда var=raw_input считывает любое значение, которое печатается в текстовом поле оболочки Python и записывает ее в переменную var.
Далее, если значение этой переменной равно 1, то по последовательному каналу в плату Arduino передается ‘1’, а если 0 – то в плату Arduino передается ‘0’. А программа на Arduino в зависимости от принятого значения включает или выключает встроенный в плату светодиод.
Полный текст программы на Python у вас должен выглядеть примерно следующим образом:

Теперь нажмите Run -> Run Module или клавишу F5 и ваша программа запустится (возможно, она дополнительно спросит о том сохранить изменения или нет).
Управление светодиодом с помощью Python и Arduino
Загрузите программу в плату Arduino и удостоверьтесь в том, что она подсоединена к тому COM порту, который указан в программе на Python. Затем запустите на выполнение программу в Python.
Запустится скрипт оболочки Python как показано на следующем рисунке. Окно слева на этом рисунке – это окно оболочки показывающее выходные данные программы, а справа – окно непосредственно с программой.

Как вы можете видеть, строка “Hi!, I am Arduino”, передаваемая платой Arduino, принимается программой на Python и отображается в окне его оболочки.
Когда окно оболочки просит ввести значения, мы можем ввести 0 или 1. Если мы введем 1, то светодиод на плате Arduino зажгется, а если 0 – то погаснет. Это будет свидетельствовать об успешном взаимодействии наших программ на Arduino и Python.
Исходный код программы
Далее приведен текст двух программ: одна для Arduino, а вторая – на Python. Надеемся что это простой пример поможет вам в создании более сложных проектов, основанных на совместном взаимодействии Arduino и Python.
Исходный код программы для Arduino
|
1 2 3 4 5 6 7 8 9 10 11 12 13 14 15 16 17 |
int data; void setup() { Serial.begin(9600); //инициализируем последовательную связь на COM порту со скоростью 9600 бод/с pinMode(LED_BUILTIN, OUTPUT); //задаем режим работы на вывод данных для контакта 13, к которому подключен светодиод digitalWrite (LED_BUILTIN, LOW); Serial.println(«Hi!, I am Arduino»); } void loop() { while (Serial.available()){ data = Serial.read(); } if (data == ‘1’) digitalWrite (LED_BUILTIN, HIGH); else if (data == ‘0’) digitalWrite (LED_BUILTIN, LOW); } |
Исходный код программы для Python
|
1 2 3 4 5 6 7 8 9 10 11 12 13 14 15 16 17 18 19 20 |
import serial #подключаем библиотеку для последовательной связи import time #подключаем библиотеку чтобы задействовать функции задержки в программе ArduinoSerial = serial.Serial(‘com18’,9600) #создаем объект для работы с портом последовательной связи time.sleep(2) #ждем 2 секунды чтобы установилась последовательная связь print ArduinoSerial.readline() #считываем данные из последовательного порта и печатаем их в виде строки print («Enter 1 to turn ON LED and 0 to turn OFF LED») while 1: #бесконечный цикл var = raw_input() #считываем данные от пользователя print «you entered», var #печатаем подтверждение ввода if (var == ‘1’): #если значение равно 1 ArduinoSerial.write(‘1’) #передаем 1 print («LED turned ON») time.sleep(1) if (var == ‘0’): # если значение равно 0 ArduinoSerial.write(‘0’) #передаем 0 print («LED turned OFF») time.sleep(1) |
Видео, демонстрирующее работу схемы
Примечание: если вам понравилась данная статья, то вы можете прочитать ее продолжение — использование графических возможностей VPython совместно с Arduino.
![]() Загрузка…
Загрузка…
13 372 просмотров
Давным-давно, когда я сидел под Виндовсом у меня была прога для работы с COM-портом. Это были мои «уши и руки» для доступа к моим микроконтроллерным устройствам. Я очень боялся потерять её, боялся, чтобы её не загрызли вирусы…
Потом я пересел на Линукс, и как все Линукс-новички искал аналоги этой проги. Можно не уточнять, что я их не нашел. Конечно, я тогда расстроился — «Ну как же так! Потребность есть, а проги нет? Что-то не так в мире Линукса. Ведь в мире Виндовса каких-только программ нет! А тут такая фигня — и нет! Да, похоже, правильно говорят: Линукс — это какая-то недоделанная ОСь. Ничего в нем (Линуксе) толкового нет!»
Да-да, именно такие мысли бродили у меня в голове. Иногда они подогревались Виндузятниками, которые «эксперты-по-Линуксу», и мне было очень даже тяжко. Но я, «закусив удила», пер как трактор — только вперед!
Через какое-то время я допер, что в мире Линукса существует программа MiniCom. Прога как прога, как принято говорить — «малость не дотягивает до уровня аналогичных программ для Виндос». Я ее юзал какое-то время, пока опять-таки не допер, что даже и она не очень-то нужна в мире Линукса.
Линукс — более чем самодостаточен. В Линуксе не надо никаких особых программ для работы с последовательным портом, как это принято в мире Виндовс. По этой причине, собственно, нет и не должно быть программ для работы с портом. Они просто не нужны!
В мире Линукса последовательный порт — это файл. (Вообще, Линукс на всё «смотрит» как на файлы. Всё унифицировано.) Ну а с файлами-то мы работать умеем! А раз так, то всякие вычурные программы с бантиками и бубенчиками — это ненужный антураж, который создает видимость «продуманности» программы. Отвлекать юзера от основной цели (назначения программы), уводить его на второстепенные (менее значительные) показатели и ненужную побочную функциональность — это по-Виндовому!
Однако, вернемся к Линуксу. Что я делал, когда мне нужно было принять информацию с устройства и сохранить ее в файле? Я просто в консоли выполнял команду:
$ cat /dev/ttyS0 > my-data
Но это прога выполнялась молча, на экран ничего не выводила. Но иногда требуется «мониторить» поток. Тогда команда должна стать составной — дополниться командой tee, которая одну копию потока отправляет в указанный файл, а другую выводит на консоль:
$ cat /dev/ttyS0 | tee my-data
Все предельно просто. Но что же делать, когда требуется какая-то обработка данных в реальном времени? И вот тут у меня не было ничего «красивого», что бы я мог предложить.
В этих случаях я поступал по-Виндовому. Я писал Си-шные программы, которые открывали последовательный порт, считывали из него информационный поток, как-то его обрабатывали, результат работы записывали в файл и при необходимости что-то выдавали на экран. Все это работало. Работало не плохо. Работало надежно. Но какое-то шестое чувство мне подсказывало, что это не совсем тот самый путь, который есть правильный. В Линуксе всё должно быть как-то по другому. Но, как? Я не знал. И продолжал компилировать свои многочисленные программы.
В процессе работы возникали смешные проблемы. Надо сказать, что все эти проги не были предназначены ни для продажи, ни для широкого тиражирования. Эти проги работали в единичных экземплярах и/или только с моим оборудованием. Но каждый раз, даже при незначительных (казалось бы!) изменениях, мне приходилось их заново компилировать и присваивать им версии. Путаница начинала свой разбег по взлетной полосе…
Конечно, можно было пойти по другому пути. Все переменные параметры можно было бы сохранять в конфигурационных файлах. Но, ребята, окститесь! Это ж не коммерческие проги! Я их сам поддерживаю, я сам знаю, что и где в них нужно подкрутить или изменить, чтобы они работали чуть-чуть по другому.
Конфигурационные файлы — это еще один уровень сложности в борьбе с той сложностью, ради которой создается программа. С точки зрения уменьшения сложности, конфигурационные файлы мало-что меняют. Это просто перенос сложностей в другую плоскость (на другой уровень), но это не уменьшение количества сложностей. Наша жизнь и без того сложна, и отчетливо помнить все подробности весьма затруднительно. Поэтому нужно уменьшать количество сложности, а не увеличивать.
Я понимал, что нужно было что-то делать. Как минимум, нужно было что-нибудь почитать по Линуксу и обработке данных. И я погрузился в изучение парадигмы Линукса.
Следует заметить, что Линукс очень силен в обработке статических текстов и текстовых потоков. Обработка текстовой информации — это один из столпов Линукса. Это могучий булыжник в фундаменте Линукса. И тот, кто упускает этот момент, можно утверждать, что он не понимает Линукса.
Отсюда вытекает весьма простая истина, если информационный поток, который идет через последовательный порт, будет в текстовом формате, то все проблемы легко решаются штатными утилитами, входящими в состав любого дистрибутива Линукс.
Я даже выделил эту синтецию жирным, на столько она фундаментальна.
Понимая эту и некоторые другие Линуксовые идеи начинаешь задумываться над вопросом — «Ребята, а зачем нам вообще нужна Винда?» Она и без того мне мозги прочистила так, что я до сих пор иногда мыслю по-Виндовому. А когда я мыслю по-Виндовому, я не понимаю Линукса. Отсюда все мои неудачи и разочарования. К счастью, это происходит всё реже и реже!
Прошло ещё какое-то время, я открыл для себя удобство пользования языка Python. Казалось бы, язык интерпретируемый, а значит по определению — медленный. Однако, ирония в том, что он не абсолютно медленный, а — относительно. Относительно Си-шных программ программы на языке Python исполняются медленнее. Это не открытие. Открытие в том, что для работы с последовательным портом и обработки данных быстродействия Python-ских программ вполне хватает.
А раз так, то зачем нам какие-то специализированные (а к пущему греху еще и графические — прости-хоспади!) проги для работы с последовательным портом? Написать на Python-е для работы с последовательным портом прогу, специализированную под наши требования, — проще пареной репы!
Для работы с последовательным портом существует модуль serial, который инкапсулирует доступ к порту. (В интернете иногда можно встретить название PySerial. Это одно и тоже! Возможно, так назывался этот модуль раньше, но точно я не знаю. Это только мои предположения.) Модуль serial не входит в состав Python – его нужно устанавливать самостоятельно. В Ubuntu это делается с помощью команды:
$ sudo apt-get install python-serial
Заметьте, что название модуля и название пакета не совпадают. Почему? Какая причина?
Всё просто. Дело в том, что название пакета python-serial — это, так сказать, «область имен» в сфере пакетов программ, то есть в это область операционной системы, область репозиториев пакетов, область инсталляции программ — улавливаете?
А название модуля serial — это область работы Питона. Питон понятия не имеет об операционной системе и тем более о каких-то пакетах программ. У Питона свои тараканы — модули. Модули — это в некоторой степени библиотеки.
Вас ведь не смущает, что какая-нибудь программа-инсталлятор имеет одно имя, а устанавливаемая из неё программ — другое. Так и тут: имя пакета — это название коробочки, в которой лежит куча разных файлов. Среди этих файлов вполне может находиться Питоновский модуль, возможно какие-то справочные файлы или файлы конфигурации.
В программную среду Python модуль подключается обычным способом – через команду import:
import serial
И опять, название модуля отличается.
Следующая программа позволяет найти в системе все последовательные порты. (Программа взята из книги «Beginning Python Visialization.: Crafting Visual Transformation Scripts» Shai Vaingast, 2009. Стр. 3., и немного переделана для работы Linux-е.
#! /usr/bin/env python
# coding: utf-8

import serial

found = False

for i in range(64) :
  try :
    port = "/dev/ttyS%d" % i
    ser = serial.Serial(port)
    ser.close()
    print "Найден последовательный порт: ", port
    found = True
  except serial.serialutil.SerialException :
    pass

if not found :
  print "Последовательных портов не обнаружено"
Следующая программа забирает поток данных из последовательного порта и выводит его на экран
#! /usr/bin/env python
# coding: utf-8

import serial

ser = serial.Serial("/dev/ttyS0")
ser.baudrate = 115200

while True :
  line = ser.readline()
  print line
Программа имеет бесконечный цикл, поэтому для ее окончания нужно нажать Ctrl-C.
Еще одна программа из книги «Beginning Python Visialization.: Crafting Visual Transformation Scripts» Shai Vaingast, 2009. (cтраница 5). Эта программа забирает поток данных из последовательного порта и сохраняет его в файле. В целях контроля, поток данных выводится на экран.
Имя файла формируется автоматически на основе времени запуска программы. Например, имя файла, созданного 8-го Февраля 2014-го года в 9 часов (утра) 3 минуты и 31-у секунду, будет следующим:
GPS-2014-02-08-09-03-31.csv
здесь GPS – это префикс файла. По нему можно ориентироваться, какие данные в нем находятся. Программа использовалась для работы с GPS-приёмником, это отразилось на имени создаваемых ею файлов.
Далее следует дата-время, записанные через дефис. Стандарт ISO 8601 предписывает числа в дате писать через черточки, а числа во времени писать через двоеточие. Использование символа двоеточия в именах файлов – это не очень хорошая идея, поэтому числа во времени удобнее написать так же через дефис. Следует обратить внимание, что месяцы, дни, часы, минуты и секунды должны всегда иметь две цифры – незначащий ноль должен присутствовать. Это облегчит поиск и анализ файлов в директории, где подобных файлов может оказаться очень много. Поскольку файловые менеджеры зачастую упорядочивают файлы, то избранная правильная система наименования файлов только облегчат работу с ними.
Суффикс файла csv – говорит о том, что этот файл текстовый, то есть состоит из строк текста. Каждая строка состоит из информационных полей, разделителем которых является символ запятая. В английском это более прозрачно: csv – это Comma Separaterd Values – значения, разделенные запятой.
Однако, давайте перейдем к рассмотрению самой программы:
#! /usr/bin/python
# coding: utf-8

import time, serial

ser = serial.Serial("/dev/ttyUSB0")
ser.baudrate = 9600

filename = 'GPS-%4d-%02d-%02d-%02d-%02d-%02d.csv" % time.localtime()[0:6]

f = open(filename, 'w')
while True :
  line = ser.readline()
  f.write(line)
  print line, # Запятая нужна!
Здесь имя последовательного порта несколько отличается. У меня GPS-приемник подключен к USB-порту через самодельный переходник USB-UART. Переходник самый обычный, выполнен на микросхеме FTDI232RL.
Со стороны компа я обращаюсь к UART-у, как к виртуальному последовательному порту, который «проброшен» через USB-порт. Поэтому имя файла порта в моем случае будет /dev/ttyUSB0.
В самой последней команде программы запятая нужна для того, чтобы исключить переход на следующую строку. Дело в том, что в сообщениях GPS-приемника, которые состоят из строк, символ перевода на новую строку уже есть. И если в команде опустить запятую, то на экран будут выводится два символа перевода на новую строку – один присутствует в самой строке , а другой – от команды print.
Вот пример текста, который появляется у меня на экране и записывается в файл:
...
$GNRMC,110354.000,A,5654.2781,N,06049.3861,E,0.07,105.23,110214,,,A*7E
$GPVTG,105.23,T,,M,0.07,N,0.13,K,A*3D
$GPGGA,110354.000,5654.2781,N,06049.3861,E,1,10,1.14,292.5,M,-7.0,M,,*74
$GNGSA,A,3,13,23,04,20,10,31,,,,,,,1.44,1.14,0.89*1E
$GNGSA,A,3,83,77,67,68,,,,,,,,,1.44,1.14,0.89*1C
$GPGSV,4,1,13,23,62,270,45,20,57,202,38,31,41,062,15,32,33,157,*71
$GPGSV,4,2,13,13,28,272,40,04,24,305,42,16,18,149,,25,08,023,*78
$GPGSV,4,3,13,29,06,045,16,10,05,316,30,02,04,348,18,01,02,209,*7C
$GPGSV,4,4,13,45,,,*7A
$GLGSV,3,1,09,67,74,300,34,76,66,063,,77,49,196,31,66,46,141,*6B
$GLGSV,3,2,09,68,19,314,42,84,18,002,,83,14,311,38,75,13,036,*6F
$GLGSV,3,3,09,85,04,045,*54
$GNGLL,5654.2781,N,06049.3861,E,110354.000,A,A*4C
...
Это текст в формате NMEA (америкосы произносят это как «эн-ем-Иа», ударение на «И»). Я бы не хотел сейчас заострять внимание на его расшифровке. Важно только то, что это, во первых, текстовая информация (а не двоичная), а во вторых, эта информация достаточно хорошо структурирована и может быть легко обработана.
Точно такой же тип текстовой информации я получаю с геологических приборов:
...
E 3 825 48 499 508 508 508 508 508 506 542 573 602 628 652 674 695 713 731 748 762 776 789 801 812 822 832 841 849 857 864 871 877 883 888 893 897 902 905 909 912 915 918 920 922 924 926 928 930 931 933 934 935 937 938 939 940 941 942 942 943 944 944 945 946 946 947 947 947 948 948 949 949 949 950 950 950 950 951 951 951 951 951 952 952 952 952 952 952 952 952 953 953 953 953 953 953 953 953 953 953 953 953 953 953 954 954 954 954 968 923 885 851 820 792 767 745 724 705 688 673 659 646 635 624 614 605 597 590 583 577 571 566 561 557 553 550 546 543 540 538 536 533 531 529 528 526 525 524 523 521 520 519 519 518 517 516 516 515 515 514 514 513 513 513 512 512 512 511 511 511 511 511 510 510 510 510 510 510 510 509 509 509 509 509 509 509 509 509 509 509 508 508 508 508 508 508 508 508 508 508 508 508 508 508 508 508 508 508 501 463 431 400 373 348 325 304 285 267 251 236 222 209 197 186 176 166 157 149 142 135 128 122 116 111 107 102 98 94 90 87 84 81 78 76 73 71 69 67 66 64 63 61 60 59 57 56 55 55 54 53 52 51 51 50 49 49 48 48 47 47 46 46 45 45 44 44 44 44 43 43 43 43 42 42 42 42 41 41 41 41 41 41 40 40 40 40 40 40 40 40 39 39 39 39 39 39 39 39 47 92 131 165 195 223 248 271 291 310 327 342 356 369 381 392 401 411 419 426 433 439 445 450 455 459 463 466 470 473 476 478 480 483 484 486 488 489 491 492 493 494 495 496 497 498 498 499 499 500 501 501 502 502 502 503 503 503 504 504 504 504 504 504 505 505 505 505 505 505 505 505 505 506 506 506 506 506 506 506 506 506 506 506 506 506 506 506 506 507 507 506 507 507 507 507 507 507 507 507
M 3 0 10524 12498 14417 16335 18239 20157 22078 23989 25915 27834
E 4 825 33 499 508 508 508 508 508 506 542 573 602 628 652 674 695 713 731 748 762 776 789 801 812 822 832 841 849 857 864 871 877 883 888 893 897 902 905 909 912 915 918 920 922 924 926 928 930 931 933 934 935 937 938 939 940 941 942 942 943 944 944 945 945 946 947 947 947 948 948 949 949 949 950 950 950 950 951 951 951 951 951 952 952 952 952 952 952 952 952 952 953 953 953 953 953 953 953 953 953 953 953 954 954 954 954 954 954 967 923 885 851 820 792 767 745 724 705 688 673 659 646 634 624 614 605 597 590 583 577 571 566 561 557 553 550 546 543 540 538 536 533 531 529 528 526 525 524 523 521 520 519 519 518 517 516 516 515 515 514 514 513 513 513 512 512 512 511 511 511 511 511 510 510 510 510 510 510 510 509 509 509 509 509 509 509 509 509 509 509 508 508 508 508 508 508 508 508 508 508 508 508 508 508 508 508 508 508 501 463 431 401 373 348 326 304 285 267 251 236 222 209 197 186 176 166 158 149 142 135 128 122 117 111 107 102 98 94 91 87 84 81 79 76 74 71 69 67 66 64 63 61 60 59 58 57 56 55 54 53 52 51 51 50 49 49 48 48 47 47 46 46 45 45 44 44 44 44 43 43 43 43 42 42 42 42 41 41 41 41 41 41 41 40 40 40 40 40 40 40 40 39 39 39 39 39 39 39 47 92 131 165 195 223 248 271 291 310 327 342 356 369 381 392 402 411 419 426 433 439 445 450 455 459 463 466 470 473 476 478 480 483 484 486 488 489 491 492 493 494 495 496 497 498 498 499 499 500 501 501 502 502 502 503 503 503 504 504 504 504 504 504 505 505 505 505 505 505 505 505 505 506 506 506 506 506 506 506 506 506 506 506 506 506 506 506 506 507 507 507 507 507 507 507 507 507 507 507
M 4 0 10528 12500 14420 16339 18243 20162 22084 23996 25924 27843
...
Здесь у меня чередуются два типа пакетов (два типа строк). Пакет типа «M» содержит данные Модуля Магнитного Каротажа (ММК), а пакет типа «E» – данные Модуля Электро-Каротажа (МЭК). Пакет ММК значительно меньше по размеру пакета МЭК. Если пакет ММК состоит из 13 полей, то пакет МЭК содержит более 400.
Каждая запись (каждый пакет) располагается в одной информационной строке, которая заканчивается символом «новая строка». Здесь поля отделяются друг от друга символом пробела. Это не совсем правильно. Это я только сейчас понял, что csv-формат может автоматически «затягиваться» в программы электронных таблиц из офисных пакетов (типа Calc из Libre-Office) без дополнительных телодвижений по указанию символов-разграничителей полей. Да, надо будет как-нибудь переписать программу и заменить символ-разграничитель.
Как видите, ничего сверхсложного и непонятного в работе с последовательным портом — нет. Я предполагаю, что вы немного знакомы с языком Python, поэтому я не слишком подробно прокомментировал действия в программах. Но если что, задавайте вопросы.
А пока на этом всё!
UPDATE 29.10.2015
Небольшая заметка, касающаяся особенности использования модуля serial под Python-3:
http://wp.me/p1H7g0-1ed
UPDATE 01.12.2015
Вопрос: где взять модуль serial для Python-3?
Ответ: Модуль serial для Python-3 я тупо взял из репозитория Debian-8. То есть даже не заморачивался его поисками в интернете.
Команда для инсталляции:
# apt-get install python3-serial
Установка модуля serial для Python-2.x на Ubuntu-10.04 LTS производится очень просто:
$ sudo apt-get install python-serial
Но для Python-3.x модуля serial в репозитории Ubuntu-10.04 LTS нет. Поэтому установка будет производиться несколько сложнее
1) Идем на страницу http://pupi.python.org/pypi/serial/2.7
и скачиваем архивный файл pyserial-2.7.tar.gz
$ wget -c http://pupi.python.org/pypi/serial/2.7/pyserial-2.7.tar.gz
2) Распаковываем полученный архивный файл:
$ tar -xvf pyserial-2.7.tar.gz
3) Заходим в поддиректорий:
$ cd pyserial-2.7/
4) Запускаем процесс инсталляции:
$ sudo python3 setup.py install
После этого можно использовать модуль serial в программах под Python-3.x.
Есть мнение, что можно проинсталлировать модуль вот так:
pip install pyserial
или так
$ easy_install -U pyserial
, но я этого не делал. Поэтому я не могу сказать можно ли так делать или нельзя.
UPDATE 30.03.2016
Написал новую статью: «Python, последовательный порт и нуль-модемный кабель»
http://wp.me/p1H7g0-1nb
UPDATE 12.11.2017
Написал статью про использование последовательного порта в проектах с микроконтроллером
Документация по Python
20 авг. 2020 г.
читать 1 мин
Инициализировать последовательное устройство
import serial

#Serial takes these two parameters: serial device and baudrate

ser = serial.Serial('/dev/ttyUSB0', 9600)
Читать из последовательного порта
Инициализировать последовательное устройство
import serial

#Serial takes two parameters: serial device and baudrate
ser = serial.Serial('/dev/ttyUSB0', 9600)
читать один байт с последовательного устройства
data = ser.read()читать заданное количество байтов из последовательного устройства
data = ser.read(size=5)прочитать одну строку из последовательного устройства.
data = ser.readline()
читать данные с последовательного устройства, пока что-то записывается поверх него.
#for python2.7
data = ser.read(ser.inWaiting())

#for python3
ser.read(ser.inWaiting)
Проверьте, какие последовательные порты доступны на вашем компьютере
Чтобы получить список доступных последовательных портов, используйте в командной строке
python -m serial.tools.list_portsили из обочки Python
from serial.tools import list_ports
list_ports.comports()  # Outputs list of available serial ports
Написано
![]()
Еще от кодкамп
Замечательно! Вы успешно подписались.
Добро пожаловать обратно! Вы успешно вошли
Вы успешно подписались на кодкамп.
Срок действия вашей ссылки истек.
Ура! Проверьте свою электронную почту на наличие волшебной ссылки для входа.
Успех! Ваша платежная информация обновлена.
Ваша платежная информация не была обновлена.

Tutorial on connecting an Arduino or Microcontroller (AVR ATmega328P,MSP430 ,PIC) with a Linux/Windows PC using serial port (VCP). and communicating with it using Python and PySerial library.
This tutorial will concentrate on Python 3.x.x language and will use Pyserial 3.4 Library.
First section deals with Arduino and Second section deals with bare microcontrollers like AVR,Microchip and Last section deals with Linux specific details.
You can check our Video on Python Serial Port Programming Below.
If you have any doubts put it in the Youtube Comments section.
|
Introduction
Python is an open source, cross platform ,interpreted language that is easy to learn for beginners. One of the many advantages of Python is the sheer number of contributed modules for performing a wide variety of tasks.It is widely used for building scripts/program to interact with real world objects like USB relays,USB data acquisition devices,USB data loggers and other embedded systems.
Easiest way to interact with serial port devices is over a Virtual Com Port using a USB to Serial Converter IC like
- FTDI FT232RL
- TUSB3410
- or CP2102.
Once the necessary drivers are installed you can interact over VCP by reading and writing into it.
One problem with developing code that uses serial port is portability, you can’t use the same code in both Windows and Linux. For each operating system (Windows/Linux) you have to write custom codes using the native API’s as we have done
- here Win32 Serial Port Programming using Native APi’s
- and Linux serialPort programming using Native API’s.
pySerial Module
Python provides an easy way to do cross platform serial communication using pySerial module.
The modules hides all the OS specific peculiarities and presents a uniform simple interface for programming the serial port.
The code written with pySerial can run unmodified on Windows and Linux systems.
Sourcecodes

- Browse Python Serial Comm code from our Github Repo
- Download Python Serial Comm code as zip file
- Please note that the source codes on the website show only the relevant sections to highlight the process of programming the serial port.
- Please use the complete source codes from our github repo when building your own program.
Hardware Used


USB2SERIAL — Any easy to use multi protocol converter that can convert from USB to RS485/RS232/Serial.The Board comes with selectable voltage levels for interfacing with 5V and 3.3V logic families.It has screw terminals for easy access to FT232RL pins .3 Pin RS232 and DB9 Male pin for RS232 protocols.
Python on Windows
In Windows, Python is not installed by default, you can find python binary installers from either python.org or from ActiveState software.
After completing the installation you can type “python” on your command prompt to enter the python shell. (use CTRL + Z to exit from the shell).

or use GUI based shell IDLE.

Installing PySerial on Windows
After you have installed the python interpreter, You can install PySerial using pip installer.
Earlier Pyserial Homepage used to provide Windows Executable file which can be installed using point and click method .Now they are providing source and wheels package only.
Here we will be installing the PySerial Package using pip installer. So open up your Windows Command prompt and type in the following command.
C: python -m pip install pyserial
as shown below

After installing pySerial, open the python shell and type “import serial”.
If you are not getting any error messages, pySerial is installed properly.
Some IDE’s like Thonny has built in Python interpretors which work independently from the interpreter installed on your system.

The IDE already has pySerial installed and there is no need for installing it using pip command.

Writing data to Serial Port using Python and pySerial

Now lets open a serial port and write some values to it. The code in python is quite straight forward, you can just read it like plain English.
Open a text editor and type the following lines of code into it .Save the file with a ” .py” extension.
The Below code writes character ‘A’ to the serial port.
# Python code transmits a byte to Arduino /Microcontroller
import serial
import time
SerialObj = serial.Serial(‘COM24‘) # COMxx format on Windows
# ttyUSBx format on Linux
SerialObj.baudrate = 9600 # set Baud rate to 9600
SerialObj.bytesize = 8 # Number of data bits = 8
SerialObj.parity =’N‘ # No parity
SerialObj.stopbits = 1 # Number of Stop bits = 1
time.sleep(3)
SerialObj.write(b’A’) #transmit ‘A’ (8bit) to micro/Arduino
SerialObj.close() # Close the port
The first line import serial imports the pySerial module so that your program can use it.
ComPort = serial.Serial(‘COM24’) opens the serial port named COM24.
In Windows,
Please give the COM number corresponding to your Serial port or USB to Serial Converter instead of COM24.

Opening the serial port using pySerial may reset the Arduino connected on the port,(here COM24).This is specific to Arduino only .
time.sleep(3)
So you should wait some time (here 3 seconds) before transmitting the data to the Arduino board.In the above code we are using time.sleep(3) function.
Serial communication occurs in bytes (8 bits) while Python3+ handles strings in unicode format which may consume upto 4 bytes.
So to make the characters suitable to send to a microcontroller we have to convert them to byte based chunks.
In the above Example we are sending a byte ‘A’. Here A is defined as a byte by using b prefix.You can also use the bytearray() function.
SerialObj.write(b’A’) #transmit ‘A’ (8bit) to micro/Arduino
SerialObj.write(b’A’) function then writes/sends data to your microcontroller /Arduino.
Running the Python Code
In Windows,
You can either run the code from command line,
D:> python yourSerialTransmitCode.py
or by using IDLE
From IDLE use “File → Open” to open your code file and from “Run → Run Module”.

Arduino Side Code
PC and Arduino are connected as shown below using a single USB cable.

On the Arduino side ,
we wait for the Character A and turns the LED connected to Pin12 ON for 2 seconds.
A switch() is used to select the required action.
The partial code is shown below.
if (Serial.available())
{
RxedByte = Serial.read();
switch(RxedByte)
{
case ‘A’: digitalWrite(12,HIGH);
delay(1000);
digitalWrite(12,LOW);
break;
case ‘B’: //your code
break;
default:
break;
}//end of switch()
}//endof if
Please visit our Github for the full code
Handling Pyserial Serial Port Exceptions
Some times opening the serial port may fail due to various conditions like port in use ,port not found etc .
PySerial comes with the exception serial.SerialException which can be used to identify the error and fail gracefully.
The below partial code shows how to use exceptions
try:
SerialObj = serial.Serial(‘COM11’,9600) # open the Serial Port
except serial.SerialException as var : # var contains details of issue
print(‘An Exception Occured‘)
print(‘Exception Details-> ‘, var)
else:
print(‘Serial Port Opened‘)
Here is an example of the error message you will get
when some other process is using the port you are trying to access.

When Port number is wrong.

%Run is due to the IDE running the code on the terminal
Reading Data from Serial port using Python and Pyserial

PySerial provides two functions to read data from the serialport
- readline()
- read()
readline() reads till it encounters a newline character ‘n‘ and returns the bytes it has read.If n character is not encountered it will wait forever or until the read timeout expires.
| ReceivedString = SerialObj.readline() print(ReceivedString) SerialObj.close() |
| void loop() { char TextToSend[] = » Hello From Arduino Uno«; Serial.println(TextToSend); // sends a n with text delay(1000); } |
The Arduino sends a string which is received by the PC side Python code and displayed on terminal.

Please note that only relevant portions of the code are shown above.
Please visit our github repo for full code.
Connecting a Bare Microcontroller to your PC ‘s Serial port
In the above tutorial we learned how to connect an Arduino board with a PC and communicate with it (Receive/Transmit data ) using a standard USB cable.
What if instead of an Arduino we just want to connect a bare microcontroller like ATmega328P,ATmega16,MSP430 or PIC18F4550 to your PC.
In the case of Arduino all the details of how ATmega328P connects with the USB section is abstracted away from the user,when you are building embedded systems you have to know which signals are connected to which.
When you are using a microcontroller which do not have any built in USB controller like ATmega16 or MSP430G2553 ,you have to use a USB to Serial Converter chip like FT232RL or buy a standard USB to serial converter board like USB2SERIAL to convert serial signals to the USB ones.
The USB2SERIAL board shown can work as a USB to serial Converter,USB to RS232 Converter or USB to RS485 converter
The below block diagram shows how to interface any microcontroller with a standard USB to serial converter.

Here the TXD of the serial port is connected to the RXD of the microcontroller UART and vice versa. So when microcontroller transmits a byte it goes to the receive buffer of the serialport on the PC side and vice versa.
Ground lines are made common to both PC and microcontroller.

MSP430 Microcontroller interface with PC using Python

Above image shows how to hook up a launchpad board with PC using USB2SERIAL converter The Controller (MSP430G2553) is connected to the FT232’s Serial port using a null modem cable as shown in the above figure.

Please note that MSP430’s are 3.3V microcontrollers ,so please select the IO voltage levels of USB2SERIAL board as 3.3V.
In case you want to know more about MSP430’s, check this short tutorial on how to configure MSP430G2553 UART.
ATmega328P Microcontroller interface with PC using Python
Yes, Arduino uno is ATmega328P but here the code is written in AVR embedded C and compiled using AVR studio or Microchip Studio.

- Full tutorial on AVR ATmega to PC communication can be found here
Controlling RTS and DTR pins in Python using PySerial
RTS and DTR pins are two extra lines available on most serial ports which are used for signaling purposes.They do not transmit serial data but are used for signalling purposes.You can make them HIGH or LOW to control a transistor switch or logic circuit.
Earlier, PySerial API used SerialObj.setRTS() and SerialObj.setDTR() which are now deprecated.
The new simplified API is just
- rts
- and dtr
which can be set or cleared by assigning a 1 or 0.
import serial
SerialObj = serial.Serial(‘COM6‘,9600)
SerialObj.rts = 1 #RTS HIGH
SerialObj.rts = 0 #RTS LOW
SerialObj.dtr = 1 #DTR HIGH
SerialObj.dtr = 0 #DTR LOW
SerialObj.close()
Please note that you need to add delay between HIGH and LOW to visualise the transition.
In some USB to Serial Converter chips like FT232RL the signals are Active LOW,so setting the pin=1 would make the signal LOW.
Python Serial programming on Linux
- Linux specific parts of the Python Serial programming can be found here.
contents
- I. Introduction
-
- 1. Purpose
- 2. Prepare
- II. About Pyserial
-
- 1 Introduction
- 2. Open and close the serial port
- 3. Serial port status
- 4. Serial port and write
- 5. Directive
- 3. Project example
- IV. Reference
I. Introduction
1. Purpose
Since the normal servo does not have a memory function, it is difficult to accept when debugging the Arduino six-degree-of-degree robot arm, so the remote control is added, and the current angle of each servo is returned by the serial port. When the implementation, it is found that each time the serial debugging assistant records the steering gear angle, so I want to use Python’s serial communication to receive and save the specified data into a text, which is convenient to call, TA should have the following functions:

2. Prepare
CH340, single chip microcomputer, Python3
II. About Pyserial
1 Introduction
The Pyserial module encapsulates Python’s access to serial ports, providing a unified interface for multi-platform usage.
Installation: PIP3 Install Pyserial
 Import: import serial
2. Open and close the serial port
Example:
Open the serial port
import serial

def serget(port,bps,time):#port: Port number, BPS: baud rate, Time: Timeout
    try:
        ser = serial.Serial(port, bps, timeout=time)# Open the serial port
        print('Serial port is connected, current serial port: {0}'.format(port))
        print("Serial port details parameters:", ser)
        return ser
    except Exception as e:  # If there is an abnormality
        print("Serial port connection failed, failed analysis:", e)

portx = input('Input port number')  #, For example: port = "COM8"
ser = serget(portx,115200,None)
Close the serial port
ser.close() # Close the serial port
3. Serial port status
| state | illustrate |
|---|---|
| name | Equipment name |
| port | port |
| baudrate | Baud rate |
| bytesize | Byte size |
| parity | Check Digit |
| stopbits | Stop |
| timeout | Read timeout |
| writeTimeout | Overtime |
| interCharTimeout | Character interval |
| xonxoff | Software flow control |
| rtscts | Hardware flow control |
| dsrdtr | Hardware flow control |
Use example:
print(ser.name)
4. Serial port and write
| instruction | illustrate |
|---|---|
| open() | Open the serial port |
| close() | Close the serial port |
Example:
Read data
def serload(ser):
    while True:
        if ser.in_waiting:
            str1 = ser.readline().decode('GBK')  # Read a row, end with / N.
            char1 = print(ser.read(size=1).hex()) #       s s  tem
            print(str1)
Write data
def serwrite(ser):
    text = input('please enter:')
    ser.write(text.encode("gbk"))
5. Directive
| instruction | illustrate |
|---|---|
| read(size=1) | Read Size byte from serial port |
| write(data) | Send DATA and return the number of sending bytes |
| inWaiting() | Returns the number of bytes in the receiving cache |
| flush() | Waiting for all data to write |
| flushInput() | Discard all data in the receiving cache |
| flushOutput() | Terminate the current write operation and discard the data in the sending cache |
| sendBreadk(duration=0.25) | Send BREAK conditions and return to IDLE after Duration Time |
3. Project example
The serial will receive the message:

The serial port data will be received via Python and stored in the specified text each received, and data can also be transmitted to the serial port.
IV. Reference
- Pyserial instance tutorial detailed usage
- Python’s serial communication (Pyserial)
- Python3- serial port: 1 Python3 simple serial communication implementation