| title | description | ms.reviewer | manager | ms.author | ms.prod | ms.localizationpriority | author | ms.topic | ms.technology | ms.collection | ms.date |
|---|---|---|---|---|---|---|---|---|---|---|---|
|
Deploy a Windows 10 image using MDT (Windows 10) |
This article will show you how to take your reference image for Windows 10, and deploy that image to your environment using the Microsoft Deployment Toolkit (MDT). |
aaroncz |
frankroj |
windows-client |
medium |
frankroj |
article |
itpro-deploy |
highpri |
11/28/2022 |
Deploy a Windows 10 image using MDT
Applies to:
- Windows 10
This article will show you how to take your reference image for Windows 10 (that was created), and deploy that image to your environment using the Microsoft Deployment Toolkit (MDT).
We’ll prepare for this deployment by creating an MDT deployment share that is used solely for image deployment. Separating the processes of creating reference images from the processes used to deploy them in production allows greater control of on both processes. We’ll configure Active Directory permissions, configure the deployment share, create a new task sequence, and add applications, drivers, and rules.
For the purposes of this article, we’ll use four computers: DC01, MDT01, HV01 and PC0005.
- DC01 is a domain controller
- MDT01 is a domain member server
- HV01 is a Hyper-V server
- PC0005 is a blank device to which we’ll deploy Windows 10
MDT01 and PC0005 are members of the domain contoso.com for the fictitious Contoso Corporation. HV01 used to test deployment of PC0005 in a virtual environment.

[!NOTE]
For details about the setup for the procedures in this article, please see Prepare for deployment with MDT.
Step 1: Configure Active Directory permissions
These steps will show you how to configure an Active Directory account with the permissions required to deploy a Windows 10 machine to the domain using MDT. These steps assume you’ve The account is used for Windows Preinstallation Environment (Windows PE) to connect to MDT01. In order for MDT to join machines into the contoso.com domain you need to create an account and configure permissions in Active Directory.
On DC01:
-
Download the Set-OUPermissions.ps1 script and copy it to the C:SetupScripts directory on DC01. This script configures permissions to allow the MDT_JD account to manage computer accounts in the contoso > Computers organizational unit.
-
Create the MDT_JD service account by running the following command from an elevated Windows PowerShell prompt:
New-ADUser -Name MDT_JD -UserPrincipalName MDT_JD@contoso.com -path "OU=Service Accounts,OU=Accounts,OU=Contoso,DC=CONTOSO,DC=COM" -Description "MDT join domain account" -AccountPassword (ConvertTo-SecureString "pass@word1" -AsPlainText -Force) -ChangePasswordAtLogon $false -PasswordNeverExpires $true -Enabled $true
-
Next, run the Set-OuPermissions script to apply permissions to the MDT_JD service account, enabling it to manage computer accounts in the Contoso / Computers OU. Run the following commands from an elevated Windows PowerShell prompt:
Set-ExecutionPolicy -ExecutionPolicy RemoteSigned -Force
Set-Location C:SetupScripts
.Set-OUPermissions.ps1 -Account MDT_JD -TargetOU "OU=Workstations,OU=Computers,OU=Contoso"
The following list is of the permissions being granted:
- Scope: This object and all descendant objects
- Create Computer objects
- Delete Computer objects
- Scope: Descendant Computer objects
- Read All Properties
- Write All Properties
- Read Permissions
- Modify Permissions
- Change Password
- Reset Password
- Validated write to DNS host name
- Validated write to service principal name
Step 2: Set up the MDT production deployment share
Next, create a new MDT deployment share. You shouldn’t use the same deployment share that you used to create the reference image for a production deployment. Perform this procedure on the MDT01 server.
Create the MDT production deployment share
On MDT01:
The steps for creating the deployment share for production are the same as when you created the deployment share for creating the custom reference image:
-
Ensure you’re signed on as: contosoadministrator.
-
In the Deployment Workbench console, right-click Deployment Shares and select New Deployment Share.
-
On the Path page, in the Deployment share path text box, type D:MDTProduction and select Next.
-
On the Share page, in the Share name text box, type MDTProduction$ and select Next.
-
On the Descriptive Name page, in the Deployment share description text box, type MDT Production and select Next.
-
On the Options page, accept the default settings and select Next twice, and then select Finish.
-
Using File Explorer, verify that you can access the \MDT01MDTProduction$ share.
Configure permissions for the production deployment share
To read files in the deployment share, you need to assign NTFS and SMB permissions to the MDT Build Account (MDT_BA) for the D:MDTProduction folder
On MDT01:
-
Ensure you’re signed in as contosoadministrator.
-
Modify the NTFS permissions for the D:MDTProduction folder by running the following command in an elevated Windows PowerShell prompt:
icacls.exe "D:MDTProduction" /grant '"CONTOSOMDT_BA":(OI)(CI)(M)'
grant-smbshareaccess -Name MDTProduction$ -AccountName "ContosoMDT_BA" -AccessRight Full -force
Step 3: Add a custom image
The next step is to add a reference image into the deployment share with the setup files required to successfully deploy Windows 10. When adding a custom image, you still need to copy setup files (an option in the wizard) because Windows 10 stores other components in the SourcesSxS folder that is outside the image and may be required when installing components.
Add the Windows 10 Enterprise x64 RTM custom image
In these steps, we assume that you’ve completed the steps in the Create a Windows 10 reference image article, so you’ve a Windows 10 reference image at D:MDTBuildLabCapturesREFW10X64-001.wim on MDT01.
-
Using the Deployment Workbench, expand the Deployment Shares node, and then expand MDT Production; select the Operating Systems node, and create a folder named Windows 10.
-
Right-click the Windows 10 folder and select Import Operating System.
-
On the OS Type page, select Custom image file and select Next.
-
On the Image page, in the Source file text box, browse to D:MDTBuildLabCapturesREFW10X64-001.wim and select Next.
-
On the Setup page, select the Copy Windows 7, Windows Server 2008 R2, or later setup files from the specified path option; in the Setup source directory text box, browse to D:MDTBuildLabOperating SystemsW10EX64RTM and select Next.
-
On the Destination page, in the Destination directory name text box, type W10EX64RTM, select Next twice, and then select Finish.
-
After adding the operating system, double-click the added operating system name in the Operating Systems / Windows 10 node and change the name to Windows 10 Enterprise x64 RTM Custom Image.
[!NOTE]
The reason for adding the setup files has changed since earlier versions of MDT. MDT 2010 used the setup files to install Windows. MDT uses DISM to apply the image; however, you still need the setup files because some components in roles and features are stored outside the main image.

Step 4: Add an application
When you configure your MDT Build Lab deployment share, you can also add applications to the new deployment share before creating your task sequence. This section walks you through the process of adding an application to the MDT Production deployment share using Adobe Reader as an example.
Create the install: Adobe Reader DC
On MDT01:
-
Download the Enterprise distribution version of Adobe Acrobat Reader DC (AcroRdrDC2200320282_en_US.exe) to D:setupadobe on MDT01.
-
Extract the .exe file that you downloaded to a .msi (ex: .AcroRdrDC2200320282_en_US.exe -sfx_o»d:setupadobeinstall» -sfx_ne).
-
In the Deployment Workbench, expand the MDT Production node and navigate to the Applications node.
-
Right-click the Applications node, and create a new folder named Adobe.
-
In the Applications node, right-click the Adobe folder and select New Application.
-
On the Application Type page, select the Application with source files option and select Next.
-
On the Details page, in the Application Name text box, type Install — Adobe Reader and select Next*.
-
On the Source page, in the Source Directory text box, browse to D:setupadobeinstall and select Next.
-
On the Destination page, in the Specify the name of the directory that should be created text box, type Install — Adobe Reader and select Next.
-
On the Command Details page, in the Command Line text box, type msiexec /i AcroRead.msi /q, select Next twice, and then select Finish.

The Adobe Reader application added to the Deployment Workbench.

Step 5: Prepare the drivers repository
In order to deploy Windows 10 with MDT successfully, you need drivers for the boot images and for the actual operating system. This section will show you how to add drivers for the boot image and operating system, using the following hardware models as examples:
- Lenovo ThinkPad T420
- Dell Latitude 7390
- HP EliteBook 8560w
- Microsoft Surface Pro
For boot images, you need to have storage and network drivers; for the operating system, you need to have the full suite of drivers.
[!NOTE]
You should only add drivers to the Windows PE images if the default drivers don’t work. Adding drivers that are not necessary will only make the boot image larger and potentially delay the download time.
Create the driver source structure in the file system
The key to successful management of drivers for MDT, and for any other deployment solution, is to have a good driver repository. From this repository, you import drivers into MDT for deployment, but you should always maintain the repository for future use.
On MDT01:
[!IMPORTANT]
In the steps below, it’s critical that the folder names used for various computer makes and models exactly match the results of wmic computersystem get model,manufacturer on the target system.
-
Using File Explorer, create the D:drivers folder.
-
In the D:drivers folder, create the following folder structure:
- WinPE x86
- WinPE x64
- Windows 10 x64
-
In the new Windows 10 x64 folder, create the following folder structure:
- Dell Inc.
- Latitude E7450
- Hewlett-Packard
- HP EliteBook 8560w
- Lenovo
- ThinkStation P500 (30A6003TUS)
- Microsoft Corporation
- Surface Laptop
- Dell Inc.
[!NOTE]
Even if you’re not going to use both x86 and x64 boot images, we still recommend that you add the support structure for future use.
Create the logical driver structure in MDT
When you import drivers to the MDT driver repository, MDT creates a single instance folder structure based on driver class names. However, you can, and should, mimic the driver structure of your driver source repository in the Deployment Workbench. This mimic is done by creating logical folders in the Deployment Workbench.
-
On MDT01, using Deployment Workbench, select the Out-of-Box Drivers node.
-
In the Out-Of-Box Drivers node, create the following folder structure:
- WinPE x86
- WinPE x64
- Windows 10 x64
-
In the Windows 10 x64 folder, create the following folder structure:
- Dell Inc.
- Latitude E7450
- Hewlett-Packard
- HP EliteBook 8560w
- Lenovo
- 30A6003TUS
- Microsoft Corporation
- Surface Laptop
- Dell Inc.
The preceding folder names should match the actual make and model values that MDT reads from devices during deployment. You can find out the model values for your machines by using the following command in Windows PowerShell:
Get-WmiObject -Class:Win32_ComputerSystem
Or, you can use this command in a normal command prompt:
wmic.exe csproduct get name
If you want a more standardized naming convention, try the ModelAliasExit.vbs script from the Deployment Guys blog post, entitled Using and Extending Model Aliases for Hardware Specific Application Installation.

The Out-of-Box Drivers structure in the Deployment Workbench.
Create the selection profiles for boot image drivers
By default, MDT adds any storage and network drivers that you import to the boot images. However, you should add only the drivers that are necessary to the boot image. You can control which drivers are added by using selection profiles.
The drivers that are used for the boot images (Windows PE) are Windows 10 drivers. If you can’t locate Windows 10 drivers for your device, a Windows 7 or Windows 8.1 driver will most likely work, but Windows 10 drivers should be your first choice.
On MDT01:
-
In the Deployment Workbench, under the MDT Production node, expand the Advanced Configuration node, right-click the Selection Profiles node, and select New Selection Profile.
-
In the New Selection Profile Wizard, create a selection profile with the following settings:
- Selection Profile name: WinPE x86
- Folders: Select the WinPE x86 folder in Out-of-Box Drivers.
- Select Next, Next and Finish.
-
Right-click the Selection Profiles node again, and select New Selection Profile.
-
In the New Selection Profile Wizard, create a selection profile with the following settings:
- Selection Profile name: WinPE x64
- Folders: Select the WinPE x64 folder in Out-of-Box Drivers.
- Select Next, Next and Finish.
Creating the WinPE x64 selection profile.

Extract and import drivers for the x64 boot image
Windows PE supports all the hardware models that we have, but here you learn to add boot image drivers to accommodate any new hardware that might require more drivers. In this example, you add the latest Intel network drivers to the x64 boot image.
On MDT01:
-
Download PROWinx64.exe from Intel.com (ex: PROWinx64.exe).
-
Extract PROWinx64.exe to a temporary folder — in this example to the C:TmpProWinx64 folder.
[!NOTE]
Extracting the .exe file manually requires an extraction utility. You can also run the .exe and it will self-extract files to the %userprofile%AppDataLocalTempRarSFX0 directory. This directory is temporary and will be deleted when the .exe terminates. -
Using File Explorer, create the D:DriversWinPE x64Intel PRO1000 folder.
-
Copy the content of the C:TmpPROWinx64PRO1000Winx64NDIS64 folder to the D:DriversWinPE x64Intel PRO1000 folder.
-
In the Deployment Workbench, expand the MDT Production > Out-of-Box Drivers node, right-click the WinPE x64 node, and select Import Drivers, and use the following Driver source directory to import drivers: D:DriversWinPE x64Intel PRO1000.
Download, extract, and import drivers
For the Lenovo ThinkStation P500
For the ThinkStation P500 model, you use the Lenovo ThinkVantage Update Retriever software to download the drivers. With Update Retriever, you need to specify the correct Lenovo Machine Type for the actual hardware (the first four characters of the model name). As an example, the Lenovo ThinkStation P500 model has the 30A6003TUS model name, meaning the Machine Type is 30A6.

To get the updates, download the drivers from the Lenovo ThinkVantage Update Retriever using its export function. You can also download the drivers by searching PC Support on the Lenovo website.
In this example, we assume you’ve downloaded and extracted the drivers using ThinkVantage Update Retriever to the D:DriversLenovoThinkStation P500 (30A6003TUS) directory.
On MDT01:
-
In the Deployment Workbench, in the MDT Production > Out-Of-Box Drivers > Windows 10 x64 node, expand the Lenovo node.
-
Right-click the 30A6003TUS folder and select Import Drivers and use the following Driver source directory to import drivers:
D:DriversWindows 10 x64LenovoThinkStation P500 (30A6003TUS)
The folder you select and all subfolders will be checked for drivers, expanding any .cab files that are present and searching for drivers.
For the Latitude E7450
For the Dell Latitude E7450 model, you use the Dell Driver CAB file, which is accessible via the Dell TechCenter website.
In these steps, we assume you’ve downloaded and extracted the CAB file for the Latitude E7450 model to the D:DriversDell Inc.Latitude E7450 folder.
On MDT01:
-
In the Deployment Workbench, in the MDT Production > Out-Of-Box Drivers > Windows 10 x64 node, expand the Dell Inc. node.
-
Right-click the Latitude E7450 folder and select Import Drivers and use the following Driver source directory to import drivers:
D:DriversWindows 10 x64Dell Inc.Latitude E7450
For the HP EliteBook 8560w
For the HP EliteBook 8560w, you use HP Image Assistant to get the drivers. The HP Image Assistant can be accessed on the HP Support site.
In these steps, we assume you’ve downloaded and extracted the drivers for the HP EliteBook 8650w model to the D:DriversWindows 10 x64Hewlett-PackardHP EliteBook 8560w folder.
On MDT01:
-
In the Deployment Workbench, in the MDT Production > Out-Of-Box Drivers > Windows 10 x64 node, expand the Hewlett-Packard node.
-
Right-click the HP EliteBook 8560w folder and select Import Drivers and use the following Driver source directory to import drivers:
D:DriversWindows 10 x64Hewlett-PackardHP EliteBook 8560w
For the Microsoft Surface Laptop
For the Microsoft Surface Laptop model, you find the drivers on the Microsoft website. In these steps, we assume you’ve downloaded and extracted the Surface Laptop drivers to the D:DriversWindows 10 x64MicrosoftSurface Laptop folder.
On MDT01:
-
In the Deployment Workbench, in the MDT Production > Out-Of-Box Drivers > Windows 10 x64 node, expand the Microsoft node.
-
Right-click the Surface Laptop folder and select Import Drivers; and use the following Driver source directory to import drivers:
D:DriversWindows 10 x64MicrosoftSurface Laptop
Step 6: Create the deployment task sequence
This section will show you how to create the task sequence used to deploy your production Windows 10 reference image. You’ll then configure the task sequence to enable patching via a Windows Server Update Services (WSUS) server.
Create a task sequence for Windows 10 Enterprise
On MDT01:
-
In the Deployment Workbench, under the MDT Production node, right-click Task Sequences, and create a folder named Windows 10.
-
Right-click the new Windows 10 folder and select New Task Sequence. Use the following settings for the New Task Sequence Wizard:
- Task sequence ID: W10-X64-001
- Task sequence name: Windows 10 Enterprise x64 RTM Custom Image
- Task sequence comments: Production Image
- Template: Standard Client Task Sequence
- Select OS: Windows 10 Enterprise x64 RTM Custom Image
- Specify Product Key: Don’t specify a product key at this time
- Full Name: Contoso
- Organization: Contoso
- Internet Explorer home page:
https://www.contoso.com - Admin Password: Don’t specify an Administrator Password at this time
Edit the Windows 10 task sequence
-
Continuing from the previous procedure, right-click the Windows 10 Enterprise x64 RTM Custom Image task sequence, and select Properties.
-
On the Task Sequence tab, configure the Windows 10 Enterprise x64 RTM Custom Image task sequence with the following settings:
-
Preinstall: After the Enable BitLocker (Offline) action, add a Set Task Sequence Variable action with the following settings:
- Name: Set DriverGroup001
- Task Sequence Variable: DriverGroup001
- Value: Windows 10 x64%Make%%Model%
-
Configure the Inject Drivers action with the following settings:
-
Choose a selection profile: Nothing
-
Install all drivers from the selection profile
[!NOTE]
The configuration above indicates that MDT should only use drivers from the folder specified by the DriverGroup001 property, which is defined by the «Choose a selection profile: Nothing» setting, and that MDT shouldn’t use plug and play to determine which drivers to copy, which is defined by the «Install all drivers from the selection profile» setting.
-
-
State Restore. Enable the Windows Update (Pre-Application Installation) action.
-
State Restore. Enable the Windows Update (Post-Application Installation) action.
-
-
Select OK.
The task sequence for production deployment.

Step 7: Configure the MDT production deployment share
In this section, you’ll learn how to configure the MDT Build Lab deployment share with the rules required to create a dynamic deployment process. This configuration includes commonly used rules and an explanation of how these rules work.
Configure the rules
[!NOTE]
The following instructions assume the device is online. If you’re offline you can remove SLShare variable.
On MDT01:
-
Right-click the MDT Production deployment share and select Properties.
-
Select the Rules tab and replace the existing rules with the following information (modify the domain name, WSUS server, and administrative credentials to match your environment):
[Settings]
Priority=Default

[Default]
_SMSTSORGNAME=Contoso
OSInstall=YES
UserDataLocation=AUTO
TimeZoneName=Pacific Standard Time
AdminPassword=pass@word1
JoinDomain=contoso.com
DomainAdmin=CONTOSOMDT_JD
DomainAdminPassword=pass@word1
MachineObjectOU=OU=Workstations,OU=Computers,OU=Contoso,DC=contoso,DC=com
SLShare=\MDT01Logs$
ScanStateArgs=/ue:** /ui:CONTOSO*
USMTMigFiles001=MigApp.xml
USMTMigFiles002=MigUser.xml
HideShell=YES
ApplyGPOPack=NO
WSUSServer=mdt01.contoso.com:8530
SkipAppsOnUpgrade=NO
SkipAdminPassword=YES
SkipProductKey=YES
SkipComputerName=NO
SkipDomainMembership=YES
SkipUserData=YES
SkipLocaleSelection=YES
SkipTaskSequence=NO
SkipTimeZone=YES
SkipApplications=NO
SkipBitLocker=YES
SkipSummary=YES
SkipCapture=YES
SkipFinalSummary=NO
-
Select Edit Bootstrap.ini and modify using the following information:
[Settings]
Priority=Default

[Default]
DeployRoot=\MDT01MDTProduction$
UserDomain=CONTOSO
UserID=MDT_BA
UserPassword=pass@word1
SkipBDDWelcome=YES
-
On the Windows PE tab, in the Platform drop-down list, make sure x86 is selected.
-
On the General sub tab (still under the main Windows PE tab), configure the following settings:
In the Lite Touch Boot Image Settings area:
- Image description: MDT Production x86
- ISO file name: MDT Production x86.iso
[!NOTE]
Because you’re going to use Pre-Boot Execution Environment (PXE) later to deploy the machines, you don’t need the ISO file; however, we recommend creating ISO files because they’re useful when troubleshooting deployments and for quick tests.
-
On the Drivers and Patches sub tab, select the WinPE x86 selection profile and select the Include all drivers from the selection profile option.
-
On the Windows PE tab, in the Platform drop-down list, select x64.
-
On the General sub tab, configure the following settings:
In the Lite Touch Boot Image Settings area:
- Image description: MDT Production x64
- ISO file name: MDT Production x64.iso
-
In the Drivers and Patches sub tab, select the WinPE x64 selection profile and select the Include all drivers from the selection profile option.
-
In the Monitoring tab, select the Enable monitoring for this deployment share check box.
-
Select OK.
[!NOTE]
It will take a while for the Deployment Workbench to create the monitoring database and web service.The Windows PE tab for the x64 boot image.

The rules explained
The rules for the MDT Production deployment share are different from those rules for the MDT Build Lab deployment share. The biggest differences are that you deploy the machines into a domain instead of a workgroup.
You can optionally remove the UserID and UserPassword entries from Bootstrap.ini so that users performing PXE boot are prompted to provide credentials with permission to connect to the deployment share. Setting SkipBDDWelcome=NO enables the welcome screen that displays options to run the deployment wizard, run DaRT tools (if installed), exit to a Windows PE command prompt, set the keyboard layout, or configure a static IP address. In this example, we’re skipping the welcome screen and providing credentials.
The Bootstrap.ini file
This file is the MDT Production Bootstrap.ini:
[Settings]
Priority=Default

[Default]
DeployRoot=\MDT01MDTProduction$
UserDomain=CONTOSO
UserID=MDT_BA
UserPassword=pass@word1
SkipBDDWelcome=YES
The CustomSettings.ini file
This file is the CustomSettings.ini file with the new join domain information:
[Settings]
Priority=Default

[Default]
_SMSTSORGNAME=Contoso
OSInstall=Y
UserDataLocation=AUTO
TimeZoneName=Pacific Standard Time
AdminPassword=pass@word1
JoinDomain=contoso.com
DomainAdmin=CONTOSOMDT_JD
DomainAdminPassword=pass@word1
MachineObjectOU=OU=Workstations,OU=Computers,OU=Contoso,DC=contoso,DC=com
SLShare=\MDT01Logs$
ScanStateArgs=/ue:** /ui:CONTOSO*
USMTMigFiles001=MigApp.xml
USMTMigFiles002=MigUser.xml
HideShell=YES
ApplyGPOPack=NO
WSUSServer=http://mdt01.contoso.com:8530
SkipAppsOnUpgrade=NO
SkipAdminPassword=YES
SkipProductKey=YES
SkipComputerName=NO
SkipDomainMembership=YES
SkipUserData=YES
SkipLocaleSelection=YES
SkipTaskSequence=NO
SkipTimeZone=YES
SkipApplications=NO
SkipBitLocker=YES
SkipSummary=YES
SkipCapture=YES
SkipFinalSummary=NO
EventService=http://MDT01:9800
Some properties to use in the MDT Production rules file are as follows:
- JoinDomain. The domain to join.
- DomainAdmin. The account to use when joining the machine to the domain.
- DomainAdminDomain. The domain for the join domain account.
- DomainAdminPassword. The password for the join domain account.
- MachineObjectOU. The organizational unit (OU) to which to add the computer account.
- ScanStateArgs. Arguments for the User State Migration Tool (USMT) ScanState command.
- USMTMigFiles(*). List of USMT templates (controlling what to back up and restore).
- EventService. Activates logging information to the MDT monitoring web service.
[!NOTE]
For more information about localization support, see the following articles:
- MDT sample guide
- LCID (Locale ID) codes
Optional deployment share configuration
If your organization has a Microsoft Software Assurance agreement, you also can subscribe to another Microsoft Desktop Optimization Package (MDOP) license (at an extra cost). Included in MDOP is Microsoft Diagnostics and Recovery Toolkit (DaRT), which contains tools that can help you troubleshoot MDT deployments, and troubleshoot Windows itself.
Add DaRT 10 to the boot images
If you’ve licensing for MDOP and DaRT, you can add DaRT to the boot images using the steps in this section. If you don’t have DaRT licensing, or don’t want to use it, skip to the next section, Update the Deployment Share. To enable the remote connection feature in MDT, you need to do the following steps:
[!NOTE]
DaRT 10 is part of MDOP 2015.MDOP might be available as a download from your Visual Studio subscription. When searching, be sure to look for Desktop Optimization Pack.
On MDT01:
-
Download MDOP 2015 and copy the DaRT 10 installer file to the D:SetupDaRT 10 folder on MDT01 (DaRTDaRT 10Installers<lang>x64MSDaRT100.msi).
-
Install DaRT 10 (MSDaRT10.msi) using the default settings.
-
Copy the two tools CAB files from C:Program FilesMicrosoft DaRTv10 (Toolsx86.cab and Toolsx64.cab) to the production deployment share at D:MDTProductionToolsx86 and D:MDTProductionToolsx64, respectively.
-
In the Deployment Workbench, right-click the MDT Production deployment share and select Properties.
-
On the Windows PE tab, in the Platform drop-down list, make sure x86 is selected.
-
On the Features sub tab, select the Microsoft Diagnostics and Recovery Toolkit (DaRT) checkbox.
Selecting the DaRT 10 feature in the deployment share. -
In the Windows PE tab, in the Platform drop-down list, select x64.
-
In the Features sub tab, in addition to the default selected feature pack, select the Microsoft Diagnostics and Recovery Toolkit (DaRT) check box.
-
Select OK.


Update the deployment share
Like the MDT Build Lab deployment share, the MDT Production deployment share needs to be updated after it has been configured. This update-process is the one during which the Windows PE boot images are created.
-
Right-click the MDT Production deployment share and select Update Deployment Share.
-
Use the default options for the Update Deployment Share Wizard.
[!NOTE]
The update process will take 5 to 10 minutes.
Step 8: Deploy the Windows 10 client image
These steps will walk you through the process of using task sequences to deploy Windows 10 images through a fully automated process. First, you need to add the boot image to Windows Deployment Services (WDS) and then start the deployment. In contrast with deploying images from the MDT Build Lab deployment share, we recommend using the Pre-Installation Execution Environment (PXE) to start the full deployments in the datacenter, even though you technically can use an ISO/CD or USB to start the process.
Configure Windows Deployment Services
You need to add the MDT Production Lite Touch x64 Boot image to WDS in preparation for the deployment. In this procedure, we assume that WDS is already installed and initialized on MDT01 as described in the Prepare for Windows deployment article.
On MDT01:
-
Open the Windows Deployment Services console, expand the Servers node and then expand MDT01.contoso.com.
-
Right-click Boot Images and select Add Boot Image.
-
Browse to the D:MDTProductionBootLiteTouchPE_x64.wim file and add the image with the default settings.
The boot image added to the WDS console.

Deploy the Windows 10 client
At this point, you should have a solution ready for deploying the Windows 10 client. We recommend starting by trying a few deployments at a time until you’re confident that your configuration works as expected. We find it useful to try some initial tests on virtual machines before testing on physical hardware. These tests help rule out hardware issues when testing or troubleshooting. Here are the steps to deploy your Windows 10 image to a virtual machine:
On HV01:
-
Create a virtual machine with the following settings:
- Name: PC0005
- Store the virtual machine in a different location: C:VM
- Generation: 2
- Memory: 2048 MB
- Network: Must be able to connect to MDT01MDTProduction$
- Hard disk: 60 GB (dynamic disk)
- Installation Options: Install an operating system from a network-based installation server
-
Start the PC0005 virtual machine, and press Enter to start the PXE boot. The VM will now load the Windows PE boot image from the WDS server.
The initial PXE boot process of PC0005. -
After Windows PE has booted, complete the Windows Deployment Wizard using the following setting:
- Select a task sequence to execute on this computer: Windows 10 Enterprise x64 RTM Custom Image
- Computer Name: PC0005
- Applications: Select the Install — Adobe Reader checkbox.
-
Setup now begins and does the following steps:
- Installs the Windows 10 Enterprise operating system.
- Installs the added application.
- Updates the operating system via your local Windows Server Update Services (WSUS) server.


Application installation
Following OS installation, Microsoft Office 365 Pro Plus — x64 is installed automatically.

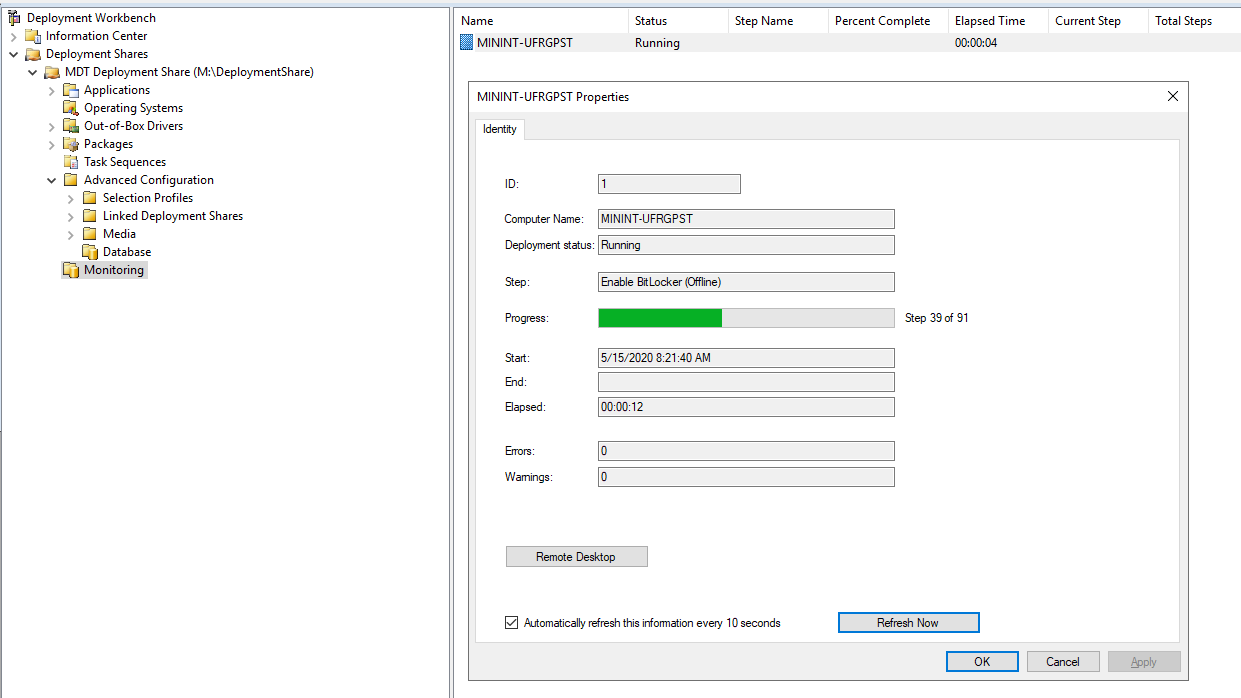
Use the MDT monitoring feature
Since you’ve enabled the monitoring on the MDT Production deployment share, you can follow your deployment of PC0005 via the monitoring node.
On MDT01:
-
In the Deployment Workbench, expand the MDT Production deployment share folder.
-
Select the Monitoring node, and wait until you see PC0005.
-
Double-click PC0005, and review the information.
The Monitoring node, showing the deployment progress of PC0005.

Use information in the Event Viewer
When monitoring is enabled, MDT also writes information to the event viewer on MDT01. This information can be used to trigger notifications via scheduled tasks when deployment is completed. For example, you can configure scheduled tasks to send an email when a certain event is created in the event log.

The Event Viewer showing a successful deployment of PC0005.
Multicast deployments
Multicast deployment allows for image deployment with reduced network load during simultaneous deployments. Multicast is a useful operating system deployment feature in MDT deployments, however it’s important to ensure that your network supports it and is designed for it. If you’ve a limited number of simultaneous deployments, you probably don’t need to enable multicast.
Requirements
Multicast requires that Windows Deployment Services (WDS) is running on Windows Server 2008 or later. In addition to the core MDT setup for multicast, the network needs to be configured to support multicast. In general, this configuration means involvement of the organization networking team to ensure that Internet Group Management Protocol (IGMP) snooping is turned on and that the network is designed for multicast traffic. The multicast solution uses IGMPv3.
Set up MDT for multicast
Setting up MDT for multicast is straightforward. You enable multicast on the deployment share, and MDT takes care of the rest.
On MDT01:
-
In the Deployment Workbench, right-click the MDT Production deployment share folder and select Properties.
-
On the General tab, select the Enable multicast for this deployment share (requires Windows Server 2008 R2 Windows Deployment Services) check box, and select OK.
-
Right-click the MDT Production deployment share folder and select Update Deployment Share.
-
After updating the deployment share, use the Windows Deployment Services console to, verify that the multicast namespace was created.
The newly created multicast namespace.

Use offline media to deploy Windows 10
In addition to network-based deployments, MDT supports the use of offline media-based deployments of Windows 10. You can easily generate an offline version of your deployment share — either the full deployment share or a subset of it — by using selection profiles. The generated offline media can be burned to a DVD or copied to a USB stick for deployment.
Offline media are useful not only when you don’t have network connectivity to the deployment share, but also when you’ve limited connection to the deployment share and don’t want to copy 5 GB of data over the wire. Offline media can still join the domain, but you save the transfer of operating system images, drivers, and applications over the wire.
Create the offline media selection profile
To filter what is being added to the media, you create a selection profile. When creating selection profiles, you quickly realize the benefits of having created a good logical folder structure in the Deployment Workbench.
On MDT01:
-
In the Deployment Workbench, under the MDT Production / Advanced Configuration node, right-click Selection Profiles, and select New Selection Profile.
-
Use the following settings for the New Selection Profile Wizard:
-
General Settings
- Selection profile name: Windows 10 Offline Media
-
Folders
- Applications / Adobe
- Operating Systems / Windows 10
- Out-Of-Box Drivers / WinPE x64
- Out-Of-Box Drivers / Windows 10 x64
- Task Sequences / Windows 10
-

Create the offline media
In these steps, you generate offline media from the MDT Production deployment share. To filter what is being added to the media, you use the previously created selection profile.
-
On MDT01, using File Explorer, create the D:MDTOfflineMedia folder.
[!NOTE]
When creating offline media, you need to create the target folder first. It’s crucial that you don’t create a subfolder inside the deployment share folder because it will break the offline media. -
In the Deployment Workbench, under the MDT Production / Advanced Configuration node, right-click the Media node, and select New Media.
-
Use the following settings for the New Media Wizard:
- General Settings
- Media path: D:MDTOfflineMedia
- Selection profile: Windows 10 Offline Media
- General Settings
Configure the offline media
Offline media has its own rules, its own Bootstrap.ini and CustomSettings.ini files. These files are stored in the Control folder of the offline media; they also can be accessed via properties of the offline media in the Deployment Workbench.
On MDT01:
-
Copy the CustomSettings.ini file from the D:MDTProductionControl folder to D:MDTOfflineMediaContentDeployControl. Overwrite the existing files.
-
In the Deployment Workbench, under the MDT Production / Advanced Configuration / Media node, right-click the MEDIA001 media, and select Properties.
-
In the General tab, configure the following:
- Clear the Generate x86 boot image check box.
- ISO file name: Windows 10 Offline Media.iso
-
On the Windows PE tab, in the Platform drop-down list, select x64.
-
On the General sub tab, configure the following settings:
- In the Lite Touch Boot Image Settings area:
- Image description: MDT Production x64
- In the Windows PE Customizations area, set the Scratch space size to 128.
- In the Lite Touch Boot Image Settings area:
-
On the Drivers and Patches sub tab, select the WinPE x64 selection profile and select the Include all drivers from the selection profile option.
-
Select OK.
Generate the offline media
You’ve now configured the offline media deployment share, however the share hasn’t yet been populated with the files required for deployment. Now everything is ready you populate the deployment share content folder and generate the offline media ISO.
On MDT01:
-
In the Deployment Workbench, navigate to the MDT Production / Advanced Configuration / Media node.
-
Right-click the MEDIA001 media, and select Update Media Content. The Update Media Content process now generates the offline media in the D:MDTOfflineMediaContent folder. The process might require several minutes.
Create a bootable USB stick
The ISO that you got when updating the offline media item can be burned to a DVD and used directly (it will be bootable), but it’s often more efficient to use USB sticks instead since they’re faster and can hold more data. (A dual-layer DVD is limited to 8.5 GB.)
[!TIP]
In this example, the .wim file is 5.5 GB in size. However, bootable USB sticks are formatted with the FAT32 file system which limits file size to 4.0 GB. You can place the image on a different drive (ex: E:DeployOperating SystemsW10EX64RTMREFW10X64-001.swm) and then modify E:DeployControlOperatingSystems.xml to point to it. Alternatively to keep using the USB you must split the .wim file, which can be done using DISM:
Dism.exe /Split-Image /ImageFile:D:MDTOfflinemediaContentDeployOperating SystemsW10EX64RTMREFW10X64-001.wim /SWMFile:E:sourcesinstall.swm /FileSize:3800.Windows Setup automatically installs from this file, provided you name it install.swm. The file names for the next files include numbers, for example: install2.swm, install3.swm.
To enable split image in MDT, the Settings.xml file in your deployment share (ex: D:MDTProductionControlSettings.xml) must have the SkipWimSplit value set to False. By default this value is set to True (
<SkipWimSplit>True</SkipWimSplit>), so this must be changed and the offline media content updated.
Follow these steps to create a bootable USB stick from the offline media content:
-
On a physical machine running Windows 7 or later, insert the USB stick you want to use.
-
Copy the content of the MDTOfflineMediaContent folder to the root of the USB stick.
-
Start an elevated command prompt (run as Administrator), and start the Diskpart utility by typing Diskpart and pressing Enter.
-
In the Diskpart utility, you can type list volume (or the shorter list vol) to list the volumes, but you only need to remember the drive letter of the USB stick to which you copied the content. In our example, the USB stick had the drive letter F.
-
In the Diskpart utility, type select volume F (replace F with your USB stick drive letter).
-
In the Diskpart utility, type active, and then type exit.
Unified Extensible Firmware Interface (UEFI)-based deployments
As referenced in Windows 10 deployment scenarios and tools, Unified Extensible Firmware Interface (UEFI)-based deployments are becoming more common. In fact, when you create a generation 2 virtual machine in Hyper-V, you get a UEFI-based computer. During deployment, MDT automatically detects that you’ve an UEFI-based machine and creates the partitions UEFI requires. You don’t need to update or change your task sequences in any way to accommodate UEFI.

The partitions when deploying an UEFI-based machine.
Related articles
- Get started with the Microsoft Deployment Toolkit (MDT)
- Create a Windows 10 reference image
- Build a distributed environment for Windows 10 deployment
- Refresh a Windows 7 computer with Windows 10
- Replace a Windows 7 computer with a Windows 10 computer
- Configure MDT settings
| title | description | ms.reviewer | manager | ms.author | ms.prod | ms.localizationpriority | author | ms.topic | ms.technology | ms.collection | ms.date |
|---|---|---|---|---|---|---|---|---|---|---|---|
|
Deploy a Windows 10 image using MDT (Windows 10) |
This article will show you how to take your reference image for Windows 10, and deploy that image to your environment using the Microsoft Deployment Toolkit (MDT). |
aaroncz |
frankroj |
windows-client |
medium |
frankroj |
article |
itpro-deploy |
highpri |
11/28/2022 |
Deploy a Windows 10 image using MDT
Applies to:
- Windows 10
This article will show you how to take your reference image for Windows 10 (that was created), and deploy that image to your environment using the Microsoft Deployment Toolkit (MDT).
We’ll prepare for this deployment by creating an MDT deployment share that is used solely for image deployment. Separating the processes of creating reference images from the processes used to deploy them in production allows greater control of on both processes. We’ll configure Active Directory permissions, configure the deployment share, create a new task sequence, and add applications, drivers, and rules.
For the purposes of this article, we’ll use four computers: DC01, MDT01, HV01 and PC0005.
- DC01 is a domain controller
- MDT01 is a domain member server
- HV01 is a Hyper-V server
- PC0005 is a blank device to which we’ll deploy Windows 10
MDT01 and PC0005 are members of the domain contoso.com for the fictitious Contoso Corporation. HV01 used to test deployment of PC0005 in a virtual environment.
[!NOTE]
For details about the setup for the procedures in this article, please see Prepare for deployment with MDT.
Step 1: Configure Active Directory permissions
These steps will show you how to configure an Active Directory account with the permissions required to deploy a Windows 10 machine to the domain using MDT. These steps assume you’ve The account is used for Windows Preinstallation Environment (Windows PE) to connect to MDT01. In order for MDT to join machines into the contoso.com domain you need to create an account and configure permissions in Active Directory.
On DC01:
-
Download the Set-OUPermissions.ps1 script and copy it to the C:SetupScripts directory on DC01. This script configures permissions to allow the MDT_JD account to manage computer accounts in the contoso > Computers organizational unit.
-
Create the MDT_JD service account by running the following command from an elevated Windows PowerShell prompt:
New-ADUser -Name MDT_JD -UserPrincipalName MDT_JD@contoso.com -path "OU=Service Accounts,OU=Accounts,OU=Contoso,DC=CONTOSO,DC=COM" -Description "MDT join domain account" -AccountPassword (ConvertTo-SecureString "pass@word1" -AsPlainText -Force) -ChangePasswordAtLogon $false -PasswordNeverExpires $true -Enabled $true
-
Next, run the Set-OuPermissions script to apply permissions to the MDT_JD service account, enabling it to manage computer accounts in the Contoso / Computers OU. Run the following commands from an elevated Windows PowerShell prompt:
Set-ExecutionPolicy -ExecutionPolicy RemoteSigned -Force
Set-Location C:SetupScripts
.Set-OUPermissions.ps1 -Account MDT_JD -TargetOU "OU=Workstations,OU=Computers,OU=Contoso"
The following list is of the permissions being granted:
- Scope: This object and all descendant objects
- Create Computer objects
- Delete Computer objects
- Scope: Descendant Computer objects
- Read All Properties
- Write All Properties
- Read Permissions
- Modify Permissions
- Change Password
- Reset Password
- Validated write to DNS host name
- Validated write to service principal name
Step 2: Set up the MDT production deployment share
Next, create a new MDT deployment share. You shouldn’t use the same deployment share that you used to create the reference image for a production deployment. Perform this procedure on the MDT01 server.
Create the MDT production deployment share
On MDT01:
The steps for creating the deployment share for production are the same as when you created the deployment share for creating the custom reference image:
-
Ensure you’re signed on as: contosoadministrator.
-
In the Deployment Workbench console, right-click Deployment Shares and select New Deployment Share.
-
On the Path page, in the Deployment share path text box, type D:MDTProduction and select Next.
-
On the Share page, in the Share name text box, type MDTProduction$ and select Next.
-
On the Descriptive Name page, in the Deployment share description text box, type MDT Production and select Next.
-
On the Options page, accept the default settings and select Next twice, and then select Finish.
-
Using File Explorer, verify that you can access the \MDT01MDTProduction$ share.
Configure permissions for the production deployment share
To read files in the deployment share, you need to assign NTFS and SMB permissions to the MDT Build Account (MDT_BA) for the D:MDTProduction folder
On MDT01:
-
Ensure you’re signed in as contosoadministrator.
-
Modify the NTFS permissions for the D:MDTProduction folder by running the following command in an elevated Windows PowerShell prompt:
icacls.exe "D:MDTProduction" /grant '"CONTOSOMDT_BA":(OI)(CI)(M)'
grant-smbshareaccess -Name MDTProduction$ -AccountName "ContosoMDT_BA" -AccessRight Full -force
Step 3: Add a custom image
The next step is to add a reference image into the deployment share with the setup files required to successfully deploy Windows 10. When adding a custom image, you still need to copy setup files (an option in the wizard) because Windows 10 stores other components in the SourcesSxS folder that is outside the image and may be required when installing components.
Add the Windows 10 Enterprise x64 RTM custom image
In these steps, we assume that you’ve completed the steps in the Create a Windows 10 reference image article, so you’ve a Windows 10 reference image at D:MDTBuildLabCapturesREFW10X64-001.wim on MDT01.
-
Using the Deployment Workbench, expand the Deployment Shares node, and then expand MDT Production; select the Operating Systems node, and create a folder named Windows 10.
-
Right-click the Windows 10 folder and select Import Operating System.
-
On the OS Type page, select Custom image file and select Next.
-
On the Image page, in the Source file text box, browse to D:MDTBuildLabCapturesREFW10X64-001.wim and select Next.
-
On the Setup page, select the Copy Windows 7, Windows Server 2008 R2, or later setup files from the specified path option; in the Setup source directory text box, browse to D:MDTBuildLabOperating SystemsW10EX64RTM and select Next.
-
On the Destination page, in the Destination directory name text box, type W10EX64RTM, select Next twice, and then select Finish.
-
After adding the operating system, double-click the added operating system name in the Operating Systems / Windows 10 node and change the name to Windows 10 Enterprise x64 RTM Custom Image.
[!NOTE]
The reason for adding the setup files has changed since earlier versions of MDT. MDT 2010 used the setup files to install Windows. MDT uses DISM to apply the image; however, you still need the setup files because some components in roles and features are stored outside the main image.
Step 4: Add an application
When you configure your MDT Build Lab deployment share, you can also add applications to the new deployment share before creating your task sequence. This section walks you through the process of adding an application to the MDT Production deployment share using Adobe Reader as an example.
Create the install: Adobe Reader DC
On MDT01:
-
Download the Enterprise distribution version of Adobe Acrobat Reader DC (AcroRdrDC2200320282_en_US.exe) to D:setupadobe on MDT01.
-
Extract the .exe file that you downloaded to a .msi (ex: .AcroRdrDC2200320282_en_US.exe -sfx_o»d:setupadobeinstall» -sfx_ne).
-
In the Deployment Workbench, expand the MDT Production node and navigate to the Applications node.
-
Right-click the Applications node, and create a new folder named Adobe.
-
In the Applications node, right-click the Adobe folder and select New Application.
-
On the Application Type page, select the Application with source files option and select Next.
-
On the Details page, in the Application Name text box, type Install — Adobe Reader and select Next*.
-
On the Source page, in the Source Directory text box, browse to D:setupadobeinstall and select Next.
-
On the Destination page, in the Specify the name of the directory that should be created text box, type Install — Adobe Reader and select Next.
-
On the Command Details page, in the Command Line text box, type msiexec /i AcroRead.msi /q, select Next twice, and then select Finish.
The Adobe Reader application added to the Deployment Workbench.
Step 5: Prepare the drivers repository
In order to deploy Windows 10 with MDT successfully, you need drivers for the boot images and for the actual operating system. This section will show you how to add drivers for the boot image and operating system, using the following hardware models as examples:
- Lenovo ThinkPad T420
- Dell Latitude 7390
- HP EliteBook 8560w
- Microsoft Surface Pro
For boot images, you need to have storage and network drivers; for the operating system, you need to have the full suite of drivers.
[!NOTE]
You should only add drivers to the Windows PE images if the default drivers don’t work. Adding drivers that are not necessary will only make the boot image larger and potentially delay the download time.
Create the driver source structure in the file system
The key to successful management of drivers for MDT, and for any other deployment solution, is to have a good driver repository. From this repository, you import drivers into MDT for deployment, but you should always maintain the repository for future use.
On MDT01:
[!IMPORTANT]
In the steps below, it’s critical that the folder names used for various computer makes and models exactly match the results of wmic computersystem get model,manufacturer on the target system.
-
Using File Explorer, create the D:drivers folder.
-
In the D:drivers folder, create the following folder structure:
- WinPE x86
- WinPE x64
- Windows 10 x64
-
In the new Windows 10 x64 folder, create the following folder structure:
- Dell Inc.
- Latitude E7450
- Hewlett-Packard
- HP EliteBook 8560w
- Lenovo
- ThinkStation P500 (30A6003TUS)
- Microsoft Corporation
- Surface Laptop
- Dell Inc.
[!NOTE]
Even if you’re not going to use both x86 and x64 boot images, we still recommend that you add the support structure for future use.
Create the logical driver structure in MDT
When you import drivers to the MDT driver repository, MDT creates a single instance folder structure based on driver class names. However, you can, and should, mimic the driver structure of your driver source repository in the Deployment Workbench. This mimic is done by creating logical folders in the Deployment Workbench.
-
On MDT01, using Deployment Workbench, select the Out-of-Box Drivers node.
-
In the Out-Of-Box Drivers node, create the following folder structure:
- WinPE x86
- WinPE x64
- Windows 10 x64
-
In the Windows 10 x64 folder, create the following folder structure:
- Dell Inc.
- Latitude E7450
- Hewlett-Packard
- HP EliteBook 8560w
- Lenovo
- 30A6003TUS
- Microsoft Corporation
- Surface Laptop
- Dell Inc.
The preceding folder names should match the actual make and model values that MDT reads from devices during deployment. You can find out the model values for your machines by using the following command in Windows PowerShell:
Get-WmiObject -Class:Win32_ComputerSystem
Or, you can use this command in a normal command prompt:
wmic.exe csproduct get name
If you want a more standardized naming convention, try the ModelAliasExit.vbs script from the Deployment Guys blog post, entitled Using and Extending Model Aliases for Hardware Specific Application Installation.
The Out-of-Box Drivers structure in the Deployment Workbench.
Create the selection profiles for boot image drivers
By default, MDT adds any storage and network drivers that you import to the boot images. However, you should add only the drivers that are necessary to the boot image. You can control which drivers are added by using selection profiles.
The drivers that are used for the boot images (Windows PE) are Windows 10 drivers. If you can’t locate Windows 10 drivers for your device, a Windows 7 or Windows 8.1 driver will most likely work, but Windows 10 drivers should be your first choice.
On MDT01:
-
In the Deployment Workbench, under the MDT Production node, expand the Advanced Configuration node, right-click the Selection Profiles node, and select New Selection Profile.
-
In the New Selection Profile Wizard, create a selection profile with the following settings:
- Selection Profile name: WinPE x86
- Folders: Select the WinPE x86 folder in Out-of-Box Drivers.
- Select Next, Next and Finish.
-
Right-click the Selection Profiles node again, and select New Selection Profile.
-
In the New Selection Profile Wizard, create a selection profile with the following settings:
- Selection Profile name: WinPE x64
- Folders: Select the WinPE x64 folder in Out-of-Box Drivers.
- Select Next, Next and Finish.
Creating the WinPE x64 selection profile.
Extract and import drivers for the x64 boot image
Windows PE supports all the hardware models that we have, but here you learn to add boot image drivers to accommodate any new hardware that might require more drivers. In this example, you add the latest Intel network drivers to the x64 boot image.
On MDT01:
-
Download PROWinx64.exe from Intel.com (ex: PROWinx64.exe).
-
Extract PROWinx64.exe to a temporary folder — in this example to the C:TmpProWinx64 folder.
[!NOTE]
Extracting the .exe file manually requires an extraction utility. You can also run the .exe and it will self-extract files to the %userprofile%AppDataLocalTempRarSFX0 directory. This directory is temporary and will be deleted when the .exe terminates. -
Using File Explorer, create the D:DriversWinPE x64Intel PRO1000 folder.
-
Copy the content of the C:TmpPROWinx64PRO1000Winx64NDIS64 folder to the D:DriversWinPE x64Intel PRO1000 folder.
-
In the Deployment Workbench, expand the MDT Production > Out-of-Box Drivers node, right-click the WinPE x64 node, and select Import Drivers, and use the following Driver source directory to import drivers: D:DriversWinPE x64Intel PRO1000.
Download, extract, and import drivers
For the Lenovo ThinkStation P500
For the ThinkStation P500 model, you use the Lenovo ThinkVantage Update Retriever software to download the drivers. With Update Retriever, you need to specify the correct Lenovo Machine Type for the actual hardware (the first four characters of the model name). As an example, the Lenovo ThinkStation P500 model has the 30A6003TUS model name, meaning the Machine Type is 30A6.
To get the updates, download the drivers from the Lenovo ThinkVantage Update Retriever using its export function. You can also download the drivers by searching PC Support on the Lenovo website.
In this example, we assume you’ve downloaded and extracted the drivers using ThinkVantage Update Retriever to the D:DriversLenovoThinkStation P500 (30A6003TUS) directory.
On MDT01:
-
In the Deployment Workbench, in the MDT Production > Out-Of-Box Drivers > Windows 10 x64 node, expand the Lenovo node.
-
Right-click the 30A6003TUS folder and select Import Drivers and use the following Driver source directory to import drivers:
D:DriversWindows 10 x64LenovoThinkStation P500 (30A6003TUS)
The folder you select and all subfolders will be checked for drivers, expanding any .cab files that are present and searching for drivers.
For the Latitude E7450
For the Dell Latitude E7450 model, you use the Dell Driver CAB file, which is accessible via the Dell TechCenter website.
In these steps, we assume you’ve downloaded and extracted the CAB file for the Latitude E7450 model to the D:DriversDell Inc.Latitude E7450 folder.
On MDT01:
-
In the Deployment Workbench, in the MDT Production > Out-Of-Box Drivers > Windows 10 x64 node, expand the Dell Inc. node.
-
Right-click the Latitude E7450 folder and select Import Drivers and use the following Driver source directory to import drivers:
D:DriversWindows 10 x64Dell Inc.Latitude E7450
For the HP EliteBook 8560w
For the HP EliteBook 8560w, you use HP Image Assistant to get the drivers. The HP Image Assistant can be accessed on the HP Support site.
In these steps, we assume you’ve downloaded and extracted the drivers for the HP EliteBook 8650w model to the D:DriversWindows 10 x64Hewlett-PackardHP EliteBook 8560w folder.
On MDT01:
-
In the Deployment Workbench, in the MDT Production > Out-Of-Box Drivers > Windows 10 x64 node, expand the Hewlett-Packard node.
-
Right-click the HP EliteBook 8560w folder and select Import Drivers and use the following Driver source directory to import drivers:
D:DriversWindows 10 x64Hewlett-PackardHP EliteBook 8560w
For the Microsoft Surface Laptop
For the Microsoft Surface Laptop model, you find the drivers on the Microsoft website. In these steps, we assume you’ve downloaded and extracted the Surface Laptop drivers to the D:DriversWindows 10 x64MicrosoftSurface Laptop folder.
On MDT01:
-
In the Deployment Workbench, in the MDT Production > Out-Of-Box Drivers > Windows 10 x64 node, expand the Microsoft node.
-
Right-click the Surface Laptop folder and select Import Drivers; and use the following Driver source directory to import drivers:
D:DriversWindows 10 x64MicrosoftSurface Laptop
Step 6: Create the deployment task sequence
This section will show you how to create the task sequence used to deploy your production Windows 10 reference image. You’ll then configure the task sequence to enable patching via a Windows Server Update Services (WSUS) server.
Create a task sequence for Windows 10 Enterprise
On MDT01:
-
In the Deployment Workbench, under the MDT Production node, right-click Task Sequences, and create a folder named Windows 10.
-
Right-click the new Windows 10 folder and select New Task Sequence. Use the following settings for the New Task Sequence Wizard:
- Task sequence ID: W10-X64-001
- Task sequence name: Windows 10 Enterprise x64 RTM Custom Image
- Task sequence comments: Production Image
- Template: Standard Client Task Sequence
- Select OS: Windows 10 Enterprise x64 RTM Custom Image
- Specify Product Key: Don’t specify a product key at this time
- Full Name: Contoso
- Organization: Contoso
- Internet Explorer home page:
https://www.contoso.com - Admin Password: Don’t specify an Administrator Password at this time
Edit the Windows 10 task sequence
-
Continuing from the previous procedure, right-click the Windows 10 Enterprise x64 RTM Custom Image task sequence, and select Properties.
-
On the Task Sequence tab, configure the Windows 10 Enterprise x64 RTM Custom Image task sequence with the following settings:
-
Preinstall: After the Enable BitLocker (Offline) action, add a Set Task Sequence Variable action with the following settings:
- Name: Set DriverGroup001
- Task Sequence Variable: DriverGroup001
- Value: Windows 10 x64%Make%%Model%
-
Configure the Inject Drivers action with the following settings:
-
Choose a selection profile: Nothing
-
Install all drivers from the selection profile
[!NOTE]
The configuration above indicates that MDT should only use drivers from the folder specified by the DriverGroup001 property, which is defined by the «Choose a selection profile: Nothing» setting, and that MDT shouldn’t use plug and play to determine which drivers to copy, which is defined by the «Install all drivers from the selection profile» setting.
-
-
State Restore. Enable the Windows Update (Pre-Application Installation) action.
-
State Restore. Enable the Windows Update (Post-Application Installation) action.
-
-
Select OK.
The task sequence for production deployment.
Step 7: Configure the MDT production deployment share
In this section, you’ll learn how to configure the MDT Build Lab deployment share with the rules required to create a dynamic deployment process. This configuration includes commonly used rules and an explanation of how these rules work.
Configure the rules
[!NOTE]
The following instructions assume the device is online. If you’re offline you can remove SLShare variable.
On MDT01:
-
Right-click the MDT Production deployment share and select Properties.
-
Select the Rules tab and replace the existing rules with the following information (modify the domain name, WSUS server, and administrative credentials to match your environment):
[Settings]
Priority=Default

[Default]
_SMSTSORGNAME=Contoso
OSInstall=YES
UserDataLocation=AUTO
TimeZoneName=Pacific Standard Time
AdminPassword=pass@word1
JoinDomain=contoso.com
DomainAdmin=CONTOSOMDT_JD
DomainAdminPassword=pass@word1
MachineObjectOU=OU=Workstations,OU=Computers,OU=Contoso,DC=contoso,DC=com
SLShare=\MDT01Logs$
ScanStateArgs=/ue:** /ui:CONTOSO*
USMTMigFiles001=MigApp.xml
USMTMigFiles002=MigUser.xml
HideShell=YES
ApplyGPOPack=NO
WSUSServer=mdt01.contoso.com:8530
SkipAppsOnUpgrade=NO
SkipAdminPassword=YES
SkipProductKey=YES
SkipComputerName=NO
SkipDomainMembership=YES
SkipUserData=YES
SkipLocaleSelection=YES
SkipTaskSequence=NO
SkipTimeZone=YES
SkipApplications=NO
SkipBitLocker=YES
SkipSummary=YES
SkipCapture=YES
SkipFinalSummary=NO
-
Select Edit Bootstrap.ini and modify using the following information:
[Settings]
Priority=Default

[Default]
DeployRoot=\MDT01MDTProduction$
UserDomain=CONTOSO
UserID=MDT_BA
UserPassword=pass@word1
SkipBDDWelcome=YES
-
On the Windows PE tab, in the Platform drop-down list, make sure x86 is selected.
-
On the General sub tab (still under the main Windows PE tab), configure the following settings:
In the Lite Touch Boot Image Settings area:
- Image description: MDT Production x86
- ISO file name: MDT Production x86.iso
[!NOTE]
Because you’re going to use Pre-Boot Execution Environment (PXE) later to deploy the machines, you don’t need the ISO file; however, we recommend creating ISO files because they’re useful when troubleshooting deployments and for quick tests.
-
On the Drivers and Patches sub tab, select the WinPE x86 selection profile and select the Include all drivers from the selection profile option.
-
On the Windows PE tab, in the Platform drop-down list, select x64.
-
On the General sub tab, configure the following settings:
In the Lite Touch Boot Image Settings area:
- Image description: MDT Production x64
- ISO file name: MDT Production x64.iso
-
In the Drivers and Patches sub tab, select the WinPE x64 selection profile and select the Include all drivers from the selection profile option.
-
In the Monitoring tab, select the Enable monitoring for this deployment share check box.
-
Select OK.
[!NOTE]
It will take a while for the Deployment Workbench to create the monitoring database and web service.The Windows PE tab for the x64 boot image.
The rules explained
The rules for the MDT Production deployment share are different from those rules for the MDT Build Lab deployment share. The biggest differences are that you deploy the machines into a domain instead of a workgroup.
You can optionally remove the UserID and UserPassword entries from Bootstrap.ini so that users performing PXE boot are prompted to provide credentials with permission to connect to the deployment share. Setting SkipBDDWelcome=NO enables the welcome screen that displays options to run the deployment wizard, run DaRT tools (if installed), exit to a Windows PE command prompt, set the keyboard layout, or configure a static IP address. In this example, we’re skipping the welcome screen and providing credentials.
The Bootstrap.ini file
This file is the MDT Production Bootstrap.ini:
[Settings]
Priority=Default

[Default]
DeployRoot=\MDT01MDTProduction$
UserDomain=CONTOSO
UserID=MDT_BA
UserPassword=pass@word1
SkipBDDWelcome=YES
The CustomSettings.ini file
This file is the CustomSettings.ini file with the new join domain information:
[Settings]
Priority=Default

[Default]
_SMSTSORGNAME=Contoso
OSInstall=Y
UserDataLocation=AUTO
TimeZoneName=Pacific Standard Time
AdminPassword=pass@word1
JoinDomain=contoso.com
DomainAdmin=CONTOSOMDT_JD
DomainAdminPassword=pass@word1
MachineObjectOU=OU=Workstations,OU=Computers,OU=Contoso,DC=contoso,DC=com
SLShare=\MDT01Logs$
ScanStateArgs=/ue:** /ui:CONTOSO*
USMTMigFiles001=MigApp.xml
USMTMigFiles002=MigUser.xml
HideShell=YES
ApplyGPOPack=NO
WSUSServer=http://mdt01.contoso.com:8530
SkipAppsOnUpgrade=NO
SkipAdminPassword=YES
SkipProductKey=YES
SkipComputerName=NO
SkipDomainMembership=YES
SkipUserData=YES
SkipLocaleSelection=YES
SkipTaskSequence=NO
SkipTimeZone=YES
SkipApplications=NO
SkipBitLocker=YES
SkipSummary=YES
SkipCapture=YES
SkipFinalSummary=NO
EventService=http://MDT01:9800
Some properties to use in the MDT Production rules file are as follows:
- JoinDomain. The domain to join.
- DomainAdmin. The account to use when joining the machine to the domain.
- DomainAdminDomain. The domain for the join domain account.
- DomainAdminPassword. The password for the join domain account.
- MachineObjectOU. The organizational unit (OU) to which to add the computer account.
- ScanStateArgs. Arguments for the User State Migration Tool (USMT) ScanState command.
- USMTMigFiles(*). List of USMT templates (controlling what to back up and restore).
- EventService. Activates logging information to the MDT monitoring web service.
[!NOTE]
For more information about localization support, see the following articles:
- MDT sample guide
- LCID (Locale ID) codes
Optional deployment share configuration
If your organization has a Microsoft Software Assurance agreement, you also can subscribe to another Microsoft Desktop Optimization Package (MDOP) license (at an extra cost). Included in MDOP is Microsoft Diagnostics and Recovery Toolkit (DaRT), which contains tools that can help you troubleshoot MDT deployments, and troubleshoot Windows itself.
Add DaRT 10 to the boot images
If you’ve licensing for MDOP and DaRT, you can add DaRT to the boot images using the steps in this section. If you don’t have DaRT licensing, or don’t want to use it, skip to the next section, Update the Deployment Share. To enable the remote connection feature in MDT, you need to do the following steps:
[!NOTE]
DaRT 10 is part of MDOP 2015.MDOP might be available as a download from your Visual Studio subscription. When searching, be sure to look for Desktop Optimization Pack.
On MDT01:
-
Download MDOP 2015 and copy the DaRT 10 installer file to the D:SetupDaRT 10 folder on MDT01 (DaRTDaRT 10Installers<lang>x64MSDaRT100.msi).
-
Install DaRT 10 (MSDaRT10.msi) using the default settings.
-
Copy the two tools CAB files from C:Program FilesMicrosoft DaRTv10 (Toolsx86.cab and Toolsx64.cab) to the production deployment share at D:MDTProductionToolsx86 and D:MDTProductionToolsx64, respectively.
-
In the Deployment Workbench, right-click the MDT Production deployment share and select Properties.
-
On the Windows PE tab, in the Platform drop-down list, make sure x86 is selected.
-
On the Features sub tab, select the Microsoft Diagnostics and Recovery Toolkit (DaRT) checkbox.
Selecting the DaRT 10 feature in the deployment share. -
In the Windows PE tab, in the Platform drop-down list, select x64.
-
In the Features sub tab, in addition to the default selected feature pack, select the Microsoft Diagnostics and Recovery Toolkit (DaRT) check box.
-
Select OK.
Update the deployment share
Like the MDT Build Lab deployment share, the MDT Production deployment share needs to be updated after it has been configured. This update-process is the one during which the Windows PE boot images are created.
-
Right-click the MDT Production deployment share and select Update Deployment Share.
-
Use the default options for the Update Deployment Share Wizard.
[!NOTE]
The update process will take 5 to 10 minutes.
Step 8: Deploy the Windows 10 client image
These steps will walk you through the process of using task sequences to deploy Windows 10 images through a fully automated process. First, you need to add the boot image to Windows Deployment Services (WDS) and then start the deployment. In contrast with deploying images from the MDT Build Lab deployment share, we recommend using the Pre-Installation Execution Environment (PXE) to start the full deployments in the datacenter, even though you technically can use an ISO/CD or USB to start the process.
Configure Windows Deployment Services
You need to add the MDT Production Lite Touch x64 Boot image to WDS in preparation for the deployment. In this procedure, we assume that WDS is already installed and initialized on MDT01 as described in the Prepare for Windows deployment article.
On MDT01:
-
Open the Windows Deployment Services console, expand the Servers node and then expand MDT01.contoso.com.
-
Right-click Boot Images and select Add Boot Image.
-
Browse to the D:MDTProductionBootLiteTouchPE_x64.wim file and add the image with the default settings.
The boot image added to the WDS console.
Deploy the Windows 10 client
At this point, you should have a solution ready for deploying the Windows 10 client. We recommend starting by trying a few deployments at a time until you’re confident that your configuration works as expected. We find it useful to try some initial tests on virtual machines before testing on physical hardware. These tests help rule out hardware issues when testing or troubleshooting. Here are the steps to deploy your Windows 10 image to a virtual machine:
On HV01:
-
Create a virtual machine with the following settings:
- Name: PC0005
- Store the virtual machine in a different location: C:VM
- Generation: 2
- Memory: 2048 MB
- Network: Must be able to connect to MDT01MDTProduction$
- Hard disk: 60 GB (dynamic disk)
- Installation Options: Install an operating system from a network-based installation server
-
Start the PC0005 virtual machine, and press Enter to start the PXE boot. The VM will now load the Windows PE boot image from the WDS server.
The initial PXE boot process of PC0005. -
After Windows PE has booted, complete the Windows Deployment Wizard using the following setting:
- Select a task sequence to execute on this computer: Windows 10 Enterprise x64 RTM Custom Image
- Computer Name: PC0005
- Applications: Select the Install — Adobe Reader checkbox.
-
Setup now begins and does the following steps:
- Installs the Windows 10 Enterprise operating system.
- Installs the added application.
- Updates the operating system via your local Windows Server Update Services (WSUS) server.
Application installation
Following OS installation, Microsoft Office 365 Pro Plus — x64 is installed automatically.
Use the MDT monitoring feature
Since you’ve enabled the monitoring on the MDT Production deployment share, you can follow your deployment of PC0005 via the monitoring node.
On MDT01:
-
In the Deployment Workbench, expand the MDT Production deployment share folder.
-
Select the Monitoring node, and wait until you see PC0005.
-
Double-click PC0005, and review the information.
The Monitoring node, showing the deployment progress of PC0005.
Use information in the Event Viewer
When monitoring is enabled, MDT also writes information to the event viewer on MDT01. This information can be used to trigger notifications via scheduled tasks when deployment is completed. For example, you can configure scheduled tasks to send an email when a certain event is created in the event log.
The Event Viewer showing a successful deployment of PC0005.
Multicast deployments
Multicast deployment allows for image deployment with reduced network load during simultaneous deployments. Multicast is a useful operating system deployment feature in MDT deployments, however it’s important to ensure that your network supports it and is designed for it. If you’ve a limited number of simultaneous deployments, you probably don’t need to enable multicast.
Requirements
Multicast requires that Windows Deployment Services (WDS) is running on Windows Server 2008 or later. In addition to the core MDT setup for multicast, the network needs to be configured to support multicast. In general, this configuration means involvement of the organization networking team to ensure that Internet Group Management Protocol (IGMP) snooping is turned on and that the network is designed for multicast traffic. The multicast solution uses IGMPv3.
Set up MDT for multicast
Setting up MDT for multicast is straightforward. You enable multicast on the deployment share, and MDT takes care of the rest.
On MDT01:
-
In the Deployment Workbench, right-click the MDT Production deployment share folder and select Properties.
-
On the General tab, select the Enable multicast for this deployment share (requires Windows Server 2008 R2 Windows Deployment Services) check box, and select OK.
-
Right-click the MDT Production deployment share folder and select Update Deployment Share.
-
After updating the deployment share, use the Windows Deployment Services console to, verify that the multicast namespace was created.
The newly created multicast namespace.
Use offline media to deploy Windows 10
In addition to network-based deployments, MDT supports the use of offline media-based deployments of Windows 10. You can easily generate an offline version of your deployment share — either the full deployment share or a subset of it — by using selection profiles. The generated offline media can be burned to a DVD or copied to a USB stick for deployment.
Offline media are useful not only when you don’t have network connectivity to the deployment share, but also when you’ve limited connection to the deployment share and don’t want to copy 5 GB of data over the wire. Offline media can still join the domain, but you save the transfer of operating system images, drivers, and applications over the wire.
Create the offline media selection profile
To filter what is being added to the media, you create a selection profile. When creating selection profiles, you quickly realize the benefits of having created a good logical folder structure in the Deployment Workbench.
On MDT01:
-
In the Deployment Workbench, under the MDT Production / Advanced Configuration node, right-click Selection Profiles, and select New Selection Profile.
-
Use the following settings for the New Selection Profile Wizard:
-
General Settings
- Selection profile name: Windows 10 Offline Media
-
Folders
- Applications / Adobe
- Operating Systems / Windows 10
- Out-Of-Box Drivers / WinPE x64
- Out-Of-Box Drivers / Windows 10 x64
- Task Sequences / Windows 10
-
Create the offline media
In these steps, you generate offline media from the MDT Production deployment share. To filter what is being added to the media, you use the previously created selection profile.
-
On MDT01, using File Explorer, create the D:MDTOfflineMedia folder.
[!NOTE]
When creating offline media, you need to create the target folder first. It’s crucial that you don’t create a subfolder inside the deployment share folder because it will break the offline media. -
In the Deployment Workbench, under the MDT Production / Advanced Configuration node, right-click the Media node, and select New Media.
-
Use the following settings for the New Media Wizard:
- General Settings
- Media path: D:MDTOfflineMedia
- Selection profile: Windows 10 Offline Media
- General Settings
Configure the offline media
Offline media has its own rules, its own Bootstrap.ini and CustomSettings.ini files. These files are stored in the Control folder of the offline media; they also can be accessed via properties of the offline media in the Deployment Workbench.
On MDT01:
-
Copy the CustomSettings.ini file from the D:MDTProductionControl folder to D:MDTOfflineMediaContentDeployControl. Overwrite the existing files.
-
In the Deployment Workbench, under the MDT Production / Advanced Configuration / Media node, right-click the MEDIA001 media, and select Properties.
-
In the General tab, configure the following:
- Clear the Generate x86 boot image check box.
- ISO file name: Windows 10 Offline Media.iso
-
On the Windows PE tab, in the Platform drop-down list, select x64.
-
On the General sub tab, configure the following settings:
- In the Lite Touch Boot Image Settings area:
- Image description: MDT Production x64
- In the Windows PE Customizations area, set the Scratch space size to 128.
- In the Lite Touch Boot Image Settings area:
-
On the Drivers and Patches sub tab, select the WinPE x64 selection profile and select the Include all drivers from the selection profile option.
-
Select OK.
Generate the offline media
You’ve now configured the offline media deployment share, however the share hasn’t yet been populated with the files required for deployment. Now everything is ready you populate the deployment share content folder and generate the offline media ISO.
On MDT01:
-
In the Deployment Workbench, navigate to the MDT Production / Advanced Configuration / Media node.
-
Right-click the MEDIA001 media, and select Update Media Content. The Update Media Content process now generates the offline media in the D:MDTOfflineMediaContent folder. The process might require several minutes.
Create a bootable USB stick
The ISO that you got when updating the offline media item can be burned to a DVD and used directly (it will be bootable), but it’s often more efficient to use USB sticks instead since they’re faster and can hold more data. (A dual-layer DVD is limited to 8.5 GB.)
[!TIP]
In this example, the .wim file is 5.5 GB in size. However, bootable USB sticks are formatted with the FAT32 file system which limits file size to 4.0 GB. You can place the image on a different drive (ex: E:DeployOperating SystemsW10EX64RTMREFW10X64-001.swm) and then modify E:DeployControlOperatingSystems.xml to point to it. Alternatively to keep using the USB you must split the .wim file, which can be done using DISM:
Dism.exe /Split-Image /ImageFile:D:MDTOfflinemediaContentDeployOperating SystemsW10EX64RTMREFW10X64-001.wim /SWMFile:E:sourcesinstall.swm /FileSize:3800.Windows Setup automatically installs from this file, provided you name it install.swm. The file names for the next files include numbers, for example: install2.swm, install3.swm.
To enable split image in MDT, the Settings.xml file in your deployment share (ex: D:MDTProductionControlSettings.xml) must have the SkipWimSplit value set to False. By default this value is set to True (
<SkipWimSplit>True</SkipWimSplit>), so this must be changed and the offline media content updated.
Follow these steps to create a bootable USB stick from the offline media content:
-
On a physical machine running Windows 7 or later, insert the USB stick you want to use.
-
Copy the content of the MDTOfflineMediaContent folder to the root of the USB stick.
-
Start an elevated command prompt (run as Administrator), and start the Diskpart utility by typing Diskpart and pressing Enter.
-
In the Diskpart utility, you can type list volume (or the shorter list vol) to list the volumes, but you only need to remember the drive letter of the USB stick to which you copied the content. In our example, the USB stick had the drive letter F.
-
In the Diskpart utility, type select volume F (replace F with your USB stick drive letter).
-
In the Diskpart utility, type active, and then type exit.
Unified Extensible Firmware Interface (UEFI)-based deployments
As referenced in Windows 10 deployment scenarios and tools, Unified Extensible Firmware Interface (UEFI)-based deployments are becoming more common. In fact, when you create a generation 2 virtual machine in Hyper-V, you get a UEFI-based computer. During deployment, MDT automatically detects that you’ve an UEFI-based machine and creates the partitions UEFI requires. You don’t need to update or change your task sequences in any way to accommodate UEFI.
The partitions when deploying an UEFI-based machine.
Related articles
- Get started with the Microsoft Deployment Toolkit (MDT)
- Create a Windows 10 reference image
- Build a distributed environment for Windows 10 deployment
- Refresh a Windows 7 computer with Windows 10
- Replace a Windows 7 computer with a Windows 10 computer
- Configure MDT settings
Время прочтения
8 мин
Просмотры 75K
Как было написано в одной умной книге — если в вашем IT-отделе нет автоматизированной установки операционной системы, то её создание может быть самой важной задачей, которую вы когда-либо выполняли.
Для работы MDT необходимо:
- WDS
- Windows ADK
- PowerShell
- .net Framework
- DHCP
План
- Добавление роли Windows Deployment Services (WDS) на сервер;
- Загрузка и установка на сервер необходимых компонентов;
- Запуск и настройка WDS;
- Запуск и настройка MDT;
- Импорт приложений;
- Импорт установочных образов;
- Импорт драйверов;
- Импорт пакетов;
- Создание задач;
- Тестирование.
Добавление роли Windows Deployment Services (WDS) на сервер
На сервере включаем роль WDS.

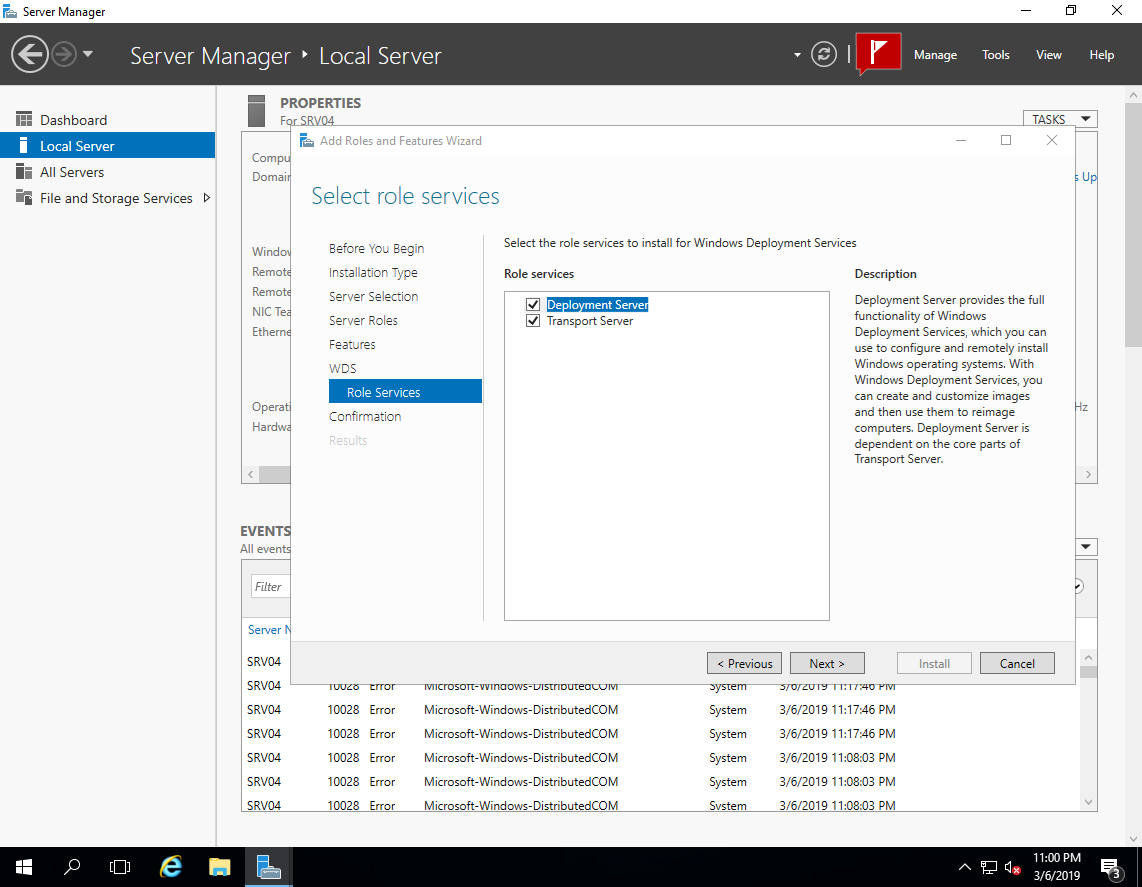

Загрузка и установка на сервер необходимых компонентов
С официального сайта скачиваем и устанавливаем Windows Assessment and Deployment Kit (ADK):
1) Download the Windows ADK for Windows 10, version 1809 (возможно, новее)
2) Download the Windows PE add-on for the ADK
Отмечаем для установки:
- Deployment Tools
- Imaging And Configuration Designer
- Configuration Designer
- User State Migration Tools

Также скачиваем и устанавливаем Microsoft Deployment Toolkit (MDT)
Запуск и настройка WDS
Открываем консоль WDS

Запускаем конфигурирование.
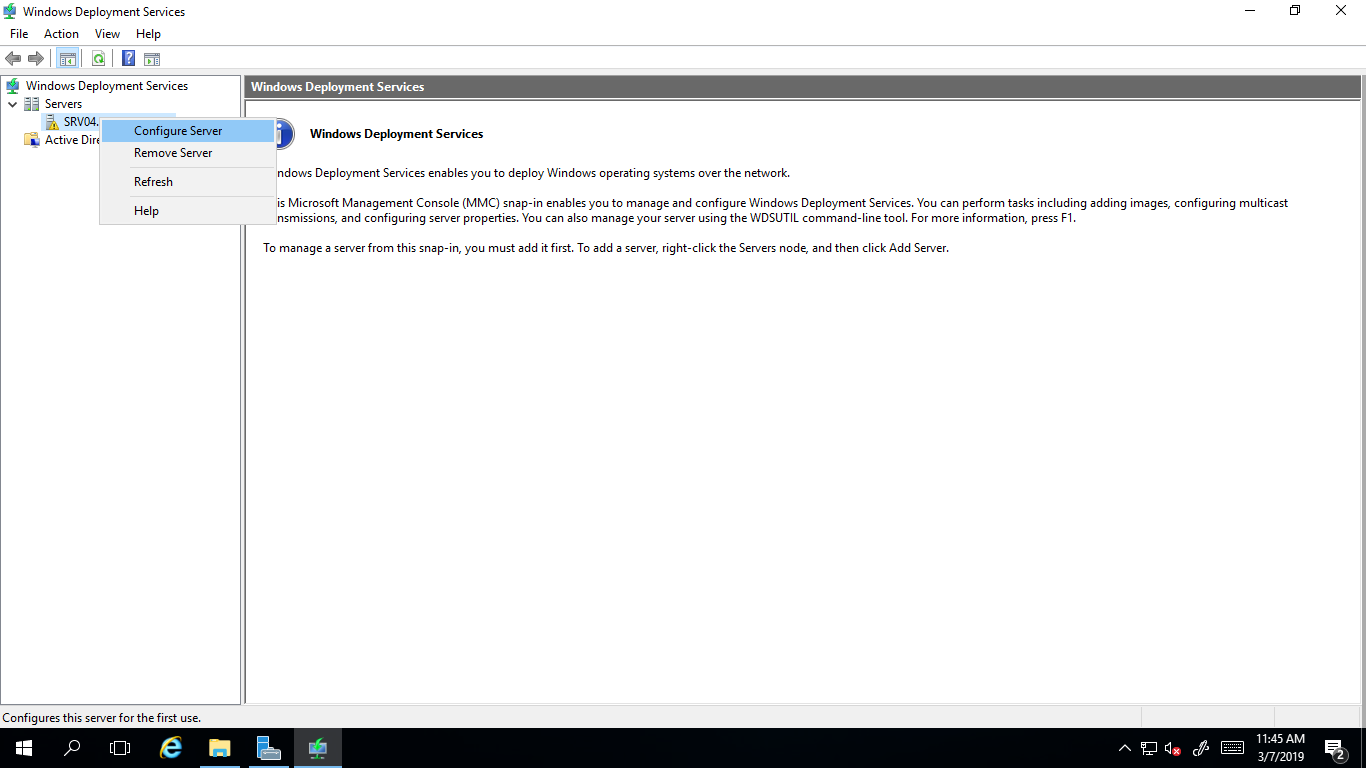
В мастере настройки выбираем интеграцию с доменом.
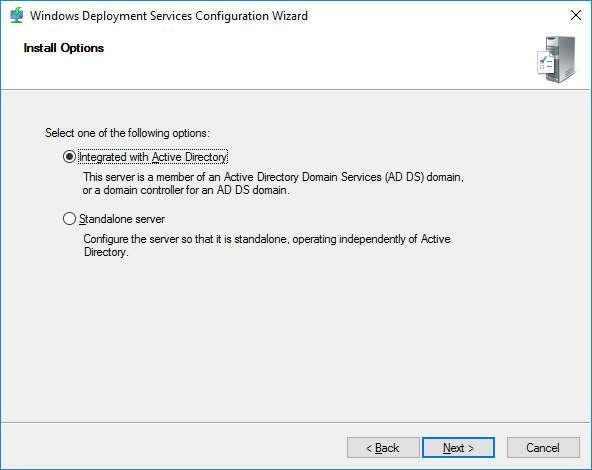
Задаем служебную папку WDS.
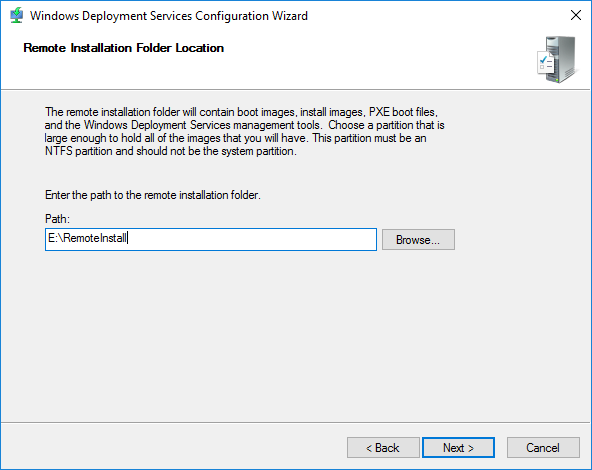
На следующем шаге можно выбрать каким компьютерам будет отвечать сервер WDS:
- Никому не отвечать — можно отключить работу сервера на время настройки или тестирования, например, чтобы пользователи не получали возможные конфликты при установке.
- Отвечать только известным компьютерам — список составляется в консоли и если записи адреса компьютера нет, то он не получит возможность работать с сервером.
- Отвечать всем клиентам — ответ получат все компьютеры. Если установить галку ниже, то при обращении неизвестных устройств (не записанных ранее) в консоли появится запись, что некий компьютер с определенным адресом запрашивает подключение. Можно отклонить или принять и процесс продолжится. Позже эти настройки можно изменить в консоли WDS.
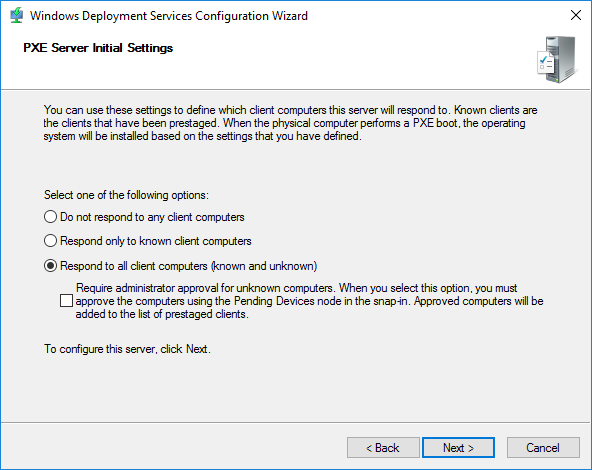
Завершаем процесс первоначальной настройки. Имеем следующую структуру папок:
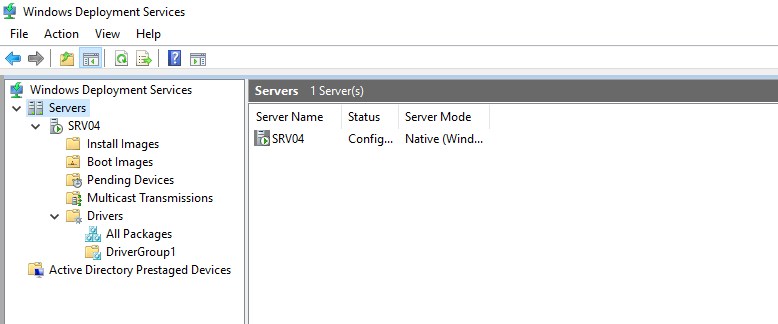
WDS нам понадобится только для подключения и передачи образов, поэтому без подробного объяснения:
Install Images — установочные образы (не используем);
Boot Images — загрузочные образы (добавим созданные в MDT);
Pending Devices — появляются устройства запрашивающие соединение если включена опция «требуется подтверждение администратора».
Запуск и настройка MDT
Для настройки MDT запускаем его консоль. Microsoft Deployment Toolkit -> Deployment Workbench.

Добавляем новую DeploymentShare. В ней будут храниться все файлы для установки.
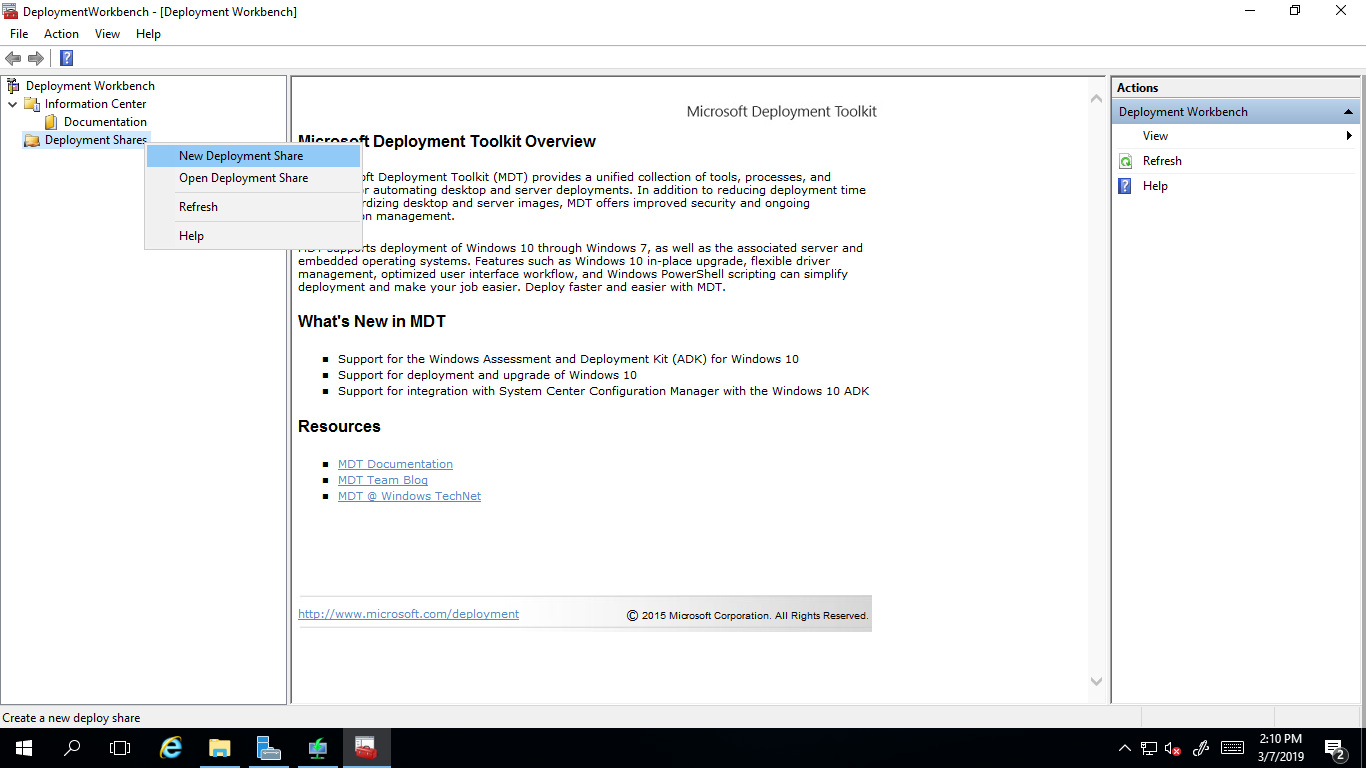
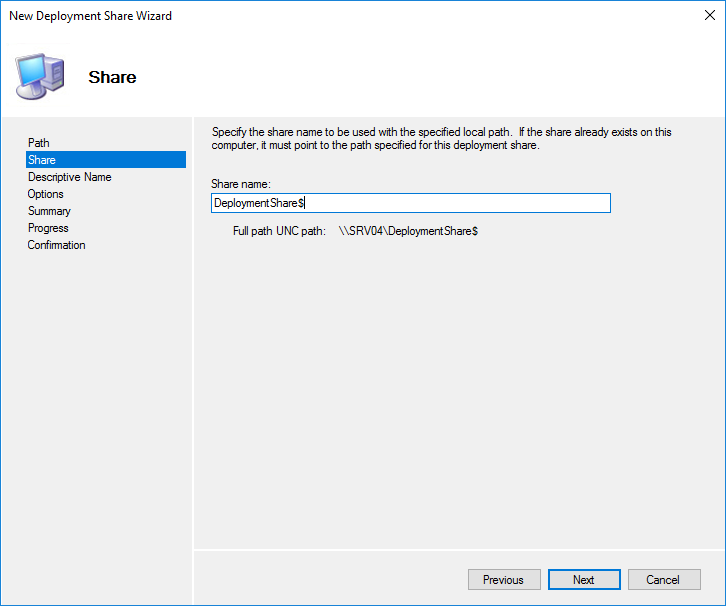
Следующие опции относятся к процессу установки и могут быть изменены позже.
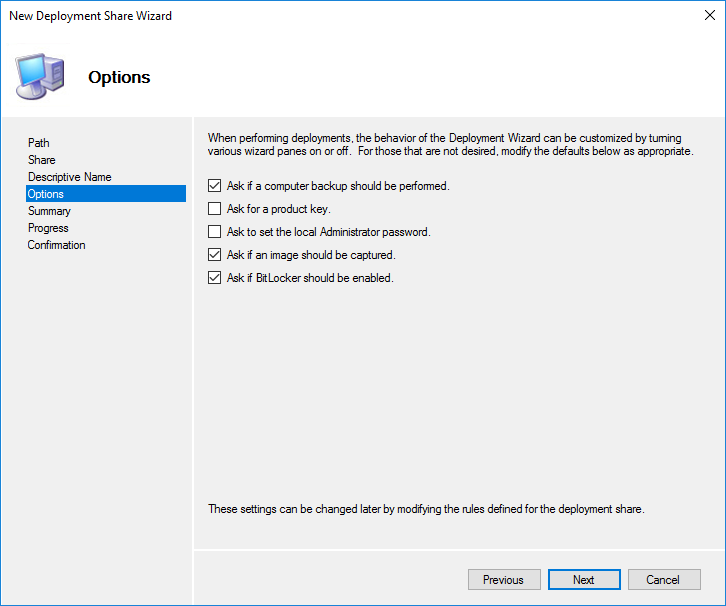
На завершающем этапе будет запущен процесс создания который должен пройти успешно.
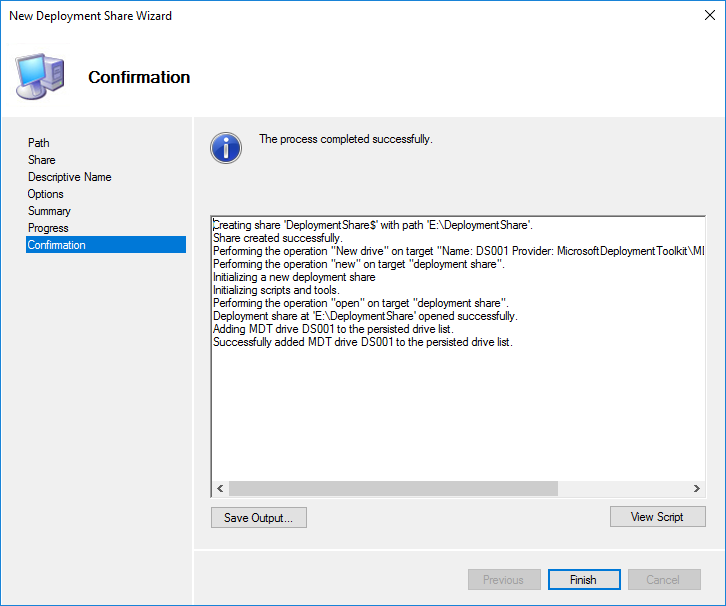
Общая папка E:DeploymentShare$ может переноситься на другие сервера простым копированием. Отключение и подключение осуществляется в консоли MDT.
Applications — приложения которые устанавливаются на операционную систему;
Operating Systems — операционные системы доступные для загрузочного образа;
Out-of-Box Drivers — драйвера (.inf);
Packages — пакеты обновлений безопасности, сервисные, языковые и т.д. (.cab и .msu);
Task Sequences — последовательность задач установки;
Selection Profiles — логические группы объединения контента;
Linked Deployment Shares — другие подключенные DeploymentShare с других серверов;
Monitoring — при включенной опции отображается ход выполнения установки на клиентах.
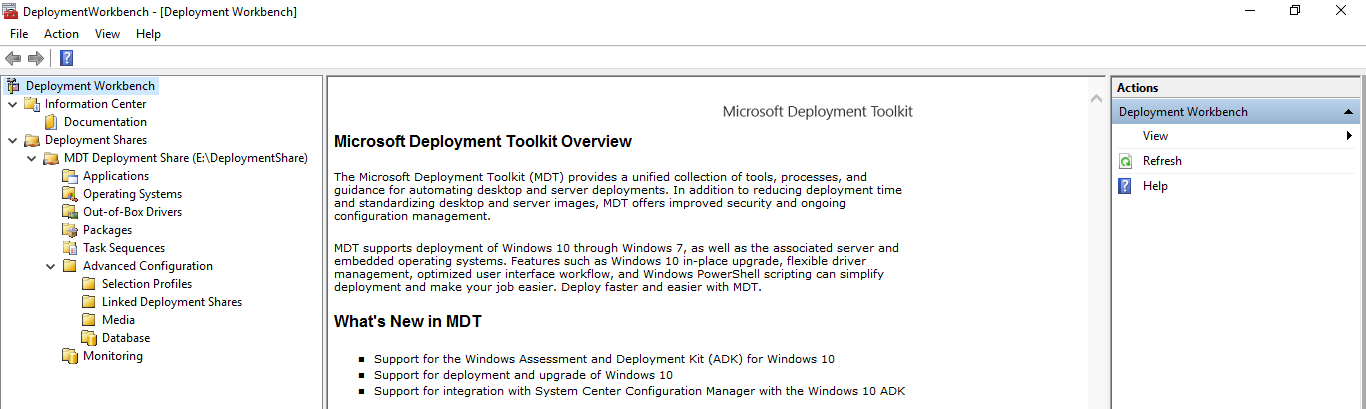
Открываем свойства нашей шары MDT Deployment Share. На вкладке General можно выбрать для каких платформ создавать .wim файлы с которых позже можно будет загружаться.
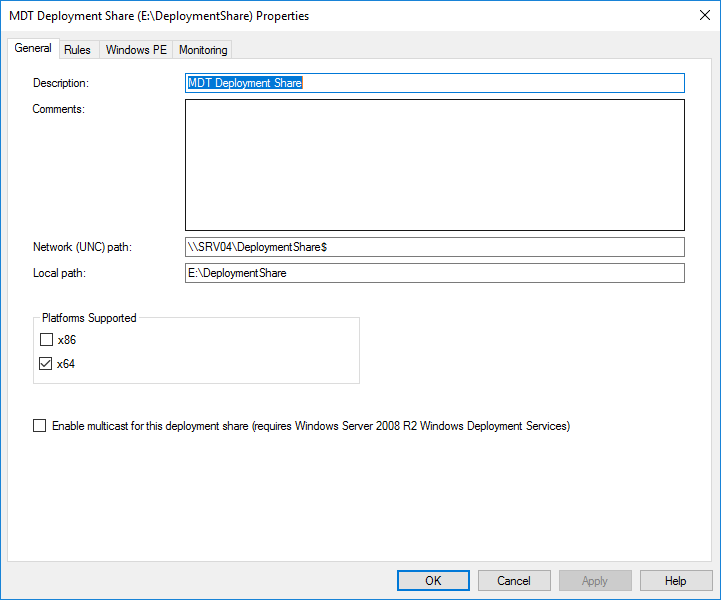
На вкладке Rules настраиваются конфигурационные файлы автоматизации MDT. В самом окне отображается текст файла .ControlCustomSettings.ini, а под кнопкой Edit Bootstrap.ini файл .ControlBootstrap.ini.
CustomSettings.ini — находится на сервере и скрывает шаги меню установки, а также определяет некоторые параметры установки.
Bootstrap.ini — находится в загрузочном образе и определяет параметры для подключения к DeploymentShare.
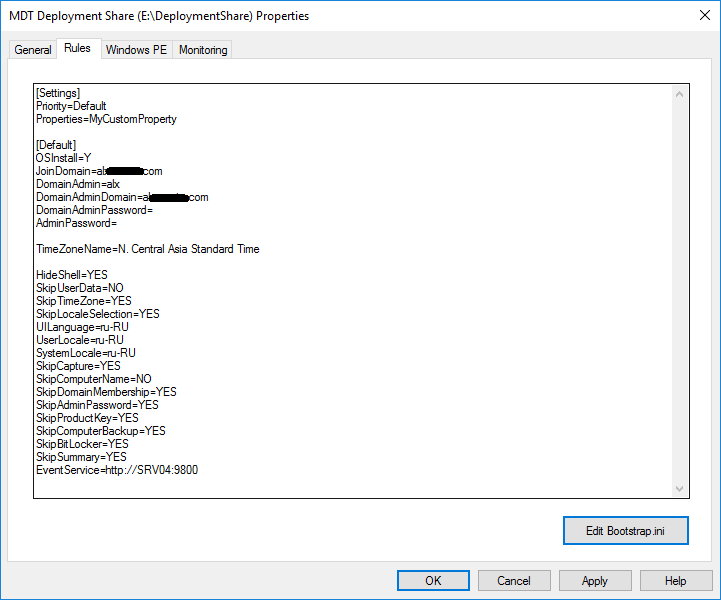
.ControlCustomSettings.ini
OSInstall=Y //установить операционную систему
JoinDomain=alx*.com //ввести в этот домен
DomainAdmin=alx - имя пользователя используемого для присоединения
DomainAdminDomain=alx*.com //домен пользователя
DomainAdminPassword= //пароль пользователя
AdminPassword= //пароль локального администратора на новой машине
HideShell=YES //скрыть Shell
SkipUserData=NO //пропустить шаг о решении сохранности пользовательских данных (если установка производится поверх существующей системы)
TimeZoneName=N. Central Asia Standard Time //временная зона
SkipTimeZone=YES //пропустить выбор временной зоны
UILanguage=ru-RU //выбор языка интерфейса
UserLocale=ru-RU //выбор местоположения
SkipLocaleSelection=YES //пропустить выбор месторасположения
SystemLocale=ru-RU //выбор языка для non-Unicode программ
SkipCapture=YES //пропустить захват установленной операционной системы
SkipComputerName=NO //пропустить ввод имени компьютера
SkipDomainMembership=YES //пропустить членство в домене
SkipAdminPassword=YES //пропустить пароль администратора
SkipProductKey=YES //пропустить ввод лицензионного ключа
SkipComputerBackup=YES //пропустить выполнение резервного копирования
SkipBitLocker=YES //пропустить настройку шифрования BitLocker
SkipSummary=YES //пропустить страницу с выводом результирующих настроек
EventService=http://SRV04:9800 //установить сервер назначения для логов
Список временных зон
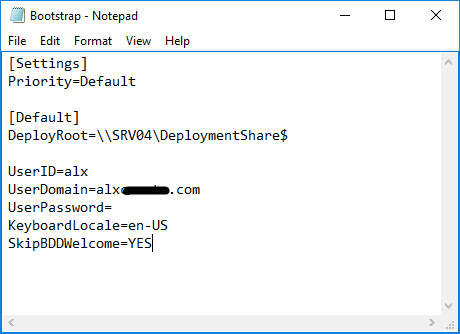
.ControlBootstrap.ini
[Settings]
Priority=Default
[Default]
DeployRoot=\SRV04DeploymentShare$
UserID=alx //имя пользователя для доступа к папкам Deployment Share
UserDomain=alx*.com //домен пользователя
UserPassword= //пароль пользователя
KeyboardLocale=en-US //выбор языка
SkipBDDWelcome=YES //пропустить начальную страницу установщика
На вкладке Windows PE настраивается создание загрузочных образов. Можно отключить на первой вкладке создание .wim файла, но выбрать на третьей .iso файл, если он нам нужен. Сейчас оставил только платформу x64. Второй пункт Generate a Lite Touch bootable ISO image понадобится, если нам необходим загрузочный ISO файл который мы могли бы записать на флешку или диск и загрузиться с него. Scratch space size — размер памяти в мегабайтах выделяемой для скриптов и команд установщика.
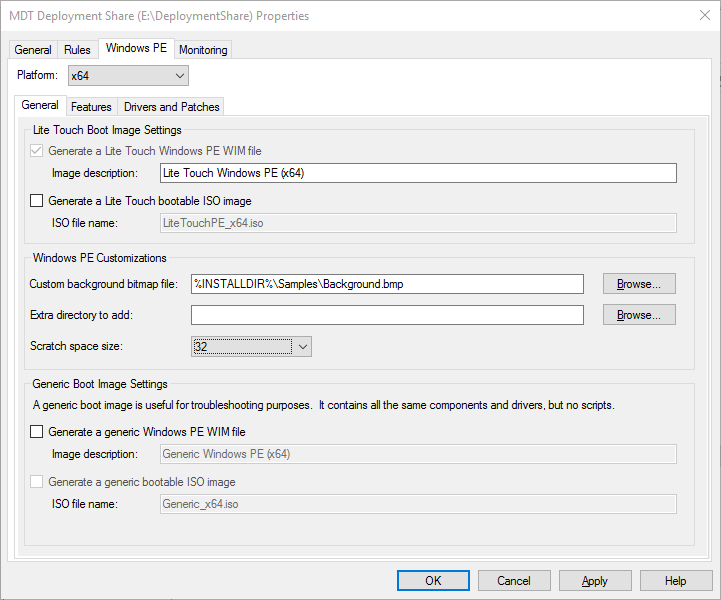
На вкладке Features можем добавить какие-либо компоненты в загрузочный образ. На вкладке Drivers and Patches лучше выбрать созданный специально для загрузочного образа Selection profile с сетевыми драйверами.
На следующей вкладке Monitoring включаем опцию чтобы он начал принимать логи от клиентов во время установки и отображать статус в папке Monitoring.
В соответствии со своей политикой безопасности добавляем разрешения на чтение каталога DeploymentShare$ и на этом простая настройка MDT закончена.

Импорт приложений
В контекстном меню папки Applications выбираем пункт New Application.
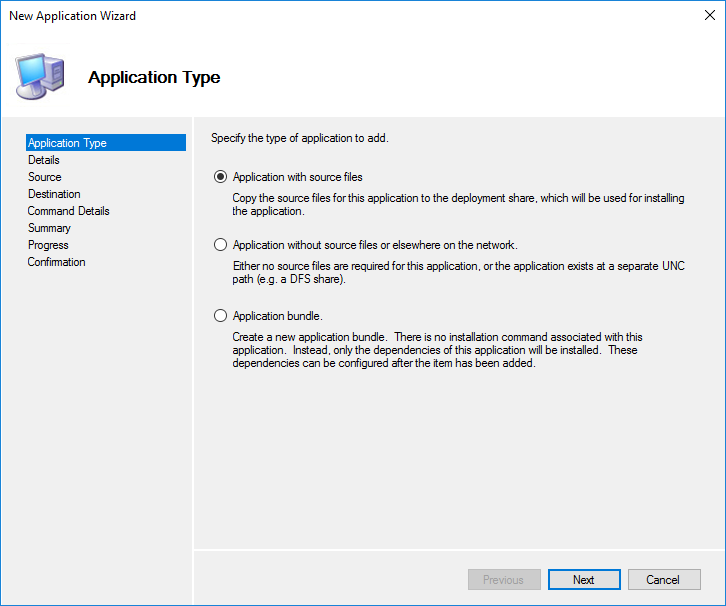
Добавим Google Chrome.
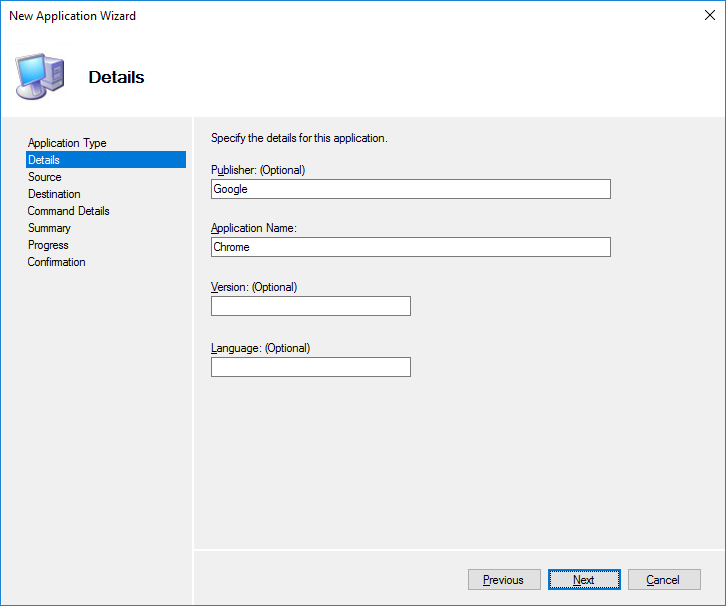
Скачиваем Standalone Enterprise на 64 бита и сохраняем в отдельную временную папку, например, E:Soft. Указываем, где программа находится и выбираем опцию чтобы всё содержимое было перемещено в новую папку.
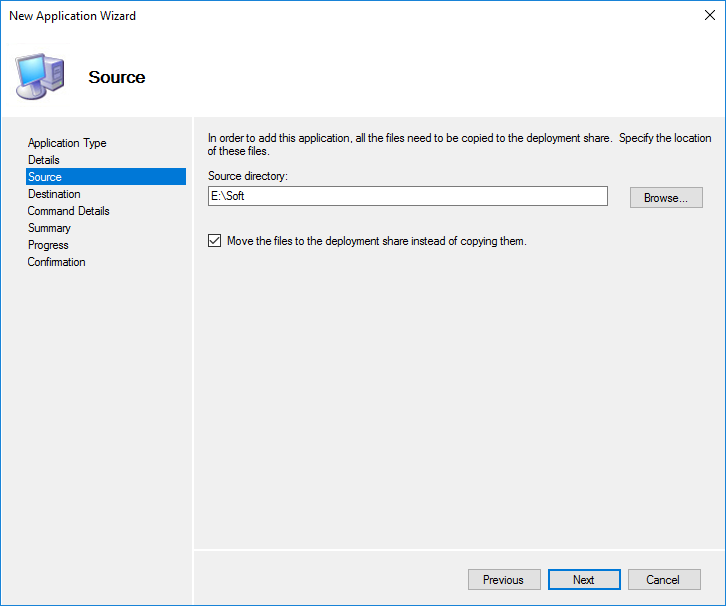
Далее составляем команду для тихой установки этого приложения и заполняем соответствующее поле.
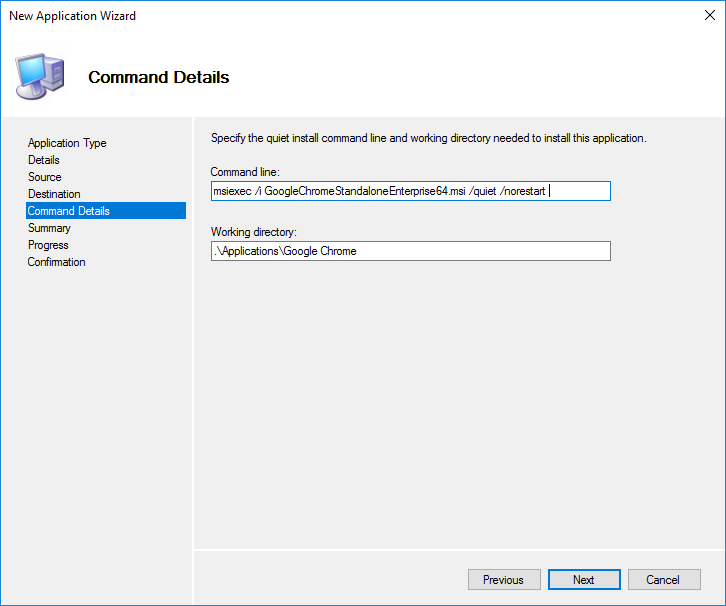
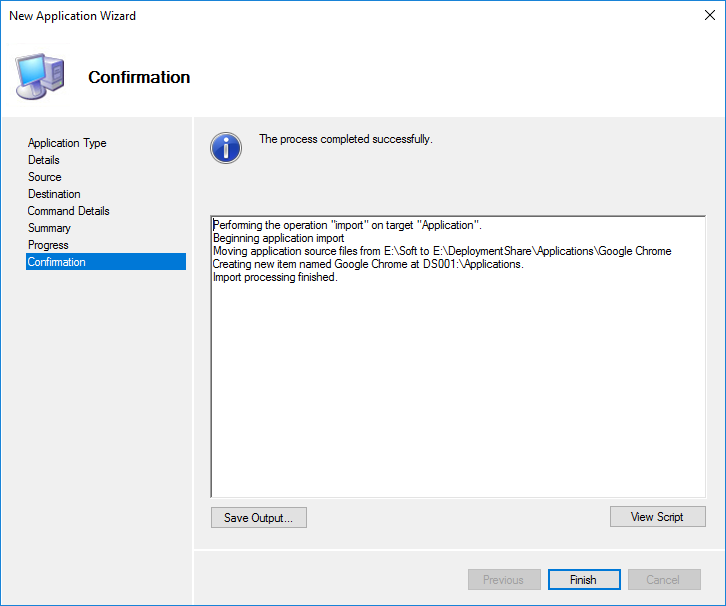
По аналогии добавляем весь нужный нам софт.
При переходе в свойства импортированного приложения на вкладке General можно редактировать ранее заполненные параметры, скрыть из списка выбора приложений при установке (если хотим устанавливать принудительно через задачу, например) и отключить это приложение в MDT вовсе если нужно исключить его использование в установке, но не желаем удалять (например, тестирование или обновление).
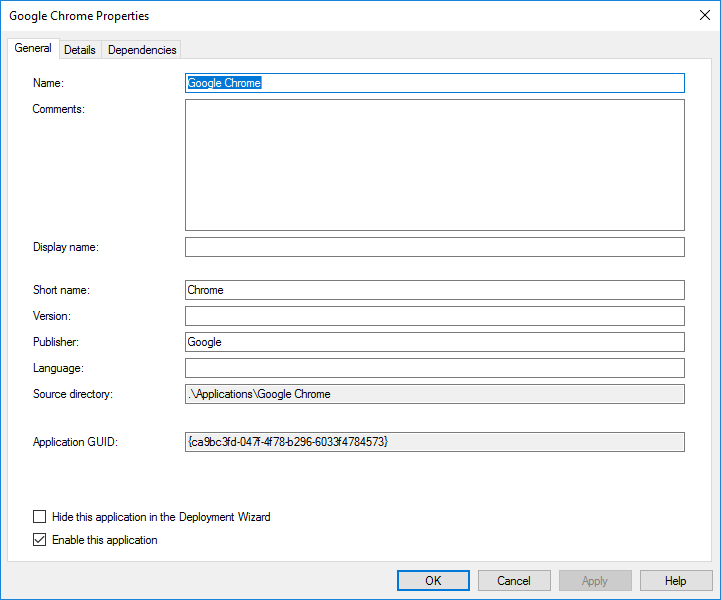
На вкладке Details можно изменить внесенные настройки, обязать перезагружаться после установки и разрешить запуск только на выбранных платформах.
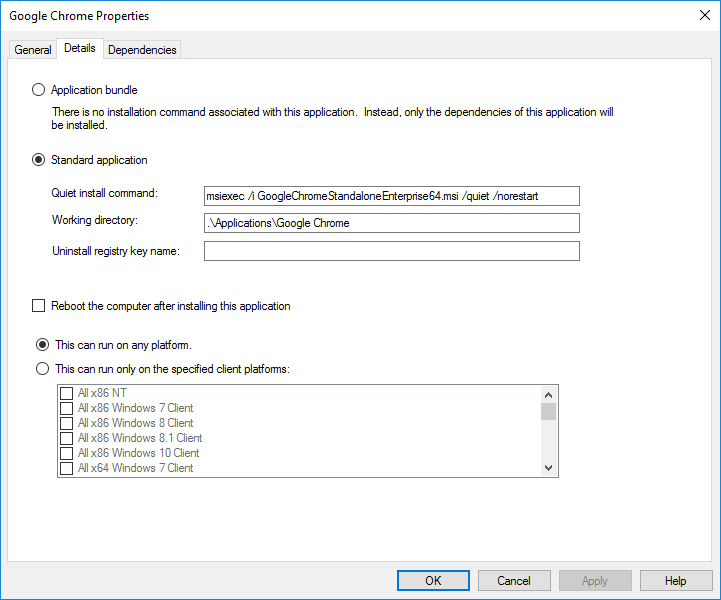
На последней вкладке Dependencies указываются зависимости. Если для приложения нужны какие-то дополнительные установки, то тут указывается их порядок. Только после установки зависимостей установится основное приложение. Софт, указанный в списке, должен быть импортирован заранее.
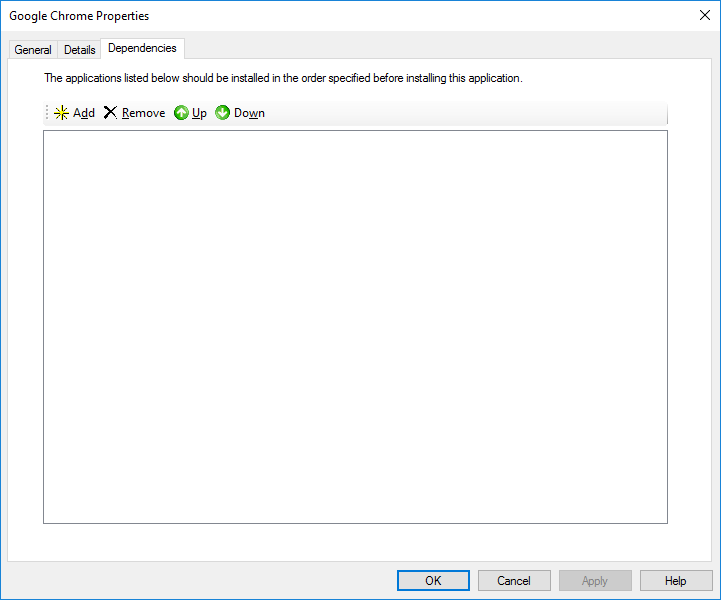
Импорт установочных образов
В папку Operating Systems добавляем операционную систему. У меня имеется .wim файл с Windows 10 Pro x64.
Почему .wim?
Лицензий на LTSC нет, только Pro. Поэтому приходится с выходом новой версии скачивать актуальную Windows 10 и с помощью MSMG ToolKit вычищать предустановленное… программы. На выходе получается .iso с вложенным .wim.

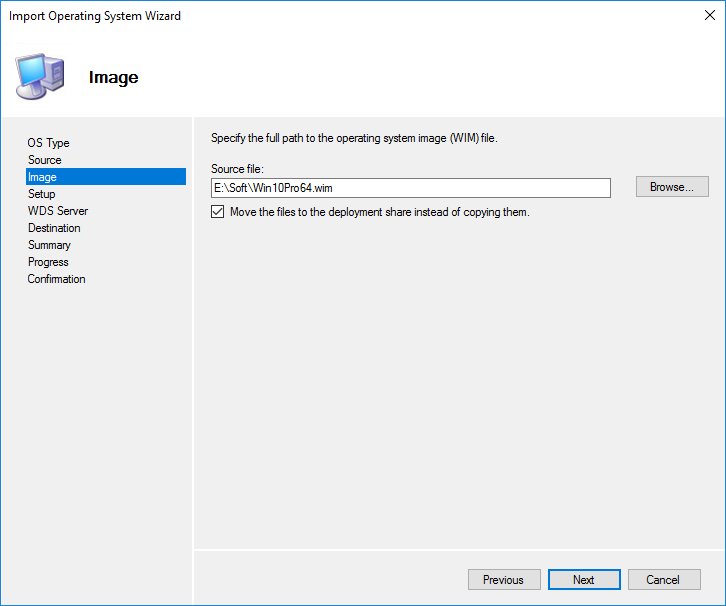
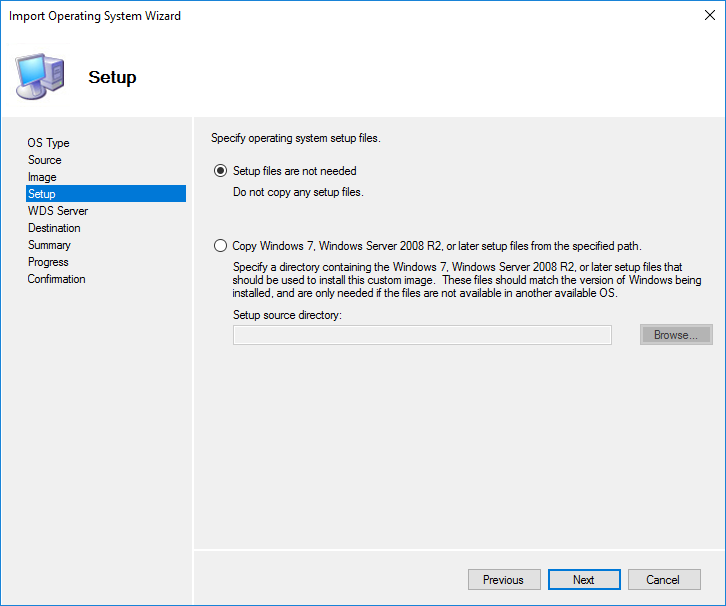
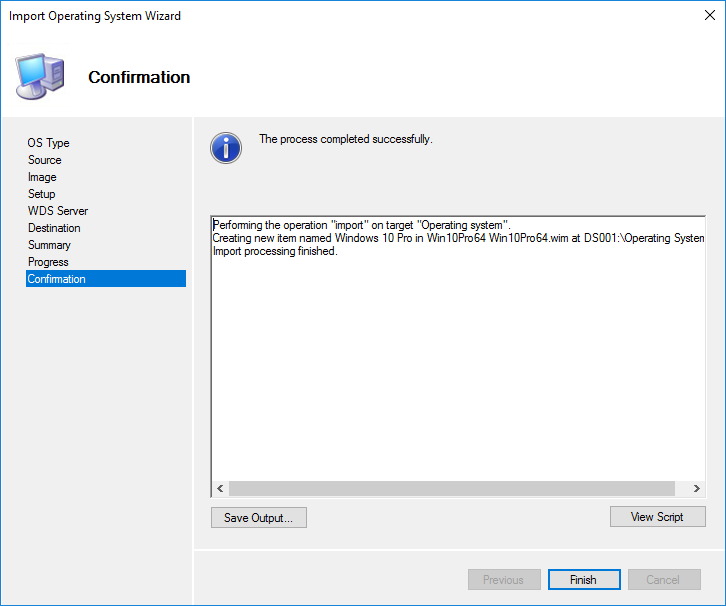
Переименовываем в более удобный вид.
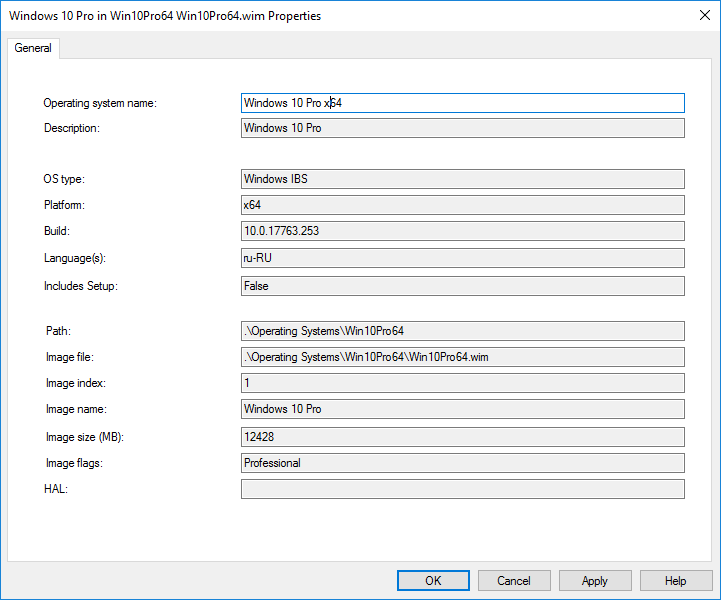
Импорт драйверов
Для примера импортируем драйвера для сетевых карт Intel. Стоит сразу заметить, что любые архивы должны быть распакованы т.к. MDT автоматически по указанной директории ищет именно .inf файлы.
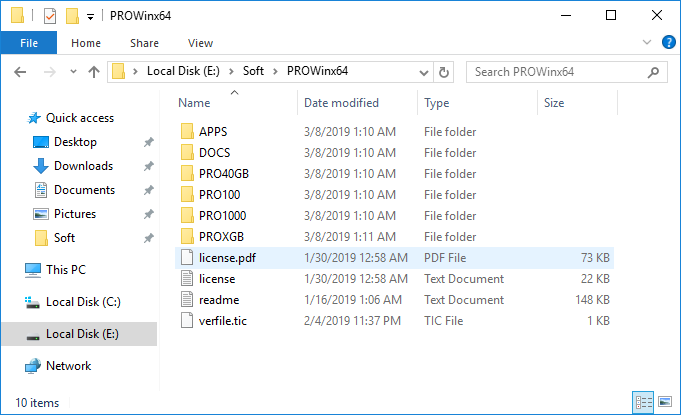
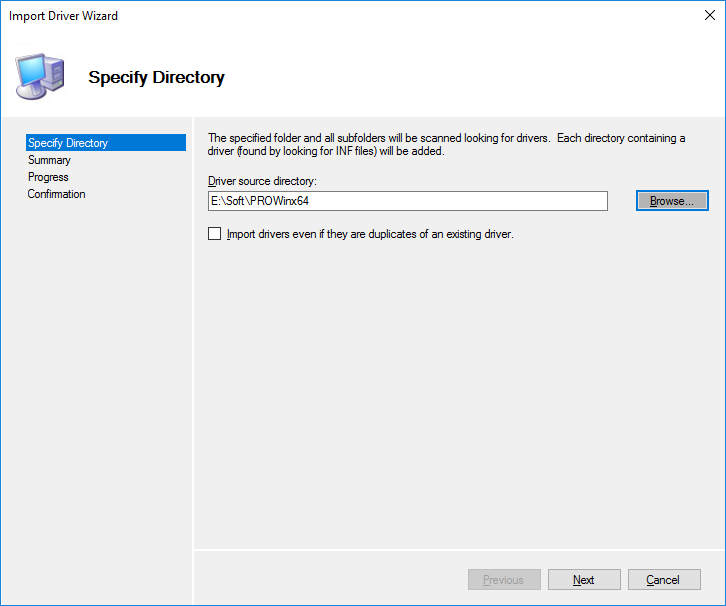
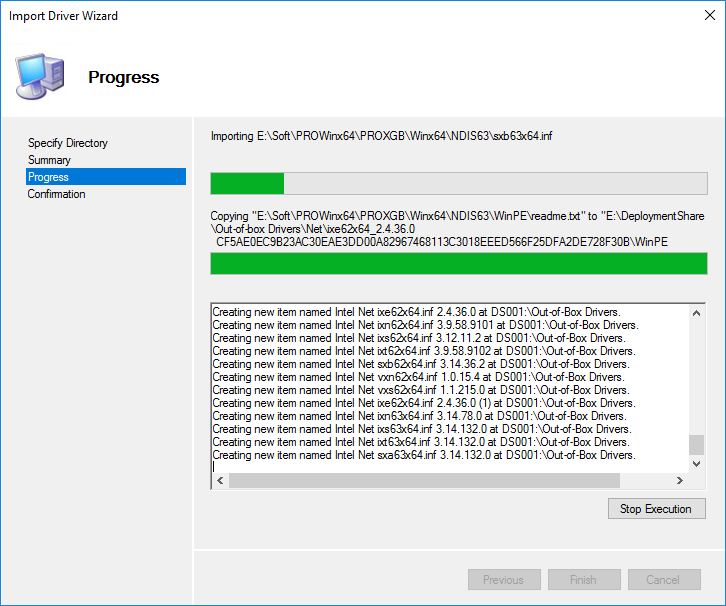


Целесообразно создавать подпапки для разделения производителей и моделей компьютерного оборудования. Отдельно стоит выделить драйвера для сетевых карт и дисков для загрузочного образа с помощью Selection Profiles.
Импорт пакетов
Если имеется WSUS, то можно указать на папку с его расположением и все пакеты будут найдены автоматически (из найденных сортировать через Selection Profiles). Если нет, то необходимо вручную скачать пакеты и указать место их расположения.
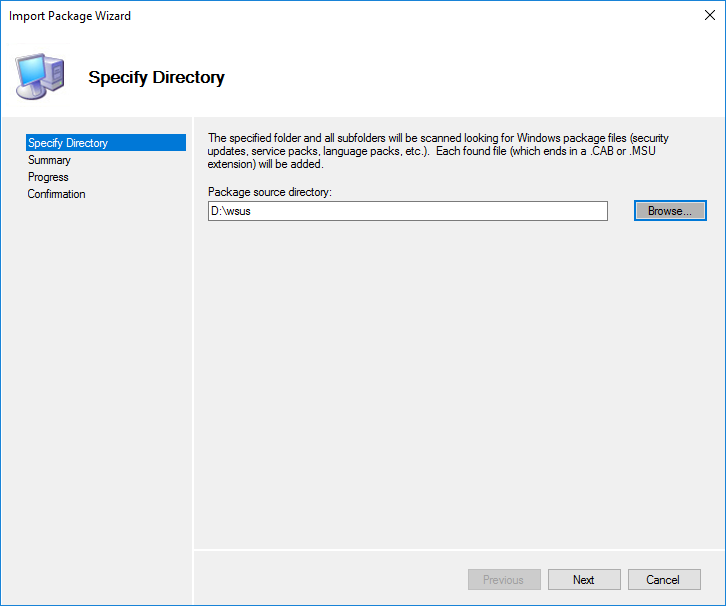
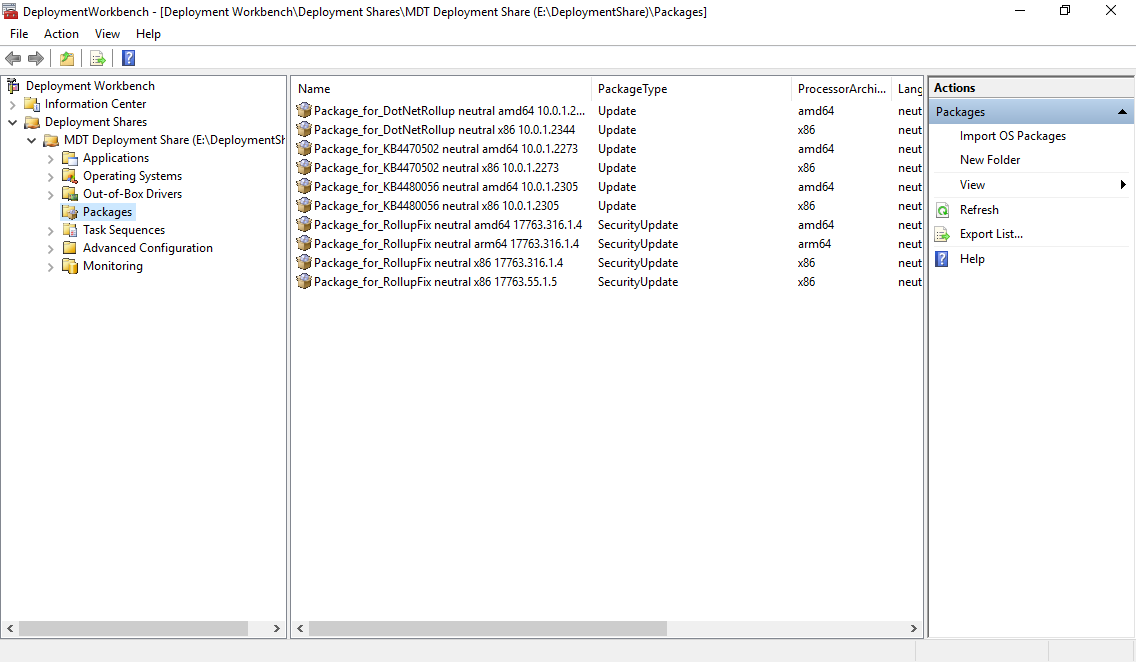
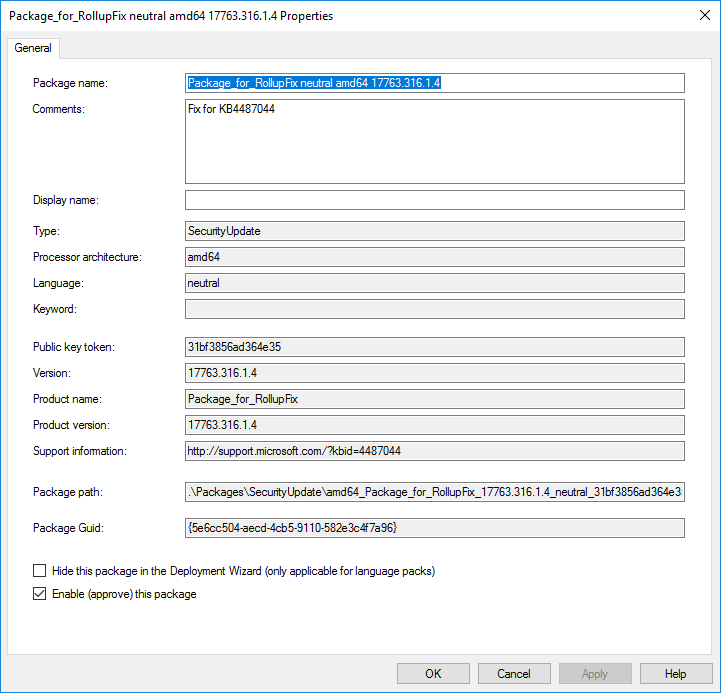
Создание задач
Task Sequences — это последовательность задач для установки. Можно добавлять, удалять или изменять шаги установки. На первой странице при добавлении задается ID и название.
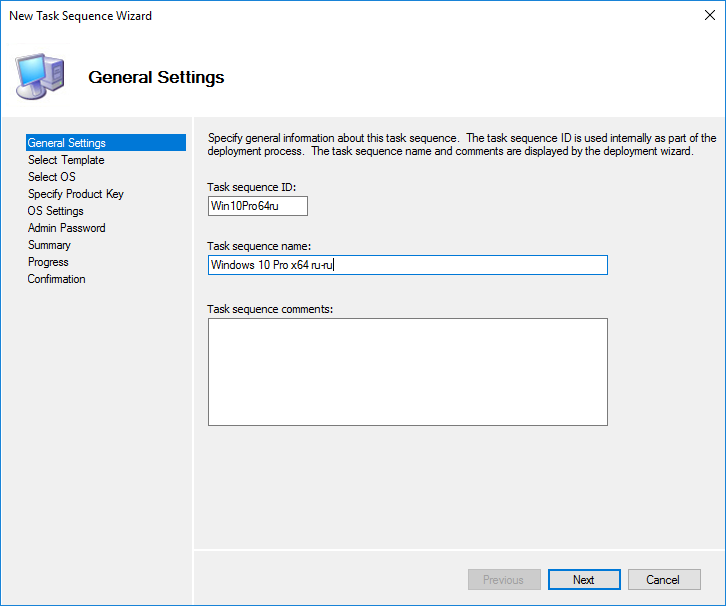
Выбирается шаблон.
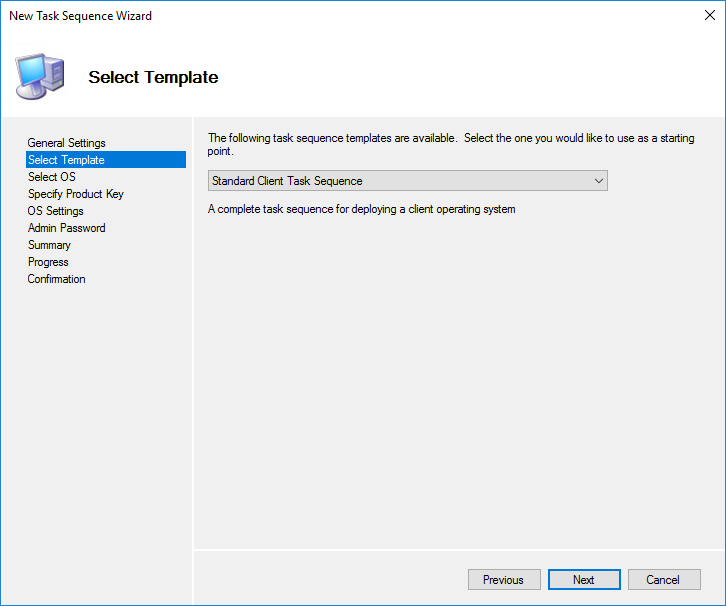
Выбор операционной системы из добавленных ранее.
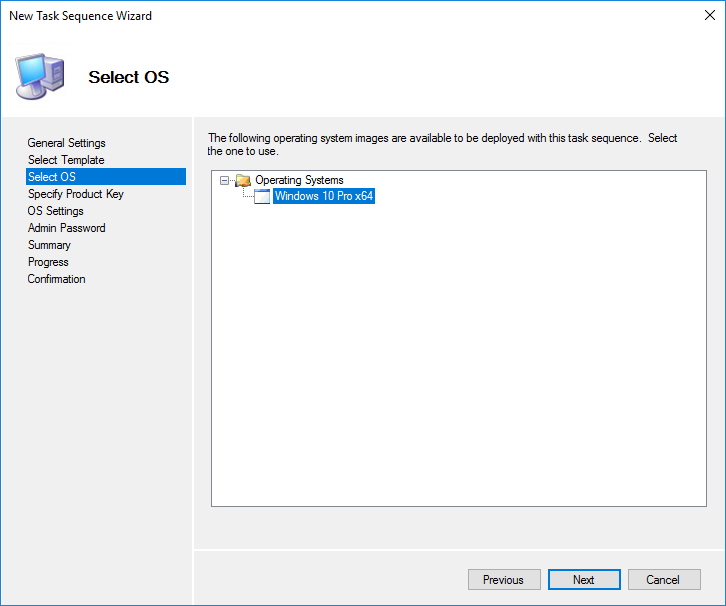
Ввод лицензионных ключей. Ключ будет указан после или во время установки, поэтому не задан.
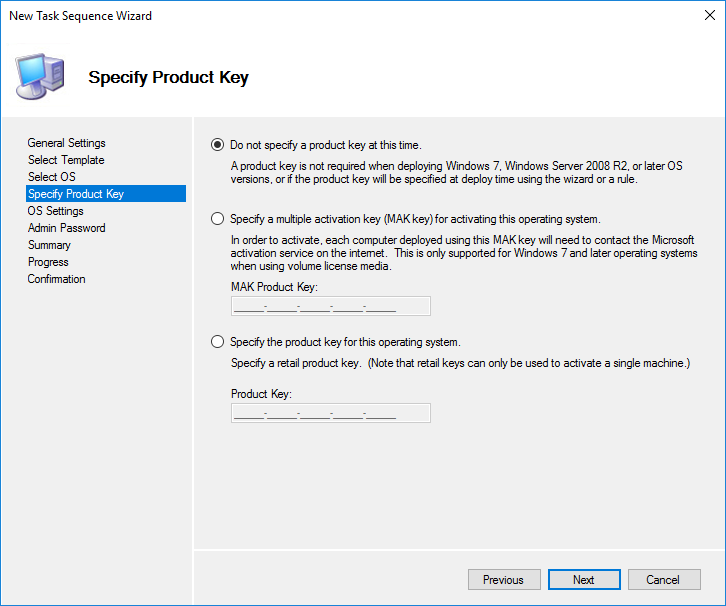
Вводим имя пользователя и название организации.
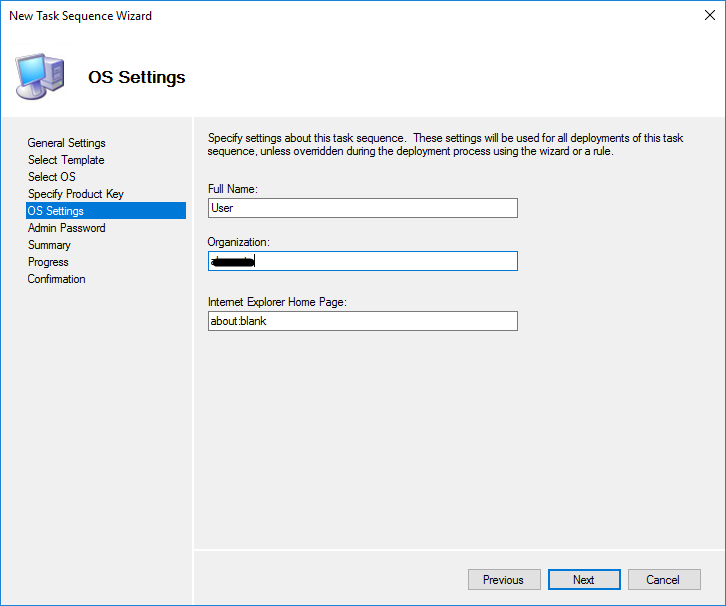
Пароль будущего локального администратора.
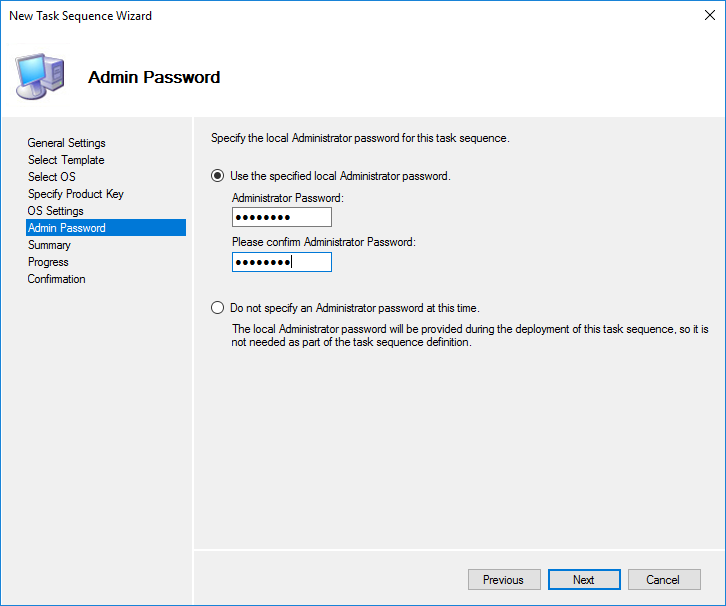
После создания можно аналогично просматривать её свойства и вносить изменения.

На вкладке Task Sequence описан весь процесс выполнения установки. Последовательность необходимо изменять под свои нужды.

Для примера я добавлю скрипт включающий возможность подключиться по RDP т.к. по умолчанию после установки она отключена.
В папке .ScriptsCustom создан скрипт на PowerShell Enable_RDP.ps1:
(Get-WmiObject Win32_TerminalServiceSetting -Namespace rootcimv2TerminalServices).SetAllowTsConnections(1,1)
(Get-WmiObject -Class "Win32_TSGeneralSetting" -Namespace rootcimv2TerminalServices -Filter "TerminalName='RDP-tcp'").SetUserAuthenticationRequired(1)
Enable-NetFirewallRule -DisplayGroup "Remote Desktop"
Далее выбираем желаемое место в этом порядке и добавляем новый пункт.
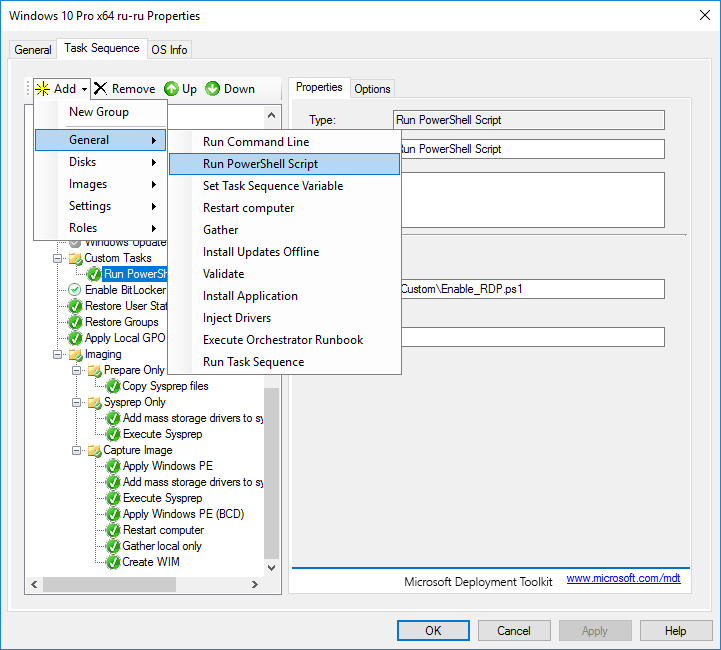
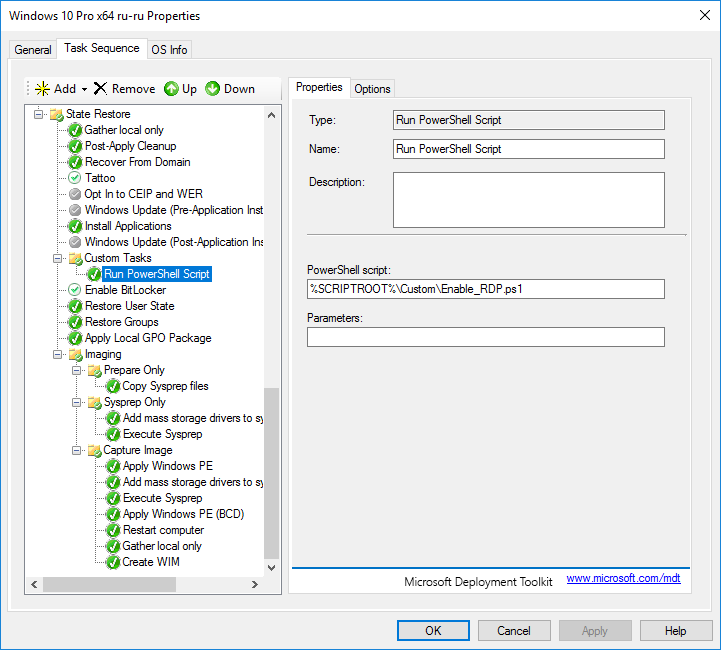
На вкладке Options мы можем отключить выполнение этого шага и включить продолжение выполнения установки если на этом шаге возникнет ошибка. Там же добавляются дополнительные необходимые условия для выполнения этого шага.
Рекомендую более детально изучить возможности разных типов задач. После завершения редактирования последовательности можно приступить к созданию загрузочных образов.

Для создания образов выбираем второй пункт.

Обновление DeploymentShare необходимо выполнять после:
- обновления загрузочных драйверов (сетевых карт и дисковых накопителей);
- добавления компонентов в загрузочный образ;
- изменения параметров загрузочного образа;
- обновления версии Windows ADK;
- изменения Bootrstrap.ini;
- изменения файлов «экстра»-директорий.
Переходим в консоль WDS и в папку Boot Images добавляем созданный загрузочный образ. WDS скопирует этот образ в свой рабочий каталог.
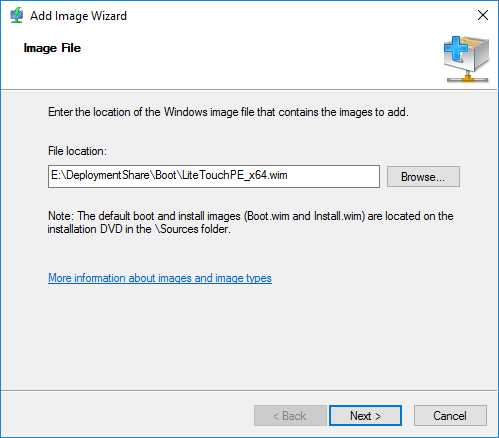
Тестирование
Настраиваем на тестовом компьютере загрузку по сети. Сервер WDS определяется автоматически. По умолчанию, компьютер ожидает нажатия F12 для продолжения загрузки. Эта настройка меняется в свойствах сервера WDS на вкладке Boot.
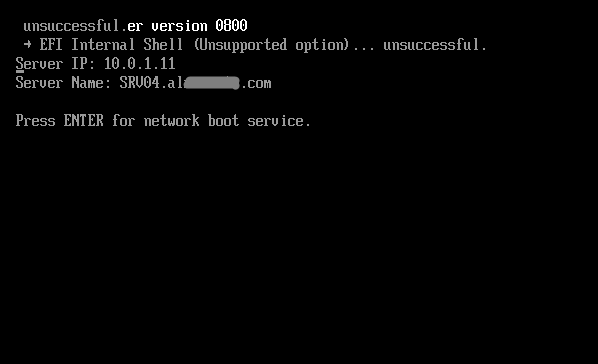

Большинство настроек было определено в конфигурационных файлах, остается заполнить недостающие. Выбираем доступный Task Sequences.

Задаем имя компьютера.
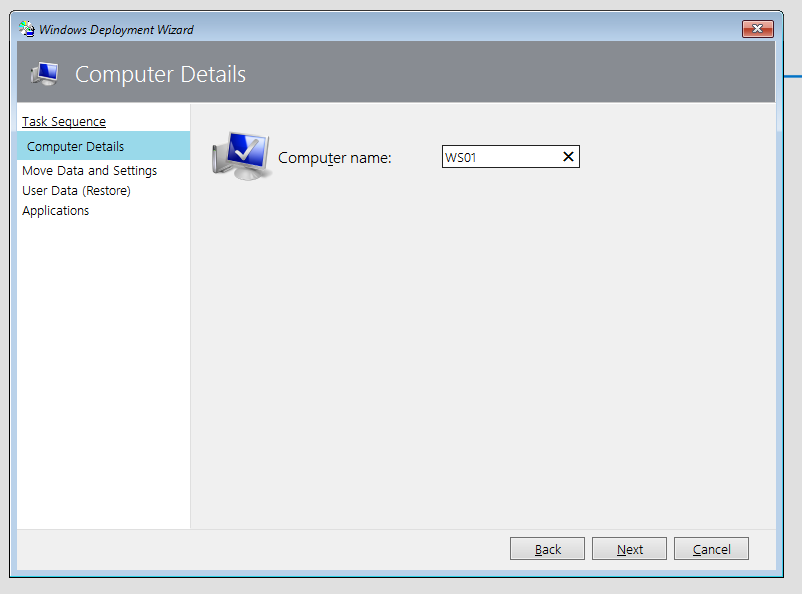
Данная настройка позволяет сохранить профили пользователей. У нас чистая установка, поэтому оставим как есть.

Можно и восстановить откуда-либо.
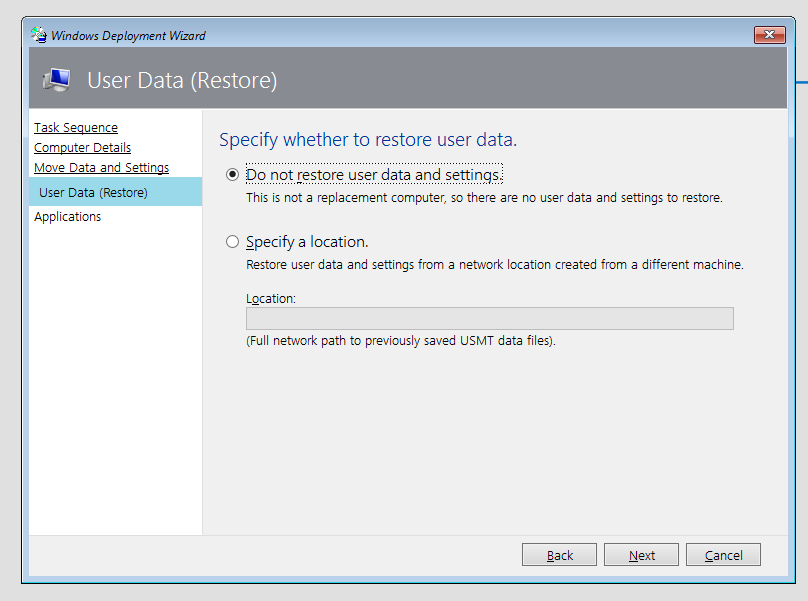
Выбираем необходимый софт.
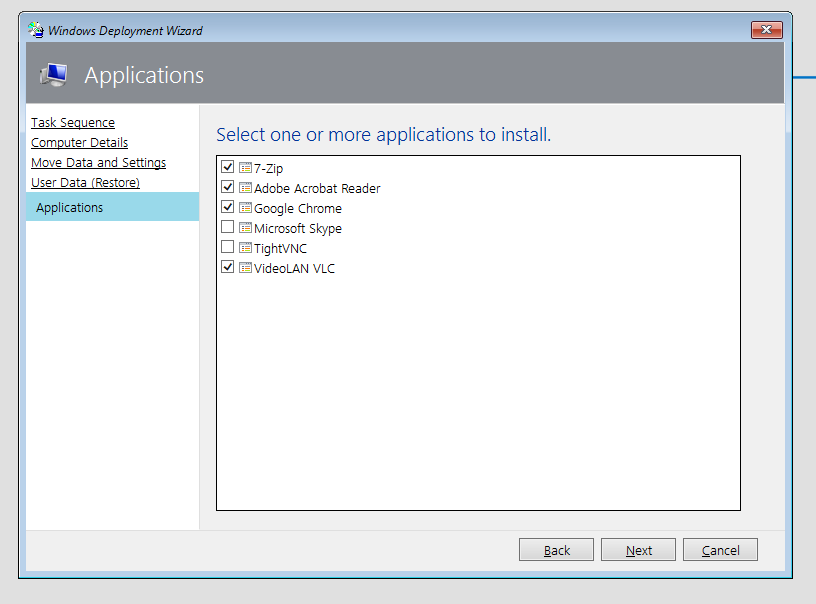
Дальнейшая установка производится в автоматическом режиме.

При включенном мониторинге за ходом процесса установки можно наблюдать через консоль.
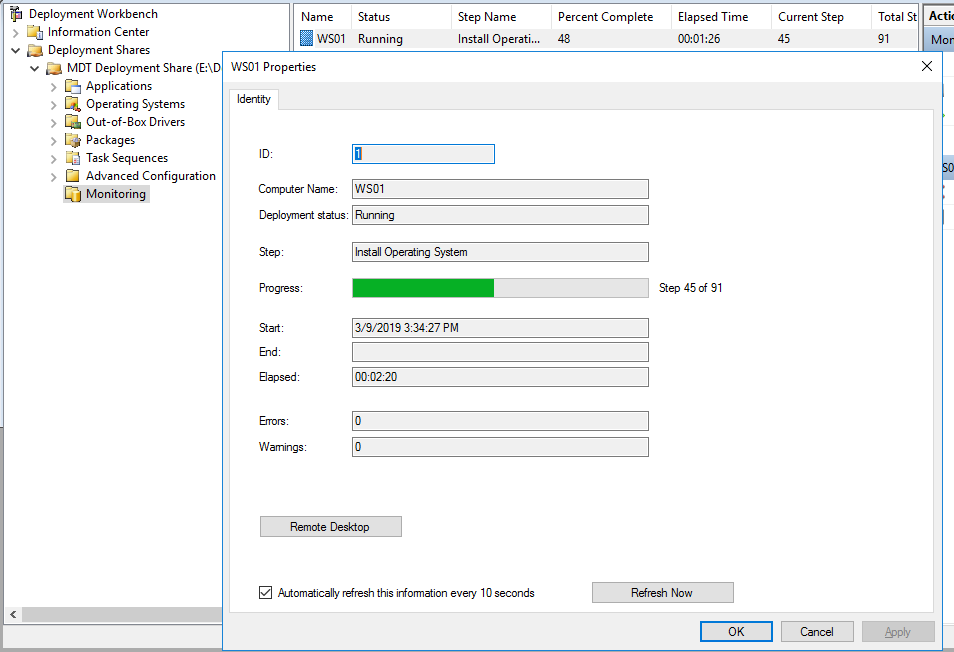
В конечном итоге, затратив пару минут своего времени (не считая установку) на загрузку по сети и ввод оставшихся настроек, мы получаем готовую к работе отвечающую нашим требованиям операционную систему. Сложность конечного результата определяется заранее, поэтому смысла особого не имеет.
Явные плюсы автоматизации:
- Экономия своего времени. Во время установки можем заниматься интересными делами.
- Единообразие устанавливаемых систем.
- Меньше время ожидания, чем это делалось бы вручную.
- Возможность менять отдельные элементы при изменениях, а не пересобирать образ целиком.
Полная официальная документация MDT

В этом руководстве мы увидим, как использовать пару MDT (Microsoft Deployment Toolkit) и WDS (службы развертывания Windows) для развертывания образов Windows.
Пара WDS и MDT для развертывания образов, начиная с сети (PXE) с WDS и MDT, позволяет настраивать и автоматизировать установку операционных систем в организации.
Цель руководства — использовать WDS для предоставления среды PXE и развертывания образов Windows и MDT для персонализации.
Содержание
- Разница между WDS и MDT
- Установка роли Windows Deployment Services WDS
- Загружаем дополнительные компоненты
- Установка windows ADK
- Настраиваем WDS сервер(Роль Windows Server 2016)
- Настройка Microsoft Deployment Toolkit (MDT)
- Добавляем образ операционной системы в MDT
- Добавляем приложения в MDT
- Файл ответов MDT
- Настройка правил MDT
- Update Deployment Share
- Добавляем Lite-Touch образ на WDS
- Конфигурация DHCP для PXE
Разница между WDS и MDT
Службы развертывания Windows (WDS) — это серверная технология от Microsoft для выполнения сетевой установки операционных систем Windows (ОС). WDS — это переработанная версия служб удаленной установки (RIS), которая позволяет развертывать операционные системы Windows. Вы можете использовать WDS для настройки новых клиентов через сетевую установку.
Microsoft Deployment Toolkit (MDT): MDT, ранее известный как Business Desktop Deployment, — это бесплатный инструмент для автоматизации развертывания операционных систем Windows и Windows Server, использующий комплект для оценки и развертывания Windows (ADK) для Windows 10. MDT — это унифицированный набор инструменты, процессы и рекомендации по автоматизации развертывания настольных компьютеров и серверов. Вы можете использовать его для создания эталонных образов или в качестве полного решения для развертывания.
MDT использует два способа подключения к серверу по сети: USB-ключ или PXE. Среда предварительного выполнения (PXE) требует использования сервера Windows, настроенного с ролью служб развертывания Windows (WDS).
MDT работает вместе с WDS, предоставляя возможности PXE-сервера в сети и управляя подключением к общему ресурсу MDT с помощью предварительно созданного загрузочного файла MDT. Если вы хотите, чтобы ваши клиенты использовали образы ОС из WDS, вам потребуется импортировать эти загрузочные образы в WDS. WDS также может помочь захватывать образы вашего эталонного устройства и развертывать эти образы с поддержкой драйверов на различных устройствах в вашей среде с помощью PXE. Хотя MDT — это скорее инструмент проектирования, MDT создает загрузочные образы с различными пошаговыми последовательностями развертывания.
Установка роли Windows Deployment Services WDS


Загружаем дополнительные компоненты
Комплект для оценки и развертывания Windows (Windows ADK) и надстройка Windows PE содержат инструменты, необходимые для настройки образов Windows для крупномасштабного развертывания, а также для проверки качества и производительности вашей системы.
С официального сайта скачиваем :
1) Download the ADK for Windows Server 2022
2) Download the Windows PE add-on for the ADK for Windows Server 2022
Также скачиваем Microsoft Deployment Toolkit (MDT)
Установка windows ADK
- После того как скачали ADK for Windows Server 2022 монтируем скаченный iso файл 20348.1.210507-1500.fe_release_amd64fre_ADK


- Установка надстройки Windows PE для сервера MDT , мы его скачивали по ссылке Windows PE add-on for the ADK for Windows Server 2022. Монтируем образ 20348.1.210507-1500.fe_release_amd64fre_ADKWINPEADDONS


- Загружаем и устанавливаем Microsoft Deployment Toolkit (MDT)


Настраиваем WDS сервер(Роль Windows Server 2016)
Открываем консоль WDS

Запускаем конфигурирование.

В мастере настройки выбираем интеграцию с доменом.

Задаем служебную папку WDS.

На следующем шаге можно выбрать каким компьютерам будет отвечать сервер WDS:
- Никому не отвечать — можно отключить работу сервера на время настройки или тестирования, например, чтобы пользователи не получали возможные конфликты при установке.
- Отвечать только известным компьютерам — список составляется в консоли и если записи адреса компьютера нет, то он не получит возможность работать с сервером.
- Отвечать всем клиентам — ответ получат все компьютеры. Если установить галку ниже, то при обращении неизвестных устройств (не записанных ранее) в консоли появится запись, что некий компьютер с определенным адресом запрашивает подключение. Можно отклонить или принять и процесс продолжится. Позже эти настройки можно изменить в консоли WDS.


Снимаем галочку — add images to the server now , и жмем Finish.


WDS нам понадобится только для подключения и передачи образов, поэтому без подробного объяснения:
Install Images — установочные образы (не используем);
Boot Images — загрузочные образы (добавим созданные в MDT);
Pending Devices — появляются устройства запрашивающие соединение если включена опция «требуется подтверждение администратора».
Настройка Microsoft Deployment Toolkit (MDT)
запустим Deployment Workbench , как показано ниже

После запуска приложения Microsoft Deployment Toolkit (MDT)
щелкните правой кнопкой мыши Deployment Shares в левой панели навигации и
выберите New Deployment Share .

Откроется мастер создания общего ресурса для развертывания, как показано ниже.
– Если вы хотите изменить путь к общему ресурсу развертывания, используйте кнопку обзора, как показано ниже.

В мастере общего доступа введите имя общего ресурса.
– Убедитесь, что имя общего ресурса совпадает с именем, указанным в указанном выше пути. (По умолчанию имя — DeploymentShare$), я оставлю его таким же
— Затем нажмите «Далее ».

Измените описание общего ресурса развертывания или оставьте значение по умолчанию. Я оставлю этот путь, так как это лабораторная среда.
– Нажмите «Далее».

В окне «Параметры» я выбераю все пункты.
Примечание. Если для вашей среды требуются другие входные данные, отметьте их.
Нажмите «Далее» .

В окнах сводки просмотрите это и нажмите «Далее».

Далее будут созданы общие ресурсы, как показано ниже.

В окне подтверждения нажмите «Готово».
– Общий ресурс развертывания успешно завершен, и MDT успешно настроен.
— Теперь нажмите «Готово».

Прежде чем перейти к следующим шагам, убедитесь, что вы примонтировали образ ISO для дальнейшей его модернизации.
Добавляем образ операционной системы в MDT

В консоли Deployment Workbench щелкните правой кнопкой мыши папку операционной системы и
выберите «Импорт операционной системы» .
Общая папка E:DeploymentShare$ может переноситься на другие сервера простым копированием. Отключение и подключение осуществляется в консоли MDT.
Applications — приложения которые устанавливаются на операционную систему;
Operating Systems — операционные системы доступные для загрузочного образа;
Out-of-Box Drivers — драйвера (.inf);
Packages — пакеты обновлений безопасности, сервисные, языковые и т.д. (.cab и .msu);
Task Sequences — последовательность задач установки;
Selection Profiles — логические группы объединения контента;
Linked Deployment Shares — другие подключенные DeploymentShare с других серверов;
Monitoring — при включенной опции отображается ход выполнения установки на клиентах.

В мастере типов ОС
— нажмите «Полный набор исходных файлов», а затем — нажмите «Далее ».


Введите имя каталога( К примеру операционную систему и название билда) назначения и нажмите «Далее» .

Просмотрите сводную страницу и нажмите «Далее» .

Это продолжит импорт файлов ОС. – На странице подтверждения нажмите «Готово», как показано ниже.


На приведенном ниже снимке экрана видно, что операционная система успешно импортирована.
Можно создавать папки, сортировать разные версии Windows , удалять не нужные редакции.

Добавляем приложения в MDT
– Щелкните правой кнопкой мыши узел приложения.

– В Типе приложения выберите приложение с исходными файлами

На странице сведений вам будет предложено ввести информацию о добавляемом приложении. Другие поля занимают важную информацию только тогда, когда требуется название приложения, что может быть полезно, когда установлены приложения для устранения неполадок в пути.

Теперь просмотрите местоположение, чтобы указать исходную папку для импорта в папку MDT.
– Я выбрал путь загрузки в качестве места для хранения этих файлов.

Укажите имя каталога, который необходимо создать. Пожалуйста, измените имя в соответствии с вашими потребностями.

Введите ключ для тихой установки. я подглядывал тут

А вот еще пример

Просмотрите сводную страницу, как показано ниже, чтобы узнать, что будет импортировано в MDT, и нажмите «Далее».

На странице подтверждения нажмите «Готово», как показано ниже.

На снимке экрана ниже видно, что приложение успешно импортировано.

Файл ответов MDT
Давайте создадим последовательность задач — в консоли Deployment Workbench —
щелкните правой кнопкой мыши Task Sequences , а затем — нажмите New Task Sequences

На странице «Общие настройки» введите следующую информацию ниже.

В мастере выбора шаблона — выберите стандартную последовательность клиентских задач и
— нажмите «Далее» .

Выберите из списка операционную систему, которую вы импортируете, и
нажмите «Далее».

В окне «Укажите ключ продукта» выберите «Не указывать ключ продукта в данный момент» и
нажмите «Далее ».

На странице настроек ОС введите следующую информацию
: если у вас есть домашняя страница в Интернете, введите ее здесь, а затем
— нажмите «Далее» .

В окне «Пароль администратора» укажите пароль и нажмите « Далее ».

Проверьте сводку и нажмите «Далее».

В окне подтверждения нажмите «Готово».

Как мы видим ниже, последовательность задач была успешно создана.

Настройка правил MDT
Настройка правил MDT, среды предустановки Windows и мониторинга
. Этот шаг очень важен, если вы не хотите выполнять большую ручную настройку позже.
– Щелкните правой кнопкой мыши общий ресурс развертывания MDT , а затем
– щелкните Свойства.


Примечание: Если вы оставите правило общего доступа к развертыванию MDT по умолчанию, вам придется много вводить вручную.
Если вы не хотите этого делать. Ниже приведен пример файла правил, используйте этот файл для ускорения процесса.
Файл Rules для ответов при установке операционной системы

[Settings]
Priority=Default
Properties=MyCustomProperty
[Default]
OSInstall=Y
SkipTaskSequence=YES
TaskSequenceID=Server_2016
OSDComputerName=W10RUMSC01#Right("%SerialNumber%",5)#
JoinDomain=pentagon.loc
DomainAdmin=alukashin
DomainAdminDomain=pentagon.loc
DomainAdminPassword=mypassworddomainaccount
MachineObjectOU=OU=Servers,OU=Moscow-CTD,OU=RU,OU=Europe,OU=BV,DC=eua,DC=bvcorp,DC=corp
AdminPassword=mynewpasswordserveraccount
HideShell=YES
SkipUserData=YES
TimeZoneName=N. Central Asia Standard Time
SkipTimeZone=YES
UILanguage=ru-RU
UserLocale=ru-RU
SkipLocaleSelection=YES
SystemLocale=ru-RU
SkipCapture=YES
SkipComputerName=YES
SkipDomainMembership=YES
SkipAdminPassword=YES
SkipProductKey=YES
SkipComputerBackup=YES
SkipBitLocker=YES
SkipSummary=YES
Мини описание
OSInstall=Y //установить операционную систему
JoinDomain=alx*.com //ввести в этот домен
DomainAdmin=alx - имя пользователя используемого для присоединения
DomainAdminDomain=alx*.com //домен пользователя
DomainAdminPassword= //пароль пользователя
AdminPassword= //пароль локального администратора на новой машине
HideShell=YES //скрыть Shell
SkipUserData=NO //пропустить шаг о решении сохранности пользовательских данных (если установка производится поверх существующей системы)
TimeZoneName=N. Central Asia Standard Time //временная зона
SkipTimeZone=YES //пропустить выбор временной зоны
UILanguage=ru-RU //выбор языка интерфейса
UserLocale=ru-RU //выбор местоположения
SkipLocaleSelection=YES //пропустить выбор месторасположения
SystemLocale=ru-RU //выбор языка для non-Unicode программ
SkipCapture=YES //пропустить захват установленной операционной системы
SkipComputerName=NO //пропустить ввод имени компьютера
SkipDomainMembership=YES //пропустить членство в домене
SkipAdminPassword=YES //пропустить пароль администратора
SkipProductKey=YES //пропустить ввод лицензионного ключа
SkipComputerBackup=YES //пропустить выполнение резервного копирования
SkipBitLocker=YES //пропустить настройку шифрования BitLocker
SkipSummary=YES //пропустить страницу с выводом результирующих настроек
EventService=http://server1:9800 //установить сервер назначения для логов
Файл BootStrap.ini для доступа к файловой шаре


[Settings]
Priority=Default
[Default]
DeployRoot=SERVER1DeploymentShare$
UserID=alukashin
UserDomain=pentagon.loc
UserPassword=mydomainpassword
KeyboardLocale=en-US
SkipBDDWelcome=YES
Мини описание
[Settings]
Priority=Default
[Default]
DeployRoot=\SRV04DeploymentShare$
UserID=alx //имя пользователя для доступа к папкам Deployment Share
UserDomain=alx*.com //домен пользователя
UserPassword= //пароль пользователя
KeyboardLocale=en-US //выбор языка
SkipBDDWelcome=YES //пропустить начальную страницу установщика
Если вы после настройки файлов ответа меняете их снова, то вам при Update Deployment Share нужно выбирать Optimize the boot image updating process
Нажмите Apply
Обновите общий ресурс развертывания. Чтобы обновить общий ресурс развертывания, выполните следующие действия.
– Щелкните правой кнопкой мыши общий ресурс развертывания MDT, а затем
– нажмите «Update Deployment Share », чтобы создать файл Windows 10 LiteTouchPE_x64.wim.

В окне «Параметры»
— нажмите «Оптимизировать процесс обновления загрузочного образа», а затем
— нажмите «Далее» .


Как мы видим, шаг процесса обновления настроек общего доступа будет продолжен
. Примечание. Этот процесс займет некоторое время.


После обновления папки Deployment Share будет создан WIM-файл LiteTouch .
– Эти файлы будут расположены в загрузочной папке (C:DeploymentShareBoot ) созданного вами общего ресурса развертывания.
Добавляем Lite-Touch образ на WDS
Чтобы добавить образы Lite-Touch в WDS, выполните следующие действия. На WDS откройте службы развертывания Windows (WDS),щелкните правой кнопкой мыши загрузочные образы, а затем щелкните Добавить загрузочный образ

Откроется мастер добавления изображений, как показано ниже.
– Нажмите «Обзор», затем выберите файл LiteTouch в папке загрузочных файлов на общем ресурсе развертывания, как показано ниже.


Конфигурация DHCP для PXE

Tips
При загрузке по PXE , идет загрузка образа с mdt , появляется окно Microsoft Deployment Toolkit , через некоторое время , не идет считывание ответов , а просто появляется окно cmd
Это из за того , что у вас уже установлена система и вам нужно форматировать жесткий диск через diskpart
- diskpart
- list disk (вы увидите список подключенных физических дисков, вам нужен номер диска, который будет форматироваться, у меня это 5, у вас будет свой).

- select disk 5
- clean
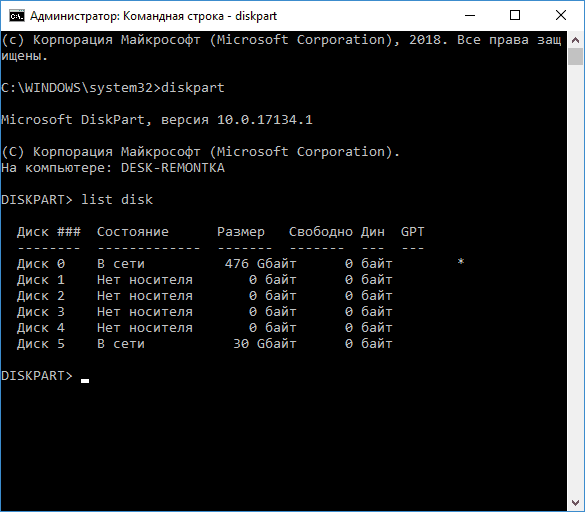
Здравствуйте, уважаемые читатели сайта remontcompa.ru! Меня зовут Роман Нахват и я представляю вашему вниманию статью о создании установочного дистрибутива операционной системы Windows 10 (версии 1809) с интегрированными в него приложениями и драйверами. Создавать данный установочный дистрибутив мы с вами будем используя Microsoft Deployment Toolkit (MDT) версии 8456. Для создания такого дистрибутива нам понадобится оригинальный, скачанный с официального сайта Microsoft iso образ Windows 10, комплект средств для развёртывания и оценки Windows 10 (ADK for Windows 10) версии 1809, установочный файл Microsoft Deployment Toolkit, установочные файлы приложений и драйвера, которые необходимо включить в состав дистрибутива Windows 10. Итак, поехали.
Создание установочного дистрибутива Windows 10 1809 с приложениями и драйверами используя Microsoft Deployment Toolkit (MDT) версии 8456
Переходим по адресу:
https://docs.microsoft.com/en-us/windows-hardware/get-started/adk-install
И выполняем скачивание пакета ADK for Windows 10 версии 1809.
 версии 8456")
Также переходим по адресу:
https://www.microsoft.com/en-us/download/details.aspx?id=54259
И скачиваем установочный файл Microsoft Deployment Toolkit.
 версии 8456")
Выполняем установку ADK for Windows 10 версии 1809.
 версии 8456")
В окошке принятия правил конфиденциальности жмём «Далее». Затем принимаем лицензионное соглашение. На этапе выбора компонентов всё оставляем по умолчанию, жмём «Установить».
 версии 8456")
И устанавливаем.
 версии 8456")
Теперь выполняем установку Microsoft Deployment Toolkit. Принимаем лицензионное соглашение.
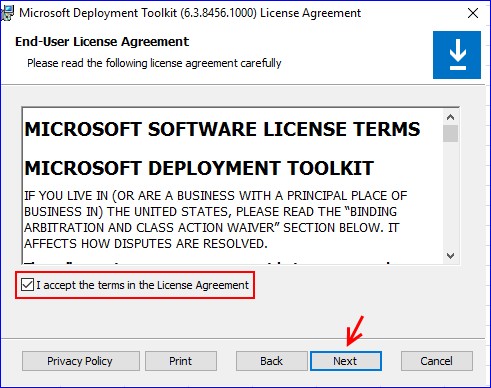
Жмём просто Next на этапе настройки компонентов. И на следующем за ним этапе тоже жмём Next.
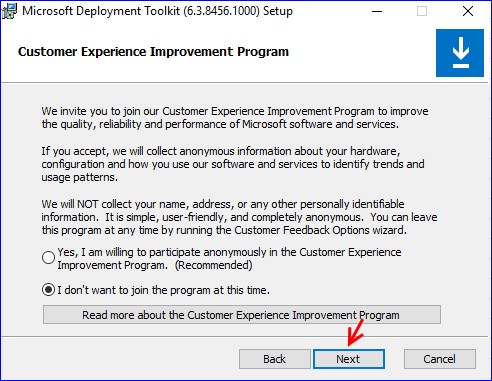
Install.
Установка Microsoft Deployment Toolkit завершена. Жмём в конце «Finish».
Запускаем Deployment Workbench в меню «Пуск». Microsoft Deployment Toolkit (MDT) предоставляет пользователю набор инструментов для автоматизации развертывания операционных систем на настольных компьютерах и серверах. MDT поддерживает развертывание операционных систем от Windows 7 до Windows 10, гибкое управление драйверами и приложениями.
 версии 8456")
Создадим новую Deployment Share (New Deployment Share).
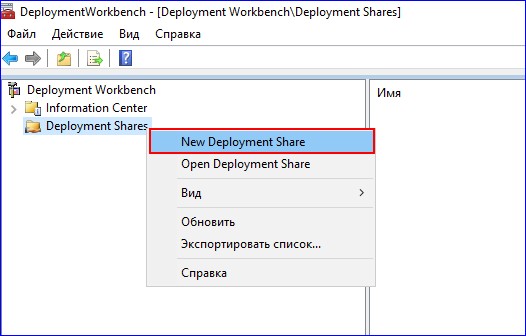
Указываем месторасположение создаваемой Deployment Share (в нашем случае это раздел E:).
 версии 8456")
На странице Share оставляем всё по умолчанию.
 версии 8456")
Next.
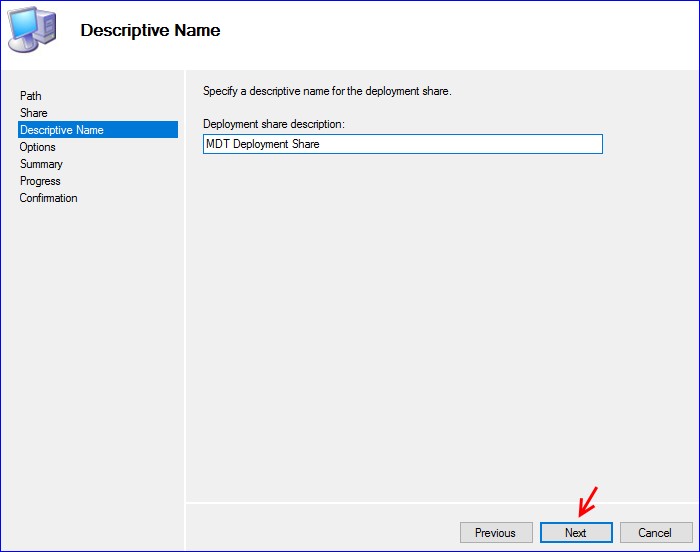
Next.
 версии 8456")
Next.
 версии 8456")
Deployment Share успешно создана.
 версии 8456")
Созданная Deployment Share.
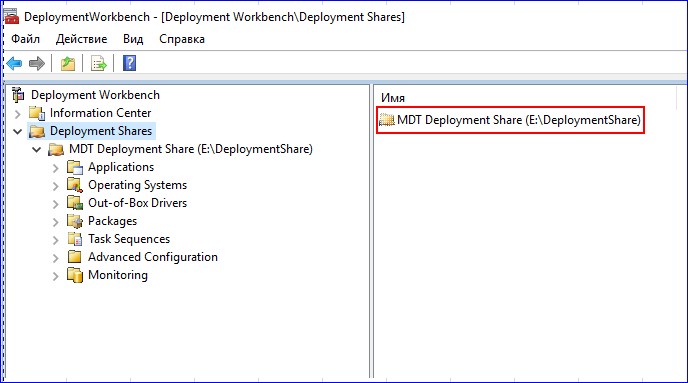
Под буквой G: у нас смонтирован в виртуальный привод установочный дистрибутив Windows 10. Cмонтированный дистрибутив Windows 10 базируется на файле install.esd.
 версии 8456")
Создадим на разделе C: папку win10x64 и скопируем в него файл install.esd.
 версии 8456")
Запустим командную строку от имени администратора, перейдем в папку win10x64 и выполним команду:
dism /Get-WimInfo /WimFile:install.esd
 версии 8456")
Как видим, файл install.esd содержит в себе несколько редакций операционной системы Windows 10. Нас интересует редакция под индексом 4, то есть Windows 10 Pro.
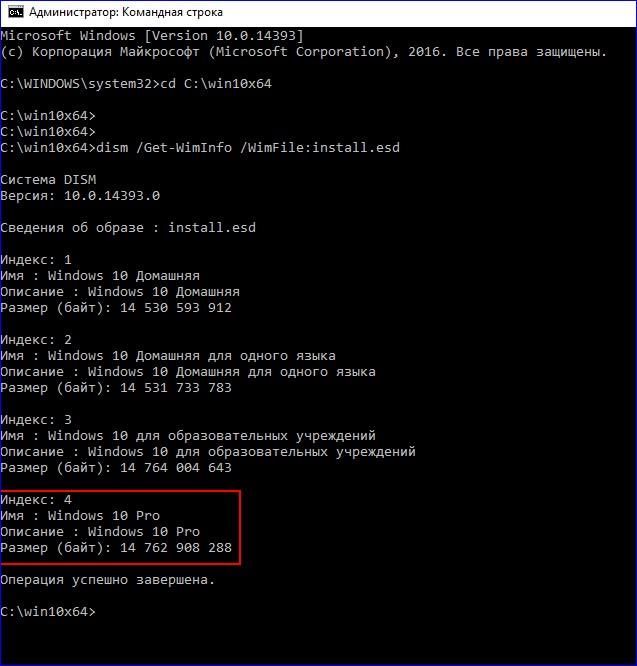
Выполним экспорт образа Windows 10 Pro из файла install.esd в отдельный файл c расширением .wim. Для этого вводим команду:
dism /export-image /SourceImageFile:install.esd /SourceIndex:4 /DestinationImageFile:install.wim /Compress:max /CheckIntegrity
После параметра SourceIndex указываем число 4 (т.е порядковый номер индекса Windows 10 pro), задаём максимальное сжатие экспортируемого образа (параметр Compress:max), параметр CheckIntegrity применяем для выявления повреждения wim-файла.
 версии 8456")
Процесс экспорта Windows 10 pro в отдельный файл с расширением .wim.
 версии 8456")
Экспорт образа Windows 10 pro успешно завершён
 версии 8456")
Перейдём в папку win10x64 и рядом с файлом install.esd видим файл install.wim
 версии 8456")
Перейдём в окно Deployment Workbench, развернём созданную Deployment Share и далее в Operating Systems создадим папки windows 10 pro и x64 (пункт New Folder).
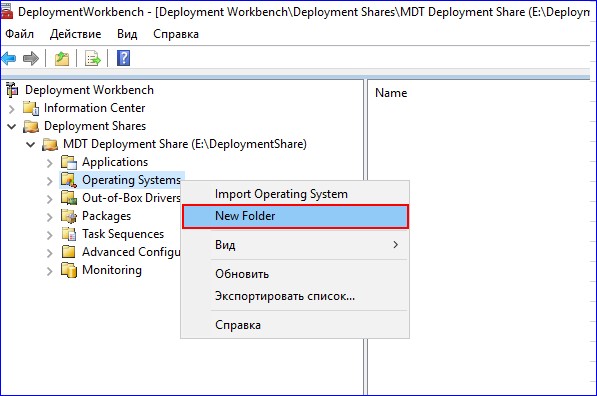
Указываем имя папки.
 версии 8456")
Жмём Next.
 версии 8456")
Finish.
 версии 8456")
Таким же образом создаем папку x64. В итоге получаем следующее
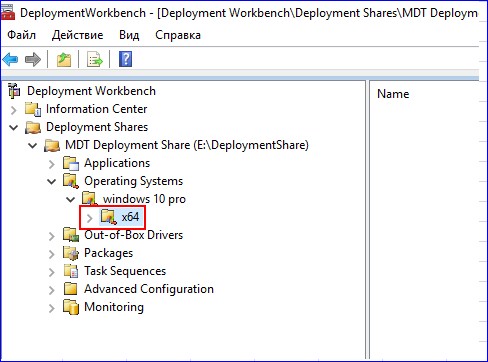
Выделяем папку x64 и в контекстном меню выбираем Import Operating System.
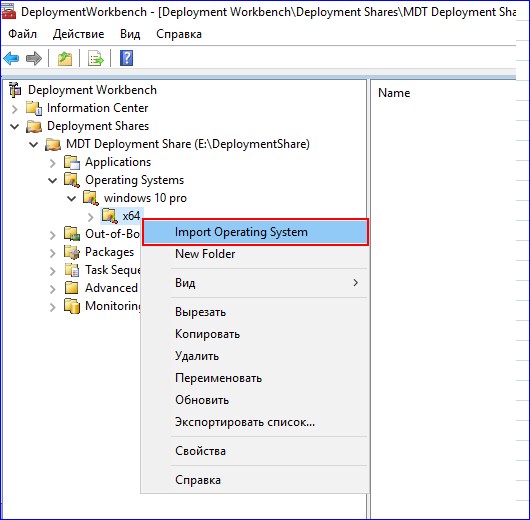
Выбираем Custom image file.
 версии 8456")
Указываем путь к файлу install.wim, который мы выше экспортировали из файла install.esd.
 версии 8456")
Оставляем всё по умолчанию. Жмём Next.
 версии 8456")
Next.
 версии 8456")
Next.
 версии 8456")
Процесс добавления образа Windows 10 pro в Deployment Share.
 версии 8456")
Жмём Finish.
 версии 8456")
Видим, что мы успешно добавили образ Windows 10 pro в Deployment Share.
 версии 8456")
Добавим в созданную Deployment Share приложения и драйвера. На флеш накопителе в соответствующих папках у нас находятся драйвера и установочные файлы приложений.
 версии 8456")
Выбираем Out-of-Box Drivers, и создаём структуру папок, как показано ниже.
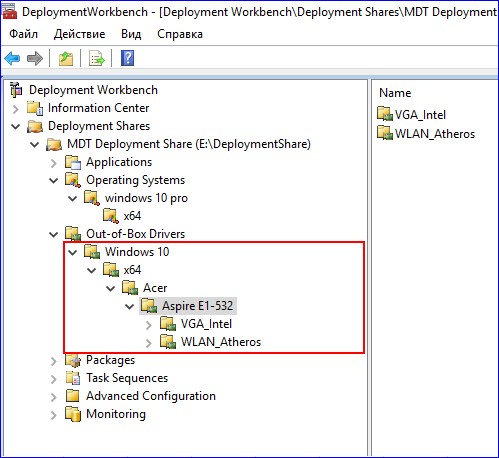
Выделяем папку VGA_Intel и выбираем Import Drivers.
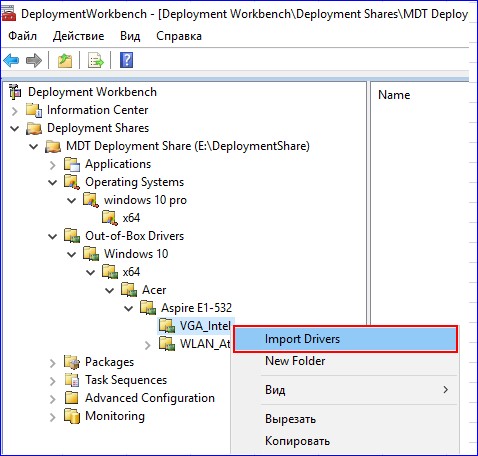
Указываем путь к драйверам, которые будем добавлять в папку VGA_Intel.
 версии 8456")
Next.
 версии 8456")
Процесс добавления драйверов в папку VGA_Intel.
 версии 8456")
Finish.
 версии 8456")
Драйвера, добавленные в папку VGA_Intel.
 версии 8456")
Таким же образом добавим драйвера и в папку WLAN_Atheros. Получим следующее.
 версии 8456")
В Deployment Share переходим в Applications и создаём три папки: AIMP, Notepad++ и Visual Studio Code.
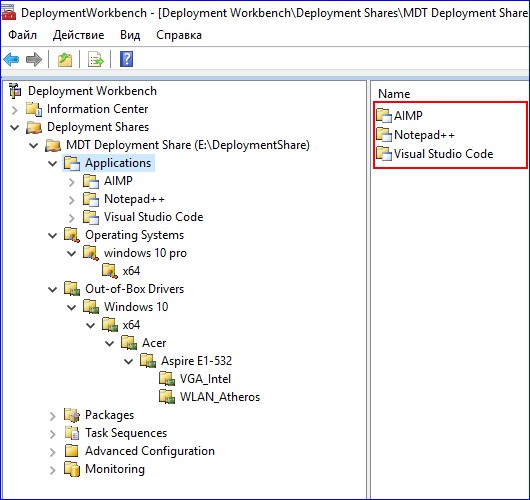
В каждую из созданных папок добавим соответствующие приложения. Выделяем папку AIMP и выбираем New Application.
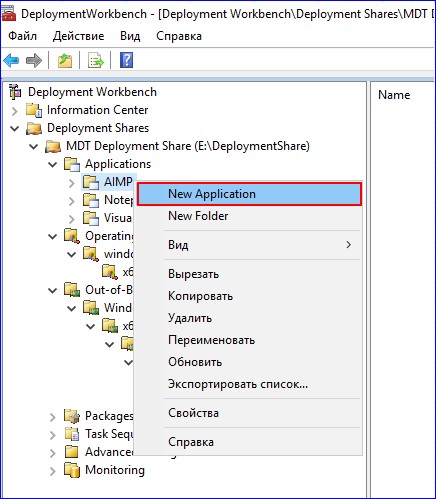
Выбираем Application with source files.
 версии 8456")
Указываем название приложения и его версию.
 версии 8456")
Прописываем путь к установочному файлу приложения.
 версии 8456")
В строке Command line указываем название установочного файла приложения с расширением и далее прописываем ключ для тихой установки данного приложения. Например, для медиапроигрывателя AIMP ключ тихой установки будет /SILENT /AUTO.
 версии 8456")
Next.
 версии 8456")
Приложение AIMP успешно добавлено.
 версии 8456")
Таким же образом в соответствующие папки добавляем приложения Notepad++ и Visual Studio Сode, используя следующие ключи тихой установки:
- для Notepad++ /S, а
- для Visual Studio Сode /VERYSILENT /SUPPRESSMSGBOXES /NORESTART /SP-
Получаем следующее.
 версии 8456")
 версии 8456")
Переходим в Task Sequences, и как это делали выше, создаём папку Install Windows 10 x64. Создадим новую последовательность задач, выделив данную папку и выбрав New Task Sequence.
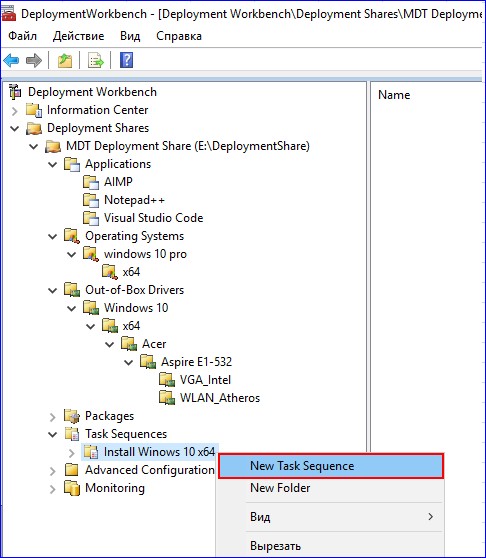
Указываем идентификатор последовательности задач (w10), и название (Install Windows 10).
 версии 8456")
На вкладке Select Template из выпадающего списка выбираем Standard Client Task Sequence.
 версии 8456")
Указываем операционную систему для установки.
 версии 8456")
Вводим ключ для установки Windows 10 pro.
 версии 8456")
Указываем имя владельца системы, название организации и домашнюю страницу для встроенного в операционную систему браузера.
 версии 8456")
Указываем пароль для встроенной учётной записи администратора.
 версии 8456")
Жмём Next.
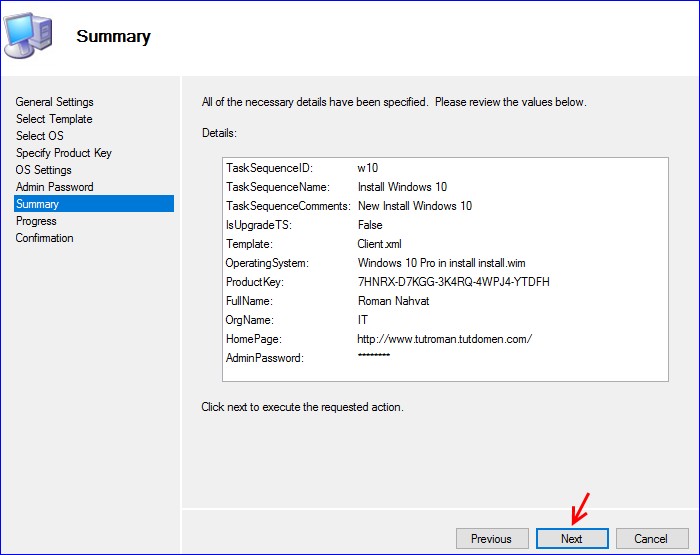
Последовательность задач Install Windows 10 x64 успешно создана.
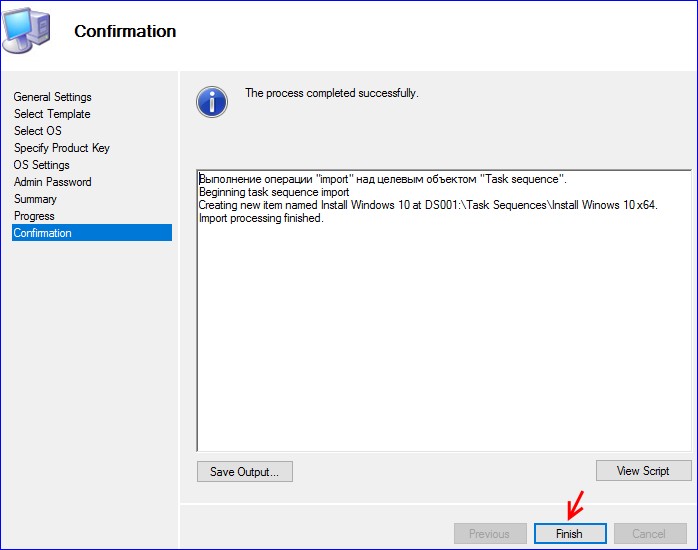
Созданная последовательность задач Install Windows 10 x64.1
 версии 8456")
Переходим к Selection Profiles и выбираем New Selection Profile.
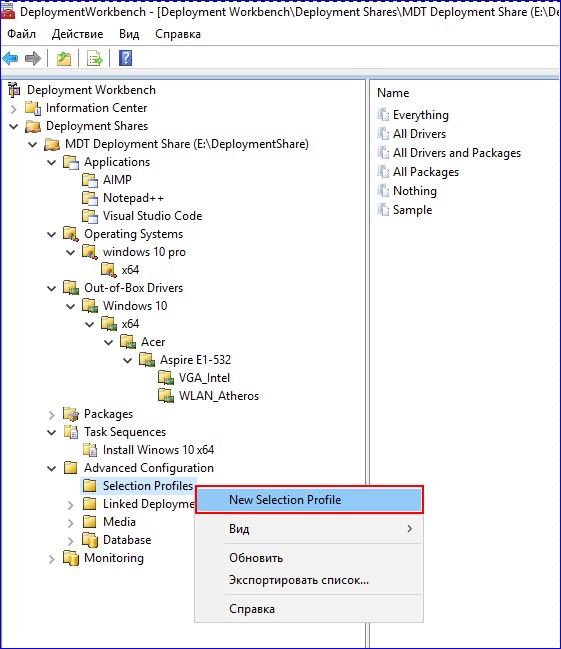
Указываем имя для создаваемого Selection profile, в нашем случае это Drivers Acer Aspire E1-532.
 версии 8456")
Выбираем компоненты для создаваемого Selection profile (ставим галочки напротив папок с драйверами, а именно VGA_Intel и WLAN_Atheros).
 версии 8456")
Жмём Next.
 версии 8456")
Finish.
 версии 8456")
Selection profile c именем Drivers Acer Aspire E1-532 успешно создан.
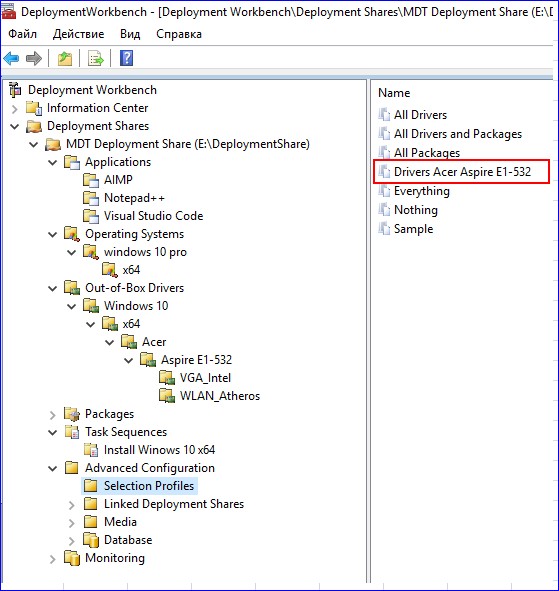
Создадим ещё один Selection profile с именем Install Windows 10 x64.
 версии 8456")
Для Selection profile с именем Install Windows 10 x64 поставим галочки для компонентов, как это показано ниже.
 версии 8456")
Next.
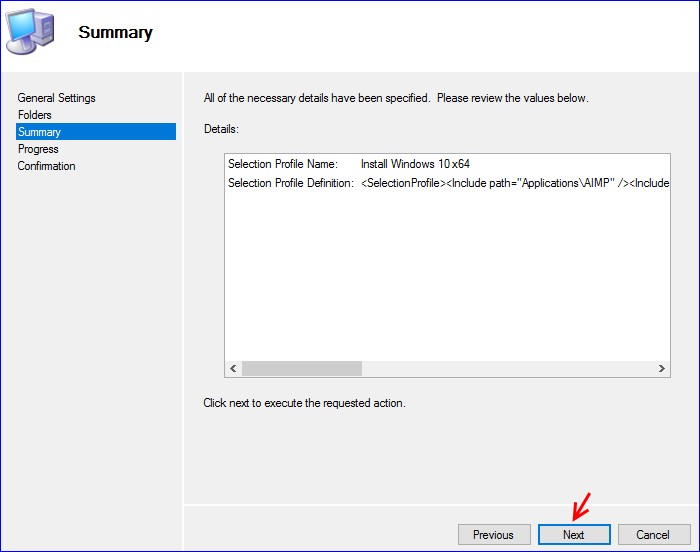
Selection profile с именем Install Windows 10 x64 успешно создан.
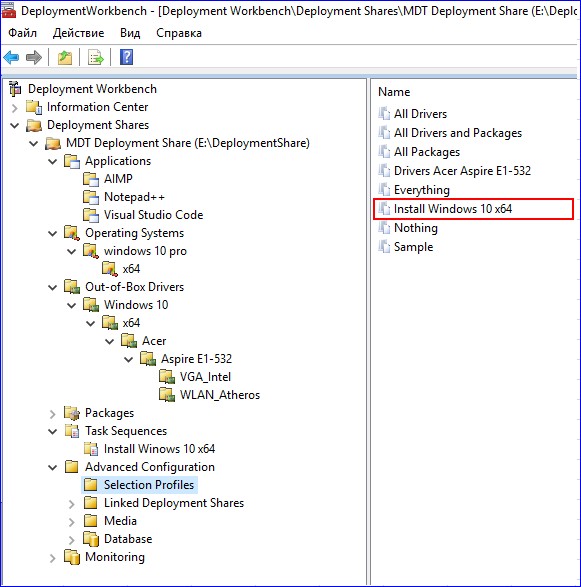
Приступим к созданию установочного дистрибутива с Windows 10 pro. Щёлкаем по Media и выбираем New Media.
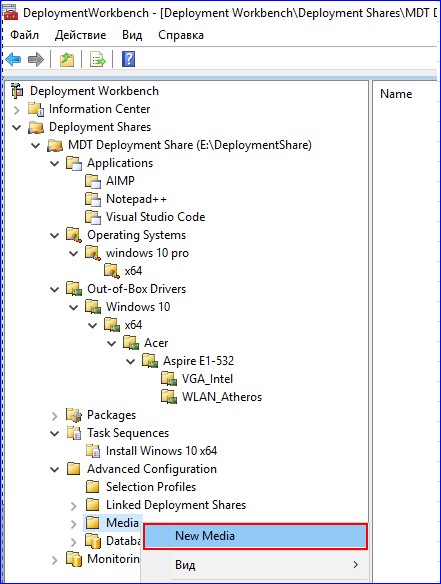
Указываем путь, где будет сохраняться создаваемый установочный дистрибутив. В выпадающем списке Selection profile выбираем Install Windows 10 x64.
 версии 8456")
Next.
 версии 8456")
Ожидаем завершения процесса копирования файлов, необходимых для создания установочного дистрибутива (в нашем случае с Windows 10).
 версии 8456")
Finish.
 версии 8456")
Получаем следующее.
 версии 8456")
Щёлкаем по созданному MEDIA001 и выбираем Свойства.
 версии 8456")
Переходим на вкладку Windows PE.
 версии 8456")
Далее переходим на вкладку Drivers and Patches.
 версии 8456")
Включим в состав создаваемого установочного дистрибутива Windows 10 драйвера, которые мы добавляли в Deployment Share. Для этого в выпадающем списке Selection profile выбираем Drivers Acer Aspire E1-532.
 версии 8456")
Жмём Применить и ОК
 версии 8456")
Выделяем созданный Media (MEDIA001) и выбираем Update Media Content
 версии 8456")
Ожидаем завершения процесса создания установочного дистрибутива Windows 10. Процесс создания установочного дистрибутива Windows 10 с интегрированными драйверами и приложениями успешно завершён
 версии 8456")
Переходим на раздел E: в папку media и видим созданный установочный дистрибутив Windows 10 под именем LiteTouchMedia и расширением .iso
 версии 8456")
В следующей статье по Microsoft Deployment Toolkit (MDT) мы выполним установку Windows 10 на компьютер используя созданный дистрибутив, а так же рассмотрим процесс настройки данного дистрибутива для полной автоматизации установки Windows 10
В этой статье мы разберемся, как на базе Windows Server 2012 R2 установить и настроить связку Microsoft Deployment Toolkit 2013, Windows Assessment & Deployment Kit и роли WDS, и использовать этот набор для разворачивания образа Windows 10 на компьютеры клиентов по сети путем загрузки в режиме PXE (Preboot Execution Environment).
Нам понадобятся следующие компоненты:
- Windows Deployment Services – это роль Windows Server 2012, используемая для загрузки и разворачивания операционных систем по сети
- Microsoft Deployment Toolkit (MDT) 2013 Update 1 ( https://www.microsoft.com/en-us/download/details.aspx?id=48595) – набор инструментов для автоматизации развертывания операционных систем на рабочие станции и сервера
- Windows Assessment and Deployment Kit (Windows ADK) для Windows 10 (https://go.microsoft.com/fwlink/p/?LinkId=526740) – набор компонентов для настройки и развертывания Windows на новые компьютеры
- Установочный образ Windows 10 — в виде iso образа или установочного диска
Содержание:
- Установка роли Windows Deployment Services
- Установка Microsoft Deployment Toolkit 2013
- Установка Windows Assessment and Deployment Kit
- Настройка MDT 2013
- Создание задания установки MDT
- Настройка загрузочного образа в Windows Deployment Services
- Тестирование установки Windows 10 по сети
Установка роли Windows Deployment Services
В первую очередь нужно на сервере под управлением Windows Server 2012 R2 установить роль Windows Deployment Services. Установку роли можно выполнить из консоли Server Manager. В списке ролей выберите Windows Deployment Services и нажмите Next.
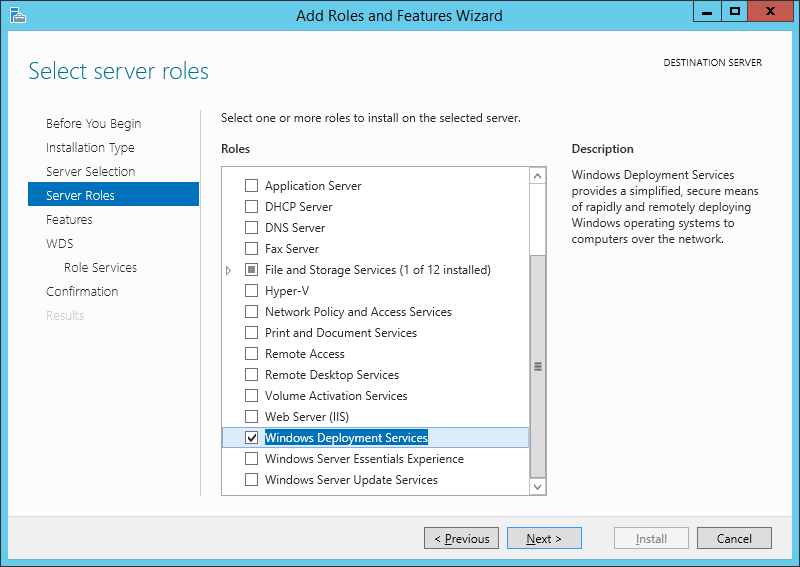
В списке устанавливаемых компонентов роли WDS отметьте службы Deployment Server и Transport Server.
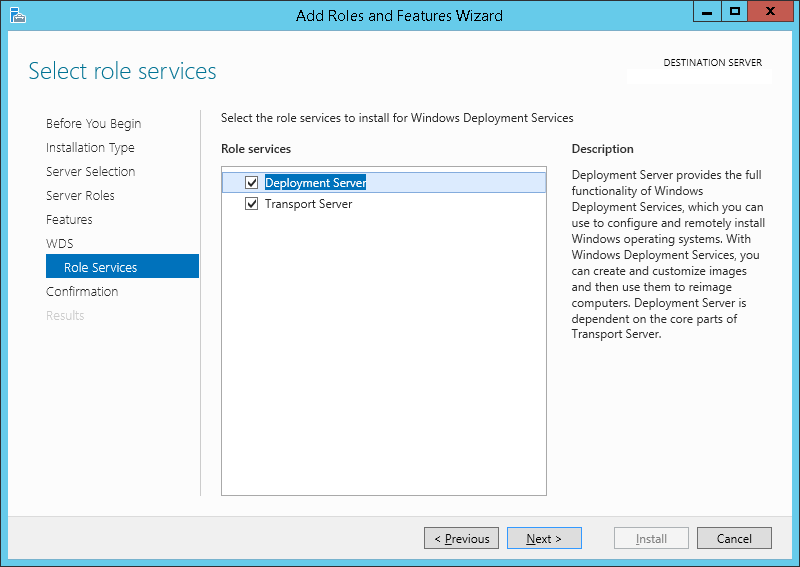
Запустите установку роли WDS (занимает пару минут).
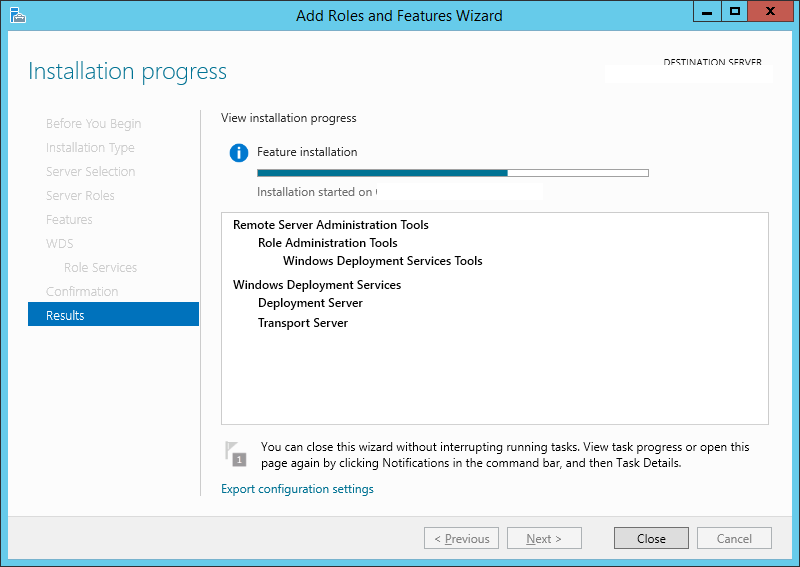
Совет. Роль Windows Deployment Services можно установить с помощью всего одной команды PowerShell:
Install-WindowsFeature -Name WDS -IncludeManagementTools
Установка Microsoft Deployment Toolkit 2013
Установите Microsoft Deployment Toolkit (MDT) 2013 Update 1 со стандартными настройками, для чего достаточно скачать и запустить с правами администратора файл MicrosoftDeploymentToolkit2013_x64.
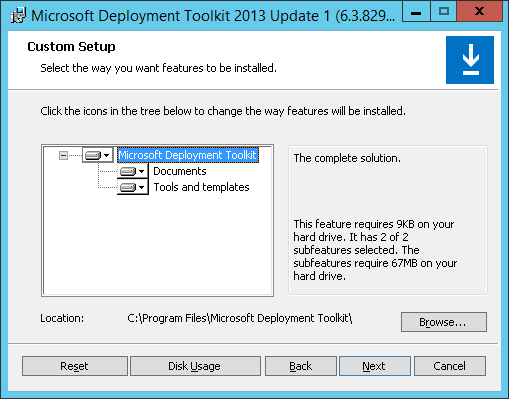
Установка Windows Assessment and Deployment Kit
Далее нужно установить Windows Assessment and Deployment Kit (Windows ADK) для Windows 10. Скачайте и запустите файл adksetup.exe.
Укажите каталог для установки (по умолчанию C:Program Files (x86)Windows Kits10).
В списке компонентов ADK для установки отметьте:
- Deployment tools –используется для настройки образа Windows и автоматизации развертывания образа
- Windows Preinstallation Environment (Windows PE) – среда WinPE — минимальная ОС, разработанная для подготовки компьютера к установке Windows или обслуживания
- User State Migration tool (USMT) – набор инструментов для миграции данных пользователей между системами
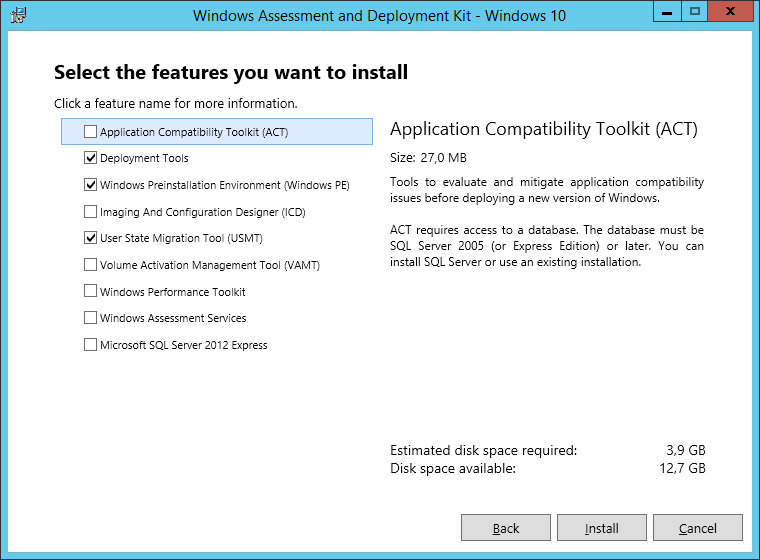
Запустите установке Windows ADK.
Теперь нам нужен дистрибутив Windows 10. В нашем примере это будет Windows 10 x64 Pro. Т.к. MDT не позволяет напрямую работать с iso файлами образа Windows, необходимо распаковать установочные файлы. Самый простой вариант – смонтировать файл с iso образом Windows 10 через File Explorer (Проводник) в отдельный виртуальный драйв (ПКМ по iso файлу-> Mount).
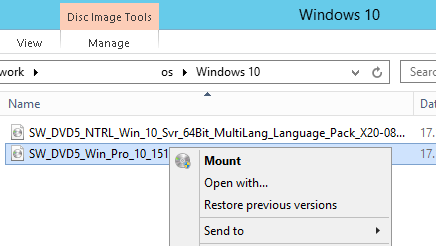
Настройка MDT 2013
Приступим к настройке MDT 2013. Запустим консоль Deployment Workbench, щелкнем ПКМ по Deployment Share и создадим новый каталог (New Deployment Share).
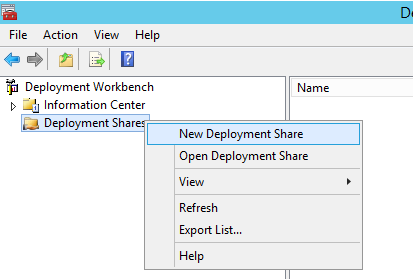
В окне мастера создания нового каталога распространения укажите путь к папке (C:DeploymentShare в нашем случае).
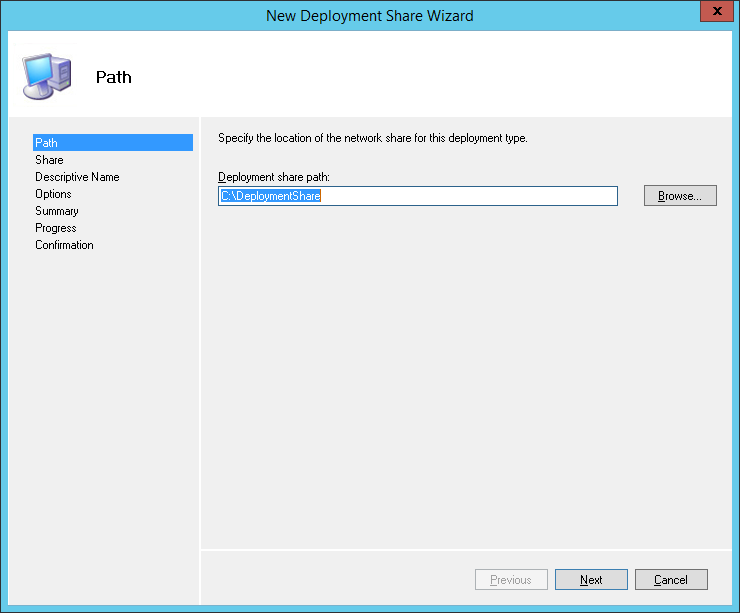
Укажите сетевое имя каталога (мы оставили имя по умолчанию DeploymentShare$) и нажмите Next.
Совет. Знак “$” в имени сетевой папки означает, что она будет скрыта от пользователей.
После окончания работы мастера перейдите в папку C:DeploymentShare.
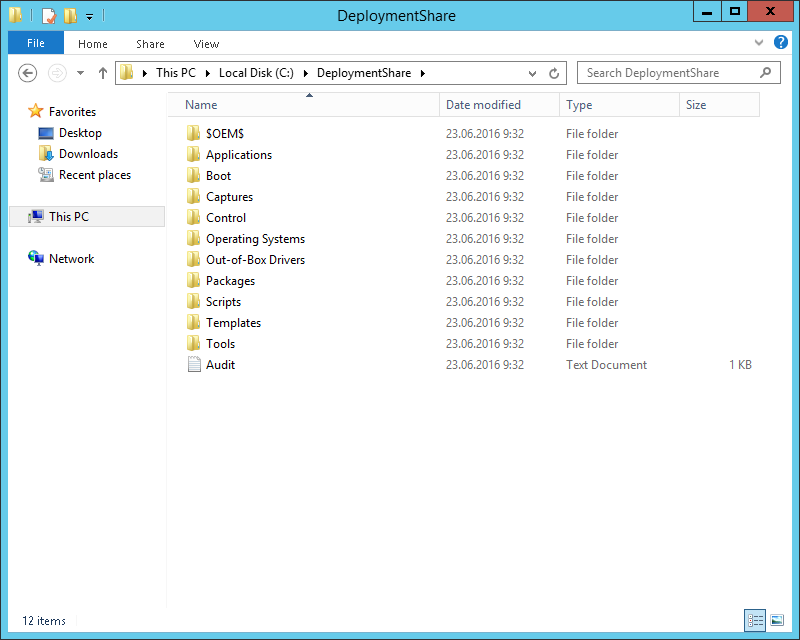
В этой папке хранятся образы ОС, драйвера, настройки, пакеты с приложениями и т.д. Папка является портабельной и может быть легко перенесена на другой MDT сервер.
Чтобы все сетевые клиенты (в том числе анонимные) могли обращаться к содержимому этой папке, в свойствах сетевой папки DeploymentShare$, нужно добавить группу Everyone с разрешением на чтение.
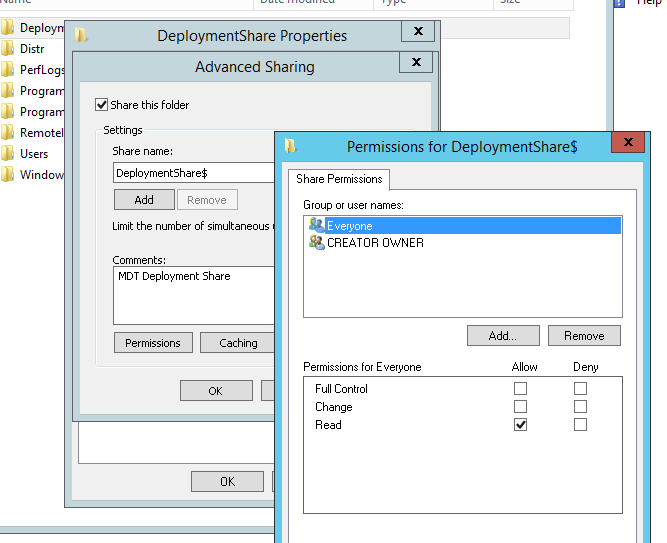
На следующем шаге нам нужно импортировать образ Windows 10. MDT поддерживает импорт образа операционной системы непосредственно с диска дистрибутива, wim файла или образа wds.
Разверните Deployment Shares -> MDT Deployment share. ПКМ по разделу Operating systems и в меню выберите Import Operating System.
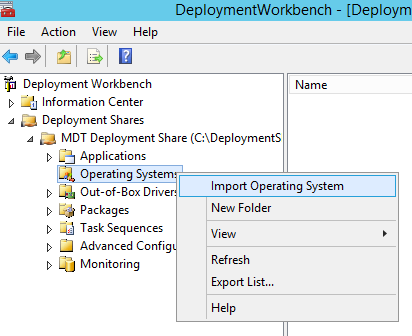
Выберите пункт Full set of source files и укажите имя драйва, на который был смонтирован iso образ Windows 10.
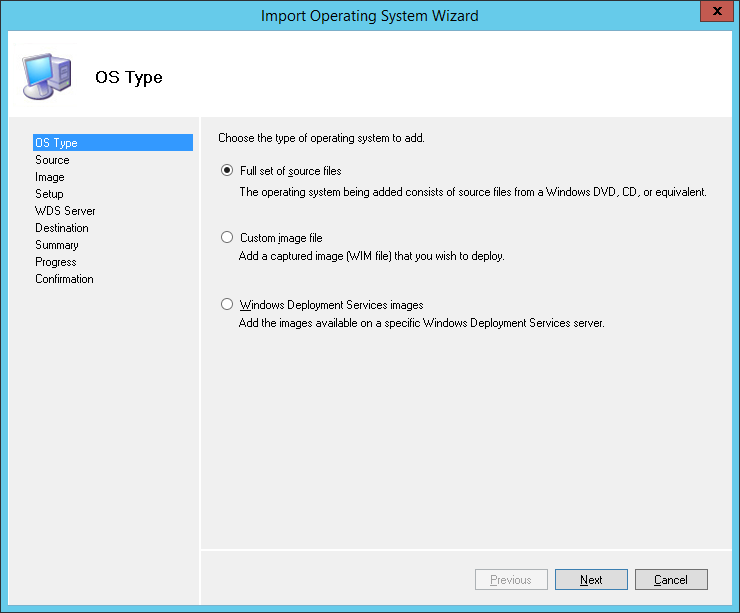
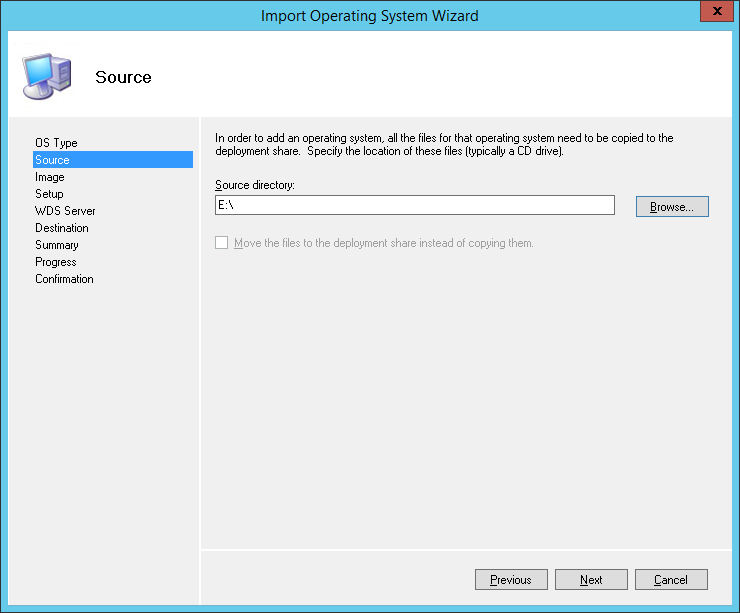
Укажите имя каталога, в котором будет храниться импортируемый образ.
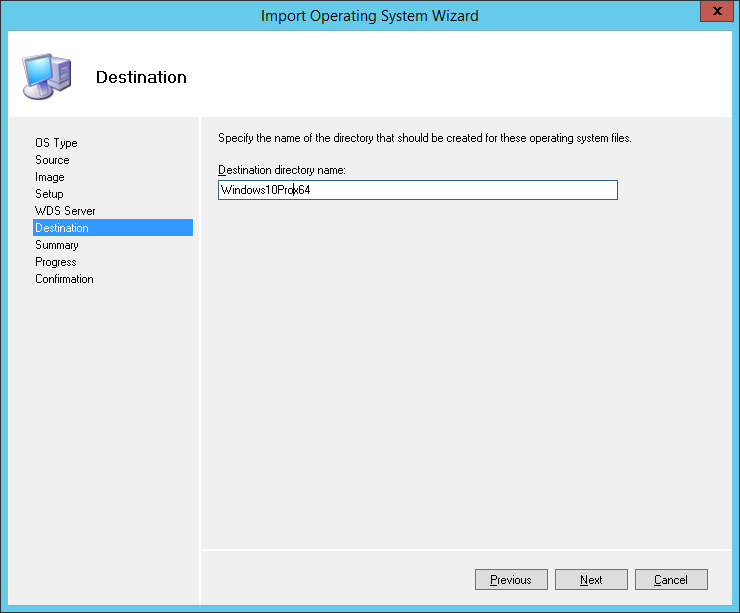
Мастер скопирует файлы дистрибутива Windows 10 в каталог C:DeploymentShareOperating SystemsWindows10Prox64, а в разделе Operating Systems появится новый запись, указывающая на образ Windows 10 Pro x64.
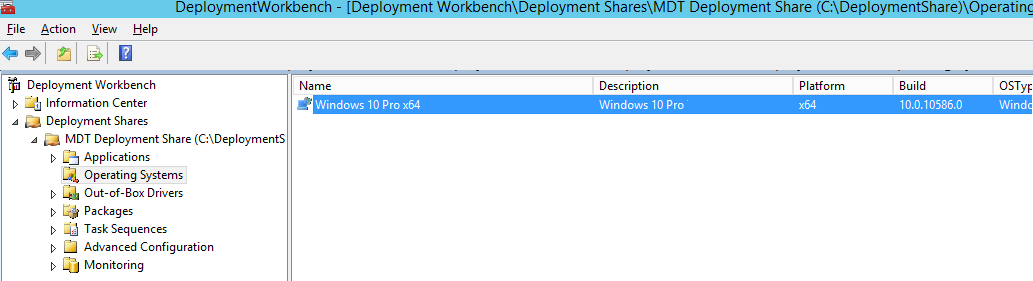
Создание задания установки MDT
Теперь нужно создать задание установки (Task Sequence), представляющее собой последовательность действий, необходимых для разворачивания Windows (это установка ОС, драйверов, приложений, конфигурация системы, обновлений, запуск различных скриптов настройки и т.п.).
Щелкните ПКМ по разделу Task Sequences и выберите New Task Sequence.
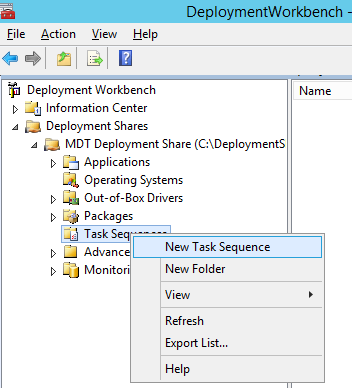
В качестве идентификатора задания (Task sequence ID) укажем DeployWin10x64, а имени (Task sequence name) — “Deploy Windows 10 x64”.
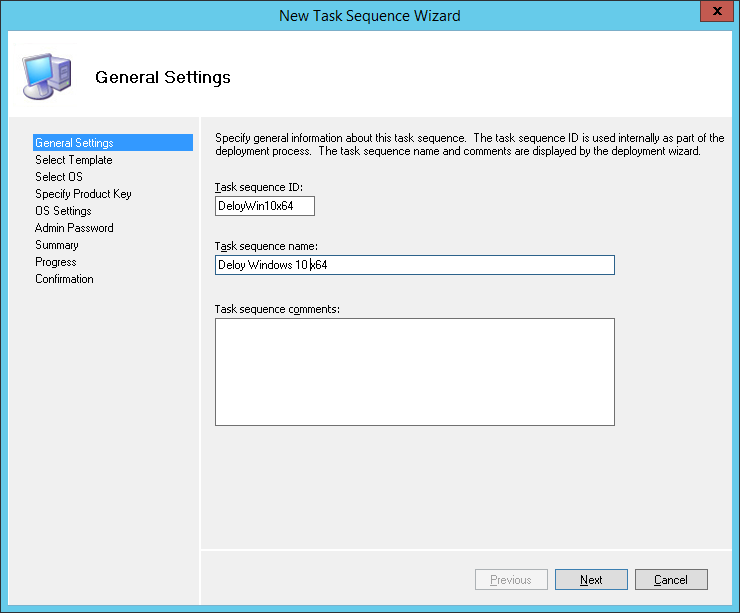
В выпадающем меню нужно выбрать один из существующих шаблонов заданий установки. В нашем случае это будет Standard Client Task Sequence.
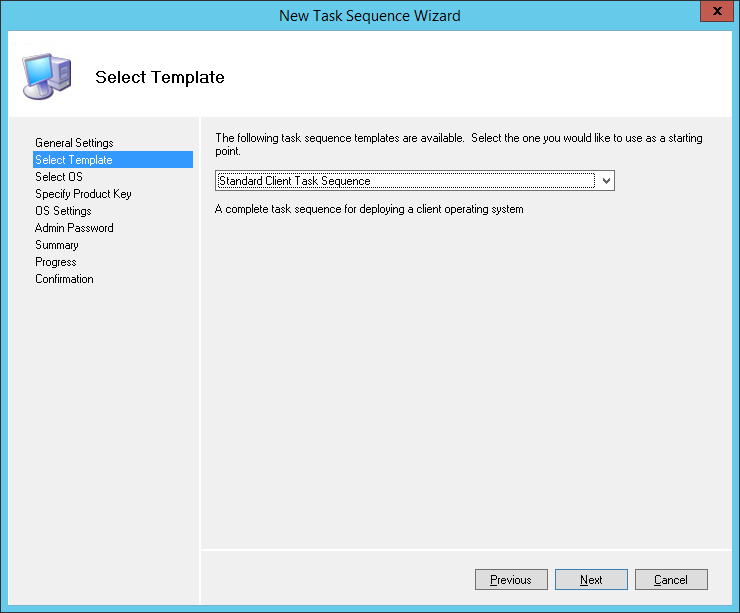
Выберите ОС, которую нужно установить в рамках этого задания (Windows 10 Pro x64).
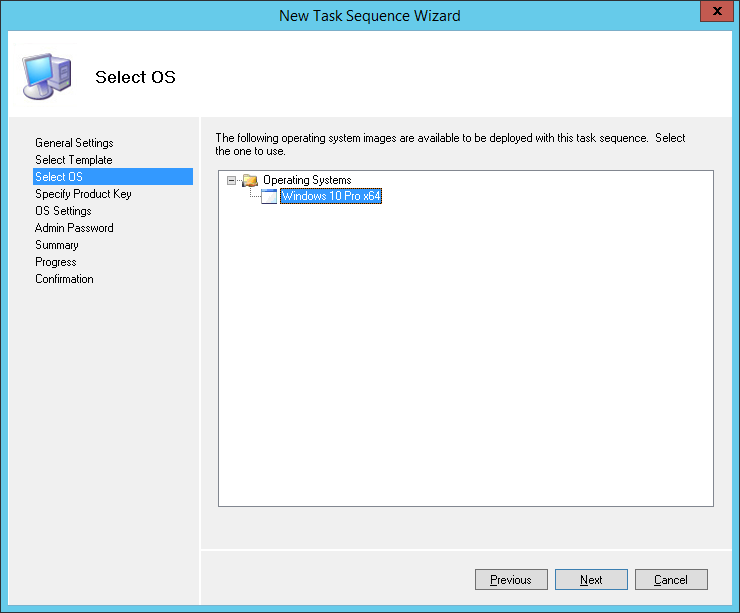
Затем можно указать ключ продукта, это может быть как retail, MAK или KMS ключ.

Далее можно задать пароль локального администратора на устанавливаемой системе.
Совет. Имейте в виду, что пароль хранится в открытом виде в файле Unattend.xml, поэтому стоит задать простой пароль локального администратора, который после ввода компьютера в домен будет автоматически измен с помощью MS LAPS.
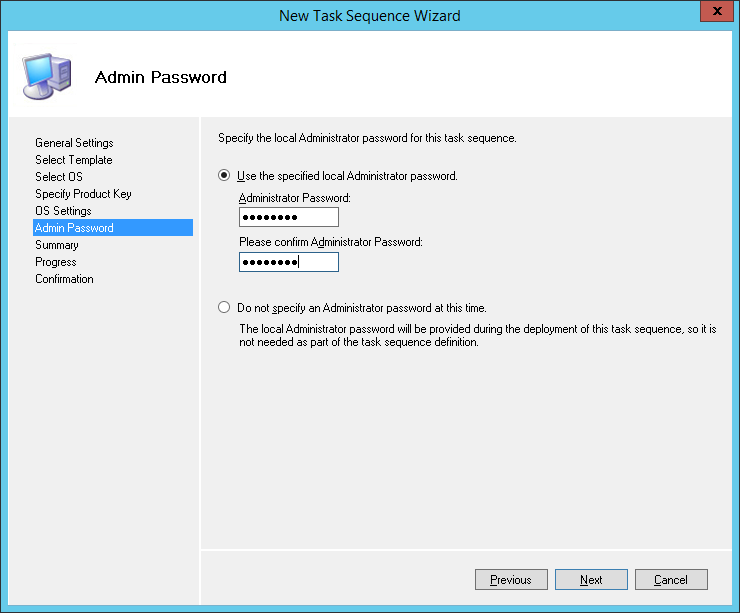
Откройте свойства созданного задания и проверьте, что его запуск разрешён на любых платформах (This can run on any platforms).
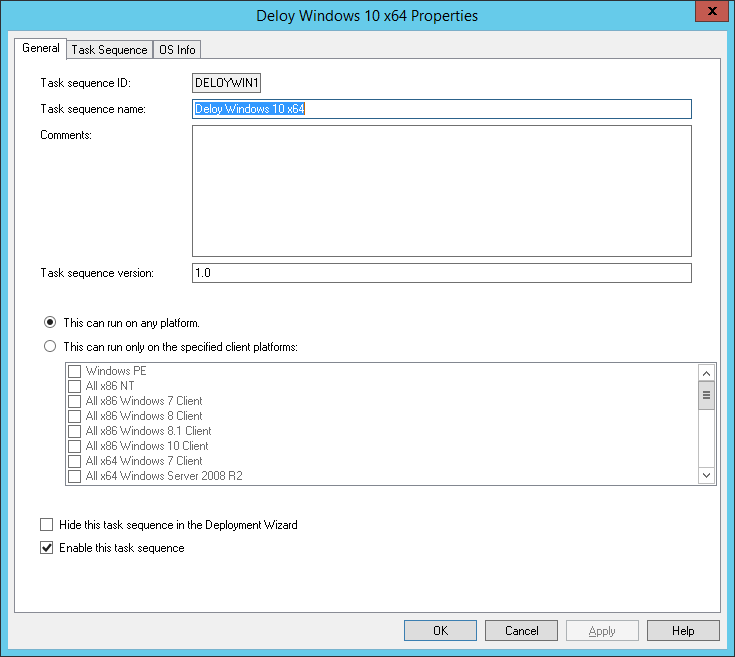
На вкладке Task Sequence отображается последовательность шагов, определенных в шаблоне, которые нужно выполнить при разворачивании ОС на клиенте. Здесь можно добавить собственные шаги, либо оставить все по-умолчанию.
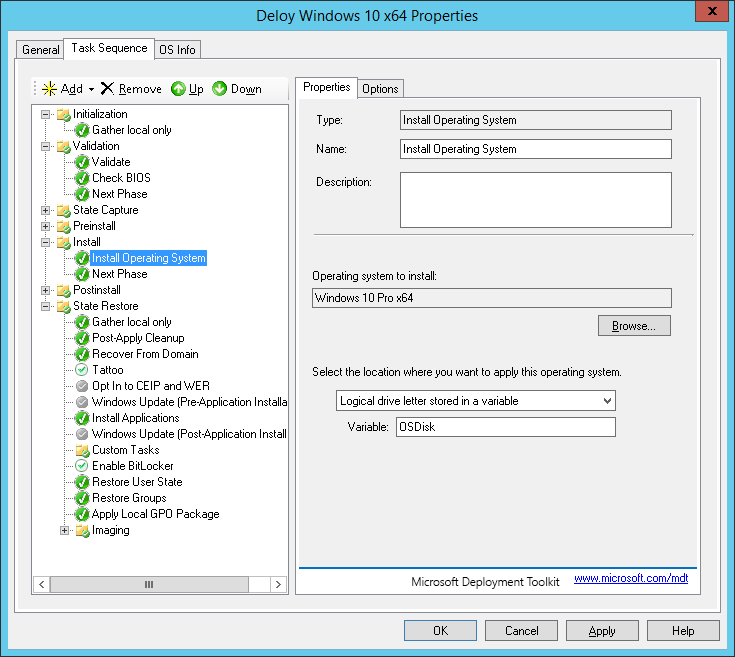
Далее нужно обновить каталок распространения MDT. Щелкните ПКМ по MDT Deployment Share и выберите Update Deployment Share. MDT сгенерирует загрузочные образы и файлы, нужные для установки ОС.
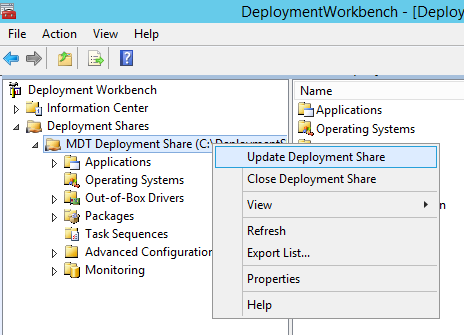
При первом запуске каталог C:DeploymentShareBoot пуст, поэтому нужно выбрать пункт Completely regenerate the boot image и дождаться генерации образов ОС.
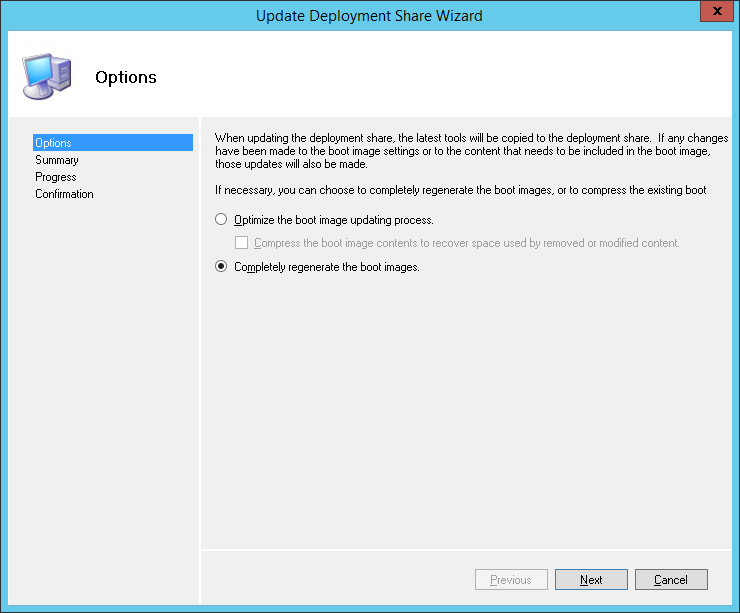
В каталоге C:DeploymentShareBoot должны появится iso и wim образы Windows PE для x86 и x64 платформ. Эти образы могут быть использованы для загрузки физических или виртуальных машин при разворачивании образа. При разворачивании образа Windows по сети (PXE boot) с помощью Windows Deployment Services могут быть использованы wim файлы.
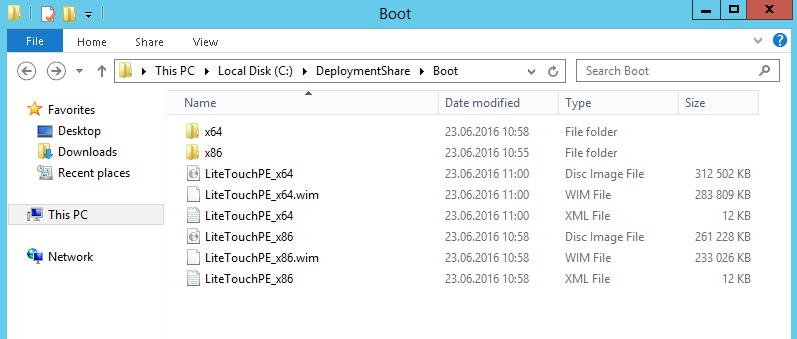
Совет. Т.к. мы планируем использовать загрузку PXE booting, нам понадобятся только wim файлы LiteTouchPE_x64.wim и LiteTouchPE_x86.wim.
Настройка загрузочного образа в Windows Deployment Services
Следующий этап – настройка сервера WDS, который должен обслуживать запросы клиентов PXE. Откройте консоль Windows Deployment Services (Server Manager -> Tools -> Windows Deployment Services), разверните ветку Servers и в контекстном меню сервера выберите Configure Server.
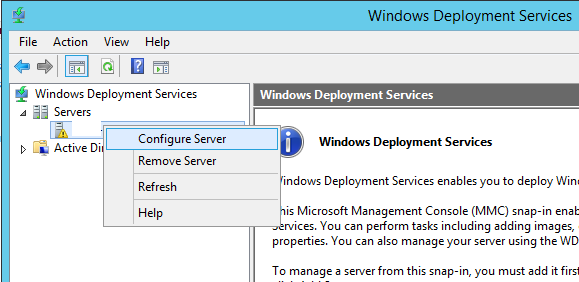
Укажем, что это будет отдельный WDS сервер (Standalone Server), не зависимый от Active Directory.
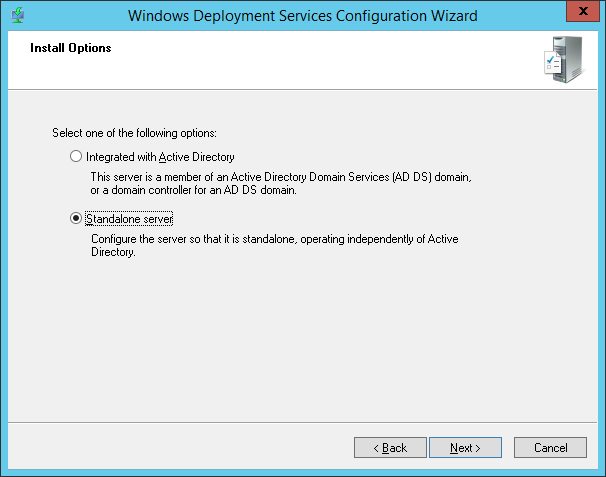
Каталог установки оставим без изменений — C:RemoteInstall.
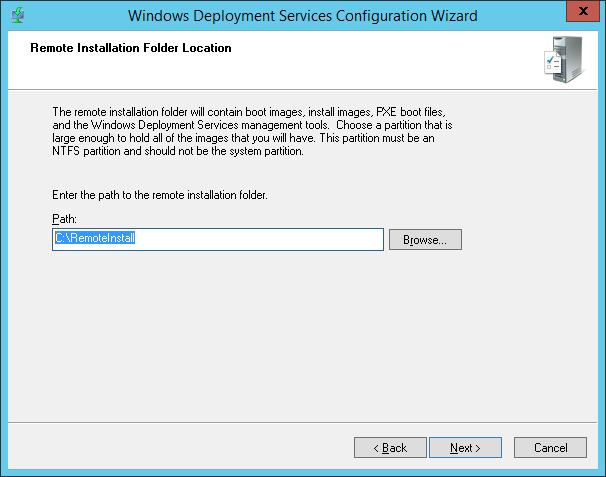
В настройках клиента PXE нужно указать, что нужно отвечать на запросы всех клиентов — Respond to all clien computers (known and unknown).
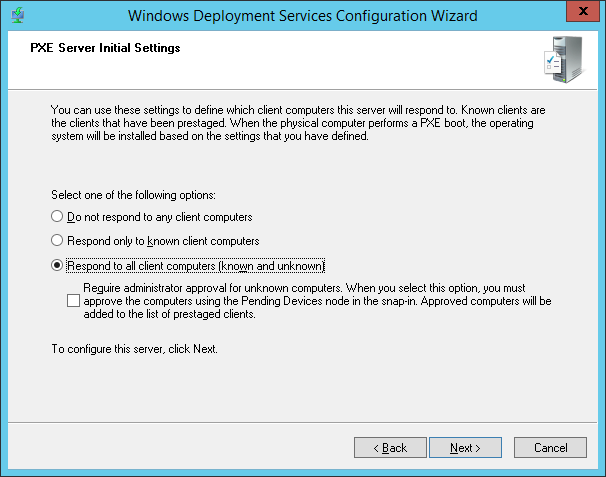
Совет. В среде Active Directory было бы безопаснее использовать опцию Respond only to known client computer.
Снимите галку– Add images to the server now.
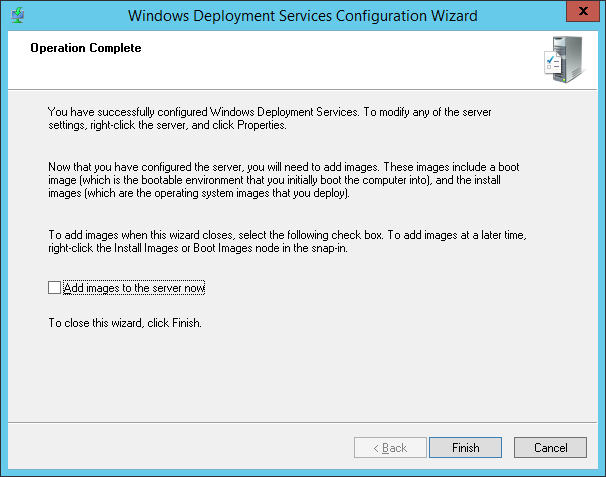
Зеленый треугольник на имени WDS сервера означает, что он настроен и запущен.
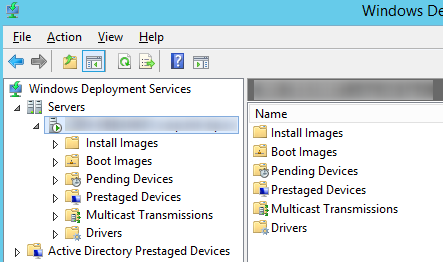
Теперь нам нужно импортировать на WDS сервер загрузочный образ, который мы создали ранее с помощью MDT. Щелкните ПКМ по Boot Image –> Add boot image.
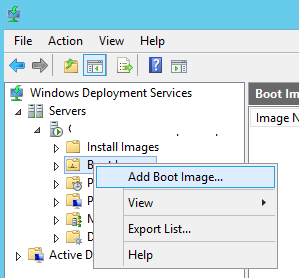
Перейдите в каталог C:DeploymentShareBoot и последовательно добавьте файлы LiteTouchPE_x86.wim и LiteTouchPE_x64.wim.
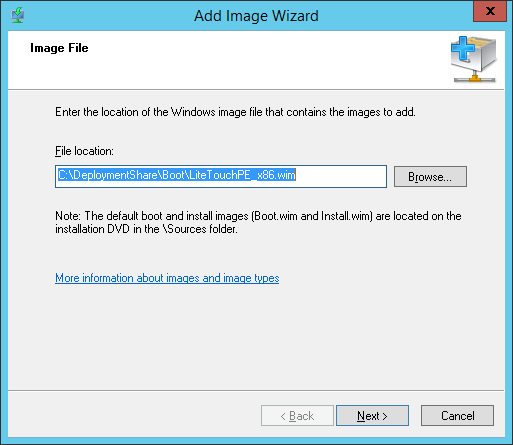
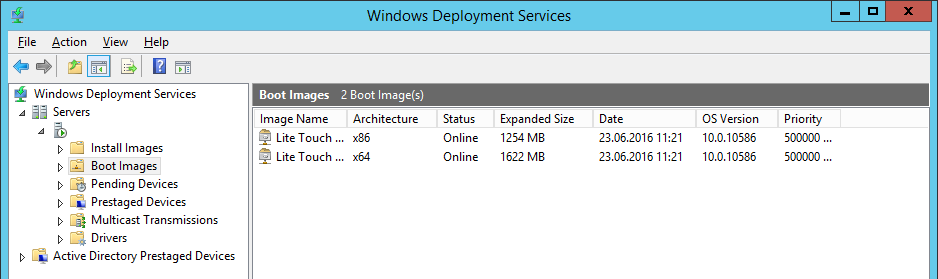
Последнее, что осталось выполнить – открыть свойства WDS сервера и перейти на вкладку Boot. Чтобы предотвратить случайную загрузку клиентов через PXE и автоматическую установку Windows, зададим обязательное использование клавиши F12 для использования PXE-загрузки. Для этого в секции PXE Boot Policy нужно выбрать опцию Require the user to press the F12 key to continue the PXE boot.
Здесь же укажите загрузочные образы для архитектур x86 и x64 (в том числе для архитектуры UEFI).
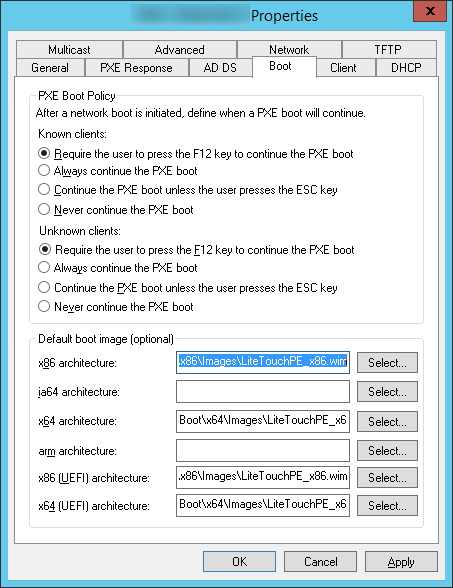
Все остальные настройки WDS сервера оставим по-умолчанию. Перезапустите службу WDS через консоль (All tasks ->Restart).
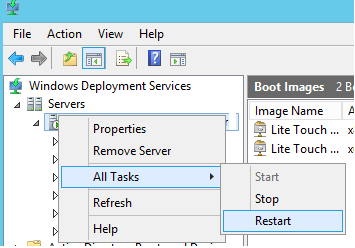
Важно. WDS сервер и клиентский компьютер, на который вы хотите установить ОС через PXE, должны находится в одной подсети (VLAN). Если они расположены в разных подсетях, нужно настроить DHCP-relay (IP Helper) с дополнительными DHCP опциями 60 и 67.
Тестирование установки Windows 10 по сети
Теперь мы готовы протестировать сетевую загрузку компьютера клиента с wim образа, расположенного на WDS сервере (PXE boot). В этом тесте это будет виртуальная машина VMWare. Запустите ВМ и в процессе загрузи несколько раз нажмите клавишу F12 для начала загрузки через PXE.
Press F12 for network service boot
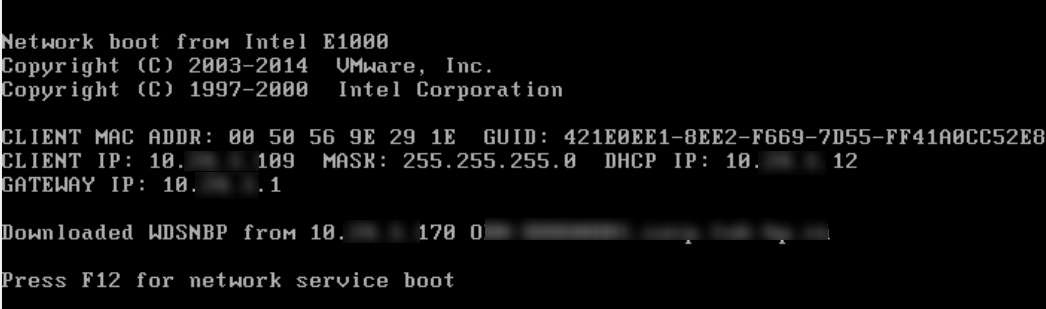
Совет. Т.к. экран загрузки в ВМ проскакивает слишком быстро, практически нереально успеть нажать кнопку F12. Поэтом в настройках ВМ предпочтительно задать наивысший приоритет для загрузочного устройства Network boot from Intel E1000.
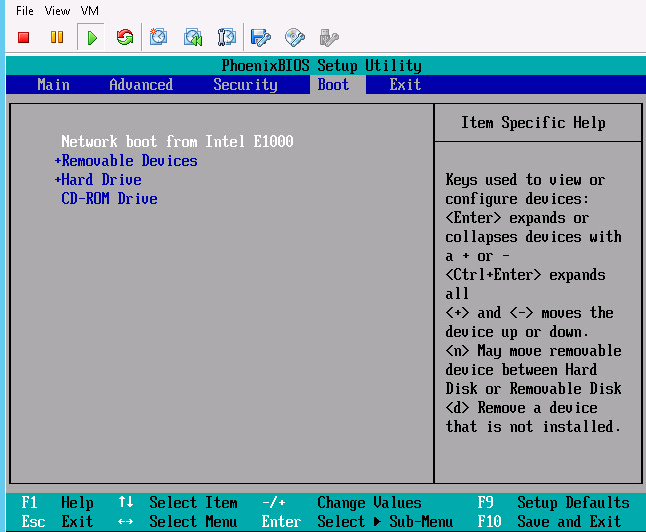
Машина подключится к WDS серверу и получит список доступных загрузочных образов Windows PE. В стандартном диалоге Boot Manager нужно быте выбрать ОС, которую нужно загрузить. В нашем случае это Lite Touch Windows PE (x86).
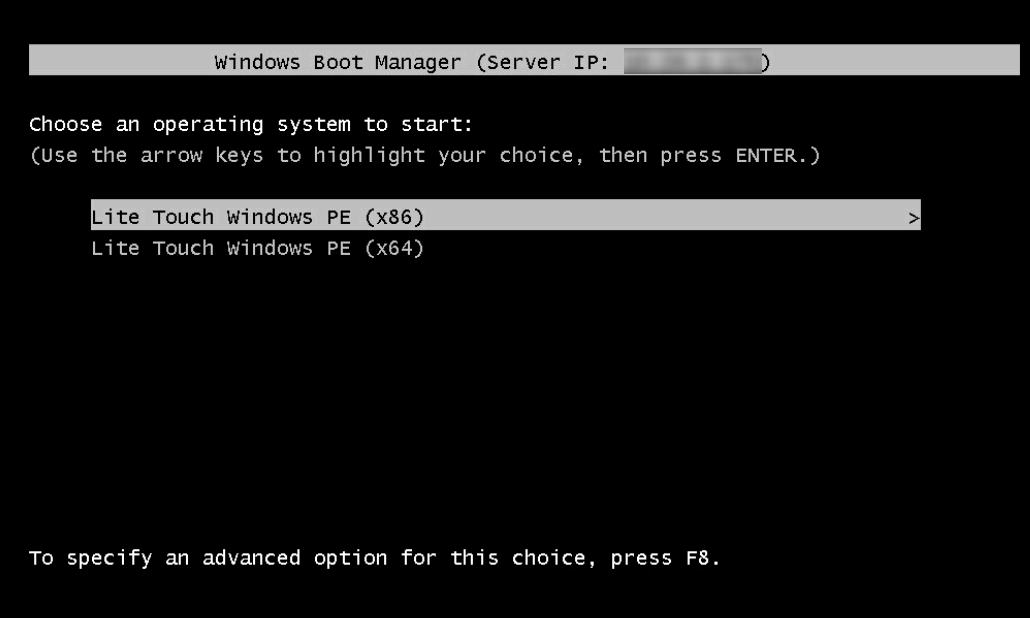
Система начнет загрузку по сети wim образа со средой WinPE и предложит начать установку Windows 10 с помощью мастера Microsoft Deployment Tool Wizard.

Нажмите на кнопку Run the Deployment Wizard to install a new Operating System для запуска пошагового мастера установки образа Windows 10 на компьютер клиента.
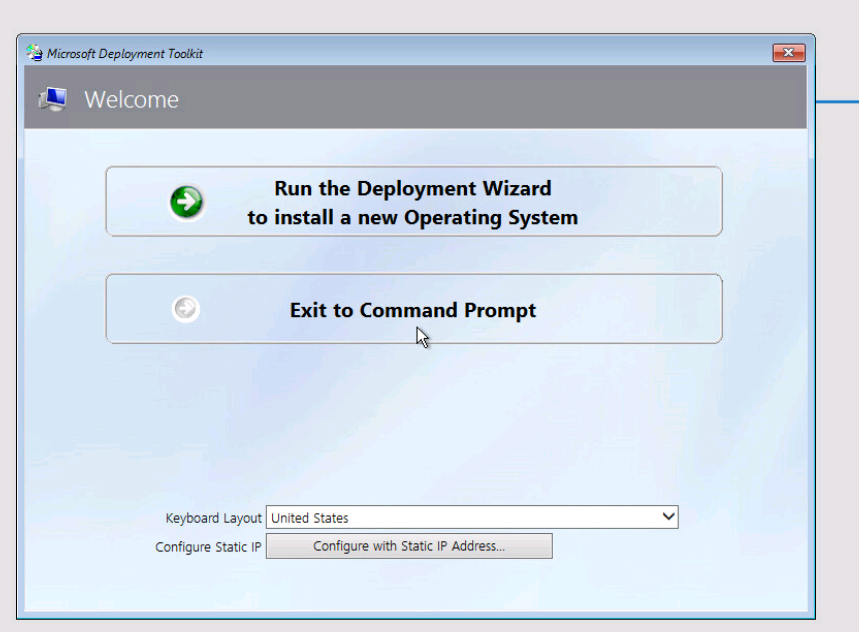
В нашем примере также понадобилось указать UNC путь к сетевой папке DeploymentShare$ на MDT сервере(\10.1.24.170DeploymentShare$) и имя+пароль пользователя для доступа к ней.
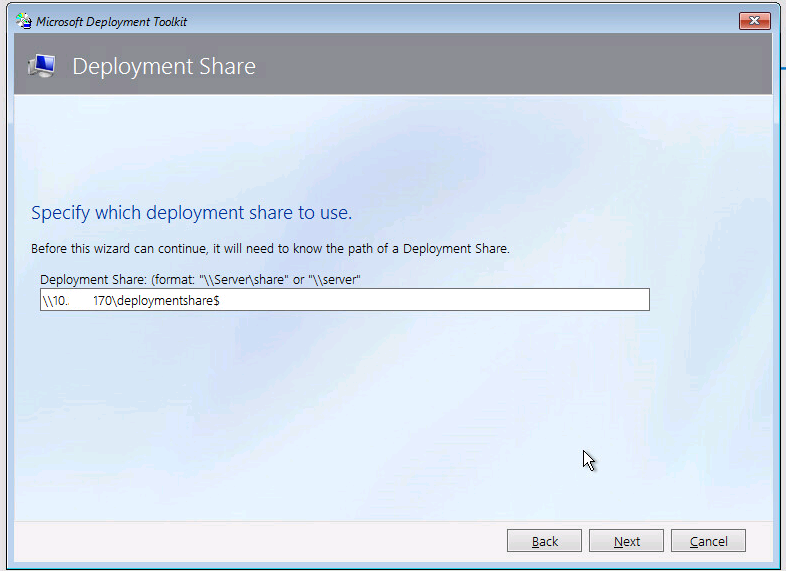
Осталось среди доступных заданий выбрать созданное ранее Deploy Windows 10 x64 и дождаться окончания сетевой установки образа Windows 10 на этот компьютер.
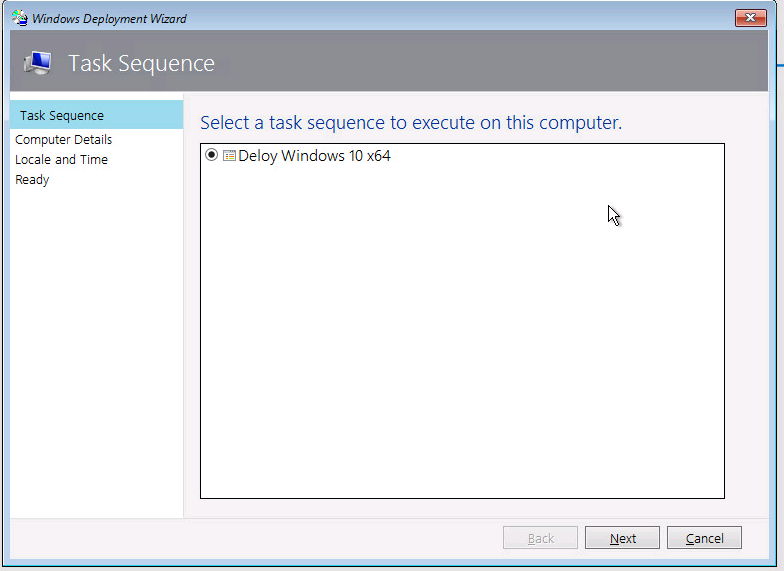
Итак, в этой статье мы показали, как воспользоваться функционалом MDT 2013 и WDS сервера для создания инфраструктуры, позволяющей в автоматическом режиме по сети развернуть образ Windows 10 на клиентах.
Если вы системный администратор, то перед вами обязательно встанет вопрос массового развертывания операционной системы на компьютеры пользователей. И каким бы способов вы его не развертывали — с USB, через WDS сервер с MDT, с помощью SCCM, — в любом случае вы будете использовать WIM файл с образом операционной системы.
Обзор способов разветывания ОС
- Установка с загрузочного USB накопителя. На нем в корне диска должен располагаться файл ответов autounattend.xml. Это файл вы создаете заранее с помощью Windows System Image Manager (SIM), который входит в комплект пакет Windows ADK. Обратите внимание, для всех билдов Windows 10 версия ADK своя. Скачать её можно с сайта Microsoft. Сам файл образа ОС с расширением WIM или ESD, лежит в папке sources вашего USB. Образ вы можете взять оригинальный MSDN, скопировать откуда-то или подготовить свой. Драйвера вам необходимо заранее интегрировать в WIM файл или положены в подпапку $OEM$, а путь к ней указан в файле autounattend.xml.
Такой способ подходит для одиночных установок без возможности глубокой кастомизации под разные задачи, разных пользователей или разное железо. - Развертывание с помощью MDT c USB накопителя. В этом случае, сам загрузочный диск вы готовите с помощью MDT (Microsoft Deployment Toolkit). Пакет MDT вы бесплатно скачиваете с сайта Microsoft (опять же, разные версии MDT поддерживают разные версии развертываемых ОС). Для работы MDT также требуется правильная версия ADK. Последняя на данный момент MDT 8450 сейчас поддерживает только Windows 10 1709 и старее. В среде MDT вы подготавливаете Task Sequence, добавляете пакеты, драйверы и WIM файл операционной системы. Далее вы создаете загрузочную media, которая будет включать все выше перечисленное и копируете её на USB. Тонкость заключается в том, что здесь кастомизацию образа вы делаете или заранее модифицируя WIM файл, или редактируя файл unattend.xml, относящийся к созданному вами Task Sequence в MDT, который будет автоматически включен в media, или же пишете скрипты, которые добавляете в пакеты и включаете в ход установки как шаг Task Sequence.
При создании media MDT вам создат boot.wim загрузочный файл, который и будет исполняться при загрузке с флэшки. Он загрузит вам среду Windows PE, из под которой начнется установка.
Очень гибкий способ, который позволяет включить любые драйвера и установить любой софт по время установки ОС. - Развертывание с помощью MDT и WDS сервера. Отличие этого способа заключается лишь в том, что boot.wim, созданный в MDT, будет располагаться не на USB, в сети на WDS сервере, откуда можно выполнить загрузка по PXE.
- Развертывание с помощью SCCM и WDS сервера. Загрузка клиента выполняется как в варианте 3, но отличие заключается в том, что все WIM файлы, драйверы и пакеты, а также сам Task Sequence с файлом unattend.xml будет созданы и запускаться с SCCM сервера, а не с MDT. Загрузочный boot.wim образ также будет создан с помощью SCCM.
Такой вариант подходит для самых сложных развертываний с большим числом распределенных установок.
Обратите внимание также, что файл ответов unattend.xml можно включить и в сам WIM образ, положив его в папку %WINDIR%PantherUnattend, но для MDT и SCCM все равно потребуется отдельный внешний файл для исполнения Task Sequence.
Как я уже указал, файлы unattend.xml или autounattend.xml можно редактировать вручную в редакторе, но правильнее и безопаснее делать это через SIM. Сам же файл образа операционной системы WIM создается и редактируется с помощью консольной утилиты DISM, имеющей множество ключей. Более того, этой же утилитой выполняется и развертывание (применение, apply) WIM файла на диск.
Утилита DISM входит в пакет ADK, важно пользоваться той версией утилиты, которая поддерживает разворачиваемую ОС.
Захват образа и создание WIM
Для того, чтобы создать WIM файл, необходимо выполнить операции Sysprep and Capture. Для этого устанавливаете систему на компьютер, настраиваете как вам угодно, устанавливаете или удаляете приложения, ставите обновления. Также для успешного sysprep в Windows 10 необходимо сделать чистку системы и удалить некоторые запровиженные Modern App приложения от HP и Canon, иначе sysprep завалится. Это можно сделать командами Powershell:
1 2 |
Get-AppxPackage *hp* -AllUsers | Remove-AppxPackage Get-AppxPackage *canon* -AllUsers | Remove-AppxPackage |
Задача Sysprep заключается в том, что система очищается от пользовательских данные и профилей, удаляются SID системы и пользователя, для этого, чтобы этот имидж можно было использовать на других компьютерах. Чтобы запустить sysprep вручную, необходимо перейти в папку C:WindowsSystem32sysprep и запустить команду:
1 |
Sysprep.exe /generalize /shutdown /oobe |
При этом система перейдет в OOBE режим (Out-Of-Box Experience, как будто она только устанавливается с нуля), а затем компьютер выключится. Больше про эту процедуру можно почитать в документации Microsoft.
Теперь образ диска можно захватывать. Захват диска выполняется уже упомянутой утилитой DISM.
Если выполнять захват вручную, то для этого нужно загрузиться в среду Windows PE с USB или по сети, или же подключить диск к другому компьютеру. В составе Windows PE уже должна быть утилита dism. Захват образа выполняется командой (при условии, что вы захватываете диск C:):
1 |
Dism /Capture-Image /ImageFile:D:my-windows-partition.wim /CaptureDir:C: /Name:"My Windows partition" |
Больше об этой процедуре почитайте в официальной документации.
Один файл WIM может содержать несколько образов ОС, вы можете добавлять новый захваченный диск в уже существующий образ. Это удобно тогда, когда вам требуется с одного WIM файла развертывать разные системы (например с разным набором программ). Вы можете редактировать свойства wim файла, название образов в нем.
Каждый образ в файле имеет индекс, начинающийся с 1. Соответственно, когда вы будете применять образ на чистый диск, то вам надо будет указать индекс системы:
Dism /apply-image /imagefile:N:Imagesmy-windows-partition.wim /index:1 /ApplyDir:C:
Хочу отметить, что если вы просто примените образ на диск, то система не будет загружаться. Вам предварительно необходимо создать системные разделы на диске (партиции) командой diskpart, а команда
вам создаст BCD-загрузчик на диске с операционной системой. Помимо этого вам нужно будет сделать раздел Recovery. Для быстроты приведу пример типового bat-скрипта, который выполняет все эти операции из документации Microsoft.
На самом деле все это не цель нашей статьи, а скорее обзор, позволяющий понять, какими утилитами и в каком случае необходимо пользоваться. Ведь синтаксис всех команд хорошо расписан в документации. Кроме того, процедуру как sysprep /capture, так и развертывания образа на диск с предварительным форматированием проще выполнить через MDT, создав в нем соответствующие Task Sequence, однако MDT требует навыков, для разовых задач проще все сделать вручную.
Утилиты для работы с образами WIM
Все утилиты в данном списке будут графическими заменами для консольной DISM.
GImageX
Это прекрасная утилита, написанная на языке скриптов AutoIt, экономит массу вашего времени, выполняя:
- захвата диска в образ (capture)
- применения образа на диск (apply)
- показывает информацию из готового wim образа
- позволяет смонтировать образ в папку, отредактировать его содержимое и размонтировать обратно (mount and unmount)
- выгрузки отдельного образа из файла wim с несколькими образами
- редактирования имени и описания образов в wim файле
Текущая версия 2.2.0 совместима вплоть до Windows 10 build 1803. Все операции выполняются в один клик. Установка не требуется. Вариант использования: захват другого раздела на вашем диске или на подключенном диске, а также редактирование имеющегося wim файла. Работа в Windows PE не подразумевается.
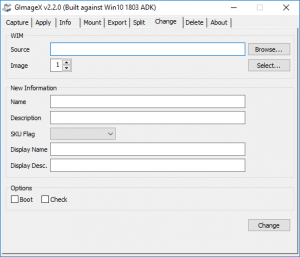
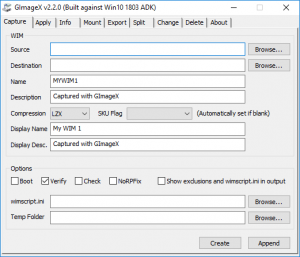
DISM.GUI
Эта утилита написана на Powershell, но предназначена немного для других операций, а именно для обслуживания и редактирования имеющегося WIM. Все закладки расположены в порядке их использования: сначала вы монтируете образ в папку, а затем его редактируете или сохраняете изменения.
Утилита позволяет:
- интегрировать драйвера в образ (drivers)
- добавлять пакеты (cab packages) и включать/выключать функции (features)
- Приписывать лицензионную информацию и ключ
- применять готовый Unattend.xml
- получать список приложений (applications) и патчей (patches) в образе
- захватывать и применять образ
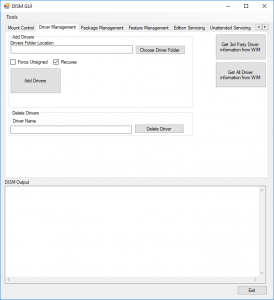
DISM++
Третья утилита предназначена для подготовки системы к захвату. Она позволяет очень гранулированно вырезать или добавить из нее все, что захотите:
- очистка кэшей, журналов, Appx (Modern приложения), временных файлов
- управление установленными Appx-приложениями — позволяет удалить Modern Apps, что раньше можно было сделать только через Powershell.
- оптимизация и кастомизация меню, значков
- добавление и удаление драйверов
- добавление и удаление компонентов Windows
- добавление и удаление возможностей Windows (Features on Demand)
- добавление и удаление обновлений
- настройка ассоциаций файлов
- Редактирование файла ответов Unattend.xml
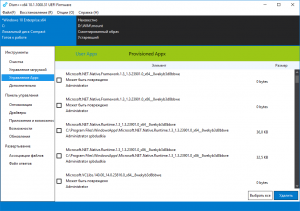
 [Посещений: 10 463, из них сегодня: 1]
Please refer to the tutorial below for Windows 10 Deployment with MDT
Components used in this lab
- Windows 2019 Server Core as AD Domain Controller
- AVENTIS-AD01 – 192.168.1.230
- Windows 2019 Server as MDT Deployment Server
- AVENTIS-MGMT – 192.168.1.232
Software Required for MDT Installation
- Download Windows ADK for Windows 10, version 1903 and Windows PE Add on for ADK and save it locally
Windows PE is available separately form the Assessment and Deployment Kit (ADK) starting from Windows 10 version 1809
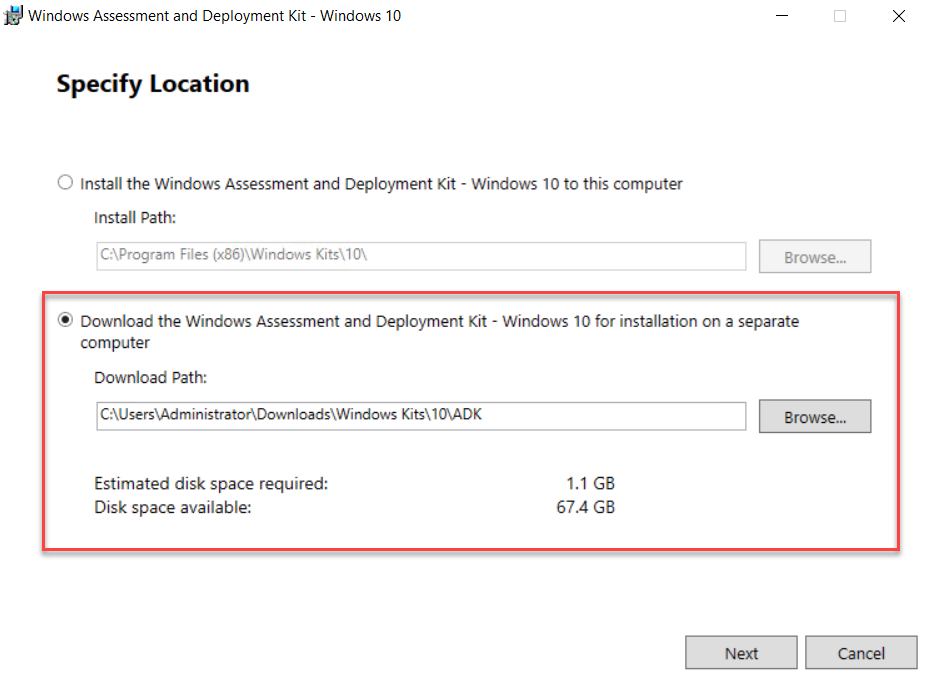
- Download Microsoft MDT 8456 – MicrosoftDeploymentToolkit_x64.msi
- Download ISO Installation file for Windows 10 1909 from [Microsoft Volume License Service Center] (https://www.microsoft.com/Licensing/servicecenter/default.aspx)
- Driver Pack for HP Laptop
- Installation Files for Applications, like 7Zip, Foxit Reader and etc
Installation of Windows Deployment Service (WDS)
Install WDS Role with the PowerShell
#Enable WDS Role
Install-WindowsFeature wds-deployment -includemanagementtools
Open Windows Deployment Service and right click on Server-SERVER_NAME-Configure Server
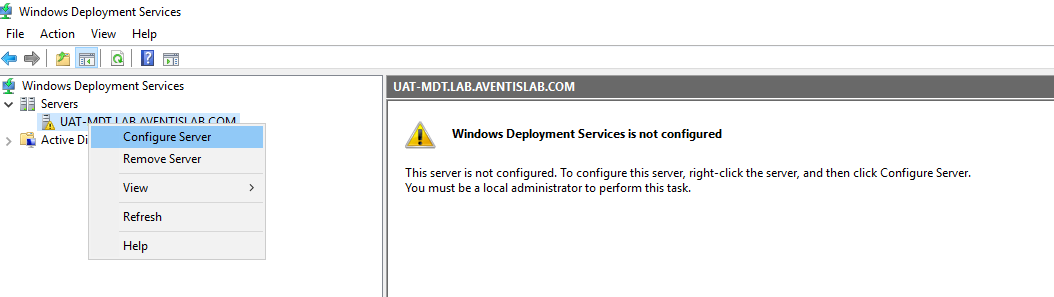
Select Integrated with Active Directory

Select the Remote Installation Folder
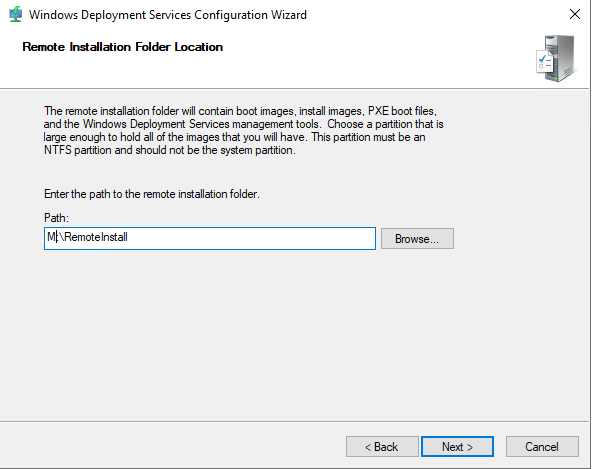
Select Response to all client computers (known and unknown)
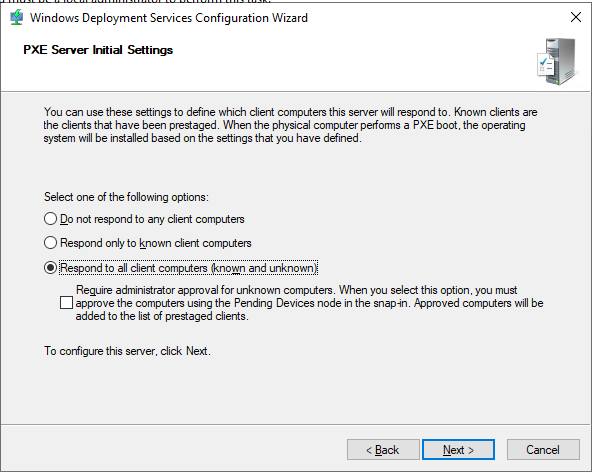
Uncheck Add image to the server now
We will prepare the Boot & Capture Image in later stage
Preparation of DHCP Server for PXE Boot
Add the following DHCP Options to existing DHCP Server running on AVENTIS-AD01
#Define 060 as PXEClient
Add-DhcpServerv4OptionDefinition -ComputerName $env:COMPUTERNAME -Name "PXEClient" -Description "PXE Support" -OptionId 060 -Type String

#Set PXE Boot Options
Set-DhcpServerv4OptionValue -OptionId 066 -Value "192.168.1.232"
Set-DhcpServerv4OptionValue -OptionId 067 -Value "bootx64wdsnbp.com"
DHCP Option 066 & 067 are configured
Do not configure Option 60 if DHCP Server is NOT installed on MDT Server, or VM will failed to boot from PXE with error PXE-E55 ProxyDHCP did not reply to request on port 4011
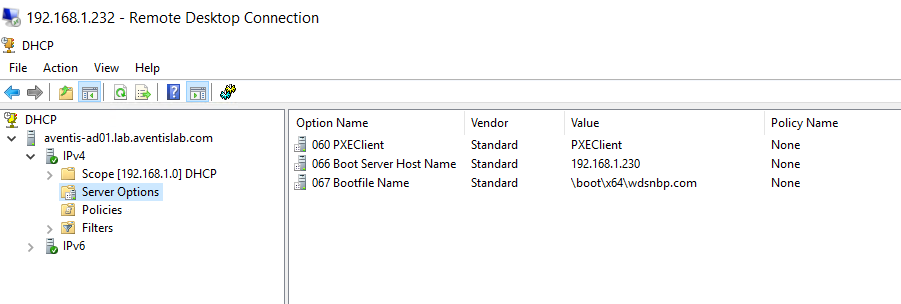
Installation of Windows ADK & MDT
Install ADK v1903 by double click on C:Usersadministrator.LABDownloadsWindows Kits10ADKadksetup.exe
Select the following features when prompted
- Deployment Tools
- Imaging And Configuration Designer (ICD)
- Configuration Designer
- User State Migration Tool (USMT)
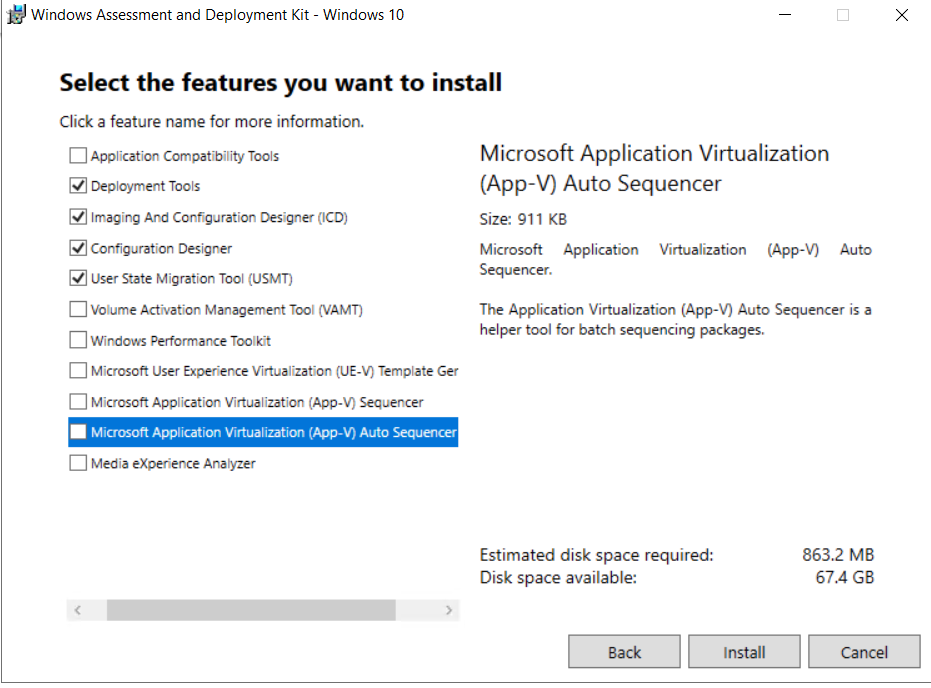
Install WinPE by double click on C:Usersadministrator.LABDownloadsWindows Kits10ADKWinPEAddonsadkwinpesetup.exe
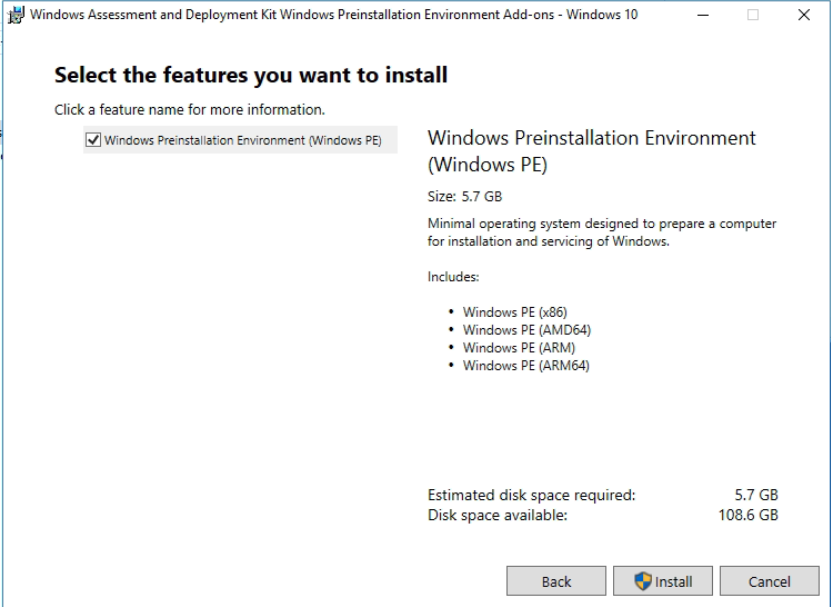
Installation of MDT v8456
Launch MDT by opening Deployment Workbench
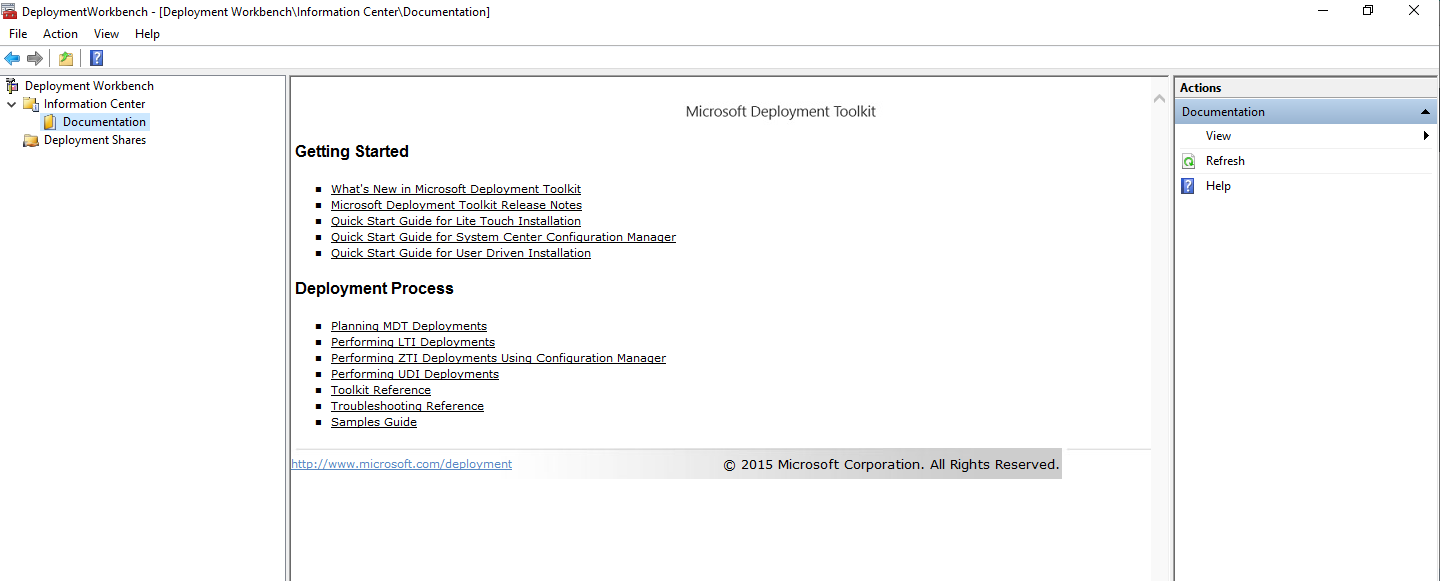
Create Deployment Share with PowerShell
Import PowerShell Module for MDT
Import-Module “C:Program FilesMicrosoft Deployment ToolkitbinMicrosoftDeploymentToolkit.psd1”
Create a New Deployment Share called MDT$ in M:MDT on AVENTIS-MGMT
$MDT_Folder = "M:MDT"
$MDT_Share = "MDT$"
$MDT_Path = "\192.168.1.232MDT$"

New-Item -Path $MDT_Folder -ItemType directory
New-SmbShare -Name $MDT_Share -Path $MDT_Folder -FullAccess Administrators

New-PSDrive -Name "DS001" -PSProvider "MDTProvider" -Root $MDT_Folder -Description "MDT Deployment Share" `
-NetworkPath $MDT_Path -Verbose | add-MDTPersistentDrive -Verbose
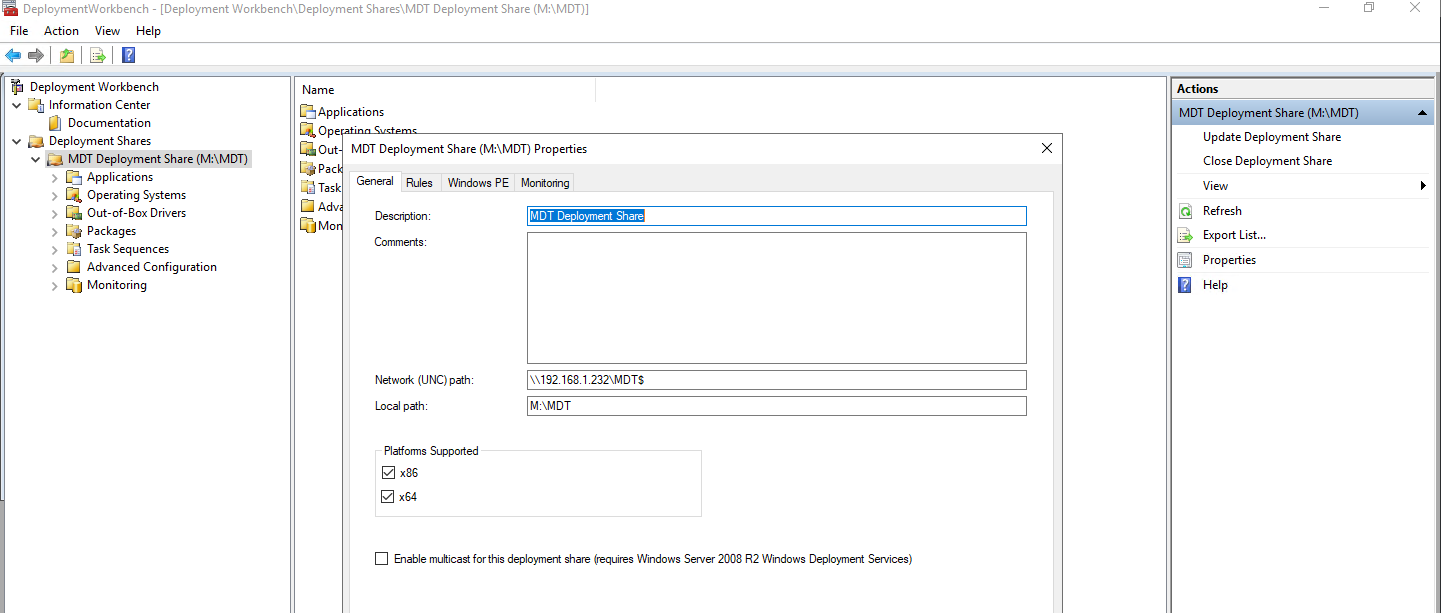
Prepare Boot Image in WDS
A boot image is a WindowsPE which is a stripped down OS that only includes the necessary tools to install, deploy, and repair Windows.
Mount Windows 10 1909 ISO File
#Mount Windows 10 1909 ISO File
$ISO = "E:MyLABMDTWIN10_1909.iso"
$MountInfo = Mount-DiskImage -ImagePath $ISO
Write-Output "ISO is mounted to $(($MountInfo | Get-Volume).DriveLetter):"

#Dismount ISO when done
Dismount-DiskImage -ImagePath $ISO
Right click on Boot Image-Add Boot Image
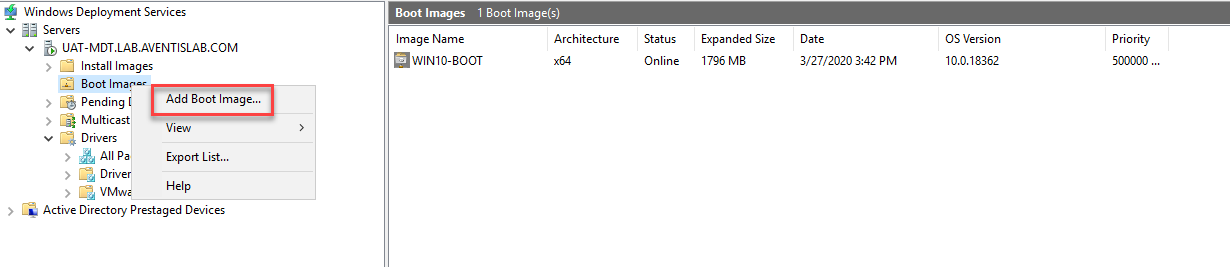
Select E:SourcesBoot.wim
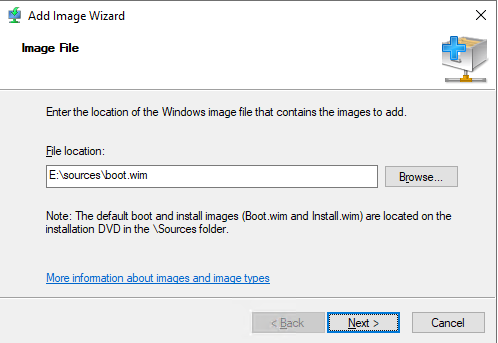
Enter Image Name, like WIN10-BOOT
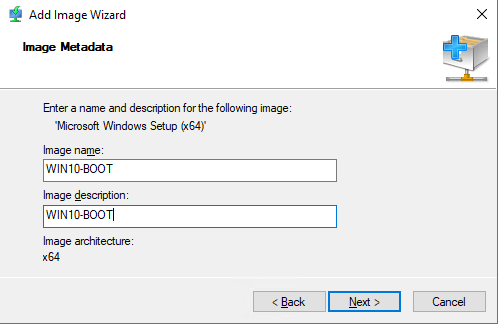
Import VMware Drivers to Boot Image
Please follow the steps below to import VMware Drivers to Boot image if you are preparing the Windows 10 reference image in VMware ESXi Host
Download VMware Tools (windows.iso) from ESXi host with SCP
scp [email protected]:/vmimages/tools-isoimages/windows.iso /home/mobaxterm
Mount the ISO file and extract the contents to M:MDT-AppsVMware with «setup64.exe /a /p«
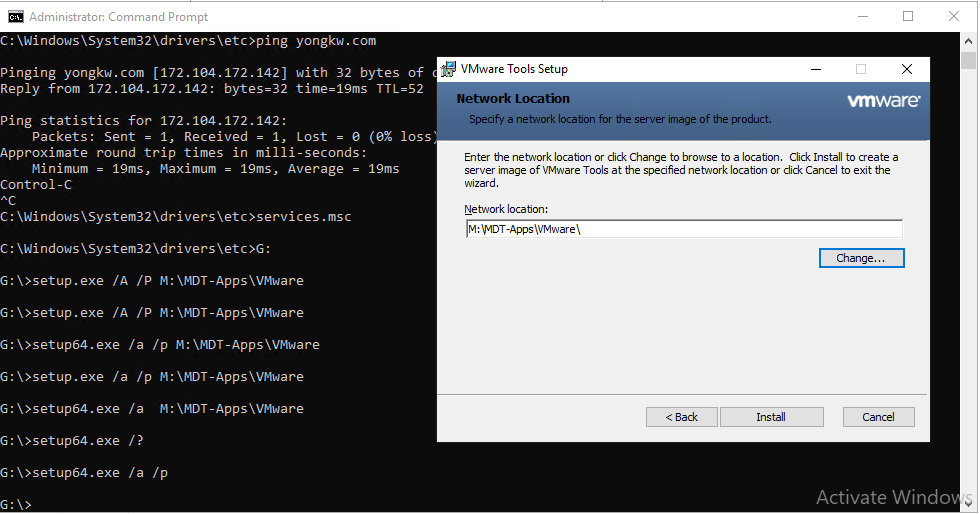
VMware Drivers are extracted to M:MDT-AppsVMwareVMwareVMware ToolsVMwareDrivers
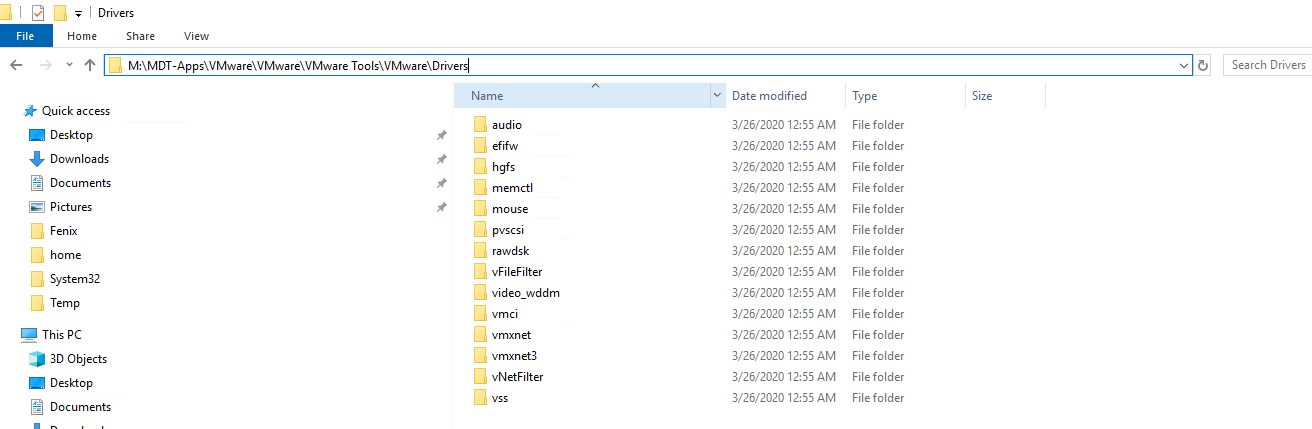
Open Windows Deployment Services and right click on Drivers – Add Driver Package to import drivers
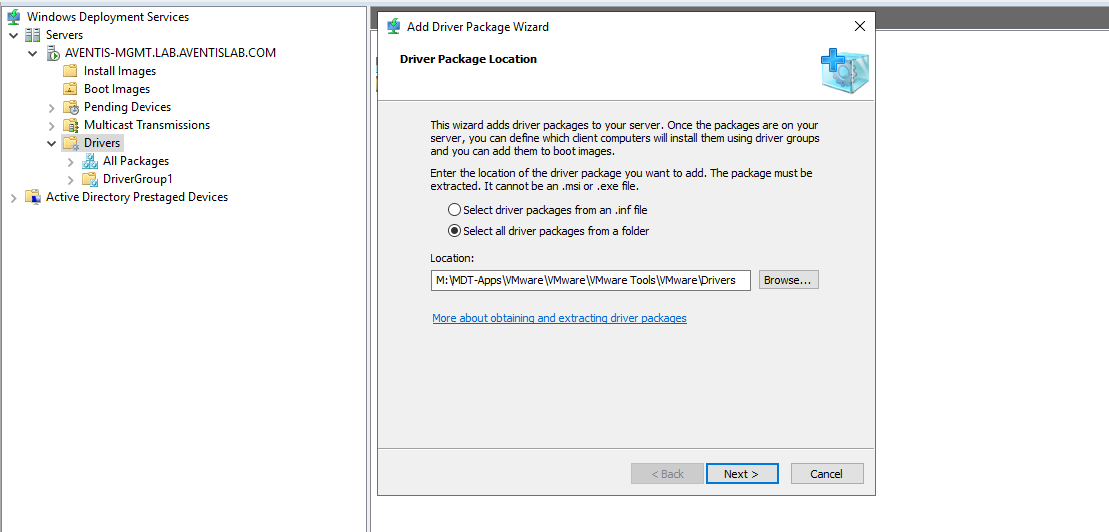
Create a Driver Group called VMware where prompted
Accept all default values when prompted, and VMware Drivers are imported successfully
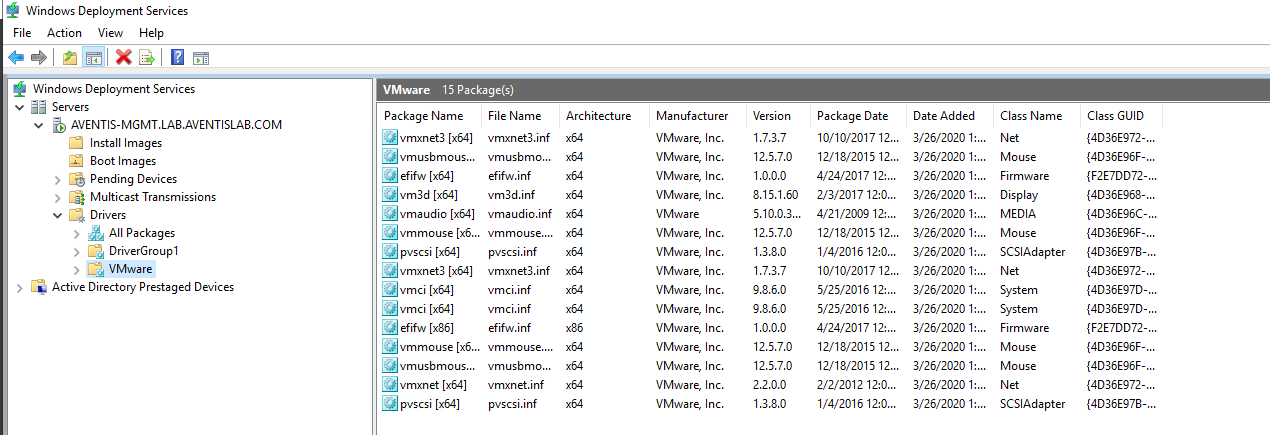
Right click on WIN10-BOOT and select Add Drivers Package to Image
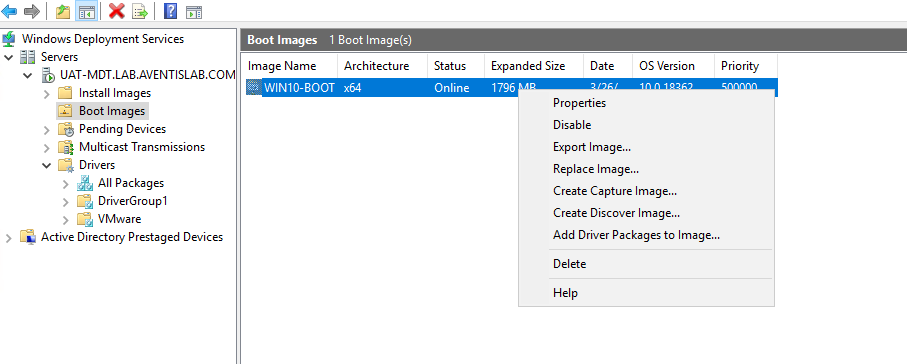
Click Search for Packages
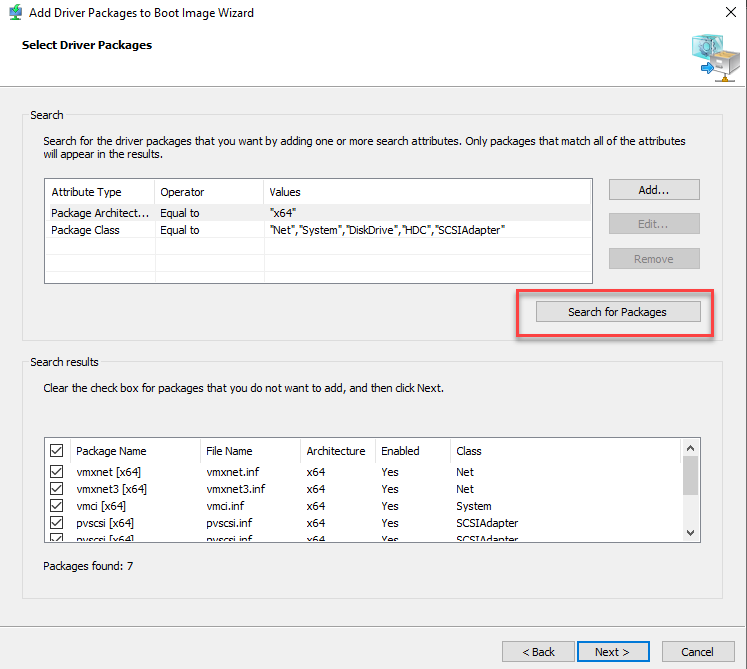
VMware Drivers are imported to boot.wim image successfully
Prepare Capture Image
A capture Image is used to capture a Windows 10 Reference Images and import it to MDT for deployment
Right Click on WIN10-BOOT and select Create Capture Image
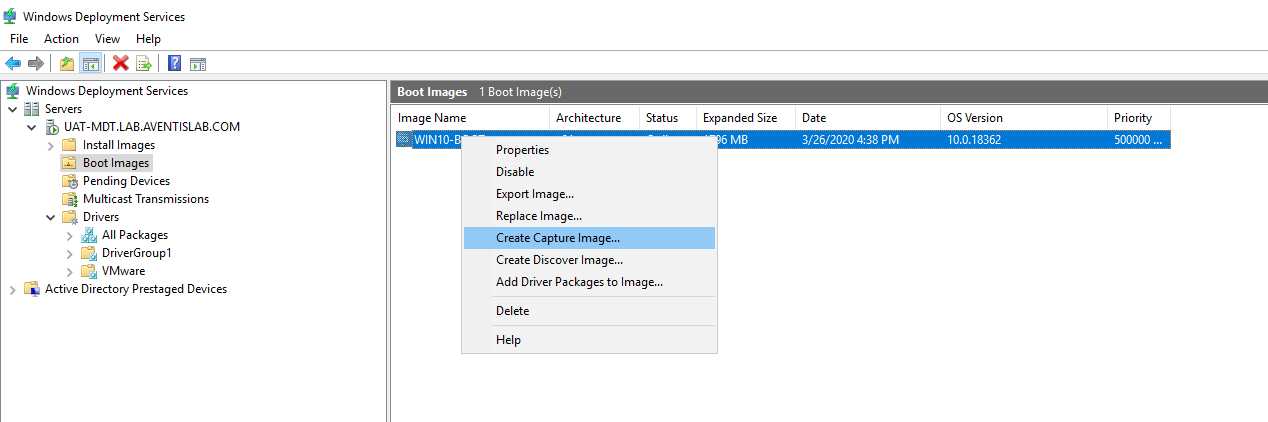
Enter Name & Location for Capture Image

Check Add Image to the Windows Deployment Server Now
Enter the Location & Image Name when prompted
WIN10-BOOT & WIN10-CAPTURE are created in WDS successfully
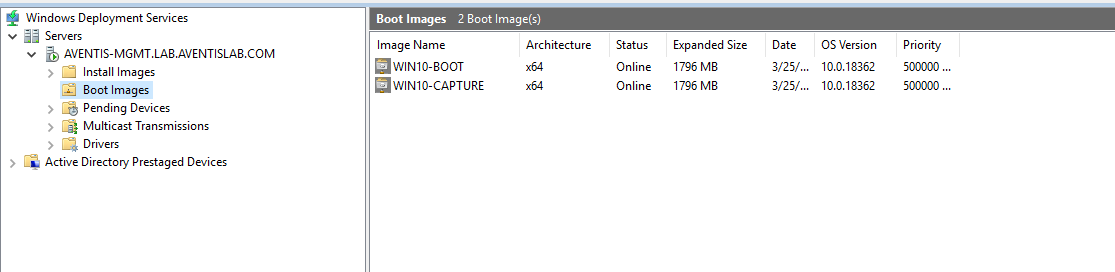
Prepare Windows 10 Reference Image
Refer to Prepare Windows 10 Image for MDT Deployment
Capture Windows 10 Reference Image
Refer to Capture Windows 10 Image for MDT Deployment
Import Windows 10 Reference Image
Import the captured WIN10-2004.wim file to MDT
- -SetupPath – Location of the Windows 10 ISO File
- -DestinationFolder – Create a new Folder for WIN10-2004.wim image
# Import WIM file
$SourceFile = "M:WIN10-2004.wim"
$MDT_Drive = (Get-MDTPersistentDrive)

# creates temporary and persistent drives to map to MDT Drive - DS001
New-PSDrive -Name $MDT_Drive.Name -PSProvider MDTProvider -Root $MDT_Drive.Path

Import-MDTOperatingSystem -Path "DS001:Operating Systems" -SourceFile $SourceFile -SetupPath D: -DestinationFolder "WIN10PRO-2004"
Rename the imported image
Get-ChildItem "DS001:Operating Systems"

Name
----

WIN10-1909.wim
WIN10PRO-2004 in WIN10PRO-2004 WIN10-2004.wim

Rename-Item '.WIN10PRO-2004 in WIN10PRO-2004 WIN10-2004.wim' "WIN10PRO-2004.wim"
WIN10PRO-2004.wim is imported to Deployment Share – Operating Systems successfully
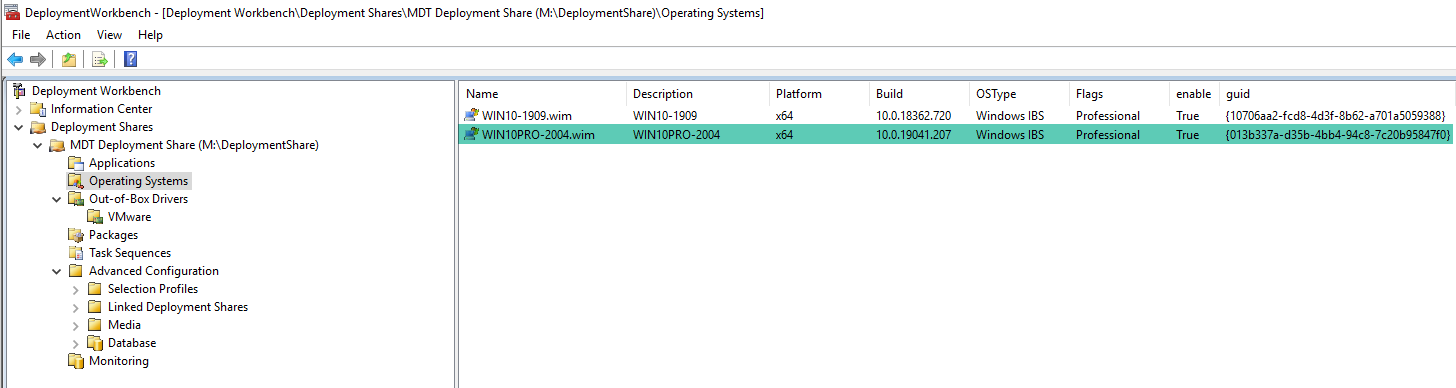
Out of Box Drivers
Drivers for Windows 10 can be organized in folder and injected to Windows 10 during MDT deployment
Download and extract SCCM Driver Pack, like HP Driver Pack and import to MDT Server using PowerShell below
# Create a New Folder
New-Item -path "DS001:Out-of-Box Drivers" -enable "True" -Name "VMware" -ItemType "folder" -Verbose

# Import Drivers
Import-MDTDriver -path "DS001:Out-of-Box DriversVMware" -SourcePath "M:DriversVMware" -Verbose
New folder called VMware is created in Out-of-Box-Drivers with all VMware Drivers imported
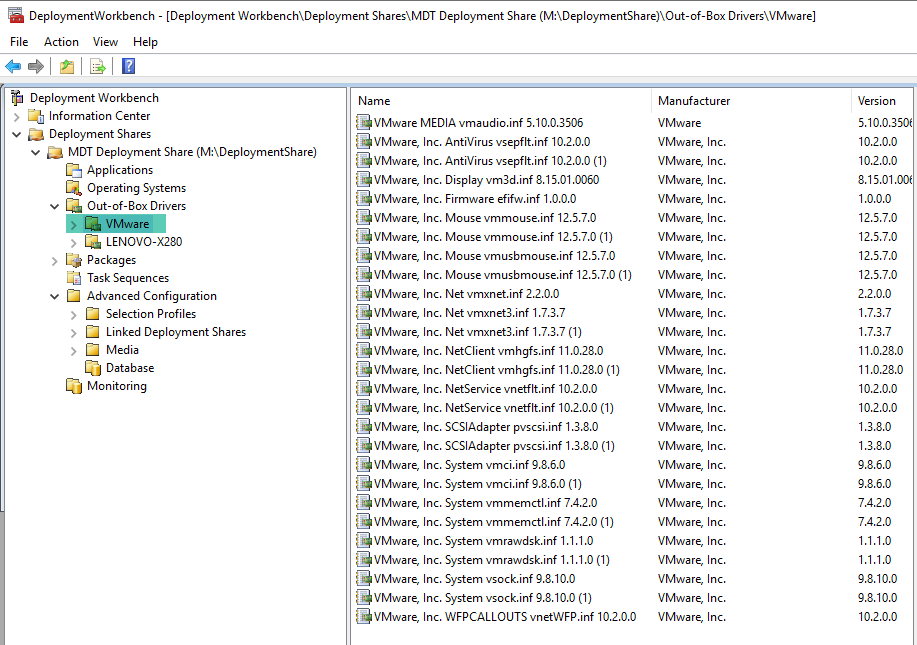
Selection Profile
Selection Profile can be used to control what drivers and packages are injected into the Boot Image.
Create a new Selection Profile called VMware with all drivers in Out-of-Box DriversVMware
New-Item -path "DS001:Selection Profiles" -enable "True" -Name "VMware" -Definition "<SelectionProfile><Include path=`"Out-of-Box DriversVMware`" /></SelectionProfile>" -ReadOnly "False" -Verbose
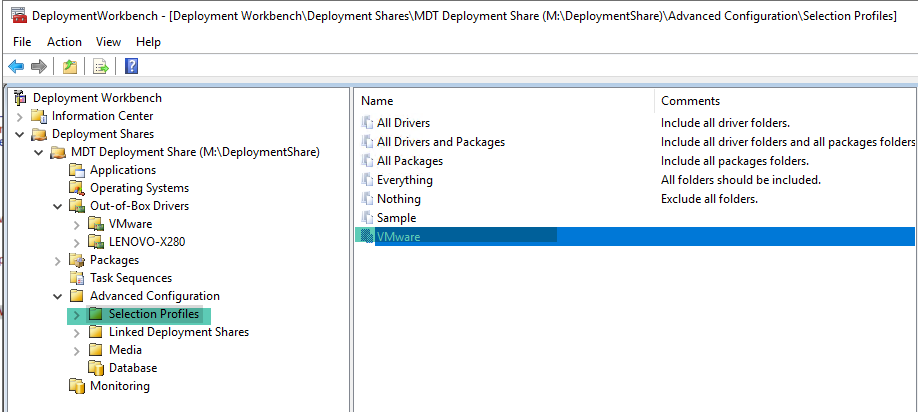
Task Sequence
Task sequences are basic XML files which call on a series of scripts to run parameters chosen by the user, when the task was created.
Create a new Task Sequence based on the template Client.xml to deploy WIN10PRO-2004.wim to new computer
Import-MDTTaskSequence -Path "DS001:Task Sequences" -Name "WIN10PRO-2004" -Template "Client.xml" -ID "010" -OperatingSystemPath "DS001:Operating SystemsWIN10PRO-2004.wim" `
-Version 1.0 -Verbose
Customize the Task Sequence
- Disable Format and Partition Disk (BIOS)

- Remove the Recovery Partition and increase the Windows (Primary) partition to use 100% of the remaining spaces
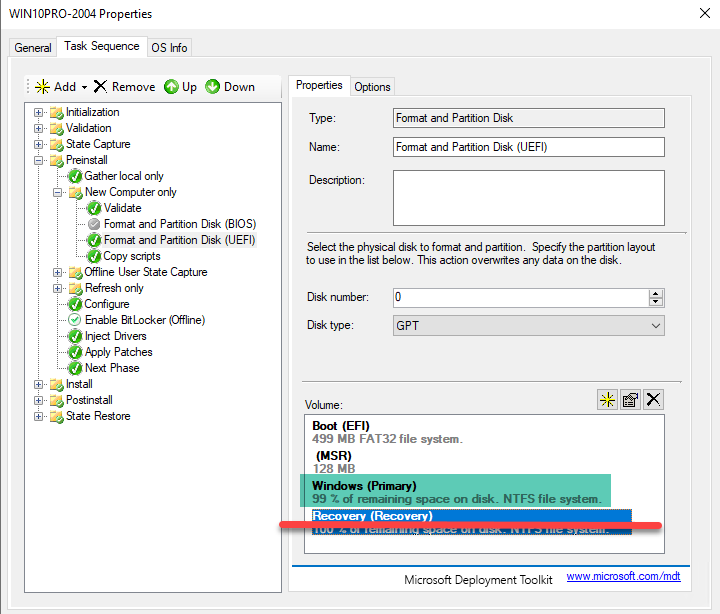
- Inject Drivers – Select the Drive Profile to be installed during OS Deployment
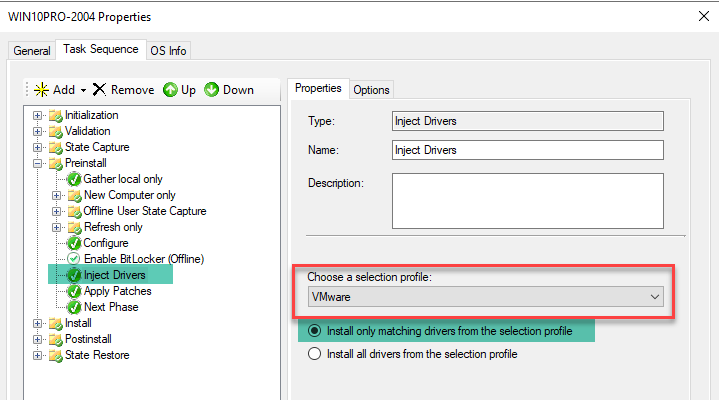
- Install Operating System – Select the WIM file that will be deployed and Select Next Available Formatted Partition

- Inject Drivers – Select Continue on Error
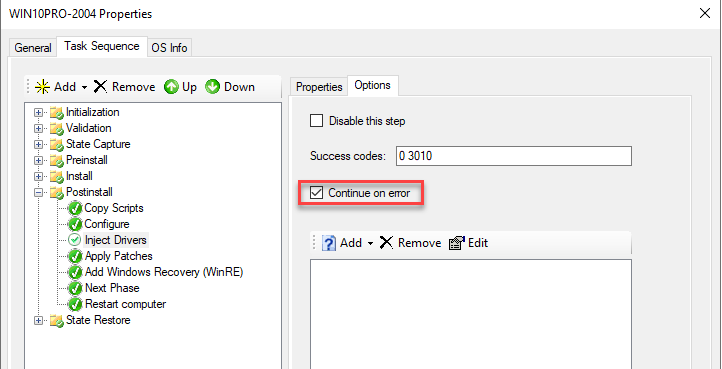
- Add a PowerShell Script in State Restore – Custom Tasks – Run PowerShell Script
Create a PowerShell Script called PostInstallation.ps1 in M:DeploymentShareScriptsCustom
# PostInstallation.ps1
# Join to AD Domain
$cred = New-Object System.Management.Automation.PsCredential("LABAdministrator", (ConvertTo-SecureString "[email protected][email protected]#$" -AsPlainText -Force))
Add-Computer -DomainName "lab.aventislab.com" -Credential $cred -OUPath "OU=MDT,DC=lab,DC=aventislab,DC=com"
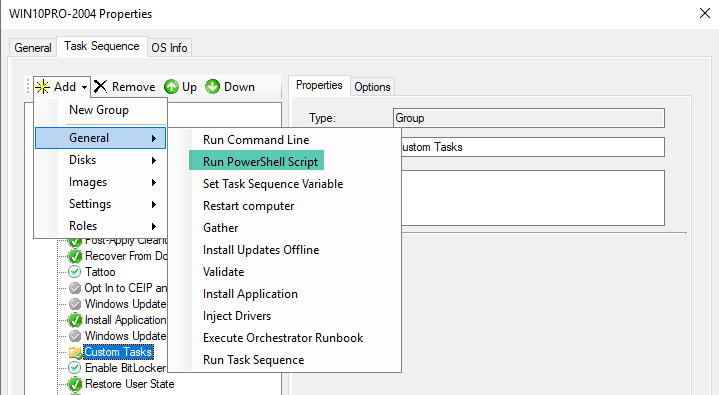
- Enter the location of PowerShell Script – %SCRIPTROOT%CustomPostInstallation.ps1

- Disable Apply Local GPO Package
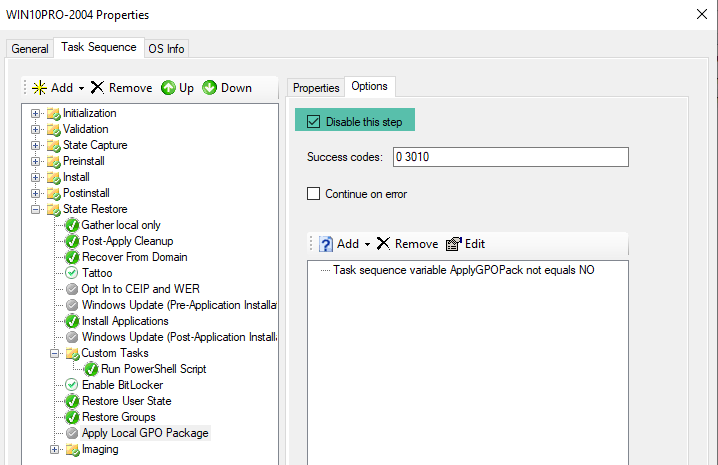
We had create a task sequence to deploy Windows 10 PRO successfully
Convert the Task Sequence to Template
Copy the the Task Sequence we prepared above from M:DeploymentShareControl10ts.xml to M:DeploymentShareTemplatesTS-WIN10PRO-UEFI-VM.xml
Open the XML file with Notepad and change the Display Name this Template
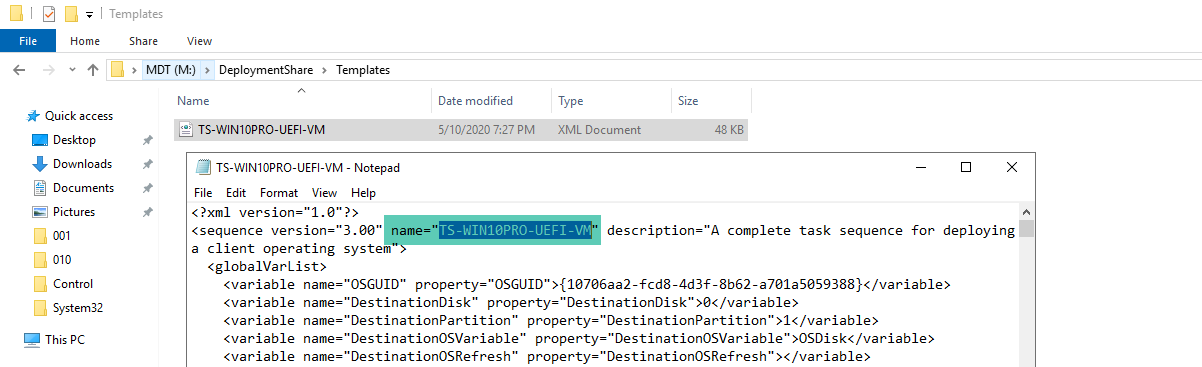
Select the Template – TS-WIN10PRO-WUFI-VM when you want to create a similar Task Sequence in the future.
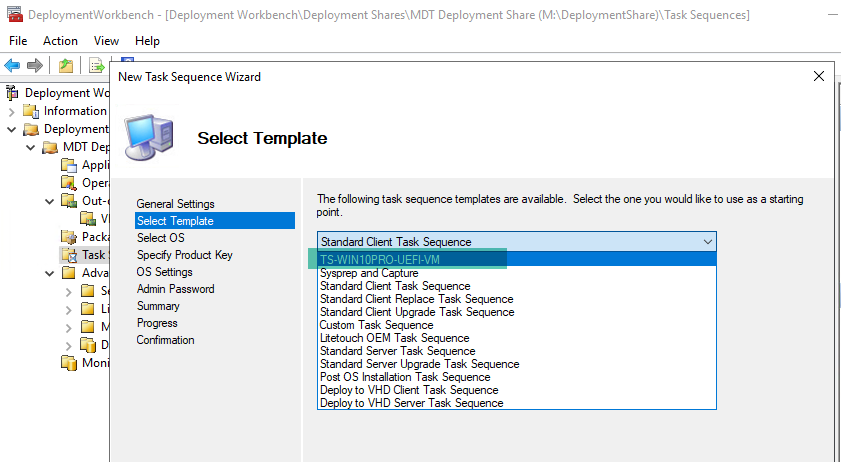
Update Deployment Share
Update Deployment Share with the latest file from the Windows ADK to updates or regenerates the required Windows PE boot images in both WIM and ISO file formats.
- Right click on MDT Deployment Share – General and uncheck x86 as we are going to use x64 files only
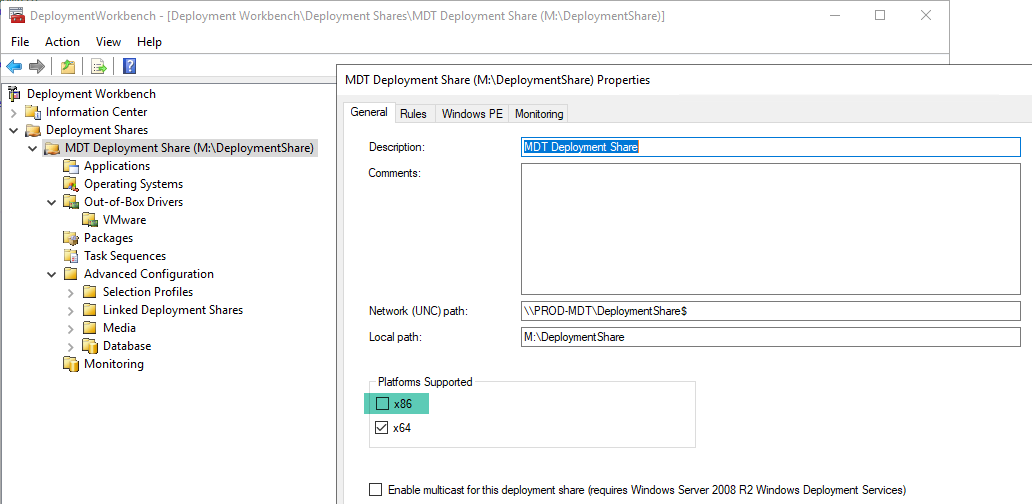
- Modify the CustomSettings.ini (Rules) and Bootstrap.ini in M:DeploymentShareControl

[Settings]
Priority=Default
Properties=MyCustomProperty
[Default]
OSInstall=Y
SkipCapture=YES
SkipAdminPassword=YES
[email protected]
SkipComputerBackup=YES
SkipBitLocker=NO
BDERecoveryKey=AD
BDEInstall=TPMPin
SkipCapture=YES
SkipComputerName=NO
SkipComputerBackup=YES
SkipDomainMembership=YES
SkipFinalSummary=YES
SkipLocaleSelection=YES
KeyboardLocale=en-us
UserLocale=en-us
UILanguage=en-us
SkipPackageDisplay=No
SkipProductKey=YES
SkipSummary=YES
SkipTaskSequence=NO
SkipTimeZone=YES
TimeZoneName=Singapore Standard Time
WSUSServer=http://prod-mdt.lab.aventislab.com:8530
SkipUserData=Yes
FinishAction=REBOOT
EventService=http://PROD-MDT.lab.aventislab.com:9800
[Settings]
Priority=Default
[Default]
DeployRoot=\PROD-MDTDeploymentShare$
UserID=labadministrator
[email protected][email protected]#$- Uncheck Generate a Lite Touch Bootable ISO Image as we are not going to use the WinPE ISO file to boot up VM

- Update Deployment Share
Update-MDTDeploymentShare -Path "DS001:" -Verbose
MDT Monitoring
MDT Monitoring let you to monitor the progress of deployment tasks and check for error message from MDT console
Check Enable Monitoring for this Deployment Share
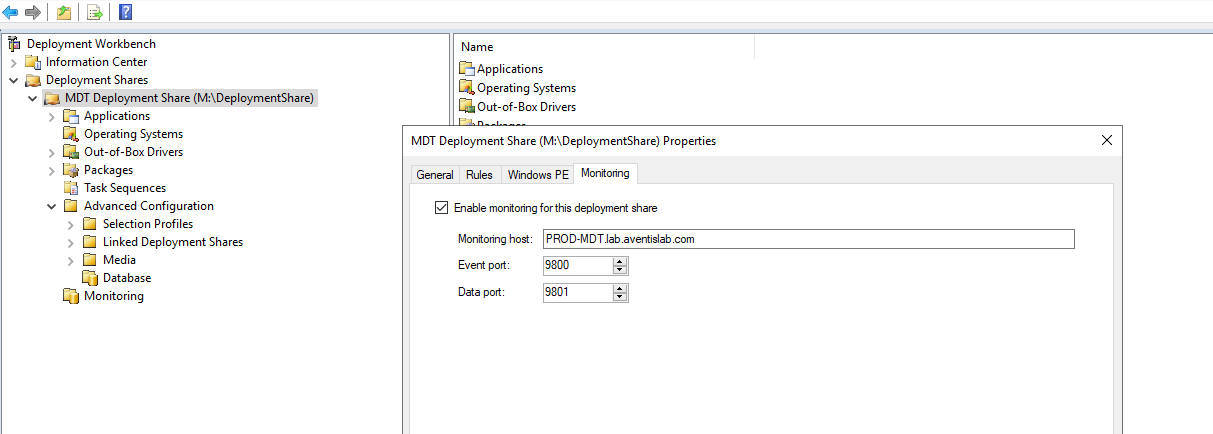
Ensure that Microsoft Deployment Toolkit Monitor Service is running
Get-Service -Name MDT_Monitor | ft

Status   Name               DisplayName
------   ----               -----------
Running  MDT_Monitor        Microsoft Deployment Toolkit Monito...
Allow inbound TCP 9800 & 9801 if Windows Firewall is enabled – Optional Steps
# Allow inbound TCP 8002 TCP 9800
New-NetFirewallRule -DisplayName "In-TCP-9800" -Direction Inbound -Protocol TCP -LocalPort 9800 -Action Allow
New-NetFirewallRule -DisplayName "In-TCP-9801" -Direction Inbound -Protocol TCP -LocalPort 9801 -Action Allow

# TCP 9800 & 9801 is in listening mode
Get-NetTCPConnection | ? LocalPort -like "980*"

LocalAddress                        LocalPort RemoteAddress                       RemotePort State       AppliedSetting
------------                        --------- -------------                       ---------- -----       --------------
::                                  9801      ::                                  0          Listen
::                                  9800      ::                                  0          Listen
Verify that EventService=http://PROD-MDT.lab.aventislab.com:9800 is added in CustomSettings.ini
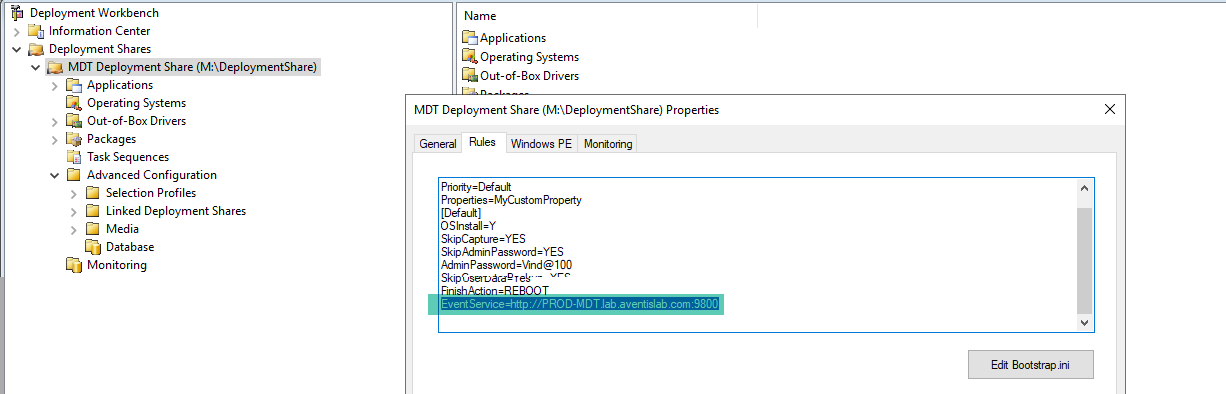
Access to http://192.168.1.232:9801/MDTMonitorData/ to confirm that the page below is displayed
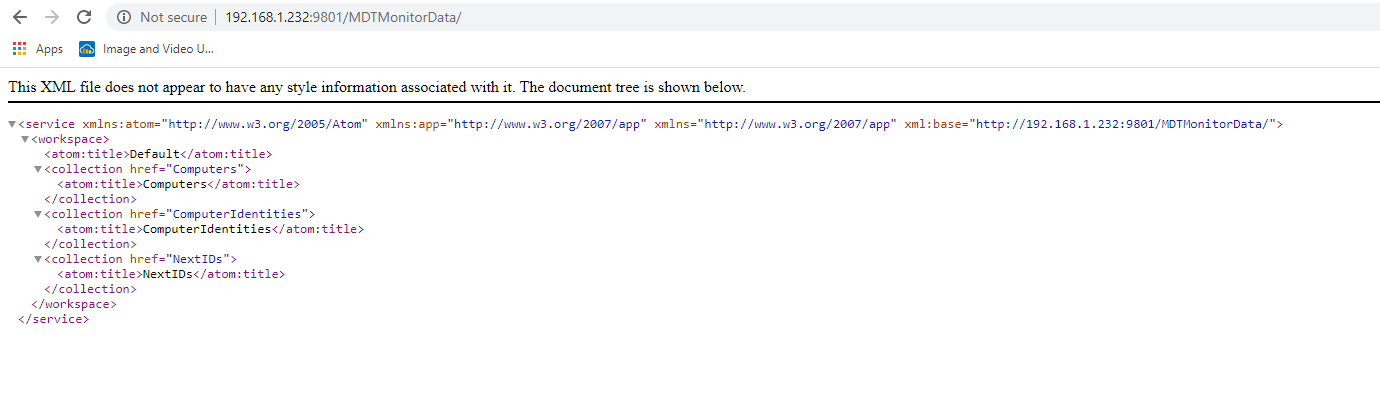
You can monitor the deployment progress in MDT Console now