Honest advice
The functionality of developing IOS apps on windows is something that Apple intentionally wants to block and hence tries to give you hard time doing that by purposeful hindrances in the software that slow you down in such attempts.
To do that, you will need to install Xcode, which requires MacOS, which you would have to install on a virtual machine if you ever want to use on windows, which itself is against the apple terms and policy
So, even if it works, you wouldn’t be smoothly developing in such blocked environment. So I believe it isn’t worth spending time on.
I am writing this since I have tried it myself, and want to help you to not waste your time. Since most websites during search including on youtube, this subject is for clickbait with videos with more dislikes than likes. The most you can get is the following
- Use cloud services like MacInCloud, MacStadium, XcodeClub ( They are expensive )
- Install MacOS on virtual machine like VirtualBox or Vmware ( Apple intentionally hinders such activities and you will have hard time installing it let alone using it for bearable development )
- Build and use hackintosh ( expensive, I prefer buying mac )
I hope this saves your time

In this article, We learn about how to build ios from windows using react-native and expo, basically to do this we need to install react-native then have to install expo, no Android studio or XCode required to build project
1. Install react-native
To install react-native first, make sure you have Node v6 or later installed, to install the react-native run following command
$ npm install -g react-native-cli
To know more in detail about installation on windows I request you to go through this tutorial after complete installation of react-native next step to install expo client
2. Install expo
To install expo, run following command
$ npm install -g expo-cli
after installation complete we need to create a project, normally we use react-native init projectName to create a new project, but instead of this command we have to run following command
$ expo init my-app
after running this command you will see the following dialog:

You will see two options here black and tabs, blank create a blank project and tabs create bottom tabs for you
Select option and hit enter button you will see following options

Type name of your project which you want to set and hit enter
it takes some time to create a project after completing your project it will give some instructions in order to run the project
like below:

so go to your project root directory and run npm start after running npm start it will redirect to the browser and start packager like below:

Now, download Expo app from Appstore it also available on Play store, now see left navigation options there is an option for send link with email… if you have iPhone then use this option, And for Android, you can directly scan the QR code from Android Expo App,
you will get an email from Expo

Click on the first link and open in Expo app it will run the app with three tabs

Thank you… enjoy coding… 🙂
Apple has done a great job of locking in developers by ensuring the Xcode toolchain can only run on MacOS products. For people who prefer working on Windows machines, this is very frustrating. We wanted a way to run our builds from our Windows computers.
We managed to find a solution for building from a Windows computer, however it still requires using a MacOS server in the backend.
Want to build React Native for iOS, from Linux?
We’re working to make things easier.
Before you get too excited, the methods described in this article still require that you have a MacOS machine to build your project on. That means additional infrastructure to pay for and manage (which is likely what you’re trying to avoid in the first place).
Introducing RNBuildAnywhere
At matix.io, we’re currently working on a service which manages all the technical difficulties described in this article for you. How does it work?
npx rnbuildanywhere build
That’s it. Your project is shipped off to a build server and you’re returned a file to install on your iPhone, so you can continue building and not worry about the technical difficulties.
Interested? Fill out the form below and we’ll be in touch to talk about how we can work together.
Getting started
- A Mac. This can be a physical machine like an old Macbook, a Mac Mini, or a Mac Server. Or, it could be a Mac VPS rented from a service like MacinCloud or other VPS providers.
- A Windows computer.
- An iPhone or iPad connected via USB to the Windows computer.
Setting up the Mac
SSH Access
First thing’s first: you’re going to need to be able to SSH into the Mac from your Windows machine. That means you’ll need to enable remote connections on the Mac and add your public SSH key to the ~/.ssh/authorized_keys file.
We won’t cover the SSH setup in this tutorial, but there are many resources on the internet which can help you do so.
Xcode toolchain
Install the Xcode command line tools by running:
xcode-select --install
fastlane
fastlane is a toolkit for automating tasks related to iOS and Android builds. We use it to do the complicated things like managing provisioning profiles and codesigning.
To install fastlane, check out their installation instructions.
Git access
You’ll need to create a git repository, on Gitlab or Github, where fastlane will store your signing certificates (encrypted). Your Mac needs to be set up to access this git repository via an SSH url (e.g. [email protected]:user/repo.git).
If you can clone the repo without it asking for a username / password, you’re all good.
Other build requirements for React Native
Any tools that you use to build your React Native project need to be available. For example, npm, yarn, etc.
Setting up the Windows machine
SSH & SCP setup
Windows 10 now ships with SSH & SCP! YAYA
- Open Powershell
- Type «ssh» and «scp». If you see «is not recognized as an internal or external command», it’s not set up properly.
ssh-keygento generate a keypair- keypair gets placed in
%HOME%.ssh - Add a config to access your Mac server in
%HOME%.sshconfig
We’ll assume that you can SSH into your Mac machine by using the command ssh mac.
Install required tools
You’ll need to have access to the following commands:
tar(accessible from a Powershell)rsync(Download the free version of cwRsync and add it to your path)git(Download Git for Windows)ideviceinstallerfastlane(yes, you probably need it installed on both machines)node/npm([Download the installer from nodejs.org)
Apple Developer setup
Bundle ID creation
You’ll need to make sure your bundle identifier is created. To do this:
- Visit https://developer.apple.com/account/
- Sign in with your account
- Navigate to https://developer.apple.com/account/resources/identifiers/list
- Add a new App identifier
Take note of your Bundle Identifier you entered
Team ID
You need to note your Team ID. You can get this by visiting https://developer.apple.com/account/#/membership/.
Devices
You need to make sure your device is added to the list at https://developer.apple.com/account/resources/devices/
React Native project setup
The important thing here is getting your project set up to build with fastlane. We’ll start from a fresh React Native project to illustrate things from the start.
First, we’ll create a new React Native project:
npm install react-native
npx react-native init reactnativetest
Then, we’ll initialize fastlane for the project:
cd reactnativetest/ios
fastlane init
When it asks you What would you like to use fastlane for?, select Manual setup.
Finally, you need to create your Fastfile, which tells fastlane what commands to execute (in this case to build the React Native project).
This takes some tinkering. Here’s what worked for us:
# must match the bundle ID in Apple Developer Setup (above)
BUNDLE_ID = 'your-bundle-id'

# must match your Apple Developer Team ID
TEAM_ID = 'your-team-id'

# the email associated with your Apple Developer account
ICLOUD_USERNAME = '[email protected]'

# the path to Info.plist. normally, this is 'projectname/Info.plist'
PLIST_PATH = 'reactnativetest/Info.plist'

# the scheme (normally just your project name)
SCHEME = 'reactnativetest'

# the git repo where fastlane Match will store your certs
GIT_REPO = '[email protected]:user/repo.git'

update_fastlane
default_platform(:ios)

platform :ios do
  desc "Builds the app for iOS"
  lane :build do

    # specify the team_id we want to use for this build
    team_id(TEAM_ID)

    # make sure the xcode project has the appropriate settings
    update_app_identifier(app_identifier: BUNDLE_ID, plist_path: PLIST_PATH)
    update_project_team(teamid: TEAM_ID)

    # install dependencies
    sh('cd ../.. && yarn install')
    cocoapods

    # set up code signing using a temporary keychain
    disable_automatic_code_signing
    delete_keychain(name: "codesigning.keychain") if File.exist?(File.expand_path("~/Library/Keychains/codesigning.keychain-db"))
    create_keychain(name: 'codesigning.keychain', default_keychain: true, unlock: true, timeout: false, password: 'codesigning')

    # set up provisioning profiles and code signing
    match(
      type: 'development',
      username: ICLOUD_USERNAME,
      app_identifier: BUNDLE_ID,
      keychain_name: 'codesigning.keychain',
      keychain_password: 'codesigning',
      force: true,
      git_url: GIT_REPO
    )

    # run the build
    gym(
      scheme: SCHEME,
      export_method: 'development',
      xcargs: {
        :PROVISIONING_PROFILE_SPECIFIER => 'match Development ' + BUNDLE_ID
      }
    )
  end
end
After that, you should be good to go!
Building the project
Finally, here’s the fun part! Here are the steps for building:
- Uploading the project to the MacOS server. This will be run once, for the first build.
- Updating the project on the MacOS server. On the first build, this will do nothing, but on subsequent builds we’ll upload any changes.
- Executing the build on the MacOS server.
- Downloading the built .ipa file.
- Installing the built .ipa file to the iPhone, connected to your Windows computer.
Uploading the project to the MacOS server
To do the initial upload, we’re going to create a tarball of the project and upload it to the remote server. This is especially important if you have a large project, as the tarball upload will be quicker than the method we will use to update files on the remote server. The issue, though, is that we do not want to include any installed dependencies (such as node_modules or installed Pods).
Luckily, react-native init generates a .gitignore file which excludes all these by default.
If you haven’t set up a git repo for your project, you need to do the following:
git init
git add .
Then, we’ll create a tarball of the project as follows:
git ls-files >files.txt && tar -cvf archive.tar.gz --files-from files.txt && del files.txt
We’ll upload the new archive to the MacOS server and extract it:
# create a new folder on the remote server
ssh mac "cd ~ && mkdir reactnativetest"

# upload the archive
scp ./archive.tar.gz mac:~/reactnativetest

# extract the archive
ssh mac "cd ~/reactnativetest && tar -xvf archive.tar.gz"
Finally, we’ll clean up the mess we made.
rm archive.tar.gz
ssh mac "rm ~/reactnativetest/archive.tar.gz"
Updating the project on the MacOS server
This part is a bit simpler. After we’ve uploaded the initial tarball, we’ll use rsync to upload any changes we make. Again, we’ll need to make sure we don’t upload any of the node_modules or other dependencies.
Unfortunately, rsync won’t read from our ~/.ssh/config.
rsync -avzP --delete --exclude=".git" --exclude-from=".gitignore" -e "ssh -i $HOME/.ssh/id_rsa" . [email protected]:~/reactnativetest
That’s it! rsync is a great tool.
Executing the build on the remote server
This is also a single command, luckily!
We’re going to use two variables when we run the build:
FASTLANE_PASSWORDpasses your icloud password to Fastlane (use to access the API to download provisioning profiles and code signing certificatesMATCH_PASSWORDis the password Fastlane uses to encrypt your generated provisioning profiles and signing certificates.
ssh mac "cd ~/reactnativetest/ios && FASTLANE_PASSWORD=your_icloud_password MATCH_PASSWORD=match_password fastlane build"
Downloading the .ipa file
This is a quick and easy step:
scp mac:~/reactnativetest/ios/reactnativetest.ipa .
Installing the .ipa file
Plug in your phone, and grant the Windows computer permission to access it. Then, simply run
ideviceinstaller -i reactnativetest.ipa
That’s it, the app should be installed on the iOS device!

Это перевод оригинальной статьи программистки, ведущей блог под псевдонимом Soujanya PS. Она профессионал своего дела и любит не только разрабатывать приложения и сервисы, но и писать об этом статьи. Вот ее обзор запуска iOS-приложения с использованием фреймворка React Native.
Не так давно я начала использовать React Native для программ под iOS. Это мое первое глубокое погружение в среду разработки нативных приложений. Замечу, что я была удивлена легкостью всего процесса, а также уровнем абстракции, который обеспечивает интерфейс командной строки React Native. Собственно, это стало одним из факторов, который побудил меня написать об этом фреймворке. Я хотела бы поделиться собственным опытом с теми, кто только начал работать с ним.
Skillbox рекомендует: «Мобильный разработчик PRO».
Напоминаем: для всех читателей «Хабра» — скидка 10 000 рублей при записи на любой курс Skillbox по промокоду «Хабр».
React Native обеспечивает инструменты командной строки для запуска приложений под iOS и Android на эмуляторах и устройствах. Давайте попробуем понять, что и как нужно сделать, чтобы развернуть React Native приложение под iOS.
Собственно запуск
React Native предоставляет отличную утилиту, которая называется init. Она дает шаблон приложения, одновременно создавая релевантные файлы проекта Xcode в iOS-папке этого приложения.
Его, в свою очередь, можно запустить как в среде эмулятора iOS, так и на телефоне/планшете путем ввода следующей команды в корневой папке приложения:
react-native run-ios
Успешное выполнение команды сопровождается запуском приложения в эмуляторе или на устройстве. Рассказываем, что нужно сделать для этого.
Команда run-ios
React Native предоставляет в распоряжение разработчика несколько утилит командной строки, позволяющих взаимодействовать с приложением. Они находятся в папке local-cli ноды модуля React Native. Run-ios — одна из утилит, которая запускает функцию runIOS (), определенную в файле runIOS.js.
Run-ios позволяет использовать следующие опции:
#Launch the app on a specific simulator
react-native run-ios —simulator «iPhone 5»
#Pass a non-standard location of iOS directory
react-native run-ios —project-path «./app/ios»
#Run on a connected device, e.g. Max’s iPhone
react-native run-ios —device «Max’s iPhone»
#Build the app in Release mode
react-native run-ios —configuration Release
Выбор устройства/эмулятора
Если устройство не задано, то run-ios запустит режим отладки приложения в эмуляторе по умолчанию. Это возможно благодаря выполнению серии команд xcrun / simctl. Сначала идет проверка списка доступных эмуляторов, выбор одного из них и загрузка приложения в его среде.
Если вы хотите запустить приложение на физическом устройстве, просто подключите его к вашему ноутбуку и задайте детали через run-ios.
Следующий шаг — создание проекта приложения Xcode.
Код приложения
Обычно Xcode-проект приложения React Native располагается в папке iOS в корневой директории. Проект Xcodе создается при помощи команды xcodebuild. Любые параметры, ранее заданные для run-ios, передаются этой команде.
Как только проект создан, приложение устанавливается и запускается на эмуляторе или подключенном устройстве.
Добавление кода приложения в режиме отладки
В течение всего процесса разработки React Native динамически подгружает ваш код. Для того чтобы все шло гладко и код был доступен по мере необходимости, понадобится сервер.
Пока Xcode-проект в процессе отладки, параллельно с ним запускается сервер Metro. Он используется приложениями, которые создаются при помощи интерфейса командной строки React Native. Все это позволяет ускорить и упростить процесс при помощи «горячей» перезагрузки и других методов.
По умолчанию Metro «слушает» 8081 порт. Как только приложение запущено в эмуляторе, отправляется запрос серверу.
#Code in AppDelegate.m sends the request for the bundle: #index.bundle to server
jsCodeLocation = [[RCTBundleURLProvider sharedSettings] jsBundleURLForBundleRoot:@"index" fallbackResource:nil];

RCTRootView *rootView = [[RCTRootView alloc] initWithBundleURL:jsCodeLocation
 moduleName:@"MobileApp
 initialProperties:nil
 launchOptions:launchOptions];
Сервер подгружает все необходимые зависимости, собирает код JavaScript и отправляет его приложению. После этого шага вы можете видеть работающее приложение в эмуляторе или на подключенном устройстве.
Упаковка пакета JavaScript
В release-mode необходимо предварительно упаковать JavaScript, разместив его в приложении. Для этого нужны некоторые изменения, обеспечивающие возможность загрузки статического пакета. Изменить нужно jsCodeLocation в файле AppDelegate.m, указав местоположение статического пакета вне режима отладки:
#ifdef DEBUG
jsCodeLocation = [[RCTBundleURLProvider sharedSettings] jsBundleURLForBundleRoot:@"index" fallbackResource:nil];

#else
jsCodeLocation = [[NSBundle mainBundle] URLForResource:@"main" withExtension:@"jsbundle"];

#endif
Теперь это указание на ресурсный файл main.bundle, который появился в ходе обработки проекта Xcode.На этом этапе запускается скрипт react-native-xcode.sh. Его можно найти в папке сценариев модуля React Native.
Создание приложения из Xcode
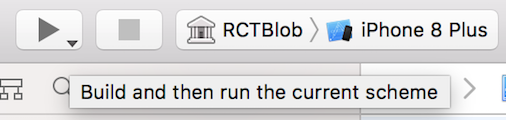
Xcode-проект можно создать и прямо на Maс вместо использования React Native CLI. После создания приложение можно также запустить на эмуляторе, выбранном в опциях Xcode, или же на физическом устройстве.
Надеюсь, что этот материал помог вам понять процессы, которые запускаются в момент выполнения react-native run-ios команды, которая творит волшебство и позволяет выполнять приложение в среде iOS.
Skillbox рекомендует:
- Практический курс «Профессия веб-разработчик».
- Онлайн-курс «Профессия Frontend-разработчик».
- Практический годовой курс «PHP-разработчик с нуля до PRO».
One of the big advantages of Expo is that you can build a mobile app for iOS on Windows. However, the answer to the question ‘how to build an expo app on Windows‘ whilst well documented here, also contained lots of info I didn’t need. I was already set up with certificates in my Apple developer account, and was only publishing for iOS. So this is a more condensed overview for anyone busy searching ‘expo build ios‘ in an effort to build an Expo iOS app using a PC.
Table of contents
- Prerequisites – getting started
- Use Powershell to prepare Windows to build the app
- Build your Expo App on Windows PC
- Expo credentials manager
- Uploading the IPA file to TestFlight and the App Store
- Build your Expo app on a Mac
- Summary
- Related:
Prerequisites – getting started
Before you follow these steps I have presumed that as a Windows user you’ve already installed the WSL as outlined here. I’m also presuming that you’ve installed the Expo CLI, created an Expo app, and that you have an Apple Developer account. Once you have, then you’re ready to build an Expo app.
Use Powershell to prepare Windows to build the app
- Open Powershell as administrator by right-clicking the Powershell icon and selecting ‘run as administrator’
- Type – Enable-WindowsOptionalFeature -Online -FeatureName Microsoft-Windows-Subsystem-Linux
Restart PC (I’m not totally sure this is necessary, do your own tests!) - Open git bash at the project root
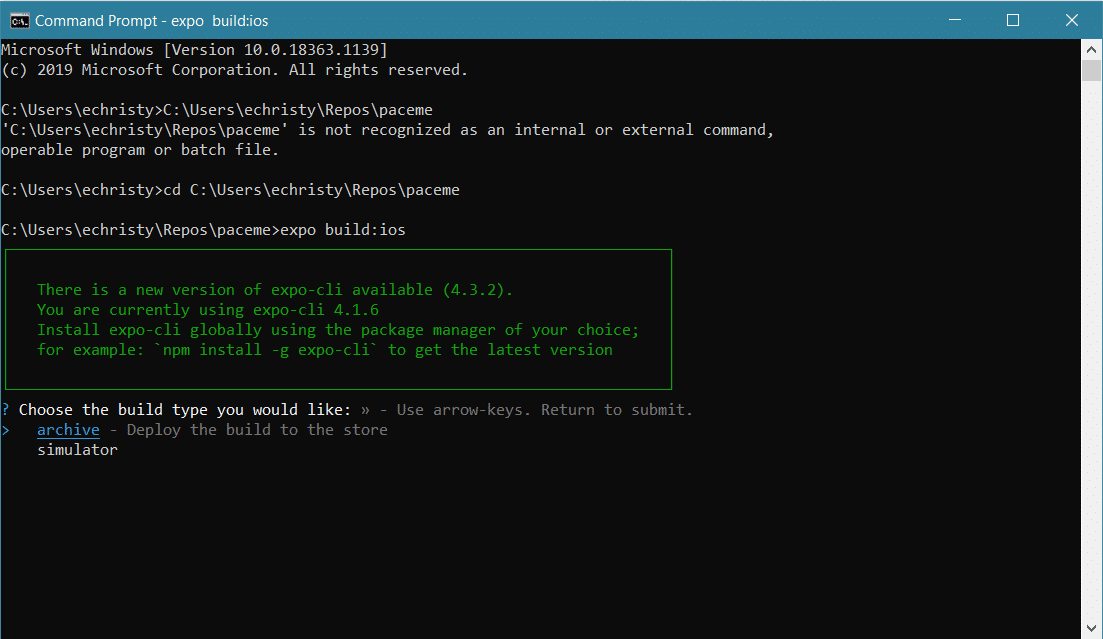
- Type expo build:ios
Please note if you see a message saying “Additional information needed to setup credentials in non-interactive mode.” use CMD instead. I have seen lots of info saying don’t use Git Bash for this, but honestly on my PC it seems a bit hit or miss. Rule of thumb is try both!
Open CMD or Git Bash, navigate to project folder, and use this command:
expo:build:iosLet Expo manage the process for you and as long as you had all your profiles and certificates set up ok in your Apple Developer account then Expo should be able to put it all together.
Once the Expo build process starts, it will ask you a series of questions. The first one asks you what kind of build you want – choose Archive if you want to upload this to TestFlight and run this on a device.
Next, the Expo build process will ask you for your Apple account credentials:
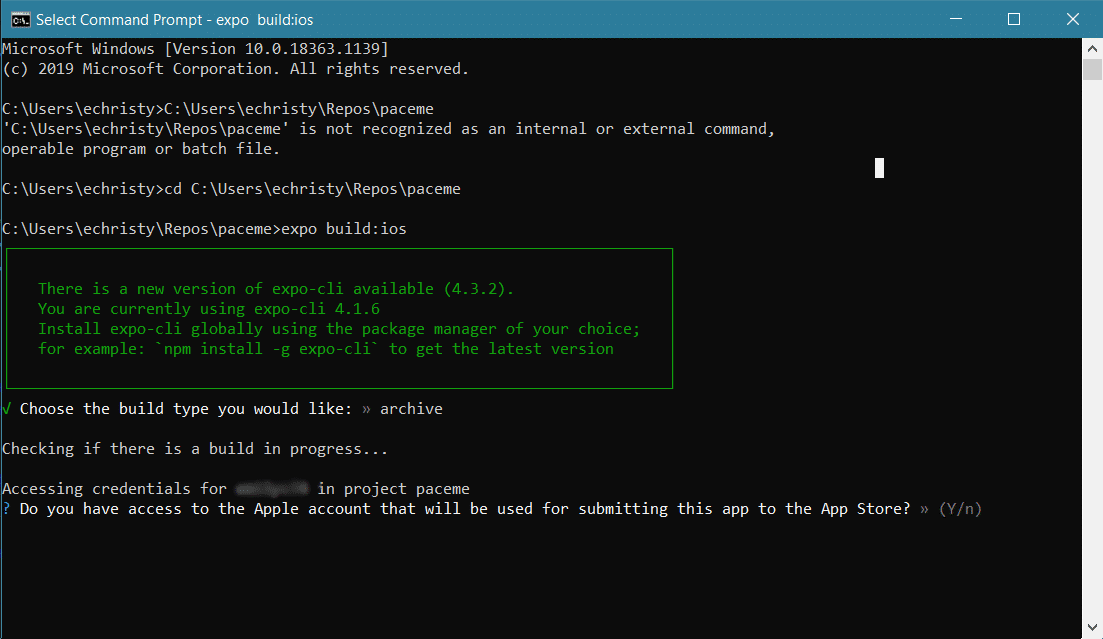
Once it’s complete, you’ll see a message saying that your build is queued. There’s a link provided in the output which will let you both see the progress of your Expo build and download the IPA file once it’s finished, from the Expo website.
Expo credentials manager
If there are any issues with any stage of this and you need to take a look at the certificates and provisioning profiles that Expo is trying to use, then type this command:
expo credentials:manager …. and follow the on-screen prompts. You can remove the certificates it’s trying to use and start the whole process again. This Expo page is really useful as it clearly explains what each bit is for.
Uploading the IPA file to TestFlight and the App Store
Now that you’ve downloaded your IPA file you are ready to submit it to the app store and / or TestFlight. And here’s where the wheels fall off a bit if you are trying to build your iOS Expo app using a Windows PC. You can get this far but to upload the IPA file you HAVE to use Transporter, and that only runs on a Mac. I find it a huge shame that you can’t do this any other way, but for now you’ll have to find a friend with a MAC to get your IPA file to Apple. Or you’ll have to buy a Mac…..
Build your Expo app on a Mac
If you can’t borrow a Mac then you’ll have to buy one, and the most cost effective way to do this is to buy a Mac Mini. They are small enough to be portable too, should you ever need it to be but a great machine that will enable you to develop, build and deploy Expo iOS apps for the app store.
Summary
In this post you’ve learned how to set up your PC to build Expo apps, how to kick off the build process and use your Apple credentials, and how to upload the IPA file to TestFlight and the app store.
Please note some links on this page are affiliate links. As an Amazon Associate I earn from qualifying purchases.
Do you need a Mac OS X operating system to develop React Native IOS App on Windows? The answer is almost certain. Here is the answer for 2016. There are still no good solutions after two years.
create-react-native-app + Expo I don’t need the OS X operating system, but I need an iPhone, I still don’t. Even if there is, this method is not suitable for development.
So installing a virtual machine on Windows seems to be the best option. After my practice, as long as the computer memory is not less than 8 GB, the processor is not too slag development experience is basically acceptable.
This article is written in the following order: Installing VMware 14=> Unlock VMware=> Install OS X=> Update operating system=> Installation development tool=> Run the RN initialized application
Install VMware 14
The following is my VM, unzip after downloading, double-click during installation, the next step will be OK, which contains the activation code.
Unlock VMware
Apple has made some restrictions, does not allow Mac OS to be installed on the virtual machine, VMware should not have authorization, so the default is not the option to install Mac OS, but there are third-party tools can unlock this feature. This is the download address for this tool:
After decompressing, run as the right administratorwin-install.cmd The program is fine.
After unlocking the function, create a virtual machine, and then select the Mac OS image as shown in the figure. This image is larger. You can go to the Baidu network disk to download, link: Password: ma9g
Later, when customizing the hardware, the allocated memory and CPU cores can be half of the host. It can also be assigned by default, and can be changed at any time. (However, it is better to have more CPU, because the graphics card of the operating system in the virtual machine is virtualized by the CPU of the host, and the processor of the host will directly affect whether the system screen after installation is smooth)
Install OS X
When you first open the virtual machine, there will be an error, open the Mac OS installation directory (non-virtual machine installation directory), findmacOS 10.12.vmx Document, atsmc.present = "TRUE" Add a line latersmc.version = 0. Then open the virtual machine again and it will enter the interface of loading the system.
Next, go to the following interface, partition as shown, and then install the system in this partition.
After rebooting, there are some custom settings. It is recommended to choose not to connect to the Internet (even if you choose to connect to the Internet, you can not log in to the Apple ID), and quickly set up an account to enter the system.
After entering the system, you can install VMtools.
After installing VMtools, Mac OS can be displayed in full screen.
The shared folder is also set by the way. I have shared the Windows D drive with OS X so that the two systems can easily transfer and access files to each other.
Update operating system
I can’t say that I have already installed OS X, because I can’t log in to the Apple ID. At least I can’t log in. It gives me such a hint.
You need a Mac with macOS 10.13 or higher to log in with this Apple ID
Copy code
So, the next step is to upgrade the system to 10.13. In fact, it’s very simple. Open the App Store and there are installation options on the home page of the update page.
After the update is downloaded and installed, the next time you reboot, you will be asked to log in to the Apple ID and also enter the password of the last used Apple device.
This completes the installation of Mac OS X.
Installation development tool
First go to the App Store to install XCode, about 5.3 G
Then open the terminal and run the command to install the package manager brew
$ /usr/bin/ruby -e "$(curl -fsSL https://raw.githubusercontent.com/Homebrew/install/master/install)"
Copy code
With the package manager, you can easily install the node.
$ brew install node
Copy code
In order to make npm download things faster, set the Taobao image here.
$ npm config set registry https://registry.npm.taobao.org --global
$ npm config set disturl https://npm.taobao.org/dist --global
Copy code
Then install the yarn and react-native command line tools, where yarn is optional
$ npm install -g yarn react-native-cli
Copy code
Or for speed, then set the Taobao image of the yarn
$ yarn config set registry https://registry.npm.taobao.org --global
$ yarn config set disturl https://npm.taobao.org/dist --global
Copy code
React Native’s IOS environment is here.
Run the RN initialized application
Initialize a React Native app and launch it with the following commands
$ react-native init testApp
$ cd testApp
$ react-native run-ios
Copy code
In order to save time, an IOS simulator is started in advance. Normally, it will start automatically after the above command is executed.
Press win + D to open the emulator option to enable hot loading, then change the code and the page will automatically refresh.
Finally, I tested the performance of the virtual machine, then opened the project with XCode and started an 8 plus simulator. The two simulators running simultaneously with XCode, VSCode, Node terminal, and browser are still very smooth. It seems that allocating 4 G of memory is completely OK.
Enjoy it!😁