Аудиодрайвер Realtek HD — это широко используемый аудиодрайвер в Windows. Некоторые пользователи сообщают, что аудиоменеджер Realtek HD не работает или не отображается в Windows 11/10. Если вы столкнулись с этой проблемой, то этот пост вам поможет.

Аудиодрайвер Realtek HD помогает нам воспроизводить звук на нашем ПК с Windows. Представьте, что вы проигрываете аудиоклип и ничего не слышите. Динамики работают нормально, звук воспроизводится нормально. Мы пытаемся исправить это, увеличивая или уменьшая громкость и устраняя неполадки аудиодрайвера Realtek. Что делать, если вы не можете найти аудиодрайвер Realtek HD в диспетчере устройств? Как это исправить? Давайте посмотрим, как решить проблему.
Realtek HD Audio Manager не отображается в диспетчере устройств
Если Realtek HD Audio Manager не работает, не отображается или отсутствует в диспетчере устройств в Windows 11 или Windows 10, вы можете решить проблему, используя следующие методы.
- Обновите аудиодрайвер Realtek HD
- Показать скрытые устройства
- Добавить устаревшее оборудование
- Переустановите драйверы
- Сбросить BIOS по умолчанию
Давайте подробно рассмотрим каждый метод.
1]Обновите аудиодрайвер Realtek HD.
Если Realtek HD Audio Manager не работает на вашем компьютере, это может быть связано с устаревшими драйверами или отсутствием файлов. Первое, что вы должны попробовать, это обновить аудиодрайверы Realtek HD в диспетчере устройств. Также проверьте наличие обновлений Windows в приложении «Настройки», с помощью которого мы можем обновлять драйверы автоматически.
2]Показать скрытые устройства
Если вы не видите Realtek HD Audio Manager, есть вероятность, что Realtek HD Audio Manager или связанные с ним устройства скрыты по ошибке. Вы должны выбрать опцию отображения скрытых устройств в диспетчере устройств. Скрытые устройства будут видны, и вы можете найти в них Realtek HD Audio Manager.
3]Добавить устаревшее оборудование
Если Realtek HD Audio Manager отсутствует в диспетчере устройств, вы можете исправить это, используя функцию добавления устаревшего оборудования. Откройте Диспетчер устройств на своем ПК и выберите Звуковые, видео и игровые контроллеры. Затем нажмите «Действие» в строке меню и выберите «Добавить устаревшее оборудование».
Затем следуйте инструкциям на экране и выберите «Поиск и автоматическая установка оборудования» (рекомендуется), затем следуйте инструкциям и установите устройство вручную.
Это может решить проблему с Realtek HD Audio Manager.
4]Переустановите драйверы
Если проблема все еще не устранена, вам необходимо удалить аудиодрайвер Realtek HD и переустановить его вручную, чтобы решить проблему. Это решит проблему, и вы сможете легко воспроизводить звук с помощью аудиоустройств Realtek HD.
5]Сбросить BIOS по умолчанию
Иногда изменения, которые вы вносите или вносите в настройки BIOS, могут повлиять на устройства, которые вы используете на своем ПК. Единственный способ исправить проблемы, возникающие в этом экземпляре, — это сбросить BIOS до значений по умолчанию. После этого вы сможете без проблем использовать Realtek HD Audio Manager.
Почему мой Realtek не отображается в диспетчере устройств?
Может быть множество причин, по которым устройства Realtek не отображаются в диспетчере устройств. Возможно, устройства скрыты, драйверы устарели или повреждены, или некоторые настройки в BIOS повлияли на это. Вы можете легко решить проблему, используя описанные выше методы.
Диспетчер звука Realtek HD: «В этом пакете драйверов не поддерживался драйвер»
Когда вы видите значок «В этом пакете драйверов не поддерживался ни один драйвер”При попытке использовать аудиоменеджер Realtek HD, вам необходимо обновить драйверы или переустановить их, если необходимо установить правильные драйверы для вашего ПК.
.
by Loredana Harsana
Loredana is a passionate writer with a keen interest in PC software and technology. She started off writing about mobile phones back when Samsung Galaxy S II was… read more
Published on October 26, 2022
- Downloading the Realtek audio driver on your Windows 11 system helps boost the audio quality and enhances connectivity, along with various other benefits.
- Learn how to download the driver for HP, Dell, Lenovo, and ASUS devices.
- Also, find out how to fix issues with the Realtek audio driver in Windows 11.
XINSTALL BY CLICKING THE DOWNLOAD FILE
This software will keep your drivers up and running, thus keeping you safe from common computer errors and hardware failure. Check all your drivers now in 3 easy steps:
- Download DriverFix (verified download file).
- Click Start Scan to find all problematic drivers.
- Click Update Drivers to get new versions and avoid system malfunctionings.
- DriverFix has been downloaded by 0 readers this month.
Realtek audio drivers are a useful piece of software that helps enhance the sound output and improve the system’s connectivity with external audio devices. Owing to these benefits, you may want to download the Realtek audio driver in Windows 11.
But many are clueless as to how to get Realtek audio driver installed on their computer. And with Windows 11 still in the early stages, this is expected.
If you too had been trying to download and install the Realtek audio driver in Windows 11, read the following sections to find out how you can do that.
How does installing the Realtek audio driver help in Windows 11?
Drivers, as we know, are critical for the effective functioning of every piece of hardware connected to the PC. Be it keyboard, mouse, printer, or the graphics and sound card.
First, the Realtek audio driver is one of the most user-friendly options available out there. Apart from that, it delivers high-quality audio not just with the built-in speakers and microphones but also if you connect external ones.
And the best part, you are unlikely to encounter issues with the connectivity. On the contrary, the driver would actually help improve it. Also, with each driver update, you are likely to see better performance and patches for previously known bugs.
So, let’s now see how you can download the Realtek audio driver in Windows 11.
How can I install the Realtek audio driver in Windows 11?
To make things easier, we will take up individual manufacturers in the following sections, and you can directly head to the one that you are using.
Also, we will be manually searching for the driver. But, several manufacturers offer a tool to automatically detect the device and list out the available drivers for it and you can use it, if available.
1. Realtek audio driver for HP in Windows 11
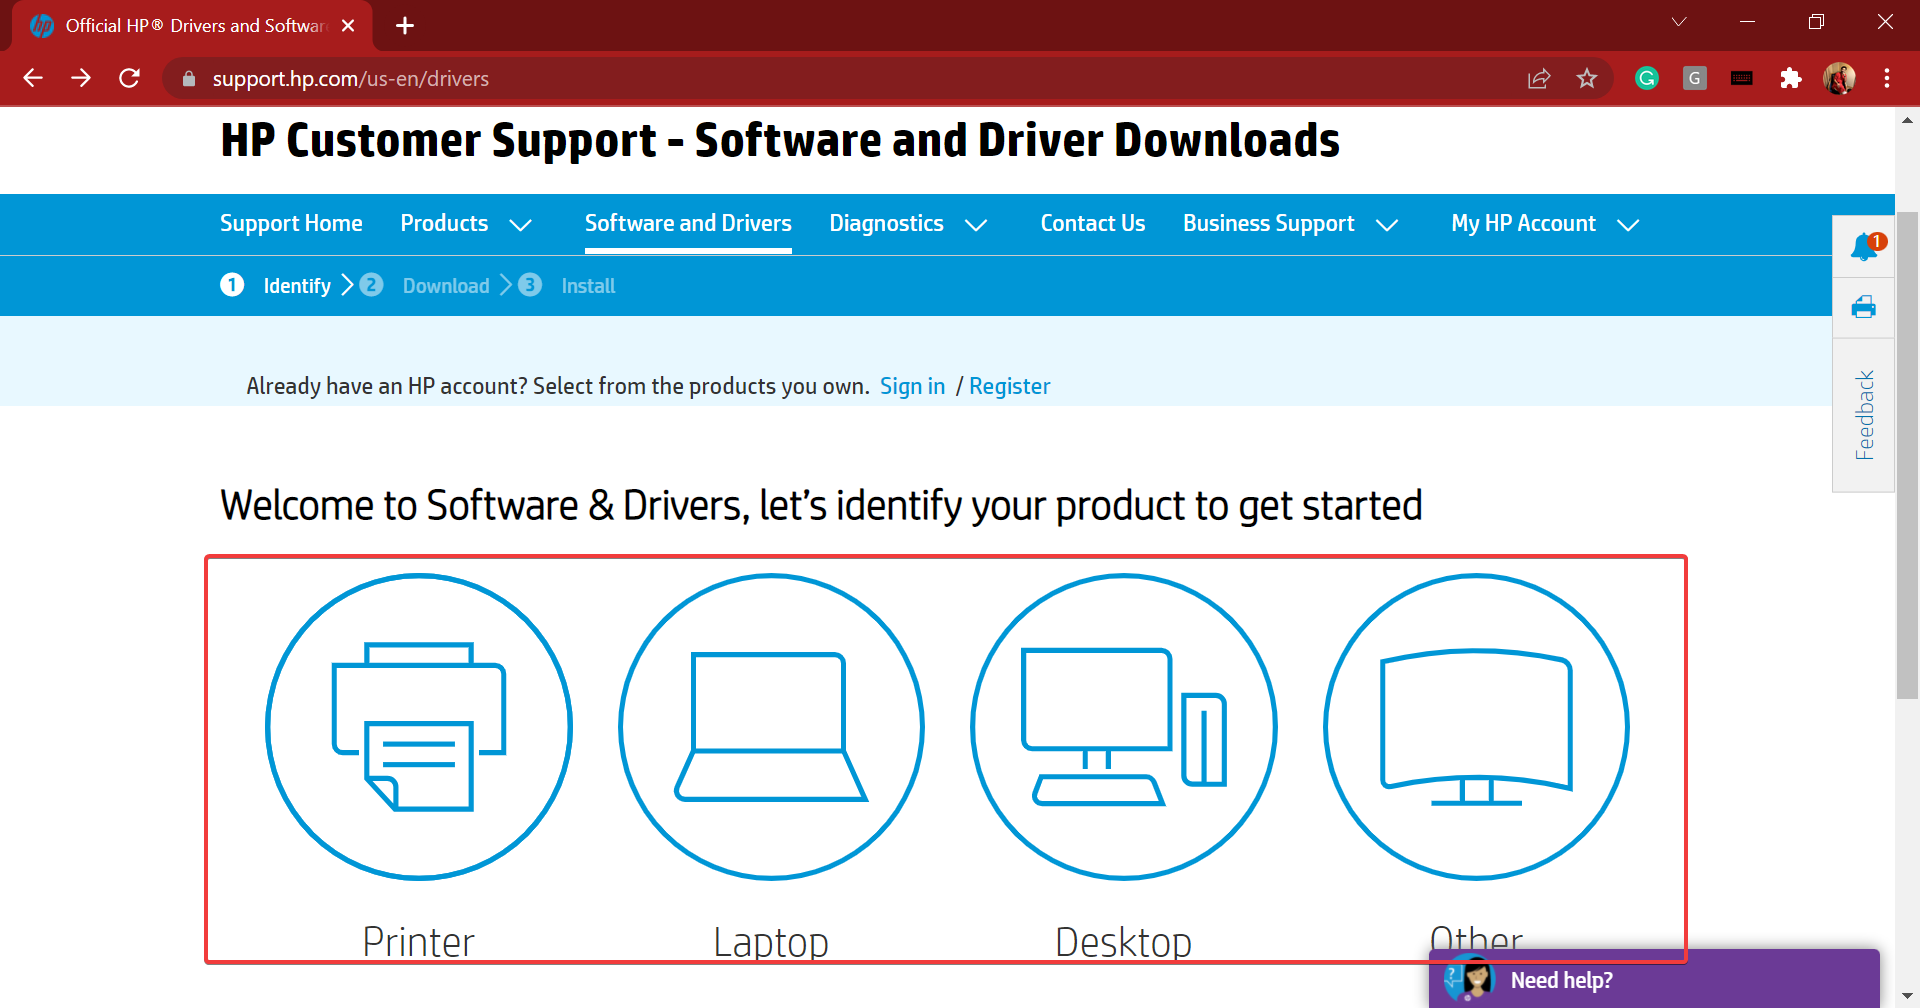
- Go to the driver section of HP’s official website, and select your device from the option listed here.

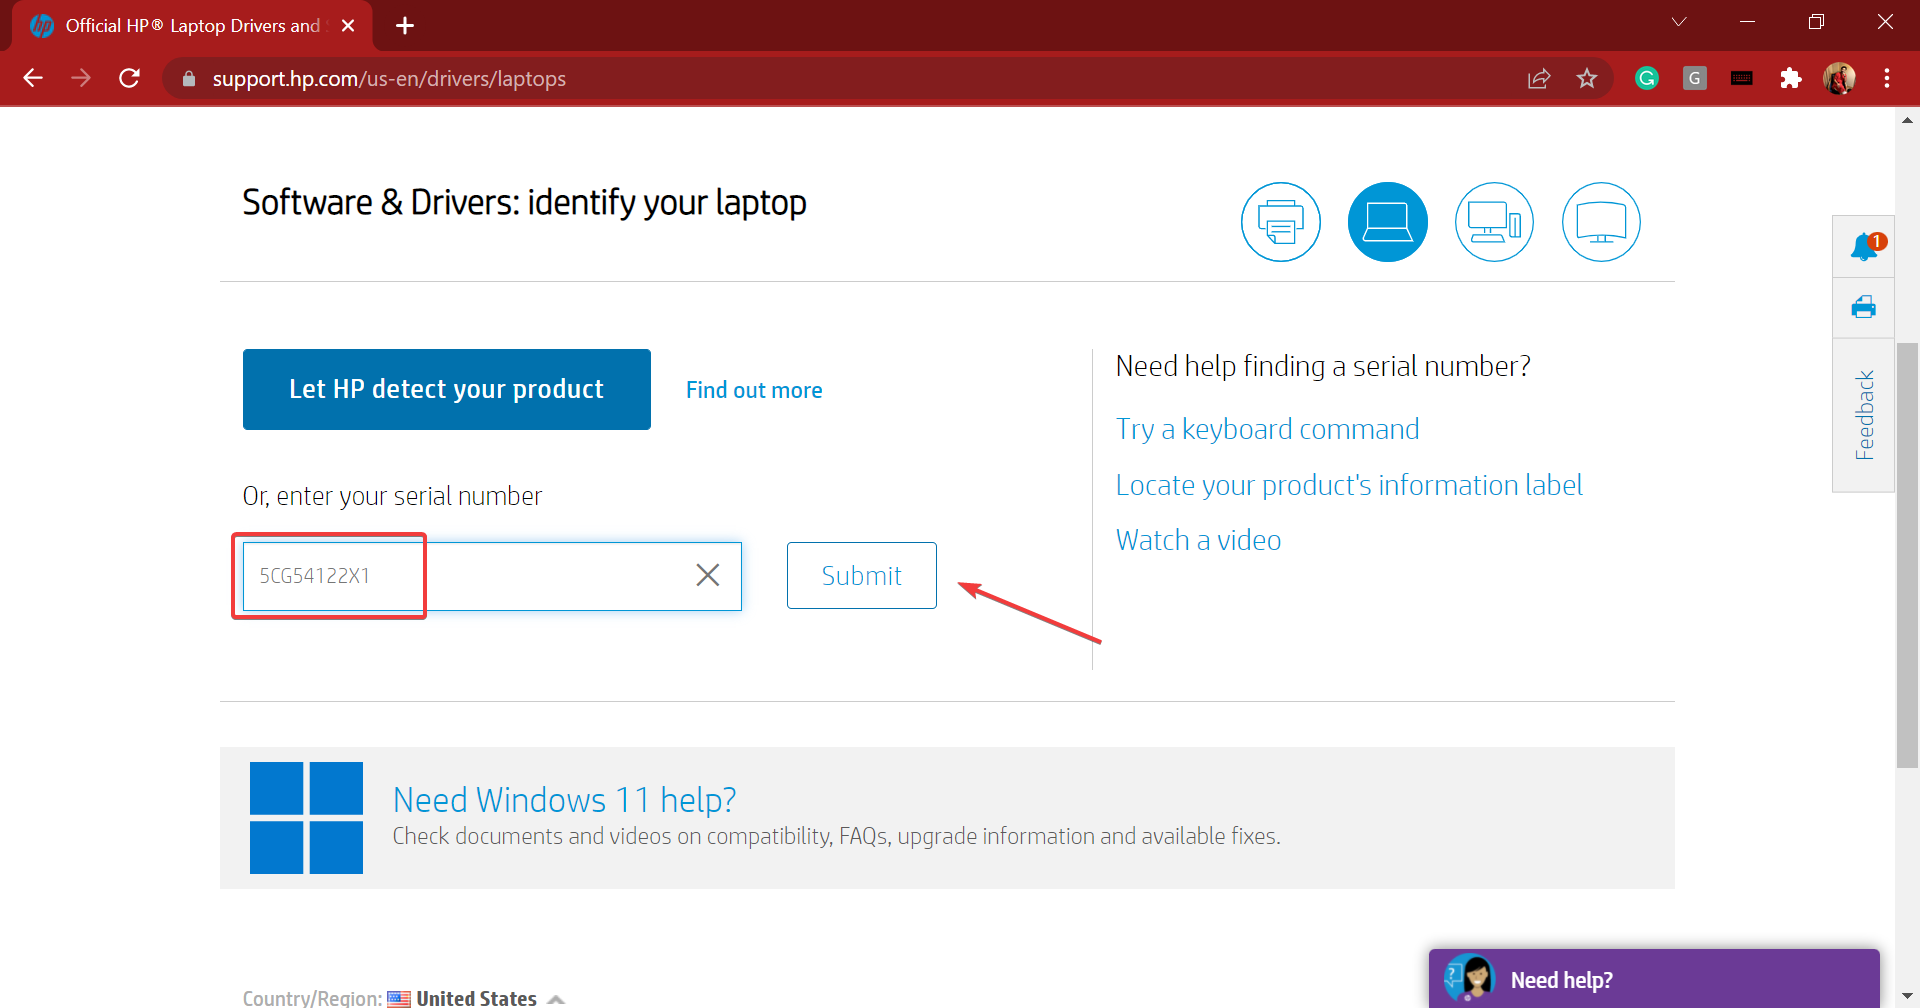
- Now, enter the product name or serial number in the provided text field, and click on the Submit button.
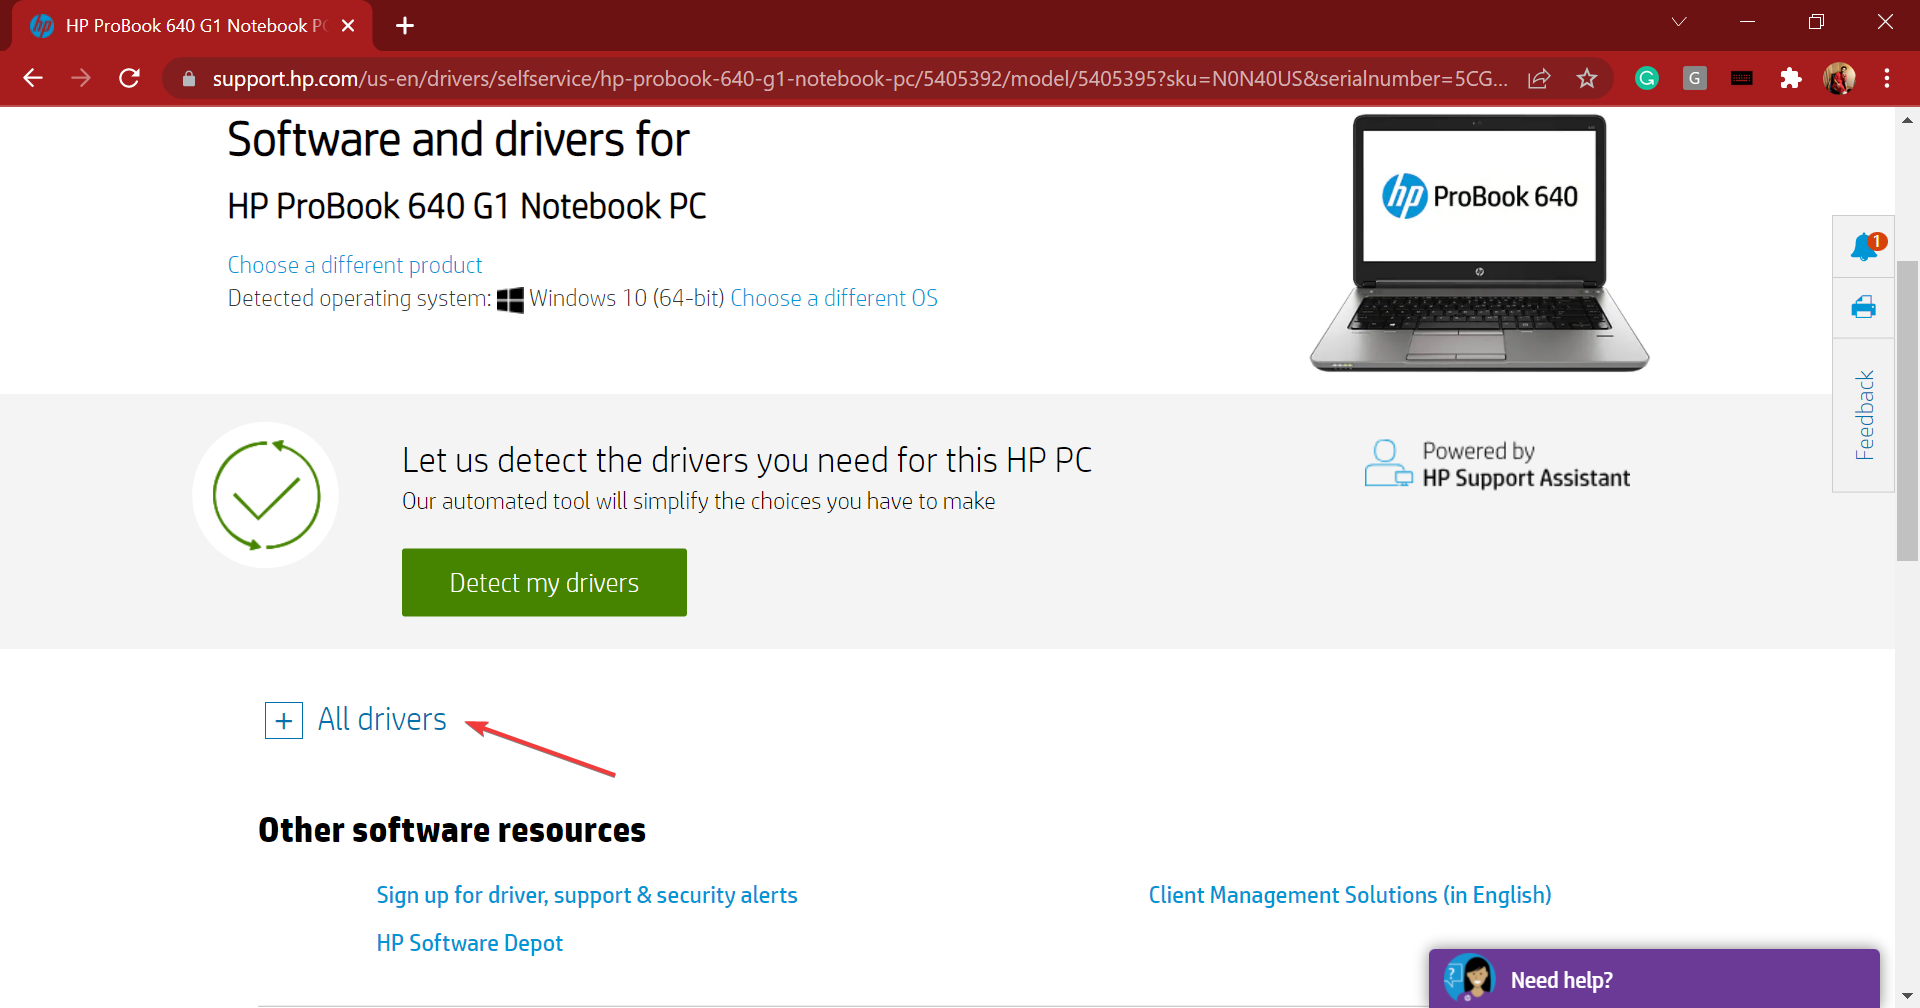
- Click on the All drivers entry to check out the various available ones. Also, make sure that the latest iteration is selected as the operating system. In case it isn’t, click on Choose a different OS and select Windows 11.
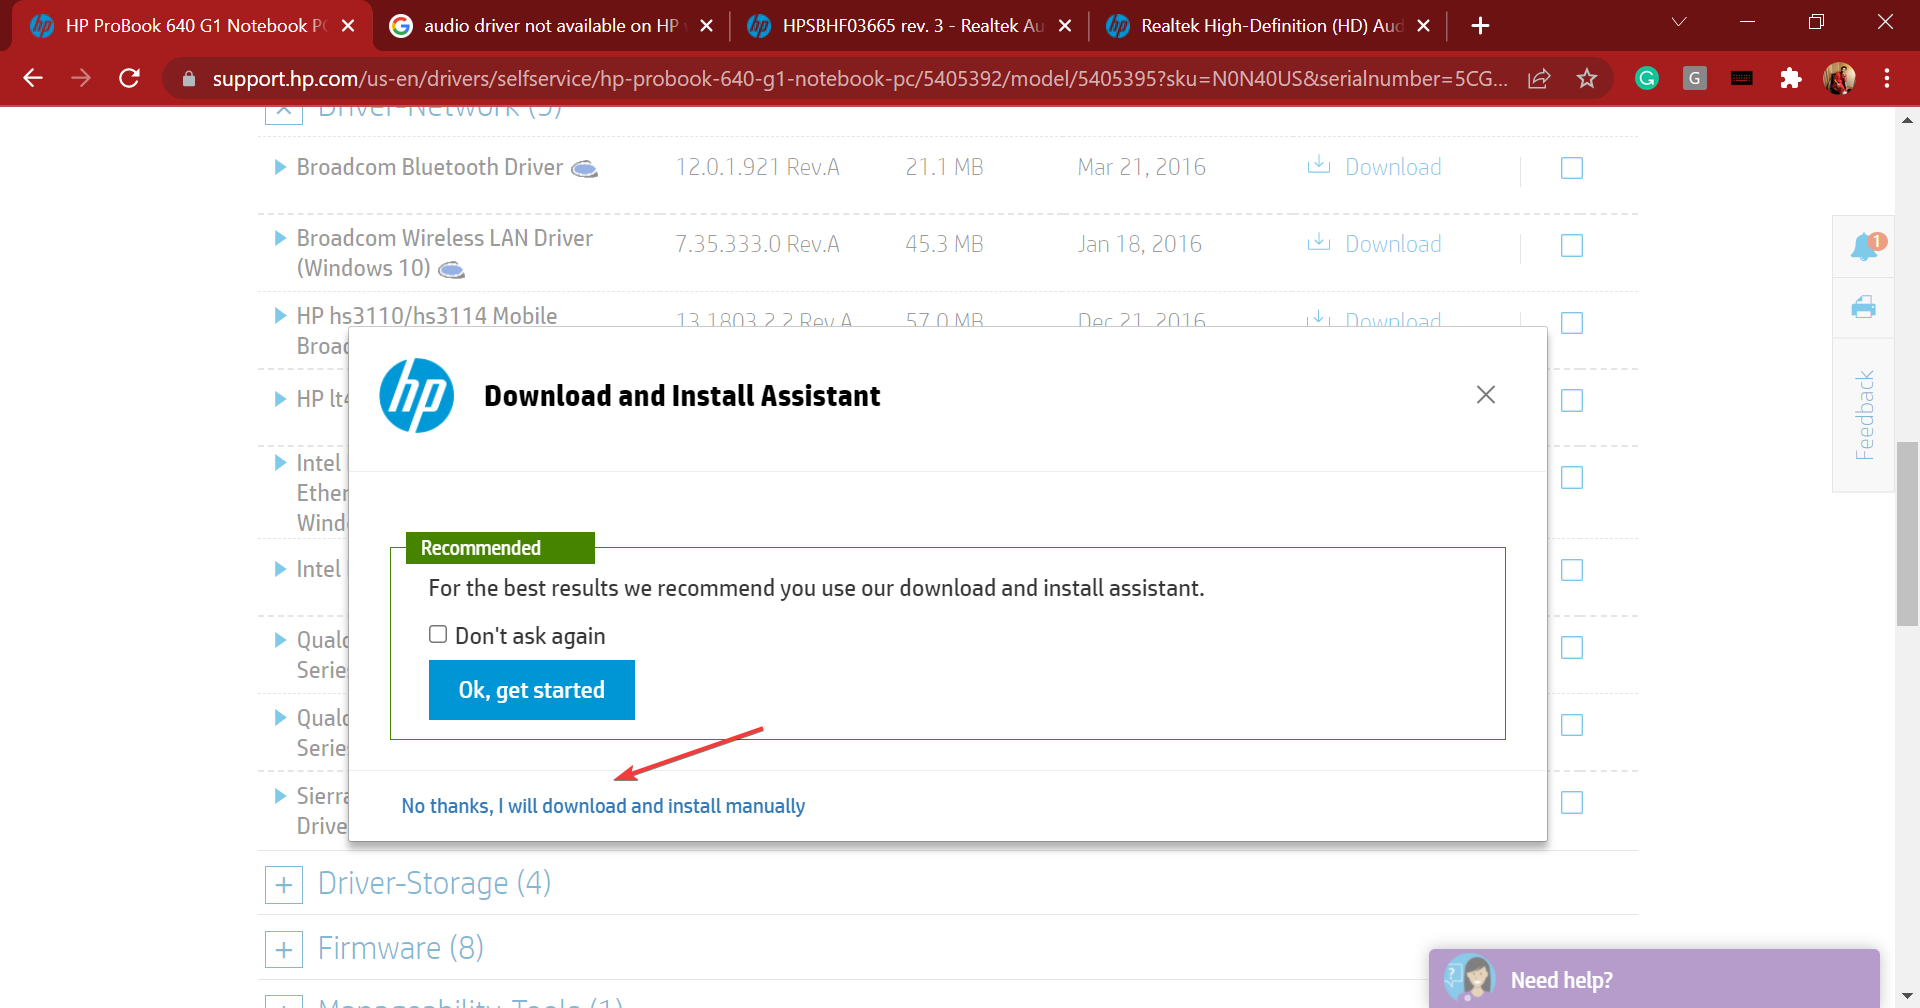
- Now, locate the Realtek audio driver, and click on the Download option next to it.
- You can now download the install assistant or click on No thanks, I will download and install manually. We choose the latter.
- Once the setup is downloaded, click on it to launch the installer.
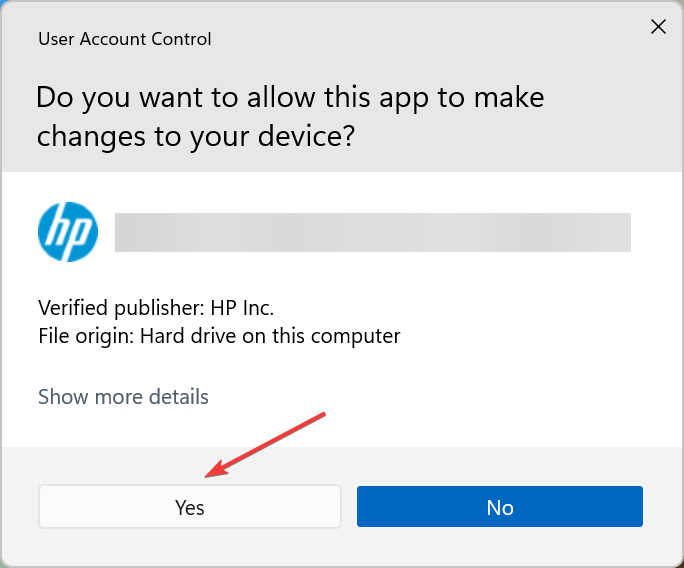
- Click Yes on the UAC (User Account Control) prompt that pops up.

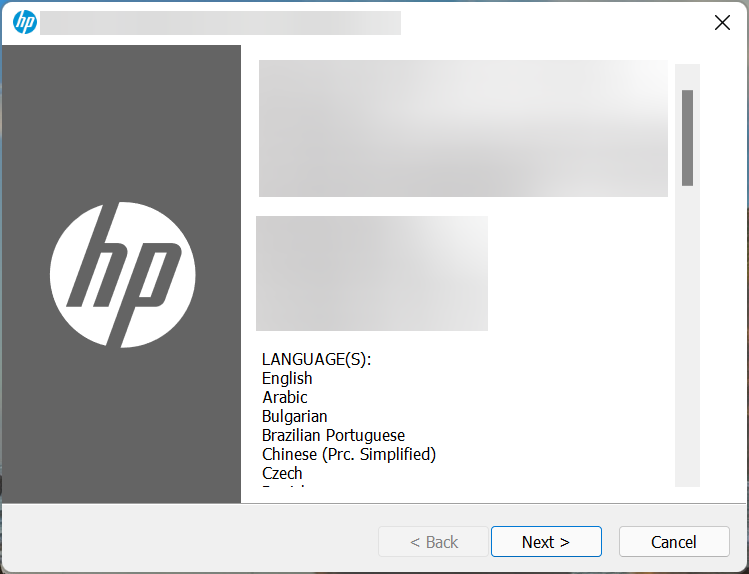
- Now, follow the on-screen instructions to complete the installation process, and restart the computer once it’s done for the changes to fully come into effect.


Once done with the steps listed here, you would have the Realtek audio driver downloaded and running in Windows 11.
Also, if you don’t want to go through the trouble of manually searching for the driver, use a reliable third-party app. We recommend using DriverFix, a dedicated tool that will automatically download and update the relevant drivers on your system.
2. Realtek audio driver for Dell in Windows 11
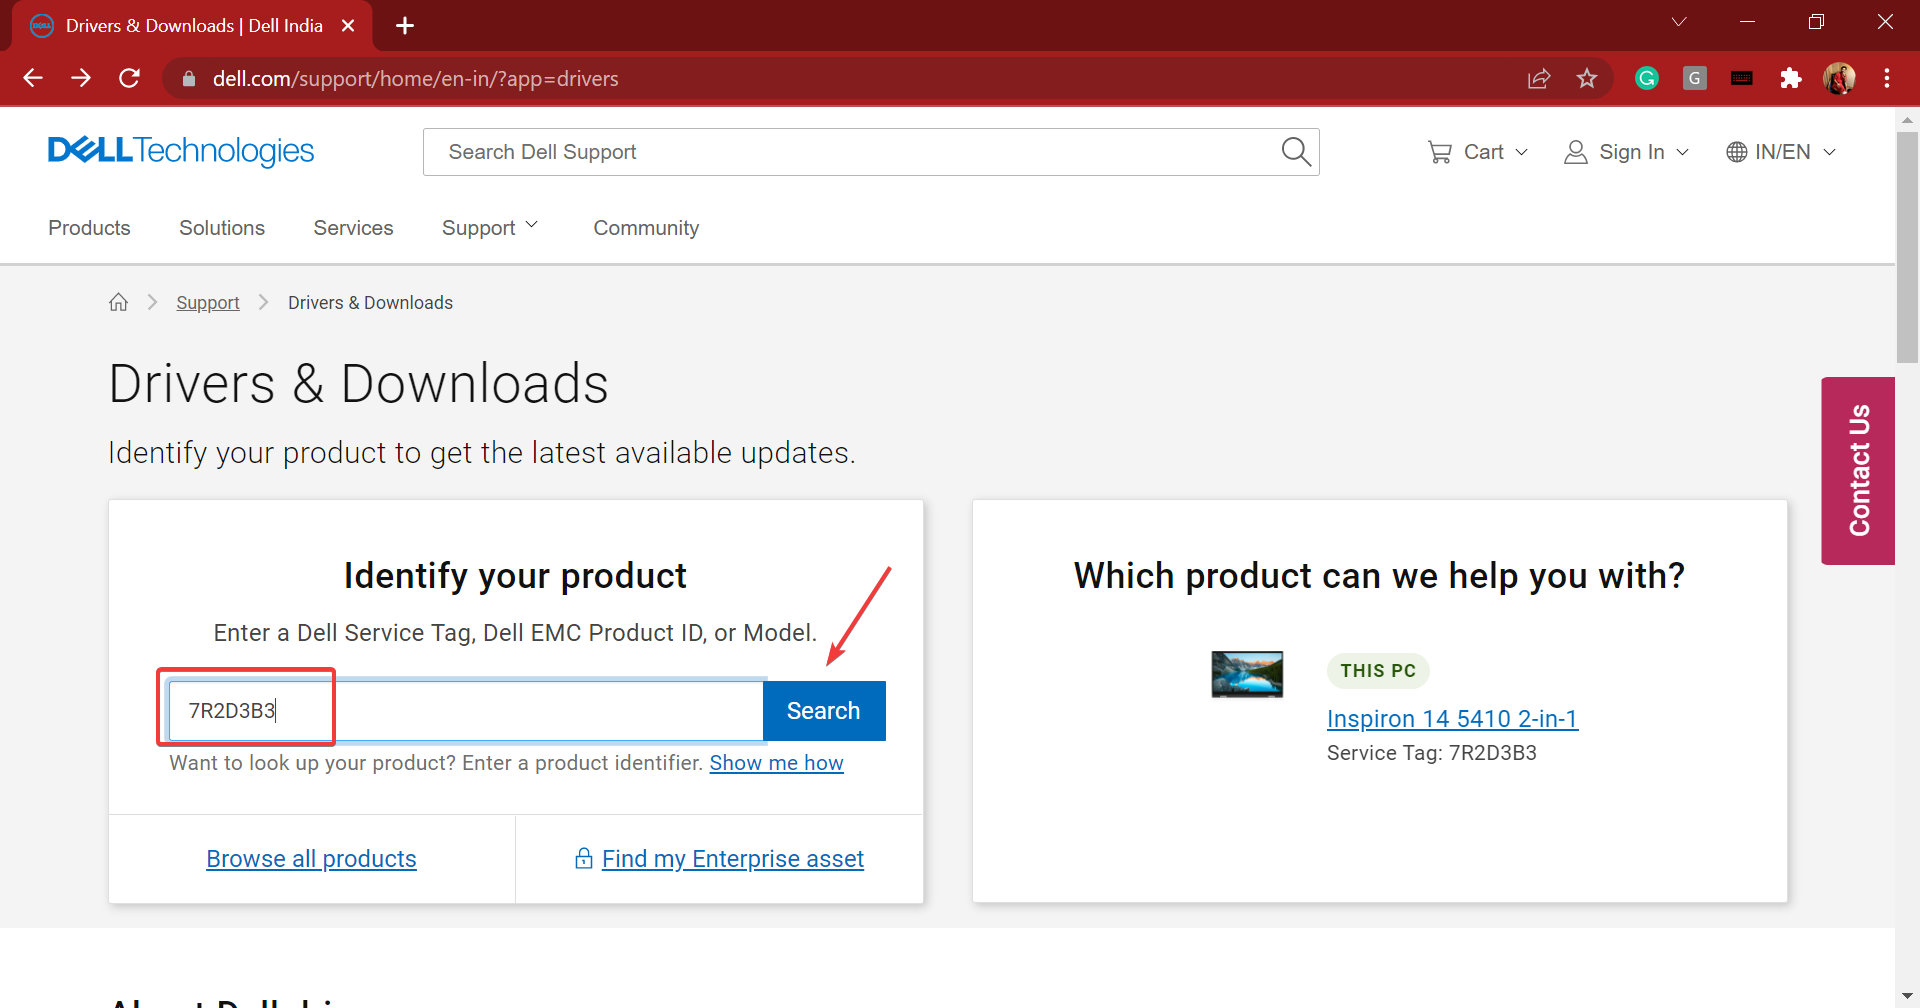
- Go to the driver dowloads section on Dell’s website, enter a product identifier in the designated text field, and click on Search.
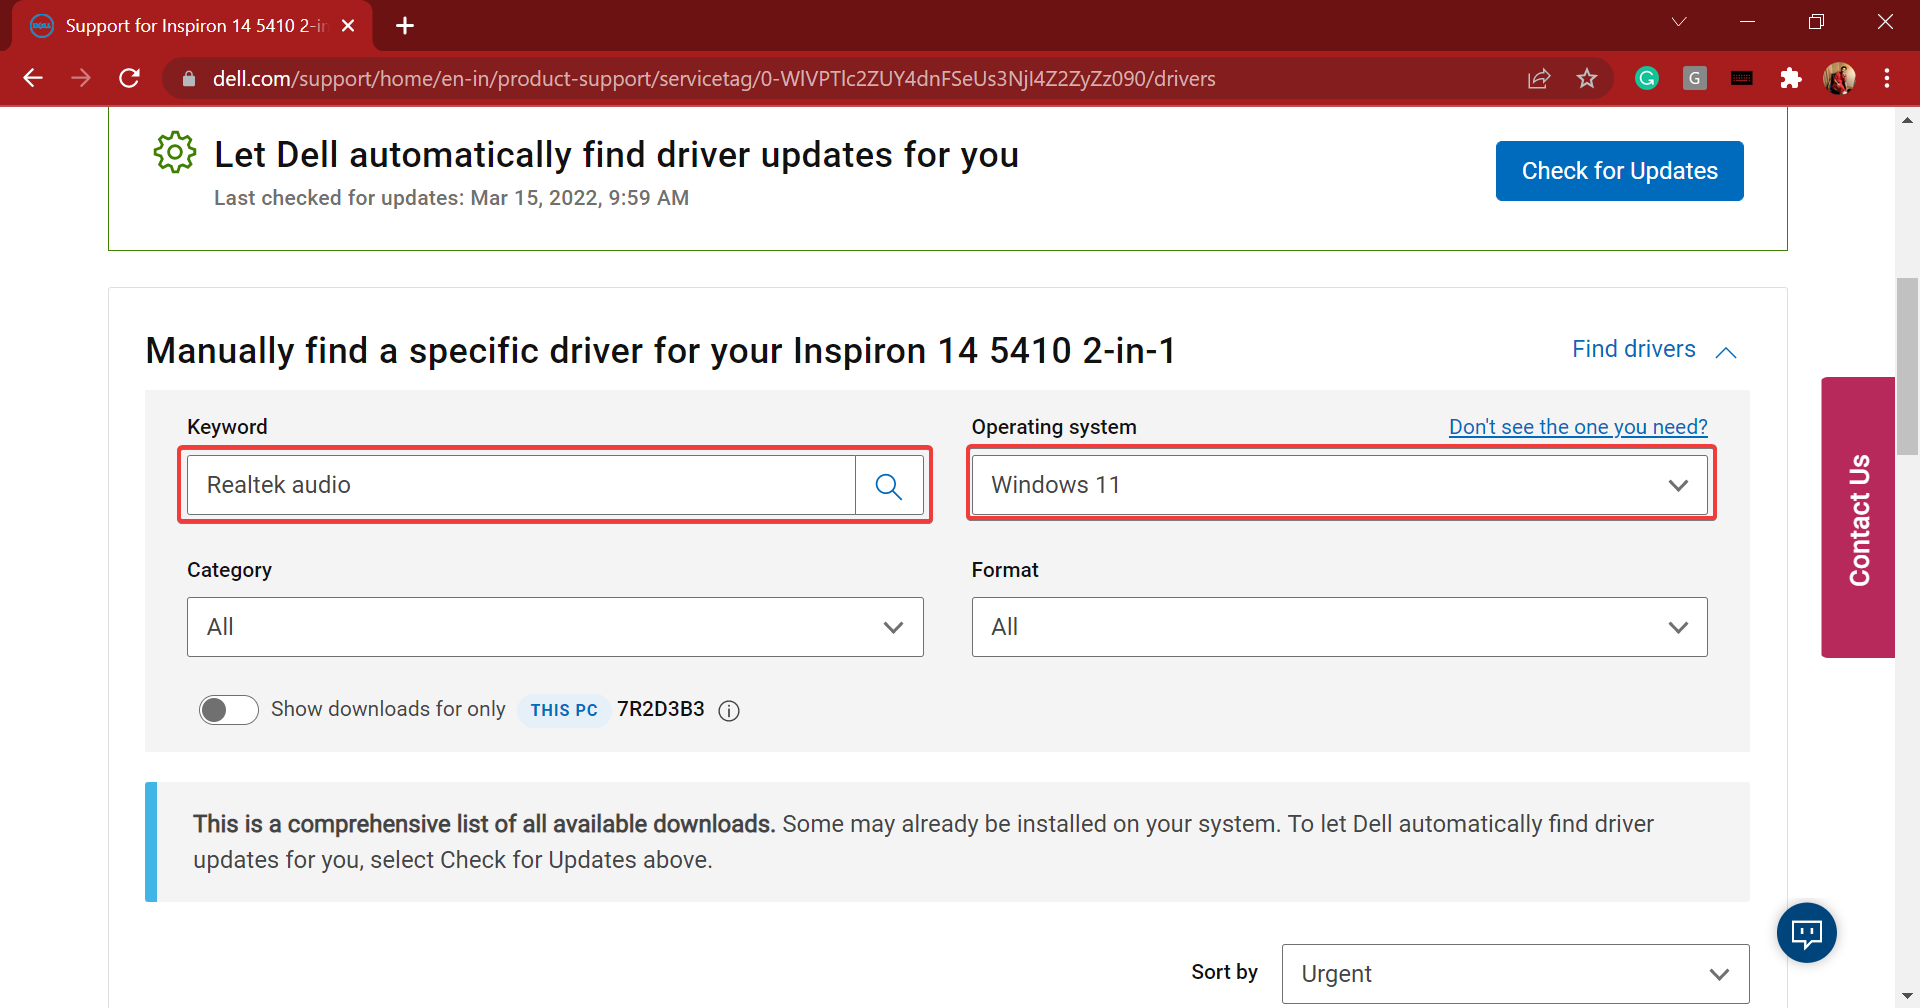
- Now, click on the Find drivers option to manually search for the Realtek audio driver.
- Enter Realtek audio in the Keyword text field and choose Windows 11 from the Operating system dropdown menu.
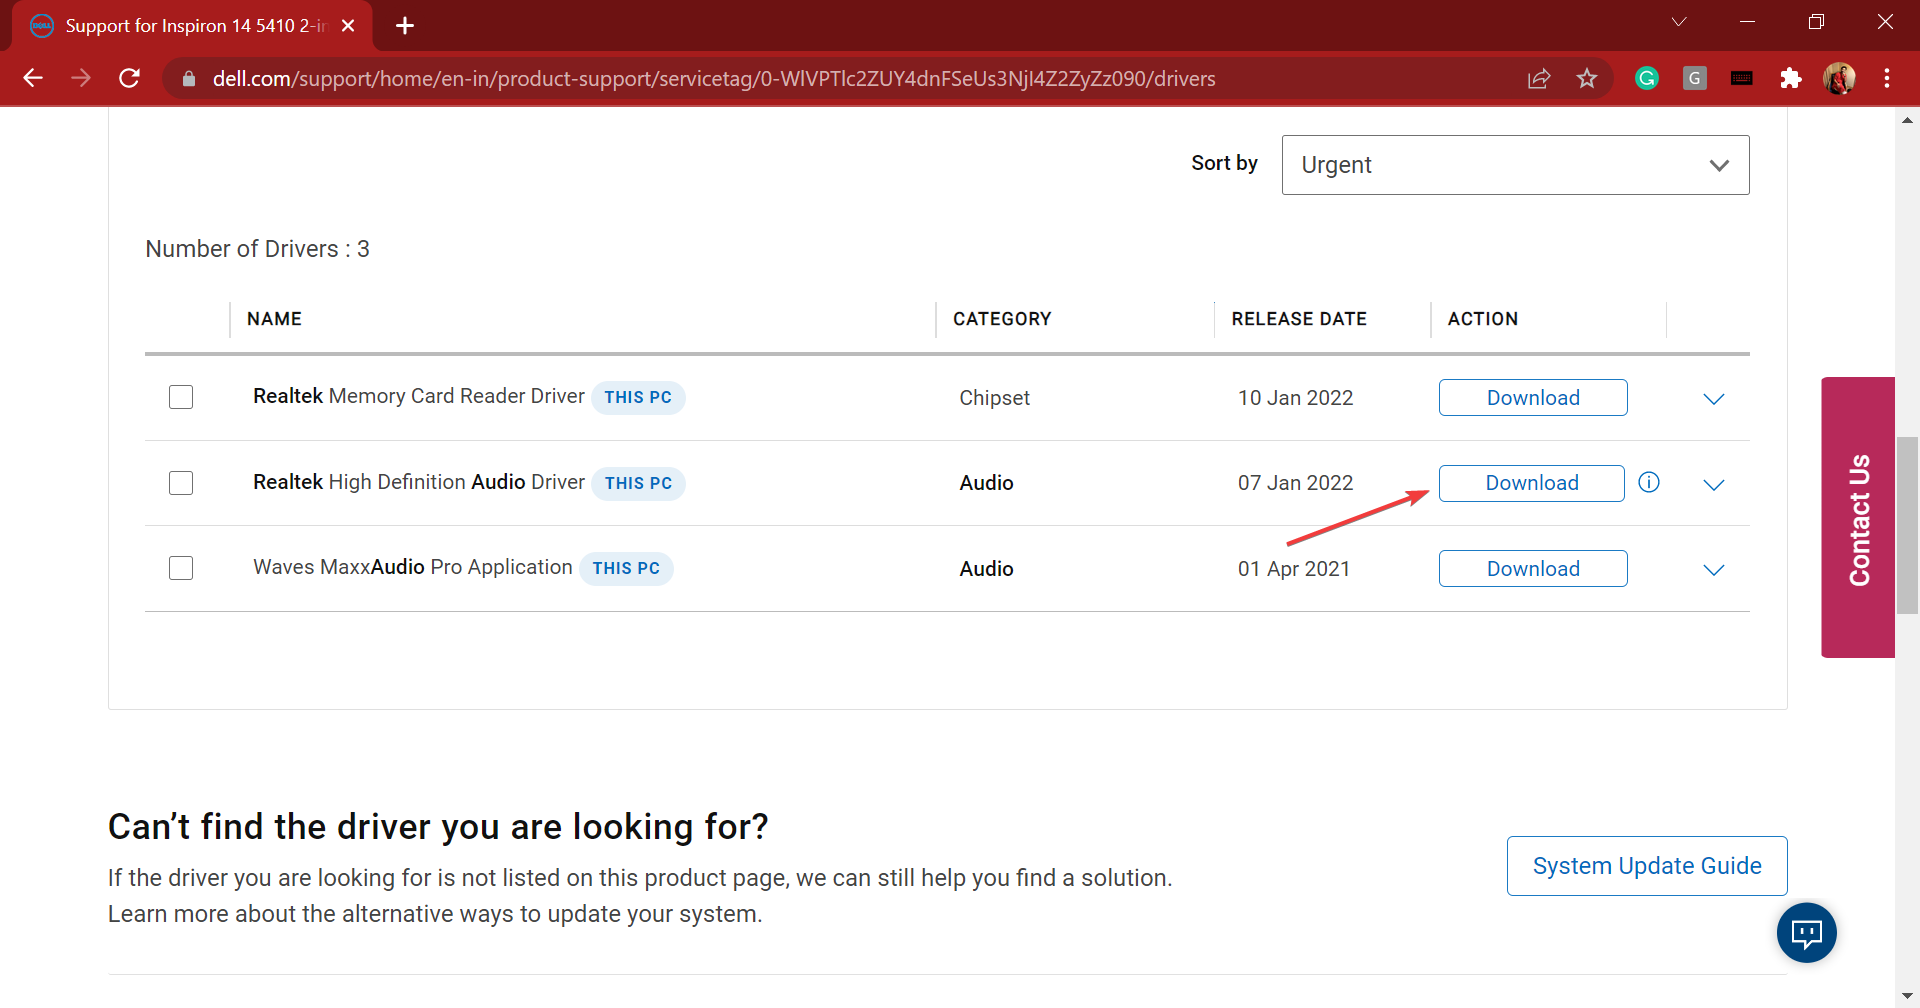
- Now, scroll down and click on the Download button next to Realtek audio driver.
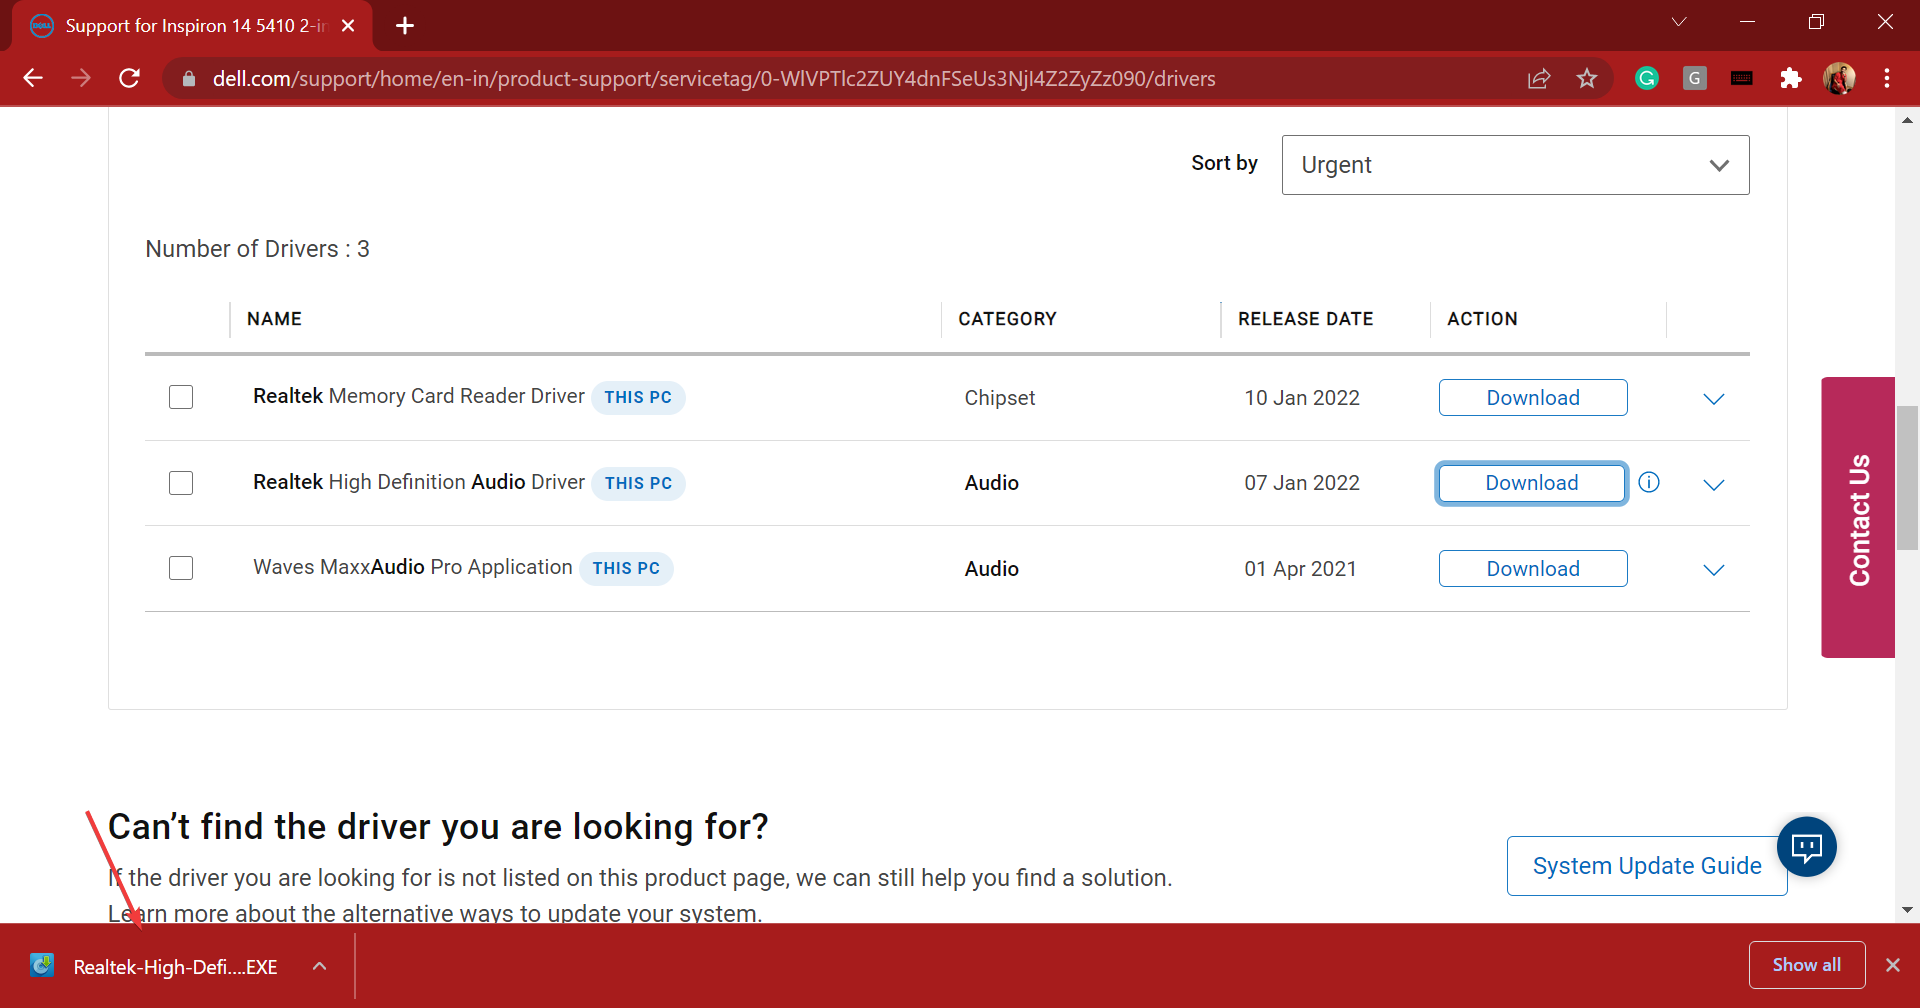
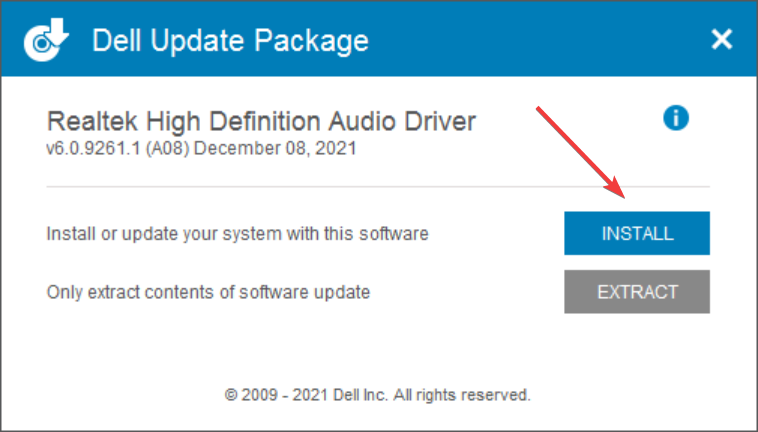
- Once the setup is downloaded, click on it to launch the installer.
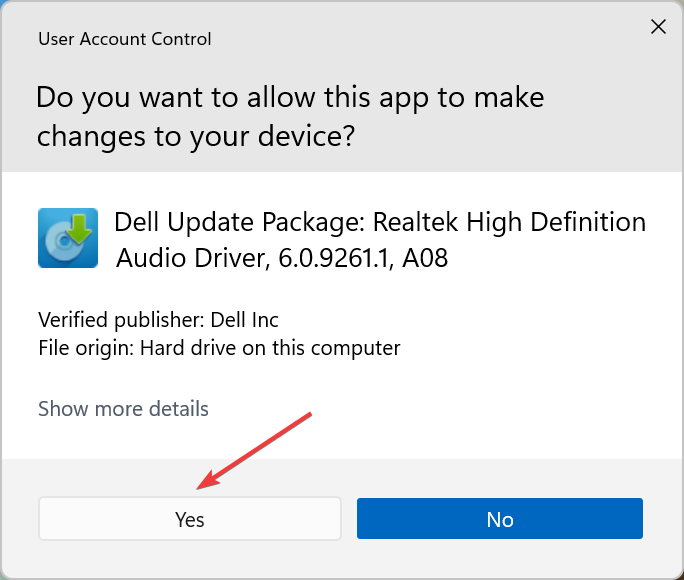
- Click Yes on the UAC (User Account Control) prompt that pops up.

- Next, click Install and follow the on-screen instructions to complete the process.


Once you have downloaded and installed the Realtek audio driver in Windows 11, restart the computer for the changes to come into effect, and you are good to go.
- How to reinstall the audio driver in Windows 11
- How to download ASUS Realtek HD Audio Manager in Windows 11
- FIX: No sound output devices found in Windows 11
- Fix: Windows 11’s audio crackling & sound distortion
3. Realtek audio driver for Lenovo
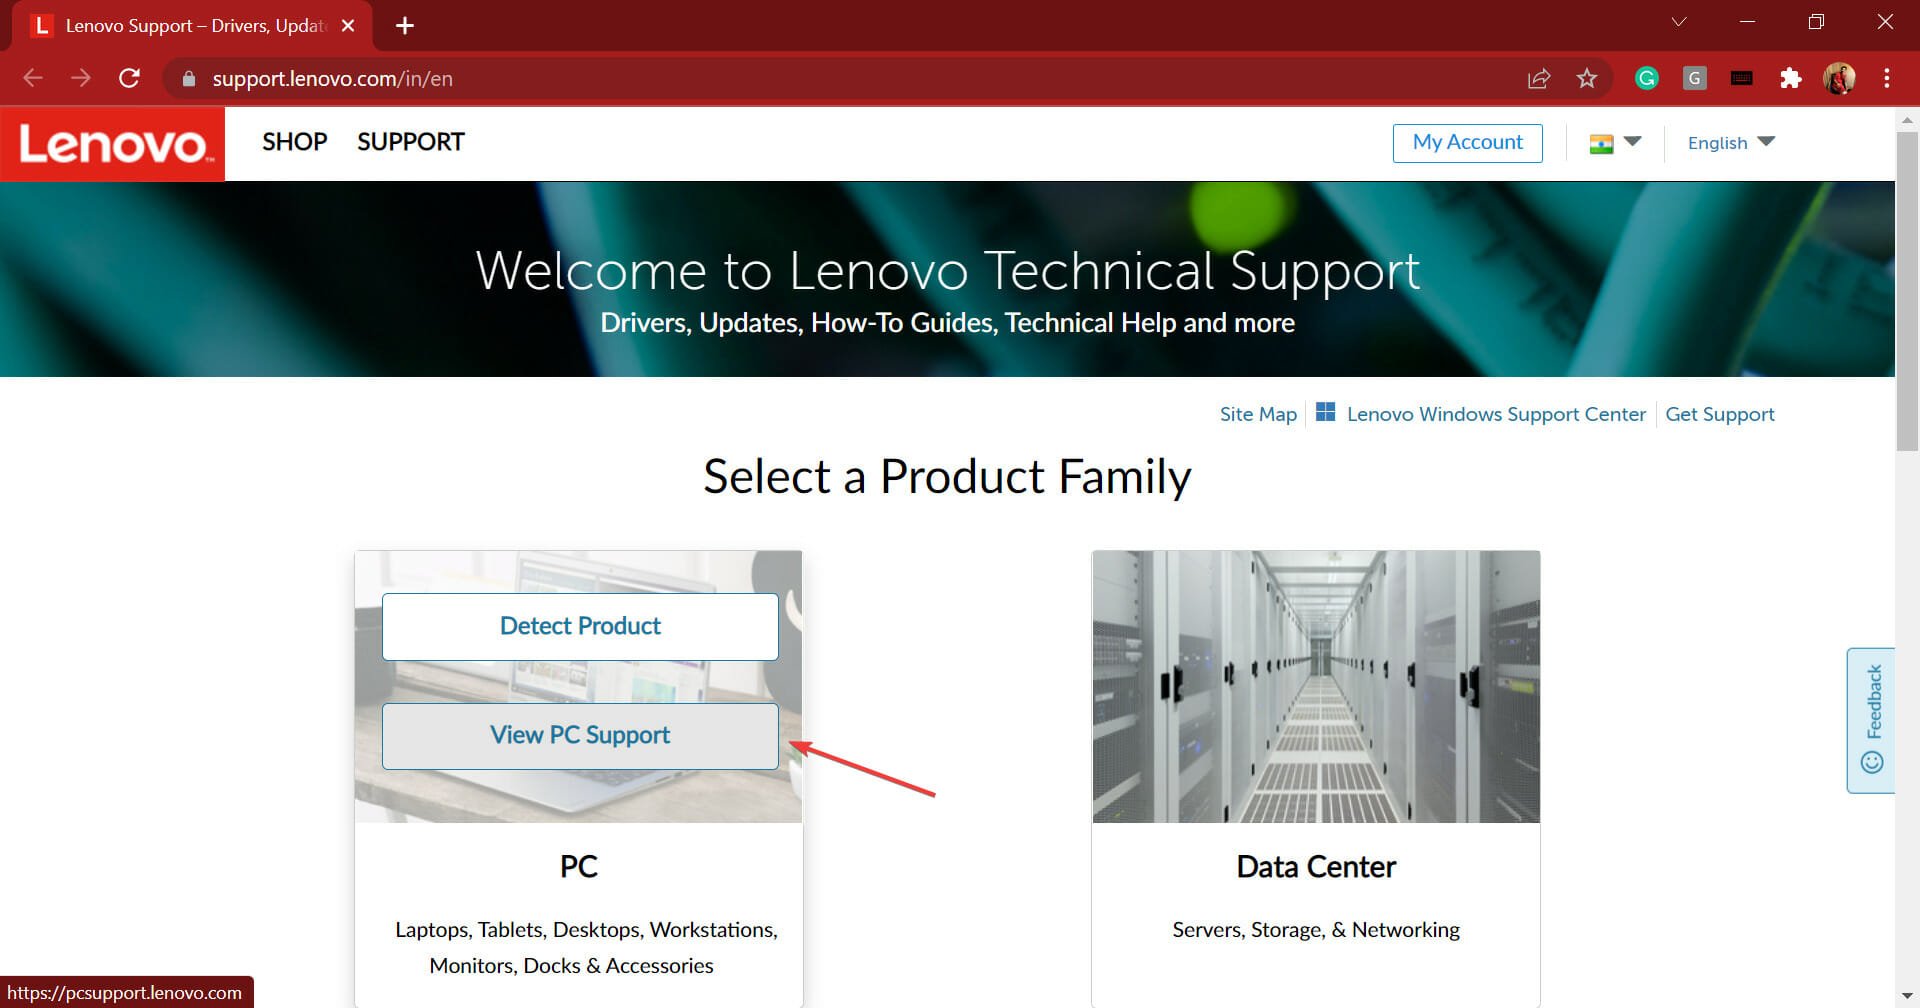
- Go to the technical support page for Lenovo, hover the cursor over PC from the options listed here, and select View PC Support.
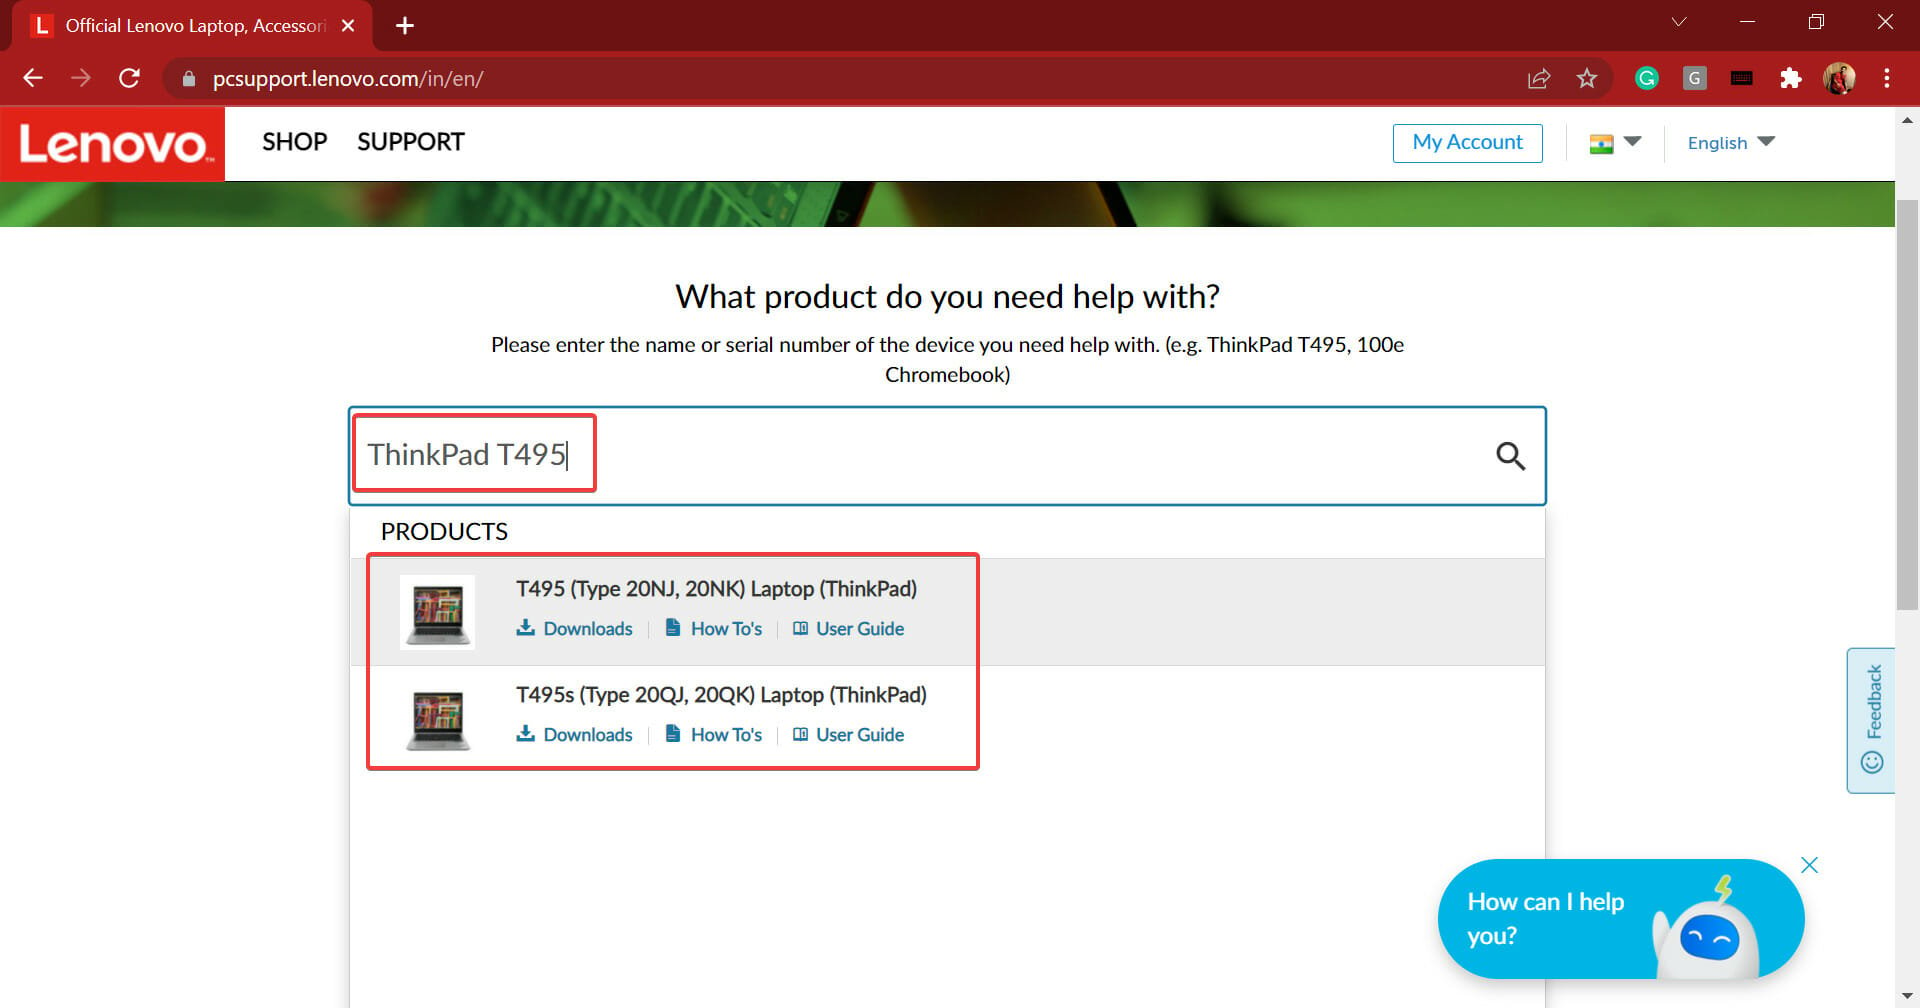
- Now, enter the device name in the designated text field and select the relevant option once it appears in the search results.
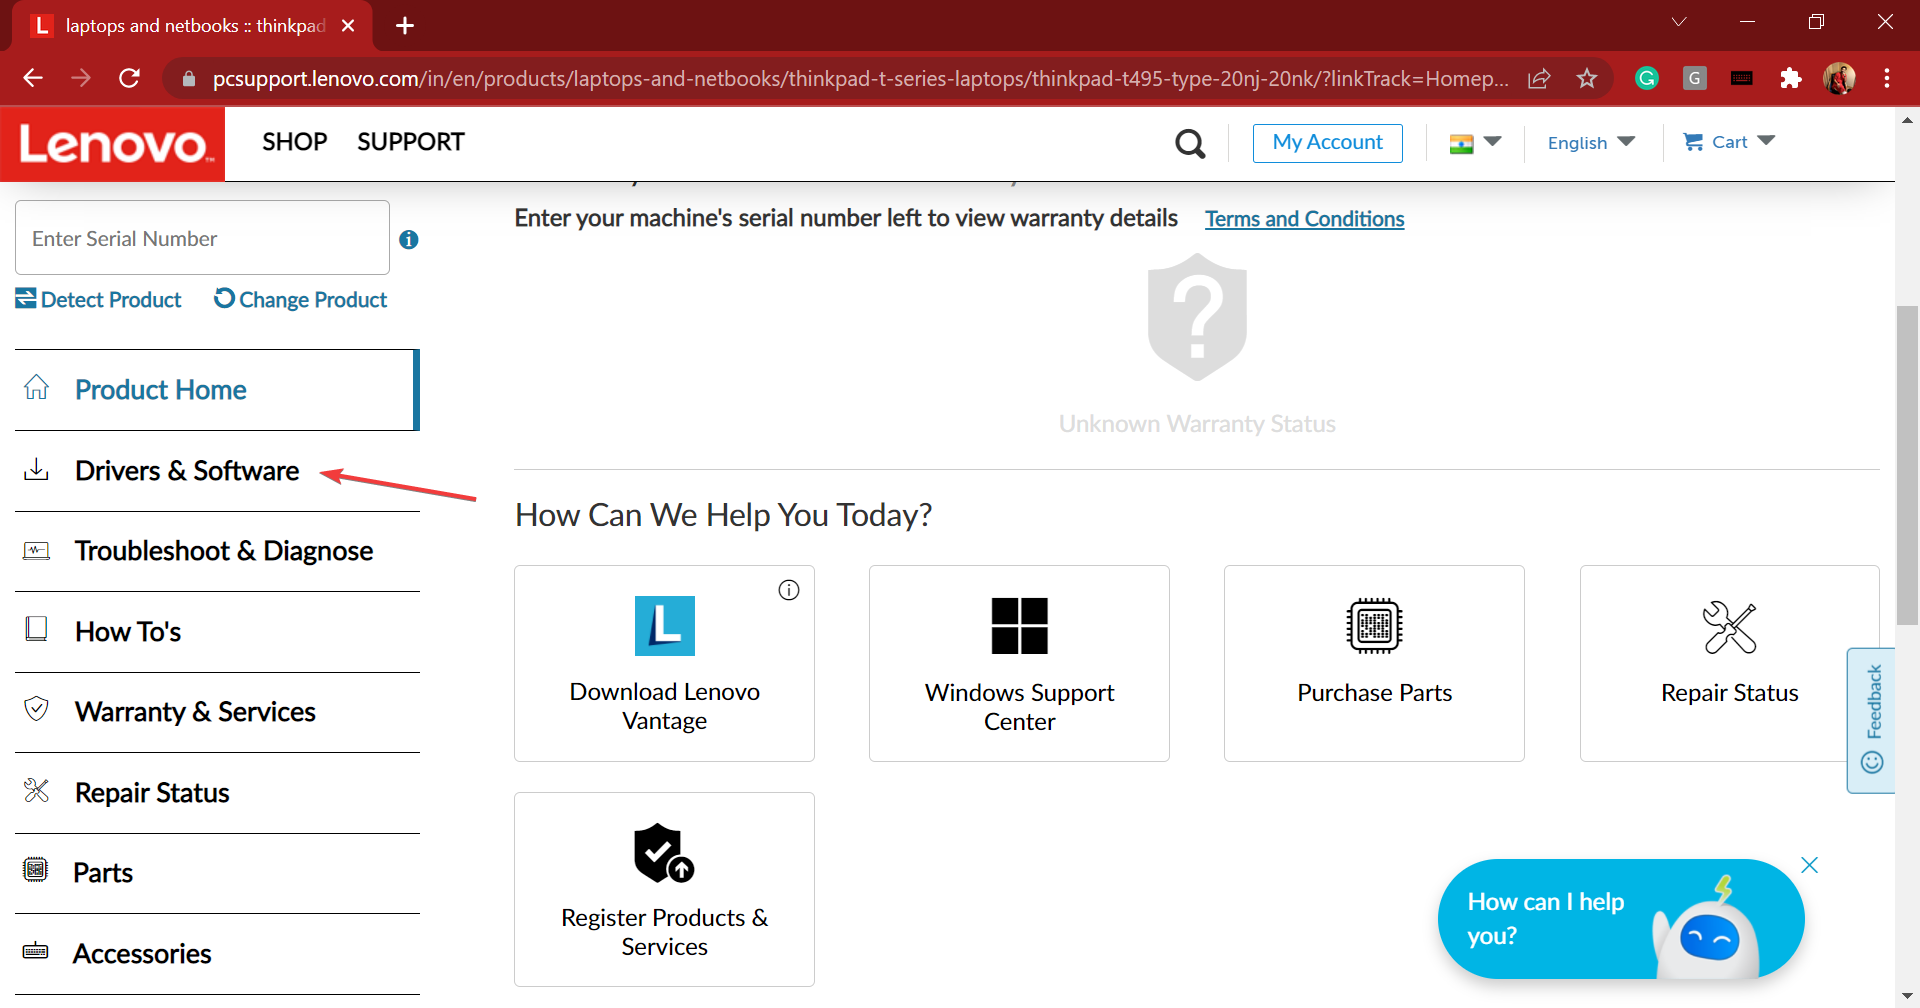
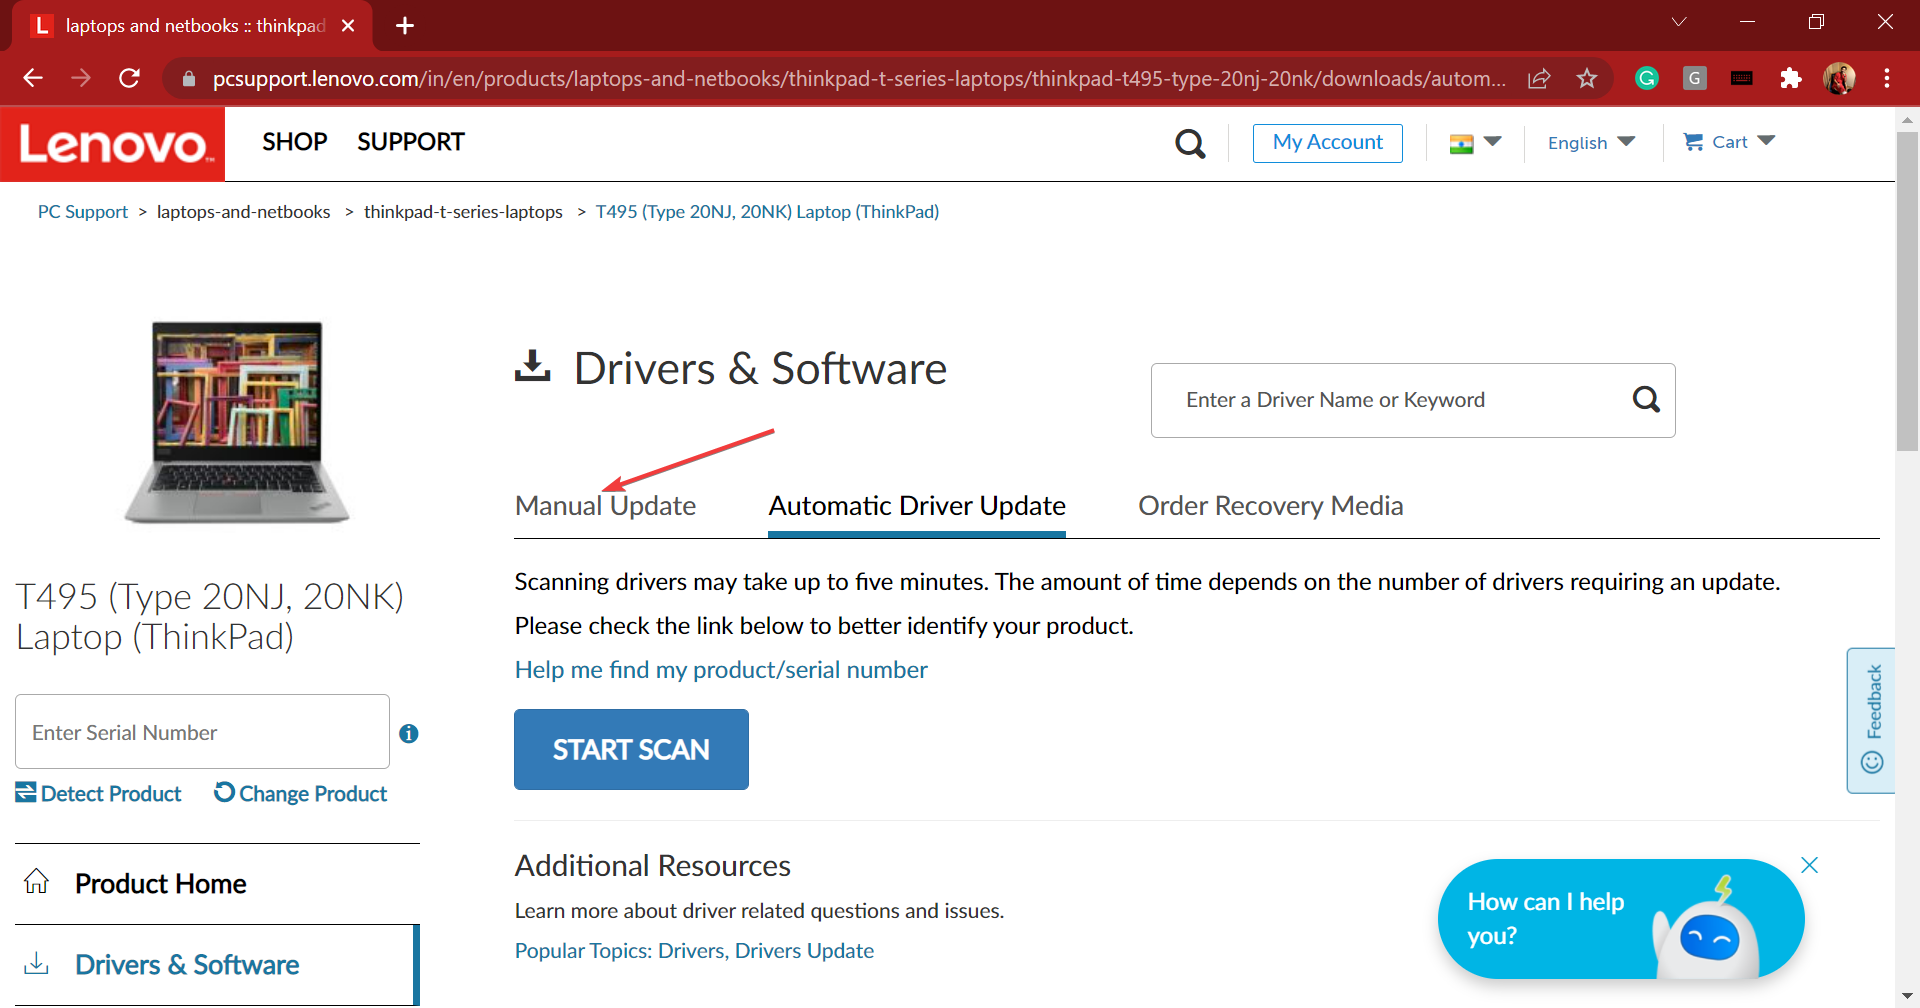
- Select Drivers & Software from the navigation pane on the left.
- Now, select the Manual update tab.
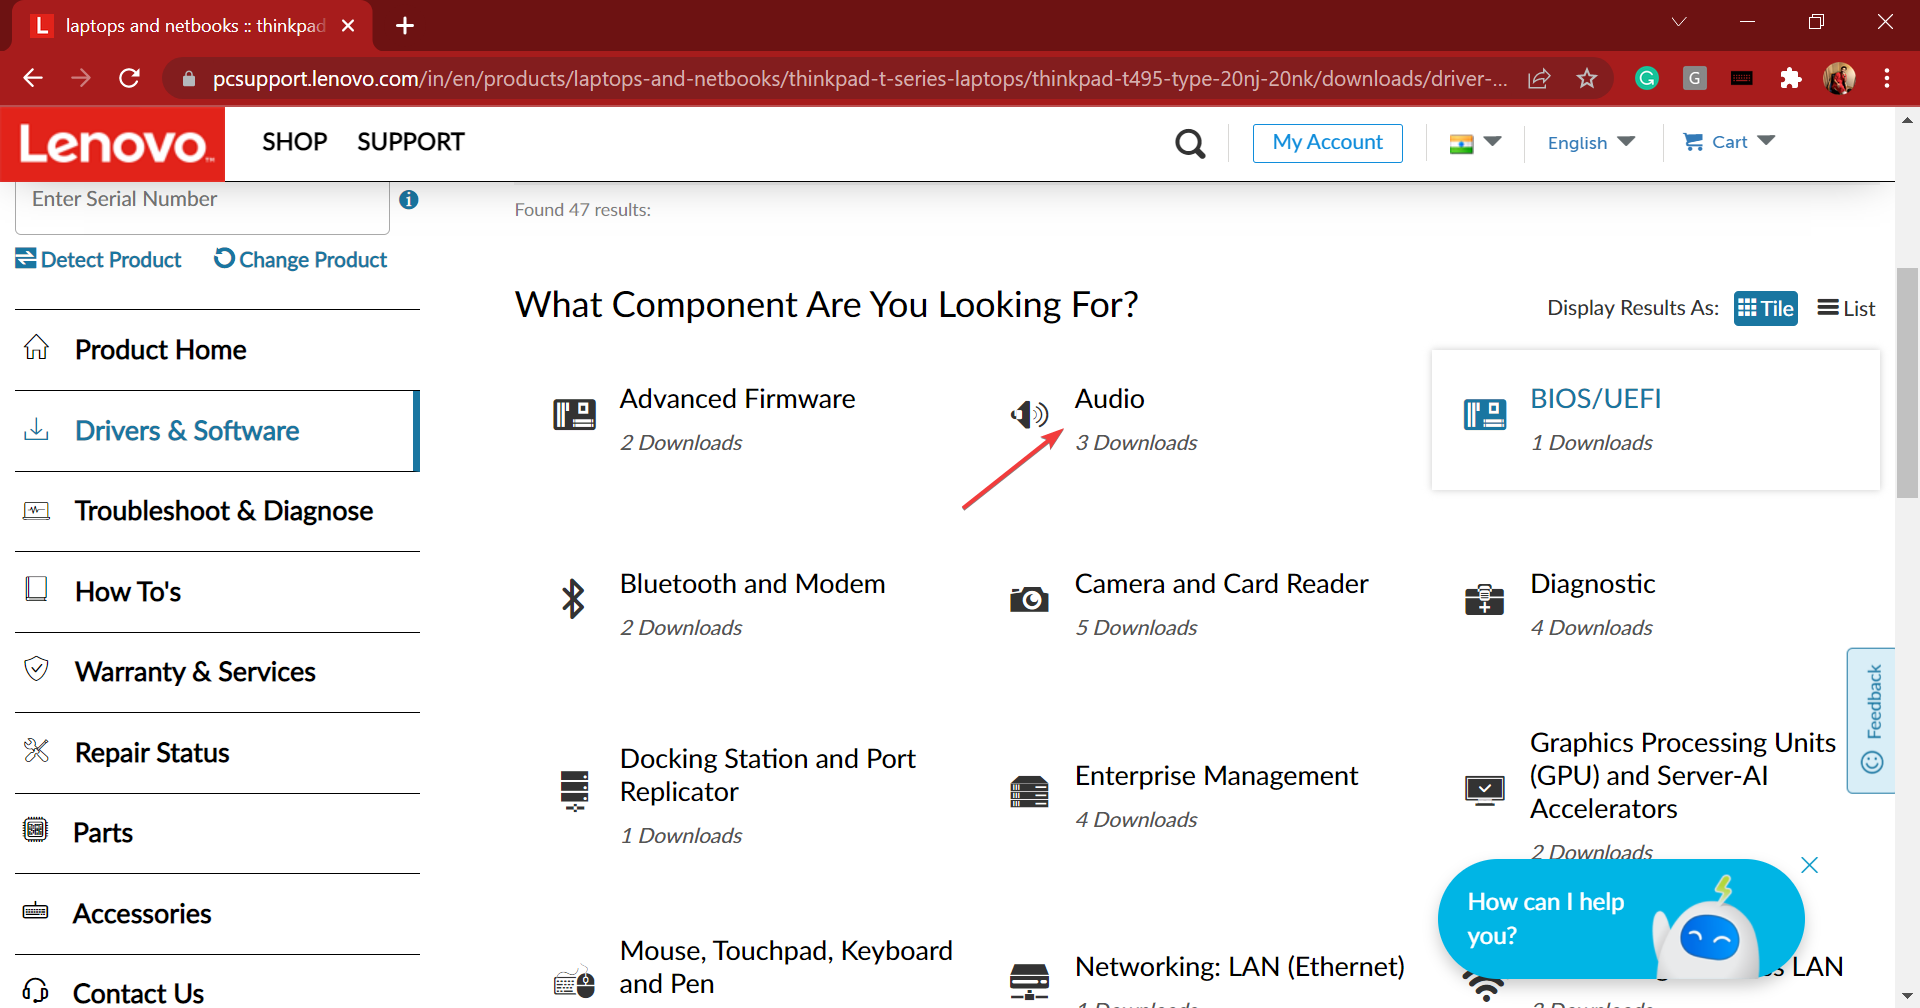
- Click on the Audio entry from the various components listed here.
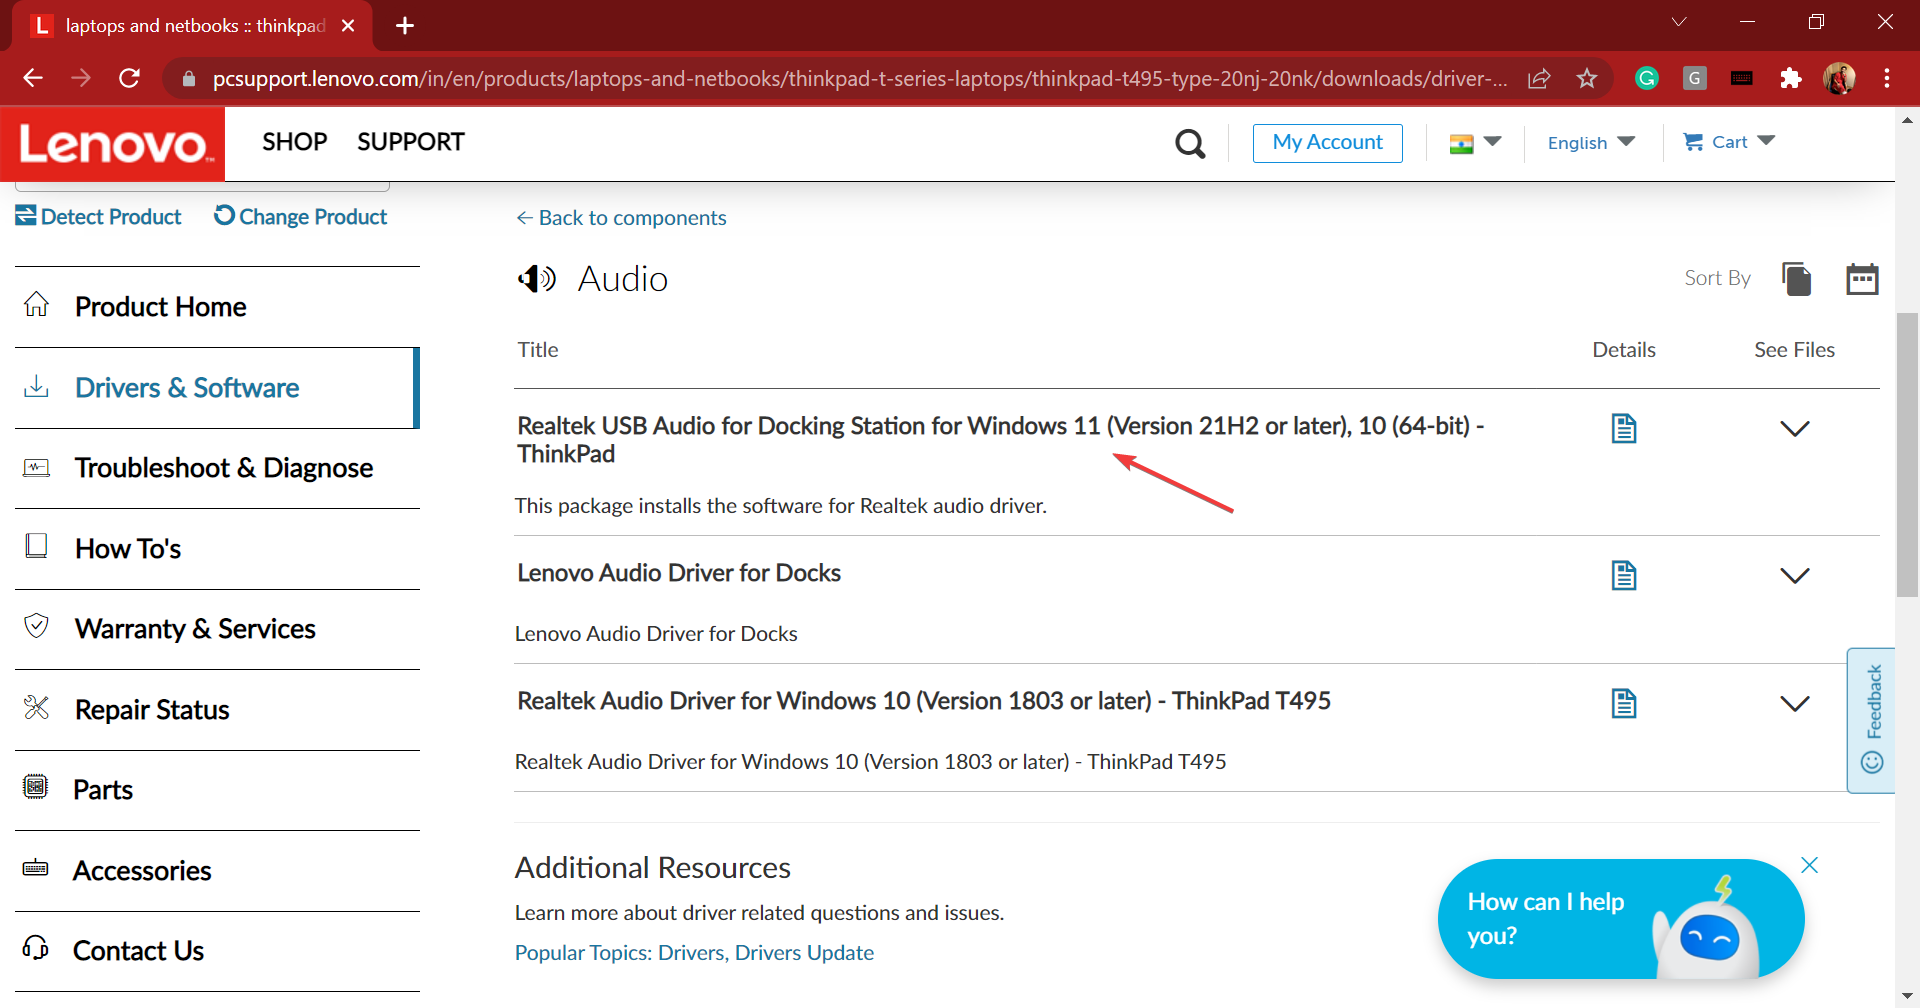
- Next, click on Realtek audio driver for Windows 11.
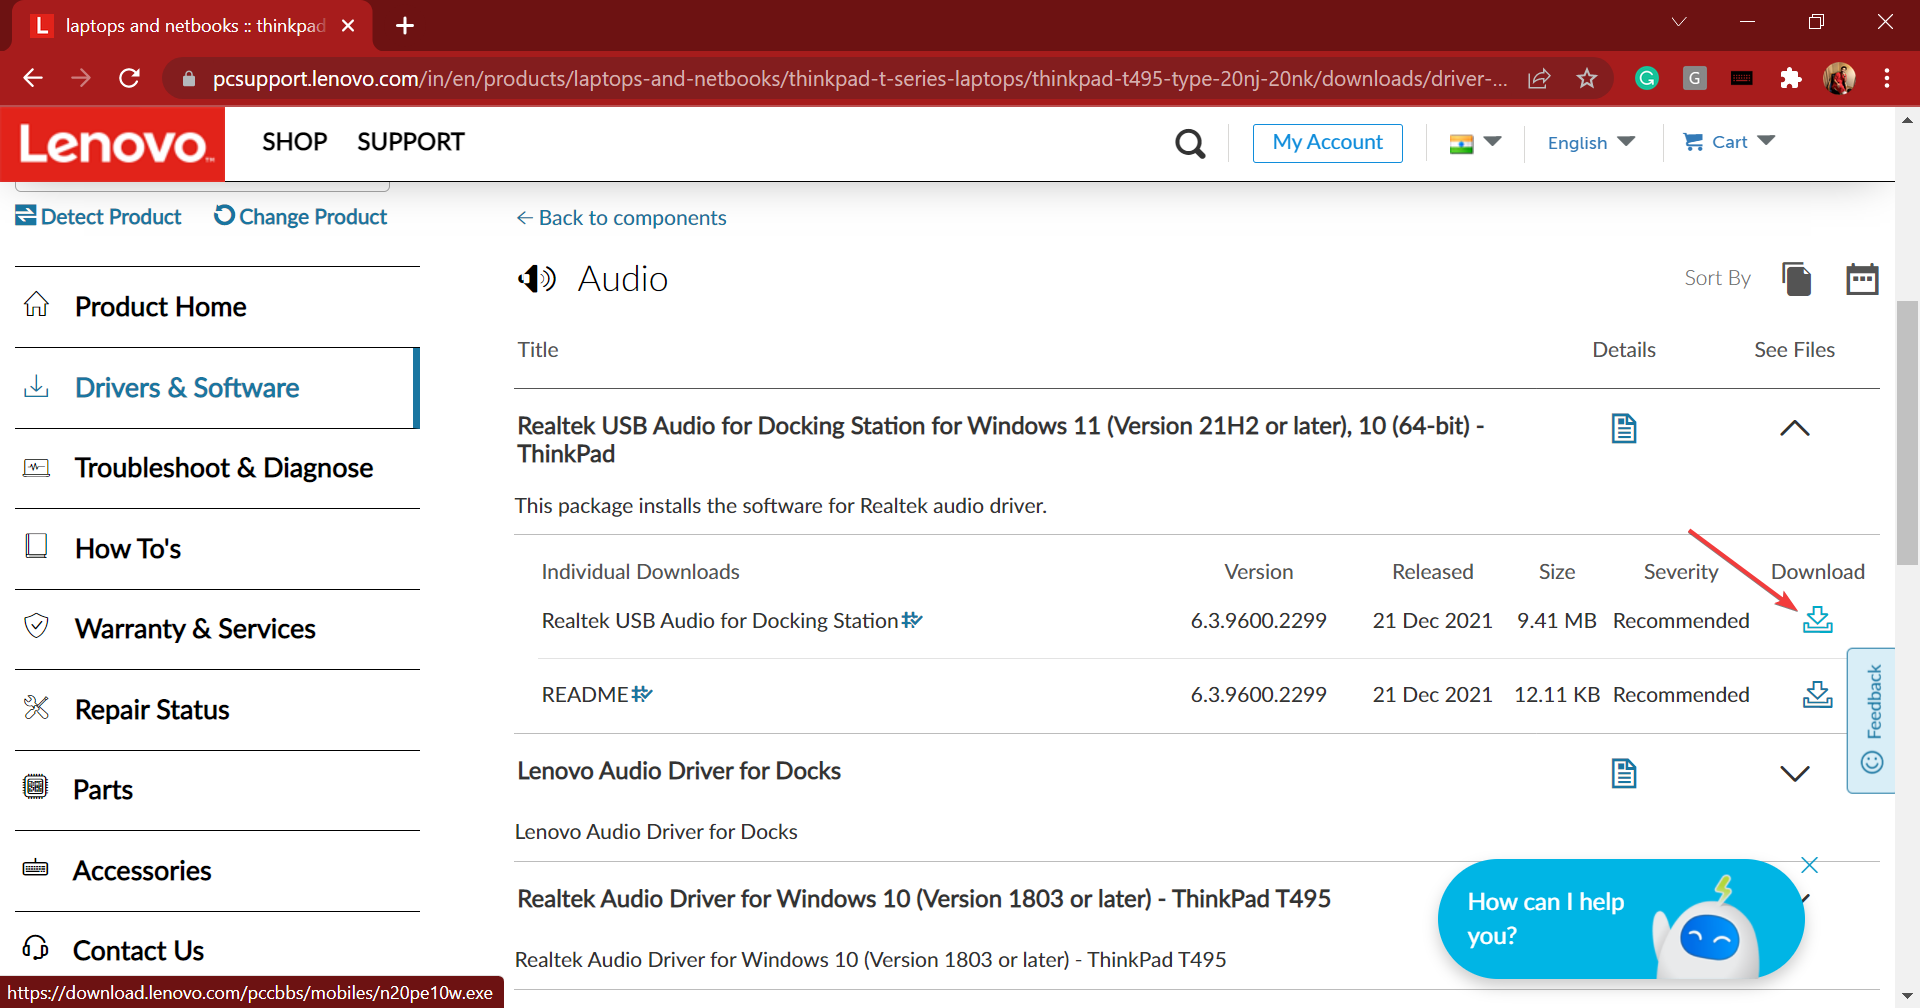
- Click on the Download icon next to the Realtek audio driver.
- Once the setup is downloaded, click on it to launch the installer.
- Click Yes in the UAC (User Account Control) prompt that pops up.
- Now, follow the on-screen instructions to complete the installation process.

Once done with the download and installation of Realtek audio driver in Windows 11 on Lenovo device, restart the computer for the changes to come into effect.
4. Realtek audio driver for Asus
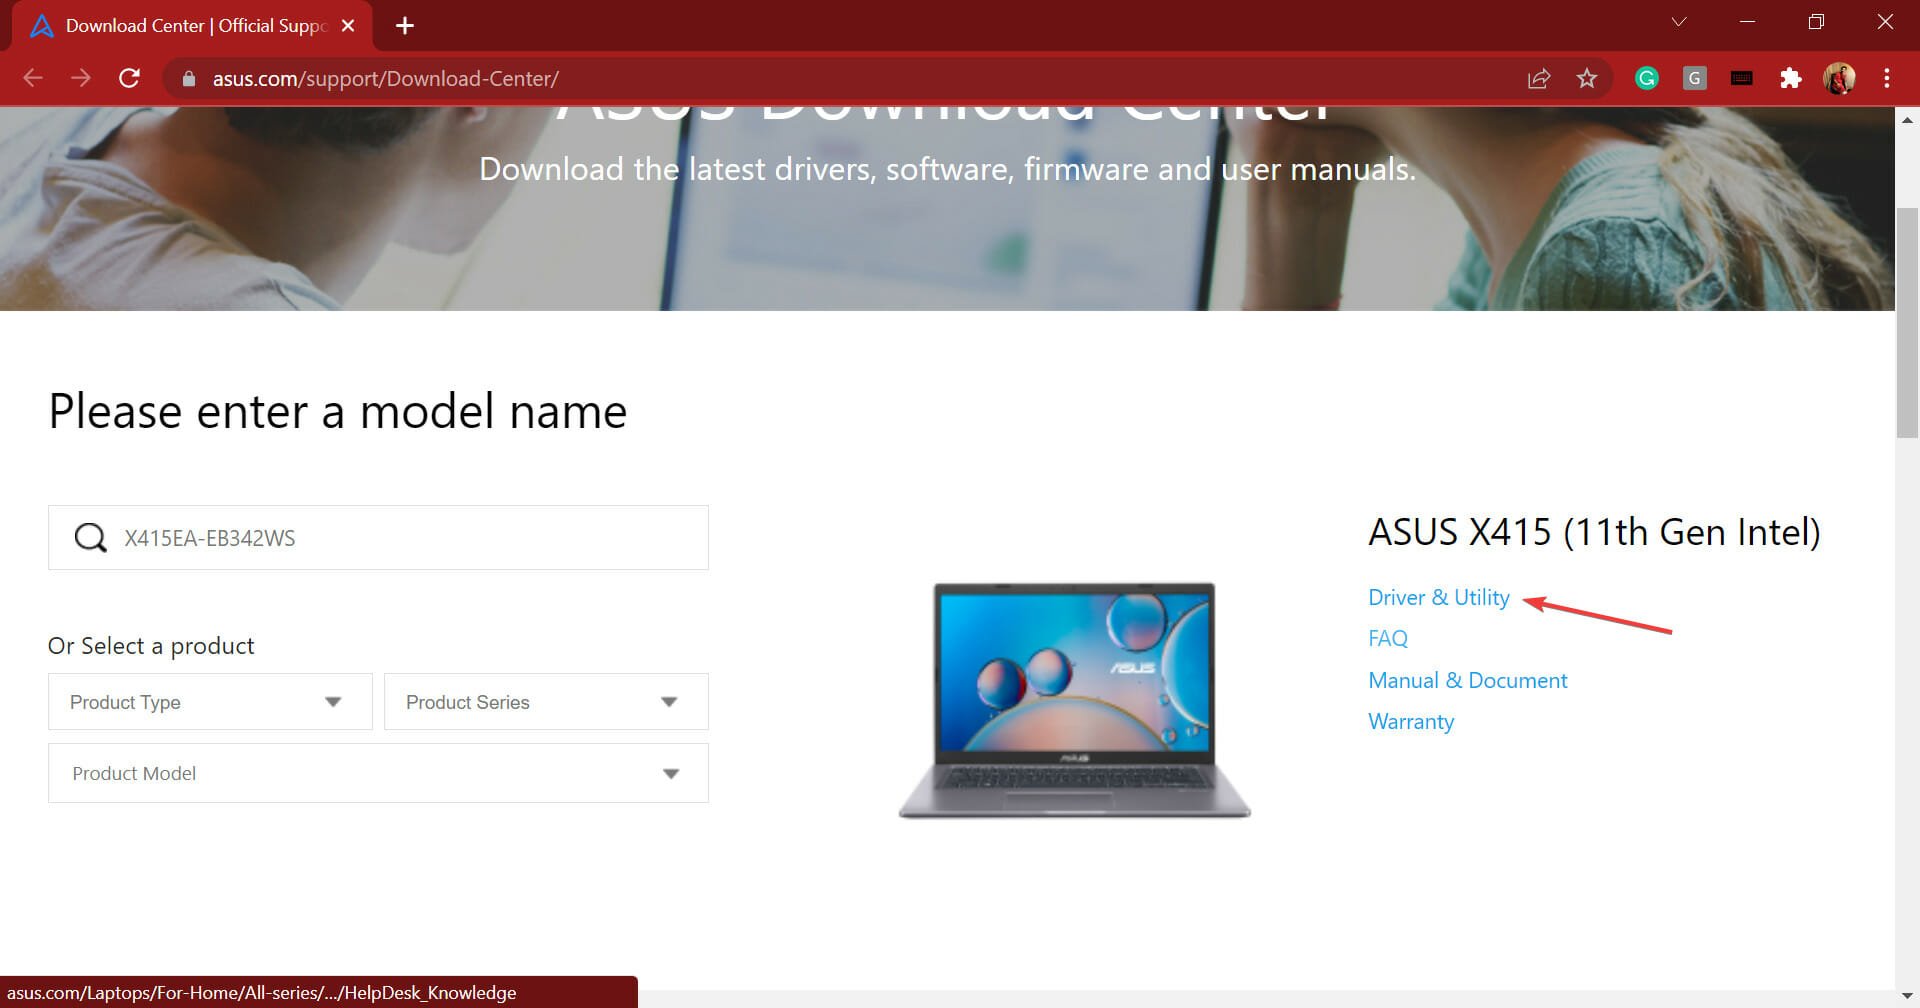
- Go to Asus support, and either enter the model name and select the relevant option from the search results, or you can manually find your product.
- Click on the Driver & Utility option on the right.
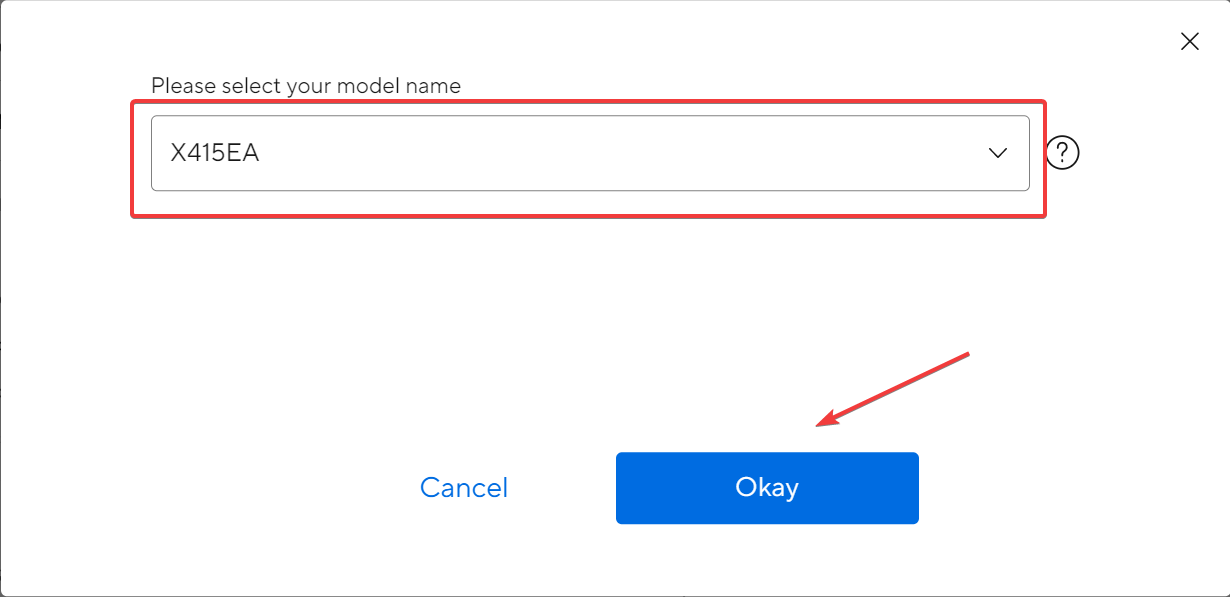
- Now, select your model name from the dropdown menu and click on Okay, if prompted.

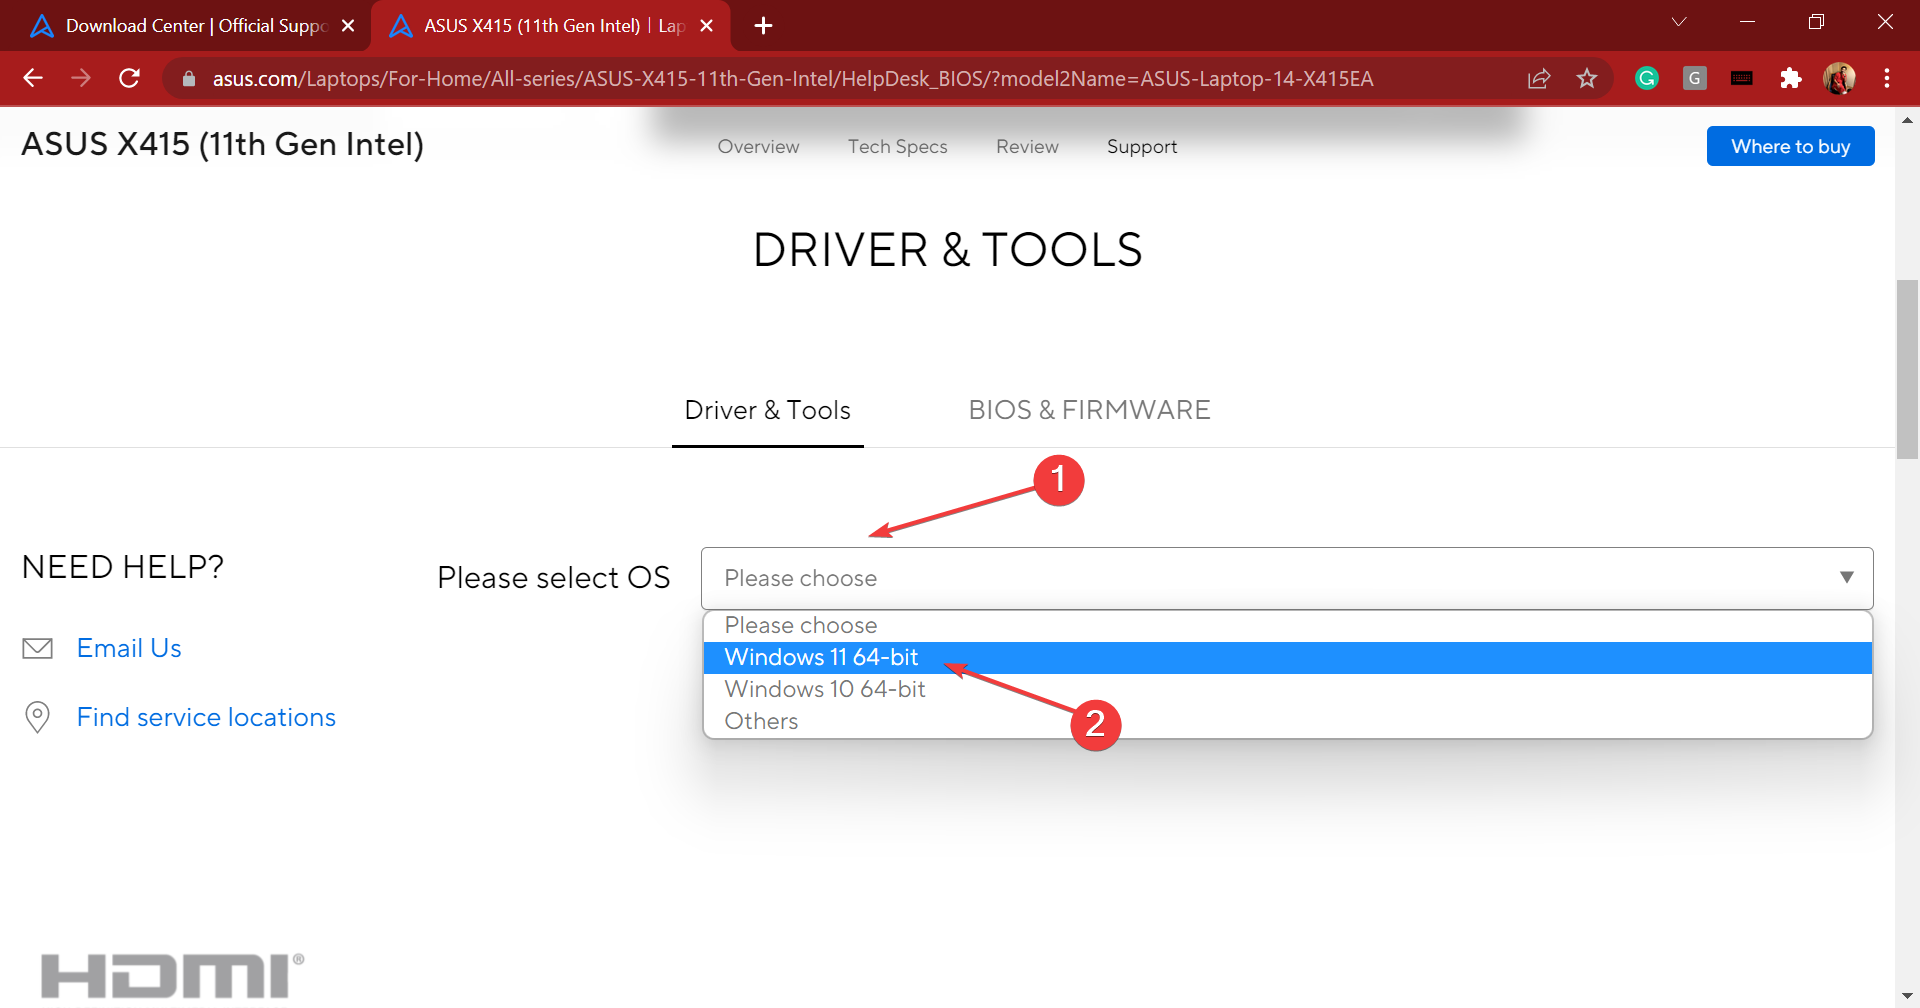
- Scroll down, click on the Please select OS dropdown menu, and select Windows 11 from the list of options.
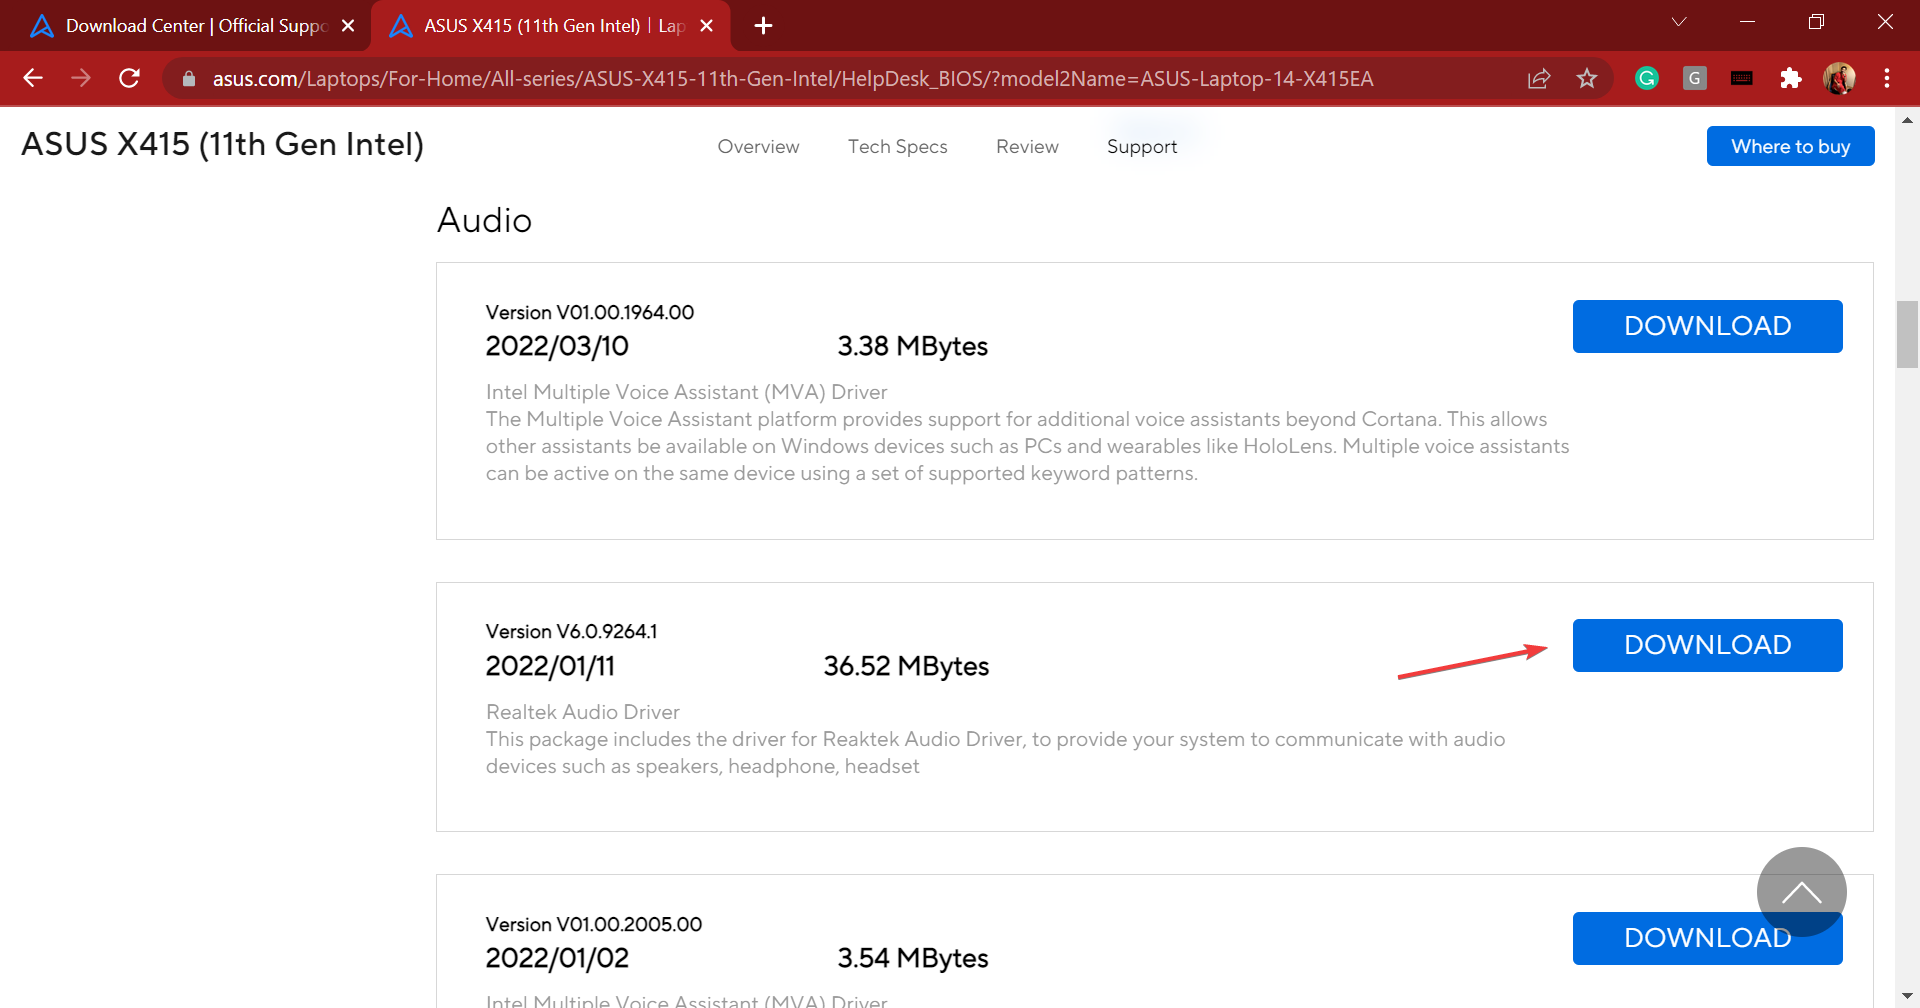
- Again scroll down, and click on Show all under the Audio section.
- Click on the Download button next to the Realtek audio driver entry.
- Once you have the setup downloaded, click on it to launch the installer.
- Next, click Yes in the UAC (User Account Control) prompt that pops up.
- After the installer is launched, follow the on-screen instructions to complete the installation process.

- Once done, restart the computer for the changes to come into effect.


That’s it! You have now downloaded and installed Realtek audio driver in Windows 11 on the Asus device. In case you want to be sure, just head to the Device Manager and verify the same.
How can I fix issues with the Realtek audio driver in Windows 11?
Downloading the Realtek audio driver in Windows 11 was relatively simpler, the real task is troubleshooting issues with it. Though the chances of you encountering an error are bleak, you must always be prepared for such a situation to effectively handle it.
If you want to fix issues with the Realtek audio driver in Windows 11, first verify if the connections are in order. Also, check if there’s a newer version available and if you find one, update the driver. In case the driver is corrupt, reinstalling it should do the job.
Besides check for misconfigured sound settings and disable audio enhancements. If nothing else works, you can always perform a system restore in Windows 11, and get your PC back to a healthy state.
You now know how to manually download Realtek audio driver in Windows 11, and fix issues with it. So from now onwards, the audio quality on your system would always be up to the mark, with no major glitches.
Also, you must have noticed that all the manufacturers listed here have a tool on their website to automatically list out the various available drivers or their updates.
So try using it for a quicker experience, but if that doesn’t help, you can always follow the manual approach. Besides, find out what to do if there’s no sound in Windows 11.
Tell us your experience with the Realtek audio driver and if you noticed any improvement with the audio quality in the comments section below.
![]()
Newsletter
by Loredana Harsana
Loredana is a passionate writer with a keen interest in PC software and technology. She started off writing about mobile phones back when Samsung Galaxy S II was… read more
Published on October 26, 2022
- Downloading the Realtek audio driver on your Windows 11 system helps boost the audio quality and enhances connectivity, along with various other benefits.
- Learn how to download the driver for HP, Dell, Lenovo, and ASUS devices.
- Also, find out how to fix issues with the Realtek audio driver in Windows 11.
XINSTALL BY CLICKING THE DOWNLOAD FILE
This software will keep your drivers up and running, thus keeping you safe from common computer errors and hardware failure. Check all your drivers now in 3 easy steps:
- Download DriverFix (verified download file).
- Click Start Scan to find all problematic drivers.
- Click Update Drivers to get new versions and avoid system malfunctionings.
- DriverFix has been downloaded by 0 readers this month.
Realtek audio drivers are a useful piece of software that helps enhance the sound output and improve the system’s connectivity with external audio devices. Owing to these benefits, you may want to download the Realtek audio driver in Windows 11.
But many are clueless as to how to get Realtek audio driver installed on their computer. And with Windows 11 still in the early stages, this is expected.
If you too had been trying to download and install the Realtek audio driver in Windows 11, read the following sections to find out how you can do that.
How does installing the Realtek audio driver help in Windows 11?
Drivers, as we know, are critical for the effective functioning of every piece of hardware connected to the PC. Be it keyboard, mouse, printer, or the graphics and sound card.
First, the Realtek audio driver is one of the most user-friendly options available out there. Apart from that, it delivers high-quality audio not just with the built-in speakers and microphones but also if you connect external ones.
And the best part, you are unlikely to encounter issues with the connectivity. On the contrary, the driver would actually help improve it. Also, with each driver update, you are likely to see better performance and patches for previously known bugs.
So, let’s now see how you can download the Realtek audio driver in Windows 11.
How can I install the Realtek audio driver in Windows 11?
To make things easier, we will take up individual manufacturers in the following sections, and you can directly head to the one that you are using.
Also, we will be manually searching for the driver. But, several manufacturers offer a tool to automatically detect the device and list out the available drivers for it and you can use it, if available.
1. Realtek audio driver for HP in Windows 11
- Go to the driver section of HP’s official website, and select your device from the option listed here.
- Now, enter the product name or serial number in the provided text field, and click on the Submit button.
- Click on the All drivers entry to check out the various available ones. Also, make sure that the latest iteration is selected as the operating system. In case it isn’t, click on Choose a different OS and select Windows 11.
- Now, locate the Realtek audio driver, and click on the Download option next to it.
- You can now download the install assistant or click on No thanks, I will download and install manually. We choose the latter.
- Once the setup is downloaded, click on it to launch the installer.
- Click Yes on the UAC (User Account Control) prompt that pops up.
- Now, follow the on-screen instructions to complete the installation process, and restart the computer once it’s done for the changes to fully come into effect.
Once done with the steps listed here, you would have the Realtek audio driver downloaded and running in Windows 11.
Also, if you don’t want to go through the trouble of manually searching for the driver, use a reliable third-party app. We recommend using DriverFix, a dedicated tool that will automatically download and update the relevant drivers on your system.
2. Realtek audio driver for Dell in Windows 11
- Go to the driver dowloads section on Dell’s website, enter a product identifier in the designated text field, and click on Search.
- Now, click on the Find drivers option to manually search for the Realtek audio driver.
- Enter Realtek audio in the Keyword text field and choose Windows 11 from the Operating system dropdown menu.
- Now, scroll down and click on the Download button next to Realtek audio driver.
- Once the setup is downloaded, click on it to launch the installer.
- Click Yes on the UAC (User Account Control) prompt that pops up.
- Next, click Install and follow the on-screen instructions to complete the process.
Once you have downloaded and installed the Realtek audio driver in Windows 11, restart the computer for the changes to come into effect, and you are good to go.
- How to reinstall the audio driver in Windows 11
- How to download ASUS Realtek HD Audio Manager in Windows 11
- FIX: No sound output devices found in Windows 11
- Fix: Windows 11’s audio crackling & sound distortion
3. Realtek audio driver for Lenovo
- Go to the technical support page for Lenovo, hover the cursor over PC from the options listed here, and select View PC Support.
- Now, enter the device name in the designated text field and select the relevant option once it appears in the search results.
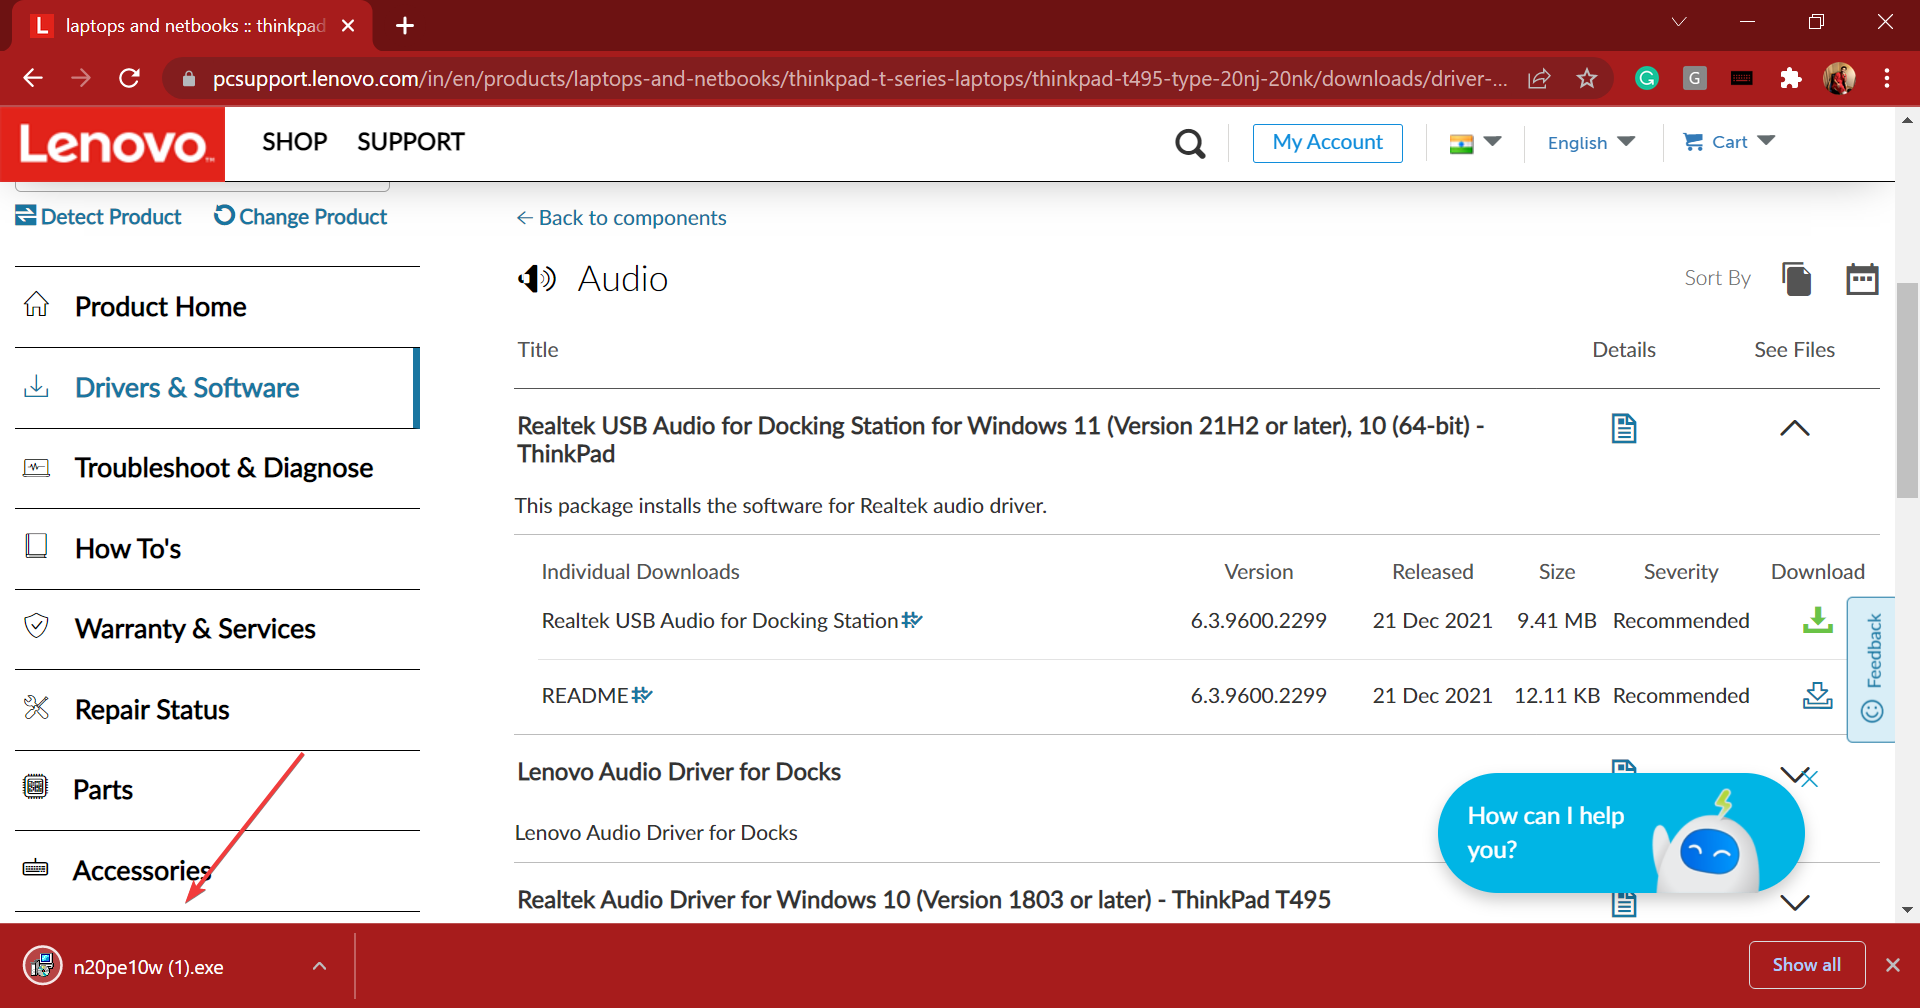
- Select Drivers & Software from the navigation pane on the left.
- Now, select the Manual update tab.
- Click on the Audio entry from the various components listed here.
- Next, click on Realtek audio driver for Windows 11.
- Click on the Download icon next to the Realtek audio driver.
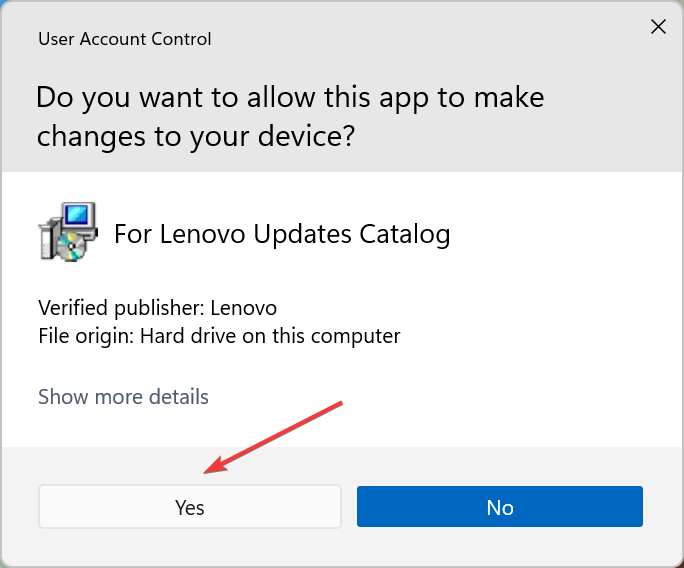
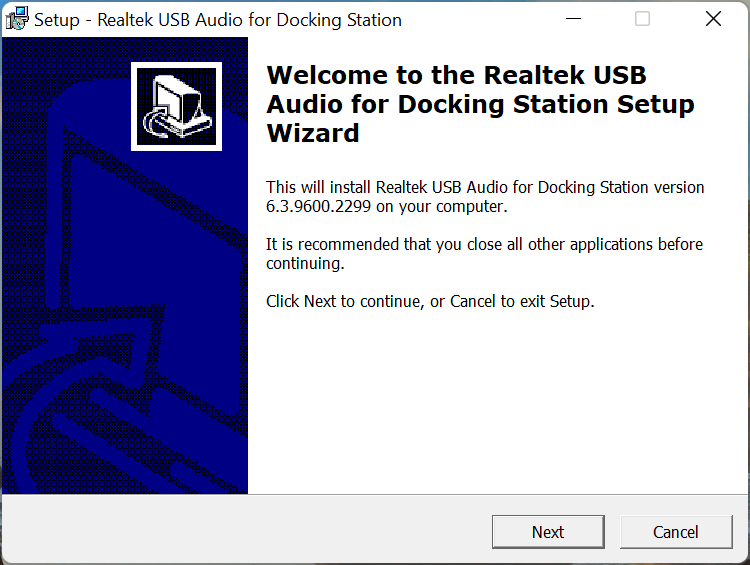
- Once the setup is downloaded, click on it to launch the installer.
- Click Yes in the UAC (User Account Control) prompt that pops up.
- Now, follow the on-screen instructions to complete the installation process.
Once done with the download and installation of Realtek audio driver in Windows 11 on Lenovo device, restart the computer for the changes to come into effect.
4. Realtek audio driver for Asus
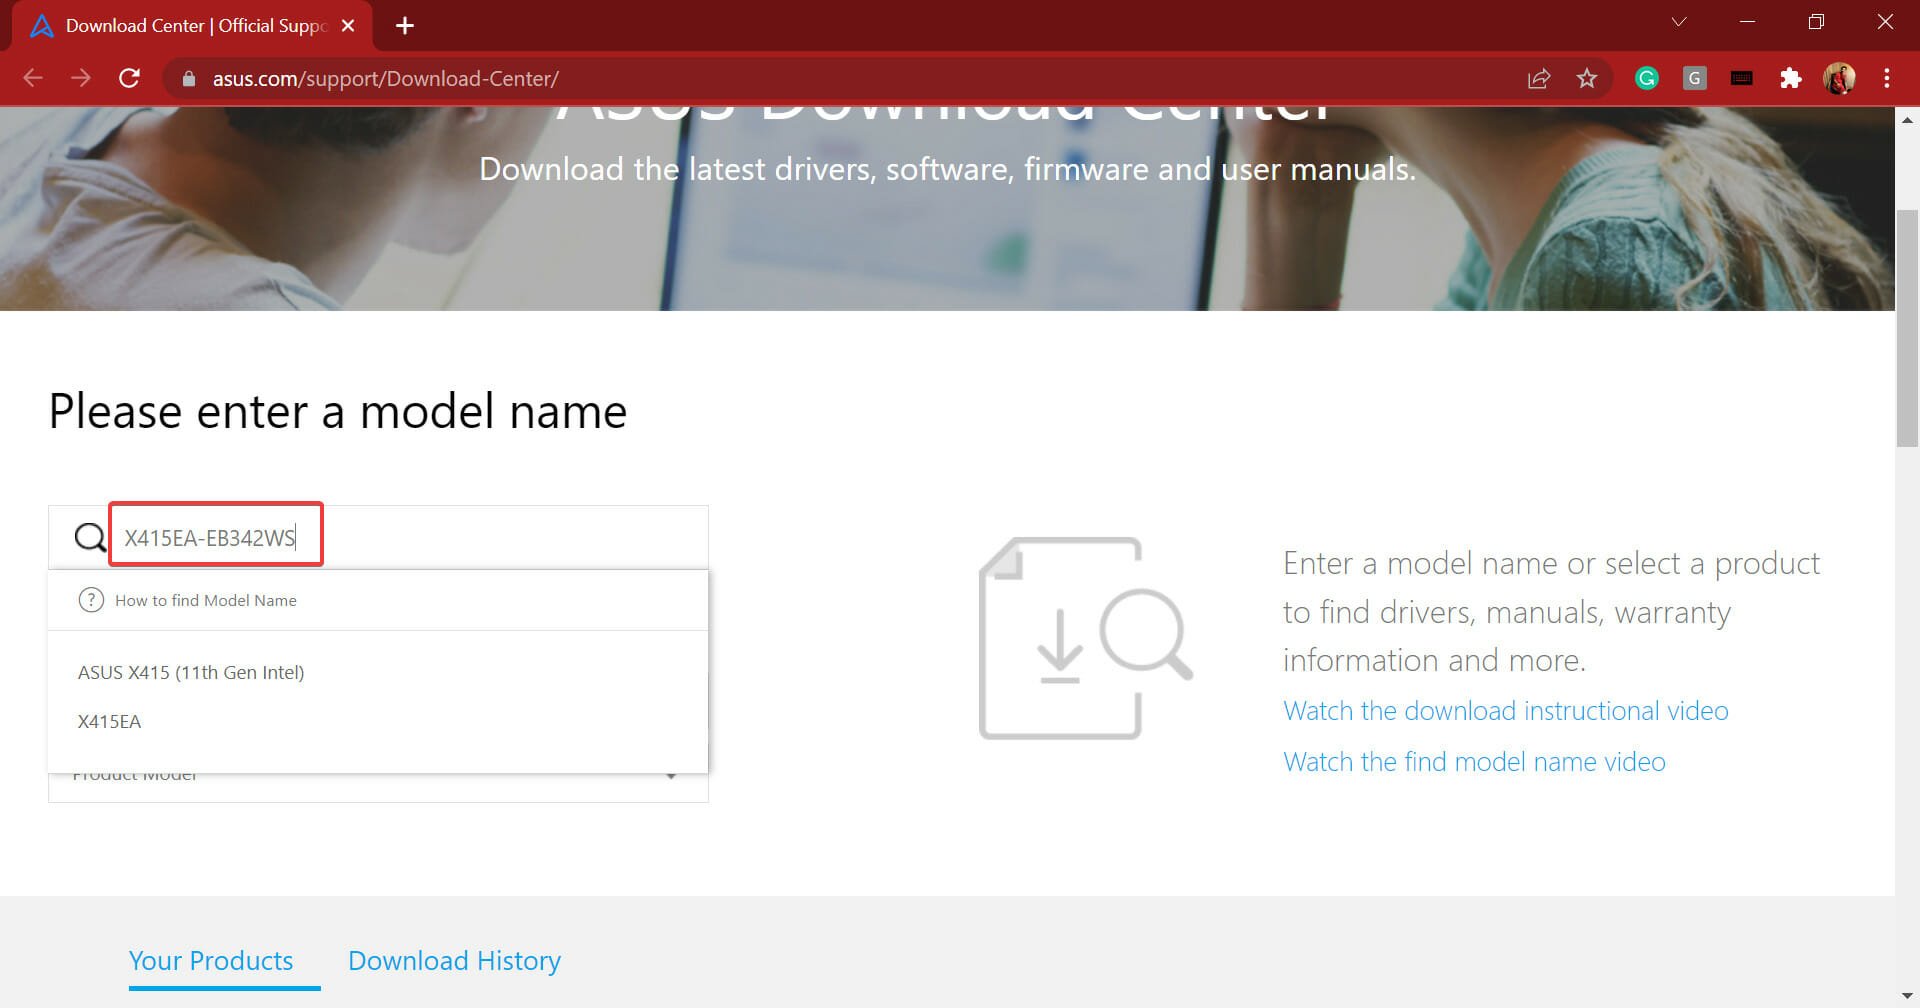
- Go to Asus support, and either enter the model name and select the relevant option from the search results, or you can manually find your product.
- Click on the Driver & Utility option on the right.
- Now, select your model name from the dropdown menu and click on Okay, if prompted.
- Scroll down, click on the Please select OS dropdown menu, and select Windows 11 from the list of options.
- Again scroll down, and click on Show all under the Audio section.
- Click on the Download button next to the Realtek audio driver entry.
- Once you have the setup downloaded, click on it to launch the installer.
- Next, click Yes in the UAC (User Account Control) prompt that pops up.
- After the installer is launched, follow the on-screen instructions to complete the installation process.
- Once done, restart the computer for the changes to come into effect.
That’s it! You have now downloaded and installed Realtek audio driver in Windows 11 on the Asus device. In case you want to be sure, just head to the Device Manager and verify the same.
How can I fix issues with the Realtek audio driver in Windows 11?
Downloading the Realtek audio driver in Windows 11 was relatively simpler, the real task is troubleshooting issues with it. Though the chances of you encountering an error are bleak, you must always be prepared for such a situation to effectively handle it.
If you want to fix issues with the Realtek audio driver in Windows 11, first verify if the connections are in order. Also, check if there’s a newer version available and if you find one, update the driver. In case the driver is corrupt, reinstalling it should do the job.
Besides check for misconfigured sound settings and disable audio enhancements. If nothing else works, you can always perform a system restore in Windows 11, and get your PC back to a healthy state.
You now know how to manually download Realtek audio driver in Windows 11, and fix issues with it. So from now onwards, the audio quality on your system would always be up to the mark, with no major glitches.
Also, you must have noticed that all the manufacturers listed here have a tool on their website to automatically list out the various available drivers or their updates.
So try using it for a quicker experience, but if that doesn’t help, you can always follow the manual approach. Besides, find out what to do if there’s no sound in Windows 11.
Tell us your experience with the Realtek audio driver and if you noticed any improvement with the audio quality in the comments section below.
![]()
Newsletter
 Среди частых вопросов пользователей последних версий Windows — загрузка и установка приложения Realtek Audio Console (или Realtek Audio Control), а также решение проблем с его работой, если оно было установлено.
В этой инструкции подробно о способах скачать и установить Realtek Audio Console, а также о причинах, по которым при установке приложения могут возникнуть проблемы.
Информация про Realtek Audio Console и необходимые условия для работы приложения
Прежде чем устанавливать Realtek Audio Console необходимо учесть важный нюанс: это приложение предназначено для звуковых карт Realtek, работающих с новыми драйверами DCH или UAD (Universal Audio Driver). Определить версию текущего драйвера в Windows 11 и Windows 10 легко:
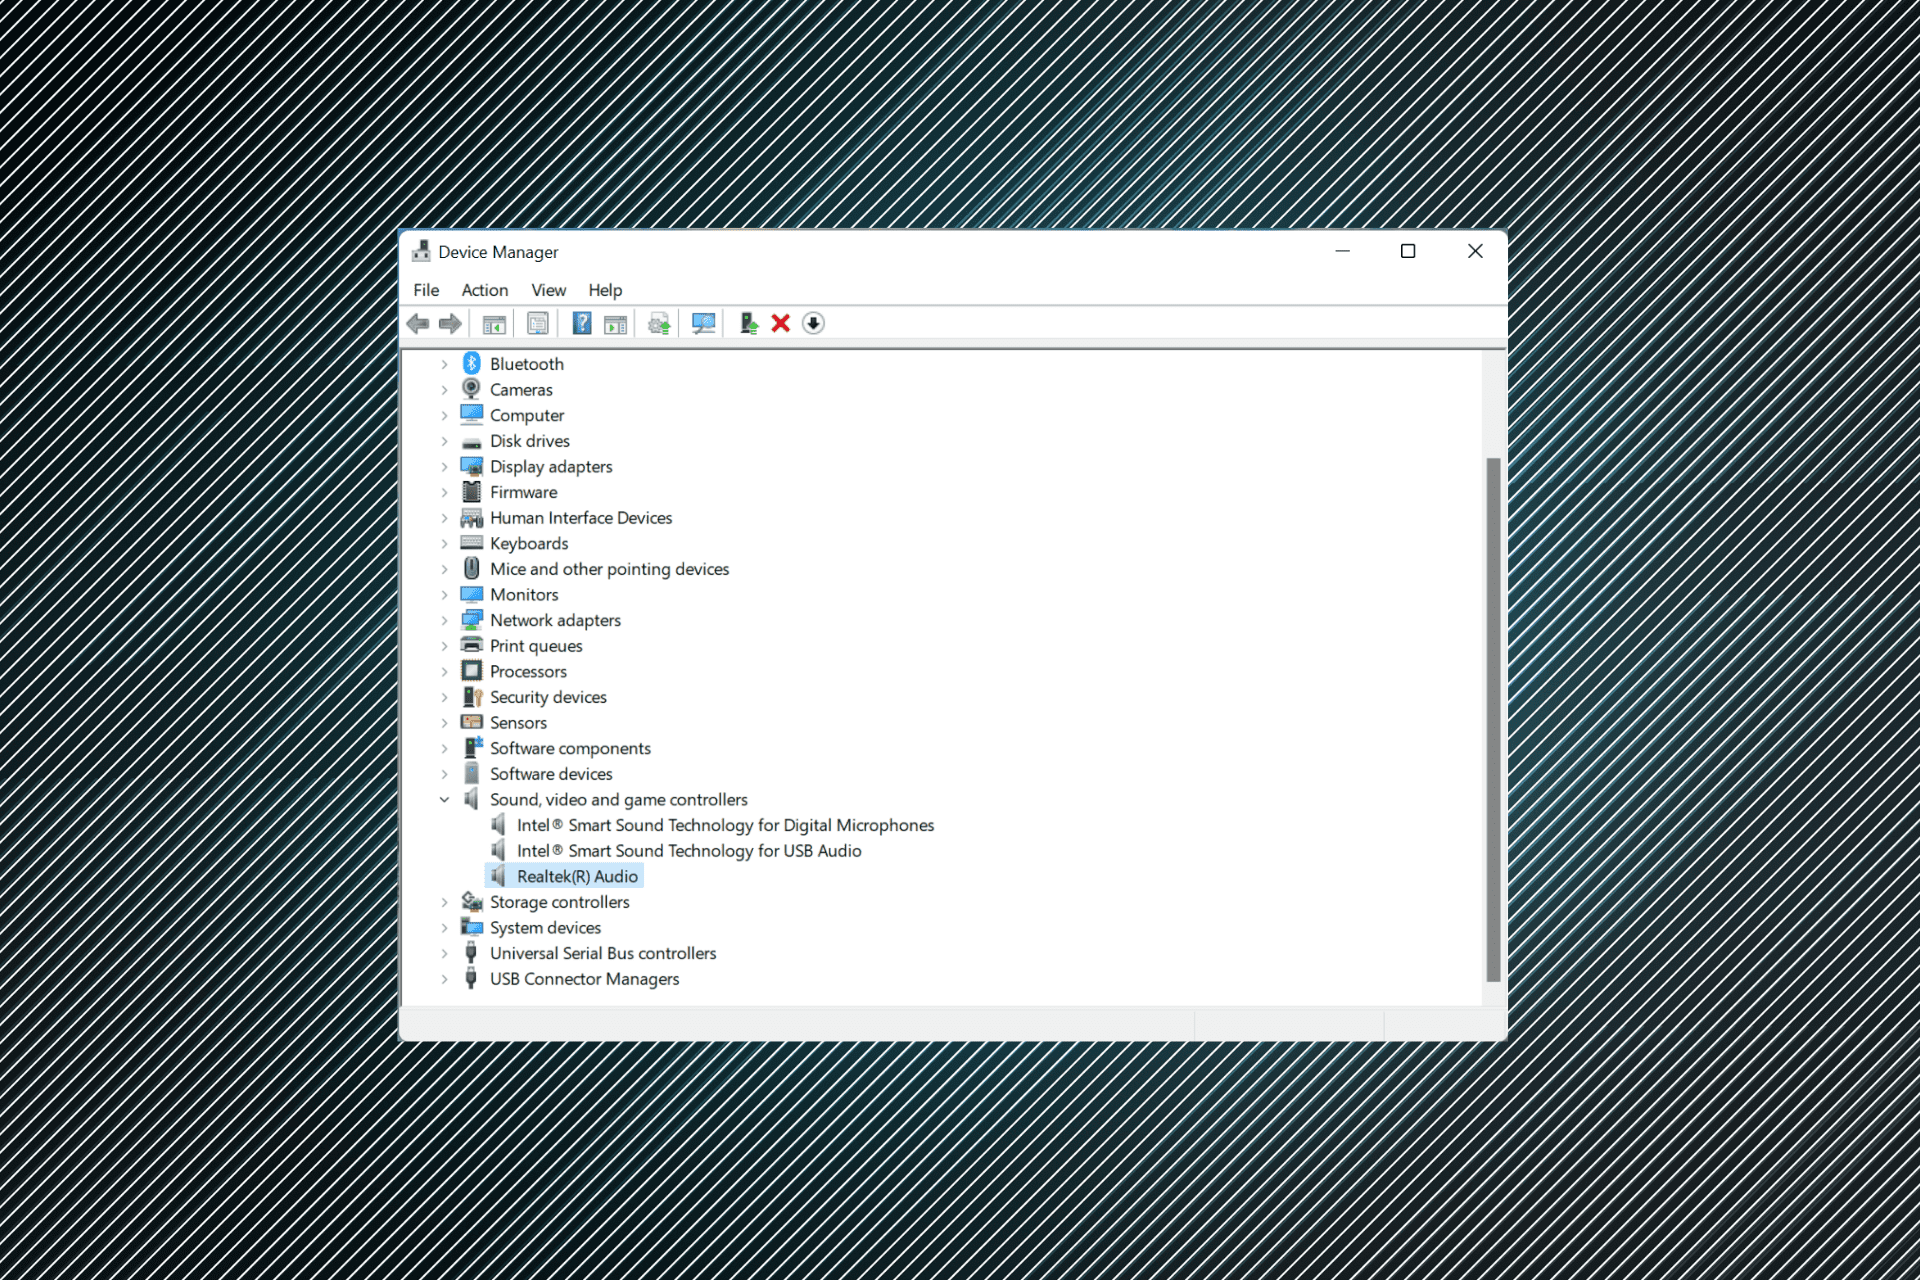
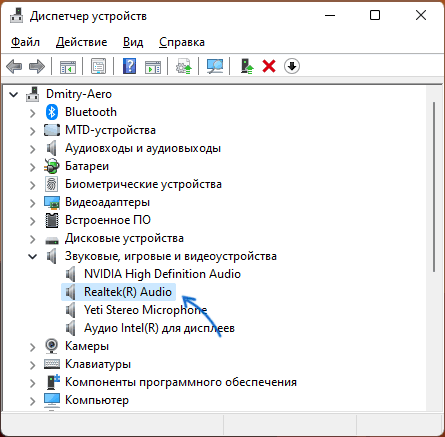
- Нажмите правой кнопкой мыши по кнопке пуск и выберите пункт «Диспетчер устройств» в контекстном меню.
- Посмотрите название вашей звуковой карты в разделе «Звуковые, игровые и видеоустройства».
- Если вы видите Realtek(R) Audio — это говорит о том, что у вас установлен драйвер DCH/UAD и Realtek Audio Console может использоваться.

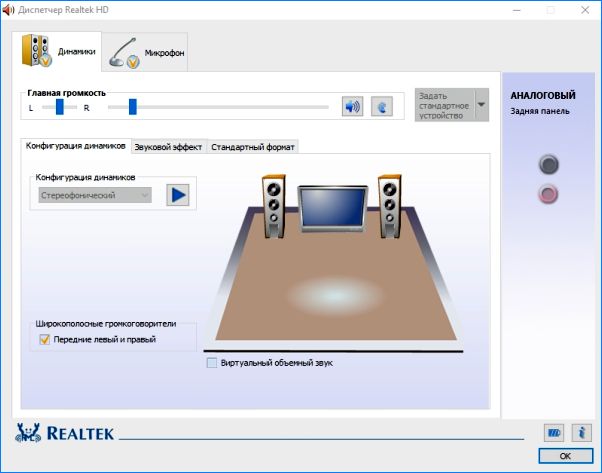
- Если указано: Realtek High Definition Audio — это говорит о том, что установлен старый драйвер и для управления должно использоваться приложение Realtek HD Audio Manager.
В случае, если у вас используется традиционный (старый) вариант драйвера, вы можете попробовать обновить драйвер прямо в диспетчере устройств: нажмите правой кнопкой мыши по Realtek High Definition Audio, выберите пункт «Обновить драйвер», затем — «Найти драйверы на этом компьютере» — «Выбрать драйвер из списка доступных драйверов на компьютере» и посмотрите, есть ли в списке совместимых устройств Realtek(R) Audio. При наличии — выберите и установите его.
И дополнительный нюанс: в случае если на компьютере установлен новый драйвер Realtek, как правило, установка Realtek Audio Console выполняется автоматически, и вы увидите его в списке установленных приложений. Если же этого не произошло, есть следующие варианты скачать и установить приложение.
Как скачать Realtek Audio Console из магазина Microsoft Store
Если выполнять поиск по приложениям в Microsoft Store, приложение, которое в магазине имеет название Realtek Audio Control, вы не найдёте. Однако можно воспользоваться прямой ссылкой:
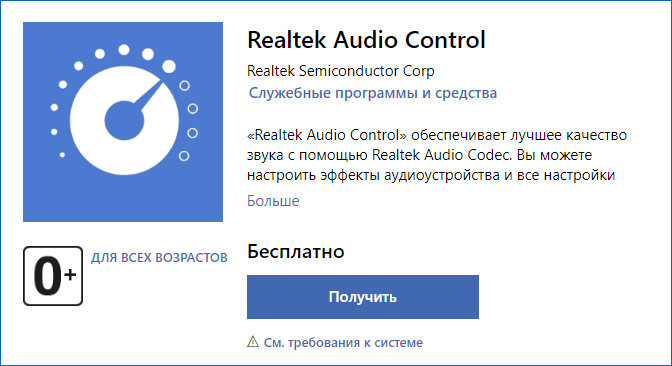
- Перейдите по ссылке на приложение Realtek Audio Control в Microsoft Store
- Нажмите кнопку «Получить» (если будет предложено открыть в приложении магазина, согласитесь) и установите приложение.

- После установки оно появится в списке приложений под именем Realtek Audio Console.
Напомню, что приложение будет работать лишь при наличии соответствующих драйверов Realtek.
Установка Realtek Audio Console вместе с драйверами звуковой карты
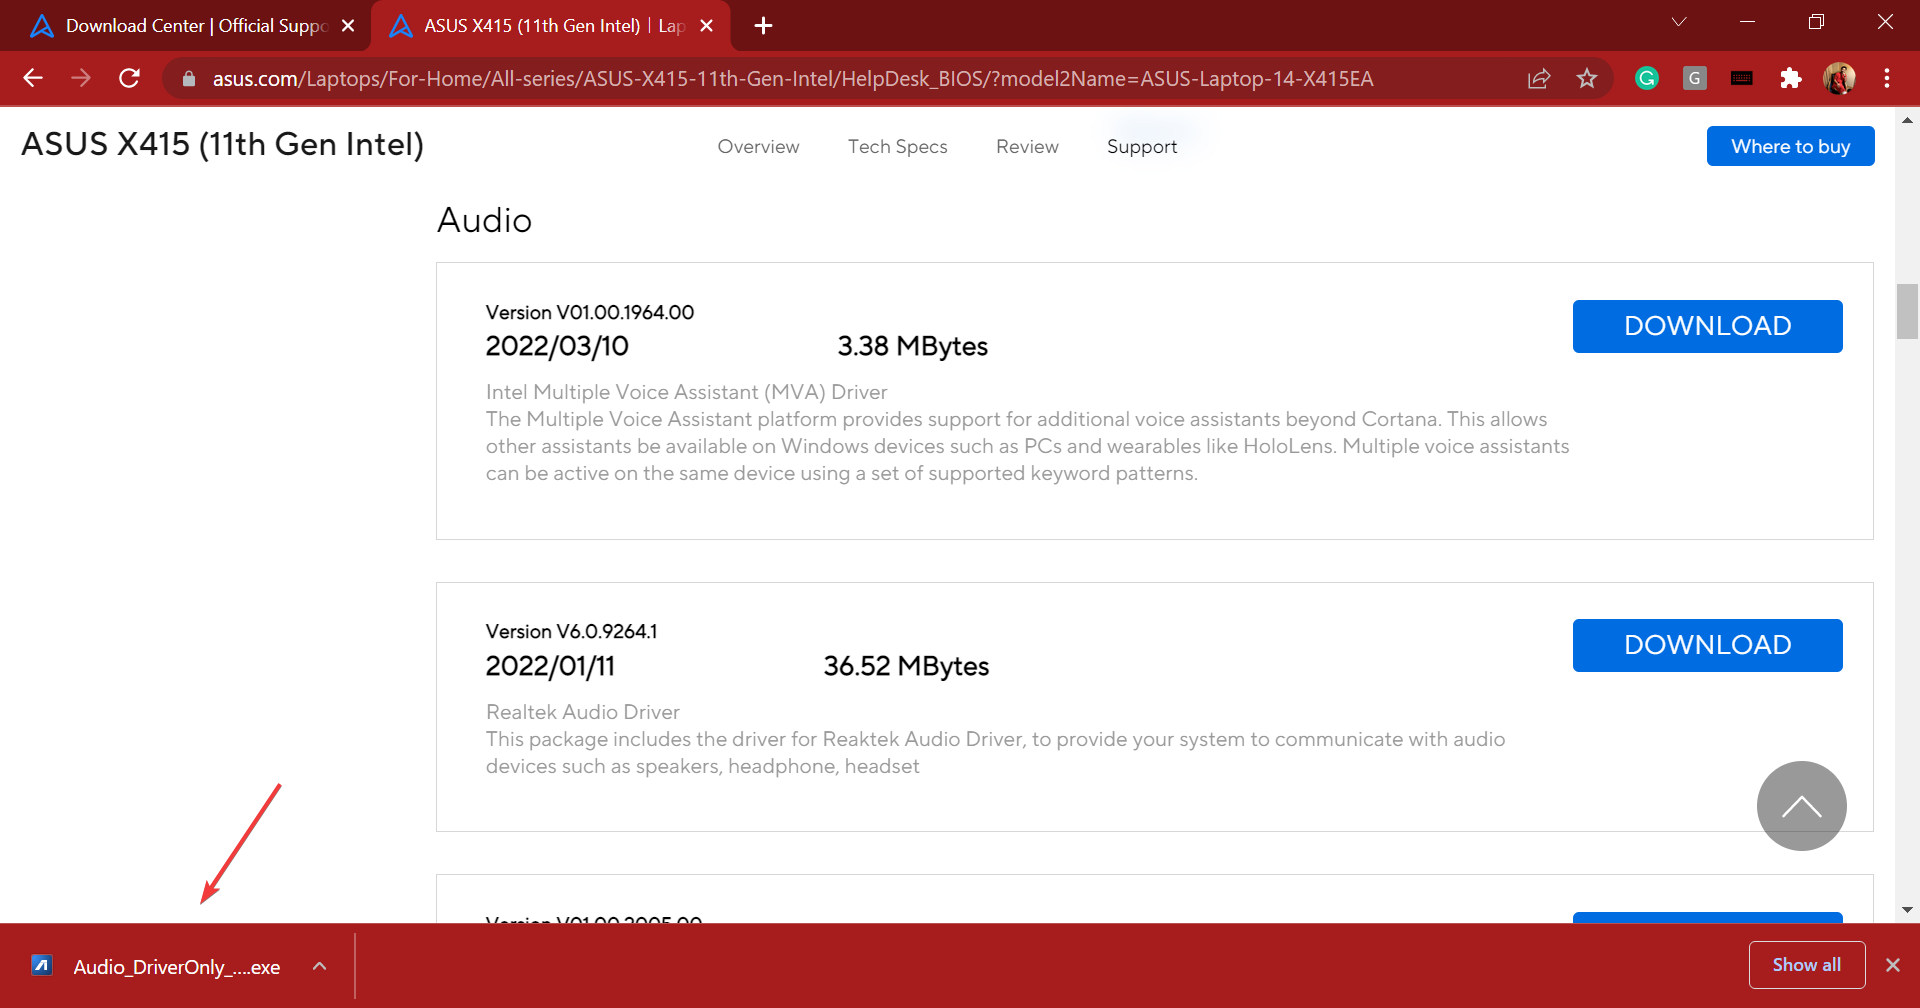
Если после установки или переустановки Windows 11 или Windows 10 вы не устанавливали драйверы вручную, при этом имеете не самый старый компьютер или ноутбук, загрузка и установка драйвера звука с официального сайта производителя может решить проблему:
- Найдите официальную страницу поддержки вашей материнской платы (если это ПК) или ноутбука.
- В разделе загрузок найдите драйвер Audio и скачайте его.

- После установки проверьте, появилось ли приложение Realtek Audio Console.
- В некоторых случаях оно появляется не сразу, а загружается из Интернета.
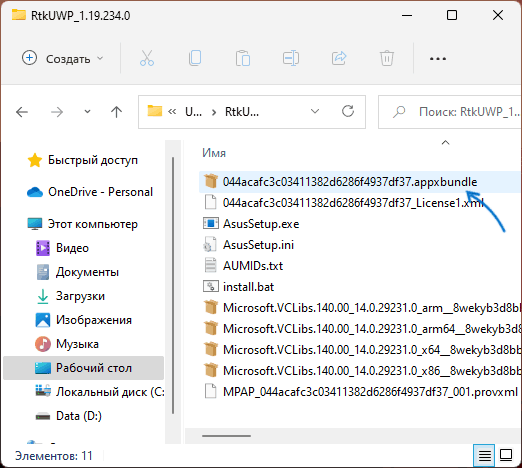
- В некоторых драйверах файлы приложения можно найти внутри архива. К примеру, если открыть архив с драйверами Audio некоторых материнских плат Asus (на примере — B560M), то в нём можно найти папку UWP, распаковать её и запустить файл appxbundle оттуда для установки Realtek Audio Console.


Неофициальный источник Realtek Audio Console и драйверов UAD (DCH)
На GitHub доступен проект, где выкладываются неофициальные сборки драйверов Realtek Universal Audio Driver и приложения Realtek Audio Console. Если другие методы установки для вас не работают, можно попробовать этот вариант:
- Зайдите на страницу https://github.com/pal1000/Realtek-UAD-generic/releases
- Ссылка на установщик Realtek Audio Console находится в разделе Realtek Audio Control app, после распаковки потребуется запустить файл setup.cmd из папки с распакованным архивом.

- Ниже, в разделе Assets вы найдете архив с последней сборкой драйвера Realtek, необходимого для работы приложения. Учитывайте, что он может не работать для достаточно старых звуковых карт Realtek.

В случае, если Realtek Audio Console не запускается, хотя все условия для его работы выполняются, причинами могут быть:
- Отключенные элементы Realtek в автозагрузке.
- Отключенные службы Realtek в списке служб.
- Наличие и работа дополнительных приложений и служб улучшения звука от производителя.
Надеюсь, инструкция поможет или решить проблему и установить Realtek Audio Console или разобраться, почему это не удавалось сделать.
Люди, использующие Windows 10 и 11, сообщают, что Realtek Audio Console по какой-то причине не может подключиться к службам RPC. Из-за этого сбоя люди не могут изменить свои настройки звука. Есть несколько причин, по которым может произойти этот сбой. К ним относятся:
- Или драйверы Realtek High Definition Audio могут быть повреждены.
- Ваша звуковая карта или внутренний ЦАП могут работать странно.
- Вы можете отключили службы Realtek.
Теперь, когда мы знаем, что вызывает эту проблему, ниже приведены исправления для Realtek Audio Console, не подключающейся к проблеме со службой RPC.
Исправить # 1 – Запустите средство устранения неполадок со звуком
Простое устранение неполадок может решить проблему, когда Realtek Audio Console не подключается к службе RPC. Вы можете получить доступ к средству устранения неполадок со звуком, выполнив следующие действия:
- Откройте Настройки Windows.
- Нажмите кнопку Система. и выберите Устранение неполадок.
- Теперь выберите параметр Другие средства устранения неполадок и запустите параметр Воспроизведение аудио.
- Теперь перезапустите и посмотрите, устранена ли проблема.
Исправить № 2 – Удалите и переустановите аудиодрайверы
Есть вероятность, что вы столкнулись с этой проблемой, потому что ваши аудиодрайверы повреждены. Чтобы исправить это, лучший способ — переустановить аудиодрайверы. Вот как это сделать:
- Откройте Диспетчер устройств.
- Выберите Аудиовходы и выходы вариант. Это расширится, чтобы предоставить вам еще несколько вариантов.
- Теперь щелкните правой кнопкой мыши Драйвер Realtek и выберите вариант удаления.
- Перезагрузите компьютер.< /li>
- При перезагрузке последние версии драйверов должны установиться автоматически.
Исправление № 3 — Включение службы Realtek при запуске
Возможно, этот сбой возникает из-за того, что служба Realtek не загружается при запуске компьютера. Чтобы это исправить, вам нужно разрешить их запуск при включении компьютера. Вот как это сделать:
- Откройте Диспетчер задач.
- Теперь выберите вкладку “Автозагрузка”.
- Теперь щелкните правой кнопкой мыши Realtek Services и выберите параметр включения.
- Теперь перезагрузите компьютер и посмотрите, решена ли проблема.
Исправить# 4 – Включение универсальной службы Realtek Audio
Включение универсальной службы Realtek Audio может решить вашу проблему. Возможно, эта служба уже работает, поэтому вы можете проверить ее перед входом в систему. Для этого выполните следующие действия:
- Откройте диалоговое окно “Выполнить”.< /strong>
- В текстовом поле напишите Services.msc и нажмите Enter.
- Теперь найдите Realtek Audio Universal Service.
- Щелкните правой кнопкой мыши и выберите Свойства.
- Если в статусе указано, что остановлено, нажмите кнопку запуска.
- Перезапустите, чтобы проверить, устранена ли проблема.
Это это все, что касается наших исправлений для Realtek Audio Console, не подключающейся к службе RPC. Кроме того, посетите наш хаб, чтобы узнать о часто встречающихся ошибках ПК и их исправлениях, если вы сталкиваетесь с другими ошибками на ПК или в видеоиграх.
Когда вы скачиваете Realtek Audio Control для Windows 11 или Windows 10 из Microsoft Store, то столкнетесь с ошибкой «невозможно подключиться к службе RPC» при установке или 0x803fb005 при скачивании. Это заставляет вас не продолжать и думать, что приложение не рабочее, особенно почитав отзывы с негативными оценками, но это не так.
Причина данных ошибок в том, что нужен универсальный драйвер Upd Realtek от производителя материнской платы. Если их не будет, то вы получите ошибку 0x803fb005 при скачивании. Кроме того, если они были, а потом вы их удалили, то получите ошибку невозможно подключиться к службе RPC.
В данной инструкции разберем, как правильно скачать и установить Realtek Audio Control из Microsoft Store для Windows 11/10, чтобы не было ошибки невозможно подключиться к службе RPC при установке и кода 0x803fb005 при скачивании. Ниже, вы должны следовать алгоритму действий, не пропуская пункты.

Как без ошибок скачать и установить Realtek Audio Control
1. В Windows 11/10 зайдите в «Приложения и возможности» и удалите все программы связанные с Realtek. Если у вас там ничего такого нет, то пропустите данный шаг.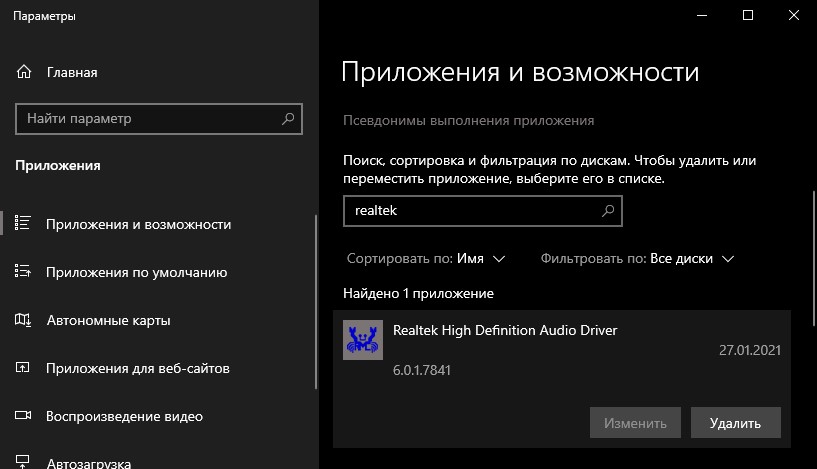
2. Скачайте программу DDU и удалите драйвера Realtek из системы. Данная программа позволяет удалять полностью все файлы.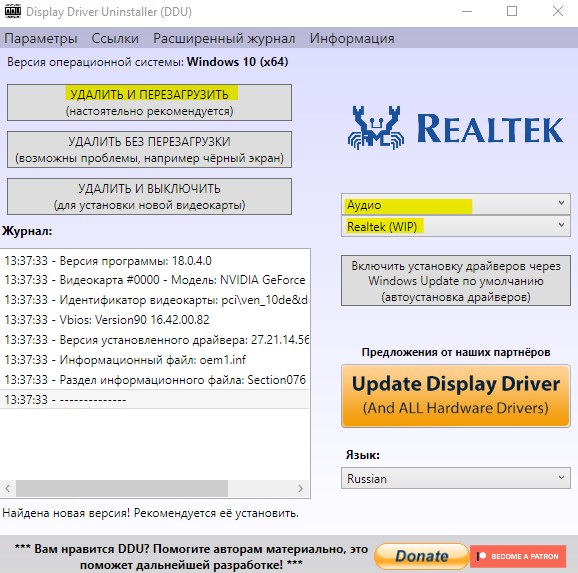
3. Установите драйвер аудио от материнской платы производителя. Вы должны перейти на сайт производителя своей материнской платы и скачать драйвер Audio. Вбейте в поиск Google или Яндекс производителя и модель, чтобы найти официальный сайт.
Узнать производителя и модель материнской платы можно нажав сочетание кнопок Win+R и вбив msinfo32.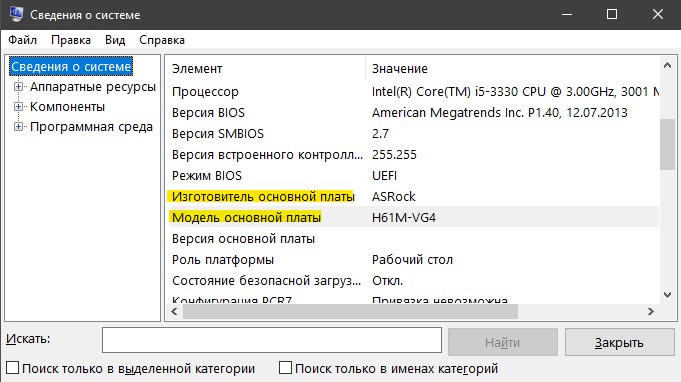
4. После того, как установили аудио драйвер от материнской платы, перейдите в MS и скачайте Realtek Audio Control, после чего ошибка устраниться и программа будет работать.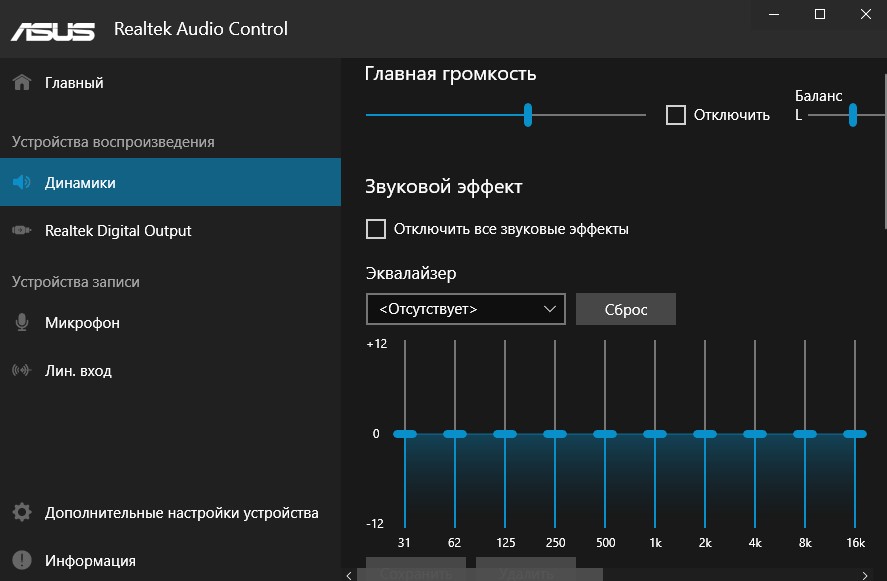
Смотрите еще:
- Драйверы NVIDIA, AMD, Realtek не устанавливаются в Windows 10
- Сбой установки аудио драйвера Realtek-0001
- Почему Пропал и Не Работает Звук в Windows 10?
- Пропал значок громкости звука с панели задач Windows 10
- Запись звука на компьютере Windows 10
[ Telegram | Поддержать ]
Диспетчер Realtek HD — это удобный инструмент для тонкой настройки звука. Но иногда после обновления или установки Windows, в которую уже включена программная поддержка Realtek, пользователи не могут найти его в системе. Значок приложения не отображается в области уведомлений, Панели управления и Диспетчере задач, а при попытке запустить его исполняемый файл из папки расположения, программа просто не открывается.
Узнаем причины отсутствия значка диспетчера, а также почему не удается запустить его с папки установки приложения.
Содержание
- 1 Причины
- 2 Обновление драйверов
- 3 Восстановление диспетчера звука
- 4 Средство исправления неполадок (Windows 7)
- 5 Откат драйверов
- 6 Установка драйверов из Центра обновления Microsoft
- 7 Выбор драйверов из списка установленных
Причины
В большинстве случаев сбой приложения связан с неисправными драйверами. Они могут быть повреждены в ходе обновления или в результате вирусного заражения. Также бывают случаи, когда после их автоматической установки из Центра обновления Windows диспетчер перестает открываться.
Для решения проблемы сначала обновите систему, установив все ожидающие пакеты. Иногда этого бывает достаточно, чтобы решить проблему.
Если хотите узнать, где находится исполняемый файл, и запустить из файлового менеджера или Проводника, сделайте следующие шаги.
Нажмите Win +R и наберите C:Program FilesRealtekAudioHDA.
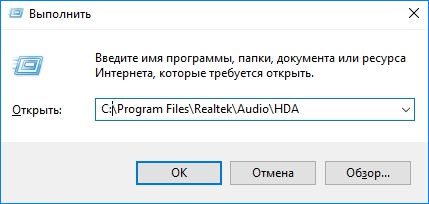
Найдите и дважды кликните на исполняемый файл (.exe).

После этого должно открыться окно диспетчера Realtek HD. В случае успешного запуска кликните правой кнопкой мыши на файл *.exe, выберите «Создать ярлык». Сохраните его на рабочий стол.
Обновление драйверов
Realtek HD часто не открывается из-за неисправных или поврежденных драйверов. Таким образом, удаление и повторная их установка позволит решить неполадки с диспетчером.
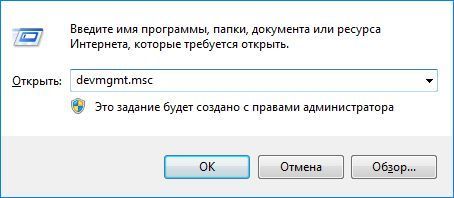
Откройте окно «Выполнить» (клавиши Win + R), наберите команду devmgmt.msc и подтвердите ее на Enter.
Раскройте вкладку «Звуковые, игровые и видеоустройства». Кликните правой кнопкой мыши на Realtek High Definition Audio, выберите «Удалить» и подтвердите все дополнительные запросы.
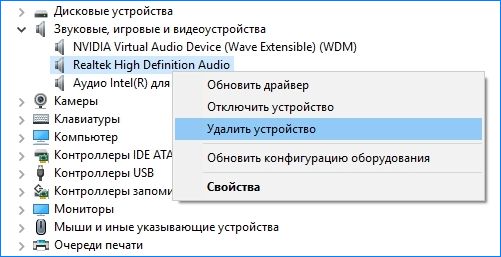
В верхнем меню перейдите на вкладку «Действие», щелкните «Обновить конфигурацию оборудования».
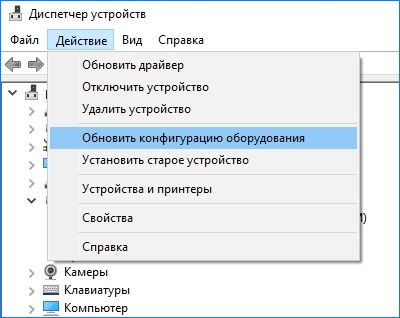
Таким образом, будут переустановлены драйверы и возможно устранен сбой с запуском диспетчера.
Если проблема остается, после удаления вместо действия «Обновить конфигурацию оборудования» просто перезагрузите компьютер. В ходе следующей загрузки, когда система обнаружит звуковое оборудование, драйвер будет загружен автоматически.
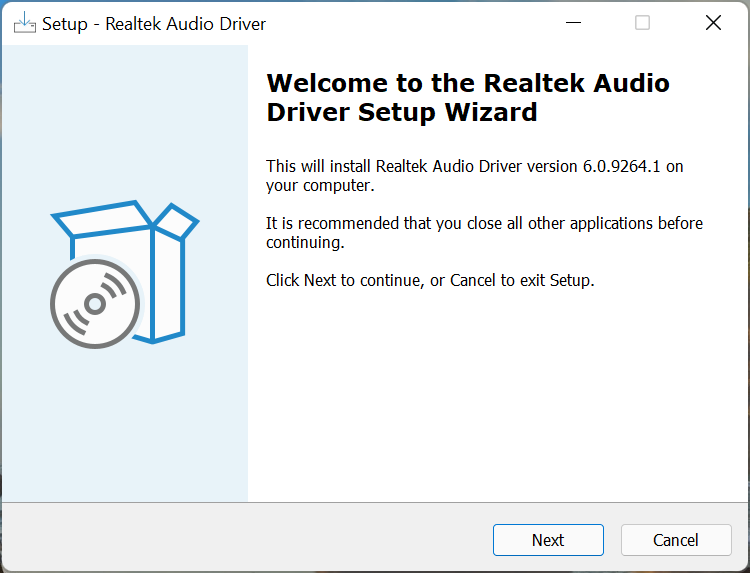
Также можно обновить Realtek HD вручную. Для этого загрузите с официального сайта последнюю версию программного обеспечения на компьютер.
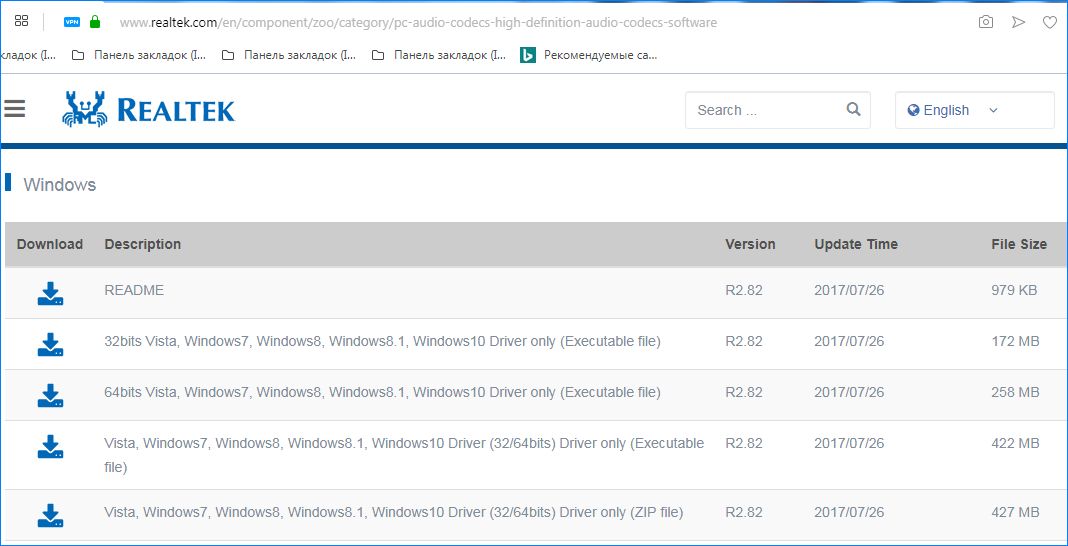
Запустите загруженный файл, следуйте дальнейшим инструкциям. После перезагрузки проблема с диспетчером звука должна исчезнуть.
Восстановление диспетчера звука
Если не открываются настройки звука, то попробуйте восстановить Realtek HD с Панели управления.
Выведите на экран панель «Выполнить» клавишами Win + R, впишите appwiz.cpl, подтвердите на Enter.
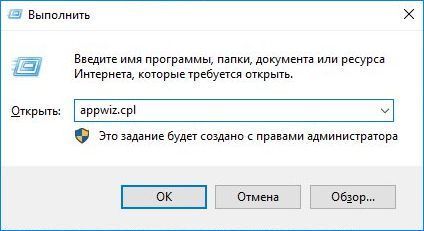
Правым щелчком мыши на Realtek High Definition Audio Driver откройте контекстное меню и выберите «Восстановить». Если этот пункт не отображается, нажмите «Удалить/Изменить».
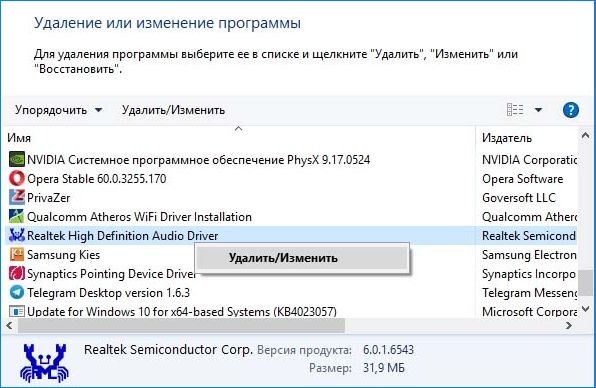
Откроется окно, в котором будет доступен вариант восстановления. Следуйте инструкциям на экране. После восстановления проверьте, открываются ли настройки Realtek HD.
Средство исправления неполадок (Windows 7)
Майкрософт предоставляет собственные средства устранения неполадок, которые исправляют незначительные неисправности. Это не самые эффективные средства, но требуют всего несколько минут для поиска и устранения неполадок.
На панели Windows + R, впишите команду:
control.exe /name Microsoft.Troubleshooting

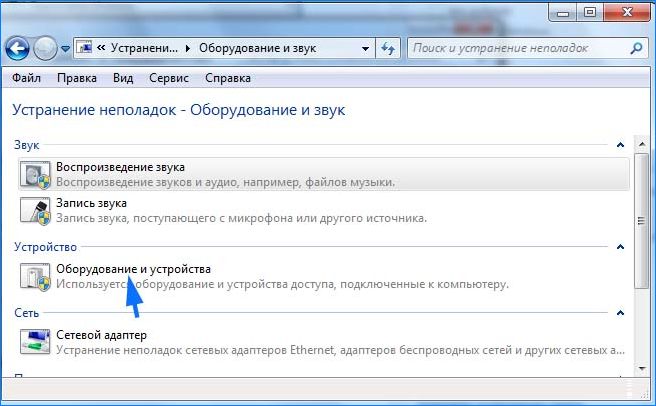
Перейдите в «Оборудование и звук».

Выберите «Оборудование и устройства».
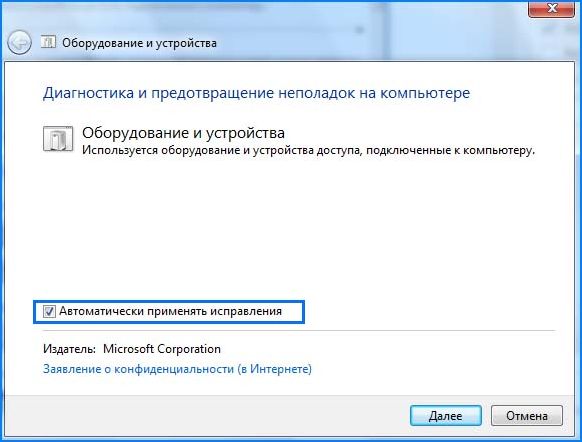
Кликните на «Дополнительно» и отметьте флажком опцию «Автоматически применять исправления». Щелкните «Далее», следуйте инструкциям на экране.
Откат драйверов
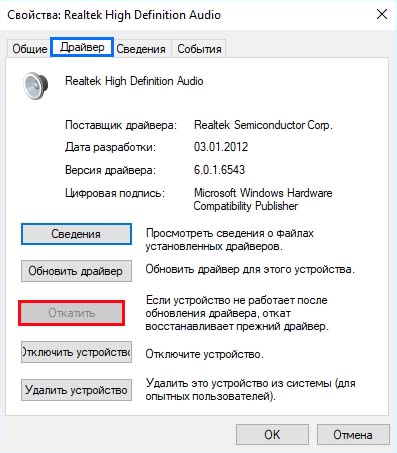
Если диспетчер Realtek HD Audio перестал открываться после обновления драйвера, то ошибка связана с несовместимостью или произошел сбой при установке. В Диспетчере устройств есть опция, которая позволяет откатить его к предыдущей версии.
Откройте строку «Выполнить», впишите devmgmt.msc для входа в «Диспетчер устройств».
Разверните «Звуковые, игровые и видеоустройства». Дважды кликните на карте, перейдите во вкладку «Драйвер» и нажмите «Откатить». Если эта кнопка не активна, тогда удалите и разрешите Windows установить его автоматически.
Установка драйверов из Центра обновления Microsoft
Если неполадки с диспетчером Realtek HD начались после обновления Windows, то попробуйте переустановить драйвера из каталога Центра Майкрософт.
Перейдите на сайт Каталога Центра обновления Майкрософт. В строке поиска введите «6.0.1.8328» и скачайте подходящую версию.

Кликните правой кнопкой мыши на загруженный файл, выберите «Извлечь». Нажмите «Обзор» и укажите пустую папку, куда хотите извлечь содержимое файла.
Теперь нужно отключить интернет. Это связано с тем, что когда удалим текущие драйвера, Windows может автоматически заменить их стандартными.
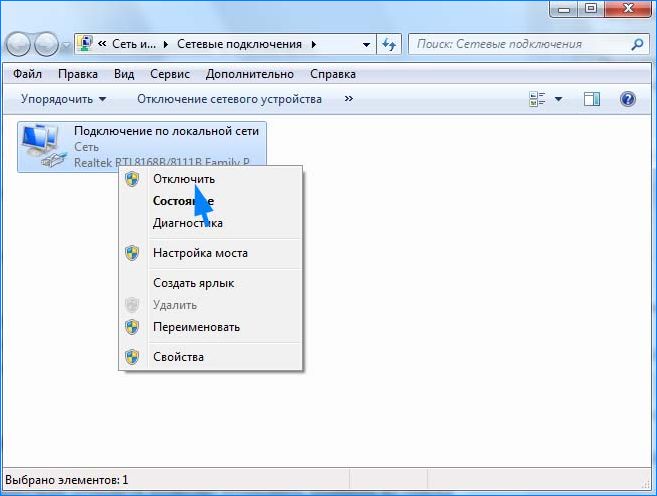
Откройте окно Win + R, впишите команду ncpa.cpl, подтвердите ее запуск на Enter. Кликните правой кнопкой мыши на активное соединение и отключите.
После опять нажмите Win + R, введите devmgmt.msc. Разверните «Звуковые, видео и игровые устройства». Правым щелчком мыши по звуковой карте откройте меню, нажмите на «Удалить» и подтвердите все дополнительные запросы.
Перезагрузите ПК, после откройте «Диспетчер устройств» и раскройте вкладку «Звуковые, видео и игровые устройства».
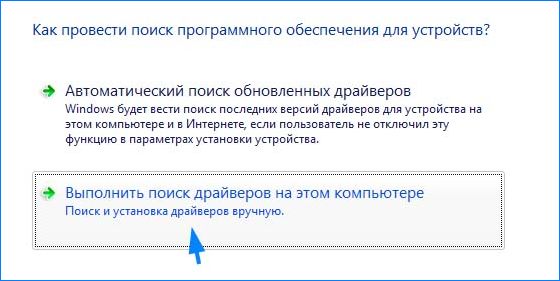
Щелкните правой кнопкой мыши на Realtek High Definition Audio и обновите драйвер. Затем щелкните на второй вариант «Выполнить поиск на этом компьютере».
Нажмите на «Обзор» и укажите папку, куда распаковали драйвера. Следуйте инструкциям до завершения установки. После перезагрузите ПК, подключите обратно интернет. Проверьте, открывается ли диспетчер.
Выбор драйверов из списка установленных
Это решение позволит установить драйвера из списка установленных на компьютере.
Выведите на экран окно «Выполнить» (Windows + R), наберите команду devmgmt.msc.
Разверните вкладку «Звуковые, игровые и видео контроллеры», правой кнопкой щелкните на аудио карте, выберите «Обновить».
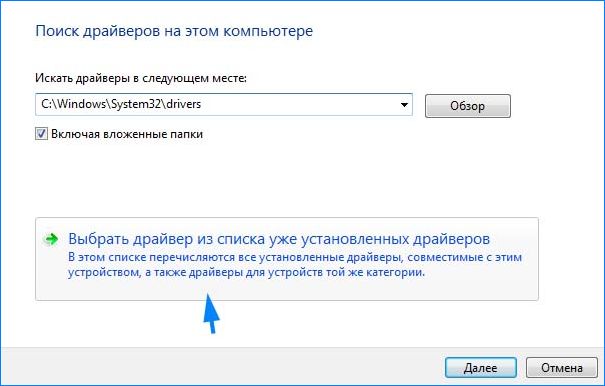
Перейдите в пункт «Выполнить поиск на этом компьютере», затем щелкните «Выбрать из списка уже установленных».
Отметьте Realtek HD Audio, щелкните «Далее». После завершения перезагрузите компьютер и проверьте, открывается ли Realtek HD.