Если фоновый процесс COM-соединения оканчивается ошибкой
{Обработка.ОбменДаннымиXML.МодульОбъекта(15947)}: Ошибка при вызове конструктора (COMОбъект): -2147221005(0x800401F3): Invalid class string
, то нужно зарегистрировать библиотеку ComConnector comcntr.dll из каталога программы.
В 32-битной версии сервера проблема решилась бы командой
regsvr32 «C:Program Files (x86)1cv88.3.5.1119bincomcntr.dll»
но в 64-битной версии команда будет примерно такой * :
C:WindowsSysWOW64regsvr32 «C:Program Files (x86)1cv88.3.5.1119bincomcntr.dll»
Затем перезайдите в 1С Предприятие и попробуйте установить COM-соединение снова.
* если команда регистрации не помогла, то нужно предварительно удалить регистрацию библиотеки comcntr.dll, запустив ту же команду вызова regsvr32 с ключом /u
** если и это не помогло, попробуйте переустановить платформу 1С в режиме Исправить, а затем зарегистрируйте библиотеку, как написано выше
Запись опубликована в рубрике Настройка, Регламенты с метками com-соединение. Добавьте в закладки постоянную ссылку.
Windows 10 Pro released in July 2015 Windows Vista Enterprise Windows Vista Business Windows Vista Home Basic Windows Vista Home Premium Windows Vista Ultimate Microsoft Windows XP Home Edition Microsoft Windows XP Professional Microsoft Windows XP Tablet PC Edition Windows 7 Enterprise Windows 7 Home Basic Windows 7 Home Premium Windows 7 Professional Windows 7 Ultimate Windows 8 Windows 8 Enterprise Windows 8 Pro Windows 8.1 Windows 8.1 Enterprise Windows 8.1 Pro Еще…Меньше
Если вы получили сообщение об ошибке, описания которого нет в этой статье, можно найти его подробное объяснение, рекомендуемые действия и список дополнительных ресурсов поддержки на странице ошибок и событий TechNet.
Аннотация
Regsvr32 — это служебная программа командной строки для регистрации и отмены регистрации элементов управления OLE, например ActiveX и библиотеки DLL в реестре Windows. Средство Regsvr32.exe установлено в папке %systemroot%System32 в ОС Windows XP и более поздних версиях Windows.
Примечание. В 64-разрядных версиях Windows есть две версии файла Regsv32.exe:
-
64-разрядная версия — %systemroot%System32regsvr32.exe;
-
32-разрядная версия — %systemroot%SysWoW64regsvr32.exe.
Синтаксис команды Regsvr32
Программа RegSvr32.exe имеет следующие параметры командной строки.
Regsvr32 [/u] [/n] [/i[:строка_команд]] DLL-файл
/u — отменяет регистрацию сервера
/i — вызывает DllInstall, передавая ей в параметре необязательную строку_команд; при использовании с ключом /u вызывает DllUnInstall.
/n — не вызывает DllRegisterServer; это может использоваться с ключом /i
/s – «тихий» режим; окна сообщений не отображаются
Типичные решения ошибок Regsvr32
При появлении ошибки Regsvr32 попробуйте устранить ее одним из следующих способов.
-
Способ 1. Повторный запуск команды Regsvr32 в командной строке с повышенными привилегиямиЧтобы открыть командную строку с повышенными привилегиями, выполните указанные ниже действия.
Windows 8.1 и Windows 8Проведите пальцем от правого края экрана к центру и коснитесь кнопки Поиск. Либо, если вы используете мышь, переместите указатель в правый нижний угол экрана и щелкните кнопку Поиск. Введите запрос Командная строка в поле Поиск, щелкните правой кнопкой мыши элемент Командная строка, затем выберите команду Запуск от имени администратора. Если система запросит пароль администратора или подтверждение, введите пароль или нажмите кнопку Разрешить.
Windows 7 и Windows VistaНажмите кнопку Пуск, введите запрос Командная строка или cmd в поле Поиск, щелкните правой кнопкой мыши элемент Командная строка, а затем выберите команду Запуск от имени администратора. Если система запросит пароль администратора или подтверждение, введите пароль или нажмите кнопку Разрешить.
Windows XPВойдите в систему в качестве администратора или с другой учетной записью с правами администратора и откройте окно «Командная строка».
-
Способ 2. Использование 32-разрядной версии Regsvr32 для регистрации 32-разрядной библиотеки DLL в 64-разрядной версии ОС WindowsЕсли при регистрации 32-разрядной библиотеки DLL в 64-разрядной версии ОС Windows появляется ошибка, выполните следующие действия.
-
Откройте командную строку с повышенными привилегиями.
-
Если 32-разрядная библиотека DLL находится в папке %systemroot%System32, переместите ее в папку %systemroot%SysWoW64.
-
Выполните следующую команду:
%systemroot%SysWoW64regsvr32 <full path of the DLL>
-
Сообщения об ошибках Regsvr32
В приведенной ниже таблице содержатся сообщения об ошибках RegSvr32 и возможные причины их возникновения.
|
Сообщение об ошибке |
Причина |
|---|---|
|
Недопустимый параметр командной строки «»%1″». Проверьте использование команды и повторите попытку. |
Введено недопустимое сочетание параметров командной строки для вызова средства regsvr32.exe. |
|
Эта команда допустима только в том случае, если открыт проект элемента OLE Activex в Microsoft Visual Studio. |
Средство Regsvr32.exe вызвано программой Visual Studio, но в командной строке не указано ни одного модуля. |
|
Чтобы зарегистрировать модуль, нужно задать имя двоичного файла. |
Средство Regsvr32.exe вызвано без указания модулей в командной строке. |
|
Не удалось выполнить команду OleInitialize. Недостаточно свободной оперативной памяти на этом компьютере. Закройте все открытые программы и повторите попытку. |
Средство Regsvr32 должно инициализировать библиотеку COM, прежде чем вызывать ее функции, и отменить инициализацию при завершении работы. Это сообщение об ошибке выводится, если попытка инициализации или ее отмены не были успешными. |
|
Не удалось загрузить модуль «%1».nn Проверьте, что двоичный файл хранится на указанном пути или запустите отладку, чтобы диагностировать проблемы с этим двоичным файлом или зависимыми DLL-файлами.nn%2. |
При загрузке указанного в командной строке модуля произошла ошибка. Текст ошибки выводится как часть сообщения. |
|
Модуль «%1″ загружен, но точка входа %2 не найдена.nnПроверьте, что » %1″ является правильным файлом DLL или OCX и повторите попытку. |
Средству Regsvr32.exe не удалось найти необходимую точку входа модуля, указанного в командной строке. Это может произойти при неправильном экспорте точек входа из модуля или если модуль не является DLL- либо OCX-файлом. |
|
Модуль » %1″ загружен, но не удалось выполнить вызов %2, код ошибки: %3.nnДля получения дополнительных сведений об этой ошибке выполните поиск в Интернете, указав код ошибки как аргумент поиска. |
При вызове средством regsvr32.exe точки входа модуля, указанного в командной строке, произошла ошибка. Код ошибки выводится как часть сообщения. |
|
Возможно, модуль «%1» несовместим с версией Windows, работающей на этом компьютере. Проверьте, совместим ли этот модуль с x86 (32-разрядной) или x64 (64-разрядной) версией regsvr32.exe. |
Эта ошибка может произойти, если средство regsvr32.exe запущено на 32-разрядном (x86) компьютере, а в командной строке указан 64-разрядный модуль. |
В приведенной ниже таблице содержатся сообщения об ошибках RegSvr32 и возможные причины их возникновения.
|
Сообщение об ошибке |
Причина |
|
|---|---|---|
|
Нераспознанный флаг: /неверный_флаг |
Введено недопустимое сочетание флагов и ключей. |
|
|
Не указано имя DLL. |
Не введено имя DLL-файла. |
|
|
Имя_DLL было загружено, но найти точку входа для DllRegisterServer или DllUnregisterServer не удалось. |
Файл с указанным именем DLL не является DLL- или OCX-файлом. Например, это сообщение об ошибке будет отображено, если введена команда regsvr32 wjview.exe. |
|
|
Имя_DLL не является исполняемым файлом, и ни одного модуля поддержки для этого типа файлов не зарегистрировано. |
Файл с указанным именем DLL не является исполняемым файлом EXE, DLL или OCX. Например, это сообщение об ошибке будет отображено, если введена команда regsvr32 autoexec.bat. |
|
|
Имя_DLL не поддерживает автоматическую регистрацию, либо в памяти находится поврежденная версия. |
Например, при вводе команды «regsvr32 icwdial.dll» будет возвращено это сообщение об ошибке, так как файл Icwdial.dll не регистрируется автоматически. При подозрении на наличие в памяти поврежденной версии файла с указанным именем DLL перезагрузите компьютер или повторно извлеките исходную версию файла. |
|
|
Ошибка функции OleInitialize (или OleUninitialize) |
Средство Regsvr32 должно инициализировать библиотеку COM, прежде чем вызывать ее функции, и отменить инициализацию при завершении работы. Эти сообщения об ошибке возникают, если попытка инициализации библиотеки COM или ее отмены не были успешными. Например, файл Ole32.dll поврежден или является неправильной версией. |
|
|
Сбой при загрузке библиотеки («Имя_DLL»). GetlastError возвращает ошибку 0x00000485 |
Winerror.h, 0x00000485 = 1157 (ERROR_DLL_NOT_FOUND). Это означает, что «Не найден один из файлов библиотек, необходимых для выполнения данного приложения». Например, при вводе команды regsvr32 missing.dll будет возвращено это сообщение об ошибке, если файл Missing.dll не найден. |
|
|
Сбой при загрузке библиотеки («Имя_DLL»). GetLastError возвращает ошибку 0x00000002 |
Winerror.h, 0x00000002 = 2 (ERROR_FILE_NOT_FOUND). Это означает «Не удается найти указанный файл». Т. е. не найден соответствующий DLL-файл. Например, при вводе команды regsvr32 icwdial.dll будет возвращено это сообщение об ошибке, если файл Tapi32.dll не найден. |
|
|
Сбой при загрузке библиотеки (dskmaint.dll). GetLastError возвращает ошибку 0x000001f |
Winerror.h, 0x000001f = 31 (ERROR_GEN_FAILURE). Это означает «Присоединенное к системе устройство не работает». Это происходит при попытке регистрации файла Win16.dll. Например, это сообщение об ошибке будет отображено, если введена команда regsvr32 dskmaint.dll. |
|
|
Сбой при загрузке DllRegisterServer (или DllUnregisterServer) в Имя_DLL. Возвращенный код: строка |
В файле Winerror.h найдите строку, указанную в сообщении. |
Нужна дополнительная помощь?
- Remove From My Forums
-
Question
-
I have a custom DLL that is used by an MS Access application that has run for years on 2008R2 server that I need to move to 2016 Server. So I upgraded from MS access 2010 to MS access 2019 along with Server 2016
I copied it over to windowssystem32 and cannot seem to register it.
I do have the C++ Redistributable x86 & 64 installed.
The error is:
«RegSvr32
The module «C:WindowsSystem32MINFUNC.dll» failed to load
Make sure the binary is stored at the specified path or debug it to check for problems with the binary or dependent .DLL files.
The specified module could not be found. «
I looked in the event viewer and didn’t find any clues,
Any help would be greatly appreciated
GBrown
GDBrown
Answers
-
The module «C:WindowsSystem32MINFUNC.dll» failed to load
Is MINFUNC.dll the name of your custom dll, or is it a dll that the custom dll is trying to load?
If this is your custom dll and it’s 32 bit, then it should go into C:Windows|SysWOW64.
You can use the dependency walker to see what other dlls it references. http://dependencywalker.com/
Depends hasn’t been updated in a while and on newer OS’s it will report that files with names beginning with API-MS and EXT-MS cannot be found. I just ignore those errors. Use the 64 bit version.
-
Marked as answer by
Saturday, July 4, 2020 4:21 AM
-
Marked as answer by
 Среди частых вопросов пользователей, особенно после того, как они сталкиваются с тем, что какая-то из библиотек DLL отсутствует в Windows 10, Windows 11 или других версиях системы — как зарегистрировать DLL в соответствующей версии ОС.
В этой инструкции подробно о способах регистрации библиотек DLL в Windows x64 и x86 (32-бит) с помощью regsvr32.exe (и кратко о regasm.exe), о возможных нюансах и проблемах, которые могут возникнуть в процессе.
Регистрация библиотеки DLL в Windows 10, Windows 11 и предыдущих версий системы
Дальнейшие шаги описаны в предположении, что DLL, которую нужно зарегистрировать, уже находится в нужном расположении: папке C:WindowsSystem32, C:WindowsSysWOW64 или, в некоторых случаях — отдельных папках программ, к которой относится соответствующая библиотека, например, для 1С — C:Program Files1cv8номер_версииbin (или Program Files x86 в случае 32-битной версии).
Прежде чем приступить к регистрации библиотеки, учитывайте следующие моменты:
- В x64 версиях Windows 64-битные DLL хранятся в System32, а 32-битные — в SysWOW64 (у некоторых начинающих пользователей бывает обратное предположение исходя из имён папок).
- Файлы DLL x64 и x86 (32-бит) — это разные файлы. И если прямого указания на разрядность в месте загрузки файла нет, то чаще это 32-битный файл (что не мешает ему работать в x64 системе), но это не всегда так.
- Для регистрации библиотеки DLL используется системный инструмент regsvr32.exe, который также доступен в двух версиях, которые лежат в папках System32 и SysWOW64 (в случае 64-битных систем). По умолчанию при описываемых далее действиях запускается x64 версия.
- 32-битным программам и играм (по умолчанию устанавливаются в Program Files x86 в 32-битных системах) для работы нужны 32-битные DLL, не зависимо от разрядности Windows.
Сам процесс регистрации в общем случае состоит из следующих шагов:
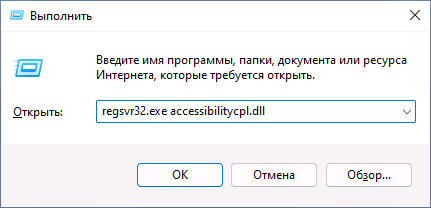
- Нажмите клавиши Win+R на клавиатуре (Win — клавиша с эмблемой Windows). Также можно нажать правой кнопкой мыши по кнопке «Пуск» в Windows 11 или Windows 10 и выбрать пункт контекстного меню «Выполнить».
- Введите команду regsvr32.exe путь_к_файлу (если путь к файлу содержит пробелы, возьмите весь путь в кавычки), например, для регистрации библиотеки DLL COMCNTR.DLL в 1С (для 64-бит) команда может иметь вид:
regsvr32.exe "C:Program Files1cv88.3.19.1150bincomcntr.dll"
Если DLL находится в System32, полный путь указывать не обязательно, достаточно простого имени файла, как на изображении ниже.

- Нажмите Ок или Enter.
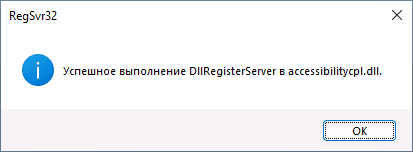
- При успехе вы получите сообщение вида «Успешное выполнение DllRegisterServer в имя_файла.dll» или «Успешное выполнение DllRegisterServer и DllInstall в имя_файла.dll».

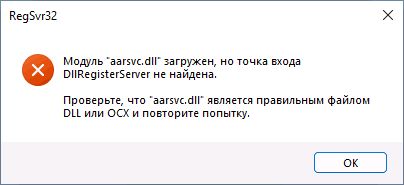
Возможна и неудача — сообщение об ошибке «Модуль dll загружен, но точка входа DllRegisterServer не найдена. Проверьте, что файл является правильным файлом DLL или OCX и повторите попытку». Подробнее об ошибке — в следующем разделе статьи.
Дополнительно: для регистрации классов из библиотек DLL .NET Framework в COM с созданием необходимых записей в реестре используется regasm.exe из .NET SDK, причем базовая команда регистрации DLL выглядит тем же образом, что и в случае с regsvr32.exe. Подробнее по использованию regasm — https://docs.microsoft.com/ru-ru/dotnet/framework/tools/regasm-exe-assembly-registration-tool.
Почему не удается зарегистрировать DLL
Ошибка при регистрации с помощью regsvr32 вида «Точка входа DllRegisterServer не найдена» говорит о том, что эта библиотека DLL не поддерживает регистрацию описанным методом. Можно попробовать использовать вариант команды:
regsvr32 /i /n путь_к_файлу.dll
но с большой вероятностью и это не поможет.
У большинства домашних пользователей такая проблема возникает при регистрации файлов DLL для игр и программ, часто не вполне лицензионных, которые сообщили, что нужный файл DLL не обнаружен или отсутствует. Причем сами библиотеки DLL обычно скачаны со сторонних сайтов (и чаще всего имеют имена начинающиеся с «vc», «msvc» или «d3d»). А решение, как правило, простое — выяснить, частью какого набора компонентов является эта DLL и установить эти компоненты с помощью их собственного установщика. Более подробно проблема и подходы к решению описаны в инструкции Точка входа DllRegisterServer не найдена — причины и возможные решения.
Видео
Надеюсь, цель достигнута, а количество вопросов, связанных с регистрацией DLL в Windows, уменьшилось.
Содержание
- Варианты решения проблемы
- Способ 1: OCX/DLL Manager
- Способ 2: Меню «Выполнить»
- Способ 3: Командная строка
- Способ 4: Открыть с помощью
- Возможные ошибки
- Вопросы и ответы
После установки различных программ или игр можно столкнуться с ситуацией, когда при включении возникает ошибка «Запуск программы произвести невозможно, так как требуемой DLL нет в системе». Несмотря на то, что ОС семейства Windows обычно регистрируют библиотеки в фоновом режиме, после того, как вы скачаете и поместите ваш DLL файл в соответствующее место, ошибка все равно возникает, и система просто его «не видит». Чтобы это исправить, нужно зарегистрировать библиотеку. Как это можно сделать, будет рассказано далее в этой статье.
Варианты решения проблемы
Имеется несколько методов, позволяющих устранить данную проблему. Рассмотрим каждый из них подробнее.
Способ 1: OCX/DLL Manager
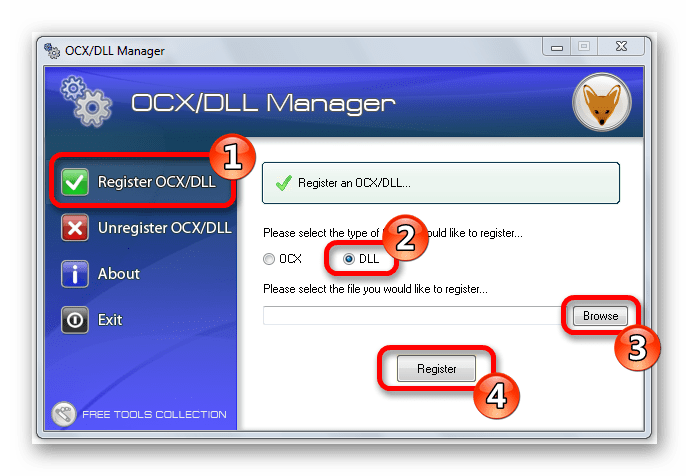
OCX/DLL Manager – это маленькая программа которая может помочь зарегистрировать библиотеку или файл OCX.
Загрузить программу OCX/DLL Manager
Для этого вам нужно будет:
- Нажать на пункт меню «Register OCX/DLL».
- Выбрать тип файла, который будете регистрировать.
- При помощи кнопки «Browse» указать местоположение DLL.
- Нажать на кнопку «Register» и программа сама зарегистрирует файл.
OCX/DLL Manager также умеет отменять регистрацию библиотеки, для этого понадобится выбрать в меню пункт «Unregister OCX/DLL» и в последствии проделать все те же операции, как и в первом случае. Функция отмены может вам понадобиться для сравнения результатов при активированном файле и при отключенном, а также в процессе удаления некоторых компьютерных вирусов.
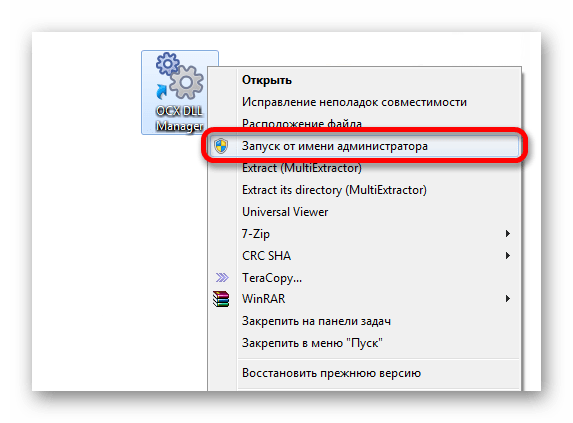
В процессе регистрации, система может выдать вам ошибку, говорящую о том, что требуются права администратора. В таком случае, нужно запустить программу нажав на неё правой кнопкой мыши, и выбрать «Запуск от имени администратора».
Способ 2: Меню «Выполнить»
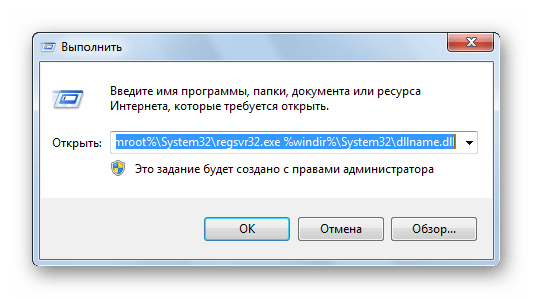
Можно зарегистрировать DLL, используя команду «Выполнить» в стартовом меню операционной системы Windows. Для этого нужно будет произвести следующие действия:
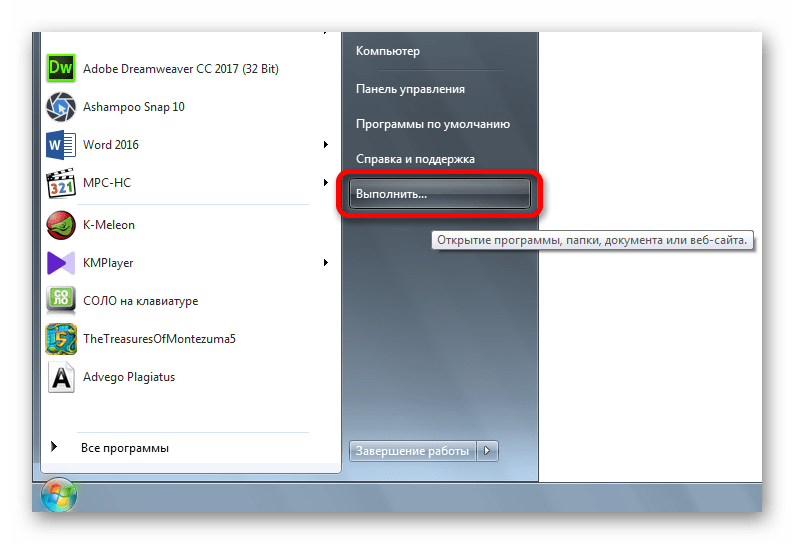
- Нажать клавиатурную комбинацию «Windows + R» или выбрать пункт «Выполнить» из меню «Пуск».
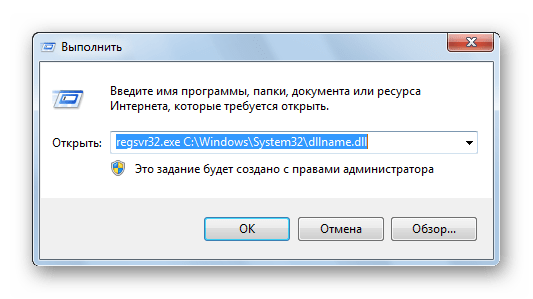
- Ввести имя программы, которая будет регистрировать библиотеку — regsvr32.exe, и путь, по которому размещен файл. В итоге должно получиться так:
- Нажмите «Enter» или кнопку «OK»; система выдаст вам сообщение о том, успешно или нет была зарегистрирована библиотека.
regsvr32.exe C:WindowsSystem32dllname.dll
где dllname — это имя вашего файла.

Этот пример подойдёт вам в том случае, если операционная система установлена на диск С. Если она находится в другом месте, то нужно будет поменять букву диска или воспользоваться командой:
%systemroot%System32regsvr32.exe %windir%System32dllname.dll
В таком варианте программа сама находит папку где у вас установлена ОС и запускает регистрацию указанного DLL файла.
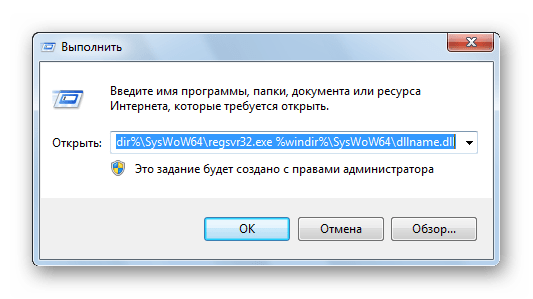
В случае с 64-разрядной системой у вас будет две программы regsvr32 — одна находится в папке:
C:WindowsSysWOW64
и вторая по пути:
C:WindowsSystem32
Это разные файлы, которые используются раздельно для соответствующих ситуаций. Если у вас 64-битная ОС, а файл DLL 32-битный, тогда сам файл библиотеки должен быть помещен в папку:
WindowsSysWoW64
и команда будет выглядеть уже так:
%windir%SysWoW64regsvr32.exe %windir%SysWoW64dllname.dll
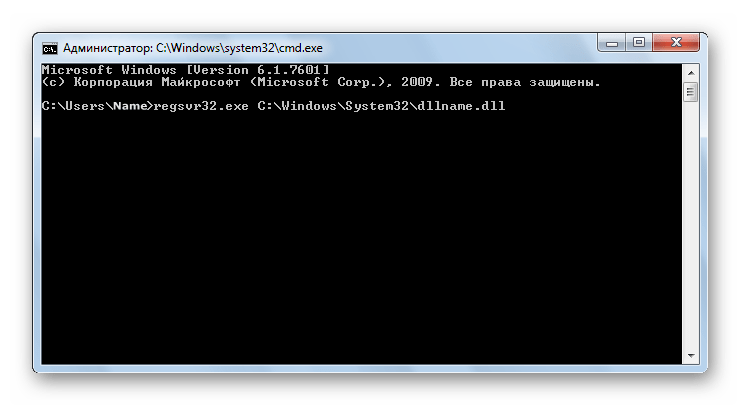
Способ 3: Командная строка
Регистрация файла через командную строку не сильно отличается от второго варианта:
- Выберите команду «Выполнить» в меню «Пуск».
- Впишите в открывшемся поле для ввода cmd.
- Нажмите «Enter».
Перед вами появится окно, в котором нужно будет вводить те же команды, что и во втором варианте.
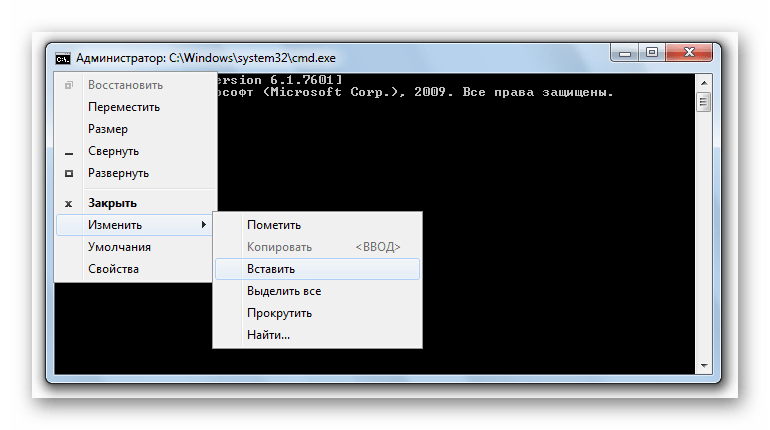
Надо отметить, что у окна командной строки имеется функция вставки скопированного текста (для удобства). Найти это меню можно, нажав правой кнопкой на пиктограмме в левом верхнем углу.
Способ 4: Открыть с помощью
- Откройте меню файла, который будете регистрировать, нажав по нему правой кнопкой мыши.
- Выберите «Открыть с помощью» в появившемся меню.
- Нажимаете «Обзор» и выберете программу regsvr32.exe из следующей директории:
- Откройте DLL с помощью этой программы. Система выдаст сообщение об успешной регистрации.
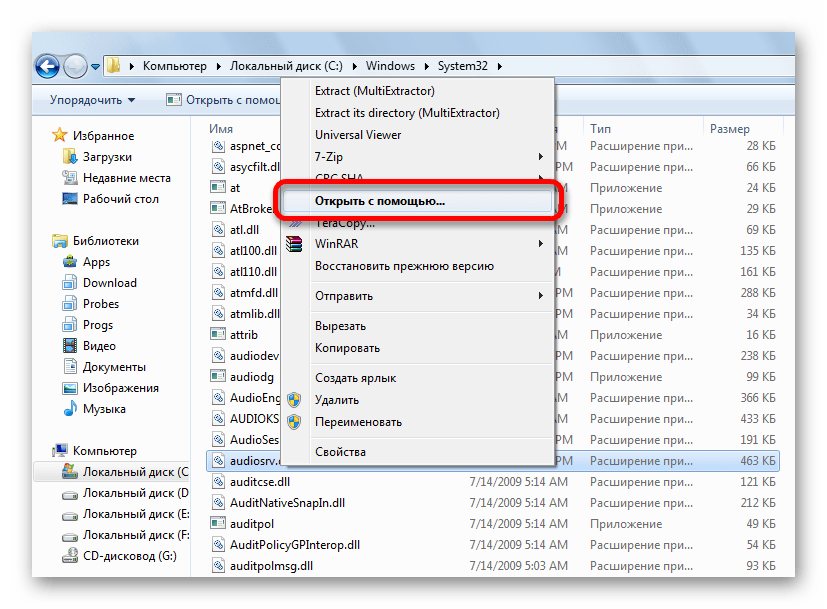
Windows/System32
или в случае, если вы работаете в 64-битной системе, а файл DLL 32-разрядный:
Windows/SysWow64
Возможные ошибки
«Файл не совместим с установленной версией Windows» — это означает, что вы, скорее всего, пытаетесь зарегистрировать 64-разрядную DLL в 32-битной системе или наоборот. Воспользуйтесь соответствующей командой, описанной во втором способе.
«Точка входа не найдена» — не все библиотеки DLL можно зарегистрировать, некоторые из них просто не поддерживают команду DllRegisterServer. Также, возникновение ошибки может быть вызвано тем, что файл уже зарегистрирован системой. Существуют сайты, распространяющие файлы, которые в реальности не являются библиотеками. В таком случае, естественно, зарегистрировать ничего не выйдет.
В заключение нужно сказать, что суть всех предложенных вариантов одна и та же — это просто разные методы запуска команды регистрации — кому как удобнее.
![]()
Download Article
![]()
Download Article
This wikiHow teaches you how to register a DLL file, which creates a path from the file to the Windows registry. Registering a DLL can fix startup issues for some programs, but most DLL files either don’t support registration or are already registered. Keep in mind that you cannot register DLLs that came pre-installed on your Windows computer, as these DLLs are vital to Windows’ operation and Windows updates will fix any out-of-date or malfunctioning DLLs.
-

1
Understand how this method works. You can use a combination of the «regsvr» command and a DLL file’s name to register the DLL if the DLL file supports the Register Server export command. This will create a path from the Windows registry to the DLL file, making it easier for Windows processes to find and use the DLL file.
- You’ll most commonly need to use this method to register DLLs which came with third-party programs that are supposed to interface directly with system-level resources (e.g., Command Prompt).
-
2
Know what the «entry point» error means. If the DLL is already registered, it doesn’t support the Register Server export command, or its code doesn’t allow it to be connected to the Windows registry, you’ll receive an error which says, «The module [DLL name] was loaded but the entry point DllRegisterServer was not found». If you see this error message occur, the DLL cannot be registered.
- The «entry point» error isn’t so much a problem as it is a confirmation, as seeing this error means that your DLL doesn’t need to be registered.
Advertisement
-
3
Find the DLL you want to register. Go to the folder location of the DLL that you want to register. Once you’ve found the DLL file that you want to register, you can proceed.
- If you installed a program for which you want to register a DLL, for example, you would go to the program’s installation folder (e.g., «C:Program Files[program name]»).
-
4
Open the DLL’s Properties. Right-click the DLL file, then click Properties in the drop-down menu. A pop-up window will open.
-
5
Note the DLL’s name. In the text box at the top of the Properties window, you’ll see the DLL’s full name. This is the name you’ll need to enter later.
- Since most DLLs have difficult-to-remember names, consider leaving up the Properties window when you’re done here; that way, you’ll be able to copy the name later.
-
6
Copy the DLL’s path. Click and drag your cursor across the string of text to the right of the «Location» heading, then press Ctrl+C to copy the folder path to the DLL.
-
7
Open Start
. Click the Windows logo in the bottom-left corner of the screen.
-
8
Search for Command Prompt. Type command prompt into the Start search bar. You should see the Command Prompt icon appear at the top of the window.
-
9
Open Command Prompt in administrator mode. To do so:
- Right-click
Command Prompt.
- Click Run as administrator
- Click Yes when prompted.
- Right-click
-
10
Switch to the DLL’s directory. Type in cd and type a space, press Ctrl+V to paste in the path to the DLL file, and press ↵ Enter.
- For example, if your DLL file is in the «SysWOW64» folder that’s inside the stock «Windows» folder, your command would look like this:
cd C:WindowsSysWOW64
- For example, if your DLL file is in the «SysWOW64» folder that’s inside the stock «Windows» folder, your command would look like this:
-
11
Enter the «regsvr» command and the DLL’s name. Type in regsvr32 and type a space, then type in your DLL’s name (complete with the «.dll» extension) and press ↵ Enter. If your DLL can be registered, doing this will result in a confirmation message.[1]
- For example, if the DLL’s name is «usbperf.dll», your command would look like this:
regsvr32 usbperf.dll - To copy the DLL’s name at this point, re-open the folder with the DLL in it (the Properties window should pop up), then highlight the name in the text box and press Ctrl+C. You can then paste the name into Command Prompt by pressing Ctrl+V.
- If the DLL is either already registered or unable to be registered, you’ll see the «entry point» error pop up instead of a confirmation message.
- For example, if the DLL’s name is «usbperf.dll», your command would look like this:
-
12
Try unregistering the DLL and then re-registering it. If entering the «regsvr» command results in an error that isn’t the «entry point» error, you may need to unregister the DLL before you can actually register it:
- Type in regsvr32 /u name.dll and press ↵ Enter. Make sure to replace «name» with the DLL’s name.
- Type in regsvr32 name.dll and press ↵ Enter, again remembering to replace «name» with the DLL’s name.


Advertisement
-
1
Understand how this method works. By creating a list of your computer’s DLL files and running the list as a BAT file, you can automatically register all of your computer’s DLL files. This is optimal if you don’t have a specific DLL that you want to register.
-
2
Open Start
. Click the Windows logo in the bottom-left corner of the screen.
-
3
Search for Command Prompt. Type command prompt into the Start search bar. You should see the Command Prompt icon appear at the top of the window.
-
4
Open Command Prompt in administrator mode. To do so:
- Right-click
Command Prompt.
- Click Run as administrator
- Click Yes when prompted.
- Right-click
-
5
Switch to the Windows directory. Type in cd c:Windows and press ↵ Enter. This will tell Command Prompt to execute the next command inside of the «Windows» folder.
-
6
Create a DLL list file. Type dir *.dll /s /b > C:regdll.bat into Command Prompt, then press ↵ Enter. Doing so allows Command Prompt to create a file listing the location and name of every DLL in the Windows directory.
-
7
Close Command Prompt. Once you see the «c:Windows>» line of text appear below the command you entered, you’re free to exit Command Prompt and proceed.
-
8
Go to the list file’s location. You can find it from within File Explorer:
- Open File Explorer
(or press ⊞ Win+E).
- Click This PC on the left side of the window.
- Double-click your computer’s OS (C:) hard drive.
- Scroll down (if necessary) until you see a file named «regdll».
- Open File Explorer
-
9
Copy the file onto your desktop. In order to save your changes, you’ll need to place a copy of the «regdll» file on your desktop:
- Click the file once to select it.
- Press Ctrl+C.
- Click the desktop.
- Press Ctrl+V.
-
10
Open the list file in Notepad. Click the file on your desktop once to select it, then do the following:
- Right-click the «regdll» file.
- Click Edit in the drop-down menu.
-
11
Remove unnecessary DLL locations. While optional, completing this step will cut down significantly on the amount of time it takes to register the DLL files. You can delete any lines of text which have the following locations:[2]
- C:WindowsWinSXS — The bottom quarter or so of the text document will contain these lines of text.
- C:WindowsTemp — You’ll find these near the section where the «WinSXS» lines were.
- C:Windows$patchcache$ — These are harder to find. You can run a search by pressing Ctrl+F, typing in $patchcache$, and clicking Find next.
-
12
Add the «regsvr» command to each line of text. You can do this by using Notepad’s «Find and Replace» feature:
- Click Edit.
- Click Replace… in the drop-down menu.
- Type c: into the «Find what» text box.
- Type Regsvr32.exe /s c: into the «Replace with» text box.
- Click Replace All
- Exit the window.
-
13
Save your changes and exit Notepad. Press Ctrl+S to save your changes, then click the X in the top-right corner of the Notepad window to close it. At this point, you’re ready to run the «regdll.bat» file.
-
14
Run the file. Right-click the «regdll.bat» file, click Run as administrator, and click Yes when prompted to run it in Command Prompt. Doing so will allow Command Prompt to begin registering every available DLL; this process can take a long time to complete, so just make sure your computer is on and plugged in for the duration.
-
15
Exit Command Prompt. Once the process finishes running, you can close Command Prompt. Your computer’s DLL files should now be registered.


Advertisement
Add New Question
-
Question
What do I do if the «register» button will not work?

War_lizard
Community Answer
Refresh the page or restart the computer.
Ask a Question
200 characters left
Include your email address to get a message when this question is answered.
Submit
Advertisement
-
Unregistering a DLL is helpful if you want to delete it, as every registered DLL is considered «read-only» and thus impossible to delete without unregistering first.
Thanks for submitting a tip for review!
Advertisement
-
DLLs are essential for Windows to run properly. While nearly impossible to do, accidentally deleting or changing a system DLL will harm your computer.
Advertisement
References
About This Article
Article SummaryX
The easiest way to register a DLL is by updating your Windows computer to the latest version of its operating system. If you want to register DLLs manually instead, you can generate a list of all DLLs on your computer from within Command Prompt, after which point you can open the list in Notepad. After removing unnecessary entries from the list and adding commands before the DLLs you want to register, you can save the Notepad file as a Windows Batch (.bat) file and then execute it by double-clicking it. This will result in all of the selected DLL files on your computer being re-registered.
Did this summary help you?
Thanks to all authors for creating a page that has been read 2,145,377 times.
Is this article up to date?
![]()
Download Article
![]()
Download Article
This wikiHow teaches you how to register a DLL file, which creates a path from the file to the Windows registry. Registering a DLL can fix startup issues for some programs, but most DLL files either don’t support registration or are already registered. Keep in mind that you cannot register DLLs that came pre-installed on your Windows computer, as these DLLs are vital to Windows’ operation and Windows updates will fix any out-of-date or malfunctioning DLLs.
-
1
Understand how this method works. You can use a combination of the «regsvr» command and a DLL file’s name to register the DLL if the DLL file supports the Register Server export command. This will create a path from the Windows registry to the DLL file, making it easier for Windows processes to find and use the DLL file.
- You’ll most commonly need to use this method to register DLLs which came with third-party programs that are supposed to interface directly with system-level resources (e.g., Command Prompt).
-
2
Know what the «entry point» error means. If the DLL is already registered, it doesn’t support the Register Server export command, or its code doesn’t allow it to be connected to the Windows registry, you’ll receive an error which says, «The module [DLL name] was loaded but the entry point DllRegisterServer was not found». If you see this error message occur, the DLL cannot be registered.
- The «entry point» error isn’t so much a problem as it is a confirmation, as seeing this error means that your DLL doesn’t need to be registered.
Advertisement
-
3
Find the DLL you want to register. Go to the folder location of the DLL that you want to register. Once you’ve found the DLL file that you want to register, you can proceed.
- If you installed a program for which you want to register a DLL, for example, you would go to the program’s installation folder (e.g., «C:Program Files[program name]»).
-
4
Open the DLL’s Properties. Right-click the DLL file, then click Properties in the drop-down menu. A pop-up window will open.
-
5
Note the DLL’s name. In the text box at the top of the Properties window, you’ll see the DLL’s full name. This is the name you’ll need to enter later.
- Since most DLLs have difficult-to-remember names, consider leaving up the Properties window when you’re done here; that way, you’ll be able to copy the name later.
-
6
Copy the DLL’s path. Click and drag your cursor across the string of text to the right of the «Location» heading, then press Ctrl+C to copy the folder path to the DLL.
-
7
Open Start
. Click the Windows logo in the bottom-left corner of the screen.
-
8
Search for Command Prompt. Type command prompt into the Start search bar. You should see the Command Prompt icon appear at the top of the window.
-
9
Open Command Prompt in administrator mode. To do so:
- Right-click
Command Prompt.
- Click Run as administrator
- Click Yes when prompted.
- Right-click
-
10
Switch to the DLL’s directory. Type in cd and type a space, press Ctrl+V to paste in the path to the DLL file, and press ↵ Enter.
- For example, if your DLL file is in the «SysWOW64» folder that’s inside the stock «Windows» folder, your command would look like this:
cd C:WindowsSysWOW64
- For example, if your DLL file is in the «SysWOW64» folder that’s inside the stock «Windows» folder, your command would look like this:
-
11
Enter the «regsvr» command and the DLL’s name. Type in regsvr32 and type a space, then type in your DLL’s name (complete with the «.dll» extension) and press ↵ Enter. If your DLL can be registered, doing this will result in a confirmation message.[1]
- For example, if the DLL’s name is «usbperf.dll», your command would look like this:
regsvr32 usbperf.dll - To copy the DLL’s name at this point, re-open the folder with the DLL in it (the Properties window should pop up), then highlight the name in the text box and press Ctrl+C. You can then paste the name into Command Prompt by pressing Ctrl+V.
- If the DLL is either already registered or unable to be registered, you’ll see the «entry point» error pop up instead of a confirmation message.
- For example, if the DLL’s name is «usbperf.dll», your command would look like this:
-
12
Try unregistering the DLL and then re-registering it. If entering the «regsvr» command results in an error that isn’t the «entry point» error, you may need to unregister the DLL before you can actually register it:
- Type in regsvr32 /u name.dll and press ↵ Enter. Make sure to replace «name» with the DLL’s name.
- Type in regsvr32 name.dll and press ↵ Enter, again remembering to replace «name» with the DLL’s name.
Advertisement
-
1
Understand how this method works. By creating a list of your computer’s DLL files and running the list as a BAT file, you can automatically register all of your computer’s DLL files. This is optimal if you don’t have a specific DLL that you want to register.
-
2
Open Start
. Click the Windows logo in the bottom-left corner of the screen.
-
3
Search for Command Prompt. Type command prompt into the Start search bar. You should see the Command Prompt icon appear at the top of the window.
-
4
Open Command Prompt in administrator mode. To do so:
- Right-click
Command Prompt.
- Click Run as administrator
- Click Yes when prompted.
- Right-click
-
5
Switch to the Windows directory. Type in cd c:Windows and press ↵ Enter. This will tell Command Prompt to execute the next command inside of the «Windows» folder.
-
6
Create a DLL list file. Type dir *.dll /s /b > C:regdll.bat into Command Prompt, then press ↵ Enter. Doing so allows Command Prompt to create a file listing the location and name of every DLL in the Windows directory.
-
7
Close Command Prompt. Once you see the «c:Windows>» line of text appear below the command you entered, you’re free to exit Command Prompt and proceed.
-
8
Go to the list file’s location. You can find it from within File Explorer:
- Open File Explorer
(or press ⊞ Win+E).
- Click This PC on the left side of the window.
- Double-click your computer’s OS (C:) hard drive.
- Scroll down (if necessary) until you see a file named «regdll».
- Open File Explorer
-
9
Copy the file onto your desktop. In order to save your changes, you’ll need to place a copy of the «regdll» file on your desktop:
- Click the file once to select it.
- Press Ctrl+C.
- Click the desktop.
- Press Ctrl+V.
-
10
Open the list file in Notepad. Click the file on your desktop once to select it, then do the following:
- Right-click the «regdll» file.
- Click Edit in the drop-down menu.
-
11
Remove unnecessary DLL locations. While optional, completing this step will cut down significantly on the amount of time it takes to register the DLL files. You can delete any lines of text which have the following locations:[2]
- C:WindowsWinSXS — The bottom quarter or so of the text document will contain these lines of text.
- C:WindowsTemp — You’ll find these near the section where the «WinSXS» lines were.
- C:Windows$patchcache$ — These are harder to find. You can run a search by pressing Ctrl+F, typing in $patchcache$, and clicking Find next.
-
12
Add the «regsvr» command to each line of text. You can do this by using Notepad’s «Find and Replace» feature:
- Click Edit.
- Click Replace… in the drop-down menu.
- Type c: into the «Find what» text box.
- Type Regsvr32.exe /s c: into the «Replace with» text box.
- Click Replace All
- Exit the window.
-
13
Save your changes and exit Notepad. Press Ctrl+S to save your changes, then click the X in the top-right corner of the Notepad window to close it. At this point, you’re ready to run the «regdll.bat» file.
-
14
Run the file. Right-click the «regdll.bat» file, click Run as administrator, and click Yes when prompted to run it in Command Prompt. Doing so will allow Command Prompt to begin registering every available DLL; this process can take a long time to complete, so just make sure your computer is on and plugged in for the duration.
-
15
Exit Command Prompt. Once the process finishes running, you can close Command Prompt. Your computer’s DLL files should now be registered.
Advertisement
Add New Question
-
Question
What do I do if the «register» button will not work?
War_lizard
Community Answer
Refresh the page or restart the computer.
Ask a Question
200 characters left
Include your email address to get a message when this question is answered.
Submit
Advertisement
-
Unregistering a DLL is helpful if you want to delete it, as every registered DLL is considered «read-only» and thus impossible to delete without unregistering first.
Thanks for submitting a tip for review!
Advertisement
-
DLLs are essential for Windows to run properly. While nearly impossible to do, accidentally deleting or changing a system DLL will harm your computer.
Advertisement
References
About This Article
Article SummaryX
The easiest way to register a DLL is by updating your Windows computer to the latest version of its operating system. If you want to register DLLs manually instead, you can generate a list of all DLLs on your computer from within Command Prompt, after which point you can open the list in Notepad. After removing unnecessary entries from the list and adding commands before the DLLs you want to register, you can save the Notepad file as a Windows Batch (.bat) file and then execute it by double-clicking it. This will result in all of the selected DLL files on your computer being re-registered.
Did this summary help you?
Thanks to all authors for creating a page that has been read 2,145,377 times.
Is this article up to date?
Dynamic Link Libraries provides helper libraries to the applications. Dynamic Link Libraries also called DLL. DLL’s provides reusable libraries, data and code which can be used by multiple applications or executables. In order to use system wide DLL’s easily we should register them. regsrv32 is a tool used to register DLL’s to the operating system.
Syntax
Syntax of regsrv32 is like below.
regsrv32 OPTIONS DLL
OPTINONSare used provide different actionsDLLis the path with the name of DLL file
Open MS-DOS or Powershell with Administrator Privileges
Playing with DLL’s in windows operating system requires Administrator privileges. So we will register and unregister DLL’s where we need a shell like MS-DOS or Powershell with Administrator privileges. In this example we will open MS_DOS shell with Administrator rights just clicking Run as administrator menu. The same technique can be used for Powershell too.

Locate and Run Regsrv32 Executable
regsrv32 is not in path environment variables path. It is found following directories.
- For 32 bit Windows
%systemroot%SysWoW64regsvr32.exe - For 64 bit Windows
%systemroot%System32regsvr32.exe
We can access just like below for 64 bit Windows.
> %systemroot%SysWoW64regsvr32.exe
Now the main operation with regsrv32 is registering DLL. We do not need any option to specify to register a DLL. We will just provide the DLL name. In this example we register DLL named cabview.dll which resides in C:DLL . Here we assume we have added %systemroot%SysWoW64 in to the path variable
> regsrv32 C:DLLcabview.dll
Unregister DLL
We can unregister already registered DLL with u option. We will unregister cabview.dll in the following example.
> regsrv32 u C:DLLcabview.dll
Do Not Display Dialogue Boxes
By default regsrv32 command outputs as dialog boxes. This may be unnecessary or distracting. We can prevent the dialog box to display with /s option. This options means silent.
> regsrv32 /s C:DLLcabview.dll
-
#1
Здравствуйте коллеги! Не получается зарегистрировать dll на сервере 1с. На сервере работает 8.3 и server 2016. Библиотека отвечает за COM соединения:
Код:
regsrv32 "C:Program Files (x86)1cv88.3.11.2954bincomcntr.dll"Не удалось загрузить модуль regsrv32 «C:Program Files (x86)1cv88.3.11.2954bincomcntr.dll»
Проверьте что двоичный файл хранится на указанном пути или запустите отладку, что бы диагностировать проблемы с этим двоичным файлом или зависимыми DLL-файлами

Последнее редактирование: 29.10.2018
-
#2
зачем такой изврат? может просто у вас компонент COM соединение не установлено. Это надо опять инсталлятор 1с сервера запускать и доустановить компонент:gowork: