Обновлено 03.08.2020
![]() Добрый день! Уважаемые читатели и гости IT блога Pyatilistnik.org. В прошлый раз мы с вами разобрали ситуацию, когда ваш жесткий диск виделся в формате RAW и не позволял получить доступ к данным, мы это благополучно решили. Сегодня мы рассмотрим задачу установки отказоустойчивой терминальной фермы Remote Desktop Services, где посредники подключений (RD Connection Broker) работают в режиме высокой доступности (High Availability) и все это дело будет работать на Windows Server 2019 в связке с хостами подключений (RDSH) на базе Windows Server 2016. Давно хотелось у себя на сайте иметь такую инструкцию, тем более что давно стояла задача перехода с W2012R2.
Добрый день! Уважаемые читатели и гости IT блога Pyatilistnik.org. В прошлый раз мы с вами разобрали ситуацию, когда ваш жесткий диск виделся в формате RAW и не позволял получить доступ к данным, мы это благополучно решили. Сегодня мы рассмотрим задачу установки отказоустойчивой терминальной фермы Remote Desktop Services, где посредники подключений (RD Connection Broker) работают в режиме высокой доступности (High Availability) и все это дело будет работать на Windows Server 2019 в связке с хостами подключений (RDSH) на базе Windows Server 2016. Давно хотелось у себя на сайте иметь такую инструкцию, тем более что давно стояла задача перехода с W2012R2.
Постановка задачи
Необходимо организовать высоко доступную ферму RDS (Remote Desktop Services), где в качестве брокеров подключения будут выступать операционные системы с Windows Server 2019. В качестве хостов подключений, на которых будут работать конечные пользователи требуется иметь операционную систему Windows Server 2016. Развернуть сервер лицензирования, раздающий лицензии на пользователя или устройства. Чем хорошо использовать в качестве посредников подключений именно Windows Server 2019, все просто, когда большинство клиентского программного обеспечения станет поддерживаться данной ОС, можно будет легко вывести из эксплуатации сервера с W2016 и заменить их на более новые.
Требования по развертыванию RD Connection Broker High Availability
Прежде, чем мы начнем к поэтапному приготовлению к установке вашей отказоустойчивой RDS ферме, я бы хотел выделить пункты, которые нам потребуется выполнить.
- Наличие двух серверов или виртуальных машин с Windows Server 2019, на которые мы будем устанавливать роли посредников подключений (RD Connection Broker)
- Создание группы безопасности Active Directory, в которую необходимо поместить сервера RD Connection Broker
- Установка MS SQL 2012 и выше, для базы Connection Broker, лучше в режиме Always On.
- Предоставление группы безопасности с серверами RD Connection Broker, прав на создание баз данных
- Установка на сервера посредников подключений SQL Server Native Client, если SQL 2016, то Client Tools Connectivity
- Создание записи в DNS, которое будет использоваться в качестве имени RDS фермы, с помощью механизма DNS round robin.
- Настройка алиаса в cliconfg.exe для SQL базы и упрощенного переноса в случае необходимости
- Подготовка одного или более сервера с Windows Server 2016 для установки роли Remote Desctop Session Host и RD Web
- Выпуск SSL сертификата безопасности
- Создание и настройка коллекции на RDS ферме
- Установка и настройка сервера лицензирования терминальных сессий
- Дополнительные правки реестра для подключений через стандартное приложение «Подключение к удаленному рабочему столу»
Тестовый стенд с виртуальными машинами фермы Remote Desktop Services
- Две виртуальные машины с установленной Windows Server 2019, RDCB01.root.pyatilistnik.org (ip-адрес 192.168.31.20) и RDCB02.root.pyatilistnik.org (ip-адрес 192.168.31.21)
- Две виртуальные машины с установленной Windows Server 2016, RDHC01.root.pyatilistnik.org
- (ip-адрес 192.168.31.22) и RDSH02.root.pyatilistnik.org (ip-адрес 192.168.31.23)
- Виртуальная машина SQL01.root.pyatilistnik.org с установленной MS SQL 2016, но напоминаю у вас должен быть отказоустойчивый кластер SQL.
Стандартная установка RDS фермы в Windows Server 2019
Перед тем, как мы сделаем высокодоступное подключение к ферме Remote Desktop Services, нам необходимо произвести установку стандартной конфигурации служб удаленных рабочих столов, включающей в себя:
- Установку посредника подключений (RD Connection Broker) на сервер RDCB01.root.pyatilistnik.org
- Установка роли удаленного подключения (RD Session Host) на сервера RDHC01.root.pyatilistnik.org и RDCH02.root.pyatilistnik.org
- Установка роли RD Web на сервера RDHC01.root.pyatilistnik.org или RDCH02.root.pyatilistnik.org, если планируете использовать RemoteApp, то ставьте на все нужные хосты.
Создание пула серверов на сервере посредника подключений (RD Connection Broker)
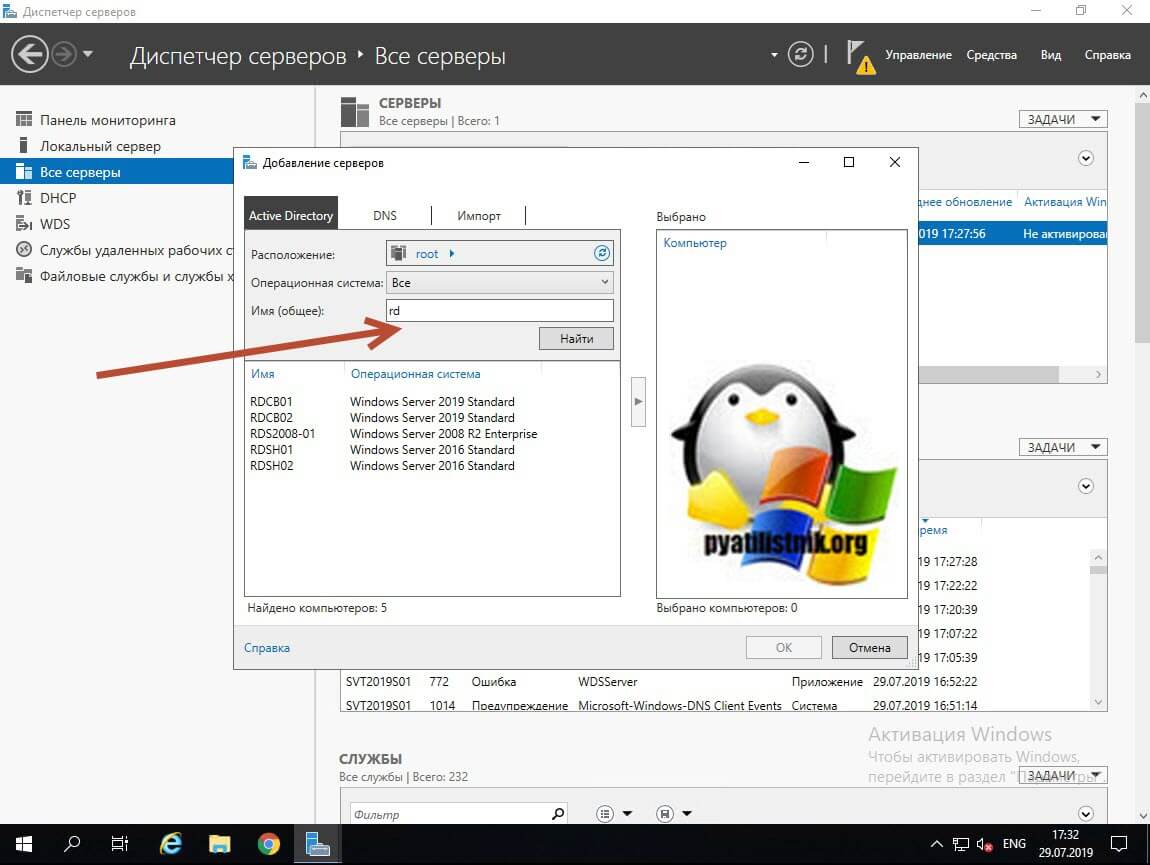
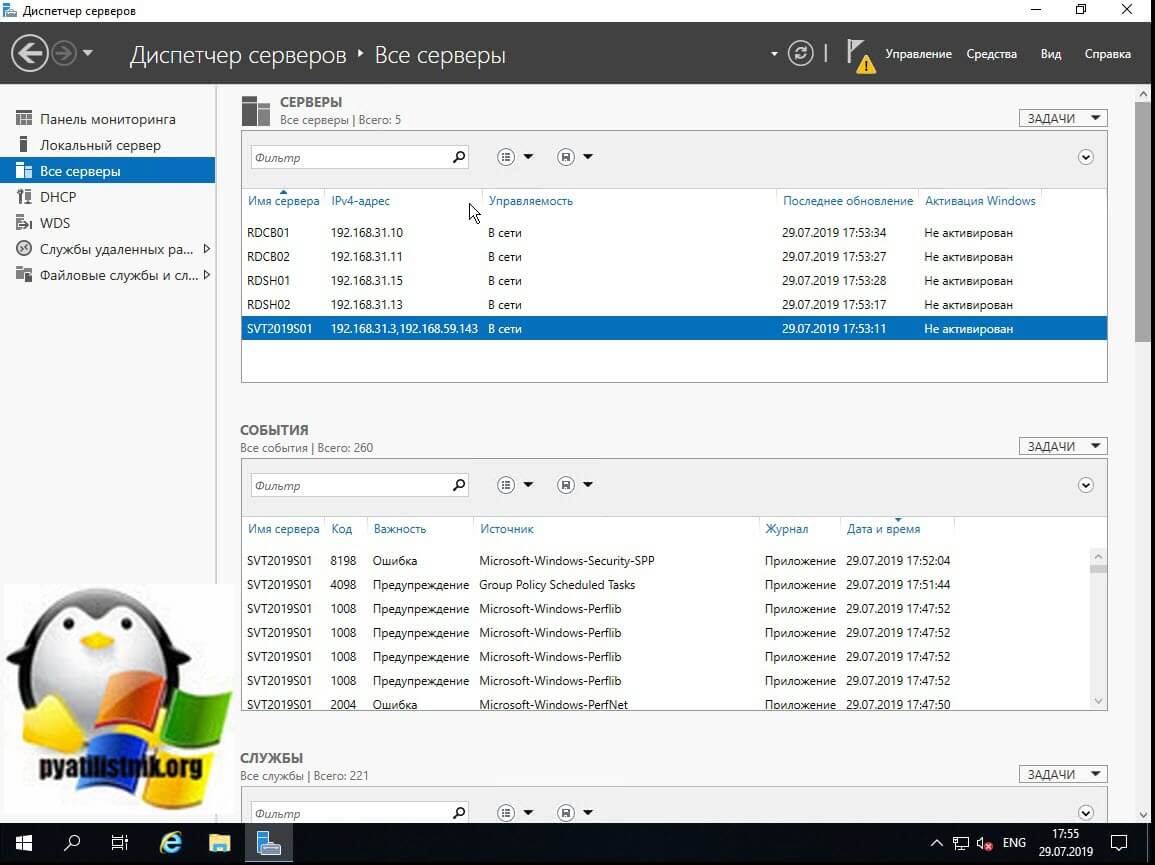
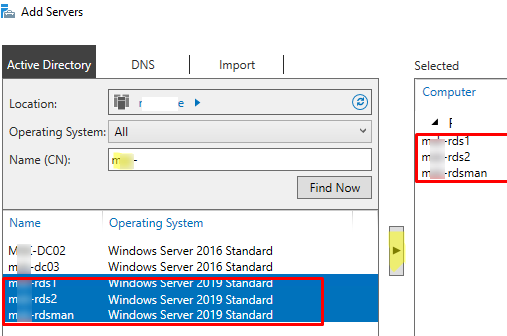
Пул серверов, это удобное объединение серверов в общий список для быстрого управления и развертывания на них ролей и компонентов. Все манипуляции производятся из единой консоли управления «Диспетчер серверов». Откройте оснастку «Диспетчер серверов» раздел «Все серверы». Щелкните по нему правым кликом и нажмите «Добавление серверов».
Напоминаю, что делать вы это должны от имени учетной записи, у которой есть права на данные сервера и ваш брандмауэр должен пропускать данные подключения

На вкладке Active Directory вам необходимо указать в каком домене вы будите производить поиск, в поле «Имя (Общие)» находим нужные вам сервера.
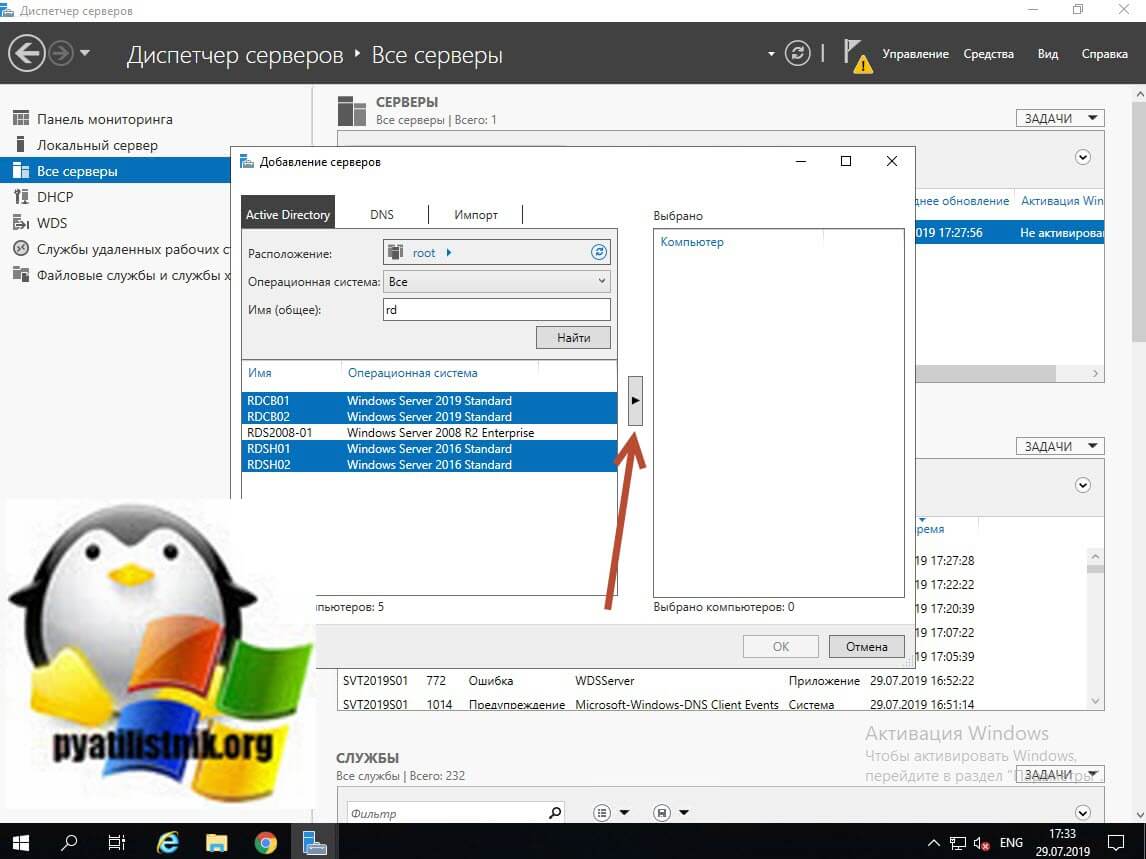
Выбираем нужные сервера и переносим их в раздел «Выбрано».
Нажимаем «Ok».
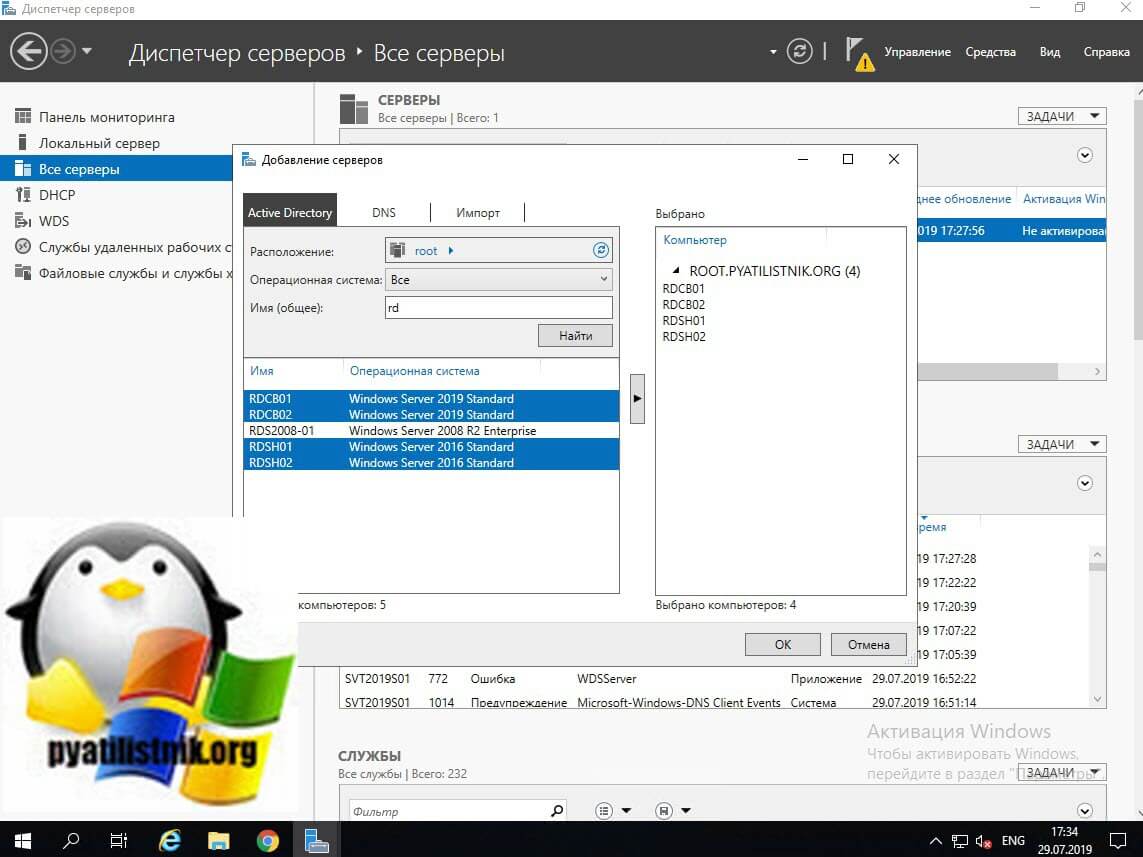
В итоге в вашей оснастке «Диспетчер серверов» вы увидите все добавленные хосты. которые будут участниками Remote Desktop Services High Availability на Windows Server 2019.
Если у ваших серверов будет статус «В сети: счетчики производительности не запущены», то запустите их через правый клик
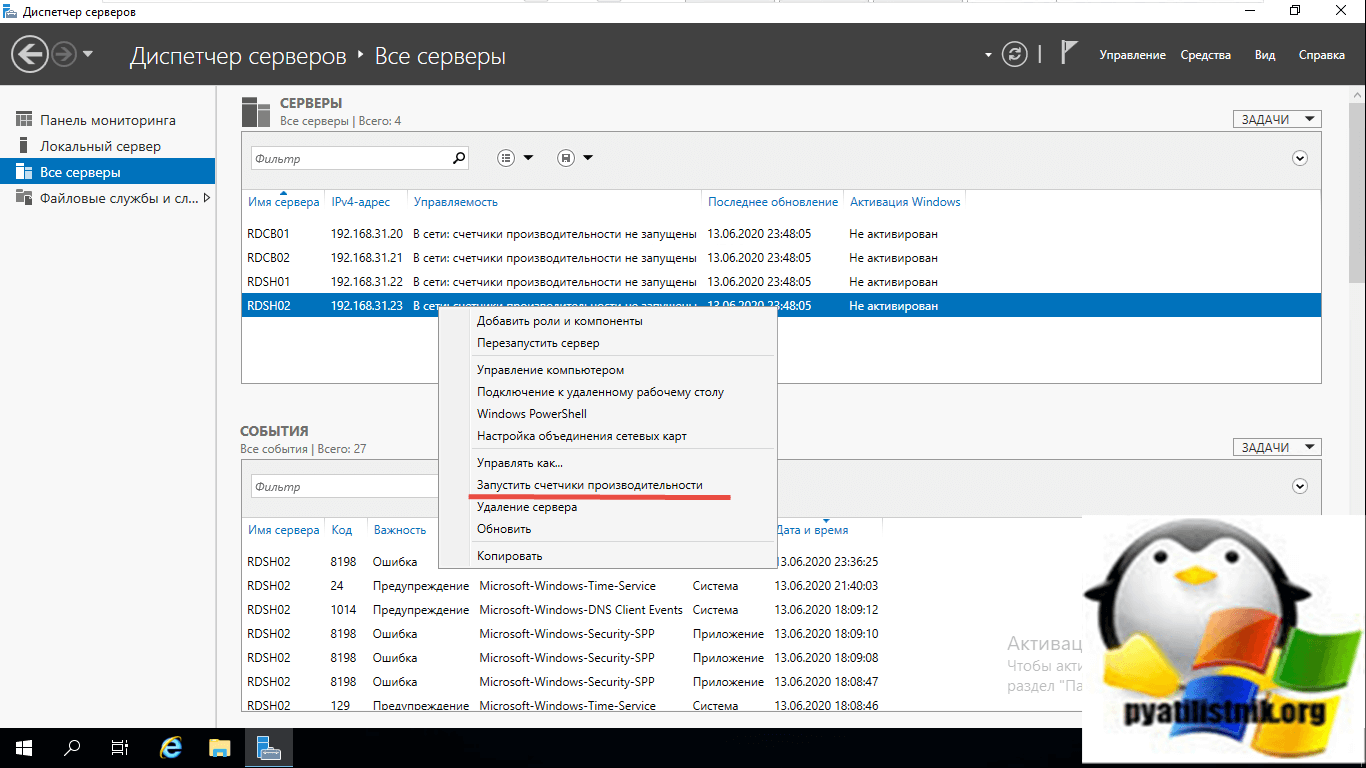
В результате все должно быть в статусе «В сети».
Стандартное развертывание службы удаленных рабочих столов
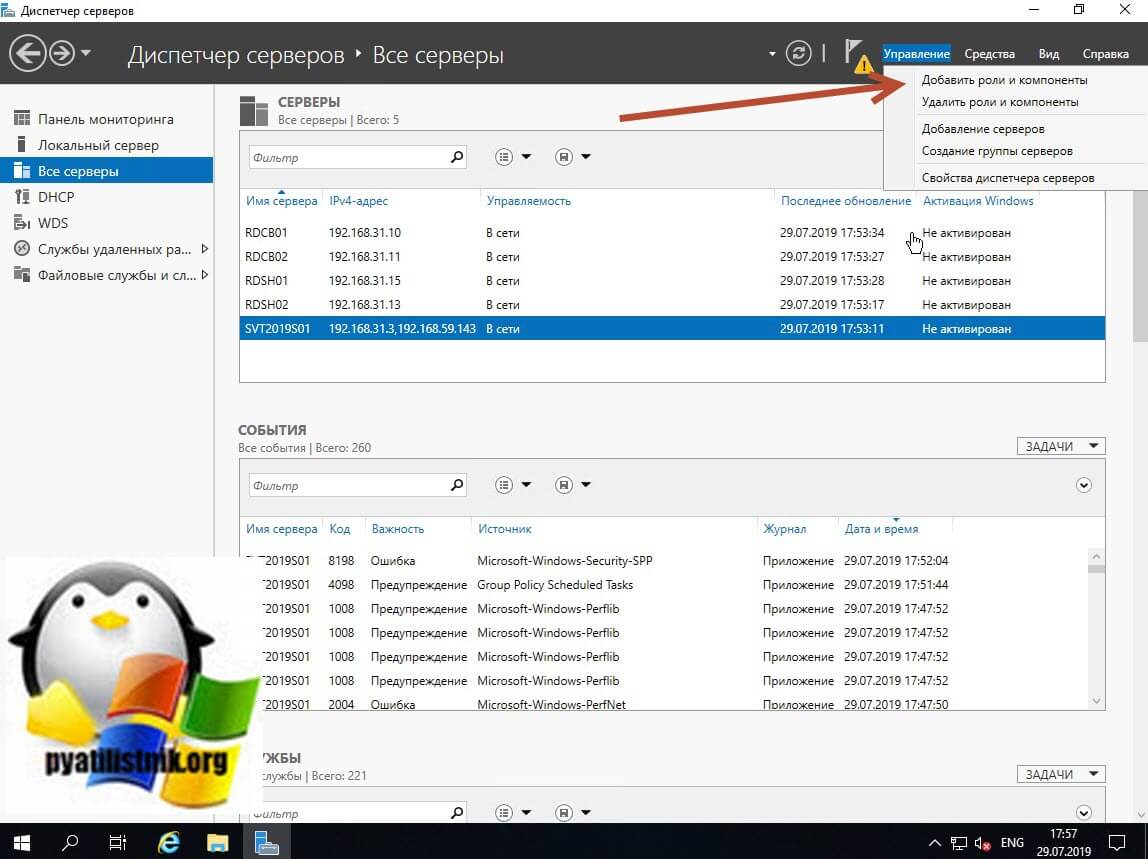
Перед тем как создавать высоко доступную ферму RDS, вы должны произвести базовую инсталляцию, а именно нам необходимо установить три роли на текущие сервера, для этого в правом верхнем углу выберите пункт «Управление — Добавить роли и компоненты«.
Стандартный тип развертывания — это лучший метод развертывания, и вы должны выбрать этот тип развертывания в производственной среде
В мастере добавления ролей выберите пункт «Установка служб удаленных рабочих столов (Remote Desktop Services Installation)» и нажимаем далее.
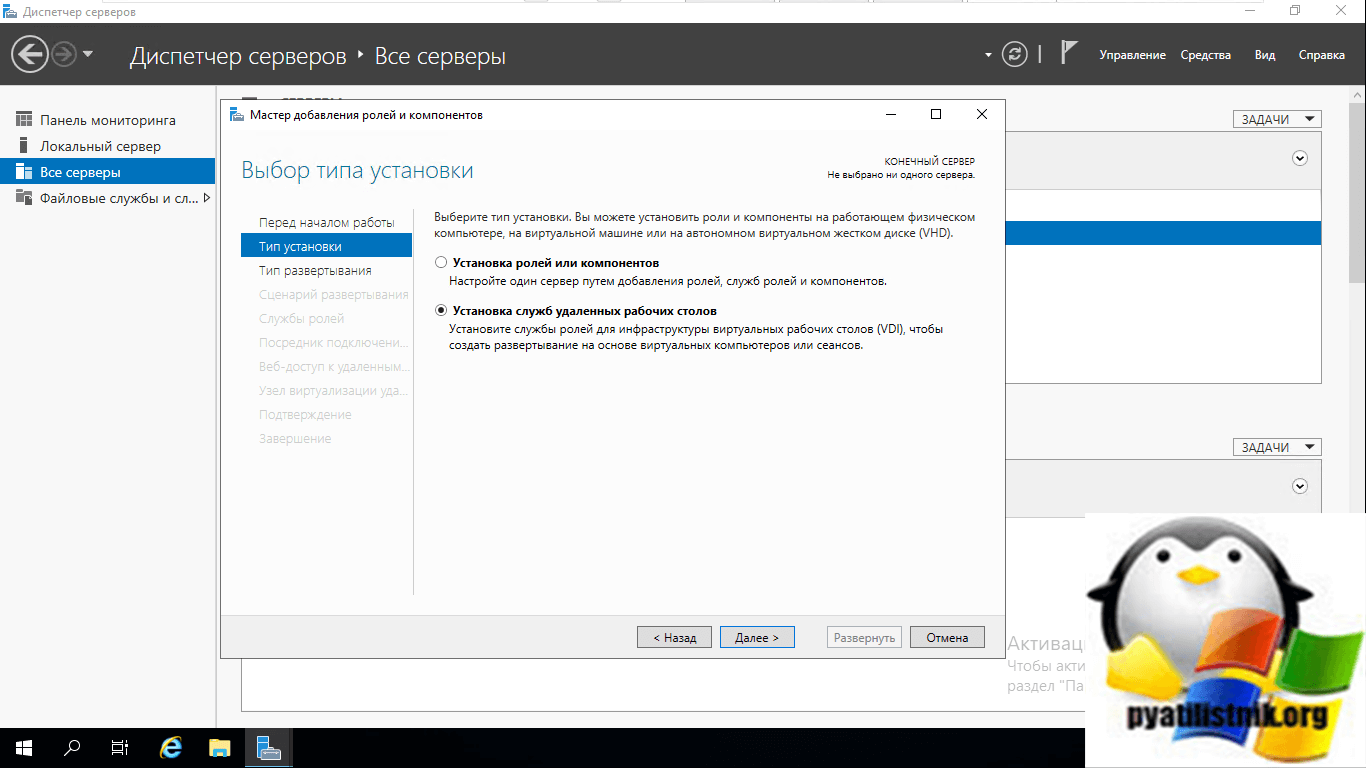
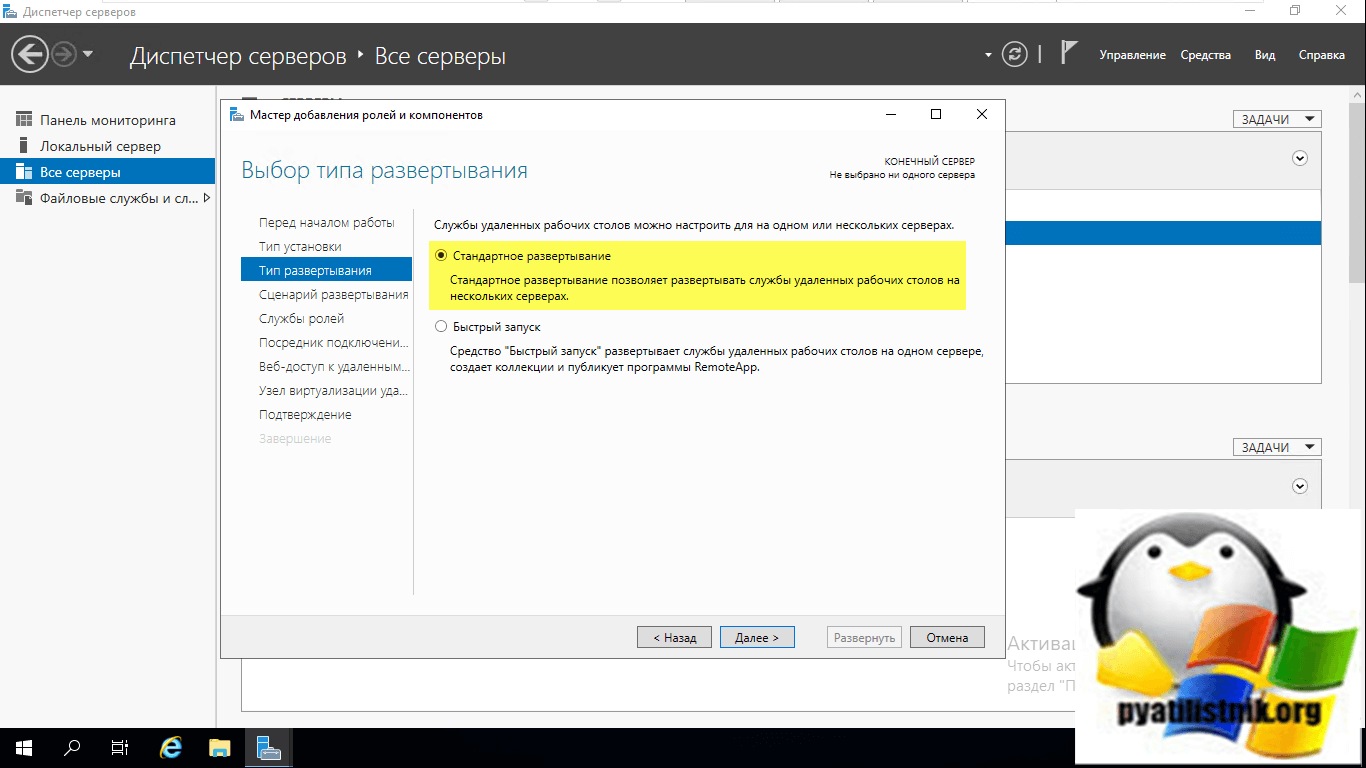
Выбираем первый пункт «Стандартное развертывание (Standard Deployment)» — данный тип развертывания позволяет устанавливать роли Remote Desktop Services на нескольких серверах одновременно.
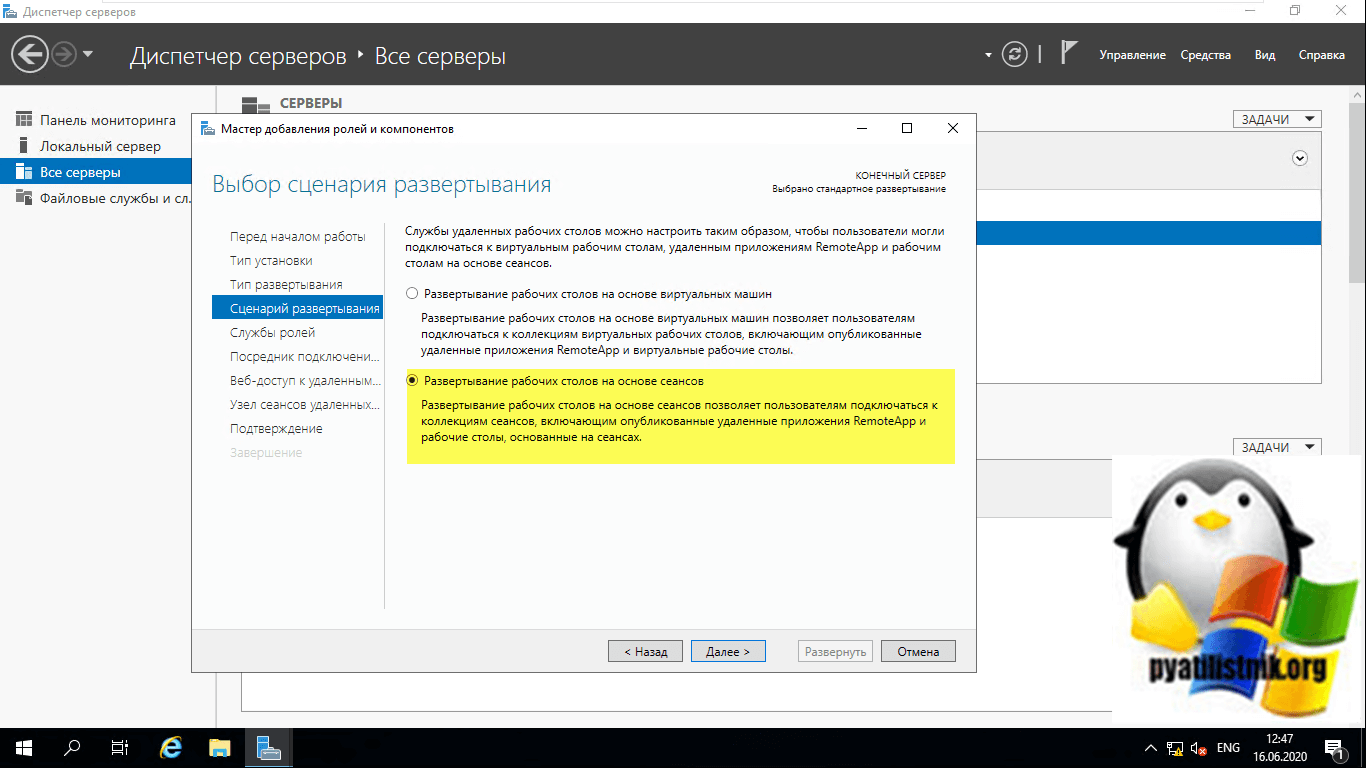
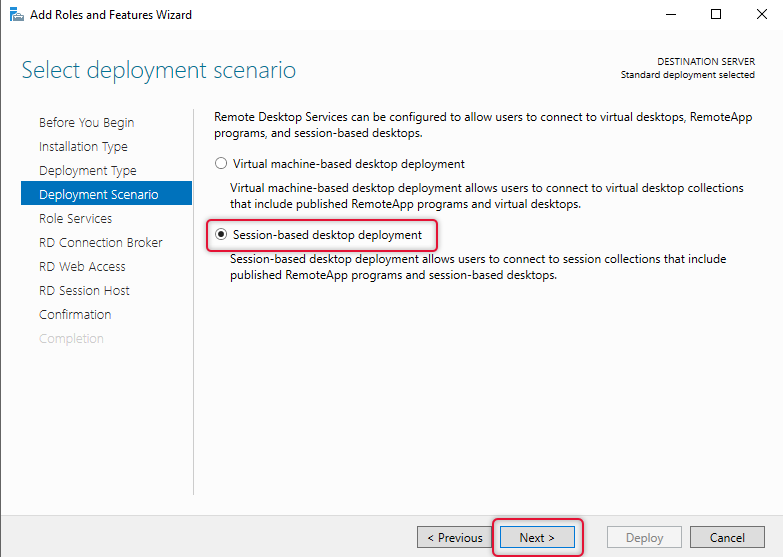
Выбираем второй пункт «Развертывание рабочих столов на основе сеансов (Session-based desktop deployment)»
Это развертывание рабочих столов на основе сеансов позволяет пользователям подключаться к коллекциям сеансов, включающим опубликованные удаленные приложения RemoteApp и рабочие столы, основанные на сеансах
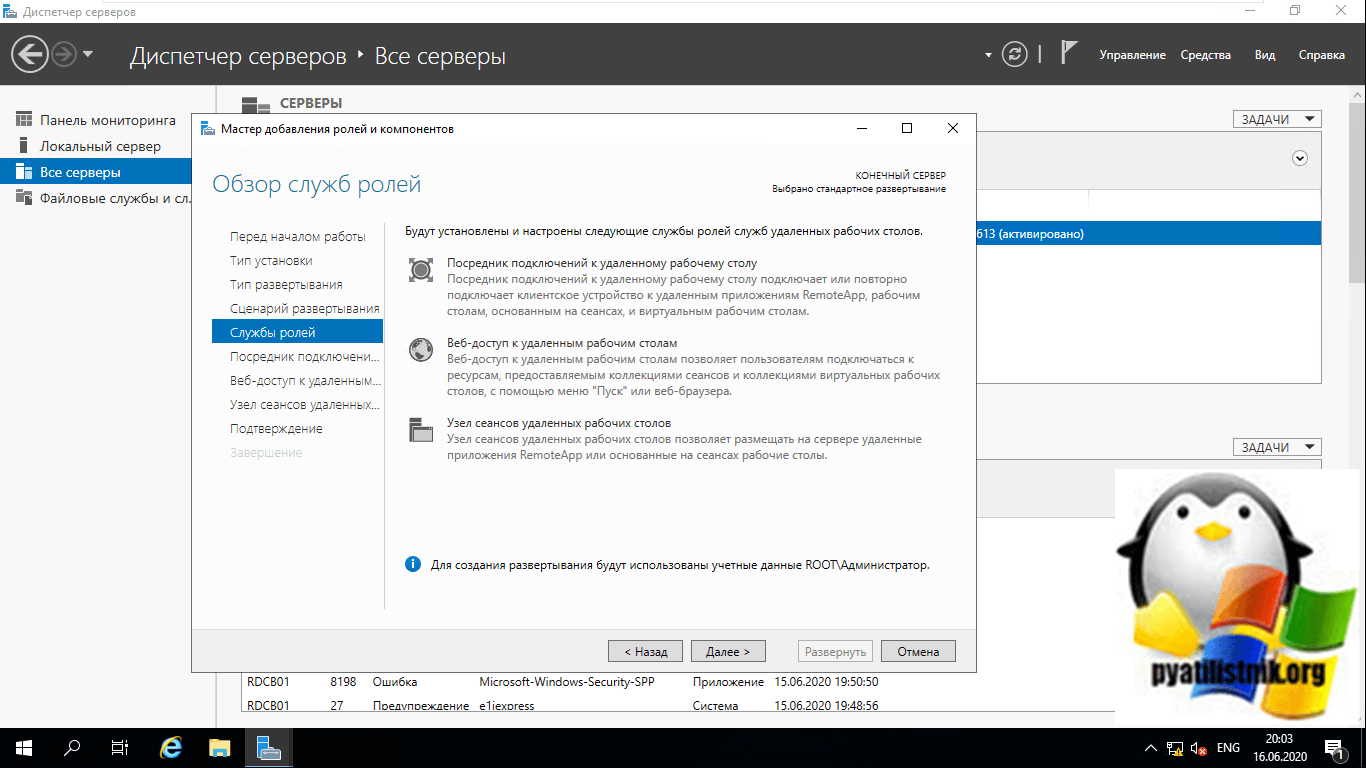
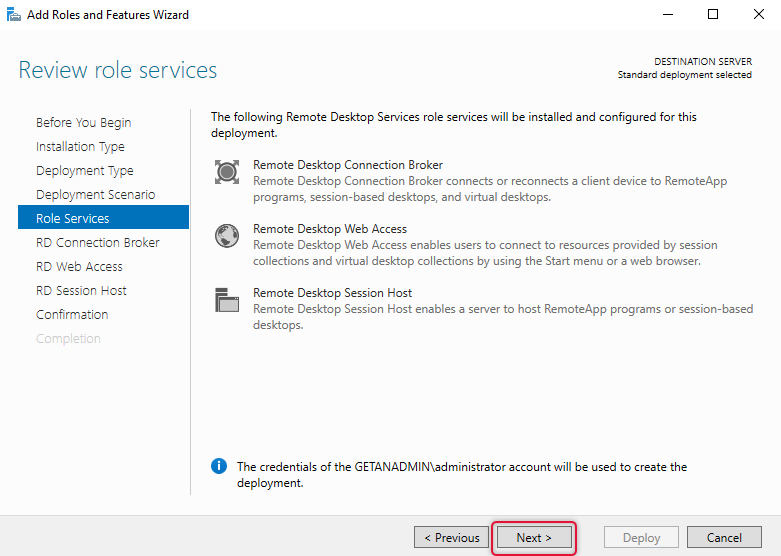
Список компонентов устанавливаемых при стандартной конфигурации RDS фермы. Тут будет установлен:
- Посредник подключений к удаленным рабочим столам (Connection Broker)
- Веб-доступ к удаленным рабочим столам
- Узел сеансов удаленных рабочих столов
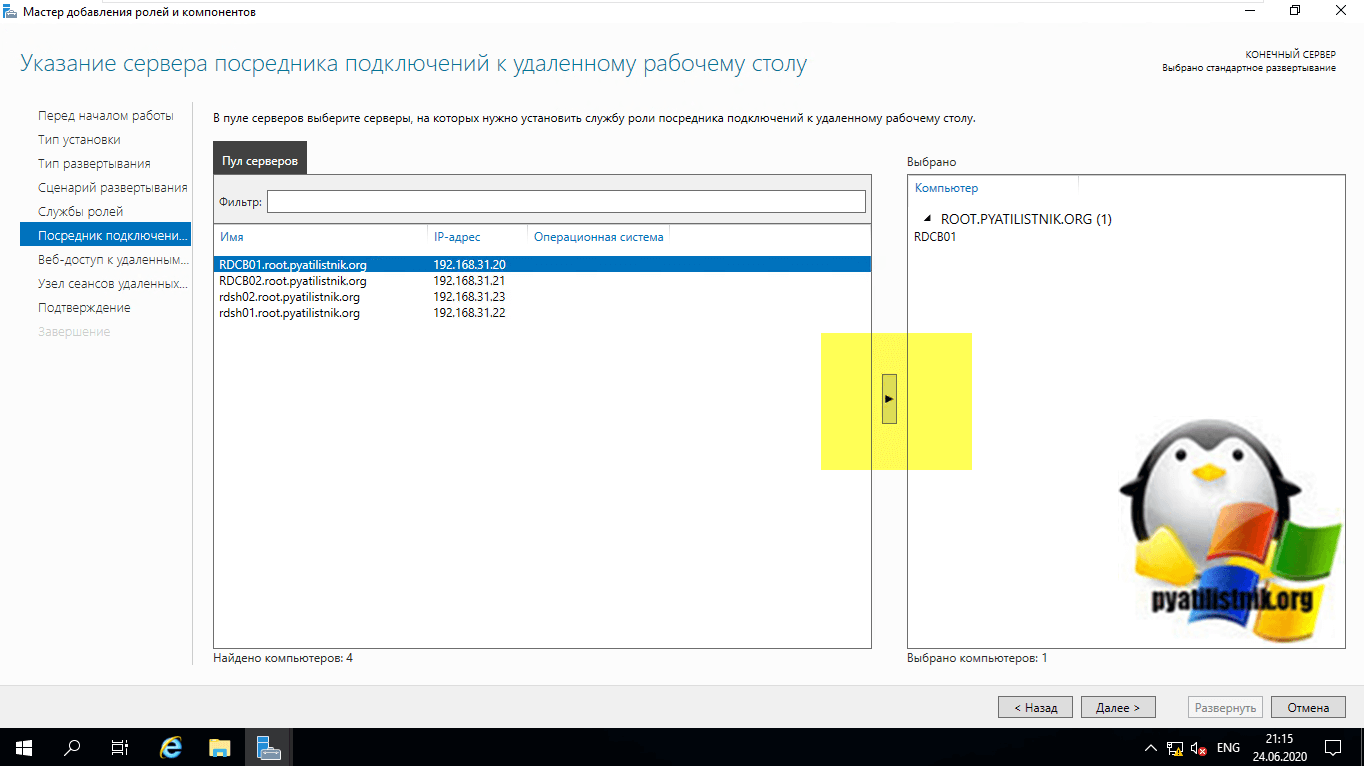
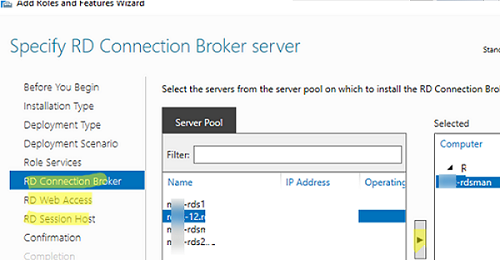
На следующем шаге вам нужно выбрать и перенести в правую область сервер, который будет нести на себе роль «Посредник подключений к удаленным рабочим столам (RD Connection Broker)». В моем примете, это первый сервер RDCB01.root.pyatilistnik.org.
Второй сервер на данном этапе добавлять не нужно
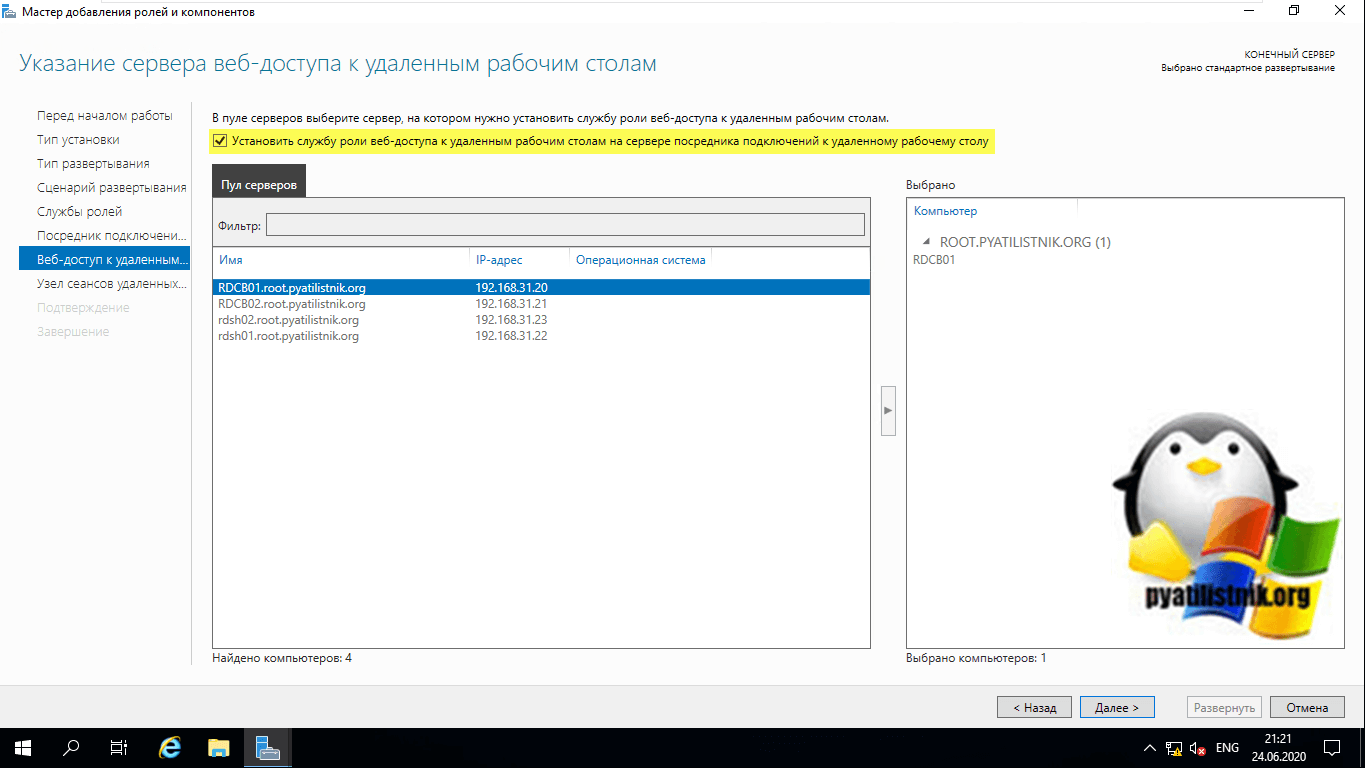
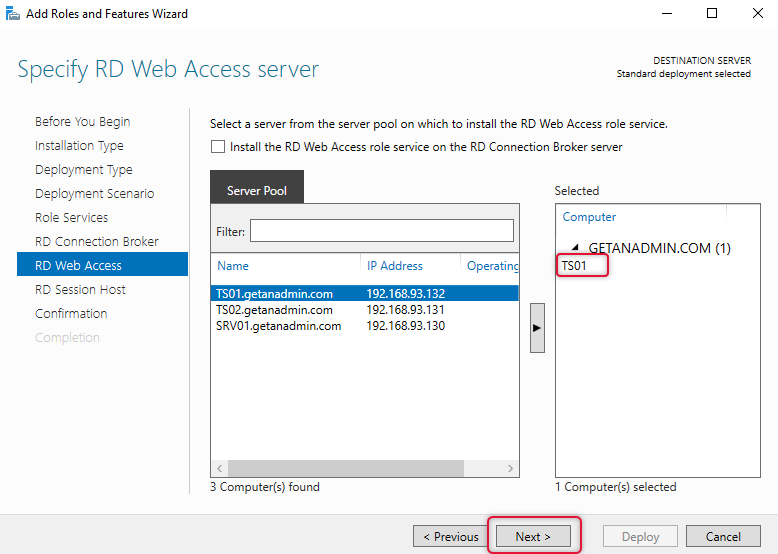
Далее у нас идет выбор сервера для установки роли «Веб-доступ к удаленным рабочим столам (RD Web Access)», так как я пока не планирую использовать веб доступ RemoteApp, а настрою это потом, то я воспользуюсь галкой «Установить службу веб-доступа к удаленным рабочим столам на сервере посреднике подключений к удаленному рабочему столу (Install the RD Web Access role service on the RD Connection Broker server)»
Данную роль нельзя пропустить в мастере стандартной установки служб Remote Desktop Services, но она нам пригодится еще очень сильно
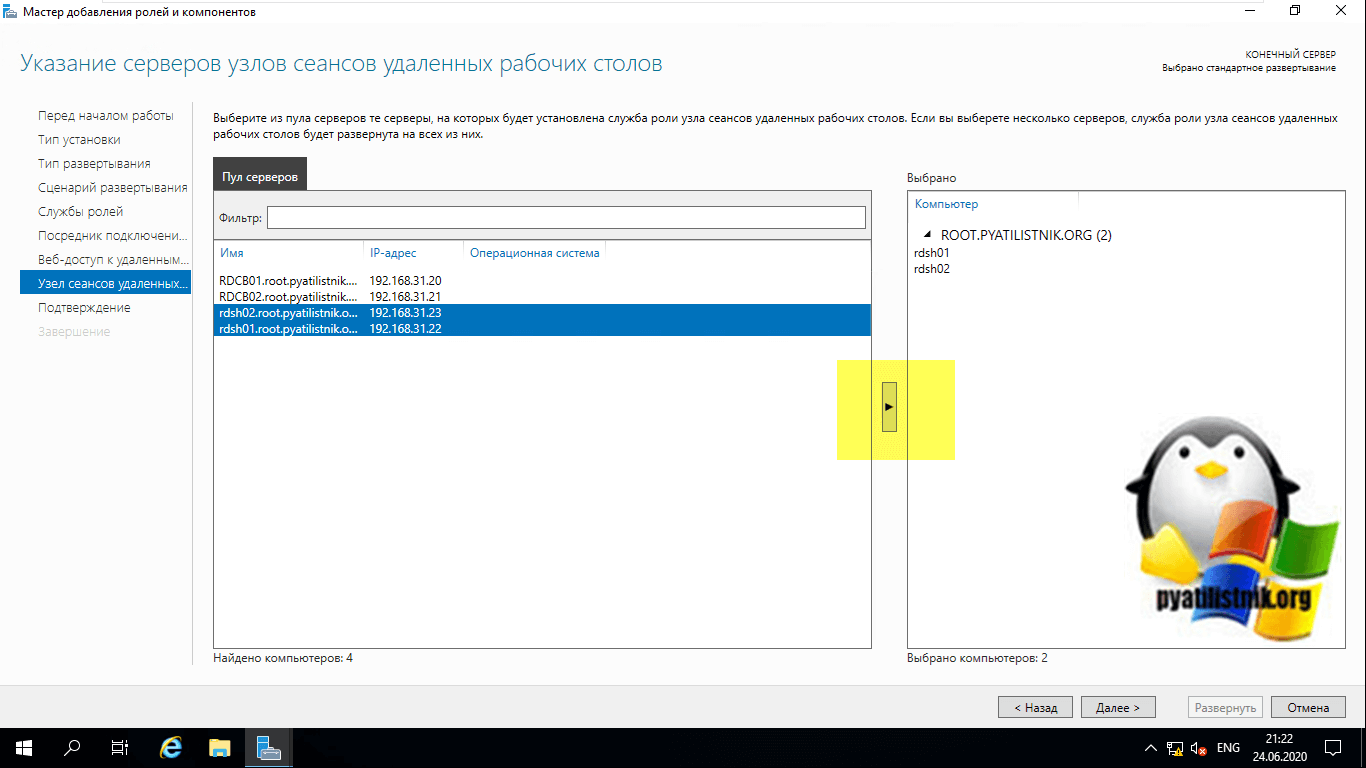
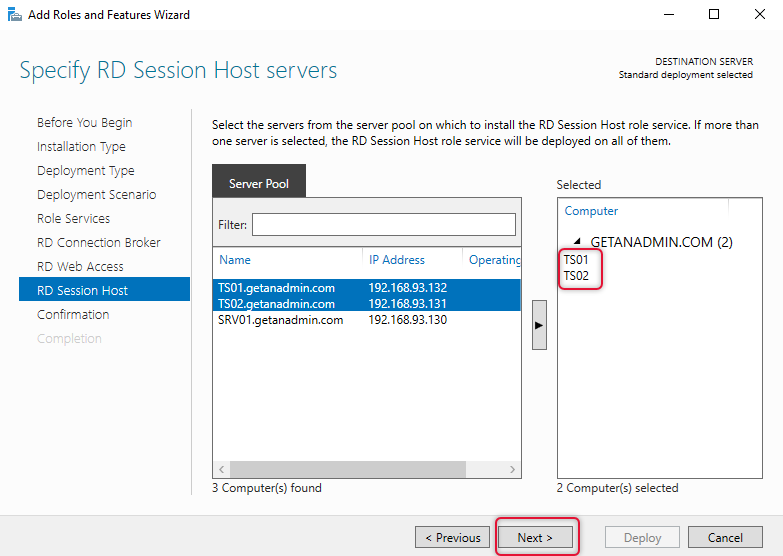
Последним идет пункт по установке роли на сервера к которым вы будите непосредственно подключаться, выбираем нужные сервера и инсталлируем на них роль «Узел сеансов удаленных рабочих столов (RS Session Host)». В моем примере, это два сервера rdsh01 и rdsh02.
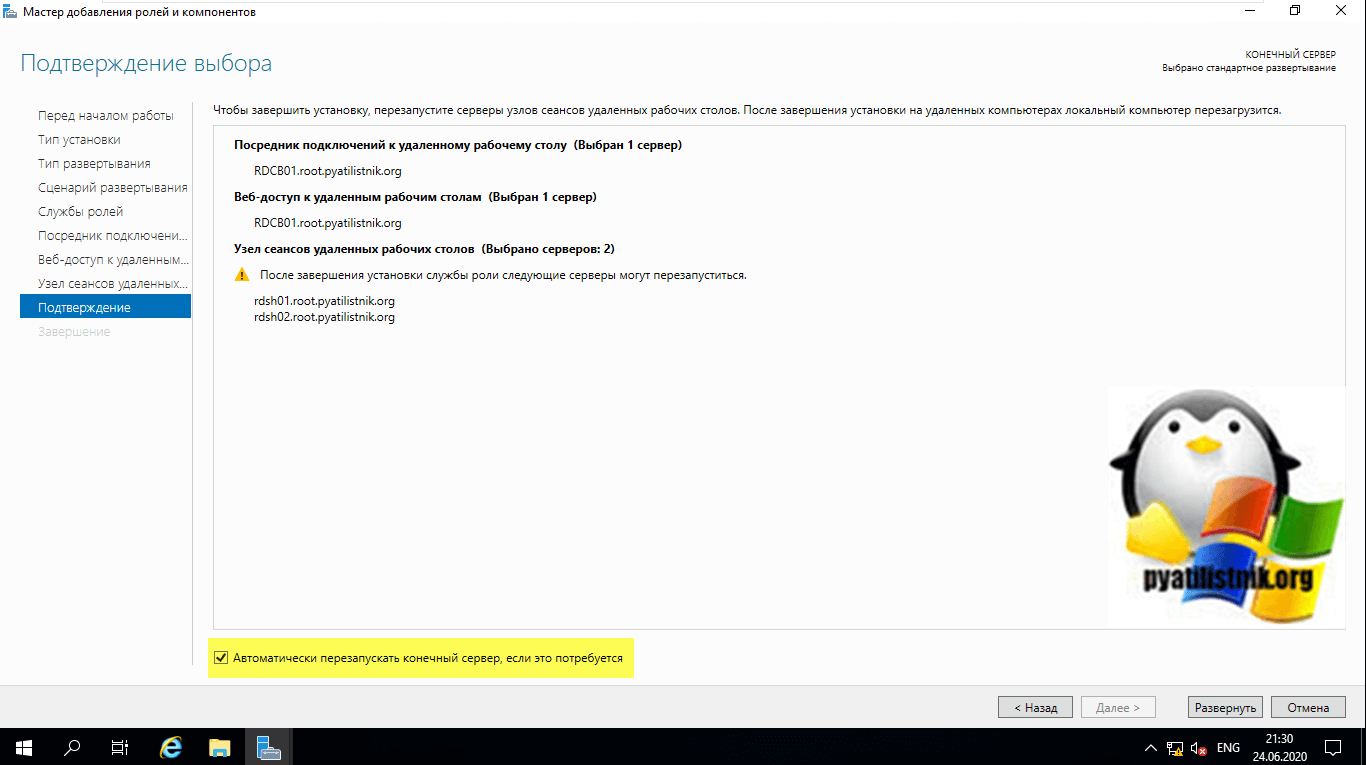
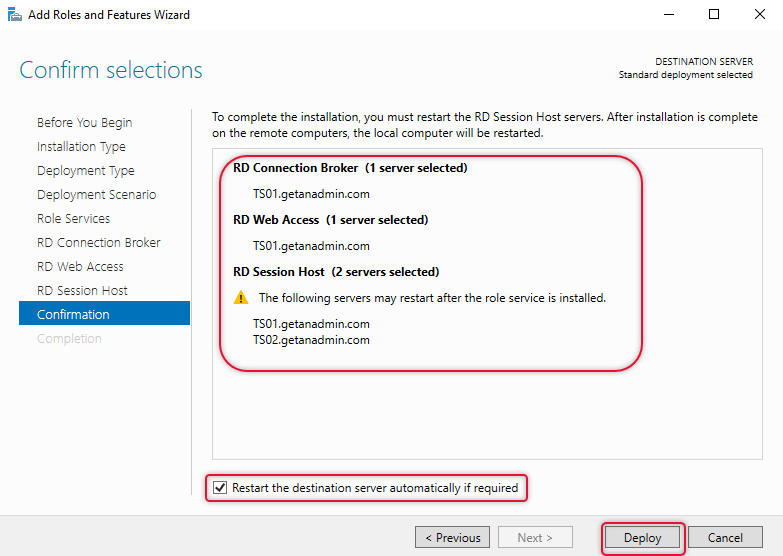
Процесс установки ролей подразумевает, что потребуется перезагрузка сервера, для этого вам необходимо выставить галку «Автоматически перезапускать конечный сервер, если это потребуется (Restart the destination server automatically if required )» и нажать кнопку «Развернуть«
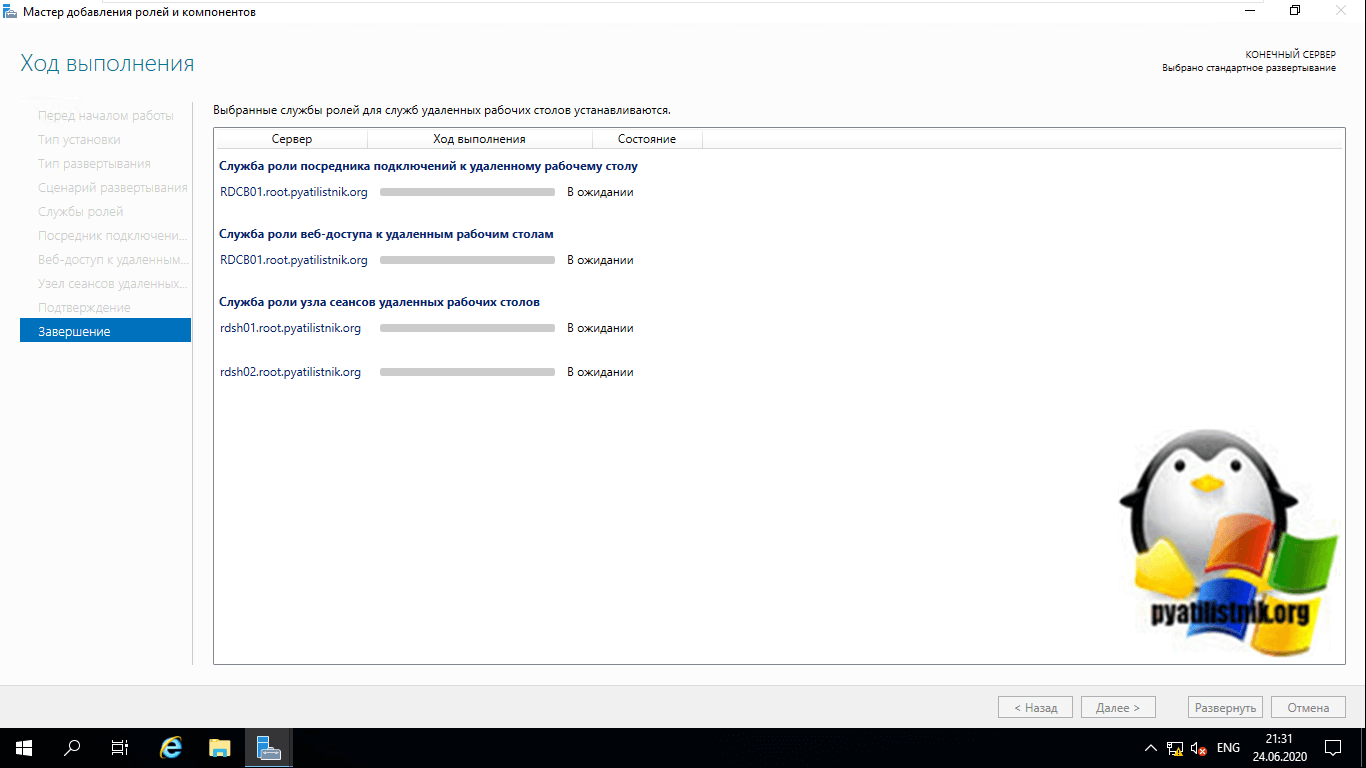
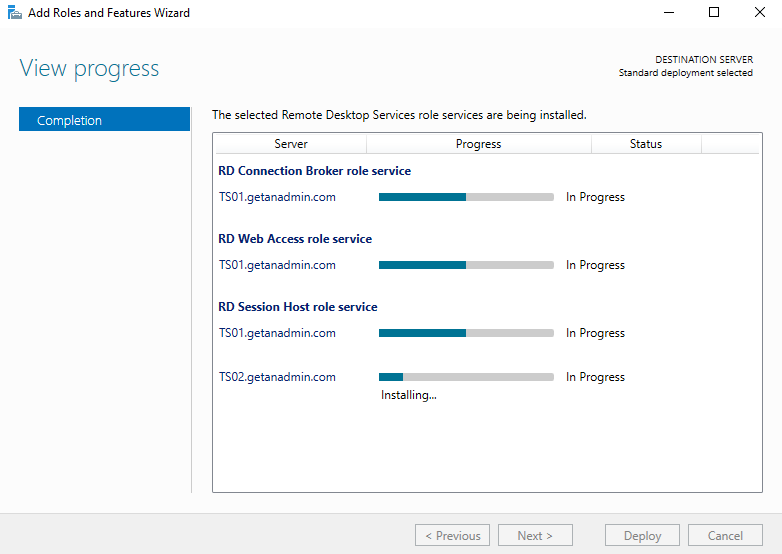
Начинается процесс установки службы удаленных рабочих столов, может занимать несколько минут.
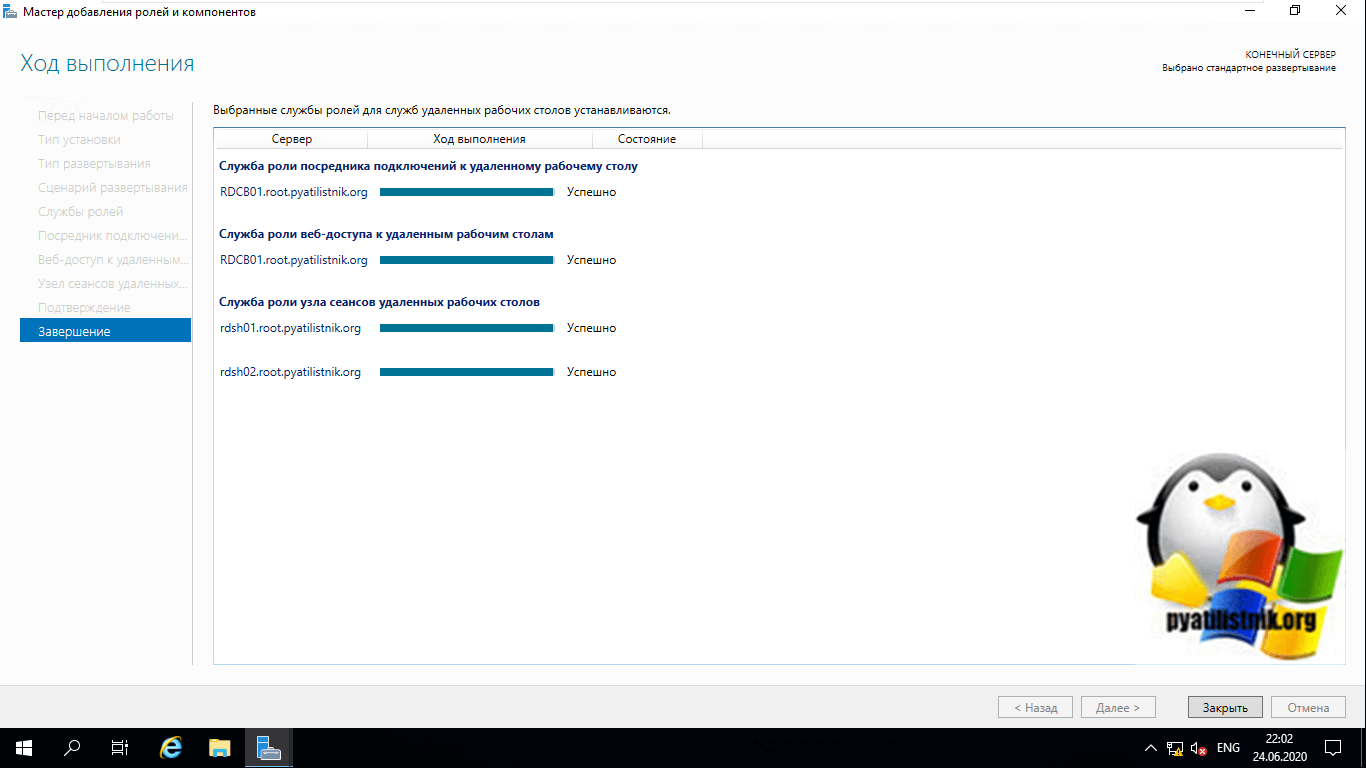
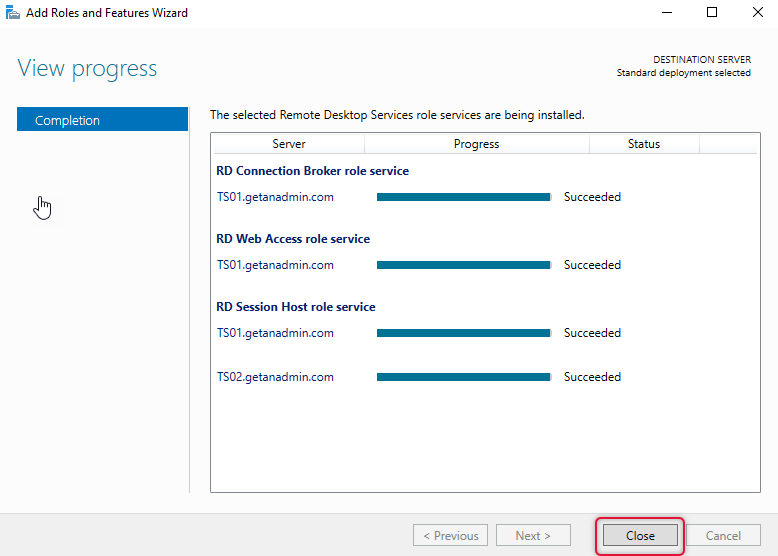
У вас должна произойти успешная установка службы «службы удаленных рабочих столов». Все необходимые сервера будут перезагружены.
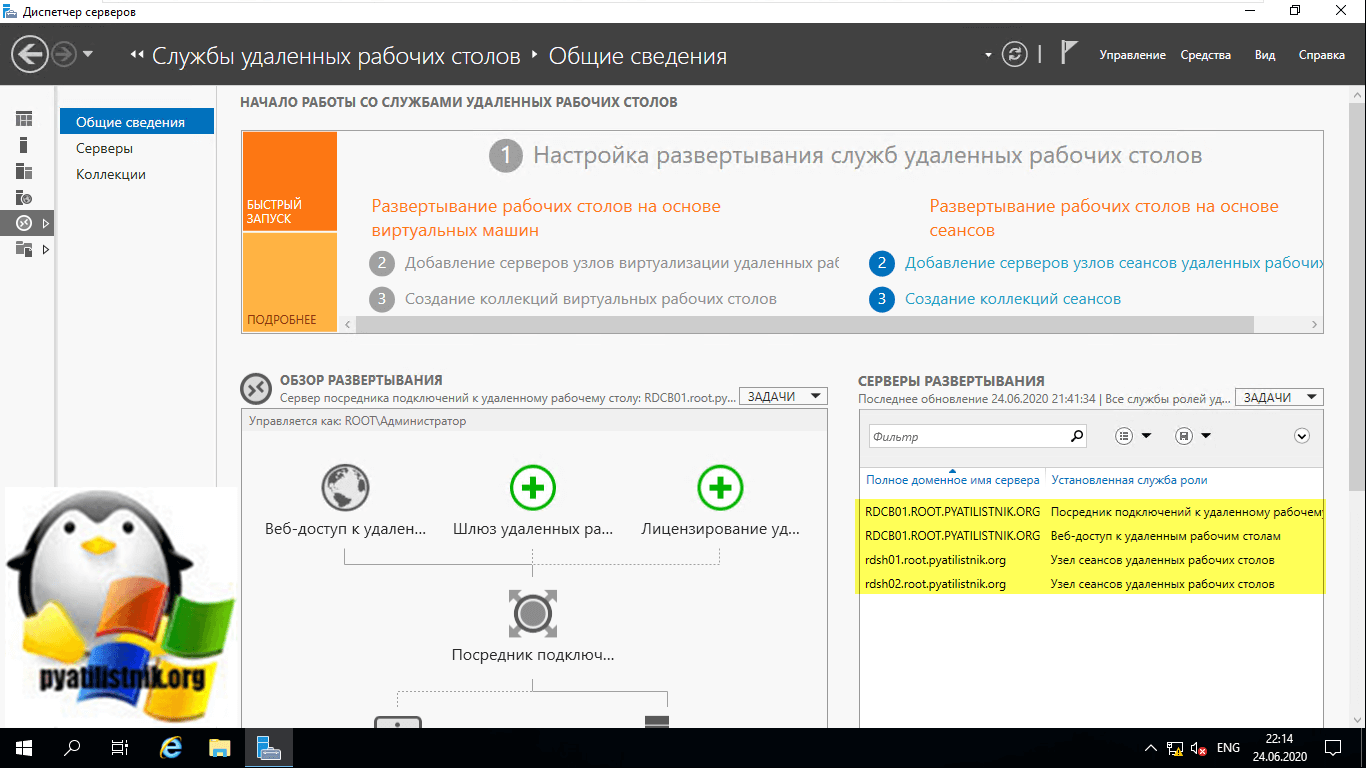
Давайте убедимся, что все серверы получили свои роли. Для этого на сервере, где вы добавляли сервера в оснастку «Диспетчер серверов (Производили установку)», откройте оснастку и перейдите в раздел «Службы удаленных рабочих столов».
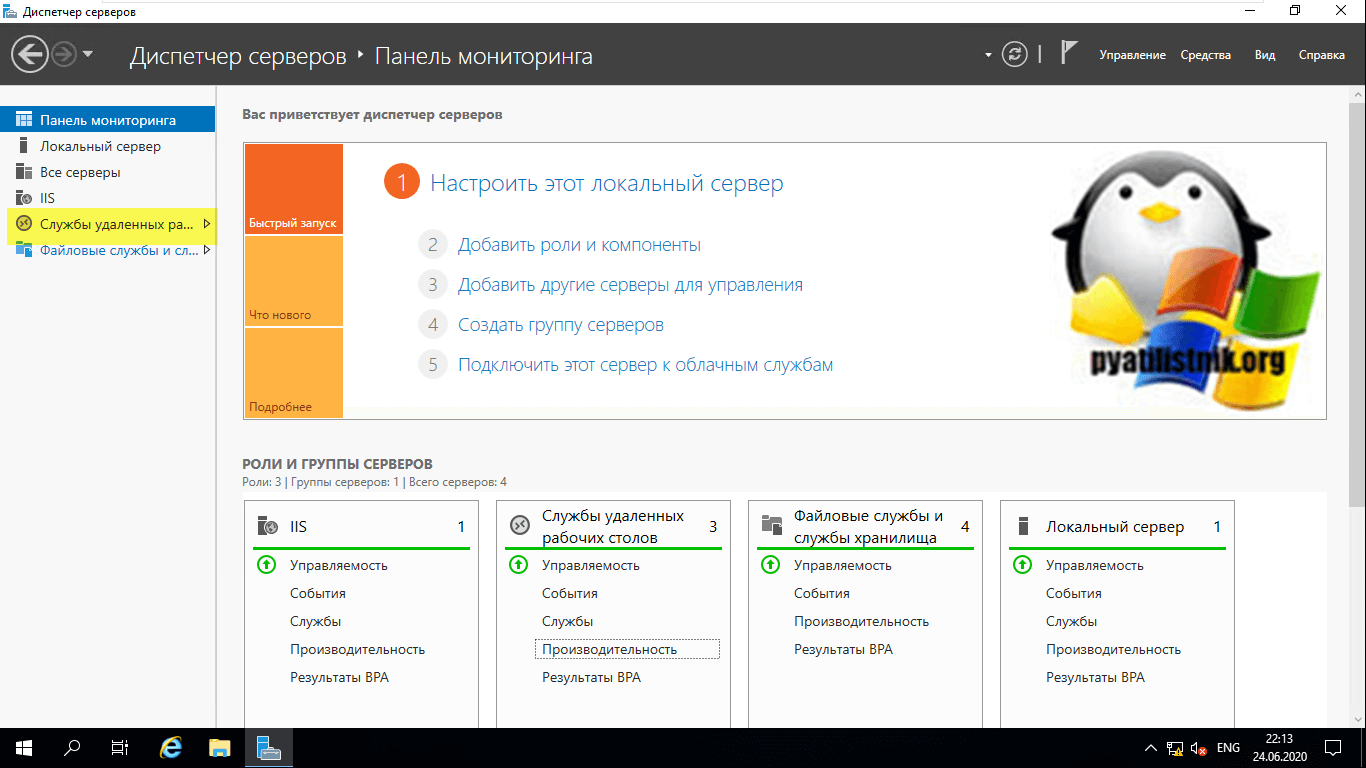
На вкладке «Общие сведения» посмотрите в разделе «Серверы развертывания», кто и какие роли себе установил.
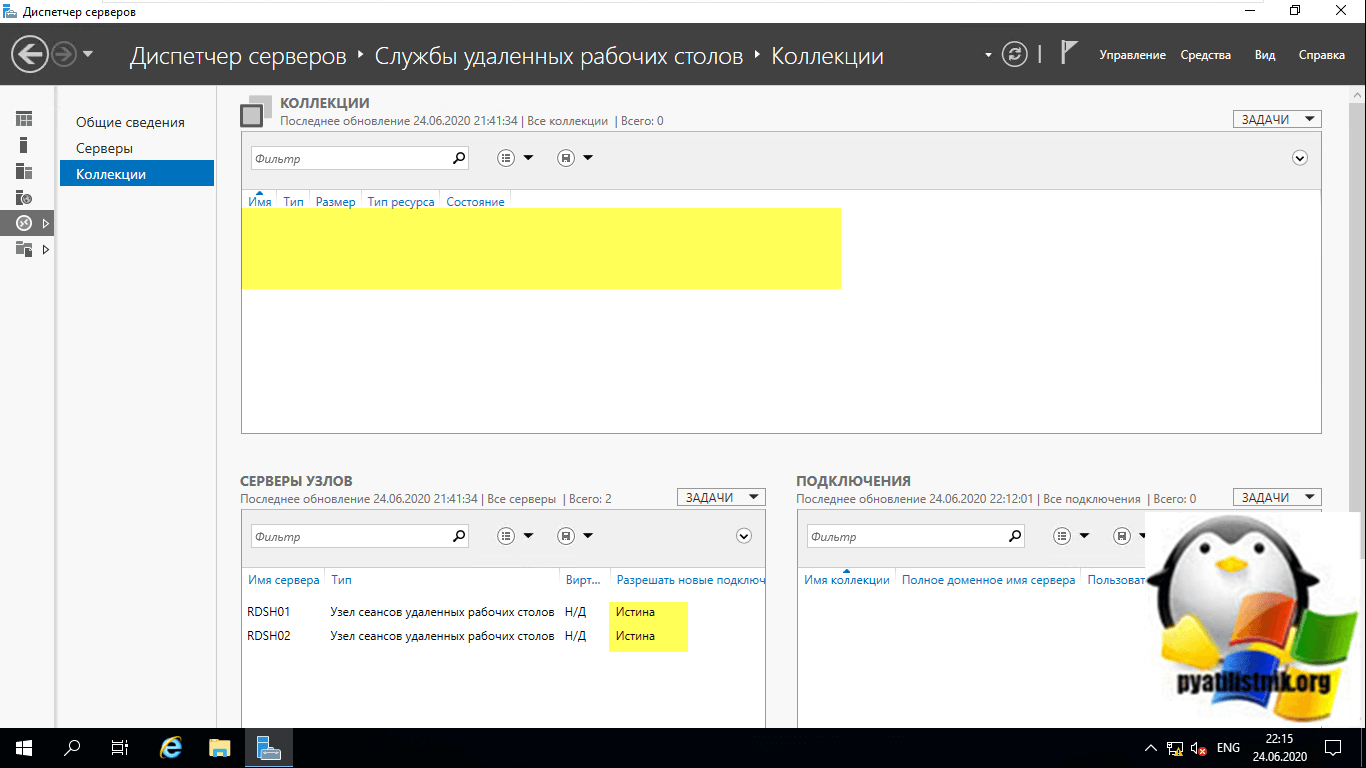
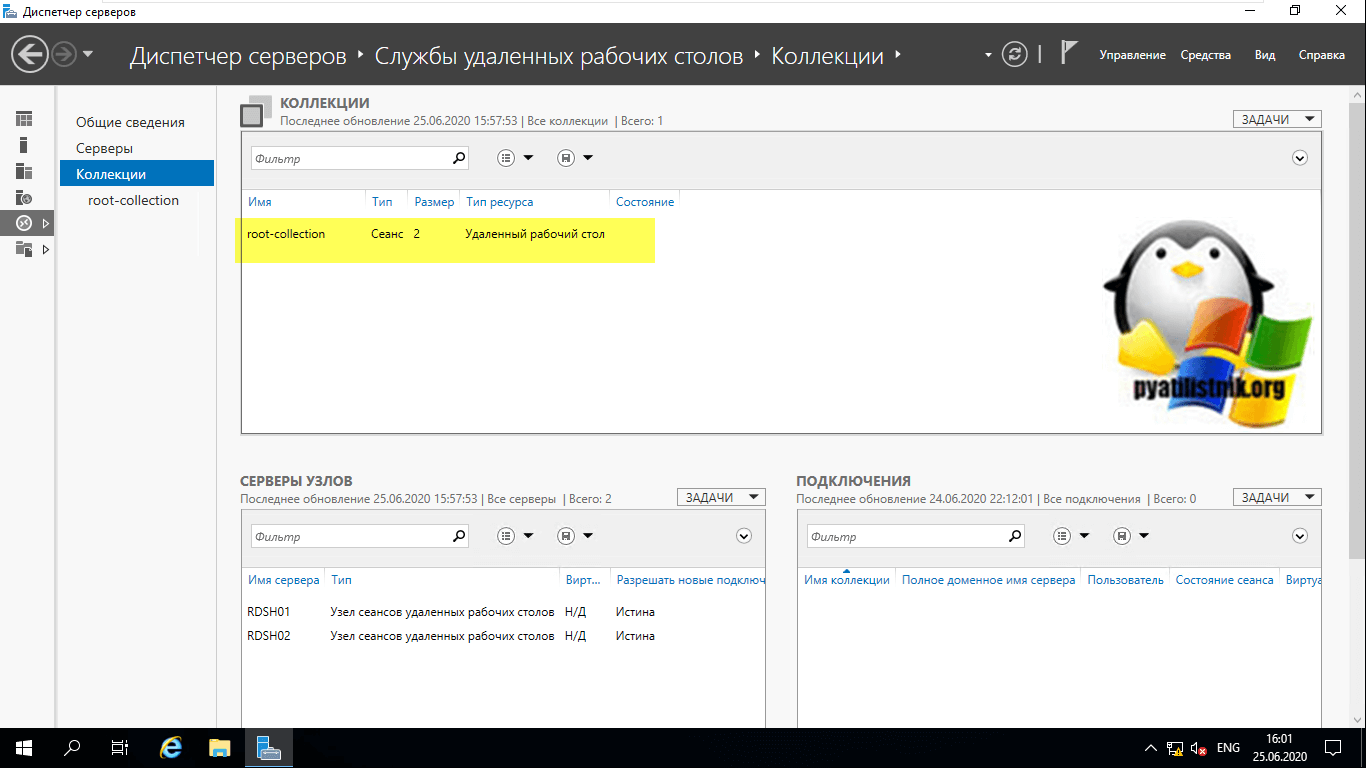
Перейдите в раздел «Коллекции» и убедитесь, что список пуст, но зато присутствуют два ваших хоста узла сеансов удаленных рабочих столов, к котором будут подключаться конечные пользователи. Они будут иметь статус «Истина (True)», что говорит о разрешении подключаться (Режим стока выключен)
Следующим шагом мы создадим новую коллекцию для подключения к службам Remote Desktop Services High Availability на Windows Server 2019.
Создание коллекции для отказоустойчивой терминальной фермы
Следующим шагом идет создание коллекции или коллекций, к ресурсам которых будут подключаться пользователи. Коллекция Remote Desktop Services — это некое объединение серверов RDSH, RD Web под определенные задачи, отделы и другие варианта разграничения. Приведу пример, у вас есть отдел продаж, есть отдел разработчиков 1С. Логично предположить, что пользователям из отдела продаж не нужны всякие программные продукты для разработчиков, а разработчикам не нужен специфический софт, который установлен у отдела продаж. Отсюда следует, что будет создано две коллекции, и каждая из них будет иметь на борту, только свои определенные сервера «Службы удаленных рабочих столов», со своим набором программного обеспечения, а доступ к коллекциям будет осуществляться исключительно по группам безопасности Active Directory.
Так, что подытожим, коллекции RDS призваны решать две задачи:
- Они позволяют нам разделять RD Session Hosts на отдельные фермы
- Второе, что они делают, это позволяют администраторам организовывать ресурсы, по отделам или другим критериям
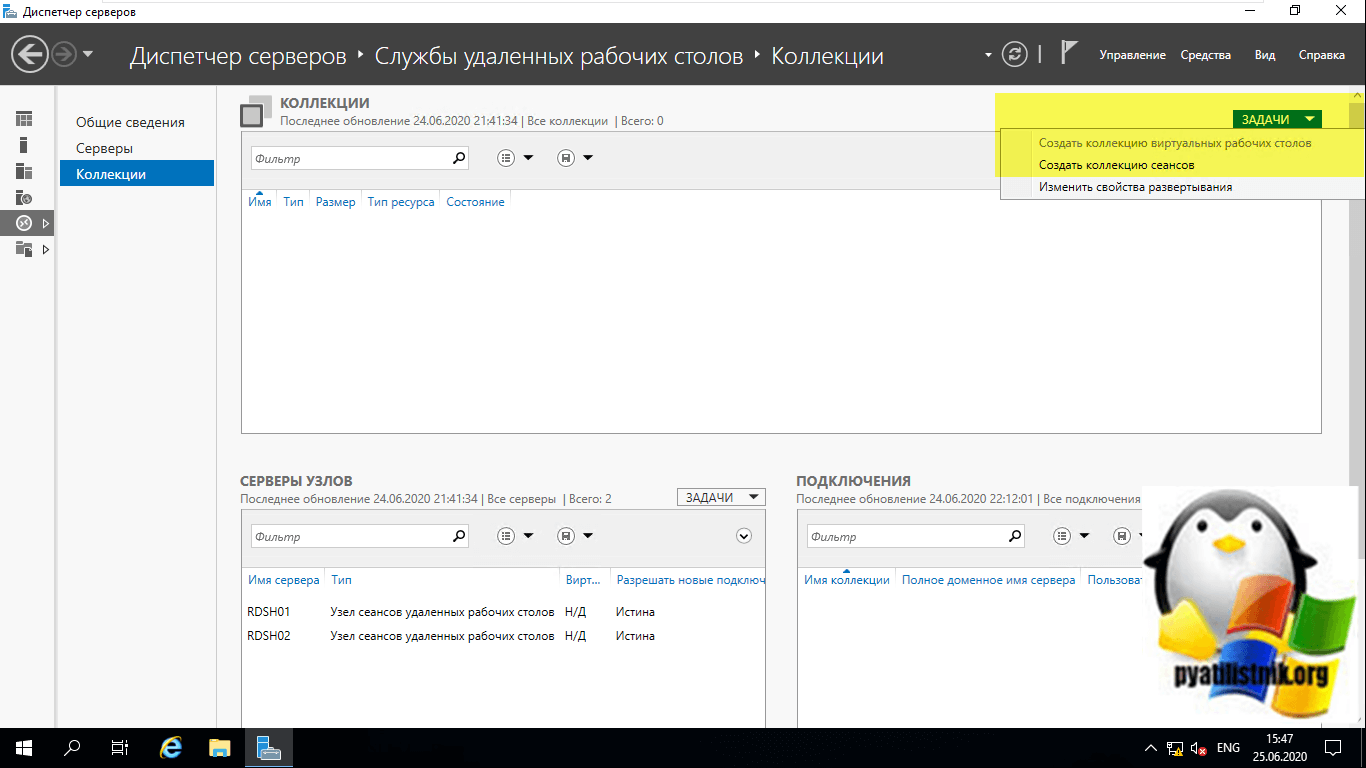
Для создания новой коллекции сеансов службы удаленных рабочих столов, выберите раздел «Коллекции» и нажмите кнопку «Задачи — Создать коллекцию сеансов«
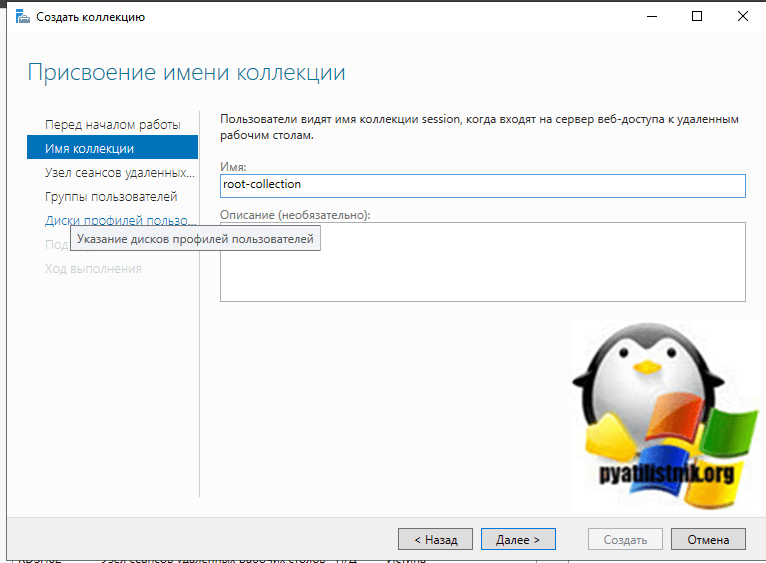
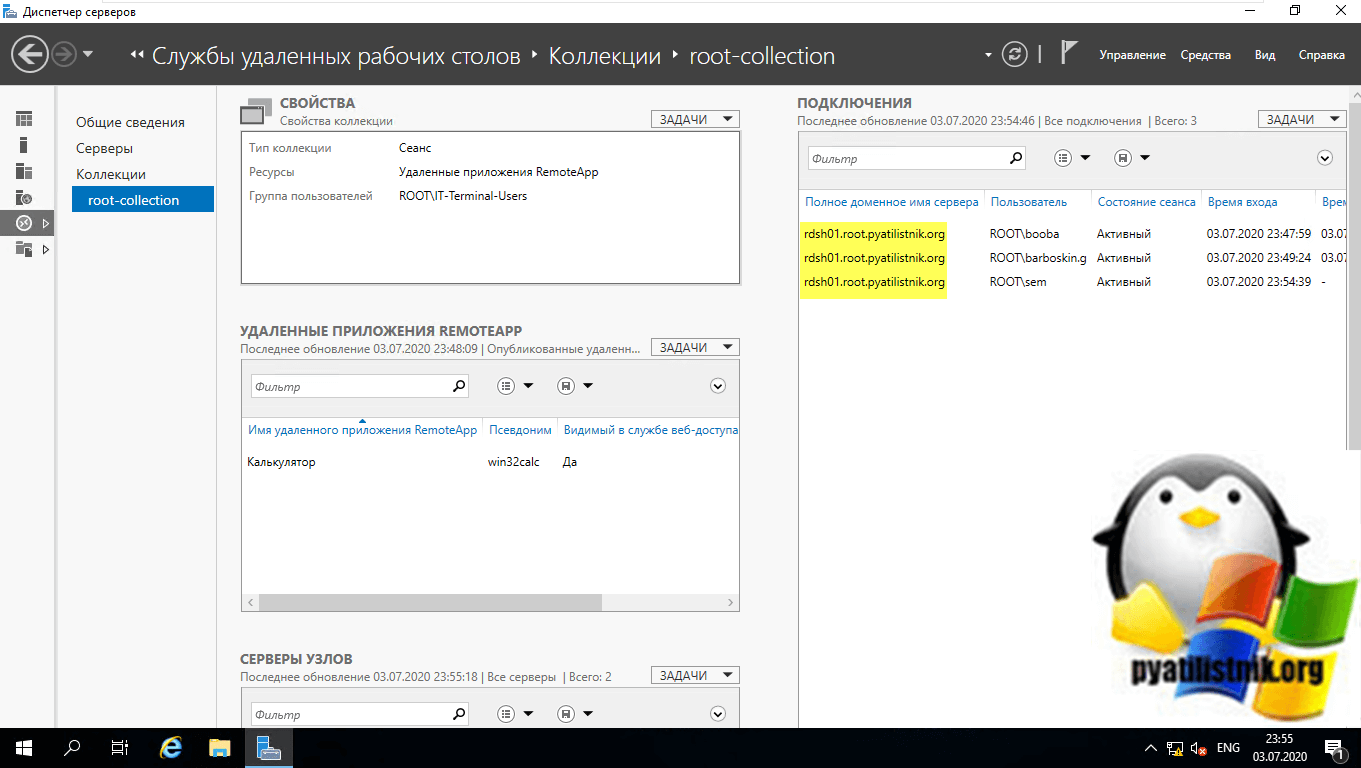
Придумываем любое имя для вашей коллекции, в моем примере это root-collection
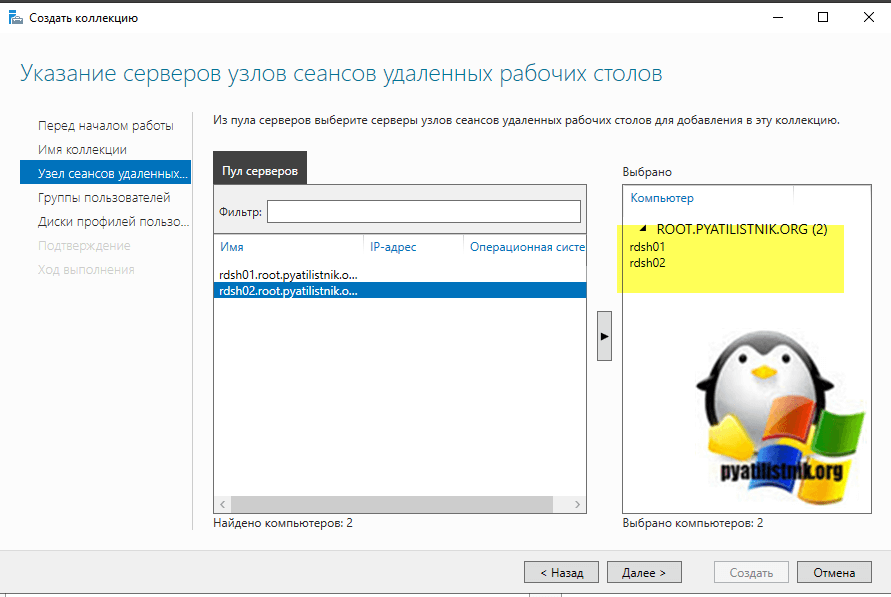
Теперь вам необходимо определиться какие серверы с ролью узлов сеансов (RDSH) вам нужно включить в коллекцию, у меня это RDSH01 и RDSH02
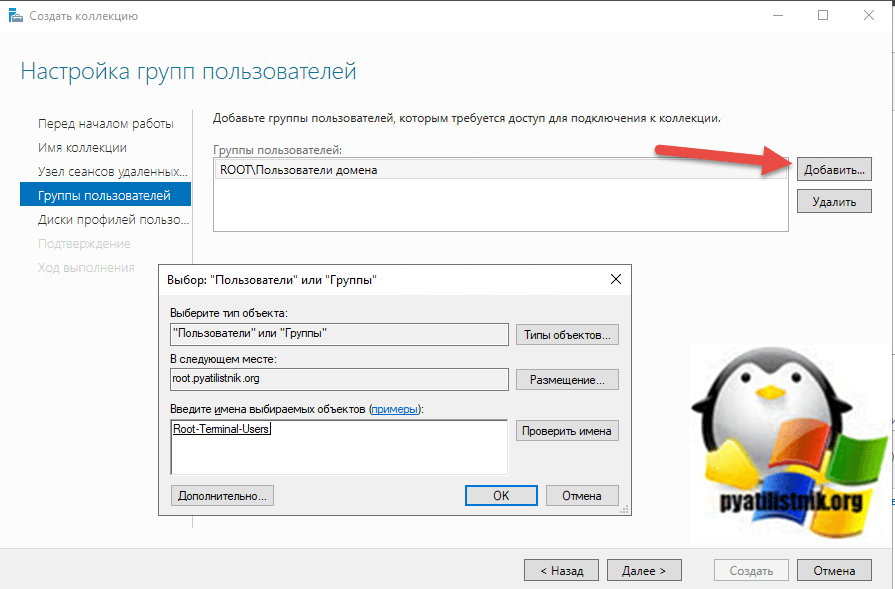
Указываем каким пользователям или группам разрешен доступ к данной терминальной ферме, я удалю группу «Пользователи домена» и добавлю другую.
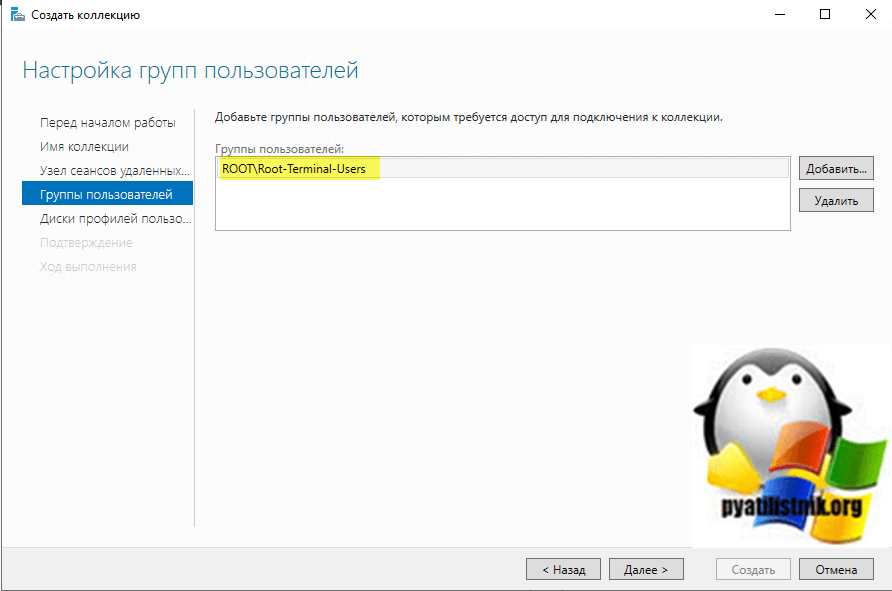
У меня получился вот такой список доступа, потом его так же можно изменить.
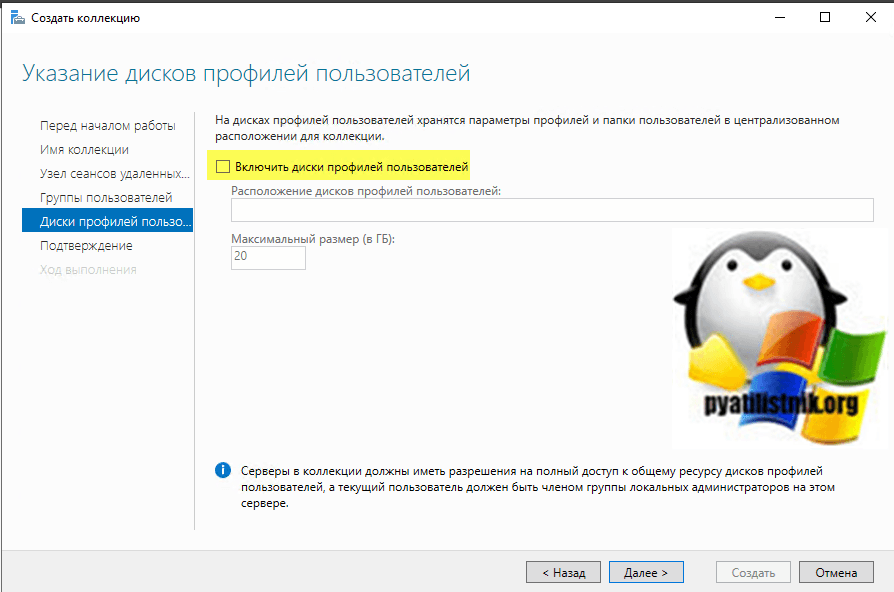
Я снимаю галку «Включить диски профилей пользователей» так как не планирую использовать UDP диски.
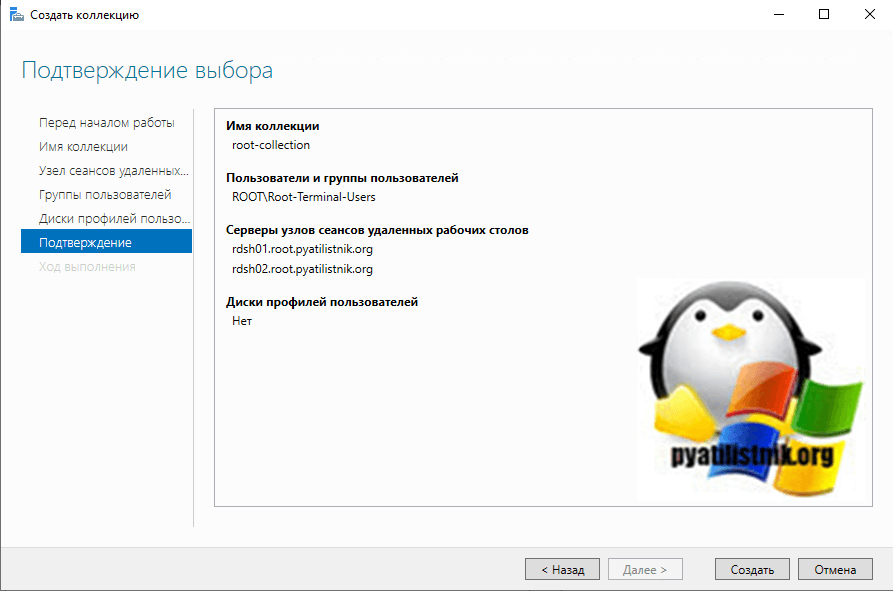
Смотрим сводную информацию по создаваемой коллекции и нажимаем «Создать».
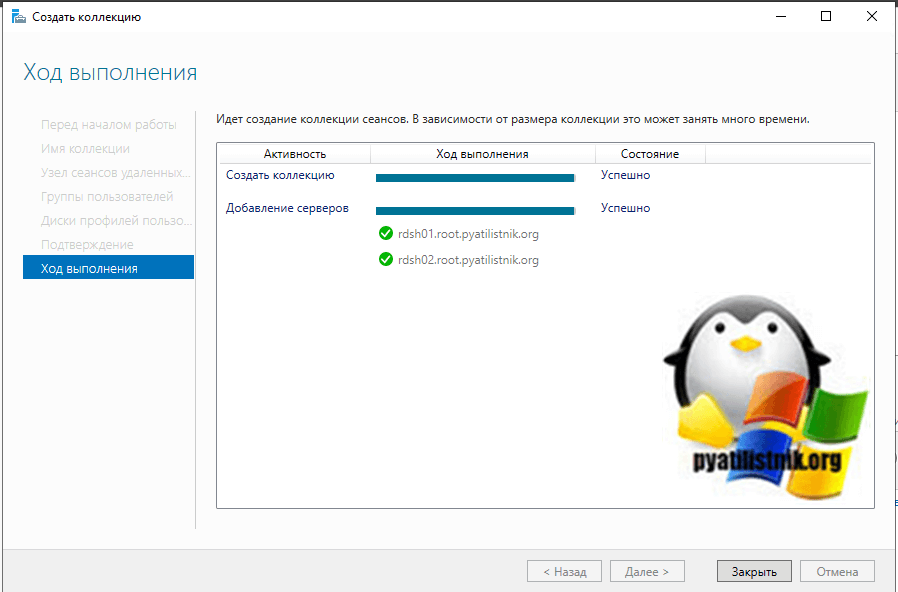
Дожидаемся создания коллекции службы удаленных рабочих столов.
В общем списке у вас будет ваша коллекция.
Про описание свойств коллекции RDS я уже писал пост, можете к нему обратиться. Теперь у системного администратора, кто первый раз развернул стандартную установку службы удаленных рабочих столов возникает вопрос, как ему подключиться к новой коллекции и это правильный вопрос, так как если вы сейчас попытаетесь подключиться брокеру, то вас не перекинет на хост из коллекции, вы просто попадете на сам RDCB хост. Чтобы это поправить нам нужно сделать две вещи:
- Скачать специальный файл RDP с RD Web хоста
- Поправить ветку реестра на сервере с ролью RD Connection Broker
Настройка RD Connection Broker для подключений к ферме RDS
Как я писал выше в текущей конфигурации посредник подключений к удаленным рабочим столам вас не будет перебрасывать в коллекцию, он просто будет подключаться к брокеру по RDP, ниже мы это поправим.
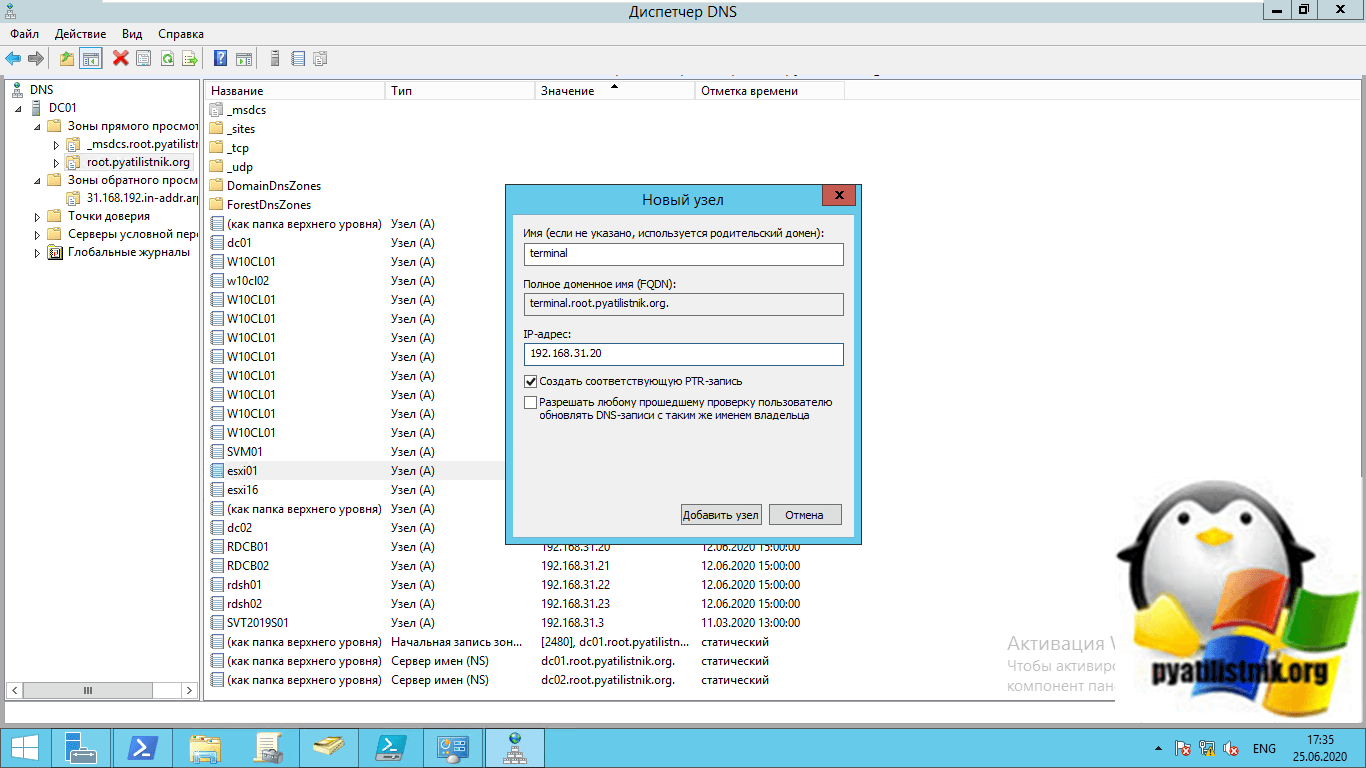
Для подключения к ферме Remote Desktop Services в отказоустойчивой конфигурации создают две записи DNS и направляют их на сервера с ролью RD Connection Broker, кто-то балансирует иначе, но мы в данном окружении воспользуемся именно DNS и механизмом перебора Round Robin. Откройте оснастку и создайте A-запись с нужным именем вашей RDS фермы у меня это будет DNS имя «terminal«.
Я пока создам одну A-запись с таким именем и в качестве IP-адреса укажу адрес моего первого сервера с ролью RD Connection Broker.
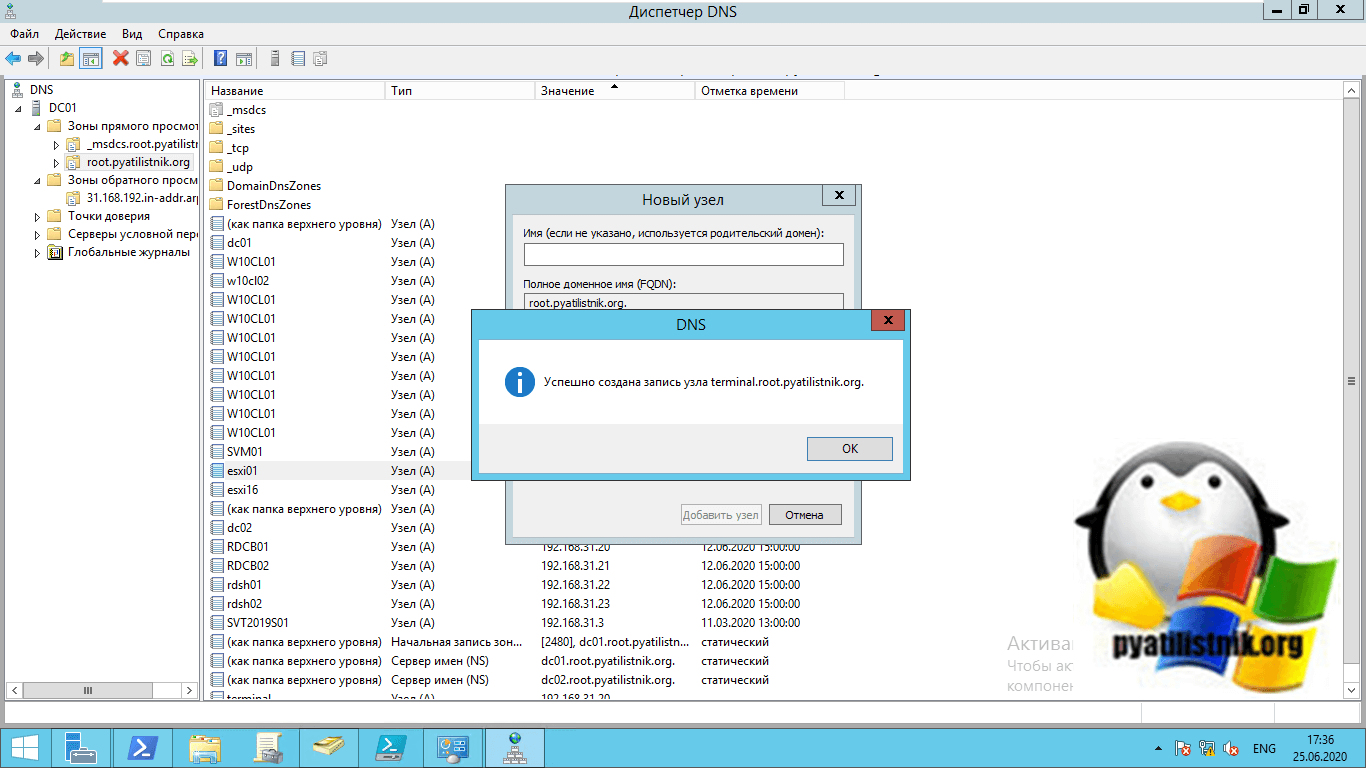
В запись terminal.root.pyatilistnik.org успешно создана.
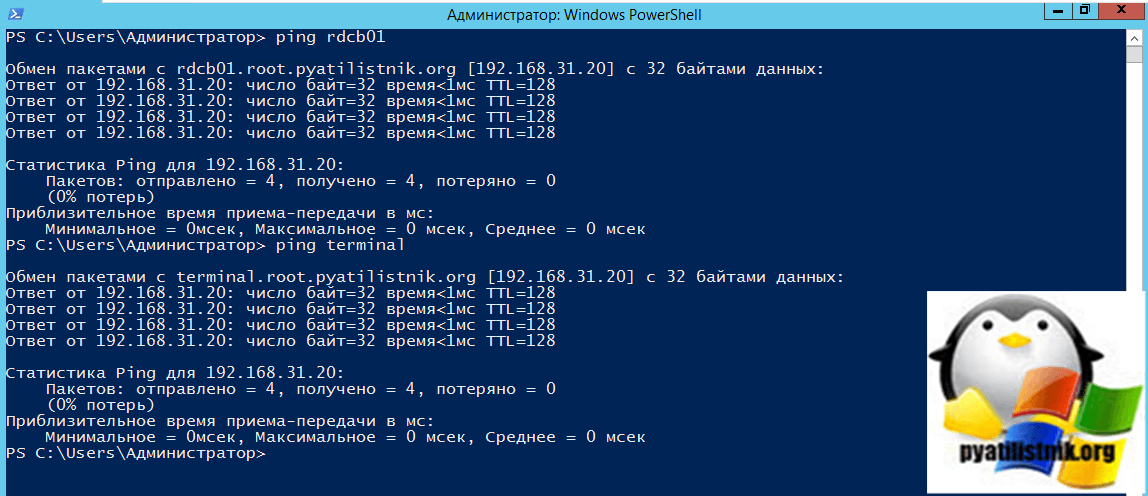
Проверяем ее через утилиту PING
Теперь, чтобы наш сервер посредник подключений к удаленным рабочим столам перебрасывал нас на RDSH сервера, нам необходимо подключиться к RD Web серверу и скачать RDP-файл с конфигурацией. Данный файл будет нести в себе параметры, о наименовании коллекции, при обращении к которой вы попадете на один из конечных серверов.
Напоминаю, что в моем тестовом окружении сервером веб-доступа к удаленным рабочим столам выступает брокер RDCB01.root.pyatilistnik.org
Стандартный адрес для подключения к вашему серверу RD Web, это:
https://dns имя вашего сервера с данной ролью/rdweb в моем примере https://rdcb01.root.pyatilistnik.org/rdweb
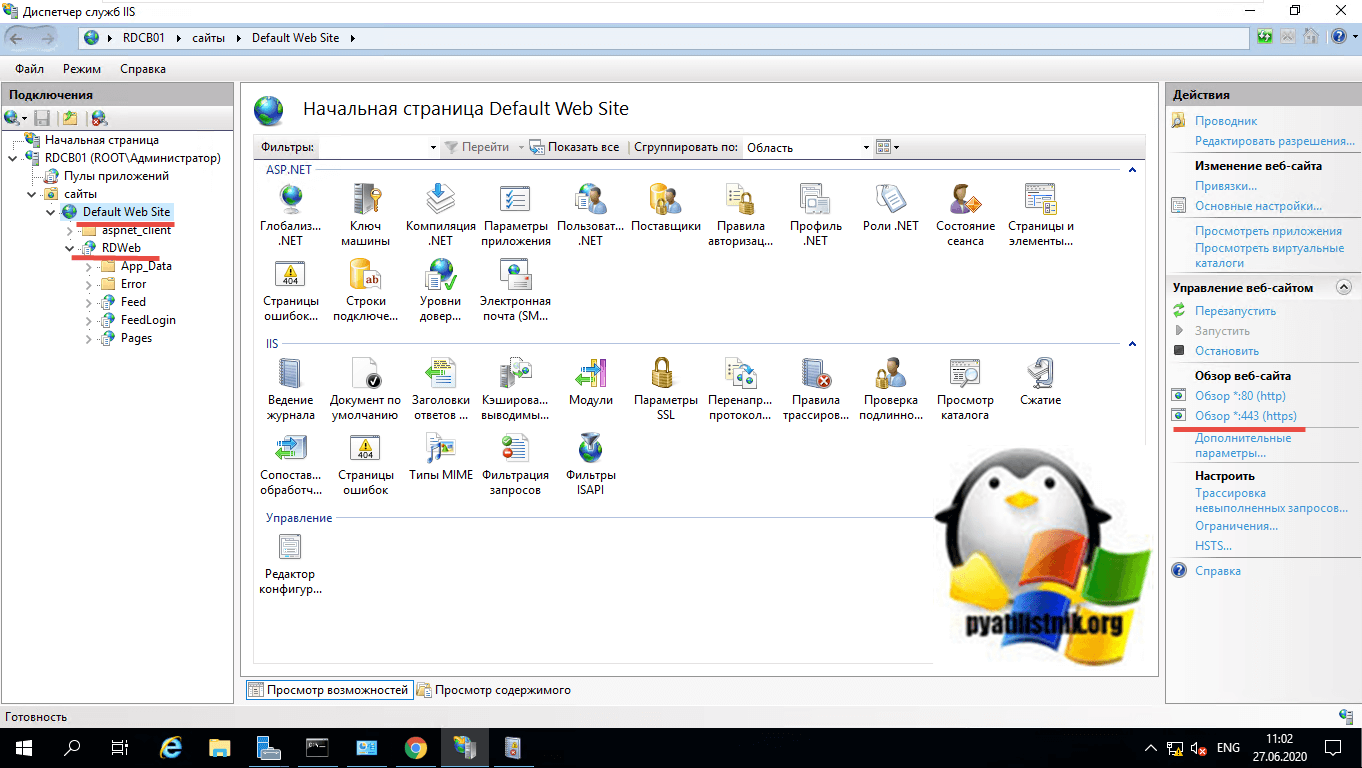
Проверить наличие данного адреса вы можете открыв диспетчер IIS.
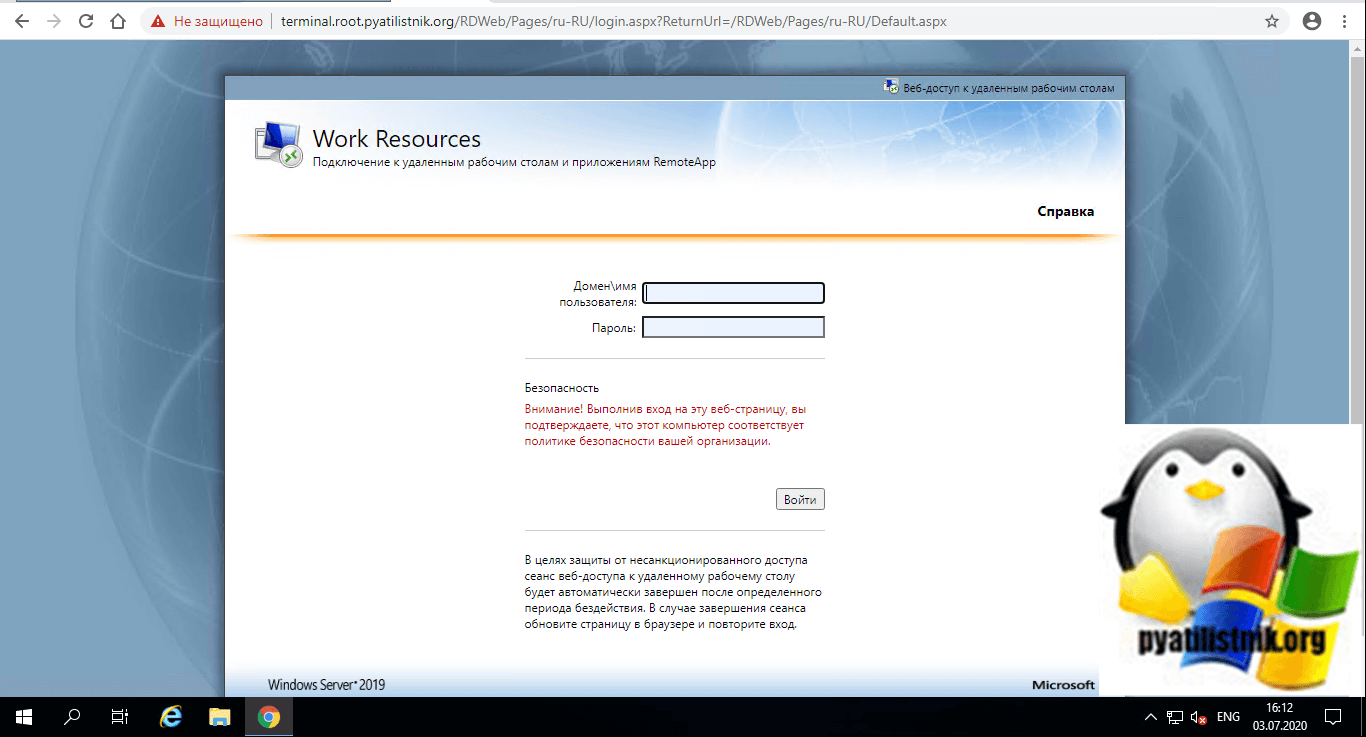
У вас должна открыться вот такая страница с авторизацией.
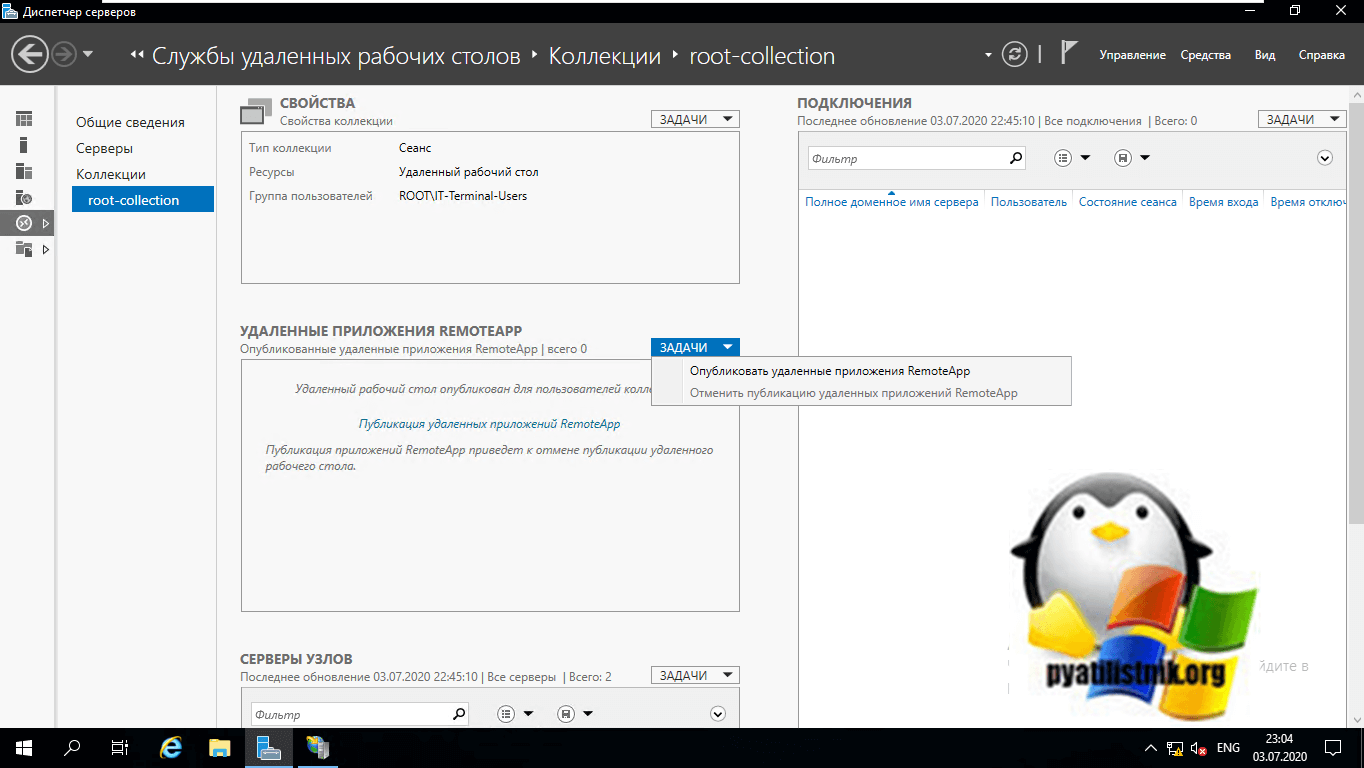
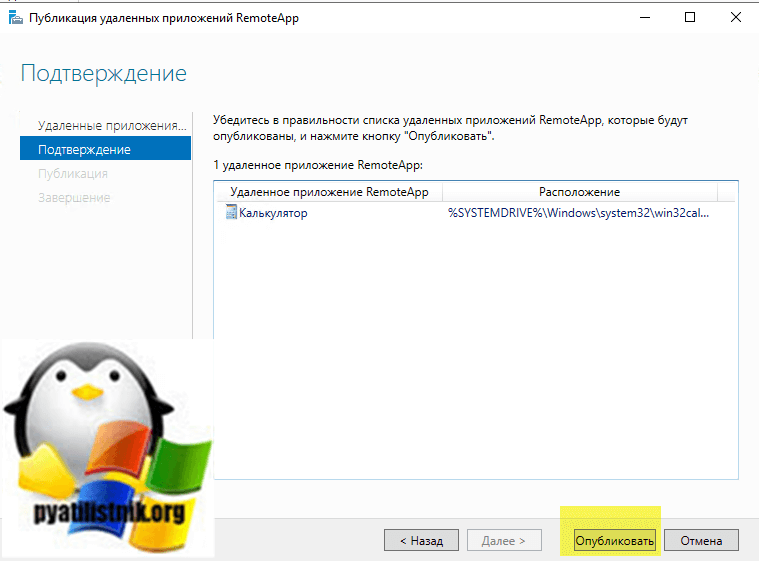
Теперь нам нужно получить значение loadbalanceinfo из свойств вашей коллекции, оно будет прописано в реестре брокеров. Для этого выполним публикацию приложения RemoteApp. Переходим в коллекцию службы удаленных рабочих столов и находим раздел «Удаленные приложения RemoteApp«. Нажимаем на задачи и произведем публикацию удаленного приложения RemoteApp.
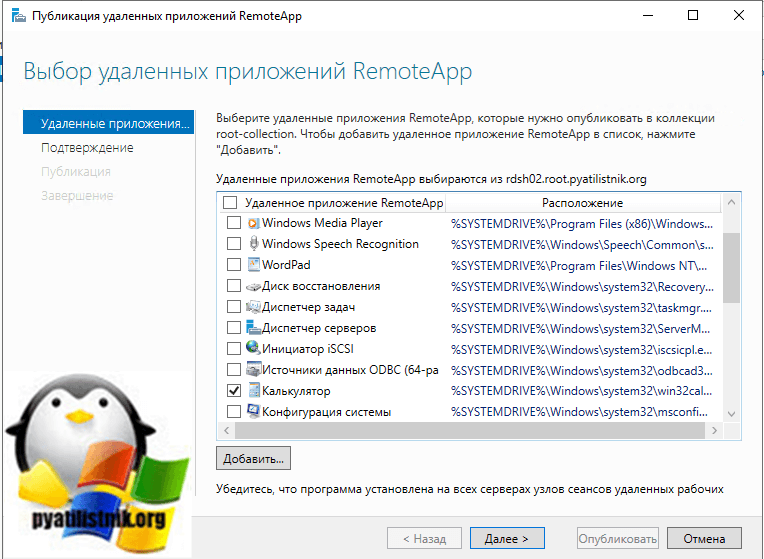
Выберите для примера обычный калькулятор
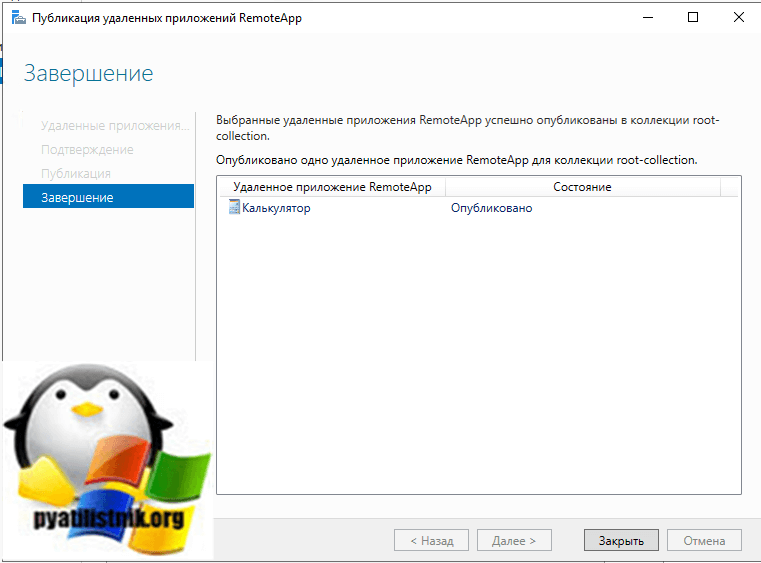
Нажимаем «Опубликовать«.
Дожидаемся публикации приложения в коллекции Remote Desktop Services.
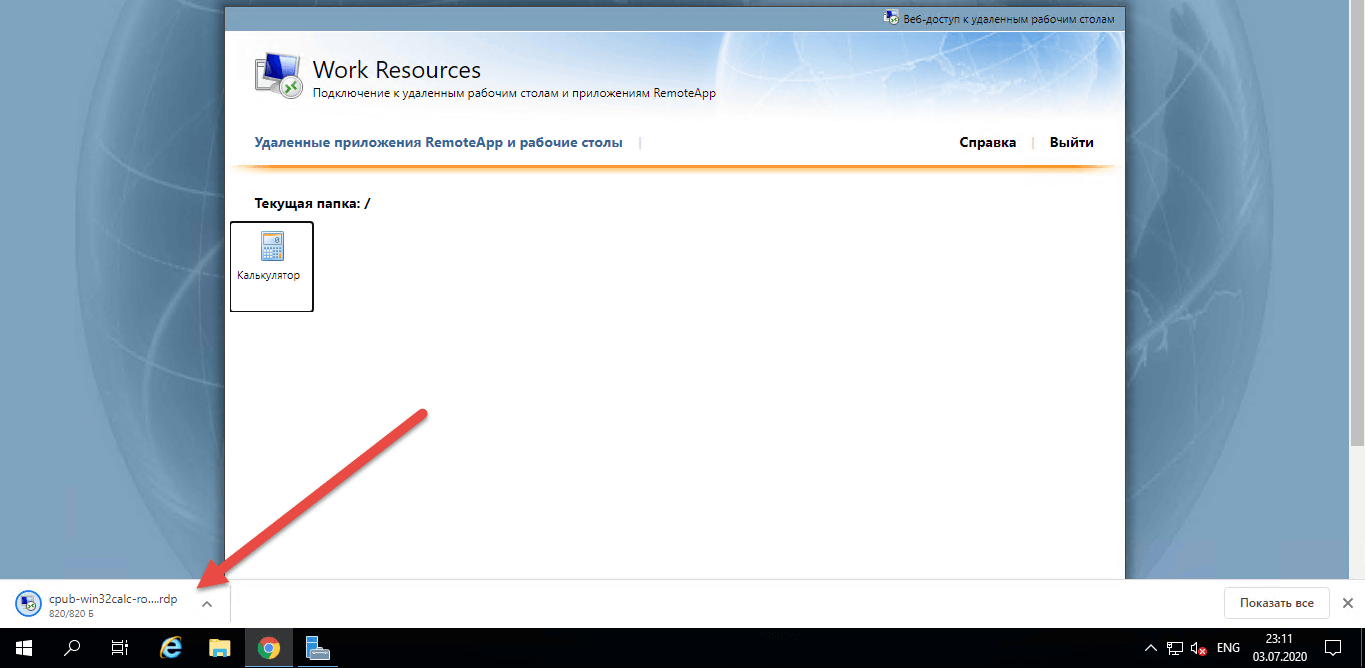
Далее вы переходите в веб интерфейс RDWEb и авторизуетесь, у вас будет доступно приложение калькулятор. Щелкните по нему и у вас будет запущено скачивание RDP пакета.
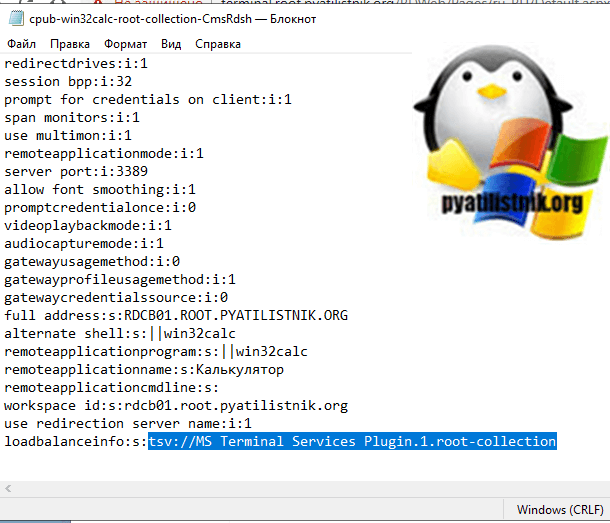
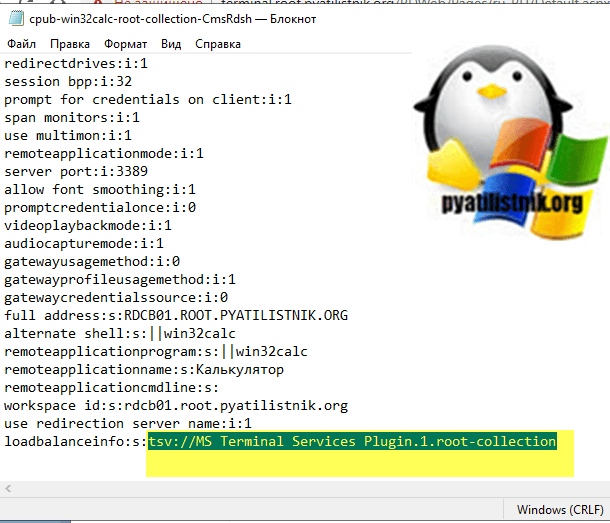
Теперь полученный файл RDP нужно открыть через блокнот.
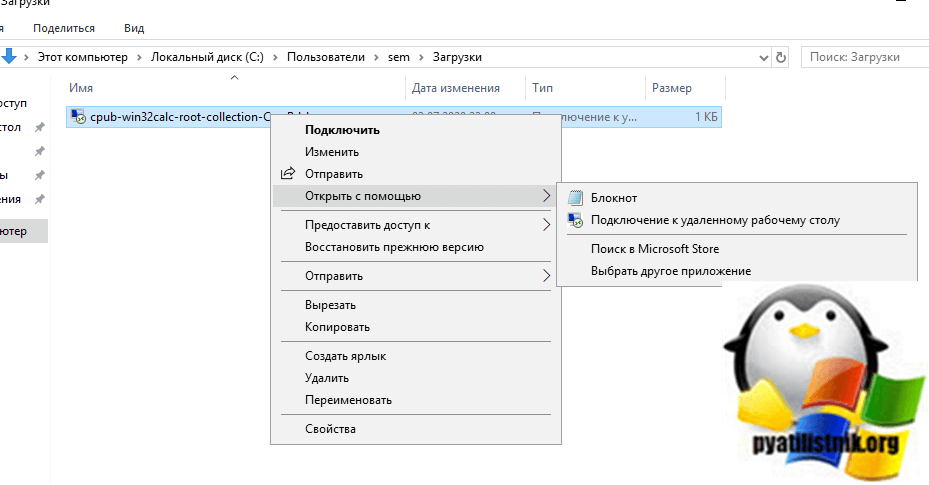
Вам нужно найти строку loadbalanceinfo:s:tsv://MS Terminal Services Plugin.1.root-collection, она то нам и нужна для прописывания ее в реестре сервера несущего роль посредника подключений к удаленным рабочим столам (Connection Broker).
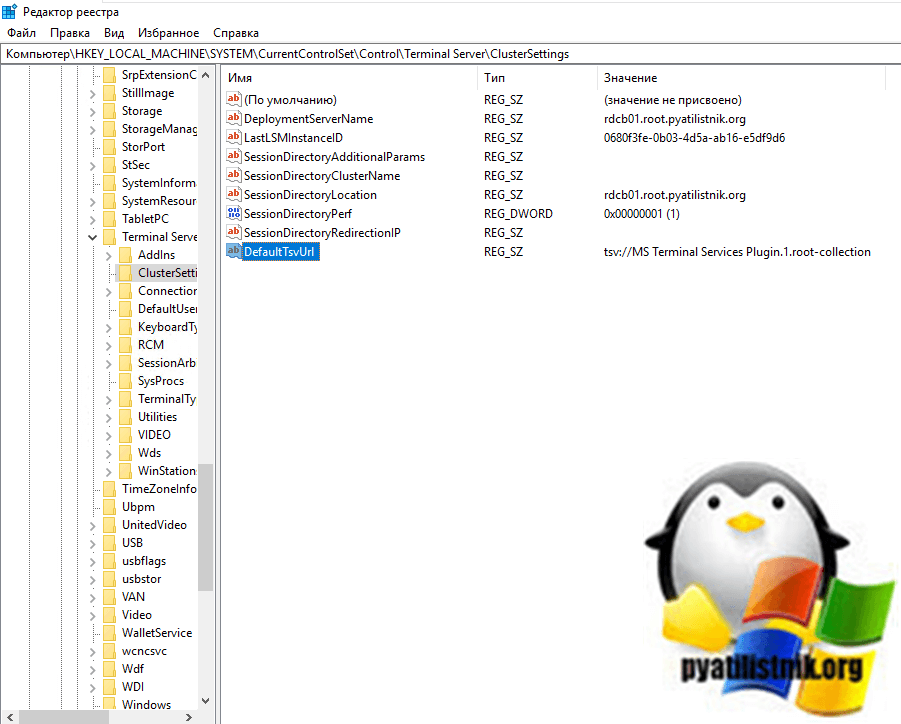
Переходим на сервер с ролью RD COnnection Broker и открываем реестр Windows. Переходим в раздел:
HKLMSYSTEMCurrentControlSetControlTerminal ServerClusterSettings
Создаем тут ключ реестра с типом REG_SZ (Строковый) и именем DefaultTsvUrl. В качестве содержимого вставляем tsv://MS Terminal Services Plugin.1.root-collection
Перезагрузите на всякий случай ваш брокер. Пробуем теперь произвести подключение по имени terminal.root.pyatilistnik.org.
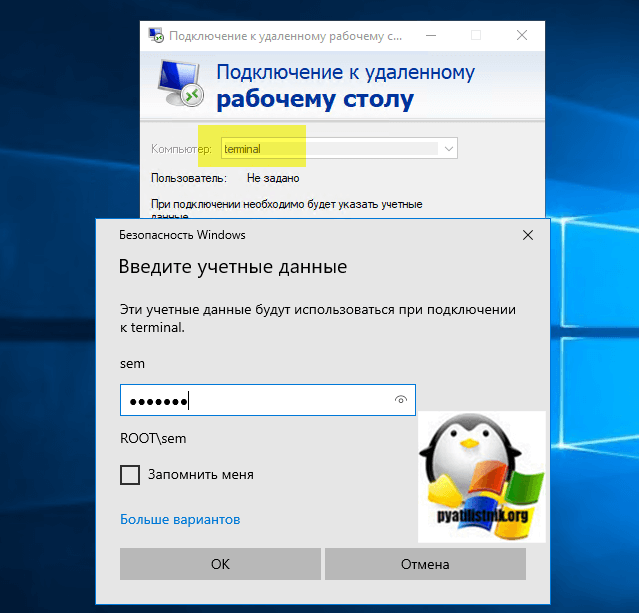
Как видите нам ответил rdcb01.root.pyatilistnik.org
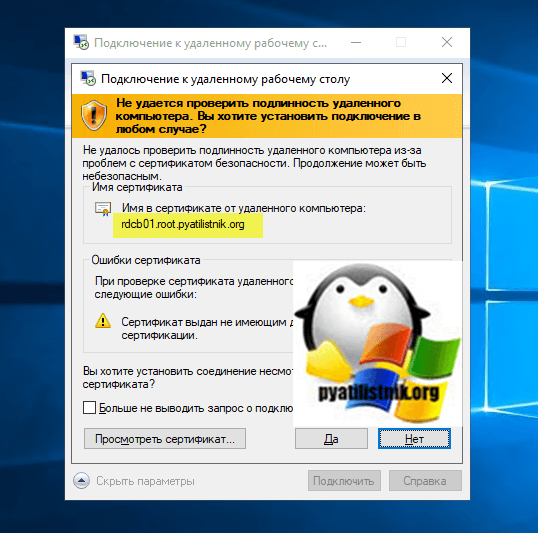
Но как и было задумано посредник подключений к удаленным рабочим столам перекину нас на конечный хост с ролью RDSH. Я для теста сделал три подключения, все отлично работает. Можно сказать, что мы успешно установили и настроили стандартную Remote Desktop Services ферму на базе Windows Server 2019. Теперь можно превращать ее в высоко доступную, о чем и пойдет речь ниже.
Создание группы безопасности для RD Connection Broker
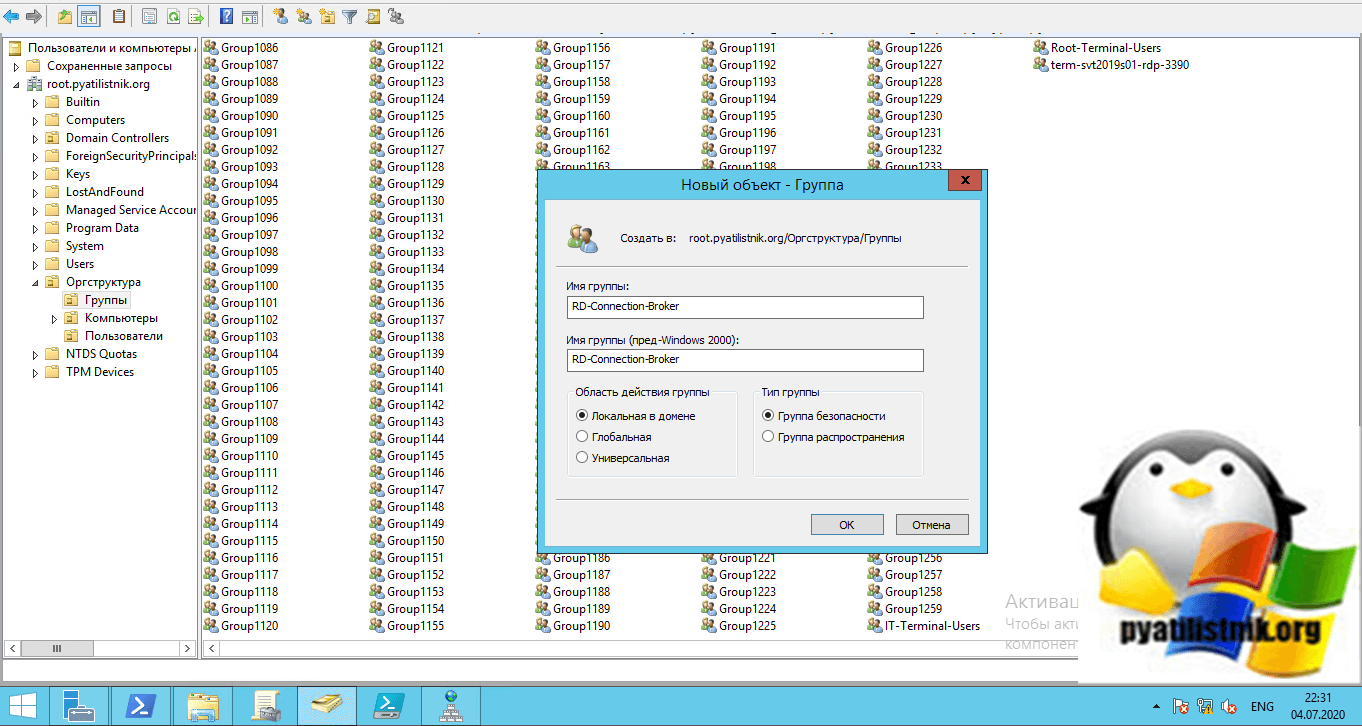
Следующим шагом нам необходимо в Active Directory создать группу безопасности в которую мы поместим наши сервера с ролью RD Connection Broker. Необходимо, это для того, чтобы мы этой группе безопасности назначили необходимые права на нашем SQL сервере.
Открываем оснастку ADUC и создаем в нужном вам расположении группу безопасности RD-Connection-Broker. Я выставлю область действия группы (Локальная в домене).
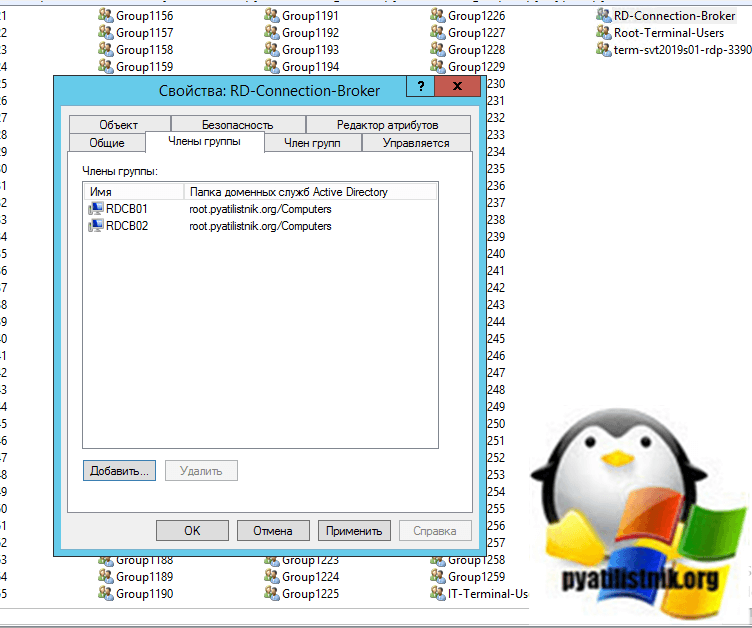
Добавим в группу RD-Connection-Broker два сервера с ролью посредника подключений к удаленным рабочим столам. В моем случае, это RDCB01 и RDCB02.
Не забудьте перезагрузить оба сервера, чтобы обновился их ACL с членством в группе
Установка SQL Native Client
Следующим шагом вам необходимо на обоих серверах с ролью RD Connection Broker установить бесплатного клиента SQL Native Client, это необходимое требование. Где скачать SQL Native Client и как его установить я подробно рассказывал, на этом я останавливаться не буду, посмотрите по ссылке.
Установка и настройка MS SQL 2016
Следующим подготовительным требованием идет установка общей базы для наших брокеров, в моем примере это будет MS SQL 2016 Standard. Сам процесс инсталляции я подробно разбирал, так что так же советую посмотреть мою статью. Еще я вам советую делать всегда вашу базу данных отказоустойчивой, в режиме Always On.
In this post I will go step by step to include everything you need to do to build an RDS farm that will include x2 RDS Broker Server, x2 RDS Session Hosts and x1 SQL Server. I will go over how to achieve HA for the entire environment and what you will need to do to get everything up and running.
Design Overview
For this deployment I want to use the below:
2x RDS Broker Server
2x RDS Session Hosts
Users are to connect to the RDS Broker Servers as below and then redirected to the RDS Session Hosts. From there they can then connect to other target servers.

As the clients will be connecting to the RDS Broker Servers we need to add DNS Round Robin for the RDS Broker Servers in DNS. For example we have rdsbroker1.domain.com with IP 10.10.20.10 and rdsbroker2.domain.com with IP 10.10.20.11. We would add a new DNS name for the RDS Broker Cluster of:
rdsbrokercluster.domain.com IP 10.10.20.10
rdsbrokercluster.domain.com IP 10.10.20.11
In Microsoft DNS please ensure DNS Round Robin is also enabled.
Installing the RDS Server Roles
First do a basic installation of Windows Server 2019 Standard on x5 servers. Once your servers are ready all we need to add all of the servers into one single console for the RDS deployment.
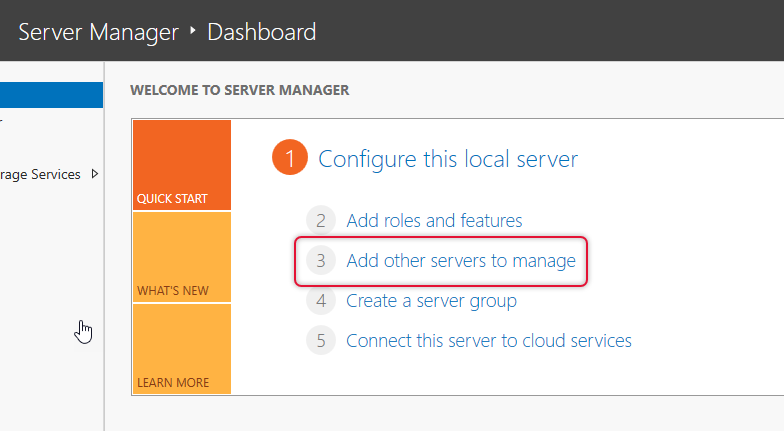
Open the Server Manager and click 3. Add other servers to manage

Add in all the soon to be broker and session host servers and click ok

Click 4. Create a server group, give it a name and add the soon to be RDS servers to it and click ok

Here is the group, click on it

You will see all the RDS servers available

The deployment of an RDS infrastructure is facilitated by the tool built into the server managers, in a single command the following roles will be installed:
• Remote Desktop Session Host
• Broker
• Remote Desktop Access via the Web
From server manager click add roles and features

Click next

Select Remote Desktop Services installation and click Next

Select a standard deployment and click next

Select session-based deployment and click Next

Click Next

Add the first broker server and click Next (we will add the second in later when we configure HA)

Select install the RD Web Access role on the RD connection broker
Select the session host and click Next

Add the RD Session host servers and click Next

Confirm is all ok and select Restart if required, click Deploy

Roles are deployed


Create a collection to specify the hosts and who can access them
Open server manager and click Remote Desktop Services, click collections and click Create Session Collection

Click next

Name the collection

Select your session host servers and click Next

Add the groups that are allowed to login to the host servers

Enter path of user profile disk folder (the NTFS and share permissions must allow full control for the RDS server AD objects – we will come back to this later)

Confirm all is correct and click create

Configurations are applied

Select the collection and click Tasks, Edit properties

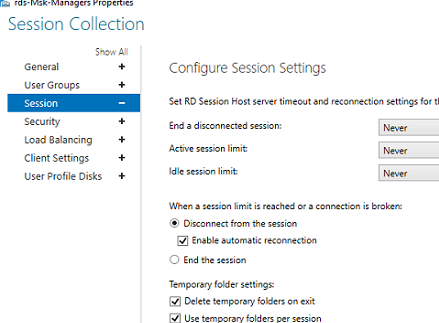
Edit the session properties so that sessions can expire

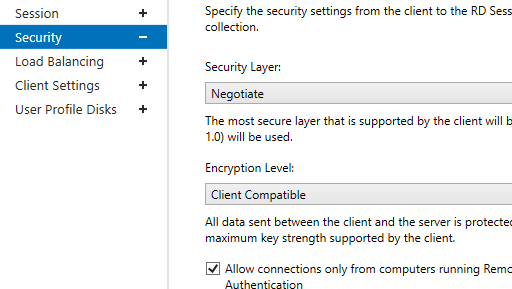
Select the security options

Select any server weighting

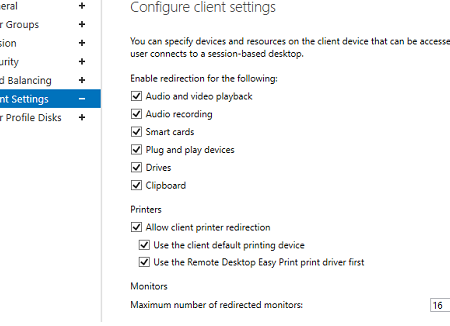
Configure client settings and click ok

Open RDS Licensing

Add the license servers (I used the session hosts)

Click Add

Licensing configuration is applied

Right click on RD Licensing and click select RD licensing mode

Select the license mode and click Apply> Ok

From the session host where we install the license server role click Tools> Remote Desktop Services> Remote Desktop Licensing Manager

Right click and Activate server

Select Automatic Connection

Enter company details

Enter email

Click Next to add licenses

Select Enterprise Agreement

Enter agreement number

Enter license details and click Next

License is installed

Go to License server and open RDS License Console. Right click license server and click Review configuration

Click add to group


Repeat on any additional license servers (I split 50:50 between my session hosts)
Preparing for the RDS Broker HA Configuration
First we need to create the user profile disk folder on a server and share. This needs to be highly available so I store mine on a replicated DFS folder. On a file server create a folder for RDS profiles and share. The RDS session hosts need full control.

Do the same for NTFS permissions

Create AD security group and add broker servers

For the purpose of this guide and because we do not want to focus on SQL too much we will just use a standalone SQL Express database. However for highly available setups the best solution is to use Always On Availability Groups as in my guide here.
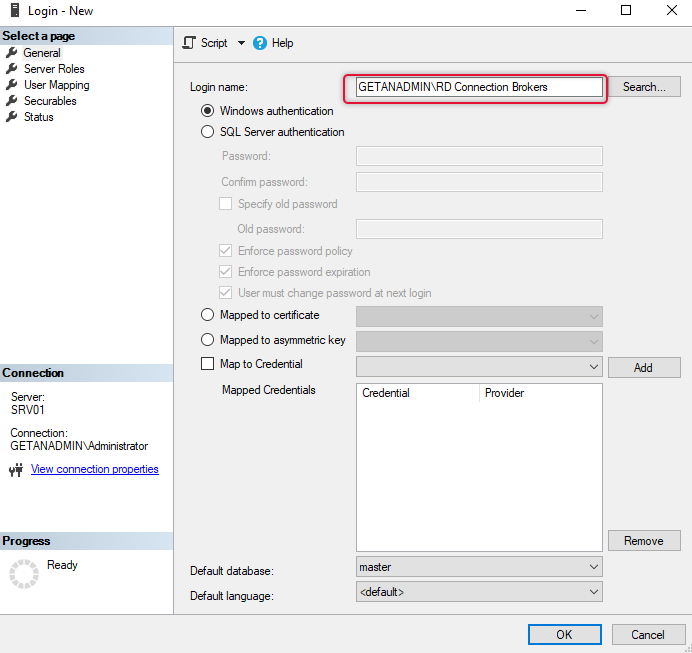
Next Setup new 2019 server and install SQL Express, I used SQL Server Express 2019 (latest available). Install SQL Management Studio and login. Then add a new login for RDS servers

Click search

Select the RDS Server Broker group

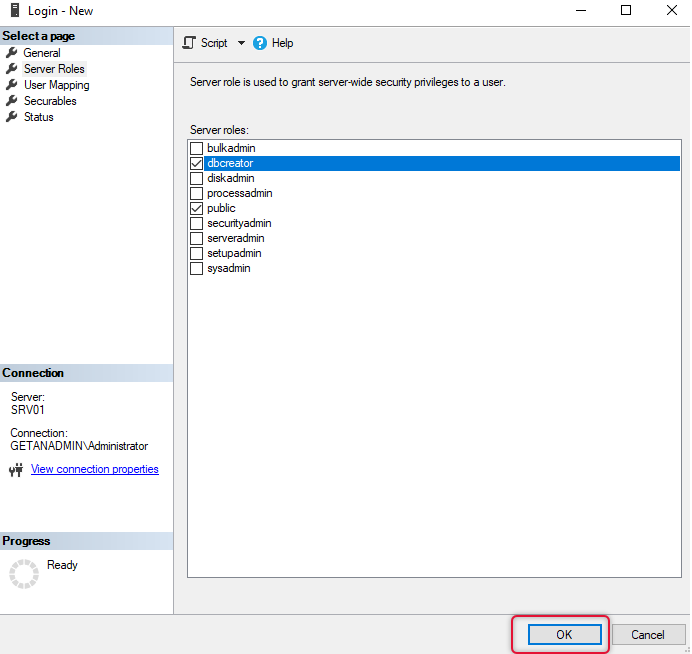
Select dbcreator in roles

Login is added to the list

Click New Database

Name the database

Database is added

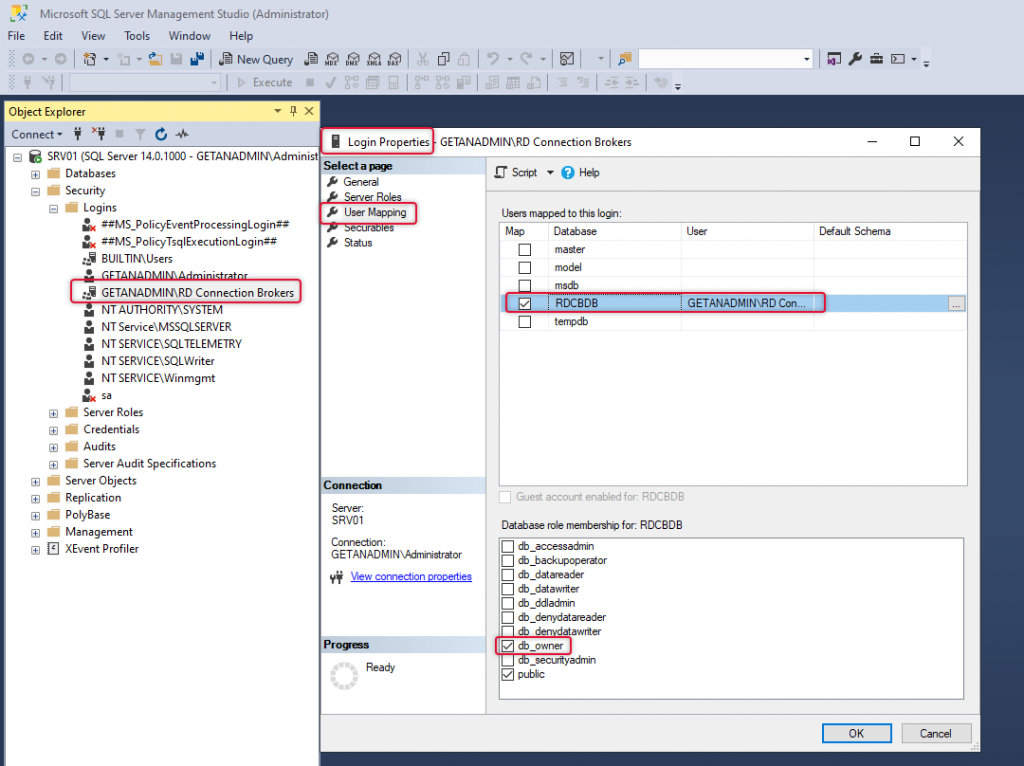
Modify the login you created to make it db owner

On the RDS servers install the SQL client from the install media

Next on your SQL servers add the broker server accounts to the Remote Management Users group


Configure RDS Broker Servers for HA
Go to RDP Overview and right click the connection broker, then click Configure High Availability

Click Next

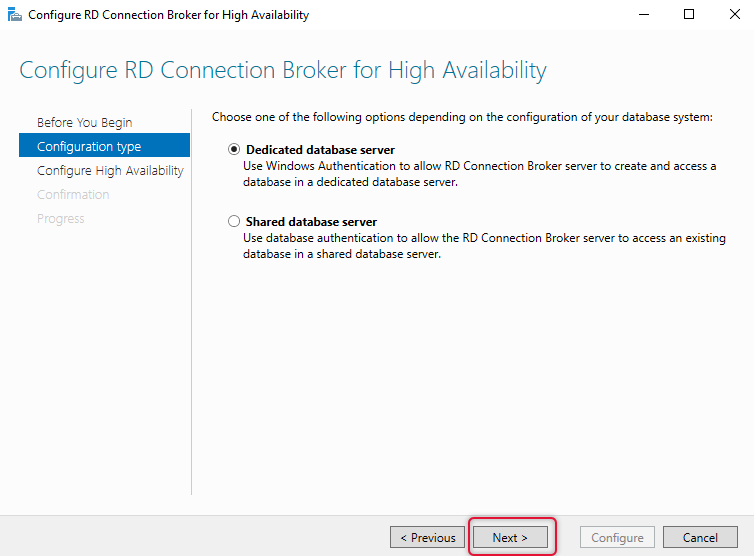
Select dedicated database server

Enter RDS broker cluster name and input connection string and click next

The connection string I used for this setup is:
DRIVER=SQL Server Native Client 11.0;SERVER=VMMGTRDSSQL101;Trusted_Connection=Yes;APP=Remote Desktop Services Connection Broker;DATABASE=RDSHA
If you are using multiple subnets and SQL Availability Groups, your string should look more like the below – using the DNS name of your SQL listener
DRIVER=SQL Server Native Client 11.0;SERVER=aglinuxrds;MultiSubnetFailover=True;Trusted_Connection=Yes;APP=Remote Desktop Services Connection Broker;DATABASE=RDSHA
If this doesn’t work try this, MultiSubnetFailover=Yes changes from True at one of the client versions
DRIVER=SQL Server Native Client 11.0;SERVER=aglinuxrds;Trusted_Connection=Yes;MultiSubnetFailover=Yes;APP=Remote Desktop Services Connection Broker;DATABASE=RDSHA;
If you have any problems at this stage first check your SQL server is listening on port 1433
Powershell (from the SQL server)
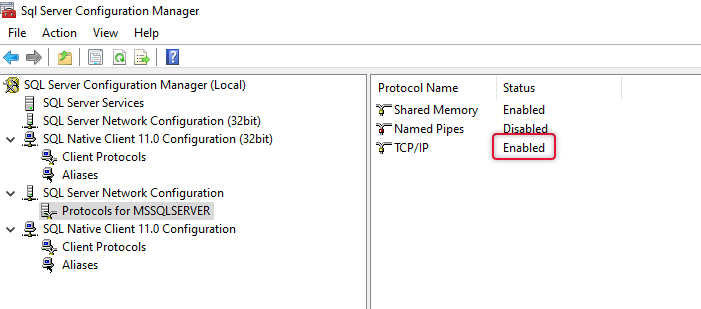
If not, open SQL configuration manager and click SQL Server Network Configuration>Protocols>TCP/IP and ensure the right IPs are enable and port 1433 is added as below

Click Configure

The task is executed, click close

Adding a broker server
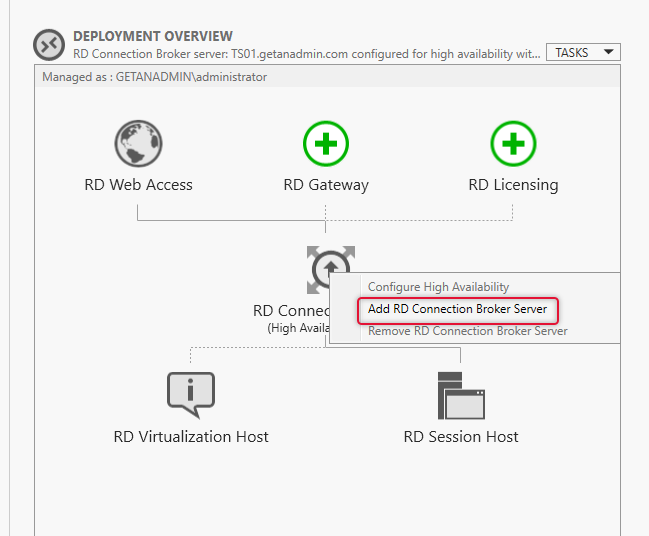
From the deployment overview Right click on the RD Connection Broker click add RD Connection Broker Server

Click Next

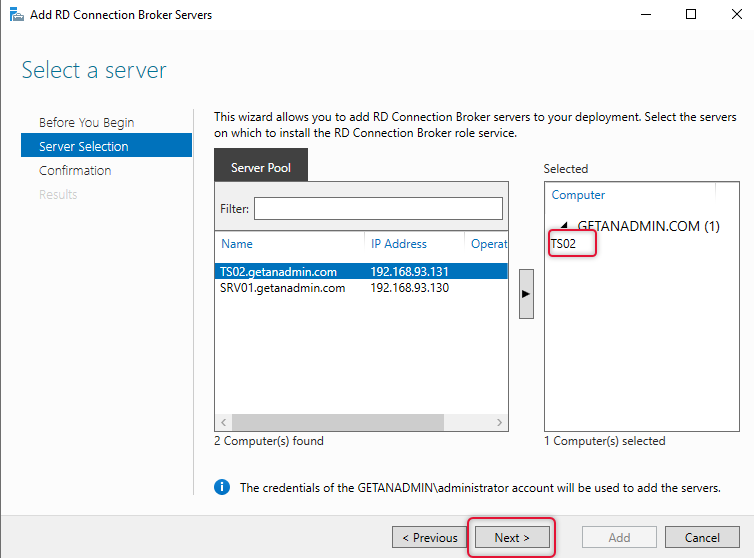
Add the second RDS Broker server and click Next

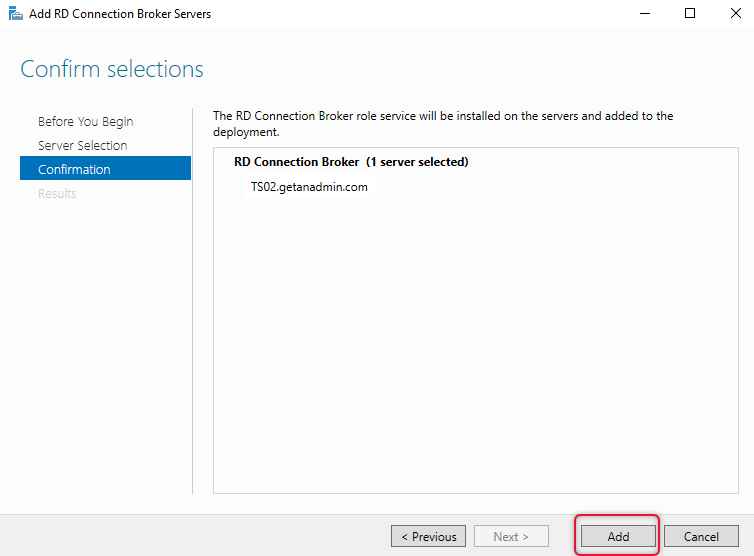
Click Add

The wizard should complete

If you have any issues at this stage connecting to the database check the SQL server log

I was seeing this

Check that the logins are still applied as db_owner – for some reason mine had dropped out even though it was definitely set and worked for the first server

Here is a PowerShell script you can use to test your SQL connection (Should just return True or False)
function Test-SQLConnection
{
    [OutputType([bool])]
    Param
    (
        [Parameter(Mandatory=$true,
                    ValueFromPipelineByPropertyName=$true,
                    Position=0)]
        $ConnectionString
    )
    try
    {
        $sqlConnection = New-Object System.Data.SqlClient.SqlConnection $ConnectionString;
        $sqlConnection.Open();
        $sqlConnection.Close();

        return $true;
    }
    catch
    {
        return $false;
    }
}


Test-SQLConnection "DRIVER=SQL Server Native Client 11.0;SERVER=VMMGTRDSSQL101;Trusted_Connection=Yes;APP=Remote Desktop Services Connection Broker;DATABASE=RDSHA"
Create a certificate to secure the connection to the RDS Broker server
Open IIS on the RDS Broker server and go to Server Certificates

Click Create New Certificate Request> Make bit length 2048

Save the request file

Click Finish

Go to the certificate authority server and issue the certificate using the request file from the RDS Broker. Simply open the command line and enter the following:
certreq -submit -attrib "CertificateTemplate:WebServer" wintelbastionreq.txt
Save the certificate output as a .cer file and copy it back onto the RDS Broker.
Go to IIS again and Server Certificates, then click complete certificate request. Select the .cer file you just collected from the CA and select the Personal Store.

Open the certificate console by going to Start>Run certlm.msc
You will see the certificate installed in the personal computer store

Right click on the certificate and click Export

Select .PFX and click Next

Specify a password and select SHA256

Save the .pfx file

Go back to the RDS Deployment Overview> Select Tasks> Properties> Certificates. Click Select existing certificate and enter the path to the .pfx file you just saved and enter the password you specified

The certificate is deployed to both RDS Broker servers and now used to secure the connection

Connecting clients to RDS Broker
I just wanted to use a normal RDP connection for clients to connect to the brokers and then be redirected to the session hosts. To do this first you need to check the below registry entry:
Check registry entry for your collection (may differ to actual collection name). Mine was as below:
HKEY_LOCAL_MACHINESOFTWAREMicrosoftWindows NTCurrentVersionTerminal ServerCentralPublishedResourcesPublishedFarmsDomain_-_Wintel_Bas
Copy collection name from registry.
Create an .rdp file open in Notepad and add these lines to it:
use redirection server name:i:1
loadbalanceinfo:s:tsv://MS Terminal Services Plugin.1.Domain_-_Wintel_Bas
full address:s:WINTELBASTION.DOMAIN.COM
Brokers should now redirect to Sessions hosts
This guide shows how to install, configure, and maintain a terminal server farm based on the Remote Desktop Services (RDS) role on Windows Server. The article will help you to deploy Remote Desktop Services on Windows Server 2022, 2019, or 2016 in an Active Directory domain.
Contents:
- Remote Desktop Services (RDS) Components Architecture
- Creating a New RDS Deployment on Windows Server
- Create Remote Desktop Services Collections on Windows Server
- How to Publish RemoteApps in Remote Desktop Services?
- How to Deploy Remote Desktop Services Farm Using PowerShell?
Remote Desktop Services (RDS) Components Architecture
The RDS role in Windows Server includes the following components:
- Remote Desktop Session Host (RDSH) – RDS session hosts. These are the main workhorses of an RDS farm on which user apps run;
- Remote Desktop Connection Broker (RDCB) – an RDS connection broker. It is used to manage an RDS farm, distribute the workload, reconnect users to their sessions, store RDS collection settings, and published RemoteApps;
- Remote Desktop Gateway (RDGW) – provides secure access to the RDS farm from the Internet;
- RD Web Access (RDWA) – a web interface to access remote desktops and RemoteApps;
- Remote Desktop Licensing (RD Licensing) — a licensing service for managing RDS licenses (CALs).
In our small RDS deployment, there are only three Windows Server hosts with the following roles:
mun-rds1.woshub.com— RDSHmun-rds2.woshub.com– RDSHmun-rdsman.woshub.com– RDSH, RDWA, RDCB, and RD Licensing
Prerequisites to create an RDS farm:
- Install the same version of Windows Server on all RDS hosts, configure them, and join the AD domain;
- Open the ADUC console (dsa.msc) and move all hosts with the RDSH role to the same Active Directory OU (Organizational Unit). Thus, it will be easier to apply RDS settings using GPO;
- Create an Active Directory domain security group for RDSH servers (for example, mun-rdsh) and add all hosts to it;
- If you want to use User Profile Disks (UPD) to store RDS user profiles (or roaming profiles), you must create a shared network folder on a file server (it is recommended to place the shared folder on a File Server Failover Cluster running Windows Serveer). Grant Full Control permissions on the shared folder for the mun-rdsh group.
Creating a New RDS Deployment on Windows Server
Let’s see how to create and configure an RDS configuration using the Server Manager GUI.
Open the Server Manager and add all RDS servers you want to the console. Click All Servers -> Add servers.
Click the Server Manager menu and select Add Roles and Features -> Remote Desktop Services installation -> Standard deployment –> Session-based deployment. 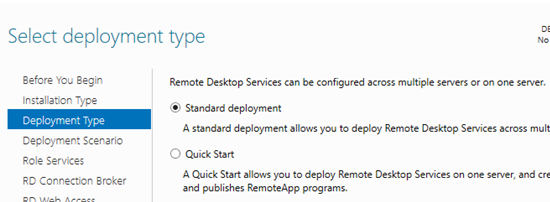
Quick Start mode is used to deploy all RDS roles on a single server. An RDS farm can have only one server running all RDS roles (RD Session Host, RD Web Access, and RD Connection broker). However, this configuration doesn’t provide fault-tolerance and workload balancing in Windows Server Remote Desktop Services.
Then specify which RDS roles you want to assign to your hosts. Select the servers for the corresponding roles in the RDS farm creation wizard. In my case, I want to build the following RDS configuration:
- RD Connection Broker –
mun-rdsman - RD Web Access —
mun-rdsman - RD Session hosts —
mun-rdsman,mun-rds1,mun-rds2
You can distribute RDS roles among servers in any other configuration.
Check Restart destination server automatically if required and click Deploy. Wait until the RDS roles are installed on all servers. 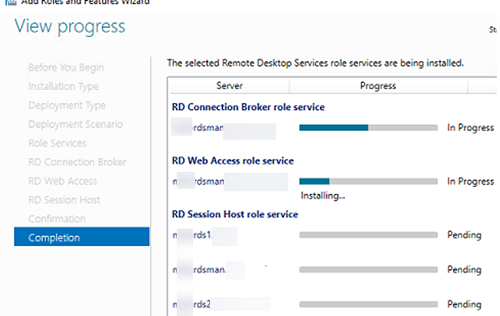
So, your RDS farm is created.
The next step is to install and configure the RDS licensing server. You can install the RD Licensing role on one of the servers on your farm or use an existing RDS licensing server in your domain. Check the detailed guide on how to install, configure and activate the RD Licensing role.
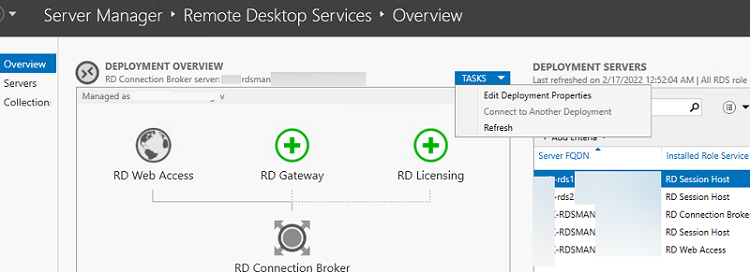
To manage your RDS deployment, open Server Manager -> Remote Desktop Services. The current RDS farm configuration is displayed on the Overview tab.
To change the RDS farm settings, select Tasks -> Edit Deployment Properties in the Deployment Overview section.
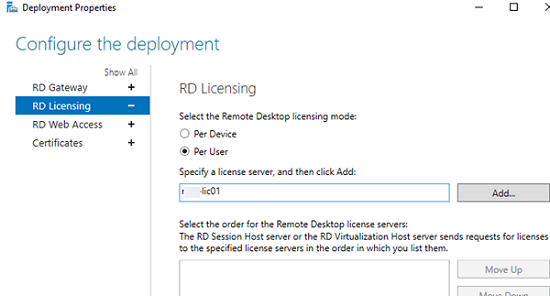
Here you can change:
- RD Gateway settings;
- Licensing server address and RDS CAL type (per user/per device);
- View RD Web Access URL;
- Add SSL certificates for RDS (we will skip this step it in the guide).
To build a fault-tolerant Remote Desktop Services farm, you have to provide high availability for the RD Connection Broker role. This is achieved by running multiple RDCB instances (Active/Active) on different servers with a shared SQL Server database that stores the connection broker configuration. You can use the SQL Server Always On high-availability group to make the RDCB SQL database high available. Earlier we published a detailed guide on how to configure a highly available RDS Connection Broker.
Create Remote Desktop Services Collections on Windows Server
The next step is to create collections of RDS sessions. Remote Desktop collections allow to split hosts in an RDS farm into separate groups or create different sets of settings and available Remote Apps for different groups of users.
Go to Collections and select Edit -> Create Session Collection.

Here you need to:
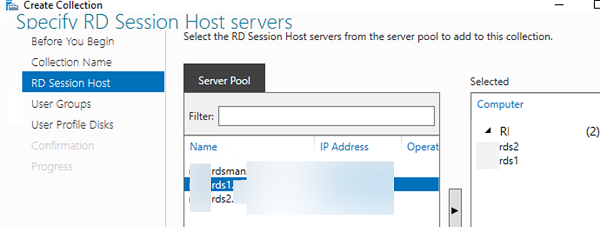
- Specify an RDS collection name:
rds-Mun-Managers; - Select which RDS hosts will serve collection users (one RDSH server may belong to one collection, it is not recommended to have hosts with different Windows Server versions in the same collection);

- In the User Groups tab, specify the groups of users allowed to connect to the collection. Remove the Domain users from the groups and add your group (
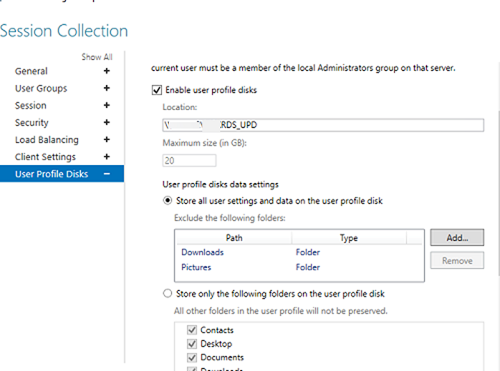
mun-Managers); - On the User Profile Disk tab, check Enable user profile disks if you want to use the UPD vhdx file format to store user profiles. In the Location of user profile disks field, specify the UNC path to your shared folder (for example,
\mun-fs01munrds_upd), in which user profile files in the UPD format will be stored and the maximum size of the disk (20 GB by default). When using UPD, if a user logs on to any RDS collection host, the user’s shared profile will always be loaded; - Click Create to create a new RDS collection;
- Make sure that the UPD file (UVHD-template.vhdx) with the user profile template is created in the specified directory.

To configure RDS collection settings, select the collection and click Tasks -> Edit Properties.
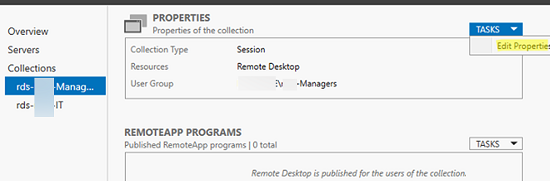
Here you can change basic collection options (name, description, access groups), and some other settings.
On the Session tab, you may configure reconnection/automatic disconnection options for inactive (idle) RDP sessions (learn more How to Configure Timeouts for RDP Sessions).
In the Security tab, you may select security (Negotiate, RDP Security level, or SSL/TLS) and encryption (Low, High, Client compatible, or FIPS compliant) settings for RDP sessions. Here you can enable/disable Network Level Authentication (NLA) for RDP.
In the Load Balancing tab, you may change RDS host Relative Weight in your farm. If server characteristics (RAM, CPU) in a collection are very different, you need to set a lower weight for the hosts with lower performance. After that, RDCB will distribute user sessions among RDS hosts depending on their weight.

The Client Settings tab allows you to specify which local devices users are allowed to redirect to their RDP sessions. For example, you may enable or disable the redirection of printers, drives, audio devices, or the clipboard from a local user computer to the RDS session.
In the User Profile Disks tab, you may fine-tune UPD settings. You may exclude certain folders or files from sync. It allows to reduce the UPD profile size in a shared network folder and makes a profile load faster (remember that it is loaded over the network from the shared folder when a user logs on).
It is easier to configure and use UPD than roaming profiles or folder redirection. You cannot use the same UPD profile in more than one RDS collection.
To reduce the size of a user UPD disk, you can use the built-in PowerShell cmdlet Resize-VHD, which is used to resize Hyper-V virtual VHDX disks.
You can put any RDSH server into maintenance mode (RDS Drain Mode) through the HOST SERVERS section of the RDS collection. To do it, click a server and select Do not allow new connection. Then the Connection Broker will not send new user sessions to the RD host. In this mode, you can install Windows updates or update apps on the server without affecting the users.
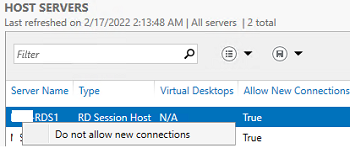
Here you can also add/remove an RDS host from a collection.
If the RD Session Host server fails, you can properly remove it from your Remote Desktop Services deployment by following this guide.
How to Publish RemoteApps in Remote Desktop Services?
RemoteApps are programs published for users on RDS servers. Thanks to RemoteApps, you may use apps installed on a terminal RDSH server as if they are running on a local user computer. The user doesn’t see the entire Windows Server RDS desktop and works only with those apps an administrator has published for them. Only the window of the program running on RDS will be displayed on the user’s computer.
If you don’t create RemoteApps, users will work directly on the Windows Server desktop. So remember to copy the app shortcuts a user may need to C:UsersPublicDesktop. Files from this folder will be displayed on the desktops of all users. If you want to install an MS Office 365 on your RDSH, note that Office must be deployed in the SharedComputerLicensing mode.
RemoteApps are created in the RDS collection settings. Select Tasks -> Publish RemoteApp Programs in the REMOTEAPP PROGRAMS section.
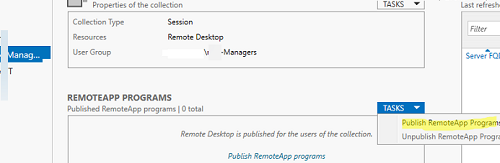
Windows will list all apps installed on the current RD host. You may select one of them. If there is no app you need in the list, but it is installed on other RDS hosts, click Add and specify the full path to the application’s executable (exe, bat, cmd, etc.).
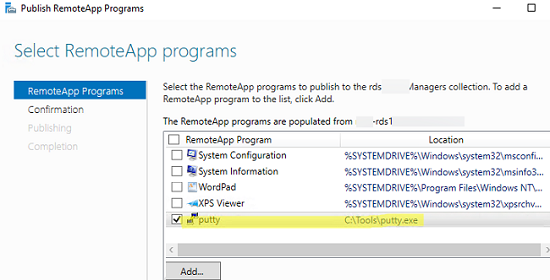
Publish the RemoteApp.
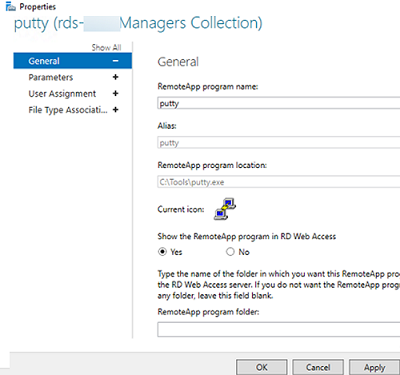
Then you can specify additional app options in the RemoteApp settings.
- Whether you want to show a published RemoteApp in the RD Web Access web interface;
- Set startup options (arguments) for the app (Command-line Parameters -> Always use the following command-line parameters);
- On the User Assignment tab, you can also set restrictions on whether a user or group may run the app.
If you want to change an icon of the published RemoteApp, open the following folder on the server with the RDS Connection Broker role:
C:WindowsRemotePackagesCPubFarmsrds-Mun-ManagersCPubRemoteApps
![]()
Replace the app icon with another ICO file.
Then a user can run a RemoteApp program from RD Web Access (https://mun-rdsman.woshub.com/RDWeb) or using a special *.RDP file.
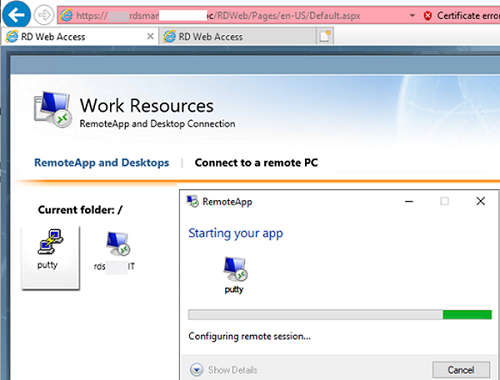
To run a published RemoteApp program, you need to add the following lines to the RDP file:
remoteapplicationmode:i:1
remoteapplicationname:s:putty
remoteapplicationprogram:s:"C:Toolsputty.exe"
disableremoteappcapscheck:i:1
alternate shell:s:rdpinit.exe
Some useful tips to use your RDS farm conveniently:
- You can configure HTML5 support for the RDWeb Access role. It allows users to connect to RDS servers using any browser or OS even without an RDP client;
- On the RD Web Access server, you can publish a link to change an expired user password (by default, if NLA is enabled you won’t be able to authenticate on an RDSH with an expired Active Directory user password);
- A user guide on how to change a password in an RDP session;
- An administrator can use RD Session Shadow connections to connect/view the desktop of a user session on an RDS server;
- To quickly find which RDS servers have sessions of a specific user, you can use PowerShell:
Import-Module RemoteDesktop

Get-RDUserSession -ConnectionBroker mun-rdsman.woshub.com | where {$_.UserName -eq "a.muller"} | Select HostServer - You can use PowerShell scripts to view RDP connection logs;
- To provide additional security, you can enable two-factor authentication (2FA) for users on your Windows RDS hosts using third-party tools.
How to Deploy Remote Desktop Services Farm Using PowerShell?
If you clearly see the structure of an RDS farm, you can quickly deploy your RDS configuration using PowerShell.
It is better to run the following PowerShell commands to create an RDS farm on another server since you will have to restart managed RDS hosts.
Set the server names in your RDS farm. In this example, I will install the RDCB and RDS licensing roles on separate servers (later it is recommended to enable a highly available RDCB configuration).
$RDSH1 = "mun-rds1.woshub.com"

$RDSH2 = "mun-rds2.woshub.com"

$RDSCB = "mun-rdcb.woshub.com"

$RDSGW = "mun-rdsgw.woshub.com"

Import-Module RemoteDesktop
Install RDS roles on the servers:
Add-WindowsFeature –ComputerName $RDSH1, $RDSH2 -Name RDS-RD-Server –IncludeManagementTools

Add-WindowsFeature –ComputerName $RDSCB -Name RDS-Connection-Broker -IncludeManagementTools

Add-WindowsFeature –ComputerName $RDSGW -Name RDS-Web-Access, RDS-Gateway –IncludeManagementTools
Restart all hosts:
Restart-Computer -ComputerName $RDSH1,$RDSH2,$RDSCB,$RDSGW
Create a new RDSessionDeployment instance:
New-RDSessionDeployment -ConnectionBroker $RDSCB -SessionHost $RDSH1,$RDSH2 –Verbose
Add RDWA and RDGW servers to your farm:
Add-RDServer -Server $RDSGW -Role RDS-WEB-ACCESS -ConnectionBroker $RDSCB

Add-RDServer -Server $RDSGW -Role RDS-GATEWAY -ConnectionBroker $RDSCB -GatewayExternalFqdn "rds.woshub.com"
You can list the RDS roles and hostnames in your farm:
Get-RDServer -ConnectionBroker $RDSGW
Install the RDS Licensing role using the Add-WindowsFeatures cmdlet:
Add-WindowsFeature –ComputerName $RDSCB -Name RDS-Licensing, RDS-Licensing-UI
Set a PerUser RDS licensing mode:
Invoke-Command -ComputerName $RDSCB -ScriptBlock {Set-RDLicenseConfiguration -Mode PerUser -LicenseServer $RDSCB -ConnectionBroker $RDSCB}

Add-RDServer -Server $RDSCB -Role RDS-LICENSING -ConnectionBroker $RDSCB
Add a licensing server to a domain security group using Add-ADGroupMember:
Add-ADGroupMember "Terminal Server License Servers" -Members "mun-rdcb$"
If you have a certificate for the RDS, you can add it to your farm configuration (you may use the free Let’s Encrypt SSL certificate for your RDS host):
$Path = "C:psRDSCert.pfx"

$Password = ConvertTo-SecureString -String "setCertificPAssw00rd11-" -AsPlainText -Force

Set-RDCertificate -Role RDGateway -ImportPath $Path -Password $Password -ConnectionBroker $RDSCB -Force

Set-RDCertificate -Role RDWebAccess -ImportPath $Path -Password $Password -ConnectionBroker $RDSCB -Force

Set-RDCertificate -Role RDPublishing -ImportPath $Path -Password $Password -ConnectionBroker $RDSCB -Force

Set-RDCertificate -Role RDRedirector -ImportPath $Path -Password $Password -ConnectionBroker $RDSCB -Force
To get information about the installed SSL certificates:
Get-RDCertificate
Then you can create RDS collections:
$CollectionName = "ITdept"

New-RDSessionCollection –CollectionName $CollectionName –SessionHost $RDSH1,$RDSH2 –ConnectionBroker $RDSCB –CollectionDescription “IT department management collection”
To allow access to RDS servers for groups:
$UserGroup =@("WOSHUBmun-admins","WOSHUBmun-devops")

Set-RDSessionCollectionConfiguration -CollectionName $CollectionName -UserGroup $UserGroup
To publish a RemoteApp program:
New-RDRemoteapp -Alias GoogleChrome -DisplayName GoogleChrome -FilePath "C:Program Files (x86)GoogleChromeApplicationchrome.exe" -ShowInWebAccess 1 -CollectionName $CollectionName -ConnectionBroker $RDSCB
In this article, we covered how to install and configure a Remote Desktop Services farm on Windows Server 2019/2022 using the Server Manager graphical interface and PowerShell. The RD Web Access and RD Gateway roles are not described here. We’ll show how to configure these roles in future articles.
Содержание
- Установка и настройка терминального сервера на Windows Server
- Шаг 1. Выбор оборудования и подготовка сервера к работе
- Выбор оборудования
- Подготовка сервера
- Шаг 2. Установка Windows Server и базовая настройка системы
- Установка системы
- Базовая настройка Windows Server
- Шаг 3. Установка и настройка терминального сервера
- Подготовка системы
- Установка роли и компонентов
- Установка служб удаленных рабочих столов
- Настройка лицензирования удаленных рабочих столов
- Добавление лицензий
- Шаг 4. Тюнинг терминального сервера
- Ограничение сессий
- Анализатор соответствия рекомендациям
- Теневые копии
- Ошибка 36888 (Source: schannel)
- Шаг 5. Настройка средств обслуживания
- Резервное копирование
- Мониторинг
- Шаг 6. Тестирование
- Особый порт для подключения
- Развернуть терминальный сервер на windows server 2019
- Постановка задачи
- Требования по развертыванию RD Connection Broker High Availability
- Тестовый стенд с виртуальными машинами фермы Remote Desktop Services
- Стандартная установка RDS фермы в Windows Server 2019
- Создание пула серверов на сервере посредника подключений (RD Connection Broker)
- Стандартное развертывание службы удаленных рабочих столов
- Создание коллекции для отказоустойчивой терминальной фермы
- Настройка RD Connection Broker для подключений к ферме RDS
- Создание группы безопасности для RD Connection Broker
- Установка SQL Native Client
- Установка и настройка MS SQL 2016
Установка и настройка терминального сервера на Windows Server
Инструкция разбита на 6 шагов. Первых 3 представляют стандартные действия для настройки терминального сервера. Остальные являются профессиональными советами, которые помогут создать надежную и профессиональную инфраструктуру для сервера терминалов.
В качестве операционной системы используется Windows Server 2012 R2 / 2016.
Шаг 1. Выбор оборудования и подготовка сервера к работе
Выбор оборудования
Выбирая оборудование для данного типа серверов, необходимо опираться на требования приложений, которые будут запускаться пользователями и количество последних. Например, если устанавливается терминальный сервер для программы 1С, а количество одновременно работающих сотрудников равно 20, получим следующие характеристики (приблизительно):
Также предлагаю для чтения статью Как выбрать сервер.
Подготовка сервера
Прежде чем начать установку операционной системы выполните следующее:
Шаг 2. Установка Windows Server и базовая настройка системы
Установка системы
Во время установки системы важно учесть только один нюанс — дисковую систему необходимо разбить на два логических раздела. Первый (малый, 70 – 120 Гб) выделить для системных файлов, второй — под пользовательские данные.
На это есть две основные причины:
Базовая настройка Windows Server
Шаг 3. Установка и настройка терминального сервера
Подготовка системы
Начиная с Windows 2012 терминальный сервер должен работать в среде Active Directory.
Если в вашей IT-среде есть контроллер домена, просто присоединяем к нему наш сервер. В противном случае, устанавливаем на наш сервер роль контроллера.
Установка роли и компонентов
В панели быстрого запуска открываем Диспетчер серверов:


Нажимаем Далее до «Выбор типа установки». Оставляем Установка ролей и компонентов и нажимаем Далее дважды:

В окне «Выбор ролей сервера» выбираем Службы удаленных рабочих столов:

Кликаем Далее, пока не появится окно «Выбор служб ролей» и выбираем следующие:

* при появлении запроса на установку дополнительных компонентов соглашаемся.
При необходимости, также выставляем остальные галочки:
Нажимаем Далее и в следующем окне Установить. Дожидаемся окончания процесса установки и перезагружаем сервер.
Установка служб удаленных рабочих столов

В окне «Выбор типа установки» выбираем Установка служб удаленных рабочих столов и нажимаем Далее:

В окне «Выбор типа развертывания» выбираем Быстрый запуск и нажимаем Далее:

В «Выбор сценария развертывания» — Развертывание рабочих столов на основе сеансов — Далее:

Еще раз Далее — при необходимости, ставим галочку «Автоматически перезапускать конечный сервер, если это потребуется» и кликаем по Развернуть.
Настройка лицензирования удаленных рабочих столов

В открывшемся окне кликаем правой кнопкой мыши по нашему серверу и выбираем Активировать сервер:

Снова открываем диспетчер серверов и переходим в «Службы удаленных рабочих столов»:


Применяем настройки, нажав OK.
Добавление лицензий
В открывшемся окне кликаем правой кнопкой мыши по нашему серверу и выбираем Установить лицензии:
Шаг 4. Тюнинг терминального сервера
Ограничение сессий
По умолчанию, пользователи удаленных рабочих столов могут находиться в системе в активном состоянии без ограничения. Это может привести к зависаниям или проблемам при повторном подключении. Для решения возможных проблем установите ограничения на терминальные сессии.
Анализатор соответствия рекомендациям
Для некоторых серверных ролей Windows (в частности, терминальных) существует база успешных конфигураций. Придерживаясь советам данной базы можно повысить надежность и стабильность системы.
Для сервера удаленных рабочих столов, как правило, необходимо выполнить следующие рекомендации:
1. Файл Srv.sys должен быть настроен на запуск по требованию.
В командной строке от имени администратора вводим:
sc config srv start= demand
2. Создание коротких имен файлов должно быть отключено.
В командной строке от имени администратора вводим:
fsutil 8dot3name set 1
Теневые копии
Если подразумевается хранение ценной информации на терминальном сервере, стоит настроить возможность восстановления предыдущих версий файлов.
Как настроить и пользоваться данной возможностью, читайте подробнее в инструкции Как включить и настроить теневые копии.
Ошибка 36888 (Source: schannel)
В журнале Windows может появляться ошибка «Возникло следующее неустранимое предупреждение: 10. Внутреннее состояние ошибки: 1203.» от источника Schannel и кодом 36888. Ее причину, однозначно, определить мне не удалось. Во многих информационных источниках пишут, что это давно известная проблема и списывают на ошибку самой операционной системы.
reg add «HKLMSYSTEMCurrentControlSetControlSecurityProvidersSchannel» /v EventLogging /t REG_DWORD /d 0 /f
* данную команду необходимо выполнить из командной строки, запущенной от администратора.
Шаг 5. Настройка средств обслуживания
Основные средства, помогающие полноценно обслуживать сервер — мониторинг и резервное копирование.
Резервное копирование
Для терминального сервера необходимо резервировать все рабочие каталоги пользователей. Если на самом сервере организована общий каталог для обмена и хранения важной информации, копируем и его. Лучшим решением будет ежедневное копирование новых данных, и с определенной периодичностью (например, раз в месяц), создание полного архива.
Мониторинг
Шаг 6. Тестирование
Тестирование состоит из 3-х основных действий:
Особый порт для подключения
По умолчанию, для подключения к терминальному серверу по RDP используется порт 3389. Если необходимо, чтобы сервер слушал на другом порту, открываем реестр, и переходим в ветку:
HKEY_LOCAL_MACHINESystemCurrentControlSetControlTerminal ServerWinStationsRDP-Tcp
Находим ключ PortNumber и задаем ему значение в десятично представлении, равное нужному номеру порта:

Также можно применить команду:
reg add «HKLMSystemCurrentControlSetControlTerminal ServerWinStationsRDP-Tcp» /v PortNumber /t REG_DWORD /d 3388 /f
* где 3388 — номер порта, на котором будет принимать запросы терминальный сервер.
Источник
Развернуть терминальный сервер на windows server 2019
Добрый день! Уважаемые читатели и гости IT блога Pyatilistnik.org. В прошлый раз мы с вами разобрали ситуацию, когда ваш жесткий диск виделся в формате RAW и не позволял получить доступ к данным, мы это благополучно решили. Сегодня мы рассмотрим задачу установки отказоустойчивой терминальной фермы Remote Desktop Services, где посредники подключений (RD Connection Broker) работают в режиме высокой доступности (High Availability) и все это дело будет работать на Windows Server 2019 в связке с хостами подключений (RDSH) на базе Windows Server 2016. Давно хотелось у себя на сайте иметь такую инструкцию, тем более что давно стояла задача перехода с W2012R2.
Постановка задачи
Необходимо организовать высоко доступную ферму RDS (Remote Desktop Services), где в качестве брокеров подключения будут выступать операционные системы с Windows Server 2019. В качестве хостов подключений, на которых будут работать конечные пользователи требуется иметь операционную систему Windows Server 2016. Развернуть сервер лицензирования, раздающий лицензии на пользователя или устройства. Чем хорошо использовать в качестве посредников подключений именно Windows Server 2019, все просто, когда большинство клиентского программного обеспечения станет поддерживаться данной ОС, можно будет легко вывести из эксплуатации сервера с W2016 и заменить их на более новые.
Требования по развертыванию RD Connection Broker High Availability
Прежде, чем мы начнем к поэтапному приготовлению к установке вашей отказоустойчивой RDS ферме, я бы хотел выделить пункты, которые нам потребуется выполнить.
Тестовый стенд с виртуальными машинами фермы Remote Desktop Services
Стандартная установка RDS фермы в Windows Server 2019
Перед тем, как мы сделаем высокодоступное подключение к ферме Remote Desktop Services, нам необходимо произвести установку стандартной конфигурации служб удаленных рабочих столов, включающей в себя:
Создание пула серверов на сервере посредника подключений (RD Connection Broker)
Пул серверов, это удобное объединение серверов в общий список для быстрого управления и развертывания на них ролей и компонентов. Все манипуляции производятся из единой консоли управления «Диспетчер серверов». Откройте оснастку «Диспетчер серверов» раздел «Все серверы». Щелкните по нему правым кликом и нажмите «Добавление серверов».
На вкладке Active Directory вам необходимо указать в каком домене вы будите производить поиск, в поле «Имя (Общие)» находим нужные вам сервера.
Выбираем нужные сервера и переносим их в раздел «Выбрано».
В итоге в вашей оснастке «Диспетчер серверов» вы увидите все добавленные хосты. которые будут участниками Remote Desktop Services High Availability на Windows Server 2019.
В результате все должно быть в статусе «В сети».
Стандартное развертывание службы удаленных рабочих столов
В мастере добавления ролей выберите пункт «Установка служб удаленных рабочих столов (Remote Desktop Services Installation)» и нажимаем далее.
Выбираем второй пункт «Развертывание рабочих столов на основе сеансов (Session-based desktop deployment)»
Список компонентов устанавливаемых при стандартной конфигурации RDS фермы. Тут будет установлен:
На следующем шаге вам нужно выбрать и перенести в правую область сервер, который будет нести на себе роль «Посредник подключений к удаленным рабочим столам (RD Connection Broker)». В моем примете, это первый сервер RDCB01.root.pyatilistnik.org.
Далее у нас идет выбор сервера для установки роли «Веб-доступ к удаленным рабочим столам (RD Web Access)», так как я пока не планирую использовать веб доступ RemoteApp, а настрою это потом, то я воспользуюсь галкой «Установить службу веб-доступа к удаленным рабочим столам на сервере посреднике подключений к удаленному рабочему столу (Install the RD Web Access role service on the RD Connection Broker server)»
Последним идет пункт по установке роли на сервера к которым вы будите непосредственно подключаться, выбираем нужные сервера и инсталлируем на них роль «Узел сеансов удаленных рабочих столов (RS Session Host)». В моем примере, это два сервера rdsh01 и rdsh02.
Процесс установки ролей подразумевает, что потребуется перезагрузка сервера, для этого вам необходимо выставить галку «Автоматически перезапускать конечный сервер, если это потребуется (Restart the destination server automatically if required )» и нажать кнопку «Развернуть«
Начинается процесс установки службы удаленных рабочих столов, может занимать несколько минут.
У вас должна произойти успешная установка службы «службы удаленных рабочих столов». Все необходимые сервера будут перезагружены.
Давайте убедимся, что все серверы получили свои роли. Для этого на сервере, где вы добавляли сервера в оснастку «Диспетчер серверов (Производили установку)», откройте оснастку и перейдите в раздел «Службы удаленных рабочих столов».
На вкладке «Общие сведения» посмотрите в разделе «Серверы развертывания», кто и какие роли себе установил.
Перейдите в раздел «Коллекции» и убедитесь, что список пуст, но зато присутствуют два ваших хоста узла сеансов удаленных рабочих столов, к котором будут подключаться конечные пользователи. Они будут иметь статус «Истина (True)», что говорит о разрешении подключаться (Режим стока выключен)
Следующим шагом мы создадим новую коллекцию для подключения к службам Remote Desktop Services High Availability на Windows Server 2019.
Создание коллекции для отказоустойчивой терминальной фермы
Так, что подытожим, коллекции RDS призваны решать две задачи:
Придумываем любое имя для вашей коллекции, в моем примере это root-collection
Теперь вам необходимо определиться какие серверы с ролью узлов сеансов (RDSH) вам нужно включить в коллекцию, у меня это RDSH01 и RDSH02
Указываем каким пользователям или группам разрешен доступ к данной терминальной ферме, я удалю группу «Пользователи домена» и добавлю другую.
У меня получился вот такой список доступа, потом его так же можно изменить.
Я снимаю галку «Включить диски профилей пользователей» так как не планирую использовать UDP диски.
Смотрим сводную информацию по создаваемой коллекции и нажимаем «Создать».
Дожидаемся создания коллекции службы удаленных рабочих столов.
В общем списке у вас будет ваша коллекция.
Про описание свойств коллекции RDS я уже писал пост, можете к нему обратиться. Теперь у системного администратора, кто первый раз развернул стандартную установку службы удаленных рабочих столов возникает вопрос, как ему подключиться к новой коллекции и это правильный вопрос, так как если вы сейчас попытаетесь подключиться брокеру, то вас не перекинет на хост из коллекции, вы просто попадете на сам RDCB хост. Чтобы это поправить нам нужно сделать две вещи:
Настройка RD Connection Broker для подключений к ферме RDS
Как я писал выше в текущей конфигурации посредник подключений к удаленным рабочим столам вас не будет перебрасывать в коллекцию, он просто будет подключаться к брокеру по RDP, ниже мы это поправим.
Для подключения к ферме Remote Desktop Services в отказоустойчивой конфигурации создают две записи DNS и направляют их на сервера с ролью RD Connection Broker, кто-то балансирует иначе, но мы в данном окружении воспользуемся именно DNS и механизмом перебора Round Robin. Откройте оснастку и создайте A-запись с нужным именем вашей RDS фермы у меня это будет DNS имя «terminal«.
Я пока создам одну A-запись с таким именем и в качестве IP-адреса укажу адрес моего первого сервера с ролью RD Connection Broker.
В запись terminal.root.pyatilistnik.org успешно создана.
Проверяем ее через утилиту PING
Теперь, чтобы наш сервер посредник подключений к удаленным рабочим столам перебрасывал нас на RDSH сервера, нам необходимо подключиться к RD Web серверу и скачать RDP-файл с конфигурацией. Данный файл будет нести в себе параметры, о наименовании коллекции, при обращении к которой вы попадете на один из конечных серверов.
Стандартный адрес для подключения к вашему серверу RD Web, это:
Проверить наличие данного адреса вы можете открыв диспетчер IIS.
У вас должна открыться вот такая страница с авторизацией.
Теперь нам нужно получить значение loadbalanceinfo из свойств вашей коллекции, оно будет прописано в реестре брокеров. Для этого выполним публикацию приложения RemoteApp. Переходим в коллекцию службы удаленных рабочих столов и находим раздел «Удаленные приложения RemoteApp«. Нажимаем на задачи и произведем публикацию удаленного приложения RemoteApp.
Выберите для примера обычный калькулятор
Нажимаем «Опубликовать«.
Дожидаемся публикации приложения в коллекции Remote Desktop Services.
Далее вы переходите в веб интерфейс RDWEb и авторизуетесь, у вас будет доступно приложение калькулятор. Щелкните по нему и у вас будет запущено скачивание RDP пакета.
Теперь полученный файл RDP нужно открыть через блокнот.
Вам нужно найти строку loadbalanceinfo:s:tsv://MS Terminal Services Plugin.1.root-collection, она то нам и нужна для прописывания ее в реестре сервера несущего роль посредника подключений к удаленным рабочим столам (Connection Broker).
Переходим на сервер с ролью RD COnnection Broker и открываем реестр Windows. Переходим в раздел:
Создаем тут ключ реестра с типом REG_SZ (Строковый) и именем DefaultTsvUrl. В качестве содержимого вставляем tsv://MS Terminal Services Plugin.1.root-collection
Перезагрузите на всякий случай ваш брокер. Пробуем теперь произвести подключение по имени terminal.root.pyatilistnik.org.
Как видите нам ответил rdcb01.root.pyatilistnik.org
Но как и было задумано посредник подключений к удаленным рабочим столам перекину нас на конечный хост с ролью RDSH. Я для теста сделал три подключения, все отлично работает. Можно сказать, что мы успешно установили и настроили стандартную Remote Desktop Services ферму на базе Windows Server 2019. Теперь можно превращать ее в высоко доступную, о чем и пойдет речь ниже.
Создание группы безопасности для RD Connection Broker
Следующим шагом нам необходимо в Active Directory создать группу безопасности в которую мы поместим наши сервера с ролью RD Connection Broker. Необходимо, это для того, чтобы мы этой группе безопасности назначили необходимые права на нашем SQL сервере.
Открываем оснастку ADUC и создаем в нужном вам расположении группу безопасности RD-Connection-Broker. Я выставлю область действия группы (Локальная в домене).
Добавим в группу RD-Connection-Broker два сервера с ролью посредника подключений к удаленным рабочим столам. В моем случае, это RDCB01 и RDCB02.
Установка SQL Native Client
Следующим шагом вам необходимо на обоих серверах с ролью RD Connection Broker установить бесплатного клиента SQL Native Client, это необходимое требование. Где скачать SQL Native Client и как его установить я подробно рассказывал, на этом я останавливаться не буду, посмотрите по ссылке.
Установка и настройка MS SQL 2016
Следующим подготовительным требованием идет установка общей базы для наших брокеров, в моем примере это будет MS SQL 2016 Standard. Сам процесс инсталляции я подробно разбирал, так что так же советую посмотреть мою статью. Еще я вам советую делать всегда вашу базу данных отказоустойчивой, в режиме Always On.
Источник
High Availability and Load Balancing Remote Desktop Services:
The Remote Desktop Services also called the Terminal Server predecessor is a value-added service of Windows Servers that is a cost-effective solution for the hardware and software licenses and ease of access to the apps. The RDS servers are very critical services as other Windows Services and high availability and Load Balancing is the most needed configuration in the Microsoft Windows Network. The High Availability and Load Balancing are not changed much from Windows Server 2012 R2 to the most recent release of Windows Server 2022.
In this article, we are going to look at important configurations required to set up High Availability and Load Balancing. The High availability part is relevant to RDS Connection Brokers and Load balancing will be of RDS Session Hosts. In order to configure RDS Connection Broker with High Availability, we need to have Microsoft SQL servers in place. Even though we have High availability for Connection Broker it is not complete if you have not configured failover for the Microsoft SQL server which holds the database of Connection Broker services. I have demonstrated RDS high availability with a single SQL server, but in your setup make sure you have configured high availability for the MSSQL server as well.
The following configurations are outlined for High Availability and Load Balancing in RDS:
- MS SQL Installation and configuration (pointed out some important parts)
- Deploy RDS roles with standard deployment.
- Create an Active Directory security group and add connection broker servers to it.
- Add Security group to MSSQL login and give dbcreator server role.
- Open port 1433 on the MSSQL server windows firewall.
- Create DNS A record for the RDS Farm hostname.
- Install MSSQL Client Tools connectivity and add ODBC x64 connection on Connection broker servers.
- Configure High Availability for Connection broker RDS server role.
- Configure User mapping to the Connection Broker DB as DB owner for the security group created in Step 3.
- Add a second Connection Broker server to the CB role.
- Add RD Licensing role to a server in the pool.
MS SQL Installation and configuration (pointed out some important parts)
Install the MSQL server with the Client Tools connectivity feature. This will allow client connectivity from the connection broker servers.
Once MSSQL server installation is complete, the TCP/IP protocol on the server needs to be enabled, and check dynamics port on the properties of the TCP/IP protocol Is set to port number 1433.
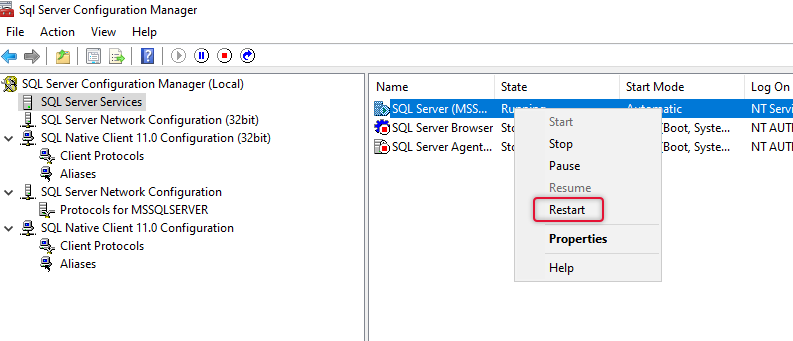
After enabling the TCP/IP port, restart the SQL server service from the services window.
Now, that the SQL server has been set up and configured, if you already have the SQL server in place just make sure the TCP/IP protocol is enabled and the port is set correctly.
- Deploy RDS roles with standard deployment.
The next part is to deploy RDS roles on one of the servers assigned for RDS deployment. Before doing the deployment, make sure you have added servers that you are configuring with RDS roles already added in the server pool.
To add servers to the server pool, click Add other servers to manage and add the servers by selecting appropriately
When you click the find now button on the add other servers window, you will be listed out with the list of servers in the network. If your network is big then type the names and add one by one.
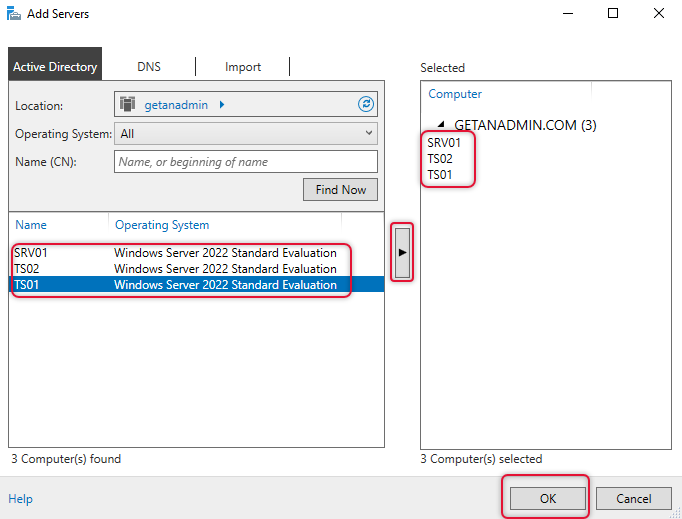
Now servers are added to the server pool, and you are ready to start the deployment of RDS with standard deployment.
Click Add roles and features from the server manager console and the add roles and features wizard will be shown to you for further actions.
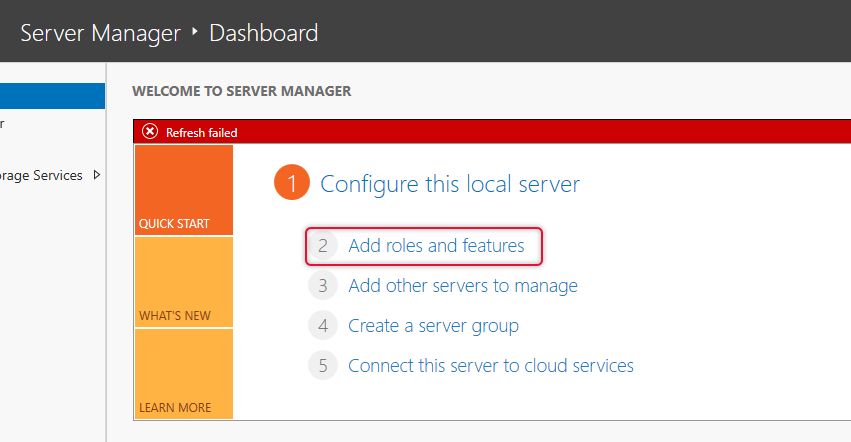
Here, we are installing remote desktop server roles, so select remote desktop services installation and click Next.
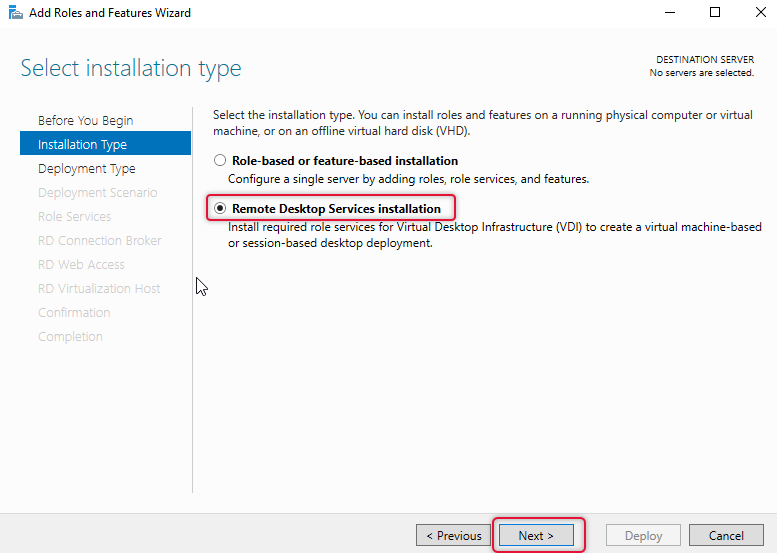
On the deployment, type select Standard deployment and click Next.

On the Next screen of the adding roles, select session-based desktop deployment and click Next.
The Review Role services screen goes through the services and clicks Next.
Select the appropriate server for connection broker, this is the first server you are installing you can add only one server to this role service, select the appropriate one and click Next.

On the RD web service select the web service role server and click next.
The next screen is to select session hosts, here you can select more than one server, I have selected ts01 and ts02. Click Next to continue.
Verify all the server selections are as you intended and click Deploy. Make sure the restart check box is checked.
The progress bar indicates the progress of the role services deployment, the server will restart in between and start the installation again when you log in to the server after a restart.
The below screen shows the deployment completion, and all role services are successfully installed. Click close to close out the deployment window.
- Create an Active Directory security group and add connection broker servers to it.
Now, we are going to create a security group and add the connection broker server’s computer accounts to it. We are creating a security group with connection broker servers in it to assign the DB creator role on the MSSQL server so that the connection broker server can create a database on the MSSQL server.
On the domain controller launch Active Directory Users and computer and right-click on an Organizational Unit and point to New/Group to add a security group.
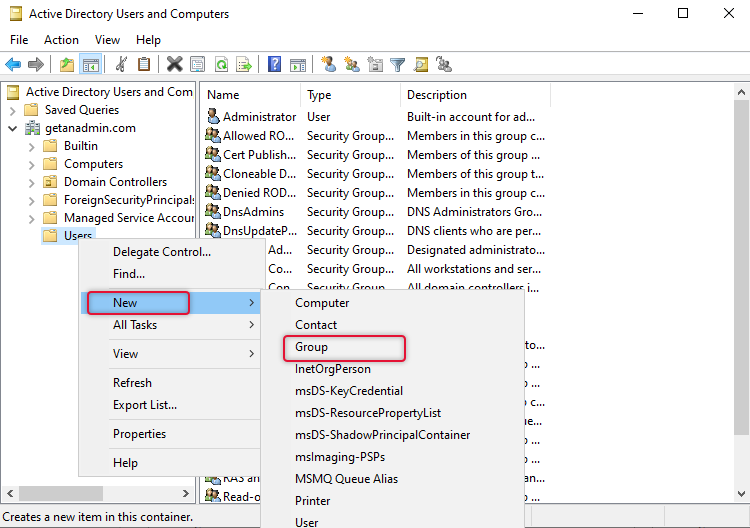
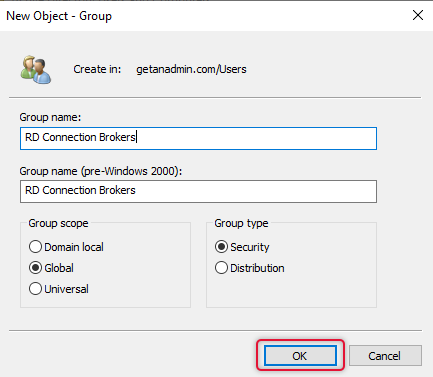
On the New object for group dialogue box opens type a name for this group that would be descriptive and leave security scope and type default and clicks OK.
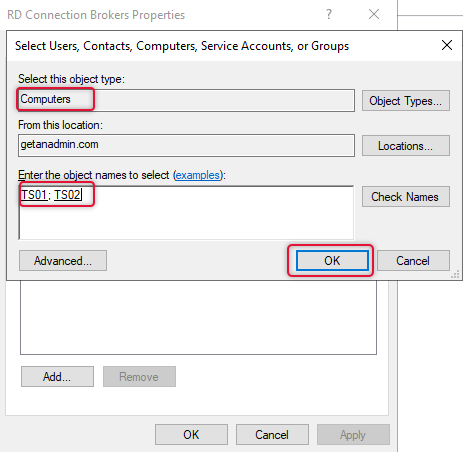
Once the Security group has been created, right-click the group, select properties and go to the Members tab and add connection broker servers that you are intended to configure. Make sure you have selected object type to Computers and location to the active directory domain.
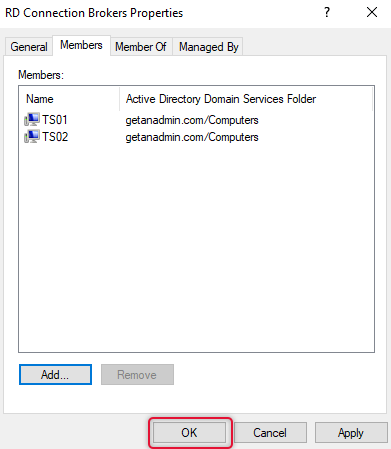
Once the connection broker servers are added, click OK to close the group object properties.
- Add Security group to MSSQL login and give dbcreator server role.
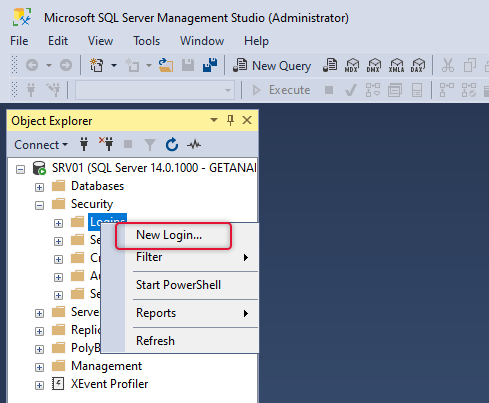
The next step is to add the security group that was created In the previous step in the MSSQL security login menu. Launch SQL Server Management Studio on SQL server and expand security and right-click Logins and select New Login as in the screenshot below.
On the general tab and login name field search for the security group with connection broker computer object in it and leave other settings default.
On the Server, roles tab select dbcreator server role and click OK to exit the dialogue box.
Open port 1433 on the MSSQL server windows firewall.
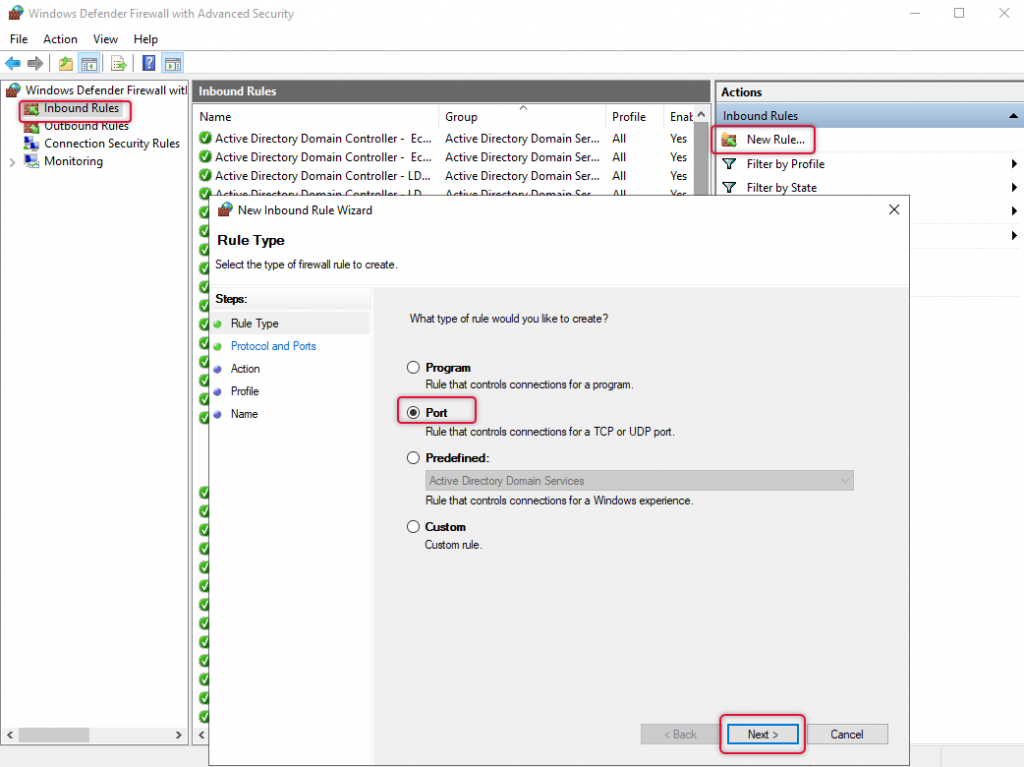
Once we completed adding connection broker servers to dbcreator role with the security group, the next step is to open the MSSQL default port 1433 on the windows firewall on the MSSQL server, Launch the windows firewall, and follow the steps below.
Select Inbound Roles and on the Actions menu click the new Rule. And on the New inbound rule wizard select Port and click Next.
Leave the apply to TCP and type the specific local ports to 1433 and click Next.

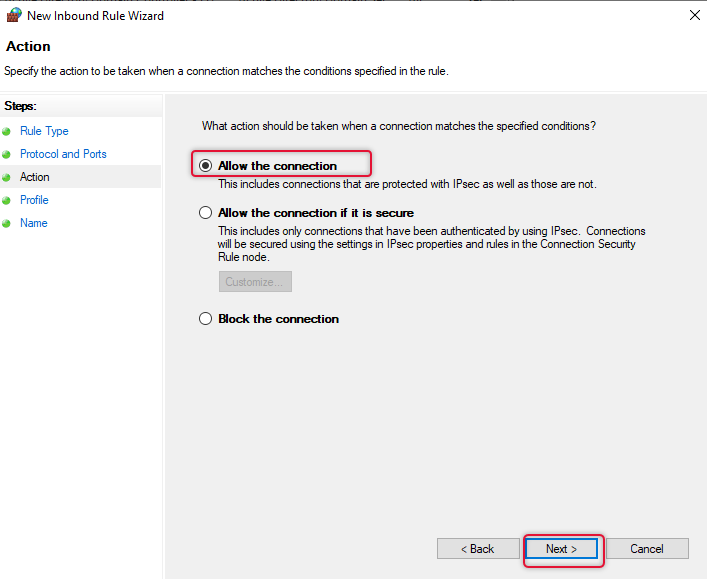
On the Action, tab select “Allow the connection” and click Next.
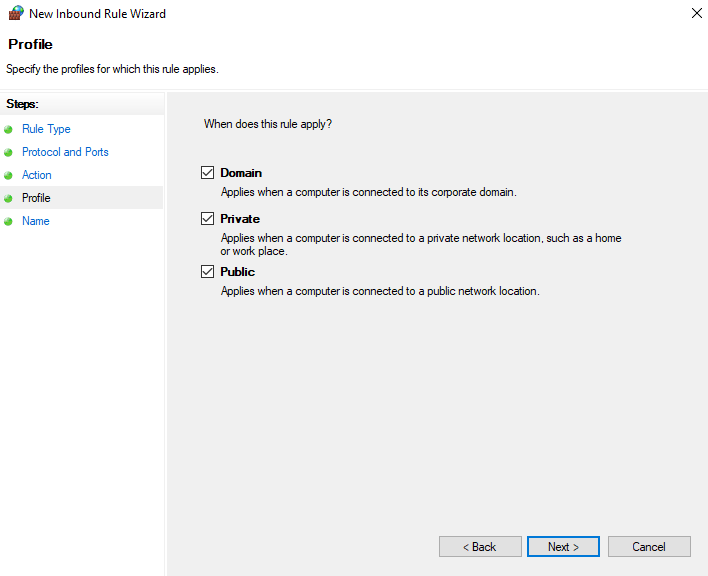
On the profiles tab, leave all profiles selected and click Next.
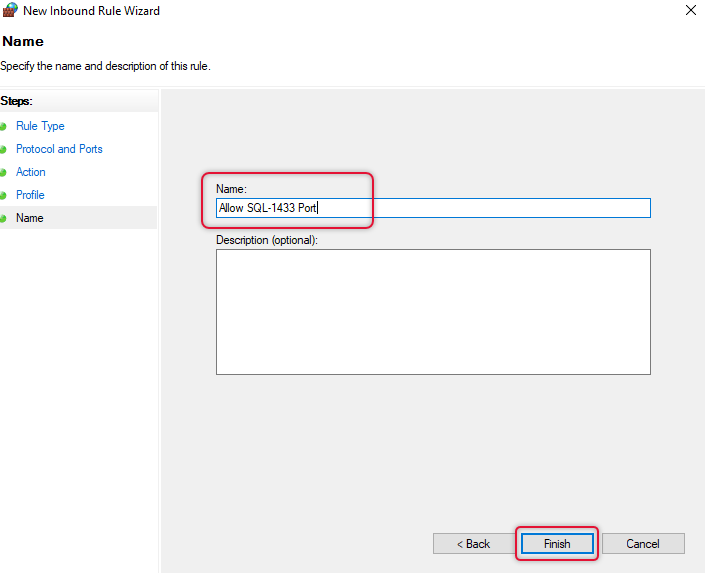
Give a descriptive name and click Finish to end the inbound rule wizard.
Create DNS A record for the RDS Farm hostname.
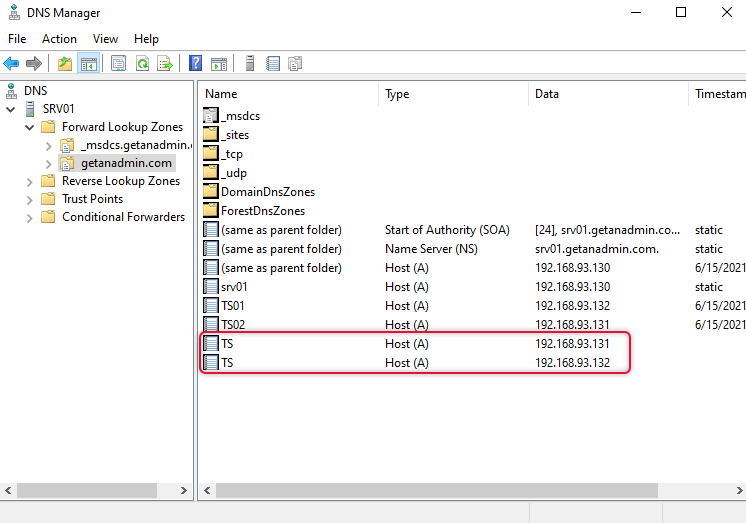
We have completed the inbound rule wizard and the next step is going to be to create “DNS Round Robin”. This means creating A records for the farm name and giving the IP address of each connection broker server IP address. The created Farm and its records are depicted on the screen capture below, so create the records as per your environment IP addresses of connection broker servers.
Install MSSQL Client Tools connectivity and add ODBC x64 connection on Connection broker servers
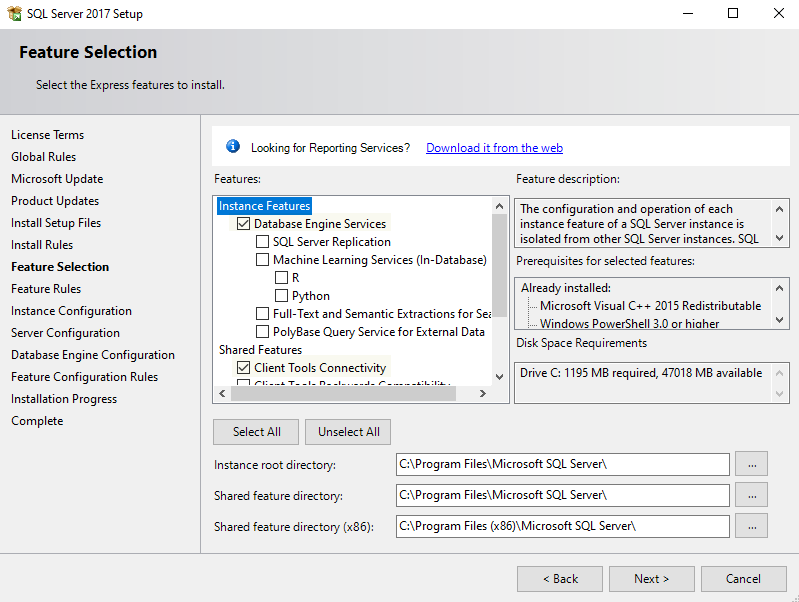
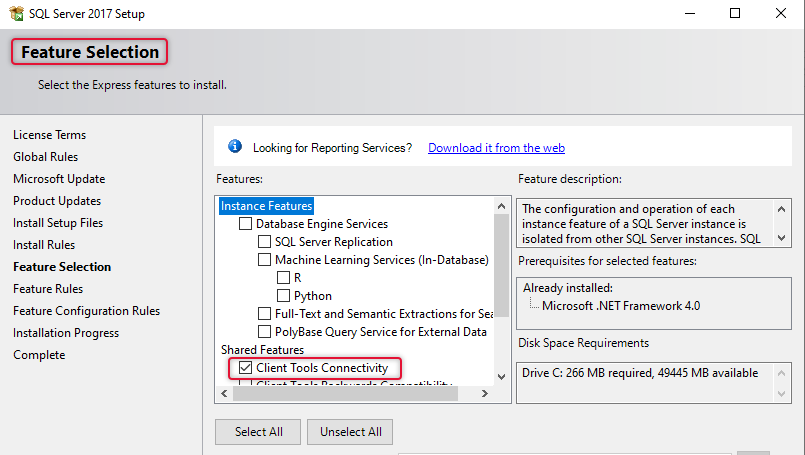
The next action is to install client tools connectivity on each connections broker server. Go to each connection broker serves and launch the MSSQL server setup from the MSSQL server installation media. The only thing we need to select is Client tools connectivity and remove all other selections on the Feature selection. The following steps must be done on each connection broker server. As the steps are identical, I have shown the demo of this installation and configuration one time. You need to do the same on all the connection broker servers.
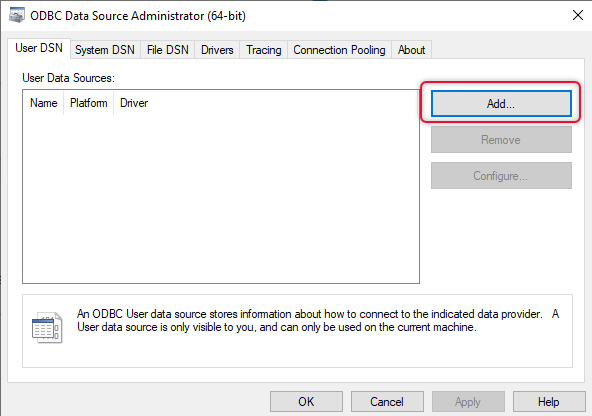
On each connection broker server, go to server manager à Tools and launch ODBC data administrator x64. The following dialogue box pops up and clicks add to add a data source.
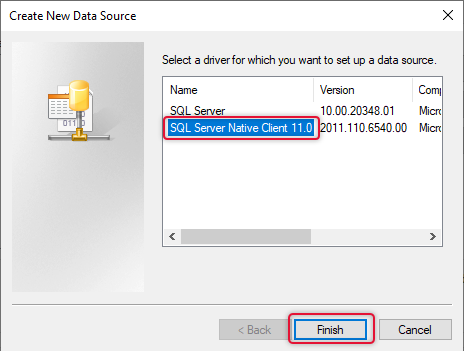
Select SQL Server Native Client 11.0 and click Finish, the Create a new data source to SQL server wizard will open on clicking the Finish button.
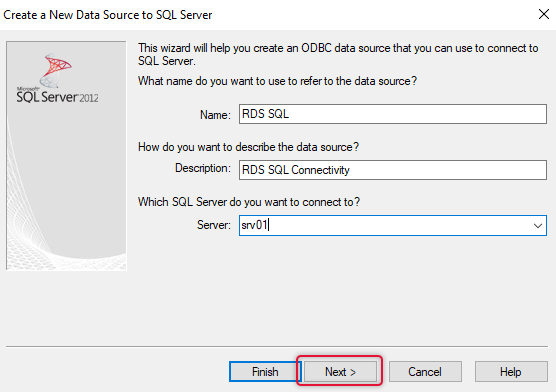
Give some descriptive name and description and type the name of the SQL server and click Next.
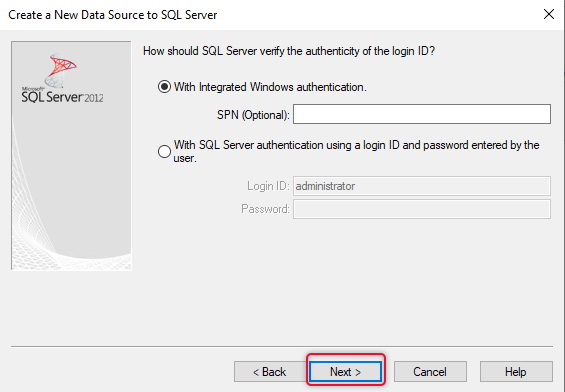
Leave the integrated windows authentication selected and click Next.
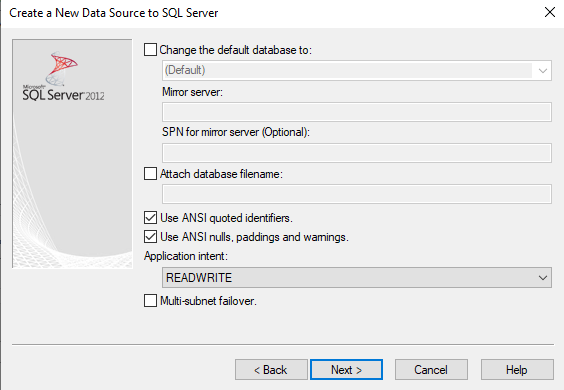
Leave the settings as default and click Next.
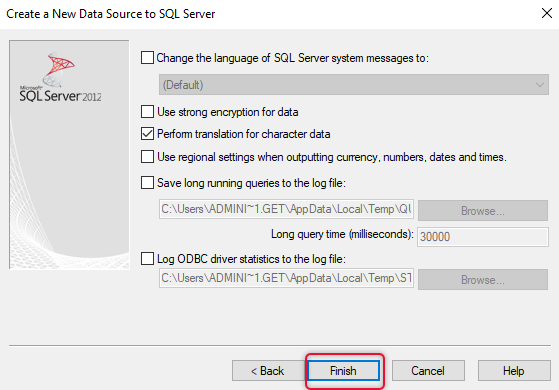
Click Finish to end the wizard.
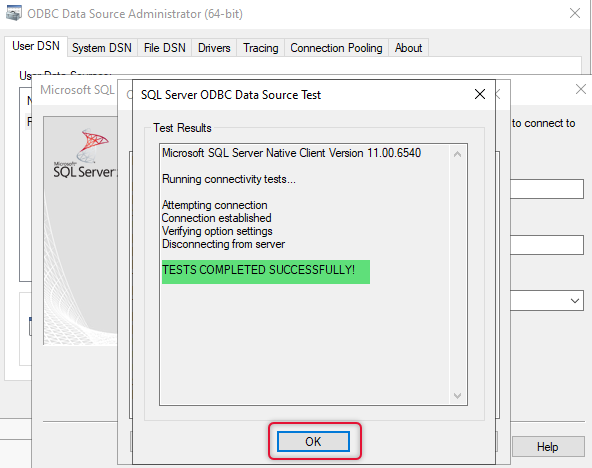
Click Test data source and find the Tests Completed Successfully popup and click OK. Do these steps on other connection broker servers.
Configure High Availability for Connection broker RDS server role.
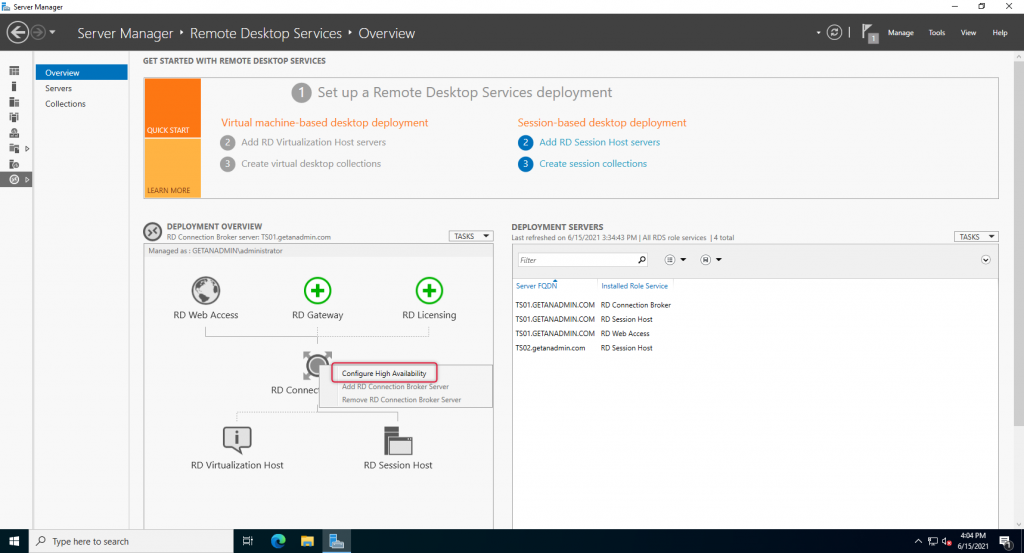
Now we are ready to configure the connection broker server’s High Availability. Launch Server manager on remove Desktops services management servers, this happens to be the first server that you install the RDS role service, and right-click on the connection brokers icon and click Configure High Availability.
Leave the Dedicated database server radio button selected and click Next.
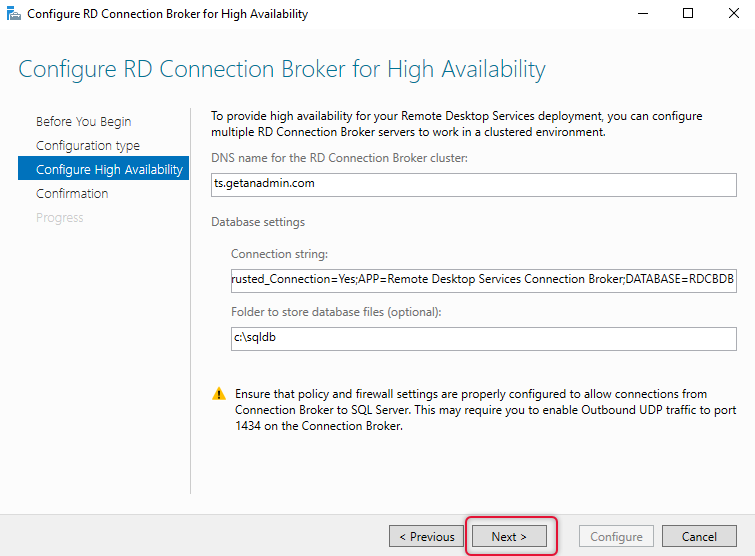
On the Configure High availability tab, type the details intuitive to your environments such as SQL Server, Far, and database name, and click next. The explanation is given below.
DNS Name connection Broker cluster:
Ts.getanadmin.com
Connection string:
DRIVER=SQL Server Native Client 11.0;SERVER=srv01;Trusted_Connection=Yes;APP=Remote Desktop Services Connection Broker;DATABASE=RDCBDB
Physical path:
C:sqldb
In your environment replace SRV01 with your MSSQL server and RDCBDB with a database name appropriate to you. It’s ok to leave this database name if you have no specific names.
Ensure the folder name you have typed on the physical path exists on the SQL server.
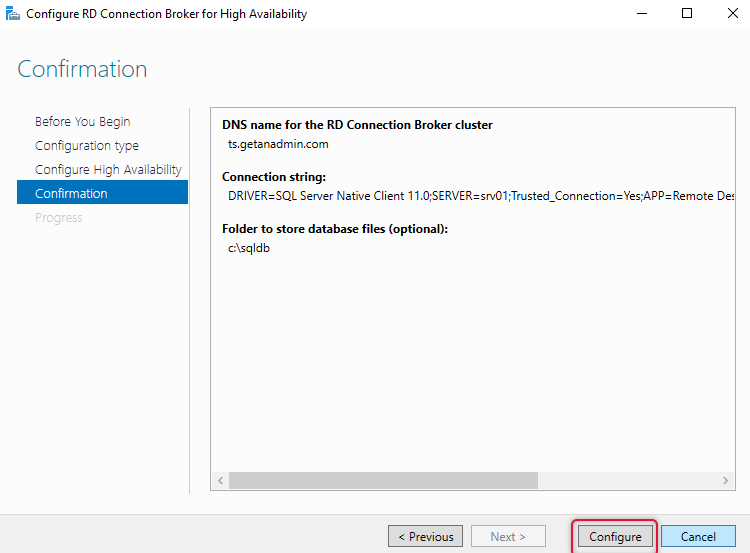
If your high availability details are correct you will be shown with the confirmation dialogue and click configure to configure High Availability.
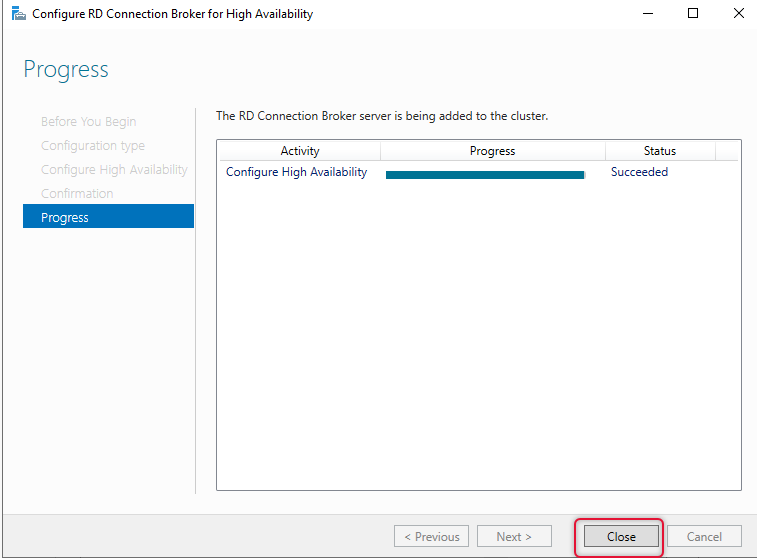
The progress bar indicated that the High availability configuration is succeeded, and you can click close to close the wizard.
The RDS connection broker high availability configuration is completed and now the steps to follow is to add the rest of the connection broker servers to the connection broker configuration.
Before adding the connection broker servers, we need to make the security group the owner of the database that we created In the configure high availability wizard in our previous step.
Launch SQL Server Management Studio and go to the Logins tab and select security group to open login properties of the security group. On the User Mapping tab on the left side navigation, select the database that configures the high availability wizard created and change the database role membership to DB owner.
Configure User mapping to the Connection Broker DB as DB owner for the security group created in Step 3
Now the security group is the DB owner of the database, now we go back to RDS Server and launch server manager and right-click the Connection broker icon, and select Add RD Connection Broker Server.
Add a second Connection Broker server to the CB role
The Add Connection Broker servers wizard pops up and on the server selection tab select the connection broker server that you intended to add and click Next.
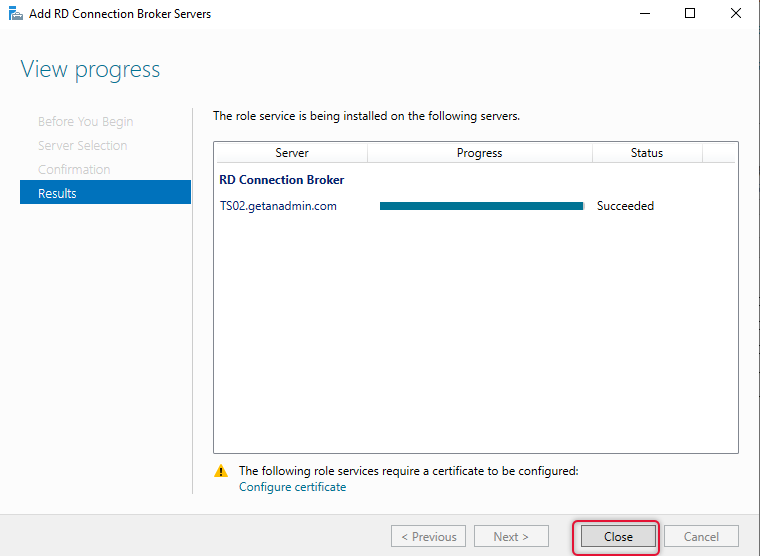
On the confirmation, dialogue click adds to confirm the addition of the second connection broker server.
The results tab shows the progress and the “succeeded” status after adding the server to the server pool. Click close to end the ”Add Connection Broker Server” wizard.
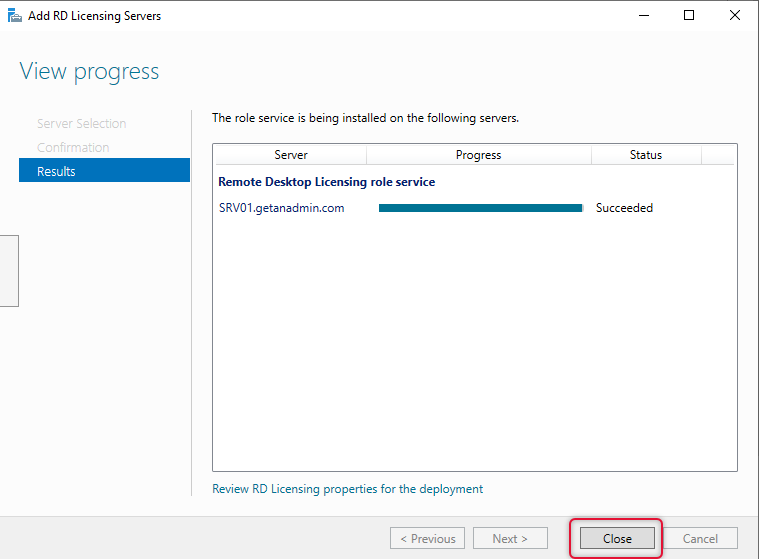
The very next and last part of this demonstration is adding RD Licensing Servers to RD Servers Farm. Click on the Green icon with add licensing server to launch add licensing server wizard. Once the add licensing server wizard pops up select the server meant for Licensing and click Next.
Add RD Licensing role to a server in the pool
On the confirmation tab with the Licensing server selected click to add to add this server as Licensing server on the RD Farm.

The Wizard shows that the status of adding Licensing server is succeeded and click close to close the wizard and back to server manager with Remote Desktop configuration.
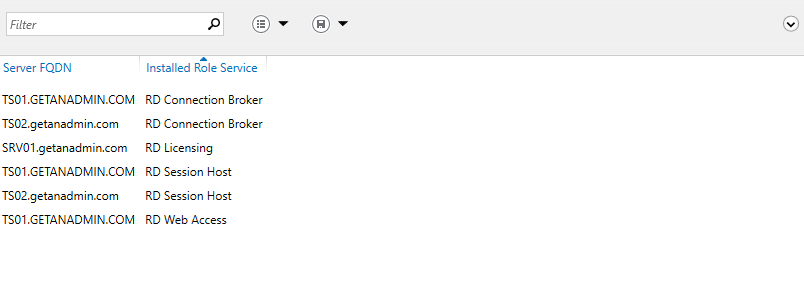
Here is the list of servers and their installed Role services from Remote Desktop Configuration.
This is the end of the demonstration and in this article, we have seen how to install and configure Remote desktop Services in infrastructure with multiple servers with different role services using standard Installation. We also looked at how to install and configure the connection broker server’s High Availability and add connection broker servers o the High availability pool. We have seen how to add Licensing server in the end.
I hope this will help administrators assigned with the RD Farm installation and configuration work. I am excited to receive comments from you, send me your comments and feedback to help others and improve this article and other articles on this website. And, I am pleased that you have read this article to the end of it. I look forward to meeting you in some other article that you are expecting to join with. See you next time and I sign off now.
A step by step guide to build a Windows Server 2019 Remote Desktop Services deployment.
I posted this before based on Windows Server 2012 R2 RDS and thought it was high time to update this post to a more modern OS version.
I will provide all the steps necessary for deploying a single server solution using the GUI tools.
Although it is called a single server installation, we will need 2 servers as shown below.
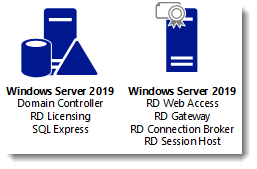
Software used in this guide:
Windows Server 2019 ISO (evaluation can be downloaded here: https://www.microsoft.com/en-us/evalcenter/evaluate-windows-server-2019).
SQL Server 2017 Express x64 (free version can be downloaded here: https://www.microsoft.com/en-us/download/details.aspx?id=55994).
SQL Server 2016 Native Client (free version can be downloaded here: https://www.microsoft.com/en-us/download/details.aspx?id=52676. After clicking the download button select ENUx64sqlncli.msi). Although I’m installing SQL Express 2017, there are no newer client tools available.
SQL Server Management Studio (free, and can be downloaded here: https://docs.microsoft.com/en-us/sql/ssms/download-sql-server-management-studio-ssms).
And a certificate. I got mine for free from https://www.sslforfree.com/. This certificate needs to contain the FQDN you will use as the RD Web Access URL (mine is rds.it-worxx.nl in this guide). It needs to be in .pfx format and you need to have the private key in it.
This guide will not focus on building a domain using a single domain controller and adding the second server as a member server to this domain.
Also some basic knowledge is assumed in this guide. I will not detail how to create a Security Group and adding a computer account to it. I will also not detail how to install SQL Express, or adding logins to a SQL Server Instance security context. If you need extra help with this, Bing it or drop me a mail with details, and I will provide steps to continue.
I will be using Hyper-V on my Windows 10 1809 laptop and I have prepared 2 servers:
ITWDC (1 vCPU, 1024MB memory, dynamic, 60GB Harddisk)
Installed Windows
IPv4 192.168.0.4/24
Added .NET Framework 3.5 as a feature
Added Active Directory Domain Services as a role
Configured this server as a Domain Controller in a new forest: it-worxx.lab
ITWRDS (1 vCPU, 1024MB memory, dynamic, 60GB Harddisk)
Installed Windows
Added .NET Framework 3.5 as a feature
IPv4 192.168.0.10/24, DNS server 192.168.0.4
Configured it as a member server in the it-worxx.lab domain
Installing the Remote Desktop Services Roles
Log on to the Domain Controller, and in Server Manager right-click the All Servers node and add the second server using the Add Servers command (or select the All Servers node, click Manage and click Add Servers).
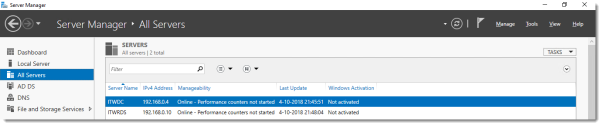
Now that all servers needed in this deployment scenario are present, click Manage, and click Add Roles & Features.
Before you begin
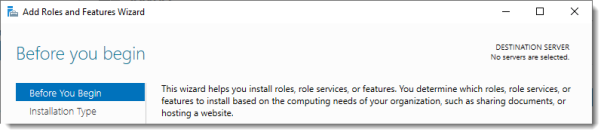
Click Next.
Select Installation Type
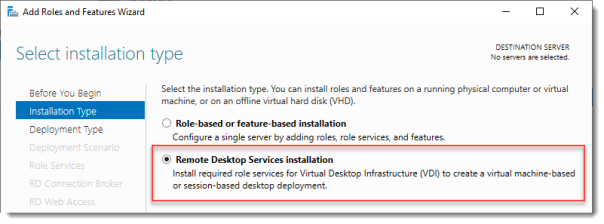
Select Remote Desktop Services installation.
Click Next.
Select Deployment Type

Although Quick Start might be a valid option for a single server deployment, leave the default selected. This will explain the steps necessary to install Remote Desktop Services in greater detail.
Click Next.
Select Deployment Scenario
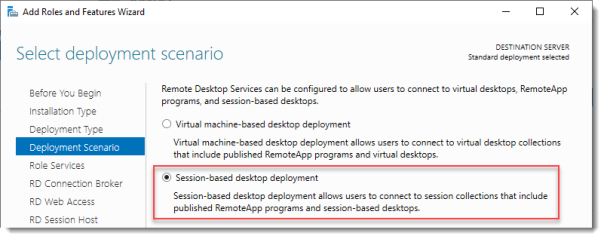
Select Session-based desktop deployment.
Click Next.
Review Role Services

Review the services that will be installed.
Click Next.
Specify RD Connection Broker server
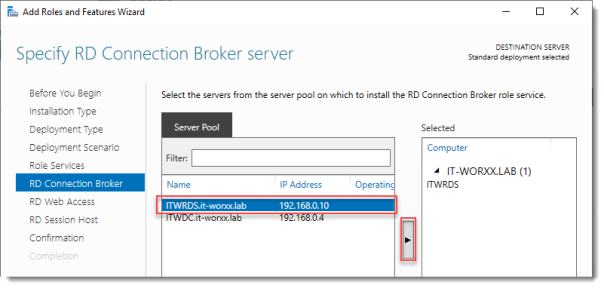
Click the member server and click the Add button.
Click Next.
Specify RD Web Access server
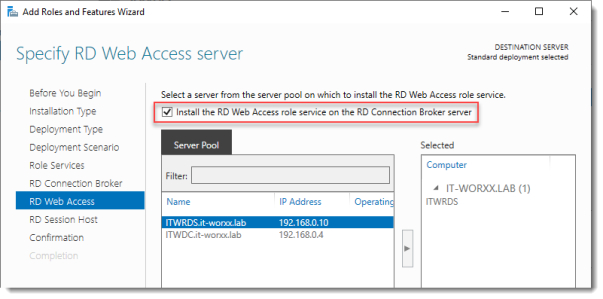
Check Install the RD Web Access role on the RD Connection Broker server.
Click Next.
Specify RD Session Host server
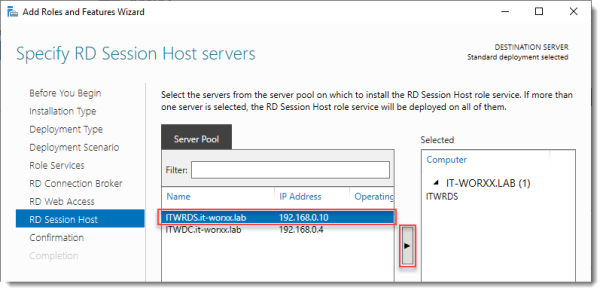
Click the member server and click the Add button.
Click Next.
Confirm selections
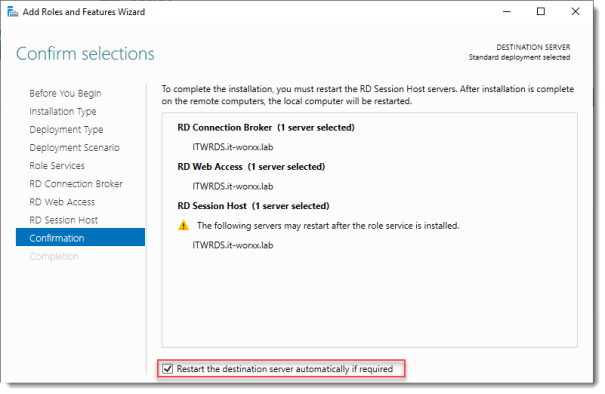
Check Restart the destination server automatically if required.
Click Deploy.
View progress
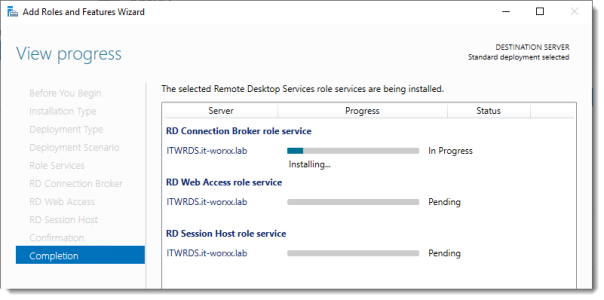
Wait until all role services are deployed and the member server has restarted.
Click Close.
In Server Manager click Remote Desktop Services and scroll down to the overview.
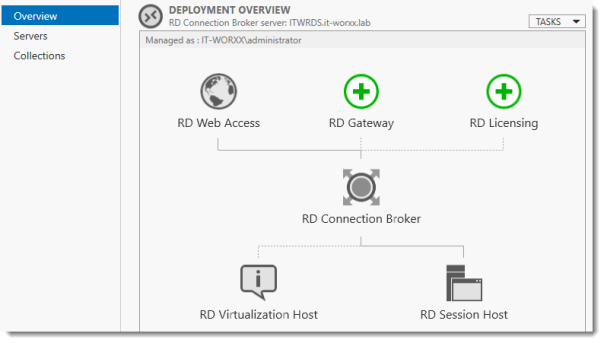
As you can see the deployment is missing a RD Gateway server and a RD Licensing server.
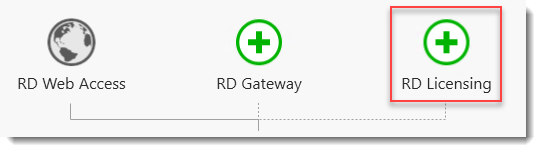
Click the Add RD Licensing server button.
Select a server
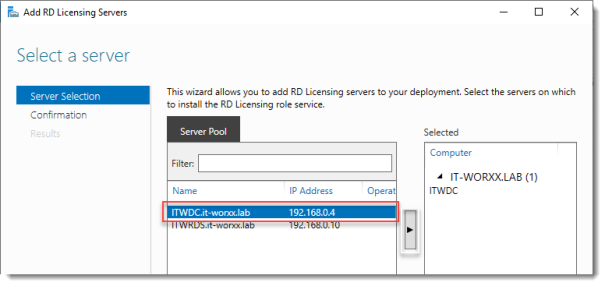
Click the domain controller and click the Add button.
Click Next.
Confirm selections
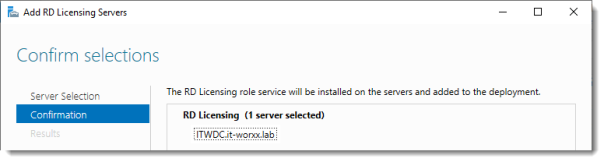
Click Add.
View progress
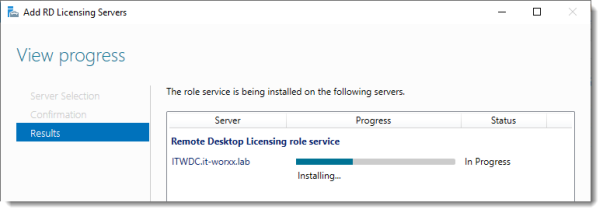
Wait until the role service is deployed. No restart is needed.
Click Close.
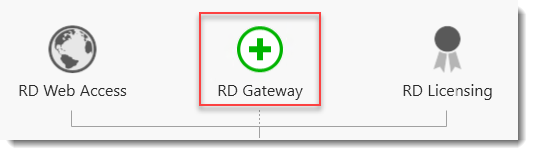
Click the Add RD Gateway server button.
Select a server
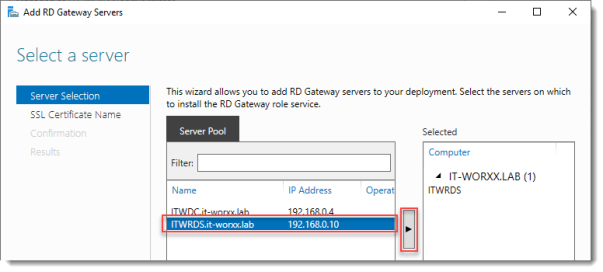
Click the member server and click the Add button.
Click Next.
Name the self-signed SSL certificate
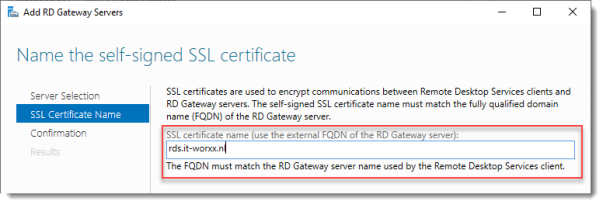
The wizard creates a self-signed certificate. We will deal with certificates in this deployment in a little bit. We will replace the self-signed certificate.
Enter the external Fully Qualified Domain Name which you will also use for the Web Access URL. In my case, for lack of a better name, I used “rds.it-worxx.nl”. I didn’t want to use “remote.it-worxx.nl” or “desktop.it-worxx.nl” or anything else.
Click Next.
Confirm selections
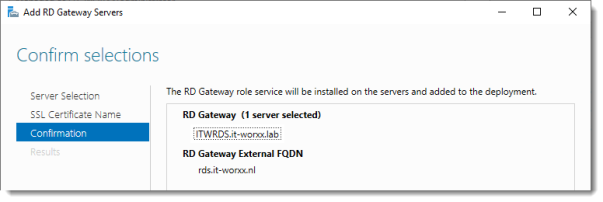
Click Add.
View progress
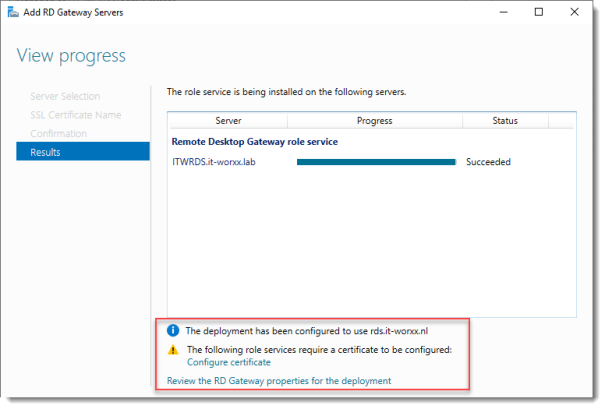
Wait until the role service is deployed. Again, no restart is needed.
Notice that “rds.it-worxx.nl” was configured for the deployment.
Also notice that even more certificate configuring is needed, but we’ll get to that later. Pay no attention to it for now. The same goes for the RD Gateway properties for the deployment. We’ll get to that later.
Click Close.
Review role installation and setting License Mode
Let’s have a quick look at the configuration we have so far.
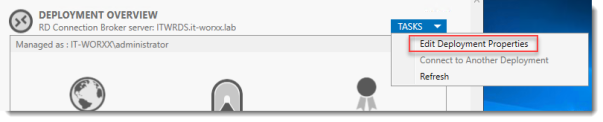
In Server Manager, Remote Desktop Services, Overview, click Tasks and click Edit Deployment Properties.
Configure the deployment
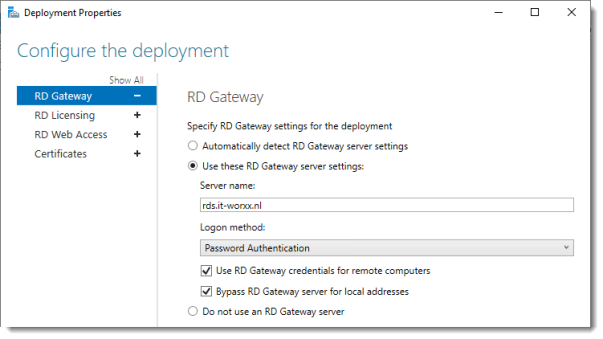
Review the RD Gateway settings and notice what settings are available.
Click RD Licensing.
Configure the deployment
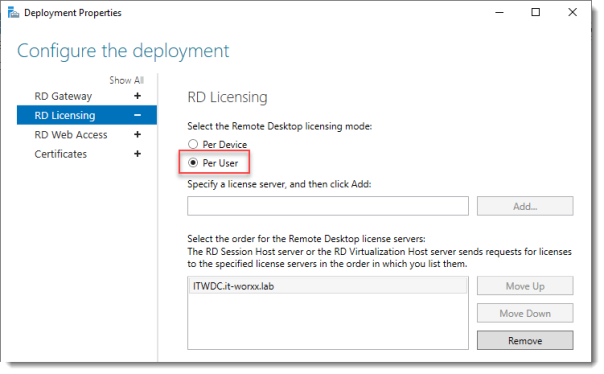
Notice that an RD License server is available, but no license type is selected yet.
I selected Per User, but since this is just a guide setup, it really doesn’t matter.
Click RD Web Access.
Configure the deployment
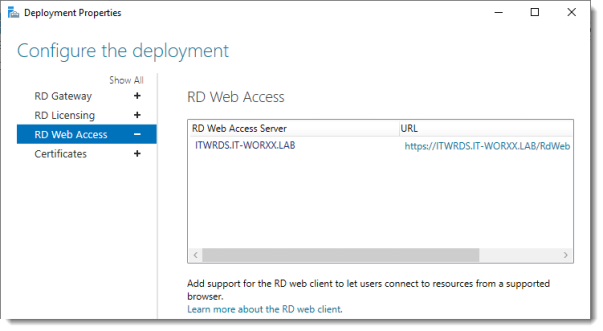
By default the RD Web Access IIS application is installed in /RdWeb.
If you want to know how to change this, check another post: https://msfreaks.wordpress.com/2013/12/07/redirect-to-the-remote-web-access-pages-rdweb/
This is for Windows Server 2012 R2 RDS, but it also works for Windows Server 2019 RDS.
Click Certificates.
Configure the deployment
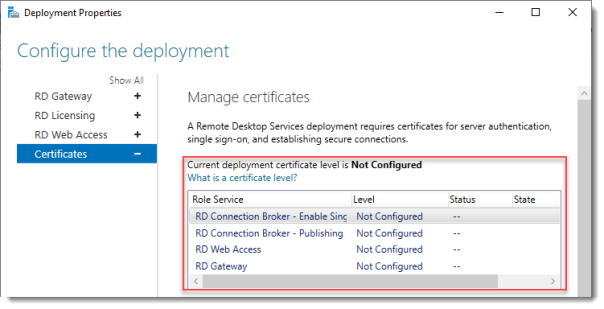
Notice that the certificate level currently has a status of Not Configured.
As you can see, certificates are used for different goals within the deployment.
The RD Gateway certificate is used for Client to gateway communication and needs to be trusted by the clients. Either install the self-signed certificate on all clients, or use a certificate for which the complete certificate chain is already trusted by all clients. As it said in the wizard, the external FQDN should be on the certificate.
The RD Web Access certificate is used by IIS to provide a server identity to the browser clients.
The RD Connection Broker actually has two goals for which it needs certificates. To enable single sign on (server to server authentication), and for publishing (signing RDP files). If you look in the deployment you’ll see that the Connection Broker is now configured to use “itwrds.it-worxx.lab”, so we have to change it to use an external FQDN as well.
If we use the same FQDN for all goals described above, we need only 1 certificate, and only 1 external IP address.
We’ll come back to this wizard later to assign the certificate. First order of business is to change the internal FQDN for the Connection Broker to an external FQDN.
Click OK (no reason why we shouldn’t commit the change we made on the licensing tab, remember?)
Changing the Connection Broker FQDN to an externally resolvable FQDN
Open DNS Manager on the domain controller and browse to Forward Lookup Zones.
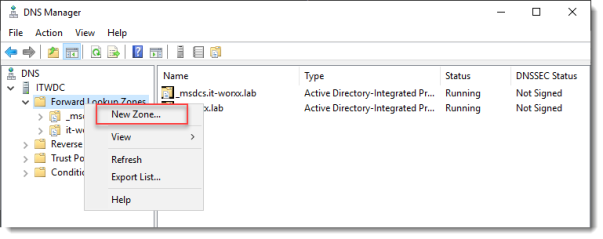
Right click Forward Lookup Zones and click New Zone… Go through this wizard accepting the defaults until you have to enter a Zone Name.
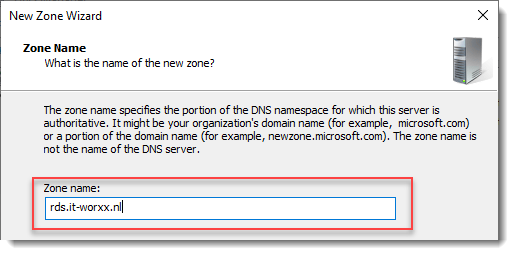
Enter the external FQDN which will also be used by the Connection Broker.
Finish the rest of the wizard accepting the defaults.
Browse to the newly created zone.
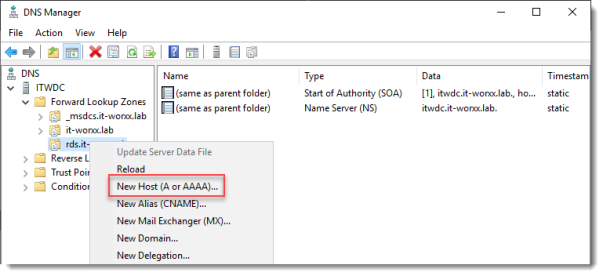
Right click the newly created zone and click New Host (A or AAAA)…
New Host
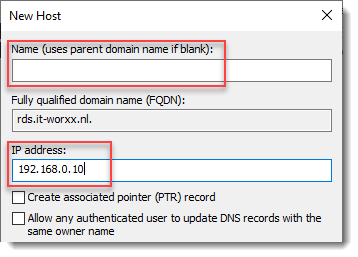
Leave the Name field blank, but enter the member server’s (holding the RD Connection Broker role) IPv4 address.
Click Add Host.
Now the configuration will be able to resolve “rds.it-worxx.nl” to the server holding the Connection Broker role, and this will work because “rds.it-worxx.nl” is also on the certificate that we will configure later.
Create a new Global Security Group called “RD Connection Brokers” and add the computer account for the member server to it as a group member.
We need this group to be able to convert the RD Connection Broker to a highly available RD Connection Broker. You’ll see why we need to do this in a few steps.
Reboot the member server to let it know it’s a member of the RDS Connection Brokers security group.
The next steps in re-configuring the RD Connection Broker depend on an SQL database shared by all Connection Brokers in the deployment. Without this configuration the RD Connection Broker will rely on the Windows Internal Database that was created during the initial deployment of the roles.
Install SQL Express on the Domain Controller (or use an existing SQL Server if you already have one).
It’s not best practice to install SQL onto a Domain Controller, but it’ll do for this guide.
Here’s a list of needed features:

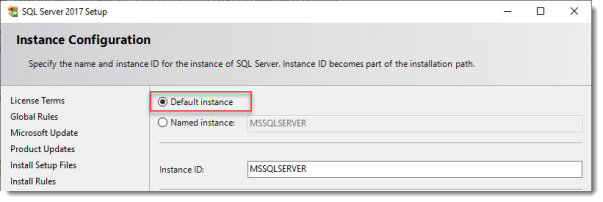
Use the Default Instance (so click Default, and do not leave the wizard’s selection on Named instance: SQLEXPRESS).
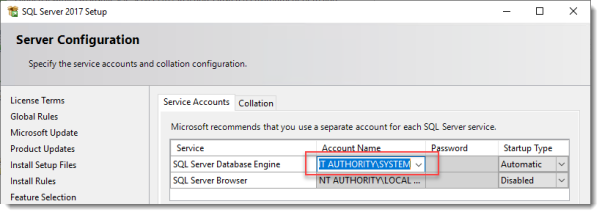
Set the SQL Service to start using SYSTEM because the default account of SQLSERVER cannot be used on a Domain Controller.
When the installation is done open SQL Configuration manager and browse to Client Protocols under SQL Native Client 11.0 Configuration.
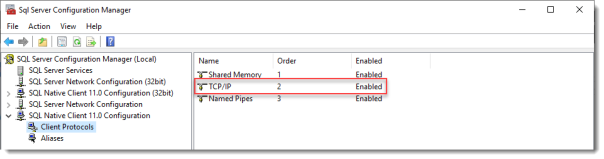
Check if TCP/IP is enabled under Client Protocols. SQL Express install enables this by default, but check it just to be sure, especially if you use an existing SQL Server.
Browse to Protocols for MSSQLSERVER under SQL Server Network Configuration.
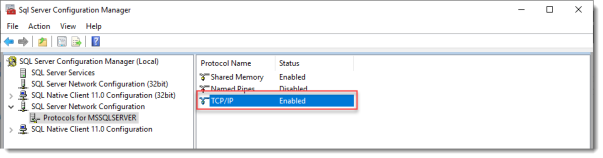
Enable TCP/IP. If this is a new SQL installation, this will be disabled by default.
Restart the SQL Server service if you changed this setting.
On the SQL Server, make sure port 1433 is not being blocked by Windows Firewall.

I added the SQL Server executable to the exception list to allow all inbound traffic, but TCP 1433 inbound should suffice.
If you installed SQL Server using the default folder locations, the sqlservr.exe executable is found in “C:Program FilesMicrosoft SQL ServerMSSQL14.MSSQLSERVERMSSQLBinn”.
Open SQL Server Management Studio, connect to the default instance on the Domain Controller and browse to Logins under Security.
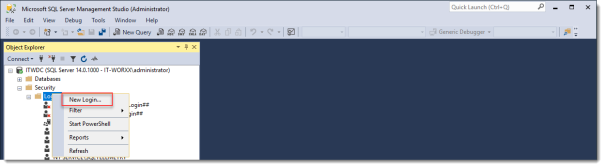
Remember the Management Studio is no longer available with the SQL Server download, but is a different download.
Right click Logins and click New Login…
Login – New
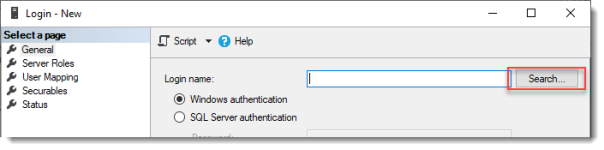
Click Search…
Select User, Service Account, or Group
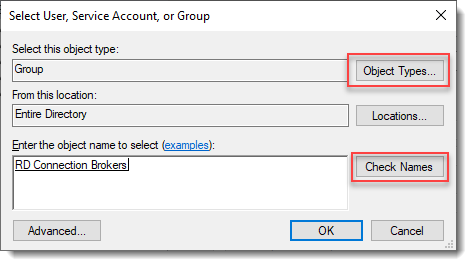
Click Object Types… and select Group.
Type the RDS Connection Brokers security group name and click Check Names.
Click OK.
Login – New
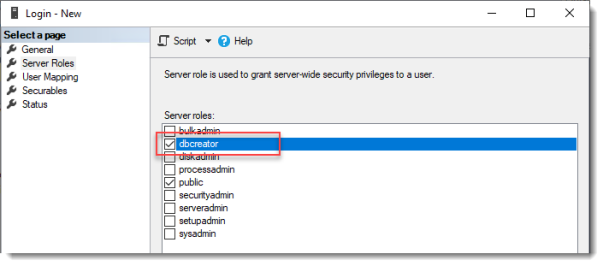
Click Server Roles and select dbcreator.
Click OK.
We have just effectively granted the RDS Connection Broker server the right to create databases.
We need this because the RDS Connection Broker service will try to migrate from WID (Windows Internal Database to a (high available) SQL Server instance when we convert the Broker to a high available broker.
Install the SQL Native Client on the member server (Client Components only). If you used the member server in this setup to install the SQL Management Studio, you can skip this step because the Native Client was installed with installing the Management Studio.
Everything we need is in place to convert the RD Connection Broker, so let’s do just that.
In Server Manager click Remote Desktop Services and scroll down to the overview.
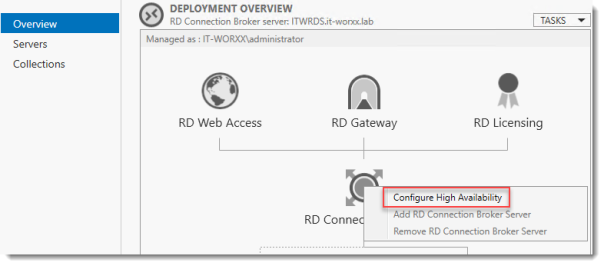
Right click RD Connection Broker and click Configure High Availability.
Before you begin
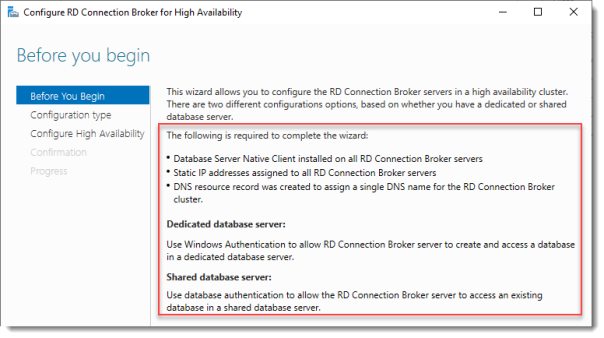
So we’re building a single node cluster here 
Look at the pre-requisites.
If you have more than one RD Connection Broker they need to be configured using DNS Round Robin.
Click Next.
Configure RD Connection Broker for High Availability
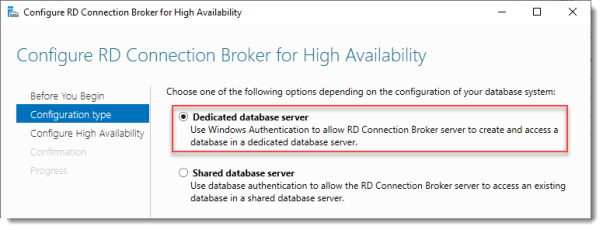
Since we just installed an SQL Server for this, leave the default selected. You’d use the other option for instance if you’d like to use Azure SQL for this deployment.
Click Next.
Configure RD Connection Broker for High Availability
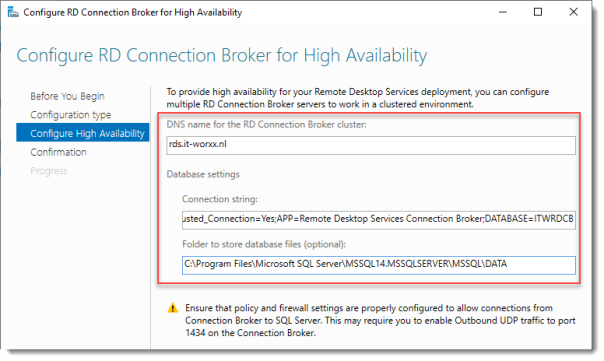
DNS name for the RD Connection Broker cluster:
The DNS Zone name we configured in DNS earlier: rds.it-worxx.nl
Connection string:
DRIVER=SQL Server Native Client 11.0;SERVER=ITWDC;Trusted_Connection=Yes;APP=Remote Desktop Services Connection Broker;DATABASE=ITWRDCB
Folder to store database files:
C:Program FilesMicrosoft SQL ServerMSSQL14.MSSQLSERVERMSSQLDATA
I used the instance default folder.
Click Next.
Confirmation
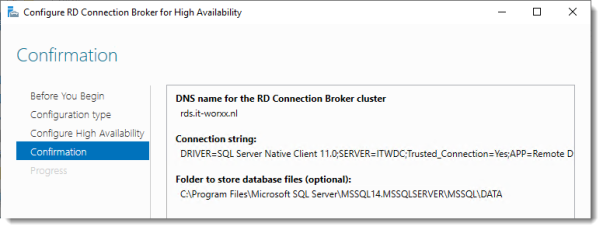
If you get an error before this page:
- Check if TCP/IP is enabled in client protocols and for your instance
- Check if you can reach port 1433 on the SQL Server from the member server
Click Configure.
Progress
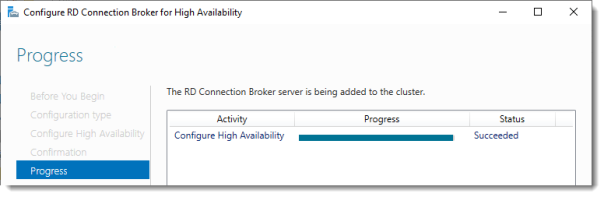
If you get an error on this page:
- Check SQL permissions for the security group
- Check if the database path you entered is correct
Click Close.
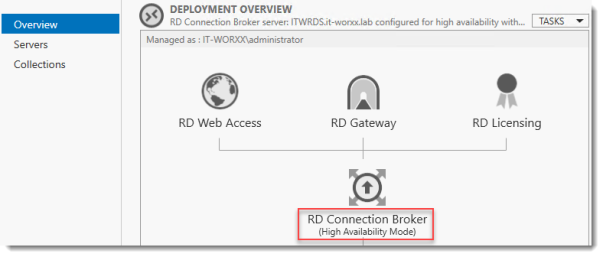
The RD Connection Broker is now in High Availability Mode, and configured as “rds.it-worxx.nl” and we are finally ready to complete the configuration.
Configuring Certificates

In Server Manager, Remote Desktop Services, Overview, click Tasks and click Edit Deployment Properties, then click Certificates.
Configure the deployment

Click RD Connection Broker – Enable Single Sign On and click Select Existing certificate.
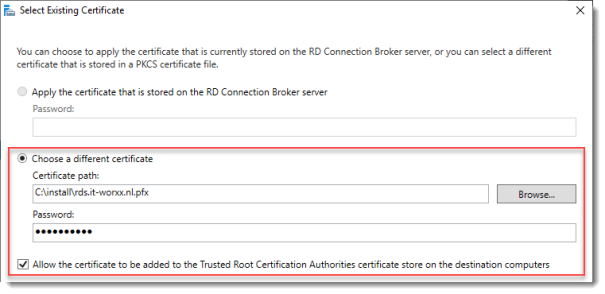
Browse to the .pfx file, enter its password, and check Allow the certificate..
Click OK.

So click Apply. This takes a little while, be patient.
Configure the deployment
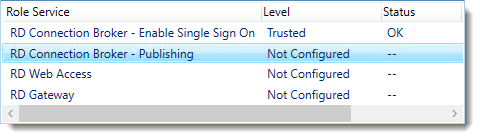
Click RD Connection Broker – Publishing and click Select Existing certificate.
Browse to the .pfx file, enter its password, and check Allow the certificate..
Click OK.
Click Apply. This again takes a little while, be a little more patient.
Configure the deployment
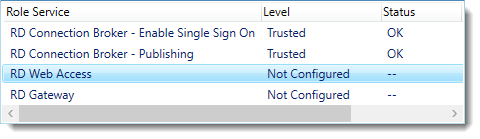
Click RD Web Access and click Select Existing certificate.

Note: Did you notice the warning when you select RD Web Access?
Browse to the .pfx file, enter its password, and check Allow the certificate..
Click OK.
Click Apply again. This takes another little while longer, be slightly more patient.
Configure the deployment
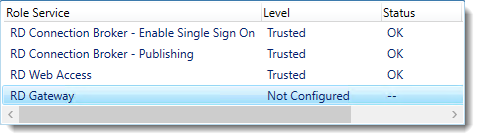
Last one. Click RD Gateway and click Select Existing certificate.
Browse to the .pfx file, enter its password, and check Allow the certificate..
Click OK.
Click OK to apply the final certificate step.
Configured all servers, configured certificates..
One thing left to do: Tell our RDS environment exactly what to publish.
Publishing resources to your users
In fact you can use this setup to either provide full desktop sessions on the Session Host, or you can choose to publish only applications on the Session Host.
Let’s publish full desktop sessions.

In Server Manager, Remote Desktop Services, Session Collections, click Tasks and click Create Session Collection.
Before you begin

Review the requirements. This won’t be an issue in this setup, but you could restrict access to this collection by selecting a select group of people.
Click Next.
Name the collection
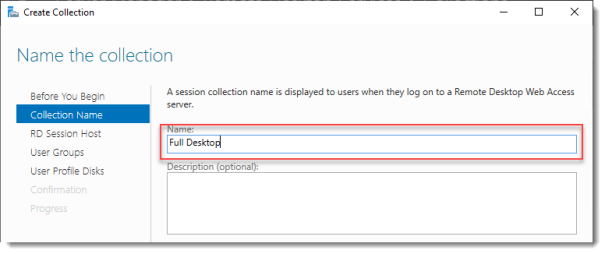
Enter a descriptive name. This name will be displayed under its icon in the Web Access interface.
Click Next.
Specify RD Session Host servers

Click the member server and click the Add button.
Click Next.
Specify user groups
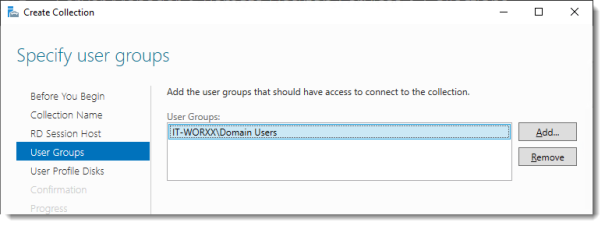
You can limit access to the resource here if you want. Add one or more groups to restrict access to these groups only. In this setup the default selection of Domain Users will do fine. Groups you specify here will be added to the list of groups of users that are allowed to connect using RDP to the Session Host server(s).
Click Next.
Specify user profile disks
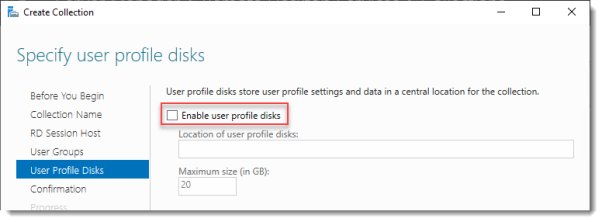
User profile disks are not in focus in this guide. Since I have no file shares configured in this setup, uncheck Enable user profile disks for now.
Click Next.
Confirm selections
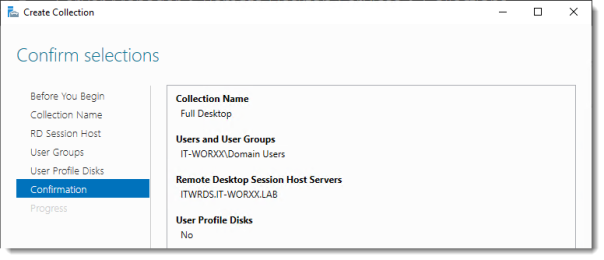
Review the information and click Create.
View Progress
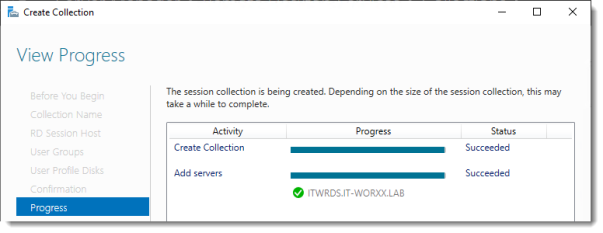
Wait until the collection is created and the server is added to the collection.
Click Close.
Time to test the setup!
Testing the setup
On a machine that has access to your test setup (you may have to add the external FQDN to your hosts file if you didn’t publish it to the internet) open https://rds.it-worxx.nl/rdweb
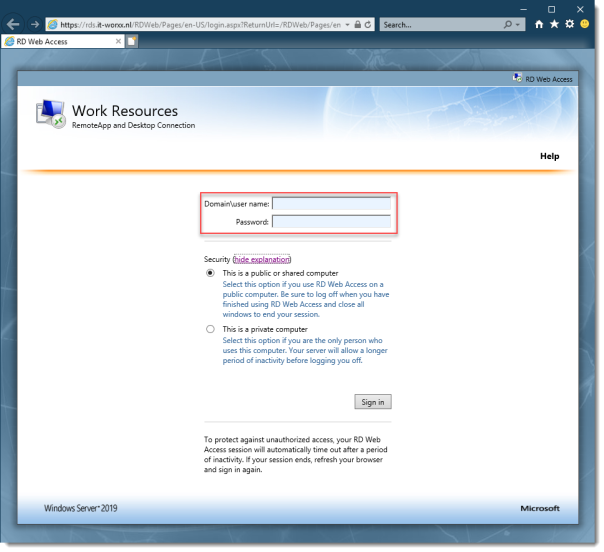
Hey! At least the RD Web Access application works 
Enter a valid username and password (IT-WORXXusername or username@it-worxx.lab).
Create a user for this, or simply use the domain admin account.
Click Sign in.
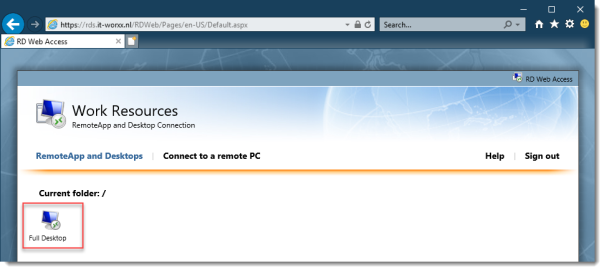
After logging in you are presented with the full desktop session collection we created.
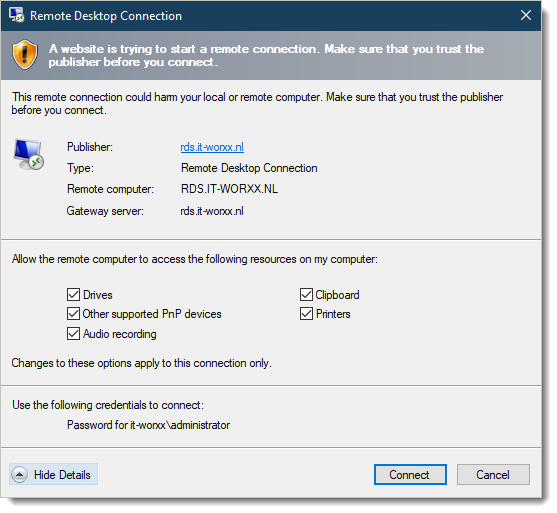
After clicking the Full Desktop icon you get the warning that devices are going to be redirected.
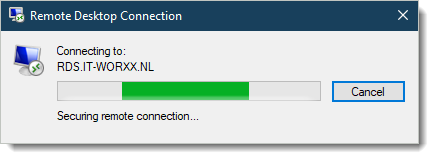
And when you click Connect, you connect
Enjoy.
Arjan
Установка службы удаленных рабочих столов (RDS) на Windows Server 2019 состоит из многих шагов, но в действительности это очень просто. Из статьи вы узнаете о том, как установить эту службу в доменной среде, которая требует наличия двух серверов.
Предварительные условия
Перед началом установки RDS необходимо убедиться, что выполняются два требования, а именно:
- все серверы подключены к домену;
- есть по крайней мере два доступных сервера.
Необходимо, чтобы было именно два сервера, так как для роли RD Licensing, согласно лучшим практикам Microsoft, требуется отдельный сервер. В данной инструкции мы будем использовать для этой роли контроллер домена, что не вполне соответствует лучшим практикам, но мы делаем это, чтобы упростить демонстрационную установку.
Установка базовых ролей службы удаленных рабочих столов
Для начала мы добавим к основному RDS-серверу следующие роли:
- RD Connection Broker (Посредник подключений к удаленному рабочему столу);
- RD Web Access (Веб-доступ к удаленным рабочим столам);
- RD Session Host (Узел сеансов удаленных рабочих столов).
Пошаговая установка
- В диспетчере сервера на основном RDS-сервере, на котором выполняется установка, откройте Add Roles and Features Wizard (мастер добавления ролей и компонентов) и выберите Remote Desktop Services installation(установку службы удаленных рабочих столов).

2. Для этой инструкции мы используем опцию Quick Start (Быстрый старт), но если вам требуется больше контроля над процессом установки, вы можете выбрать Standard Deployment (Стандартную установку), которая позволяет редактировать большее количество настроек.

3. Далее мы выбираем Session-based desktop deployment (Установка рабочих столов на основе сеансов), так как это стандартная модель подключения к удаленным приложениям и удаленным рабочим столам, используемая в большинстве установок RDS.

4. В разделе Server Selection (Выбор сервера), выберите сервер, на который мы устанавливаем RDS.

5. Чтобы начать установку, выберите Restart the destination server automatically if required (Автоматический перезапуск конечного сервера в случае необходимости) и кликните на Deploy (Установить).

6. Проверьте, что все роли успешно установлены перед тем, как переходить к следующим шагам.

Добавление дополнительного сервера
В этой инструкции мы используем доменный контроллер в качестве сервера лицензирования удаленных рабочих столов, но для упрощения установки этой роли мы можем добавить дополнительный сервер в диспетчере серверов.
- Чтобы добавить дополнительный сервер, кликните правой кнопкой мыши на All Servers (Все серверы), выберите Add Servers (Добавление серверов), а затем выберите нужный сервер в Active Directory.


2. Перейдите на экран Remote Desktop Services (Службы удаленных рабочих столов) и кликните на зеленом плюсе над RD Licensing (Лицензирование удаленных рабочих столов).

3. Откроется окно Add RD Licensing Servers (Добавление серверов лицензирования удаленных рабочих столов), в котором вы сможете выбрать дополнительный сервер для роли RD Licensing.

4. Кликните на Add (Добавление), чтобы установить роль на дополнительный сервер.

5. Убедитесь, что установка завершена и зеленый плюс над RD Licensing заменен на соответствующий значок.

Добавление роли RD Gateway Role
Теперь нам нужно добавить RD Gateway Role (роль службы шлюза удаленных рабочих столов) к основному RDS-серверу.
- На экране Remote Desktop Services (Службы удаленных рабочих столов) кликните на зеленом плюсе над RD Gateway (Шлюз удаленных рабочих столов).
- Выберите основной RDS-сервер для установки этой роли.

3. Присвойте самоподписанному SSL-сертификату полное доменное имя.

4. Кликните Next и потом Add, чтобы установить роль на основной RDS-сервер.
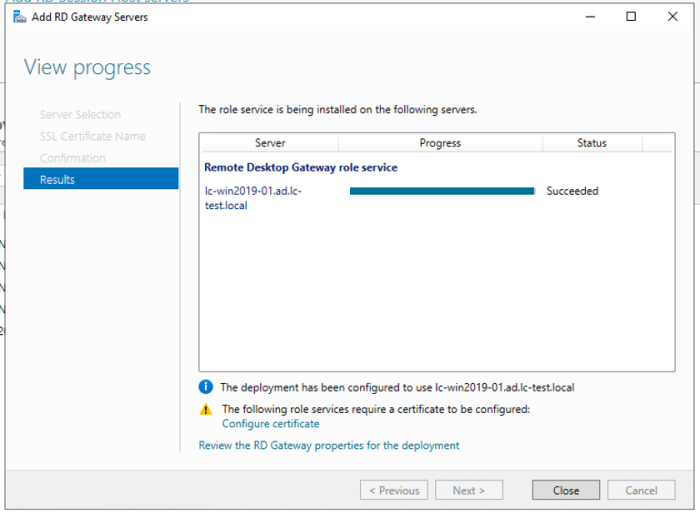
Настройка параметров установки
Теперь, когда все роли установлены, можно перейти к настройке параметров установки.
- Откройте экран Remote Desktop Services и в выпадающем списке Tasks (Задания) кликните на Edit Deployment Properties (Редактирование параметров установки).

2. На экране RD Gateway оставьте настройки по умолчанию и кликните на пункте меню RD Licensing.

3. Выберите Per User (По количеству пользователей) на экране RD Licensing. Вы можете выбрать любую из двух опций, но в целях обучения мы выбираем Per User.

4. Обратите внимание на URL на экране RD Web Access (Веб-доступ к удаленным рабочим столам). Позже мы будем его использовать для доступа к установленным приложениям.

5. В целях тестирования можно оставить сертификаты как Not Configured (Не сконфигурированные) и нажать OK, чтобы сохранить параметры установки.

Если вы хотите сконфигурировать сертификат, вам придется делать это для каждой службы роли по отдельности.
Верификация службы удаленных рабочих столов
По умолчанию после установки создается QuickSessionCollection, куда входят Calculator, WordPad и Paint в качестве удаленных приложений. Мы можем использовать это для тестирования установки RDP.
- Для тестирования IIS перейдите по ссылке, представленной на экране RD Web Access, или используйте https://localhost/rdweb/, если вы находитесь на RDP-сервере.

2. Подключитесь к сеансу IIS RDS с помощью доменной учетной записи.

3. Запустите удаленное соединение: то, которое вы сконфигурировали, или удаленное приложение по умолчанию.

Установка службы удаленных рабочих столов может состоять из многих шагов, но после изначальной настройки ее легко конфигурировать и использовать. Удаленные приложения обеспечивают значительную гибкость, как и возможность настраивать коллекции RDP-подключений для предложения их пользователям.