Всем привет! Сейчас мы с Вами рассмотрим два варианта установки и удаления файлового сервера в операционной системе Windows Server 2016, а именно традиционного с использованием графического инструмента, т.е. «Мастера добавления ролей и компонентов», и продвинутого с использованием Windows PowerShell.
Опытны системные администраторы, конечно же, знают что такое файловый сервер (File Server) и в целом файловые службы (File Services) Windows Server, а также как устанавливать, настраивать и удалять данную роль, но начинающие сисадмины в небольших компаниях многого не знают и ограничиваются простым предоставлением общего доступа к папкам. Но так как файловые службы Windows Server имеют гораздо больше возможностей, сегодня я кратко опишу их и покажу на примере процесс установки и удаления некоторых компонентов, входящих в состав файловых служб (забегая вперед, скажу, что это будет «Файловый сервер», «Диспетчер ресурсов файлового сервера» и «Средства диспетчера ресурсов файлового сервера»).
Содержание
- Что такое файловые службы и службы хранилища в Windows Server 2016?
- Компоненты и функции входящие в файловые службы в Windows Server 2016
- Средства администрирования файловых служб Windows Server 2016
- Установка и удаление роли файлового сервера в Windows Server 2016
- Установка файлового сервера с помощью мастера
- Установка файлового сервера с помощью Windows PowerShell
- Удаление файлового сервера с помощью мастера
- Удаление файлового сервера с помощью Windows PowerShell
Файловые службы и службы хранилища – это технологии, с помощью которых можно предоставлять общий доступ к файлам и папкам, управлять общими ресурсами и контролировать их, осуществлять репликацию файлов, обеспечивать быстрый поиск файлов, а также предоставлять доступ для клиентских компьютеров UNIX.
Для реализации и использования всего вышеперечисленного в роль «Файловые службы и службы хранилища» Windows Server 2016 входит достаточно большое количество компонентов и инструментов управления, и сейчас давайте, перечислим и рассмотрим их.
Компоненты и функции входящие в файловые службы в Windows Server 2016
- Службы хранения — это набор функций по управлению хранением, которые установлены по умолчанию и не могут быть удалены;
- Файловый сервер — предоставляет пользователям доступ к файлам на данном сервере из сети и управляет файловыми ресурсами общего доступа;
- Дедупликация данных – технология позволяющая экономить место на диске за счет хранения на томе только одной копии идентичных данных;
- Диспетчер ресурсов файлового сервера — позволяет управлять файлами и папками на файловом сервере, создавать отчеты хранилища, планировать задачи управления файлами, классифицировать файлы и папки, настраивать квоты папок и определять политику блокировки файлов;
- Поставщик целевого хранения iSCSI (аппаратные поставщики VDS и VSS) – позволяет приложениям на сервере, подключенным к целям iSCSI, выполнять теневое копирование томов на виртуальных дисках iSCSI. Он также дает возможность управления виртуальными дисками iSCSI с помощью старых приложений, для которых требуется аппаратный поставщик службы виртуальных дисков (VDS);
- Пространство имен DFS – с помощью данной технологии можно объединять общие папки, находящиеся на разных серверах в одно или несколько логически структурированных пространств имен. Для пользователей пространство имен выглядит как единый файловый ресурс с рядом вложенных папок, но на самом деле оно может состоять из множества общих папок, которые расположены на разных серверах;
- Рабочие папки — предоставляют пользователям возможность использования рабочих файлов с разных компьютеров, в том числе и с личных. В таких папках можно хранить свои файлы, синхронизировать их и получать к ним доступ из сети;
- Репликация DFS – это механизм репликации данных между несколькими серверами, позволяющий синхронизировать папки через подключение к локальной или глобальной сети. Данная технология использует протокол удаленного разностного сжатия (RDC) для обновления только той части файлов, которая была изменена с момента последней репликации;
- Сервер для NFS – эта технология позволяет серверу использовать файлы совместно с компьютерами на базе UNIX и другими компьютерами, которые используют протокол сетевой файловой системы (NFS).
- Сервер целей iSCSI – предоставляет службы и средства управления конечными устройствами iSCSI;
- Служба BranchCache для сетевых файлов – данная служба обеспечивает поддержку BranchCache на текущем сервере. BranchCache – это технология, которая оптимизирует пропускную способность глобальной сети (WAN). Основана она на следующем механизме, после того как клиентский компьютер запрашивает и получает данные из главного офиса, содержимое кэшируется в филиале, остальные компьютеры этого филиала могут получать данные локально, т.е. нет необходимости заново загружать их с сервера главного офиса по глобальной сети;
- Служба агента VSS файлового сервера — позволяет выполнять теневое копирование томов для приложений, которые хранят файлы данных на этом файловом сервере.
Средства администрирования файловых служб Windows Server 2016
Ранее мы рассмотрели роли Windows Server 2016 входящие в состав файловых служб, но всеми этими ролями необходимо управлять и для этих целей нам на помощь приходят «Компоненты» Windows Server, а именно «Средства администрирования ролей». В состав средств администрирования файловых служб Windows Server 2016 входят:
- Службы для средств управления NFS – добавляют оснастку NFS и такие команды как: Nfsadmin, Showmount, Rpcinfo;
- Средства диспетчера ресурсов файлового сервера – добавляют оснастку «Диспетчер ресурсов файлового сервера», а также команды: Dirquota, Filescrn, Storrept. Эти средства позволяют сисадминам отслеживать и контролировать объемы и типы данных, хранящихся на файловых серверах, а также управлять ими. Например, администраторы могут задавать квоты для папок и томов, т.е. ограничения в размерах, определять политику блокировки файлов, другими словами Вы можете указать только те типы файлов, которые Вы считаете безопасными и нужными, например, исключить возможность хранения файлов EXE. Для отслеживания и контроля средства диспетчера ресурсов файлового сервера позволяют генерировать подробные отчеты хранилища;
- Средства управления DFS – включает оснастку «Управление DFS», «Службы репликации DFS», командлеты Windows PowerShell для пространств имен DFS, а также утилиты DfsUtil, DfsCmd, DfsDiag, DfsrAdmin и DfsrDiag.
Установка и удаление роли файлового сервера в Windows Server 2016
Для примера давайте рассмотрим ситуацию, когда Вам необходимо развернуть файловый сервер для предоставления пользователям общего доступа к файлам и папкам, а также осуществлять контроль использования ресурсов на данном файловом сервере.
Для решения данной задачи мы установим два компонента входящих в роль файловых служб, а именно «Файловый сервер» и «Диспетчер ресурсов файлового сервера», а также для эффективного контроля имеющиеся ресурсов установим «Средства диспетчера ресурсов файлового сервера».
Процесс установки и удаления роли файлового сервера мы будем рассматривать на примере операционной системы Windows Server 2016, и как я уже сказал ранее, мы разберем два варианта: первый с использованием мастера, и второй с использованием Windows PowerShell.
Установка файлового сервера с помощью мастера
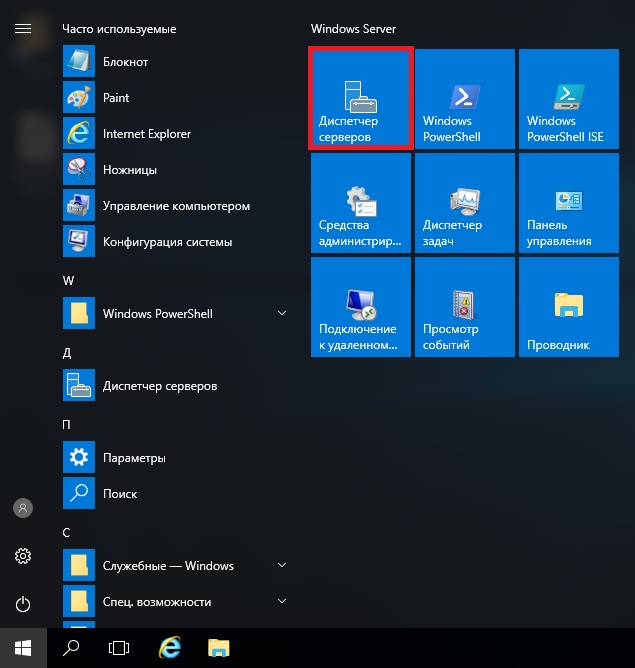
Запускаем «Диспетчер серверов», например, из меню пуск.
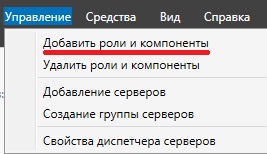
После этого запускаем «Мастер добавления ролей и компонентов», для этого выбираем пункт меню «Управление ->Добавить роли и компоненты».
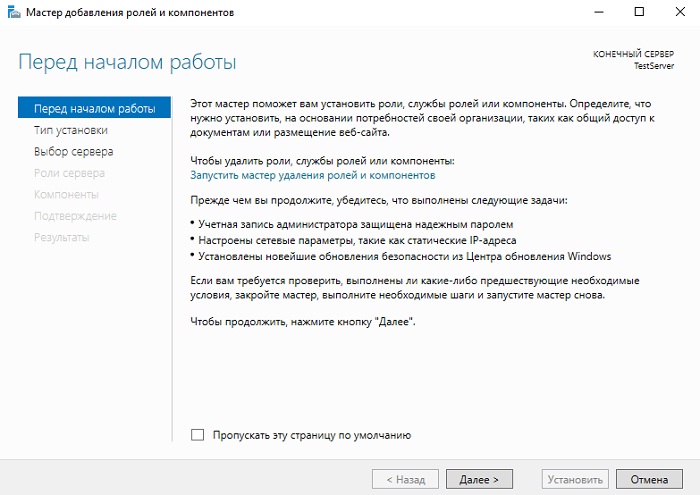
На первом окне мастера сразу нажимаем «Далее».
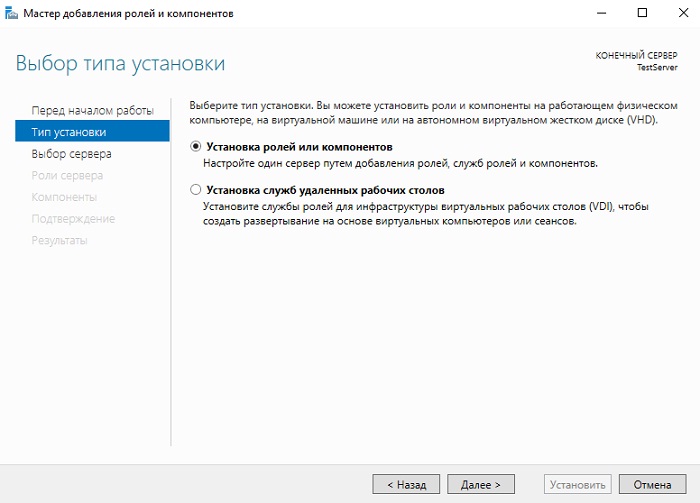
Затем выбираем тип «Установка ролей или компонентов», жмем «Далее».
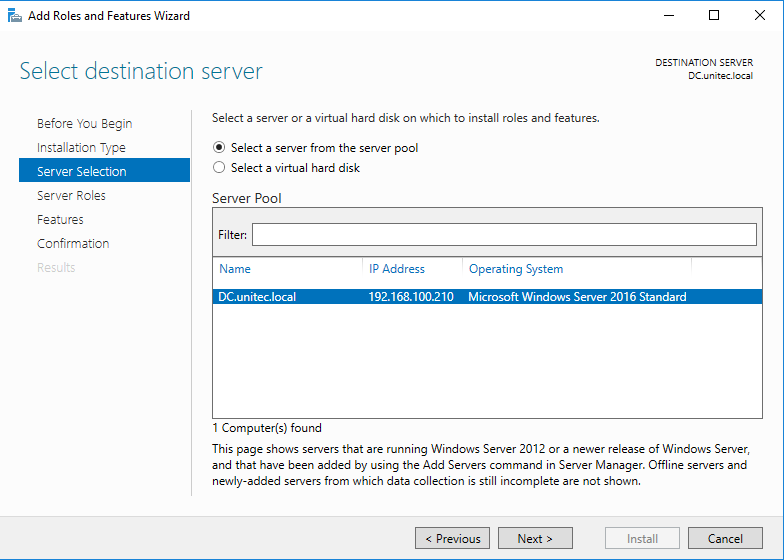
Если у Вас несколько серверов выбирайте нужный, у меня он всего один, поэтому я сразу жму «Далее».

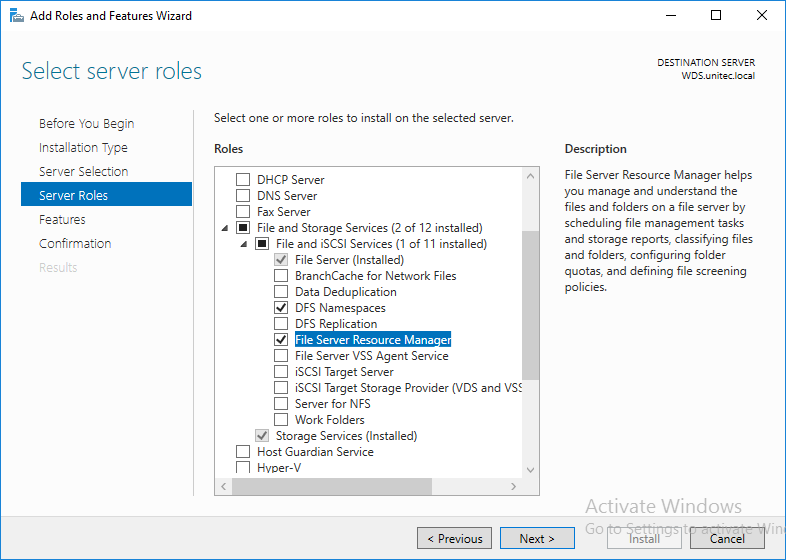
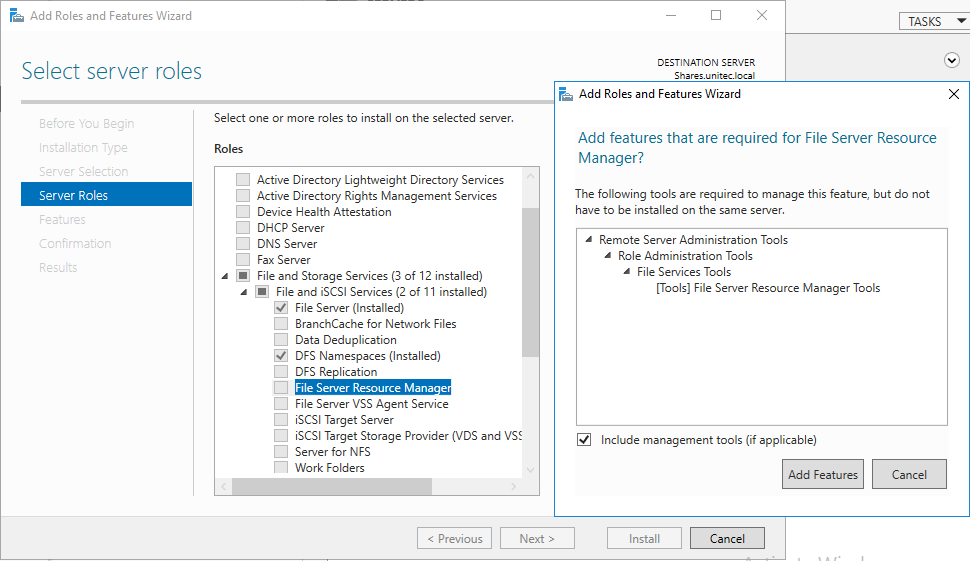
И вот, наконец, мы дошли до выбора ролей. Находим раздел «Файловые службы и службы хранилища» и ставим галочки напротив ролей, которые нужно установить, в нашем случае это «Файловый сервер» и «Диспетчер ресурсов файлового сервера».
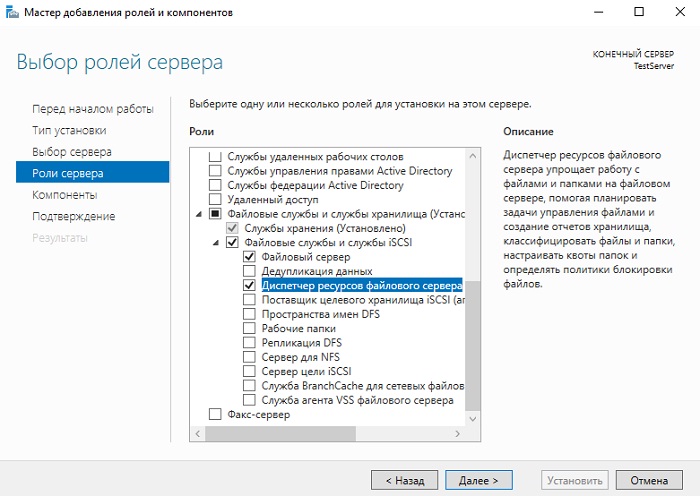
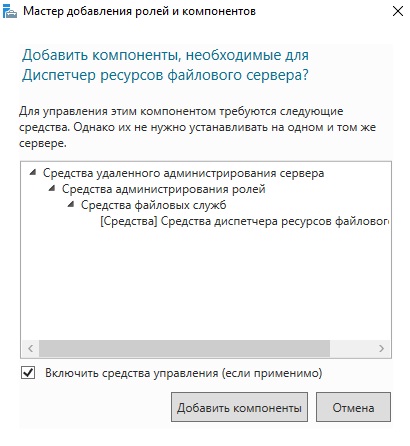
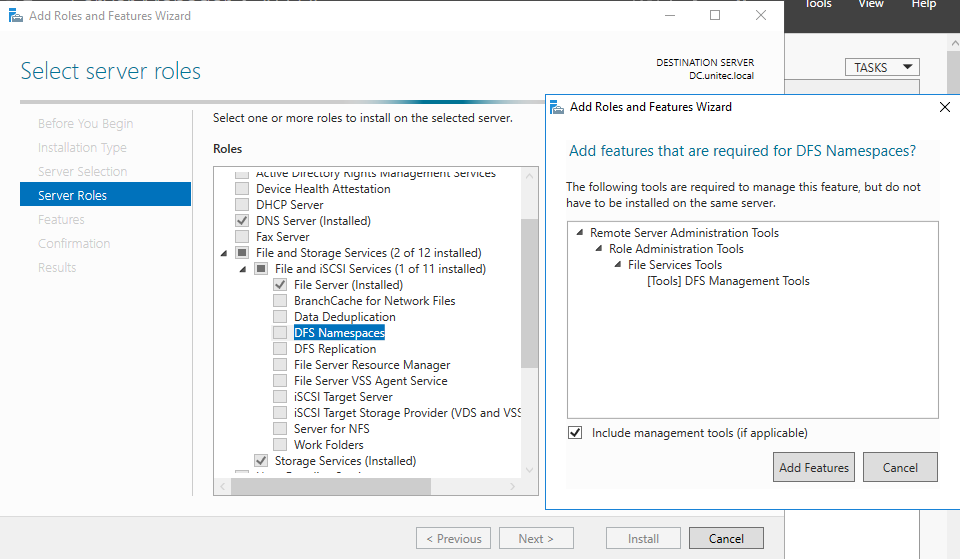
После того как Вы поставите галочку напротив роли «Диспетчер ресурсов файлового сервера» у Вас появится окно, в котором Вам предложат сразу выбрать компонент управления данной ролью, т.е. «Средства диспетчера ресурсов файлового сервера», а нам как раз нужен этот компонент, поэтому жмем кнопку «Добавить компоненты».
Необходимые роли выбраны, теперь жмем «Далее», в итоге мастер перейдет к выбору компонентов, но нужный нам компонент уже будет отмечен (в разделе средства удаленного администрирования сервера), поэтому мы сразу можем нажимать «Далее».


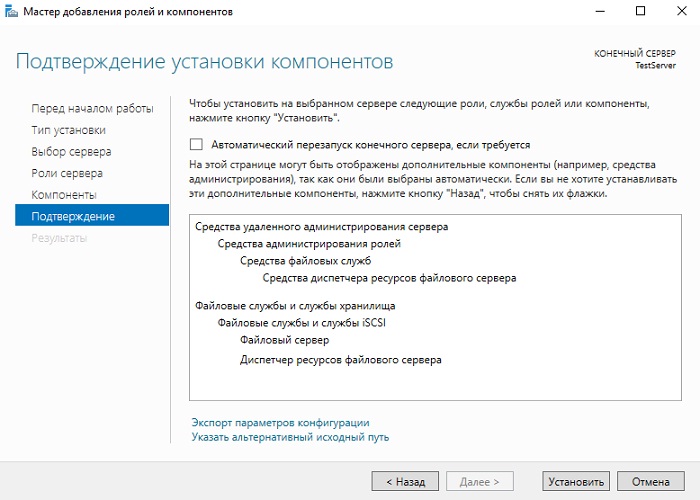
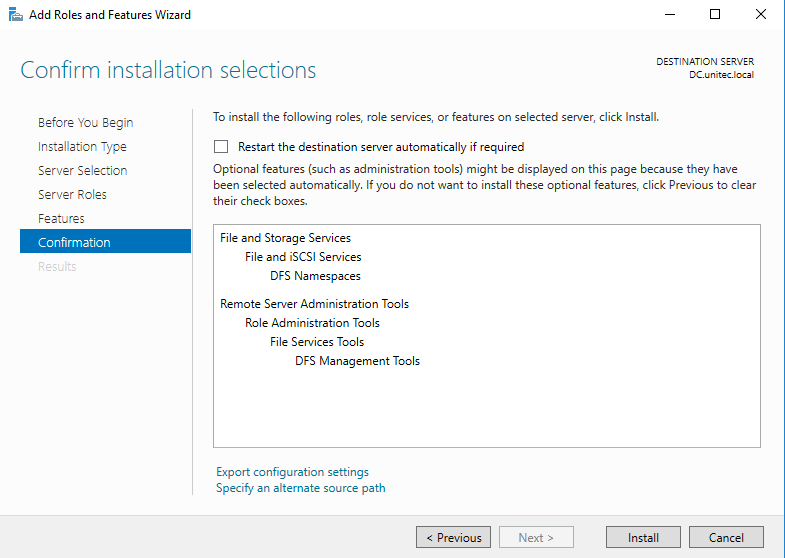
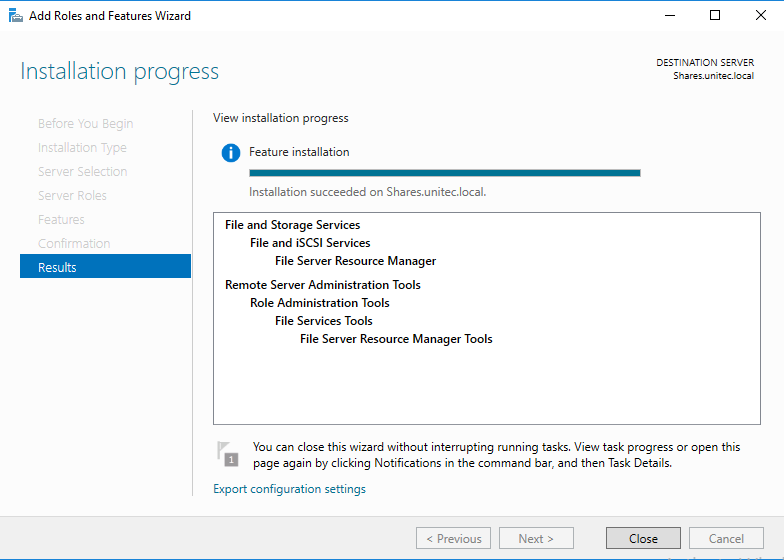
Все готово для установки, проверяем и подтверждаем параметры установки, а именно правильность выбора ролей и компонентов, жмем «Установить».
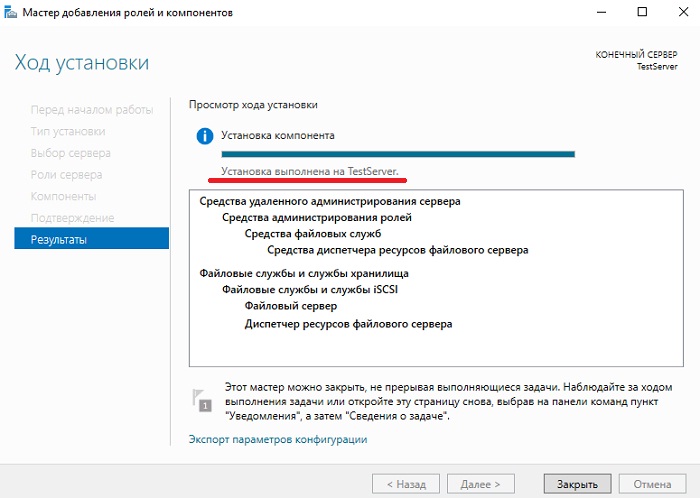
Процесс установки будет завершен, когда появится соответствующее сообщение.
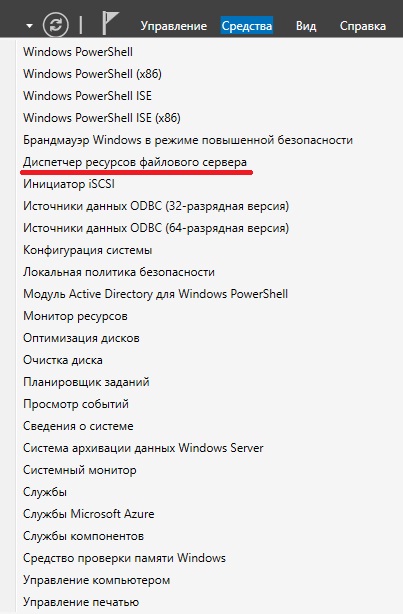
После установки Вы можете предоставлять общий доступ к файлам и папкам на данном сервере, а также с помощью «Диспетчера ресурсов файлового сервера» настраивать квоты, блокировки файлов, создавать и генерировать отчеты, данную оснастку можно запустить, например, из меню диспетчера серверов «Средства».
Установка файлового сервера с помощью Windows PowerShell
В Windows PowerShell для установки ролей и компонентов есть специальный командлет Install-WindowsFeature, именно его мы и будем использовать. Запускаем оболочку Windows PowerShell и выполняем следующие команды.

Для установки файлового сервера
Install-WindowsFeature -Name "FS-FileServer"
Для установки «Диспетчера ресурсов файлового сервера»
Install-WindowsFeature -Name "FS-Resource-Manager"
Для установки компонента «Средства диспетчера ресурсов файлового сервера»
Install-WindowsFeature -Name "RSAT-FSRM-Mgmt"
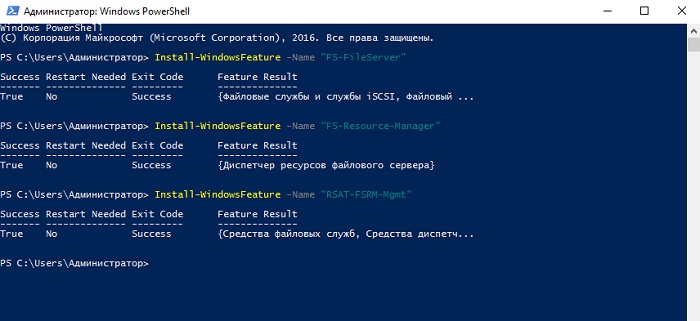
Все, установка завершена, мы только что установили файловый сервер, диспетчер ресурсов файлового сервера и средства диспетчера ресурсов файлового сервера.
Удаление файлового сервера с помощью мастера
Перед удалением файлового сервера необходимо убрать общий доступ со всех файлов и папок, иначе удалить не получится, в самом начале процесса возникнет ошибка.
Примечание! После удаления файлового сервера требуется перезагрузка сервера.
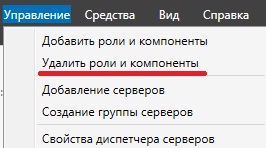
Запускаем диспетчер серверов и в меню «Управление» выбираем «Удалить роли и компоненты».
В итоге запустится «Мастер удаления ролей и компонентов», где Вы делаете практически то же самое, что и при установке, только мы не ставим галочки, а наоборот убираем их, после того как Вы уберете галочку с «Диспетчера ресурсов файлового сервера», Вам также сразу предложат удалить компонент «Средства диспетчера ресурсов файлового сервера». Затем жмем «Далее», если хотим удалить еще какие-нибудь компоненты, то также снимаем галочки, и снова жмем «Далее».

На заключительном шаге мастера проверяем выбранные роли и компоненты, и жмем «Удалить». После завершения процесса удаления, как я уже говорил, перезагружаем сервер.
Удаление файлового сервера с помощью Windows PowerShell
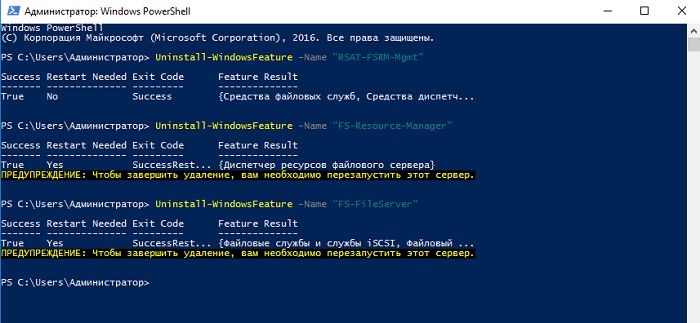
Для того чтобы удалить файловый сервер с помощью Windows PowerShell, запускаем оболочку PowerShell и выполняем перечисленные ниже команды. В данном случае нам также сначала необходимо убрать общий доступ со всех файлов и папок и не забывать о том, что после удаления нам нужно будет перезагрузить сервер.
Для удаления компонента «Средства диспетчера ресурсов файлового сервера»
Uninstall-WindowsFeature -Name "RSAT-FSRM-Mgmt"
Для удаления «Диспетчера ресурсов файлового сервера»
Uninstall-WindowsFeature -Name "FS-Resource-Manager"
Для удаления «Файлового сервера»
Uninstall-WindowsFeature -Name "FS-FileServer"
На этом у меня все, пока!
 Обновлено: 05.10.2020
Опубликовано: 2016 год или раньше
В качестве примера используется Windows Server 2012 R2 (2016, 2019). Инструкция разбита на несколько шагов и представляет из себя полный цикл настройки файлового хранилища для использования в малых и средних компаниях.
Выбор оборудования и подготовка сервера
Установка Windows и настройка системы
Базовые настройки файлового сервера
Тюнинг файлового сервера или профессиональные советы
Настройка средств обслуживания
Тестирование
Шаг 1. Выбор оборудования и подготовка сервера
В качестве сервера, желательно, выбрать профессиональное оборудование. Системные требования для файлового сервера не высокие:
- Процессор может быть самый простой;
- Оперативная память также не сильно используется;
- Дисковая система — самый основной компонент. Ее объем зависит от специфики бизнеса. Примерная формула — не менее 15 Гб на пользователя и не менее 1 Тб на сервер. До 50 пользователей можно рассматривать диски SATA, после — SAS или SSD.
Например, для компании в 300 пользователей подойдет сервер с процессором Xeon E3, 8 Гб ОЗУ и 5 Тб дискового пространства на дисках SAS 10K.
Дополнительные требования
- Для обеспечения сохранности информации при выходе из строя жесткого диска, необходим RAID-контроллер. Настройка последнего выполняется из специального встроенного программного обеспечения, которое запускается при загрузке сервера;
- Сервер должен быть подключен к источнику бесперебойного питания;
- Необходимо предусмотреть резервное копирование. Для этого нужен дисковый накопитель (внешний жесткий диск) или другой сервер.
Подробнее о выборе оборудования читайте статью Как выбрать сервер.
Шаг 2. Установка Windows и настройка системы
Установка системы
На этом шаге все стандартно, за исключением одного нюанса: разбивая во время установки Windows жесткий диск, стараемся выделить небольшую часть (70 — 120 Гб) для системы и все остальное под данные. Если выделить много дискового пространства для системного раздела, увеличится время его обслуживания и фрагментация, что негативно скажется на производительности и надежности системы в целом.
Настройка системы
- Проверяем правильность настройки времени и часового пояса;
- Задаем понятное имя для сервера и, при необходимости, вводим его в домен;
- Если сервер не подключен напрямую к сети Интернет, стоит отключить брандмауэр;
- Для удаленного администрирования, включаем удаленный рабочий стол;
- Устанавливаем все обновления системы.
Шаг 3. Базовые настройки файлового сервера
Это стандартные действия, которые выполняются при настройке обычного файлового сервера.
Установка роли и вспомогательных компонентов
Как правило, данная роль устанавливается вместе с Windows. Остается только это проверить и доустановить компоненты, которые нужны для полноценной эксплуатации сервиса.
Открываем Диспетчер серверов. Он может быть запущен из панели быстрого запуска.

Нажимаем Управление — Добавить роли и компоненты.

В открывшемся окне оставляем Установка ролей и компонентов и нажимаем Далее.

В следующем окне выбираем нужный сервер (выбран по умолчанию, если работаем на сервере, а не через удаленную консоль) и нажимаем Далее.
Среди ролей находим Файловые службы и службы хранилища, раскрываем ее и проверяем, что установлены галочки напротив следующих компонентов:
- Службы хранения;
- Файловый сервер;

Если данные службы не установлены, выбираем их и нажимаем Далее.
В окне Выбор компонентов просто нажимаем Далее.
Откроется окно Подтверждение установки компонентов. Нажимаем Установить и после окончания процесса перезагружаем сервер.
Настройка шары (общей папки)
Создаем первую папку, которую хотим предоставить в общее использование. Затем кликаем по ней правой кнопкой мыши и нажимаем Свойства:

В открывшемся окне переходим на вкладку Доступ и нажимаем Расширенная настройка:

Ставим галочку Открыть общий доступ к этой папке и нажимаем кнопку Разрешения:

Предоставляем полный доступ всем пользователям:

* конечно же, мы не будем давать доступ всем пользователям, но для этого есть вкладка безопасность (см. ниже).
Нажимаем OK и еще раз OK.
Теперь переходим на вкладку Безопасность и нажимаем Дополнительно:

В открывшемся окне нажимаем Отключение наследования и Преобразовать унаследованные разрешения в явные разрешения этого объекта.

Нажимаем OK и Изменить.

Выставляем необходимые права на папку, например:

Совет: старайтесь управлять правами на ресурсы только при помощи групп. Даже если доступ необходимо предоставить только одному человеку!
Теперь нажимаем OK два раза. Папка настроена для общего использования и в нашем примере доступна по сетевому пути \fs1Общая папка.
Шаг 4. Тюнинг файлового сервера или профессиональные советы
Данные настройки, по сути, представляют секреты того, как сделать файловый сервер лучше, надежнее и безопаснее. Применяя их, администраторы создают более правильную и профессиональную среду ИТ.
DFS
С самого начала стоит создавать общие папки в пространстве имен DFS. На это есть две основные причины:
- При наличии или появлении нескольких файловых серверов пользователям будет удобнее находить общие папки в одном месте.
- Администратор легко сможет создать отказоустойчивую систему при необходимости.
Как создать и настроить DFS читайте в статьях Как установить и настроить DFS и Как установить и настроить DFS с помощью Powershell.
Теневые копии
Позволят вернуться к предыдущим версиям файлов. Это очень полезная функция позволит не только восстановить некорректно отредактированный документ, но и вернуть случайно удаленный файл или папку.
Как настроить и пользоваться данной возможностью, читайте подробнее в инструкции Как включить и настроить теневые копии.
Аудит
Аудит позволит вести протокол доступа к данным — понять, кто и когда удалил важные данные или внес в них изменения.
О том, как настроить данную возможность читайте статью Как включить аудит доступа к файлам Windows.
Анализатор соответствия рекомендациям
В диспетчер управления серверами Windows встроен инструмент для проверки конфигурации сервера — анализатор соответствия рекомендациям. Чтобы им воспользоваться переходим в диспетчере в Локальный сервер:

Находим раздел «Анализатор соответствия рекомендациям» и справа кликаем по ЗАДАЧИ — Начать проверку BPA:

Рассмотрим решения некоторых рекомендаций.
1. Для XXX должно быть задано рекомендованное значение.
Это набор однотипных рекомендаций, для выполнения которых нужно обратить внимание на описание и задать значение параметро, которое в нем указано. Например, для CachedOpenLimit в описании проблемы есть описание решения — «Задайте для CachedOpenLimit рекомендуемое значение 5». Чтобы это сделать, открываем Powershell от администратора и вводим команду:
Set-SmbServerConfiguration -CachedOpenLimit 5
* мы задаем параметру CachedOpenLimit значение 5, как это и рекомендовано анализатором.
На запрос, уверены ли мы, что хотим выполнить команду, отвечаем утвердительно.
Остальные параметры задаем аналогичными действиями.
2. Файл Srv.sys должен быть настроен на запуск по требованию.
В командной строке от имени администратора вводим:
sc config srv start= demand
3. Создание коротких имен файлов должно быть отключено.
В командной строке от имени администратора вводим:
fsutil 8dot3name set 1
Шаг 5. Настройка средств обслуживания
Ни одна инфраструктура не может полноценно существовать без мониторинга и резервного копирования. Предупредить о возможной проблеме, узнать о последней раньше пользователей или иметь возможность восстановить данные — показатели высокой ответственности и профессионализма системного администратора.
Резервное копирование
Для файлового сервера все просто — необходимо резервировать все рабочие папки и файлы. Лучшим решением будет ежедневное копирование новых данных, и с определенной периодичностью (например, раз в месяц), создавать полный архив.
Мониторинг
Мониторить стоит:
- Сетевую доступность сервера;
- Свободное дисковое пространство;
- Состояние жестких дисков.
Шаг 6. Тестирование
Тестирование состоит из 3-х основных действий:
- Проверить журналы Windows и убедиться в отсутствие ошибок. В случае их обнаружения, необходимо устранить все проблемы.
- Выполнить действия анализатора соответствий рекомендациям.
- Провести живой тест работы сервиса с компьютера пользователя.
В серии статей мы рассмотрим установку файлового сервера на базе Windows Server 2016, настройку пространства имен, квотирования, группы AD, права доступа к сетевым папкам, создание ярлыков на сетевые папки через GPO.
За базу берем поставленную мне задачу, упростим ее для статьи. В примере будем использовать два отдела компании. На сервере будет использовано два HDD диска для хранения данных, также подключим третий HDD диск по сети с другого сервера.
1 . Установка и настройка файлового сервера, DFS Namespace и квот
2 . Настройка прав доступа к сетевым папкам на файловом сервере
3 . Добавление групп в AD
4 . Добавляем ярлыки на рабочий стол через GPO
Установка роли файлового сервера
1 . Открываем панель управления Server Manager, справа, вверху, находим Manage, выбираем «Add roles and features» (Добавить роли и компоненты)
2 . Тип установки указываем «Role-based or feature-based installation» (Установка ролей и компонентов)
3 . Выбираем необходимый нам сервер из пула (списка) серверов
4 . Выбираем компоненты
Установка DFS-namespace
Зачем нужен DFS?
DFS имеет ряд преимуществ как для пользователей сети, так и для предприятий.
Для пользователей сети:
Namespace DFS — это упрощенный доступ к файлам, распределенным по сети. Исчезает необходимость в подключении множества сетевых дисков. Пользователям предоставляется одна общая сетевая папка, в которой отображаются только те папки, к которым им предоставлен доступ, если конечно включен ABE.
Для организации:
Namespace DFS — гибкое использование свободных ресурсов. Создание и подключение к DFS сетевых папок с серверов и компьютеров со свободным местом на жестком диске.
Replication DFS (Репликация DFS) — автоматическое резервирование важной информации повышает отказоустойчивость всей системы (выход одного сервера или дискового устройства не повлияет на работу пользователей).
В моем случае DFS мне поможет создать более удобную структуру файлового сервера для пользователей, получить одну точку входа.
Установка DFS
Если вы не установили DFS при инсталляции роли файлового сервера, то можно ее просто добавить. Для этого:
Откройте панель управления сервером Windows и найдите Add roles and features (Добавить роли и компоненты).
В качестве типа установки укажите Role-based or feature-based installation (Установка ролей и компонен
Выбираем нужный сервер из пула серверов. тов).
Выбираем нужный сервер из пула серверов.
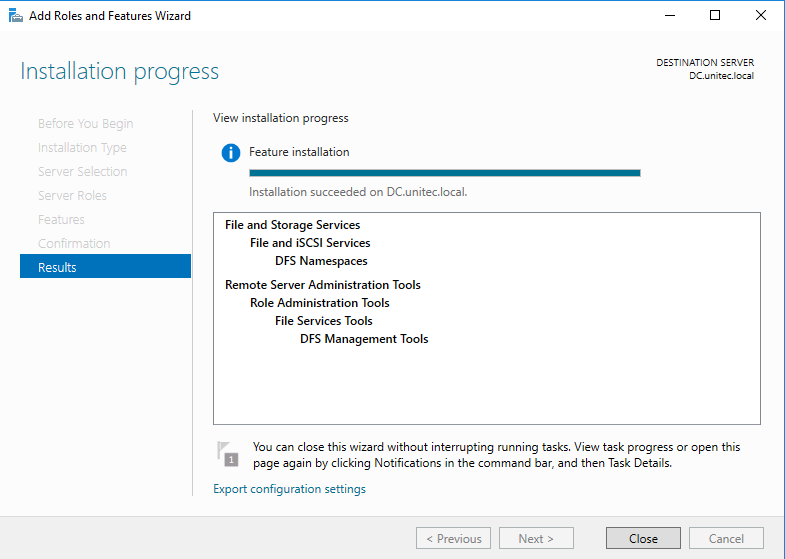
В следующем окне отмечаем DFS Namespaces и DFS Replication, если нужно.
После удачной инсталляции переходим к настройке DFS
Настройка DFS
В Server ManagerDashboard выберете > Tools > DFS Managment.
Или в поиске введите команду dfsmgmt.msc.
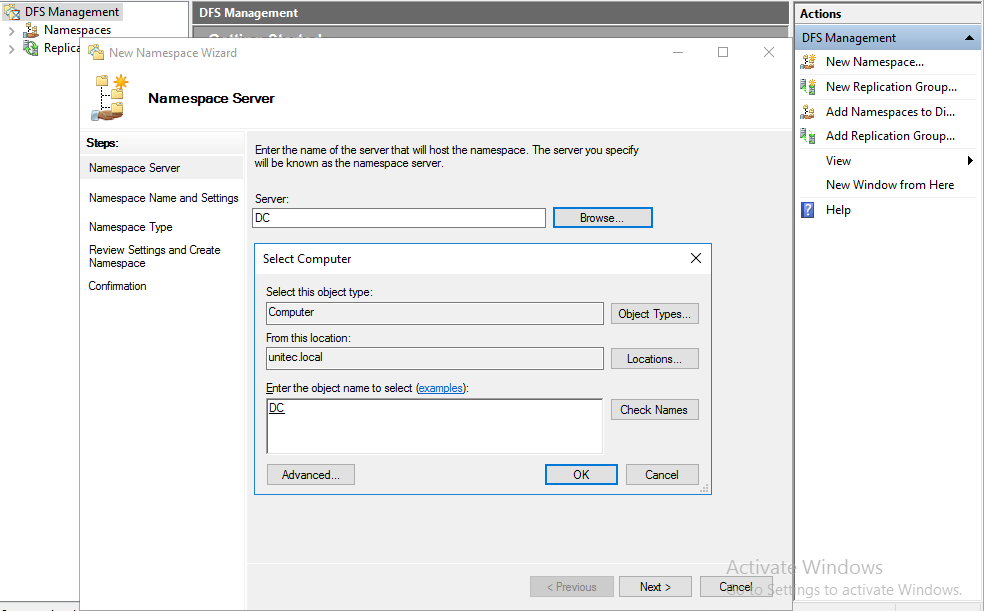
Для создания нового пространства имен выберете в правой части экрана New Namespace.
Введите название сервера и выберите его местоположение.
На следующем этапе задаем имя пространства имен DFS. Хочу обратить внимание, что заданное здесь имя будет использоваться при подключении общей сетевой папки. Например:
\companyname.localshare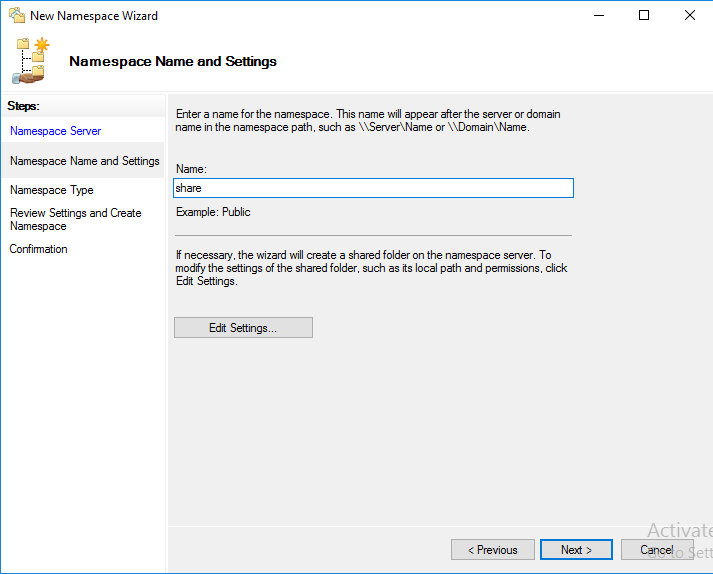
На следующем шаге выбираем Domain-based namespace, так как используются доменные службы Active Directory.
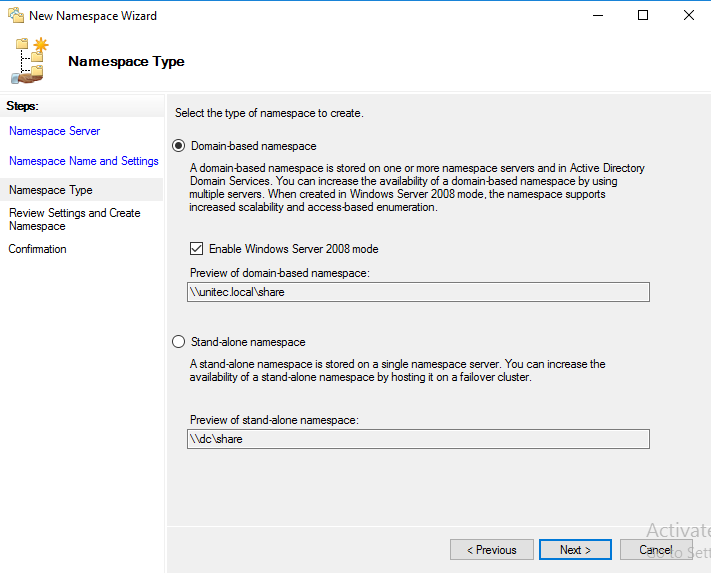
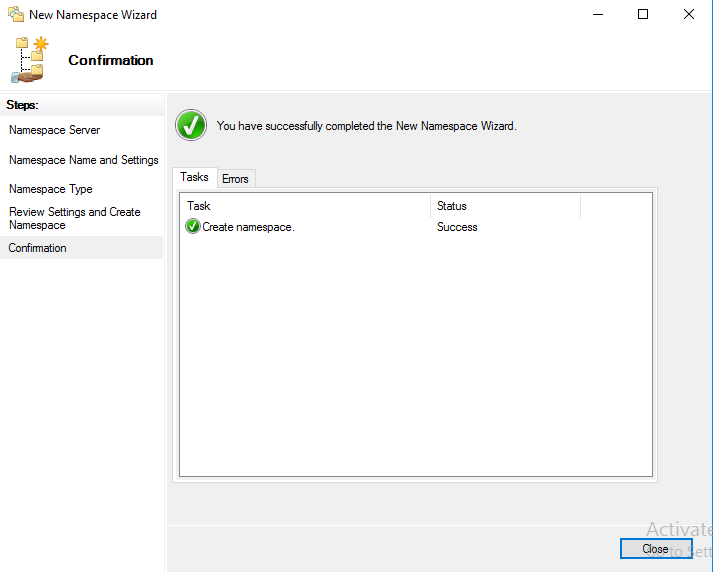
В результате видим сообщение об успешном создании пространства имен.
Теперь подключаем к нашему созданному Namespace сетевые папки.
Настройку прав доступа для папок смотрите здесь >>>
Для создания новой папки выберете в правой части экрана New Folder. Задайте имя папки и путь к ней.
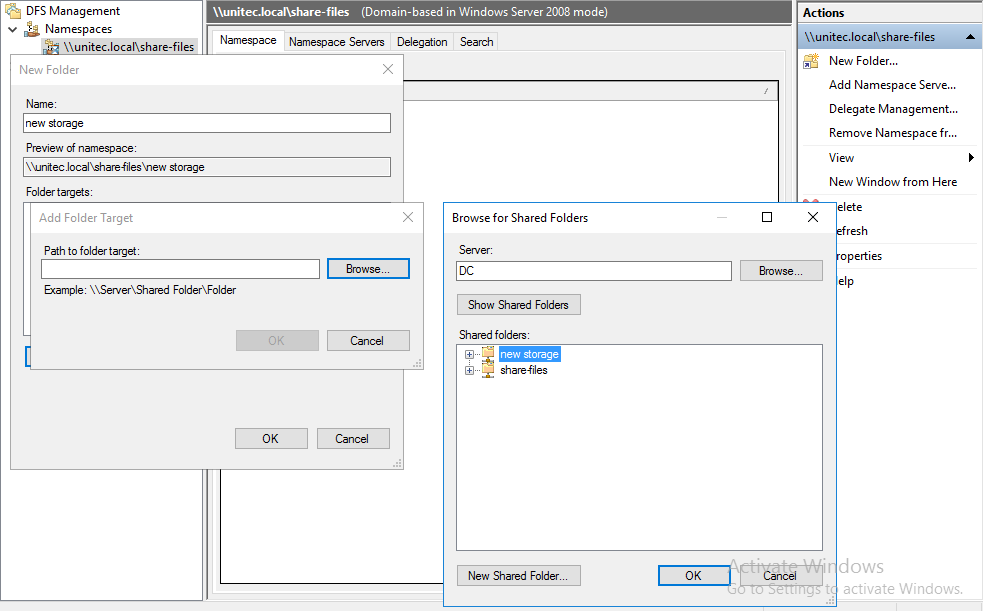
В моем случае у меня 2 разных сетевых папки на разных дисках. Но для пользователей отдела один сетевой ресурс:
\companyname.localshare-files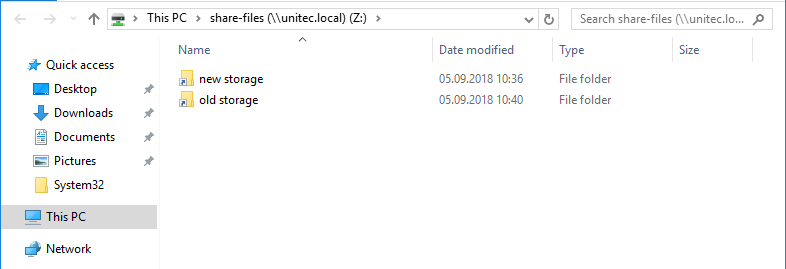
Если в будущем мне понадобится добавить какие-либо сетевые папки для отделов, но при этом не подключать несколько сетевых ресурсов, то достаточно будет создать новый Namespace и подключить к нему нужные папки.
НА ЗАМЕТКУ!
Если после удаления Namespace появилась ошибка и перестали отображаться другие, то нажмите на него
и выберите Remove DFS Namespaces from the display.
Ошибка исчезнет и все остальные Namespace появятся на экране.
Replication DFS (Репликация DFS) мною не настраивалась. Наличие свободных ресурсов всегда болезненный вопрос.
Для второго отдела был создана обычная сетевая папка с правами доступа.
\sharename-filesНастройка квот для сетевых папок в Windows Server 2016
Причины для установки квот на сетевые папки могут быть самые разные. Для меня было целью разделить место на логическом диске D: моего файлового сервера на 2 отдела.
Для установки квот на сетевые папки необходимо установить File Server Resource Manager.
В Server ManagerDashboard выберете > Tools > File Server Resource Manager. Откроется окно управления File Server Resource Manager. Если у вас в компании есть настроенный SMTP server с 25 портом, то вы можете настроить отправку уведомлений о квотах на e-mail администратора. Для этого выберите: File Server Resource Manager > Configure Options…

Для создания своей квоты выберите Quota Management > Quota Templates > Create Quota Templates
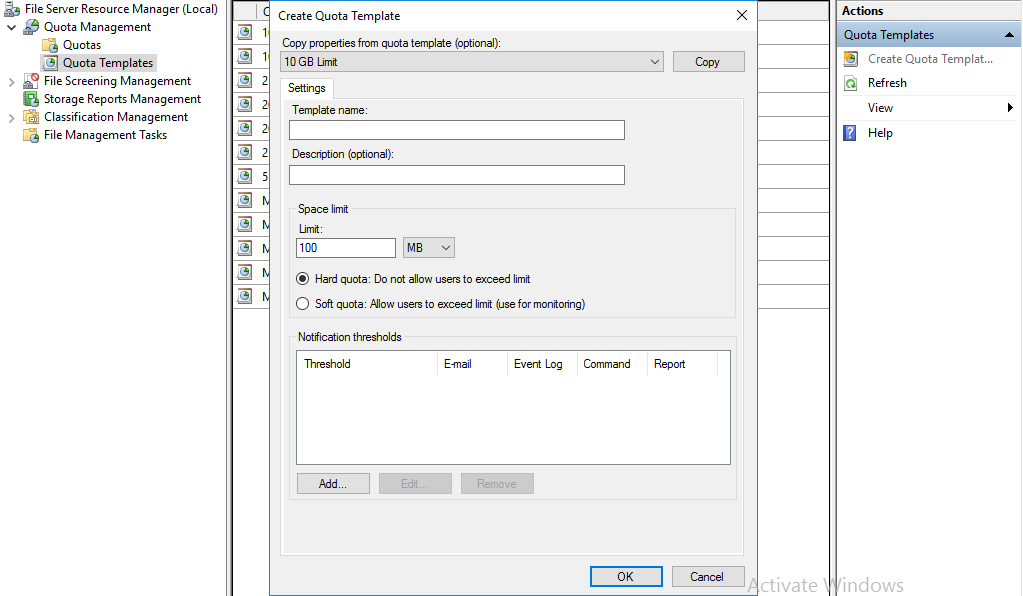
Задаем имя для нашей новой квоты, описание, если нужно, и устанавливаем лимит. Нажимаем OK. Квота создана. Если нажать кнопку ADD, то открывается окно с доп. настройками, в котором можно создать уведомления о действиях с папкой, к которой применена квота, запись уведомлений в журнал и отправки на e-mail администратора.
Создадим квоту Storage и применим ее к папке old storage.
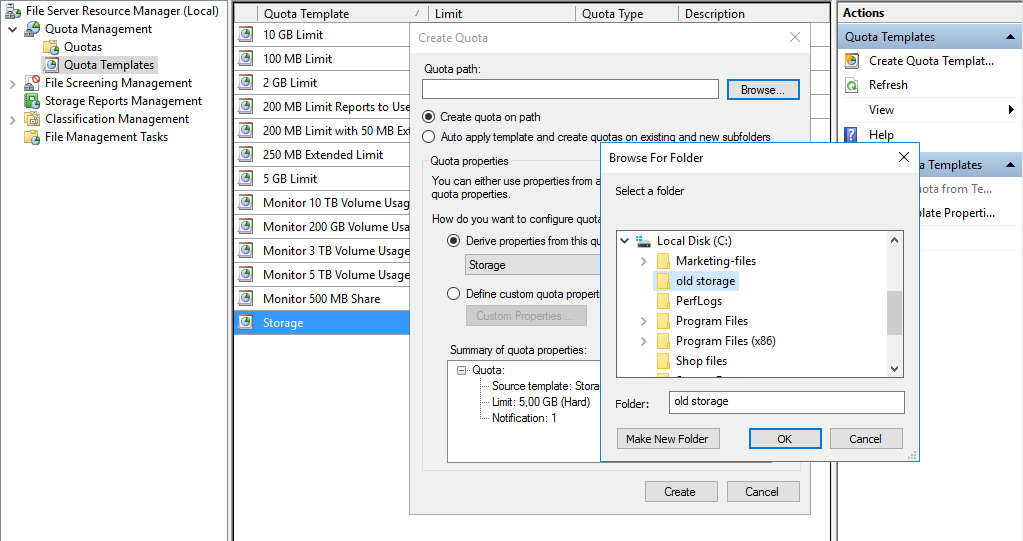
Подключим эту папку на компьютере пользователя, видим результат.

Хочу добавить, что квоты бывают Hard (жесткими) и Soft (мягкими). Мягкие квоты – это квоты, в которых установленный лимит можно превышать при достижении порогового значения. Жесткие квоты – запрещают пользователю превышать установленное пороговое значение лимита. Я использую жесткие квоты, так как хочу закрепить выделенное место на жестком диске за отделами.
На заметку!
Если вы подключаете сетевую папку созданную в Namespace,
то корректного отображения информации об объеме данной сетевой папки не будет.
Обращаю внимание на то, что эта статья описывает конкретный пример. Задачи и решения для каждой компании индивидуальны.
Краткое описание: В данном руководстве рассматривается установка и настройка файлового сервера Windows Server 2016.
 Поддержи автора статьи, просмотри рекламу ↓↓↓
 Поддержи автора статьи, просмотри рекламу
 - Установка роли файлового сервера
- Создание фильтра по типу файла
- Создание теневых копий
Это роль становится актуальна в том случае, когда общая или индивидуальная папка требует повышенного контроля. Для администрирования это:
- Контроль наличия разных типов файлов(к примеру исключение исполняемых файлов, как первый метод борьбы с вирусами);
- Создания теневых копий. Позволяет быстро восстановить копию файла за разные периоды;
- Аудит использования общих файлов. Журнал отметок по удалению, изменению файлов.
Установка роли файлового сервера Windows
После установки Windows Server 2016 данная роль уже присутствует в списке ролей, но для полного функционирования её нужно дополнить.
Диспетчер сервера, добавление роли

Поддержи автора статьи, просмотри рекламу ↓↓↓
Перед началом работы

Тип установки

Выбор сервера для установки

Добавление роли

Поддержи автора статьи, просмотри рекламу ↓↓↓
Подтверждение установки

Процесс установки

Создание фильтра по типу файла
Предоставить общий доступ к папке


Консоль управления

Поддержи автора статьи, просмотри рекламу ↓↓↓
Создать фильтра на основании шаблона


Список фильтров по типу файлов

Попытка записать EXE файл

Создание теневых копий
Консоль управления теневыми копиями

Создать теневые копии

Поддержи автора статьи, просмотри рекламу ↓↓↓
Задать параметры для теневых копий

Создание расписания для теневых копий

Список теневых копий

Восстановление из теневой копии

Поддержи автора статьи, просмотри рекламу ↓↓↓
| title | manager | ms.author | ms.topic | ms.assetid | author | ms.date | description |
|---|---|---|---|---|---|---|---|
|
Deploy Storage Spaces Direct on Windows Server |
femil |
inhenkel |
how-to |
20fee213-8ba5-4cd3-87a6-e77359e82bc0 |
stevenek |
11/16/2021 |
Step-by-step instructions to deploy software-defined storage with Storage Spaces Direct in Windows Server as either hyperconverged infrastructure or converged (also known as disaggregated) infrastructure. |
Deploy Storage Spaces Direct on Windows Server
Applies to: Windows Server 2022, Windows Server 2019, Windows Server 2016
This topic provides step-by-step instructions to deploy Storage Spaces Direct on Windows Server. To deploy Storage Spaces Direct as part of Azure Stack HCI, see What is the deployment process for Azure Stack HCI?
[!Tip]
Looking to acquire hyperconverged infrastructure? Microsoft recommends purchasing a validated hardware/software Azure Stack HCI solution from our partners. These solutions are designed, assembled, and validated against our reference architecture to ensure compatibility and reliability, so you get up and running quickly. To peruse a catalog of hardware/software solutions that work with Azure Stack HCI, see the Azure Stack HCI Catalog.
[!Tip]
You can use Hyper-V virtual machines, including in Microsoft Azure, to evaluate Storage Spaces Direct without hardware. You may also want to review the handy Windows Server rapid lab deployment scripts, which we use for training purposes.
Before you start
Review the Storage Spaces Direct hardware requirements and skim this document to familiarize yourself with the overall approach and important notes associated with some steps.
Gather the following information:
-
Deployment option. Storage Spaces Direct supports two deployment options: hyper-converged and converged, also known as disaggregated. Familiarize yourself with the advantages of each to decide which is right for you. Steps 1-3 below apply to both deployment options. Step 4 is only needed for converged deployment.
-
Server names. Get familiar with your organization’s naming policies for computers, files, paths, and other resources. You’ll need to provision several servers, each with unique names.
-
Domain name. Get familiar with your organization’s policies for domain naming and domain joining. You’ll be joining the servers to your domain, and you’ll need to specify the domain name.
-
RDMA networking. There are two types of RDMA protocols: iWarp and RoCE. Note which one your network adapters use, and if RoCE, also note the version (v1 or v2). For RoCE, also note the model of your top-of-rack switch.
-
VLAN ID. Note the VLAN ID to be used for management OS network adapters on the servers, if any. You should be able to obtain this from your network administrator.
Step 1: Deploy Windows Server
Step 1.1: Install the operating system
The first step is to install Windows Server on every server that will be in the cluster. Storage Spaces Direct requires Windows Server Datacenter Edition. You can use the Server Core installation option, or Server with Desktop Experience.
When you install Windows Server using the Setup wizard, you can choose between Windows Server (referring to Server Core) and Windows Server (Server with Desktop Experience), which is the equivalent of the Full installation option available in Windows Server 2012 R2. If you don’t choose, you’ll get the Server Core installation option. For more information, see Install Server Core.
Step 1.2: Connect to the servers
This guide focuses the Server Core installation option and deploying/managing remotely from a separate management system, which must have:
- A version of Windows Server or Windows 10 at least as new as the servers it’s managing, and with the latest updates
- Network connectivity to the servers it’s managing
- Joined to the same domain or a fully trusted domain
- Remote Server Administration Tools (RSAT) and PowerShell modules for Hyper-V and Failover Clustering. RSAT tools and PowerShell modules are available on Windows Server and can be installed without installing other features. You can also install the Remote Server Administration Tools on a Windows 10 management PC.
On the Management system install the Failover Cluster and Hyper-V management tools. This can be done through Server Manager using the Add Roles and Features wizard. On the Features page, select Remote Server Administration Tools, and then select the tools to install.
Enter the PS session and use either the server name or the IP address of the node you want to connect to. You’ll be prompted for a password after you execute this command, enter the administrator password you specified when setting up Windows.
Enter-PSSession -ComputerName <myComputerName> -Credential LocalHostAdministrator
Here’s an example of doing the same thing in a way that is more useful in scripts, in case you need to do this more than once:
$myServer1 = "myServer-1"
$user = "$myServer1Administrator"

Enter-PSSession -ComputerName $myServer1 -Credential $user
[!TIP]
If you’re deploying remotely from a management system, you might get an error like WinRM cannot process the request. To fix this, use Windows PowerShell to add each server to the Trusted Hosts list on your management computer:
Set-Item WSMAN:LocalhostClientTrustedHosts -Value Server01 -ForceNote: the trusted hosts list supports wildcards, like
Server*.To view your Trusted Hosts list, type
Get-Item WSMAN:LocalhostClientTrustedHosts.To empty the list, type
Clear-Item WSMAN:LocalhostClientTrustedHost.
Step 1.3: Join the domain and add domain accounts
So far you’ve configured the individual servers with the local administrator account, <ComputerName>Administrator.
To manage Storage Spaces Direct, you’ll need to join the servers to a domain and use an Active Directory Domain Services domain account that is in the Administrators group on every server.
From the management system, open a PowerShell console with Administrator privileges. Use Enter-PSSession to connect to each server and run the following cmdlet, substituting your own computer name, domain name, and domain credentials:
Add-Computer -NewName "Server01" -DomainName "contoso.com" -Credential "CONTOSOUser" -Restart -Force
If your storage administrator account isn’t a member of the Domain Admins group, add your storage administrator account to the local Administrators group on each node — or better yet, add the group you use for storage administrators. You can use the following command (or write a Windows PowerShell function to do so — see Use PowerShell to Add Domain Users to a Local Group for more info):
Net localgroup Administrators <DomainAccount> /add
Step 1.4: Install roles and features
The next step is to install server roles on every server. You can do this by using Windows Admin Center, Server Manager), or PowerShell. Here are the roles to install:
- Failover Clustering
- Hyper-V
- File Server (if you want to host any file shares, such as for a converged deployment)
- Data-Center-Bridging (if you’re using RoCEv2 instead of iWARP network adapters)
- RSAT-Clustering-PowerShell
- Hyper-V-PowerShell
To install via PowerShell, use the Install-WindowsFeature cmdlet. You can use it on a single server like this:
Install-WindowsFeature -Name "Hyper-V", "Failover-Clustering", "Data-Center-Bridging", "RSAT-Clustering-PowerShell", "Hyper-V-PowerShell", "FS-FileServer"
To run the command on all servers in the cluster as the same time, use this little bit of script, modifying the list of variables at the beginning of the script to fit your environment.
# Fill in these variables with your values
$ServerList = "Server01", "Server02", "Server03", "Server04"
$FeatureList = "Hyper-V", "Failover-Clustering", "Data-Center-Bridging", "RSAT-Clustering-PowerShell", "Hyper-V-PowerShell", "FS-FileServer"

# This part runs the Install-WindowsFeature cmdlet on all servers in $ServerList, passing the list of features into the scriptblock with the "Using" scope modifier so you don't have to hard-code them here.
Invoke-Command ($ServerList) {
    Install-WindowsFeature -Name $Using:Featurelist
}
Step 2: Configure the network
If you’re deploying Storage Spaces Direct inside virtual machines, skip this section.
Storage Spaces Direct requires high-bandwidth, low-latency networking between servers in the cluster. At least 10 GbE networking is required and remote direct memory access (RDMA) is recommended. You can use either iWARP or RoCE as long as it has the Windows Server logo that matches your operating system version, but iWARP is usually easier to set up.
[!Important]
Depending on your networking equipment, and especially with RoCE v2, some configuration of the top-of-rack switch may be required. Correct switch configuration is important to ensure reliability and performance of Storage Spaces Direct.
Windows Server 2016 introduced switch-embedded teaming (SET) within the Hyper-V virtual switch. This allows the same physical NIC ports to be used for all network traffic while using RDMA, reducing the number of physical NIC ports required. Switch-embedded teaming is recommended for Storage Spaces Direct.
Switched or switchless node interconnects
- Switched: Network switches must be properly configured to handle the bandwidth and networking type. If using RDMA that implements the RoCE protocol, network device and switch configuration is even more important.
- Switchless: Nodes can be interconnected using direct connections, avoiding using a switch. It is required that every node have a direct connection with every other node of the cluster.
For instructions to set up networking for Storage Spaces Direct, see the Windows Server 2016 and 2019 RDMA Deployment Guide.
Step 3: Configure Storage Spaces Direct
The following steps are done on a management system that is the same version as the servers being configured. The following steps should NOT be run remotely using a PowerShell session, but instead run in a local PowerShell session on the management system, with administrative permissions.
Step 3.1: Clean drives
Before you enable Storage Spaces Direct, ensure your drives are empty: no old partitions or other data. Run the following script, substituting your computer names, to remove all any old partitions or other data.
[!Warning]
This script will permanently remove any data on any drives other than the operating system boot drive!
# Fill in these variables with your values
$ServerList = "Server01", "Server02", "Server03", "Server04"

Invoke-Command ($ServerList) {
    Update-StorageProviderCache
    Get-StoragePool | ? IsPrimordial -eq $false | Set-StoragePool -IsReadOnly:$false -ErrorAction SilentlyContinue
    Get-StoragePool | ? IsPrimordial -eq $false | Get-VirtualDisk | Remove-VirtualDisk -Confirm:$false -ErrorAction SilentlyContinue
    Get-StoragePool | ? IsPrimordial -eq $false | Remove-StoragePool -Confirm:$false -ErrorAction SilentlyContinue
    Get-PhysicalDisk | Reset-PhysicalDisk -ErrorAction SilentlyContinue
    Get-Disk | ? Number -ne $null | ? IsBoot -ne $true | ? IsSystem -ne $true | ? PartitionStyle -ne RAW | % {
        $_ | Set-Disk -isoffline:$false
        $_ | Set-Disk -isreadonly:$false
        $_ | Clear-Disk -RemoveData -RemoveOEM -Confirm:$false
        $_ | Set-Disk -isreadonly:$true
        $_ | Set-Disk -isoffline:$true
    }
    Get-Disk | Where Number -Ne $Null | Where IsBoot -Ne $True | Where IsSystem -Ne $True | Where PartitionStyle -Eq RAW | Group -NoElement -Property FriendlyName
} | Sort -Property PsComputerName, Count
The output will look like this, where Count is the number of drives of each model in each server:
Count Name                          PSComputerName
----- ----                          --------------
4     ATA SSDSC2BA800G4n            Server01
10    ATA ST4000NM0033              Server01
4     ATA SSDSC2BA800G4n            Server02
10    ATA ST4000NM0033              Server02
4     ATA SSDSC2BA800G4n            Server03
10    ATA ST4000NM0033              Server03
4     ATA SSDSC2BA800G4n            Server04
10    ATA ST4000NM0033              Server04
Step 3.2: Validate the cluster
In this step, you’ll run the cluster validation tool to ensure that the server nodes are configured correctly to create a cluster using Storage Spaces Direct. When cluster validation (Test-Cluster) is run before the cluster is created, it runs the tests that verify that the configuration appears suitable to successfully function as a failover cluster. The example directly below uses the -Include parameter, and then the specific categories of tests are specified. This ensures that the Storage Spaces Direct specific tests are included in the validation.
Use the following PowerShell command to validate a set of servers for use as a Storage Spaces Direct cluster.
Test-Cluster -Node <MachineName1, MachineName2, MachineName3, MachineName4> -Include "Storage Spaces Direct", "Inventory", "Network", "System Configuration"
Step 3.3: Create the cluster
In this step, you’ll create a cluster with the nodes that you have validated for cluster creation in the preceding step using the following PowerShell cmdlet.
When creating the cluster, you’ll get a warning that states — «There were issues while creating the clustered role that may prevent it from starting. For more information, view the report file below.» You can safely ignore this warning. It’s due to no disks being available for the cluster quorum. Its recommended that a file share witness or cloud witness is configured after creating the cluster.
[!Note]
If the servers are using static IP addresses, modify the following command to reflect the static IP address by adding the following parameter and specifying the IP address:-StaticAddress <X.X.X.X>.
In the following command the ClusterName placeholder should be replaced with a netbios name that is unique and 15 characters or less.New-Cluster -Name <ClusterName> -Node <MachineName1,MachineName2,MachineName3,MachineName4> -NoStorage
After the cluster is created, it can take time for DNS entry for the cluster name to be replicated. The time is dependent on the environment and DNS replication configuration. If resolving the cluster isn’t successful, in most cases you can be successful with using the machine name of a node that is an active member of the cluster may be used instead of the cluster name.
Step 3.4: Configure a cluster witness
We recommend that you configure a witness for the cluster, so clusters with three or more servers can withstand two servers failing or being offline. A two-server deployment requires a cluster witness, otherwise either server going offline causes the other to become unavailable as well. With these systems, you can use a file share as a witness, or use cloud witness.
For more info, see the following topics:
- Configure and manage quorum
- Deploy a Cloud Witness for a Failover Cluster
Step 3.5: Enable Storage Spaces Direct
After creating the cluster, use the Enable-ClusterStorageSpacesDirect PowerShell cmdlet, which will put the storage system into the Storage Spaces Direct mode and do the following automatically:
-
Create a pool: Creates a single large pool that has a name like «S2D on Cluster1».
-
Configures the Storage Spaces Direct caches: If there is more than one media (drive) type available for Storage Spaces Direct use, it enables the fastest as cache devices (read and write in most cases)
-
Tiers: Creates two tiers as default tiers. One is called «Capacity» and the other called «Performance». The cmdlet analyzes the devices and configures each tier with the mix of device types and resiliency.
From the management system, in a PowerShell command windows opened with Administrator privileges, initiate the following command. The cluster name is the name of the cluster that you created in the previous steps. If this command is run locally on one of the nodes, the -CimSession parameter is not necessary.
Enable-ClusterStorageSpacesDirect -CimSession <ClusterName>
To enable Storage Spaces Direct using the above command, you can also use the node name instead of the cluster name. Using the node name may be more reliable due to DNS replication delays that may occur with the newly created cluster name.
When this command is finished, which may take several minutes, the system will be ready for volumes to be created.
Step 3.6: Create volumes
We recommend using the New-Volume cmdlet as it provides the fastest and most straightforward experience. This single cmdlet automatically creates the virtual disk, partitions and formats it, creates the volume with matching name, and adds it to cluster shared volumes – all in one easy step.
For more information, check out Creating volumes in Storage Spaces Direct.
Step 3.7: Optionally enable the CSV cache
You can optionally enable the cluster shared volume (CSV) cache to use system memory (RAM) as a write-through block-level cache of read operations that aren’t already cached by the Windows cache manager. This can improve performance for applications such as Hyper-V. The CSV cache can boost the performance of read requests and is also useful for Scale-Out File Server scenarios.
Enabling the CSV cache reduces the amount of memory available to run VMs on a hyper-converged cluster, so you’ll have to balance storage performance with memory available to VHDs.
To set the size of the CSV cache, open a PowerShell session on the management system with an account that has administrator permissions on the storage cluster, and then use this script, changing the $ClusterName and $CSVCacheSize variables as appropriate (this example sets a 2 GB CSV cache per server):
$ClusterName = "StorageSpacesDirect1"
$CSVCacheSize = 2048 #Size in MB

Write-Output "Setting the CSV cache..."
(Get-Cluster $ClusterName).BlockCacheSize = $CSVCacheSize

$CSVCurrentCacheSize = (Get-Cluster $ClusterName).BlockCacheSize
Write-Output "$ClusterName CSV cache size: $CSVCurrentCacheSize MB"
For more info, see Using the CSV in-memory read cache.
Step 3.8: Deploy virtual machines for hyper-converged deployments
If you’re deploying a hyper-converged cluster, the last step is to provision virtual machines on the Storage Spaces Direct cluster.
The virtual machine’s files should be stored on the systems CSV namespace (example: c:ClusterStorageVolume1) just like clustered VMs on failover clusters.
You can use in-box tools or other tools to manage the storage and virtual machines, such as System Center Virtual Machine Manager.
Step 4: Deploy Scale-Out File Server for converged solutions
If you’re deploying a converged solution, the next step is to create a Scale-Out File Server instance and setup some file shares. If you’re deploying a hyper-converged cluster — you’re finished and don’t need this section.
Step 4.1: Create the Scale-Out File Server role
The next step in setting up the cluster services for your file server is creating the clustered file server role, which is when you create the Scale-Out File Server instance on which your continuously available file shares are hosted.
To create a Scale-Out File Server role by using Server Manager
-
In Failover Cluster Manager, select the cluster, go to Roles, and then click Configure Role….
The High Availability Wizard appears. -
On the Select Role page, click File Server.
-
On the File Server Type page, click Scale-Out File Server for application data.
-
On the Client Access Point page, type a name for the Scale-Out File Server.
-
Verify that the role was successfully set up by going to Roles and confirming that the Status column shows Running next to the clustered file server role you created, as shown in Figure 1.

Figure 1 Failover Cluster Manager showing the Scale-Out File Server with the Running status

[!NOTE]
After creating the clustered role, there might be some network propagation delays that could prevent you from creating file shares on it for a few minutes, or potentially longer.
To create a Scale-Out File Server role by using Windows PowerShell
In a Windows PowerShell session that’s connected to the file server cluster, enter the following commands to create the Scale-Out File Server role, changing FSCLUSTER to match the name of your cluster, and SOFS to match the name you want to give the Scale-Out File Server role:
Add-ClusterScaleOutFileServerRole -Name SOFS -Cluster FSCLUSTER
[!NOTE]
After creating the clustered role, there might be some network propagation delays that could prevent you from creating file shares on it for a few minutes, or potentially longer. If the SOFS role fails immediately and won’t start, it might be because the cluster’s computer object doesn’t have permission to create a computer account for the SOFS role. For help with that, see this blog post: Scale-Out File Server Role Fails To Start With Event IDs 1205, 1069, and 1194.
Step 4.2: Create file shares
After you’ve created your virtual disks and added them to CSVs, it’s time to create file shares on them — one file share per CSV per virtual disk. System Center Virtual Machine Manager (VMM) is probably the handiest way to do this because it handles permissions for you, but if you don’t have it in your environment, you can use Windows PowerShell to partially automate the deployment.
Use the scripts included in the SMB Share Configuration for Hyper-V Workloads script, which partially automates the process of creating groups and shares. It’s written for Hyper-V workloads, so if you’re deploying other workloads, you might have to modify the settings or perform additional steps after you create the shares. For example, if you’re using Microsoft SQL Server, the SQL Server service account must be granted full control on the share and the file system.
[!NOTE]
You’ll have to update the group membership when you add cluster nodes unless you use System Center Virtual Machine Manager to create your shares.
To create file shares by using PowerShell scripts, do the following:
-
Download the scripts included in SMB Share Configuration for Hyper-V Workloads to one of the nodes of the file server cluster.
-
Open a Windows PowerShell session with Domain Administrator credentials on the management system, and then use the following script to create an Active Directory group for the Hyper-V computer objects, changing the values for the variables as appropriate for your environment:
# Replace the values of these variables
$HyperVClusterName = "Compute01"
$HyperVObjectADGroupSamName = "Hyper-VServerComputerAccounts" <#No spaces#>
$ScriptFolder = "C:ScriptsSetupSMBSharesWithHyperV"

# Start of script itself
CD $ScriptFolder
.ADGroupSetup.ps1 -HyperVObjectADGroupSamName $HyperVObjectADGroupSamName -HyperVClusterName $HyperVClusterName
-
Open a Windows PowerShell session with Administrator credentials on one of the storage nodes, and then use the following script to create shares for each CSV and grant administrative permissions for the shares to the Domain Admins group and the compute cluster.
# Replace the values of these variables
$StorageClusterName = "StorageSpacesDirect1"
$HyperVObjectADGroupSamName = "Hyper-VServerComputerAccounts" <#No spaces#>
$SOFSName = "SOFS"
$SharePrefix = "Share"
$ScriptFolder = "C:ScriptsSetupSMBSharesWithHyperV"

# Start of the script itself
CD $ScriptFolder
Get-ClusterSharedVolume -Cluster $StorageClusterName | ForEach-Object {
    $ShareName = $SharePrefix + $_.SharedVolumeInfo.friendlyvolumename.trimstart("C:ClusterStorageVolume")
    Write-host "Creating share $ShareName on "$_.name "on Volume: " $_.SharedVolumeInfo.friendlyvolumename
    .FileShareSetup.ps1 -HyperVClusterName $StorageClusterName -CSVVolumeNumber $_.SharedVolumeInfo.friendlyvolumename.trimstart("C:ClusterStorageVolume") -ScaleOutFSName $SOFSName -ShareName $ShareName -HyperVObjectADGroupSamName $HyperVObjectADGroupSamName
}
Step 4.3 Enable Kerberos constrained delegation
To setup Kerberos constrained delegation for remote scenario management and increased Live Migration security, from one of the storage cluster nodes, use the KCDSetup.ps1 script included in SMB Share Configuration for Hyper-V Workloads. Here’s a little wrapper for the script:
$HyperVClusterName = "Compute01"
$ScaleOutFSName = "SOFS"
$ScriptFolder = "C:ScriptsSetupSMBSharesWithHyperV"

CD $ScriptFolder
.KCDSetup.ps1 -HyperVClusterName $HyperVClusterName -ScaleOutFSName $ScaleOutFSName -EnableLM
Additional References
- Storage Spaces Direct overview
- Understand the cache in Storage Spaces Direct
- Planning volumes in Storage Spaces Direct
- Storage Spaces Fault Tolerance
- Storage Spaces Direct Hardware Requirements
- To RDMA, or not to RDMA – that is the question (TechNet blog)
| title | manager | ms.author | ms.topic | ms.assetid | author | ms.date | description |
|---|---|---|---|---|---|---|---|
|
Deploy Storage Spaces Direct on Windows Server |
femil |
inhenkel |
how-to |
20fee213-8ba5-4cd3-87a6-e77359e82bc0 |
stevenek |
11/16/2021 |
Step-by-step instructions to deploy software-defined storage with Storage Spaces Direct in Windows Server as either hyperconverged infrastructure or converged (also known as disaggregated) infrastructure. |
Deploy Storage Spaces Direct on Windows Server
Applies to: Windows Server 2022, Windows Server 2019, Windows Server 2016
This topic provides step-by-step instructions to deploy Storage Spaces Direct on Windows Server. To deploy Storage Spaces Direct as part of Azure Stack HCI, see What is the deployment process for Azure Stack HCI?
[!Tip]
Looking to acquire hyperconverged infrastructure? Microsoft recommends purchasing a validated hardware/software Azure Stack HCI solution from our partners. These solutions are designed, assembled, and validated against our reference architecture to ensure compatibility and reliability, so you get up and running quickly. To peruse a catalog of hardware/software solutions that work with Azure Stack HCI, see the Azure Stack HCI Catalog.
[!Tip]
You can use Hyper-V virtual machines, including in Microsoft Azure, to evaluate Storage Spaces Direct without hardware. You may also want to review the handy Windows Server rapid lab deployment scripts, which we use for training purposes.
Before you start
Review the Storage Spaces Direct hardware requirements and skim this document to familiarize yourself with the overall approach and important notes associated with some steps.
Gather the following information:
-
Deployment option. Storage Spaces Direct supports two deployment options: hyper-converged and converged, also known as disaggregated. Familiarize yourself with the advantages of each to decide which is right for you. Steps 1-3 below apply to both deployment options. Step 4 is only needed for converged deployment.
-
Server names. Get familiar with your organization’s naming policies for computers, files, paths, and other resources. You’ll need to provision several servers, each with unique names.
-
Domain name. Get familiar with your organization’s policies for domain naming and domain joining. You’ll be joining the servers to your domain, and you’ll need to specify the domain name.
-
RDMA networking. There are two types of RDMA protocols: iWarp and RoCE. Note which one your network adapters use, and if RoCE, also note the version (v1 or v2). For RoCE, also note the model of your top-of-rack switch.
-
VLAN ID. Note the VLAN ID to be used for management OS network adapters on the servers, if any. You should be able to obtain this from your network administrator.
Step 1: Deploy Windows Server
Step 1.1: Install the operating system
The first step is to install Windows Server on every server that will be in the cluster. Storage Spaces Direct requires Windows Server Datacenter Edition. You can use the Server Core installation option, or Server with Desktop Experience.
When you install Windows Server using the Setup wizard, you can choose between Windows Server (referring to Server Core) and Windows Server (Server with Desktop Experience), which is the equivalent of the Full installation option available in Windows Server 2012 R2. If you don’t choose, you’ll get the Server Core installation option. For more information, see Install Server Core.
Step 1.2: Connect to the servers
This guide focuses the Server Core installation option and deploying/managing remotely from a separate management system, which must have:
- A version of Windows Server or Windows 10 at least as new as the servers it’s managing, and with the latest updates
- Network connectivity to the servers it’s managing
- Joined to the same domain or a fully trusted domain
- Remote Server Administration Tools (RSAT) and PowerShell modules for Hyper-V and Failover Clustering. RSAT tools and PowerShell modules are available on Windows Server and can be installed without installing other features. You can also install the Remote Server Administration Tools on a Windows 10 management PC.
On the Management system install the Failover Cluster and Hyper-V management tools. This can be done through Server Manager using the Add Roles and Features wizard. On the Features page, select Remote Server Administration Tools, and then select the tools to install.
Enter the PS session and use either the server name or the IP address of the node you want to connect to. You’ll be prompted for a password after you execute this command, enter the administrator password you specified when setting up Windows.
Enter-PSSession -ComputerName <myComputerName> -Credential LocalHostAdministrator
Here’s an example of doing the same thing in a way that is more useful in scripts, in case you need to do this more than once:
$myServer1 = "myServer-1"
$user = "$myServer1Administrator"

Enter-PSSession -ComputerName $myServer1 -Credential $user
[!TIP]
If you’re deploying remotely from a management system, you might get an error like WinRM cannot process the request. To fix this, use Windows PowerShell to add each server to the Trusted Hosts list on your management computer:
Set-Item WSMAN:LocalhostClientTrustedHosts -Value Server01 -ForceNote: the trusted hosts list supports wildcards, like
Server*.To view your Trusted Hosts list, type
Get-Item WSMAN:LocalhostClientTrustedHosts.To empty the list, type
Clear-Item WSMAN:LocalhostClientTrustedHost.
Step 1.3: Join the domain and add domain accounts
So far you’ve configured the individual servers with the local administrator account, <ComputerName>Administrator.
To manage Storage Spaces Direct, you’ll need to join the servers to a domain and use an Active Directory Domain Services domain account that is in the Administrators group on every server.
From the management system, open a PowerShell console with Administrator privileges. Use Enter-PSSession to connect to each server and run the following cmdlet, substituting your own computer name, domain name, and domain credentials:
Add-Computer -NewName "Server01" -DomainName "contoso.com" -Credential "CONTOSOUser" -Restart -Force
If your storage administrator account isn’t a member of the Domain Admins group, add your storage administrator account to the local Administrators group on each node — or better yet, add the group you use for storage administrators. You can use the following command (or write a Windows PowerShell function to do so — see Use PowerShell to Add Domain Users to a Local Group for more info):
Net localgroup Administrators <DomainAccount> /add
Step 1.4: Install roles and features
The next step is to install server roles on every server. You can do this by using Windows Admin Center, Server Manager), or PowerShell. Here are the roles to install:
- Failover Clustering
- Hyper-V
- File Server (if you want to host any file shares, such as for a converged deployment)
- Data-Center-Bridging (if you’re using RoCEv2 instead of iWARP network adapters)
- RSAT-Clustering-PowerShell
- Hyper-V-PowerShell
To install via PowerShell, use the Install-WindowsFeature cmdlet. You can use it on a single server like this:
Install-WindowsFeature -Name "Hyper-V", "Failover-Clustering", "Data-Center-Bridging", "RSAT-Clustering-PowerShell", "Hyper-V-PowerShell", "FS-FileServer"
To run the command on all servers in the cluster as the same time, use this little bit of script, modifying the list of variables at the beginning of the script to fit your environment.
# Fill in these variables with your values
$ServerList = "Server01", "Server02", "Server03", "Server04"
$FeatureList = "Hyper-V", "Failover-Clustering", "Data-Center-Bridging", "RSAT-Clustering-PowerShell", "Hyper-V-PowerShell", "FS-FileServer"

# This part runs the Install-WindowsFeature cmdlet on all servers in $ServerList, passing the list of features into the scriptblock with the "Using" scope modifier so you don't have to hard-code them here.
Invoke-Command ($ServerList) {
    Install-WindowsFeature -Name $Using:Featurelist
}
Step 2: Configure the network
If you’re deploying Storage Spaces Direct inside virtual machines, skip this section.
Storage Spaces Direct requires high-bandwidth, low-latency networking between servers in the cluster. At least 10 GbE networking is required and remote direct memory access (RDMA) is recommended. You can use either iWARP or RoCE as long as it has the Windows Server logo that matches your operating system version, but iWARP is usually easier to set up.
[!Important]
Depending on your networking equipment, and especially with RoCE v2, some configuration of the top-of-rack switch may be required. Correct switch configuration is important to ensure reliability and performance of Storage Spaces Direct.
Windows Server 2016 introduced switch-embedded teaming (SET) within the Hyper-V virtual switch. This allows the same physical NIC ports to be used for all network traffic while using RDMA, reducing the number of physical NIC ports required. Switch-embedded teaming is recommended for Storage Spaces Direct.
Switched or switchless node interconnects
- Switched: Network switches must be properly configured to handle the bandwidth and networking type. If using RDMA that implements the RoCE protocol, network device and switch configuration is even more important.
- Switchless: Nodes can be interconnected using direct connections, avoiding using a switch. It is required that every node have a direct connection with every other node of the cluster.
For instructions to set up networking for Storage Spaces Direct, see the Windows Server 2016 and 2019 RDMA Deployment Guide.
Step 3: Configure Storage Spaces Direct
The following steps are done on a management system that is the same version as the servers being configured. The following steps should NOT be run remotely using a PowerShell session, but instead run in a local PowerShell session on the management system, with administrative permissions.
Step 3.1: Clean drives
Before you enable Storage Spaces Direct, ensure your drives are empty: no old partitions or other data. Run the following script, substituting your computer names, to remove all any old partitions or other data.
[!Warning]
This script will permanently remove any data on any drives other than the operating system boot drive!
# Fill in these variables with your values
$ServerList = "Server01", "Server02", "Server03", "Server04"

Invoke-Command ($ServerList) {
    Update-StorageProviderCache
    Get-StoragePool | ? IsPrimordial -eq $false | Set-StoragePool -IsReadOnly:$false -ErrorAction SilentlyContinue
    Get-StoragePool | ? IsPrimordial -eq $false | Get-VirtualDisk | Remove-VirtualDisk -Confirm:$false -ErrorAction SilentlyContinue
    Get-StoragePool | ? IsPrimordial -eq $false | Remove-StoragePool -Confirm:$false -ErrorAction SilentlyContinue
    Get-PhysicalDisk | Reset-PhysicalDisk -ErrorAction SilentlyContinue
    Get-Disk | ? Number -ne $null | ? IsBoot -ne $true | ? IsSystem -ne $true | ? PartitionStyle -ne RAW | % {
        $_ | Set-Disk -isoffline:$false
        $_ | Set-Disk -isreadonly:$false
        $_ | Clear-Disk -RemoveData -RemoveOEM -Confirm:$false
        $_ | Set-Disk -isreadonly:$true
        $_ | Set-Disk -isoffline:$true
    }
    Get-Disk | Where Number -Ne $Null | Where IsBoot -Ne $True | Where IsSystem -Ne $True | Where PartitionStyle -Eq RAW | Group -NoElement -Property FriendlyName
} | Sort -Property PsComputerName, Count
The output will look like this, where Count is the number of drives of each model in each server:
Count Name                          PSComputerName
----- ----                          --------------
4     ATA SSDSC2BA800G4n            Server01
10    ATA ST4000NM0033              Server01
4     ATA SSDSC2BA800G4n            Server02
10    ATA ST4000NM0033              Server02
4     ATA SSDSC2BA800G4n            Server03
10    ATA ST4000NM0033              Server03
4     ATA SSDSC2BA800G4n            Server04
10    ATA ST4000NM0033              Server04
Step 3.2: Validate the cluster
In this step, you’ll run the cluster validation tool to ensure that the server nodes are configured correctly to create a cluster using Storage Spaces Direct. When cluster validation (Test-Cluster) is run before the cluster is created, it runs the tests that verify that the configuration appears suitable to successfully function as a failover cluster. The example directly below uses the -Include parameter, and then the specific categories of tests are specified. This ensures that the Storage Spaces Direct specific tests are included in the validation.
Use the following PowerShell command to validate a set of servers for use as a Storage Spaces Direct cluster.
Test-Cluster -Node <MachineName1, MachineName2, MachineName3, MachineName4> -Include "Storage Spaces Direct", "Inventory", "Network", "System Configuration"
Step 3.3: Create the cluster
In this step, you’ll create a cluster with the nodes that you have validated for cluster creation in the preceding step using the following PowerShell cmdlet.
When creating the cluster, you’ll get a warning that states — «There were issues while creating the clustered role that may prevent it from starting. For more information, view the report file below.» You can safely ignore this warning. It’s due to no disks being available for the cluster quorum. Its recommended that a file share witness or cloud witness is configured after creating the cluster.
[!Note]
If the servers are using static IP addresses, modify the following command to reflect the static IP address by adding the following parameter and specifying the IP address:-StaticAddress <X.X.X.X>.
In the following command the ClusterName placeholder should be replaced with a netbios name that is unique and 15 characters or less.New-Cluster -Name <ClusterName> -Node <MachineName1,MachineName2,MachineName3,MachineName4> -NoStorage
After the cluster is created, it can take time for DNS entry for the cluster name to be replicated. The time is dependent on the environment and DNS replication configuration. If resolving the cluster isn’t successful, in most cases you can be successful with using the machine name of a node that is an active member of the cluster may be used instead of the cluster name.
Step 3.4: Configure a cluster witness
We recommend that you configure a witness for the cluster, so clusters with three or more servers can withstand two servers failing or being offline. A two-server deployment requires a cluster witness, otherwise either server going offline causes the other to become unavailable as well. With these systems, you can use a file share as a witness, or use cloud witness.
For more info, see the following topics:
- Configure and manage quorum
- Deploy a Cloud Witness for a Failover Cluster
Step 3.5: Enable Storage Spaces Direct
After creating the cluster, use the Enable-ClusterStorageSpacesDirect PowerShell cmdlet, which will put the storage system into the Storage Spaces Direct mode and do the following automatically:
-
Create a pool: Creates a single large pool that has a name like «S2D on Cluster1».
-
Configures the Storage Spaces Direct caches: If there is more than one media (drive) type available for Storage Spaces Direct use, it enables the fastest as cache devices (read and write in most cases)
-
Tiers: Creates two tiers as default tiers. One is called «Capacity» and the other called «Performance». The cmdlet analyzes the devices and configures each tier with the mix of device types and resiliency.
From the management system, in a PowerShell command windows opened with Administrator privileges, initiate the following command. The cluster name is the name of the cluster that you created in the previous steps. If this command is run locally on one of the nodes, the -CimSession parameter is not necessary.
Enable-ClusterStorageSpacesDirect -CimSession <ClusterName>
To enable Storage Spaces Direct using the above command, you can also use the node name instead of the cluster name. Using the node name may be more reliable due to DNS replication delays that may occur with the newly created cluster name.
When this command is finished, which may take several minutes, the system will be ready for volumes to be created.
Step 3.6: Create volumes
We recommend using the New-Volume cmdlet as it provides the fastest and most straightforward experience. This single cmdlet automatically creates the virtual disk, partitions and formats it, creates the volume with matching name, and adds it to cluster shared volumes – all in one easy step.
For more information, check out Creating volumes in Storage Spaces Direct.
Step 3.7: Optionally enable the CSV cache
You can optionally enable the cluster shared volume (CSV) cache to use system memory (RAM) as a write-through block-level cache of read operations that aren’t already cached by the Windows cache manager. This can improve performance for applications such as Hyper-V. The CSV cache can boost the performance of read requests and is also useful for Scale-Out File Server scenarios.
Enabling the CSV cache reduces the amount of memory available to run VMs on a hyper-converged cluster, so you’ll have to balance storage performance with memory available to VHDs.
To set the size of the CSV cache, open a PowerShell session on the management system with an account that has administrator permissions on the storage cluster, and then use this script, changing the $ClusterName and $CSVCacheSize variables as appropriate (this example sets a 2 GB CSV cache per server):
$ClusterName = "StorageSpacesDirect1"
$CSVCacheSize = 2048 #Size in MB

Write-Output "Setting the CSV cache..."
(Get-Cluster $ClusterName).BlockCacheSize = $CSVCacheSize

$CSVCurrentCacheSize = (Get-Cluster $ClusterName).BlockCacheSize
Write-Output "$ClusterName CSV cache size: $CSVCurrentCacheSize MB"
For more info, see Using the CSV in-memory read cache.
Step 3.8: Deploy virtual machines for hyper-converged deployments
If you’re deploying a hyper-converged cluster, the last step is to provision virtual machines on the Storage Spaces Direct cluster.
The virtual machine’s files should be stored on the systems CSV namespace (example: c:ClusterStorageVolume1) just like clustered VMs on failover clusters.
You can use in-box tools or other tools to manage the storage and virtual machines, such as System Center Virtual Machine Manager.
Step 4: Deploy Scale-Out File Server for converged solutions
If you’re deploying a converged solution, the next step is to create a Scale-Out File Server instance and setup some file shares. If you’re deploying a hyper-converged cluster — you’re finished and don’t need this section.
Step 4.1: Create the Scale-Out File Server role
The next step in setting up the cluster services for your file server is creating the clustered file server role, which is when you create the Scale-Out File Server instance on which your continuously available file shares are hosted.
To create a Scale-Out File Server role by using Server Manager
-
In Failover Cluster Manager, select the cluster, go to Roles, and then click Configure Role….
The High Availability Wizard appears. -
On the Select Role page, click File Server.
-
On the File Server Type page, click Scale-Out File Server for application data.
-
On the Client Access Point page, type a name for the Scale-Out File Server.
-
Verify that the role was successfully set up by going to Roles and confirming that the Status column shows Running next to the clustered file server role you created, as shown in Figure 1.
Figure 1 Failover Cluster Manager showing the Scale-Out File Server with the Running status
[!NOTE]
After creating the clustered role, there might be some network propagation delays that could prevent you from creating file shares on it for a few minutes, or potentially longer.
To create a Scale-Out File Server role by using Windows PowerShell
In a Windows PowerShell session that’s connected to the file server cluster, enter the following commands to create the Scale-Out File Server role, changing FSCLUSTER to match the name of your cluster, and SOFS to match the name you want to give the Scale-Out File Server role:
Add-ClusterScaleOutFileServerRole -Name SOFS -Cluster FSCLUSTER
[!NOTE]
After creating the clustered role, there might be some network propagation delays that could prevent you from creating file shares on it for a few minutes, or potentially longer. If the SOFS role fails immediately and won’t start, it might be because the cluster’s computer object doesn’t have permission to create a computer account for the SOFS role. For help with that, see this blog post: Scale-Out File Server Role Fails To Start With Event IDs 1205, 1069, and 1194.
Step 4.2: Create file shares
After you’ve created your virtual disks and added them to CSVs, it’s time to create file shares on them — one file share per CSV per virtual disk. System Center Virtual Machine Manager (VMM) is probably the handiest way to do this because it handles permissions for you, but if you don’t have it in your environment, you can use Windows PowerShell to partially automate the deployment.
Use the scripts included in the SMB Share Configuration for Hyper-V Workloads script, which partially automates the process of creating groups and shares. It’s written for Hyper-V workloads, so if you’re deploying other workloads, you might have to modify the settings or perform additional steps after you create the shares. For example, if you’re using Microsoft SQL Server, the SQL Server service account must be granted full control on the share and the file system.
[!NOTE]
You’ll have to update the group membership when you add cluster nodes unless you use System Center Virtual Machine Manager to create your shares.
To create file shares by using PowerShell scripts, do the following:
-
Download the scripts included in SMB Share Configuration for Hyper-V Workloads to one of the nodes of the file server cluster.
-
Open a Windows PowerShell session with Domain Administrator credentials on the management system, and then use the following script to create an Active Directory group for the Hyper-V computer objects, changing the values for the variables as appropriate for your environment:
# Replace the values of these variables
$HyperVClusterName = "Compute01"
$HyperVObjectADGroupSamName = "Hyper-VServerComputerAccounts" <#No spaces#>
$ScriptFolder = "C:ScriptsSetupSMBSharesWithHyperV"

# Start of script itself
CD $ScriptFolder
.ADGroupSetup.ps1 -HyperVObjectADGroupSamName $HyperVObjectADGroupSamName -HyperVClusterName $HyperVClusterName
-
Open a Windows PowerShell session with Administrator credentials on one of the storage nodes, and then use the following script to create shares for each CSV and grant administrative permissions for the shares to the Domain Admins group and the compute cluster.
# Replace the values of these variables
$StorageClusterName = "StorageSpacesDirect1"
$HyperVObjectADGroupSamName = "Hyper-VServerComputerAccounts" <#No spaces#>
$SOFSName = "SOFS"
$SharePrefix = "Share"
$ScriptFolder = "C:ScriptsSetupSMBSharesWithHyperV"

# Start of the script itself
CD $ScriptFolder
Get-ClusterSharedVolume -Cluster $StorageClusterName | ForEach-Object {
    $ShareName = $SharePrefix + $_.SharedVolumeInfo.friendlyvolumename.trimstart("C:ClusterStorageVolume")
    Write-host "Creating share $ShareName on "$_.name "on Volume: " $_.SharedVolumeInfo.friendlyvolumename
    .FileShareSetup.ps1 -HyperVClusterName $StorageClusterName -CSVVolumeNumber $_.SharedVolumeInfo.friendlyvolumename.trimstart("C:ClusterStorageVolume") -ScaleOutFSName $SOFSName -ShareName $ShareName -HyperVObjectADGroupSamName $HyperVObjectADGroupSamName
}
Step 4.3 Enable Kerberos constrained delegation
To setup Kerberos constrained delegation for remote scenario management and increased Live Migration security, from one of the storage cluster nodes, use the KCDSetup.ps1 script included in SMB Share Configuration for Hyper-V Workloads. Here’s a little wrapper for the script:
$HyperVClusterName = "Compute01"
$ScaleOutFSName = "SOFS"
$ScriptFolder = "C:ScriptsSetupSMBSharesWithHyperV"

CD $ScriptFolder
.KCDSetup.ps1 -HyperVClusterName $HyperVClusterName -ScaleOutFSName $ScaleOutFSName -EnableLM
Additional References
- Storage Spaces Direct overview
- Understand the cache in Storage Spaces Direct
- Planning volumes in Storage Spaces Direct
- Storage Spaces Fault Tolerance
- Storage Spaces Direct Hardware Requirements
- To RDMA, or not to RDMA – that is the question (TechNet blog)
Опубликовано
⏰ 05.07.2019


Приветствую Вас, уважаемые читатели. Сегодня у нас тема: «Файловый сервер Windows server 2012-16». Мы добавим необходимую роль, и рассмотрим функционал файлового сервера.
Установка Файлового сервера в Windows server 2012-2016
- Заходим в диспетчер сервера, и на панели мониторинга кликаем по «Добавить роли и компоненты».

Окно-памятка мастера установки.
- Жмём «Далее».

Выбор типа установки.
- Нам нужна «Установка ролей и компонентов».
- Жмём «Далее».

Выбор целевого сервера.
- Выбираем нужный сервер, или виртуальный жёсткий диск, из списка.
- Жмём «Далее».

Выбор ролей сервера.
- Выбираем в списке «Диспетчер ресурсов файлового сервера».

- Открывается окно, с необходимыми к установке компонентами.
- Жмём «Добавить компоненты».

- В окне выбора компонентов, жмём «Далее».

Подтверждение установки компонентов.
- Проверяем выбранные параметры, если всё верно, жмём «Установить».

- Закрываем окно по окончании установки.

- Заходим в средства администрирования.

- Выбираем «Диспетчер ресурсов файлового сервера».

Радел «Квоты».
- Тут можно настроить квоты, для дискового пространства, необходимой директории.

- Квоты можно создать на своё усмотрение, либо воспользовавшись, одним из шаблонов.

Раздел «Управление блокировкой файлов».
- Тут можно настроить фильтры, для добавления файлов определённого расширения, в ту или иную директорию.
- Блокировку можно настроить в ручную, либо выбрав один из готовых шаблонов.

Раздел «Управление ресурсами хранилища».
- Тут можно автоматизировать процесс управления хранилищем.

Раздел «Управление классификацией».
- Тут можно настроить классификацию файлов, для более удобной работы с ними.

Раздел «Задачи управления файлами».
- Тут можно создать задачи для работы с файлами.

Сегодня мы рассмотрели тему: «Файловый сервер Windows server 2012-16». Добавили роль, и сделали краткий обзор функционала.
Надеюсь статья была вам полезна. До встречи в новых статьях.
✍
С уважением, Андрей Бондаренко.
Видео на тему «Файловый сервер Windows server 2012»:
Видео на тему «Файловый сервер Windows server 2016»:
✧✧✧
Поблагодарить автора за полезную статью:

WMZ-кошелёк = Z667041230317
✧ Рубрика «Windows server»
✧ Комментарии: нет
Похожие записи