- Remove From My Forums
-
Question
-
Hi,
I have made a windows service that has a timer checks for a certain time to remind me. Now the time is reached so i want the service to display an alert!!
I have made a windows app that shows the alert but when i run it from the service it runs but not GUI displayed!!!
I can see it runs from the Task Manager but i cant show the form.
So is there any way to dispay i GUI alert from a windows service?
Thanks a lot
Answers
-
Well, you will probably have to make the client app sit in the background and check in with the service at certain intervals. once the service tells the client app (when it checks in with the service) that there is an alert to display then the app can display the form. there is no way of getting out of it. the client will have to either run in the background or you will have to use the task scheduler service for client app checkins. if you try to run your app from a windows service it will run in the user context of the service. for example. if your windows service runs in the SYSTEM account then if you try to run the GUI from the service. the GUI will display but, only on the SYSTEM account. since you cannot login to the system account it will not work. even if you tried your applcication running under your user account it still will not work as the service would start the GUI under a different session then the one you are logged into. you are left with either letting your client run in the background and checking in with the service or, running it through the task scheduler and check in that way.
Quilnux
-
window service has a property «Interact with Desktop». Set it to true, Re install the service and see what happens.
I hope this will work!
Best Regards,
You should check this article Impact of Session 0 Isolation on Services and Drivers in Windows and download the .docx file and READ IT carefully , it was very helpful for me.
However this is a class which works fine for my case :
    [StructLayout(LayoutKind.Sequential)]
    internal struct PROCESS_INFORMATION
    {
        public IntPtr hProcess;
        public IntPtr hThread;
        public uint dwProcessId;
        public uint dwThreadId;
    }

    [StructLayout(LayoutKind.Sequential)]
    internal struct SECURITY_ATTRIBUTES
    {
        public uint nLength;
        public IntPtr lpSecurityDescriptor;
        public bool bInheritHandle;
    }


    [StructLayout(LayoutKind.Sequential)]
    public struct STARTUPINFO
    {
        public uint cb;
        public string lpReserved;
        public string lpDesktop;
        public string lpTitle;
        public uint dwX;
        public uint dwY;
        public uint dwXSize;
        public uint dwYSize;
        public uint dwXCountChars;
        public uint dwYCountChars;
        public uint dwFillAttribute;
        public uint dwFlags;
        public short wShowWindow;
        public short cbReserved2;
        public IntPtr lpReserved2;
        public IntPtr hStdInput;
        public IntPtr hStdOutput;
        public IntPtr hStdError;

    }

    internal enum SECURITY_IMPERSONATION_LEVEL
    {
        SecurityAnonymous,
        SecurityIdentification,
        SecurityImpersonation,
        SecurityDelegation
    }

    internal enum TOKEN_TYPE
    {
        TokenPrimary = 1,
        TokenImpersonation
    }

    public static class ProcessAsUser
    {

        [DllImport("advapi32.dll", SetLastError = true)]
        private static extern bool CreateProcessAsUser(
            IntPtr hToken,
            string lpApplicationName,
            string lpCommandLine,
            ref SECURITY_ATTRIBUTES lpProcessAttributes,
            ref SECURITY_ATTRIBUTES lpThreadAttributes,
            bool bInheritHandles,
            uint dwCreationFlags,
            IntPtr lpEnvironment,
            string lpCurrentDirectory,
            ref STARTUPINFO lpStartupInfo,
            out PROCESS_INFORMATION lpProcessInformation);


        [DllImport("advapi32.dll", EntryPoint = "DuplicateTokenEx", SetLastError = true)]
        private static extern bool DuplicateTokenEx(
            IntPtr hExistingToken,
            uint dwDesiredAccess,
            ref SECURITY_ATTRIBUTES lpThreadAttributes,
            Int32 ImpersonationLevel,
            Int32 dwTokenType,
            ref IntPtr phNewToken);


        [DllImport("advapi32.dll", SetLastError = true)]
        private static extern bool OpenProcessToken(
            IntPtr ProcessHandle,
            UInt32 DesiredAccess,
            ref IntPtr TokenHandle);

        [DllImport("userenv.dll", SetLastError = true)]
        private static extern bool CreateEnvironmentBlock(
                ref IntPtr lpEnvironment,
                IntPtr hToken,
                bool bInherit);


        [DllImport("userenv.dll", SetLastError = true)]
        private static extern bool DestroyEnvironmentBlock(
                IntPtr lpEnvironment);

        [DllImport("kernel32.dll", SetLastError = true)]
        private static extern bool CloseHandle(
            IntPtr hObject);

        private const short SW_SHOW = 5;
        private const uint TOKEN_QUERY = 0x0008;
        private const uint TOKEN_DUPLICATE = 0x0002;
        private const uint TOKEN_ASSIGN_PRIMARY = 0x0001;
        private const int GENERIC_ALL_ACCESS = 0x10000000;
        private const int STARTF_USESHOWWINDOW = 0x00000001;
        private const int STARTF_FORCEONFEEDBACK = 0x00000040;
        private const uint CREATE_UNICODE_ENVIRONMENT = 0x00000400;


        private static bool LaunchProcessAsUser(string cmdLine, IntPtr token, IntPtr envBlock)
        {
            bool result = false;


            PROCESS_INFORMATION pi = new PROCESS_INFORMATION();
            SECURITY_ATTRIBUTES saProcess = new SECURITY_ATTRIBUTES();
            SECURITY_ATTRIBUTES saThread = new SECURITY_ATTRIBUTES();
            saProcess.nLength = (uint)Marshal.SizeOf(saProcess);
            saThread.nLength = (uint)Marshal.SizeOf(saThread);

            STARTUPINFO si = new STARTUPINFO();
            si.cb = (uint)Marshal.SizeOf(si);


            //if this member is NULL, the new process inherits the desktop
            //and window station of its parent process. If this member is
            //an empty string, the process does not inherit the desktop and
            //window station of its parent process; instead, the system
            //determines if a new desktop and window station need to be created.
            //If the impersonated user already has a desktop, the system uses the
            //existing desktop.

            si.lpDesktop = @"WinSta0Default"; //Modify as needed
            si.dwFlags = STARTF_USESHOWWINDOW | STARTF_FORCEONFEEDBACK;
            si.wShowWindow = SW_SHOW;
            //Set other si properties as required.

            result = CreateProcessAsUser(
                token,
                null,
                cmdLine,
                ref saProcess,
                ref saThread,
                false,
                CREATE_UNICODE_ENVIRONMENT,
                envBlock,
                null,
                ref si,
                out pi);


            if (result == false)
            {
                int error = Marshal.GetLastWin32Error();
                string message = String.Format("CreateProcessAsUser Error: {0}", error);
                FilesUtilities.WriteLog(message,FilesUtilities.ErrorType.Info);

            }

            return result;
        }


        private static IntPtr GetPrimaryToken(int processId)
        {
            IntPtr token = IntPtr.Zero;
            IntPtr primaryToken = IntPtr.Zero;
            bool retVal = false;
            Process p = null;

            try
            {
                p = Process.GetProcessById(processId);
            }

            catch (ArgumentException)
            {

                string details = String.Format("ProcessID {0} Not Available", processId);
                FilesUtilities.WriteLog(details, FilesUtilities.ErrorType.Info);
                throw;
            }


            //Gets impersonation token
            retVal = OpenProcessToken(p.Handle, TOKEN_DUPLICATE, ref token);
            if (retVal == true)
            {

                SECURITY_ATTRIBUTES sa = new SECURITY_ATTRIBUTES();
                sa.nLength = (uint)Marshal.SizeOf(sa);

                //Convert the impersonation token into Primary token
                retVal = DuplicateTokenEx(
                    token,
                    TOKEN_ASSIGN_PRIMARY | TOKEN_DUPLICATE | TOKEN_QUERY,
                    ref sa,
                    (int)SECURITY_IMPERSONATION_LEVEL.SecurityIdentification,
                    (int)TOKEN_TYPE.TokenPrimary,
                    ref primaryToken);

                //Close the Token that was previously opened.
                CloseHandle(token);
                if (retVal == false)
                {
                    string message = String.Format("DuplicateTokenEx Error: {0}", Marshal.GetLastWin32Error());
                    FilesUtilities.WriteLog(message, FilesUtilities.ErrorType.Info);

                }

            }

            else
            {

                string message = String.Format("OpenProcessToken Error: {0}", Marshal.GetLastWin32Error());
                FilesUtilities.WriteLog(message, FilesUtilities.ErrorType.Info);

            }

            //We'll Close this token after it is used.
            return primaryToken;

        }

        private static IntPtr GetEnvironmentBlock(IntPtr token)
        {

            IntPtr envBlock = IntPtr.Zero;
            bool retVal = CreateEnvironmentBlock(ref envBlock, token, false);
            if (retVal == false)
            {

                //Environment Block, things like common paths to My Documents etc.
                //Will not be created if "false"
                //It should not adversley affect CreateProcessAsUser.

                string message = String.Format("CreateEnvironmentBlock Error: {0}", Marshal.GetLastWin32Error());
                FilesUtilities.WriteLog(message, FilesUtilities.ErrorType.Info);

            }
            return envBlock;
        }

        public static bool Launch(string appCmdLine /*,int processId*/)
        {

            bool ret = false;

            //Either specify the processID explicitly
            //Or try to get it from a process owned by the user.
            //In this case assuming there is only one explorer.exe

            Process[] ps = Process.GetProcessesByName("explorer");
            int processId = -1;//=processId
            if (ps.Length > 0)
            {
                processId = ps[0].Id;
            }

            if (processId > 1)
            {
                IntPtr token = GetPrimaryToken(processId);

                if (token != IntPtr.Zero)
                {

                    IntPtr envBlock = GetEnvironmentBlock(token);
                    ret = LaunchProcessAsUser(appCmdLine, token, envBlock);
                    if (envBlock != IntPtr.Zero)
                        DestroyEnvironmentBlock(envBlock);

                    CloseHandle(token);
                }

            }
            return ret;
        }

    }
And to execute , simply call like this :
string szCmdline = "AbsolutePathToYourExe\ExeNameWithoutExtension";
ProcessAsUser.Launch(szCmdline);
- Download source — 93.1 KB
Introduction
In Windows XP, Windows Server 2003 and earlier Windows versions, a Windows service could start an application with a user interface, and this application would be visible in the session of the currently logged-in user. In Windows Vista and later, Windows services run in Session 0 which does not allow any interaction with the user. A Windows Service may launch a UI application but this application will never be displayed on the currently logged-in user’s desktop. This tip shows how to launch a UI application from a Windows Service by using the Windows API.
Background
This problem emerged when migrating a Cluster Resource from Windows Server 2003 to Windows Server 2012. In Windows Server 2003, a Cluster Resource could be a UI application. In Windows Server 2012, when bringing online the same Cluster Resource, the UI application does not become visible. This happens, because the Cluster Service is also a Windows Service, and the Cluster Resources launched by the Cluster Service are run in Session 0, which does not have user interaction. The workaround is to create a Windows Service that launches the UI application, and make this Windows Service a Cluster Resource. Only the Windows Service will be explained here.
Through the Windows API, it is possible to launch a new process in the currently interactive session. Only Windows Services that run under the local system account have the right to do that. However, the new process also runs under the local system account, whereas the requirement is for the new process to run under a specific user. The solution is for the new process to launch a second new process under a specific user. Once the second new process is started, the first new process terminates. At the end, the Windows Service and the second new process are running, the first in session 0 which is non interactive, and the latter in the currently interactive session. The Windows Service finds the process id of the second new process by the process name. When the service is stopped, it kills that process id. The Windows Service monitors if the process id exists, and stops if it no longer exists. The Windows Service can be made a Cluster Resource. When the second new process fails, the Windows Service will also stop and a Fail Over is initiated.
Using the Code
Two Visual Studio projects are provided:
WindowsService1: Runs under the local system account, and startsWindowsApplication1in the currently interactive session. InstructsWindowsApplication1through the command line parameters to start Notepad.WindowsApplication1: Starts a new process given by the command line arguments. In this case, the new process is Notepad. The new process runs under a specific user, defined in the configuration file. WhenWindowsApplication1is started without command line arguments, a form is shown to enter the user credentials and save them to the configuration file.
WindowsService1
Contains the following items:
WindowsApi: Contains the Windows API signatures ofWTSGetActiveConsoleSessionId,WTSQueryUserToken,CreateProcessAsUser. You can get these at www.pinvoke.net.Service1: Implements the Windows Service.OnStart: CallsWTSGetActiveConsoleSessionIdto get the current interactive session and puts it into the variableuserTokenHandlewithWTSQueryUserToken. LaunchesWindowsApplication1withCreateProcessAsUserW. Passes as command line parameter «C:WindowsSystem32notepad.exe a b c«. CallsGetProcIdto get the process id that was created byWindowsApplication1. Starts the methodMonitorProcessin a new thread.GetProcId: Gets the process id withProcess.GetProcessesByName, in this case it will be Notepad. If no such process is found, or more than one processes are found, an exception is thrown.MonitorProcess: Checks withProcess.GetProcessByIdif the process id still exists. If it does not exist, calls theStopmethod of the service.OnStop: UsesProcess.Killto kill the process id, in this case the Notepad process.
ProjectInstaller: This class is needed for installing the service.
WindowsApplication1
Contains the following items:
- App.config: contains the credentials of the user under which the created process should run.
ModMainMain: is the main entrypoint. If command line arguments exist, thenProcessStartis called, otherwiseForm1is shown.ProcessStart: A new process is created. The user credentials are read from the configuration file withConfiguration.ConfigurationManager.AppSettings. The password is set by callingSetPassword. The first of the command line arguments defines the executable to be started, and the rest of the command line arguments, define the command line arguments for the newly created process. The process is started withProcess.Start.SetPassword: CallsDecryptto decrypt the password and fills aSecureString.
Form1: Provides textboxes to fill the domain, username and password. Upon pressing the button ok, the password is encrypted by callingEncryptand the values are saved to the configuration file. The configuration file is opened withConfigurationManager.OpenExeConfigurationand it is saved withConfiguration.Save.ModCrypto: provides methods for encryption and decryption.Encrypt: UsesSystem.Security.Cryptography.ProtectedData.Protectto encrypt astring. The entropy makes guessing the password more difficult.Decrypt: UsesSystem.Security.Cryptography.ProtectedData.UnProtectto decrypt astring.
Test
This program has been tested on Windows 7 and Windows Server 2012. It should run on Windows versions of Vista and later. To run the program, follow these steps:
- With Visual Studio 2010, open solution CreateAppFromService.sln.
- Build the solution.
- In Windows Explorer, double click on Source/bin/WindowsApplication1.exe. A form to enter the credentials is shown.

- Enter the credentials under which the Notepad launched by
WindowsApplication1should run. - Press Ok. The credentials are saved to bin/WindowsApplication1.exe.config. You may see that the Password is encrypted.
- In Windows Explorer, double click on Source/InstallService.bat. If the message «The transacted install has completed.» is shown in the console, then
Service1has been installed successfully. Otherwise, try right-click and choose Run as administrator. - Start/Run/services.msc. This starts the Services Management Console. Check that
Service1is installed. - Right-click on
Service1and choose Start. The service’sStatusshould change toStarted. - A Notepad should open asking: Cannot find the a b c.txt file. Do you want to create a new file?
You may click Yes or No. This is to demonstrate that parameters may be passed to the UI application.
- Start/Run/taskmgr to start the Windows Task Manager. Check that Notepad runs under the User Name entered in step 4. If this is the case, it seems that all worked well, that means, Windows Service «
Service1» successfully startedWindowsApplication1, which in turn started Notepad under the specified user. - Right-click on
Service1and choose Stop. The Notepad should close and the service’s Status should change to Stopped. - Start again the
Service1to test the monitoring thread. - Notepad should start again. Close the Notepad window.
- Right-click on
Service1and choose Refresh. The service’s status should change to Stopped, because the monitoring thread found out that Notepad is no more running, and therefore the monitoring thread instructed the service to stop. - If the service did not start, check the Application Log in the Event Viewer. You may start the event viewer with Start/Run/eventvwr.msc.
- You may find for example the following error:
- Source:
WindowsApplication1 - Message: Main Logon failure: unknown user name or bad password.
- Source:
- In Windows Explorer, double click on Source/UnInstallService.bat. If the message «The uninstall has completed.» is shown in the console, then
Service1has been uninstalled successfully. Otherwise, try right-click and choose Run as administrator. If this does not work either, in a command prompt type:sc delete Service1.


History
WindowsService1launchingWindowsApplication1launching Notepad with credentials in the configuration file encrypted byProtectedData.Protect.
This member has not yet provided a Biography. Assume it’s interesting and varied, and probably something to do with programming.
Содержание
- Run Windows forms app from Windows service
- 1 Answer 1
- Tutorial: Create a Windows service app
- Create a service
- Rename the service
- Add features to the service
- Add custom event log functionality
- Define what occurs when the service starts
- Polling
- Define what occurs when the service is stopped
- Define other actions for the service
- Set service status
- Implement service pending status
- Add installers to the service
- (Optional) Set startup parameters
- To add startup parameters
- Build the service
- Install the service
- Start and run the service
- Verify the event log output of your service
- Clean up resources
- Next steps
Run Windows forms app from Windows service
We have a third party legacy software which we need to run from a service, we want to automate it using window messages to click on buttons, suppress Message boxes etc.
The problem is I cant seem to start the process with the forms active, I can retrieve the process using Process.GetProcessesByName(«ProcessName»); but the MainWindowHandle and MainWindowTitle is null.
Is there a way of starting the Windows client program from the Service so that the forms are created properly?
1 Answer 1
Services run in a different session from the user’s desktop, the infamous session 0. It is isolated since Vista due to a chronic problem with shatter attacks, google «session 0 isolation» to find out more about it.
Session 0 still has a desktop, you just can’t switch to it. The most typical diagnostic for getting a null MainWindowHandle is not waiting long enough to allow the process to create it. You’ll need at least Process.WaitForInputIdle().
That doesn’t exactly promise a solution, you still have a very serious problem detecting that the program is misbehaving. Or for that matter that MainWindowHandle is actually the handle of a splash screen and not the main window and is therefore null since the splash screen was dismissed. Or that the program keeled over because it doesn’t work properly with a different user account or a uncommon working directory. Etcetera, things you need to sort out by first making this work with a console mode program before you ever try to run it as a service.
At which point is is probably best just to keep it a console mode app. Because failure is utterly undiagnosable, this will be a constant pain in your rear end when IT staff calls you because it stopped working and you’ve got nothing to look at either.
Tutorial: Create a Windows service app
This article demonstrates how to create a Windows service app in Visual Studio that writes messages to an event log.
Create a service
To begin, create the project and set the values that are required for the service to function correctly.
From the Visual Studio File menu, select New > Project (or press Ctrl+Shift+N) to open the New Project window.
Navigate to and select the Windows Service (.NET Framework) project template. To find it, expand Installed and Visual C# or Visual Basic, then select Windows Desktop. Or, enter Windows Service in the search box on the upper right and press Enter.

If you don’t see the Windows Service template, you may need to install the .NET desktop development workload:
In the New Project dialog, select Open Visual Studio Installer on the lower left. Select the .NET desktop development workload, and then select Modify.
For Name, enter MyNewService, and then select OK.
The Design tab appears (Service1.cs [Design] or Service1.vb [Design]).
The project template includes a component class named Service1 that inherits from System.ServiceProcess.ServiceBase. It includes much of the basic service code, such as the code to start the service.
Rename the service
Rename the service from Service1 to MyNewService.
In Solution Explorer, select Service1.cs, or Service1.vb, and choose Rename from the shortcut menu. Rename the file to MyNewService.cs, or MyNewService.vb, and then press Enter
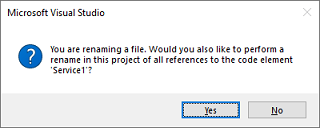
A pop-up window appears asking whether you would like to rename all references to the code element Service1.
In the pop-up window, select Yes.
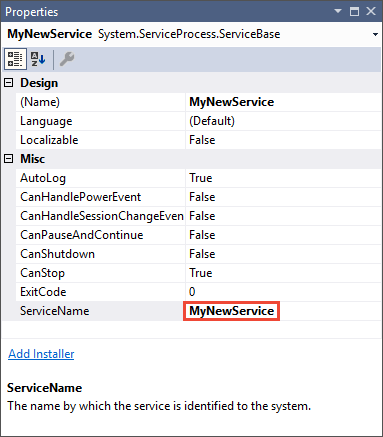
In the Design tab, select Properties from the shortcut menu. From the Properties window, change the ServiceName value to MyNewService.
Select Save All from the File menu.
Add features to the service
In this section, you add a custom event log to the Windows service. The EventLog component is an example of the type of component you can add to a Windows service.
Add custom event log functionality
In Solution Explorer, from the shortcut menu for MyNewService.cs, or MyNewService.vb, choose View Designer.
In Toolbox, expand Components, and then drag the EventLog component to the Service1.cs [Design], or Service1.vb [Design] tab.
In Solution Explorer, from the shortcut menu for MyNewService.cs, or MyNewService.vb, choose View Code.
Define a custom event log. For C#, edit the existing MyNewService() constructor; for Visual Basic, add the New() constructor:
Add a using statement to MyNewService.cs (if it doesn’t already exist), or an Imports statement MyNewService.vb, for the System.Diagnostics namespace:
Select Save All from the File menu.
Define what occurs when the service starts
In the code editor for MyNewService.cs or MyNewService.vb, locate the OnStart method; Visual Studio automatically created an empty method definition when you created the project. Add code that writes an entry to the event log when the service starts:
Polling
Because a service application is designed to be long-running, it usually polls or monitors the system, which you set up in the OnStart method. The OnStart method must return to the operating system after the service’s operation has begun so that the system isn’t blocked.
To set up a simple polling mechanism, use the System.Timers.Timer component. The timer raises an Elapsed event at regular intervals, at which time your service can do its monitoring. You use the Timer component as follows:
- Set the properties of the Timer component in the MyNewService.OnStart method.
- Start the timer by calling the Start method.
Set up the polling mechanism.
Add the following code in the MyNewService.OnStart event to set up the polling mechanism:
Add a using statement to MyNewService.cs, or an Imports statement to MyNewService.vb, for the System.Timers namespace:
In the MyNewService class, add the OnTimer method to handle the Timer.Elapsed event:
In the MyNewService class, add a member variable. It contains the identifier of the next event to write into the event log:
Instead of running all your work on the main thread, you can run tasks by using background worker threads. For more information, see System.ComponentModel.BackgroundWorker.
Define what occurs when the service is stopped
Insert a line of code in the OnStop method that adds an entry to the event log when the service is stopped:
Define other actions for the service
You can override the OnPause, OnContinue, and OnShutdown methods to define additional processing for your component.
The following code shows how you to override the OnContinue method in the MyNewService class:
Set service status
Services report their status to the Service Control Manager so that a user can tell whether a service is functioning correctly. By default, a service that inherits from ServiceBase reports a limited set of status settings, which include SERVICE_STOPPED, SERVICE_PAUSED, and SERVICE_RUNNING. If a service takes a while to start up, it’s useful to report a SERVICE_START_PENDING status.
You can implement the SERVICE_START_PENDING and SERVICE_STOP_PENDING status settings by adding code that calls the Windows SetServiceStatus function.
Implement service pending status
Add a using statement to MyNewService.cs, or an Imports statement to MyNewService.vb, for the System.Runtime.InteropServices namespace:
Add the following code to MyNewService.cs, or MyNewService.vb, to declare the ServiceState values and to add a structure for the status, which you’ll use in a platform invoke call:
The Service Control Manager uses the dwWaitHint and dwCheckpoint members of the SERVICE_STATUS structure to determine how much time to wait for a Windows service to start or shut down. If your OnStart and OnStop methods run long, your service can request more time by calling SetServiceStatus again with an incremented dwCheckPoint value.
In the MyNewService class, declare the SetServiceStatus function by using platform invoke:
To implement the SERVICE_START_PENDING status, add the following code to the beginning of the OnStart method:
Add code to the end of the OnStart method to set the status to SERVICE_RUNNING:
(Optional) If OnStop is a long-running method, repeat this procedure in the OnStop method. Implement the SERVICE_STOP_PENDING status and return the SERVICE_STOPPED status before the OnStop method exits.
Add installers to the service
Before you run a Windows service, you need to install it, which registers it with the Service Control Manager. Add installers to your project to handle the registration details.
In Solution Explorer, from the shortcut menu for MyNewService.cs, or MyNewService.vb, choose View Designer.
In the Design view, select the background area, then choose Add Installer from the shortcut menu.
By default, Visual Studio adds a component class named ProjectInstaller , which contains two installers, to your project. These installers are for your service and for the service’s associated process.
In the Design view for ProjectInstaller, select serviceInstaller1 for a Visual C# project, or ServiceInstaller1 for a Visual Basic project, then choose Properties from the shortcut menu.
In the Properties window, verify the ServiceName property is set to MyNewService.
Add text to the Description property, such as A sample service.
This text appears in the Description column of the Services window and describes the service to the user.

Add text to the DisplayName property. For example, MyNewService Display Name.
This text appears in the Display Name column of the Services window. This name can be different from the ServiceName property, which is the name the system uses (for example, the name you use for the net start command to start your service).
Set the StartType property to Automatic from the drop-down list.
When you’re finished, the Properties windows should look like the following figure:

In the Design view for ProjectInstaller, choose serviceProcessInstaller1 for a Visual C# project, or ServiceProcessInstaller1 for a Visual Basic project, then choose Properties from the shortcut menu. Set the Account property to LocalSystem from the drop-down list.
This setting installs the service and runs it by using the local system account.
The LocalSystem account has broad permissions, including the ability to write to the event log. Use this account with caution, because it might increase your risk of attacks from malicious software. For other tasks, consider using the LocalService account, which acts as a non-privileged user on the local computer and presents anonymous credentials to any remote server. This example fails if you try to use the LocalService account, because it needs permission to write to the event log.
(Optional) Set startup parameters
Before you decide to add startup parameters, consider whether it’s the best way to pass information to your service. Although they’re easy to use and parse, and a user can easily override them, they might be harder for a user to discover and use without documentation. Generally, if your service requires more than just a few startup parameters, you should use the registry or a configuration file instead.
A Windows service can accept command-line arguments, or startup parameters. When you add code to process startup parameters, a user can start your service with their own custom startup parameters in the service properties window. However, these startup parameters aren’t persisted the next time the service starts. To set startup parameters permanently, set them in the registry.
Each Windows service has a registry entry under the HKEY_LOCAL_MACHINESYSTEMCurrentControlSetServices subkey. Under each service’s subkey, use the Parameters subkey to store information that your service can access. You can use application configuration files for a Windows service the same way you do for other types of programs. For sample code, see ConfigurationManager.AppSettings.
To add startup parameters
Select Program.cs, or MyNewService.Designer.vb, then choose View Code from the shortcut menu. In the Main method, change the code to add an input parameter and pass it to the service constructor:
In MyNewService.cs, or MyNewService.vb, change the MyNewService constructor to process the input parameter as follows:
This code sets the event source and log name according to the startup parameters that the user supplies. If no arguments are supplied, it uses default values.
To specify the command-line arguments, add the following code to the ProjectInstaller class in ProjectInstaller.cs, or ProjectInstaller.vb:
Typically, this value contains the full path to the executable for the Windows service. For the service to start up correctly, the user must supply quotation marks for the path and each individual parameter. A user can change the parameters in the ImagePath registry entry to change the startup parameters for the Windows service. However, a better way is to change the value programmatically and expose the functionality in a user-friendly way, such as by using a management or configuration utility.
Build the service
In Solution Explorer, choose Properties from the shortcut menu for the MyNewService project.
The property pages for your project appear.
On the Application tab, in the Startup object list, choose MyNewService.Program, or Sub Main for Visual Basic projects.
To build the project, in Solution Explorer, choose Build from the shortcut menu for your project (or press Ctrl+Shift+B).
Install the service
Now that you’ve built the Windows service, you can install it. To install a Windows service, you must have administrator credentials on the computer where it’s installed.
In Developer Command Prompt for Visual Studio, navigate to the folder that contains your project’s output (by default, the binDebug subdirectory of your project).
Enter the following command:
If the service installs successfully, the command reports success.
If the system can’t find installutil.exe, make sure that it exists on your computer. This tool is installed with the .NET Framework to the folder %windir%Microsoft.NETFramework[64] . For example, the default path for the 64-bit version is %windir%Microsoft.NETFramework64v4.0.30319InstallUtil.exe.
If the installutil.exe process fails, check the install log to find out why. By default, the log is in the same folder as the service executable. The installation can fail if:
- The RunInstallerAttribute class isn’t present on the ProjectInstaller class.
- The attribute isn’t set to true .
- The ProjectInstaller class isn’t defined as public .
Start and run the service
In Windows, open the Services desktop app. Press Windows+R to open the Run box, enter services.msc, and then press Enter or select OK.
You should see your service listed in Services, displayed alphabetically by the display name that you set for it.

To start the service, choose Start from the service’s shortcut menu.
To stop the service, choose Stop from the service’s shortcut menu.
(Optional) From the command line, use the commands net start and net stop to start and stop your service.
Verify the event log output of your service
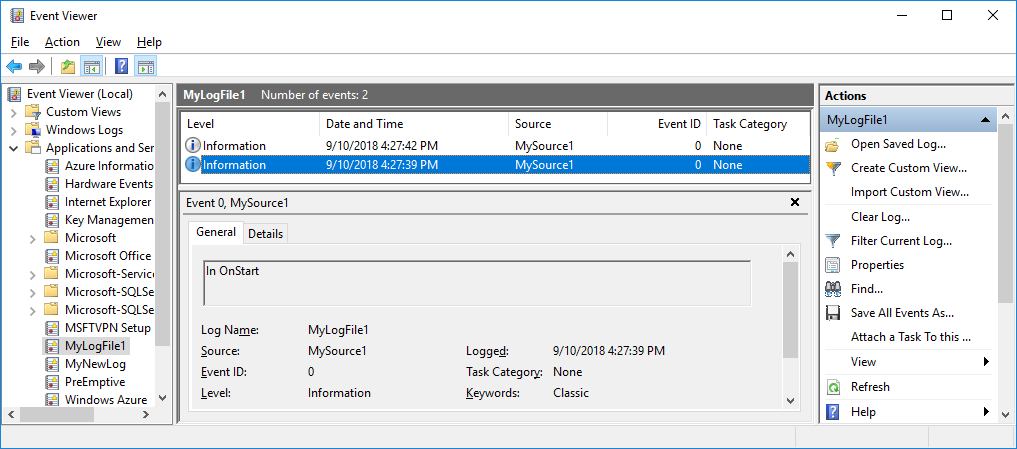
In Windows, open the Event Viewer desktop app. Enter Event Viewer in the Windows search bar, and then select Event Viewer from the search results.
In Visual Studio, you can access event logs by opening Server Explorer from the View menu (or press Ctrl+Alt+S) and expanding the Event Logs node for the local computer.
In Event Viewer, expand Applications and Services Logs.
Locate the listing for MyNewLog (or MyLogFile1 if you followed the procedure to add command-line arguments) and expand it. You should see the entries for the two actions (start and stop) that your service performed.
Clean up resources
If you no longer need the Windows service app, you can remove it.
Open Developer Command Prompt for Visual Studio with administrative credentials.
In the Developer Command Prompt for Visual Studio window, navigate to the folder that contains your project’s output.
Enter the following command:
If the service uninstalls successfully, the command reports that your service was successfully removed. For more information, see How to: Install and uninstall services.
Next steps
Now that you’ve created the service, you can:
Create a standalone setup program for others to use to install your Windows service. Use the WiX Toolset to create an installer for a Windows service. For other ideas, see Create an installer package.
Explore the ServiceController component, which enables you to send commands to the service you’ve installed.
Instead of creating the event log when the application runs, use an installer to create an event log when you install the application. The event log is deleted by the installer when you uninstall the application. For more information, see EventLogInstaller.

Topic: Run application from a Windows service (Read 8767 times)
I’m trying to create a Windows service that after a certain load time runs an external application.
The idea is that if it is detected that the necessary configuration has not been made, a program is loaded with which the necessary parameters can be configured.
The attachment contains the sample project that I am using with which I charge notepad.exe, however the problem I have is that at the time of loading the program it does not show the window although it appears in the Task Manager. My question is whether I want to do it or what am I doing wrong?
Any suggestions are welcome

Logged
It could be the user under which you run service.
Logged
@arodriguezfarfan
I’m trying to create a Windows service that after a certain load time runs an external application.
You have to break session 0 isolation. For security reasons, since windows vista, the services run in session 0. The first user logs on to session 1, the second one to session 2 and so on. Session 0 cannot interact with session 1,2…x, so you cannot show an UI element from your service. You have to start the external application in user space. CreateProcessAsUser api for example will run the application in the security context of the user.
Logged
Thanks Getmen for the explanation. I researched about CreateProcessAsUser, but I think what I intend to do is not the right thing to do, so I’m going to look for another alternative. Thank you.
Logged
@arodriguezfarfan
Thanks Getmen for the explanation.
You’re welcome!
I researched about CreateProcessAsUser, but I think what I intend to do is not the right thing to do
Sometimes there are good reasons to run a process from a service, then exchange message between them via inter process communication(sockets, pipes, named pipes, memory mapped files, etc…). If you change your mind, you can try something like this:
-
function FindWinlogon(ASessionId: DWord): DWord;
-
var
-
PID, SessionId: DWord;
-
hSnap: THANDLE;
-
procEntry: TProcessEntry32;
-
begin
-
Result := 0;
-
hSnap := CreateToolhelp32Snapshot(TH32CS_SNAPPROCESS, 0);
-
if (hSnap <> INVALID_HANDLE_VALUE) then
-
begin
-
procEntry.dwSize := Sizeof(PROCESSENTRY32);
-
PID := 0;
-
SessionId := 0;
-
if Process32First(hSnap, procEntry) then
-
begin
-
while Process32Next(hSnap, procEntry) do
-
begin
-
if Pos(‘winlogon.exe’, LowerCase(procEntry.szExeFile)) > 0 then
-
begin
-
if ProcessIdToSessionId(procEntry.th32ProcessID, SessionId) then
-
begin
-
if SessionId = ASessionId then
-
begin
-
PID := procEntry.th32ProcessID;
-
Break;
-
end;
-
end
-
end;
-
end;
-
Result := PID;
-
end;
-
end;
-
end;
-
function RunProcessAsUser(APath: WideString): DWord;
-
var
-
pi: PROCESS_INFORMATION;
-
si: STARTUPINFOW;
-
dwSessionId, PID, DesiredAccess, dwCreationFlags: DWord;
-
hUserTokenDup, hPToken, hProcess: THANDLE;
-
begin
-
Result := 0;
-
RevertToSelf;
-
dwSessionId := WtsGetActiveConsoleSessionID;
-
PID := FindWinLogon(dwSessionId);
-
if PID <> 0 then
-
begin
-
hPToken := 0;
-
hProcess := OpenProcess(MAXIMUM_ALLOWED, False, PID);
-
DesiredAccess := TOKEN_ADJUST_PRIVILEGES or TOKEN_QUERY or TOKEN_DUPLICATE or
-
TOKEN_ASSIGN_PRIMARY or TOKEN_ADJUST_SESSIONID or TOKEN_READ or TOKEN_WRITE;
-
if OpenProcessToken(hProcess, DesiredAccess, hPToken) then
-
begin
-
hUserTokenDup := 0;
-
if DuplicateTokenEx(hPToken, MAXIMUM_ALLOWED, nil, SecurityIdentification, TokenPrimary, hUserTokenDup) then
-
begin
-
ZeroMemory(@si, SizeOf(si));
-
ZeroMemory(@pi, SizeOf(pi));
-
dwCreationFlags := NORMAL_PRIORITY_CLASS or CREATE_UNICODE_ENVIRONMENT;
-
if CreateProcessAsUserW(hUserTokenDup, PWideChar(APath), nil, nil, nil, False, dwCreationFlags, nil, nil, si, pi) then
-
Result := pi.dwProcessId
-
end
-
end
-
end;
-
end;
Then inside your services, create a worker thread, wait a few seconds, then run notepad «as user»:
-
procedure TThreadWorker.Execute;
-
var
-
WPath: WideString;
-
PID: DWord;
-
begin
-
FTick := 0;
-
while not Terminated do
-
begin
-
Inc(FTick);
-
Sleep(1000);
-
if FTick = 5 then
-
begin
-
WPath := ‘c:windowsnotepad.exe’;
-
PID := RunProcessAsUser(WPath);
-
if PID > 0 then
-
//notepad successfully executed
-
Break;
-
end;
-
end;
-
end;
PS: Actually I ran a few test and notepad starts fine, with a nice visible window.
« Last Edit: December 02, 2021, 07:23:13 am by GetMem »
Logged
Thanks Getmen for the explanation. I researched about CreateProcessAsUser, but I think what I intend to do is not the right thing to do, so I’m going to look for another alternative.
There is no alternative except for using the functionality provided by the operating system as it’s intended.
Logged
Logged
I forgot to attach my test daemon. After you build the executable, run _install.bat form the same folder. If the install was successful, start the service. In order for the notepad window to appear, you have to wait approximately five seconds. If something went wrong check log.txt.
PS: Tested with Lazarus Trunk/FPC 3.2.0(32 bit) on a 64 bit Windows
Logged
Thank you Getmen. The project works perfectly. Now I have to study it and implement in my project.
Logged
Thank you Getmen. The project works perfectly. Now I have to study it and implement in my project.
You are welcome, I’m glad it’s working.
I made a few improvement, now the worker thread is properly terminated and freed, no more memory leaks. However I cannot properly «self» shut down the service. It would be nice to find a method to terminate the service from inside, without using the service manager. Of course a Halt always work, but I’m not satisfied with this method.
Logged
@GetMem
However I cannot properly «self» shut down the service. It would be nice to find a method to terminate the service from inside, without using the service manager. Of course a Halt always work, but I’m not satisfied with this method.
I will answer my own question. The idea is to pass the daemon to the workerthread constructor(FDaemon), when it’s time to shut down the service:
-
var
-
Daemon: TCustomDaemon;
-
DaemonThread: TDaemonThread;
-
begin
-
Daemon := TCustomDaemon(FDaemon);
-
DaemonThread := TDaemonThread(Daemon.DaemonThread);
-
DaemonThread.ShutDownDaemon;
-
end;
It works very nicely. The method though is somewhat convoluted. I would implement a procedure inside TCustomDaemon(daemonapp.pp) class to achieve the same thing. I wonder if a patch would be accepted.
Logged
It works very nicely. The method though is somewhat convoluted. I would implement a procedure inside TCustomDaemon(daemonapp.pp) class to achieve the same thing. I wonder if a patch would be accepted.
If you make clear what the use case is and what implications it has you might at least try…
Logged
I have created one windows application which should run every time in the desktop. For this we put the application in startup. But due to some exceptions or user closing the window application getting close.
To avoid this I had written windows service, it will check every one minute whether application is running or not. If it is closed windows service will start the application.
When i am debugging the windows service the application is running fine. But when i done setup of the service. Service is running every one minute but windows application is not opening.
code as follows:
void serviceTimer_Elapsed(object sender, EventArgs e)
        {
            try
            {
                bool isAppRunning = IsProcessOpen("App");
                if (!isAppRunning)
                {
                    Process p = new Process();
                    if (Environment.Is64BitOperatingSystem)
                        p.StartInfo.FileName = @"C:Program Files (x86)Creative SolutionsAppApp.exe";
                    else
                        p.StartInfo.FileName = @"C:Program FilesCreative SolutionsAppApp.exe";
                     p.Start();

                }
            }
            catch (Exception ex)
            {
                WriteErrorLog("Error in service " + ex.Message);
            }
        }
Method to check instance is running or not:
 public bool IsProcessOpen(string name)
        {
            //here we're going to get a list of all running processes on
            //the computer
            foreach (Process clsProcess in Process.GetProcesses())
            {
                if (clsProcess.ProcessName.Contains(name))
                {
                    //if the process is found to be running then we
                    //return a true
                    return true;
                }
            }
            //otherwise we return a false
            return false;
        }
Please can anyone help how to resolve this issue.
Try looking at this question:
How can a Windows service execute a GUI application?
In your case with P/Invoke
However as stated, this is a poor design choice.
Required code, should run in the service using SCM and any configuration required or interaction with the service should be placed in a seperate client application communicating through .. whatever you like.
This article reviews several scenarios of process creating from Windows service like: creating process win GUI from non-interactive service, creating process under another user account and in the different session. The article doesn’t contain code examples however it explains how to achieve the result with a free command line tool DevxExec. This text requires basic level of familiarity of Windows API.
There are could be different situations when you need to create an additional process from your main process. One of those situations is when you need to isolate some code of your service because that code could be a reason of resource leak or can damage your common process somehow. Another case is when your application needs to perform action that requires changing primary process token. Finally you just may need to run a 3rd party application.
From first glance creating a new process is a very simple operation. That is actually true. There are 3 different functions CreateProcess, CreateProcessAsUser and CreateProcessWithLogon in Windows API that you can use to create a new process. However there are situations when they don’t work in the way you could expect.
How to run a process from the Windows service
To allow several users work with the same computer at the same time Windows isolates processes of each user with special object called session. During system startup it creates session with ID=0. OS uses this session to isolate windows services processes from users’ processes. Also Windows creates another session (ID=1) during startup and run first instance of winlogon.exe under that session. Therefore first logged in (via console) user will work under session with ID=1. When another user wants to login to computer system creates a new session for him.
Window always creates a new session before the user logs in. Another words it happens when a new remote desktop connection is established or when user connected via console uses “switch user” function. Once the session is created, Windows runs a new instance of winlogon.exe. So the login screen, where user types his credentials, always relates to its own session.
Every session has own windows station. Windows station is another isolation object that has come to us from older version of system. Every window station contains a dedicated clipboard and a number of desktops.
Here is the typical hierarchy of sessions, window stations and desktops in Windows Vista and Seven (Windows 7).

In older systems like XP or 2003, it is different. The user logged in via console and the services are running in the same session and interactive services even use the same windows station and the same desktop.

When you are running a process from windows service under user account, that process may not have (usually it doesn’t) access to the window station and to the desktop related to session 0. Of course, if your process doesn’t create any window then you are just lucky. However it’s actually not easy to write an application that doesn’t create any window at all. Typical Windows application infrastructure is based on a window even if this window is newer shown. The console application written on the most of languages (like Visual C++ or C#) creates a window too. Therefore in 99% of cases our application needs the access to the window station and to the desktop.
Information
When you run a console application and the user under which the process is running doesn’t have an access to the window station on some versions of OS you may see the error message like this:

To solve this problem you can add permissions to the window station and the desktop. Usually services run under the separate window station “Service-0x0-3e7$”. However if the option “Allow interact with Desktop” is on for the service then it runs under “WinSta0”. The difference between those windows stations is that “Service-0x0-3e7$” can’t be ever interactive so user will be not able to see the GUI of applications are running there. In case of “WinSta0” user can see the GUI but remember that in Windows Vista/Seven/2008 interactive services and logged in user have different window stations with the same name but in different sessions.
In Windows Vista/Seven/2008, ones a window is created into the Session0Winsta0Default, operation system will show a dialog like this. This dialog allows switching active user desktop to Session0Winsta0Default.

It’s actually not really important if you service runs in interactive mode or not. You always can specify window station and a desktop while creating a new process. There is a special parameter in StartupInfo structure for this.
You also can use the Developex free tool DevxExec to run a process from the windows service under another user.
DevxExec.exe /user: Administrator /password:qwerty “cmd.exe”
This command automatically grand to user “Administrator” permissions on the appropriate window station and the desktop and run a command shell.
How to run an application for a user from the Windows service
Let’s see the following scenario. You have a Windows service running. User Marcus has logged to the computer. And you want yours service to start the application that will be shown to Marcus on his current desktop. In other words, you need to run a new process in another session.
It sounds like an easy task. Yes, you can change a window station and a desktop, but unfortunately, there is no option to specify a session ID to CreateProcess functions. However Windows security token is always related to one session and fortunately we can change the session for the security token. Therefore if we create a new token for our user (for example using LogonUser), then change a session for this token using SetTokenInformation function and finally, call CreateProcessAsUser, the new process will be created in the appropriate session.
Again you can use DevxExec. It has a special parameter /sessionid to specify the session you what to run a new process in. For example this command could start a command shell for a logged in user under Administrator.
DevxExec.exe /user: Marcus /password:qwerty /sessionid:1 “cmd.exe”
How to run an application for a user from the Windows service (part 2)
Here is another scenario. User Marcus has logged to the computer. And you want your service to start an application as Annette that Marcus can work with on his current desktop. The solution above will work in that scenario too, but only if Annette is a member of the local “Administrators” group. Otherwise she will not have access to the Marcus’s desktop and windows station.
So our service (that runs in session = 0) need to give permission to Annette to Marcus’s desktop (session ≠ 0). The problem is how to get a handle of desktop that lives in another session. If you find out how to do it please let me know. Unfortunately I haven’t found how to do it but here is a workaround solution:
- Get a primary process (OpenProcessToken).
- Create a primary copy of this token (DuplicateTokenEx)
- Modify session id of the replica (SetTokenInformation).
- Create a new temporary process using that taken with CreateProcessAsUser.
- This process will be run into the Marcus’s session therefore it could access his window station and his desktop and give permission to Annette.
DevxExec works approximately that way so you can create a process for either user in either session.
To be continued…
Mike Makarov
Developex CTO
If you want to run an application as a Service in Windows OS, then continue reading this tutorial. As you know, the common methods to run a program at Windows Startup is to place the program at Windows Startup folder, or to run the program at startup by using the Windows Registry, or to start the application using the Task Scheduler. Although these methods are effective in most cases, in some cases there is a need to run an application at startup as a Windows service, before user’s login or user’s interaction.
This tutorial contains step-by-step instructions on how to create a Windows service with any program in Windows 10, 8, 7 & Server OS.
How to Run Any Application as a Windows Service.
Method 1. Run Application as Windows Service by using RunAsService utility.
Method 2. Run Program as Service by using NSSM utility.
Method 1. How to run any application as a Windows Service with ‘Run As Service’ Utility.
The first method to create a user-defined service from any program is to use the «RunAsService» utility.
1. Download the RunAsService tool to your PC.
2. Move or Copy the downloaded file RunAsService.exe, to the root folder of drive C:. *
* Note (Important): You can place the «RunAsService.exe» tool to any location you want on the disk, but make sure to keep the tool in the same location in order the installed service(s) to continue functioning.

3. Open Command Prompt as Administrator.
4. In the command prompt type: cd
5. Now install the application you want as a service, by using the following command: *
- RunAsService install «ServiceName» «Display-Name« «PathToExecutable«
Notes:
1. In the above command replace the values in red letters as follows:
Name: Type a Name for the Service you want to create. You can use the Service Name to start or stop the service manually on the future by giving the «net start» or «net stop» commands.
Display Name: If you want, type a different Name for the Windows Services list. This is how the service name will be displayed in the services list. If no «Display Name» is specified, then the Display Name will be the same as the «ServiceName» of the service you create.
PathToExecutable: Type the full path of the application that you want to run as a Windows service.
For example: To install the «Notepad.exe» application as a Windows service with the name «Notepad», give the following command:
- RunAsService install «Notepad» «C:WindowsSystem32notepad.exe»

2. If after executing the above command you receive the message «An app needs the .Net Framework 2.0 feature to work», click Download and install this feature, or download the .Net Framework 2.0 from the Microsoft download center.

6. After the command execution, a new Windows Service will appear in the services list, with the name you specified in the «RunAsService» command. To run the newly created service at startup:
a. Right-click on the service and choose Properties.

b. Ensure that the Startup type is set to Automatic.

c. Restart your PC, to test the service. *
* Notes:
1. You can start or stop the service at any time you want, by running the «net start» or the «net stop» commands in Command Prompt (Admin).
2. If you want to uninstall the installed service in the future:
a. Stop the service by running this command in Admin Command Prompt:
- net stop «ServiceName«
e.g. net stop «Notepad»
b. Uninstall the service by giving this command:
- RunAsService uninstall «ServiceName«
e.g. RunAsService uninstall «Notepad»

Method 2. How to run any program as a service by using NSSM.
The second method to run any application as a service in Windows, is by using the Non-Sucking Service Manager tool.
1. Download NSSM.
2. Extract the downloaded ZIP file.
3. Rename the extracted folder (e.g. «nssm-2.24»), to NSSM.
4. Copy the NSSM folder to the root folder of drive C:
5. Open Command Prompt as Administrator and navigate to the NSSM folder, by typing the following commands in order (Press Enter after typing each command):
- cd
- cd nssm
6. Now according to your Windows version (32 or 64bit), navigate to the one of two contained subfolders, by type the corresponding command (and press Enter).
- If you own 64Bit Windows, type: cd win64
- If you own 32Bit Windows, type: cd win32
7. Now type the following command: *
- nssm install

8. In the window that opens:
8a. Press the tree (3) dots button next ![]() to PATH and select the application’s executable that you want to run as a service.
to PATH and select the application’s executable that you want to run as a service.

8b. When done, type a Name for the new service and click Install service.

8c. Click OK to the message «Service installed successfully» and you’re done! *
* Notes:
1. After installing the service with the NSSM service installer, a new Windows Service will appear in the services list, with the name you specified in the Service name, than can be managed as any other Windows service.
2. To uninstall the service in the future:
a. Follow the steps 5 & 6 above, and then type the following command: *
- nssm remove ServiceName
* Note: Where ServiceName = the name of the service you created, using the NSSM utility.
e.g. nssm remove NOTEPAD in this example.

b. Finally click Yes to Remove the service.

That’s it! Let me know if this guide has helped you by leaving your comment about your experience. Please like and share this guide to help others.
If this article was useful for you, please consider supporting us by making a donation. Even $1 can a make a huge difference for us in our effort to continue to help others while keeping this site free:

If you want to stay constantly protected from malware threats, existing and future ones, we recommend that you install Malwarebytes Anti-Malware PRO by clicking below (we
do earn a commision from sales generated from this link, but at no additional cost to you. We have experience with this software and we recommend it because it is helpful and useful):
Full household PC Protection — Protect up to 3 PCs with NEW Malwarebytes Anti-Malware Premium!
I’ve got a project which has an application monitoring a set of applications through API’s.
If those applications to monitor become non responsive, I have a windows service that can take the request of the monitoring application to restart that non responsive application.
The applications that need to be monitored can also be run as a windows service, and if this is the case I have no issue whatsoever to stop the service and restart it.
However, if the applications that need to be monitored are running as an application with a GUI, I have to go out of my way to be able to start them from the windows service.
This is because since windows 7, Microsoft has introduced session 0 isolation, meaning the service can start an application with a GUI, but that GUI would never show in the current user’s session.
I’ve tried hijacking the current user’s token, starting the application with that token but that doesn’t work, and frankly I was way out of my depths because this was with C++.
In the end I’ve settled for creating a scheduled task that starts the application, but as soon as I stop that task the application shuts down as well. This has forced me to create a separate task for each application I’m restarting. It works, but I’m not 100% satisfied..
I was hoping someone here could point me to a way I haven’t tried yet, if there is any. Many hours spent Googling this.
Thanks in advance!