Содержание
- 1 Решение 1. Попробуйте эту простую командную настройку
- 2 Решение 2. Чистая загрузка
- 3 Решение 3. Восстановите контроль над своей папкой пользователя
- 4 Решение 4: Странные глюки антивируса
- 5 Решение 5. Специальная переустановка проигрывателя Windows Media
- 6 Решение 6. Исправьте службу общего доступа к проигрывателю Windows Media.
- 7 Решение 7. Переустановите Java
Проигрыватель Windows Media уже давно является встроенным компонентом всех операционных систем Windows и не был удален даже в ОС Windows 10. Он довольно прост в использовании и определенно не требует ресурсов, что делает его одним из самых популярных медиаплееров всех времен.
Решение 1. Попробуйте эту простую командную настройку
Вот простая команда, которая действительно может решить проблему мгновенно, и это займет всего минуту вашего времени. Этот метод очень полезен, если вы замечаете другие проблемы на вашем компьютере, такие как неисправность гаджетов Windows и т. Д.
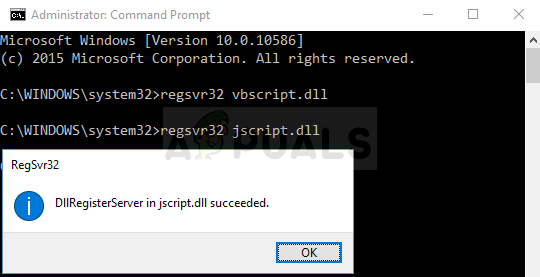
- Найдите «Командная строка», щелкните ее правой кнопкой мыши и выберите «Запуск от имени администратора». Скопируйте и вставьте следующие команды и обязательно нажимайте Enter после каждой:
regsvr32.exe jscript.dll
regsvr32.exe vbscript.dll
- Проверьте, решена ли проблема после перезагрузки компьютера.
Решение 2. Чистая загрузка
Чистая загрузка, чтобы успешно обнаружить службу или процесс, который запускается на вашем компьютере, определенно является решением номер один. Некоторые другие сервисы просто мешают работе медиаплеера из-за разрешений, и вам нужно будет определить, какой из них, просто исключив их.
- Используйте комбинацию клавиш «Windows + R» на клавиатуре. В диалоговом окне «Выполнить» введите «MSCONFIG» и нажмите «ОК».
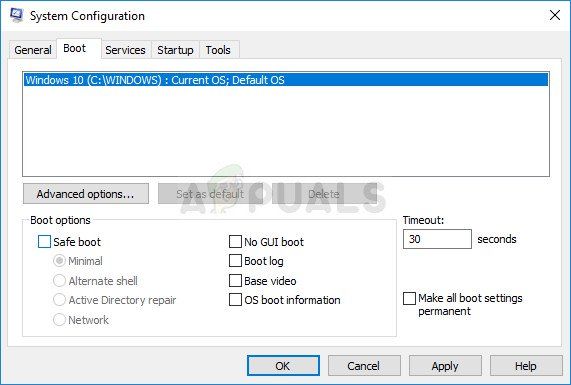
- Нажмите на вкладку «Загрузка» и снимите флажок «Безопасная загрузка» (если установлен).
- На вкладке Общие в том же окне щелкните, чтобы выбрать параметр Выборочный запуск, а затем нажмите, чтобы снять флажок Загружать элементы запуска, чтобы убедиться, что он не установлен.
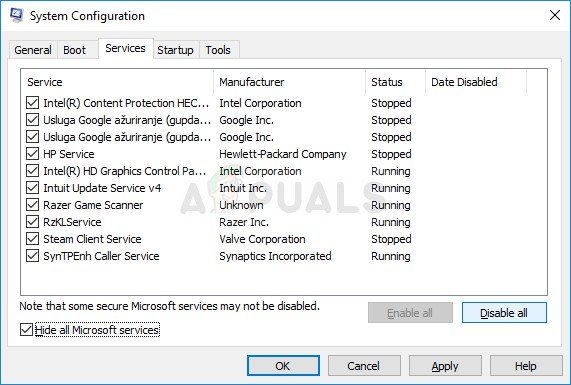
- На вкладке «Службы» установите флажок «Скрыть все службы Microsoft» и нажмите «Отключить все».
- На вкладке «Автозагрузка» нажмите «Открыть диспетчер задач». В окне «Диспетчер задач» на вкладке «Автозагрузка» щелкните правой кнопкой мыши по каждому включенному элементу автозагрузки и выберите «Отключить».
- После этого вам нужно будет выполнить некоторые из самых скучных процессов, то есть включить элементы запуска по одному и перезагрузить компьютер. После этого вам нужно проверить, появляется ли ошибка снова. Вам нужно будет повторить тот же процесс даже для Сервисов, которые вы отключили в Шаге 4. После того, как вы обнаружите проблемный элемент автозагрузки или сервис, вы можете предпринять действия для решения проблемы. Если это программа, вы можете переустановить ее или починить. Если это услуга, вы можете отключить ее и т. Д.
Решение 3. Восстановите контроль над своей папкой пользователя
Если вы выполняли определенные изменения в своей ОС, вполне возможно, что что-то сделало вашу пользовательскую папку заблокированной из Media Player, и вам нужно получить контроль над ней, чтобы позволить Windows Media Player получить доступ к файлам под вашим управлением. Следуйте инструкциям ниже, чтобы сделать это:
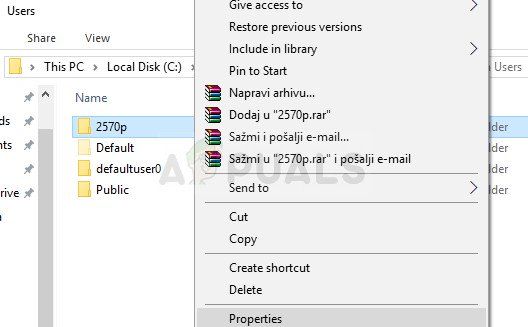
- Откройте проводник, а затем найдите C >> Users >> YourUsername. Щелкните правой кнопкой мыши папку, выберите «Свойства» и перейдите на вкладку «Безопасность».
- Нажмите кнопку Advanced, чтобы открыть окно Advanced Security Settings. Здесь вам нужно изменить владельца ключа, поэтому начните с нажатия на ссылку «Изменить» рядом с меткой «Владелец:».
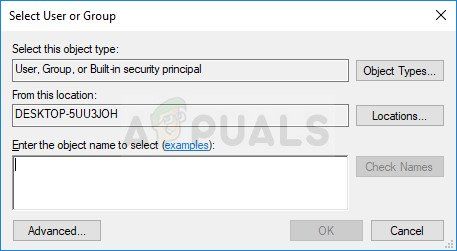
- Появится окно выбора пользователя или группы. Выберите свою учетную запись пользователя с помощью кнопки «Дополнительно» или просто введите свое имя пользователя в поле с надписью «Введите имя объекта для выбора» и нажмите «ОК».
- Кроме того, чтобы изменить владельца всех подпапок и файлов внутри папки, установите флажок «Заменить владельца на подконтейнеры и объекты» в окне «Дополнительные параметры безопасности». Нажмите кнопку ОК, чтобы изменить владельца.
- Теперь вам нужно будет предоставить полный доступ к папке для вашей учетной записи. Вернитесь на вкладку «Безопасность» в окнах «Свойства» и нажмите кнопку «Добавить», чтобы открыть окно «Ввод разрешений». Нажмите «Выбрать принципала» и выберите свою учетную запись.
- Установите права доступа «Полный контроль» и нажмите «ОК». Вы также можете выбрать параметр «Заменить все существующие наследуемые разрешения для всех потомков наследуемыми разрешениями от этого объекта» в окне «Дополнительные параметры безопасности».
Решение 4: Странные глюки антивируса
По некоторым причинам лучшие бесплатные антивирусные инструменты, такие как AVG или Avast, приводят к неправильной работе проигрывателя Windows Media. Один пользователь сообщил, что он удалил AVG и сумел решить проблему только после того, как установил Avast. Вот почему лучше всего добавить исключение в проигрыватель Windows Media в любой антивирусной программе, которую вы используете.
- Откройте антивирусный пользовательский интерфейс, дважды щелкнув его значок на панели задач или выполнив поиск в меню «Пуск».
- Параметр «Исключение» расположен в разных местах относительно разных антивирусных инструментов. Его часто можно найти просто без особых хлопот, но вот несколько быстрых советов о том, как найти его в самых популярных антивирусных инструментах:
Kaspersky Internet Security: Главная >> Настройки >> Дополнительно >> Угрозы и исключения >> Исключения >> Укажите надежные приложения >> Добавить.
AVG: Главная >> Настройки >> Компоненты >> Web Shield >> Исключения.
стой: Главная >> Настройки >> Общие >> Исключения.
Решение 5. Специальная переустановка проигрывателя Windows Media
Переустановка инструмента обычно является логичным шагом для всех, у кого есть проблемы с программой, и многие пользователи сделали это, и это не сработало. Тем не менее, это сработало для людей, которые следовали этому конкретному набору шагов, которые работали с самого начала. Убедитесь, что вы не пропустите ни шагу!
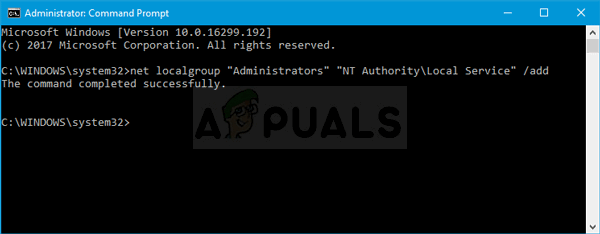
Прежде всего, вы должны выполнить этот трюк командной строки, который может даже решить проблему самостоятельно, поэтому убедитесь, что вы проверяли, решена ли проблема после прохождения команды:
- Найдите «Командная строка», щелкните ее правой кнопкой мыши и выберите «Запуск от имени администратора». Скопируйте и вставьте следующую команду и обязательно нажмите Enter после этого.
net localgroup «Администраторы» «NT Authority Local Service» / добавить
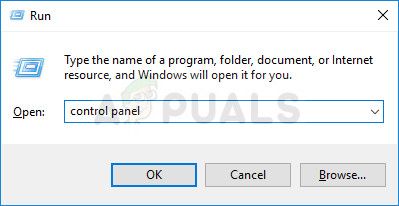
- На клавиатуре используйте комбинацию клавиш Windows + R, чтобы открыть диалоговое окно «Выполнить». Кроме того, вы можете искать их непосредственно в меню «Пуск», если ваша ОС Windows поддерживает это.
- Введите в панели управления и нажмите кнопку ОК, чтобы открыть его.
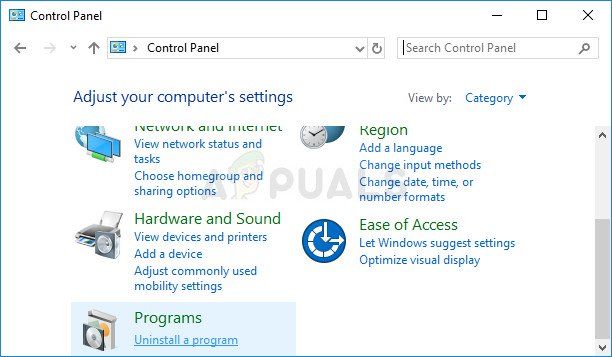
- Измените представление на панели управления на «Просмотр по: категории» и нажмите «Удалить программу» в разделе «Программы».
- В правой части открывшегося экрана нажмите «Включить или отключить функции Windows» и найдите раздел «Функции мультимедиа». Разверните список и найдите Windows Media Player. Снимите флажок рядом с ним, нажмите ОК и подтвердите все появившиеся диалоговые окна. После этого перезагрузите компьютер (важно)!
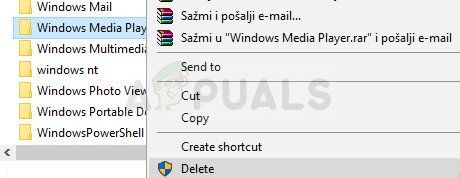
- После этого перейдите в папку Program Files или Program Files (x86) на используемом диске (в зависимости от архитектуры вашего ПК) и удалите папку Windows Media Player.
- Теперь вы можете вернуться к записи проигрывателя Windows Media в разделе «Включение или отключение компонентов Windows» и снова установить флажок рядом с ним, что инициирует процесс переустановки. После завершения установки перезагрузите компьютер и перезагрузите компьютер снова. Проверьте, решена ли проблема!
Решение 6. Исправьте службу общего доступа к проигрывателю Windows Media.
Если служба для проигрывателя Windows Media вышла из строя, ошибки, подобные той, о которой мы сейчас говорим, неизбежно произойдут, и вы почти ничего не можете сделать, чтобы исправить это, кроме исправления самой службы.
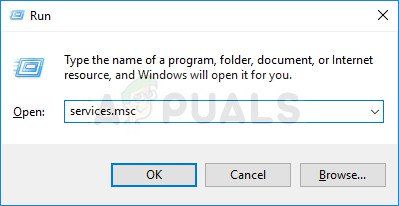
- Откройте диалоговое окно «Выполнить» с помощью комбинации клавиш Windows + R. Введите «services.msc» без кавычек в диалоговом окне «Выполнить» и нажмите «ОК», чтобы открыть «Службы».
- Найдите службу общего доступа к проигрывателю Windows Media, щелкните ее правой кнопкой мыши и выберите «Свойства» в контекстном меню.
- Если служба остановлена (вы можете проверить это рядом с сообщением о состоянии службы), вы должны оставить ее остановленной. Если он запущен, нажмите кнопку «Стоп» и дождитесь завершения работы службы.
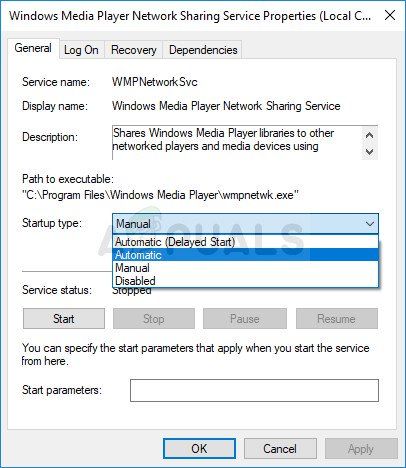
- Убедитесь, что в разделе «Тип запуска» в разделе «Свойства службы общего доступа к проигрывателю Windows Media» установлено значение «Автоматически», прежде чем нажимать кнопку «Пуск», чтобы перезапустить службу и проверить, решена ли проблема.
При нажатии кнопки «Пуск» может появиться следующее сообщение об ошибке:
«Windows не удалось запустить службу общего доступа к проигрывателю Windows Media на локальном компьютере. Ошибка 1079: учетная запись, указанная для этой службы, отличается от учетной записи, указанной для других служб, работающих в том же процессе ».
Если это произойдет, следуйте инструкциям ниже, чтобы исправить это.
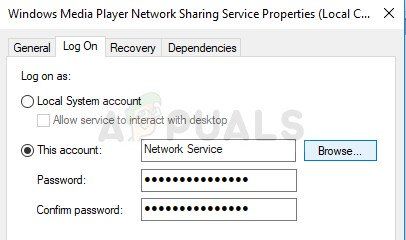
- Выполните шаги 1-3 из приведенных выше инструкций, чтобы открыть свойства службы общего доступа к проигрывателю Windows Media. Перейдите на вкладку «Вход в систему» и нажмите кнопку «Обзор…».
- В поле «Введите имя объекта для выбора» введите имя своего компьютера, нажмите «Проверить имена» и подождите, пока имя не будет аутентифицировано.
- Нажмите кнопку ОК, когда вы закончите, и введите пароль администратора в поле Пароль, когда вам будет предложено с ним.
Решение 7. Переустановите Java
Переустановка Java определенно может решить эту проблему во многих случаях, так как проигрыватель Windows Media зависит от времени работы. Возможно, на вашем компьютере он уже установлен, поэтому убедитесь, что вы удалили установленную версию, чтобы установить новую.
Удаление Java в Windows 10:
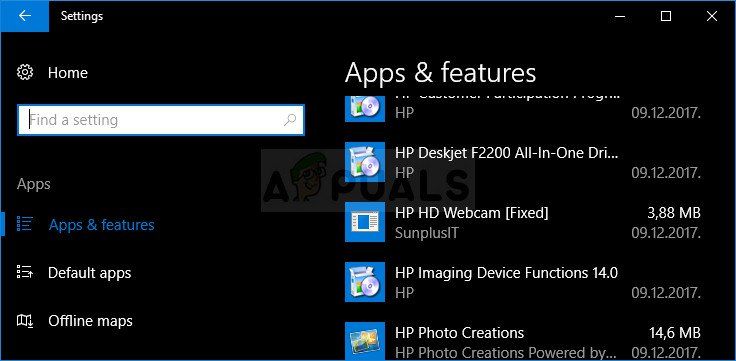
- Нажмите на меню «Пуск» в нижней левой части экрана. Выберите «Настройки», щелкнув значок шестеренки над кнопкой питания в меню «Пуск».
- Выберите раздел «Приложения» в приложении «Настройки». Выберите Java из списка установленных приложений и нажмите кнопку «Удалить».
- Ответьте на инструкции, отображаемые на экране, чтобы завершить процесс удаления.
Удаление Java в предыдущих версиях Windows:
- Нажмите на меню «Пуск» в нижней левой части экрана.
- Выберите «Панель управления» в меню «Пуск» и переключите параметр «Просмотр по» на «Категория». Выберите «Удалить программу» в разделе «Программы».
- Выберите Java из списка установленных программ, нажав на нее, а затем нажмите кнопку Удалить. Следуйте инструкциям на экране, чтобы завершить работу мастера.
Установка Java
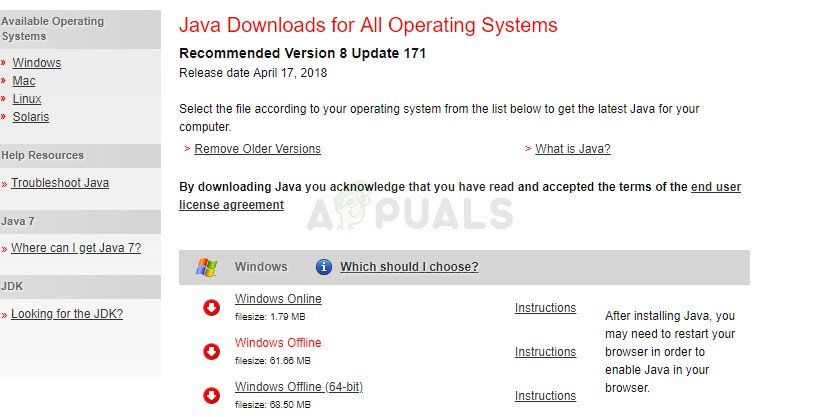
Есть два способа установки Java. Вы можете использовать онлайн-установщик, который загружает только небольшой файл, который используется для загрузки всей программы, или вы можете загрузить весь пакет и установить его без активного подключения к Интернету. Вот как установить его в автономном режиме:
- Перейдите на страницу загрузки вручную и нажмите «Не в сети».
- Появится диалоговое окно «Загрузка файла», предлагающее запустить или сохранить загружаемый файл. Нажмите «Сохранить», чтобы загрузить файл в локальную систему.
- Закройте все приложения, включая браузер, и дважды щелкните сохраненный файл, чтобы начать процесс установки. Нажмите кнопку Установить, чтобы принять условия лицензии и продолжить установку.
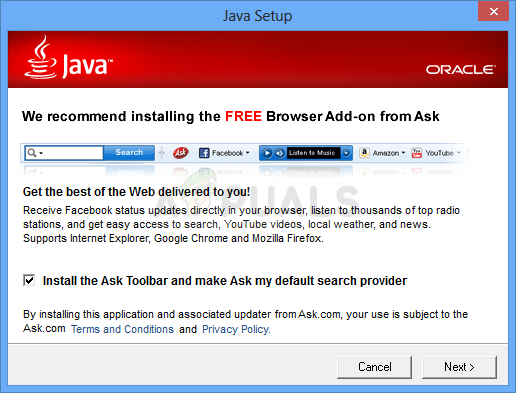
- Oracle сотрудничает с компаниями, которые предлагают различные продукты. Установщик может предоставить вам возможность установить эти программы при установке Java. Убедившись, что выбраны нужные программы, нажмите кнопку «Далее», чтобы продолжить установку.
- Несколько коротких диалогов подтверждают последние шаги процесса установки; нажмите Закрыть в последнем диалоговом окне. Это завершит процесс установки Java.
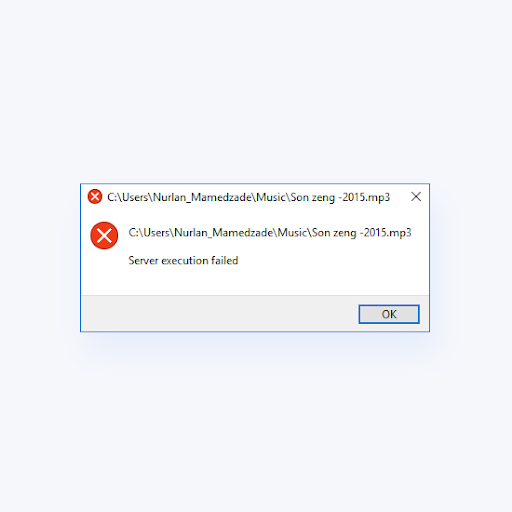
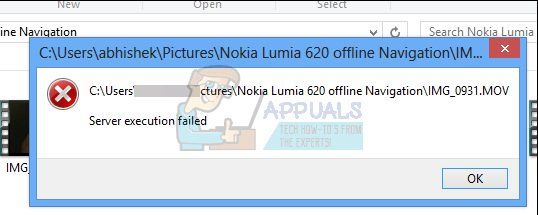
The Windows Media Player allows you to stream media with ease. It comes pre-installed on all recent Windows systems, allowing immediate access to videos, movies, and audio files even on a fresh install. However, users have been running into an error that reads “Server execution failed” when trying to open files in Windows Media Player.
In this article, you can learn how to fix the “Server execution failed” error when viewing files in Windows Media Player. We’ll be using Windows 10 for the purposes of demonstrating the proper fixes.
Solved: “Server execution failed” in Windows Media Player
Method 1. Start your computer in clean boot
Starting your computer in a clean boot will ensure that no applications clash with each other and no third-party conflicts cause errors on your system. With non-Microsoft apps and services disabled, you can see if the Windows Media Player is able to function.
This is how you can perform a clean boot on your Windows 10 system:
- Press the Windows + R keys on your keyboard. This is going to bring up the Run utility.
- Type in “msconfig” without the quotation marks and press the Enter key on your keyboard. This will launch the System Configuration window.
- Switch over to the Services tab. Make sure that you check the “Hide all Microsoft services” box. This is going to ensure that you only see third-party services.
- After hiding all system services, click the Disable all button to temporarily disable every third-party service on your device.
- Click the Apply button and restart your computer. Now you’ll be in a clean boot state with only official Microsoft services running.
- See if you’re able to use Windows Media Player without issues. If so, one of your third-party services is interfering with the software — find out which, and disable it.
Method 2. Terminate the “wmplayer” process
By default, your computer shouldn’t be able to launch multiple instances of an app. In some rare cases, this is bypassed and duplicate processes may appear running simultaneously on the system. Exiting all Windows Media Player processes and then reopening the application may fix your error.
- Right-click on an empty space in your taskbar and choose Task Manager.
- If the Task Manager launched in compact mode, make sure to expand details by clicking on the “Mode details” button.
- Switch to the Details tab using the header menu in the Task Manager. Here, look for the process named “wmplayer.exe” and select it, then click End task.
- Look for multiple “wmplayer.exe” processes, and terminate all of them. After ensuring that there’s no active Windows Media Player process, relaunch the app and check if the error still comes up.
Method 3. Use the Windows store apps troubleshooter
Windows 10 comes with built-in troubleshooters to help you quickly identify and fix errors. It’s possible that by running the Windows store apps troubleshooter, your error in Windows Media Player will be automatically fixed.
- Click on the Windows icon in the bottom left of your screen to bring up the Start menu. Choose Settings, or alternatively use the Windows + I shortcut.
- Click on the Update & Security tile.
- Switch to the Troubleshoot tab using the left-side pane. Here, you should be able to see a troubleshooter titled Windows Store Apps.
- If you don’t share full diagnostic data to Microsoft, click on the Additional troubleshooters link and locate the Windows Store Apps troubleshooter there.
- Click on the Run the troubleshooter button.
- Wait for the troubleshooter to identify the issue and apply any possible fixes. Please note that your device may shut down and restart during this process. When it’s finished, see if you’re able to use the Windows Media Player.
Method 4. Re-register DLL files with the Command Prompt
You can use the Command Prompt to run two specific commands in order to fix the Windows Media Player. These commands re-register key DLL files that are often the very source of the “Server execution failed” error.
- Open the Search function in your taskbar, or alternatively use the Ctrl + S keyboard shortcut to bring up the search bar and look up “Command Prompt”.
- Right-click on it from the results, and then choose Run as Administrator.
- When prompted by the User Account Control (UAC), click Yes to allow the app to launch with administrative permissions.
Need help? Check out our How to make a local user an administrator in Windows 10 guide.
- Input the following commands. Press Enter on your keyboard after each line to execute the command:
regsvr32.exe jscript.dll
regsvr32.exe vbscript.dll - Restart your computer and check if the error in Windows Media Player is still happening.
Method 5. Temporarily disable your antivirus
Antivirus applications are known to cause issues on computers by interfering with your Internet connection or blocking apps and services from running properly. You can test if the antivirus you’re using at the moment is causing the error by temporarily disabling it.
Note: This method is not recommended as it is unsafe to use your computer without protection. Only proceed if you’re aware of the possible risks and have a backup of your system to revert any damage that may happen.
- Right-click on an empty space in your taskbar and choose Task Manager.
- If the Task Manager launched in compact mode, make sure to expand details by clicking on the “Mode details” button.
- Switch to the Start-up tab using the header menu located at the top of the window.
- Find your antivirus application from the list and select it by clicking on it once.
- Click on the Disable button now visible in the bottom-right of the window. This will disable the application from launching when you start your device.
- Restart your computer.
Method 6. Give your local user full access to the user folder
Some recent system modifications may have affected your permissions as a local user. This could result in you losing full access to your user folder, causing the Windows Media Player to have an error.
- Open the File Explorer. This can be done by clicking on the Explorer icon in your taskbar, or by pressing the Windows + E keys on your keyboard.
- Navigate to This PC → C: drive → Users. Look for a folder with your local account’s username.
- Right-click on your user folder, and then select Properties.
- Switch to the Security tab, and then click on the Advanced button. This should open the Advanced Security Settings window.
- Click on the Change link next to the current owner of the folder. You’ll need administrative permissions to be able to do this.
- Type in your user account’s name in the Enter the object name to select field, then click on the Check Names button. The system should automatically input your full account name. When done, click the OK button.
- Next, click on the Add button.
- Click on the Select a principal link next to the Principal section. Select your user account using the same method(s) as described above and click the OK button.
- Place a checkmark in the Full control box under the Basic permissions section.
- Exit all of the Properties windows and restart your computer. Check if you’re still experiencing issues with the Windows Media Player afterward.
Method 7. Add the Administrator group to the Local Service
Another way of fixing permission-related issues is by adding the entire Administrator group to the Local Service. You can do this with the Command Prompt.
- Open the Search function in your taskbar, or alternatively use the Ctrl + S keyboard shortcut to bring up the search bar and look up “Command Prompt”.
- Right-click on it from the results, and then choose Run as Administrator.
- When prompted by the User Account Control (UAC), click Yes to allow the app to launch with administrative permissions.
- Input the following command, and then press Enter on your keyboard after each line to execute it: net localgroup “Administrators” “NT AuthorityLocal Service” /add
- Reboot your device and check if you’re able to use the Windows Media Player after performing these steps.
Method 8. Disable the Windows Media Player Network Sharing Service
Some users have reported that going into the Service manager and disabling this specific Windows Media Player service fixed their issues.
- Open the search bar in your taskbar by clicking on the magnifying glass icon. You can also bring it up with the Windows + S keyboard shortcut.
- Type in Services and click on the first search result.
- Scroll down and locate the Windows Media Player Network Sharing Service. Right-click on it, and then choose Properties.
- Set the Startup type to Disabled, and then click the Apply button. This will completely take the service out of your system until you manually re-enable it.
- Restart your computer and see if you’re able to use Windows Media Player without the “Server execution failed” error.
Method 9. Reinstall Windows Media Player
If nothing has worked so far, you might have to reinstall the Windows Media Player. As it is a system app, the process is slightly different from regular app uninstalls.
- Press the Windows + R keys on your keyboard. This is going to bring up the Run utility.
- Type in “control” without the quotation marks and press the Enter key on your keyboard. This will launch the Control Panel application.
- Click on the Programs header. If you don’t see this, change your view mode to Category in the upper right corner.
- Click on the Turn Windows features on or off-link. You’ll need administrative permissions to complete this action.
- Scroll down and expand the Media features category, and then remove the checkmark from the Windows Media Player checkbox.
- Click OK and restart your computer. After the reboot is complete, navigate back to the same window and re-select the Windows Media Player.
Final thoughts
We hope this helps you. If you liked this article please share. Also, our Help Center offers hundreds of guides to assist you if you’re in need of further help. Return to us for more informative articles, or get in touch with our experts for immediate assistance.
One more thing
Would you like to receive promotions, deals, and discounts to get our products for the best price? Don’t forget to subscribe to our newsletter by entering your email address below! Be the first to receive the latest news in your inbox.
You may also like
» How to Fix Error 0xc00d5212 in Windows Media Player
» How To Get the HEVC Codec Windows 10 for Free
» How to fix Audio and Video out of Sync in Windows 10
Download PC Repair Tool to quickly find & fix Windows errors automatically
It may so happen that when trying to play music files using the Windows Media Player, you receive Server execution failed popup. Post this; you will not be able to play media files for some time. Some users reported that even if they reinstall Windows Media Player, it did not solve the problem. In this post, we will suggest a few methods to resolve this problem
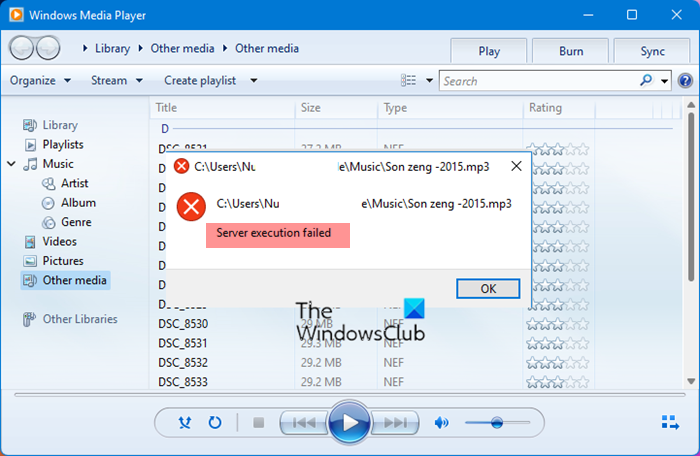
“Server execution failed”means that “wmplayer.exe” is still running or shutting down at that point. It is possible that it is stuck, and is not able to close.
- Run Video Playback Troubleshooter
- Disable WMP Network Sharing Service
- Register jscript.dll and vbscript.dll.
Make sure to try each of them, and then check if the problem was resolved. If you do that, and the problem occurs again, you will know how to fix it.
1] Run Video Playback Troubleshooter
Microsoft Easy Fix It for Windows Media Player is no more available. It used to fix this problem in the early version of Windows. Now, the alternate option is to run Video Playback troubleshooter.
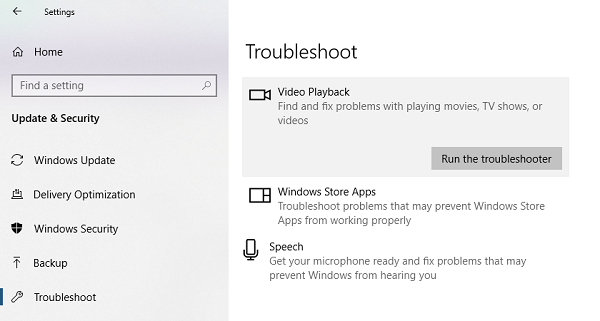
Go to Settings > Windows Update & Security > Troubleshoot > Video Playback > Run the troubleshooter.
Did this help?
2] Disable WMP Network Sharing Service
WMP Network sharing service is used to share Windows Media Player libraries to other networked players and media devices using Universal Plug and Play. Since you are not using any network here, and all you want to do is play a music file, disable this service.
- Type services.msc in the run prompt and hit Enter to open the Services Manager.
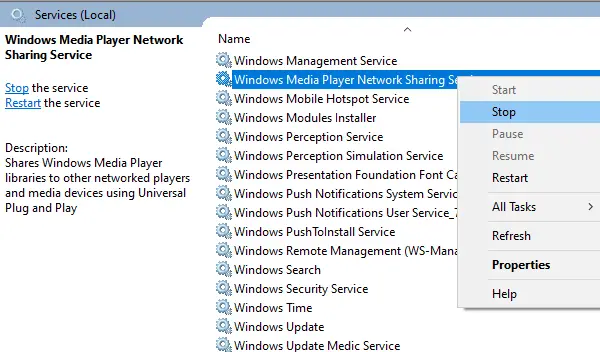
- From the Services list, find Windows Media Player Network Sharing Service
- Right click on it, and select Stop.
See if this helped.
3] Register jscript.dll and vbscript.dll
- Press Windows key + X, select PowerShell (Admin) to bring up an elevated prompt
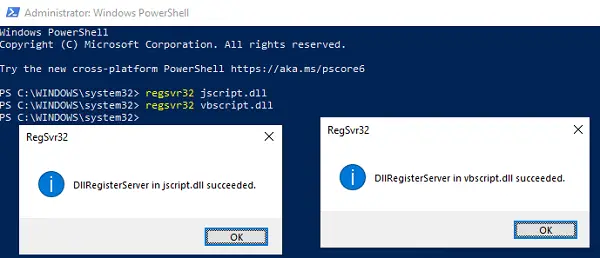
- Type regsvr32 jscript.dll hit Enter and then click on the confirmation box.
- Repeat the same for regsvr32 vbscript.dll.
- It will reregister the DLLs required or working of the Media Player.
- Exit.
If you are still using Windows 7 or Windows Vista, we would recommend you check details in our Troubleshooting Media Player post. Microsoft used to offer a quick fix in the form of a diagnostic program which did resolve the issue.
Related:
- Windows Backup Server execution failed (0x80080005)
- Explorer.exe server execution failed.
Ashish is a veteran Windows and Xbox user who excels in writing tips, tricks, and features on it to improve your day-to-day experience with your devices. He has been a Microsoft MVP (2008-2010).
“Server Execution Failed” occurs on Windows Media Player when you try to open some files.
If you have come across this issue & looking for some solutions, continue to read this guide. We will explain several ways to fix it.
As you already know, Windows Media Player is a built-in tool in Windows OS. It was in use for a very long time.
This tool is included even in the latest Windows 10 editions. It is a pretty simplified player with all the essential features. This player comprises a friendly user interface.
One of the key things associated with the Windows Media Player is that it has very lightweight. All those features together make it one of the most popular tools.
Although it functions smoothly all the time, it tends to experience occasional issues. After all, there is no invincible software, and Windows Media Player is no exception.
“Server Execution Failed” is one of those issues that many users often experience. There is no shortage of methods to try and solve this issue.
However, not all those issues are effective as they claim. So, to make it easier for you, we have created a list of solutions.
That said, mentioned below are the solutions you should try if you see Server Execution Failed error.
Method 1: Use Command Prompt to Fix the Server Execution Failed issue
You can use the command prompt in your system and fix the “Server Execution Failed” issue. Interestingly, many individuals could fix this issue simply by using this command. The truth is that this method can fix various other problems on the PC.
- First, hit the “Windows” key on the keyboard and search for the term “Command Prompt.”
- Once it is displayed on the Start Menu, right-click on it and select the option called “Run as Administrator.”
- Now, you should type each of the below lines. Be sure to hit “Enter” after typing each line. If you don’t want to type them, just copy each of those lines one after the other. You should still hit “Enter” after typing each command.
regsvr32.exe jscript.dll
regsvr32.exe vbscript.dll

- Now, check if the problem is gone.
PS: learn more about how to fix unexpected_kernel_mode_trap and how to fix the sync session failed to start error.
Method 2: Clean Boot Your Computer
Performing a Clean Boot is another fix you can try if the “Server Execution Failed” error occurs. When you clean boot a computer, the services that may bother Windows Media Player will be stopped. So, that can be a great solution.
- First, launch the “Run” utility by using the “Windows” + “R” keys on the keyboard. Then, enter the text “msconfig” and hit the “OK” or “Enter” key.

- On the “Boot” tab, uncheck the “Safe Boot” option.

- Go to its “General” tab and click “Selective Startup.” Then, click on “Load Startup Items” and check.

- Go to the “Services” tab and select “Hide all Microsoft services.”
- Click on “Disable All.”

- Click on “Open Task Manager” under the “Startup” tab. Then right-click on each item displayed and select the option “Disable.”
- Now, you will have to manually enable the Startup items. After enabling one service, you should restart the computer. Then, enable the next one and restart the computer again. Do it until you enable all the items. It is a pretty daunting task.
- After locating the erroneous item, take the necessary actions to resolve it. For instance, you can reinstall it.
Method 3: Reconfigure Your User Folder
If your user folder is locked, Windows Media Player will experience some issues. In this case, you should permit Windows Media Player to access the files under the administration.
Mentioned below are the steps.
- Launch File Explorer and go to C > Users > Your Username.
- Then, Right-click on the folder and click on Properties. Then, go to the “Security” tab.


- You can click on the “Advanced” button and launch “Advanced Security Settings” now. Click on the Change link, which is located next to the “Owner.”

- Now, you will see the Select User option. Use the Advanced button to select the user account. Then, hit OK.

- Now, you should change the owner of the subfolders (all of them). Then, click “Replace owner on subcontainers and objects” to check it. It is located in the “Advanced Security Settings.” Click on OK so that it will change the ownership.

- After that, you should grant full access to the account’s folder. Go to the “Security” tab located in the “Properties.” Then, click “Add” and open the “Permission Entry” window.

- Click on the “Select a Principal” option and choose the account now.

- Give “Full Control” and click on “OK.” Then, choose “Replace all existing inheritable permissions on all descendants with inheritable permissions from this object.” It is under “Advanced Security Settings.”


Method 4: Check for Potential Conflicts Created by Antivirus
Interestingly, your antivirus can create some errors on your system and make Windows Media Player malfunction. Although this is not always possible, you shouldn’t underestimate the probability.
It can be fixed by adding an exception to Windows Media Player’s antivirus program. Let’s see how to get it done.
- Launch the antivirus program.
- Adding exceptions can vary depending on the type of antivirus you are using. Here are the steps to perform it with the most common antivirus programs in the market.
- For Kaspersky Internet Security: Go to Home and choose Settings. Go to Additional and select Threats and Exclusions. Select Exclusion and choose Specify Trusted Applications and select Add.
- For AVG: Go to Home and choose Settings. Select Components and choose Web Shield. Go to Exceptions.
- For Avast: Go to Home and select Settings. Go to General and then select Exclusions.
The reinstallation of Windows Media Player can resolve the “Server Execution Failed” issue for many users. However, for some users, it hasn’t worked. It is an excellent option, so let’s see how to do it.
Start Command Prompt with Administrator privileges.
In the command prompt, enter the following code and hit enter.
net localgroup “Administrators” “NT AuthorityLocal Service” /add

- Launch Control Panel on the computer. Then, change its view to Category View.

- Click on the option called “Uninstall a program.”
- Click on the option called “Turn Windows features On/Off.” Then, locate the section labeled Media Features.
- Expand its list and find Windows Media Player. There will be a box next to it. Just check it. Click on OK and confirm when prompted.
- You can restart the computer to complete the process.
- Go to the Program Files folder. Then, delete the subfolder labeled “Windows Media Player.”
- Now, go to the Windows Media Player entry in turn Windows features on or off. Check the box next to it. It will start the reinstallation of the Windows Media Player. Restart the computer and see if it works.
If Windows Media Player Network Sharing Service is Corrupted or damaged, the “Server Execution Failed” issue can occur. Here’s how to fix it if that is the case.
- Launch Run the utility and enter “services.msc.” Hit enter so the “Services” window will open.
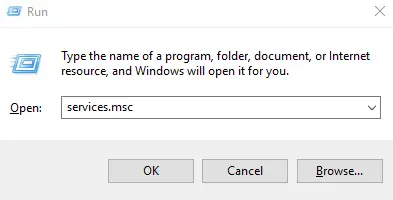
- You can locate the Windows Media Player Sharing Service now. Right-click and choose the option “Properties.”
- If it is running, just click on “Stop.”
- There is an option under the startup type of that service’s properties. Just set it to “Automatic.” Then, hit the “Start” button and restart the service.

However, if you see any error, follow the below steps and fix it.
- Open Windows Media Player Network Sharing Service properties;
- Now, go to the tab called “Log On.” Click on the “Browse” button.

- Locate the option called “Enter the object name to select.” Enter the name of your computer and click on “Check Names.” Wait for the authentication to be completed.
- Click on OK once it is completed. Then, enter the Administrator password in the password box.
Method 7: Reinstall Java on Your Computer
Reinstalling the Java component in your OS can be one of the most successful remedies to this issue. Windows Media Player works on this component and requires Java for the runtime function.
Your computer might already have this component installed. If so, you should uninstall the existing version and reinstall it.
How to Uninstall Java on Windows 10 OS
- Hit the “Windows” key on the keyboard or click on the “Start” button. Then, click on the “Settings” icon (that looks like a cogwheel above the “Power” button.”
- Go to the Apps under Settings. You can see Java under this list. Click on it and choose its “Uninstall” option.

- You should now follow the steps that are displayed on the screen and complete the uninstallation process.
How to Uninstall Java on Older Windows Versions
If you are using an older version of Windows, you should follow the steps below.
- Click on the Start menu or hit the Windows key on the keyboard.
- Go to Control Panel and navigate the option “View by.” Click on its dropdown and choose “Category.”
- Now, choose “Uninstall a Program,” which is located under Programs.

- Choose the “Java” option and click on the “Uninstall” button. Then, please follow the onscreen instructions to complete the process.
Reinstalling Java
There are two ways to install Java. You can do it either through an online installer or download the entire package and install it offline. If you do it online, a smaller file will be downloaded.
However, the offline method requires you to download the entire package. Please follow the below guide to do it.
- You should go to Java’s official website and navigate its manual download page. Then, go to the option called Windows Offline.
- Now, you should save the download file on your hard drive.

- Be sure to close all the applications that are running now. Then, double-click on the downloaded file and begin the installation. Click on “Install” and then accept the license terms.
- You will see many options during the installation process. Those programs are presented by Oracle. Just click on the desired programs and check them so they will be installed. After that, you should click on the “Next” button and continue the installation of Java.

- Confirm the dialogs that are prompted. After reaching the last dialog, click on the option “Close.”
As we believe at least one of the above methods should fix the “Server Execution Failed” error. Good luck!
This website uses cookies to ensure you get the best experience on our website

