В современных версиях Windows уже есть встроенный SSH сервер на базе пакета OpenSSH. В этой статье мы покажем, как установить и настроить OpenSSH сервер в Windows 10/11 и Windows Server 2022/2019 и подключиться к нему удаленно по защищенному SSH протоколу (как к Linux).
Содержание:
- Установка сервера OpenSSH в Windows
- Настройка SSH сервера в Windows
- Sshd_config: Конфигурационный файл сервера OpenSSH
- Подключение по SSH к Windows компьютеру
- Логи SSH подключений в Windows
Установка сервера OpenSSH в Windows
Пакет OpenSSH Server включен в современные версии Windows 10 (начиная с 1803), Windows 11 и Windows Server 2022/2019 в виде Feature on Demand (FoD). Для установки сервера OpenSSH достаточно выполнить PowerShell команду:
Get-WindowsCapability -Online | Where-Object Name -like ‘OpenSSH.Server*’ | Add-WindowsCapability –Online
Или при помощи команды DISM:
dism /Online /Add-Capability /CapabilityName:OpenSSH.Server~~~~0.0.1.0
Если ваш компьютер подключен к интернету, пакет OpenSSH.Server будет скачан и установлен в Windows.
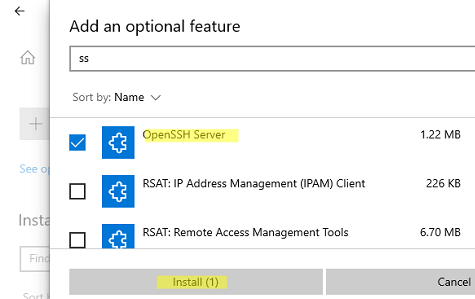
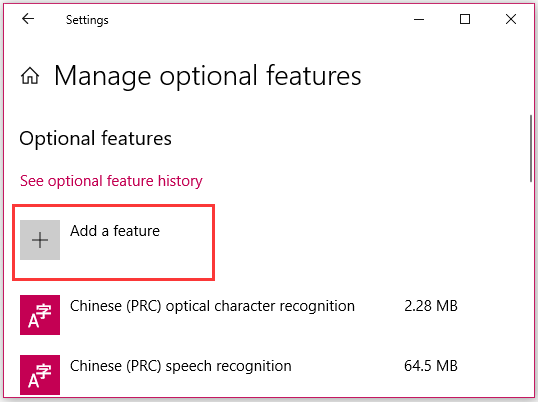
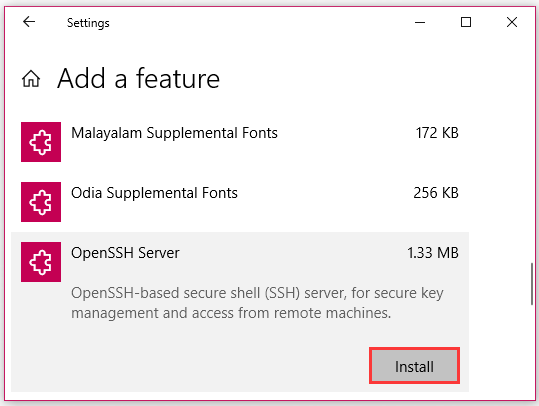
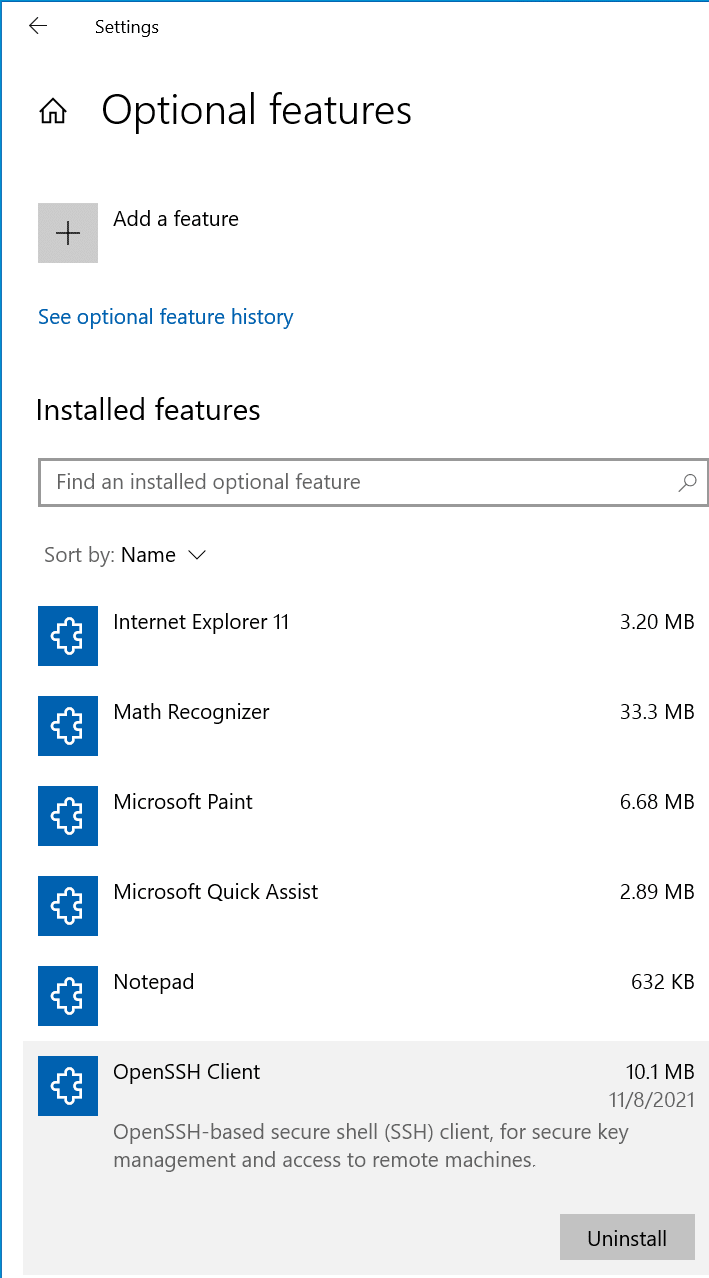
Также вы можете установить сервер OpenSSH в Windows через современную панель Параметры (Settings -> Apps and features -> Optional features -> Add a feature, Приложения -> Управление дополнительными компонентами -> Добавить компонент. Найдите в списке OpenSSH Server и нажмите кнопку Install).
На изолированных от интернета компьютерах вы можете установить компонент с ISO образа Features On Demand (доступен в личном кабинете на сайте Microsoft: MSDN или my.visualstudio.com). Скачайте диск, извлеките его содержимое в папку c:FOD (достаточно распаковать извлечь файл
OpenSSH-Server-Package~31bf3856ad364e35~amd64~~.cab
), выполните установку из локального репозитория:
Add-WindowsCapability -Name OpenSSH.Server~~~~0.0.1.0 -Online -Source c:FOD
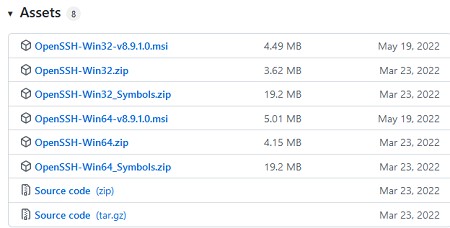
Также доступен MSI установщик OpenSSH для Windows в официальном репозитории Microsoft на GitHub (https://github.com/PowerShell/Win32-OpenSSH/releases/). Например, для Windows 10 x64 нужно скачать и установить пакет OpenSSH-Win64-v8.9.1.0.msi. Следующая PowerShell команда скачает MSI файл и установит клиент и сервер OpenSSH:
Invoke-WebRequest https://github.com/PowerShell/Win32-OpenSSH/releases/download/v8.9.1.0p1-Beta/OpenSSH-Win64-v8.9.1.0.msi -OutFile $HOMEDownloadsOpenSSH-Win64-v8.9.1.0.msi -UseBasicParsing
msiexec /i c:usersrootdownloadsOpenSSH-Win64-v8.9.1.0.msi
Также вы можете вручную установить OpenSSH сервер в предыдущих версиях Windows (Windows 8.1, Windows Server 2016/2012R2). Пример установки Win32-OpenSSH есть в статье “Настройка SFTP сервера (SSH FTP) в Windows”.
Чтобы проверить, что OpenSSH сервер установлен, выполните:
Get-WindowsCapability -Online | ? Name -like 'OpenSSH.Ser*'
State : Installed

Настройка SSH сервера в Windows
После установки сервера OpenSSH в Windows добавляются две службы:
- ssh-agent (OpenSSH Authentication Agent) – можно использовать для управления закрытыми ключами если вы настроили SSH аутентификацию по ключам;
- sshd (OpenSSH SSH Server) – собственно сам SSH сервер.
Вам нужно изменить тип запуска службы sshd на автоматический и запустить службу с помощью PowerShell:
Set-Service -Name sshd -StartupType 'Automatic'
Start-Service sshd

С помощью nestat убедитесь, что теперь в системе запущен SSH сервер и ждет подключений на порту TCP:22 :
netstat -na| find ":22"

Проверьте, что включено правило брандмауэра (Windows Defender Firewall), разрешающее входящие подключения к Windows по порту TCP/22.
Get-NetFirewallRule -Name *OpenSSH-Server* |select Name, DisplayName, Description, Enabled
Name DisplayName Description Enabled
---- ----------- ----------- -------
OpenSSH-Server-In-TCP OpenSSH SSH Server (sshd) Inbound rule for OpenSSH SSH Server (sshd) True

Если правило отключено (состоянии Enabled=False) или отсутствует, вы можете создать новое входящее правило командой New-NetFirewallRule:
New-NetFirewallRule -Name sshd -DisplayName 'OpenSSH Server (sshd)' -Enabled True -Direction Inbound -Protocol TCP -Action Allow -LocalPort 22
Рассмотрим, где храниться основные компоненты OpenSSH:
- Исполняемые файлы OpenSSH Server находятся в каталоге
C:WindowsSystem32OpenSSH
(sshd.exe, ssh.exe, ssh-keygen.exe, sftp.exe и т.д.) - Конфигурационный файл sshd_config (создается после первого запуска службы):
C:ProgramDatassh - Файлы authorized_keys и ssh ключи можно хранить в профиле пользователей:
%USERPROFILE%.ssh
Sshd_config: Конфигурационный файл сервера OpenSSH
Настройки сервере OpenSSH хранятся в конфигурационном файле %programdata%sshsshd_config. Это обычный текстовый файл с набором директив. Для редактирования можно использовать любой текстовый редактор (я предпочитаю notepad++). Можно открыть с помощью обычного блокнота:
start-process notepad C:Programdatasshsshd_config
Например, чтобы запретить SSH подключение для определенного доменного пользователя (и всех пользователей указанного домена), добавьте в конце файле директивы:
DenyUsers winitpro[email protected]
DenyUsers corp*
Чтобы разрешить подключение только для определенной доменной группы:
AllowGroups winitprosshadmins
Либо можете разрешить доступ для локальной группы:
AllowGroups sshadmins
По умолчанию могут к openssh могут подключаться все пользователи Windows. Директивы обрабатываются в следующем порядке: DenyUsers, AllowUsers, DenyGroups,AllowGroups.
Можно запретить вход под учетными записями с правами администратора, в этом случае для выполнения привилегированных действий в SSH сессии нужно делать runas.
DenyGroups Administrators
Следующие директивы разрешают SSH доступ по ключам (SSH аутентификации в Windows с помощью ключей описана в отдельной статье) и по паролю:
PubkeyAuthentication yes
PasswordAuthentication yes
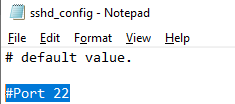
Вы можете изменить стандартный SSH порт TCP/22, на котором принимает подключения OpenSSH в конфигурационном файле sshd_config в директиве Port.
После любых изменений в конфигурационном файле sshd_config нужно перезапускать службу sshd:
restart-service sshd
Подключение по SSH к Windows компьютеру
Теперь вы можете попробовать подключиться к своей Windows 10 через SSH клиент (в этом примере я использую putty).
Вы можете использовать встроенный SSH клиентом Windows для подключения к удаленному хосту. Для этого нужно в командной строке выполнить команду:
ssh [email protected]
В этом примере
alexbel
– имя пользователя на удаленном Windows компьютере, и 192.168.31.102 – IP адрес или DNS имя компьютера.
Обратите внимание что можно использовать следующие форматы имен пользователей Windows при подключении через SSH:
-
[email protected]
– локальный пользователь Windows -
[email protected]@server1
–пользователь Active Directory (в виде UPN) или аккаунт Microsoft/ Azure(Microsoft 365) -
winitpro[email protected]
– NetBIOS формат имени
В домене Active Directory можно использовать Kerberos аутентификацию в SSH. Для этого в sshd_config нужно включить параметр:
GSSAPIAuthentication yes
После этого можно прозрачно подключать к SSH сервер с Windows компьютера в домене из сессии доменного подключается. В этом случае пароль пользователя не указывается и выполняется SSO аутентификация через Kerberos:
ssh -K server1
При первом подключении появится стандартный запрос на добавление узла в список известных SSH хостов.
Нажимаем Да, и в открывшееся окне авторизуемся под пользователем Windows.
При успешном подключении запускается командная оболочка cmd.exe со строкой-приглашением.
[email protected] C:Usersadmin>
В командной строке вы можете выполнять различные команды, запускать скрипты и программы.
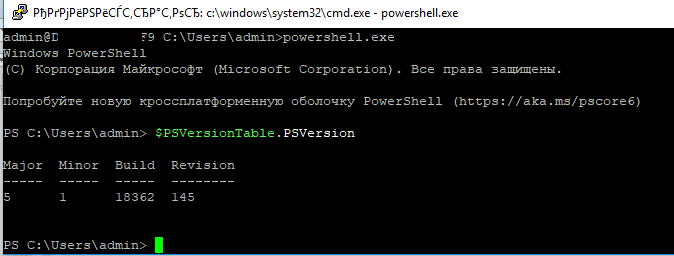
Я предпочитаю работать в командной строке PowerShell. Чтобы запустить интерпретатор PowerShell, выполните:
powershell.exe
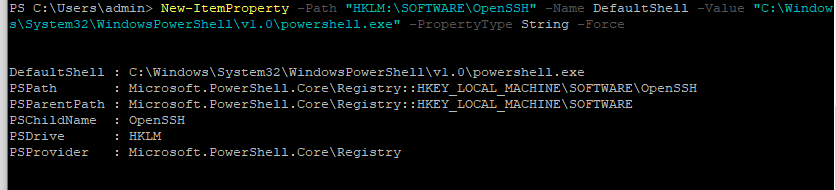
Чтобы изменить командную оболочку (Shell) по умолчанию в OpenSSH с cmd.exe на PowerShell, внесите изменение в реестр такой командой:
New-ItemProperty -Path "HKLM:SOFTWAREOpenSSH" -Name DefaultShell -Value "C:WindowsSystem32WindowsPowerShellv1.0powershell.exe" -PropertyType String –Force
Осталось перезапустить SSH подключение и убедиться, что при подключении используется командный интерпретатор PowerShell (об этом свидетельствует приглашение
PS C:Usersadmin>
).
В SSH сессии запустилась командная строка PowerShell, в которой работают привычные функции: авто дополнение, раскраска модулем PSReadLine, история команд и т.д. Если текущий пользователь входит в группу локальных администраторов, то все команды в его сессии выполняются с повышенными правами даже при включенном UAC.
Логи SSH подключений в Windows
В Windows логи подключений к SSH серверу по-умолчанию пишутся не в текстовые файлы, а в отдельный журнал событий через Event Tracing for Windows (ETW). Откройте консоль Event Viewer (
eventvwr.msc
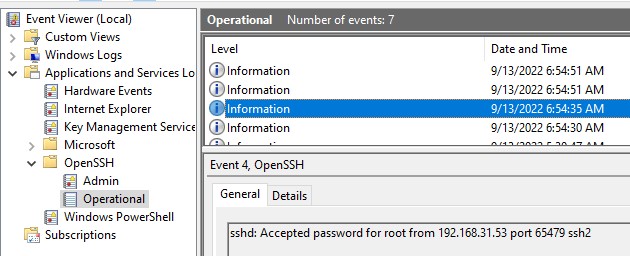
>) и перейдите в раздел Application and services logs -> OpenSSH -> Operational.
При успешном подключении с помощью к SSH серверу с помощью пароля в журнале появится событие:
EventID: 4
sshd: Accepted password for root from 192.168.31.53 port 65479 ssh2
Если была выполнена аутентификация с помощью SSH ключа, событие будет выглядеть так:
sshd: Accepted publickey for locadm from 192.168.31.53 port 55772 ssh2: ED25519 SHA256:FEHDEC/J72Fb2zC2oJNb45678967kghH43h3bBl31ldPs
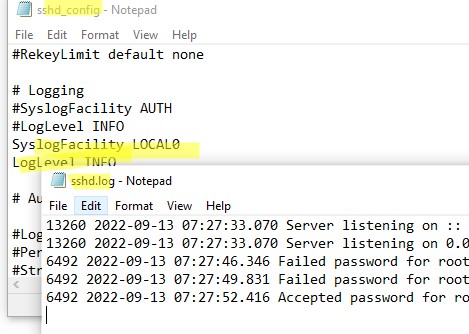
Если вы хотите, чтобы логи писались в локальный текстовый файл, нужно в файле sshd_config включить параметры:
SyslogFacility LOCAL0
LogLevel INFO
Перезапустите службу sshd и провеьте, что теперь логи SSH сервера пишутся в файл C:ProgramDatasshlogssshd.log
-
Partition Wizard
-
Partition Magic
- How to Set up SSH Client and Server on Windows 10 [Full Guide]
By Ariel | Follow |
Last Updated April 23, 2020
What is SSH Client Windows? How to set up SSH client and server on your Windows 10 PC? If you are also trying to figure them out, this post of MiniTool will walk you through detailed steps to use SSH client Windows 10.
About SSH Client Windows 10
What is SSH Windows? SSH was developed with encryption that intends to provide integrity and confidentiality of data via an unsecured network. That indicates when accessing an unsecured network by using a client server architecture, SSH Windows can provide you with a secure channel that connects to an SSH client app with an SSH server.
In order to authenticate the remote computer, SSH usually needs public-key cryptography. There are 2 major ways to use SSH Windows 10, you can use automatically or manually generated public-private key pair.
Right now, I believe that you already have an overall understanding of SSH Windows. Let’s see how to set up SSH client Windows 10.
How to Install SSH Client and Server on Windows 10
The SSH client is an optional feature on Windows 10 that isn’t installed by default. To use Windows 10 SSH client and server smoothly, you need to install OpenSSH client firstly. This is because OpenSSH is set up as a default SSH client on Windows 10 operating system.
The OpenSSH client and OpenSSH server need to be installed separately in Windows 10 1809 and Windows Server 2019. So, please install OpenSSH client and server Windows 10 respectively. For that:
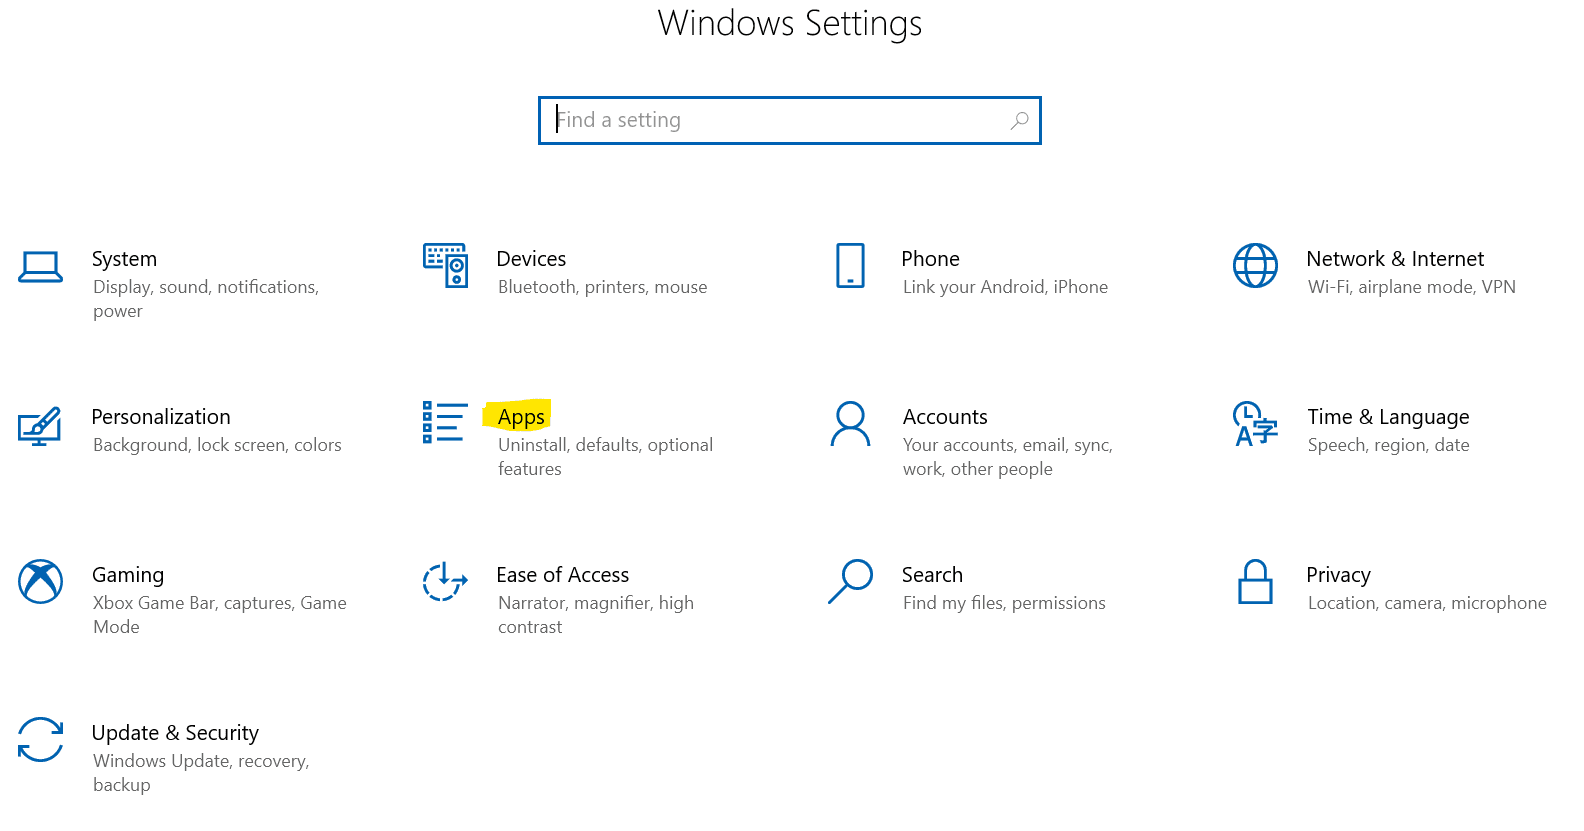
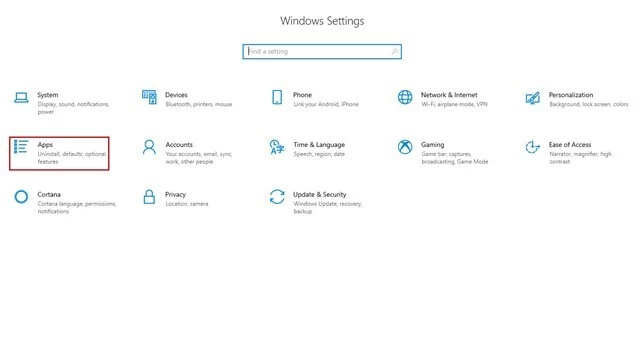
Step 1. Press Win + I keys to open the Settings app and click on the Apps section to go on.
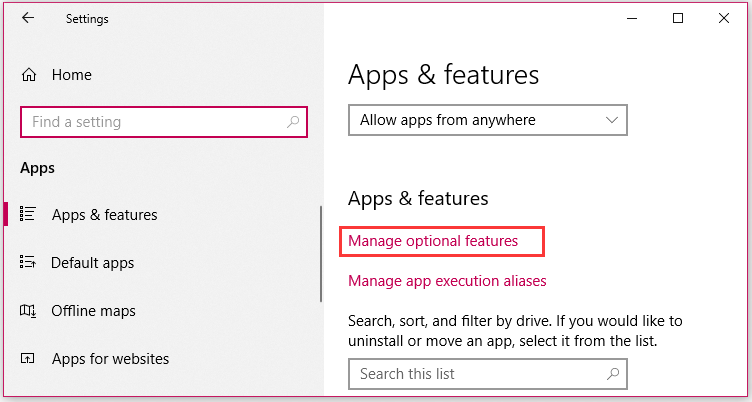
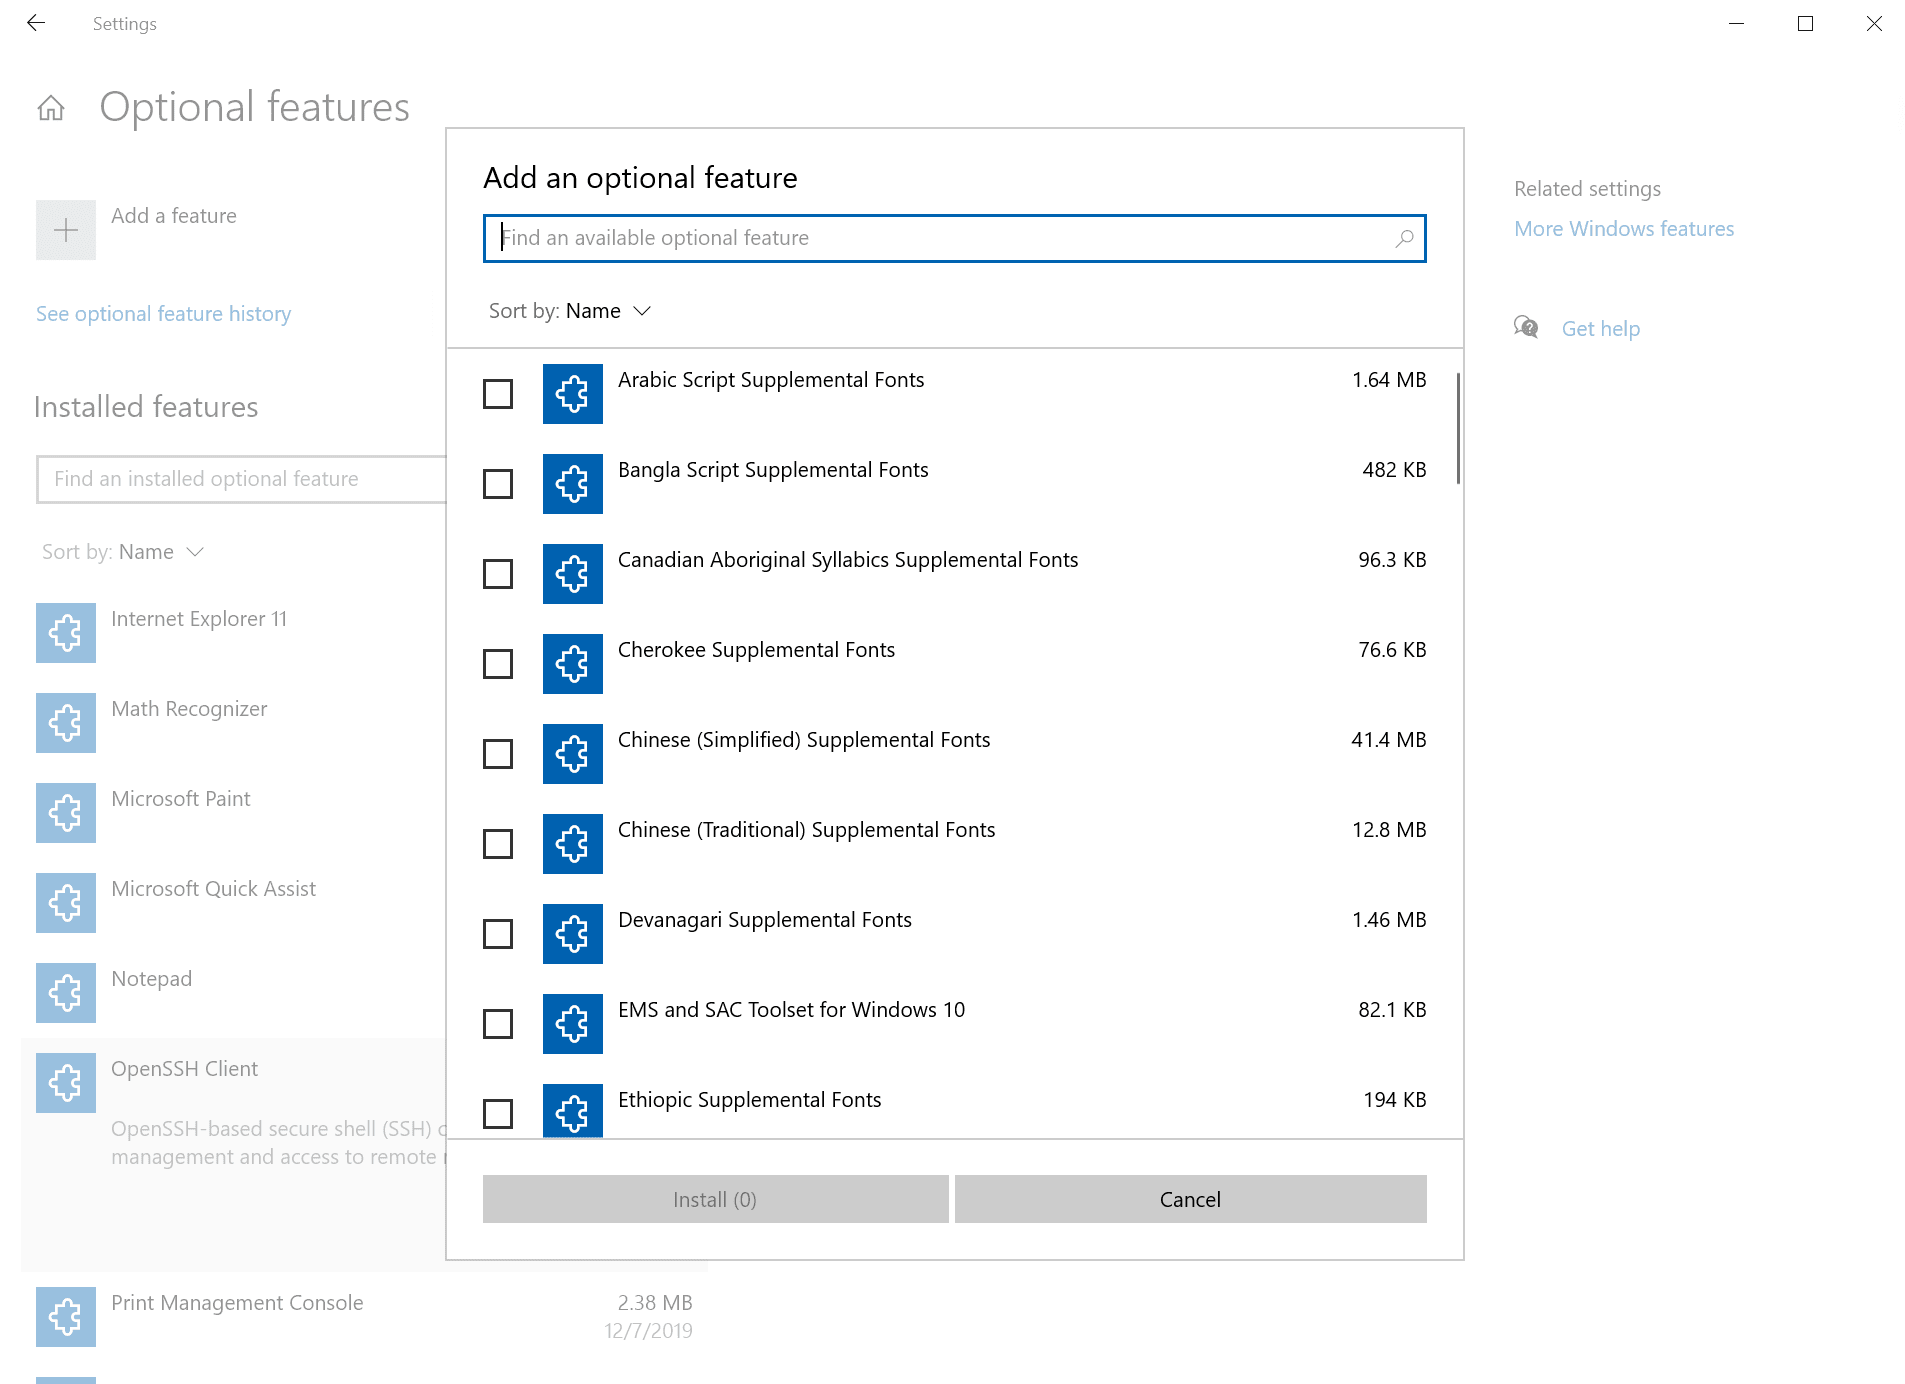
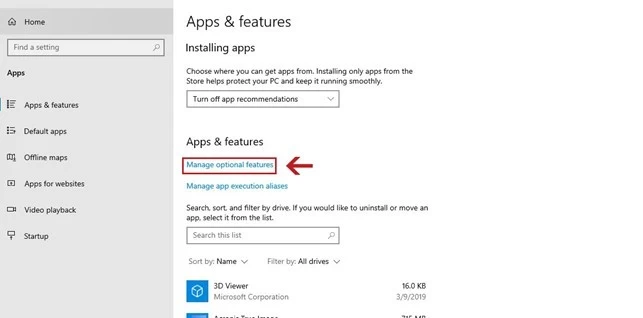
Step 2. Scroll down the right sidebar and click on the Manage optional features under the Apps & features section.
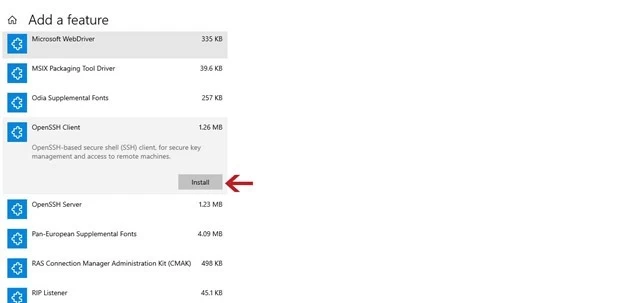
Step 3. In the pop-up window, click on the Add a feature at the top of the list of installed features.
Tip: You can scroll down this list of installed programs to check if the OpenSSH client and server have been installed. If it is, you can skip this step.
Step 4. Scroll down to find the OpenSSH Client program, double click it and click on the Install button.
Step 5. Then you can follow the same steps to install the OpenSSH server on your Windows 10 PC.
Note: When installing the OpenSHH server, you need to create and enable a firewall rule named “OpenSSH-Server-In-TCP”, which will allow inbound SSH traffic on port 22. You can refer to this post to create the firewall rule.
How to Use SSH Client Windows 10
Once you installed OpenSSH client and server on Windows 10, you can try using the Windows 10 SSH client by running the SSH command. You can run the SSH command in either a PowerShell window or a Command Prompt window.
Here mainly focus on how to use SSH client Windows 10 via PowerShell. To do so, follow the steps below carefully.
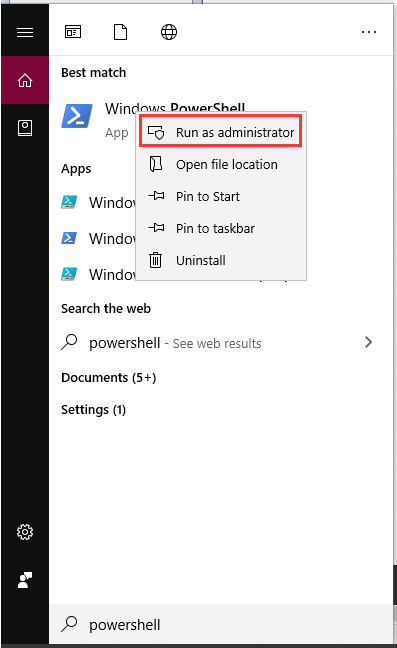
Step 1. Type PowerShell in the search box, and then right-click the Windows PowerShell and select Run as administrator.
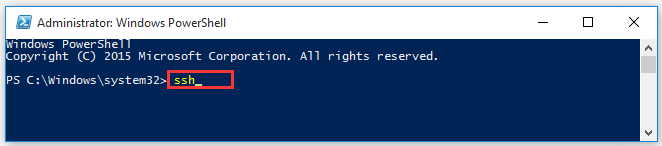
Step 2. Type the ssh command and hit Enter.
Tip: If you receive an error message saying the command isn’t found, you need to sign out and sign in again. Then restart your computer.
Step 3. To continue connecting to an SSH server at a ssh.example.com on port 22, you can type the ssh [email protected] command and hit Enter. If you want to run on a different port, you can type a specified port with the –p witch and hit Enter.
About The Author

Position: Columnist
Ariel is an enthusiastic IT columnist focusing on partition management, data recovery, and Windows issues. She has helped users fix various problems like PS4 corrupted disk, unexpected store exception error, the green screen of death error, etc. If you are searching for methods to optimize your storage device and restore lost data from different storage devices, then Ariel can provide reliable solutions for these issues.
-
Partition Wizard
-
Partition Magic
- How to Set up SSH Client and Server on Windows 10 [Full Guide]
By Ariel | Follow |
Last Updated April 23, 2020
What is SSH Client Windows? How to set up SSH client and server on your Windows 10 PC? If you are also trying to figure them out, this post of MiniTool will walk you through detailed steps to use SSH client Windows 10.
About SSH Client Windows 10
What is SSH Windows? SSH was developed with encryption that intends to provide integrity and confidentiality of data via an unsecured network. That indicates when accessing an unsecured network by using a client server architecture, SSH Windows can provide you with a secure channel that connects to an SSH client app with an SSH server.
In order to authenticate the remote computer, SSH usually needs public-key cryptography. There are 2 major ways to use SSH Windows 10, you can use automatically or manually generated public-private key pair.
Right now, I believe that you already have an overall understanding of SSH Windows. Let’s see how to set up SSH client Windows 10.
How to Install SSH Client and Server on Windows 10
The SSH client is an optional feature on Windows 10 that isn’t installed by default. To use Windows 10 SSH client and server smoothly, you need to install OpenSSH client firstly. This is because OpenSSH is set up as a default SSH client on Windows 10 operating system.
The OpenSSH client and OpenSSH server need to be installed separately in Windows 10 1809 and Windows Server 2019. So, please install OpenSSH client and server Windows 10 respectively. For that:
Step 1. Press Win + I keys to open the Settings app and click on the Apps section to go on.
Step 2. Scroll down the right sidebar and click on the Manage optional features under the Apps & features section.
Step 3. In the pop-up window, click on the Add a feature at the top of the list of installed features.
Tip: You can scroll down this list of installed programs to check if the OpenSSH client and server have been installed. If it is, you can skip this step.
Step 4. Scroll down to find the OpenSSH Client program, double click it and click on the Install button.
Step 5. Then you can follow the same steps to install the OpenSSH server on your Windows 10 PC.
Note: When installing the OpenSHH server, you need to create and enable a firewall rule named “OpenSSH-Server-In-TCP”, which will allow inbound SSH traffic on port 22. You can refer to this post to create the firewall rule.
How to Use SSH Client Windows 10
Once you installed OpenSSH client and server on Windows 10, you can try using the Windows 10 SSH client by running the SSH command. You can run the SSH command in either a PowerShell window or a Command Prompt window.
Here mainly focus on how to use SSH client Windows 10 via PowerShell. To do so, follow the steps below carefully.
Step 1. Type PowerShell in the search box, and then right-click the Windows PowerShell and select Run as administrator.
Step 2. Type the ssh command and hit Enter.
Tip: If you receive an error message saying the command isn’t found, you need to sign out and sign in again. Then restart your computer.
Step 3. To continue connecting to an SSH server at a ssh.example.com on port 22, you can type the ssh [email protected] command and hit Enter. If you want to run on a different port, you can type a specified port with the –p witch and hit Enter.
About The Author
Position: Columnist
Ariel is an enthusiastic IT columnist focusing on partition management, data recovery, and Windows issues. She has helped users fix various problems like PS4 corrupted disk, unexpected store exception error, the green screen of death error, etc. If you are searching for methods to optimize your storage device and restore lost data from different storage devices, then Ariel can provide reliable solutions for these issues.
| title | description | ms.date | ms.topic | ms.author | author | ms.custom |
|---|---|---|---|---|---|---|
|
Get started with OpenSSH for Windows |
Learn how to install and connect to remote machines using the OpenSSH Client and Server for Windows. |
01/11/2023 |
quickstart |
roharwoo |
robinharwood |
contperf-fy21q4 |
Get started with OpenSSH for Windows
Applies to: Windows Server 2022, Windows Server 2019, Windows 10 (build 1809 and later)
OpenSSH is a connectivity tool for remote sign-in that uses the SSH protocol. It encrypts all traffic between client and server to eliminate eavesdropping, connection hijacking, and other attacks.
An OpenSSH-compatible client can be used to connect to Windows Server and Windows client devices.
[!IMPORTANT]
If you downloaded the OpenSSH beta from the GitHub repo at PowerShell/Win32-OpenSSH, follow the instructions listed there, not the ones in this article. Some information in the Win32-OpenSSH repository relates to prerelease product that may be substantially modified before it’s released. Microsoft makes no warranties, express or implied, with respect to the information provided there.
Prerequisites
Before you start, your computer must meet the following requirements:
- A device running at least Windows Server 2019 or Windows 10 (build 1809).
- PowerShell 5.1 or later.
- An account that is a member of the built-in Administrators group.
Prerequisites check
To validate your environment, open an elevated PowerShell session and do the following:
-
Type winver.exe and press enter to see the version details for your Windows device.
-
Run
$PSVersionTable.PSVersion. Verify your major version is at least 5, and your minor version at least 1. Learn more about installing PowerShell on Windows. -
Run the command below. The output will show
Truewhen you’re a member of the built-in Administrators group.(New-Object Security.Principal.WindowsPrincipal([Security.Principal.WindowsIdentity]::GetCurrent())).IsInRole([Security.Principal.WindowsBuiltInRole]::Administrator)
Install OpenSSH for Windows
GUI
Both OpenSSH components can be installed using Windows Settings on Windows Server 2019 and Windows 10 devices.
To install the OpenSSH components:
-
Open Settings, select Apps, then select Optional Features.
-
Scan the list to see if the OpenSSH is already installed. If not, at the top of the page, select Add a feature, then:
- Find OpenSSH Client, then select Install
- Find OpenSSH Server, then select Install
-
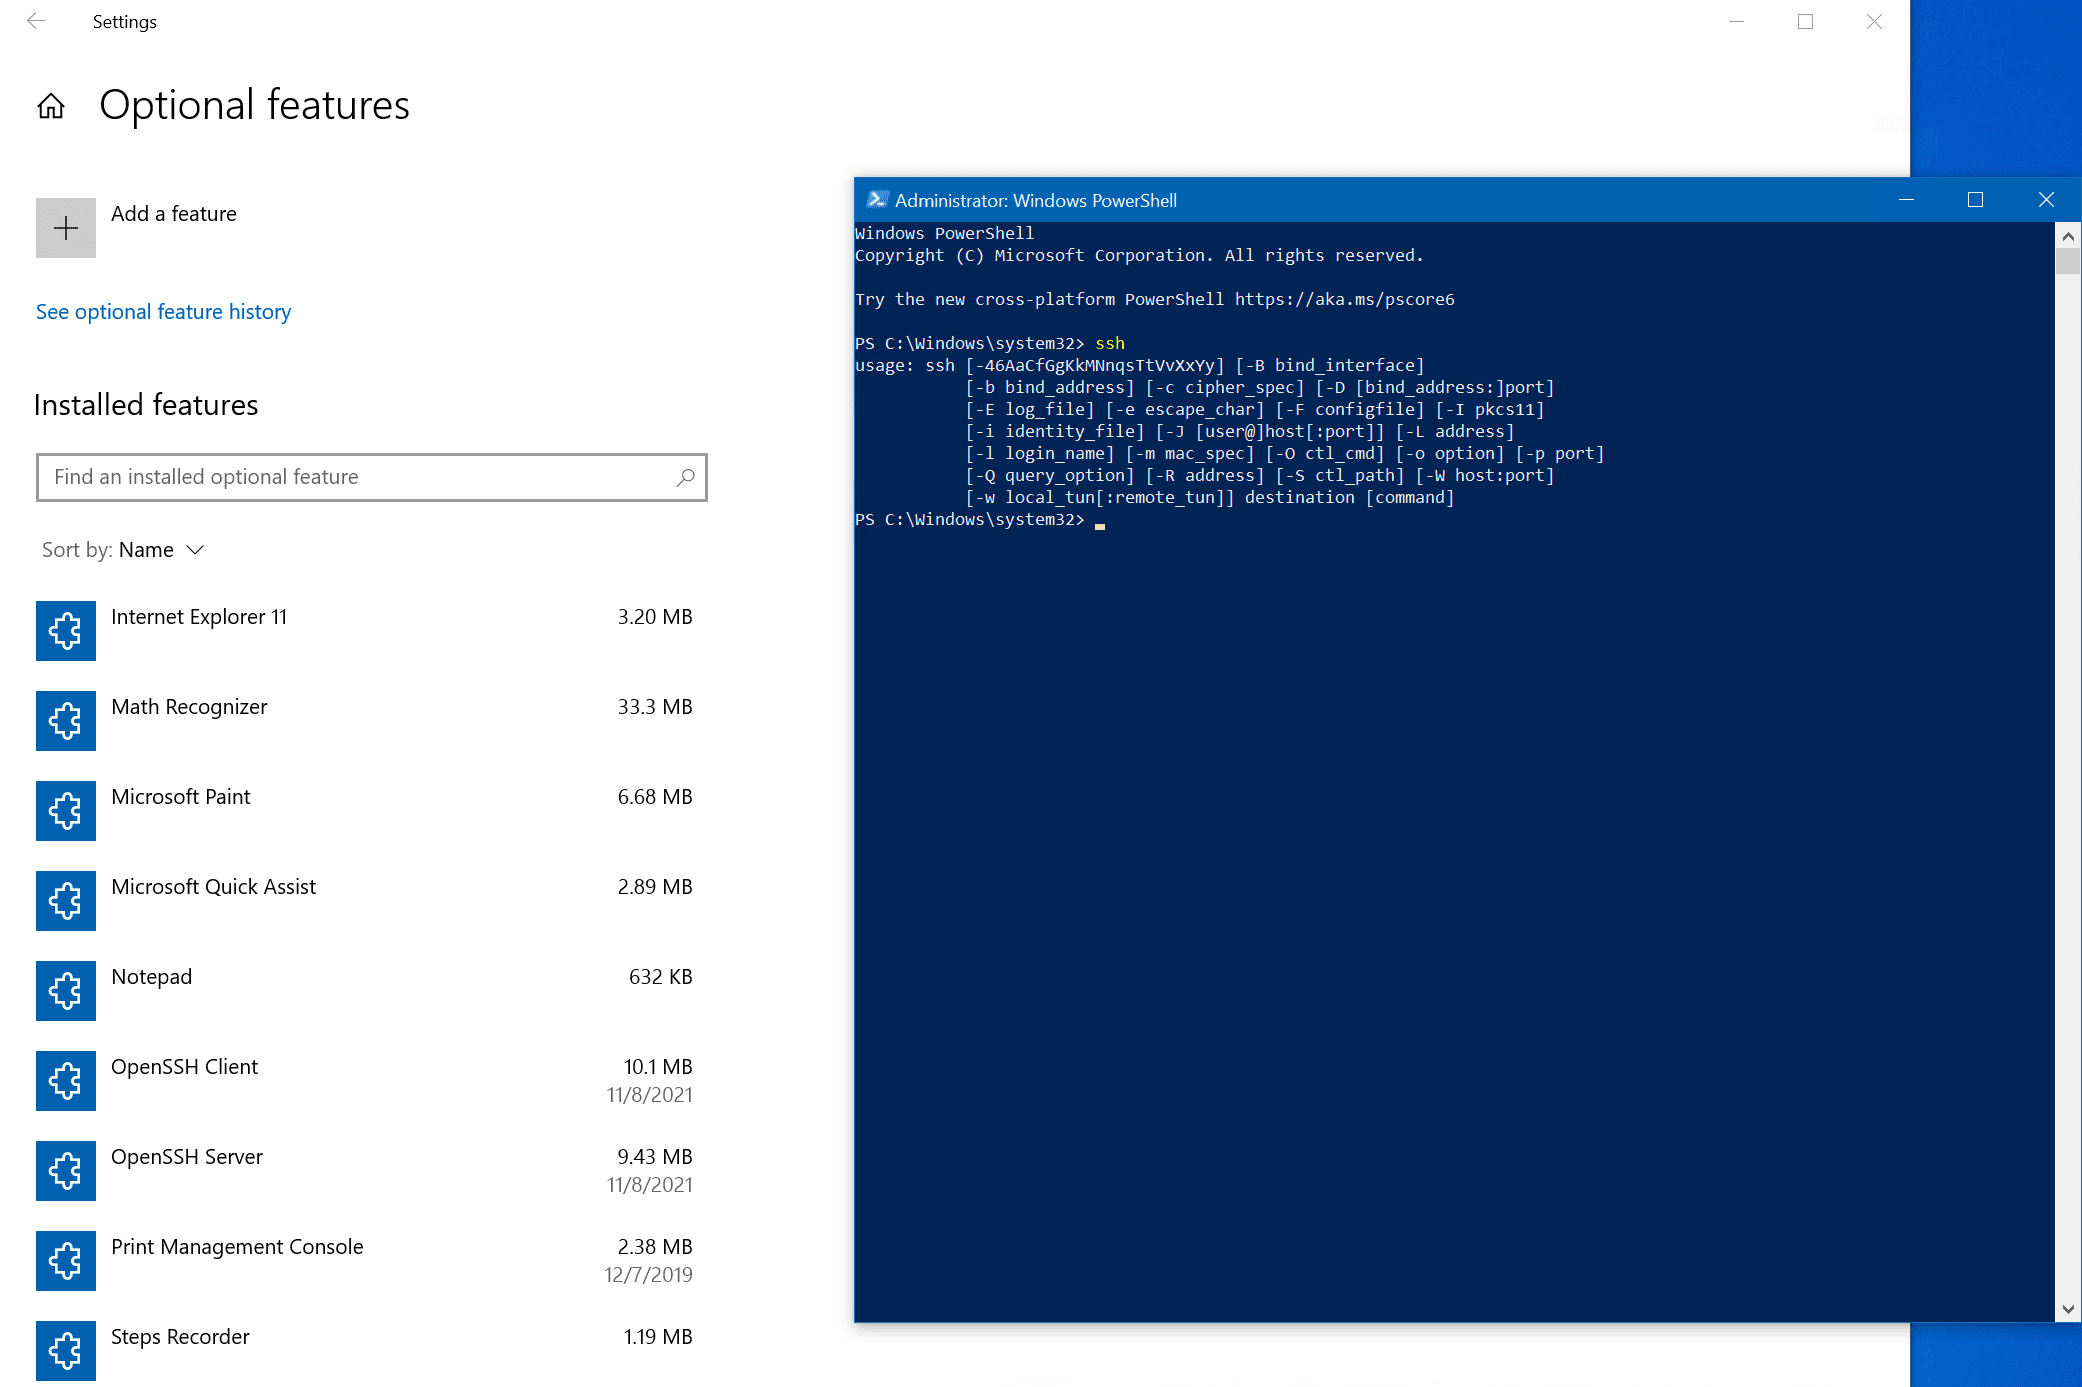
Once setup completes, return to Apps and Optional Features and confirm OpenSSH is listed.
-
Open the Services desktop app. (Select Start, type services.msc in the search box, and then select the Service app or press ENTER.)
-
In the details pane, double-click OpenSSH SSH Server.
-
On the General tab, from the Startup type drop-down menu, select Automatic.
-
To start the service, select Start.
[!NOTE]
Installing OpenSSH Server will create and enable a firewall rule namedOpenSSH-Server-In-TCP. This allows inbound SSH traffic on port 22. If this rule is not enabled and this port is not open, connections will be refused or reset.
PowerShell
To install OpenSSH using PowerShell, run PowerShell as an Administrator.
To make sure that OpenSSH is available, run the following cmdlet:
Get-WindowsCapability -Online | Where-Object Name -like 'OpenSSH*'
The command should return the following output if neither are already installed:
Name  : OpenSSH.Client~~~~0.0.1.0
State : NotPresent

Name  : OpenSSH.Server~~~~0.0.1.0
State : NotPresent
Then, install the server or client components as needed:
# Install the OpenSSH Client
Add-WindowsCapability -Online -Name OpenSSH.Client~~~~0.0.1.0

# Install the OpenSSH Server
Add-WindowsCapability -Online -Name OpenSSH.Server~~~~0.0.1.0
Both commands should return the following output:
Path          :
Online        : True
RestartNeeded : False
To start and configure OpenSSH Server for initial use, open an elevated PowerShell prompt (right click, Run as an administrator), then run the following commands to start the sshd service:
# Start the sshd service
Start-Service sshd

# OPTIONAL but recommended:
Set-Service -Name sshd -StartupType 'Automatic'

# Confirm the Firewall rule is configured. It should be created automatically by setup. Run the following to verify
if (!(Get-NetFirewallRule -Name "OpenSSH-Server-In-TCP" -ErrorAction SilentlyContinue | Select-Object Name, Enabled)) {
    Write-Output "Firewall Rule 'OpenSSH-Server-In-TCP' does not exist, creating it..."
    New-NetFirewallRule -Name 'OpenSSH-Server-In-TCP' -DisplayName 'OpenSSH Server (sshd)' -Enabled True -Direction Inbound -Protocol TCP -Action Allow -LocalPort 22
} else {
    Write-Output "Firewall rule 'OpenSSH-Server-In-TCP' has been created and exists."
}
Connect to OpenSSH Server
Once installed, you can connect to OpenSSH Server from a Windows or Windows Server device with the OpenSSH client installed. From a PowerShell prompt, run the following command.
ssh domainusername@servername
Once connected, you get a message similar to the following output.
The authenticity of host 'servername (10.00.00.001)' can't be established.
ECDSA key fingerprint is SHA256:(<a large string>).
Are you sure you want to continue connecting (yes/no)?
Entering yes adds that server to the list of known SSH hosts on your Windows client.
At this point, you’ll be prompted for your password. As a security precaution, your password won’t be displayed as you type.
Once connected, you’ll see the Windows command shell prompt:
domainusername@SERVERNAME C:Usersusername>
Uninstall OpenSSH for Windows
GUI
To uninstall OpenSSH using Windows Settings:
- Open Settings, then go to Apps > Apps & Features.
- Go to Optional Features.
- In the list, select OpenSSH Client or OpenSSH Server.
- Select Uninstall.
PowerShell
To uninstall the OpenSSH components using PowerShell, use the following commands:
# Uninstall the OpenSSH Client
Remove-WindowsCapability -Online -Name OpenSSH.Client~~~~0.0.1.0

# Uninstall the OpenSSH Server
Remove-WindowsCapability -Online -Name OpenSSH.Server~~~~0.0.1.0
You may need to restart Windows afterwards if the service was in use at the time it was uninstalled.
Next steps
Now that you’ve installed OpenSSH Server for Windows, here are some articles that might help you as you use it:
- Learn more about using key pairs for authentication in OpenSSH key management
- Learn more about the OpenSSH Server configuration for Windows
As a seasoned, or even new IT Pro, you’re likely an avid user of Putty, using secure shell (SSH) to connect to Unix/Linux servers, computers, and even Windows machines for an efficient and secure remote command-line experience. Well, did you know Windows 10, Windows 11, and Windows Server 2019 (and Windows Server 2022) include an open-source implementation of SSH?
Table of Contents
- How is SSH implemented in Windows?
- Install OpenSSH using Windows Settings
- Install OpenSSH using PowerShell
- Start and configure OpenSSH Server
- Using SSH in Windows Terminal
- Connect to OpenSSH Server
- Uninstall OpenSSH using Windows Settings
- Uninstall OpenSSH using PowerShell
In this mega ‘how-to’ guide, you’ll learn how to install and configure OpenSSH on Windows. Find out how to connect remotely to Linux, Unix, Oracle, Windows, Windows Server, and other operating systems via the secure command line.
How is SSH implemented in Windows?
There are two separate components of OpenSSH in Windows – an SSH client and an SSH server. Microsoft implemented both in Windows using OpenSSH Client and OpenSSH Server respectively.
And there are also two main methods to install and uninstall these components in Windows. The OpenSSH Client feature is installed by default in higher-end versions of Windows.
The Client is like the functionality of Putty. It allows you to make ‘client’ connections to other servers and devices using various secure protocols.
You can confirm if you have the client installed by opening a command prompt or PowerShell prompt and typing ‘ssh’ and hitting Enter. You will be provided with an overview of how to use the ssh command if it is already installed.

Install OpenSSH using Windows Settings
To install OpenSSH Client, let’s first use the more modern approach – Windows Settings.
First, click the Start button, then click Settings. Next, click the ‘Apps‘ category.
Click the ‘Add a feature’ ‘+‘ at the top of the ‘Optional features’ window.
Scroll down to ‘OpenSSH Client’, place a checkmark next to it and click the ‘Install’ button. Wait a few moments, and we’re good!
Install OpenSSH using PowerShell
The other core method to installing OpenSSH is using PowerShell. Fire up an administrative PowerShell prompt and type in this command to install the ‘OpenSSH Client’ feature.
Add-WindowsCapability -Online -Name OpenSSH.Client~~~~0.0.1.0
You can run this command to confirm the feature is installed.
Get-WindowsCapability -Online | Where-Object Name -like 'OpenSSH*'
Start and configure OpenSSH Server
As you may have noticed, you can install OpenSSH Client and OpenSSH Server on Windows 10 and Windows Server 2019/2022 (You need at least Windows Server 2019 to host OpenSSH Server). I will now switch to one of my Windows Server 2022 servers and demonstrate how to start up the ‘Server’ part of the implementation and test connections from Windows 10.
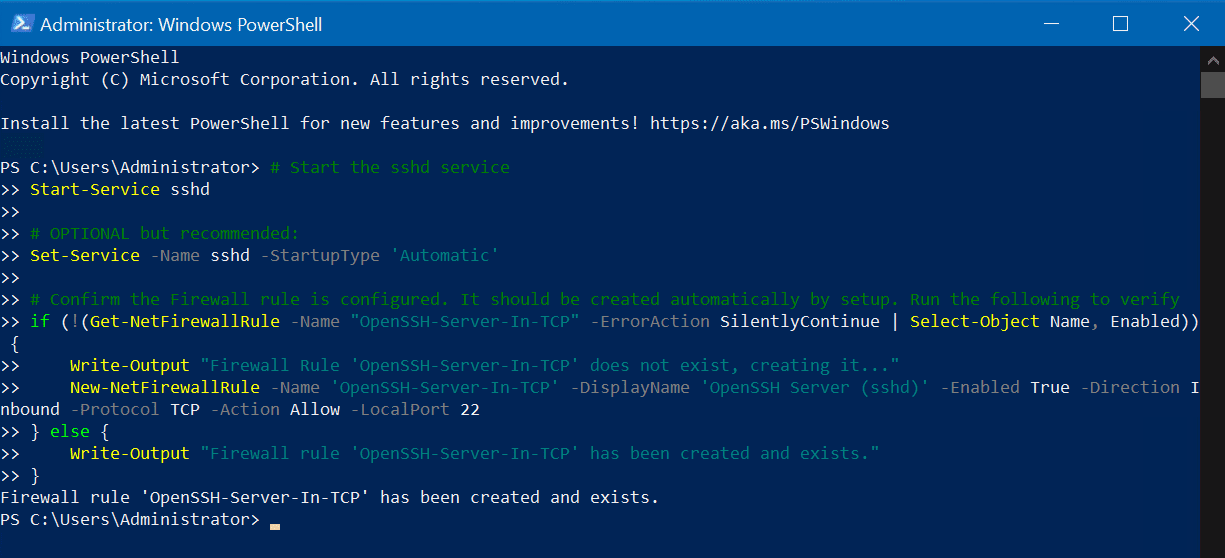
Fire up another administrative PowerShell prompt and run these commands.
# Start the sshd service
Start-Service sshd

# OPTIONAL but recommended:
Set-Service -Name sshd -StartupType 'Automatic'

# Confirm the Firewall rule is configured. It should be created automatically by setup. Run the following to verify
if (!(Get-NetFirewallRule -Name "OpenSSH-Server-In-TCP" -ErrorAction SilentlyContinue | Select-Object Name, Enabled)) {
    Write-Output "Firewall Rule 'OpenSSH-Server-In-TCP' does not exist, creating it..."
    New-NetFirewallRule -Name 'OpenSSH-Server-In-TCP' -DisplayName 'OpenSSH Server (sshd)' -Enabled True -Direction Inbound -Protocol TCP -Action Allow -LocalPort 22
} else {
    Write-Output "Firewall rule 'OpenSSH-Server-In-TCP' has been created and exists."
}
This will start the secure SSH service (Server), set its service settings to ‘Automatic’ so it runs every time the server boots, and verify all the appropriate Windows Firewall rules are in place to allow client connections on TCP localport 22 through Windows Server’s built-in Windows Defender software-based firewall.
Success!
Using SSH in Windows Terminal
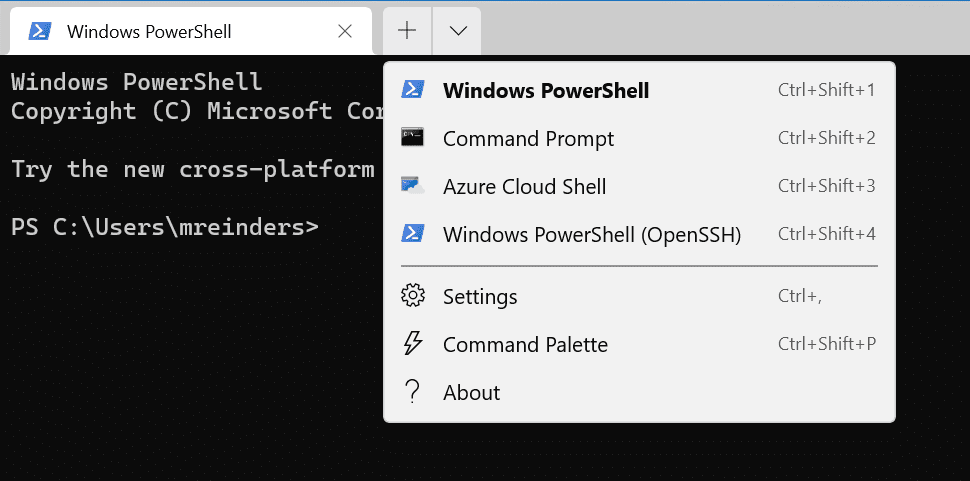
If you’ve gotten on the Windows Terminal bandwagon like many an IT Pro that I’ve spoken with, you’ll be pleased to know you can set up new profiles to fire up OpenSSH connections to your favorite servers at the touch of a profile dropdown button!
Let me show you the steps you can perform to add a profile for OpenSSH in your lovely Windows Terminal configuration. This will allow you to open your favorite SSH connection right from the profile dropdown in Windows Terminal, or even launch it when Windows Terminal starts on your computer.
First, launch Windows Terminal if it’s not already running on your computer.
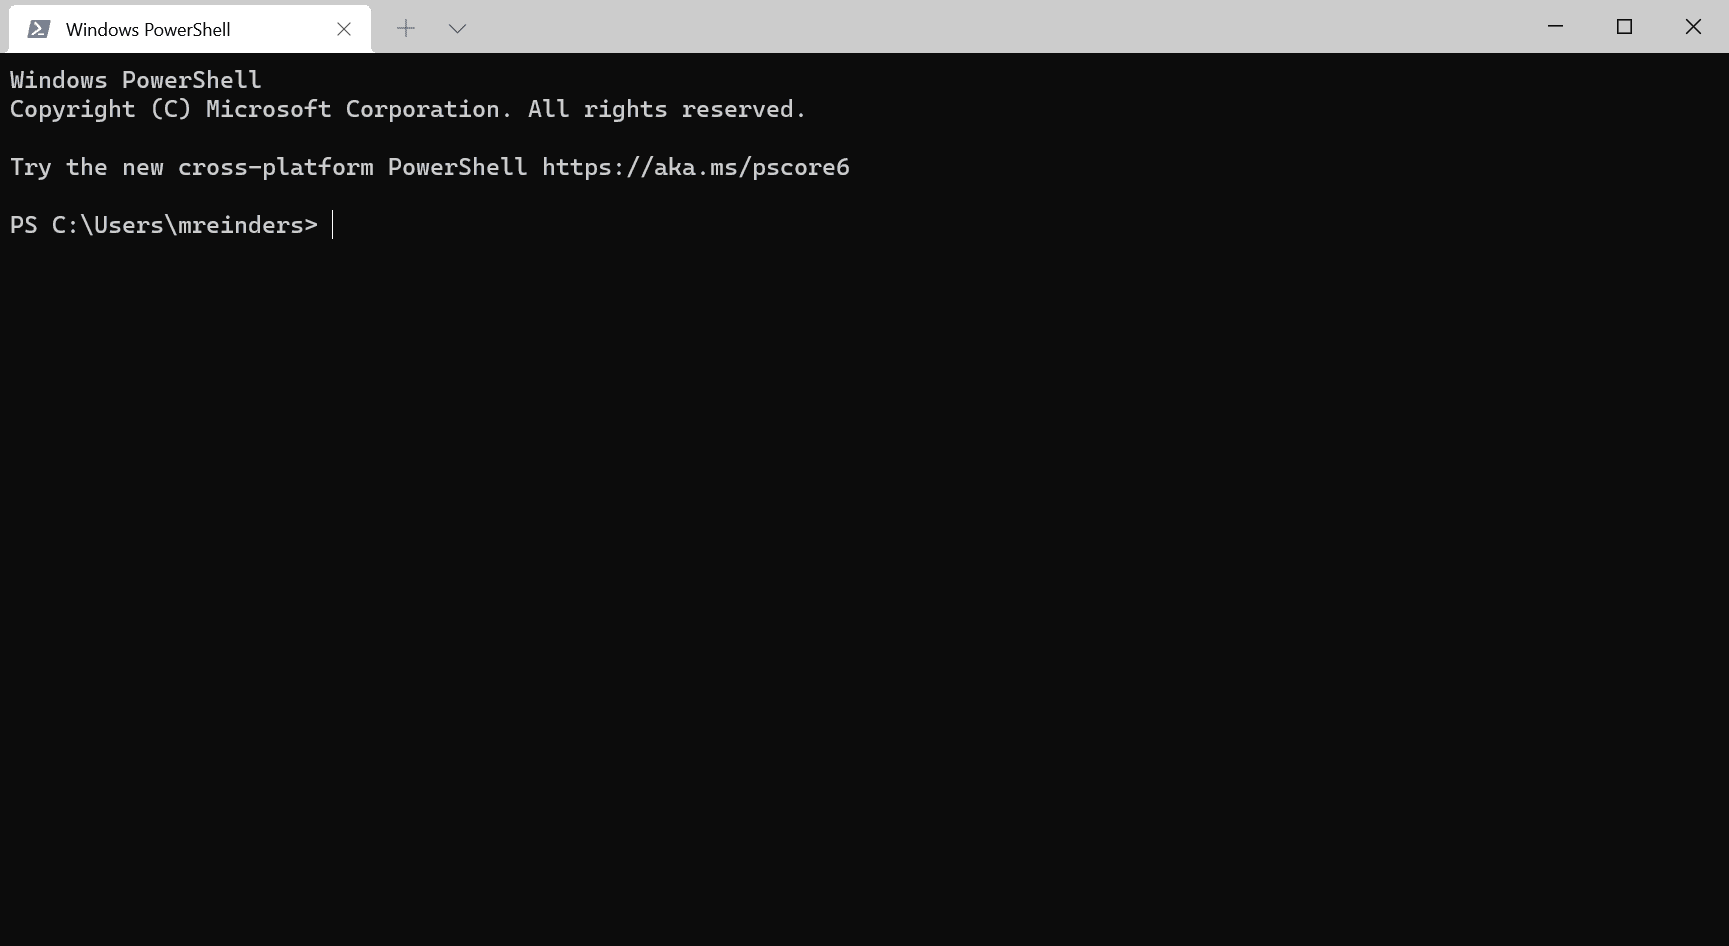
Click the arrow dropdown to the right of the ‘+’ sign and click Settings.
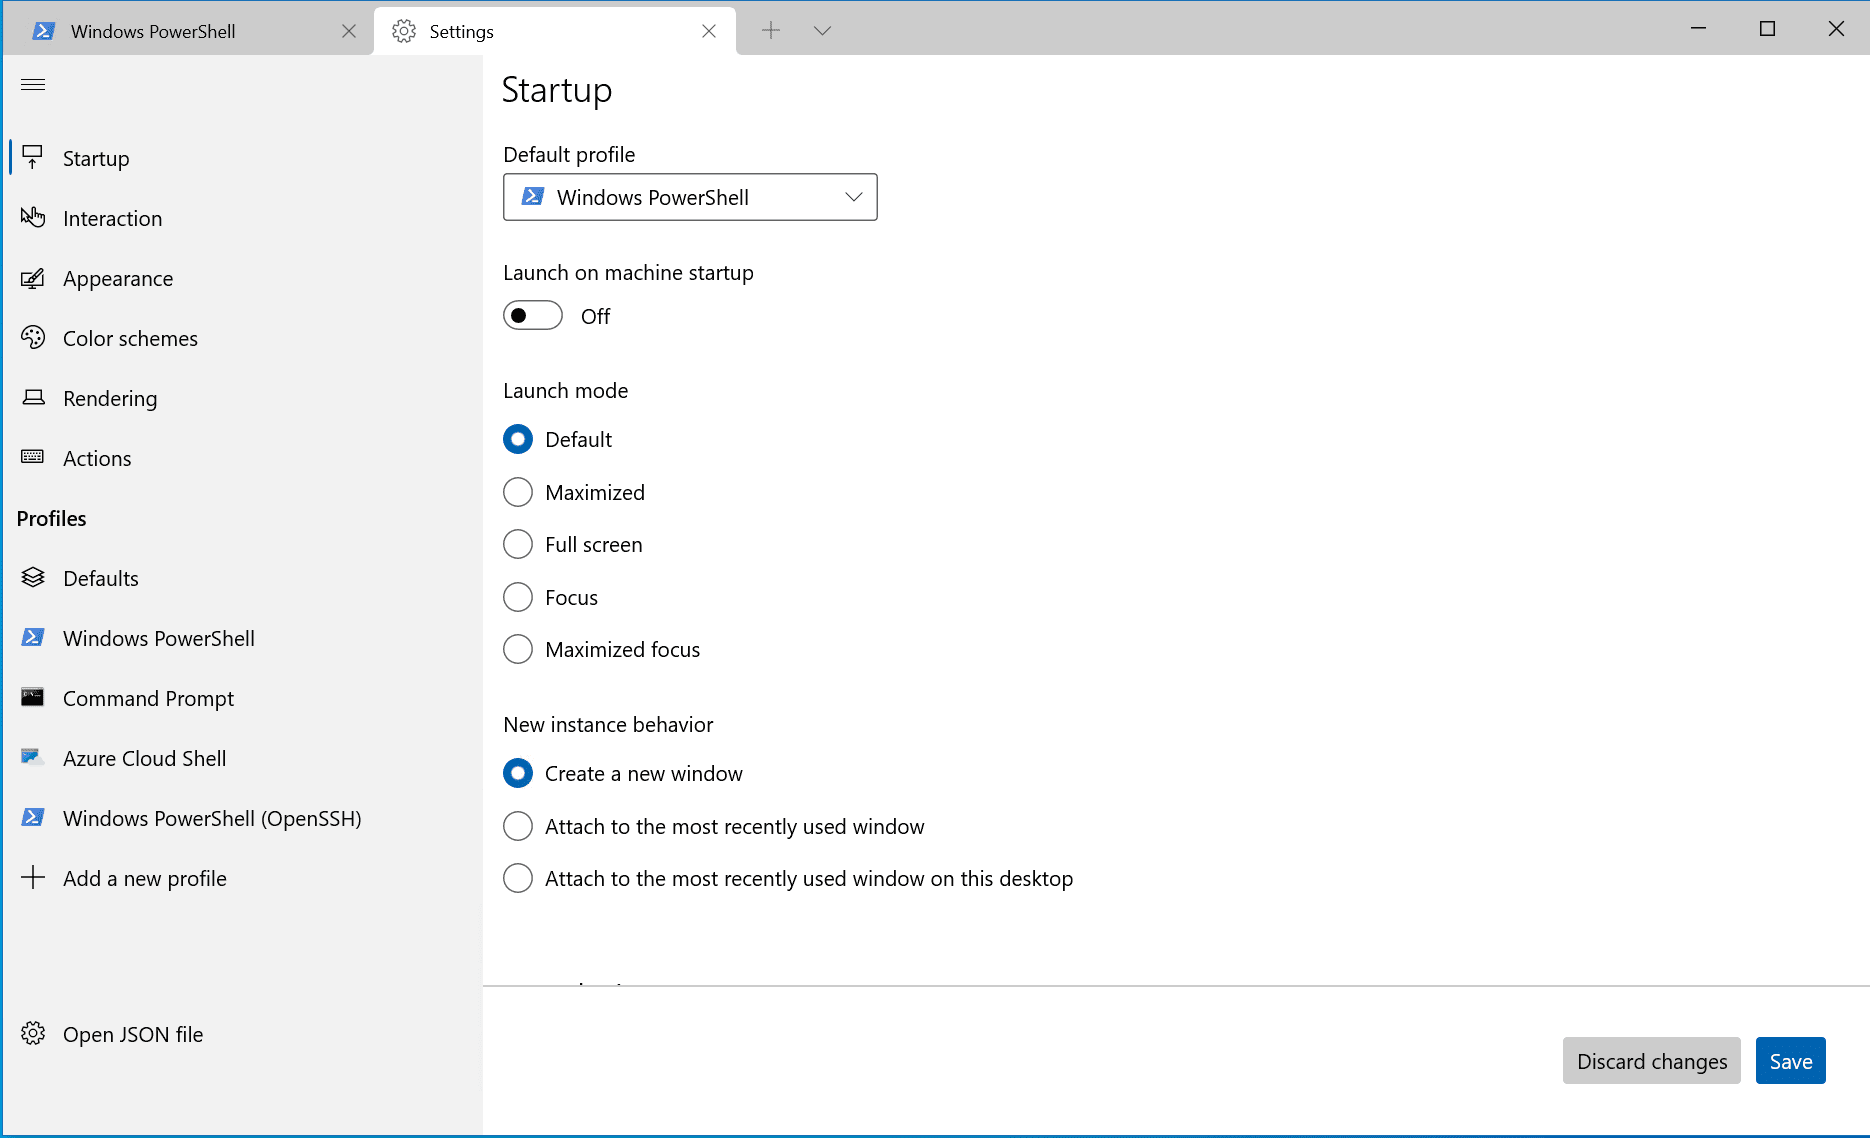
Click the ‘+ Add a new profile’ link at the bottom of the Profiles list. Click to select the ‘Windows PowerShell’ profile to choose as a template and click the ‘Duplicate’ button. You can choose whatever you prefer in the Name, Starting directory, and Tab title fields, including a different icon if you wish, but the key is in the ‘Command line’ field.

You have the option of typing in our custom ‘ssh’ command or appending said command to the end of whichever console you’re launching/using (cmd.exe, powershell.exe, etc.). We are using the following to connect to my ‘WS22-FS02′ server where ‘OpenSSH Server’ is installed: ‘ssh username@servername.’
Or, in our case, ‘ssh administrator@ws22-fs02′. Then, be sure to click Save in the lower-right corner of the Settings page. (Don’t worry if some of the syntax here doesn’t ‘click’ yet…you’ll learn a bit more about connecting to SSH in the next section – Connect to OpenSSH Server.)
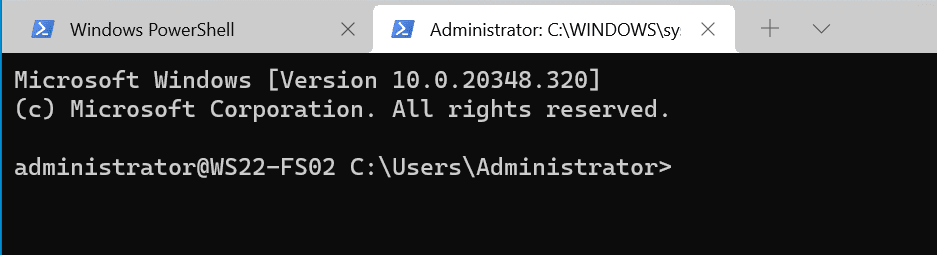
Now, click the same dropdown arrow and click your new profile. In my case “Windows PowerShell (OpenSSH)”. You’ll be prompted for credentials (again, you’ll understand in the next section…). Enter them, and voila!
Connect to OpenSSH Server
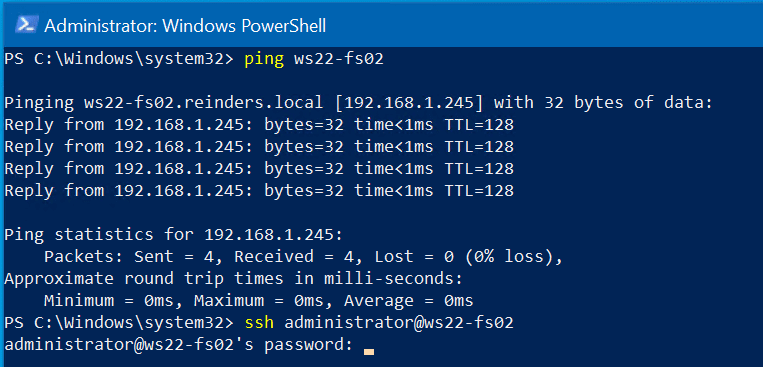
We are making excellent progress. We have our Windows Server 2022 server (WS22-FS02) configured to accept SSH incoming connections. We have the OpenSSH Client feature installed and verified on our Windows 10 system. We’ll first try a basic connectivity test by pinging the server.
We’ll then type in ‘ssh username@servername‘. Because the server’s name is ‘ws22-fs02’, we’ll use ‘ssh administrator@ws22-fs02’. We’ll get prompted for the account’s password because by default, the SSH server in Windows is set to use password authentication.
Enter your password and we’re in!
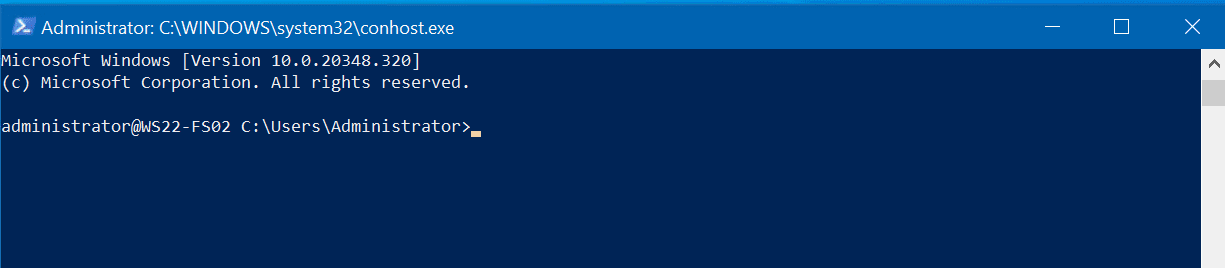
We are now running an administrative command prompt remotely and securely from our Windows 10 computer, using native open-source SSH. Pretty slick, huh?
Uninstall OpenSSH using Windows Settings
If you ever need to uninstall OpenSSH components for security, compliance, or any other reason, it’s straightforward via Windows Settings. Let’s walk you through.
First, click the Start button, and click on Settings. Click the Apps category heading, then Optional Features.
Click ‘OpenSSH Client‘ and click the Uninstall button.

Go ahead and reboot your computer if it prompts you to (assuming you can, should, and no one will yell at you for Rebooting the Exchange Server!!!) One of my favorite online IT Pro videos to watch from many years ago. Some of you will definitely resonate… (The Website is Down #1)
Uninstall OpenSSH using PowerShell
There are strikingly similar PowerShell commands to run to uninstall OpenSSH features in Windows compared to Installing them. I know, right? Mesmerizing. Go ahead and run this command to validate which OpenSSH components are installed on your system.
Get-WindowsCapability -Online | Where-Object Name -like 'OpenSSH*'

Run the following command to uninstall OpenSSH Client from your computer.
Remove-WindowsCapability -Online -Name OpenSSH.Client~~~~0.0.1.0

As you can see, I ran the ‘Get-WindowsCapability’ command again after the feature was uninstalled to confirm. All looks good!
There, that wasn’t so bad. Honestly, it’s pretty straightforward to get up and running fast with OpenSSH in Windows.
03 Feb, 23
by Ayden I
3 min Read
List of content you will read in this article:
- 1. What is OpenSSH?
- 2. How to Install OpenSSH Client
- 3. How to Install OpenSSH Server
- 4. Conclusion
Secure Shel is built into Linux OS as the default method of carrying out remote server management, however, until recently, Microsoft’s proprietary Remote Desktop software was the only option for Windows (i.e., without installing third-party software). Luckily, with the release of Windows 10 and Windows Server 2019, the developers have mercifully added one more first-party choice.
OpenSSH is the recent addition that allows you to remotely control your server without installing any third-party applications on either of the devices. As you might have guessed from the name, it uses Secure Shell in order to establish the connection, and today we will show you how to install OpenSSH Client on Windows 10 systems and OpenSSH Server on Windows Server 2019. But first, let us delve into what OpenSSH is.
What is OpenSSH?
OpenSSH is the open-source version of the Secure Shell (SSH) tools used by administrators of Linux and other non-Windows for cross-platform management of remote systems. OpenSSH has been added to Windows as of autumn 2018 and is included in Windows 10 and Windows Server 2019.
OpenSSH in Windows 10 comes with two different versions, called OpenSSH Client and OpenSSH Server. OpenSSH Client only has the ability to communicate with Windows SSH and is available to users through the CMD and PowerShell environment.
How to Install OpenSSH Client
To install OpenSSH Client, follow these very simple steps:
Step 1: Open Windows 10 settings and click on Apps.
Step 2: On the newly-opened page, you will see all of the installed applications on Windows. Click on Manage optional features.

Step 3: Then, click on Add a feature to viewing all of the features which you can install on your Windows.

Step 4: In the feature list, find OpenSSH Client and click on it, then click on Install.
Step 5: Wait for the installation step to be completed. After finishing the OpenSSH Client installation, restart your PC to finish up.

How to Install OpenSSH Server
The steps for OpenSSH Server installation are very similar to OpenSSH Client. Here’s what you should do:
Step 1: Open Windows settings and click on Apps.

Step 2: On the newly-opened page, you will see all of the installed applications on Windows. Click on Manage optional features.
Step 3: Then, click on Add a feature to viewing all of the features which you can install on your Windows.

Step 4: In the feature list, find OpenSSH Server and click on it, then click on Install.
Step 5: After the OpenSSH Server installation is complete, restart your server to finalize the process.
Conclusion
There are many trustworthy third-party clients out there, however, thanks to OpenSSH it is now possible to do so without the hassle of installing them. While RDP is still the most convenient option for establishing Windows-to-Windows connections, Secure Shell is the best tool for cross-platform remote server management.
We hope that with the help of the detailed tutorials outlined within this blog, you were able to successfully install OpenSSH Client and Server versions on your respective systems. If you have any questions or suggestions, please leave them in the comment section below.
One of the biggest and most welcome changes to the Windows 10 1809 update and in Windows Server 2019 was the addition of the OpenSSH Client and OpenSSH Server features. It is now incredibly easy to SSH into a Windows Workstation/Server using native tools that are now builtin to the Operating System. In the past this was only possible by using complicated tools and odd workarounds in order to get an SSH-like implementation to work correctly. You can also use the SSH commands right from the Windows command line (CMD, PowerShell), without needing third-party tools or odd commands. This is a very nice change that Microsoft has added, since it is much easier to remotely manage a Windows through the Command Line instead of the GUI, and having the ability to use the same tools on both Windows and Linux is a big advantage.
Note: I have only tested this on Windows 10 Pro for Workstations (Version 1809 Build 17763.253) and on Windows Server 2019 Standard.
Table Of Contents
Installation
Installing the OpenSSH Client and OpenSSH Server options can be done through either the Settings app or through the Command Line.
GUI Installation
To install through the GUI, go to Settings -> Apps -> Apps & Features -> Manage optional features -> Add a feature. You should see the two options in the list of available features that can be installed:
- OpenSSH Client
- OpenSSH Server

Highlight each option and click the Install button to install the feature. If the options are missing, then you are not on the latest version/patch level of Windows 10 or Windows Server 2019. A restart should not be necessary after adding these features, but the newly installed services will need to be started and configured to automatically start at boot.
Command Line Installation
To install through the Command Line, open an elevated PowerShell console in order to proceed. To confirm that you are able to install the OpenSSH Client and OpenSSH Server features, run the following command:
Get-WindowsCapability -Online | findstr OpenSSH

Name  : OpenSSH.Client~~0.0.1.0
Name  : OpenSSH.Server~~0.0.1.0
If those two options are present, run the following two commands to install the features:
Add-WindowsCapability -Online -Name OpenSSH.Client~~~~0.0.1.0
Add-WindowsCapability -Online -Name OpenSSH.Server~~~~0.0.1.0

Like installing through the Settings app, a restart should not be necessary after adding these features. The newly installed services will need to be started and configured to automatically start at boot.
Services Start
In order to start using OpenSSH Server, the associated services will need to be started first. This can be done through either the Services MMC console or through the Command Line.
Services MMC Console
Open the Services MMC Console (Win + R, and type in services.mmc) and find the two Services that are related to OpenSSH Server:
- OpenSSH Authentication Agent
- OpenSSH Server
Right-click on each service and select Properties. Under Service Status, click the Start button to start the service. To configure the service to start automatically at boot, change the Startup Type drop-down menu to Automatic and click Apply.

Command Line Services
To start the OpenSSH Server services and enable them to run automatically, there are a few command that you will need to run. To do this, open an elevated PowerShell console and run the following commands to start the OpenSSH Server:
Start-Service sshd
Start-Service ssh-agent
To have these services start automatically at boot, there are two additional commands to run as well:
Set-Service sshd -StartupType Automatic
Set-Service ssh-agent -StartupType Automatic
After this has been completed, you should be able to connect to your Windows installation over SSH.
Using OpenSSH Client
The OpenSSH Client can be used exactly the same way as you would on any Linux/Unix host. It will work through the regular Command Line and in PowerShell:
PS C:> ssh.exe
usage: ssh [-46AaCfGgKkMNnqsTtVvXxYy] [-B bind_interface]
           [-b bind_address] [-c cipher_spec] [-D [bind_address:]port]
           [-E log_file] [-e escape_char] [-F configfile] [-I pkcs11]
           [-i identity_file] [-J [user@]host[:port]] [-L address]
           [-l login_name] [-m mac_spec] [-O ctl_cmd] [-o option] [-p port]
           [-Q query_option] [-R address] [-S ctl_path] [-W host:port]
           [-w local_tun[:remote_tun]] destination [command]
Here is the same output from a Linux environment:
matthew@thinkpad / $ ssh
usage: ssh [-46AaCfGgKkMNnqsTtVvXxYy] [-b bind_address] [-c cipher_spec]
           [-D [bind_address:]port] [-E log_file] [-e escape_char]
           [-F configfile] [-I pkcs11] [-i identity_file]
           [-J [user@]host[:port]] [-L address] [-l login_name] [-m mac_spec]
           [-O ctl_cmd] [-o option] [-p port] [-Q query_option] [-R address]
           [-S ctl_path] [-W host:port] [-w local_tun[:remote_tun]]
           [user@]hostname [command]
I won’t go into the details on how to use any of these advanced options, there are very good tutorials on how to use the OpenSSH Client on other sites. The behaviour of OpenSSH Client on Windows should be almost exactly the same as on a Linux environment. So far I haven’t run into any issues with connectivity.
Connecting to OpenSSH Server
There is nothing special required to connect to a Windows host, it behaves exactly the same way as any other SSH host. There are a few different username formats that you can use:
user@windows-host (Local User Account)
user@domain.local@windows-host (Domain UPN)
domainuser@windows-host (Netbios)
One of the benefits is the ability to login with a Microsoft account if you are using that as your username. It is a bit unusual to see an e-mail address used this way, but I am glad that Microsoft made sure that this functionality worked correctly:
user@outlook.com@windows-host
There is nothing more to OpenSSH Server, you can manage your Windows host from the command line once you are logged in. If you want to do any further customization or need some basic troubleshooting, there is additional information below.
Change the Default Shell
By default when you login to a Windows installation with SSH, it defaults to the regular Command Prompt (cmd.exe). I prefer PowerShell for everyday usage, and it is easy to switch to PowerShell once you login, but you can change the default shell to save yourself some time if you are going to be using this feature often.
This is done through the Registry Editor, which will run with Administrator privileges. You need to navigate to the following key:
ComputerHKEY_LOCAL_MACHINESOFTWAREOpenSSH
Create a new string called DefaultShell and give it the following value:
C:WindowsSystem32WindowsPowerShellv1.0powershell.exe
Restart the OpenSSH Server Service and the next time that you login with SSH, you should automatically go to PowerShell. I have tried making this work with Bash, but it doesn’t seem to be supported yet.

If you do want to use Bash, just type in bash.exe to switch to it.
Additional Settings
There are a few customizations that you can do to the OpenSSH Server service if needed. Since this is a port of the OpenSSH Server, the customization is done in a very similar way. To begin, the directory where all of the associated executable files are found is in the C:WindowsSystem32OpenSSH directory:

The other important directory for OpenSSH Server is the C:ProgramDatassh folder, which contains the configuration files and log files.

OpenSSH Server options, such as changing the login banner and locking down security options are done in the C:ProgramDatasshsshd_config file.
Not all options can be used on a Windows host. For more information, you can refer to the official Wiki article on what options are supported:
https://github.com/PowerShell/Win32-OpenSSH/wiki/sshd_config
Troubleshooting
If you need to view the log file for OpenSSH Server, you need to make a quick change to the configuration file (C:ProgramDatasshsshd_config) to enable logging:
# Logging
#SyslogFacility AUTH
#LogLevel INFO
Make the following change:
# Logging
SyslogFacility LOCAL0
LogLevel INFO
You will need to restart the OpenSSH Server service in order to apply the change. Once the change has been made, the log file (sshd.log) can be found in the C:ProgramDatasshlogs directory. When you are finished troubleshooting, you should revert this change to prevent unnecessary logging for the OpenSSH service.
Links
- https://blogs.technet.microsoft.com/askpfeplat/2018/10/29/ssh-on-windows-server-2019/
- https://github.com/PowerShell/Win32-OpenSSH
В этой статье мы расскажем, как работает SSH-клиент, как его установить, а также как подключиться к Ubuntu и Windows 10 по SSH. Но давайте сначала разберёмся, что такое SSH.
Что такое SSH
SSH (Secure Shell) — сетевой протокол прикладного уровня, который позволяет управлять операционной системой и выполнять функцию туннелирования TCP-соединения. Работа SSH построена на взаимодействии 2-х компонентов: SSH-сервера и SSH-клиента. Подробнее читайте в статье Что такое SSH.
SSH-сервер по умолчанию прослушивает соединения на порту 22, а также требует аутентификации сторон. Есть несколько вариантов проверки соединения:
- по паролю. Используется чаще всего. При таком типе аутентификации между клиентом и сервером создаётся общий секретный ключ: он шифрует трафик;
- с помощью ключевой пары. Предварительно генерируется открытый и закрытый ключ. На устройстве, с которого нужно подключиться, хранится закрытый ключ, а на сервере — открытый. При подключении файлы не передаются, система только проверяет, что устройство имеет доступ не только к открытому, но и к закрытому ключу.
- по IP-адресу. При подключении система идентифицирует устройство по IP-адресу. Такой тип аутентификации небезопасен и используется редко.
OpenSSH (Open Secure Shell) — набор программ, который позволяет шифровать сеансы связи в сети. При таких сеансах используется протокол SSH.
OpenSSH включает в себя компоненты:
- ssh,
- scp,
- sftp,
- sshd,
- sftp-server,
- ssh-keygen,
- ssh-keysign,
- ssh-keyscan,
- ssh-agent,
- ssh-add.
Этот набор ПО может аутентифицировать пользователей с помощью таких встроенных механизмов как:
- публичные ключи,
- клавиатурный ввод: пароли и запрос-ответ,
- Kerberos/GSS-API.
Установка OpenSSH на Ubuntu 20.04
В качестве примера мы рассмотрим установку Ubuntu 20.04. Настройка SSH Ubuntu Server 18.04 версии проходит аналогично.
При первой установке Ubuntu подключение по SSH запрещено по умолчанию. Включить доступ по SSH можно, если установить OpenSSH.
Для этого:
-
1.
Откройте терминал с помощью комбинации клавиш Ctrl + Alt + T.
-
2.
Обновите репозиторий командой:
-
3.
Установите SSH с помощью команды:
-
4.
Установите OpenSSH:
sudo apt install openssh-server -
5.
Добавьте пакет SSH-сервера в автозагрузку:
sudo systemctl enable sshd -
6.
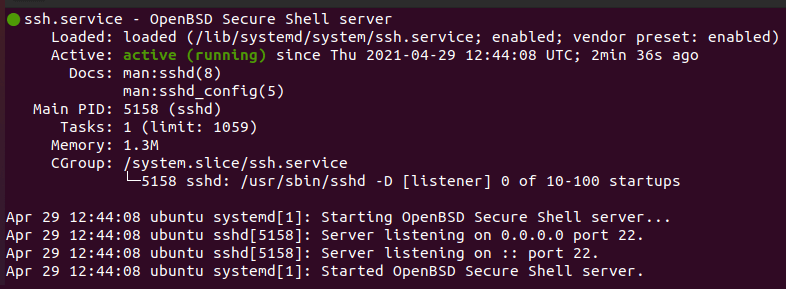
Проверьте работу SSH:
Если установка прошла корректно, в выводе вы увидите настройки по умолчанию:

Настройка SSH Linux
Готово, вы установили OpenSSH на Ubuntu.
Настройка OpenSSH на Ubuntu 20.04
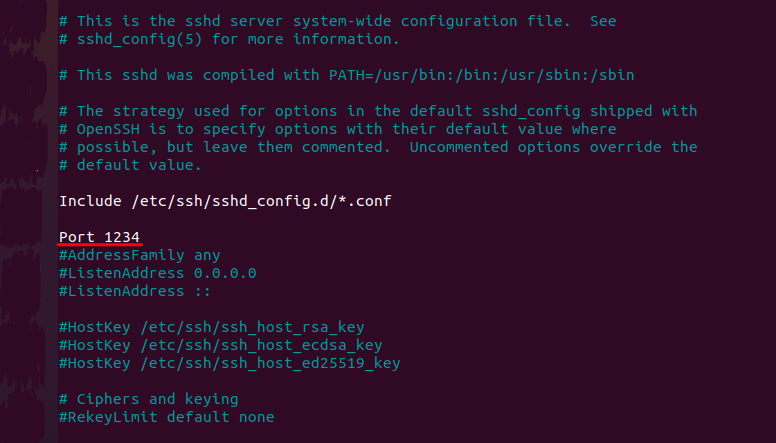
По умолчанию SSH-соединение работает по порту 22. Из соображений безопасности порт лучше изменить. Для этого:
-
1.
Запустите терминал с помощью комбинации клавиш Ctrl + Alt + T.
-
2.
Откройте конфигурационный файл в текстовом редакторе:
sudo nano /etc/ssh/sshd_config -
3.
В sshd_config замените порт 22 на другое значение в диапазоне от 1 до 65 535. Важно, чтобы выбранный порт не был занят другой службой:
CentOS 8 настройка SSH -
4.
Чтобы изменения вступили в силу, перезапустите SSH-сервер:
Готово, вы настроили OpenSSH на Ubuntu 20.04. Теперь вы можете внести дополнительные настройки или в Ubuntu разрешить пользователю доступ по SSH.
Установка OpenSSH на Windows 10
-
1.
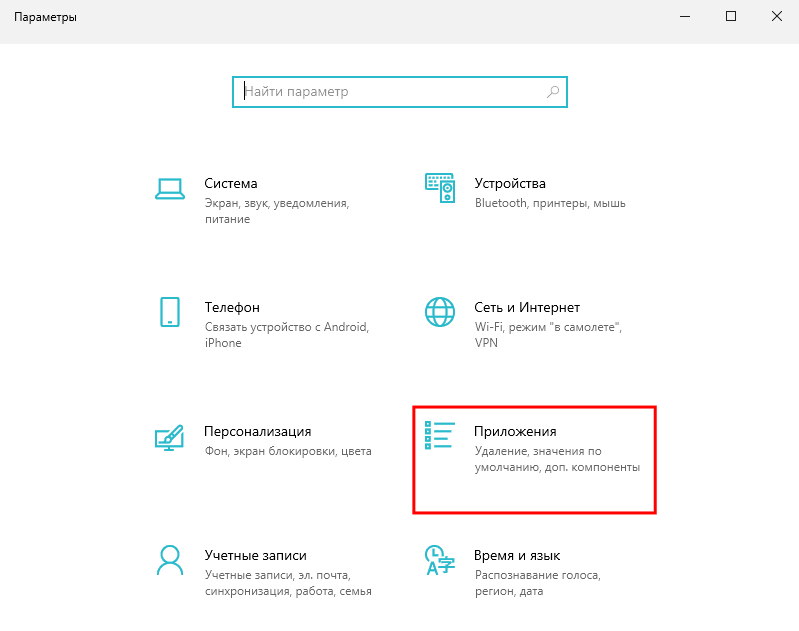
В меню «Пуск» нажмите Параметры:
-
2.
Перейдите в раздел Приложения:
Настройка SSH -
3.
Выберите Приложения и возможности и нажмите Дополнительные компоненты:
-
4.
Проверьте, установлен ли компонент «Клиент OpenSSH». Для этого в поисковой строке наберите «OpenSSH». Если компонент уже установлен, переходите к шагу Настройка SSH на Windows 10.
Если компонент ещё не установлен, используйте PowerShell.


Что такое PowerShell
PowerShell — это утилита командной строки в ОС Windows. Она выпущена в составе Windows 7, Windows 8, Windows 8.1 и Windows 10 как неотъемлемая часть системы.
Управлять ОС через PowerShell можно при помощи командлетов — специальных команд. Командлеты работают аналогично с командами в терминале Linux.
Использование командлетов позволяет:
- работать с файловой системой и реестром Windows,
- изменять настройки операционной системы,
- управлять службами и процессами,
- устанавливать программы,
- управлять установленным ПО,
- встраивать исполняемые компоненты в программы,
- создавать сценарии, которые помогут автоматизировать администрирование.
-
5.
Перейдите в меню «Пуск». Правой кнопкой мыши кликните на Windows PowerShell и выберите Запуск от имени администратора:
-
6.
Дайте согласие на запуск программы. Для этого нажмите Да:
-
7.
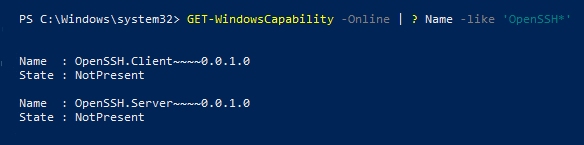
Введите командлет:
Get-WindowsCapability -Online | ? Name -like 'OpenSSH*'Вы увидите следующее сообщение:
-
8.
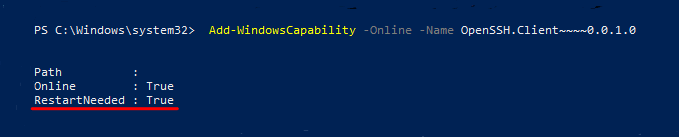
Установите OpenSSH с помощью командлета:
Add-WindowsCapability -Online -Name OpenSSH.Client~~~~0.0.1.0После установки вы увидите сообщение. Если для параметра «RestartNeeded» указан статус «True», перезагрузите компьютер.

Готово, вы установили OpenSSH на Windows.
Настройка Open SSH на Windows 10
-
1.
В меню «Пуск» и кликните на Windows PowerShell:
-
2.
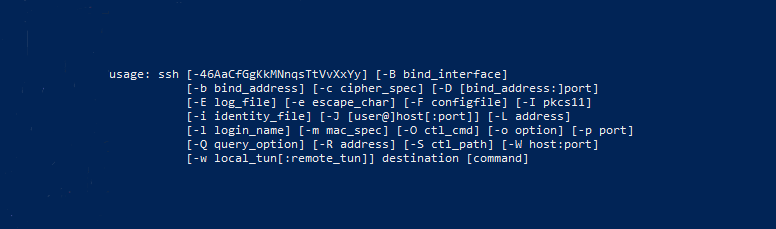
Введите командлет:
В выводе отобразится справочная информация о командлетах:
-
3.
Если вам нужно подключиться к серверу по SSH, выполните командлет:
Где:
- username — имя пользователя SSH,
- host — имя удаленного сервера или его IP-адрес.
Например, так выглядит командлет для подключения к хостингу REG.RU:
ssh u1234567@123.123.123.123

Готово, теперь вы можете как открыть доступ по SSH, так и внести дополнительные настройки на сервере.
The latest builds of Windows 10 and Windows 11 include a built-in server and client that are based on OpenSSH. This means now you can remotely connect to Windows 10/11 or Windows Server 2019 using any SSH client, similar to Linux distros. In this article, we’ll show you how to configure OpenSSH on Windows 10 and Windows 11, and connect to it using Putty or any other SSH client.
OpenSSH is an open-source, cross-platform version of Secure Shell (SSH) that is used by Linux users for a long time. This project is currently ported to Windows and can be used as an SSH server on almost any version of Windows. OpenSSH is built-in into the operating system image in the latest versions of Windows Server 2022/2019 and Windows 11.
How to Enable SSH Server on Windows 10?
Make sure your build of Windows 10 is 1809 or newer. The easiest way to do this is by running the command:
winver

Note. If you have an older Windows 10 build installed, you can update it through Windows Update or using an ISO image with a newer Windows 10 build (you can create an image using the Media Creation Tool). If you don’t want to update your Windows 10 build, you can manually install the Win32-OpenSSH port for Windows from GitHub.
You can enable the OpenSSH server in Windows 10 through the graphical Settings panel:
- Go to Settings > Apps > Apps and features > Optional features (or run the command ms-settings:appsfeatures);

- Click Add a feature, select OpenSSH Server (OpenSSH-based secure shell (SSH) server, for secure key management and access from remote machines), and click Install.


You can also install the sshd server using PowerShell:
Add-WindowsCapability -Online -Name OpenSSH.Server*

Or using DISM:
dism /Online /Add-Capability /CapabilityName:OpenSSH.Server~~~~0.0.1.0
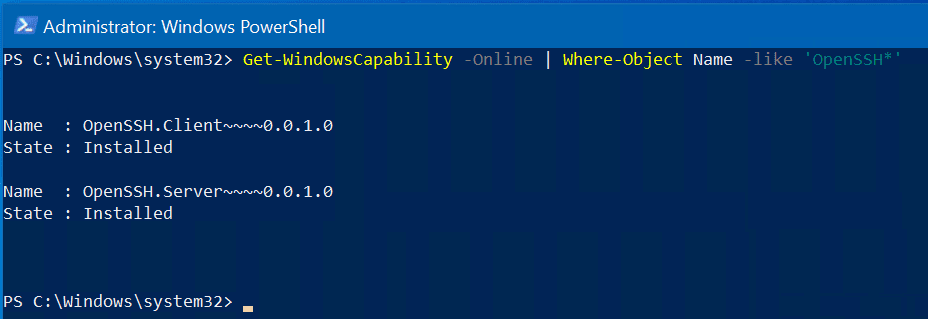
If you want to make sure the OpenSSH server is installed, run the following PS command:
Get-WindowsCapability -Online | ? Name -like 'OpenSSH.Server*'

Name : OpenSSH.Server~~~~0.0.1.0

State : Installed

Use the following PowerShell command to uninstall the SSH server:
Remove-WindowsCapability -Online -Name OpenSSH.Server~~~~0.0.1.0
How to Install SSH Server on Windows 11?
Also, you can add the OpenSSH Server on Windows 11.
- Go to Settings > Apps > Optional features;
- Click View Features;

- Select OpenSSH Server from the list and click Next > Install;

- Wait for the installation to complete.


The OpenSSH binaries are located in the C:WindowsSystem32OpenSSH folder.

Configuring SSH Service on Windows 10 and 11
Check the status of ssh-agent and sshd services using the PowerShell Get-Service command:
Get-Service -Name *ssh*

As you can see, both services are in a Stopped state and not added to the automatic startup list. To start services and configure autostart for them, run the following commands:
Start-Service sshd

Set-Service -Name sshd -StartupType 'Automatic'

Start-Service ‘ssh-agent’

Set-Service -Name ‘ssh-agent’ -StartupType 'Automatic'

You also need to allow incoming connections to TCP port 22 in the Windows Defender firewall settings. You can open the port using netsh:
netsh advfirewall firewall add rule name=”SSHD service” dir=in action=allow protocol=TCP localport=22
Or you can add a firewall rule to allow SSH traffic using PowerShell:
New-NetFirewallRule -Name sshd -DisplayName 'OpenSSH Server (sshd)' -Enabled True -Direction Inbound -Protocol TCP -Action Allow -LocalPort 22
You can configure various OpenSSH server settings in Windows using the %programdata%sshsshd_config configuration file.

For example, you can disable password authentication and leave only key-based auth with:
PubkeyAuthentication yes

PasswordAuthentication no
Here you can also specify a new TCP port (instead of the default TCP 22 port) on which the SSHD will accept connections. For example:
Port 2222
Using the directives AllowGroups, AllowUsers, DenyGroups, DenyUsers, you can specify users and groups who are allowed or denied to connect to Windows via SSH:
- DenyUsers theitbrosjbrown@192.168.1.15 — denies connections to username jbrown from 192.168.1.15 host;
- DenyUsers theitbros* — prevent all users from theitbros domain to connect host using ssh;
- AllowGroups theitbrosssh_allow — only allow users from theitbrosssh_allow to connect host.
The allow and deny rules of sshd are processed in the following order: DenyUsers, AllowUsers, DenyGroups, and AllowGroups.
For example, to allow to connect to SSH under mylocaluser1 account from 192.168.31.100 host, add the following directive:
AllowUsers mylocaluser1@192.168.31.100
After making changes to the sshd_config file, you need to restart the sshd service:
Get-Service sshd| Restart-Service –force

Connect to Windows via SSH
Now you can connect to Windows 10 using any SSH client. To connect from Linux, use the command:
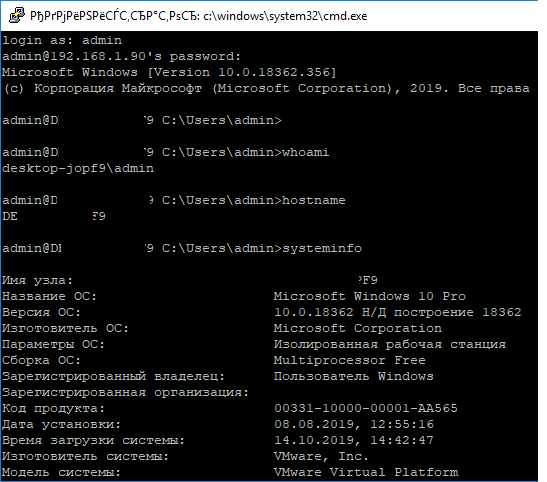
ssh -p 22 admin@192.168.1.90
Here, the admin is a local Windows user under which you want to connect. This account must be a member of the built-in Administrators group. 192.168.1.90 is an IP address of your Windows 10 computer.

After that, a Windows command prompt window will open in the SSH session.
You can use the Putty client to connect to a Windows computer via SSH:
- Download and run putty.exe;
- Enter the hostname or IP address of the remote Windows host you want to connect over SSH;
- Select the Connection type: SSH and make sure port 22 is specified;

- Click Open;
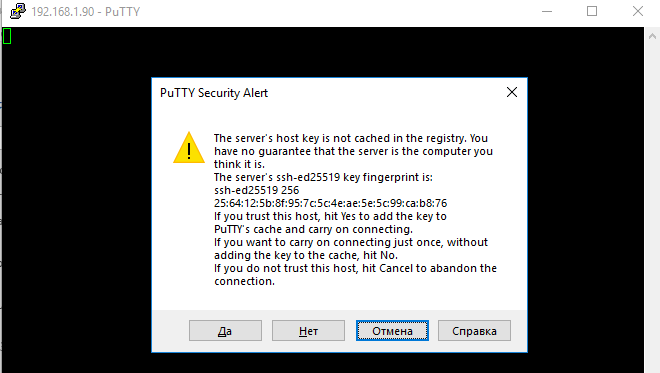
- The first time you connect to a Windows host via SSH, a Security Alert will appear asking you to confirm that you want to add the ssh-ed25519 key fingerprint of the remote machine to your local cache. If you trust this host, click the Accept button. This will add that server to the list of known SSH hosts;

Note. OpenSSH server fingerprint stored in a file C:ProgramDatasshssh_host_ecdsa_key.pub. You can determine the current ECDSA key fingerprint on a Windows 10 host with the command:ssh-keygen -lf C:ProgramDatasshssh_host_ed25519_key.pub

- A Putty window will appear. Here you need to specify the Windows username and password that you want to use to connect to SSH;

- Once logged in, the command line of the remote Windows host will open;
- You can now interactively run commands on the remote host.


You can also use the built-in Windows SSH client to connect to another Windows host. Install the ssh.exe client on Windows using the command:
Add-WindowsCapability -Online -Name OpenSSH.Client*
Now you can connect to a remote SSH host directly from the Windows command prompt. Use the following command:
ssh root@192.168.13.202
The first time you connect, you will also need to add the fingerprint of the SSH server’s ECDSA key to the list of known hosts. To do this, type “yes” > “enter”.

Enter the user’s password. The command line C:Windowssystem32conhost.exe should appear: 
You can now use the OpenSSH.Client tools (scp.exe, sftp.exe) to copy a file between hosts using the SSH protocol. The following command will copy the local test1.log file to a remote Windows SSH host:
scp.exe D:PStest1.log root@192.168.13.202:c:temp
![]()
If you prefer to use Windows Terminal, you can add the required SSH host profiles to it for quick connection:
- Run Windows Terminal and go to its Settings;
- Click the Add a new profile button in the Profiles section;

- Specify that you want to create a duplicate of Windows PowerShell profile;

- Specify a profile name (“SSH Windows 10 DEVPC” in this example);
- In the Command line parameter, specify the connection string to your SSH host. For example: %SystemRoot%System32WindowsPowerShellv1.0powershell.exe ssh root@192.168.13.202

- Save the profile;
- Now in the Windows Terminal menu you will have a separate option for a quick SSH connection to a Windows host.


Hint. In some scenarios, you will need to run the PowerShell.exe cli instead of the cmd.exe shell when logging in via SSH on Windows 10. You can do this by running the following command in Windows 10 (under the admin account):
New-ItemProperty -Path "HKLM:SOFTWAREOpenSSH" -Name DefaultShell -Value "C:WindowsSystem32WindowsPowerShellv1.0powershell.exe" -PropertyType String -Force
Now, you change the default OpenSSH shell. From here, when connecting to Windows via SSH, you will immediately see PowerShell prompt instead of cmd.exe.

If you want to use key-based ssh authentication instead of password authentication, you need to generate a key using ssh-keygen on your client. In such a case, the contents of the id_rsa.pub file must be copied to the c:usersadmin.sshauthorized_keys file in Windows 10.
After that, you can connect from your Linux client to Windows 10 without a password. Use the command:
ssh -l admin@192.168.1.90
In previous versions of OpenSSH on Windows, all of the sshd service logs were written to the text file C:ProgramDatasshlogssshd.log by default.
On Windows 11, SSH logs can be viewed using the Event Viewer console (eventvwr.msc). All SSH events are available in a separate section Application and Services Logs > OpenSSH > Operational.
For example, the screenshot shows an example of an event with a successful connection to the computer via SSH. You can see the ssh client’s IP address (hostname) and the username used to connect.
Sshd: Accepted password for jbrown from 192.168.14.14. port 49833 ssh2

- About
- Latest Posts

I enjoy technology and developing websites. Since 2012 I’m running a few of my own websites, and share useful content on gadgets, PC administration and website promotion.