In this guide you will learn how to install MASM32 on a Windows 10 machine, and also how to modify the Path environment variable to use the MASM tools directly from the command prompt. By the end of the guide you will have an environment to start writing software in assembly.
Let’s begin.
Download MASM for Windows 10
The first thing you need to do is head over to the MASM32 SDK download page. Select a mirror and your download should begin.
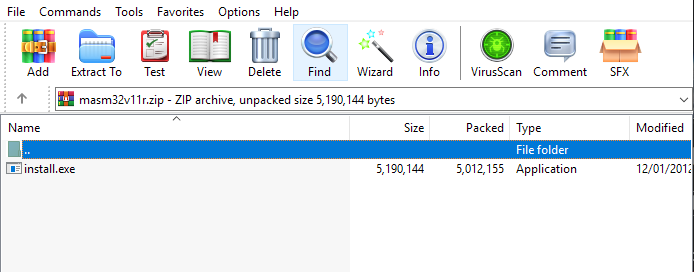
Next open up the archive and extract the installer to your desktop.
Installing MASM on Windows 10
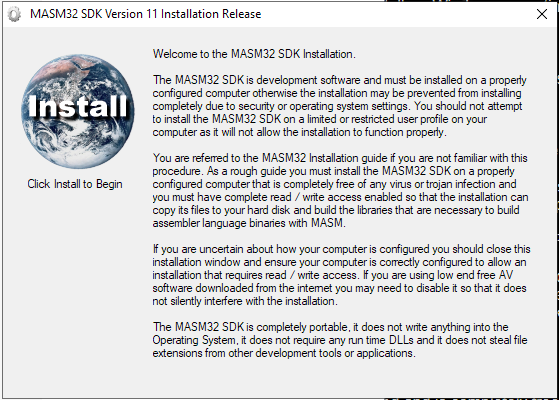
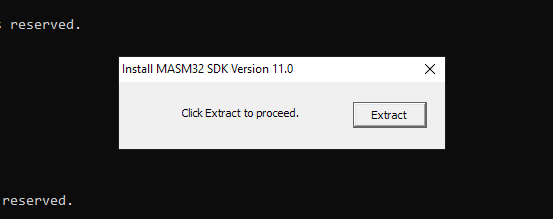
Double click on the installer. It will ask for administrator privileges. This application is deemed to be safe so you can safely press yes. After you have granted permissions you will see a dialog similar to the one below:
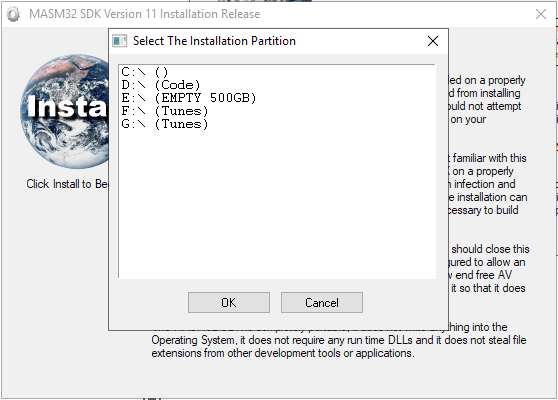
Click on the install icon on the top left and select the drive you want to use to install MASM. I will select my D: partition. MASM will install all the necessary files to the root directory of whatever partition you select.
Tip: I like to create a separate partition for my assembly projects and install MASM to the root directory of the partition. This makes it much easier to include libraries and includes such as windows.inc and friends.
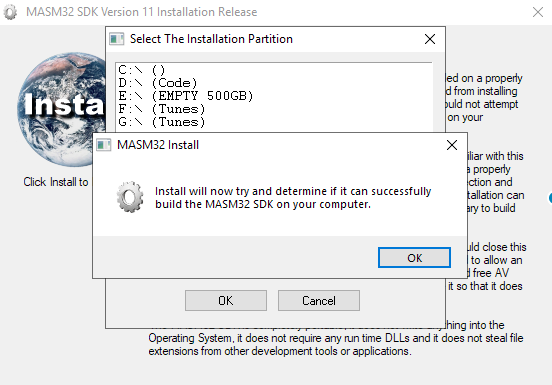
MASM will proceed to run a bunch of tests to see if you’re computer is compatible and able to run MASM32. You will see a number of dialog boxes appear that require you to press the ok button.
Once the tests are complete press the extract button.
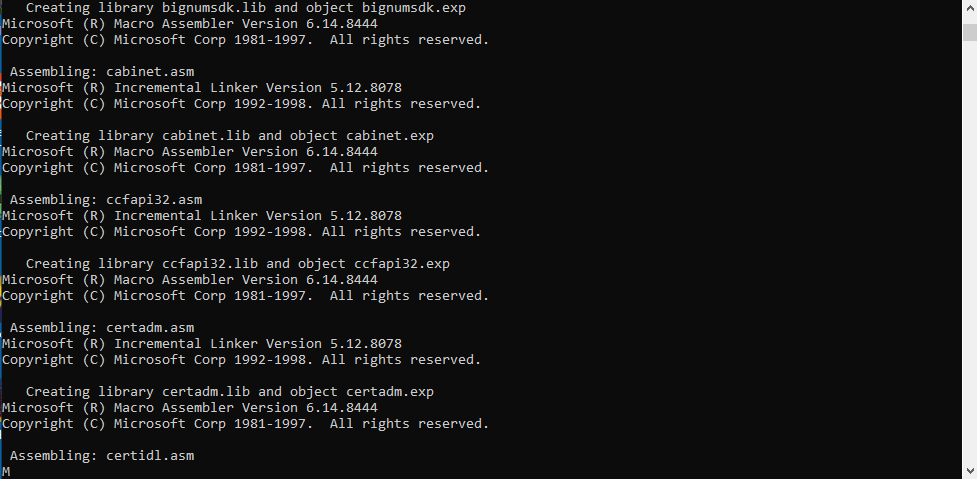
After the extraction has completed you will see another dialog box that informs you a command prompt will appear to complete the installation. Press ok and let the installation finish. It should only take a few moments.
After the installation has finished you will once again see a couple of dialog boxes that require you to press ok. You will also see a different type of dialog box similar to the one below. This runs a VB script to add an icon to your desktop for the MASM editor. If you want an icon on your desktop press yes.
Finally if everything went well you will see the final dialog box telling you the installation is complete.
Don’t run off just yet
I don’t use the default MASM editor. Instead I use Vim, or Sublime. This means I need to call the MASM compiler and linker directly from the command line to build my code. To do this you need to add the location of the MASM32 installation directory to your Path environment variable.
Adding a directory to environment variable Path on Windows 10
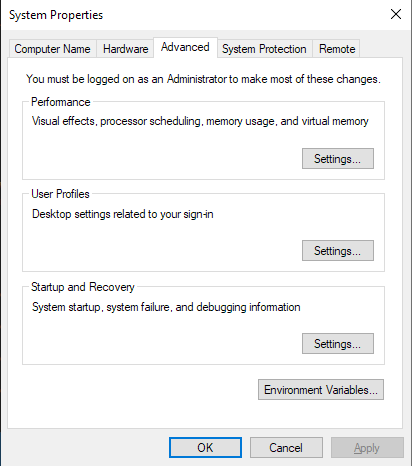
Open up the system properties dialog by entering the following command on the command prompt:
sysdm.cpl SystemProperties
Click the advanced tab, and click the Environment Variables button.
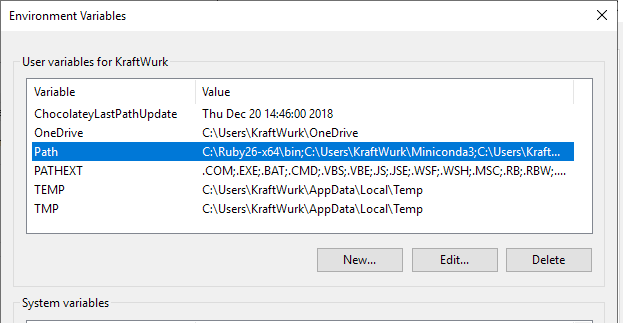
Next select the Path item from the list and click Edit.
On the next dialog press New and enter the path to the MASM bin directory. This contains the tools needed to compile and link assembly. For me the path is D:masm32bin. In most cases just change the drive letter if you installed to a different partition. The rest of the path is the same.
Press the ok button, and then then the apply button to save and close the system properties dialog.
Open a new command prompt and enter the following command to run the MASM assembler:
ml
If everything installed correctly and your Path is setup correctly you will see some output similar to the image below:
💡 Assembly Language Weekly Newsletter
Every week I publish a newsletter that contains tutorials, tips, tricks and resources related to assembly language. If you would like to receive this newsletter subscribe here: http://eepurl.com/ghximb
All Done!
And that’s all there is to it folks. If you want to hit the ground running check out my guide on how to compile and link MASM assembly to produce an executable on Windows 10.
If you’re having any issues following this guide please leave a comment and I will help you the best I can. You can also check out the official documentation includes detailed installation instructions and FAQ’s to solve common problems.
Здравствуйте. дорогие друзья, сегодня мы будем устанавливать Assembler(MASM32), предварительно нам нужно будет скачать MASM32 на компьютер: ну а саму установку мы упростили до простых шагов, поэтому она не займет много времени.
1) Скачать MASM32 архивом с файлами.
Прежде всего вам следует скачать архив masm32, который мы любезно выложили. В нем всего 2 файла.
2) Запустить файл MYASM.EXE
При запуске вам нужно будет указать путь куда вы хотите разархивировать MASM. Лучше выберите вашу директорию на диске C:
3) Поместить файл amake.bat из архива в папку BIN, которая появилась после разархивации.
Также вы можете заметить, что в папке BIN уже есть приложение OLLYDBG, это наш отладчик, и, как вы уже поняли, он установлен. Как им пользоваться, мы расскажем в следующей статье, где будем разбирать тему сложение на Assembler.
4) Настроить переменные среды Windows.
Звучит как то необычно, но ничего сложного здесь нет, это нужно, чтобы мы могли запускать из командной строки наши программы.
Есть несколько способов настройки:
4.1) Открываем Пуск, в поисковой строке вводим(без кавычек) «Переменные среды», откроется окно, в котором нужно создать переменную.
Нажимаем Создать; В поле «Имя переменной» можете ввести, что хотите (я ввел Assembler), а в поле «Значение» нужно ввести путь к папке BIN ( у меня это C:usersникитаBIN ). Жмем Ок.
4.2) Другой способ открыть переменные среды(встречается редко): Мой Компьютер — Свойства — Дополнительно — Переменные среды, далее делаем то же самое, что и в 4.1
Установка MASM32 завершена! Дальше нам нужно будет создать файл с расширением .asm, в котором будет прописан сам код программы для MASM32 и запустить его в командной строке WINDOWS, а как именно это сделать будет описано в следующих статьях.
На этом все, если у вас возникли проблемы, то пишите об этом в комментариях.
ASEM-51
ASEM-51 — двухпросмотровый макроассемблер семейства микроконтроллеров Intel MCS-51. ASEM-51 предназначен для работы на персональном компьютере под операционными системами DOS, Windows и Linux. Язык ассемблирования ASEM-51 основан на стандартном синтаксисе Intel, и содержит средства условного ассемблирования, макроопределения, а также включает файловую обработку. На выходе у ассемблера может быть как объектный код в форматах Intel-HEX или Intel OMF-51, так и детализированный список файлов. Пакет ASEM-51 включает поддержку более чем 200 производных 8051, программу самозагрузки для целевого управления MCS-51 и документацию в ASCII- и HTML-формате.
Скачать ASEM-51. Version 1.3:
Assembly Language Debugger
The Assembly Language Debugger – это инструмент для отладки исполняемых программ на уровне ассемблера. В настоящее время он работает только на платформах Intel x86 и поддерживается операционными системами Linux, FreeBSD, NetBSD, OpenBSD.
Особенности:
- Step into / Step over;
- Контрольные точки (Breakpoints);
- Мощный переводчик в формат ELF;
- Легкость манипуляций с памятью;
- Дизассемблер для инструкций Intel x86;
- Легкость манипуляций с регистром.
Перейти на сайт разработчика
Скачать Assembly Language Debugger:
The Assembly Language Debugger Linux, FreeBSD, NetBSD, OpenBSD, 651 kB
MASM32
The MASM32 SDK version 10 — распространенный 32-bit ассемблер процессоров семейства x86.
Особенности MASM32 SDK version 10:
- лучшая на сегодняшний день версия библиотеки для обработки чисел с плавающей запятой;
- добавлена библиотека для работы с датой и временем;
- расширен набор функций в библиотеках MASM32;
- библиотеки обновлены до XP SP2;
- добавлены специализированный компоновщик, компилятор и ассемблер от Pelle’s tool set с рабочими примерами.
Есть еще много изменений и дополнений. Полный список нововведений можно посмотреть на сайте разработчика.
Лицензионное соглашение
Скачать MASM32 SDK. Version 10:
MASM 32 SDK vers 10 Windows 2000 и выше, 3 854 kB
OllyDbg
Один из лучших низкоуровневых user-mode отладчиков под Windows. Позволяет дизассемблировать, просматривать регистры, память, выполнять программу по шагам, модифицировать уже выполняемую программу, ставить точки останова на инструкции или на память, присоединяться к уже запущенным процессам, писать ассемблерный код прямо в работающую программу. Незаменим при отладке лаб по ПАКМ.
Сайт программы

