С помощью программы можно управлять 3D принтером, загружать модели и отправлять их на печать. Поддерживается режим нагрева стола и функция мониторинга температуры.
Дата обновления:
26.12.2020
Версия Windows:
Windows XP, Windows Vista, Windows 7, Windows 8, Windows 8.1, Windows 10
Pronterface – приложение с открытым исходным кодом для Windows, позволяющее настроить параметры работы 3D принтера. Как и Slic3r, данная утилита дает возможность осуществлять мониторинг температуры. С ее помощью можно вручную управлять осью X, Y и Z, а также двигателем экструдера.
Подключение
Для использования приложения необходимо подключить принтер к компьютеру и установить соединение с устройством. Потребуется указать порт и скорость передачи данных. Далее нужно нажать кнопку Connect. В правой части главного окна расположена консоль взаимодействия с принтером. Есть возможность получать информация о состоянии устройства и посылать управляющие команды.
Настройка
Утилита позволяет выполнить предварительный прогрев рабочей поверхности перед печатью. Также пользователи могут вручную настраивать расположение оси X, Y и Z. Доступна функция управления экструдером и регулировки температуры сопла.
Печать
Программа работает с моделями трехмерных объектов в формате STL, OBJ и GCODE. Пользователю необходимо нажать кнопку Load file и указать путь к файлу. Есть возможность задать скорость печати.
Утилита позволяет создавать макросы для автоматизации выполнения однотипных действий. В процессе работы принтера на главном экране отображается график изменения температуры в режиме реального времени.
Особенности
- приложение можно скачать и использовать бесплатно;
- утилита предназначена для подключения 3D принтера к компьютеру и отправки заданий на печать;
- доступна функция предварительного прогрева стола и управления экструдером;
- есть возможность следить за изменениями температуры;
- программа совместима с актуальными версиями Windows.
38,7 Мб (скачиваний: 2977)
![]() ChatGPT
ChatGPT
Windows XP, Windows Vista, Windows 7, Windows 8, Windows 8.1, Windows 10 Бесплатно
Чат бот от компании OpenAI, способный вести диалог, искать ошибки в программном коде, шутить и спорить на разные темы. Сервис создан на основе модели GPT 3.5.
ver 3.5
![]() EA app
EA app
Windows 7, Windows 8, Windows 8.1, Windows 10 Бесплатно
Приложение представляет собой платформу, позволяющую приобретать, скачивать и запускать компьютерные игры. Есть возможность обмениваться достижениями с друзьями.
ver 12.21.0.5278
![]() Мой спорт Тренер
Мой спорт Тренер
Бесплатно
Сервис представляет собой цифровую платформу, предназначенную для спортивных школ и организаций. С его помощью тренеры могут составлять расписание занятий.
ver
![]() BUFF Game
BUFF Game
Windows XP, Windows Vista, Windows 7, Windows 8, Windows 8.1, Windows 10 Бесплатно
Приложение позволяет геймерам получать баллы за выполнение игровых заданий. Есть возможность обменять бонусы на реальные товары или цифровые подарочные карты.
ver 0.5.0.45
![]() Toncoin
Toncoin
Windows XP, Windows Vista, Windows 7, Windows 8, Windows 8.1, Windows 10 Бесплатно
Утилита представляет собой криптовалютный кошелек, позволяющий хранить средства и совершать переводы. Можно получить информацию о балансе и список транзакций.
ver 1.0
![]() Ton Place
Ton Place
Windows XP, Windows Vista, Windows 7, Windows 8, Windows 8.1, Windows 10 Бесплатно
Социальная сеть, разработанная на основе блокчнейна TON. Пользователи могут публиковать новости, создавать сообщества по интересам и общаться с друзьями.
ver 1.0
![]() PokerStars
PokerStars
Windows XP, Windows Vista, Windows 7, Windows 8, Windows 8.1, Windows 10 Бесплатно
Официальный клиент одноименного покер рума. Программа позволяет принимать участие в турнирах и играть на деньги. Есть возможность получить бонус на первый депозит.
ver 7.46703
![]() SmartThings
SmartThings
Windows 10 Бесплатно
Приложение предназначено для управления смарт телевизорами, кондиционерами, холодильниками и другими приборами от Samsung. Можно контролировать статус устройств.
ver 1.21192.2.0
При помощи данной программы можно печатать 3D-модели из файлов на компьютере. Соответственно, понадобится подходящий трехмерный принтер. В статье данный вопрос будет раскрыт максимально подробно, в том числе мы расскажем, как настроить приложение, как его установить, а также где бесплатно скачать новейшую версию программы Pronterface на русском языке через торрент.

Содержание
- Описание и возможности
- Как пользоваться
- Загрузка и установка
- Инструкция по работе
- Достоинства и недостатки
- Похожие приложения
- Системные требования
- Скачать
- Видеообзор
- Вопросы и ответы
Описание и возможности
Первое, что мы сделаем, это разберемся с возможностями приложения. Список основных и дополнительных функций Pronterface можно выразить следующим образом:
- Наличие нескольких дополнительных модулей, которые обеспечивают работу командной строки или функционирование в связке с G-Code.
- Поддерживается загрузки 3D-объектов на внешний накопитель и считывание их непосредственно оттуда.
- Программа может работать с ЧПУ-станками.
- Приложение может считывать информацию с датчиков принтера. Например, эта температура, которая тут отображается в виде графика.
- Возможна калибровка печатающей головки.
- Есть интерактивное средство просмотра двухмерных и трехмерных объектов.
- Пользовательский интерфейс настраивается.
- Поддерживается работа с пресетами Slic3r.
Это далеко не полный список функций обозреваем программы. Более детально ознакомиться с ними вы можете на официальном сайте или, просмотрев тематическое видео, прикрепленное в конце инструкции.
Как пользоваться
Теперь переходим к более интересной части статьи. Ниже будет рассказано, где бесплатно скачать программу для ПК или ноутбука, как ее установить, а также начать печатать свою первую 3D-модель.
Загрузка и установка
Продолжая работать с программой, мы сталкиваемся с еще одним ее достоинством. Дело в том, что устанавливать Pronterface не нужно. Программа работает сразу после запуска. Итак, поступаем следующим образом.
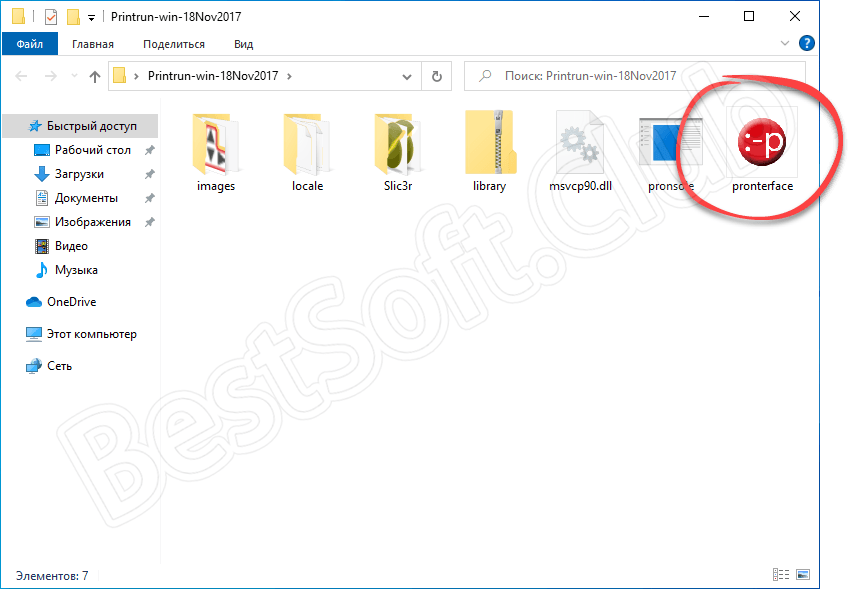
- Сначала переходим в самый конец странички и находим там раздел скачивание файла. Нажимаем кнопку и дожидаемся, пока архив с исполняемым компонентом будет получен. После этого распаковываем его, воспользовавшись паролем, который прописан чуть выше. Запускаем приложение, сделав двойной левый клик на обозначенном файле.
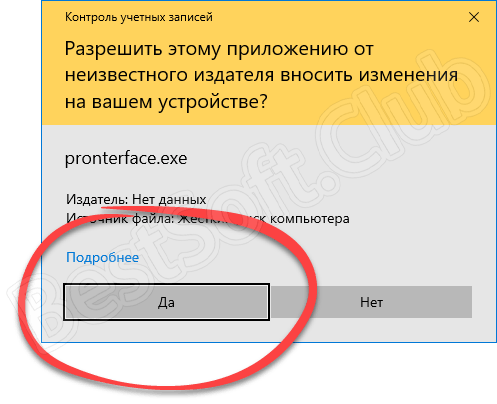
- Появится предупреждение о том, что для работы программы нам необходимо предоставить доступ к полномочиям администратора. Делаем эта, кликнув по отмеченной кнопке.
В результате программа запустится, и мы сможем переходить к работе с ней.
Инструкция по работе
Сама тема 3D-печати является не слишком простой. Если вы новичок и только приступайте к созданию первых трехмерных объектов, настоятельно рекомендуем сначала посмотреть обучающее видео. Именно в нем автор на собственном компьютере показывает, как пользоваться Pronterface. Если говорить кратко, то нужно отметить, что сначала вы должны перейти к настройкам, и произвести конфигурацию приложения для собственных нужд. Только потом можно будет приступать к печати.
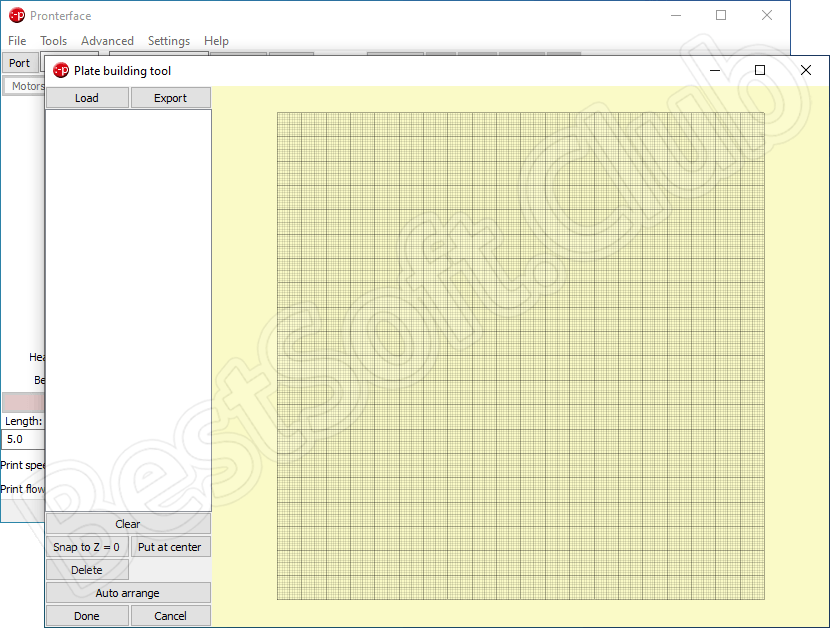
Рабочая область приложения выглядит так, как вы видите это на скриншоте ниже. Пока тут ничего нет, но уже скоро появятся контуры будущего трехмерного объекта.
Достоинства и недостатки
Для полноты картины давайте рассмотрим сильные и слабые стороны приложения, о котором говорилось в статье.
Плюсы:
- Огромное количество возможностей, которые позволяют реализовывать печать 3D-модели любого уровня сложности.
- Несколько основных компонентов, каждый из которых отлично справляется с положенной на него задачей.
- Огромное количество положительных отзывов от довольных пользователей.
Минусы:
- Сложность освоения.
Похожие приложения
Рекомендуем ознакомиться со списком программ, которые также могут использоваться для 3D-печати на компьютере:
- Sculptris.
- Vectary.
- Slic3R.
- OnShape.
- PTC Creo.
- Rhinoceros 3D.
- MatterControl.
- SolidWorks.
- Fusion 360.
- Cura.
Системные требования
Приложение не отличается простотой и для своей работы требует ПК или ноутбука с такими параметрами.
- Центральный процессор: от 2 ГГц.
- Оперативная память: от 4 Гб.
- Пространство на жестком диске: от 45 Мб.
- Платформа: Microsoft Windows 32/64 Bit.
Скачать
Скачать последнюю версию программы можно по кнопке, которая находится сразу после таблицы.
| Разработчик: | Kliment Yanev |
| Информация обновлена и актуальна: | 2022 год |
| Название: | Pronterface |
| Платформа: | Windows XP, 7, 8, 10 |
| Язык: | Русский |
| Лицензия: | Бесплатно |
| Пароль к архиву: | bestsoft.club |
Pronterface
Видеообзор
Данный ролик поможет познакомиться с программой и научиться с ней работать.
Вопросы и ответы
Приступайте к делу и пробуйте печатать собственную трехмерную модель. В комментариях напишите, получилось ли все с первого раза. Там же мы можем помочь и ответить на заданные вопросы.
-

-
October 22 2014, 22:07
- Технологии
- Cancel
Программа используется для:
— предварительного нагрева стола перед печатью,
— смены пластика,
— контроля температуры,
— настройки оси Z и других настроек.
Ссылка для скачивания архива программы
Щёлкаем на скачанный архив и переносим папку из архива в удобное, для нас, место. Подключаем 3D принтер к компьютеру и в сеть 220в. Входим в папку и щёлкаем по файлу pronterface.exe
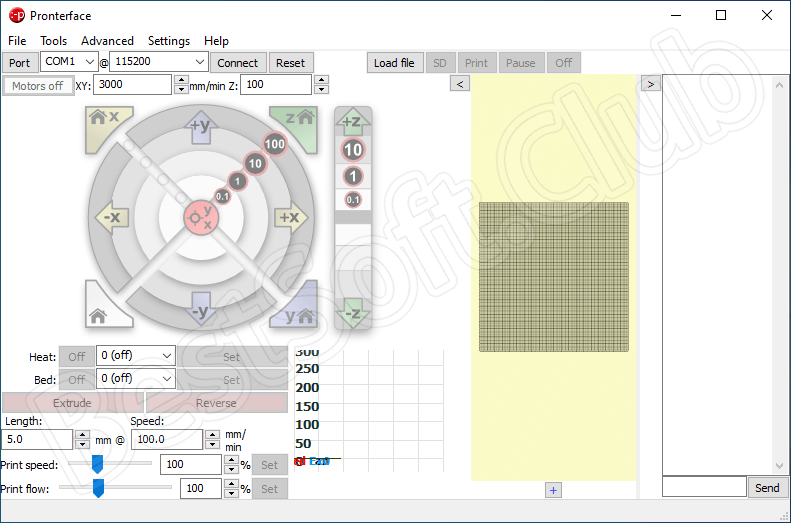
Блок подключения 3D принтера.
1 — Кнопка автоматического определения подключенного COM порта.
2 — Выбранный COM порт.
3 — Скорость обмена данными. Не менять!
4 — Кнопка подключения 3D принтера к программе управления.
Подключаем 3D принтер.
Текстовое поле вывода информации 3D принтером. Если нет слова ERROR, значит включение прошло без ошибок.
Если же видим надпись Connecting… , значит программа не может подключиться к 3D принтеру. Проверяем подключение USB кабеля или перебираем COM порты из выпадающего списка.
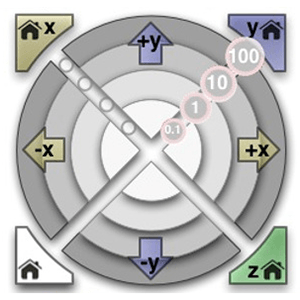
Перемещение сопла и стола по осям XYZ.
Устанавливаем скорости перемещения:
1 — по осям X и Y
2 — по оси Z
Скорость также зависит от ускорения, задаваемого в прошивке.
Для начала перемещения сопла или стола нужно 3D принтер вывести в нули. Для этого нажимаем кнопку Home (3). После касания концевых датчиков по XYZ установятся максимальные координаты, т.к. ноль находится на поверхности стола в левом ближнем углу. И все ручные перемещения начинаются в «минус», направление (4). Перемещения осуществляются фиксированными отрезками (6): 0.1мм, 1мм, 10мм, 100мм. После выхода в нули поле перемещения устанавливается и ограничивается из прошивки. При перемещении обращайте внимание на клипсы-прижимы стекла.
Управление нагревом сопла.
1 — Выбираем или устанавливаем вручную температуру сопла. Температура зависит от типа пластика PLA или ABS и типа сопла (индивидуально). Обычно PLA 180-210 градусов, ABS 230-275 градусов. В прошивке установлено ограничение температуры.
2 — Нажимаем кнопку Set для начала прогрева сопла.
3 — Кнопка отключения нагрева сопла.
Управление нагревом стола.
Здесь всё аналогично нагреву сопла, кроме температуры. При охлаждении пластика происходит усадка и углы детали отлипают от стола (деламинация). Для борьбы с деламинацией прогревают нижнюю часть детали. Для ABS 105-115 градусов, для PLA 70 градусов, при печати на каптоновом скотче. PLA можно печатать на синем скотче без нагрева стола.
Мониторинг температуры.
1 — Текущая температура сопла
2 — Текущая температура стола
3 — График изменения температуры
Управление экструдером (выдавливание пластика).
1 — Выдавливание пластика. Минимальная температура ограничена в прошивке.
2 — Обратное выталкивание пластика для смены катушки или бобины.
3 — Длина прутка пластика для перемещения
4 — Скорость перемещения пластика в экструдере (выдавливание или выталкивание)
Консоль взаимодействия с 3D принтером.
Консоль используется для настройки 3D принтера и в частности оси Z.
Некоторые команды:
M106 включить вентилятор охлаждения детали
M107 выключить вентилятор охлаждения детали
M114 показывает координаты в текущей позиции
M119 сообщает нам состояние концевых датчиков
G1 Перемещение в заданную координату (G1 Z90 — перемещение сопла до Z90)
Printrun consists of printcore, pronsole and pronterface, and a small collection of helpful scripts.
- printcore.py is a library that makes writing reprap hosts easy
- pronsole.py is an interactive command-line host software with tabcompletion goodness
- pronterface.py is a graphical host software with the same functionality as pronsole
GETTING PRINTRUN
This section suggests using precompiled binaries, this way you get everything bundled into one single package for an easy installation.
If you want the newest, shiniest features, you can run Printrun from source using the instructions further down this README.
Windows
A precompiled version is available at http://koti.kapsi.fi/~kliment/printrun/
Mac OS X
A precompiled version is available at http://koti.kapsi.fi/~kliment/printrun/
Note for OSX users: if OSX tells you the file is corrupted, you don’t need to redownload it. Instead, you need to allow OSX to run unsigned apps. To do this, run
sudo spctl --master-disable
Linux
Ubuntu/Debian
You can install Printrun from official packages (*):
sudo apt install printrun
Or you can run Printrun directly from source.
- Fetch and install the dependencies using (**):
sudo apt-get install python-serial python-wxgtk2.8 python-pyglet python-numpy cython python-libxml2 python-gobject python-dbus python-psutil python-cairosvg libpython-dev git
- Clone the repository
git clone https://github.com/kliment/Printrun.git
- You can start using Printrun from the Printrun directory created by the git clone command.
(*) Please be aware that the Printrun package available in Ubuntu Yakkety Yak, or later, and Debian Stretch/Sid repositories, is known to be affected by issue #615.
(**) Users of Ubuntu Xenial Xerus or later and Debian Jessie or later won’t find the package «python-wxgtk2.8» available, having been replaced by «python-wxgtk3.0». Running Printrun with «python-wxgtk3.0» instead, is possible but it is known to be affected by issue #615.
Chrome OS
You can use Printrun via crouton ( https://github.com/dnschneid/crouton ). Assuming you want Ubuntu Trusty, you used probably sudo sh -e ~/Downloads/crouton -r trusty -t xfce to install Ubuntu. Fetch and install dependencies with the line given above for Ubuntu/Debian, and obtain the source via git clone.
By default you have no access to the serial port under Chrome OS crouton, so you cannot connect to your 3D printer. Add yourself to the serial group within the linux environment to fix this
sudo usermod -G serial -a <username>
where <username> should be your username. Log out and in to make this group change active and allow communication with your printer.
Fedora
You can install Printrun from official packages. Install the whole package using
sudo yum install printrun
Or get only apps you need by
sudo yum install pronsole or pronterface or plater
Adding --enablerepo updates-testing option to yum might give you newer packages (but also not very tested).
You can also run Printrun directly from source, if the packages are too old for you. Fetch and install the dependencies using
sudo yum install pyserial wxPython python-pyglet python-cairosvg
Optional: sudo yum install skeinforge simarrange
Archlinux
Packages are available in AUR. Just run
yaourt printrun
and enjoy the pronterface, pronsole, … commands directly.
RUNNING FROM SOURCE
Run Printrun for source if you want to test out the latest features.
Dependencies
To use pronterface, you need:
- python (ideally 2.6.x or 2.7.x),
- pyserial (or python-serial on ubuntu/debian)
- pyreadline (not needed on Linux) and
- argparse (installed by default with python >= 2.7)
- wxPython (some features such as Tabbed mode work better with wx 2.9)
- pyglet
- numpy (for 3D view)
- pycairo (to use Projector feature)
- cairosvg (to use Projector feature)
- dbus (to inhibit sleep on some Linux systems)
Please see specific instructions for Windows and Mac OS X below. Under Linux, you should use your package manager directly (see the «GETTING PRINTRUN» section), or pip:
pip install -r requirements.txt
Cython-based G-Code parser
Printrun default G-Code parser is quite memory hungry, but we also provide a much lighter one which just needs an extra build-time dependency (Cython), plus compiling the extension with:
python setup.py build_ext --inplace
The warning message
WARNING:root:Memory-efficient GCoder implementation unavailable: No module named gcoder_line
means that this optimized G-Code parser hasn’t been compiled. To get rid of it and benefit from the better implementation, please install Cython and run the command above.
Windows
Download the following, and install in this order:
- http://python.org/ftp/python/2.7.2/python-2.7.2.msi
- http://pypi.python.org/packages/any/p/pyserial/pyserial-2.5.win32.exe
- http://downloads.sourceforge.net/wxpython/wxPython2.8-win32-unicode-2.8.12.0-py27.exe
- https://pypi.python.org/packages/any/p/pyreadline/pyreadline-1.7.1.win32.exe
- http://pyglet.googlecode.com/files/pyglet-1.1.4.zip
For the last one, you will need to unpack it, open a command terminal,
go into the the directory you unpacked it in and run
python setup.py install
Mac OS X Lion
- Ensure that the active Python is the system version. (
brew uninstall pythonor other appropriate incantations) - Download an install [wxPython2.8-osx-unicode] matching to your python version (most likely 2.7 on Lion,
check with: python —version) from: http://wxpython.org/download.php#stable
Known to work PythonWX: http://superb-sea2.dl.sourceforge.net/project/wxpython/wxPython/2.8.12.1/wxPython2.8-osx-unicode-2.8.12.1-universal-py2.7.dmg - Download and unpack pyserial from http://pypi.python.org/packages/source/p/pyserial/pyserial-2.5.tar.gz
- In a terminal, change to the folder you unzipped to, then type in:
sudo python setup.py install - Repeat 4. with http://http://pyglet.googlecode.com/files/pyglet-1.1.4.zip
The tools will probably run just fine in 64bit on Lion, you don’t need to mess
with any of the 32bit settings. In case they don’t, try
5. export VERSIONER_PYTHON_PREFER_32_BIT=yes
in a terminal before running Pronterface
Mac OS X (pre Lion)
A precompiled version is available at http://koti.kapsi.fi/~kliment/printrun/
-
Download and install http://downloads.sourceforge.net/wxpython/wxPython2.8-osx-unicode-2.8.12.0-universal-py2.6.dmg
-
Grab the source for pyserial from http://pypi.python.org/packages/source/p/pyserial/pyserial-2.5.tar.gz
-
Unzip pyserial to a folder. Then, in a terminal, change to the folder you unzipped to, then type in:
defaults write com.apple.versioner.python Prefer-32-Bit -bool yessudo python setup.py install
Alternatively, you can run python in 32 bit mode by setting the following environment variable before running the setup.py command:
This alternative approach is confirmed to work on Mac OS X 10.6.8.
export VERSIONER_PYTHON_PREFER_32_BIT=yes
sudo python setup.py install
Then repeat the same with http://http://pyglet.googlecode.com/files/pyglet-1.1.4.zip
USING PRINTRUN
USING PRONTERFACE
When you’re done setting up Printrun, you can start pronterface.py in the directory you unpacked it.
Select the port name you are using from the first drop-down, select your baud rate, and hit connect.
Load an STL (see the note on skeinforge below) or GCODE file, and you can upload it to SD or print it directly.
The «monitor printer» function, when enabled, checks the printer state (temperatures, SD print progress) every 3 seconds.
The command box recognizes all pronsole commands, but has no tabcompletion.
If you want to load stl files, you need to install a slicing program such as Slic3r or Skeinforge and add its path to the settings.
Slic3r integration
To invoke Slic3r directly from Pronterface your slicing command (Settings > Options > External Commands > Slice Command) should look something like slic3r $s -o $o. If Slic3r is properly installed «slic3r» will suffice, otherwise, replace it with the full path to Slic3r’s executable.
If the Slic3r integration option (Settings > Options > User interface > Enable Slic3r integration) is checked a new menu will appear after application restart which will allow you to choose among your previously saved Slic3r Print/Filament/Printer settings.
USING PRONSOLE
To use pronsole, you need:
- python (ideally 2.6.x or 2.7.x),
- pyserial (or python-serial on ubuntu/debian) and
- pyreadline (not needed on Linux)
Start pronsole and you will be greeted with a command prompt. Type help to view the available commands.
All commands have internal help, which you can access by typing «help commandname», for example «help connect»
If you want to load stl files, you need to put a version of skeinforge (doesn’t matter which one) in a folder called «skeinforge».
The «skeinforge» folder must be in the same folder as pronsole.py
USING PRINTCORE
To use printcore you need python (ideally 2.6.x or 2.7.x) and pyserial (or python-serial on ubuntu/debian)
See pronsole for an example of a full-featured host, the bottom of printcore.py for a simple command-line
sender, or the following code example:
#to send a file of gcode to the printer
from printrun.printcore import printcore
from printrun import gcoder
p=printcore('/dev/ttyUSB0',115200) # or p.printcore('COM3',115200) on Windows
gcode=[i.strip() for i in open('filename.gcode')] # or pass in your own array of gcode lines instead of reading from a file
gcode = gcoder.LightGCode(gcode)
p.startprint(gcode) # this will start a print

#If you need to interact with the printer:
p.send_now("M105") # this will send M105 immediately, ahead of the rest of the print
p.pause() # use these to pause/resume the current print
p.resume()
p.disconnect() # this is how you disconnect from the printer once you are done. This will also stop running prints.
PLATERS
Printrun provides two platers: a STL plater (plater.py) and a G-Code plater (gcodeplater.py).
3D VIEWER CONTROLS
When the 3D viewer is enabled, the controls are the following:
- Mousewheel: zoom (Control reduces the zoom change steps)
- Shift+mousewheel: explore layers (in print gcode view ; Control key makes layer change by increments of 10 instead of 1) or rotate object (in platers)
- Left-click dragging: rotate view
- Right-click dragging: pan view
- Shift + left-click dragging: move object (in platers)
- Page up/down keys: zoom (Control reduces the zoom change steps)
- Up/down keys: explore layers
- R key: reset view
- F key: fit view to display entire print
- C key: toggle «display current layer only» mode (in print gcode view)
RPC SERVER
pronterface and pronsole start a RPC server, which runs by default
on localhost port 7978, which provides print progress information.
Here is a sample Python script querying the print status:
import xmlrpclib

rpc = xmlrpclib.ServerProxy('http://localhost:7978')
print rpc.status()
CONFIGURATION
Build dimensions
Build dimensions can be specified using the build_dimensions option (which can
be graphically edited in Pronterface settings). This option is formed of 9 parameters:
3 for the build volume dimensions, 3 for the build volume coordinate system
offset minimum, 3 for the endstop positions.
The default value is 200x200x100+0+0+0+0+0+0, which corresponds to a
200x200mm (width x height) bed with 100mm travel in Z (there are the first
three numbers) and no offset. The absolute coordinates system origin (0,0,0) is
at the bottom left corner on the bed surface, and the top right corner on the
bed surface is (200,200,0).
A common practice is to have the origin of the coordinate system (0,0,0) at the
center of the bed surface. This is achieved by using the next three parameters,
for instance with 200x200x100-100-100+0+0+0+0.
In this case, the bottom left corner of the bed will be at (-100,-100,0) and
the top right one at (100,100,0).
These two sets of settings should be sufficient for most people. However, for
some specific complicated setups and GCodes and some features, we might also
need the endstops positions for perfect display. These positions (which are
usually 0,0,0, so if you don’t know you probably have a standard setup) are
specified in absolute coordinates, so if you have your bed starting at
(-100,-100,0) and your endstops are 10mm away from the bed left and right and
the Z endstop 5mm above the bed, you’ll want to set the endstops positions to
(-110,-110,5) for this option.
USING MACROS AND CUSTOM BUTTONS
Macros in pronsole and pronterface
To send simple G-code (or pronsole command) sequence is as simple as entering them one by one in macro definition.
If you want to use parameters for your macros, substitute them with {0} {1} {2} … etc.
All macros are saved automatically immediately after being entered.
Example 1, simple one-line alias:
Instead of having to remember the code to query position, you can query the position:
PC> where
X:25.00Y:11.43Z:5.11E:0.00
Example 2 — macros to switch between different slicer programs, using «set» command to change options:
PC> macro use_slicer
Enter macro using indented lines, end with empty line
..> set sliceoptscommand Slic3r/slic3r.exe --load slic3r.ini
..> set slicecommand Slic3r/slic3r.exe $s --load slic3r.ini --output $o
Macro 'use_slicer' defined
PC> macro use_sfact
..> set sliceoptscommand python skeinforge/skeinforge_application/skeinforge.py
..> set slicecommand python skeinforge/skeinforge_application/skeinforge_utilities/skeinforge_craft.py $s
Macro 'use_sfact' defined
Example 3, simple parametric macro:
PC> macro move_down_by
Enter macro using indented lines, end with empty line
..> G91
..> G1 Z-{0}
..> G92
..>
Invoke the macro to move the printhead down by 5 millimeters:
For more powerful macro programming, it is possible to use python code escaping using ! symbol in front of macro commands.
Note that this python code invocation also works in interactive prompt:
PC> !print "Hello, printer!"
Hello printer!

PC> macro debug_on !self.p.loud = 1
Macro 'debug_on' defined
PC> debug_on
PC> M114
SENT:  M114
X:0.00Y:0.00Z:0.00E:0.00 Count X:0.00Y:0.00Z:0.00
RECV:  X:0.00Y:0.00Z:0.00E:0.00 Count X:0.00Y:0.00Z:0.00
RECV:  ok
You can use macro command itself to create simple self-modify or toggle functionality:
Example: swapping two macros to implement toggle:
PC> macro toggle_debug_on
Enter macro using indented lines, end with empty line
..> !self.p.loud = 1
..> !print "Diagnostic information ON"
..> macro toggle_debug toggle_debug_off
..>
Macro 'toggle_debug_on' defined
PC> macro toggle_debug_off
Enter macro using indented lines, end with empty line
..> !self.p.loud = 0
..> !print "Diagnostic information OFF"
..> macro toggle_debug toggle_debug_on
..>
Macro 'toggle_debug_off' defined
PC> macro toggle_debug toggle_debug_on
Macro 'toggle_debug' defined
Now, each time we invoke «toggle_debug» macro, it toggles debug information on and off:
PC> toggle_debug
Diagnostic information ON

PC> toggle_debug
Diagnostic information OFF
When python code (using ! symbol) is used in macros, it is even possible to use blocks/conditionals/loops.
It is okay to mix python code with pronsole commands, just keep the python indentation.
For example, following macro toggles the diagnostic information similarily to the previous example:
!if self.p.loud:
  !self.p.loud = 0
  !print "Diagnostic information OFF"
!else:
  !self.p.loud = 1
  !print "Diagnostic information ON"
Macro parameters are available in ‘!’-escaped python code as locally defined list variable: arg[0] arg[1] … arg[N]
All python code is executed in the context of the pronsole (or PronterWindow) object,
so it is possible to use all internal variables and methods, which provide great deal of functionality.
However the internal variables and methods are not very well documented and may be subject of change, as the program is developed.
Therefore it is best to use pronsole commands, which easily contain majority of the functionality that might be needed.
Some useful python-mode-only variables:
!self.settings - contains all settings, e.g.
  port (!self.settings.port), baudrate, xy_feedrate, e_feedrate, slicecommand, final_command, build_dimensions
  You can set them also via pronsole command "set", but you can query the values only via python code.
!self.p - printcore object (see USING PRINTCORE section for using printcore object)
!self.cur_button - if macro was invoked via custom button, the number of the custom button, e.g. for usage in "button" command
!self.gwindow - wx graphical interface object for pronterface (highly risky to use because the GUI implementation details may change a lot between versions)
Some useful methods:
!self.onecmd - invokes raw command, e.g.
    !self.onecmd("move x 10")
    !self.onecmd("!print self.p.loud")
    !self.onecmd("button "+self.cur_button+" fanOFF /C cyan M107")
!self.project - invoke Projector
USING HOST COMMANDS
Pronsole and the console interface in Pronterface accept a number of commands
which you can either use directly or inside your G-Code. To run a host command
from inside a G-Code, simply prefix it with ;@.
List of available commands:
pause: pauses the print until the user resumes itrun_script scriptname [arg1 ...]: runs a custom script or program on the
host computer. This can for instance be used to produce a sound to warn the
user (e.g.run_script beep -r 2on machines were thebeeputil is
available), or to send an email or text message at the end of a print. The $s
token can be used in the arguments to get the current gcode file namerun_gcode_script scripname [arg1 ...]: same asrun_script, except that
all lines displayed by the script will be interpreted in turn (so that G-Code
lines will be immediately sent to the printer)shell pythoncommand: run a python command (can also be achieved by doing
!pythoncommand)set option value: sets the value of an option, e.g.set mainviz 3Dconnectblock_until_online: wait for the printer to be online. For instance you can
dopython pronsole.py -e "connect" -e "block_until_online" -e "upload object.gcode"to start pronsole, connect for the printer, wait for it to be
online to start uploading theobject.gcodefile.disconnectload gcodefileupload gcodefile target.g: uploadgcodefiletotarget.gon the SD cardslice stlfile: slicestlfileand load the produced G-Codeprint: print the currently loaded filesdprint target.g: start a SD printls: list files on SD cardeta: display remaining print timegettemp: get current printer temperaturessettemp: set hotend target temperaturebedtemp: set bed target temperaturemonitor: monitor printer progress during a printtool K: switch to tool Kmove xK: move alongxaxis (works with other axes too)extrude length [speed]reverse length [speed]home [axis]off: turns off fans, motors, extruder, heatbed, power supplyexit
LICENSE
Printrun is free software: you can redistribute it and/or modify
it under the terms of the GNU General Public License as published by
the Free Software Foundation, either version 3 of the License, or
(at your option) any later version.

Printrun is distributed in the hope that it will be useful,
but WITHOUT ANY WARRANTY; without even the implied warranty of
MERCHANTABILITY or FITNESS FOR A PARTICULAR PURPOSE.  See the
GNU General Public License for more details.

You should have received a copy of the GNU General Public License
along with Printrun.  If not, see <http://www.gnu.org/licenses/>.
All scripts should contain this license note, if not, feel free to ask us. Please note that files where it is difficult to state this license note (such as images) are distributed under the same terms.
Pronterface is a graphical interface for the host software supplied with your printer. It is part of a set of software from Printrun– a group of G-code utility applications. It is with Pronterface that you can control your 3D printer. This guide assumes you already have all the required software installed. If you do not already have the required software installed, please visit our guide on how to install it.
Connecting to your printer
Start by connecting your 3D printer to you computer via a USB cable. Connect the provided power supply to the 3D printer and plug the power supply into a power outlet. Next open Pronterface by navigating to the directory you have installed Pronterface in (i.e. C:Pronterface ) and double click on the Pronterface.exe icon. After Pronterface loads select the com port your 3D printer is connected to and then set the baudrate to 250000. Next click on the connect button. You will see a message in the right column of Pronterface indicating that the printer has successfully connected .


Homing and Moving the X, Y and Z Axis and the Extruder
Once connected you can use Pronterface to manually control the X, Y, and Z axis plus the extruder. Before manually moving an axis, you may want to home the axis before hand to prevent the axis from over shooting its boundary. After the axis is homed it will not be able to travel past its maximum set limit of 204mm. To home an axis (moving the axis to its zero start position), press the X-home, Y-home, or Z-home icon to home the X, Y, or Z axis respectively. When a print is started (if you use the provided software and the predefined parameters to slice the model) the printer will automatically home each axis so it is not necessary to home the axis’ before printing.
After homing you may move any axis, X, Y, or Z by pressing the X+, X-, Y+, Y-, or Z+, Z- directional icons. The X and Y directions have 4 distances to choose from to move at a time—.1mm, 1mm, 10mm, or 100mm in either the plus or negative direction. The Z axis directions has 3 distances to choose from–.1mm, 1mm, and 10mm. When an axis is at its home position it is at zero. You can move each axis of your Asterid printer 204mm from the home position. Starting from zero press the icon in the positive direction. To move towards the home position move in the negative direction. You can also change the rate at which the X, Y and Z axis move by entering a value in the XY mm/min dialog box and the Z mm/min dialog box, however, we recommend using the default values of 2000 mm/min for the X and Y axis and 200 for the Z axis.
You can also manually control the extruder motor using Pronterface, but be sure that heater is turned on before doing so, see the instructions below for more information. The distance and speed of the manual control is set right below the extrude button. The default values are 5mm at 100mm/min.

Nozzle and Heated bed settings
Underneath the directional controls for moving an axis are the nozzle heater and heated bed controls.
To set the temperature of the nozzle use the pull down menu following Heater:, to select a predefined temperature or enter a temperature manually and press Set. To turn the nozzle heater off, press the Offbutton next to Heater:.
To set the temperature of the heated bed (if you model of printer has a heated bed) use the pull down menu following Bed:, to select a predefined temperature or enter a temperature manually and press Set. To turn the heated bed off, press the Off button next to Bed:.
You can monitor the temperature of the nozzle and bed by selecting the Watch option and then viewing the graph of real time temperature value. Or, you can press the Check Temp to view the actual temperature in the console on the right of Proterface.


Opening Slic3r from Pronterface
From the pull down menu in the toolbar select Settings then choose Slicing options. This will open the program Slic3r. Click here for a tutorial on using Slic3r for more information.

If this is your first time opening Slic3r then you will be prompted with the Slic3r configuration wizard. Select cancel on this wizard and Slic3r will now load the 3 pre-configured profiles for your Asterid Series 3D printer.

Opening a file to print
Your Asterid 3D printer uses G-code to know what to print. The slicing program will convert a stereolithography (.STL) file of a 3D model into the necessary G-code that your printer can understand. Once the file has been exported into the needed g-code format you can open that file in Pronterface for printing. For more information and instructions on how to slice please visit our Getting Started with Slic3rarticle for more information.
To open the G-code, navigate to the pull down menu on the Pronterface toolbar and select File, open… Navigate to the folder you exported the G-code file into and select that file and then press OK.
When Pronterface loads the file it will appear on the graph in the graphical user interface.

Pronterface is a host software for Reprap electronics, originally developped by Kliment.
It is mostly oriented towards 3D printing, but can also be used to control laser cutters and CNC routers.
Pronterface’s website is at http://www.pronterface.com/
The pronterface interface

Mainly for 3D printers, but very useful for debugging problems with any types of machine because it does communication very well and reports problems instead of ignoring them.
Pronterface is for 3D printers
Pronterface is designed for 3D printers and will do weird things for CNC mills and laser cutters ( like ignoring some commands ).
For CNC mills/routers, use bCNC and for laser cutters use Visicut.
There are two ways to connect to Smoothie using Pronterface, via USB, or via Ethernet
USB connection
Everybody has USB, and Smoothie does too.
Smoothie uses serial over USB ( ACM ), allowing Pronterface to send commands and G-codes for execution, and even to upload files.
USB can be finicky
Contrary to Ethernet, USB can fail due to EMI and ground loop problems.
Those problems will mostly manifest as your board “disconnecting”, this means it would become un-responsive, the machine would stop moving, and sometimes your host computer may indicate that a USB disconnect occured.
Ways to fight those problems include :
-
Make sure your USB cable is as short as possible
-
It should be shielded
-
It should have ferrite at one end, or even better, both ends
-
The machine shouldn’t be placed in an electromagnetically noisy environment.
-
The machine, and the computer controlling it, should be connected as close as possible in the electrical installation, ideally they should be plugged in the same power strip.
Windows drivers
Using a Smoothieboard with the Windows operating system, requires the prior installation of drivers.
Those drivers as well as instructions on how to install them, can be found at the Windows Drivers page.
Please make sure you install the drivers, and restart the computer, before you try to connect to Smoothie via Pronterface.
To connect to Smoothie, follow this procedure :
-
Click on Port, this refreshes the list of boards connected to the computer
-
Select your board in the drop-down menu next to the Port button. This can be something like /dev/ttyACM0 on a Linux machine, or COM1 on a Windows machine
-
You do not need to set a baud rate, Smoothie will use the fastest speed possible over USB, and any baud rate setting is ignored.
-
Click on Connect
If everything works correctly, the Pronterface log panel on the right, should show something like :
Connecting...
Printer is now online.
Now, Pronterface will start reading and displaying temperatures, and will allow you to interract with your machine.
Ethernet
Smoothieboard has an ethernet connector, it exposes a web interface, but also a serial ( telnet ) interface.
You can use that interface to connect to Smoothieboard over Ethernet, using Pronterface
First of all, set up your Smoothieboard to activate Ethernet : see the Network page.
Wifi
It is not recommended that you talk to your Smoothieboard over Wifi, it introduces a certain lag, that can make the interface annoying, or even un-usable.
Make sure your computer is connected to your network switch and then to your Smoothieboard, using ethernet cable all the way
Streaming mode
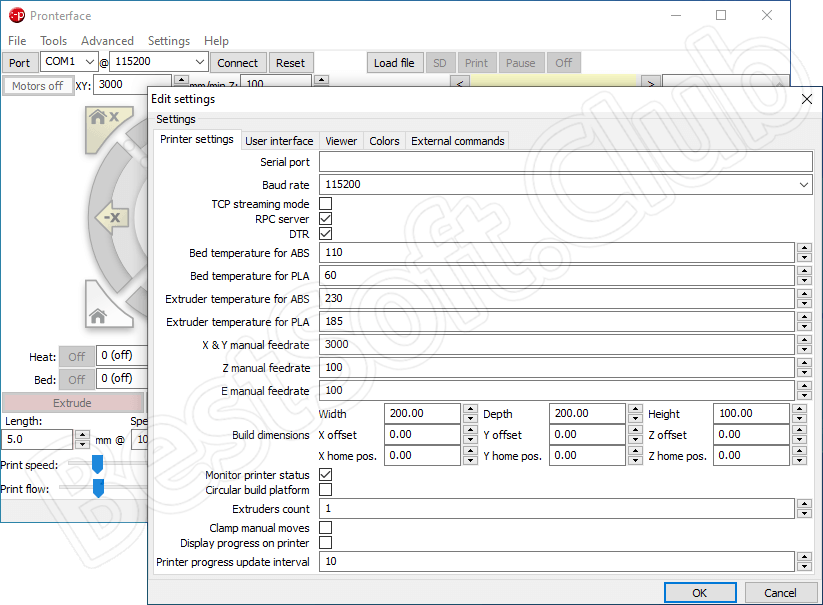
Make sure you have the right option set in Pronterface. Go into the Settings > Options menu, then go to the Printer Settings tab, and check that the TCP streaming mode option is checked.
If it is not, you will probably experience slow transfers and streaming.
Once you have confirmed that the Network functionality works normally ( for example by accessing the Web Interface ), you can now try to connect using Pronterface.
First, find your Smoothieboard’s IP adress, here we will for example say it is 192.168.1.10
Now, in the Port drop-down menu, where the USB serial port name usually is, enter :
192.168.1.10:23
And click on Connect
If everything works correctly, the Pronterface log panel on the right, should show something like :
Connecting...
Printer is now online.
Now, Pronterface will start reading and displaying temperatures, and will allow you to interract with your machine.
Sending commands
In addition to all of the nice buttons and controls the Pronterface interface offers,
you can use the Send input box and button, to send G-codes and commands to your Smoothieboard manually.
G-codes
Sending G-codes requires no special treatement at all, simply input the G-code into the Send input box ( lower right ), and hit the Send button.
You can find a list of useful G-codes here.
Commands
In addition to G-codes, Smoothie understands a set of commands.
You can find a list of useful commands here.
However, sending commands is not as trivial as sending G-codes.
Because Pronterface is used to G-codes, but not commands, it will ignore commands if you input those as-is.
So, you need to add a @ character before the command to send it.
For example, to send the Version command, you need to actually send @version.
Smoothieboard has a SD card, which is used to store configuration, but also G-code files.
You can use Pronterface to send G-code files to the Smoothieboard, which are then store, and which you can then play as you wish.
This is useful in particular if you have problems with USB connection errors, or insufficent USB speed ( both extremely rare problems ).
To send a G-code file to your Smoothieboard, follow this procedure :
-
Click on Load file
-
Select your file
-
Pronterface will load and analyze the file
-
Click on SD
-
Click on SD Upload in the menu that popped out
-
Enter a filename ( with Smoothie you can ignore the warning about using a 8.3-type filename and just use a normal filename )
-
Now the file will upload over the serial interface, you can monitor the progress in the bottom bar
When we need to control of our JellyBOX using our computer, be it for troubleshooting, development, or for show, we use Pronterface.
Pronterface is a 3D printing host– a program that allows direct control of 3D printers (including printing a sliced gcode) through a USB cable.
Pronterface is a part of Printrun, a free, open-source software suite, licensed under the GNU General Public License, version 3. (Yay!)
What sets Pronterface apart is its large and comfortable command line interface, and small footprint (it takes no space on your computer.) The interface is barely functionalist, but also highly functional.
PS: Also, great simple macros. That’s your homework, you overachievers.
Quick HowTo for the Impatient
- Download and install from http://www.pronterface.com/#download (or https://github.com/kliment/Printrun if you like github)
Regular HowTo
- Head over to http://www.pronterface.com/#download
- “Windows & OSX binaries” (unless you’re on Linux, but then you don’t need this tutorial)

- Download the latest Mac or PC
.ziparchive
- Unzip the archive (double click)
- On both platforms, Pronterface simply runs from whereever you put it. On Windows, I suggest creating a folder ‘Portable Applications’ on your Desktop. On Mac, I suggest dragging the app into your
Applicationsfolder just like all the other programs. - Done!


Next Steps: Connect to JellyBOX
To actually get anything done with Pronterface, head over to our fancy guide on Connecting JellyBOX to Pronterface