![Windows Me (Millennium Edition) [rus] - оригинальный образ. Перезалит в ISO + ключ Скачать торрент](https://torrent-wind.net/uploads/posts/2011-10/1318442028_da4d93e7bb642c0a05ce31cf26cf2e29.jpg)
- Размер: 367 MB
- Категория: виндовс / Windows 2000
- Загрузок: 49 584
- Комментарии: 8
- Дата обновления:12.10.2011
полный обзор Windows Me (Millennium
Год выпуска: 2000
Разработчик: Microsoft
Платформа: Windows x86
Совместимость с Vista: полная
Системные требования: Pentium-266, RAM 64 Мb, 1Gb HDD
Язык интерфейса: только русский
Таблэтка: Присутствует
Описание: Windows Millennium Edition, также известная как Windows Me — смешанная 16/32-разрядная операционная система с графическим интерфейсом, выпущенная корпорацией Microsoft 14 сентября 2000 года. Была названа в честь нового III тысячелетия.
От своих предшественниц — Windows 98 и Windows 95 — новая система отличается относительно небольшими обновлениями, такими как новый Internet Explorer 5.5, и Windows Media Player версии 7. Появился также Movie Maker с базовыми функциями редактирования цифрового видео. Изменился интерфейс системы — в него были добавлены возможности, впервые появившиеся в Windows 2000.
Одно из наиболее заметных изменений в Windows Me — в стандартной конфигурации системы отсутствует реальный режим MS-DOS, из-за чего нельзя пользоваться программами, требующими его. Однако с помощью специальных утилит эту функцию можно добавить. По сути же загрузка Windows Me ничем не отличается от аналогичного процесса Windows 95 и 98.
Доп. информация: Основные нововведения:
Восстановление системы (System restore).
Предоставляет возможность отката системы в предыдущее работоспособное состояние. Технически это выглядит так: по некоторым событиям система создаёт «точки восстановления», в которые записывает реестр, и затем следит за изменениями в определённом наборе файлов и в случае перезаписи их другими сохраняет в точках восстановления старые версии.
Защита системных файлов (Windows File Protection).
Не позволяет перезаписывать довольно значительное множество системных и других файлов никогда, кроме случаев установки обновлений. Призвана решить проблему DLL hell.
Автоматическое обновление с веб-узла Windows Update (обновление с сервера WSUS не поддерживается).
Распознает съёмные устройства USB,Firewire и т. д. и позволяет их безопасно извлекать
(в Windows 98 это надо было делать через Device manager или с помощью сторонних утилит)
Справочная система в стиле Windows XP
локальная справка + поиск в KB на сайте Microsoft
Неиспользуемые пункты меню «Пуск» автоматически «прячутся»
Поддержка нового оборудования
В базу драйверов добавлены драйвера для новых (со времён выхода Windows 98) устройств — пятикнопочная мышь, веб-клавиатура, широкополосные USB-модемы и т. п.
Новые возможности по настройке сети.
Поддержка новых технологий подключения: ADSL и кабельные модемы
Общий доступ к подключению интернета
компьютер может работать в качестве простого маршрутизатора с поддержкой NAT и автодозвона.
Мастер домашней сети.
Вспомогательная программа для простой настройки сети с типовой конфигурацией.
Поддержка устройств UPnP.
Internet Explorer 5.5 и Windows Media Player 7
Скачать торрент:
с нашего сервера
Релиз проверен Администрацией! Можно качать, На этой странице доступно для скачивания Windows Me (Millennium Edition) [rus] — оригинальный образ. Перезалит в ISO + ключ Скачать торрент
оставайтесь на раздаче, оставляйте комментарии и помогите другим оценить качество сборки windows и программы
Item Preview

me_01.jpeg

me_02.jpeg

me_03.jpeg

me_04.jpeg

me_05.jpeg

me_06.jpeg

me_07.jpeg

me_08.jpeg

me_09.jpeg

me_10.jpeg

me_11.jpeg

me_12.jpeg

me_13.jpeg

me_14.jpeg

me_15.jpeg

me_16.jpeg

me_17.jpeg

me_18.jpeg

me_19.jpeg

me_20.jpeg

me_21.jpeg

me_22.jpeg

me_23.jpeg

me_24.jpeg

me_25.jpeg

me_26.jpeg

me_27.jpeg

me_28.jpeg

me_29.jpeg

me_30.jpeg

me_31.jpeg

me_32.jpeg

me_33.jpeg

me_34.jpeg

me_35.jpeg

me_36.jpeg

me_37.jpeg

me_38.jpeg

me_39.jpeg

me_40.jpeg

me_41.jpeg

me_42.jpeg

me_43.jpeg
SIMILAR ITEMS (based on metadata)
Комментарии магазина.
Уважаемые пользователи, для связи с администрацией магазина можете воспользоваться формой контакта в правом нижнем углу окна.
А так же, если Вы приобрели наш товар и активировали ключ, оставьте пожалуйста комментарий, это помогает развитию магазина. Спасибо, что воспользовались нашими услугами!
Если Вы оставляете отзыв через личный кабинет, который у Вас появляется после покупки, то на сайте в отзывах он отображается от имени «Анонима». При написании отзыва непосредственно со страницы с товаром в поле ниже — пункты «Имя» и «Почта» обязательны, Ваш Email публично не публикуется, он нужен нам только для обратной связи.
Процент максимальной скидки, который Вы можете получить при покупке товаров в нашем магазине. Скидка считается по Вашему e-mail адресу, Вы можете совершать покупки разными кошельками, но использовать один электронный адрес почты, и тогда скидка будет всегда при Вас!
| Сумма покупок | Размер скидки |
|---|---|
| 1200$ | 8% |
| 800$ | 6% |
| 600$ | 4% |
| 350$ | 2% |
| 50$ | 1% |
![]()
Old Version
OS Name — Microsoft Windows
OS Family — Windows
Developer — Microsoft
Platform ![]() — Desktop
— Desktop
Share on
![]()
![]()
Description 
Windows ME was released to the public on September 14, 2000, preceded by Windows 98. Targeted for home computer users, the operating system includes many new features in the GUI and core software. Firstly, Windows Shell components (e.g., Explorer, Desktop etc.) are updated with useful features, and secondly, more software utilities like Windows Movie Maker, System Restore, Automatic Software Update is bundled with Windows ME compared to Windows 98.
Windows ME is not successful as Windows 98, users encountered so many problems with the version. This is the last version of Windows that was based on MS-DOS.
Specification
| Available in | English, Russian, Dutch, Finnish, French, German, Greek, Hebrew, Japanese and 7 more |
| CPU Platform(s) | IA-32 |
| License | Commercial |
Screenshot(s)
System requirements
Minimum:
- Intel Pentium 150 MHz or higher.
- 32 MB of RAM.
- 320 MB of disk drive.
Installation Instructions for the VirtualBox (application)
To install Windows ME on Virtualbox, follow the steps below:
- Download any Windows ME ISO, with ‘Windows ME Boot Disk English’ file from the download section.
- Install and open the Virtualbox app on your computer.
- Create a new virtual machine with the recommended configuration for Windows ME, or use manual configuration according to system requirements.
- Start VM and when it asks to select Host Drive, then select the Windows ME ISO file downloaded in step 1.
- Press Start, then go to Virtualbox menu> Devices> Floppy Drives and select Boot Disk ISO Image.
- Then go to Virtualbox Menu> Machine, and select Reset.
- Follow the on-screen instructions, boot from CD-ROM and start your installation.
- When the setup is complete, do not forget to remove the boot disk floppy drive from the Virtualbox menu.
Comments
New releases in  Microsoft Windows View All
 Latest uploads
![]()
Manjaro Linux 22.0 Sikaris (December, 2022) 64-bit Official ISO Free Download
5.0
![]() Up to 3.57 GB
Up to 3.57 GB
Latest Version
![]()
Linux Mint 21.1 Vera (December, 2022) 64-bit All Editions Official ISO Download
5.0
![]() Up to 2.55 GB
Up to 2.55 GB
Latest Version
![]()
Debian 11.6.0 Bullseye (December, 2022) 32-bit 64-bit ISO Disk Image Download
4.7
![]() Up to 3.72 GB
Up to 3.72 GB
Latest Version
![]()
Kali Linux 2022.4 (December, 2022) Desktop 32-bit 64-bit ISO Free Download
5.0
![]() Up to 3.80 GB
Up to 3.80 GB
Latest Version
![]()
Deepin 20.8 (December, 2022) 64-bit Official ISO Disk Image Free Download
5.0
![]() 3.51 GB
3.51 GB
Latest Version
![]()
Fedora Linux 37 (November, 2022) Workstation 64-bit Official ISO Disk Image Download
5.0
![]() Up to 3.71 GB
Up to 3.71 GB
Latest Version
![]()
Zorin OS 16.2 (October, 2022) 64-bit Official ISO Free Download
5.0
![]() Up to 2.86 GB
Up to 2.86 GB
Latest Version
![]()
Ubuntu MATE 22.10 Kinetic Kudu (October, 2022) Desktop 64-bit Official ISO Download
5.0
![]() 2.98 GB
2.98 GB
Latest Version
![]()
Kubuntu 22.10 Kinetic Kudu (October, 2022) Desktop 64-bit Official ISO Download
5.0
![]() 3.97 GB
3.97 GB
Latest Version
![]()
Ubuntu 22.10 Kinetic Kudu (October, 2022) Desktop 64-bit Official ISO Download
5.0
![]() 3.79 GB
3.79 GB
Latest Version
In this article, we will examine how to set up and use Windows Millennium Edition (ME) on a new virtual machine using Oracle VM VirtualBox 7.0 on the Windows 11 operating system.
 on Oracle VM VirtualBox")
How to Set Up Windows ME (Millennium) on Windows 11 / 10 using Oracle VM VirtualBox 7
Microsoft released the Windows ME (Millennium Edition) operating system, which has both 16 Bit and 32 Bit versions, on September 14, 2000, for users.
Windows ME has the same code structure as Windows 98 and is the last version of 9x systems. A 150 MHz Pentium processor, 320 MB of free disk space, and 32 MB of RAM are required as a minimum requirement for this system to run on a physical PC.
Windows ME, which physically supports a maximum of 1.5 GB of RAM, can be increased to more capacity by editing some configuration files.
Windows ME also includes Internet Explorer 5.5, Windows Media Player, and Windows Movie Maker, as it is mostly developed for home users.
This system, which took the title of Microsoft’s most unsuccessful operating system, was replaced by Windows XP in a very short time due to system instability and crashing problems.
Major support for the Windows Millennium Edition (ME) system officially ended on December 31, 2003, and extended support on July 11, 2006.
Nowadays, it may not make much sense to install Microsoft’s legacy Me system on a physical computer, but in some cases, it may be necessary because the updated software of older devices supports older systems.
Even if you install it on an old computer, it can be difficult to find and install the drivers for the hardware. Therefore, it may be easier to install older Windows operating systems on virtual machines.
How to Create a New Virtual Machine for Windows ME
You can install all old and new Windows, Linux, and macOS systems on virtual machines by using Oracle VM VirtualBox on your host computer which supports virtualization.
Creating a new virtual computer for Windows Millennium is simple, but you need to configure its settings correctly. Otherwise, you may get a lot of errors during the operating system installation.
Step 1
After installing VirtualBox, run the program and click the Machine / New button from the tool menu or the New button from the shortcuts on the right and start the virtual machine setup wizard.

Step 2
As soon as you type the name of the operating system you will install in the Name field of the Virtual PC wizard, the values in the Type and Version fields will be determined automatically by VirtualBox.
If you do not want to install it on your host disk, configure the Folder to a location on your external disk. Also, expand the drop-down menu from the ISO Image section and click Other to add a Windows ME ISO file to the virtual machine.

Step 3
Select the Microsoft Windows ME (Millennium) ISO file that you downloaded to your computer from the table below the article and open it.
 ISO File to Virtual Machine")
Step 4
You can see the unattended system configuration in this window, as the UI has been changed in the 7.x versions of VirtualBox. On older systems of Windows, this feature may not work, so you have to continue with the manual system setup.

Step 5
The recommended memory size for the Windows Me VM is 128 MB, but set the RAM value to 1024 MB (1 GB) and click Next.

Step 6
Since you will install a clean Windows system, select Create a Virtual Hard Disk Now in the Hard Disk configuration window and configure the disk size to 10 GB or according to your needs.
NOTE: At this stage, if you are using one of the old versions of VBox and are installing it on an old host computer, you can configure the virtual disk size to the Fixed Size for virtual machine performance. Thus, all the capacity of the virtual HDD will be allocated from the host disk. If your host computer has a fast SSD disk, it is recommended to install it with the Dynamically Allocated option. In this case, the disk space required by the VM will be automatically allocated from the host disk.

Step 7
Check the hardware information of the Windows ME guest machine and close the wizard.

Step 8
Open Settings to better organize the virtual PC’s settings.

Step 9
You cannot use drag-drop or copy-paste features in VirtualBox 7.x versions as Guest Additions are not supported for older Windows systems. However, if you are trying to install with 5.x or 6.x version of VirtualBox and it supports these features, change the Shared Clipboard and Drag’n’Drop properties to Bidirectional.

Step 10
In the System / Motherboard tab, select the Optical device in the first row of the Boot Order setting and enable the I/O APIC feature.

Step 11
In the Acceleration tab, enable Nested Paging and leave the Paravirtualization Interface at default for better memory management between the host and VM.

Step 12
As we said, you will not be able to use the 3D feature in new versions of VBox. But if you are using the old version VBox, enable 3D Acceleration for the Display device and also configure the Video Memory value to 128.
If you cannot install the Guest Additions for 9x versions in VirtualBox because it is not officially supported, but we will install the driver for the display adapter, which is useful to increase the video memory.

Step 13
Remove the Floppy controller from the Storage devices.

Step 14
Check that the Host I/O Cache feature of the IDE controller is enabled.

Step 15
Configure WindowsMe.vdi disk file as SSD (Solid State Drive) to improve read and write speeds.

Step 16
If you want to use USB flash memory or storage devices in your Windows Millennium virtual system, enable USB 2.0 (OHCI + EHCI) Controller.

Step 17
After editing all the settings of the guest operating system, run the VM for system setup.

How to Install Windows ME (Millennium)
After running the Windows Millennium virtual machine, you can continue as if you were installing it on a physical computer by following the steps below.
Step 1
You can boot from both Hard Disk and CD-ROM in the Microsoft Windows ME CD-ROM Startup Menu screen. Since you will install the system on the virtual PC, press Enter on the Boot from CD-ROM option.

Step 2
Since you have added the ISO file to the optical drive, press Enter on the Start Windows Setup from the CD-ROM option.

Step 3
When the Microsoft WinME Setup wizard opens, press Enter to start the installation. You can press F1 to get more information about the installation or press F3 to exit the installation.

Step 4
Press Enter on the Configure unallocated disk space option to edit the unallocated disk space.

Step 5
If you have a disk capacity of more than 512MB disk capacity, you need to enable large disk space usage. Click the down arrow, select “Yes, enable large disk support” and press Enter.

Step 6
When the setup wizard restarts your virtual machine, boot your system again from the CD-ROM.

Step 7
When your guest machine restarts, this time the setup wizard will format your virtual disk.

Step 8
After the virtual disk is formatted, the setup wizard will check your system, so press Enter and continue.

Step 9
When Microsoft ScanDisk is opened, media, file, and directory structures will be checked on the C drive and disk space will be checked.

Step 10
When your virtual machine restarts, Setup will prepare the Windows setup wizard.

Step 11
The Windows Millennium Edition setup wizard reports that the installation will complete in 30 to 60 minutes. Continue by clicking Next to start the installation process.

Step 12
Installing Windows from the default directory can cause system problems. Therefore, choose C:WINDOWS as the installation directory and click Next.

Step 13
Wait while the setup wizard prepares the Windows directory and checks the disk space.

Step 14
In this step, you need to choose your preferred installation type, but it is recommended to continue with the Typical selected by default.

Step 15
In the Windows Components window, choose to install the most commonly used components and continue.

Step 16
To identify your computer on a network, type a different computer name from your other existing computers and click Next.

Step 17
In the Country/Region window, select the country you live in and click Next.

Step 18
Configure the time zone of your virtual system according to the country you live in and click Next.

Step 19
If there is a setting you want to change, you can go back to the relevant settings and make changes by clicking the Back button. When the setup wizard is ready to copy the Windows files, click Finish and continue.

Step 20
Wait while the system files are copied to your virtual disk.

Step 21
Your virtual system will automatically reboot in 15 seconds.

Step 22
Windows will identify plug-and-play devices on your guest machine. If the hardware scan is taking longer than usual at this stage, restart your virtual machine and try again.

Step 23
Type the user account name for your Windows Millennium system and click Next.

Step 24
Accept the license agreement of the WinME operating system and click Next.

Step 25
Type your WinME product key and continue.

Step 26
After typing the product key of your virtual system, click Finish to start WinME.

Step 27
When your guest machine restarts, wait while your configuration files are updated.

Step 28
When your virtual machine restarts, system settings such as the control panel, shortcuts in the start menu, and Windows help will be updated.

Step 29
After configuring the system settings, type your username and click OK to continue.

Step 30
Wait while your system settings are updated for the last time.

Step 31
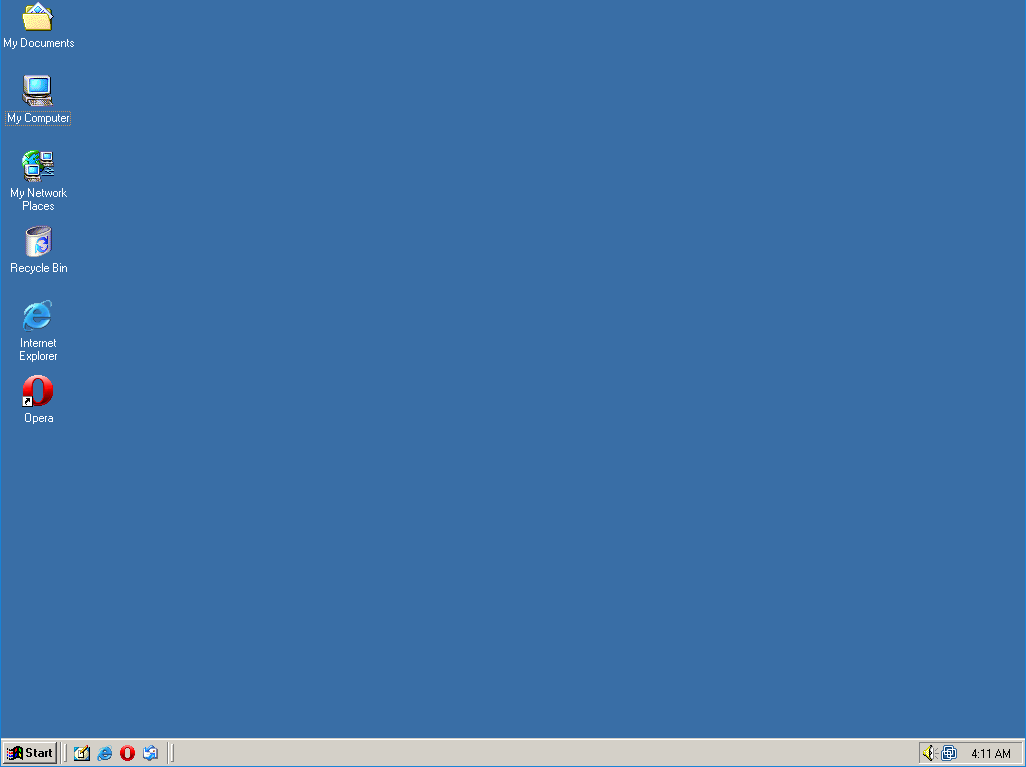
After installing Windows ME with VirtualBox, the desktop view will be as in the image below. You can also check system information by right-clicking on My Computer and clicking Properties.
")
How to Install Graphics Driver and Change Screen Resolution
The Oracle VM VirtualBox virtualization program does not support Guest Additions for 9x versions of Windows. Therefore, you may not get full efficiency from virtual machines, but you can change the screen resolution and color mode using a 3rd party software.
Step 1
First of all, open Device Manager after clicking My Computer / System Properties and check the drivers that are not installed. If Guest Additions could be installed, drivers for all devices in the device manager would be installed automatically.
You can use SciTech Display Doctor software or just install the Display Adapter driver to change the screen resolution in Windows 95, 98, and ME versions.
Download the VBE Miniport display adapter driver from the table at the bottom of the article to your host computer and right-click on the CD/DVD icon to add the ISO file to the guest machine, and then click Choose a disk file.

Step 2
Double-click Standard PCI Graphics Adapter on Device Manager and click the Update Driver button.

Step 3
To install the relevant driver from the ISO file content that you added to the optical drive, click Next while the auto install driver option is selected.

Step 4
When Driver options are listed, select VBE Miniport – Standard PCI Graphics Adapter (VGA) / 032MBVBEMP.INF and click OK.

Step 5
After installing the driver for the graphics adapter of the monitor device, restart your virtual computer.

Step 6
Open Display Properties and choose True Color (32 Bit) from the options under Colors and apply the changes without restarting your virtual PC.

How to Install USB 2.0 Driver
Under normal circumstances, installing USB 2.0 driver on Windows ME/Millennium virtual PC is a very troublesome task. All the drivers you download from the internet are both incompatible and problematic. Therefore, you can download the USB 2.0 driver that we have prepared for you, which works without any problems, from the table below the article to your computer.
NOTE: If you install the driver for the graphics device of the virtual machine with SciTech Display Doctor, the USB 2.0 driver will not work when you restart your VM. This is because the display driver is not fully compatible with WinMe. So configure the graphics adapter with VBE Miniport.
Step 1
Open Device Manager again and check that USB 2.0 is not enabled under Universal Serial Bus Controllers. Then, right-click on the CD/DVD icon and click Choose a disk file to add the USB 2.0 Driver ISO file to the virtual machine.
Select the USB 2.0 Driver ISO file that you downloaded to your computer from the table below the article and click the Open button.

Step 2
Double-click PCI Universal Serial Bus on Device Manager and click the Reinstall Driver button. In the window that opens, select the Automatic Search for a Better Driver option and click Next again.
After scanning the USB 2.0 drivers from the ISO file you added, restart your system after the Intel (R) 82801FB/FBM (ICH6 Family) USB2 Enhanced Host Controller – 265C is installed.

Step 3
Plug a USB 2.0/3.0 supported flash memory into the USB 2.0 port of your host computer and create a folder in it as an example.

Step 4
Click Devices / USB / KINGSTON DataTraveler in the tool menu of your guest machine. Then, after clicking the Refresh button in the device manager of the virtual machine, your USB storage device inserted in your virtual PC will be determined and its drivers will be installed.

Step 5
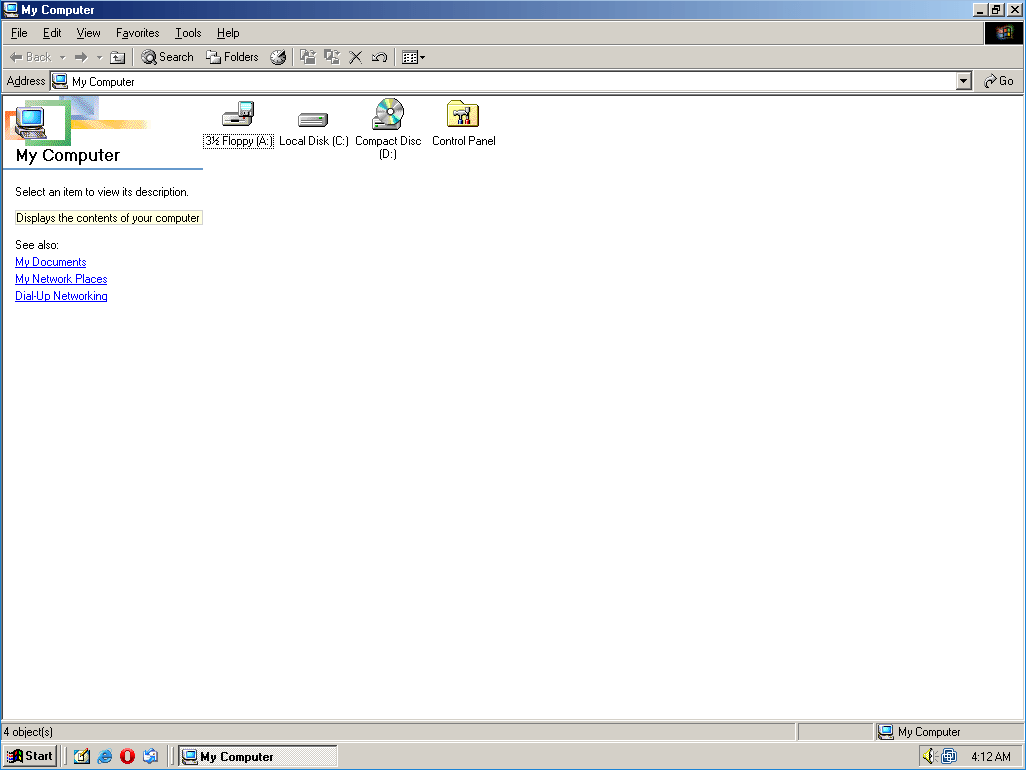
You can see your USB device under Storage Device in the device manager. Also, when you open the My Computer window, you can see that the USB flash memory you have inserted in your virtual machine is identified.

How to Install PCI System Peripheral
Since Windows ME is not fully supported by Oracle virtualization software, you may see in Device Manager that drivers for some devices such as PCI System Peripheral cannot be installed. In such cases, you can install an alternative driver just to remove the device warning, although it is not a definitive solution.
Step 1
After opening System Properties, click the Device Manager tab. In the hardware window that opens, double-click PCI System Peripheral in the Other Devices section. Click the Reinstall Driver button in the window that opens and tick Specify the location of the driver (Advanced) in the next window and continue.
In the driver update wizard, choose to install the driver you want and continue.

Step 2
Select System Devices from the hardware types in the device list and click Next. Then, after selecting Standard System Devices from the Manufacturers section, select MCA Bus from the device types listed on the right and continue.

Step 3
After installing the MCA Bus driver, confirm using the non-recommended driver and restart your virtual system.

Step 4
After your system is turned on, you can see that all hardware is running smoothly in Device Manager.

How to Configure and Check Internet Connection
Of course, one of the things you should test on your Windows Millennium guest machine is the Internet connection. Network adapters are automatically installed by Oracle software when installing the system.
Step 1
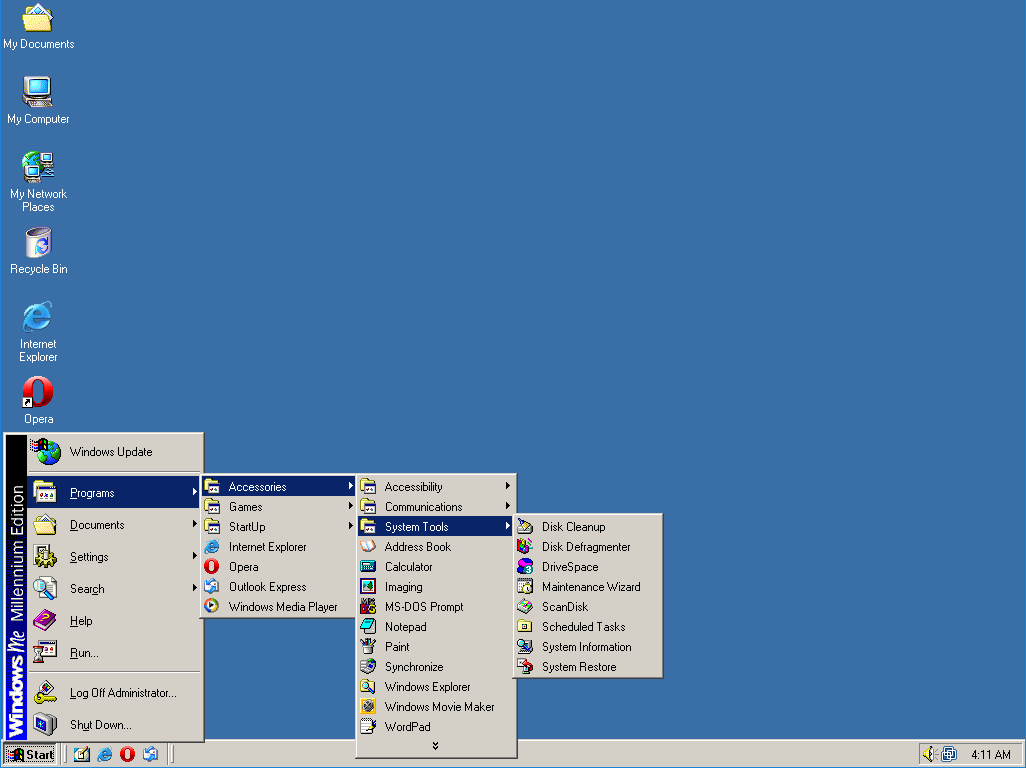
To check the Internet connection, open MS-DOS Prompt from Start / Programs / Accessories and execute the “ping 8.8.8.8” command and test the connection.

Step 2
If the internet connection is healthy, open Internet Explorer from the desktop location and click Next in the “Welcome to MSN Internet Access” window and click Cancel in the modem add wizard that opens.

Step 3
Click LAN/MANUAL to configure using MSN using a local area connection. Check LAN in the Internet connection wizard and click Next.

Step 4
Check the proxy discovery and skip the mail account creation and close the wizard.

Step 5
After closing the Internet connection wizard, you can view the Google search engine.

How to Increase System RAM Size
The officially stated Windows ME maximum RAM is 512 MB, but on physical computers, the maximum RAM is 1.5 GB.
You can increase the RAM value of your WinMe system running on a virtual machine by 2 GB by editing the SYSTEM.INI file.
Step 1
With your Windows guest machine running, open the SYSTEM.INI file in C:WINDOWS. Add MaxPhysPage=7C6FF under [386Enh] in SYSTEM.INI and save the file.

Step 2
Turn off your virtual computer and change the Base Memory value to 2048 MB (2 GB) from the system settings.

Step 3
Run your virtual computer and verify that the system memory is 2 GB in the system properties.

Video
Installing Old Versions
VirtualBox Version
YouTube Video
Slide
Windows ME ISO ve Driver Download
Windows ME/Millennium ISO
Windows ME Display Driver (VBE Miniport)
Windows ME USB 2.0 Driver
Related Articles
♦ How to Install Windows XP on VirtualBox
♦ How to Install Windows 7 on VirtualBox
♦ How to Install Windows Vista on VirtualBox
♦ How to Install Windows 8.1 on VirtualBox
♦ How to Install Windows 10 on VirtualBox
Last Updated on February 7, 2023 by Rizwan
Microsoft Windows ME (Millennium Edition) released on June 19, 2000.
If you ask anyone who used Windows ME, it was a real flop. A useless operating system which was a mess of Windows 2000 and 98, but without their goodness. Neither it was a secure operating system nor could it support games. That is why it could not get popularity among public and died soon.
How to install Windows ME from USB/CD
Once you have created ultimate Windows ME bootable USB using the Rufus of any other tool (as mentioned above), you are ready to install Windows ME using this USB flash drive.
Make sure you have Windows ME installation USB disc with you. Plug this flash drive into USB port of computer, then start (or restart) computer and follow these steps:
- Press boot menu key (usually F9 for most computers) and select USB drive from the list.
- Press any key on your keyboard when prompted.
- Windows installation files will take a while to load and Windows ME installer setup will start.
Follow the on screen step by step instructions to continue and finish installation.
How to install Windows ME on Virtual Machines?
For some reason, if you want to install Windows ME on virtual machines like VirtualBox or VMware etc. Here is a brief guide for these type of applications.
How to install Windows ME on VirtualBox?
First of all, download VirtualBox for Windows ME (if you do not have it already).
- Download Windows ME ISO image from download section (above on top of this page)
- Launch VirtualBox and start creating new virtual machine.
- Now select Windows ME ISO image and accept default settings.
- Start virtual machine you just created and continue with Windows ME setup installer.
Installation on VirtualBox is almost same to normal installation on real computer.
How to install Windows ME on VMware
First of all, download VMware (if you do not have it already).
- Download Windows ME ISO image from download section (above on top of this page)
- Launch VMware and start creating new virtual machine.
- Now select Windows ME ISO image and accept default settings.
- Start virtual machine you just created and continue with Windows ME setup installer.
Installation on VirtualBox is almost same to normal installation on real computer.
DMCA / Removal Request
If you find any software/app or game listed on Windowstan which should not be here due to copyright violation, and you want us remove it; you are welcome to contact us. Windowstan is DMCA-compliant and would take your DMCA/Removal Request seriously and take action as immediately as possible. In this regard, please follow the directions listed below:
- Explicitly identify the page or post with Title and URL.
- In case of a partial copyright part, please quote the part of page or text or attach a screenshot.
- Your legal identity, including phone number, address and email address.
- Your status (owner, agent, lawyer or other) and your concern to copyrighted content.
- An appropriate proof of copyrighted part/page with valid URL and screenshot.
- Your signature either electronic or physical.
Download Windows ME (Millennium Edition) ISO
Windows_ME_OEM_English.iso
Windows_ME_Retail_English.iso
Windows_ME_Boot_Disk_English.iso
Windows Millennium Edition (internally Windows 4.90) was the last in the line of DOS-based Windows products. Like Windows 95 and Windows 98 it used the same hybrid 16/32 bit kernel that ran on top of a bundled version of DOS (MS-DOS 8.0).
Windows ME was often criticized for its poor stability. Microsoft had made numerous internal changes at the device driver level. However with the news that this architecture was at an end, vendors did not update their Windows 98 drivers for Windows ME. While existing 98 drivers usually «worked», they were often buggy and unstable under ME. Additionally, users were becoming used to the increased stability of Windows 2000 (NT 5.0) and the new MacOS X.
Although Windows ME still runs on top of DOS, just like Windows versions back to 1.01, it crippled the ability to start up to or exit to DOS. Many Windows 95 and 98 users had relied on that, as many popular games and utilities were still DOS based. If you wish to set up an older computer for use with DOS programs, we recommend you use nothing later than Windows 98 SE.
Feature-wise, Windows ME changes the desktop appearance to be on par with Windows 2000. It adds Windows Movie Maker, Internet Games, System Restore, Explorer Web View, Personalized Menus, and new common dialogs.
Windows ME targeted the home market, while the NT-based Windows 2000 targeted the business market. Initiated during the Windows 2.0 days, Microsoft finally realized its dream of merging these two markets under one single, more powerful OS, with the release of Windows XP.
If a download does not include a boot disk, please see Microsoft Windows Boot Disks
If the listed serials below do not work for a specific release, please see the Serials thread