# Скачивает страницу и сохраняет ее в файл

import requests

result = requests.get('http://www.tinko.msk.ru/')
try:
    result.raise_for_status()
except Exception as e:
    print('Ошибка при загрузке страницы: ' + str(e))

file = open('C:\example\tinko.txt', mode = 'w', encoding = 'utf-8')
file.write(result.text)
file.close()
# Открывает карту в браузере, извлекая адрес
# из командной строки или буфера обмена

import webbrowser, sys, pyperclip
from urllib import parse

if len(sys.argv) > 1:
    address = ' '.join(sys.argv[1:])
else:
    address = pyperclip.paste()

address = parse.urlencode({'text': address})
webbrowser.open('https://yandex.ru/maps/?' + address)
# Ищет в буфере обмена номера телефонов и адреса эл.почты

# импортируем модули pyperclip (работа с буфером обмена)
# и re (работа с регулярными выражениями)
import pyperclip, re

# регулярное выражение для номера телефона
phoneRegex = re.compile('''(
    (?:(?(d{3}))?)?             # код города
    (?:s|-)?                      # разделитель
    (d{3})                        # первые три цифры
    (?:s|-)?                      # разделитель
    (d{2})                        # еще две цифры
    (?:s|-)?                      # разделитель
    (d{2})                        # еще две цифры
    (?:s*доб[.а-я]*s*(d{2,5}))? # добавочный
    )''', re.VERBOSE)

# регулярное выражение для адреса эл.почты
emailRegex = re.compile('''
    [a-z0-9._-]+     # имя пользователя
    @                # @
    [a-z0-9.-]+      # первая часть домена
    .[a-z]{2,6}     # вторая часть домена
    ''', re.VERBOSE | re.IGNORECASE)

# получить содержимое буфера обмена
text = str(pyperclip.paste())

# список для хранения найденных номеров
# телефонов и адресов эл.почты
matches = []

# цикл по найденным номерам телефонов
for groups in phoneRegex.findall(text):
    phoneNum = '+7 (' + groups[1] + ') ' + groups[2] + '-' + groups[3] + '-' + groups[4]
    if groups[5] != '':
        phoneNum += ' доб.' + groups[5]
    # пропускаем дубли
    if phoneNum not in matches:
        matches.append(phoneNum)

# цикл по найденным адресам эл.почты
for groups in emailRegex.findall(text):
    if groups not in matches:
        # пропускаем дубли
        matches.append(groups)

# копируем результат в буфер обмена
if len(matches) > 0:
    pyperclip.copy('n'.join(matches))
    print('Скопировано в буфер обмена:')
    print('n'.join(matches))
else:
    print('Телефонные номера и адреса почты не найдены.')
# Копирует директорию со всем ее содержимым в
# zip-файл с инкрементным номером в имени файла

import zipfile, os

def backupToZip(source, backup):
    """Создание резервной копии всего содержимого директории source"""

    # Проверить, что обе директории существуют
    if not (os.path.isabs(source) and os.path.isdir(source)):
        print('Директория %s не существует' % (source))
        return
    if not (os.path.isabs(backup) and os.path.isdir(backup)):
        print('Директория %s не существует' % (backup))
        return

    # Определить, какое имя файла будет у zip-архива,
    # исходя из имен уже существующих файлов
    number = 1
    while True:
        name = os.path.basename(source) + '-' + str(number) + '.zip'
        backupFile = os.path.join(backup, name)
        if not os.path.isfile(backupFile):
            break
        number = number + 1

    # Создание нового zip-файла
    print('Создание нового zip-файла %s...' % (backupFile))
    zipFile = zipfile.ZipFile(backupFile, 'w')

    # Обход всего дерева директории и сжатие файлов в каждой папке
    archDirName = ''
    for dir, subdirs, files in os.walk(source):
        print('Добавление файлов из директории %s...' % (dir))
        # Имя текущей директории в архиве
        archDirName = '/'.join([archDirName, os.path.basename(dir)]).strip('/')
        # Добавить в архив текущую директорию
        zipFile.write(dir, archDirName)

        # Добавить в архив все файлы из текущей директории
        for file in files:
            # Имя текущего файла в архиве
            archFileName = archDirName + '/' + file
            zipFile.write(os.path.join(dir, file), archFileName)

    # Закрываем zip-файл
    zipFile.close()

    print('Готово')

# end function backupToZip()


backupToZip('C:\project', 'C:\backup')
Поиск:
Python • Web-разработка • Модуль
Каталог оборудования
Lorem ipsum dolor sit amet, consectetur adipiscing elit, sed do eiusmod tempor incididunt ut labore et dolore magna aliqua.
Производители
Lorem ipsum dolor sit amet, consectetur adipiscing elit, sed do eiusmod tempor incididunt ut labore et dolore magna aliqua.
Функциональные группы
Lorem ipsum dolor sit amet, consectetur adipiscing elit, sed do eiusmod tempor incididunt ut labore et dolore magna aliqua.
Время прочтения
5 мин
Просмотры 367K

Python — один из самых популярных языков программирования, чрезвычайно полезный и в решении повседневных задач. В этой статье я вкратце расскажу о 22 полезных примерах кода, позволяющих воспользоваться мощью Python.
Некоторые из примеров вы могли уже видеть ранее, а другие будут новыми и интересными для вас. Все эти примеры легко запоминаются.
1. Получаем гласные
Этот пример возвращает в строке найденные гласные "a e i o u". Это может оказаться полезным при поиске или обнаружении гласных.
def get_vowels(String):
    return [each for each in String if each in "aeiou"]
get_vowels("animal") # [a, i, a]
get_vowels("sky") # []
get_vowels("football") # [o, o, a]
2. Первая буква в верхнем регистре
Этот пример используется для превращения каждой первой буквы символов строки в прописную букву. Он работает со строкой из одного или нескольких символов и будет полезен при анализе текста или записи данных в файл и т.п.
def capitalize(String):
    return String.title()
capitalize("shop") # [Shop]
capitalize("python programming") # [Python Programming]
capitalize("how are you!") # [How Are You!]
3. Печать строки N раз
Этот пример может печатать любую строку n раз без использования циклов Python.
n=5
string="Hello World "
print(string * n)  #Hello World Hello World Hello World Hello World Hello World
4. Объединяем два словаря
Этот пример выполняет слияние двух словарей в один.
def merge(dic1,dic2):
    dic3=dic1.copy()
    dic3.update(dic2)
    return dic3
dic1={1:"hello", 2:"world"}
dic2={3:"Python", 4:"Programming"}
merge(dic1,dic2) # {1: 'hello', 2: 'world', 3: 'Python', 4: 'Programming'}
5. Вычисляем время выполнения
Этот пример полезен, когда вам нужно знать, сколько времени требуется для выполнения программы или функции.
import time
start_time= time.time()
def fun():
    a=2
    b=3
    c=a+b
end_time= time.time()
fun()
timetaken = end_time - start_time
print("Your program takes: ", timetaken) # 0.0345
6. Обмен значений между переменными
Это быстрый способ обменять местами две переменные без использования третьей.
a=3
b=4
a, b = b, a
print(a, b) # a= 4, b =3
7. Проверка дубликатов
Это самый быстрый способ проверки наличия повторяющихся значений в списке.
def check_duplicate(lst):
    return len(lst) != len(set(lst))
check_duplicate([1,2,3,4,5,4,6]) # True
check_duplicate([1,2,3]) # False
check_duplicate([1,2,3,4,9]) # False
8. Фильтрация значений False
Этот пример используется для устранения всех ложных значений из списка, например false, 0, None, " ".
def Filtering(lst):
    return list(filter(None,lst))
lst=[None,1,3,0,"",5,7]
Filtering(lst) #[1, 3, 5, 7]
9. Размер в байтах
Этот пример возвращает длину строки в байтах, что удобно, когда вам нужно знать размер строковой переменной.
def ByteSize(string):
    return len(string.encode("utf8"))
ByteSize("Python") #6
ByteSize("Data") #4
10. Занятая память
Пример позволяет получить объём памяти, используемой любой переменной в Python.
import sys
var1="Python"
var2=100
var3=True
print(sys.getsizeof(var1)) #55
print(sys.getsizeof(var2)) #28
print(sys.getsizeof(var3)) #28
11. Анаграммы
Этот код полезен для проверки того, является ли строка анаграммой. Анаграмма — это слово, полученное перестановкой букв другого слова.
from collections import Counter
def anagrams(str1, str2):
    return Counter(str1) == Counter(str2)
anagrams("abc1", "1bac") # True
12. Сортировка списка
Этот пример сортирует список. Сортировка — это часто используемая задача, которую можно реализовать множеством строк кода с циклом, но можно ускорить свою работу при помощи встроенного метода сортировки.
my_list = ["leaf", "cherry", "fish"]
my_list1 = ["D","C","B","A"]
my_list2 = [1,2,3,4,5]

my_list.sort() # ['cherry', 'fish', 'leaf']
my_list1.sort() # ['A', 'B', 'C', 'D']
print(sorted(my_list2, reverse=True)) # [5, 4, 3, 2, 1]
13. Сортировка словаря
orders = {
 'pizza': 200,
 'burger': 56,
 'pepsi': 25,
    'Coffee': 14
}
sorted_dic= sorted(orders.items(), key=lambda x: x[1])
print(sorted_dic)  # [('Coffee', 14), ('pepsi', 25), ('burger', 56), ('pizza', 200)]
14. Получение последнего элемента списка
my_list = ["Python", "JavaScript", "C++", "Java", "C#", "Dart"]
#method 1
print(my_list[-1])  # Dart
#method 2
print(my_list.pop()) # Dart
15. Преобразование разделённого запятыми списка в строку
Этот код преобразует разделённый запятыми список в единую строку. Его удобно использовать, когда нужно объединить весь список со строкой.
my_list1=["Python","JavaScript","C++"]
my_list2=["Java", "Flutter", "Swift"]
#example 1
"My favourite Programming Languages are" , ", ".join(my_list1)) # My favourite Programming Languages are Python, JavaScript, C++
print(", ".join(my_list2))  # Java, Flutter, Swift
16. Проверка палиндромов
Этот пример показывает, как быстро проверить наличие палиндромов.
def palindrome(data):
    return data == data[::-1]

palindrome("level") #True
palindrome("madaa") #False
17. Перемешивание списка
from random import shuffle
my_list1=[1,2,3,4,5,6]
my_list2=["A","B","C","D"]
shuffle(my_list1) # [4, 6, 1, 3, 2, 5]
shuffle(my_list2) # ['A', 'D', 'B', 'C']
18. Преобразование строки в нижний и верхний регистры
str1 ="Python Programming"
str2 ="IM A PROGRAMMER"
print(str1.upper()) #PYTHON PROGRAMMING
print(str2.lower()) #im a programmer
19. Форматирование строки
Этот код позволяет форматировать строку. Под форматированием в Python подразумевается присоединение к строке данных из переменных.
#example 1
str1 ="Python Programming"
str2 ="I'm a {}".format(str1)   # I'm a Python Programming
#example 2 - another way
str1 ="Python Programming"
str2 =f"I'm a {str1}"    # I'm a Python Programming
20. Поиск подстроки
Этот пример будет полезен для поиска подстроки в строке. Я реализую его двумя способами, позволяющими не писать много кода.
programmers = ["I'm an expert Python Programmer",
               "I'm an expert Javascript Programmer",
               "I'm a professional Python Programmer"
               "I'm a beginner C++ Programmer"
]
#method 1
for p in programmers:
    if p.find("Python"):
        print(p)
#method 2
for p in programmers:
    if "Python" in p:
        print(p)
21. Печать в одной строке
Мы знаем, что функция print выполняет вывод в каждой строке, и если использовать две функции print, они выполнят печать в две строки. Этот пример покажет, как выполнять вывод в той же строке без перехода на новую.
# fastest way
import sys
sys.stdout.write("Call of duty ")
sys.stdout.write("and Black Ops")
# output: Call of duty and Black Ops
#another way but only for python 3
print("Python ", end="")
print("Programming")
# output: Python Programming
22. Разбиение на фрагменты
Этот пример покажет, как разбить список на фрагменты и разделить его на меньшие части.
def chunk(my_list, size):
    return [my_list[i:i+size] for i in range(0,len(my_list), size)]
my_list = [1, 2, 3, 4, 5, 6]
chunk(my_list, 2) # [[1, 2], [3, 4], [5, 6]]
На правах рекламы
Серверы для разработчиков — выбор среди обширного списка предустановленных операционных систем, возможность использовать собственный ISO для установки ОС, огромный выбор тарифных планов и возможность создать собственную конфигурацию в пару кликов, активация любого сервера в течение минуты. Обязательно попробуйте!
Подписывайтесь на наш чат в Telegram.

The examples below will increase in number of lines of code and difficulty:
1 line: Output
print ('Hello, world!')
2 lines: Input, assignment
name = input('What is your name?n')
print ('Hi, %s.' % name)
3 lines: For loop, built-in enumerate function, new style formatting
friends = ['john', 'pat', 'gary', 'michael']
for i, name in enumerate(friends):
    print ("iteration {iteration} is {name}".format(iteration=i, name=name))
4 lines: Fibonacci, tuple assignment
parents, babies = (1, 1)
while babies < 100:
    print ('This generation has {0} babies'.format(babies))
    parents, babies = (babies, parents + babies)
5 lines: Functions
def greet(name):
    print ('Hello', name)

greet('Jack')
greet('Jill')
greet('Bob')
6 lines: Import, regular expressions
import re
for test_string in ['555-1212', 'ILL-EGAL']:
    if re.match(r'^d{3}-d{4}$', test_string):
        print (test_string, 'is a valid US local phone number')
    else:
        print (test_string, 'rejected')
7 lines: Dictionaries, generator expressions
prices = {'apple': 0.40, 'banana': 0.50}
my_purchase = {
    'apple': 1,
    'banana': 6}
grocery_bill = sum(prices[fruit] * my_purchase[fruit]
                   for fruit in my_purchase)
print ('I owe the grocer $%.2f' % grocery_bill)
8 lines: Command line arguments, exception handling
# This program adds up integers that have been passed as arguments in the command line
import sys
try:
    total = sum(int(arg) for arg in sys.argv[1:])
    print ('sum =', total)
except ValueError:
    print ('Please supply integer arguments')
9 lines: Opening files
# indent your Python code to put into an email
import glob
# glob supports Unix style pathname extensions
python_files = glob.glob('*.py')
for file_name in sorted(python_files):
    print ('    ------' + file_name)

    with open(file_name) as f:
        for line in f:
            print ('    ' + line.rstrip())

    print()
10 lines: Time, conditionals, from..import, for..else
from time import localtime

activities = {8: 'Sleeping',
              9: 'Commuting',
              17: 'Working',
              18: 'Commuting',
              20: 'Eating',
              22: 'Resting' }

time_now = localtime()
hour = time_now.tm_hour

for activity_time in sorted(activities.keys()):
    if hour < activity_time:
        print (activities[activity_time])
        break
else:
    print ('Unknown, AFK or sleeping!')
11 lines: Triple-quoted strings, while loop
REFRAIN = '''
%d bottles of beer on the wall,
%d bottles of beer,
take one down, pass it around,
%d bottles of beer on the wall!
'''
bottles_of_beer = 9
while bottles_of_beer > 1:
    print (REFRAIN % (bottles_of_beer, bottles_of_beer,
        bottles_of_beer - 1))
    bottles_of_beer -= 1
12 lines: Classes
class BankAccount(object):
    def __init__(self, initial_balance=0):
        self.balance = initial_balance
    def deposit(self, amount):
        self.balance += amount
    def withdraw(self, amount):
        self.balance -= amount
    def overdrawn(self):
        return self.balance < 0
my_account = BankAccount(15)
my_account.withdraw(50)
print (my_account.balance, my_account.overdrawn())
13 lines: Unit testing with unittest
import unittest
def median(pool):
    copy = sorted(pool)
    size = len(copy)
    if size % 2 == 1:
        return copy[int((size - 1) / 2)]
    else:
        return (copy[int(size/2 - 1)] + copy[int(size/2)]) / 2
class TestMedian(unittest.TestCase):
    def testMedian(self):
        self.assertEqual(median([2, 9, 9, 7, 9, 2, 4, 5, 8]), 7)
if __name__ == '__main__':
    unittest.main()
14 lines: Doctest-based testing
def median(pool):
    '''Statistical median to demonstrate doctest.
    >>> median([2, 9, 9, 7, 9, 2, 4, 5, 8])
    6 #change to 7 in order to pass the test
    '''
    copy = sorted(pool)
    size = len(copy)
    if size % 2 == 1:
        return copy[int((size - 1) / 2)]
    else:
        return (copy[int(size/2 - 1)] + copy[int(size/2)]) / 2
if __name__ == '__main__':
    import doctest
    doctest.testmod()
15 lines: itertools
from itertools import groupby
lines = '''
This is the
first paragraph.

This is the second.
'''.splitlines()
# Use itertools.groupby and bool to return groups of
# consecutive lines that either have content or don't.
for has_chars, frags in groupby(lines, bool):
    if has_chars:
        print (' '.join(frags))
# PRINTS:
# This is the first paragraph.
# This is the second.
16 lines: csv module, tuple unpacking, cmp() built-in
import csv

# need to define cmp function in Python 3
def cmp(a, b):
    return (a > b) - (a < b)

# write stocks data as comma-separated values
with open('stocks.csv', 'w', newline='') as stocksFileW:
    writer = csv.writer(stocksFileW)
    writer.writerows([
        ['GOOG', 'Google, Inc.', 505.24, 0.47, 0.09],
        ['YHOO', 'Yahoo! Inc.', 27.38, 0.33, 1.22],
        ['CNET', 'CNET Networks, Inc.', 8.62, -0.13, -1.4901]
    ])

# read stocks data, print status messages
with open('stocks.csv', 'r') as stocksFile:
    stocks = csv.reader(stocksFile)

    status_labels = {-1: 'down', 0: 'unchanged', 1: 'up'}
    for ticker, name, price, change, pct in stocks:
        status = status_labels[cmp(float(change), 0.0)]
        print ('%s is %s (%.2f)' % (name, status, float(pct)))
18 lines: 8-Queens Problem (recursion)
BOARD_SIZE = 8

def under_attack(col, queens):
    left = right = col

    for r, c in reversed(queens):
        left, right = left - 1, right + 1

        if c in (left, col, right):
            return True
    return False

def solve(n):
    if n == 0:
        return [[]]

    smaller_solutions = solve(n - 1)

    return [solution+[(n,i+1)]
        for i in range(BOARD_SIZE)
            for solution in smaller_solutions
                if not under_attack(i+1, solution)]
for answer in solve(BOARD_SIZE):
    print (answer)
20 lines: Prime numbers sieve w/fancy generators
import itertools

def iter_primes():
     # an iterator of all numbers between 2 and +infinity
     numbers = itertools.count(2)

     # generate primes forever
     while True:
         # get the first number from the iterator (always a prime)
         prime = next(numbers)
         yield prime

         # this code iteratively builds up a chain of
         # filters...slightly tricky, but ponder it a bit
         numbers = filter(prime.__rmod__, numbers)

for p in iter_primes():
    if p > 1000:
        break
    print (p)
21 lines: XML/HTML parsing
dinner_recipe = '''<html><body><table>
<tr><th>amt</th><th>unit</th><th>item</th></tr>
<tr><td>24</td><td>slices</td><td>baguette</td></tr>
<tr><td>2+</td><td>tbsp</td><td>olive oil</td></tr>
<tr><td>1</td><td>cup</td><td>tomatoes</td></tr>
<tr><td>1</td><td>jar</td><td>pesto</td></tr>
</table></body></html>'''

# From http://effbot.org/zone/element-index.htm
import xml.etree.ElementTree as etree
tree = etree.fromstring(dinner_recipe)

# For invalid HTML use http://effbot.org/zone/element-soup.htm
# import ElementSoup, StringIO
# tree = ElementSoup.parse(StringIO.StringIO(dinner_recipe))

pantry = set(['olive oil', 'pesto'])
for ingredient in tree.getiterator('tr'):
    amt, unit, item = ingredient
    if item.tag == "td" and item.text not in pantry:
        print ("%s: %s %s" % (item.text, amt.text, unit.text))
28 lines: 8-Queens Problem (define your own exceptions)
BOARD_SIZE = 8

class BailOut(Exception):
    pass

def validate(queens):
    left = right = col = queens[-1]
    for r in reversed(queens[:-1]):
        left, right = left-1, right+1
        if r in (left, col, right):
            raise BailOut

def add_queen(queens):
    for i in range(BOARD_SIZE):
        test_queens = queens + [i]
        try:
            validate(test_queens)
            if len(test_queens) == BOARD_SIZE:
                return test_queens
            else:
                return add_queen(test_queens)
        except BailOut:
            pass
    raise BailOut

queens = add_queen([])
print (queens)
print ("n".join(". "*q + "Q " + ". "*(BOARD_SIZE-q-1) for q in queens))
33 lines: «Guess the Number» Game (edited) from http://inventwithpython.com
import random

guesses_made = 0

name = input('Hello! What is your name?n')

number = random.randint(1, 20)
print ('Well, {0}, I am thinking of a number between 1 and 20.'.format(name))

while guesses_made < 6:

    guess = int(input('Take a guess: '))

    guesses_made += 1

    if guess < number:
        print ('Your guess is too low.')

    if guess > number:
        print ('Your guess is too high.')

    if guess == number:
        break

if guess == number:
    print ('Good job, {0}! You guessed my number in {1} guesses!'.format(name, guesses_made))
else:
    print ('Nope. The number I was thinking of was {0}'.format(number))
These all run under Python 3. If you are interested in differences between Python 2 and Python 3, please take a look at the previous version of this page.
CategoryDocumentation
Несколько скриптов для автоматизации ваших повседневных задач. Нижу будет приведен полный код Python программ.
Почему в эпоху программирования мы все еще делаем то, что можем автоматизировать. Подумайте о задачах, которые вы повторяете ежедневно или ежедневных проектах, требующих автоматизации, таких как чтение электронной почты, редактирование изображений, чтение PDF и т. д. В этой статье мы рассмотрим 10 скриптов автоматизации для ваших повседневных задач.
Автоматизация решает проблему один раз, а затем ставит ее на автопилот
— Майкл Хаятт
👉 Автоматизируем отправку электронной почты с помощью Python
Этот потрясающий скрипт автоматизации позволит вам читать и отправлять электронные письма, будь то Outlook, Gmail или любой другой почтовый сервер. Ниже пример кода, который разделен на две части.
Чтение электронной почты и отправка электронной почты использует модуль IMAP для чтения электронных писем, а другой использует модуль SMTP для отправки электронной почты, ниже приведен код:
# Automate Emails with Python
import imaplib
import email
import smtplib
from email.mime.text import MIMEText
from email.mime.multipart import MIMEMultipart
# Read Email
Email = imaplib.IMAP4_SSL('imap.gmail.com')
Email.login('your_username', 'your_password')
status, msgs = Email.select('INBOX')
print("Status: ", status)
for i in range(1, int(msgs[0])):
    res, message = Email.fetch(str(i), '(RFC822)')
    for r in message:
        if isinstance(r, tuple):
            message = email.message_from_bytes(r[1])
            print (message["subject"])
---------------------------------------------------
# Send Email
Your_Email = "test@xyz.com"
password = "your_password"
reciver = "Sender Mail"
subject = "Medium Article"
text_msg = "Hi, Codedev010 here from Medium Article"
msg = MIMEMultipart()
msg["From"] = Your_Email
msg["To"] = reciver
msg["Subject"] = subject
msg.attach(MIMEText(text_msg, 'plain'))
server = smtplib.SMTP("smtp.gmail.com", 587)
server.starttls()
server.login(Your_Email, password)
MSG = msg.as_string()
server.sendmail(Your_Email, reciver, MSG)
server.quit()
172 / 5 000
Результаты перевода
star_border
👉 Редактор изображений на Python
Используйте этот скрипт автоматизации для программного редактирования изображений. Ниже я приводу общие функции для редактирования изображений, такие как размытие, поворот, объединение изображений и т. д.
# Редактор изображений
# pip install pillow
from PIL import Image
from PIL import ImageDraw
# Combine Image
img1 = Image.open('img101.jpg')
img2 = Image.open('img102.jpg')
combine = Image.blend(img1, img2, 0.5)
# Resize Image
resize = Image.open('img101.jpg')
resize = resize.resize((300, 300))
# Flip an Image
flip_image = Image.open('img101.jpg')
flip_image = flip_image.transpose(Image.FLIP_LEFT_RIGHT)
# Blur an Image
blur_image = Image.open('img101.jpg')
blur_image = blur_image.filter(Image.BLUR)
# Add Drop Shadow
shadow_image = Image.open('img101.jpg')
shadow_image = shadow_image.filter(Image.EDGE_ENHANCE_MORE)
# Crop an Image
crop_image = Image.open('img101.jpg')
crop_image = crop_image.crop((50, 50, 300, 200))
#Add Brightness
bright_image = Image.open('img101.jpg')
bright_image = bright_image.point(lambda p: p + 50)
# Add Text to Image
text_image = Image.open('img101.jpg')
text_image = text_image.convert('RGB')
draw = ImageDraw.Draw(text_image)
draw.text((10, 10), "Hello World", (255, 255, 255))
# Rotate an Image
rotate_image = Image.open('img101.jpg')
rotate_image = rotate_image.rotate(90)
# Save Image
img1.save('img101.jpg')
👉 Редактор аудио на Python
Этот скрипт автоматизации будет редактировать аудио файлы. Вы можете извлекать звуки, объединять их, воспроизводить, разделять/вырезать фрагменты аудио и многое другое. Скрипт использует модуль Pydub, который является модулем управления звуком. Код приведен ниже:
# Редактор аудио на Python
# pip install pydub
from pydub import AudioSegment
from pydub.utils import mediainfo
from pydub.playback import play
# Extract Sound from Video
sound = AudioSegment.from_file("video.mp4", format="mp4")
sound.export("music.mp3", format="mp3")
# Get Media Info
info = mediainfo("musci.wav")
print(info)
# Play Sound
play("music.mp3")
# Combine Sounds
sound1 = AudioSegment.from_file("music.mp3")
sound2 = AudioSegment.from_file("music.mp3")
combined = sound1 + sound2
combined.export("music_combined.mp3", format="mp3")
# Split Audio
sound = AudioSegment.from_file("music.mp3", format="mp3")
sound_1 = sound[:10000]
sound_2 = sound[10000:]
sound_1.export("music_1.mp3", format="mp3")
sound_2.export("music_2.mp3", format="mp3")
# Increase or Reduce Volumn
sound = AudioSegment.from_file("music.mp3", format="mp3")
sound_volumn = sound + 10
sound_volumn.export("music_volumn.mp3", format="mp3")
# Adding Silence to Audio
sound = AudioSegment.from_file("music.mp3", format="mp3")
sound_silence = sound + AudioSegment.silent(duration=1000)
sound_silence.export("music_silence.mp3", format="mp3")
👉 Установите пароль на ваши файлы
Вам нужно было скрыть свои файлы, чтобы никто не мог их прочитать, тогда этот скрипт автоматизации поможет вам. Скрипт использует метод криптографии для шифрования ваших файлов, и когда вам нужно их открыть, вы можете их расшифровать с кодом ниже. Это очень безопасный способ скрыть ваши файлы, потому что расшифровать файл без ключа невозможно.
https://t.me/pro_python_code – бесплатное обучение Python c нуля
# Lock Your Files
#pip install cryptography
from cryptography.fernet import Fernet
def Lock_file(file_name, key):
    with open(file_name, 'rb') as file:
        data = file.read()
    f = Fernet(key)
    encrypted_data = f.encrypt(data)
    with open(file_name, 'wb') as file:
        file.write(encrypted_data)
    print("File Lock...")
def Unlock_file(file_name, key):
    with open(file_name, 'rb') as file:
        data = file.read()
    f = Fernet(key)
    decrypted_data = f.decrypt(data)
    with open(file_name, 'wb') as file:
        file.write(decrypted_data)
    print("File Unlock...")
key = input("Enter the key: ")
Lock_file('test.txt', key)
Unlock_file('test.txt', key)
👉 Мобильные приложения на Python
Вы можете разрабатывать мобильные приложения с помощью Python. Модуль Kivy используется для разработки кроссплатформенных приложений, таких как Android, IOS и Win. В приведенном ниже коде будут важные виджеты Kivy, которые мы будем использовать для разработки приложения для начинающих.
Примечание. После того, как ваше приложение будет прочитано, вы можете собрать его Apk со следующим модулем: pip install buildozer
# Develop Mobile Apps with Kivy
# pip install kivy
from kivy.app import App
from kivy.uix.label import Label
from kivy.uix.button import Button
from kivy.uix.boxlayout import BoxLayout
from kivy.uix.textinput import TextInput
from kivy.uix.gridlayout import GridLayout
from kivy.uix.scrollview import ScrollView
from kivy.uix.checkbox import CheckBox
from kivy.uix.image import Image
from kivy.uix.popup import Popup
class MobileApp(App):
def build(self):
        # Layout of App
        layout = BoxLayout(orientation="vertical")
# Label
        label = Label(text="Hello Kivy!")
# Button
        btn = Button(text="Click Me!")
# Button Action
        btn.bind(on_press=self.btn_pressed)
# Input Box
        input_box = TextInput(hint_text="Input Here",size_hint=(.3,.2))
# Check Box
        check_box = CheckBox(text="Check Me!")

        # ScrollView
        scroll_view = ScrollView()
        grid_layout = GridLayout(cols=2, size_hint_y=None)
                      grid_layout.bind(minimum_height=grid_layout.setter('height'))
# Add Image to App
        image = Image(source="medium.png")
# Popup
        popup = Popup(title="Popup", size_hint=(.5,.5))

        # Add to layout
        layout.add_widget(label)
        layout.add_widget(btn)
        layout.add_widget(input_box)
        layout.add_widget(scroll_view)
        layout.add_widget(check_box)
        layout.add_widget(image)
        layout.add_widget(popup)
return layout
    def btn_pressed(self, instance):
        print("Button Pressed!")
# Run the App
app = MobileApp()
app.run()
👉 Программа записи экрана Python
Теперь вы можете записывать экраны рабочего стола с помощью Python со скоростью 60 кадров в секунду. Этот скрипт автоматизации использует несколько модулей для выполнения своей работы, и это очень полезен для тех, кто хочет выполнять запись экрана программно.
import pyautogui
import numpy as np
import cv2
import keyboard
# pip install opencv-python
# pip install pyautogui
# pip install keyboard
# pip install numpy
def Screen_Recording():
    while True:
        # Press R to Start Recording
        if keyboard.is_pressed('r'):
            print("Recording Has been Started...")
            # resolution
            capture_area = (1920, 1080)

            codec = cv2.VideoWriter_fourcc(*'mp4v')
            filename = "Your_Recording.mp4"
# Frame per Second
            fps = 60.0
            output_video = cv2.VideoWriter(filename, codec, fps, capture_area)
            while True:
                image = pyautogui.screenshot()
                Image_frame = np.array(image)
                Image_frame = cv2.cvtColor(Image_frame, cv2.COLOR_BGR2RGB)
                output_video.write(Image_frame)
                cv2.waitKey(1)
                # Press Q button to Stop recording
                if keyboard.is_pressed('q'):
                    print("Recording Has been Stopped...")
                    break
output_video.release()
            cv2.destroyAllWindows()
Screen_Recording()
👉 Проверка грамматики на Python
Проверка грамматики всегда сложна но этот скрипт автоматизации поможет вам. Этот удивительный скрипт использует модуль Gingerit, который подключен к API средства проверки Ginger Grammer, и второй модуль Streamlit для создания веб-приложений с меньшим количеством кода. Это удобный скрипт, когда у вас есть много текста или данных, которые нужно проверить программно.
# Proofreading with Pyton
# pip install gingerit
# pip install streamlit
from gingerit.gingerit import GingerIt
import streamlit as webapp
app = GingerIt()
webapp.title('Proofreading in Python')
Text = webapp.text_area("Enter Your Text or Sentence:", value='', height=None, max_chars=None, key=None)
if webapp.button('Correct Sentence'):
    if Text == '':
        webapp.write('Please enter text for proofreading')
    else:
        correction = app.parse(Text)
        webapp.markdown('Corrected Text => ' + str(correction["result"]))
👉 Извлечение текста из PDF с Python
Этот скрипт просто извлечет текст из вашего PDF. Этот скрипт очень удобен для разработчиков и людей, которые ищут автоматизированный способ извлечения содержимого таблицы из файлов PDF. Потому что никто не любит сидеть и извлекать строки одну за другой из нескольких pdf. Проверьте код ниже:
# Extract Tables from Camelot
# pip install camelot-py
import camelot
table = camelot.read_pdf('test.pdf', pages='1-2')
# get total number of tables
print("Total tables: ", table.n) # 2
# print table by num
print(table[0].df)
print(table[1].df)
# Export Table to CSV
table[0].to_csv('table1.csv')
table[1].to_csv('table2.csv')
# Export Table to Excel
table[0].to_excel('table1.xlsx')
# Export Table to HTML
table[0].to_html('table1.html')
# Extract and Export Table At Once
table.export('tables.csv', f='csv', compress=True)
# Parse Table Report
table[0].parse(['Date', 'Description', 'Amount'])
👉 Автоматизируем работу MS Excel, Word и PowerPoint
Думали ли вы, что с помощью Python можно также автоматизировать программное обеспечение MS Office? Тогда этот скрипт позволит вам это сделать. Скрипт разделен на три части, и каждая часть имеет модуль для чтения и записи данных в программном обеспечении MS.
# Автоматизируем работу MS Excel, Word и PowerPoint
# pip install xlrd
import xlrd
wb = xlrd.open_workbook('test.xlsx')
worksheet = wb.sheet_by_index(0)
# Read by row and col number
print(worksheet.cell_value(0, 0))
# read whole row
print(worksheet.row_values(0))
# read whole col
print(worksheet.col_values(1))
# Write to excel by row and col number
worksheet.write(0, 0, 'Hello')
wb.save('test.xlsx')
-------------------------------------------------
# Automate MS WORD
# pip install python-docx
import docx

doc = docx.Document("zen_of_python.docx")

# read paragraph by paragraph
text = [p.text for p in doc.paragraphs]
print(text)
# read table by table
for table in doc.tables:
    for row in table.rows:
        for cell in row.cells:
            print(cell.text)
# Write in Doc
doc.add_paragraph("Hello World")
doc.save("test.docx")
-------------------------------------------------
# Automate PowerPoint
# pip install python-pptx
from pptx import Presentation
# Read Slides
PP = Presentation('file.pptx')
for slide in PP.slides:
    for shape in slide.shapes:
        for paragraph in shape.text_frame.paragraphs:
            for data in paragraph.runs:
                print(data.text)
# Write in PPT
PP = Presentation()
title_slide_layout = PP.slide_layouts[0]
slide = PP.slides.add_slide(title_slide_layout)
title = slide.shapes.title
title.text = "Medium Article"
PP.save('file.pptx')
👉 Преобразовываем Изображение в PDF с Python
Этот простой скрипт автоматизации поможет вам преобразовать ваши изображения в формат PDF.
# Images to Python
from PIL import Image
def Images_Pdf(filename, output):
    images = []
for file in filename:
        im = Image.open(file)
        im = im.convert('RGB')
        images.append(im)

    images[0].save(output, save_all=True, append_images=images[1:])
Images_Pdf(["test1.jpg", "test2.jpg", "test3.jpg"], "output.pdf")
👉Заключительные мысли
Что ж, я очень рад, что вы дошли до конца этой статьи, и я надеюсь, что вы найдете ее информативной и получили удовольствие от ее чтения. Если вам понравилась эта статья, не забудьте поделиться ❤️ ею со своими друзьями.
Больше полезных скриптов в нашем телеграмм канале по аналитике данных на Python
https://t.me/data_analysis_ml
Просмотры: 3 724
пython является распространенным и востребованным языком программирования в наши дни, потому что он может создавать приложения, от простых до сложных. Эта статья предназначена для тех, кто плохо знаком с программированием на Python и хочет изучить его с нуля за короткий промежуток времени.
Примеры скриптов Python
Эта статья объясняет 35 примеров скриптов Python, используя простые примеры, которые помогут вам изучить основы Python.
Создайте и запустите первый скрипт python
Вам не нужно создавать файл python для написания и запуска простого сценария python из терминала. Вы можете просто получить доступ к консоли Python и запустить ее прямо там. Чтобы получить доступ к консоли python, откройте терминал (Ctrl + Alt + T в ubuntu) и запустите команды «python» или «python3», чтобы открыть Python в режиме взаимодействия и выполнить любой сценарий из терминала.
tuts @ fosslinux: ~ $ python3
Если скрипт длинный, его нужно будет записать и сохранить в файле python с помощью любого редактора. Для написания сценария вы можете использовать любой текстовый редактор или редактор кода, например PyCharm, sublime, Spyder, Visual Studio Code или любую программу IDE, разработанную специально для Python.
Файл python имеет расширение .py.
Скрипты python в этой статье написаны с использованием Python 3.9 и Python PyCharm IDE. Чтобы использовать его, вы должны сначала установить PyCharm IDE на свое устройство. Таким образом, демонстрационные сценарии этой статьи будут сохранены с расширением .py и запускаться с помощью команды python3, за которой следует имя сценария на терминале. Например,
python3 example_script.py
1. Свинья латинский переводчик сценарий
Свиной латынь относится к комбинации правил, которые изменяют текст на определенном языке, чтобы его было трудно понять для человека, который не обучен.
Сохраните сценарий в файл с именем latin_translator.py со следующим кодом.
# latin_translator.py # запрос пользователя на ввод. user_input = input ("Введите текст для перевода на латынь свиньи:") print ("User Text:", user_input) # На этом шаге слова разбиваются на список. updated_user_input = user_input.split ('') for j в updated_user_input: if len (j)> = 3: # переводить только слова с более чем 3 символами j = j + "% say"% (j [0]) j = j [1:] print (j) else: pass
Чтобы выполнить latin_translator.py из терминала, введите следующий код.
python3 latin_translator.py
После запуска кода терминал отобразит следующий вывод.

2. Скрипт для переворота числа
Сценарий пытается изменить значение числа. В этом случае решение влечет за собой:
1. Возьмите целочисленное значение и сохраните его в переменной.
2. Получите каждую цифру числа и сохраните обратное число в другой переменной, используя цикл while.
3. Напишите номер в обратном порядке.
4. Уходи оттуда.
Сохраните сценарий в файл с именем reverse_number.py со следующим кодом.
# reverse_number.py user_input = int (input ("Введите число для обратного:")) _rev = 0. while (user_input> 0): dig = user_input% 10 _rev = _rev * 10 + dig user_input = user_input // 10. print ("Обратное число:", _ rev)
После запуска кода терминал отобразит следующий вывод.

3. Соединение двух струн
В Python существует множество способов соединения строковых значений. Это называется конкатенацией строк.
Оператор «+» — это самый простой способ объединить два строковых значения в Python.
Чтобы узнать, как соединить две строки, создайте сценарий Python со следующим сценарием.
Два строковых значения назначаются двум переменным, а третья переменная используется для хранения объединенных значений, которые будут напечатаны позже.
Сохраните сценарий в файл с именем join_strings.py со следующим кодом.
# join_strings.py string1 = "мой" строка2 = "работа" объединенная_строка = строка1 + строка2 печать (объединенная_строка)
После запуска сценария появится следующий вывод.

Слова «моя» и «работа» здесь объединены, и в результате получается «моя работа».
4. В заданном диапазоне выведите нечетные числа
Это процесс автоматизации, который в противном случае был бы утомительным и трудоемким для выполнения вручную. Программа печатает все нечетные числа в заданном диапазоне, используя верхний и нижний пределы.
Решение проблемы:
- Возьмите верхний и нижний пределы диапазона и сохраните их отдельно в переменных.
- Создайте цикл for, охватывающий нижний и верхний пределы диапазона.
- Наконец, используйте оператор if, чтобы определить, четное или нечетное число, а затем распечатайте результат.
- выход
Сохраните сценарий в файл с именем print_odd_numbers.py со следующим кодом.
# print_odd_numbers.py lower_limit = int (input ("Введите нижний предел диапазона:")) upper_limit = int (input ("Введите верхний предел диапазона:")) для j в диапазоне (lower_limit, upper_limit + 1): if (j% 2! = 0): print (j)
После запуска сценария появится следующий вывод.

5. Форматирование числа с плавающей запятой в строке
Программирование требует чисел с плавающей запятой для генерации дробных чисел, и часто бывает необходимо форматирование числа с плавающей запятой в целях программирования.
В Python есть различные способы форматирования числа с плавающей запятой. Следующий скрипт форматирует число с плавающей запятой, используя форматирование строк и интерполяцию строк.
При форматировании строки используется метод format () с шириной формата, а при интерполяции строки используется символ «процента» с форматом с шириной.
Пять цифр устанавливаются перед десятичной точкой, а две цифры устанавливаются после десятичной точки в соответствии с расстоянием форматирования.
Сохраните скрипт в файл с именем Floating_point_number.py со следующим кодом.
# float_point_number.py # применение форматирования строки first_val = 365.48951. print ("Форматирование строки: {: 5.2f}". format (first_val)) # применение интерполяции строк. second_val = 365,48951. print ("Интерполяция строки:% 5.2f"% second_val)
После выполнения вывод будет выглядеть следующим образом.

6. Увеличить число в раз
Есть много способов измерить x ^ n в Python. В приведенном ниже скрипте показаны три метода вычисления x ^ n в Python.
X ^ n вычисляется с использованием двойного оператора «*», метода pow () и метода math.pow (). Числовые значения используются для инициализации значений x и n.
Методы double ‘*’ и pow () используются для вычисления мощности целых чисел. math.pow () можно использовать для измерения мощности дробных чисел, как показано в последнем разделе скрипта.
Сохраните сценарий в файл с именем raise_number_factor.py со следующим кодом.
# raise_number_factor.py import math # инициализируйте x и n значениями. х = 4. n = 3 # подход 1. результат_вал = х ** п. print ("% d в степени% d - это% d"% (x, n, result_val)) # подход 2. result_val = pow (x, n) print ("% d в степени% d - это% d"% (x, n, result_val)) # подход 3. результат_вал = math.pow (x, n) print ("% d в степени% d составляет% 5.2f"% (x, n, result_val))
После запуска сценария появится следующий вывод.

7. Работа с логическими типами
Следующий сценарий демонстрирует различные варианты использования логических типов. Значение «value_one» будет напечатано в первом выводе, который является допустимым логическим значением. Здесь только ноль возвращает ложь как логическое значение, а все положительные и отрицательные числа возвращают истину.
С другой стороны, второй и третий выходы будут печатать вещественные числа как для положительных, так и для отрицательных чисел.
Поскольку оператор сравнения возвращает false, четвертый вывод будет выводить false для 0, а пятый вывод также будет выводить false.
Сохраните сценарий в файл с именем boolean_types.py со следующим кодом.
# boolean_types.py # Логическое значение. value_one = Истина. print ("логическое значение:", value_one) # Число в логическое значение. number_to_boolean = 10. print ("число в логическое:", bool (number_to_boolean)) num_val = -5. print ("отрицательное число:", bool (num_val)) num_val = 0. print ("число равно нулю:", bool (num_val)) # Логическое значение из оператора сравнения. val_1 = 6. val_2 = 3. print ("логическое значение из оператора сравнения:", val_1 После запуска сценария появится следующий вывод.

Работа с логическими типами 8. Использование условного оператора if-else
Следующий скрипт демонстрирует, как использовать условный оператор if-else в Python. Обратите внимание, что в Python аргумент if-else объявлен немного иначе, чем в других языках.
В Python, в отличие от других языков, фигурные скобки не нужны для определения блока if-else, но блок отступов должен использоваться правильно, иначе сценарий завершится ошибкой.
Сценарий использует простой аргумент if-else, чтобы проверить, больше ли значение числовой переменной 70 или нет. После блоков if и else двоеточие (:) используется для обозначения начала блока.
Сохраните сценарий в файл с именем conditional_if_else.py со следующим кодом.
# conditional_if_else.py # инициализировать num_val числовым значением. num_val = 40 # Проверяем, больше ли num_val 50 или нет. if (num_val> 50): print («ваш результат выше среднего») else: print ("Вы набрали ниже среднего")
После запуска сценария появится следующий вывод.
Использование условного оператора if-else
9. Использование операторов AND и OR в условном выражении
В следующем сценарии показано, как использовать операторы AND и OR в условном выражении.
Оператор И возвращает истину, если оба условия истинны, а оператор ИЛИ возвращает истину, если любое из двух условий истинно. В качестве практических и теоретических знаков будут использоваться два числа с плавающей запятой.
В аргументе if используются операторы И и ИЛИ.
Согласно условию, оператор «if» вернет истину, если практическая оценка больше 40. Теоретические оценки больше или равны 30, или если сумма практических и теоретических оценок больше или равна 70.
Сохраните сценарий в файл с именем and_or_operators.py со следующим кодом.
# практических отметок. Practical_marks = float (input ("Введите практические отметки:")) # теоретических оценок. theory_marks = float (input ("Введите оценки теории:")) # используйте оператор AND и OR, чтобы проверить, соответствует ли он условию if (практические_ отметки> = 40 и теоретические_ отметки> = 30) или (практические_ отметки + теоретические_ отметки)> = 70: print (" nВы являетесь успешный") else: print (" nВы не добились успеха")
Результат выглядит так, как показано ниже:
Использование операторов AND и OR в условном выражении
Соответственно, оператор if возвращает false для входных значений 30 и 35. Но верно для входных значений 40 и 45.
10. Оператор переключения регистра
В Python нет оператора switch-case, как в других языках программирования, но пользовательская функция может обеспечить его выполнение.
В следующем скрипте функция job_details () создается для работы так же, как аргумент switch-case.
Функция имеет только один параметр и словарь переключателя. Каждый индекс словаря проверяется на значение параметра функции.
Если совпадение найдено, функция вернет соответствующее значение индекса; в противном случае будет возвращен метод value.get () второго параметра переключателя.
Сохраните сценарий в файл с именем switch_case_statement.py со следующим кодом.
# switch_case_statement.py # Switcher для реализации опций switch case. def job_details (ID): Switcher = { «100»: «Описание работы: инженер-программист», «200»: «Описание работы: юрист», «300»: «Описание работы: графический дизайнер»,} Первый аргумент будет возвращен, если совпадение найдено и. ничего не будет возвращено, если совпадений не найдено return Switcher.get (ID, "ничего") # Возьмите идентификатор задания. job_id = input ("Введите идентификатор задания:") # Распечатать вывод. печать (job_details (job_id))
Если обнаружено совпадение, будет возвращен первый аргумент; если совпадений не найдено, ничего не будет возвращено - верните переключатель.
Соответственно, сценарий запускается дважды, и два описания задания печатаются на основе значений идентификатора задания, как показано.
Оператор переключения регистра
11. Пока цикл
Использование цикла while в Python демонстрируется на следующем примере.
Двоеточие (:) используется для описания начального блока цикла, и все операторы цикла должны иметь правильный отступ; в противном случае произойдет ошибка отступа.
В следующем скрипте, который используется в цикле, значение счетчика установлено на 1. И цикл будет повторяться пять раз, выводя значения счетчиков после каждой итерации.
Чтобы войти в состояние завершения цикла, значение счетчика увеличивается на единицу на каждой итерации.
Сохраните сценарий в файл с именем while_loop.py со следующим кодом.
# while_loop.py # Инициализировать значение счетчика. counter_val = 1. # Повторить цикл 10 раз. while counter_val <11: # Распечатать значение счетчика print ("counter value:% d"% counter_val) # Увеличить counter_val counter_val = counter_val + 1
После запуска сценария появится следующий вывод.
Пока цикл
12. Для цикла
Цикл for в Python можно использовать для многих целей. Двоеточие должно определять начальный блок этого цикла (:), а операторы должны определяться правильным отступом.
Список названий дней недели указан в следующем скрипте. А цикл for используется для перебора и печати каждого элемента в списке. Метод len () также используется для подсчета общего количества элементов в списке и для установки ограничения функции range ().
Сохраните сценарий в файл с именем for_loop.py со следующим кодом.
# Инициализировать список. будние дни = ["воскресенье", "понедельник", "вторник", "среда", "четверг", "пятница", "суббота"] print ("Семь рабочих дней: n") # Итерировать список, используя цикл for. для дня в диапазоне (len (будние дни)): print (будние дни [день])
После запуска сценария появится следующий вывод.
Для цикла
13. Запуск сценария Python из другого сценария Python
Часто бывает необходимо использовать скрипт файла python из другого файла python. Это легко сделать, как и импортировать любой модуль с ключевым словом import. Строковые значения инициализируют две переменные в файле holiday.py.
Этот файл импортируется с псевдонимом «h» в файл run_python_script_from_another_script.py. Здесь вы найдете список названий месяцев.
Переменная flag используется для печати значения переменной holiday_1 для октября, ноября и декабря только один раз.
Значение переменной holiday_2 будет напечатано для месяца «апрель».
Когда выполняется часть else объявления if-else if-else, будут напечатаны другие имена девяти месяцев.
run_python_script_from_another_script.py - это скрипт Python, который позволяет использовать предопределенные значения для установленных праздников.
# Импортировать еще один скрипт python из holiday.py. импортировать праздники как список h # месяцев. month = [«Январь», «Февраль», «Март», «Апрель», «Май», «Июнь», «Июль», «Август», «Сентябрь», «Октябрь», «Ноябрь», «Декабрь» ] # Начальная переменная _flag для однократной печати праздника. _flag = 0 # Итерировать список, используя цикл for. для m в месяцах: если m == "октябрь" или m == "ноябрь" или m == "декабрь": if _flag == 0: print ("### Now ", h.holiday_1) _flag = 1 elif m ==" April ": print (" ### Now ", h.holiday_2) else: print (" Текущий месяц есть ", м)
Сохраните второй скрипт в файл с именем holiday.py со следующим кодом.
# holiday.py # праздничные значения. holiday_1 = "Долгие каникулы" holiday_2 = "Короткий отпуск"
Если вы запустите сценарий без аргументов командной строки, вы получите следующий результат, в котором показано имя файла сценария.
Запуск сценария Python из другого сценария Python
15. Обычные выражения
Регулярные выражения, также известные как регулярные выражения, используются в Python для соответствия или сканирования и замены определенных частей строки на основе шаблона.
В Python модуль «re» относится к регулярному выражению. В приведенном ниже сценарии показано, как использовать регулярное выражение в Python.
Шаблон, используемый в сценарии, подходит для строк, в которых в качестве первого символа используется заглавная буква. Фактически, шаблон будет сопоставлен со строковым значением с помощью процесса match ().
Сообщение об успешном завершении будет напечатано, если метод вернет значение true; в противном случае будет напечатано информационное сообщение.
Сохраните сценарий в файл с именем regular_expressions.py со следующим кодом.
# regular_expressions.py # Импортировать модуль. import re # Возьмите любые строковые данные. string_data = input ("введите строку:") # шаблон поиска. search_pattern = '^ [A-Z]' # сопоставить шаблон с входным значением. _found = re.match (search_pattern, string_data) # печатаемое сообщение основано на возвращаемом значении, если _found: print ("значение начинается с заглавной буквы") else: print («Введите повторно, начиная с заглавной буквы»)
После запуска сценария появится следующий вывод.
Обычные выражения
16. Использование getpass
getpass - полезный модуль Python для получения обратной связи с паролем от пользователя. Модуль getpass проиллюстрирован в следующем скрипте ниже.
Метод getpass () используется для преобразования ввода в пароль. Кроме того, оператор if используется для сравнения входного значения с заданным паролем.
Если пароль совпадает, появится сообщение «вы прошли аутентификацию»; в противном случае появится сообщение «вы не прошли аутентификацию».
Сохраните сценарий в файл с именем get_pass.py со следующим кодом.
# get_pass.py # импорт модуля getpass. import getpass # запрашивать у пользователя пароль. passwd = getpass.getpass ('Password:') # проверка пароля, введенного пользователем, на соответствие данному паролю. если passwd == "пароль": print ("аутентификация прошла успешно") else: print ("ошибка аутентификации")
Когда сценарий запускается с терминала, входное значение не отображается для других паролей Linux.
Скрипт запускается дважды с терминала. Один раз с неверным паролем и один раз с правильным паролем, как показано на схеме ниже.
Использование getpass
17. Формат даты
Значение даты в Python можно форматировать разными способами. Модуль datetime используется в следующем скрипте для установки существующих и настраиваемых значений даты.
Текущие дата и время устройства считываются с помощью функции today (). Затем форматированное значение даты печатается с использованием различных имен свойств объекта даты.
В следующем разделе сценария показано, как выделить и распечатать настраиваемое значение даты.
Сохраните сценарий в файл с именем date_format.py со следующим кодом.
# date_format.py # программа для форматирования и печати даты с использованием библиотеки datetime from datetime import date # зафиксировать сегодняшнюю дату. date_today = date.today () # Распечатать отформатированную дату. print ("Сегодняшняя дата:% d-% d-% d"% (date_today.day, date_today.month, date_today.year)) # настроить данную дату. custom_date = дата (2021, 4, 5) print ("Настраиваемая дата:", custom_date)
После запуска сценария появится следующий вывод.
Формат даты
18. Добавление и удаление объектов из списка
Объект списка Python используется для решения многих проблем. Для работы с объектом списка в Python есть несколько встроенных функций.
В следующем примере показано, как добавлять и удалять новые элементы из списка. Скрипт объявляет список из четырех объектов.


- Метод Insert () используется для добавления нового элемента во второе место списка.
- Метод remove () используется для поиска и удаления определенного элемента из списка.
После вставки и удаления записывается список.
Сохраните сценарий в файл с именем list_methods.py со следующим кодом.
# list_methods.py # Объявить список видов спорта. sports = ["футбол", "регби", "нетбол", "волейбол"] # Вставьте новый вид спорта на 3-ю позицию. sports.insert (2, "настольный теннис") # Список результатов после вставки. print ("Список видов спорта после вставки:") print (sports) # Удалить спорт. sports.remove ("netball") # Распечатать список видов спорта после удаления. print ("Список видов спорта после удаления:") печать (спорт)
После запуска сценария появится следующий вывод.

19. Понимание списка
Понимание списка - это функция Python, которая позволяет вам создать новый список из любой строки, кортежа или другого списка.
Для выполнения той же задачи можно использовать цикл for и лямбда-функцию.
Приведенный ниже сценарий демонстрирует два отдельных применения понимания списка: понимание списка используется для преобразования строкового значения в список символов.
Затем кортеж таким же образом преобразуется в список.
Сохраните сценарий в файл с именем list_comprehension.py со следующим кодом.
# list_comprehension.py # создание списка персонажей с использованием понимания списка. build_char_list = [символ для символа в "понимании"] print (build_char_list) # Определите кортеж из многомиллионных компаний. companies_tuple = ("Facebook", "Google", "Twitter", "IBM", "Apple", "HP", "DELL") # используйте понимание списка для создания списка из кортежа companies_list = [сайт для сайта в companies_tuple] печать (список_компаний)
После запуска сценария ниже появится следующий результат.

20. Данные среза
Метод slice () в Python используется для вырезания определенной части строки. В этой системе есть три параметра - пуск, останов и фаза - это три параметра.
Параметр остановки необходим, а два других параметра необязательны. В следующем скрипте демонстрируется метод slice () с одним, двумя и тремя параметрами. Когда в процессе slice () определен только один параметр, используется обязательный параметр stop.
Параметры start и stop используются, когда два параметра используются в процессе slice (). Наконец, параметры начала, конца и фазы используются, когда используются все три параметра.
Сохраните сценарий в файл с именем slice_data.py со следующим кодом.
# slice_data.py # присвоение строкового значения. _text = "детали данных среза" # использовать один параметр для среза. slice_obj = кусок (5) print ("one parameters:", _text [slice_obj]) # используйте два параметра для Slice. slice_obj = срез (6,12) print ("два параметра:", _text [slice_obj]) # используйте три параметра для Slice. slice_obj = срез (6,25,5) print ("три параметра:", _text [slice_obj])
После запуска сценария появится следующий вывод. Значение аргумента для первого метода slice () - 5. Он разделил пять текстовых переменных, которые выводятся на печать, на пять символов. Аргументы 6 и 12 используются во второй форме slice (). Процесс нарезки начинается с шестой позиции и заканчивается после 12 символов.

Третий метод slice () принимает три аргумента: 6, 25 и 5. Нарезка начинается с шестой позиции и заканчивается после 25 символов, при этом каждый ход пропускает пять символов.
21. Добавление и поиск данных в словаре
Подобно ассоциативному массиву в других языках программирования, объект словаря используется в Python для хранения нескольких данных.
Следующий сценарий демонстрирует, как добавить новый элемент в словарь и выполнить поиск любого элемента.
Сценарий объявляет словарь знаний о клиентах с индексом, содержащим идентификатор вида спорта, а значение, содержащее название вида спорта. После этого в конец словаря добавляется новая спортивная запись. Для проверки словаря в качестве входных данных используется спортивный идентификатор.
Для перебора индексов словаря и проверки входного значения словаря используются цикл for и условие if.
Сохраните сценарий в файл с именем add_search_data.py со следующим кодом.
# add_search_data.py # Определить словарь. sports = {'100': 'soccer', '200': 'rugby', '300': 'настольный теннис', '400': 'volleyball', '500': 'Basketball'} # Добавить новые данные. sports ['600'] = 'netball' print ("Спортивные названия:") # Распечатать значения словаря. для спорта в спорте: печать (спорт [спорт]) # Использовать спортивный идентификатор в качестве входного для поиска. sport_name = input ("Введите идентификатор вида спорта:") # Найдите идентификатор вида спорта в словаре. для спорта в спорте: if sport == sport_name: print (sports [sport]) сломать
После запуска сценария и выбора «3», «400» в качестве значения спортивного идентификатора следующий вывод будет выглядеть как:

22. Добавление и поиск данных в наборе Python
Приведенный ниже сценарий демонстрирует, как добавлять и искать данные в наборе Python. Скрипт объявляет набор целочисленных данных. Чтобы добавить новые данные в пакет, используйте метод add ().
В цикле for и if целочисленное значение будет использоваться для проверки установленного значения.
Сохраните сценарий в файл с именем add_search_data_in_python.py со следующим кодом.
# add_search_data_in_python.py # определение набора номеров. number_set = {23, 90, 56, 78, 12, 34, 67} # добавляются новые данные number_set.add (50) # печать установленных значений. print (number_set) _message = "этот номер недоступен." # запрос на использование числового значения для поиска. search_val = int (input ("введите число:")) # Поиск номера в наборе. для val в number_set: if val == search_val: _message = "этот номер доступен". прервать печать (_message)
Скрипт запускается дважды: один раз с целочисленным значением 46 и один раз с 90. Здесь число 46 отсутствует в наборе, поэтому «этот номер недоступен». печатается. Однако в наборе присутствует число 90 и сообщение «этот номер доступен». печатается.
Результат выполнения приведенного выше сценария выглядит так, как показано на диаграмме ниже.

23. Подсчитайте количество элементов в списке
Метод count () в Python используется для подсчета того, сколько раз строка встречается в другой строке.
Есть три возможных претензии. Первый аргумент необходим, и он ищет конкретную строку в более крупной строке. Два других аргумента метода используются для ограничения поиска путем указания позиций поиска.
Метод count () используется с одним аргументом в следующем скрипте для измерения слова «Python» в строковой переменной.
Сохраните сценарий в файл с именем count_items_list.py со следующим кодом.
# count_items_list.py # определение строки. string = 'Обучение Python отдельно от Java, Python, Kotlin PHP, Python & PERL' # строка поиска. search = 'Python' # значение счетчика сохранено. count = string.count (search) # форматированный вывод Печатный. print ("% s появляется% d раз"% (search, count))
После запуска сценария появится следующий вывод.

24. Создайте функцию и вызовите ее
В следующем сценарии показано, как объявлять и вызывать пользовательские функции в Python.
Здесь объявлены две функции. Во-первых, чтобы измерить сумму двух чисел и распечатать результат, используйте функцию сложения () с двумя аргументами.
Во-вторых, функция area () принимает только один аргумент и вычисляет площадь круга перед возвратом результата вызывающего объекта с помощью оператора return.
Сохраните сценарий в файл с именем create_a_function_and_call_it.py со следующим кодом.
# create_a_function_and_call_it.py # Определить функцию сложения. def add (first_number, second_number): _result = first_number + second_number. return _result # используйте оператор return для определения функции области def area (_radius): _result = 3.14 * _radius * _radius. return _result # добавить вызываемую функцию. print ("Результаты сложения:", add (400, 300)) # вызывается функция области. print ("Площадь круга:", область (4))
После запуска сценария появится следующий вывод.

25. Бросить и поймать исключение
Чтобы выбросить и перехватить исключение, используются блоки try и catch.
В Python блок try-catch показан в следующем скрипте. Блок try принимает на вход числовое значение и проверяет, четное оно или нечетное.
Если в качестве входных данных задано какое-либо нечисловое значение, выдается исключение ValueError и создается исключение в блоке catch, который печатает сообщение об ошибке.
Сохраните сценарий в файл с именем try_block.py со следующим кодом.
# try_block.py # Блок Try. try: # запрашиваем у пользователя ввод числа. num_val = int (input ("Введите число:")) если num_val% 2 == 0: print ("Четное число") else: print ("Odd Number") # Блок Exception except (ValueError): # Сообщение об ошибке напечатано print ("Введите числовое значение")
После запуска сценария появится следующий вывод.

26. Чтение и запись файла
Приведенный ниже сценарий демонстрирует, как читать и записывать в файл в Python. Имя файла вектора содержит имя файла.
Файл открывается для записи в начале скрипта с помощью процесса open (). А метод write () используется для записи трех строк в регистр.
После этого метод open () используется для открытия того же файла для чтения. А цикл for используется для чтения и печати строки файла.
Сохраните сценарий в файл с именем read_write_file.py со следующим кодом.
filename = "cities.txt" # Открыть файл для записи. fileHandler = open (filename, "w") # добавить города. fileHandler.write ("Нью-Йорк n") fileHandler.write ("Вашингтон n") fileHandler.write ("Los Angeles n") # Закройте файл. fileHandler.close () # Открыть файл для чтения. lines = open (filename, "r") # Построчное чтение файла. для строки в строках: print (line) # Закройте файл. fileHandler.close ()
После запуска сценария появится следующий вывод.

27. Список файлов в каталоге
Модуль os в Python можно использовать для чтения содержимого любого каталога.
Следующий сценарий демонстрирует, как использовать модуль os в Python для получения списка файлов в заданном каталоге.
Сценарий использует метод listdir () для получения списка файлов и каталогов в каталоге. Далее содержимое каталога печатается с использованием цикла for.
Сохраните сценарий в файл с именем list_files_in_directory.py со следующим кодом.
# list_files_in_directory.py # для чтения каталога, модуль Import os. import os # путь к каталогу _path = '/ home / tuts / Documents' # Чтение содержимого файла. _files = os.listdir (_path) # Распечатать содержимое каталога для _file в _files: print (_file)
Если указанный путь к каталогу существует, содержимое каталога появится после запуска сценария.

28. Чтение и запись данных с помощью Pickle
Следующий скрипт демонстрирует, как писать и читать данные с помощью модуля Python Pickle.
В сценарии объект объявляется и инициализируется пятью числовыми значениями. Кроме того, метод dump () используется для сохранения данных этого объекта на диск. Затем данные считываются из того же файла и сохраняются в массиве с помощью процесса load ().
Сохраните сценарий в файл с именем read_write_data_with_pickle.py со следующим кодом.
# read_write_data_with_pickle.py # Импортировать модуль рассола. import pickle as объявлен объект p # для хранения данных. data_object = [] # Повторяем цикл for 10 раз. for val in range (10,20): data_object.append (val) # открывается файл для записи данных. file_handler = open ('languages', 'wb') # Выгрузить данные объекта в файл. p.dump (data_object, file_handler) # закрываем обработчик файлов. file_handler.close () # Открыть файл для чтения. _handler = open ('языки', 'rb') # Загрузить данные из файла после десериализации. data_object = p.load (_handler) # Итерировать цикл для печати данных. для v в объекте_данных: print ('Значение данных:', v) # закрыть обработчик файлов. _handler.close ()
После запуска сценария появится следующий вывод.

29. Определите класс и метод
Следующий сценарий демонстрирует, как объявить класс и метод и получить к ним доступ в Python.
Здесь описывается класс, а также переменная класса и процесс. Впоследствии доступ к переменной класса и методу класса осуществляется путем объявления объекта класса.
Сохраните сценарий в файл с именем class_method.py со следующим кодом.
# class_method.py # определение класса. class Job: name = "Software Engineer" # Определите метод def job_details (self): print ("place: New York") print ("Department: IT") print ("Salary: $ 100 000") # Создайте объект Job _job = Job () # переменная класса Печатный. print ("Name:", _ job.name) # запускает метод класса. _job.job_details ()
После запуска сценария появится следующий вывод.

30. Использование функции диапазона
Следующий скрипт демонстрирует, как использовать функцию диапазона в Python.
Этой функции можно передать три аргумента - start, stop и stage. Однако необходимо использовать стоп-требование.
Значение начала по умолчанию равно 0, когда используется только один аргумент. В трех циклах for используются функции range () с одним, двумя и тремя аргументами.
Сохраните сценарий в файл с именем range_function.py со следующим кодом.
# range_function.py print ('Функция range () с одним параметром n') для _range в диапазоне (8): print (_range, end = '') print (' nФункция range () с двумя параметрами n ') для _range in range (8,20): print (_range, end = '') print (' nФункция range () с тремя параметрами n') для _range в диапазоне (8,20,2): print (_range, end = '') print (' n')
После запуска сценария появится следующий вывод.

31. Функция map ()
Функция map () в Python используется для создания списка из любой пользовательской функции и любого итерируемого объекта.
Функция power_fun () указана в следующем скрипте для вычисления xn и используется в первом аргументе функции map ().
Второй аргумент функции map () - это список, называемый числами.
Будет взято значение x пользователя, а функция map () вернет список значений мощности x на основе значений элементов списка чисел.
Сохраните сценарий в файл с именем map_function.py со следующим кодом.
# map_function.py # определение и расчет степенной функции. def power_fun (n): return x ** n # запрашивать у пользователя ввод значения x. x = int (input ("Введите значение x:")) # Определите кортеж, в котором будут храниться числа. num_val = [2, 3, 4] # используйте map () для вычисления x в степени n map_result = map (power_fun, num_val) печать (список (map_result))
После запуска сценария появится следующий вывод.

32. Фильтрация данных из повторяемого объекта с помощью функции filter ()
Функция filter () в Python использует пользовательскую функцию для фильтрации данных из итерируемого объекта и создания списка объектов, для которых функция возвращает.
Функция SelectedSport () используется в следующем скрипте для создания списка отфильтрованных данных на основе объектов selectedList.
Сохраните сценарий в файл с именем filter_function.py со следующим кодом.
# filter_function.py # Определите список всех видов спорта. all_sports = ['футбол', 'баскетбол', 'волейбол', 'нетбол', 'легкая атлетика'] # Определите функцию для фильтрации выбранных видов спорта. def SelectedSport (val): selected_sports = ['легкая атлетика', 'футбол', 'регби'] if (val in selected_sports): return True selectedList = filter (SelectedSport, all_sports) print ('Выбранные виды спорта:') для элемента в selectedList: print (элемент)
После запуска сценария появится следующий вывод.

33. Скрипт для проверки внешнего IP-адреса
Необходимость знать свой внешний IP-адрес - это не то, что происходит постоянно… до тех пор, пока это не произойдет. Вот пример сценария Python, который показывает, насколько быстро можно использовать Python для решения этих трудоемких задач.
Это базовый скрипт Python для определения вашего внешнего IP-адреса. Сначала импортируются запросы и ре-модули.
Сохраните сценарий в файл с именем check_external_ip.py со следующим кодом.
# check_external_ip.py # скрипт для проверки вашего внешнего IP-адреса. импорт ре. запросы на импорт ur_url = " http://checkip.dyndns.org" request = requests.get (ur_url) _result = request.text.split (':', 1) [1] your_ip = _result.split ('', 1) [0] print (your_ip)

34. бросить кости
Это традиционная игра «брось кости». Поскольку мы хотим рандомизировать числа, которые мы получаем от игральных костей, мы будем использовать модуль random.
Наименьшее и наибольшее количество игральных костей задаются как переменные (минимальное и максимальное). После этого мы используем цикл while, чтобы пользователь мог бросить кости еще раз.
Параметр roll again может быть установлен на любое значение; в данном случае это «да» или «y», но вы также можете добавить другие значения.
Сохраните сценарий в файл с именем roll_dice.py со следующим кодом.
# roll_dice.py import random def roll_dice (min_val, max_val): while True: print ("Dice Rolling ...") print (f "Ваше число {random.randint (min_val, max_val)}") result = input ("Вы хотите бросить кости? опять таки? (y / n) ") if result.lower () ==" n ": break roll_dice (1, 6)
После выполнения вышеуказанного сценария появится следующий вывод.

35. Поиск на вашем ПК определенных файлов
мы объясним, как пройти по дереву каталогов с помощью функции модуля os.walk () и сопоставить имена файлов с модулем fnmatch. Кроме того, в этой статье мы научим вас использовать функцию модуля os.walk () для обхода дерева каталогов и модуль fnmatch для сопоставления имен файлов.
Что такое OS.walk?
Он просматривает дерево сверху вниз или снизу вверх для создания имен файлов в дереве каталогов. Он возвращает набор из трех кортежей для каждого каталога в дереве с корнем на вершине каталога, включая сам верх, то есть dirpath, dirnames, filenames.
- dirpath # - это строка, представляющая путь к каталогу.
- dirnames # - это список имен подкаталогов в dirpath, которые не начинаются с букв «.» или «..».
- filenames # - это список имен файлов, не являющихся каталогами, в dirpath. Имена в списках не содержат компонентов пути.
Выполните os.path.join, чтобы получить полный путь, начинающийся с вершины, к файлу или каталогу в dirpath (dirpath, name). Для сопоставления шаблонов с подстановочными знаками используется модуль fnmatch.
Соответствие легко
fnmatch () сравнивает одно имя файла с шаблоном и возвращает логическое значение, которое указывает, совпадают они или нет. Если операционная система использует файловую систему с учетом регистра, при сравнении учитывается регистр.
Модуль fnmatch сравнивает имена файлов с шаблонами в стиле glob, которые используются оболочками Unix. Их не следует путать с более сложными законами нормального выражения. Это не что иное, как процесс сопоставления строк.
Если вы решите использовать другой тип шаблона, например регулярные выражения, просто поместите свои имена файлов с помощью операций с регулярными выражениями. Этот сценарий выполняет поиск на жестком диске всех файлов изображений с помощью команд 'os.walk' и 'fnmatch' с фильтрами.
Сохраните сценарий в файле с именем search_specific_files.py со следующим кодом.
# search_specific_files.py import fnmatch. import os root_path = '/ home / tuts / Documents' _pattern = '* .mp4' для _root, dirs, _files в os.walk (root_path): для _file в fnmatch.filter (_files, _pattern): print (os.path.join (_root, _file))

Здарова, щеглы, сегодня мы своими руками будем писать скрипт на Python. Нам понадобятся: интерпретатор Python 3 под «какая-там-у-вас-ОС», текстовый редактор с подсветкой синтаксиса, например, Sublime Text, Google, упаковка прамирацетама, бутылка минеральной воды и 60 минут свободного времени.
Перед тем как писать скрипт, мы должны определиться, что он вообще будет делать. Делать он будет следующее: получив на вход домен и диапазон IP-адресов, многопоточно проходить список этих адресов, совершать HTTP-запрос к каждому, в попытках понять, на каком же из них размещен искомый домен. Зачем это нужно? Бывают ситуации, когда IP-адрес домена закрыт Cloudflare, или Stormwall, или Incapsula, или еще чем-нибудь, WHOIS история не выдает ничего интересного, в DNS-записях такая же канитель, а, внезапно, один из поддоменов ресолвится в адрес из некоторой подсети, которая не принадлежит сервису защиты. И в этот момент нам становится интересно, вдруг и основной домен размещен в той же самой подсети.
Погнали, сразу выпиваем половину бутылки воды, и пишем следующий код:
|
1 2 3 4 5 6 7 8 9 10 11 12 13 14 15 16 17 18 19 20 21 22 23 24 25 26 27 28 29 30 31 32 33 34 35 36 37 38 39 40 41 42 43 44 45 46 47 48 49 50 51 52 53 54 55 56 57 58 59 60 61 62 63 64 65 66 67 68 69 70 71 72 73 74 75 76 77 78 79 80 81 82 83 84 85 86 87 88 89 90 91 92 93 94 95 96 97 98 99 100 |
import argparse import logging import coloredlogs import ssl import concurrent.futures import urllib.request from netaddr import IPNetwork from collections import deque VERSION = 0.1 def setup_args(): parser = argparse.ArgumentParser( description = ‘Domain Seeker v’ + str(VERSION) + ‘ (c) Kaimi (kaimi.io)’, epilog = », formatter_class = argparse.ArgumentDefaultsHelpFormatter ) parser.add_argument( ‘-d’, ‘—domains’, help = ‘Domain list to discover’, type = str, required = True ) parser.add_argument( ‘-i’, ‘—ips’, help = ‘IP list (ranges) to scan for domains’, type = str, required = True ) parser.add_argument( ‘—https’, help = ‘Check HTTPS in addition to HTTP’, action = ‘store_true’ ) parser.add_argument( ‘—codes’, help = ‘HTTP-codes list that will be considered as good’, type = str, default = ‘200,301,302,401,403’ ) parser.add_argument( ‘—separator’, help = ‘IP/Domain/HTTP-codes list separator’, type = str, default = ‘,’ ) parser.add_argument( ‘—include’, help = ‘Show results containing provided string’, type = str ) parser.add_argument( ‘—exclude’, help = ‘Hide results containing provided string’, type = str ) parser.add_argument( ‘—agent’, help = ‘User-Agent value for HTTP-requests’, type = str, default = ‘Mozilla/5.0 (Windows NT 6.1; WOW64; rv:40.0) Gecko/20100101 Firefox/40.1’ ) parser.add_argument( ‘—http-port’, help = ‘HTTP port’, type = int, default = 80 ) parser.add_argument( ‘—https-port’, help = ‘HTTPS port’, type = int, default = 443 ) parser.add_argument( ‘—timeout’, help = ‘HTTP-request timeout’, type = int, default = 5 ) parser.add_argument( ‘—threads’, help = ‘Number of threads’, type = int, default = 2 ) args = parser.parse_args() return args if __name__ == ‘__main__’: main() |
Ни одного комментария, какие-то import, непонятные аргументы командной строки и еще эти две последние строчки… Но будьте спокойны, все нормально, это я вам как мастер программирования на Python с 30-минутным стажем говорю. Тем более, как известно, Google не врет, а официальная документация по Python — это вообще неоспоримая истина.
Так что же мы все-таки сделали в вышеописанном фрагменте кода? Мы подключили модули для работы с аргументами коммандной строки, модули для логирования (потокобезопасные между прочим!), модуль для работы с SSL (для одной мелочи, связанной с HTTPS-запросами), модуль для создания пула потоков, и, наконец, модули для совершения HTTP-запросов, работы с IP-адресами и двухсторонней очередью (по поводу различных типов импорта можно почитать здесь).
После этого мы, в соответствии с документацией по модулю argparse, создали вспомогательную функцию, которая будет обрабатывать аргументы, переданные скрипту при запуске из командной строки. Как видите, в скрипте будет предусмотрена работа со списком доменов/IP-диапазонов, а также возможность фильтрации результатов по ключевым словам и по кодам состояния HTTP и еще пара мелочей, как, например, смена User-Agent и опциональная проверка HTTPS-версии искомого ресурса. Последние две строки в основном используются для разделения кода, который будет выполнен при запуске самого скрипта и при импортировании в другой скрипт. В общем тут все сложно, все так пишут. Мы тоже так будем писать. Можно было бы немного модифицировать этот код, например, добавив возврат разных статусов системе в зависимости от того, как отработала функция main, добавить argv в качестве аргумента, и так далее, но мы изучаем Python только 10 минут и ленимся вчитываться в документацию.
Делаем перерыв и выпиваем глоток освежающей минеральной воды.
Поехали дальше.
|
1 2 3 4 5 6 7 8 9 10 11 12 13 14 15 16 17 18 19 20 21 22 23 24 25 26 27 28 29 30 31 32 33 34 35 36 37 38 39 40 41 42 43 44 45 46 47 48 49 50 51 |
def main(): # Обрабатываем аргументы и инициализируем логирование # с блекджеком и цветными записями args = setup_args() coloredlogs.install() # Сообщаем бесполезную информацию, а также запускаем цикл проверки logging.info(«Starting…») try: check_loop(args) except Exception as exception: logging.error(exception) logging.info(«Finished») def check_loop(args): # Создаем пул потоков, еще немного обрабатываем переданные аргументы # и формируем очередь заданий with concurrent.futures.ThreadPoolExecutor(max_workers = args.threads) as pool: domains = args.domains.split(args.separator) ips = args.ips.split(args.separator) codes = args.codes.split(args.separator) tasks = deque([]) for entry in ips: ip_list = IPNetwork(entry) for ip in ip_list: for domain in domains: tasks.append( pool.submit( check_ip, domain, ip, args, codes ) ) # Обрабатываем результаты и выводим найденные пары домен-IP for task in concurrent.futures.as_completed(tasks): try: result = task.result() except Exception as exception: logging.error(exception) else: if result != None: data = str(result[0]) if( ( args.exclude == None and args.include == None ) or ( args.exclude and args.exclude not in data ) or ( args.include and args.include in data ) ): logging.critical(«[+] « + args.separator.join(result[1:])) |
В коде появился минимум комментариев. Это прогресс. Надо войти в кураж (не зря мы заготовили прамирацетам) и дописать одну единственную функцию, которая будет осуществлять, непосредственно, проверку. Ее имя уже упомянуто в коде выше: check_ip.
30 минут спустя
Хорошо-то как. Не зря я говорил, что понадобится час времени. Продолжим.
|
1 2 3 4 5 6 7 8 9 10 11 12 13 14 15 16 17 18 19 20 21 22 23 24 25 26 27 28 29 30 31 32 33 34 35 36 37 38 39 40 41 42 43 44 45 |
def check_ip(domain, ip, args, codes): # Преобразуем IP из числа в строку # Магическая code-flow переменная для совершения двух проверок # И бесполезное логирование ip = str(ip) check_https = False logging.info(«Checking « + args.separator.join([ip, domain])) while True: # Задаем порт и схему для запроса в зависимости от магической переменной schema = ‘https://’ if check_https else ‘http://’; port = str(args.https_port) if check_https else str(args.http_port) request = urllib.request.Request( schema + ip + ‘:’ + port + ‘/’, data = None, headers = { ‘User-Agent’: args.agent, ‘Host’: domain } ) # Совершаем запрос, и если получаем удовлетворительный код состояни HTTP, # то возвращаем содержимое ответа сервера, а также домен и IP try: response = urllib.request.urlopen( request, data = None, timeout = args.timeout, context = ssl._create_unverified_context() ) data = response.read() return [data, ip, domain] except urllib.error.HTTPError as exception: if str(exception.code) in codes: data = exception.fp.read() return [data, ip, domain] except Exception: pass if args.https and not check_https: check_https = True continue return None |
В общем-то весь наш скрипт готов. Приступаем к тестированию.
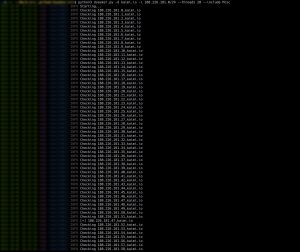
Неожиданно узнаем, что у блога есть альтернативный IP-адрес. И действительно:
|
curl —i ‘http://188.226.181.47/’ —header ‘Host: kaimi.io’ |
|
HTTP/1.1 301 Moved Permanently Server: nginx/1.4.6 (Ubuntu) Date: Sun, 02 Oct 2016 13:52:43 GMT Content—Type: text/html Content—Length: 193 Connection: keep—alive Location: https://kaimi.io/ <html> <head><title>301 Moved Permanently</title></head> <body bgcolor=«white»> <center><h1>301 Moved Permanently</h1></center> <hr><center>nginx/1.4.6 (Ubuntu)</center> </body> </html> |
Однако:
|
curl —i ‘https://188.226.181.47/’ —header ‘Host: kaimi.io’ |
|
curl: (51) SSL: certificate subject name (*.polygraph.io) does not match target host name ‘188.226.181.47’ |
Какой-то левый хост обрабатывает запросы. Почему? Потому что это прокси, который реагирует на содержимое заголовка Host. В общем скрипт готов, по крайней мере альфа-версия скрипта. Если вам понравилось — подписывайтесь, ставьте лайки, шлите pull-реквесты на github.
Python — невероятно гибкий язык программирования, который хорошо интегрируется с существующими программами. Немало Python-кода написано в виде скриптов и интерфейсов командной строки (CLI).
Инструменты и интерфейсы командной строки — эффективная вещь, так как они позволяют автоматизировать практически всё что угодно. Как следствие, эти интерфейсы с течением времени могут стать довольно сложными.
Обычно всё начинается с простого скрипта на Python, который что-то делает. Например, получает доступ к веб-API и выводит результат в консоль:
# print_user_agent.py
import requests

json = requests.get('http://httpbin.org/user-agent').json()
print(json['user-agent'])
Вы можете запустить этот скрипт с помощью команды python3 print_user_agent.py, и он выведет имя user-agent, использованного для вызова API.
Как и было сказано, довольно простой скрипт.
Но что делать, когда подобная программа растёт и становится всё более сложной?
Решением этого вопроса мы сегодня и займёмся. Вы узнаете об основах написания интерфейсов командной строки на Python и о том, как click позволяет упростить этот процесс.
Используя эти знания, мы шаг за шагом перейдём от простого скрипта к интерфейсу командной строки с аргументами, опциями и полезными инструкциями по использованию. Всё это мы сделаем с помощью библиотеки click.
К концу этой статьи вы будете знать:
- Почему click — лучшая альтернатива argparse и optparse;
- Как с его помощью создать простой CLI;
- Как добавить обязательные аргументы командной строки в ваши скрипты;
- Как парсить флаги и опции командной строки;
- Как сделать ваши консольные приложения более удобными, добавив справочный текст.
Вы увидите, как сделать всё это с минимальным количеством шаблонного кода.
Примечание переводчика Код в данной статье написан на Python 3.6, работоспособность на более ранних версиях не гарантируется.
Итак, начнём!
Код выше — всего лишь пример, не очень полезный в реальной жизни. На самом деле скрипты бывают куда более сложные. Возможно, вы имели опыт с ними и знаете, что они могут быть важной частью нашей повседневной работы: некоторые скрипты остаются на протяжении всего времени жизни проекта, для которого они были написаны. Некоторые начинают приносить пользу другим командам или проектам. У них даже может расширяться функционал.
В этих случаях важно сделать скрипты более гибкими и настраиваемыми с помощью параметров командной строки. Они позволяют указать имя сервера, учётные данные или любую другую информацию скрипту.
Здесь приходят на выручку такие модули, как optparse и argparse, которые делают нашу жизнь на порядок проще. Но прежде чем мы с ними познакомимся, давайте разберёмся с терминологией.
Основы интерфейса командной строки
Интерфейс командной строки (CLI) начинается с имени исполняемого файла. Вы вводите имя в консоль и получаете доступ к главной точке входа скрипта, такого как pip.
В зависимости от сложности CLI обычно есть определённые параметры, которые вы можете передавать скрипту:
- Аргумент, который является обязательным параметром. Если его не передать, то CLI вернёт ошибку. Например, в следующей команде click является аргументом:
pip install click. - Опция — необязательный параметр, который объединяет имя и значение, например
--cache-dir ./my-cache. Вы говорите CLI, что значение./my-cacheдолжно использоваться как директория для кэша. - Флаг, который включает или выключает определённый сценарий. Вероятно, самым частым является
--help. Вы только указываете имя, а CLI самостоятельно интерпретирует значение.
С более сложными CLI, такими как pip или Heroku CLI, вы получаете доступ к набору функций, которые собраны под главной точкой входа. Они обычно называются командами или подкомандами.
Возможно, вы уже использовали CLI, когда устанавливали Python-библиотеку с помощью команды pip install <имя пакета>. Команда install говорит CLI, что вы хотите использовать функцию установки пакета, и даёт вам доступ к параметрам, характерным для этой функции.
Пакеты для работы с командной строкой, доступные в стандартной библиотеке Python 3.x
Добавление команд и параметров в ваши скрипты может сделать их значительно лучше, но парсить командную строку не так просто, как может показаться. Однако вместо того, чтобы пытаться самостоятельно решить эту проблему, лучше воспользоваться одним из многих пакетов, которые сделали это за вас.
Два наиболее известных пакета для этого — optparse и argparse. Они являются частью стандартной библиотеки Python и добавлены туда по принципу «всё включено».
По большей части они делают одно и то же и работают схожим образом. Главное отличие заключается в том, что optparse не используется начиная с Python 3.2, и argparse считается стандартом для создания CLI в Python.
Вы можете узнать о них больше в документации Python, но, чтобы иметь представление, как выглядит скрипт с argparse, посмотрите на пример ниже:
import argparse

parser = argparse.ArgumentParser(description='Process some integers.')
parser.add_argument('integers', metavar='N', type=int, nargs='+',
                    help='an integer for the accumulator')
parser.add_argument('--sum', dest='accumulate', action='store_const',
                    const=sum, default=max,
                    help='sum the integers (default: find the max)')

args = parser.parse_args()
print(args.accumulate(args.integers))
click против argparse: лучшая альтернатива?
Вероятно, вы смотрите на этот код и думаете: «Что это всё значит?» И это является одной из проблем argparse: код с ним неинтуитивен и сложночитаем.
Поэтому вам может понравиться click.
Click решает ту же проблему, что и optparse и argparse, но немного иначе. Он использует декораторы, поэтому ваши команды должны быть функциями, которые можно обернуть этими декораторами.
С click легко создавать многофункциональный CLI с небольшим количеством кода. И этот код будет легко читаться, даже когда ваш CLI вырастет и станет более сложным.
Пишем простой CLI на Python с помощью click
Вдоволь поговорив о CLI и библиотеках, давайте взглянем на пример, чтобы понять, как написать простой CLI с click. Как и в первом примере, мы создаём простой CLI, который выводит результат в консоль. Это несложно:
# cli.py
import click

@click.command()
def main():
    print("I'm a beautiful CLI ✨")

if __name__ == "__main__":
    main()
Не пугайтесь последних двух строк: это то, как Python запускает функцию main при исполнении файла как скрипта.
Как вы видите, всё, что нам нужно сделать — создать функцию и добавить к ней декоратор @click.command(). Он превращает функцию в команду, которая является главной точкой входа нашего скрипта. Теперь вы можете запустить скрипт через командную строку и увидеть что-то вроде этого:
$ python3 cli.py
I'm a beautiful CLI ✨
Что в click здорово, так это то, что мы получаем некоторые дополнительные возможности просто так. Мы не реализовывали справочную функцию, однако вы можете добавить флаг --help и увидеть базовое сообщение:
$ python3 cli.py --help
Usage: cli.py [OPTIONS]

Options:
  --help  Show this message and exit.
Более реалистичный пример CLI на Python с использованием click
Теперь, когда вы знаете, как click упрощает написание CLI, давайте взглянем на более реалистичный пример. Мы напишем программу, которая позволяет нам взаимодействовать с веб-API.
API, который мы дальше будем использовать, — OpenWeatherMap API. Он предоставляет информацию о текущей погоде, а также прогноз на пять дней для определённого местоположения. Мы начнём с тестового API, который возвращает текущую погоду для места.
Прежде чем мы начнём писать код, давайте познакомимся с API. Для этого можно использовать сервис HTTPie, включая онлайн-терминал.
Давайте посмотрим, что случится, когда мы обратимся к API с Лондоном в качестве местоположения:
$ http --body GET http://samples.openweathermap.org/data/2.5/weather
  q==London
  appid==b1b15e88fa797225412429c1c50c122a1
{
    "base": "stations",
    "clouds": {
        "all": 90
    },
    "cod": 200,
    "coord": {
        "lat": 51.51,
        "lon": -0.13
    },
    "dt": 1485789600,
    "id": 2643743,
    "main": {
        "humidity": 81,
        "pressure": 1012,
        "temp": 280.32,
        "temp_max": 281.15,
        "temp_min": 279.15
    },
    "name": "London",
    "sys": {
        "country": "GB",
        "id": 5091,
        "message": 0.0103,
        "sunrise": 1485762037,
        "sunset": 1485794875,
        "type": 1
    },
    "visibility": 10000,
    "weather": [
        {
            "description": "light intensity drizzle",
            "icon": "09d",
            "id": 300,
            "main": "Drizzle"
        }
    ],
    "wind": {
        "deg": 80,
        "speed": 4.1
    }
}
Если вы смущены наличием API-ключа в примере сверху, не переживайте, это тестовый API-ключ, предоставляемый сервисом.
Более важное наблюдение заключается в том, что мы отправляем два параметра (обозначаемые == при использовании HTTPie), чтобы узнать текущую погоду:
q— место, в котором мы хотим узнать погоду;appid— наш API-ключ.
Это позволяет нам создать простую реализацию на Python с использованием библиотеки requests (опустим обработку ошибок и неудачных запросов для простоты):
import requests

SAMPLE_API_KEY = 'b1b15e88fa797225412429c1c50c122a1'

def current_weather(location, api_key=SAMPLE_API_KEY):
    url = 'http://samples.openweathermap.org/data/2.5/weather'

    query_params = {
        'q': location,
        'appid': api_key,
    }

    response = requests.get(url, params=query_params)

    return response.json()['weather'][0]['description']
Эта функция делает простой запрос к API, используя два параметра. В качестве обязательного аргумента она принимает location (местоположение), которое должно быть строкой. Также мы можем указать API-ключ, передавая параметр api_key при вызове функции. Это необязательно, так как по умолчанию используется тестовый ключ.
И вот мы видим текущую погоду в Python REPL:
>>> current_weather('London')
'light intensity drizzle'  # впрочем, ничего нового ?
Парсим обязательные параметры с click
Простая функция current_weather позволяет нам создать CLI с местоположением, указанным пользователем. Это должно работать примерно так:
$ python3 cli.py London
The weather in London right now: light intensity drizzle.
Как вы, возможно, догадались, местоположение — это аргумент, поскольку оно является обязательным параметром для нашего погодного CLI.
Как нам сделать это при помощи click? Всё довольно просто, мы используем декоратор под названием argument. Кто бы мог подумать?
Давайте возьмём наш предыдущий пример и слегка изменим его, добавив аргумент location:
@click.command()
@click.argument('location')
def main(location):
    weather = current_weather(location)
    print(f"The weather in {location} right now: {weather}.")
Если этот print выглядит для вас странно, не волнуйтесь — это новый способ форматирования строк в Python 3.6+, который называется f-форматированием.
Как вы видите, всё, что нам нужно сделать, это добавить дополнительный декоратор к нашей функции main и дать ему имя. Click использует имя в качестве имени аргумента, переданного обёрнутой функции.
Примечание переводчика Имя аргумента, переданное click, должно совпадать с именем аргумента в объявлении функции.
В нашем случае значение аргумента командной строки location будет передано функции main в качестве аргумента location. Логично, не так ли?
Также вы можете использовать тире в именах, например api-key, которые click переведёт в snake case для имени аргумента в функции, например main(api_key).
Реализация main просто использует нашу функцию current_weather для получения погоды в указанном месте. И затем мы с помощью print выводим полученную информацию.
Готово!
Парсим опциональные параметры с click
Как вы, возможно, догадались, тестовый API ограничивает нас в возможностях. Поэтому, прежде чем мы продолжим, зарегистрируйтесь и получите настоящий API-ключ.
Первое, что нам нужно изменить, — URL, откуда берутся данные о текущей погоде. Это можно сделать, изменив значение переменной url в функции current_weather на URL, указанный в документации OpenWeatherMap:
def current_weather(location, api_key=SAMPLE_API_KEY):
    url = 'https://api.openweathermap.org/data/2.5/weather'

    # дальше всё остаётся как было
    ...
Это изменение приведёт к неработоспособности нашего CLI, так как указанный API-ключ не работает с реальным API. Поэтому давайте добавим новый параметр в наш CLI, который позволит нам указывать API-ключ. Но сначала мы должны решить, будет ли этот параметр аргументом или опцией. Мы сделаем его опцией, так как добавление параметра вроде --api-key делает его более явным и говорящим за себя.
Мы хотим, чтобы наша программа запускалась таким образом:
$ python3 cli.py --api-key  London
The weather in London right now: light intensity drizzle.
Проще простого. Посмотрим, как добавить опцию к нашей существующей команде:
@click.command()
@click.argument('location')
@click.option('--api-key', '-a')
def main(location, api_key):
    weather = current_weather(location, api_key)
    print(f"The weather in {location} right now: {weather}.")
И снова мы добавляем декоратор к нашей функции main. В этот раз мы используем декоратор с говорящим именем @click.option и указываем имя для нашей опции, начинающееся с двух тире. Как вы видите, мы также можем указать сокращение для нашей опции с одним тире, чтобы сэкономить пользователю немного времени.
Как было сказано ранее, click создаёт аргумент для передачи в функцию main из длинного варианта имени. В случае с опцией он убирает впередистоящие тире и переводит её в snake case. Таким образом, --api-key становится api_key.
Чтобы всё заработало, осталось лишь передать API-ключ в функцию current_weather.
Мы добавили возможность указывать свой собственный ключ и проверять погоду в любом месте:
$ python3 cli.py --api-key  Canmore
The weather in Canmore right now: broken clouds.
Добавляем автоматически генерируемые инструкции по использованию
Можете себя похвалить, вы создали отличный небольшой CLI почти без шаблонного кода. Однако прежде чем вы решите отдохнуть, давайте убедимся, что новый пользователь будет знать, как пользоваться нашим CLI, путём добавления документации. Не бойтесь, всё будет просто.
Сначала давайте проверим, что выведет флаг --help после всех сделанных изменений. Довольно неплохо, учитывая что мы не приложили к этому никаких усилий:
$ python3 cli.py --help
Usage: cli.py [OPTIONS] LOCATION

Options:
  -a, --api-key TEXT
  --help              Show this message and exit.
Первое, что нужно исправить, это добавить описание для нашей опции с API-ключом. Всё, что нам для этого нужно сделать, — добавить справочный текст в декоратор @click.option:
@click.command()
@click.argument('location')
@click.option(
    '--api-key', '-a',
    help='your API key for the OpenWeatherMap API',
)
def main(location, api_key):
    ...
Второе (и последнее), что мы сделаем, — добавим документацию для всей click-команды. Самый простой и самый питонический способ сделать это — добавить строку документации в нашу функцию main. Да, нам в любом случае нужно сделать это, поэтому это не лишняя работа:
...
def main(location, api_key):
    """
    A little weather tool that shows you the current weather in a LOCATION of
    your choice. Provide the city name and optionally a two-digit country code.
    Here are two examples:

    1. London,UK

    2. Canmore

    You need a valid API key from OpenWeatherMap for the tool to work. You can
    sign up for a free account at https://openweathermap.org/appid.
    """
    ...
Сложив всё вместе, мы получаем хороший вывод для нашего инструмента:
$ python3 cli.py --help
Usage: cli.py [OPTIONS] LOCATION

  A little weather tool that shows you the current weather in a LOCATION of
  your choice. Provide the city name and optionally a two-digit country
  code. Here are two examples:

  1. London,UK

  2. Canmore

  You need a valid API key from OpenWeatherMap for the tool to work. You can
  sign up for a free account at https://openweathermap.org/appid.

Options:
  -a, --api-key TEXT  your API key for the OpenWeatherMap API
  --help              Show this message and exit.
Подводим итоги
Итак, в этом уроке мы рассмотрели много всего. Можете гордиться собой, вы написали свой собственный CLI, и всё это с минимальным количеством шаблонного кода! Исходный код ниже доказывает это. Не стесняйтесь использовать его для собственных экспериментов:
import click
import requests

SAMPLE_API_KEY = 'b1b15e88fa797225412429c1c50c122a1'


def current_weather(location, api_key=SAMPLE_API_KEY):
    url = 'https://api.openweathermap.org/data/2.5/weather'

    query_params = {
        'q': location,
        'appid': api_key,
    }

    response = requests.get(url, params=query_params)

    return response.json()['weather'][0]['description']


@click.command()
@click.argument('location')
@click.option(
    '--api-key', '-a',
    help='your API key for the OpenWeatherMap API',
)
def main(location, api_key):
    """
    A little weather tool that shows you the current weather in a LOCATION of
    your choice. Provide the city name and optionally a two-digit country code.
    Here are two examples:
    1. London,UK
    2. Canmore
    You need a valid API key from OpenWeatherMap for the tool to work. You can
    sign up for a free account at https://openweathermap.org/appid.
    """
    weather = current_weather(location, api_key)
    print(f"The weather in {location} right now: {weather}.")


if __name__ == "__main__":
    main()
Перевод статьи «Writing Python Command-Line Tools With Click»
In this article, you will find a comprehensive list of Python code examples that cover most of the basics.
This list of 100 useful Python examples is intended to support someone who is:
- Preparing for a coding interview.
- Preparing for an examination.
- Exploring what programming is.
- Teaching Python and wants to find useful examples
Without further ado, let’s get coding!
1. Print ‘Hello World!’ in the Console
The simplest and probably the most common example of Python is the “Hello world” program.
Here is how it looks:
print("Hello World!")
Output:
Hello World!
2. Ask User Their Name and Greet Them
To ask for user input in Python, use the input() function.
For instance, you can store user input to a variable and use that variable in a greeting.
Here is the code:
name = input("Please, enter your name: ")

print(f"Hello, {name}!")
Output:
Please, enter your name: Jack
Hello, Jack!
3. Create a List of Names in Python
To create a list in Python, add comma-separated values between braces.
For instance, here is a list of names in Python:
names = ["Alice", "Bob", "Charlie"]
4. Merge Two Lists
Given two or more lists in Python, you may want to merge them into a single list.
This is easy in Python. Use the + operator you would use when summing up numbers. In the case of lists, this merges the lists into one.
For instance:
numbers1 = [1, 2, 3]
numbers2 = [4, 5, 6]

merged = numbers1 + numbers2

print(merged)
Output:
[1, 2, 3, 4, 5, 6]
5. Loop Through a List of Names and Print Each
A powerful feature of Python lists is that they are iterable.
In other words, you can easily loop through the items on the list to do something for them.
For example, let’s create a list of names and print each name into the console:
names = ["Alice", "Bob", "Charlie"]

for name in names:
    print(name)
Output:
Alice
Bob
Charlie
6. Get Rid of Spaces in Python String
To get rid of spaces in a Python string, replace all blank spaces with an empty string.
You can do this with the replace() method.
For instance:
sentence = "Hello, this is a sentence."

no_spaces = sentence.replace(" ", "")

print(no_spaces)
Output:
Hello,thisisasentence.
7. Calculate the Number of Spaces in a String
A Python string has a built-in method count(). You can use it to count how many times a substring occurs in a string.
For instance, let’s calculate how many blank spaces there are in a string:
sentence = "Hello, this is a sentence."

num_spaces = sentence.count(" ")

print(f"There are {num_spaces} spaces in the sentence.")
Output:
There are 4 spaces in the sentence.
8. Check If a String Is a Palindrome
To check if a string is a palindrome in Python, that is, the same when reversed:
- reverse the string and compare it with the original string.
For example:
def is_palindrome(word):
    if word == word[::-1]:
        print(f"The word {word} is a palindrome.")
    else:
        print(f"The word {word} is not a palindrome.")

is_palindrome("redivider")
Output:
The word redivider is a palindrome.
9. Find a Substring in a String
To find a specific substring inside a string in Python, use the built-in find() method of a string.
For example:
sentence = "This is just a test"
target = "just"

idx = sentence.find(target)

print(f"The word '{target}'' starts at index {idx} in '{sentence}'")
Output:
The word 'just' starts at index 8 in 'This is just a test'
10. Add Two Numbers
To create a function that adds two numbers:
- Create a function that takes two number arguments
- Sum up the arguments
- Return the result
For example:
def sum(a, b):
    return a + b

print(sum(1,2))
Output:
3
11. Find Maximum of Two Numbers in Python
To find the maximum value between two (or more) numbers in Python, use the built-in max() function.
For instance:
n1 = 10
n2 = 100

maximum = max(n1, n2)

print(f"The maximum number is {maximum}")
Output:
The maximum number is 100
12. Find the Minimum of Two Numbers in Python
To find the minimum value between two (or more) numbers in Python, use the built-in min() function.
For instance:
n1 = 10
n2 = 100

minimum = min(n1, n2)

print(f"The minimum number is {minimum}")
Output:
The minimum number is 10
13. Find the Average of a List of Numbers in Python
To compute the average of something, you need to know two things:
- The number of elements.
- The sum of all the elements.
Given these, you can calculate the average by sum/length.
In Python, you can do it like this:
nums = [1, 2, 3, 4, 5]

total = sum(nums)
length = len(nums)

average = total / length

print(f"The average of {nums} is {average}")
Output:
The average of [1, 2, 3, 4, 5] is 3.0
14. Check If a Year Is a Leap Year in Python
By definition, a leap year is a year that:
- Is divisible by 4…
- And not divisible by 100…
- Unless also divisible by 400.
In Python, you can write a function that implements these three checks to find if a given year is a leap year.
Here is how:
# A function that checks if a year is a leap year
def is_leap(year):
    return year % 4 == 0 and (year % 100 != 0 or year % 400 == 0)

# Example
year = 2020

if is_leap(year):
    print(f"The year {year} is a leap year")
else:
    print(f"The year {year} is not a leap year")
Output:
The year 2020 is a leap year
15. Find The Maximum Value of a Python Dictionary
To find the maximum value of a dictionary, you need:
- To access all the values of the dictionary using the
dict.values()method. - Find the greatest value using
max()function.
data = {"Alice": 23, "Bob": 54, "Charlie": 12}

ages = data.values()

max_age = max(ages)

print(f"The oldest person is {max_age} years old.")
Output:
The oldest person is 54 years old.
16. Merge Two Python Dictionaries
To merge two dictionaries in Python, use the double-asterisk notation to unpack the dictionary items into one dictionary.
For example, here is a function that does it for you:
# Merger function
def merge(d1, d2):
    return {**d1, **d2}

# Example code
data1 = {"Alice": 23, "Bob": 32}
data2 = {"Charlie": 77, "David": 19}

both = merge(data1, data2)

print(both)
Output:
{'Alice': 23, 'Bob': 32, 'Charlie': 77, 'David': 19}
17. Check If a Key Exists in a Python Dictionary
To check if a key exists in a dictionary, you can use the in operator.
For instance:
data1 = {"Alice": 23, "Bob": 32}

exists = "Alice" in data1

print(exists)
Output:
True
18. Delete an Element from a Python Dictionary
To delete an entry from a dictionary, use the del operator.
For example:
data1 = {"Alice": 23, "Bob": 32}

del data1["Alice"]

print(data1)
Output:
{'Bob': 32}
Learn more about dictionaries in Python.
19. Find the Distance Between Two 2D Points in Python
To calculate the distance between two points, use the Pythagorean theorem.
For example, here is a function that calculates the distance between two 2D points.
from math import sqrt

def distance(p1, p2):
    return sqrt((p1[0] - p2[0]) ** 2 + (p1[1] - p2[1]) ** 2)

start = (1, 1)
end = (2, 2)

dist = distance(start, end)

print(f"The distance between {start} and {end} is {dist}")
Output:
The distance between (1, 1) and (2, 2) is 1.4142135623730951
Notice that there is a built-in function dist() in the math module that does the exact same for you:
from math import sqrt, dist

start = (1, 1)
end = (2, 2)

dist = dist(start, end)

print(f"The distance between {start} and {end} is {dist}")
Output:
The distance between (1, 1) and (2, 2) is 1.4142135623730951
20. Read a File Line by Line in Python
To open a file, and read it line by line in Python, you need to:
- Open a file behind a path.
- Read and store the lines of the file.
- Close the file.
To do this, use a context manager. A context manager automatically closes the file once processing has been completed.
To open the file with a context manager, use the with statement.
Given a file example.txt in the same folder that looks like this:
This is a test
The file contains a bunch of words
Bye!
You can read the file line by line with a context manager using the following code:
with open("example.txt", "r") as file:
    lines = file.readlines()
    for line in lines:
        print(line)
Output:
This is a test

The file contains a bunch of words

Bye!
21. Check If a File Contains a Specific Word
To check if a file has a specific word, you need to:
- Open the file behind the path.
- Read the contents of the file in memory.
- Test if a specific word is found in the content.
- Close the file.
To do this, use a context manager. A context manager automatically closes the file once processing has been completed.
To open the file with a context manager, use the with statement.
Given a file called example.txt with contents like this:
This is a test
The file contains a bunch of words
Bye!
You can check if a specific word exists in that file with this piece of code:
with open("example.txt", "r") as file:
    has_word = "test" in file.read()
    if has_word:
        print("The file has the word 'test'")
Output:
The file has the word 'test'
22. Count the Frequency of a Word in a File
To count the frequency of a specific word in a text file in Python:
- Open the file behind the path.
- Read the contents of the file in memory.
- Count the number of occurrences of a string.
- Close the file.
To do this, use a context manager. A context manager automatically closes the file once processing has been completed.
To open the file with a context manager, use the with statement.
Given a file called example.txt with contents like this:
This is a test
The file contains a bunch of test words
Bye!
You can check many times the word “test” occurs in a file by:
with open("example.txt", "r") as file:
    n = file.read().count("test")
    print(n)
Output:
2
23. Swap Two Values without a Third
This is one is a classic examination question.
Is there a way to swap two variables without a third helper variable?
The answer is yes. You can use tuple unpacking to achieve this.
For example:
a = 1
b = 2

a, b = b, a

print(a, b)
Output:
2 1
24. Check If a Given Number Is a Prime Number
A prime number is any positive non-zero number that is only divisible by itself or by 1.
For example, 11 is a prime number.
To create a Python program that finds if a number is a prime number, you need to:
- Have a target number.
- Ensure the number is more than 1.
- Loop through all the numbers that are less than half the target number.
- Check if any number divides the target evenly.
For example, to check if 11 is a prime number, you need to check if any of the following numbers divides it evenly: 2, 3, 4, 5.
Here is a Python program that checks if a given number is a prime number:
def is_prime(number):
    if number > 1:
        for i in range(2, int(number / 2) + 1):
            if number % i == 0:
                print(f"{number} is not a prime number.")
                break
        else:
            print(f"{number} is a prime number.")
    else:
        print(f"{number} is not a prime number.")

is_prime(11)
is_prime(7)
is_prime(16)
Output:
11 is a prime number.
7 is a prime number.
16 is not a prime number.
25. Calculate Simple Interest in Python
Simple Interest is calculated using the following formula:
SI = (P × R × T) / 100
Where:
- P = Principal amount of money.
- R = Rate of Interest (e.g. 7%).
- T = Time period.
The principal is the sum of money that remains constant every year in the case of simple interest.
Here is a Python program to figure out the simple interest:
def simple_interest(p, t, r):
    """
    p = principal amount
    t = time interval
    r = rate of interest

    si = simple interest given p, t, r
    """

    si = (p * t * r)/100

    print("The Simple Interest is", si)
    return si

simple_interest(1200, 10, 7)
Output:
The Simple Interest is 840.0
This returns the earnings during the period. To get the total amount of money, add this result to the principal amount.
26. Ask a Word from the User and Reverse It
In Python, you can reverse a string by calling string[::-1].
For example, to ask the user a word and reverse it, use the following piece of code:
word = input("Give a word, I will reverse it: ")

print(word[::-1])
Example run:
Give a word, I will reverse it: testing
gnitset
27. Ask User a Sequence of Numbers and Reverse Them
To create a program that asks the user for a sequence of numbers and reverses it:
- Ask user for comma-separated number input.
- Split the resulting string by commas. This creates a list of strings that represent numbers.
- Convert the list of number strings to a list of integers.
- Call the built-in
reversed()function on the list of integers to reverse the order.
Here is the code for you:
# 1
num_strs = input("Give a comma-separated numbers: ")

# 2
num_str_list = num_strs.split(",")

# 3
num_ints = [int(num_str) for num_str in num_str_list]

# 4
reversed_nums = list(reversed(num_ints))

print(reversed_nums)
Output:
Give a comma-separated numbers: 1,2,3
[3, 2, 1]
28. Calculate BMI Index in Python
BMI or Body Measurement Index measures leanness or corpulence given height and weight.
The formula for BMI index given height in centimeters and weight in kilos is:
BMI = weight / (height/100)²
Here is a Python program that asks the user for weight and height and outputs their BMI:
weight = float(input("Enter your weight in kilos: "))
height = float(input("Enter your height in centimeters: "))

BMI = weight / (height/100)**2

print(f"Your weigh {weight}kg and you are {height}cm tall. This gives you BMI index of {BMI}")
Example input:
Enter your weight in kilos: 92
Enter your height in centimeters: 191
Your weigh 92.0kg and you are 191.0cm tall. This gives you BMI index of 25.218606946081522
29. Emit a Beep Sound in Python
On Windows, you can use the winsound module of Python to make a beeping sound.
For example, here is a program that produces a single high-pitch beep that lasts one second:
import winsound

frequency = 2500  # High pitch 2500HZ beep
duration = 1000  # Duration of the beep is 1s

winsound.Beep(frequency, duration)
30. Copy One File to Another in Python
Given a file called example.txt in your project’s folder, you can copy-paste its contents to another.txt file using shutil module’s copyfile function.
from shutil import copyfile

copyfile("example.txt", "another_example.txt")
31. Compute the Factorial of an Integer in Python
In mathematics, factorial is marked with an exclamation mark. Factorial means to multiply the number by all numbers from 1 to the number.
The factorial tells you how many ways there is to arrange n elements.
For example, to figure out how many ways there are to arrange 5 persons in a line, calculate the factorial of five: 5! = 5*4*3*2*1 = 120.
Here is a Python program that calculates the factorial given a number input. It starts with the target number. Then it subtracts one from the target and multiplies the target by this number. It does this until number 1 is reached.
def factorial(number):
    result = 1
    while number >= 1:
        result *= number
        number -= 1
    return result

print(factorial(5))
Output:
120
32. Find the Longest Word in a List
Python has a built-in function max(). If you call this function on a list of values, by default it returns the greatest element.
- In the case of numbers, it returns the largest number.
- In the case of strings, it returns the string with the highest ASCII value. Not the one with the greatest length!
To make the max() function return the longest string, you need to specify the max() function a second argument, key=len. This shows the max() function that we are interested in the maximum length, not the maximum ASCII value.
For instance:
names = ["Alice", "Bob", "Charlie"]

longest = max(names, key=len)

print(f"The longest name is {longest}")
Output:
The longest name is Charlie
33. Create Pyramid from Asterisks ‘*’
An asterisk pyramid may not be the most useful example, but it surely tests your understanding of loops and maths in Python.
To create a pyramid, you need to start with 1 asterisk. On the next line you have 3, then 5,7, and so on. In other words, the number of asterisks is 2*i + 1, where i is the row number (or the height) of the pyramid.
Now you got the number of asterisks.
Then you need to know how many spaces you need to the left of the asterisks to make it look like a pyramid.
In the first row, the number of spaces is the same as the height of the pyramid. Then on the second row, it is one less. On the third one less again. So you need to add one less space for each row of asterisks. In other words, the number of spaces is h-i-1, where h is the pyramid height and i is the row number.
def pyramid(rows):
    for i in range(rows):
        print(" "*(rows-i-1) + "*"*(2*i+1))

pyramid(12)
Output:
           *
          ***
         *****
        *******
       *********
      ***********
     *************
    ***************
   *****************
  *******************
 *********************
***********************
See also how to create a diamond pattern with asterisks.
34. Find the Intersection of Two Lists in Python
An intersection between two groups refers to the common elements among the groups.
To find the intersection between two lists:
- Loop through the other of the lists.
- Store the elements that are in the other list as well.
- Return the stored elements.
You can use a for loop, but let’s use a more compact expression called list comprehension. This is a shorthand of the for loop:
# A function that finds the intersection between two lists
def intersection(l1, l2):
    return [element for element in l1 if element in l2]

# Example run
names1 = ["Alice", "Bob", "Charlie"]
names2 = ["Alice", "Bob", "David", "Emmanuel"]

names_in_common = intersection(names1, names2)

print(f"Common names among the lists are {names_in_common}")
Output:
Common names among the lists are ['Alice', 'Bob']
35. Convert Celcius to Fahrenheit with Python
To convert temperatures from Celcius to Fahrenheit, use the following formula:
F = (9/5) * celcius + 32
To create a Python program to do this, write a function that:
- Takes a temperature measured in Celcius.
- Returns temperature in Fahrenheit with the help of the above formula.
Here is the code:
def as_fahrenheit(celcius):
    return 9/5 * celcius + 32

c = 37
f = as_fahrenheit(c)

print(f"{c} is {f} in Fahrenheits")
Output:
37 is 98.60000000000001 in Fahrenheits
36. Convert Kilograms to Pounds in Python
To convert weight from kilos to pounds, use the following formula:
p = kilos * 2.2048
To create a Python program to do this, write a function that:
- Takes a mass in kilos.
- Returns the weight in pounds with the help of the above formula.
Here is the code:
def as_pounds(kilos):
    return 2.2048 * kilos

kg = 80
pounds = as_pounds(kg)

print(f"{kg} is {pounds} in pounds")
Output:
80 is 176.38400000000001 in pounds
37. Count the Frequency of Each Letter in a String
To create a character to frequency mapping in Python:
- Define a target string.
- Create an empty character-to-frequency dictionary.
- Loop through the characters of the string.
- Add 1 to the frequency dictionary for each character.
- Return the dictionary.
Here is how it looks in code:
# A function tha calculates character frequencies in a string.
def letter_frequency(in_string):
    frequencies = {}

    for i in in_string:
        if i in frequencies:
            frequencies[i] += 1
        else:
            frequencies[i] = 1
    return frequencies

# Example run
freqs = letter_frequency("This is just a test string")

print(freqs)
Output:
{'T': 1, 'h': 1, 'i': 3, 's': 5, ' ': 5, 'j': 1, 'u': 1, 't': 4, 'a': 1, 'e': 1, 'r': 1, 'n': 1, 'g': 1}
38. Count the Number of Seconds in a Year
In a year, there are roughly 365.25 days.
In a day there are 24 hours.
In an hour there are 60 minutes.
In a minute there are 60 seconds.
Thus, the number of seconds in a year is:
seconds = 365.25 * 24 * 60 * 60 = 31 557 600
You can calculate this in Python with:
year_seconds = 365.25 * 24 * 60 * 60

print(f"There are {year_seconds} in a year.")
Output:
There are 31557600.0 in a year.
39. Find the Number of Days Between Two Datesin Python
To work with dates in Python, use the datetime module.
To calculate the number of days between two dates (and get leap years correct):
- Create two
datetime.dateobjects. - Subtract the more recent date from the more past date.
- Call
.days()method on the resulting date object to get the result.
In Python, it looks like this:
from datetime import date

d1 = date(2021, 3, 22)
d2 = date(2021, 10, 20)

diff = (d2 - d1).days

print(f"The difference between {d1} and {d2} is {diff} days")
Output:
The difference between 2021-03-22 and 2021-10-20 is 212 days
40. Generate Random Numbers Between a Range in Python
In Python, there is a built-in module for generating random numbers called random.
To generate random integers between an interval, call random.randint() method by providing it the max and min values.
For example:
from random import randint

# Print 10 random numbers between 1-100
for _ in range(10):
    print(randint(1,100))
Example output:
97
96
82
70
82
38
47
19
89
99
41. Get a Random Element from a List
The built-in random module comes in with a useful method called choice(). This method randomly selects an element from an iterable.
For example, to pick a random name at a list of strings:
from random import choice

names = ["Alice", "Bob", "Charlie", "David"]

rand_name = choice(names)

print(rand_name)
Output example:
David
42. Check If a Number Is Odd/Even
A number is even if it is evenly divisible by 2. In other words, if there is no remainder after division.
To check if a number is odd, check if it is not divisible by 2.
Here is a Python script that checks if the number 3 is odd or even:
number = 3

# Odd = not divisible by 2
# Even = divisible by 2
is_odd = True if number % 2 != 0 else False

print(is_odd)
Output:
True
43. Print a Multiplication Table of an Integer
A multiplication table is a table from where it is easy to check what times what gives what.
To produce a multiplication table of ten, for example, you want to:
- Select a target number.
- Loop from 1 to 10 and multiply the target number by each number in this range.
- Print the result to the console.
# Function that prints multiplication table from 1 to 10.
def mul_table(num):
    for i in range(1, 11):
       print(f"{num} x {i} = {num * i}")

# Example call
mul_table(9)
Output:
9 x 1 = 9
9 x 2 = 18
9 x 3 = 27
9 x 4 = 36
9 x 5 = 45
9 x 6 = 54
9 x 7 = 63
9 x 8 = 72
9 x 9 = 81
9 x 10 = 90
44. Print without New Line
By default, printing on a new line adds a new line in Python.
To overcome this, you need to join the printable items together separated by a blank space.
To do this, use the str.join() method in a blank space. This joins the elements of a list separated by a blank space.
Then you can print this whole string. As it is one string, it naturally gets printed on one line.
For example:
names = ["Alice", "Bob", "Charlie", "David"]

print(" ".join(names))
Output:
Alice Bob Charlie David
45. Find a Sum of any Number of Numbers
A Python function can accept any number of arguments. To do this, you need to use an asterisk in front of the argument name. This tells the Python interpreter that there is going to be an arbitrary number of arguments.
For example, let’s create a function that adds up any numbers you pass it:
# A function with * accepts any number of arguments
def sum_nums(*nums):
    # Return the sum of the arguments
    return sum(nums)

# Example usage
s1 = sum_nums(1, 2, 3)
s2 = sum_nums(5, 10, 15, 20, 25, 30)

print(s1, s2)
Output:
6 105
46. Find ASCII Value of a Character in Python
Each character and string in Python has an ASCII value behind the scenes. This value is just an integer ID of that character.
To figure out the ASCII value of a given character, use the built-in ord() function on it.
For instance:
character = "A"

char_ASCII = ord(character)

print(f"The ascii value of '{character}' is {char_ASCII}")
Output:
The ascii value of 'A' is 65
47. Find Factors of a Number
A factor of a number means a number divided by the factor leaves no remainder.
For example, factors of number 12 are 1, 2, 3, 4, and 6.
To find all factors of a number:
- Loop through numbers from 1 all up to the target number.
- Check if the number divides the target evenly.
- Store each factor into a list.
- Finally, return the factors list.
Here is how it looks in Python:
# Loop from 1 to x and check if x is divisible by i
def get_factors(x):
   return [i for i in range(1, x+1) if x % i == 0]

# Example run
number = 460
factors = get_factors(number)

print(factors)
Output:
[1, 2, 4, 5, 10, 20, 23, 46, 92, 115, 230, 460]
48. Simulate Coin Toss in Python
To simulate a coin toss, you need to randomly choose values of 0 or 1.
In Python’s random module, there is a function called choice(). This chooses a value from an iterable randomly.
To simulate coin toss, give this function a list that has 0 and 1. Then based on whether you got 0 or 1, display “Heads” or “Tails” in the console.
Here is how it looks in code:
from random import choice

# A function that randomizes between 0 and 1
def coin_toss():
    states = {1: "Heads", 0: "Tails"}
    one_or_zero = choice([0, 1])
    result = states[one_or_zero]
    print(result)

# Example run
coin_toss()
Output example:
Tails
49. Add Two Matrices in Python
Matrices are arrays of numbers that are arranged in rows and columns.
To add two matrices, you need to perform element-wise addition as described here.
In Python, you can represent matrices with lists of lists (nested lists). In this case, you can implement the matrix addition with the following piece of code:
# A function that finds the sum of two matrices
def add_matrices(X, Y):
    l = len(X[0])
    h = len(X)
    return [[X[i][j] + Y[i][j] for j in range(l)] for i in range(h)]

# Example run
X = [
    [1,7,1],
    [4,2,1],
    [7,9,9]
]

Y = [
    [1,8,1],
    [9,0,3],
    [2,4,7]
]

# Print rows to make the output readable in the console
for r in add_matrices(X, Y):
   print(r)
Output:
[2, 15, 2]
[13, 2, 4]
[9, 13, 16]
In this implementation, the 5th row is a list comprehension for loop. It represents a nested for loop where each matrix row and column is iterated through.
50. Transpose a Matrix in Python
A matrix transpose means the matrix is flipped over its diagonal.
In other words, each position (i, j) is replaced with (j, i) in the matrix.
In Python, you can use nested lists to represent matrices. When doing this, you can compute a transpose for the matrix with the following code:
# A function that transposes a matrix
def transpose(X):
    l = len(X[0])
    h = len(X)
    return [[X[j][i] for j in range(h)] for i in range(l)]

# Example run
X = [
    [1,7,1],
    [4,2,1],
    [7,9,9]
]

# Print rows to make the output readable in the console
for r in transpose(X):
   print(r)
Output:
[1, 4, 7]
[7, 2, 9]
[1, 1, 9]
In this implementation, the 5th row is a list comprehension for loop. It represents a nested for loop where each matrix row and column is iterated through.
51. Multiply Two Matrices in Python
To multiply two matrices, you need to implement the matrix multiplication algorithm.
Matrix multiplication means:
- Take a row from matrix A and a column on matrix B.
- Multiply the corresponding elements by one another.
- Sum up the results of the multiplications.
- Add the result to the result matrix at a corresponding position.
- Repeat until no rows are left.
An image is worth a thousand words, so here is one:

Here is how the algorithm looks in code:
# A function that multiplies two matrices
def multiply_matrices(X, Y):
    return [[sum(a * b for a, b in zip(X_row, Y_col)) for Y_col in zip(*Y)] for X_row in X]

# Example run
X = [
    [1,7,1],
    [4,2,1],
    [7,9,9]
]

Y = [
    [1,8,1],
    [9,0,3],
    [2,4,7]
]

# Print rows to make the output readable in the console
for r in multiply_matrices(X, Y):
   print(r)
Output:
[66, 12, 29]
[24, 36, 17]
[106, 92, 97]
In this implementation, the 3rd row is a list comprehension for loop. It is a nested loop where there are three inner for loops that implement the algorithm described above.
52. Track the Index in a For Loop
Sometimes when you perform a for loop, you wish there was an easy way to track the index of the current element. By default, this is not possible.
But using the built-in enumerate() function, you can relate each list element with an index.
This makes it easy for you to loop through the list and know the index at each loop.
Here is how it looks in code:
names = ["Alice", "Bob", "Charlie", "David"]

for index, name in enumerate(names):
    print(f"At position {index} is {name}")
Output:
At position 0 is Alice
At position 1 is Bob
At position 2 is Charlie
At position 3 is David
Learn more about enumerate() function in Python.
53. Flatten a Nested Python List
Given a list of lists, you can easily flatten the list to a 1D list with a for loop.
To do this:
- Loop through the list of lists.
- For each list, place each element in the list in a result list.
- Return the list.
Instead of using a nested for loop, you can use a one-liner list comprehension to make the code shorter. In case you find it hard to read, you can convert the comprehension back to a nested for loop.
Anyway, here is the implementation:
def flatten(nested_list):
    return [item for sublist in nested_list for item in sublist]

# Example run
matrix = [[1, 2, 3], [4, 5, 6], [7, 8, 9]]

numbers = flatten(matrix)

print(numbers)
Output:
[1, 2, 3, 4, 5, 6, 7, 8, 9]
54. Convert String to Date in Python
Python has a built-in datetime module for dealing with date objects reliably.
The datetime module comes in with a datetime.strptime() function. You can use this to create a date object given a date as a string. To do this:
- Import the datetime from datetime.
- Create a date string in some format.
- Convert the string to a date object with the given format.
For example:
from datetime import datetime

date_time_str = '20/10/21 03:59:44'

date_time_obj = datetime.strptime(date_time_str, '%d/%m/%y %H:%M:%S')

print ("The date is", date_time_obj)
Output:
The date is 2021-10-20 03:59:44
55. Count the Frequency of Items in a List
To count the frequencies of list items in Python, you need to:
- Have a list full of elements.
- Create a frequency dictionary to map item -> item frequency.
- Loop through the list.
- On each element, increment its counter in the frequency dictionary.
Here is how it looks in code:
# A function that counts frequencies of the list items
def item_frequency(in_list):
    frequencies = {}

    for i in in_list:
        if i in frequencies:
            frequencies[i] += 1
        else:
            frequencies[i] = 1
    return frequencies

# Example run
freqs = item_frequency(["Alice", "Bob", "Bob", "Charlie", "Bob"])

print(freqs)
Output:
{'Alice': 1, 'Bob': 3, 'Charlie': 1}
56. Add a Word to the End of an Existing File
To add a word to the end of an existing file:
- Open the file in write mode.
- Write a string to the file.
- Close the file.
You can use a context manager to open the file. This means you don’t have to worry about closing the file.
Given a list named example.txt with the following contents:
This is a test
The file contains a bunch of words
Bye!
You can write a new string to the end of it with a context manager like this:
with open("example.txt", "w") as file:
    file.write("A new string")
Output:
This is a test
The file contains a bunch of words
Bye!
A new string
57. Parse the File Extension from a File Name
To get the file extension from a path or file name, use the os.path.splitext function. This splits the file into two parts into a list:
- The path.
- The extension.
To get the extension, just access the second element of the list.
Here is how it looks in code:
import os.path

file = "example.py"
extension = os.path.splitext(file)[1]

print(f"The extension of file '{file}' is '{extension}'")
Output:
The extension of file 'example.py' is '.py'
58. Parse the File Name from the Path
To get the name of the file from a path, use os.path.basename() function.
For example:
import os

file_path = "Example/Directory/With/python_program.py"
file_name = os.path.basename(file_path)

print(file_name)
Output:
python_program
59. A Function That Takes a Default Argument
In Python, you can give function default arguments. This means you can call the function with or without an argument.
As this task does not state what kind of function to create, you can use your imagination.
For instance, let’s create a function greet() that says “Hello, there” by default. But once a name is given, the function greets the name.
Here is how:
def greet(name="there"):
    print(f"Hello, {name}!")

greet()
greet("Alice")
Output:
Hello, there!
Hello, Alice!
Learn more about default arguments in Python.
60. Count the Number of Files in the Present Directory
To count how many files are in the present directory, use os module.
- Use
os.listdir(".")to list everything in the present directory. - Call
os.path.isfile()function for each item to verify it is a file. - Return/print the result.
import os

print(len([file for file in os.listdir('.') if os.path.isfile(file)]))
Output:
9
61. Check the File Size in Python
To check the file size of a specific file, use the os.path.getsize() function.
For example:
import os

size = os.path.getsize("example.txt")
print(f"The size of file is {size} bytes")
Output:
The size of file is 74 bytes
62. Calculate the Power of a Number
In Python, you can compute the power with the double-asterisk operator.
For example, 10^3 can be calculated with:
num = 10

power = num ** 3

print(power)
Output:
1000
63. Snake-Casify Strings in Python
Snake case means a writing style where each blank space is replaced by an underscore _.
To create a Python program that converts a string into a snake case, replace each space with a “_”.
This is possible using the built-in replace() method of a string.
string = "This is a test"

snake = string.replace(" ", "_")

print(snake)
Output:
This_is_a_test
64. Camel-Casify Strings in Python
Camel case means writing style where there are no spaces between words. Instead, each word begins with a capital first letter and is connected to the next word.
To write a Python program that camel casifies a string:
- Split the words into a list by blank space.
- Convert each string into a title case (first letter capital).
- Join the parts without spaces.
Here is how it looks:
# A program that converts a string to camel-case
def camel(string):
    words = string.split(" ")
    parts_upper = [word.title() for word in words]
    return "".join(parts_upper)

# Example run
string = "this is a test"
camel = camel(string)

print(camel)
Output:
ThisIsATest
65. Get All Combinations of a List
To get combinations of length r in a list, use itertools.combinations() function.
To get all the combinations of any length:
- Loop through numbers from 1 to the length of the list.
- Create a combination of the given length and add it to the results list.
Here is a script that computes all combinations of the list [1, 2, 3]:
import itertools
numbers = [1, 2, 3]

combinations = []
for r in range(len(numbers)+1):
    for combination in itertools.combinations(numbers, r):
        combinations.append(combination)

print(combinations)
Output:
[(), (1,), (2,), (3,), (1, 2), (1, 3), (2, 3), (1, 2, 3)]
Learn more about combinations and powersets in Python.
66. Remove Duplicates from a List
To remove duplicates from a Python list:
- Have a list of items.
- Create an empty result list.
- Loop through the list of items.
- Add each item to the result list if it is not already there.
- Return the result.
Here is how it looks in code:
# A function that removes duplicates from a list
def de_dupe(items):
    result = []
    for item in items:
        if item not in result:
            result.append(item)
    return result


# Example run
numbers = [1, 2, 2, 2, 3, 1, 2, 5, 5]

de_duped_nums = de_dupe(numbers)

print(de_duped_nums)
Output:
[1, 2, 3, 5]
67. Python Program to Replace Characters of a String
Python string has a built-in method called replace().
This function takes two parameters:
- A character to be replaced.
- A character to be inserted as the replacement.
You can use this method to replace the characters of that string.
For example, let’s replace all “s” characters with “z”:
sentence = "This is a test"

new_sentence = sentence.replace("s", "z")

print(new_sentence)
Output:
Thiz iz a tezt
68. Round Floats to Two Decimals
Python comes in with a built-in function round().
This function takes two arguments:
- A number to round.
- The number of desired decimal places.
The function rounds the number to the given decimal places.
For example, let’s round pi to 2 decimals:
from math import pi

print(f"Pi is {round(pi, 2)} when rounded to 2 decimals.")
Output:
Pi is 3.14 when rounded to 2 decimals.
69. Accept Any Number of Keyword Arguments
A keyword argument in Python is a function argument that has a name label attached to it.
An example call to a function with a keyword argument can look like this:
my_func(name="Jack")
Let’s for example implement a function that takes student info as its argument. You can give it as many keyword arguments as you wish. As a result, it prints the student’s data in a nicely formatted fashion.
Here is the example code:
# An example function that takes any number of keyword arguments
def info(**students):
    print("This year students info:")
    for name, major in students.items():
        print(f"- {name}: {major}")
    print("n")

# Example run
info(Alice="Physics", Bob="Maths")

info(Alice="Applied Physics", Bob="Maths",
     Charlie="Pharmaseutics", David="Fluid Mechanics")
Output:
This year students info:
- Alice: Applied Physics
- Bob: Maths
- Charlie: Pharmaseutics
- David: Fluid Mechanics
Learn more about keyword arguments in Python.
70. Sum a List
To sum a list of numbers in Python:
- Initialize the result at 0.
- Loop through the list of numbers.
- Add each number to the result.
- Return the result.
Here is the code:
# A function that calculates the sum of numbers
def total(numbers):
    result = 0
    for number in numbers:
        result += number
    return result


# Example run
numbers = [1, 2, 3, 4, 5]

sum = total(numbers)

print(sum)
Output:
15
71. Split a String
Python string has a built-in method called split(). This function takes one argument which is the delimiter according to which you want to split the string.
Here are some examples:
sentence = "This is a test. It demonstrates splitting strings."

split_by_spaces = sentence.split()
split_by_dot = sentence.split(".")
split_by_letter_s = sentence.split("s")

print(f"Split by spaces: {split_by_spaces}")
print(f"Split by dots: {split_by_dot}")
print(f"Split by letter 's': {split_by_letter_s}")
Output:
Split by spaces: ['This', 'is', 'a', 'test.', 'It', 'demonstrates', 'splitting', 'strings.']
Split by dots: ['This is a test', ' It demonstrates splitting strings', '']
Split by letter 's': ['Thi', ' i', ' a te', 't. It demon', 'trate', ' ', 'plitting ', 'tring', '.']
72. Get Current Time in Python
You can use Python’s built-in datetime module to obtain the current time.
To do this:
- Import the
datetimefromdatetimemodule. - Get the current date object.
- Grab the time from the current date in a specific format.
Here is how it looks in code:
from datetime import datetime

today_date = datetime.now()

time_now = today_date.strftime("%H:%M:%S")
print(f"The current time is {time_now}")
Output:
The current time is 09:35:26
73. Add Quotes in a String
To add quotation marks inside a string in Python, you have two options:
- Use double quotation marks as the string markers and single quotation marks as the quotes.
- Use single quotes as the string marker and double quotation marks as the quotes.
Here are both ways in code:
quote1 = "Then he said 'I will miss you'."
quote2 = 'Then he said "I will miss you".'

print(quote1)
print(quote2)
Output:
Then he said 'I will miss you'.
Then he said "I will miss you".
Learn more about quotes and strings in Python.
74. Document a Function Using a Docstring
In Python, you have a special syntax for documenting your code. This is called a docstring.
A docstring is a triple-quote string that can be spread across multiple lines.
The purpose of the docstring is to provide useful information about a function, class, or module. In Python, it is possible to call help() on any function, class, or module. When you do this, the docstring description is printed into the console.
Here is an example:
# Document a function with a docstring """ """
def add(a, b):
    """
    This function adds two numbers and returns the result.
        - a is an integer
        - b is an integer

        - res is the result
    """
    res = a + b
    return res


# Example use:
help(add)
Output:
Help on function add in module __main__:

add(a, b)
    This function adds two numbers and returns the result.
        - a is an integer
        - b is an integer

        - res is the result
Learn more about Python docstrings.
75. Python Program to Parse a JSON String
To convert a JSON object into a Python dictionary, use json.loads() function. Remember to import the json module before doing this.
Here is an example:
import json

# JSON string:
data_JSON = '{ "name": "John", "age": 23, "major": "Physics" }'

# JSON to Python Object (it becomes a dictionary)
data = json.loads(data_JSON)

# Use the data dict like any other dict in Python:
print(data["major"])
Output:
Physics
76. Generate a Textual Representation of an Object
When you print an object in Python, you may get a verbose result like this:
<__main__.Student object at 0x105a264c0>
But this is not readable and you can make no sense of it.
To fix this, implement a special method called __str__ in your class.
For example, let’s create a Student class. Furthermore, let’s make printing student objects produce a readable result by implementing the __str__ method.
class Student:
    def __init__(self, name, major):
        self.name = name
        self.major = major

    # String representation
    def __str__(self):
        return f"I am {self.name} and I study {self.major}"


# Example run
student = Student("Alice", "Chemistry")

print(student)
Output:
I am Alice and I study Chemistry
77. Read a File Into a List
To read a file into a list in Python:
- Open a file.
- Initialize an empty list to store the lines.
- Read the lines one by one and store each line on the list.
- Close the file.
A great way to deal with files is using context managers. A context manager auto-closes the file after being used. This saves you a little bit of overhead and lines of code. A context manager is used with the with statement.
Given a file called example.txt with the following contents:
This is a test
Let's read a file into Python
Let's see how it plays out...
You can read the lines in this file to a list with a context manager as follows:
with open("example.txt", "r") as file:
    lines = []
    for line in file.readlines():
        lines.append(line.strip("n"))
    print(lines)
Output:
['This is a test', "Let's read a file into Python", "Let's see how it plays out..."]
78. Check If a Number Is an Armstrong Number
An Armstrong number is a number whose digits to the power of the length of the number equals the number.
For instance, 1634 is an Armstrong number because: 1^4 + 6^4 + 3^4 + 4^4.
To create a Python program to check if a given number is an Armstrong number:
- Have a target number.
- Initialize an empty sum.
- Go through each digit, raise it to the length power, and add to the result.
- Check if the result equals the original number.
Here is how it looks in code:
# A function that checks if a given number is an armstrong number
def is_armstrong(number):
    order = len(str(number))
    sum = 0
    temp = number
    while temp > 0:
        digit = temp % 10
        sum += digit ** order
        temp //= 10
    if number == sum:
        print(f"{number} is an Armstrong number")
    else:
        print(f"{number} is not an Armstrong number")


# Example run
print(is_armstrong(1634))
Output:
1634 is an Armstrong number
79. Capitalize a String
Python string comes with a built-in upper() method. This method capitalizes the whole string.
For example:
name = "alice"

name_cap = name.upper()

print(name_cap)
Output:
ALICE
80. Break Out of a For Loop
Breaking a loop means jumping out of a loop before the loop is exhausted.
Here is an example of a function that checks if the number matches the target. When it does, the loop is escaped:
def find(target):
    for number in [1, 2, 3, 4, 5, 6, 7, 8, 9, 10]:
        print(f"{number} in inspection...")
        if number == target:
            print("Target found!")
            break


find(3)
Output:
1 in inspection...
2 in inspection...
3 in inspection...
Target found!
Learn more about the break and other control flow statements here.
81. Check a Condition with One Line of Code
In Python, you can replace short if-else statements with one-liners. This is possible using a ternary conditional operator.
Here is an example of how:
age = 20

age_group = "adult" if age >= 18 else "minor"

print(age_group)
Output:
adult
Learn more about one-liner conditional operators in Python.
82. Calculate Remainder in Division
In Python, you can use the % operator to calculate the remainder in the division.
For example, dividing 11 slices of pizza with 3 guests means 2 leftover slices.
pizza_slices = 11
participants = 3

left_overs = pizza_slices % participants

print(f"{left_overs} slices are left over.")
Output:
2 slices are left over.
Learn more about remainders and modulo in Python.
83. Unpack a List to Separate Variables
In Python, it is possible to unpack iterables.
This means you can tear apart iterables to separate variables by comma separating the variables and using assignment operator on the iterable.
For example:
numbers = [1, 2, 3]

x, y, z = numbers

print(x)
print(y)
print(z)
Output:
1
2
3
84. Square a List of Numbers
To square a list of numbers in Python:
- Have a list of numbers.
- Initialize an empty result list.
- Loop through each number.
- Raise each number to the second power.
- Add the result to the result list.
Here is how it looks in code:
# A function that squares a list of numbers
def square(numbers):
    result = []
    for number in numbers:
        result.append(number ** 2)
    return result


# Example run
numbers = [1, 2, 3]
squared = square(numbers)
print(squared)
Output:
[1, 4, 9]
85. Filter Even Numbers
To filter even numbers in Python:
- Have a list of numbers.
- Initialize an empty result list.
- Loop through each number.
- Check if the number is even.
- Add the result to the result list.
Here is how it looks in code:
# A function that filters even numbers
def filter_even(numbers):
    result = []
    for number in numbers:
        if number % 2 == 0:
            result.append(number)
    return result


# Example run
numbers = [1, 2, 3, 4, 5, 6, 7, 8, 9, 10]

even_nums = filter_even(numbers)

print(even_nums)
Output:
[2, 4, 6, 8, 10]
Learn more about list filtering in Python here.
86. Join Two or More Strings
Python string comes with a built-in join() method.
This function takes one argument, which is the separator character.
For example, to join strings with empty space as a separator:
s1 = "This"
s2 = "is"
s3 = "a test"

sentence = " ".join([s1, s2, s3])

print(sentence)
Output:
This is a test
Learn more about joining strings and other string methods from here.
87. Remove Specific Values from a List
You can use the filter() function to filter out values based on a criterion.
The filter() function takes two arguments:
- A filtering function. This is usually a lambda expression.
- An iterable, such as a list to be filtered.
The filter() function applies the filtering function on each element of the list to produce the result.
For example, let’s filter out integers from a list:
items = ["Alice", 2, 3, "Bob", "Charlie", 30]

# Let's remove numbers

names = filter(lambda x: not isinstance(x, int), items)

print(list(names))
Output:
['Alice', 'Bob', 'Charlie']
88. Add Values to the Beginning of a List
Python list has a built-in method insert(). It takes two arguments:
- A target index.
- A string to be placed into the target index.
You can use the insert() method to add an element to the beginning of a list.
For example:
names = ["Bob", "Charlie", "David"]

names.insert(0, "Alice")

print(names)
Output:
['Alice', 'Bob', 'Charlie', 'David']
Learn more about adding and removing values from Python lists here.
89. Calculate HCF in Python
The Highest Common Factor (HCF) of two numbers is the highest number that evenly divides both numbers.
For example, the HCF of 12 and 36 is 12.
To calculate the HCF in Python:
- Take two numbers.
- Determine the smallest number of the two.
- Loop through numbers from 1 to the smallest number.
- Check on each value if it factors the greatest number.
- Keep track of the highest such number.
- At the end of the loop, return the highest factor.
Here is a Python program to find the HCF between two numbers:
# A function that finds the HCF
def compute_hcf(x, y):
    if x > y:
        smaller = y
    else:
        smaller = x
    for i in range(1, smaller + 1):
        if x % i == 0 and y % i == 0:
            hcf = i
    return hcf


# Example run
n1 = 81
n2 = 36
print(f"The H.C.F. between {n1} and {n2} is {compute_hcf(81, 36)}")
Output:
The H.C.F. between 81 and 36 is 9
90. Show N Fibonacci Numbers
A Fibonacci sequence is a series of numbers where the next number is the sum of the previous two.
For example, 0,1,1,2,3,5,8,13,21,34.
To find a Fibonacci sequence of length n in Python:
# A function to print a fibonacci sequence
def show_fib(n_terms):
    n1, n2 = 0, 1
    count = 0
    if n_terms <= 0:
        print("Enter a positive integer")
    else:
        print("Fibonacci sequence:")
        while count < n_terms:
            print(n1)
            nth = n1 + n2
            n1 = n2
            n2 = nth
            count += 1


# Example run
show_fib(10)
Output:
0
1
1
2
3
5
8
13
21
34
91. Python Program to Calculate Age
To calculate the age given a date object in Python:
- Subtract the beginning year from the current year.
- Remove 0 if the month/day of the beginning date precedes the current month/day.
Here is how it looks in code:
from datetime import date


def age(birthdate):
    today = date.today()
    age = today.year - birthdate.year -
        ((today.month, today.day) < (birthdate.month, birthdate.day))
    return age


birthdate = date(1996, 2, 27)

print(f"With birth date of {birthdate}, you are {age(birthdate)} years old")
Output:
With birth date of 1996-02-27, you are 25 years old
The above program knows how to handle leap years too. Check out this article to learn more.
92. Simulate Throwing a Dice in Python
When you throw a dice, you get 1, 2, 3, 4, 5, or 6.
To simulate dice toss in Python, randomize a number between 1 and 6. You can achieve this using the random module’s randint() function.
Here is how it looks in code:
from random import randint

def throw_dice():
    return randint(1, 6)

print(throw_dice())
Output example:
2
93. Find Out How Far Is the Horizon
This involves a bit of basic trigonometry.
To calculate the distance to the horizon, you need to realize the horizon distance is the “opposite” a side of a right triangle formed by:
- Earth’s radius + your height.
- Earth’s radius.
- The distance to the horizon.


Here is how you can implement the equation in your Python program:
from math import sqrt

# A function that calculates distance to horizon in meters given height in meters
def horizon_distance(h):
    R = 6_371_000
    return sqrt(2 * R * h + h ** 2)


airplane_height = 12_000
d_horizon = horizon_distance(airplane_height)
print(
    f"You can see ~{round(d_horizon / 1000)}km from a commercial flight.")
Output:
You can see ~391km from a commercial flight.
94. Calculate the Area of a Circle
The area of a circle is given by A = pi * r^2.
To write a Python program to calculate the area of a circle, import pi from math module and calculate the area with the above formula:
from math import pi

# A function to find the area of a circle
def circle_area(r):
    return pi * r ** 2

radius = 5

print(f"A circle of radius {radius} takes {circle_area(radius)} square meters of space.")
Output:
A circle of radius 5 takes 78.53981633974483 square meters of space.
95. Find the Volume of a Cube
Given a cube of side length a, the volume V = a^3.
Here is a Python code example on how to calculate the volume of a cube:
from math import pi

# A function to find the volume of a cube
def volume_cube(s):
    return s ** 3


side = 5

print(f"A cube of sides {side} takes {volume_cube(side)} cubic meters of room.")
Output:
A cube of sides 5 takes 125 cubic meters of room.
96. Measure Elapsed Time
To measure the runtime of a program, import the time module into your project and:
- Store the start time in memory.
- Run a piece of code.
- Store the end time into memory.
- Calculate the time difference between the start and end.
Here is how it looks in code:
import time

# Example function that takes some time
def sum_to_million():
    sum = 0
    for i in range(1_000_000):
        sum += i


# Let's see how long summing numbers up to one million takes in Python:
start = time.time()
sum_to_million()
end = time.time()

# Not too long...
print(f"The time to sum numbers up to million took {end - start} seconds")
Output:
The time to sum numbers up to million took 0.06786799430847168 seconds
97. Check If a Set Is a Subset of Another Set in Python
In set theory, set A is a subset of B if all the elements in set A are also in set B.
In Python, you can use the built-in issubset() method to check if a set A is a subset of set B.
For example:
A = {1, 2, 3}
B = {1, 2, 3, 4, 5, 6}

print(A.issubset(B))
Output:
True
Learn more about sets and the issubset() method here.
98. Find N Longest Strings in a Python List
To find n longest strings in a list:
- Sort the list of strings based on length.
- Pick the n last elements of the sorted list. These are the longest strings.
Here is how it looks in code:
# A function that finds n longest words in a list of strings
def find_longest(strings, n):
l = len(strings)
# If n is more or equal to the list length, return the whole list.
if n >= l:
return strings
else:
sorted_strings = sorted(strings, key=len)
return sorted_strings[-n:]
# Example run
names = ["Alice", "Bob", "Charlie", "David", "Emmanuel", "Frank", "Gabriel"]
print(find_longest(names, 3))
Output:
['Charlie', 'Gabriel', 'Emmanuel']
99. Clone a Python List Independently
To take an independent copy of a list, use the deepcopy() method from the copy module.
For example:
import copy names = ["Alice", "Bob", "Charlie"] names_clone = names.deepcopy() print(names_clone)
Output:
['Alice', 'Bob', 'Charlie']
Read more about copying lists in Python.
100. Break List Into N-Sized Chunks
If you want to break. alist into n-sized chunks:
- Create an empty result list.
- Loop through the original list by taking the chunk-sized steps.
- At each step, add the current element and the next i elements to the result list.
- When there are no values left, return the list.
Here is how it looks in code:
# A program that groups a list into chunks
def chunks(elements, chunk_size):
result = []
for i in range(0, len(elements), chunk_size):
result.append(elements[i:i + chunk_size])
return result
# Example run
numbers = [1, 2, 3, 4, 5, 6, 7, 8, 9, 10]
parts = chunks(numbers, 4)
print(parts)
Output:
[[1, 2, 3, 4], [5, 6, 7, 8], [9, 10]]
Conclusion
That is a lot of Python examples. I hope you find it useful where ever you go.
Happy coding my friends!
Further Reading
Python Tricks
How to Write to a File in Python
The with Statement in Python
About the Author
- I’m an entrepreneur and a blogger from Finland. My goal is to make coding and tech easier for you with comprehensive guides and reviews.