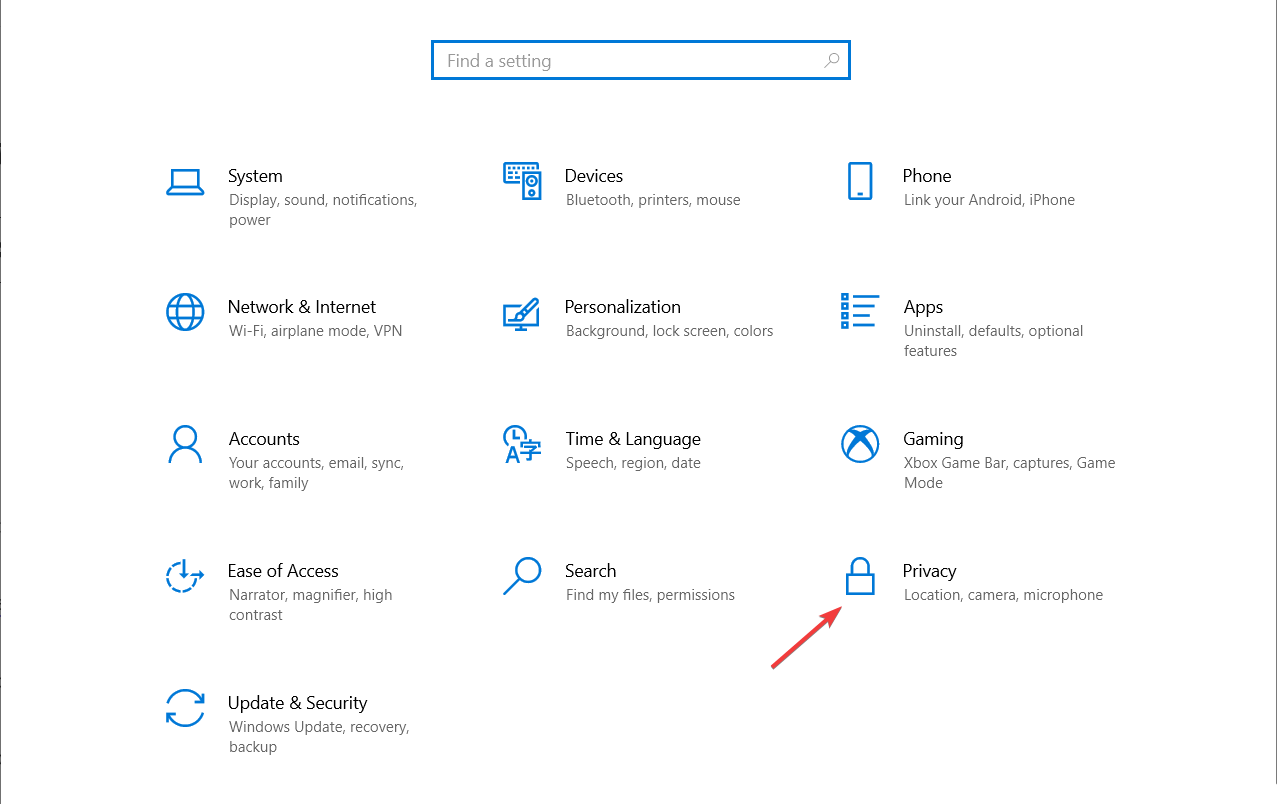
Некоторые пользователи сталкиваются с надписью «Некоторыми правами управляет ваша организация», отображающейся в настройках параметров операционной системы Windows 10. После запуска приложения «Параметры» и входа в некоторые настройки, в окне управления параметрами отображается это сообщение.
Многих пользователей это удивляет, потому что они не работают на этом ПК в какой-то организации, компьютер находится дома. Непонятно, что делать и как реагировать на это сообщение операционной системы Windows.
Содержание:
- Что значит некоторыми параметрами управляет ваша организация
- Как исправить проблему «Некоторыми параметрами управляет ваша организация»
- Сброс групповых политик в редакторе реестра Windows — 1 способ
- Изменяем параметры групповой политики на настройки по умолчанию — 2 способ
- Изменяем параметры Windows в программе O&O ShutUp10
- Выводы статьи
Что значит некоторыми параметрами управляет ваша организация
Надпись в Windows 10 «Некоторыми параметрами управляет ваша организация» не является ошибкой или сообщением о каком-нибудь системном сбое. Это предупреждение от операционной системы о том, что некоторыми функциями Windows невозможно воспользоваться из-за изменения параметров ОС, сделанных ранее на данном ПК.
В Windows 10 нельзя будет изменить некоторые настройки из-за того, что параметрах системы заблокировала возможность выполнения тех или иных действий. В последних версиях Windows 10 надпись может немного отличаться, в зависимости от характера отключенных функций: «Некоторые из этих параметров скрыты или контролируются вашей организацией», «Параметрами защиты от вирусов и угроз управляет ваша организация» или другие сообщения, но это означает тоже самое.

Под «организацией» Майкрософт подразумевает администраторов компьютеров в локальной сети, устанавливающих настройки для всех ПК, входящих в данную сеть, или обычных пользователей на локальном компьютере, который находится дома. В первом случае понятно, что администратор ограничивает функциональность рабочих ПК, чтобы работники не делали на компьютерах того, чего от них не требуется. В случае с домашними пользователями необходимо разъяснение.
Операционная система предупреждает, что из приложения «Параметры» Windows 10 нельзя изменить некоторые настройки ОС, они заблокированы и недоступны для изменения. Это продиктовано целями безопасности. В основном, подобные надписи «Некоторыми параметрами управляет ваша организация» Windows 10, встречаются в настойках параметров обновления, конфиденциальности или безопасности Windows.
Ограничения функциональности и появление предупреждения в Виндовс «Некоторыми параметрами управляет ваша организация», встречается в следующих случаях:
- применение настроек для отключения слежки в Windows, в том числе с помощью сторонних приложений;
- изменение настроек в реестре Windows;
- изменение настроек локальных групповых политик;
- отключения функции автоматических обновлений;
- после отключения Брандмауэра или Защитника Windows;
- отключение некоторых системных служб Windows.
В большинстве случаев, наличие надписи «Некоторыми параметрами управляет ваша организация» в Windows, никак не затронет возможности пользователя при использовании операционной системы.
Например, если на ПК отключены «шпионские» функции Windows 10, пользователь не испытывает от этого неудобства: на удаленные сервера Майкрософт не отправляется информация с компьютера, экономится трафик, повышается уровень конфиденциальности и приватности. С другой стороны, некоторое ограничение функциональности (отправка диагностических данных в Microsoft) системы, станет препятствием для подключения к программе предварительной оценки Windows Insider Preview.
Часть пользователей самостоятельно изменяла настройки Windows 10 при помощи сторонних приложений, по типу популярной программы Destroy Windows 10 Spying, которые изменяют настройки Центра обновлений системы, отключают функции отправки данных в Microsoft и т. д.
В других случаях, пользователю может понадобится изменить некоторые настройки Windows, но он не сможет это сделать из параметров ОС, потому что изменение настроек было заблокировано, к ним нет доступа. Поэтому при появлении надписи «Некоторыми параметрами управляет ваша организация», пользователи ищут ответ на вопрос, как отключить это сообщение на компьютере и получить доступ к необходимым параметрам.
Как исправить проблему «Некоторыми параметрами управляет ваша организация»
Пользователю придется самостоятельно применить изменения в работе операционной системы Windows 10, которые необходимы для отключения ограничений в функциональности. Существует несколько способов решить данную проблему:
- Переустановка Windows на компьютере.
- Восстановление Windows из точки восстановления, созданной до применения изменений в ОС, вызвавших появление надписи про управление компьютера «организацией».
- Восстановление Windows 10 из резервной копии, при условии, что файл-образ системы был создан до изменения данных параметров.
- Переустановка ОС с помощью функции Новый запуск Windows 10 — чистая установка системы с сохранением данных пользователя.
- Внесение изменений в системный реестр Windows.
- Изменение параметров локальной групповой политики.
- Включение отключенных настроек Windows с помощью стороннего программного обеcпечения.
В этой статье мы рассмотрим менее радикальные способы решения проблемы. Про восстановление Windows разными способами, читайте подробные статьи на моем сайте, перейдя по ссылкам выше. В случае использования восстановления ОС, Windows вернется в то состояние, которое имела система в момент создания точки восстановления или резервной копии системы.
Мы не будем рассматривать способы решения вопросов для доступа к отдельным функциям, а используем методы для отмены ограничений функциональности на уровне всей системы.
Сброс групповых политик в редакторе реестра Windows — 1 способ
Одним из способов решения проблемы является сброс локальных групповых настроек безопасности на компьютере. Для проведения изменений в системе, нам понадобится системный инструмент — командная строка Windows.
Перед выполнением изменений в реестре рекомендуется создать копию реестра Windows или создать точку восстановления системы.
Выполните следующие действия:
- Запустите командную строку от имени администратора.
- В окне интерпретатора командной строки введите команду:
secedit /configure /cfg %windir%infdefltbase.inf /db defltbase.sdb /verbose

- Нажмите на клавишу «Enter».
- После выполнения команды, закройте командную строку, а затем перезагрузите ПК.
Изменяем параметры групповой политики на настройки по умолчанию — 2 способ
С помощью системного средства — командной строки, можно изменить параметры локальной групповой политики, выполнив сброс настроек по умолчанию.
Проделайте следующее:
- Запустите командную строку от имени администратора.
- В окне «Администратор: Командная строка» выполните последовательно три команды:
RD /S /Q "%WinDir%System32GroupPolicy"

RD /S /Q "%WinDir%System32GroupPolicyUsers"

gpupdate /force
Две первые команды удаляют папки групповой политики с компьютера. Третья команда воссоздает групповую политику с настройками по умолчанию.
Изменяем параметры Windows в программе O&O ShutUp10
Многие неопытные пользователи не хотят связываться с командной строкой. Они могут воспользоваться другим вариантом для решения проблемы с отображением сообщения «Некоторыми параметрами управляет ваша организация» и ограничением возможности воспользоваться некоторыми настройками параметров Windows 10.
На помощь придет сторонняя программа — O&O ShutUp10 от известного производителя ПО из Германии. Бесплатная программа O&O ShutUp10 предназначена для и изменения настроек безопасности и конфиденциальности Windows 10, отключения «шпионских» параметров Windows.
Программа O&O ShutUp10 работает на русском языке и не требует установки на компьютер. Я рекомендую использовать это приложение, если на ПК изменялись настройки с помощью сторонних программ. Перед использованием программы создайте точку восстановления Windows.
В программе O&O ShutUp10 можно изменить параметры Windows двумя способами.
1 способ:
- Запустите программу O&O ShutUp10 от имени администратора.
- В меню «Опции» выберите пункт «Отменить все изменения (вернуть “настройки по умолчанию”)».

- Закройте программу, перезагрузите компьютер.
Все параметры Windows 10 станут доступными для применения изменений.
2 способ:
В окне программы O&O ShutUp10, запущенной от имени администратора, самостоятельно отключите настройки, препятствующие обновлениям, сбору информации, касающиеся безопасности компьютера. В этом случае, пользователь изменяет только некоторые настройки с помощью программы, оставляя другие параметры включенными.
В соответствующих разделах приложения передвиньте переключатель для отключения опций, в данный момент времени включенных в Windows 10. Цветовая индикации в программе O&O ShutUp10 работает следующим образом:
- красный цвет обозначает, что данная опция отключена (соответствует настройке по умолчанию);
- зеленый цвет сигнализирует о том, что в Windows ограничена работа определенной функции ОС.

Завершите работу программы, выполните перезагрузку ПК для применения изменений.
Выводы статьи
Некоторые пользователи сталкиваются с сообщением в Виндовс 10 «Некоторыми параметрами управляет ваша организация». Операционная система сообщает, что из-за применения некоторых настроек, теперь нельзя изменить некоторые параметры ОС из приложения «Параметры». Для решения проблемы можно воспользоваться сбросом локальных групповых политик по умолчанию, или изменить настройки Windows 10 с помощью стороннего программного обеспечения — программы O&O ShutUp10.
Похожие публикации:
- Не работает поиск Windows — 10 способов решения проблемы
- Как создать диск D в Windows — 3 способа
- Оптимизация Windows 10 для ускорения работы ПК
- Как удалить ненужные приложения Windows 10 — 5 способов
- Как отключить автоматическую перезагрузку Windows — 9 способов
Содержание
- Способ 1: Удаление учетных записей компании или учебного заведения
- Способ 2: Изменение сетевого идентификатора компьютера
- Способ 3: Удаление записей реестра для автоматического обновления Windows
- Способ 4: Редактирование групповых политик
- Способ 5: Изменение типа запуска службы обновления Windows
- Способ 6: Восстановление Windows 11
- Вопросы и ответы

Способ 1: Удаление учетных записей компании или учебного заведения
Существует вероятность того, что после подключения дополнительных учетных записей в Windows 11 произошел сбой в системных настройках, из-за которого в «Центре обновления Windows» отображается информация о том, что некоторыми параметрами управляет ваша организация. Если профили компании или учебного заведения вам не нужны или же вы можете их переподключить, рекомендуем сначала убрать их из ОС, чтобы проверить, поможет ли это решить возникшую проблему.
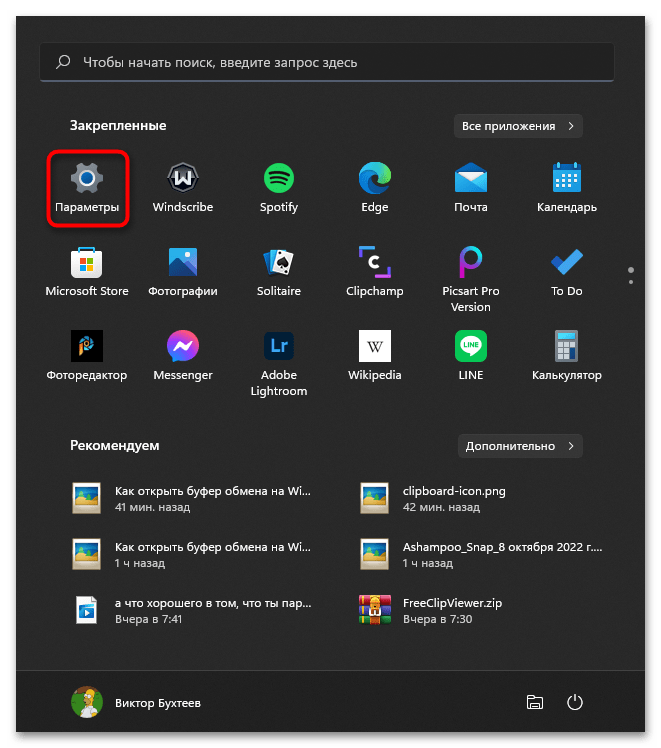
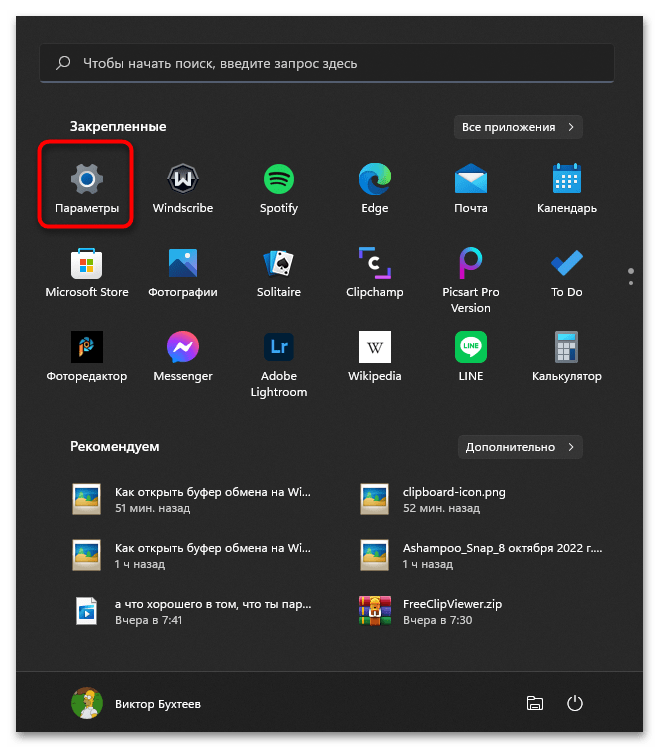
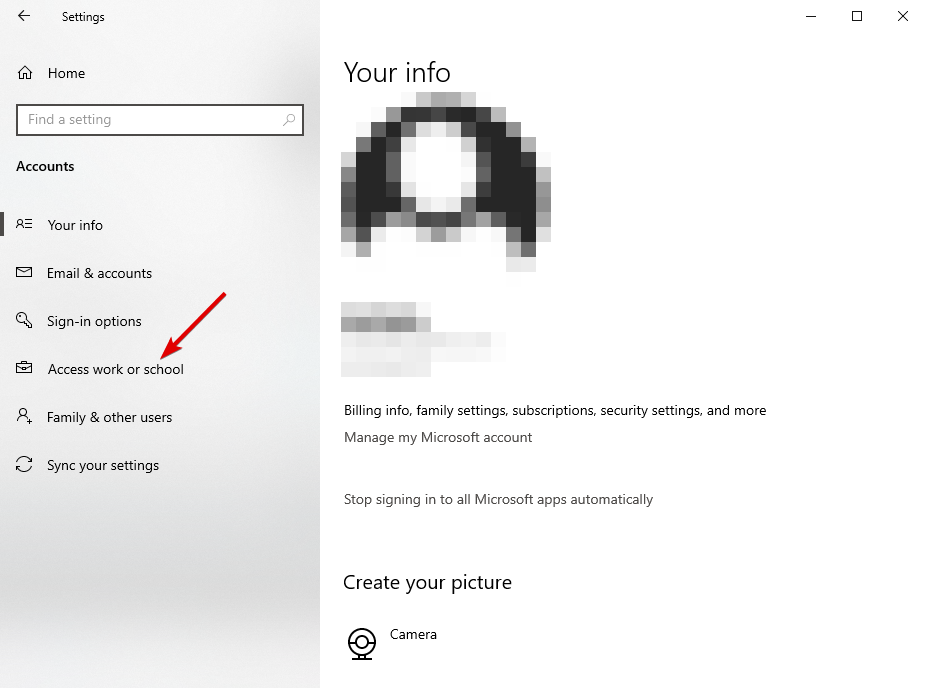
- Откройте меню «Пуск» и нажмите по значку «Параметры», чтобы открыть окно с настройками.
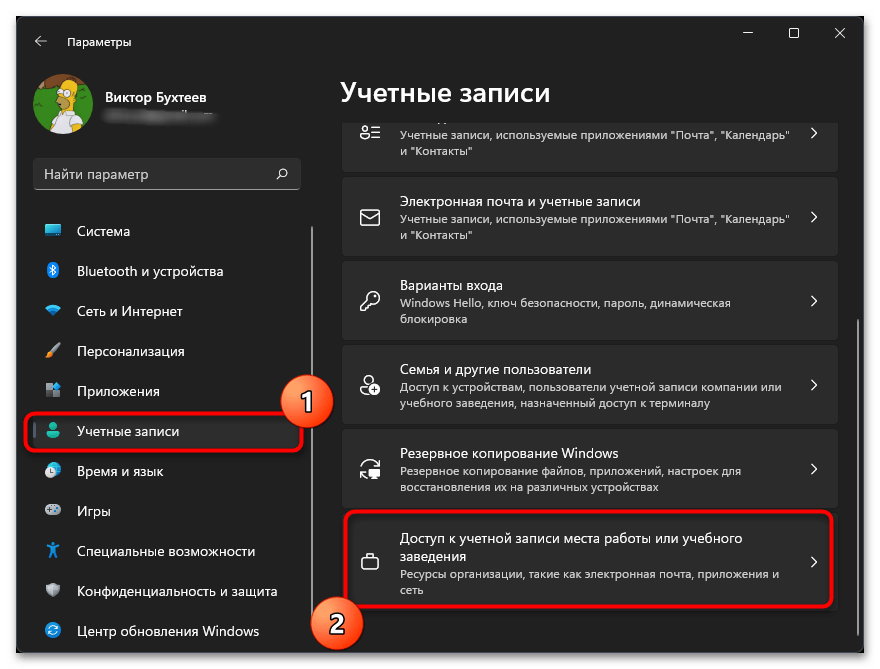
- В нем выберите раздел «Учетные записи» и тапните по плитке «Доступ к учетной записи места работы или учебного заведения».
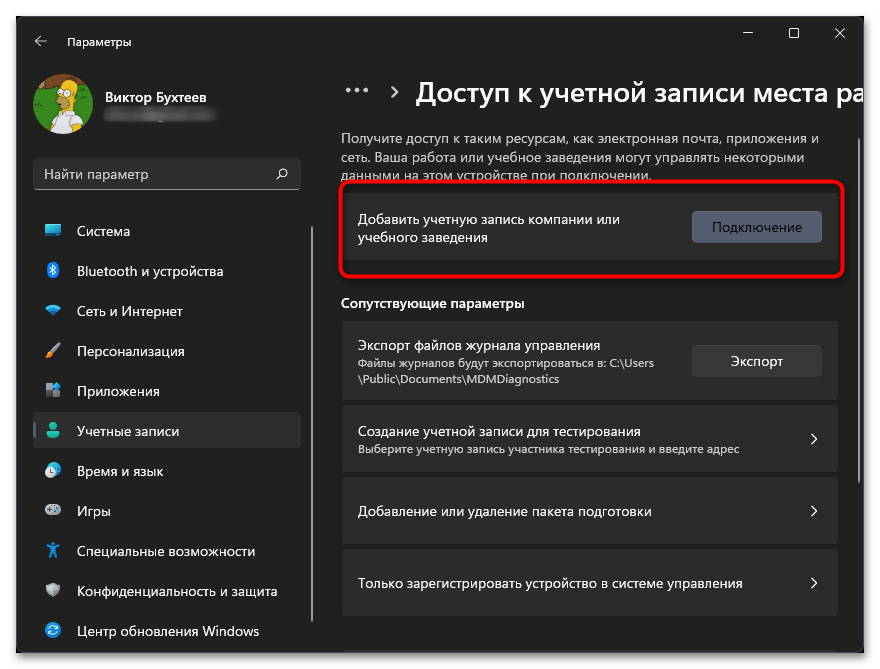
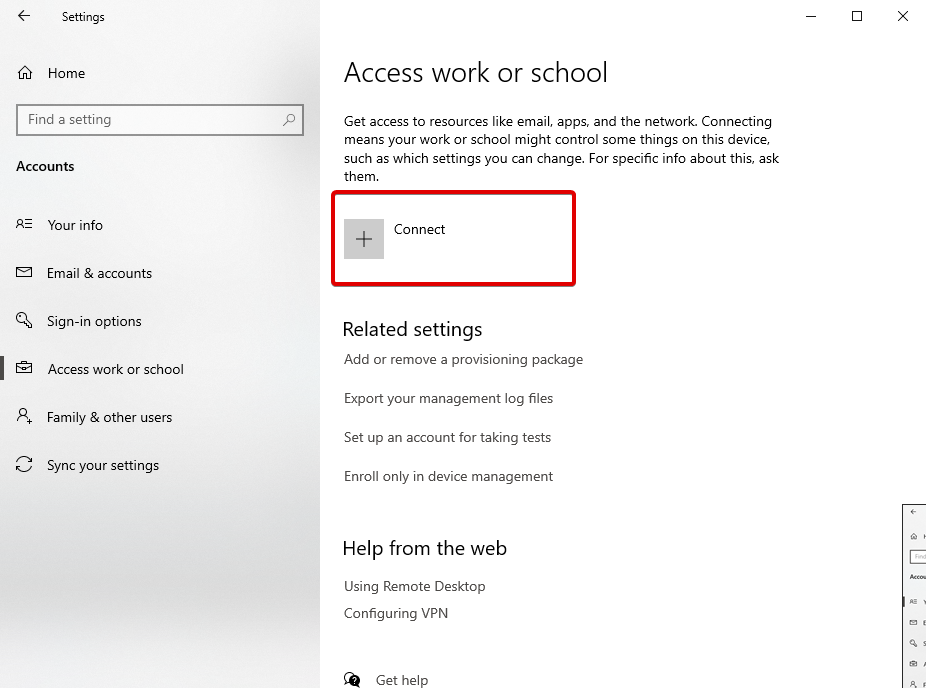
- Ознакомьтесь со списком профилей и удалите находящиеся здесь записи, если такие присутствуют. Если вместо учетных данных вы видите кнопку «Подключение», значит, никаких аккаунтов добавлено не было и можно переходить к выполнению других методов исправления ошибки.
Способ 2: Изменение сетевого идентификатора компьютера
По умолчанию сетевой идентификатор компьютера работает в режиме доступа к доменам и рабочим сетям, чтобы в случае надобности каждый пользователь мог реализовать подобное подключение. Порой такой режим работы сказывается на появлении ошибки «Некоторыми параметрами управляет ваша организация», а его изменение путем выбора идентификатора для домашнего использования может исправить эту ситуацию. Для изменения настройки понадобится выполнить такие действия:
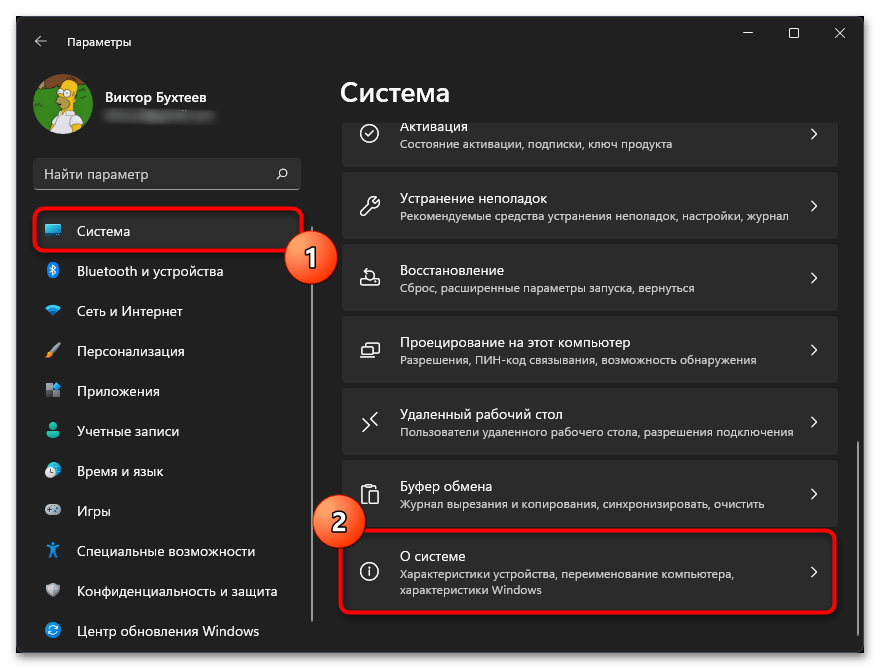
- В том же окне «Параметры» на панели слева выберите раздел «Система», прокрутите список вниз и нажмите по плитке «О системе».
- После перехода к соответствующей категории вам понадобится найти ссылку «Дополнительные параметры системы» и нажать по ней, чтобы переместиться к следующему окну.
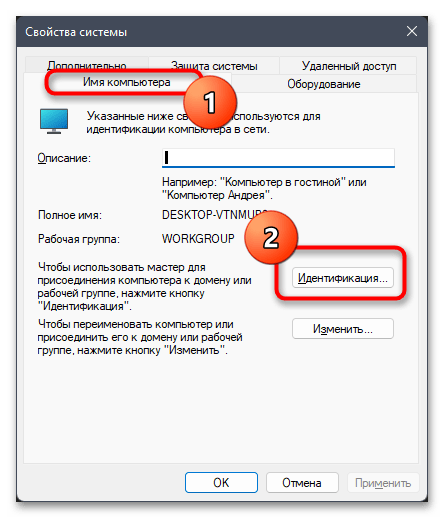
- В нем выберите вкладку «Имя компьютера» и щелкните по «Идентификация».
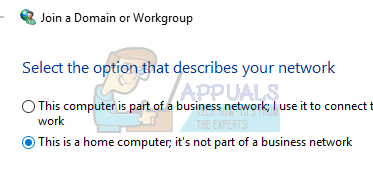
- Установите маркер возле параметра «Компьютер предназначен для домашнего использования, он не входит в корпоративную сеть». После этого нажмите «Далее» и подтвердите внесение изменений.


По окончании этой настройки лучше перезагрузить компьютер, чтобы все изменения вступили в силу. Попробуйте снова выполнить поиск обновлений и проверьте, исчезла ли надпись, о которой и идет речь в данной статье.
В Windows 11 есть папка с несколькими записями реестра, которые отвечают за автоматическое обновление. Как раз из-за неправильной работы данных параметров и может появляться сообщение «Некоторыми параметрами управляет ваша организация». Вам понадобится вручную удалить записи, чтобы проверить, как это скажется на работе компьютера.
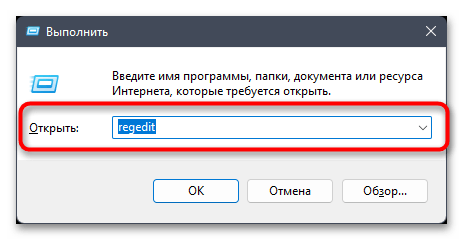
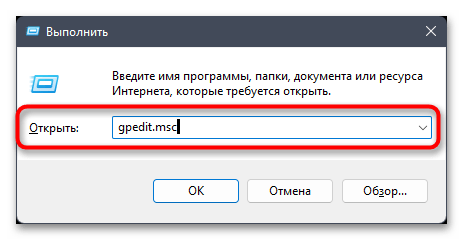
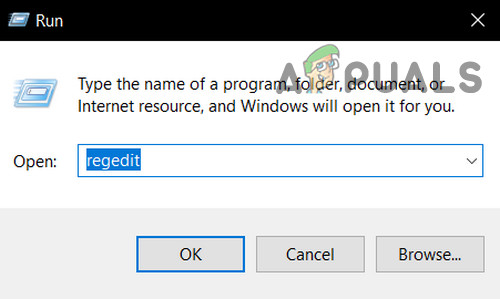
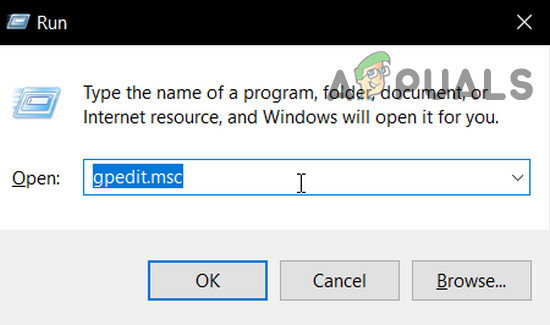
- Откройте утилиту «Выполнить», используя для этого стандартное сочетание клавиш Win + R. Введите в поле
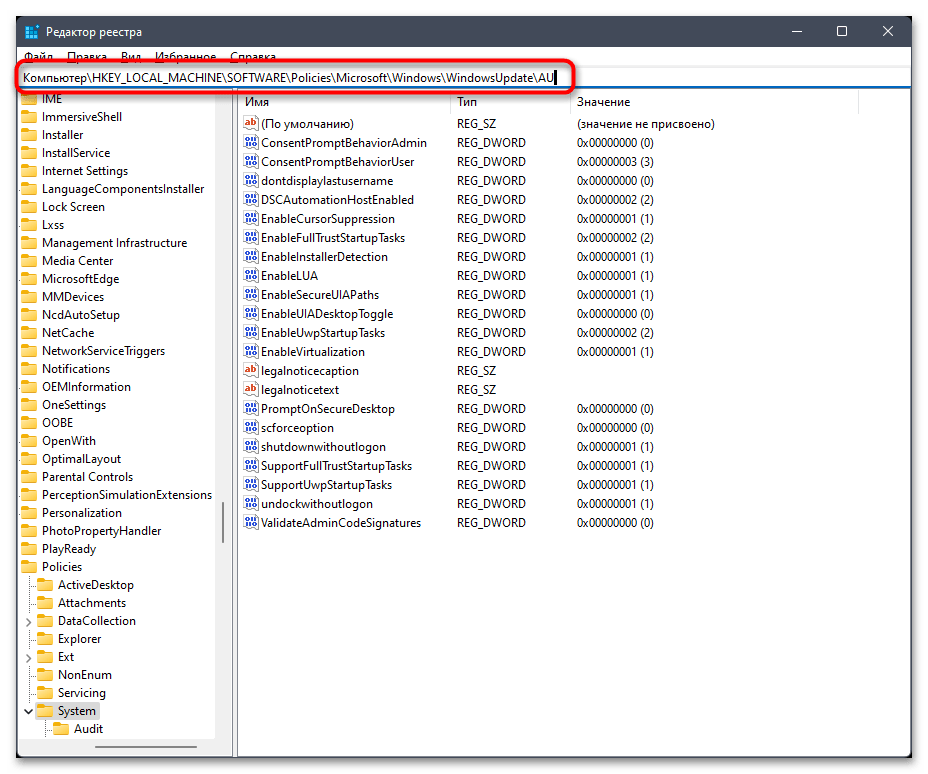
regeditи нажмите Enter, чтобы запустить окно «Редактора реестра». - В нем перейдите по пути
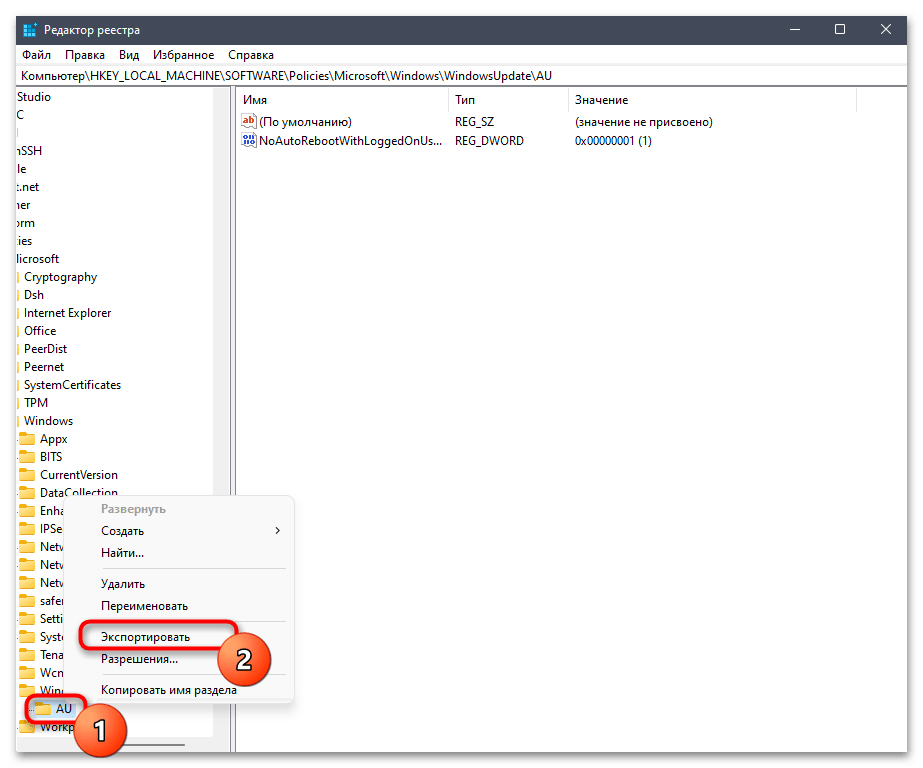
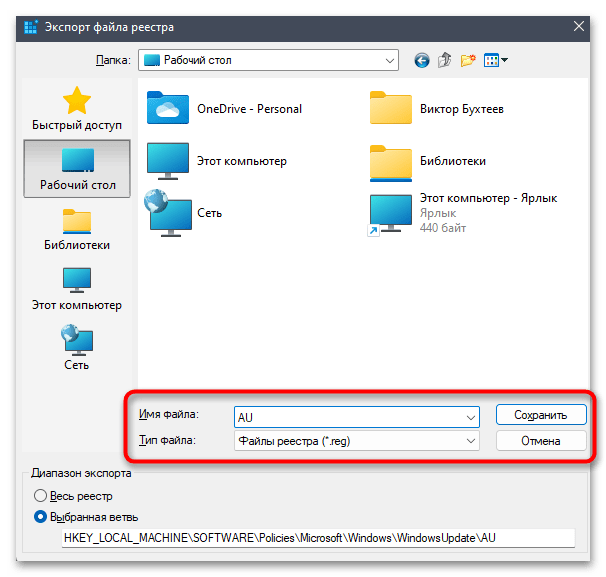
КомпьютерHKEY_LOCAL_MACHINESOFTWAREPoliciesMicrosoftWindowsWindowsUpdateAU, вставив данный путь в адресную строку. - Щелкните по папке с названием «AU» правой кнопкой мыши и выберите «Экспортировать».
- Задайте для файла любое название, тип оставьте по умолчанию и выберите подходящее место для его сохранения. Эта резервная копия нужна для того, чтобы восстановить папку в том случае, если после ее удаления что-то пойдет не так. Вам понадобится только дважды щелкнуть по созданному файлу REG левой кнопкой мыши, чтобы папка автоматически вернулась на свое место со всеми находящимися в ней записями.
- После создания резервной копии снова нажмите по данной папке ПКМ и на этот раз выберите пункт «Удалить». Отправьте компьютер на перезагрузку, чтобы внесенные в реестр изменения вступили в силу.


Способ 4: Редактирование групповых политик
Отметим, что данный способ подойдет исключительно обладателям Windows 11 Pro и Enterprise. Если у вас установлена младшая редакция операционной системы, открыть редактор локальных групповых политик не получится. Вы можете пропустить этот метод и перейти к реализации следующих, если еще не попробовали их.
- Если версия Windows соответствует требованием, откройте утилиту «Выполнить» (Win + R), ведите
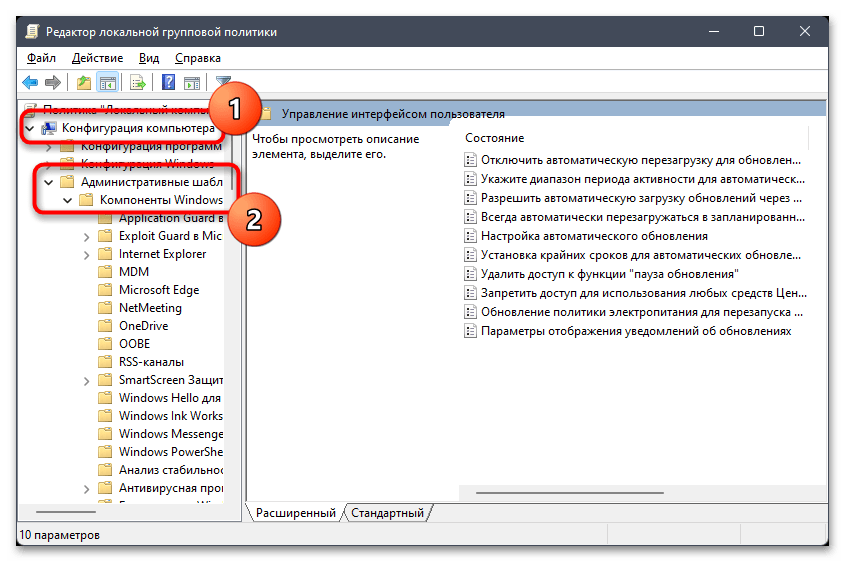
gpedit.mscи нажмите Enter для перехода к нужному окну. - В нем сначала разверните «Конфигурация компьютера», затем выберите директорию «Административные шаблоны», а в ней — «Компоненты Windows».
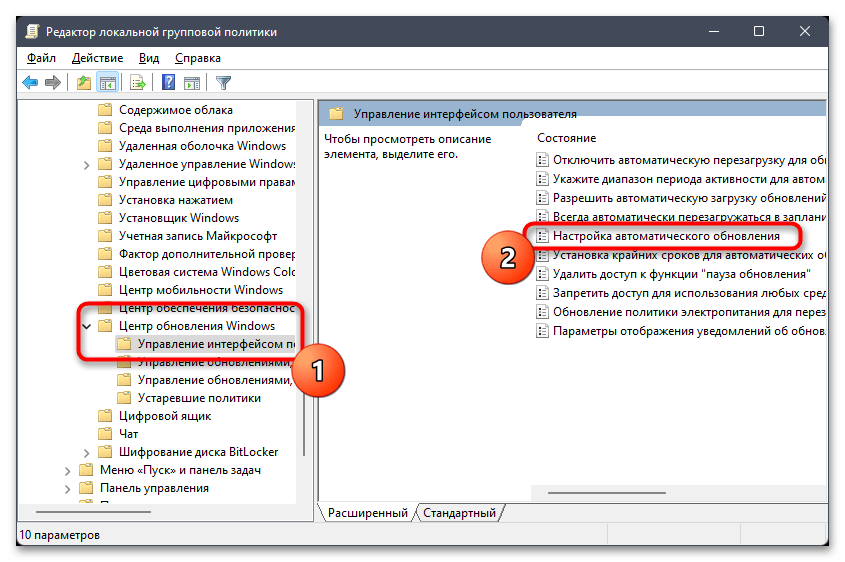
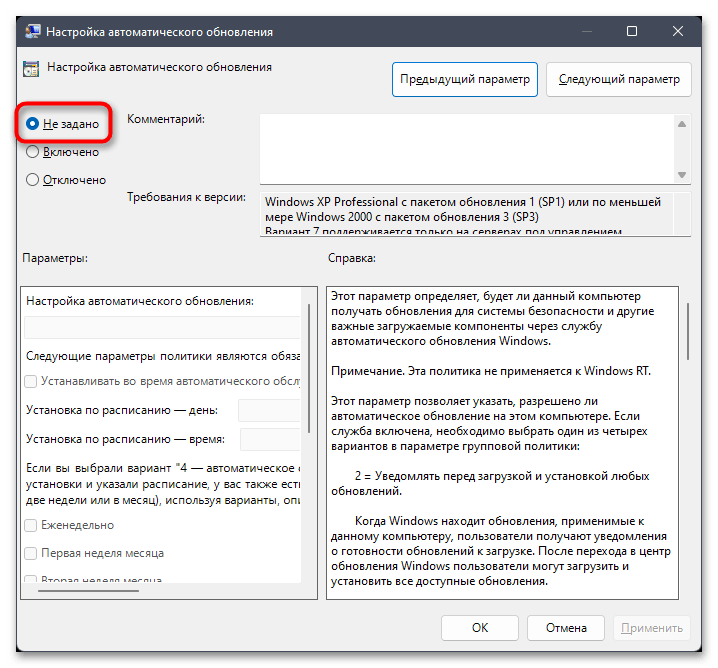
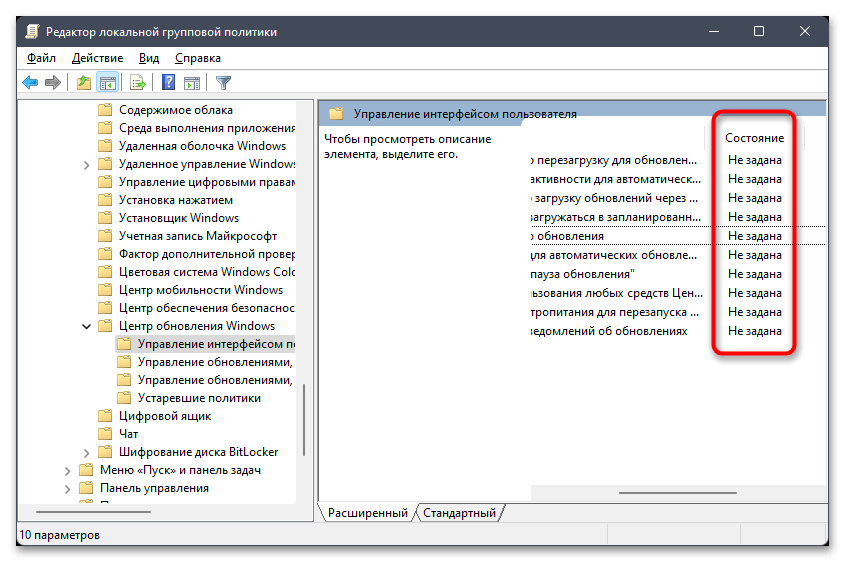
- Переходите к следующей папке под названием «Центр обновления Windows», в ней нажмите левой кнопкой мыши по «Управление интерфейсом пользователя». На панели справа отыщите политику «Настройка автоматического обновления» и дважды кликните по ней левой кнопкой мыши.
- В новом окне установите параметр «Не задано», если сейчас выбран другой, после примените изменения и закройте данное окно.
- Проверьте все остальные политики в этом каталоге и убедитесь в том, что они имеют состояние «Не задано». Если это не так, открывайте настройки точно так же, как это было показано выше, и вносите изменения.
Способ 5: Изменение типа запуска службы обновления Windows
Этот метод простой в реализации, однако оказывается эффективным не так часто, как предыдущие. Его суть состоит в том, чтобы поменять тип запуска службы обновления Windows и сделать так, чтобы она включалась только вручную. Возможно, это поможет устранить надпись «Некоторыми параметрами управляет ваша организация», которая как раз и появляется в «Центре обновления Windows».
- Откройте меню «Пуск», через поиск отыщите приложение «Службы» и запустите его.
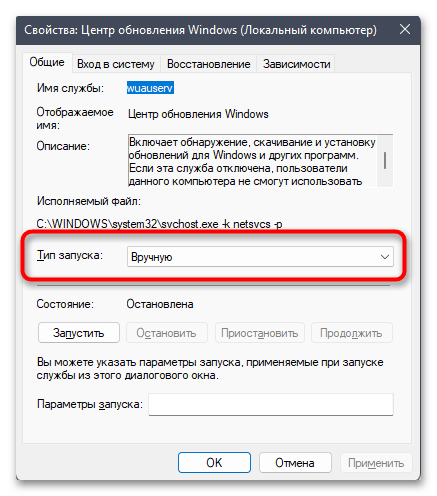
- Найдите службу «Центр обновления Windows» и дважды кликните по ней левой кнопкой мыши.
- Поменяйте тип запуска на «Вручную» и сохраните изменения. Теперь вам понадобится самостоятельно запускать проверку обновлений для Виндовс 11.


Способ 6: Восстановление Windows 11
Прибегать к выполнению этого метода стоит в том случае, если ни один из предыдущих не принес должного результата. Тогда понадобится откатить Windows 11 до исходных параметров, сохранив при этом нужные личные файлы. Специально для этого предназначен встроенный инструмент, запуск которого осуществляется следующим образом:
- Откройте меню «Пуск» и перейдите в «Параметры».
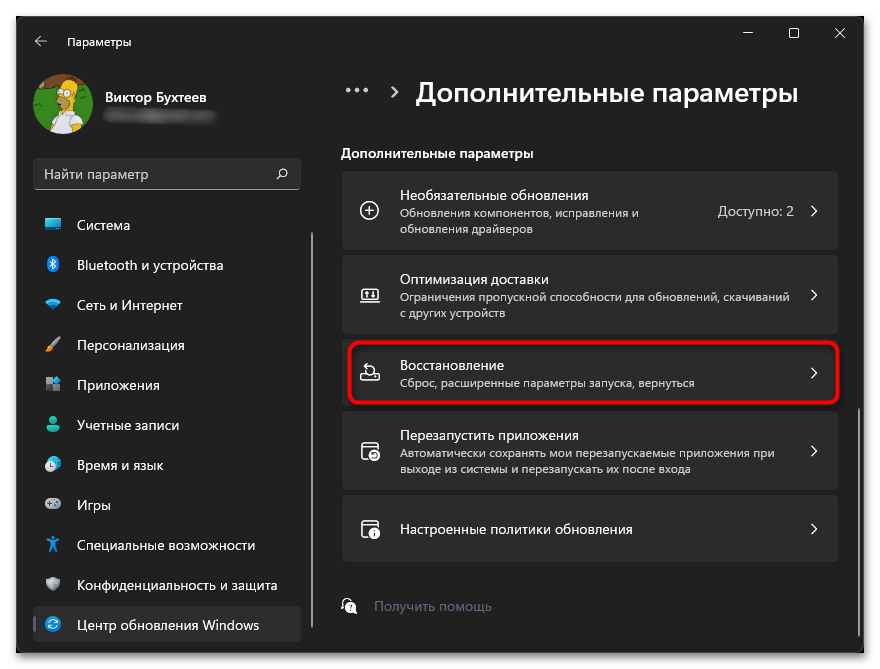
- На панели слева выберите раздел «Центр обновления Windows» и перейдите к категории «Дополнительные параметры».
- Отыщите блок с названием «Восстановление» и щелкните по нему левой кнопкой мыши для открытия.
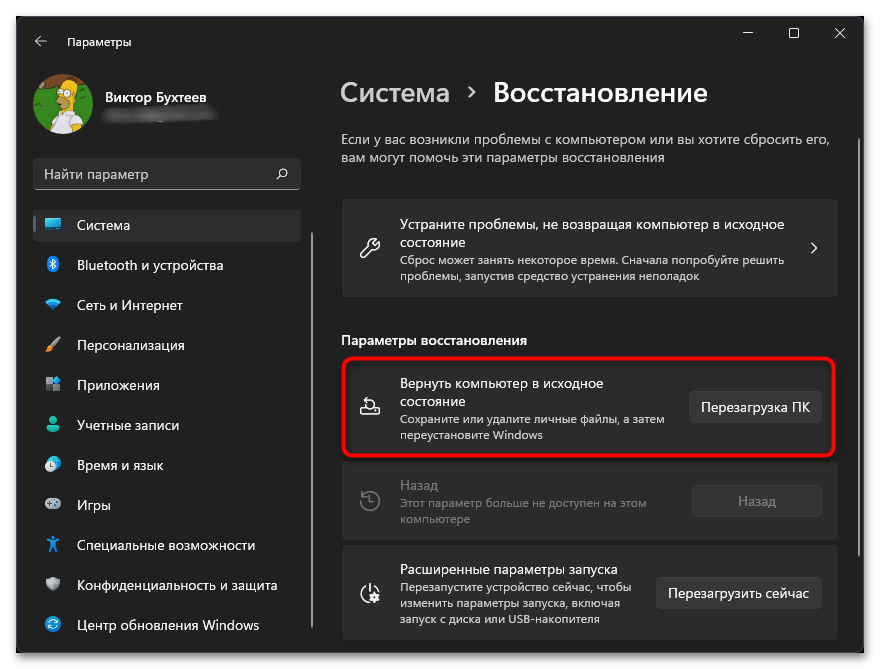
- Теперь остается найти параметр «Вернуть компьютер в исходное состояние» и нажать «Перезагрузка ПК». Далее следуйте отобразившимся на экране инструкциям, чтобы завершить восстановление.

Еще статьи по данной теме:
Помогла ли Вам статья?
You can bypass this error in Windows 10 by using our quick solutions
by Ivan Jenic
Passionate about all elements related to Windows and combined with his innate curiosity, Ivan has delved deep into understanding this operating system, with a specialization in drivers and… read more
Updated on January 25, 2023
Reviewed by
Alex Serban

After moving away from the corporate work-style, Alex has found rewards in a lifestyle of constant analysis, team coordination and pestering his colleagues. Holding an MCSA Windows Server… read more
- Some settings are managed by your organization message appears when you’re trying to change your settings on the computer.
- You can change your Diagnostic and usage data settings to make things right again.
- Also, try to change your settings from Group Policy Editor and modify the respective value.
XINSTALL BY CLICKING THE DOWNLOAD FILE
This software will repair common computer errors, protect you from file loss, malware, hardware failure and optimize your PC for maximum performance. Fix PC issues and remove viruses now in 3 easy steps:
- Download Restoro PC Repair Tool that comes with Patented Technologies (patent available here).
- Click Start Scan to find Windows issues that could be causing PC problems.
- Click Repair All to fix issues affecting your computer’s security and performance
- Restoro has been downloaded by 0 readers this month.
With Windows 10 we got all sorts of interesting features and settings, but there are certain issues sometimes. According to some users, they get Some settings are managed by your organization message when they are trying to change their settings.
But there are a few solutions available that can help you to resolve this problem and restore everything to normal.
This is a well-known issue, and Your organization manages updates on this PC message has even appeared on Windows 11. While it’s possible to remove it, you need to have administrative privileges.
In case you don’t have them, you might need to contact your system administrator. In some rare instances, it’s possible that your IT Administrator has limited access, which will cause additional problems.
Once you obtain administrative access, you need to change policy settings and allow yourself to gain access to certain features or settings.
Some settings are managed by your organization message can appear while trying to change certain settings. Speaking of this problem, users reported the following issues:
- Some settings are managed by your organization lock screen (Windows 10) – This message can appear while you’re on the lock screen. To fix this problem, be sure to try some of our solutions.
- Some settings are hidden or managed by your organization (Windows Update) – Several users reported this message while trying to use Windows Update. To fix the problem, try modifying your registry and check if that helps.
- Some settings are managed by your organization (Windows Defender) – Sometimes this issue can appear while using Windows Defender. To fix the problem, you might want to try installing a third-party antivirus.
- Some settings are managed by your organization fingerprint (Windows Hello) – This message can also appear while trying to add your fingerprint or when using Windows Hello. To fix that problem, you might have to change your group policy.
- Some settings are managed by your organization time – Several users reported this message while trying to adjust the time or date. In most cases, this message is harmless, and you can ignore it.
- Some settings are managed by your system administrator – This is a variation of this message, and if you encounter it, try changing your settings using the administrator account.
Now that we know why this happens, let’s go to the actual solutions to fix the problem.
How do you fix some settings are managed by organization?
- Why am I seeing Some of these settings are hidden or managed by your organization?
- How do you fix some settings are managed by organization?
- 1. Remove work or school accounts
- 2. Create a new Administrator account
- 3. Change your Diagnostic and usage data
- 4. Change your settings from Group Policy Editor
- 5. Edit your registry
- 6. Enable Telemetry
- 6.1 Change the Registry key
- 6.2 Enable the Telemetry service
- 7. Remove the policies from the registry
- 8. Check the scheduled tasks
Before getting into the more elaborate solutions, let’s crosscheck a few preliminary measures from our list:
- Check your hard drive – According to our readers, the issue started occurring because the drive was designed only for data storage. so you might want to inspect your hard drive using the best HDD health check software for your PC.
- Disable or uninstall your antivirus – Many antivirus tools can interfere with your system and cause this message to appear. Try to disable your antivirus and if that solves the issue, you should consider switching to the best antivirus software for Windows 10 now.
- Ask for permission – If your PC is part of the network of an organization, ask for the right permissions to change certain aspects from the network manager.
Now that we know why this issue occurs, let’s perform the solutions below to fix the problem.
1. Remove work or school accounts
1. Click the Start button and select Settings.
2. Click on Accounts.
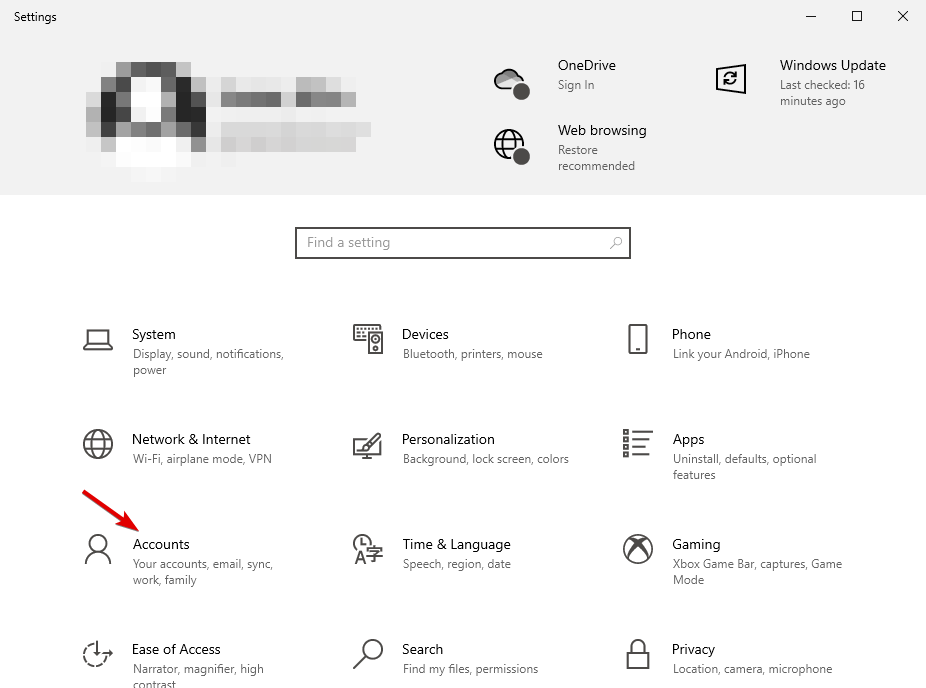
3. Go to Access work or school.
4. Select any connected account and remove it.
5. Restart your device.
Different errors such as Your school manages your PC or Your organization manages your PC usually happen when you have connected work or school accounts to the device.
Because of these accounts, you need permission from the company/school to make changes to your computer.
Additionally, this problem also occurs when you are trying to use the Windows Update Checker tool to see if you can upgrade to Windows 11.
Simply removing those accounts will get rid of the issues. Take a look at this thorough article on how to install Windows 11 and learn how to do it properly.
2. Create a new Administrator account
- Click the Start button and go to Settings.
- Then, Accounts.
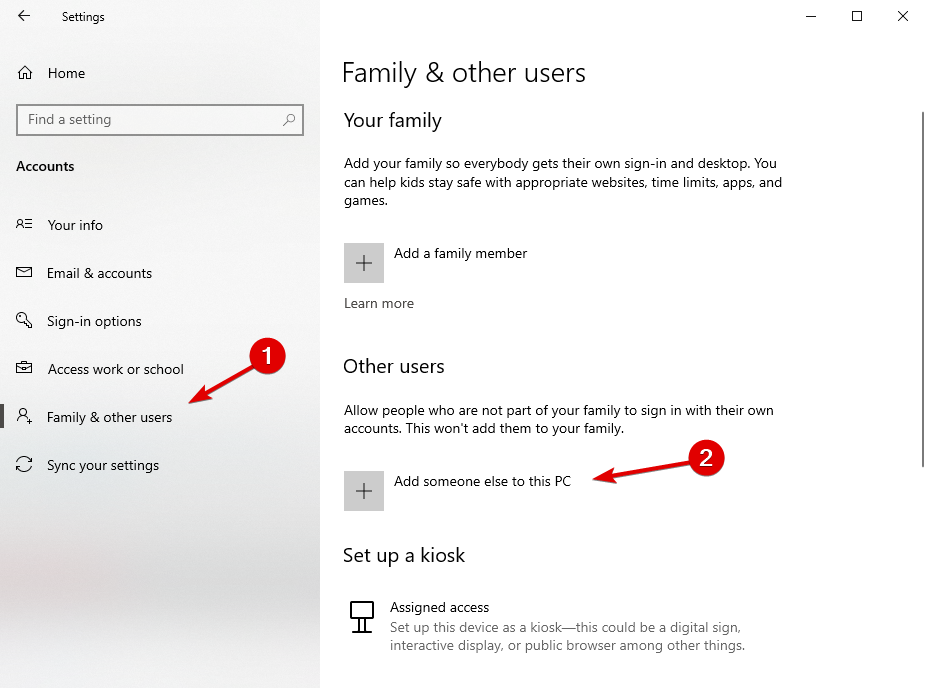
- Select Family & other users.

- Next, choose Add someone else to this PC.

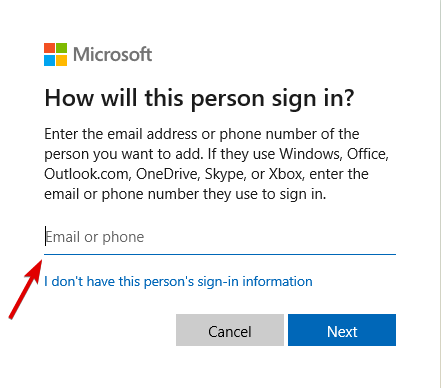
- Enter the credentials in the box and follow the guidelines.
- After creating the account, change it to Administrator and click OK.
If you are still having some issues with the installation process, check out this guide dedicated to fixing Windows 11 installation issues. It will come in handy when trying to upgrade your OS.
3. Change your Diagnostic and usage data
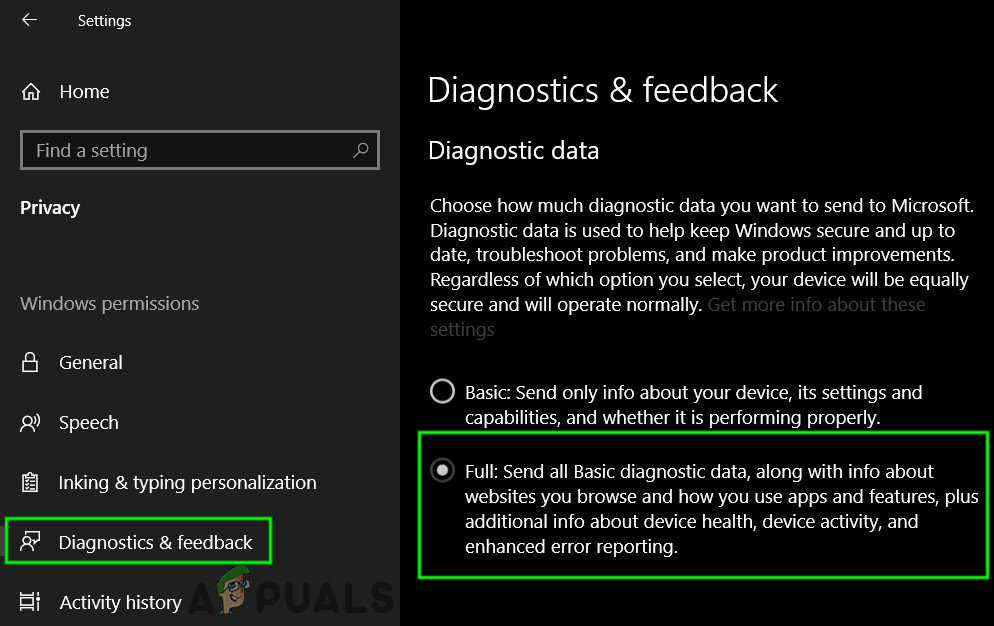
- Open Settings and select Privacy.

- On the menu on the left choose Diagnostics & feedback.

- From the right pane, change the Diagnostic data to Optional.

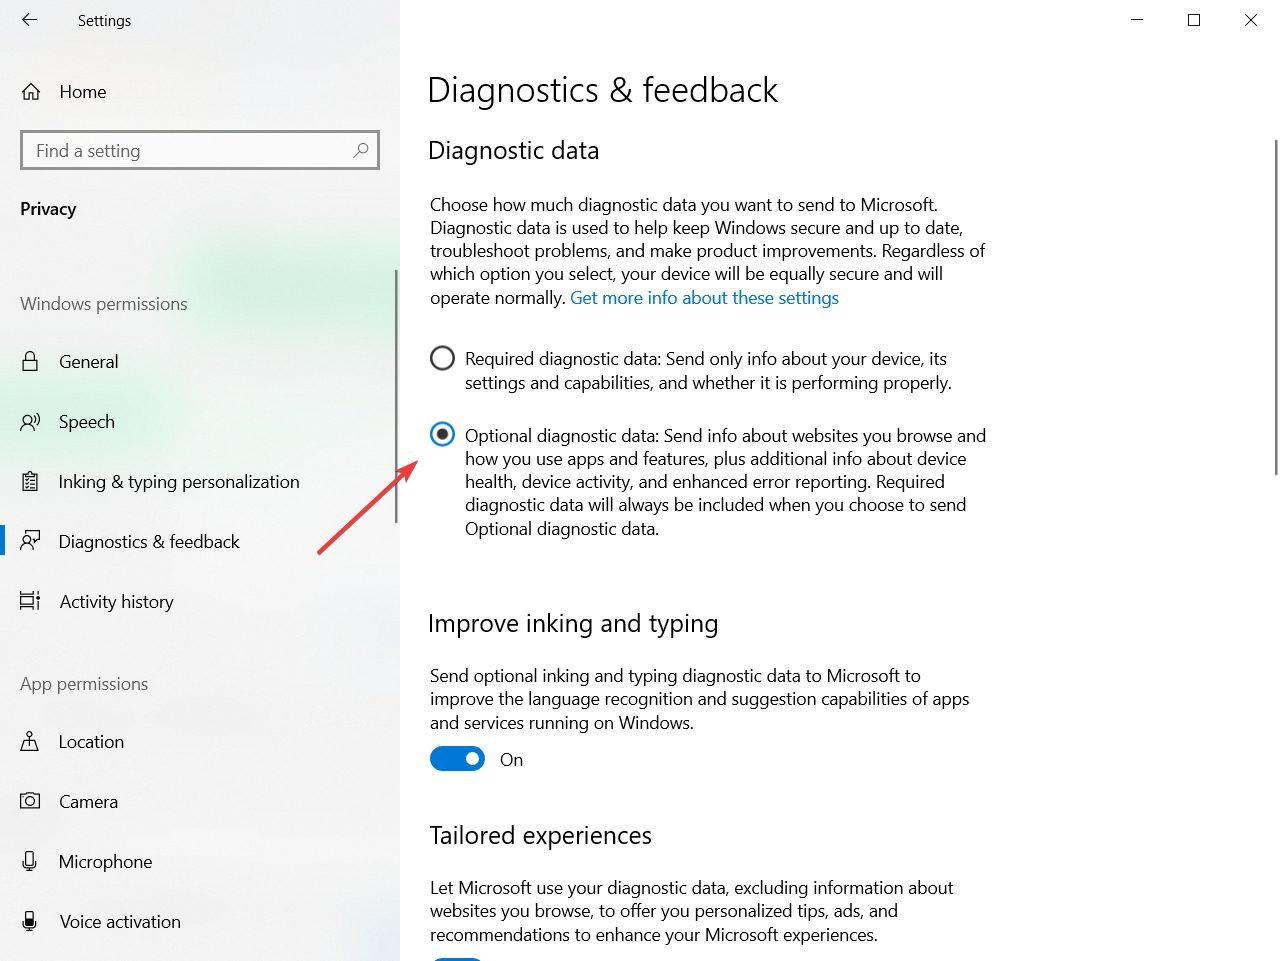
This solution is pretty simple, you just need to change one setting. We have to mention that this option regulates how much of your personal data is being sent to Microsoft for analysis.
Some PC issues are hard to tackle, especially when it comes to corrupted repositories or missing Windows files. If you are having troubles fixing an error, your system may be partially broken.
We recommend installing Restoro, a tool that will scan your machine and identify what the fault is.
Click here to download and start repairing.
If you’re not compatible with sharing too much of your personal data for analysis and bug fixing you should probably stick to the Enhanced option.
Although this solution is pretty straightforward it doesn’t always work, but luckily, we have one more solution for you.
If you’re having trouble opening the Setting app, take a look at our expert article to solve the issue quickly.
- How to install Group Policy Management in Windows 10
- Nothing happens when you click Run as administrator?
- Fix: Brother Printer Scanner Not Working/Connecting to PC
- How to Fix The Network Security Key Isn’t Correct on Windows
4. Change your settings from Group Policy Editor
- Open Group Policy Editor by pressing Windows key + R and typing gpedit.msc.

- When Group Policy Editor starts you need to navigate to:
User Configuration/Administrative Templates/Start Menu and Taskbar/Notifications - On the right side of the window find Turn off toast notifications setting and double click it.

- Try enabling it and disabling it a couple of times but remember to keep it disabled before you save your settings.


If you don’t know how to edit the Group Policy, check out our step-by-step guide, and find out how you can do it like an expert.
5. Edit your registry
- Press Windows key + R and enter regedit.
- Now press Enter or click OK. Registry Editor will now start.
- Before we make any changes, it’s recommended to export your registry. The registry is sensitive to changes, and sometimes new issues can appear if you modify your registry, therefore it’s a good idea to create a backup. To do that, follow these steps:
- Click on File and select Export.

- Now select All as Export range and enter the desired name. Choose a save location and click the Save button.

- Once you do that, you’ll create a backup of your registry. You can use this file at any time in order to restore your registry to its original state if anything goes wrong.
- Click on File and select Export.
- In the left panel, navigate to the following key:
HKEY_LOCAL_MACHINE/SOFTWARE/Policies/Microsoft/Windows/WindowsUpdate - In the right pane, look for Wuserver.
- Right-click Wuserver and choose Delete from the menu.

- A confirmation dialog will now appear. Click Yes to remove this entry.


According to users, Some settings are managed by your organization message that can appear due to your registry.
Certain registry values can interfere with your operating system and cause this and other errors to appear.
To fix the problem, you’ll need to manually modify your registry. Modifying the registry is relatively simple, and you can do it by following the steps above.
After making changes to the registry, the issue should be resolved. If you can’t find the key from Step 3 or the Wuserver DWORD, this solution won’t apply to you so you can skip it.
If you have problems with the solution above we have a guide on what to do if you can’t edit the registry.
6. Enable Telemetry
6.1 Change the Registry key
- Open Registry Editor and create a backup of your registry. We showed you in detail how to do that in the previous solution.
- When Registry Editor opens, in the left pane navigate to the following key:
Computer/HKEY_LOCAL_MACHINE/SOFTWARE/Policies/Microsoft/WindowsDataCollection - In the right pane, locate AllowTelemetry DWORD and set it to 1. If this DWORD isn’t available, you’ll have to create it manually and change its Value data to 1.


If you’re getting Some settings are managed by your organization message, you might be able to fix the problem simply by enabling Telemetry. To do that, just follow the steps above.
6.2 Enable the Telemetry service
- Press Windows key + R and enter services.msc. Press Enter or click OK.
- When the Services window opens, double-click on Connected User Experiences and Telemetry.

- Set the Startup type to Automatic and click on Apply and OK to save the changes.

- Now locate dmwappushsvc and double-click it.
- Set the Startup Type to Automatic and make sure that the service is running.


After making the changes, you need to enable the Telemetry service. To do that, just follow the steps above. After doing that, check if the problem is resolved.
7. Remove the policies from the registry
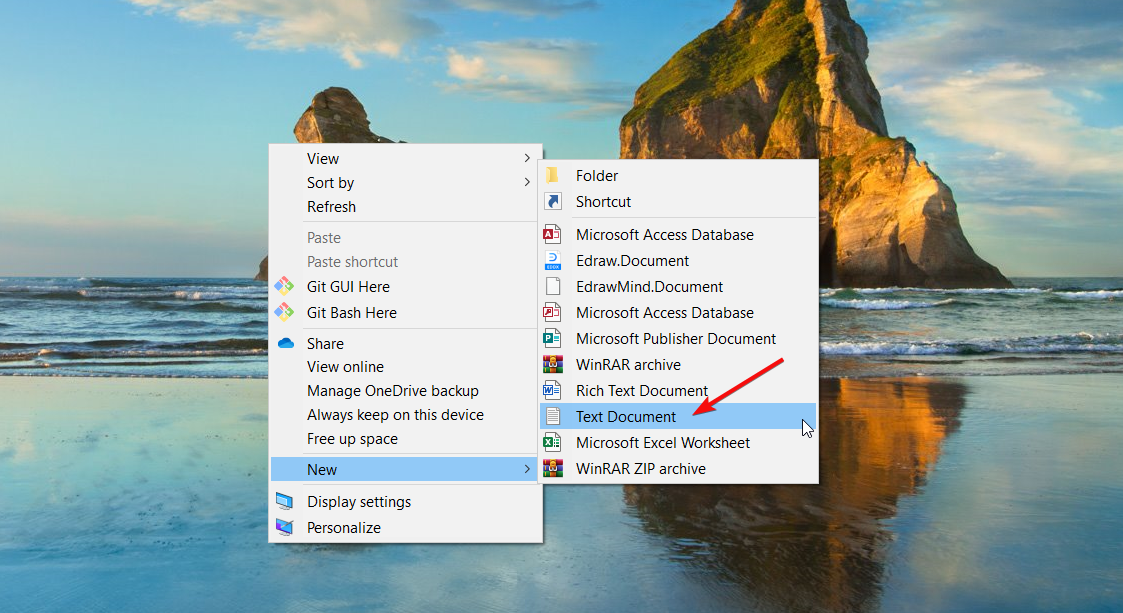
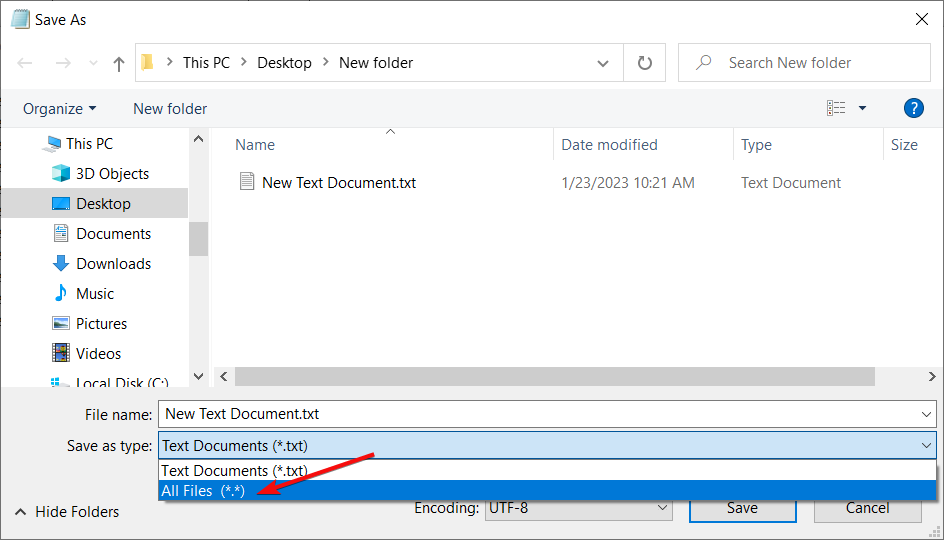
- Right-click on a free space on your desktop, select New, then choose Text document.

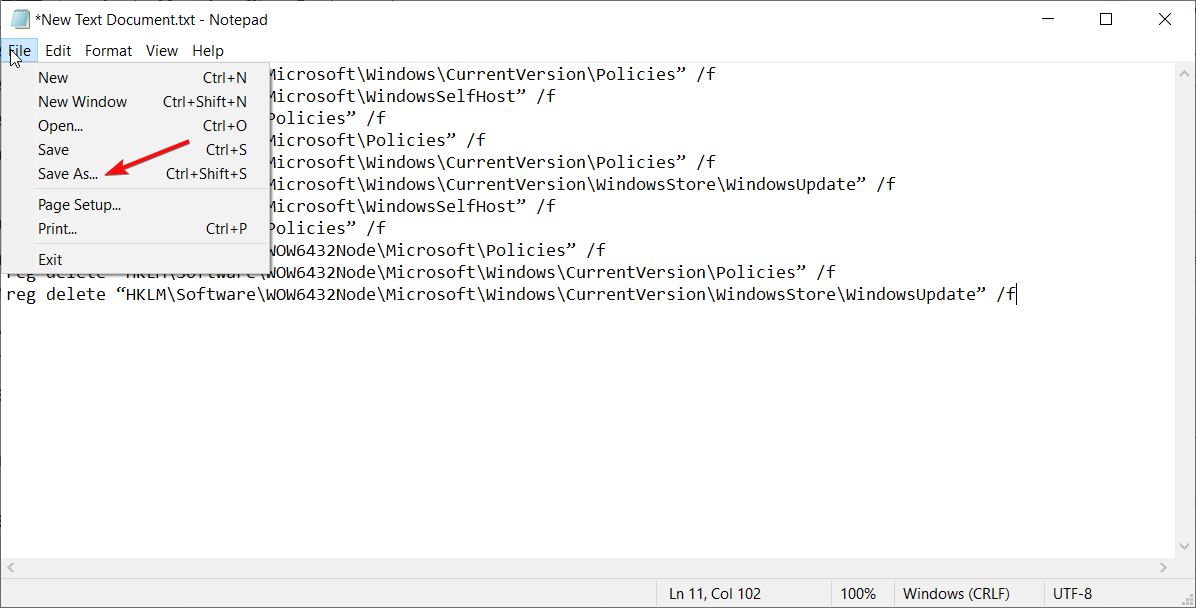
- Paste the following commands into the Notepad window:

reg delete “HKCUSoftwareMicrosoftWindowsCurrentVersionPolicies” /f
reg delete “HKCUSoftwareMicrosoftWindowsSelfHost” /f reg delete “HKCUSoftwarePolicies” /f
reg delete “HKLMSoftwareMicrosoftPolicies” /f
reg delete “HKLMSoftwareMicrosoftWindowsCurrentVersionPolicies” /f
reg delete “HKLMSoftwareMicrosoftWindowsCurrentVersionWindowsStoreWindowsUpdate” /f
reg delete “HKLMSoftwareMicrosoftWindowsSelfHost” /f
reg delete “HKLMSoftwarePolicies” /f
reg delete “HKLMSoftwareWOW6432NodeMicrosoftPolicies” /f
reg delete “HKLMSoftwareWOW6432NodeMicrosoftWindowsCurrentVersionPolicies” /f reg delete “HKLMSoftwareWOW6432NodeMicrosoftWindowsCurrentVersionWindowsStoreWindowsUpdate” /f
- Click on File and select Save as.
- Change the save option below Text Documents (*.txt) to All files.

- Name the file ResetPolicies.bat and click Save.
- Right-click on this file and choose the option Run as administrator.
- A Command Prompt will open and automatically change all lines in the register. Restart your PC to get all the changes to work.


8. Check the scheduled tasks
- Press Windows key + S and enter task scheduler. Select Task Scheduler from the list of results.

- When Task Scheduler starts, in the left pane, expand Safer-Networking directory and select Spybot Anti-Beacon. In the right panel, select the available task, right-click it and choose Delete.

Sometimes, scheduled tasks can interfere with Windows and cause Some settings are managed by your organization message to appear.
To fix the problem, you need to remove any scheduled tasks related to Spy bot Anti-beacon. To do that, follow the steps above.

NOTE
Keep in mind that this solution works only if you have Safer-Networking and Spybot Anti-Beacon directories in Task Scheduler.
If you’re looking for an alternative to Task Scheduler, check out these awesome software tools that will help you schedule your task like a pro.
Lastly, you need to modify your host’s file. Keep in mind that the host’s file is locked for editing, and in order to edit it, we recommend checking our article on how to edit the host’s file.
After opening the hosts’ file, you need to delete all values between # Start of entries inserted by Spybot Anti-Beacon for Windows 10 and # End of entries inserted by Spybot Anti-Beacon for Windows 10.
After making these changes, restart your PC and check if the problem is resolved.
As you can see Some settings are managed by your organization message can be annoying a bit, but you can easily solve it by following the instructions above.
Users have reported that both solutions are helpful although the first solution doesn’t work for all users. If the first solution isn’t working for you the second one will probably fix it.
If your device is managed by an organization, you might also be interested in the best corporate & small business VPN solutions.
For any other suggestions or questions, feel free to leave them in the comments section below and we will get back to you as soon as possible.
Still having issues? Fix them with this tool:
SPONSORED
If the advices above haven’t solved your issue, your PC may experience deeper Windows problems. We recommend downloading this PC Repair tool (rated Great on TrustPilot.com) to easily address them. After installation, simply click the Start Scan button and then press on Repair All.
![]()
Newsletter
Regular and periodic Windows update are essential for security and performance purposes. Microsoft releases both quality and feature updates to ensure that computers are secure and new features are introduced to the public. Windows update also helps in resolving bugs and glitches affecting the performance of devices.
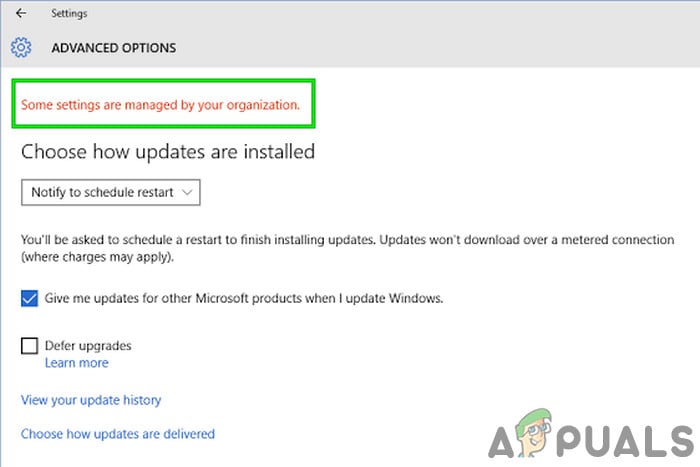
Many users report, that on their personal Windows 10 computer in the Windows Update page, they see the message «Some settings are managed by your organization» even though their computer does not belong to an organization or company. This error may also occurs in the privacy, background and notification settings.

In this article you will find several methods to eliminate the error «Some settings are managed by your organization», in Windows Update* settings on Windows 10 or Windows 11 OS.
* Note: If you see the message on Personalization settings (e.g. at Background, Colors, Themes, etc..), proceed and delete the «Personalization» key at this registry location:
- HKEY_LOCAL_MACHINESOFTWAREPoliciesMicrosoftWindowsPersonalization
FIX: Some Settings Managed by your Organization in Windows 11/10 Update.
- 1. Remove Work or School Accounts.
- 2. Change Network ID in System Settings.
- 3. Remove Automatic Update Options in Registry.
- 4. Modify Automatic Updates settings in Group Policy.
- 5. Remove Policy registry keys.
Method 1. Remove Work or School Accounts.
Removing the associated account from your work or school could help resolve this issue. Follow the steps below to disconnect the account.
1. Click the Start menu, select Settings and then Accounts.

3. From the left pane, select Access work or school.

4. Click the associated account from your work or school, select Disconnect.

Method 2. Change Network ID in System Settings.
The second method to remove the error-message «Some settings are managed by your organization», is to change the system’s properties to show that this PC is not a part of a business/work network.
1. Click on the Start menu and type in search bar: view advanced system settings. Then click Open.

2. Select the Computer Name tab, then click on Network ID

3. A dialog box will prompt you to describe if your device is a home PC or a business computer. Select This is a home computer; it is not part of a business network, then click Next.

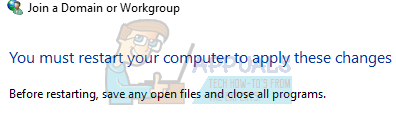
4. The PC needs to restart to apply the changes, click Finish to reboot the PC. After restart, check if the issue is resolved.
Method 3. Remove Automatic Update Options in Registry.
1. Simultaneously press the Windows ![]() + R keys to open the Run command box.
+ R keys to open the Run command box.
2. Type regedit and hit Enter to open the Registry Editor.

3. Once you are inside the Registry Editor, navigate to the location mentioned below.
- HKEY_LOCAL_MACHINESOFTWAREPoliciesMicrosoftWindowsWindowsUpdateAU
4a. Right-click at AU key and from the File menu choose Export to backup the registry key.

4b. Type a filename (e.g. «AU») and Save the registry file on your desktop. *
* Note: If something goes wrong after editing the registry, you can simply undo the changes by double-clicking the extracted registry key (.REG file) on your desktop.

5. Now, right-click again at the AU key and select Delete.

6. Close the Registry Editor and restart your PC.
7. After restart go to Windows Update, and check if the «Some settings are managed by your organization» message has disappeared.
Method 4. Modify Automatic Updates settings in Group Policy.
Changing the Group Policy of the PC also help in correcting this issue. The group policy is a built-in tool for Windows 10 Pro or Enterprise edition only. *
* Note: This method applies only to Windows 10 Pro & Enterprise versions.
1. Simultaneously press the Windows ![]() + R keys to open the Run command box.
+ R keys to open the Run command box.
2. In the text field of the dialog box, type gpedit.msc and hit Enter to open the Group Policy Editor.

3. Navigate to the location below in the Group Policy Editor.
- Computer ConfigurationAdministrative TemplatesWindows ComponentsWindows Update
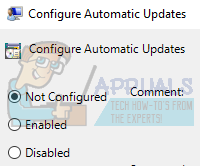
4a. Now open Configure Automatic Updates policy at the right side.

4b. Select Not Configured and click OK. *
* Note: If the policy is already «Not Configured», set it to Enabled, click OK and close the Policy Editor. Then re-open the Group Policy Editor, set this policy to Not Configured and click OK.

5. Ensure that all the rest Windows Update policies here are set to Not Configured. If not, proceed and set them to «Not Configured» as instructed above.

6 Close Group Policy Editor and restart your PC. Normally, after restart, the “Some settings are managed by your organization” message will disappear from Windows Update page.
Method 5. Remove Policy registry keys.
1. Open Registry Editor: To do that:
-
- Simultaneously press the Windows
 + R keys to open the Run command box.
 - Type regedit and hit Enter to open the Registry Editor.
- Simultaneously press the Windows
2. Navigate to the location below in Registry Editor:
- HKEY_LOCAL_MACHINESOFTWAREPoliciesMicrosoft
3a. Right-click at Microsoft folder and choose Export to backup the key.

3b. Type a filename (e.g. «Microsoft») and save the registry file on your desktop.*
* Note: If something goes wrong after editing the registry, you can simply undo the changes by double-clicking the extracted registry key (.REG file) on your desktop.
4. Now right-click again and Delete the Microsoft key. (If you get a prompt saying «Cannot delete Microsoft: Error while deleting key», click OK).

5. Now navigate to this location:
- HKEY_CURRENT_USERSOFTWAREMicrosoftWindowsCurrentVersionGroup Policy
6a. Right-click on Group Policy key and choose Export to backup the key.
6b. Type a filename (e.g. «Group Policy») and save the registry file on your desktop.*
* Note: If something goes wrong after editing the registry, you can simply undo the changes by double-clicking the extracted registry key (.REG file) on your desktop
7. Right-click on the Group Policy folder, then click Delete. (You will get a prompt asking if you want to delete the folder and its subkey permanently, click Yes)

8. Close the Registry Editor and restart your PC.
That’s it! Which method worked for you?
Let me know if this guide has helped you by leaving your comment about your experience. Please like and share this guide to help others.
If this article was useful for you, please consider supporting us by making a donation. Even $1 can a make a huge difference for us in our effort to continue to help others while keeping this site free:

If you want to stay constantly protected from malware threats, existing and future ones, we recommend that you install Malwarebytes Anti-Malware PRO by clicking below (we
do earn a commision from sales generated from this link, but at no additional cost to you. We have experience with this software and we recommend it because it is helpful and useful):
Full household PC Protection — Protect up to 3 PCs with NEW Malwarebytes Anti-Malware Premium!
After upgrading to Windows 10, users might see an error which states “Some settings are managed by your organization” when they try to change some settings using the Settings application. This error message might be seen in almost all places like Cortana, Windows Update, etc. You can even encounter this error when changing the background or lock screen of your computer.
This error mainly occurs when a user is upgrading to Windows 10. This is a setting in windows for quite some time now which enables organizations to limit the access of computer settings by their employees. If you didn’t configure the options properly during the update process, you might face this error. As a consequence, your access to settings/features might be limited by a nonexistent organization. Luckily, there are fixes available for this error. Refer to the solutions below starting from the first one and working your way down.
Solution 1: Editing the Local Group Policy
We can try resetting the group policy regarding the organizational access by enabling and disabling it. This will reset the settings and remove any bugs in your operating system. Do note that group policy is related to a lot of your windows components. Don’t change values/things you do not know about and strictly follow the steps listed below. Home Edition of Windows does not have gpedit.msc but you can add gpedit.msc to Windows Home Edition.
- Press Windows + S to launch the search bar of your start menu. Type “gpedit.msc” in the dialogue box. Right-click on the first result which comes forth and select “Run as administrator”.
- Now navigate to the following path using the navigator present at the left side of the screen.
Computer Configuration/Administrative Templates/Windows Components/Data Collection and Preview Build
- Now at the right side of the screen, find the item named “Allow Telemetry”. Double click it so we can edit the policy.
- Now change the setting to Enabled. A new drop-down box will appear near the middle of the screen. Select the third option (Full). Now click on Apply to save the changes and exit the window.
- Now open the item again and select the option of “Not Configured”. Save changes and exit. Now check if the error message went away from all your settings.
Solution 2: Granting access to applications manually
If you followed the solution and it solved the problem partially, don’t worry. We will fix the error message in each of your computer’s applications and fix them one by one. Hopefully, by the end of this solution, all your applications and utilities will be working as expected with no errors involved.
Windows Update
If the error message presides in your Windows Update window, we will change some settings and check if the problem gets fixed.
- Press Windows + S to launch the search bar of your start menu. Type “gpedit.msc” in the dialogue box. Right-click on the first result which comes forth and select “Run as administrator”.

Open gpedit.msc as Administrator in Windows Search - Now navigate to the following path using the navigator present at the left side of the screen.

Computer Configuration/ Administrative Templates/ Windows Components/ Windows Update
- Once in the correct file path, find the item named “Configure Automatic Updates” at the right side of the window.
- Double-click the entry to open its settings. Now mark the setting as “Not Configured”. Click Apply to save your changes and exit.
- Check if your problem got fixed. A restart might be required for all the effects to take place.
Desktop Background Change and Lockscreen
- Press Windows + S to launch the search bar of your start menu. Type “gpedit.msc” in the dialogue box. Right-click on the first result which comes forth and select “Run as administrator”.
- Now navigate to the following path using the navigator present at the left side of the screen.
Computer Configuration/ Administrative Templates/ Control Panel/ Personalization
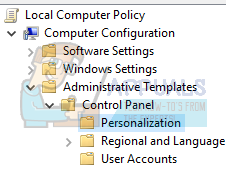
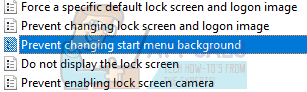
- Now, look for an entry present on the right side of the screen named “Prevent changing start menu background”. Double click it to change its settings. You can also perform the same steps for the entry of “Prevent changing lock screen and logon image”.
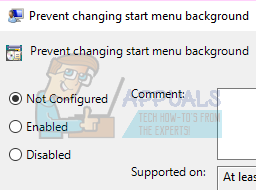
- Once in the settings, set the policy as Not Configured or Disabled.

- Click Apply to save changes and exit. Check if the error message went away. A restart might be required for all the effects to take place.
Notifications
- Press Windows + S to launch the search bar of your start menu. Type “gpedit.msc” in the dialogue box. Right-click on the first result which comes forth and select “Run as administrator”.
- Now navigate to the following path using the navigator present at the left side of the screen.
User Configuration/ Administrative Templates/ Start Menu and Taskbar/ Notifications
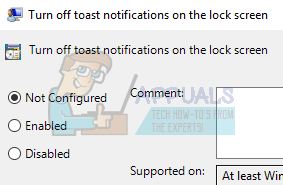
- Now, look for an entry present at the right side of the screen named “Turn off toast notifications on the lock screen”. Double click it to change its settings.
- Once in the settings, set the policy as Not Configured or Disabled.
- Click Apply to save changes and exit. Check if the error message went away. A restart might be required for all the effects to take place.
Note: These solutions work for all the utilities/applications where you are experiencing a problem. You can easily change the group policy settings and set them as Not Configured or Disabled.
Solution 3: Change the Registry Settings
We can try tweaking the registry settings a little to get your issue fixed. Registry Editor is a very powerful tool and directly affects your PC and its performance. It is advised that you proceed with caution and follow the steps very carefully.
- Press Windows + R to launch the Run application. Type “regedit” in the dialogue and press enter to launch your registry editor.

Open Regedit - Now if the problem resides in your notification area, navigate to
ComputerHKEY_CURRENT_USERSoftwarePoliciesMicrosoftWindowsCurrentVersionPushNotifications
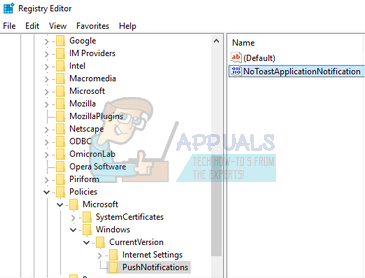
- On the right side, you will an entry named “NoToastApplicationNotification”. Double click it to change its settings.
- Now change its value to 0. The default value will be 1 and you have to change it to 0.
- Sign out from your Microsoft account and log in again. Check if your problem got fixed. Sometimes a restart is required to implement all the changes.
Solution 4: Changing Feedback and Diagnostics settings
This error also seems to go away when we change the feedback and diagnostics settings. By default, the diagnostics are set as basic so Windows is updated and secure. We can try changing the level higher to ensure that our problem goes away.
- Press Windows + S to launch the search bar of your start menu. Type Settings and open the first result which comes forth. You can also open the settings directly by pressing Windows + X and clicking on Settings from the list of options available.
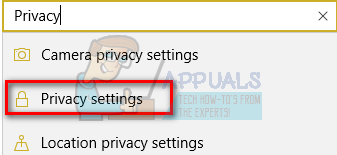
- Once in the settings, type Privacy on the search bar present at the near top of the screen. Now select “Privacy settings” from the list of options available.
- Navigate to Feedback and Diagnostics from the navigation tab present at the left side of the screen.
- Now change the default setting from Basic to Full. Save changes and exit.

Change Diagnostics and Feedback Settings to Full - A restart might be required to implement all the necessary changes. Check if the problem got solved.
Solution 5: Check Third-Party Applications
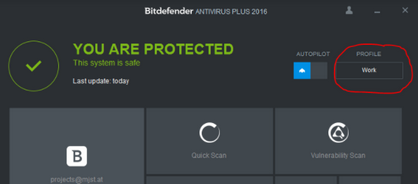
Many applications like BitDefender, ESET, etc. have the authority to change the settings of your user profiles automatically. They have an option of a Work profile that brings forward the error message so no changes can be made to the settings of the computer.
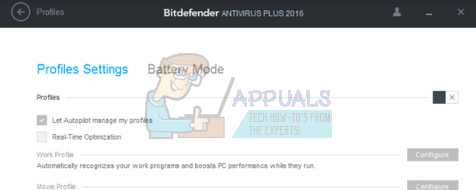
We can try disabling the Profiles on your third-party applications and checking if the error got fixed. All you have to do is open the application and navigate to a tab or heading named Profile.
Check if it is set as Work.
Now open the settings of the third party application and disable it from changing the profiles on its own.
Solution 6: Changing System Properties
There is an option in the control panel where you can change the system properties and select the option which confirms that this computer isn’t a work computer. Although this might not work for all the users, it did for some so it is worth a shot.
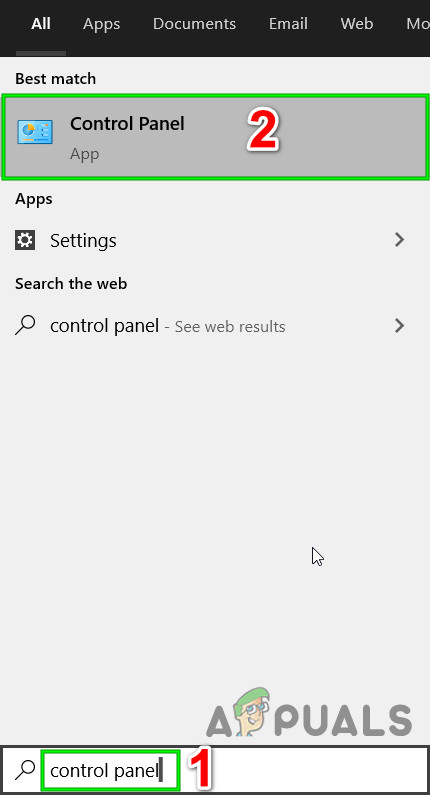
- Press Windows + R to launch the Run application. Type “control panel” in the dialogue box and press enter.

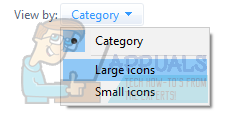
Open Control Panel - Once in the control panel, select View by and choose Large icons.
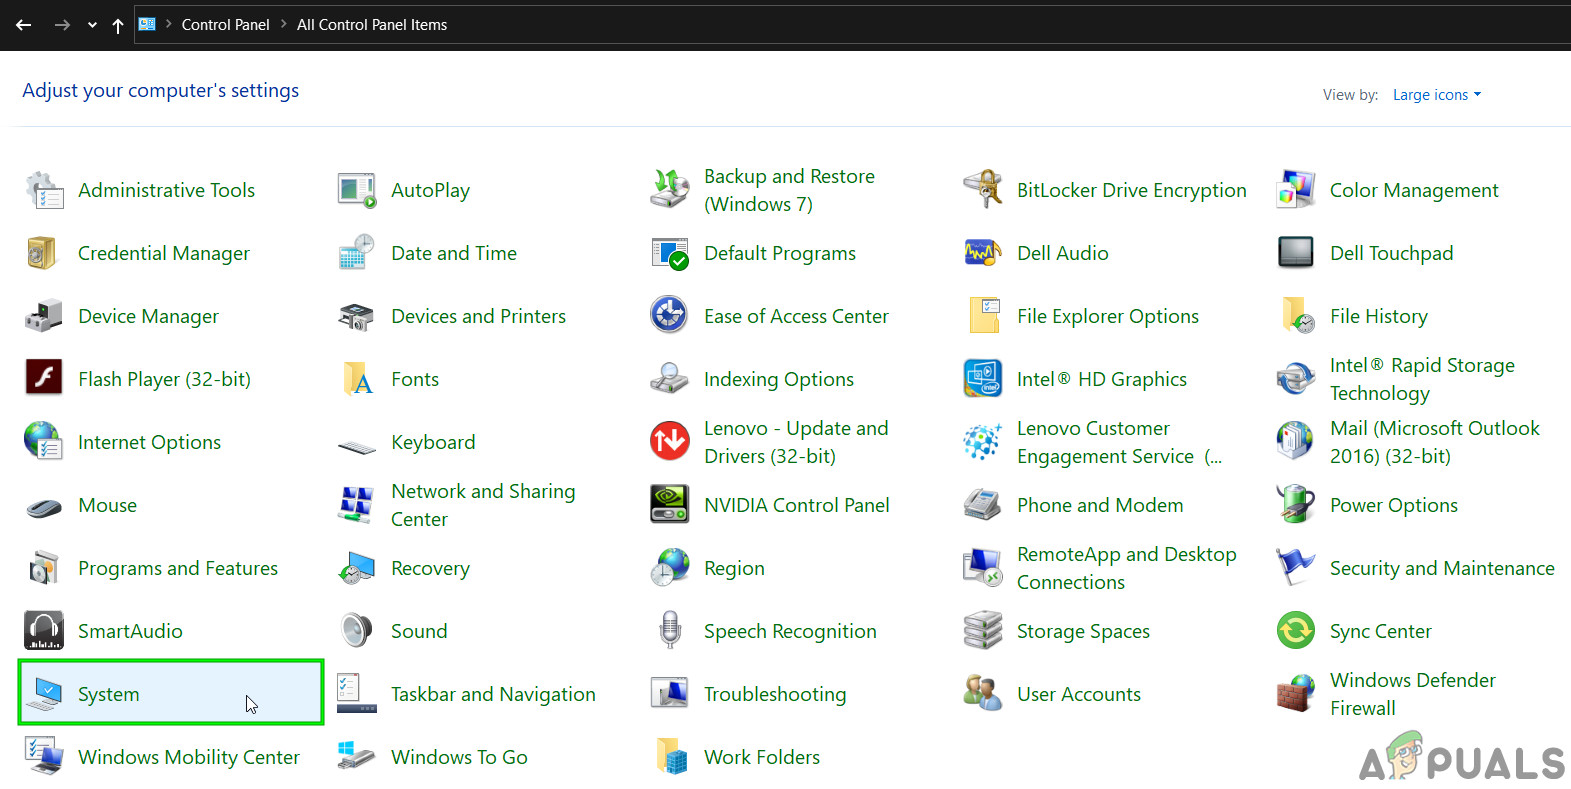
- From the new view of the control panel, select System from the list of options available.

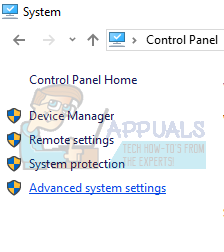
Open System in Control Panel - Once in the System settings, click on “Advanced system settings” present at the left side of the screen.
- Once in the properties, click on the button of “Network ID” present at the near bottom of the screen.
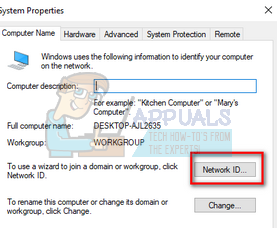
- Now windows will ask if this computer is a home computer of a business network. Select the check option which says “This is a home computer; it’s not part of a business network”.
- Now Windows will prompt you to restart your computer for the changes to take effect. Save all your current work and after restarting, check if the problem got fixed.

Solution 7: Editing all the Registry Settings at once
Like we explained earlier, the problem can be traced to your registry settings where they might be in an incorrect configuration. If you cannot pinpoint the problem properly, you can try changing all the registry settings at once using the .reg file in the link down below.
Download the required registry file and open it to change all the policies at once. A restart might be required for all the changes to take place.
Solution 8: Reset GPO Settings to Their Defaults
If nothing has helped you so far, then it is time to reset GPO Settings to their defaults, so that, no settings is enabled/disabled, to rule out any setting creating the problem.
But before moving on, create a system restore point.
- Press Windows Key, type Run and in the resulting list, click on Run.

Open Run Command - Now type gpedit.msc and hit Enter.

Open gpedit.msc - In the GP editor window, go to the following path :
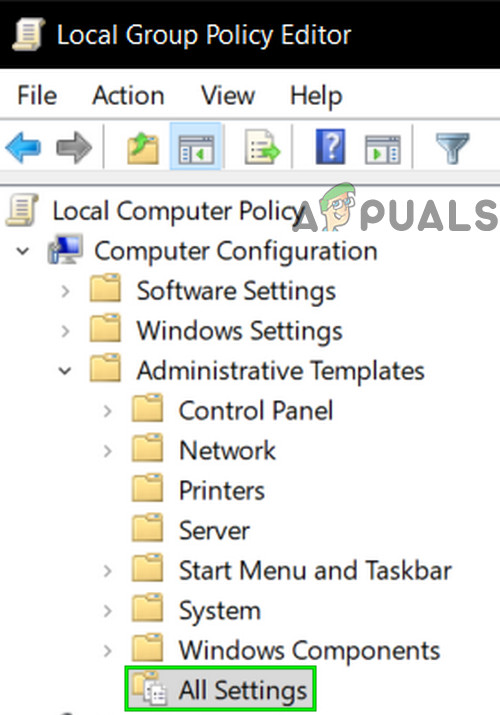
Local Computer Policy > Computer Configuration > Administrative Templates > All Settings

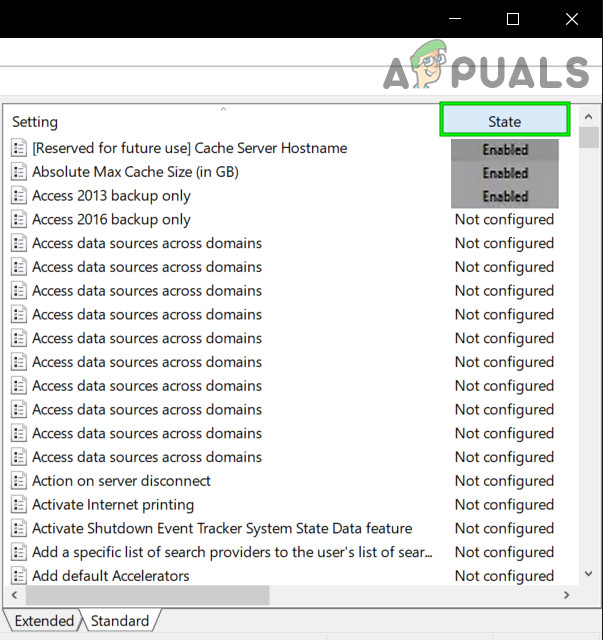
Open All Settings in GP Editor - Then in the right pane of the window, click on State column heading to sort the policy settings by State column (so that all Enabled/Disabled will be shown on the top).

Sort All Settings by State Column - Now, change the state of these entries of Enabled/Disabled to Not Configured and then apply the settings.
- Repeat the above-mentioned steps for the following path as well.
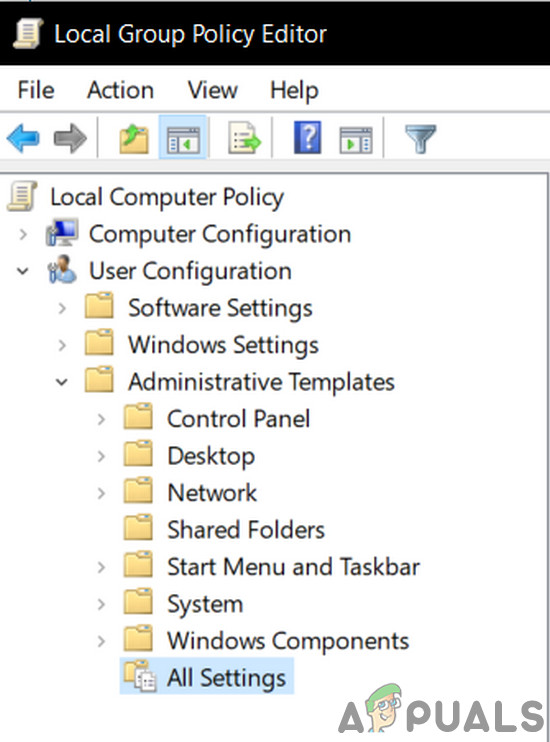
Local Computer Policy > User Configuration > Administrative Templates > All Settings

Open All Settings of User Configuration - Now restart your system and check if the message of “Some settings are managed by your organization” is gone. If you are having an issue then restore the system to the point created before.

Kevin Arrows
Kevin is a dynamic and self-motivated information technology professional, with a Thorough knowledge of all facets pertaining to network infrastructure design, implementation and administration. Superior record of delivering simultaneous large-scale mission critical projects on time and under budget.
 В комментариях на сайте не раз появлялись вопросы о том, что за сообщение о том, что «некоторыми из этих параметров управляет ваша организация» в параметрах Windows 11 или «некоторыми параметрами управляет ваша организация» в Windows 10 и как убрать эту надпись, с учетом того что это личный компьютер или ноутбук, не относящийся к каким-либо организациям. Также надпись может иметь вид «Некоторые параметры скрыты или ими управляет ваша организация».
В этой статье — о том, почему появляется текст «Некоторыми из этих параметров управляет ваша организация» или «Некоторыми параметрами управляет ваша организация» в отдельных настройках, о том, как можно сделать, чтобы она исчезла и другая информация по вопросу.
Причины появления сообщения о том, что некоторые параметры скрыты или параметрами управляет организация

Как правило, с сообщением о «некоторыми из этих параметров управляет ваша организация» или «некоторые параметры скрыты» пользователи Windows 11 и 10 сталкиваются в разделе параметров «Обновление и безопасность», в настройках Центра обновлений, а также в параметрах защитника Windows, но возможны и другие расположения.
И почти всегда это связано с одним из следующих действий пользователя:
- Основное: изменение параметров системы в реестре или редакторе локальной групповой политики. Иногда не вручную, а с помощью сторонних программ. Самый простой метод исправить ситуацию (убрать сообщение) — сброс локальных групповых политик: Как сбросить локальные групповые политики на значения по умолчанию. Учитывайте, что сама по себе надпись не несет какого-либо вреда: к примеру, если вы отключали обновления Windows путем правки реестра, политик или с помощью сторонних программ, не стоит удивляться сообщению об управлении параметрами организацией в параметрах обновлений. Да, вы можете её убрать, но и сделанные вами настройки тоже будут отменены.
- Изменение настроек «шпионства» Windows 11/10 разными способами, некоторые из которых описаны в статье Как отключить слежку в Windows 10.
- Отключение каких-либо функций системы, например, отключение защитника Windows 10, автоматических обновлений и т.п.
- Отключение некоторых служб Windows, в частности, службы «Функциональные возможности для подключенных пользователей и телеметрия».
Таким образом, если вы отключали функции телеметрии Windows 11/10 с помощью сторонних программ или вручную, меняли параметры установки обновлений и выполняли аналогичные действия — с большой вероятностью, вы будете видеть сообщение о том, что некоторыми параметрами управляет ваша организация. Хотя на самом деле причина появления сообщения не в какой-то «организации», а в том, что некоторые измененные параметры (в реестре, редакторе локальной групповой политики, с помощью различных твикеров) просто не могут управляться из стандартного окна «Параметров» Windows 11/10.
Стоит ли заниматься действиями, чтобы убрать эту надпись — решать вам, ведь по сути она появилась (вероятнее всего) именно как результат ваших целенаправленных действий и сама по себе не является признаком того, что с системой что-то не так. Если решили заняться, то основное, что следует попробовать — сбросить локальные групповые политики, как было указано выше.
Дополнительный способ убрать сообщение об управлении параметрами Windows 11/10 организацией

Если ничего похожего вы не делали (из того, что описано выше), а сброс локальных групповых политик не помогает, для того, чтобы убрать сообщение «некоторыми параметрами управляет ваша организация», попробуйте выполнить следующие шаги:
- Зайдите в параметры Windows 11/10 (Пуск — Параметры или клавиши Win+I).
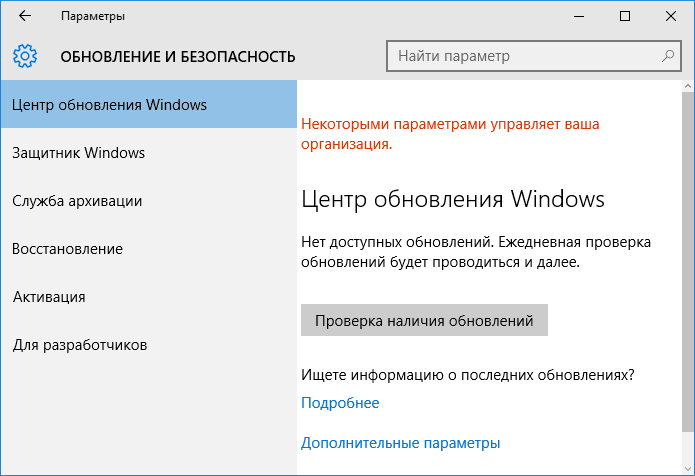
- В разделе «Конфиденциальность и защита» или «Конфиденциальность» откройте пункт «Отзывы и диагностика» (или «Диагностика и отзывы» в Windows 11).
- В Windows 11 включите отправку необязательных диагностических данных с помощью соответствующего переключателя в Параметрах. В Windows 10 в разделе «Данные диагностики и использования» в пункте «Отправка данных об устройстве корпорации Майкрософт» установите «Расширенные сведения».


После чего выйдите из параметров и перезагрузите компьютер. Если изменение параметра невозможно, то либо отключены необходимые службы Windows 11/10, либо параметр был изменен в редакторе реестра (или локальной групповой политики) или с помощью специальных программ.
Если же вы производили какие-то из описанных действий по настройке системы, то вам предстоит вернуть все как было. Возможно, это удастся сделать, используя точки восстановления Windows 11 или точки восстановления Windows 10 (если они были включены), либо вручную, вернув те параметры, которые вы меняли в значения по умолчанию.
В крайнем случае, если вам не дает покоя то, что какими-то параметрами управляет какая-то организация (хотя, как я уже отметил, если речь идет о вашем домашнем компьютере, это не так), вы можете использовать сброс Windows с сохранением данных через параметры — обновление и безопасность — восстановление, подробнее об этом в руководствах Как сбросить Windows 11 к заводским настройкам, Восстановление Windows 10.
You are here:
Home » Windows 10 » Remove “Some Settings Are Managed By Your Organization” Message In Windows 10 Settings
Over the last weekend, I performed a clean install of Windows 10 with November Update on my desktop PC, turned off automatic Windows updates via Group Policy after the install, and made several changes to default privacy settings to improve the privacy.
Since making changes to Group Policy and changing default privacy settings, I have been getting “Some settings are managed by your organization” message in the Windows Update section as well as in the Privacy section of the Settings app. The desktop PC is purely used for running virtual machines, and it’s not part of a domain or organization.
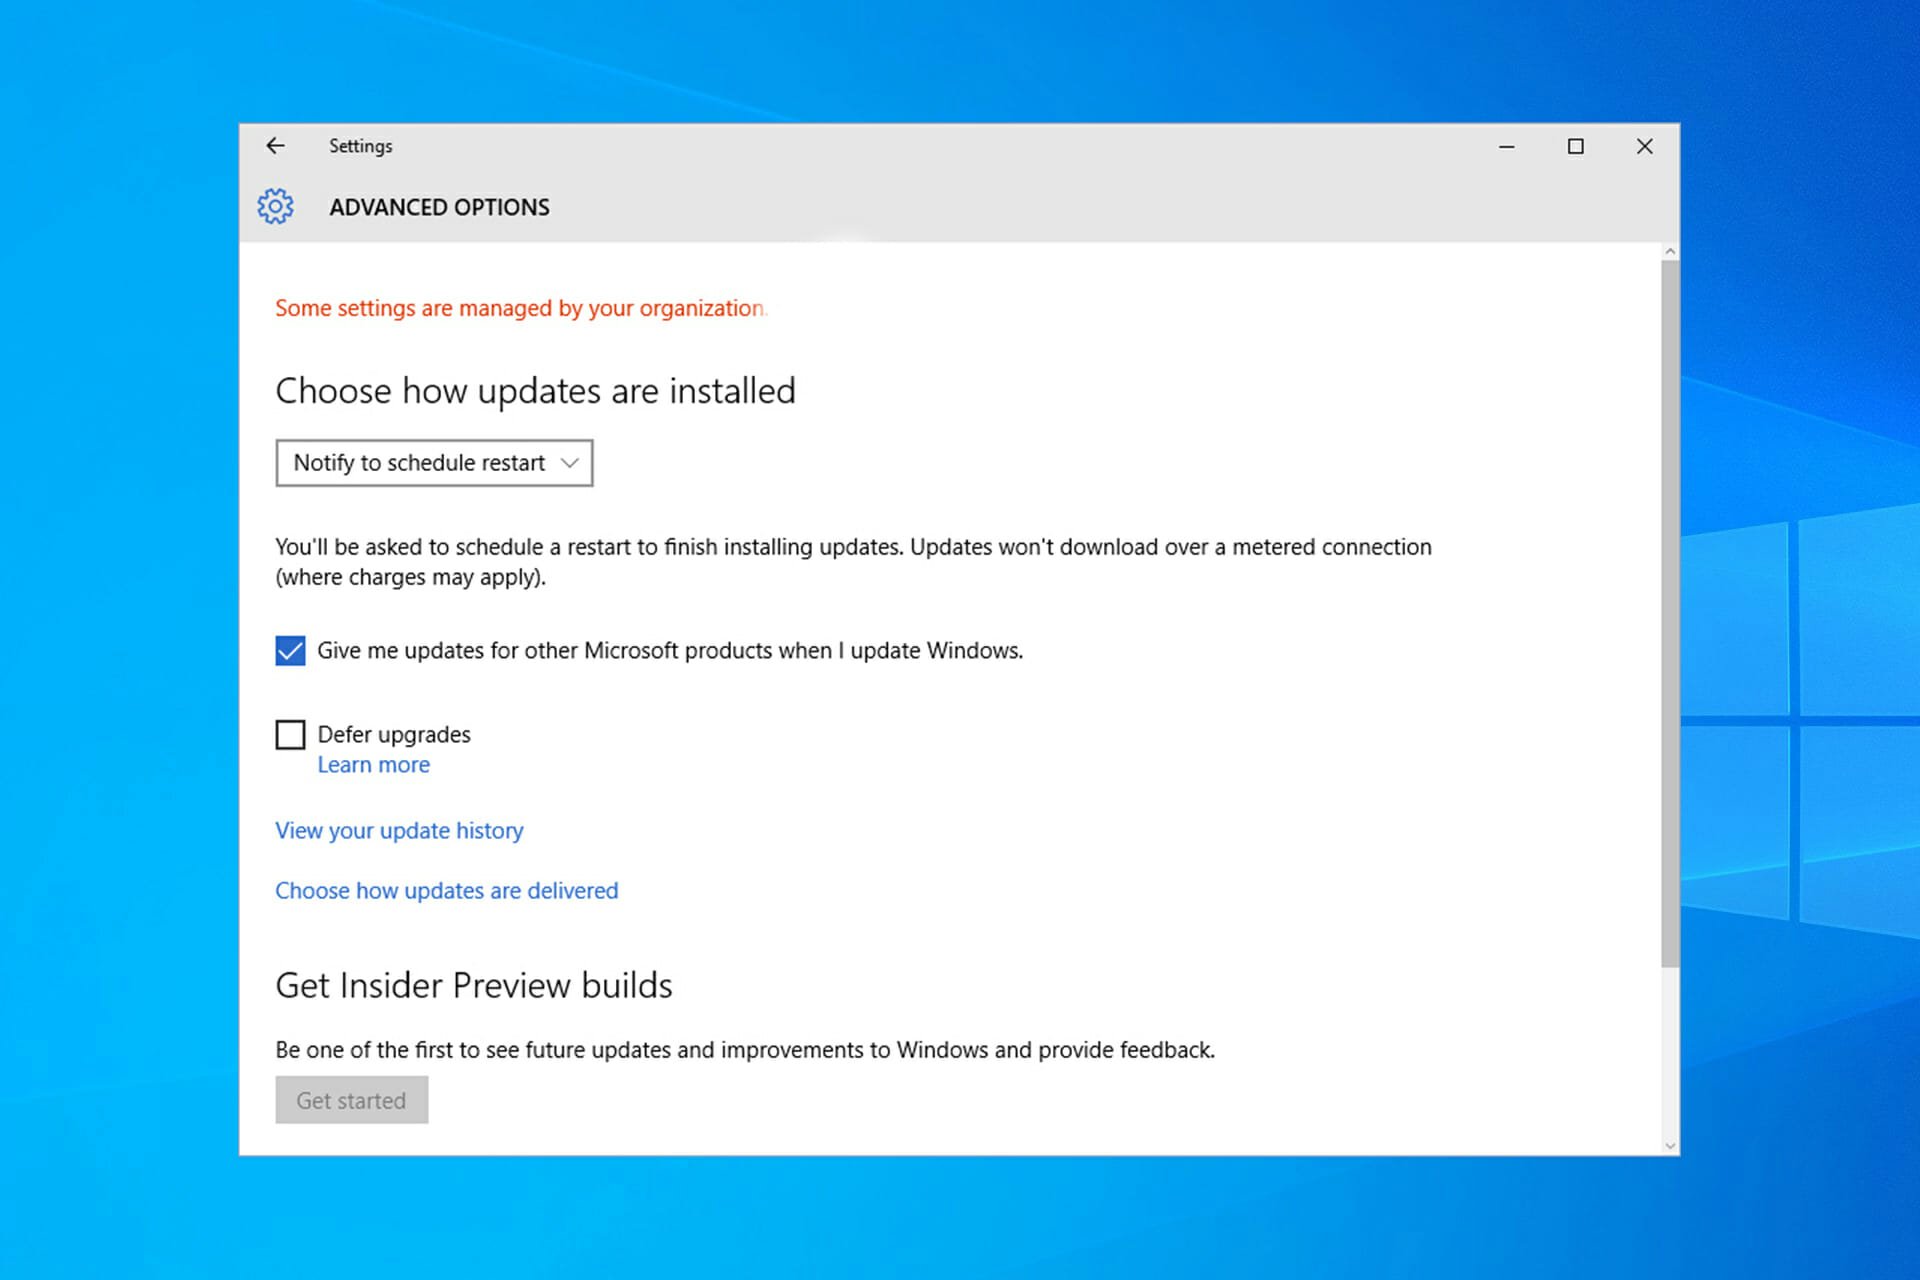
The “Some settings are managed by your organization” message appearing in the Privacy section of Settings app because you have configured Windows 10 to send only Basic device data to Microsoft instead of Enhanced or Full.
To stop seeing “Some settings are managed by your organization” message in the Privacy section of the Settings app, you need to let Windows 10 send Enhanced data to Microsoft.
According to this page of Microsoft, Windows 10 collects and sends performance as well as usage data to Microsoft to troubleshoot and improve its products and services.
Remove “Some settings are managed by your organization” in Windows Update
And if you are looking to remove “Some settings are managed by your organization” message from the Windows Update section of Settings, you need to restore Windows Update settings to its default in Group Policy.
However, if you really want to disable or configure how automatic Windows updates are installed, you can use the Registry Editor as changing default settings in Registry will not show the message in the Windows Update section. You can refer to our how to disable automatic Windows updates in Windows 10 Home edition (works for both Home and Pro) to configure Windows update settings in Registry.
Follow the instructions in Method 1 to remove the message from Windows Update.
Method 1- remove Some settings are managed by your organization message from Windows Update
Method 2 – remove the message from the Privacy section
Method 3 – remove the message from the Privacy section
Method 1
Step 1: Type Gpedit.msc in Start menu search and then press Enter key to open Local Group Policy Editor.
Step 2: Navigate to the following policy:
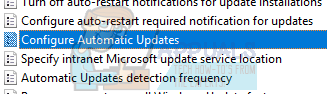
Computer configuration > Administrative Templates > Windows Components > Windows Update
On the right-side, double-click on the entry labeled Configure Automatic Updates to open its properties.
Step 3: Select Not Configured, and then click Apply button. Restart your PC if the message is still appearing when you open Windows Update in Settings, simply click Check for updates button once. The message will disappear in no time.
And if you want to disable updates, please refer to our how to turn off automatic updates in Windows 10 guide for detailed instructions.
Method 2
This will remove the message only from the Privacy section
Step 1: Open Settings app either by clicking its icon in the Start menu or using the Windows logo + I hotkey.
Step 2: Once the Settings app is launched, click Privacy.
Step 3: Click Feedback & diagnostics. Under the Diagnostics and usage data section, select either Enhanced or Full from the drop-down menu to turn off “Some settings are managed by your organization” message.
Method 3
Note that this method applies only to Windows 10 Pro edition as Group Policy Editor is not part of Home edition.
Step 1: Type Gpedit.msc in Start menu or Run command box and then press the Enter key.
Step 2: In the Local Group Policy Editor, navigate to the following policy:
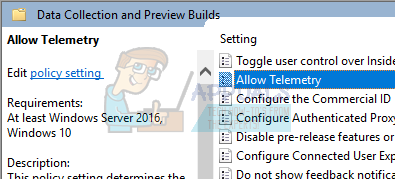
Computer configuration > Administrative Templates > Windows Components > Data Collection and Preview Builds.
Step 3: On the right-side, double-click on Allow Telemetry to open its properties, select Enabled, and then select either Enhanced or Full, as shown in the picture below.
Click the Apply button. That’s it!
Многие организации по всему миру предоставляют своим сотрудникам возможность работать удаленно. Все эти организации ограничивают некоторые параметры групповыми политиками, чтобы пользователи домена не могли изменять определенные параметры на предоставленных им компьютерах. При открытии таких настроек вы увидите «Некоторые из этих настроек скрыты или управляются вашей организацией». Теперь это сообщение не должно появляться на личной рабочей станции. Если это так, и вы ищете лекарство, вы оказались в идеальном месте. Следуйте этим простым исправлениям, чтобы решить проблему на вашем компьютере.
Исправление 1 — Использование редактора групповой политики
Используйте групповую политику для изменения политик, ограничивающих определенные параметры.
[NOTE – For Windows 10 Pro & Enterprise users only]
1. Нажмите клавишу Windows вместе с клавишей «R» на клавиатуре.
2. После этого введите эту строку и нажмите «ОК».
gpedit.msc
3. Когда на вашем экране появится экран редактора локальной групповой политики, перейдите в это место-
Computer Configuration > Administrative Templates > Control Panel > Personalization
4. Теперь с правой стороны дважды щелкните тот конкретный элемент, где вы столкнулись с этой проблемой. Например, в моем случае я видел это сообщение в верхней части страницы настроек экрана блокировки на панели настроек.
Итак, я нажму на настройки политики «Не отображать экран блокировки».
5. Затем установите для политики значение «Не настроено».
6. Наконец, нажмите «Применить» и «ОК», чтобы сохранить изменения на вашем компьютере.
После сохранения настроек политики закройте окно групповой политики. Перезагрузите компьютер.
Это должно решить вашу проблему.
[
NOTE – This solution applies to the users who are seeing the “Some of these settings are hidden or managed by your organization” message in the Personalization settings. If you are seeing this error message elsewhere (like Windows Update), you have to alter other group policies.
1. At first, type “Local Group Policy editor” in the search box.
2. Then, click on the “Edit group policy” in the search results.
3. Then, go along this direction –
User Configuration > Administrative Templates > Start Menu and Taskbar > Notifications
4. On the right-hand side, double click on the “Turn off toast notifications” policy.
5. Then, click on “Disabled” to disable the particular policy.
6. Finally, click on “Apply” and “OK“.
Close the Policy settings screen. Check if this solves your problem.
If it doesn’t, try enabling this same policy setting following the same instructions. Check again.
]
Исправление 2 — изменить реестр
Мы должны изменить ключ или два, чтобы решить эту проблему.
1. Сначала одновременно нажмите клавишу Windows и клавишу R.
2. Когда появится терминал «Выполнить», введите «regedit» и нажмите Enter.
ВАЖНЫЙ-
Одно неправильное изменение реестра может привести к поломке вашего компьютера. Итак, вы должны выполнить следующие шаги, чтобы создать резервную копию.
а. После того, как вы открыли редактор реестра, вам нужно будет нажать «Файл», а затем нажать «Экспорт».
б. Сохраните резервную копию в надежном месте.
В любом случае, если возникнет какая-либо проблема с редактором реестра, вы можете легко восстановить его.
3. Когда появится терминал редактора реестра, перейдите в это место-
HKEY_LOCAL_MACHINESoftwarePoliciesMicrosoftWindowsCurrentVersionPushNotifications
[
NOTE-
If you can’t found the “PushNotifications” sub-key under the CurrentVersion header, follow these steps –
a. On the left-hand pane, right-click on the “CurrentVersion” header.
b. Then, click on “New>” and click on “Key“.
c. Name the new key as “PushNotifications“.
d. After doing that, come to the right-hand side.
e. Right-click on space and click on “New>” and click on “DWORD (32-bit) Value“.
f. Now set the name of this value as “NoToastApplicationNotification“.
Once you have done this, follow the rest of the instructions detailed below.
]
4. Затем с правой стороны проверьте, есть ли какой-либо ключ «NoToastApplicationNotification».
5. Затем дважды щелкните ключ, чтобы изменить его.
6. Установите значение «0».
7. Затем нажмите «ОК», чтобы сохранить это изменение.
Сделав это, закройте окно редактора реестра.
Теперь перезагрузите компьютер один раз. Проверьте, отображаются ли в настройках все еще это сообщение.
Исправление 3 — Удалить ключ Центра обновления Windows
Вы должны удалить поврежденный ключ WindowsUpdate из редактора реестра.
1. Введите «regedit» в поле поиска.
2. Затем нажмите «Редактор реестра», чтобы открыть его.
3. Теперь перейдите в этот каталог —
HKEY_LOCAL_MACHINESOFTWAREPoliciesMicrosoftWindowsWindowsUpdate
4. Теперь с правой стороны проверьте, не зарегистрированы ли какие-либо значения с левой стороны.
Если он есть, щелкните его правой кнопкой мыши и нажмите «Удалить», чтобы удалить ключ.
(Пример. Как видите, в левой части есть имя значения «Wuserver». Итак, мы его удалили.)
5. Нажмите «Да», чтобы подтвердить удаление.
После удаления значений закройте окно реестра. Перезагрузите компьютер, чтобы это изменение вступило в силу.
ПРИМЕЧАНИЕ —
Если вы видите это сообщение при изменении экрана блокировки, тем, шрифтов и т. д., попробуйте удалить значения с левой панели этого места —
ComputerHKEY_LOCAL_MACHINESOFTWAREPoliciesMicrosoftWindowsPersonalization
Затем удалите все значения на левой панели вкладки «Персонализация».
Это должно было решить вашу проблему.
Перезагрузите систему и проверьте дальше.
Исправление 4 — Разрешить телеметрию
Решите проблему с помощью ключа телеметрии в реестре.
1. Щелкните правой кнопкой мыши значок Windows и выберите «Выполнить».
2. Чтобы получить доступ к экрану редактора реестра, напишите «regedit» и нажмите «ОК».
3. Затем перейдите в это место на панели реестра —
ComputerHKEY_LOCAL_MACHINESOFTWAREPoliciesMicrosoftWindowsDataCollection
4. С правой стороны проверьте, есть ли ключ с именем «AllowTelemetry» key*.
5. Дважды щелкните конкретную клавишу.
6. После этого установите значение «1».
7. Затем нажмите «ОК», чтобы сохранить значение.
[
NOTE –
If you can’t see the “AllowTelemetry” key on the right-hand side, go for these steps –
a. On the right-hand pane, right-click on “New>” and click on “DWORD (32-bit) Value“.
b. Set the name of the key as “AllowTelemetry“.
Then modify the value of the key according to the instructions mentioned before.
]
Наконец, закройте окно «Службы».
Еще раз проверьте статус проблемы.
- Remove From My Forums
-
Question
-
Some settings are managed by your organization.
The above message only happens on my Win 10 Pro Insider Preview build 15002 at Windows Update page.
My other 2 laptops, Win 10 Home and Win 10 Pro RTM are not affected.
ALL my laptops are NOT joined with Home Group, and they are in Private Network.
So, what is that message all about ?

Answers
-
Update…………..
If this site is reliable, I believe I have my answer.
https://mspoweruser.com/windows-10-build-15007-may-take-long-to-install-on-your-pc/excerpt:
ADDED 1/10: Under Settings > Update & security > Windows Update you might see the text “Some Settings are managed by your organization” even though your PC isn’t being managed by an organization. This is a bug caused by an updated flight configuration
setting for Insider Preview builds and does not mean your PC is being managed by anyone.-
Marked as answer by
Monday, January 16, 2017 4:50 PM
-
Marked as answer by