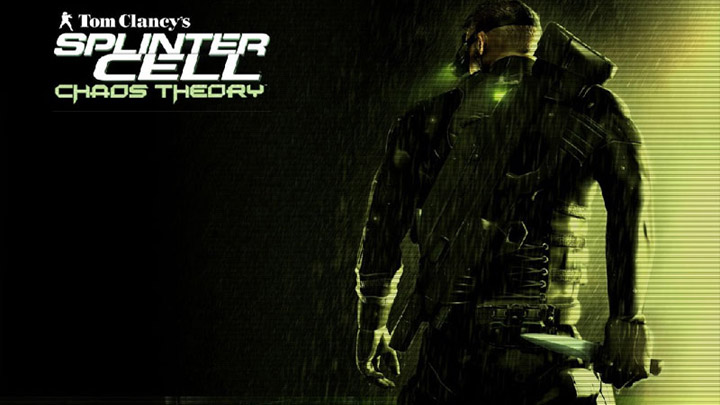
It is the year 2003. In response to the growing use of sophisticated digital encryption to conceal potential threats to the national security of the United States, the NSA (National Security Agency) has ushered forth a new dawn of intelligence-gathering techniques. This top-secret initiative is dubbed Third Echelon. Denied to exist by the U.S. government, Third Echelon deploys elite intelligence-gathering units consisting of a lone field operative supported by a remote team. Like a sliver of glass, a Splinter Cell is small, sharp, and nearly invisible. March 10, 2004 The CIA contacted NSA officials regarding the loss of contact with Agent Alison Madison, a CIA operative monitoring widespread communication shortages plaguing the former Soviet Republic of Georgia. A second operative, Agent Blaustein, was inserted into the Georgian capital T’bilisi to locate Agent Madison, only to drop from contact seven days later. Fearing for the lives of American agents compromised at the hands of…
The file Splinter Cell: Chaos Theory Win7/8/10 fix (64bit) is a modification for Tom Clancy’s Splinter Cell: Chaos Theory, a(n) action game. Download for free.
file typeGame mod
file size29.6 MB
downloads4119
(last 7 days)12
last updateMonday, January 15, 2018
Splinter Cell: Chaos Theory Win7/8/10 fix (64bit) is a mod for Tom Clancy’s Splinter Cell: Chaos Theory, created by TheUnbeholden.
Description:
This is for those who get the ‘this application can be launched with a Release Version of Microsoft Windows 95 OSR2.1/98/ME/ NT 4.0/2000/XP/ SERVER 2003 only’, since compatibility mode or changing Windows settings does not fix the issue.
Instructions:
Update the game to the latest patch first.
Copy paste fix1 first then fix2 into the Chaos Theory main directory & overwrite.
- Last update: Monday, January 15, 2018
- Genre: Action
- File size: 29.6 MB
Files for Tom Clancy’s Splinter Cell: Chaos Theory
|
Name |
Type |
Size |
Date |
Total |
7 days |
|---|---|---|---|---|---|
| Tom Clancy’s Splinter Cell: Chaos Theory — Widescreen Fix v.29072022 | mod | 2.2 MB | 9/7/2022 | 9.8K | 58 |
| Tom Clancy’s Splinter Cell: Chaos Theory — Splinter Cell Chaos Theory Raytracing v.2 | mod | 159.4 KB | 7/23/2022 | 251 | 21 |
| Tom Clancy’s Splinter Cell: Chaos Theory — v.1.05 EU retail | patch | 115.5 MB | 10/19/2005 | 4.6K | 14 |
| Tom Clancy’s Splinter Cell: Chaos Theory — Splinter Cell: Chaos Theory Win7/8/10 fix (64bit) | mod | 29.6 MB | 1/15/2018 | 4.1K | 12 |
| Tom Clancy’s Splinter Cell: Chaos Theory — SC3_CT — Xbox Xinput Trigger Fix | mod | 6.8 KB | 8/30/2020 | 1.1K | 12 |
| Tom Clancy’s Splinter Cell: Chaos Theory — Steel Squat | mod | 15.3 MB | 7/14/2005 | 4.4K | 7 |
| Tom Clancy’s Splinter Cell: Chaos Theory — v.1.05 US download | patch | 77.2 MB | 10/19/2005 | 4.7K | 5 |
| Tom Clancy’s Splinter Cell: Chaos Theory — Updated | demo | 603.3 MB | 2/25/2005 | 6.5K | 4 |
| Tom Clancy’s Splinter Cell: Chaos Theory — Polar Base | mod | 9.9 MB | 1/9/2006 | 5.1K | 4 |
| Tom Clancy’s Splinter Cell: Chaos Theory — Community Map Pack | mod | 638.4 MB | 9/30/2020 | 817 | 4 |
| Tom Clancy’s Splinter Cell: Chaos Theory — map editor | mod | 32.7 MB | 4/6/2005 | 3.7K | 3 |
| Tom Clancy’s Splinter Cell: Chaos Theory — v.1.05 US retail | patch | 119.1 MB | 10/19/2005 | 2.1K | 2 |
| Tom Clancy’s Splinter Cell: Chaos Theory — SCCT Glitched Levels Patcher v.1.01 | mod | 7 MB | 7/1/2019 | 728 | 1 |
Блокбастер Tom Clancy’s Splinter Cell — первая часть в серии, вышедшая в 2002-м году из под крыла Ubisoft. Шпионский стелс-экшн от третьего лица, повествующий о специальных заданиях Сэма Фишера.
Зачищайте ряды террористов, захватывайте ценнейшие разведданные любой ценой, выполняйте разрушительные диверсии и скрывайтесь незамеченным! Вы — высококвалифицированный специальный агент секретного отделения АНБ под названием «Третий эшелон». В это нелегкое время кибертерроризм и напряженная политическая ситуация могут вылиться в Третью мировую. Мировое равновесие в ваших руках!
Несмотря на свой возраст, первая оригинальная часть Tom Clancy’s Splinter Cell обладает отличным геймплеем и многие игроки всё еще горят желанием сыграть в хит на актуальных ПК с поддержкой современных драйверов, видеокарт и разрешений мониторов.
Так как запустить эту игру через Steam или Uplay на Windows 10 и не столкнуться с такой проблемой, что она не поддерживает ваше разрешение и выглядит черезчур архаично?
Приводим перевод хорошего туториала из Стима, которым мы сами пользуемся для оптимизации Tom Clancy’s Splinter Cell под современные ПК и ноутбуки:
- Зайдите в папку с установленной игрой Splinter Cell (Например, D:UplaygamesTom Clancy’s Splinter Cellsystem).
- Откройте при помощи блокнота файл SplinterCell.ini (для удобства рекомендуем пользоваться бесплатным и очень функциональным приложением блокнота Notepad++), но для начала сделайте резервную копию этого файла себе в удобную папку, на всякий случай.
- Найдите в файле строку с текстом [D3DDrv.D3DRenderDevice] (это название блока настроек) и всё что расположено под ней до следующего блока ([Editor.EditorEngine]) замените на:
Translucency=True
VolumetricLighting=True
ShinySurfaces=True
HighDetailActors=True
UsePrecaching=True
UseMipmapping=True
UseTrilinear=True
UseMultitexture=True
UsePageFlipping=True
UseFullscreen=False
UseGammaCorrection=True
DetailTextures=True
UseTripleBuffering=True
UsePrecache=True
Use32BitTextures=True
HardwareSkinning=False
AdapterNumber=-1
ReduceMouseLag=False
UseTripleBuffering=True
; ForceShadowMode flag : 0==projector, 1==buffer, unspecified==auto-detect
ForceShadowMode=1
EmulateGF2Mode=1
FullScreenVideo=True
UseVsync=True
- Сохраните файл
- Закройте данный файл .ini и далее нажмите на него в папке правой кнопкой мыши, выберите «Свойства» и поставьте галочку в меню «Только чтение», далее нажмите «OK».
- В той же папке вы увидите файл SplinterCellUser.ini — откройте его (так же перед этим на всякий сделайте резервную копию файла себе в удобную папку).
- Найдите в файле строку с текстом [Engine.EPCGameOptions] и всё что расположено под ней замените на:
AnimatedGeometry=True
ShadowLevel=3
LightMapsLevel=3
TextureLevel=3
Resolution=1920×1080
AmbiantVolume=99
VoicesVolume=99
MusicVolume=99
AudioVirt=0
Sound3DAcc=false
EAX=false
InvertMouse=False
FireEquipGun=False
MouseSensitivity=50
ShadowResolution=3
EnableFadeOut=0
FadeOutNearPlane=1000
FadeOutFarPlane=1250
SFXVolume=99
Brightness=50
Gamma=50
EffectsQuality=3
FadeOut=0
VidMem=2
GraphicsCaps=2
EAX_Capable=False
AntiAliasing=3
Уточнение: В строке Resolution=, введите актуальное разрешение вашего монитора. Для примера мы ввели 1920×1080 нашего монитора. У вас оно может быть иным. Посмотреть какое разрешение у вас можно нажав на рабочем столе Windows правой мышкой — выбрать «Параметры экрана», а далее «Дополнительные параметры экрана» — там увидите цифирные значения вашего разрешения экрана. Таким образом, играя с ноутбука с 15-ти дюймовым экраном, скорее всего ваше разрешение будет Resolution=1366×768.
- Для настройки угла поля зрения (FOV) нужно поменять в этом же файле значения DesiredFOV и DefaultFOV под строкой [Engine.PlayerController] в соответствии с вашим монитором:
- Если у вас соотношение сторон 4:3, то значение будет 75
- 15:9 — 87.61661884
- 16:10 — 85.2812718522
- 16:9 — 91.3154482287
Пример строк для обычного FullHD монитора 1920 на 1080, или того же ноутбука с 15-ти дюймовым монитором 1366 на 768 пикселей:
DesiredFOV=91.3154482287
DefaultFOV=91.3154482287
- Сохраните файл SplinterCellUser.ini
- Закройте данный файл .ini и далее нажмите на него в папке правой кнопкой мыши, выберите «Свойства» и поставьте галочку в меню «Только чтение», далее нажмите «OK».
Готово! Теперь можно запустить игру и посмотреть как всё работает.
Известные трудности:
- В случае, если в катсценах игра будет моргать светом и тенями, следует сменить в SplinterCell.ini значение UseVsync=True на UseVsync=False.
- В случае, если вода похожа на грязную жижу без текстур, то следует прописать значение ForceShadowMode=0 в блоке [D3DDrv.D3DRenderDevice] (на первом скриншоте выше это 115-я строчка)
- Если файлы ini не открываются, попробуйте запустить их от имени администратора через правый клик на файл.
- Подключить FXAA сглаживание можно через панель управления Nvidia или AMD для приложения Splinter Cell.
Если у вас всё получилось — отпишитесь здесь в комментариях. А если не получилось — тоже пишите, попробуем разобраться вместе.
Приятной игры, берлога!
Количество людей, посчитавших эту новость классной: 32 830
84
- Page
- Discussion
- View
- View source
- History
From PCGamingWiki, the wiki about fixing PC games
 |
|
| Developers | |
|---|---|
| Ubisoft Montreal | |
| Publishers | |
| Ubisoft | |
| Engines | |
| Unreal Engine 2.5 | |
| Release dates | |
| Windows | March 21, 2005 |
| Reception | |
| Metacritic | 92 |
| IGDB | 78 |
| Taxonomy | |
| Monetization | One-time game purchase |
| Modes | Singleplayer, Multiplayer |
| Pacing | Real-time |
| Perspectives | Third-person, First-person |
| Controls | Direct control |
| Genres | Action, Stealth |
| Art styles | Realistic |
| Themes | Contemporary, Asia, North America |
| Series | Splinter Cell |
|
|
| Splinter Cell | |
|---|---|
| Subseries of Tom Clancy | |
| Splinter Cell | 2003 |
| Splinter Cell: Pandora Tomorrow | 2004 |
| Splinter Cell: Chaos Theory | 2005 |
| Splinter Cell: Double Agent | 2006 |
| Splinter Cell: Conviction | 2010 |
| Splinter Cell: Blacklist | 2013 |
Tom Clancy’s Splinter Cell: Chaos Theory is a singleplayer and multiplayer third-person and first-person action and stealth game in the Splinter Cell series.
This version is based on the Xbox version, with additional PC-specific enhancements such as HDR Rendering. However the game didn’t support Shader Model 2.0 initially, though eventually added in patch version 1.04.[1]
The official online multiplayer service is no longer available.[2]
General information
- Ubisoft game page
- Splinter Cell Wiki
- Steam Community Discussions
Availability
- StarForce DRM for this game does not work on modern versions of Windows (see above for affected versions).
Essential improvements
Patches
- Patch 1.04, released in 2005 added Shader Model 2.0 support. Latest version is 1.05, which can be download here. All previous patches are available from Ubisoft here (if you get a «403 Forbidden» message, simply try again).
- The Steam and Uplay version are already patched.
Additional glitches in certain retail version
- Some retail version of the game contains glitches that may remain unfixed after applying the official patches (i.e. the zipline at the Penthouse). A patch can be applied to fix these issues here. Official patch 1.05 is required, Steam version is already patched.
- The unofficial map pack adds 41 new maps to the game. MR.MIC’s Map Pack is also included, bringing the total map count to 56. Some of the maps included in MR.MIC’s Map Pack are from Splinter Cell: Pandora Tomorrow’s versus mode.
- Steam version
- Retail version
Enable Steam Overlay
- Steam Overlay does not work by default.
- Can be re-enabled using this file: Steam Overlay Restoration. Once you have downloaded it Extract the archive and run the «EnableOverlay» command script after opening the game.
Skip intro videos
Use the -nointro command line argument[5]
|
|---|
| Delete/rename video files[5] |
|---|
|
Game data
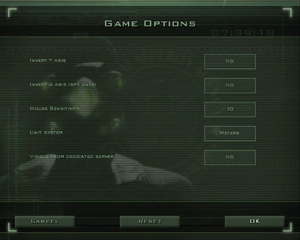
In-game general settings (for Versus Mode).
Configuration file(s) location
| System | Location |
|---|---|
| Windows | %PROGRAMDATA%UbisoftTom Clancy’s Splinter Cell Chaos Theory[Note 2] |
| Steam Play (Linux) | <Steam-folder>/steamapps/compatdata/13570/pfx/[Note 3] |
Save game data location
| System | Location |
|---|---|
| Windows | %PROGRAMDATA%UbisoftTom Clancy’s Splinter Cell Chaos TheoryProfiles[Note 2] |
| Steam Play (Linux) | <Steam-folder>/steamapps/compatdata/13570/pfx/[Note 3] |
Save game cloud syncing
Video
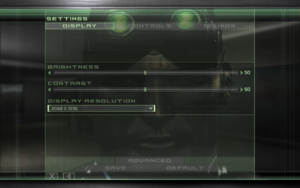
In-game general video settings.
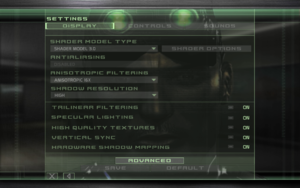
In-game advanced video settings.
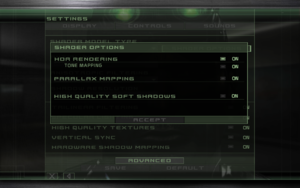
In-game shader settings (Shader Model 2 and 3 only).
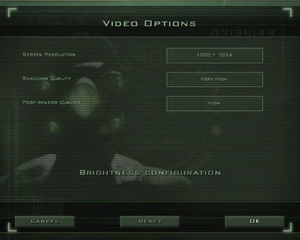
In-game video settings (for Versus Mode).
Widescreen resolution
- See also Shadows become more broken the wider the screen resolution.
| Use Splinter Cell Chaos Theory Widescreen Fix[9] |
|---|
Notes:
|
| Widescreen — Singleplayer[citation needed] |
|---|
FullscreenViewportX= (line 98) FullscreenViewportY= (line 99) |
| Widescreen — Versus[10] |
|---|
FullscreenViewportX=
FullscreenViewportY=
|
Anti-aliasing
- HDR rendering and anti-aliasing can’t be used together by default.
| Force AA externally via Nvidia Profile Inspector (for Nvidia graphics only) |
|---|
|
| Use injectSMAA |
|---|
|
Field of view (FOV)
| Edit SplinterCell3User.ini[5] |
|---|
Notes:
|
Input
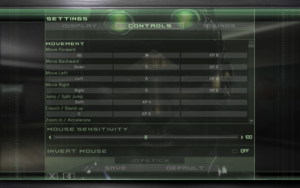
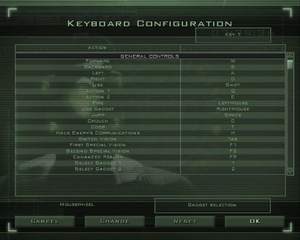
In-game keyboard/mouse settings.
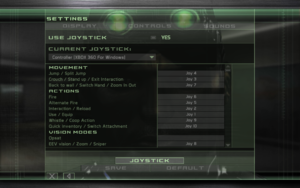
In-game joystick settings.
In-game key map settings (for Versus Mode).
Mouse acceleration
- Mouse acceleration is enabled when aiming with guns.
- Apply the following fix before creating a profile.
| Disable acceleration[5] |
|---|
|
Xbox controllers
- Xbox 360/One controllers do not work well by default- in particular, the triggers cannot be used.
| SCFix |
|---|
Note:
|
Audio
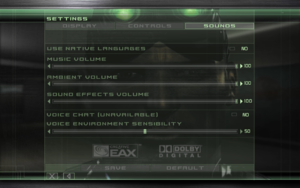
In-game audio settings.
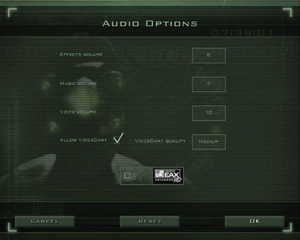
In-game audio settings (for Versus Mode).
| Audio feature | State | Notes |
|---|---|---|
| Separate volume controls | ||
| Surround sound | Up to 7.0 with DirectSound3D restoration software. | |
| Subtitles | Subtitles are exclusive to conversations between Sam Fisher and 3rd Echelon, they are not available in cutscenes, ambient dialog, or even interrogations | |
| Closed captions | ||
| Mute on focus lost | ||
| EAX support | EAX 2, EAX 3.[11] | |
| Royalty free audio |
- DSOAL requires boost=-6 set in alsoft.ini to match hardware reverb levels.[12]
Localizations
| Language | UI | Audio | Sub | Notes |
|---|---|---|---|---|
| English | ||||
| French | ||||
| German | ||||
| Hungarian | Fan translation. | |||
| Italian | ||||
| Polish | Retail only. Patch for digital release here. | |||
| Russian | Retail only. Patch for digital release here. | |||
| Spanish |
Network
Multiplayer types
| Type | Native | Players | Notes |
|---|---|---|---|
| Local play | 2 | Although it has a split screen, only console is available. | |
| LAN play | 4 | Versus, Co-op | |
| Online play | 4 | Versus, Co-op Versus uses different .exe than main game and Co-op The official multiplayer service was shut down on October 7, 2016.[2] |
Connection types
Ports
| Protocol | Port(s) and/or port range(s) |
|---|---|
| TCP | 6668, 9102, 40000-43000 |
| UDP | 7776, 8888-8891, 8878, 9011, 9102-9103, 9106-9107, 41006, 44000, 45000-45001 |
- Universal Plug and Play (UPnP) support status is unknown.
VR support
Issues unresolved
Alt+Tab
- There are issues using Alt+Tab ↹ in fullscreen mode. If used too many times, it will disconnect players connected to your server and can even crash the game.
30 FPS lock/limit
- Netcode only supports a maximum of 30 frames per second for proper sync between players in multiplayer. Bypassing this limit results in things such as co-op actions not executing properly.
- A fan made program can be used to unlock the framerate in multiplayer, but host needs to set FPS to 32 anyway, to keep the proper sync: https://steamcommunity.com/sharedfiles/filedetails/?id=265715221
Disconnect at random intervals during co-op campaign
- There is an issue for some users happening at random after a couple of minutes where the game disconnects both players while playing the co-op campaign. The issue can be encountered 100% during the training mission while hacking the first laptop the players come across. In this case you need to make sure that both players have the same FOV 75.0 set in both configs (instruction) and no widescreen patch installed since it can interfere with FOV value. Be aware that Epic version have a widescreen patch preinstalled. In subsequent missions it seems to happen randomly after some time. No real fixes have been reported that work for everyone. Try setting interface metric of your virtual LAN adapter for 1 for both players (instruction). For some completely uninstalling NOD32 solved the problem.[13][citation needed]. Optionally disabling any other anti-virus software and firewall at the same time can help for better game stability and to alleviate the issue[14] Optionally try changing LanServerMaxTickRate=30 in Splinter Cell Chaos TheoryVersusSystemdefault.ini[15][citation needed]. There is also a bug disconnecting you from the game every time when you unlock the doors in Nuclear Plant mission (here) if host uses polish language pack (might apply for client as well; there won’t be any subtitles in the last mission, because the missions were introduced later in the patch), but to fix that you just need to apply the polish version of the 1.05 patch available here, but you will also probably need to back up the exe files if you use the steam or uplay version as the exe files from the patch still require the game disc.
Issues fixed
Game crashes when trying to start new mission / change settings
| Disable any software that hooks into graphic’s API (most notably OBS and Dxtory)[9] |
|---|
|
Missing torchlight/flashlight in Versus mode
- Versus mode has problems rendering certain lighting effects on modern machines. This problem makes it very difficult to play properly. Certain shadows may not render and mercenarie’s flashlights don’t work, severely impairing gameplay. Follow one of the solutions below to fix these issues.
| Hack compatible pixel shaders[16] |
|---|
|
| Use dgVoodoo 2[5] |
|---|
|
Slow motion gameplay on multi-core CPUs in Versus mode
| Use alternate timer[17] |
|---|
|
Night vision/thermal vision/EMF not displaying correctly
- If everything turns white when you activate your night vision and/or turns black when you activate your thermal vision/EMF, follow one of the instructions below.
| Enable Windows Compatibility Mode |
|---|
|
| Use Alt+Tab |
|---|
|
| Use different shader model |
|---|
|
| Disable High dynamic range (HDR) |
|---|
|
Shadows become more broken the wider the screen resolution
| Use Widescreen Fix[20] |
|---|
Notes:
|
| Hexedit to increase shadow map size[21] |
|---|
3. Replace Notes:
|
Other information
API
| Technical specs | Supported | Notes |
|---|---|---|
| Direct3D | 8.1, 9.0c | Singleplayer/co-op uses Direct3D 9. Versus mode uses Direct3D 8. |
| Shader Model support | 1.1, 2, 3 | Only Shader Model 1.1 and 3.0 are supported prior to version 1.04, which adds Shader Model 2.0 support. Comparison here. |
| Executable | 32-bit | 64-bit | Notes |
|---|---|---|---|
| Windows |
Middleware
| Middleware | Notes | |
|---|---|---|
| Physics | Havok | |
| Audio | DirectSound3D | Dolby Digital |
| Cutscenes | Bink Video | |
| Multiplayer | Quazal |
Command line arguments
- Cheats and access to co-op maps in singleplayer mode can be found here.
First person camera
| Use a custom SplinterCell3.ini |
|---|
7// Line with this "//" are comments. They are not used by the game // Something like this [Toto] is called a section. All variables of a section must be grouped together. No empty line // can separate a section's variables. If a variable is not specified, it will be 0. Dont but spaces between the // variable name and the = [Engine.GameInfo] VisFullyThreshold=120.000000 VisMostlyThreshold=80.000000 VisPartiallyThreshold=45.000000 VisBarelyThreshold=10.000000 VisSpeedGain=10.000000 VisCrouchMul=0.90000 UseRumble=True NoBlood=False bNoRDReact=False [Echelon.EPlayerController] m_speedSmallStep=55 m_speedFadeSmallStepToWalk=0.25 m_speedWalk=105 m_speedRun=400 m_speedSmallStepCr=30 m_speedWalkCr=50 m_speedRunCr=220 m_speedActionWalk=150 m_speedActionRun=500 m_speedActionWalkCr=100 m_speedActionRunCr=350 m_speedWalkFP=400 m_speedWalkFPCr=220 m_speedWalkSniping=100.0 m_speedFence=70.0 m_speedGrab=80.0 m_speedGrabFP=60.0 m_speedCarry=130.0 m_turnMul=0.5 m_towardAngle=0.707 m_ThrowMinSpeed=(X=300,Y=0,Z=100) m_ThrowMidSpeed=(X=750,Y=0,Z=150) m_ThrowMaxSpeed=(X=2000,Y=0,Z=250) m_ThrowVarSpeed=1000.0 m_UseNewThrow=True CanBeGameOver=false m_CTE_MaxDistToLookAt=1000 //Maximum distance in cm where Sam can look at a NPC [Echelon.ECoopPlayerController] m_speedSmallStep=55 m_speedFadeSmallStepToWalk=0.25 m_speedWalk=105 m_speedRun=400 m_speedSmallStepCr=30 m_speedWalkCr=50 m_speedRunCr=220 m_speedActionWalk=150 m_speedActionRun=500 m_speedActionWalkCr=100 m_speedActionRunCr=350 m_speedWalkFP=120.0 m_speedWalkFPCr=75.0 m_speedWalkSniping=100.0 m_speedFence=70.0 m_speedGrab=80.0 m_speedGrabFP=60.0 m_speedCarry=130.0 m_turnMul=0.5 m_towardAngle=0.707 m_ThrowMinSpeed=(X=300,Y=0,Z=100) m_ThrowMidSpeed=(X=750,Y=0,Z=150) m_ThrowMaxSpeed=(X=2000,Y=0,Z=250) m_ThrowVarSpeed=1000.0 CanBeGameOver=false m_CTE_MaxDistToLookAt=1000 //Maximum distance in cm where Sam can look at a NPC BalancingPeriod=5 BalancingBlendTime=0.2 HangOverCameraOffset=(X=95,Y=0,Z=65) HangOverCameraRotation=(Pitch=11000,Yaw=0,Roll=0) HangOverCameraSpeed=200 BoostAcceleration=625 [Echelon.EPlayerCam] m_yawSpeed=40000.0 // maximum turning speed, when joystick is at extrem position m_pitchSpeed=40000.0 // maximum lookup speed, when joystick is at extrem position m_minPitch=-16380 // dont touch m_maxPitch=16380 // dont touch m_pitchCurveBias=0.2 // pitch curve when looking up. the smaller the faster m_constraintSpeed=30000.0 // How fast camera gets out of constraint angles m_absoluteMinDist=25.0 // Camera can never get closer than this m_targetZMaxDist=100.0 // max global Z distance of smoothing m_collisionRadius=15.0 // radius of the cylinder used by the camera's collision check m_collisionHeight=15.0 // height of the cylinder used by the camera's collision check m_NPCDistance=200.0 // Distance when looking at npc m_resetPitchSpeed=45000.0 m_resetYawSpeed=75000.0 m_resetEnable=True m_closeupDist=200.0 m_closeupHeight=30.0 m_closeupDamping=0.6 [EchelonIngredient.EStickyCamera] minfov=10.0 maxfov=90.0 zoomspeed=5.0 damping=100.0 [EchelonIngredient.EFlashGrenade] FlashMinRadius=500 FlashMinAngle=180 FlashMinTime=6 FlashMaxTime=18 [Echelon.ESniperNoise] pitchSize=600 pitchSpeed=2.17 yawSize=400 yawSpeed=1.8 noiseUpSpeed=1.6 noiseDownSpeed=1.6 recoilSize=600 recoilPitchAdd=300 recoilYawAdd=100 recoilUpSpeed=15000.0 recoilDownSpeed=3000.0 recoilFatigueUp=0.3 holdMax=3.0 tiredMax=3.0 // An example camera mode section. [Bidon] parent= Bidon // parent mode to copy values from offset= tx=0.0 ty=0.0 tz=0.0 sx=0.0 sy=0.0 sz=0.0 nx=0.0 ny=0.0 nz=0.0 // offset from the top of sam's collision cylinder distance= t=0.0 s=0.0 n=0.0 // distance to the camera minYaw= v=0 // angle constraint maxYaw= v=0 // angle constraint minPitch= v=0 // angle constraint maxPitch= v=0 // angle constraint useAngles= v=0 // flag to use angle constraint or not damping= v=0.0 interSpeed= v=0.0 collInterSpeed= v=0.0 targetXYSpeed= v=0.0 // smoothing speed of target displacement in local XY targetZSpeed= v=0.0 // smoothing speed of target displacement in global Z twigX= v=0.0 twigY= v=0.0 twigZ= v=0.0 biasCut= v=0.0 biasSlope= v=0.0 offsetSpeed= v=0.0 alignPawn= v=0 // Should the pawn align itself to the camera usePitchCurve= v=0 // Should the pitch curve be used useCollTarget= v=0 // Should the camera target test collision (carefull with this one) useCylColl= v=0 // Should camera collision be tested with a cylinder or a ray useColl= v=0 // Should there be any collision test useVertTwig= v=0 // Just what it says useHoriTwig= v=0 // Just what it says useCamFlag= v=0 // Use TRACE_Camer1 // Below is the definition of all the camera modes. This is the complet list of all modes: // ECM_Walking =0 // ECM_STWPeek =1 // ECM_FirstPerson =2 // ECM_FirstPersonCr =3 // ECM_Grab =4 // ECM_GrabFP =5 // ECM_Carry =6 // ECM_CarryCr =7 // ECM_Throw =8 // ECM_ThrowCr =9 // ECM_Sniping =10 // ECM_EEV =11 // ECM_HSphere =12 // ECM_FSphere =13 // ECM_HOH =14 // ECM_HOHFU =15 // ECM_HOHFP =16 // ECM_Rapel =17 // ECM_RapelFP =18 // ECM_DoorPeekRight =19 // ECM_DoorPeekLeft =20 // ECM_SplitJump =21 // ECM_SplitJumpFP =22 // ECM_Vent =23 // ECM_VentEEV =24 // ECM_Dead =25 // ECM_HOHFUFP =26 // ECM_TeamShoulder =27 // ECM_HangOver =28 // ECM_TomoeNage =29 // ECM_Shetland =30 // ECM_ShetAndSam =31 // ECM_SplitJumpEEV =32 // You can also edit these at run time with: ea class=eplayercam // You can then access the array m_camParam. To access ECM_Walking use 0, to access ECM_STWPeek use 1, etc [ECM_Walking] distance= n=250.0 s=175.0 t=100.0 alignPawn= v=0 usePitchCurve= v=1 useCollTarget= v=1 useCylColl= v=1 interSpeed= v=400.0 collInterSpeed= v=600.0 targetXYSpeed= v=400.0 targetZSpeed= v=220.0 useColl= v=1 minYaw= v=-65536 maxYaw= v=65536 minPitch= v=-13000 maxPitch= v=8000 useAngles= v=1 useVertTwig= v=1 twigX= v=20.0 twigZ= v=-20.0 damping= v=8.0 biasCut= v=0.0 biasSlope= v=0.7 offsetSpeed= v=400.0 useCamFlag= v=1 [ECM_STWPeek] parent= ECM_Walking distance= n=110.0 s=110.0 t=110.0 // offset in ECM_STWPeek is forced to 0 when using the new camera, but used by the old one offset= nx=60.0 sx=60.0 tx=60.0 [ECM_FirstPerson] parent= ECM_Walking alignPawn= v=1 offset= ny=25.0 nz=-15.8 sy=25.0 sz=0.0 ty=25.0 tz=0.0 distance= n=0.0 s=0.0 t=0.0 usePitchCurve= v=0 useCollTarget= v=0 useCylColl= v=0 useColl= v=1 interSpeed= v=800.0 collInterSpeed= v=600.0 twigX= v=30.0 twigZ= v=30.0 targetZSpeed= v=150.0 minYaw= v=-65536 maxYaw= v=65536 minPitch= v=-15000 maxPitch= v=15000 damping= v=6.0 biasCut= v=0.0 biasSlope= v=0.3 useCamFlag= v=1 [ECM_FirstPersonCr] parent= ECM_FirstPerson distance= v=50.0 offset= ny=20.0 nz=5.0 sy=20.0 sz=5.0 ty=20.0 tz=5.0 [ECM_Grab] parent= ECM_Walking maxPitch= v=5000 distance= n=120.0 s=100.0 t=90.0 offset= nz=-30.0 sz=-30.0 tz=-30.0 offsetSpeed= v=100.0 [ECM_GrabFP] parent= ECM_FirstPerson offset= ny=25.0 nz=0.0 sy=25.0 sz=0.0 ty=25.0 tz=0.0 distance= n=90.0 s=90.0 t=90.0 minPitch= v=-5000 maxPitch= v=7500 [ECM_Carry] parent= ECM_Walking maxPitch= v=6000 distance= n=160.0 s=130.0 t=100.0 [ECM_CarryCr] parent= ECM_Walking maxPitch= v=6000 distance= n=160.0 s=130.0 t=100.0 [ECM_Throw] parent= ECM_Walking alignPawn= v=1 offset= ny=25.0 nz=-15.8 sy=25.0 sz=0.0 ty=25.0 tz=0.0 distance= n=0.0 s=0.0 t=0.0 usePitchCurve= v=0 useCollTarget= v=0 useCylColl= v=0 useColl= v=1 interSpeed= v=800.0 collInterSpeed= v=600.0 twigX= v=30.0 twigZ= v=30.0 targetZSpeed= v=150.0 minYaw= v=-65536 maxYaw= v=65536 minPitch= v=-15000 maxPitch= v=15000 damping= v=6.0 biasCut= v=0.0 biasSlope= v=0.3 useCamFlag= v=1 [ECM_ThrowCr] parent= ECM_Throw distance= v=50.0 offset= ny=20.0 nz=5.0 sy=20.0 sz=5.0 ty=20.0 tz=5.0 [ECM_Sniping] parent= ECM_FirstPerson offset= nx=20.0 ny=25.0 nz=0.0 sx=20.0 sy=25.0 sz=0.0 tx=20.0 ty=25.0 tz=0.0 distance= n=0.0 s=0.0 t=0.0 interSpeed= v=800.0 targetZSpeed= v=200.0 targetXYSpeed= v=200.0 minPitch= v=-12000 useVertTwig= v=0 damping= v=8.0 biasCut= v=0.0 biasSlope= v=0.7 [ECM_EEV] parent= ECM_Sniping offset= nx=25.0 ny=0.0 nz=0.0 sx=25.0 sy=0.0 sz=0.0 tx=25.0 ty=0.0 tz=0.0 interSpeed= v=10000.0 offsetSpeed= v=10000.0 [ECM_HSphere] parent= ECM_FSphere usePitchCurve= v=1 minYaw= v=-20000 maxYaw= v=20000 minPitch= v=-13000 maxPitch= v=12000 useAngles= v=1 useVertTwig= v=1 twigX= v=20.0 twigZ= v=30.0 [ECM_FSphere] distance= n=250.0 s=175.0 t=100.0 interSpeed= v=400.0 collInterSpeed= v=600.0 targetXYSpeed= v=400.0 targetZSpeed= v=250.0 useCollTarget= v=1 useCylColl= v=1 useColl= v=1 minYaw= v=-65536 maxYaw= v=65536 minPitch= v=-13000 maxPitch= v=10000 useAngles= v=1 damping= v=8.0 biasCut= v=0.0 biasSlope= v=0.7 offsetSpeed= v=400.0 useCamFlag= v=1 [ECM_HOH] parent= ECM_FSphere twigX= v=40.0 twigZ= v=30.0 minPitch= v=-13000 maxPitch= v=10000 [ECM_HOHFU] parent= ECM_FSphere distance= t=120.0 useCylColl= v=0 offset= nx=-40.0 sx=-40.0 tx=-40.0 usePitchCurve= v=1 maxPitch= v=12000 minPitch= v=-13000 [ECM_HOHFP] offset= nx=0.0 ny=20.0 nz=10.0 sx=0.0 sy=20.0 sz=10.0 tx=0.0 ty=20.0 tz=10.0 distance= n=50.0 s=50.0 t=50.0 minYaw= v=-9000 maxYaw= v=13000 minPitch= v=-13000 maxPitch= v=13000 useAngles= v=1 interSpeed= v=800.0 targetXYSpeed= v=400.0 targetZSpeed= v=250.0 useVertTwig= v=1 twigX= v=30.0 twigY= v=0.0 twigZ= v=30.0 damping= v=6.0 biasCut= v=0.0 biasSlope= v=0.3 offsetSpeed= v=400.0 useCamFlag= v=1 [ECM_Rapel] parent= ECM_HSphere offset= nx=-30.0 nz=-20.0 sx=-30.0 sz=-20.0 tx=-30.0 tz=-20.0 [ECM_RapelFP] offset= nx=-60.0 ny=25.0 nz=-35.0 sx=-60.0 sy=25.0 sz=-35.0 tx=-60.0 ty=25.0 tz=-35.0 distance= n=45.0 s=45.0 t=45.0 minYaw= v=-12000 maxYaw= v=12000 minPitch= v=-3500 maxPitch= v=13000 useAngles= v=1 interSpeed= v=800.0 targetXYSpeed= v=400.0 targetZSpeed= v=250.0 useVertTwig= v=1 useHoriTwig= v=1 twigX= v=30.0 twigY= v=30.0 twigZ= v=30.0 damping= v=6.0 biasCut= v=0.0 biasSlope= v=0.3 offsetSpeed= v=400.0 useCamFlag= v=1 [ECM_DoorPeekRight] offset= nx=45.0 ny=25.0 nz=5.0 sx=45.0 sy=25.0 sz=5.0 tx=45.0 ty=25.0 tz=5.0 distance= n=50.0 s=50.0 t=50.0 interSpeed= v=400.0 collInterSpeed= v=600.0 targetXYSpeed= v=400.0 targetZSpeed= v=250.0 minYaw= v=0 maxYaw= v=11000 minPitch= v=-8000 maxPitch= v=12000 useAngles= v=1 damping= v=8.0 biasCut= v=0.0 biasSlope= v=0.7 offsetSpeed= v=400.0 useVertTwig= v=1 twigX= v=20.0 twigZ= v=40.0 useCamFlag= v=1 [ECM_DoorPeekLeft] offset= nx=45.0 ny=-25.0 nz=5.0 sx=45.0 sy=-25.0 sz=5.0 tx=45.0 ty=-25.0 tz=5.0 distance= n=50.0 s=50.0 t=50.0 interSpeed= v=400.0 collInterSpeed= v=600.0 targetXYSpeed= v=400.0 targetZSpeed= v=250.0 minYaw= v=-11000 maxYaw= v=0 minPitch= v=-8000 maxPitch= v=12000 useAngles= v=1 damping= v=8.0 biasCut= v=0.0 biasSlope= v=0.7 offsetSpeed= v=400.0 useVertTwig= v=1 twigX= v=20.0 twigZ= v=40.0 useCamFlag= v=1 [ECM_SplitJump] parent= ECM_FSphere offset= ny=15.0 nz=20.0 sy=15.0 sz=20.0 ty=15.0 tz=20.0 distance= n=125.0 s=100.0 t=80.0 maxPitch= v=8000 interSpeed= v=350.0 targetXYSpeed= v=350.0 targetZSpeed= v=350.0 offsetSpeed= v=350.0 [ECM_SplitJumpFP] parent= ECM_RapelFP offset= nx=0.0 ny=30.0 nz=40.0 sx=0.0 sy=30.0 sz=40.0 tx=0.0 ty=30.0 tz=40.0 distance= n=40.0 s=40.0 t=40.0 minYaw= v=-12000 maxYaw= v=9500 minPitch= v=-13000 maxPitch= v=12000 [ECM_Vent] distance= n=0.0 offset= nx=20.0 ny=-22.0 nz=10.0 sx=20.0 sy=-22.0 sz=10.0 tx=20.0 ty=-22.0 tz=10.0 interSpeed= v=400.0 collInterSpeed= v=600.0 targetXYSpeed= v=400.0 targetZSpeed= v=250.0 useCollTarget= v=1 useCylColl= v=0 useColl= v=1 minYaw= v=-12000 maxYaw= v=12000 minPitch= v=-10000 maxPitch= v=8000 useAngles= v=1 damping= v=8.0 biasCut= v=0.0 biasSlope= v=0.7 offsetSpeed= v=400.0 useCamFlag= v=1 [ECM_VentEEV] parent= ECM_Vent offset= nx=30.0 ny=0.0 nz=0.0 sx=30.0 sy=0.0 sz=0.0 tx=30.0 ty=0.0 tz=0.0 interSpeed= v=10000.0 offsetSpeed= v=10000.0 minYaw= v=-8000 maxYaw= v=8000 minPitch= v=-8000 maxPitch= v=8000 [ECM_Dead] distance= n=200.0 s=200.0 t=200.0 interSpeed= v=200.0 collInterSpeed= v=600.0 targetXYSpeed= v=200.0 targetZSpeed= v=100.0 useCollTarget= v=1 useCylColl= v=0 useColl= v=1 minYaw= v=-65536 maxYaw= v=65536 minPitch= v=-15000 maxPitch= v=-2000 useAngles= v=1 damping= v=8.0 biasCut= v=0.0 biasSlope= v=0.7 offsetSpeed= v=200.0 useCamFlag= v=1 [ECM_HOHFUFP] offset= nx=60.0 ny=25.0 nz=-60.0 sx=60.0 sy=25.0 sz=-60.0 tx=60.0 ty=25.0 tz=-60.0 distance= n=45.0 s=45.0 t=45.0 minYaw= v=-12000 maxYaw= v=8000 minPitch= v=-12000 maxPitch= v=11000 useAngles= v=1 interSpeed= v=800.0 targetXYSpeed= v=400.0 targetZSpeed= v=250.0 useVertTwig= v=1 useHoriTwig= v=1 twigX= v=-30.0 twigY= v=20.0 twigZ= v=0.0 damping= v=6.0 biasCut= v=0.0 biasSlope= v=0.3 offsetSpeed= v=400.0 useCamFlag= v=1 [ECM_TeamShoulder] parent= ECM_FirstPerson alignPawn= v=0 distance= n=30.0 s=30.0 t=30.0 offset= ny=35.0 nz=0.0 sy=35.0 sz=0.0 ty=35.0 tz=0.0 minYaw= v=-10000 maxYaw= v=12000 minPitch= v=-7000 maxPitch= v=13000 useHoriTwig= v=1 useVertTwig= v=1 twigX= v=0.0 twigY= v=25.0 twigZ= v=30.0 [ECM_HangOver] parent= ECM_HOHFUFP offset= nx=0.0 ny=25.0 nz=-10.0 sx=0.0 sy=25.0 sz=-10.0 tx=0.0 ty=25.0 tz=-10.0 distance= n=30.0 s=30.0 t=30.0 minYaw= v=-11000 maxYaw= v=9000 [ECM_TomoeNage] parent= ECM_Throw distance= n=250.0 s=175.0 t=100.0 offset= ny=0.0 nz=0.0 sy=0.0 sz=40.0 ty=0.0 tz=40.0 vy=0.0 vz=40.0 minYaw= v=-32768 maxYaw= v=32768 minPitch= v=-3186 maxPitch= v=-3186 useVertTwig= v=0 twigX= v=0.0 twigZ= v=0.0 [ECM_ShetAndSam] parent= ECM_Walking offset= nx=90.0 nz=-20 distance= n=170.0 maxPitch= v=8000 interSpeed= v=150.0 offsetSpeed= v=150.0 targetXYSpeed= v=150.0 targetZSpeed= v=150.0 usePitchCurve= v=0 useVertTwig= v=0 [ECM_Shetland] parent= ECM_HOHFP offset= nx=0 ny=20 nz=0 distance= n=30.0 s=50.0 t=50.0 minYaw= v=-1000 maxYaw= v=0 minPitch= v=-1000 maxPitch= v=400 twigX= v=0.0 twigY= v=0.0 twigZ= v=0.0 [ECM_SplitJumpEEV] parent= ECM_FSphere distance= n=0.0 s=0.0 t=0.0 offset= nx=25.0 ny=10.0 nz=10.0 sx=25.0 sy=10.0 sz=10.0 tx=25.0 ty=10.0 tz=10.0 usePitchCurve= v=0 minYaw= v=-12000 maxYaw= v=12000 minPitch= v=-12000 maxPitch= v=12000 useAngles= v=1 useVertTwig= v=0 twigX= v=0.0 twigZ= v=0.0 interSpeed= v=10000.0 offsetSpeed= v=10000.0 [ECM_TeamShoulderSniping] parent= ECM_Sniping alignPawn= v=0 minYaw= v=-15000 maxYaw= v=15000 minPitch= v=-7000 maxPitch= v=12000 [Echelon.EchelonGameInfo] HUD_OFFSET_X=24 HUD_OFFSET_Y=39 bNoGore=false bNoSamLookAt=false bDemoMode=false DemoMap=3_4_3Severonickel TrainingMap=0_0_2_Training m_minInterpolSpeed=200.000000 m_grabbingDelay=0.2 m_forwardGentle=0.2 m_forwardFull=0.9 m_moveBackwardThreshold=0.3 m_backwardGentle=-0.2 m_backwardFull=-0.9 m_rightGentle=0.2 m_rightFull=0.9 m_leftGentle=-0.2 m_leftFull=-0.9 m_minForce=0.02 m_gentleForce=0.2 m_fullForce=0.9 m_inAirAccel=1000.000000 m_onGroundAccel=2000.000 m_RollSpeed=350.0 m_walkBias=0.3 m_PlayerJoggingThreshold=300.000000 m_JumpOutSpeed=200.000000 m_LGShimmySpeed=50.000000 m_LGSpeedThreshold=10.000000 m_LGMinLength=28.000000 m_LGMaxGrabbingSpeed=200.000000 m_LGMinGrabbingSpeed=-1000.000000 m_LGMaxGrabbingAngle=-0.6 m_LGMaxGrabbingDistance=1200.0 m_HOHForwardSpeed=100.000000 m_HOHMinLength=15.000000 m_HOHMaxGrabbingSpeed=200.000000 m_HOHMinGrabbingSpeed=-1000.000000 m_HOHMaxGrabbingDistance=1500.000000 m_HOHFeetUpGap=100.0 m_HOHFeetUpColHoriOffset=45.0 m_HOHFeetUpColVertOffset=85.0 m_HOHFeetUpMoveSpeed=40.0 m_HOHFeetUpColHeight=18.0 m_NLUpwardSpeed=120.000000 m_NLDownwardSpeed=-120.000000 m_NLStepSize=32.000000 m_NLSlideDownMaxSpeed=600.000000 m_NLSlideDownMinSpeed=200.000000 m_NLSlideDownInertia=600.000000 m_NLMaxGrabbingAngle=-0.6 m_NLMaxGrabbingAngleTop=0.3 m_NLMaxGrabbingDistance=35.000000 m_NLMaxGrabbingSpeed=100.000000 m_NLMinGrabbingSpeed=-1000.000000 m_PUpwardSpeed=130.000000 m_PDownwardSpeed=-130.000000 m_PSlideDownMaxSpeed=600.000000 m_PSlideDownMinSpeed=200.000000 m_PSlideDownInertia=600.000000 m_PMaxGrabbingAngle=-0.6 m_PMaxGrabbingAngleTop=0.300000 m_PMaxGrabbingDistance=35.000000 m_PMaxGrabbingSpeed=100.000000 m_PMinGrabbingSpeed=-1000.000000 m_ZLSlideDownMaxSpeed=400.000000 m_ZLSlideDownMinSpeed=300.000000 m_ZLSlideDownInertia=400.000000 m_ZLMaxGrabbingDistance=1500.000000 m_ZLMaxGrabbingSpeed=200.000000 m_ZLMinGrabbingSpeed=-1000.000000 m_FMaxGrabbingSpeed=200.000000 m_FMinGrabbingSpeed=-1000.000000 MinBeforeDamage=1000.0 MaxBeforeDeath=1600.0 NPCCushionDivider=2.0 m_blinkDelay=3.0 b_friendlyFire=true m_bUseMagma=True m_bEnableFlashlightToAll=false m_bAlwaysPlayHurtAnim=false m_bRemoveSpecificAnims=true [MAGMAMENU] EnvironmentdBDecTime=0.35 PlayerdBDecTime=0.5 WorkInProgress=false WorkInProgressStr=1.00.000 [Echelon.EAIController] fNPCAccuracy=0.300000 RAW Paste Data |
4K AI enhanced training and story videos
- Upscales the videos to 4K using Topaz Video AI.
- The videos have very noticeable warping and don’t have the film grain effects.
- They are only in English.
System requirements
| Windows | ||
|---|---|---|
| Minimum | Recommended | |
| Operating system (OS) | 2000 | XP |
| Processor (CPU) | Intel Pentium III 1.4 GHz AMD Athlon |
Intel Pentium 4 2.2 GHz |
| System memory (RAM) | 256 MB | 512 MB |
| Hard disk drive (HDD) | 4 GB | |
| Video card (GPU) | 64 MB of VRAM DirectX 9.0c compatible Shader model 1.1 support |
128 MB of VRAM Shader model 3 support |
- Supported ATI chipsets: Radeon 8500/9000/X series.
- Supported Nvidia chipsets: GeForce 3/4/FX/6 series.
- Mobile chipsets and the Nvidia GeForce4 MX are not supported.
Notes
- ↑ This version of StarForce DRM does not work on Windows 8.1, Windows 10, or Windows 11.[3][4] For supported versions of Windows the StarForce driver may need to be updated manually using SFUPDATE.
- ↑ 2.0 2.1 When running this game without elevated privileges (Run as administrator option), write operations against a location below
%PROGRAMFILES%,%PROGRAMDATA%, or%WINDIR%might be redirected to%LOCALAPPDATA%VirtualStoreon Windows Vista and later (more details). - ↑ 3.0 3.1 File/folder structure within this directory reflects the path(s) listed for Windows and/or Steam game data (use Wine regedit to access Windows registry paths). Games with Steam Cloud support may store data in
~/.steam/steam/userdata/<user-id>/13570/in addition to or instead of this directory. The app ID (13570) may differ in some cases. Treat backslashes as forward slashes. See the glossary page for details.
References
- ↑ Splinter Cell: Chaos Theory gets SM2.0 — last accessed on 2005-08-04
- ↑ 2.0 2.1 Multiplayer and Online Services availability in Ubisoft games — Ubisoft Help
- ↑ Windows 8.1 support — StarForce Support
- ↑ Windows 10 support — StarForce Support
- ↑ 5.0 5.1 5.2 5.3 5.4 Verified by User:Antrad on March 2, 2019
- ↑ Cloud save support for games available on Ubisoft+ — last accessed on 2021-09-18
- ↑ Splinter Cell: Chaos Theory 21:9 Review (2560×1080) (60fps) (Ultrawide) — YouTube
- ↑ For example the bathhouse patrol outside is comepletely broken.
- ↑ 9.0 9.1 Verified by User:Suicide machine on 2020-09-06
- ↑ tunngle — last accessed on 2022-06-14
- ↑ Splinter Cell: Chaos Theory Review — 3DVelocity.com
- ↑ Splinter Cell: Chaos Theory w/ EAX & 3D spatial sound 🎧 (OpenAL Soft HRTF audio)
- ↑ Uninstall NOD32 source
- ↑ Verified by User:Deton24 on 2021-12-06
- It doesn’t fix the issue entirely, but I had a noticeable change for better during testing.
- ↑ [1] — last accessed on 2021-12-05
- ↑ Improvements for Splinter Cell: Chaos Theory — last accessed on 2022-06-14
- ↑ tunngle — last accessed on 2022-06-14
- ↑ https://steamcommunity.com/app/13570/discussions/0/1620599015912608846/
- ↑ Github — SplinterCellChaosTheory Update (#1021)
- ↑ Shadows become more broken the wider the screen resolution · Issue #725 · ThirteenAG/WidescreenFixesPack
Categories:
- Windows
- One-time game purchase
- Singleplayer
- Multiplayer
- Real-time
- Third-person
- First-person
- Direct control
- Action
- Stealth
- Realistic
- Contemporary
- Asia
- North America
- Games
- Pages needing references

