- Click to view our Accessibility Policy
- Skip to content
Oracle Instant Client Downloads
for Microsoft Windows (x64) 64-bit
See the Instant Client Home Page for more information about Instant Client.
The installation instructions are at the foot of the page.
Oracle Client-to-Oracle Database version interoperability is detailed in Doc ID 207303.1. For example, applications using Oracle Call Interface 19 can connect to Oracle Database 11.2 or later. Some tools may have other restrictions.
Permanent links to the latest packages are: Basic, Basic Light, SQL*Plus, Tools, SDK, JDBC Supplement
, ODBC
Version 21.8.0.0.0
Base — one of these packages is required
Tools — optional packages
Development and Runtime — optional packages
Version 19.17.0.0.0
Base — one of these packages is required
Tools — optional packages
Development and Runtime — optional packages
Version 18.5.0.0.0
Base — one of these packages is required
Tools — optional packages
Development and Runtime — optional packages
Version 12.2.0.1.0
Base — one of these packages is required
Tools — optional packages
Development and Runtime — optional packages
Version 12.1.0.2.0
Version 11.2.0.4.0
Version 11.1.0.7.0
Version 10.2.0.5
Instant Client Installation for Microsoft Windows 64-bit
See the Instant Client Home Page for more information about Instant Client packages.
Client-server version interoperability is detailed in Doc ID 207303.1. For example, Oracle Call Interface 19, 18 and 12.2 can connect to Oracle Database 11.2 or later. Some tools may have other restrictions.
- Download the appropriate Instant Client packages for your platform. All installations require the Basic or Basic Light package.
- Unzip the packages into a single directory such as
C:oracleinstantclient_19_3 - Add this directory to the
PATHenvironment variable. If you have multiple versions of Oracle libraries installed, make sure the new directory occurs first in the path. Restart any terminal windows or otherwise make sure the new PATH is used by your applications. - Download and install the correct Visual Studio Redistributable from Microsoft. Instant Client 19 requires the Visual Studio 2017 redistributable. Instant Client 18 and 12.2 require the Visual Studio 2013 redistributable. Instant Client 12.1 requires the Visual Studio 2010 redistributable.
- If you intend to co-locate optional Oracle configuration files such as tnsnames.ora, sqlnet.ora, ldap.ora, or oraaccess.xml with Instant Client, then create a subdirectory such as
C:oracleinstantclient_19_3networkadmin - Start your application.
This is the default Oracle client configuration directory for applications linked with this Instant Client.
Alternatively, Oracle client configuration files can be put in another, accessible directory. Then set the environment variable TNS_ADMIN to that directory name.
ODBC users should follow the ODBC Installation Instructions.

SQLplus is a command line utility to manage Oracle Database. It is a powerful tool that all Oracle database administrator must have. In this tutorial, I am going to install the SQLplus Utility 9.5 in Windows 10. The new version of sqlplus 19.5 is available alongside the new Oracle Database 19c. On the previous article, I have shown how to install Oracle Database 19c on CentOS 8.

Once the connection is made between the client and the server using sqlplus, we can perform many database administration, query, user management and so on.
Steps to Install SQLplus on Windows 10
Step 1. Install Oracle Instant Client
Before we can install and run the sqlplus utility, we need to configure the Oracle Instant Client Utility first. So, I would suggest you to read this article to Install Oracle Instant Client 19.5 on Windows 10.
Step 2. Download SQLplus software package
Once you’ve setup the instant client correctly, now we need to download the sqlplus package from the following link
https://download.oracle.com/otn_software/nt/instantclient/19500/instantclient-sqlplus-windows.x64-19.5.0.0.0dbru.zip
So this is the sqlplus software package for Windows 10 64 bit edition.
Step 3. Install the Package
From the previous step, you should have a zip file called : instantclient-sqlplus-windows.zip. Now extract the file to your instant client directory you created on the Step 1. Here is the screenshot of my instant client folder looks like:

Notice that there is sqlplus application in this instant client folder. Now we are ready to go.
How to Connect to Oracle Database via SQLplus Command
In the following example, I will show you how to connect to remote oracle database via sqlplus command. Before we connect, we need to configure the user in the Oracle database. Skip the user creating step if you already have a database user that can connect to the pluggable database.
Create a new user
In the database server host, we need to connect to the database using sqlplus in order to create a new user for the pluggable database. In this case, my container database called cdb1 and the pluggable database is called pdb1.
How to Install Oracle Database 19c on CentOS 8
Login as oracle user and then execute this command.
sqlplus / as sysdba

Now let’s show the current database we connected
SQL> show con_name;
 CON_NAME
 CDB$ROOT
As you can see now we are connected to the root database. We need to switch to the pluggable database (pdb1).
SQL> alter session set container = pdb1;
 Session altered.
Now check again using show command
SQL> show con_name;
 CON_NAME
 PDB1
As you can see, now we are connected to PDB1, the pluggable database. Next, we need to open the database so we can create a new user for it.
SQL> ALTER DATABASE OPEN;
Database altered.
Then, we can create a new user
SQL> CREATE USER manjaro IDENTIFIED BY thePassword;
 User created.
The command will create a new user called “manjaro” and password “thePassword”. After that, we need to grant “CONNECT” privileges to manjaro user so user can connect to the database. You can also add multiple roles to the new users. For example:
SQL> GRANT CONNECT, DBA, RESOURCE TO manjaro;
 Grant succeeded.
Done. Please note that this new user only exist in the pluggable database. So, to connect, we need to specify the username as manjaro@pdb1 in the Connect command.
Connect to the Database
Ok, so now we have a new user setup in the pdb1 database. Let’s try to connect to the database.
From the other computer (in this case Windows 10 where sqlplus is installed using above steps), open command prompt and execute the following command:
sqlplus manjaro@192.168.100.50/pdb1.griyaku.lan
Output:
C:Usersdhani>sqlplus manjaro@192.168.100.50/pdb1.griyaku.lan SQL*Plus: Release 19.0.0.0.0 - Production on Thu Jan 9 07:06:56 2020 Version 19.5.0.0.0 Copyright (c) 1982, 2019, Oracle. All rights reserved. Enter password: Connected to: Oracle Database 19c Enterprise Edition Release 19.0.0.0.0 - Production Version 19.3.0.0.0
Where:
- 192.168.100.50 is the Oracle database host IP address
- pdb1.griyaku.lan is the Oracle database service
You can check your Oracle database services and instances with the following command. Make sure you execute this command on the database host as oracle user.
lsnrctl services;
Output:
[oracle@centos ~]$ lsnrctl services;
 LSNRCTL for Linux: Version 19.0.0.0.0 - Production on 08-JAN-2020 19:08:07
 Copyright (c) 1991, 2019, Oracle.  All rights reserved.
 Connecting to (ADDRESS=(PROTOCOL=tcp)(HOST=)(PORT=1521))
 Services Summary…
 Service "86b637b62fdf7a65e053f706e80a27ca.griyaku.lan" has 1 instance(s).
   Instance "cdb1", status READY, has 1 handler(s) for this service…
     Handler(s):
       "DEDICATED" established:10 refused:0 state:ready
          LOCAL SERVER
 Service "9b7a3d83ac5545ffe0533264a8c09ccc.griyaku.lan" has 1 instance(s).
   Instance "cdb1", status READY, has 1 handler(s) for this service…
     Handler(s):
       "DEDICATED" established:10 refused:0 state:ready
          LOCAL SERVER
 Service "cdb1.griyaku.lan" has 1 instance(s).
   Instance "cdb1", status READY, has 1 handler(s) for this service…
     Handler(s):
       "DEDICATED" established:10 refused:0 state:ready
          LOCAL SERVER
 Service "cdb1XDB.griyaku.lan" has 1 instance(s).
   Instance "cdb1", status READY, has 1 handler(s) for this service…
     Handler(s):
       "D000" established:127 refused:0 current:0 max:1022 state:ready
          DISPATCHER
          (ADDRESS=(PROTOCOL=tcp)(HOST=centos.griyaku.lan)(PORT=34745))
 Service "pdb1.griyaku.lan" has 1 instance(s).
   Instance "cdb1", status READY, has 1 handler(s) for this service…
     Handler(s):
       "DEDICATED" established:10 refused:0 state:ready
          LOCAL SERVER
 The command completed successfully
Thank you for reading this how to install sqlplus 19.5 on Windows 10. I hope you enjoy it and leave us comments for any queries. Cheers.
Improve Article
Save Article
Improve Article
Save Article
Sqlplus is an interface provided by Oracle database to interact only with Oracle Database. It is having the flexibility to write some Oracle specifics code. Sqlplus is a tool created by Oracle for its Oracle DB. It is a very popular tool since it comes. It has its own syntax in addition to supporting SQL. Hence, it is called Sqlplus.
Features:
- It is basically a tool to write some Oracle-specific codes.
- It acts as an editor for writers & executes SQL query
Installing SQLPlus on Windows:
Follow the below steps to install SQLPlus on windows:
Step 1: First browse to this link.
Step 2: Then we have to click on the download button on the right side.

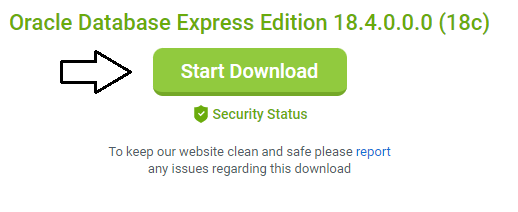
Step 3: Then on the next page you will find the Start Download button. There you have to click.
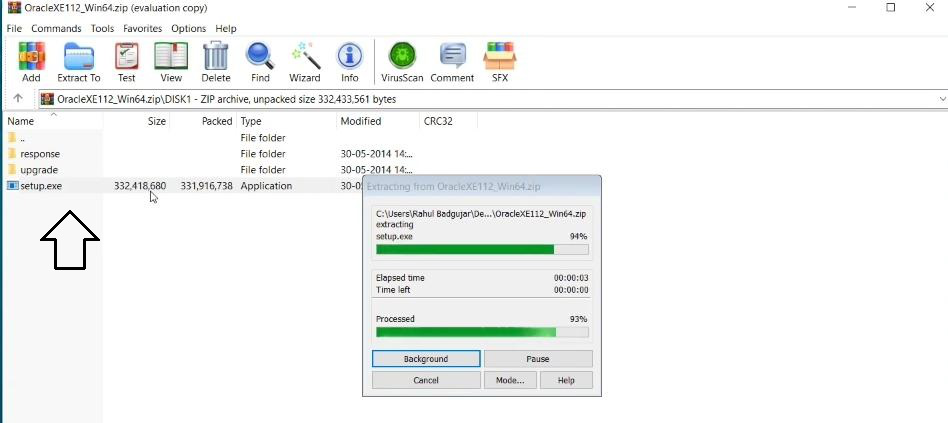
Step 4: Then in the downloaded zip file there will be a setup.exe file. We have to click & run it.
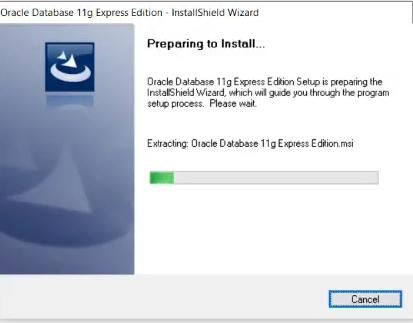
Step 5: Then the installation will start.
Step 6: Then you have to accept terms & click on Next

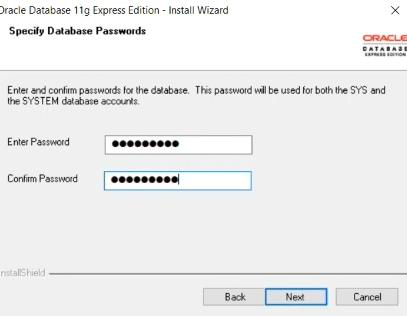
Step 7: Then you have to enter a password & confirm it. You have to remember the password for future references.
Step 8: Then click Install.
Step 9: Installation will start & it may take some time.

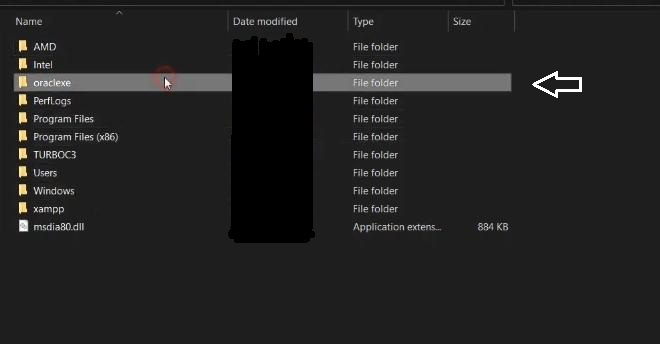
Step 10: After installation, you will find oraclexe folder in the C drive.
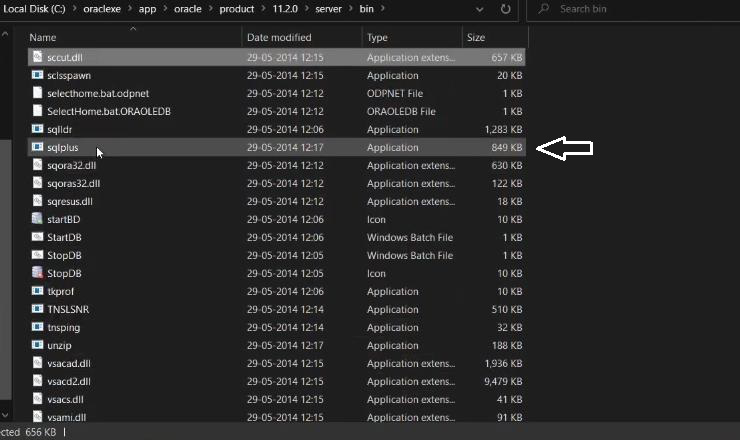
Step 11: You have to enter that folder. Then bin folder there you will find sqlplus exe file. So, your installation is successfully completed.
Содержание
- Install and Configure SQL*Plus Instant Client on Windows
- First things first: What is SQL*Plus Instant Client?
- 1. Download the installers from OTN: Basic OCI + SQL*Plus
- 2. Extract the downloads
- 3. Edit the PATH variable to include the SQL*Plus Instant Client directory
- 4. Connect to a Database with SQL*Plus Instant Client via Oracle Net connection identifier
- Notes:
- Установка Oracle Database 18c Express Edition на Windows
- Sqlplus установка на windows 10
- D.1 About Choosing the SQL*Plus Instant Client to Install
- D.1.1 Basic Instant Client
- D.1.2 Lightweight Instant Client
- D.2 About Installing SQL*Plus Instant Client by Downloading from OTN
- D.2.1 Installing SQL*Plus Instant Client from Linux RPM Packages
- D.2.2 Installing SQL*Plus Instant Client from the UNIX or Windows Zip Files
- D.2.3 List of Files Required for SQL*Plus Instant Client
- D.3 Installing SQL*Plus Instant Client from the 12 c Client Release Media
- D.3.1 Installing SQL*Plus Instant Client on UNIX or Linux
- D.3.2 Installing SQL*Plus Instant Client on Windows
- D.4 About Configuring SQL*Plus Instant Client
- D.4.1 Configuring SQL*Plus Instant Client on Linux (from RPMs)
- D.4.2 Configuring SQL*Plus Instant Client on Linux (from Client Media or Zip File) and UNIX
- D.4.3 Configuring SQL*Plus Instant Client on Windows
- D.5 About Connecting to a Database with SQL*Plus Instant Client
- D.6 AS SYSDBA or AS SYSOPER Connections with SQL*Plus Instant Client
- D.7 About Uninstalling Instant Client
- D.7.1 Uninstalling SQL*Plus Instant Client
- E SQL*Plus Instant Client
- Choosing the SQL*Plus Instant Client to Install
- Basic Instant Client
- Lightweight Instant Client
- Lightweight SQL*Plus Instant Client Error with Unsupported Character Set
- Installing SQL*Plus Instant Client by Downloading from OTN
- Installing SQL*Plus Instant Client from Linux RPM Packages
- Installing SQL*Plus Instant Client from the UNIX or Windows Zip Files
- List of Files Required for SQL*Plus Instant Client
- Installing SQL*Plus Instant Client from the 10 g Client Release Media
- Installing SQL*Plus Instant Client on UNIX or Linux
- Installing SQL*Plus Instant Client on Windows
- Configuring SQL*Plus Instant Client
- Configuring SQL*Plus Instant Client on Linux (from RPMs)
- Configuring SQL*Plus Instant Client on Linux (from Client Media or Zip File) and UNIX
- Configuring SQL*Plus Instant Client on Windows
- Connecting to a Database with SQL*Plus Instant Client
- AS SYSDBA or AS SYSOPER Connections with SQL*Plus Instant Client
- Uninstalling Instant Client
- Uninstalling SQL*Plus Instant Client
Install and Configure SQL*Plus Instant Client on Windows

GUI tools like TOAD and SQL Developer are all fine, but those who have cut their teeth on SQL*Plus will not do without good old command-line interface. And so, a message like the one below makes one want to set things right immediately…
 Here’s a step-by-step guide for doing away with this error, by installing SQL*Plus Instant Client on Windows.
First things first: What is SQL*Plus Instant Client?
SQL*Plus Instant Client is a standalone product with all the functionality of SQL*Plus command-line. It connects to existing remote Oracle databases, but does not include its own database. It is easy to install and uses significantly less disk space than the full Oracle Database Client installation required to use SQL*Plus command-line.
If all you want is a simple command-line interface to connect to remote Oracle databases, Instant Client meets your purpose well.
On to the installation…
1. Download the installers from OTN: Basic OCI + SQL*Plus
SQL*Plus Instant Client package needs OCI Instant Client as a pre-requisite. For things to work, the two must be (i) of the same version, and (ii) installed in the same directory.
Go to OTN’s Instant Client Downloads for MS Windows.
Accept the license agreement.
Choose the packages you want to install – in this case:
Versions used: SQL*Plus 12.2.0.1.0, for a Windows 64-bit environment.

Click on the hyperlinks to start download – this will download the ZIP files to your local machine.

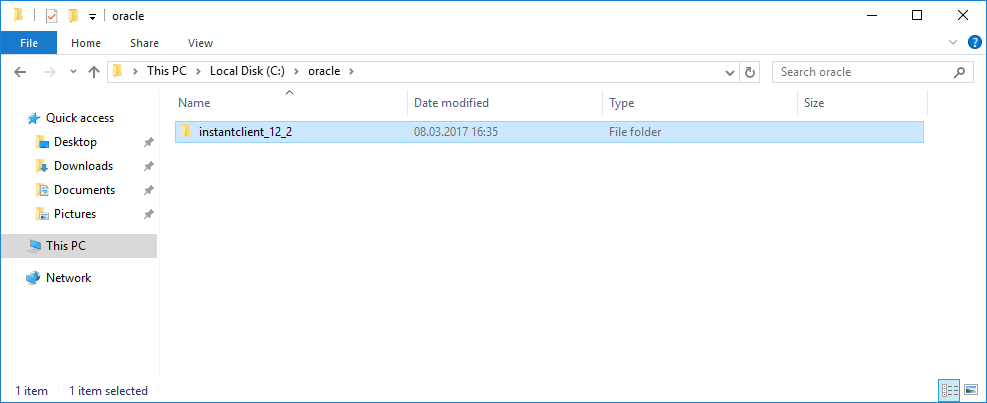
Extract both the ZIPs to the same local folder, say D:Toolssqlplus. A new subfolder (instantclient_12_2 in this case) will get created.

3. Edit the PATH variable to include the SQL*Plus Instant Client directory
Add the directory containing the Instant Client files to the PATH environment variable. Make sure this addition does not have a conflict with another existing Oracle path – if it does, either remove the existing value or move the new value to the front of the PATH variable.

We now have the SQL*Plus Instant Client ready to connect to remote databases.
4. Connect to a Database with SQL*Plus Instant Client via Oracle Net connection identifier
To connect to a database, first open a command prompt window.
Enter the Easy Connection identifier to connect to the database. For example, the Easy Connection identifier for the HR schema in an XE database, running on host sales-server, port 1521 is:
Once entered, SQL*Plus Instant Client will establish the database connection and you will see the SQL prompt.

You can now run your SQL commands through SQL*Plus Instant Client’s easy command-line interface.
Other than Easy Connection identifiers, Net Service Names can be used for making database connections via Instant Client. Net Service Names may come from sources such as LDAP or a tnsnames.ora file. For more details on connection options, see the user’s guide and reference.
Notes:
Remember that the error in the first screenshot (‘sqlplus’ is not recognized as an internal or external command) could be because of a misconfigured PATH – see step 3. Before you proceed to install SQL*Plus, verify that SQL*Plus is actually absent!
Источник
Установка Oracle Database 18c Express Edition на Windows
В посте описывается установка системы управления базами данных (СУБД) Oracle Database 18c Express Edition (XE) на операционную систему (ОС) Windows. В примере рассматривается Windows 10, но процесс актуален для всех версий ОС Windows начиная с Windows 7 (подробнее – ниже).
Рассмотрены следующие шаги:
1. Подготовка к установке
Проверяется, соответствует ли используемая операционная система минимальным требованиям для установки и работы Oracle Database 18c XE. Допустимы следующие версии ОС Windows:
Для установки требуется минимум 2 Гб оперативной памяти, минимум 8,5 Гб дискового пространства для СУБД Oracle, 2 Гб дискового пространства для хранения временных файлов, и обладание правами администратора.
Если системные требования соответствуют, то скачивается установочный файл. Oracle Database Express Edition (XE) распространяется бесплатно и установочный файл можно скачать с официального сайта Oracle – https://www.oracle.com/database/technologies/xe-downloads.html
Для скачивания на портале Oracle необходимо наличие учетной записи с паролем. При ее отсутствии осуществляется регистрация новой учетной записи.
Пройдя по ссылке, выбирается версия Oracle Database 18c XE для вашей операционной системы : Oracle Database 18c Express Edition for Windows x64. Запускается скачивание zip архива (OracleXE184_Win64.zip). Время скачивания может быть достаточно большим. Объем архива 1,9 Гб.
2. Установка СУБД
Распаковывается скачанный архив. Среди извлеченных файлов ищется и запускается файл, под названием setup.exe. Запустится окно установщика. Нажимаем Next.

Дается согласие с лицензионным соглашением (I accept the terms in the license agreement). Нажимаем Next.

Выбирается каталог, в который будет установлена СУБД Oracle Database 18с XE. Можно оставить каталог по умолчанию, или же выбрать собственный (для этого примера выбирается каталог E:dbXE18c ). Нажимаем Next.

Далее указываются пароли для учетных записей SYS, SYSTEM и PDBADMIN, которые понадобятся для подключения к базе данных (БД) в дальнейшем.

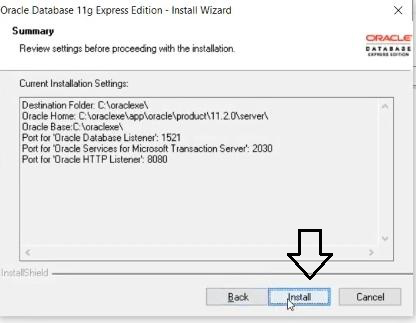
На следующем шаге проверяется (и корректируется опцией Back в случае необходимости) правильность введенной ранее информации и нажимается Install. Это запускает процесс установки СУБД.


Во время установки система запрашивает разрешение на доступ к сетям от Java платформы. Доступ предоставляется установкой галочек в соответствующие чекбоксы и нажатием «Разрешить доступ». При отказе в доступе некоторые функции Oracle Database 18c XE не будут доступны.

Завершение установки зафиксирует в соответствующем окне необходимую информацию для подключения к установленной базе данных.

3. Подключение к СУБД
После установки необходимо произвести подключение к БД, что позволит проверить работоспособность Oracle Database 18c XE. Подключиться можно с помощью SQL Developer и с помощью командной строки – SQLPlus.
Запускается SQL Developer и нажимается зеленый + в левом верхнем углу

Вводятся необходимые данные для подключения.

Все данные указывались во время установки базы данных. Если подключение осуществляется под пользователем SYS необходимо забудьте в графе роль выбрать SYSDBA.
Нажимается кнопка «Connect». Если все указано правильно, то SQL Developer открывает окно, которое позволяет выполнять SQL запросы к выбранной базе данных.

Для подключения с помощью командной строки – SQLPlus запускается командная строка и набирается команда sqlplus / as sysdba, которая подключает к БД под пользователем SYS.

На этом установка и базовые настройки Oracle Database 18c Express Edition на ОС Windows завершены.
Источник
Sqlplus установка на windows 10
SQL*Plus Instant Client is a standalone product with all the functionality of SQL*Plus command-line. It connects to existing remote Oracle databases, but does not include its own database. It is easy to install and uses significantly less disk space than the full Oracle Database Client installation required to use SQL*Plus command-line.
SQL*Plus Instant Client is available on platforms that support the OCI Instant Client. See About OCI Instant Client for more information on the OCI Instant Client.
To install SQL*Plus Instant Client, you need two packages:
SQL*Plus Instant Client package.
Either the Basic OCI Instant Client package, or the lightweight OCI Instant Client package.
D.1 About Choosing the SQL*Plus Instant Client to Install
SQL*Plus Instant Client can be installed in two ways:
Download the packages from the Oracle Technology Network (OTN).
Copy the same files that are in the packages from an Oracle Database 12 c Client Administrator installation.
Both the SQL*Plus and OCI packages must be from the same Oracle Database version, for example, 12.2.0.0.0.
D.1.1 Basic Instant Client
SQL*Plus Instant Client using the Basic OCI package works with any NLS_LANG setting supported by the Oracle Database. It supports all character sets and language settings available in the Oracle Database.
D.1.2 Lightweight Instant Client
SQL*Plus Instant Client using the lightweight OCI package displays error messages in English only and supports only specific character sets. It is significantly smaller than SQL*Plus Instant Client using the Basic OCI package.
Valid values for NLS_LANG parameters with the lightweight Instant Client are:
language can be any valid language supported by the Oracle Database, however, error messages are only reported in English.
territory can be any valid territory supported by the Oracle Database.
charset is one of the following character sets:
D.1.2.1 Lightweight SQL*Plus Instant Client Error with Unsupported Character Set
Attempting to start SQL*Plus Instant Client with an unsupported character set will fail with the following error:
D.2 About Installing SQL*Plus Instant Client by Downloading from OTN
The OTN downloads for Linux are RPM packages. The OTN downloads for UNIX and Windows are zip files.
The SQL*Plus Instant Client package should never be installed on an ORACLE_HOME.
D.2.1 Installing SQL*Plus Instant Client from Linux RPM Packages
D.2.2 Installing SQL*Plus Instant Client from the UNIX or Windows Zip Files
D.2.3 List of Files Required for SQL*Plus Instant Client
Tables E-1, E-2 and E-3 list the required files from each of the SQL*Plus and OCI packages. The files from only one of the OCI packages are required. Other files installed that are not listed here can be ignored, or can be removed to save disk space.
Table D-1 Instant Client Files in the SQL*Plus Package
SQL*Plus data shared library
Table D-2 Instant Client Files in the Basic OCI Package
| Linux and UNIX | Windows | Description |
|---|---|---|
Client code library
OCI Instant Client data shared Library
OCI Instant Client data shared library
Table D-3 Instant Client Files in the Lightweight OCI Package
| Linux and UNIX | Windows | Description |
|---|---|---|
Client code library
OCI Instant Client data shared library (English only)
D.3 Installing SQL*Plus Instant Client from the 12 c Client Release Media
D.3.1 Installing SQL*Plus Instant Client on UNIX or Linux
To install SQL*Plus Instant Client using the Basic OCI package on UNIX and Linux, copy the following files:
To install SQL*Plus Instant Client using the lightweight OCI package on UNIX and Linux, copy the following files:
D.3.2 Installing SQL*Plus Instant Client on Windows
To install SQL*Plus Instant Client using the Basic OCI package on Windows, copy the following files:
To install SQL*Plus Instant Client using the lightweight OCI package on Windows, copy the following files:
D.4 About Configuring SQL*Plus Instant Client
The SQL*Plus Instant Client executable should only be used with the matching version of the OCI Instant Client.
Note that no ORACLE_HOME or ORACLE_SID environment variables need to be set.
D.4.1 Configuring SQL*Plus Instant Client on Linux (from RPMs)
The RPMs downloaded from OTN install into Oracle specific sub-directories in the /usr file system. The sub-directory structure enables multiple versions of Instant Client to be available.
For example, to set LD_LIBRARY_PATH on Solaris in the Bourne or Korn shells:
For example, to set PATH in the bash shell:
D.4.2 Configuring SQL*Plus Instant Client on Linux (from Client Media or Zip File) and UNIX
For example on Solaris in the Bourne or Korn shells:
D.4.3 Configuring SQL*Plus Instant Client on Windows
The environment may be configured using SET commands in a Windows command prompt or made permanent by setting Environment Variables in System Properties.
For example, to set environment variables in Windows 2000 using System Properties, open System from the Control Panel, click the Advanced tab and then click Environment Variables.
For example, add c:instantclient12_2 to the beginning of PATH.
If you have installed the lightweight Instant Client, see Lightweight Instant Client for information about supported NLS_LANG settings.
D.5 About Connecting to a Database with SQL*Plus Instant Client
SQL*Plus Instant Client is always ‘remote’ from any database server. To connect to a database you must specify the database using an Oracle Net connection identifier.
An example using an Easy Connection identifier to connect to the HR schema in the MYDB database running on mymachine is:
Alternatively you can use a Net Service Name:
If you want to use Net Service Names configured in a local Oracle Net tnsnames.ora file, then set the environment variable TNS_ADMIN to the directory containing the tnsnames.ora file. For example, on UNIX, if your tnsnames.ora file is in /home/user1 and it defines the Net Service Name MYDB2:
The TWO_TASK (on UNIX) or LOCAL (on Windows) environment variable can be set to a connection identifier. This removes the need to explicitly enter the connection identifier whenever a connection is made in SQL*Plus or SQL*Plus Instant Client. This UNIX example connects to the database known as MYDB4:
On Windows, TNS_ADMIN and LOCAL may be set in the System Properties. See Configuring SQL*Plus Instant Client on Windows.
D.6 AS SYSDBA or AS SYSOPER Connections with SQL*Plus Instant Client
To connect AS SYSDBA or AS SYSOPER to perform DBA tasks, you need to set up an Oracle password file on the database server using the database’s orapwd utility. Once this is configured, your SQL*Plus Instant Client connection string might look something like:
See Using Password File Authenticationfor information on Oracle password files.
D.7 About Uninstalling Instant Client
The SQL*Plus Instant Client package can be removed separately from the OCI Instant Client. After uninstalling the SQL*Plus Instant Client package, the remaining OCI Instant Client libraries enable custom written OCI programs or third party database utilities to connect to a database.
D.7.1 Uninstalling SQL*Plus Instant Client
For installations on UNIX and Windows, and installations on Linux from the Client Release media, manually remove the following SQL*Plus specific files:
Table D-4 Instant Client Files in the SQL*Plus Package
Источник
E SQL*Plus Instant Client
SQL*Plus Instant Client is a standalone product with all the functionality of SQL*Plus command-line. It connects to existing remote Oracle databases, but does not include its own database. It is easy to install and uses significantly less disk space than the full Oracle Database Client installation required to use SQL*Plus command-line.
SQL*Plus Instant Client is available on platforms that support the OCI Instant Client. See the Oracle Call Interface Programmer’s Guide for more information on the OCI Instant Client.
To install SQL*Plus Instant Client, you need two packages:
SQL*Plus Instant Client package.
Either the Basic OCI Instant Client package, or the lightweight OCI Instant Client package.
Choosing the SQL*Plus Instant Client to Install
SQL*Plus Instant Client can be installed in two ways:
Download the packages from the Oracle Technology Network (OTN).
Copy the same files that are in the packages from an Oracle Database 10 g Client Administrator installation.
Both the SQL*Plus and OCI packages must be from the same Oracle Database version, for example, 10.2.0.1.
Basic Instant Client
SQL*Plus Instant Client using the Basic OCI package works with any NLS_LANG setting supported by the Oracle Database. It supports all character sets and language settings available in the Oracle Database.
Lightweight Instant Client
SQL*Plus Instant Client using the lightweight OCI package displays error messages in English only and supports only specific character sets. It is significantly smaller than SQL*Plus Instant Client using the Basic OCI package.
Valid values for NLS_LANG parameters with the lightweight Instant Client are:
language must always be American.
territory can be any valid territory supported by the Oracle Database.
charset is one of the following character sets:
Lightweight SQL*Plus Instant Client Error with Unsupported Character Set
Attempting to start SQL*Plus Instant Client with an unsupported character set will fail with the following error:
Installing SQL*Plus Instant Client by Downloading from OTN
The OTN downloads for Linux are RPM packages. The OTN downloads for UNIX and Windows are zip files.
The SQL*Plus Instant Client package should never be installed on an ORACLE_HOME.
Installing SQL*Plus Instant Client from Linux RPM Packages
Installing SQL*Plus Instant Client from the UNIX or Windows Zip Files
Create a new directory, for example, /home/instantclient10_2 on UNIX or c:instantclient10_2 on Windows.
Unzip the two packages into the new directory.
List of Files Required for SQL*Plus Instant Client
Tables E-1, E-2 and E-3 list the required files from each of the SQL*Plus and OCI packages. The files from only one of the OCI packages are required. Other files installed that are not listed here can be ignored, or can be removed to save disk space.
Table E-1 Instant Client Files in the SQL*Plus Package
| Linux and UNIX | Windows | Description |
|---|---|---|
SQL*Plus data shared library
SQL*Plus site profile
Table E-2 Instant Client Files in the Basic OCI Package
| Linux and UNIX | Windows | Description |
|---|---|---|
Client code library
OCI Instant Client data shared library
Table E-3 Instant Client Files in the Lightweight OCI Package
| Linux and UNIX | Windows | Description |
|---|---|---|
Client code library
OCI Instant Client data shared library (English only)
Installing SQL*Plus Instant Client from the 10 g Client Release Media
Run the installer on the Oracle Database 10 g Client Release media and choose the Administrator option.
Create a new directory, for example, /home/instantclient10_2 on UNIX and Linux, or c:instantclient10_2 on Windows.
Copy the SQL*Plus Instant Client and the OCI Instant Client files to the new directory. All files must be copied from the same ORACLE_HOME.
Installing SQL*Plus Instant Client on UNIX or Linux
To install SQL*Plus Instant Client using the Basic OCI package on UNIX and Linux, copy the following files:
To install SQL*Plus Instant Client using the lightweight OCI package on UNIX and Linux, copy the following files:
Installing SQL*Plus Instant Client on Windows
To install SQL*Plus Instant Client using the Basic OCI package on Windows, copy the following files:
To install SQL*Plus Instant Client using the lightweight OCI package on Windows, copy the following files:
Configuring SQL*Plus Instant Client
The SQL*Plus Instant Client executable should only be used with the matching version of the OCI Instant Client.
Note that no ORACLE_HOME or ORACLE_SID environment variables need to be set.
Configuring SQL*Plus Instant Client on Linux (from RPMs)
The RPMs downloaded from OTN install into Oracle specific sub-directories in the /usr file system. The sub-directory structure enables multiple versions of Instant Client to be available.
Add the name of the directory containing the Instant Client libraries to LD_LIBRARY_PATH. Remove any other Oracle directories.
For example, to set LD_LIBRARY_PATH on Solaris in the Bourne or Korn shells:
For example, to set PATH in the bash shell:
Set Oracle globalization variables required for your locale. A default locale will be assumed if no variables are set. See the Oracle Database Globalization Support Guide for more information.
Configuring SQL*Plus Instant Client on Linux (from Client Media or Zip File) and UNIX
Add the name of the directory containing the Instant Client files to the appropriate shared library path LD_LIBRARY_PATH, LIBPATH or SHLIB_PATH. Remove any other Oracle directories.
For example on Solaris in the Bourne or Korn shells:
Add the directory containing the Instant Client files to the PATH environment variable. If it is not set, then an absolute or relative path must be used to start SQL*Plus. Remove any other Oracle directories from PATH. For example:
Set SQLPATH to the directory containing the Instant Client files so glogin.sql can be found. For example:
Set Oracle globalization variables required for your locale. A default locale will be assumed if no variables are set. See the Oracle Database Globalization Support Guide for more information.
Configuring SQL*Plus Instant Client on Windows
The environment may be configured using SET commands in a Windows command prompt or made permanent by setting Environment Variables in System Properties.
For example, to set environment variables in Windows 2000 using System Properties, open System from the Control Panel, click the Advanced tab and then click Environment Variables.
Add the directory containing the Instant Client files to the PATH system environment variable. Remove any other Oracle directories from PATH.
For example, add c:instantclient10_2 to the beginning of PATH.
Set the user environment variable SQLPATH to the directory containing the Instant Client files so glogin.sql is found.
Set Oracle globalization variables required for your locale. A default locale will be assumed if no variables are set. See the Oracle Database Globalization Support Guide for more information. For example, to set NLS_LANG for a Japanese environment, create a user environment variable NLS_LANG set to JAPANESE_JAPAN.JA16EUC.
If you have installed the lightweight Instant Client, see Lightweight Instant Client for information about supported NLS_LANG settings.
Connecting to a Database with SQL*Plus Instant Client
SQL*Plus Instant Client is always ‘remote’ from any database server. To connect to a database you must specify the database using an Oracle Net connection identifier.
An example using an Easy Connection identifier to connect to the HR schema in the MYDB database running on mymachine is:
Alternatively you can use a Net Service Name:
If you want to use Net Service Names configured in a local Oracle Net tnsnames.ora file, then set the environment variable TNS_ADMIN to the directory containing the tnsnames.ora file. For example, on UNIX, if your tnsnames.ora file is in /home/user1 and it defines the Net Service Name MYDB2:
The TWO_TASK (on UNIX) or LOCAL (on Windows) environment variable can be set to a connection identifier. This removes the need to explicitly enter the connection identifier whenever a connection is made in SQL*Plus or SQL*Plus Instant Client. This UNIX example connects to the database known as MYDB4:
On Windows, TNS_ADMIN and LOCAL may be set in the System Properties. See Configuring SQL*Plus Instant Client on Windows.
AS SYSDBA or AS SYSOPER Connections with SQL*Plus Instant Client
To connect AS SYSDBA or AS SYSOPER to perform DBA tasks, you need to set up an Oracle password file on the database server using the database’s orapwd utility. Once this is configured, your SQL*Plus Instant Client connection string might look something like:
See the Oracle Database Administrator’s Guide for information on Oracle password files.
Uninstalling Instant Client
The SQL*Plus Instant Client package can be removed separately from the OCI Instant Client. After uninstalling the SQL*Plus Instant Client package, the remaining OCI Instant Client libraries enable custom written OCI programs or third party database utilities to connect to a database.
Uninstalling SQL*Plus Instant Client
For installations on UNIX and Windows, and installations on Linux from the Client Release media, manually remove the following SQL*Plus specific files:
Table E-4 Instant Client Files in the SQL*Plus Package
Источник
Adblock
detector
| Linux and UNIX | Windows | Description |
|---|---|---|
Есть машина с Windows XP. Насколько знаю, можно установить консоль SQL*Plus без SQL Developer, и вообще без Oracle на машине.
Как это сделать?
![]()
0xdb
51.2k194 золотых знака56 серебряных знаков227 бронзовых знаков
задан 9 июн 2012 в 14:16
![]()
angryangry
8,63717 золотых знаков72 серебряных знака180 бронзовых знаков
Installing SQL*Plus Instant Client from the UNIX or Windows Zip Files
На странице по ссылке есть ряд инструкций. Все сводится к тому, чтобы с сайта Oracle скачать два архива для Instant Client на Microsoft Windows (32-bit): один архив для Instant Client, другой — для SQL Plus. Список нужных файлов — по первой ссылке. Архивы надо распаковать, взять из них нужные файлы и положить в одну папку. После этого exe-файл sqlplus.exe будет запускать консоль.
ответ дан 9 июн 2012 в 14:44
![]()
stanislavstanislav
34.1k25 золотых знаков95 серебряных знаков212 бронзовых знаков
В последних версиях Oracle пытается уговорить пользователей перейти с SQL*Plus на его последователя — SQLcl. Это «облегчённая» версия SQL Developer без GUI, то есть только командная строка. Oracle обещает полную совместимость с SQL*Plus.
Взять SQLcl можно:
- прямо с установленной БД по пути:
$ORACLE_HOME/sqldeveloper/ - либо скачать с официального сайта
Поместить в какой-либо каталог на Windows машине, добавить этот каталог в PATH.
Вроде всё:
C:> set path=D:apporaclesqlclbin;%path%
C:> sql user/pass@dbserver.domain.net:1521/pdb1

SQLcl: Release 19.4 Production on Thu Jul 22 18:29:03 2021

Copyright (c) 1982, 2021, Oracle.  All rights reserved.

Last Successful login time: Do Jul 22 2021 18:29:05 +03:00

Connected to:
Oracle Database 19c Enterprise Edition Release 19.0.0.0.0 - Production
Version 19.3.0.0.0

SQL>
ответ дан 22 июл 2021 в 15:39
![]()
0xdb0xdb
51.2k194 золотых знака56 серебряных знаков227 бронзовых знаков
6

- Click to view our Accessibility Policy
- Skip to content
Oracle Instant Client Downloads
for Microsoft Windows (x64) 64-bit
See the Instant Client Home Page for more information about Instant Client.
The installation instructions are at the foot of the page.
Oracle Client-to-Oracle Database version interoperability is detailed in Doc ID 207303.1. For example, applications using Oracle Call Interface 19 can connect to Oracle Database 11.2 or later. Some tools may have other restrictions.
Permanent links to the latest packages are: Basic, Basic Light, SQL*Plus, Tools, SDK, JDBC Supplement
, ODBC
Version 21.8.0.0.0
Base — one of these packages is required
Tools — optional packages
Development and Runtime — optional packages
Version 19.17.0.0.0
Base — one of these packages is required
Tools — optional packages
Development and Runtime — optional packages
Version 18.5.0.0.0
Base — one of these packages is required
Tools — optional packages
Development and Runtime — optional packages
Version 12.2.0.1.0
Base — one of these packages is required
Tools — optional packages
Development and Runtime — optional packages
Version 12.1.0.2.0
Version 11.2.0.4.0
Version 11.1.0.7.0
Version 10.2.0.5
Instant Client Installation for Microsoft Windows 64-bit
See the Instant Client Home Page for more information about Instant Client packages.
Client-server version interoperability is detailed in Doc ID 207303.1. For example, Oracle Call Interface 19, 18 and 12.2 can connect to Oracle Database 11.2 or later. Some tools may have other restrictions.
- Download the appropriate Instant Client packages for your platform. All installations require the Basic or Basic Light package.
- Unzip the packages into a single directory such as
C:oracleinstantclient_19_3 - Add this directory to the
PATHenvironment variable. If you have multiple versions of Oracle libraries installed, make sure the new directory occurs first in the path. Restart any terminal windows or otherwise make sure the new PATH is used by your applications. - Download and install the correct Visual Studio Redistributable from Microsoft. Instant Client 19 requires the Visual Studio 2017 redistributable. Instant Client 18 and 12.2 require the Visual Studio 2013 redistributable. Instant Client 12.1 requires the Visual Studio 2010 redistributable.
- If you intend to co-locate optional Oracle configuration files such as tnsnames.ora, sqlnet.ora, ldap.ora, or oraaccess.xml with Instant Client, then create a subdirectory such as
C:oracleinstantclient_19_3networkadmin - Start your application.
This is the default Oracle client configuration directory for applications linked with this Instant Client.
Alternatively, Oracle client configuration files can be put in another, accessible directory. Then set the environment variable TNS_ADMIN to that directory name.
ODBC users should follow the ODBC Installation Instructions.
Oracle client 19c is an application which has full ability to connect to Oracle database server, but it requires to be installed and registered with Windows platform. That’s the biggest difference from Oracle instant client.
Here are steps to install Oracle client.
1. Unzip Oracle Client 19c
Here we use WINDOWS.X64_193000_client.zip from Oracle Database 19c Download for Microsoft Windows x64 (64-bit).
Please note that, the web page contains not only client packages, but also a lot of database server ones. You need to find the right one by pressing Ctrl + f and searching «client» keyword on the page.
Once you have downloaded the right one, you should unzip the package like this:

Oracle Client 19c Unzipped
2. Initiate Installation

Double Click on setup.exec to initiate Oracle Client 19c Installation
3. Select Administrator Type
To get the full power of Oracle client, we choose Administrator Type.

Oracle Client 19c Installation — Step 1 — Select Installation Type
4. Create Oracle Home Owner
We choose to create a new Windows user oracle to be the owner of Oracle software.

Oracle Client 19c Installation — Step 2 — Oracle Home User Selection
5. Select Oracle Home
We should find a proper directory to store Oracle software. In this case, we use the default.

Oracle Client 19c Installation — Step 3 — Specify Installation Location
6. Pass Prerequisite Check and Summary
As you can see, we passed the prerequisite checks and it summarize some information for us.

Oracle Client 19c Installation — Step 5 — Summary
7. Save Response File
It’s a good habit to save response file.

Oracle Client 19c Installation — Step 5 — Save Response File
8. Install the Product
If there’s nothing wrong, we can safely install the product.

Oracle Client 19c Installation — Step 6 — Install Product
9. Installation Finished
The installation is successful.

Oracle Client 19c Installation — Step 7 — Finish
10. Allow the App to Access Network
To access the network, we should put Oracle client in the white list of Windows firewall.

Windows Security Alert on Oracle Client 19c APP
To have a faster way to install Oracle client, please check: How to Install Oracle Client Home on Windows.
Install
<- Install
Overview
What follows is the most common way to install the Oracle 19 Windows 64-bit client.
- Procedure
- TNS Administration
- Environment Variables
- Validate Connection
- SQLPlus Changes
- Installing 32-bit Client with 64-bit
- Uninstall
- Uninstall (manually)
Prerequisites
 • Download Microsoft Windows x64 (64-bit) to your software dir (Ex: C:sw).
   Click the See All link then scroll down to find:
   Oracle Database 19c Client (19.3) for Microsoft Windows x64 (64-bit)
     Download this 🠊 WINDOWS.X64_193000_client.zip
     Not this      🠊 WINDOWS.X64_193000_client_home.zip
 • Unzip C:swWINDOWS.X64_193000_client.zip.
   It will create dir: C:swWINDOWS.X64_193000_clientclient
 • Set windows system to show file extensions:
   Windows-Key 🠊 File Explorer 🠊 View 🠊  [x] File name extensions
 • Unset the ORACLE_HOME if install prompts with a conflict then restart install.
If when unzippinig you get filename too long errors you can rename zip file ic.zip then try again.
Ensure This is Done
Set windows system to show file extensions:
Windows-Key 🠊 File Explorer 🠊 View 🠊 [x] File name extensions
Procedure
  1. Run C:swWINDOWS.X64_193000_clientclientsetup.exe As Administrator.
     Installer loads...

  2. Installation Type: (x) Administrator

  3. Oracle Home User Selection: (x) Use Windows Built-in Account

  4. Installation Location:
     Oracle base:       C:apporacleclient
     Software location: C:apporacleclientproduct19.0.0client_1

  5. Summary: Select [Install]
     Process runs...

     Press [Close] when completed.
- The installer adds this entry to the PATH environment var:
- C:apporacleclientproduct19.0.0client_1bin;
- Main registry additions:
- HKEY_CURRENT_USERSoftwareOracle
- HKEY_LOCAL_MACHINESOFTWAREODBC<OracleDrivers>
- HKEY_LOCAL_MACHINESOFTWAREORACLE
TNS Administration
 1. DetermineSet path to tnsnames.ora.
    If your system has multiple Oracle clients on it - try using the
    tnsnames.ora under the TNS_ADMIN path.

   Otherwise set TNS_ADMIN env value to:
     C:apporacleclientproduct19.0.0client_1networkadmin

 2. Create appropriate entry in the tnsnames.ora file if not already done.

 3. Make sure your Windows system does not name the file
    with a .txt extension: tnsnames.ora.txt
    GO CHECK!
Environment Variables
Recommended
 ORACLE_BASE: C:apporacle
 ORACLE_HOME: C:apporacleclientproduct19.0.0client_1
If Your Environment Requires
 ORACLE_SID: <YourOraSid>
 TNS_ADMIN: C:apporacleclientproduct19.0.0client_1networkadmin
Press Windows-Key then type env for option to edit environment vars.
Validate Connection
Ensure you can do the following to your Oracle database server.
 1. Ping IP: ping <OracleDBSrv or RACSCAN>
    Ex: ping 192.168.1.42
 2. Ping Port (via paping.exe etc.)
    Ex: paping -p 1521 192.168.1.42
 3. TNS Ping: tnsping <MyTnsnames.ora Service Name>
    Ex: tnsping MYDB1
SQLPlus
Create Windows Shortcut
%ORACLE_HOME%BINsqlplus.exe <Username>/<Password>@<tnsnames.ora Svc>
%ORACLE_HOME%BINsqlplus.exe scott/tiger@MYDB1
Set Global Profile
Add below values to: %ORACLE_HOME%sqlplusadminglogin.sql
 SET LINESIZE 240
 SET PAGESIZE 9999
 SET SQLPROMPT "_USER'@'_CONNECT_IDENTIFIER> "
These are the minimal recommended changes.
APPENDIX
tnsnames.ora Example
MYDB1 =
  (DESCRIPTION =
    (ADDRESS = (PROTOCOL = TCP)(HOST = 192.168.1.51)(PORT = 1521))
    (CONNECT_DATA =
      (SERVER = DEDICATED)
      (SERVICE_NAME = mydb1)
    )
  )

MYDB2 =
  (DESCRIPTION =
    (ADDRESS = (PROTOCOL = TCP)(HOST = 192.168.1.52)(PORT = 1521))
    (CONNECT_DATA =
      (SERVER = DEDICATED)
      (SERVICE_NAME = mydb2)
    )
  )
Uninstall Oracle Client Software
Prerequisites
- Ensure no 64-bit Oracle software is running on this machine and have no other apps needing 64-bit Oracle access.
Procedure
1. Find the universal installer and UNINSTALL the client
   a. Win-Key "universal Installer" run: Universal Installer.
   b. Press [Deinstatll Products].
   c. Select: [x] OraClient19Home1
   d.  Press [Remove].

   Command will be provided to uninstall for this system.
   Example: cd C:swWINDOWS.X64_193000_client_homedeinstall
            Run: deinstall.bat
		 Do you want to continue: y

   In 19c the relevant registry entries will be removed by this process.

2. Clean Environment Vars
   - rundll32.exe sysdm.cpl,EditEnvironmentVariables
   - If exist, remove: ORACLE_HOME, ORACLE_SID, TNS_ADMIN
   - From PATH remove any Oracle entries.

   Run "set" from console to confirm env clean.

3. Remove directory
   Delete dir: C:appclient (or corresponding client parent dir)
Completely Uninstalling Manually
Exercise extreme care when removing registry entries. Removing incorrect entries can severely impact your computer.
Prerequisites
- Ensure you are logged in as a user with Administrator privileges.
- Make sure you have complete backups of your system before you make any changes.
 1. Windows registry.
    HKEY_LOCAL_MACHINESOFTWAREORACLE
    - Delete the home (ex: KEY_OraClient19Home1).
    - Delete the key inst_loc.
    HKEY_LOCAL_MACHINESOFTWAREODBC
    Expand all subkeys and remove all keys related with the "Oracle ODBC Driver".
    HKEY_LOCAL_MACHINESYSTEMCurrentControlSetServices
    Remove all keys under here that begin with ORACLE or ORAWEB.
    HKEY_LOCAL_MACHINESYSTEMCurrentControlSetServicesEventLog...Application
    Remove all keys under here that begin with ORACLE.
    HKEY_LOCAL_MACHINESoftwareMicrosoftWindowsCurrentVersion...Uninstall
    Remove any entries related to Oracle.
    HKEY_CLASSES_ROOT
    Remove all keys that begin with Ora or ORCL
    (e.g. Oracle..., ORADC..., ORAMMC..., OraOLE..., OraPerf... and ORCL...).
    HKEY_LOCAL_MACHINESOFTWAREClasses
    Remove all keys that begin with Ora or ORCL
    (e.g. Oracle..., ORADC..., ORAMMC..., OraOLE..., OraPerf... and ORCL...).
    HKEY_CURRENT_USERSoftwareOracle
    Delete this ORACLE key.
    HKEY_USERS…SoftwareOracle
    Delete this ORACLE key.

 2. Environment
    a. PATH = Remove any path to Oracle client.
    b. Remove ORACLE_SID, ORACLE_BASE, ORACLE_HOME and TNS_ADMIN.

 3. Directories and Files
    • Remove "Oracle" Items.
    • Though some might be hidden, in placing the path in File Explorer they should open.
    C:Program FilesOracle
    C:ProgramDataMicrosoftWindowsStart MenuProgramsOracle - OraClient19Home1
    C:Users<UserName>AppDataRoamingMicrosoftWindowsStart Menu
    C:Users<UserName>AppDataRoamingMicrosoftWindowsStart MenuPrograms
    %SystemDrive%Temp
    %SystemDrive%Documents and Settings<username>Local SettingsTemp
 4. Misc
    Go to the drive where the Oracle software is installed on your machine
    and delete all ORACLE_BASE directories on your hard drive.
These steps have been derived from Doc ID 124353.1.
Installing 32-bit Client with 64-bit
 1. Install this 64-bit client first.
 2. Oracle 32-bit Client Install changes:
    a. If set, unset all Oracle environment vars: ORACLE_BASE, ORACLE_HOME.
    b. Run setup.exe passing: ORACLE_HOME_NAME=client_32
       C:swNT_193000_clientclient32setup.exe ORACLE_HOME_NAME=client_32
       Takes a few minutes to load.  We wait...
    c. Software location changes:
       Oracle base:       C:appclientoracle32
       Software location: C:appclientoracle32product19.0.0client_32
 3. Create a TNS_ADMIN System environment var. Set it to the 64-bit home network path:
    C:apporacleclientproduct19.0.0client_1networkadmin
 4. Create a TNS_ADMINtnsnames.ora entry(s) as needed.
 5. Create and test sqlplus shortcuts for both.
    64: C:appclientoracleproduct19.0.0client_1binsqlplus.exe scotttiger@MYSVC
    32: C:appclientoracle32product19.0.0client_32binsqlplus.exe scotttiger@MYSVC
 6. Create and test ODBC connections for both.
    64 ODBC Mgr: C:WindowsSystem32odbcad32.exe
    32 ODBC Mgr: C:WindowsSysWOW64odbcad32.exe
Notes:
- Yes crazily the 64-bit ODBC Mgr is in a directory showing 32 and vice-verse.
- Both ODBC managers see the name of the all 32 and 64 bit DSN names. So you may want to give 32-bit entries a _32 extension.
- The 32 bit would not recognize the TNS_ADMIN env var so I simply copied the tnsnames.ora to both net paths. I bet there is a registry entry that will resolve this though.
References:
- Considerations Using The Oracle Client With Microsoft Products on 64 bit Windows Operating System (Doc ID 781432.1).
- Cannot Install Oracle Client 11.2 64 Bit And Oracle Client 32 Bit On Same Windows 64 Bit Server (Doc ID 1530206.1).
- WINDOWS: Install Oracle Client 11.2 32-bit and 64-bit on Same System Overwrites Programs Menu Entry (Doc ID 1243374.1).

In the following article, I am going to show you how to install the latest Oracle instant client 19.5 on Windows 10. As you know, Oracle Instant Client is a set of tools you need to connect and manage the Oracle database server. With this tool, we can connect to both local or remote Oracle database. Not like many other software, it needs extra steps in order to install the instant client. But don’t worry, we will cover it shortly.
Steps to Install Oracle Instant Client on Windows 10
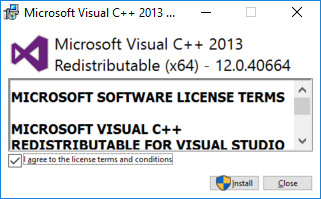
Step 1. Install Microsoft Visual Studio 2017 Redistributable
The Oracle Instant Client 19.5 requires the installation of the Microsoft Visual Studio 2017 Redistributable. Make sure you have this software installed on Windows 10.
Step 2. Create a new directory for the instant client
Create a new folder under C:/ or any other folder. This new folder will be used to store the oracle instant client files. In this example, I will create a new folder called C:oracle
Step 3. Download the Oracle Instant Client
Now download the latest version of Oracle Instant Client. Choose the correct architecture that match your system. Or, if you are using Windows 10 64 bit, you can use the link below to directly download it. Choose one of these below
Basic Package
https://download.oracle.com/otn_software/nt/instantclient/19500/instantclient-basic-windows.x64-19.5.0.0.0dbru.zip
Basic Light Package
https://download.oracle.com/otn_software/nt/instantclient/19500/instantclient-basiclite-windows.x64-19.5.0.0.0dbru.zip
You will also need to download the Instant Client SDK Package below
https://download.oracle.com/otn_software/nt/instantclient/19500/instantclient-sdk-windows.x64-19.5.0.0.0dbru.zip
Save these two files inside the folder we created earlier.
Step 4. Extract the package
I assume you have two files below:
- instantclient-basic-windows.x64-19.5.0.0.0dbru.zip
- instantclient-sdk-windows.x64-19.5.0.0.0dbru.zip
First, extract the file instantclient-basic-windows.x64-19.5.0.0.0dbru.zip. It will produce a new subfolder called instantclient_19_5. Next, extract the file instantclient-sdk-windows.x64-19.5.0.0.0dbru.zip. The second file should be extracted into the instantclient_19_5 directory. Here are the folder content result

Step 5. Modify the Environment Variable
In this section, we are going to edit the Environment Variable. We will include the Oracle Instant Client path into the environment variable. To do this, follow these steps:
- Open Control Panel >> Settings
- Click Advanced System Settings
- On the Advanced tab, click Environment variables
- Under System Variables, create OCI_LIB64 if it does not exist. Set the value OCI_LIB64 to C:oracleinstantclient_19_5
- Under System Variables, edit PATH and include C:oracleinstantclient_19_5


Oracle Client – это официальный клиент (программа), благодаря которому вы можете работать в базе данных Oracle. Вы получаете доступ базе данных, которая находится на стороннем компьютере, подсоединившись через удаленный сервер.
Воспользуйтесь этим клиентом и войдите в профиль, а также просканируйте права доступа и составления запросов. В этом клиенте вы можете работать в собственной БД. Этот софт можно установить на компьютер с OS Windows.
Войдя в эту программу, вы сможете просматривать БД, используя «проводниковую структуру файлов», но с практичным интерфейсом и оболочкой.
Версии
Сейчас в сети можно скачать этот клиент с «билдом» 12.0, но версия 11g считается намного лучше. Клиент Oracle Client 11g устанавливают на многих предприятиях и организациях. Софт можно устанавливать на компьютеры, в которых операционная система поддерживает 32 и 64 битную структуру файлов.
Главная особенность 32 разрядной версии программы – это поддержка Toad, SQL Developer и прочих инструментов визуализации. Версия x64 не подходит для подключения сторонних модулей.
Инсталляция
Устанавливая этот софт, вы выбираете тип установки: Instant Client, Administrator, Runtime и Custom. Инсталлировав клиент в первом режиме, вы сможете работать с разделенными библиотеками.
Указав Administrator, вы установите консоль администратора, которая интегрируется в дополнительные библиотеки клиента. В режиме Runtime вы инсталлируете пакет файлов вспомогательных утилит для простой обработки готовой базы данных.
В режиме «Custom» вы сами подбираете составные части, а потом установить их. Выбрав режим инсталляции, нажмите установить и подождите, пока установщик скопирует все файлы.
Полноценная работа софта доступна без инсталляции вспомогательных модулей и драйверов. Oracle Client также поддерживает работу через меню автозагрузки операционной системы. Этот клиент доступен для закачки в бесплатном режиме.
Ключевые особенности
- софт позволяет работать с удалёнными базами данных;
- перед установкой клиента можно воспользоваться одним из четырёх вариантов;
- программа запускается на 32 и 64-битных сборках OS Windows;
- этот клиент распространяется официально и создан разработчиками от Oracle;
- программа доступна для закачки в бесплатном режиме;
- графическая оболочка предназначена для неопытного пользователя компьютера.
On this page:
- Overview
- Download the client directly from Oracle’s website
Overview
At Indiana University, to download the Oracle client for Windows, UITS recommends downloading the client directly from Oracle’s website. This requires a valid OTN (Oracle Technology Network) username and password. If you do not have a valid OTN username and password, visit Oracle Database Software Downloads. At the top, hover over «Sign In», click , and then follow the on-screen instructions.
Download the client directly from Oracle’s website
To download the Oracle client directly from Oracle’s website:
- Go to Oracle Database Software Downloads.
- Under «Oracle Database 19c», below «19.3 — Enterprise Edition», to the far right of «Microsoft Windows x64 (64-bit)», click .
- Scroll down to the appropriate Oracle client for your operating system:
- 32-bit: Under «Oracle Database 19c Client (19.3) for Microsoft Windows (32-bit)», click . This file requires 1 GB of free space on your hard drive.
- 64-bit: Under «Oracle Database 19c Client (19.3) for Microsoft Windows (x64)», click . This file requires 1 GB of free space on your hard drive.
You will be prompted to accept Oracle’s license agreement and enter a valid OTN username and password. Once you have done so, you will see the «File Download» dialog box. If you do not have an OTN username and password, see the instructions for getting one above.
- Save the file.
- In Windows, navigate to the file, right-click it, and then select .
- Select a destination folder for the extracted files, and then perform the extraction.
- To launch the Oracle Client Installer, go to the destination folder, open the
clientdirectory, and then double-click (the Oracle setup file).At this point:
- Windows may prompt you for an administrator username and password. Enter an administrator username and password to proceed.
- Windows may present an «Open File — Security Warning» dialog box. Click to proceed.
It may take a minute for the «Oracle Client Installer» window to appear. To see it, you may need to minimize any other application windows that are open.
This is document agpr in the Knowledge Base.
Last modified on 2021-09-21 17:49:41.
2011-03-15 19:55:52
Oracle
Windows
Применимо для Windows XP x32 (Oracle Client Basic 10.2.0.4 + ODBC) и для Windows 7 x64 (Oracle Client Basic 11.1.0.6.0 x32).
В связи с участившимися вопросами «как ставить oracle client» опубликую что-то вроде инструкции из собственного опыта.
Первым делом нужно обзавестись самим клиентом, его можно скачать с сайта Oracle или еще где-то. Понадобится
- instantclient-basic-win32-XXXX.zip
- instantclient-odbc-win32-XXXX.zip (если требуется чтобы драйвер Oracle появился в Панель управления → Источники данных (ODBC))
Для работы PHP OCI8 и TOAD вполне будет достаточно только архива instantclient-basic. Приступим.
Распаковываем instantclient-basic-win32-10.2.0.4.zip в нужное место, в моем случае это C:Program FilesOracleinstantclient_10_2 (этот путь будет везде использоваться дальше по тексту, так что заменяйте на свой).
Под Windows 7 x64 клиент x32 работает вполне нормально и решает поставленные задачи, но никто не запрещает воспользоваться версией клиента x64.
Идем в Панель управления → Система → Дополнительно → Переменные среды. Там в разделе «Системные переменные» создаем следующие (имя переменной = значение)
LD_LIBRARY_PATH	= C:Program FilesOracleinstantclient_10_2
NLS_LANG =	RUSSIAN_CIS.CL8MSWIN1251
ORACLE_HOME	= C:Program FilesOracleinstantclient_10_2
SQL_PATH	= C:Program FilesOracleinstantclient_10_2
TNS_ADMIN	= C:Program FilesOracleinstantclient_10_2networkADMIN
NLS_LANG может быть другой в зависимости от потребностей.
А к переменной PATH дописываем (не забываем про
PATH += C:Program FilesOracleinstantclient_10_2
Теперь создаем папку C:Program FilesOracleinstantclient_10_2networkADMIN и в ней файл tnsnames.ora , в котором прописываем все SID к которым будем коннектиться.
Для работы клиента требуются DLL
Путем долгих мучений мной было выяснено, что для того чтобы клиент заработал в системе должны присутствовать следующие DLL библиотеки (которых обычно нет):
- bcrypt.dll
- ieshims.dll (в принципе работает и без нее на Win7)
- mfc71.dll
- msvcr71.dll
- ncrypt.dll
- wer.dll
Где их взять ответит гугль, скачиваем, распаковываем в C:WindowsSystem32 (можно ребутнуться для профилактики).
Если требуется работа приложений через ODBC драйвер
Распаковываем instantclient-odbc-win32-10.2.0.4.zip в нужное место, в моем случае это C:Program FilesOracleinstantclient_10_2 и запускаем оттуда odbc_install.exe
После всех этих операций у большинства все начинает работать, надеюсь и вам это поможет
Если требуется работа x32 приложений через ODBC в Windows x64
Вот тут начинается самая хитрость, тк в панели управления в источниках данных ODBC нет драйвера Oracle! Поэтому нужно запустить управление ODBC x32, который, на удивление, расположен в C:WindowsSysWoW64 (см. KB 942976 от M$). Для этого нужно выполнить команду:
%systemdrive%WindowsSysWoW64Odbcad32.exe
И в открывшемся окне будет доступна возможность создать DSN с драйвером Oracle.

![]()
На сервере с операционной системой Windows Server 2016 потребовалось установить Oracle Instant Client 12.2 с драйвером ODBC.
Ничего сложного в установке нет, но почему-то не всегда это получается сделать с первого раза.
Установка Oracle Instant Client 12.2
Внимательно читаем инструкцию:
https://www.oracle.com/ru/database/technologies/instant-client/winx64-64-downloads.html#ic_winx64_inst
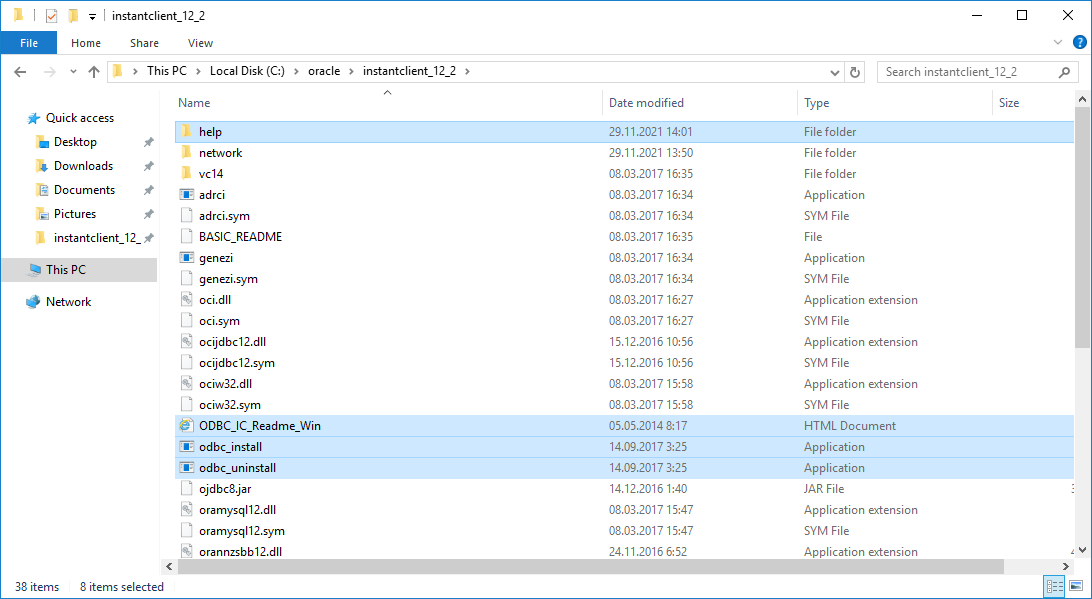
Скачиваем пакет instantclient-basic-windows.x64-12.2.0.1.0.zip. Распаковываем. Внутри находится папка instantclient_12_2. Копируем её на диск C: в папку oracle так, чтобы получился путь:
C:oracleinstantclient_12_2
Для работы пакета 12.2 требуется Microsoft Visual Studio 2013 Redistributable. Скачиваем и устанавливаем.
В переменную PATH добавляем путь C:oracleinstantclient_12_2. Для этого в свойствах компьютера нажимаем Environment Variables…
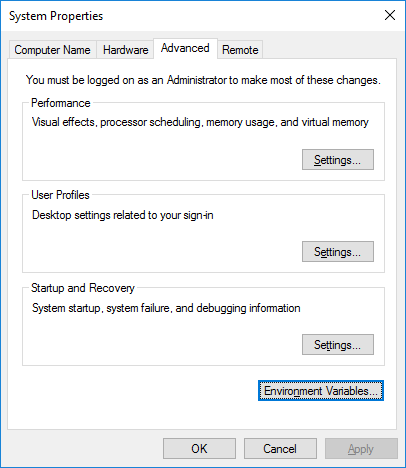
В нижней секции System variables находим переменную Path и редактируем, Edit…
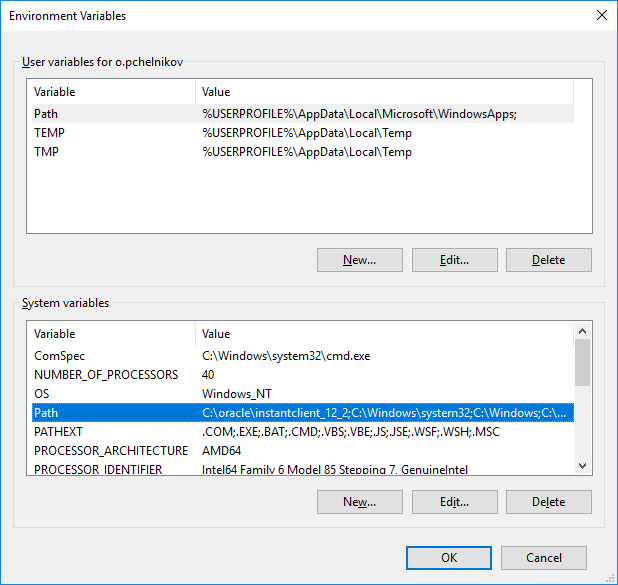
Добавляем путь C:oracleinstantclient_12_2 и кнопкой Move Up перемещаем его вверх.
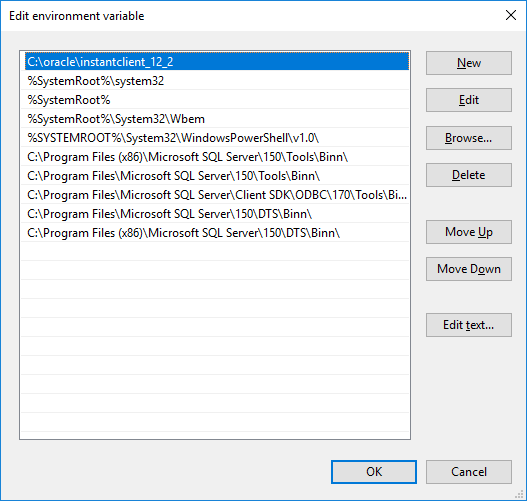
Ok.
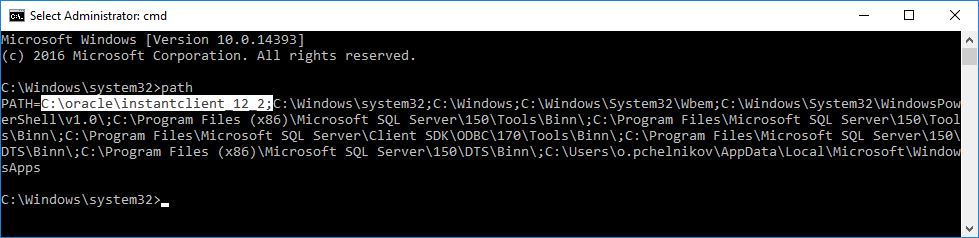
Проверим что получилось. В командной строке под администратором выполняем команду:
pathВ пути долен присутствовать элемент «C:oracleinstantclient_12_2;».
Если нам нужно использовать собственные конфигурационные файлы: tnsnames.ora, sqlnet.ora, ldap.ora, или oraaccess.xml; то создаём директорию:
C:oracleinstantclient_12_2networkadmin
и копируем эти файлы в неё. Если необходимо использовать конфигурационные файлы в другой директории, то укажите путь к ней в серверной переменной TNS_ADMIN.

Установка ODBC
Там же где скачивали Oracle Instant Client 12.2, находим для той же версии пакет ODBC instantclient-odbc-windows.x64-12.2.0.1.0-2.zip. Скачиваем, распаковываем.
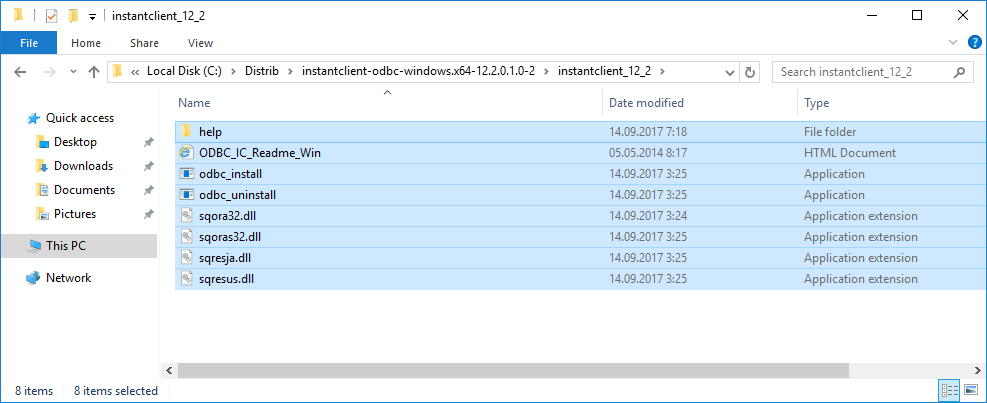
Содержимое копируем в C:oracleinstantclient_12_2.
ODBC устанавливается путём запуска файла odbc_install.exe.
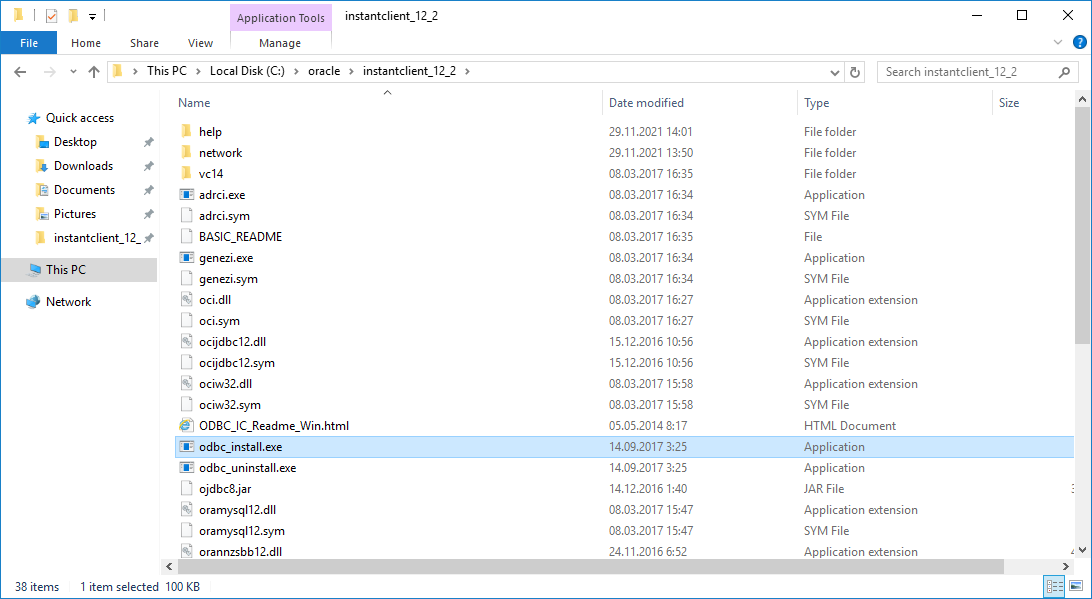
Для удобства запускаем его из командной строки под администратором.
Oracle ODBC Driver is installed successfully.

При запуске можно увидеть ошибку:
Oracle ODBC driver with same name already exists

В этом случае добавляем пользователя под которым работаем в группу локальных администраторов и бэкап-операторов. После чего снова запускаем командную строку под администратором и устанавливаем ODBC. Недостаточно просто быть в доменной группе, которая добавлена в локальные администраторы. Пользователь должен явно числиться локальным админом.
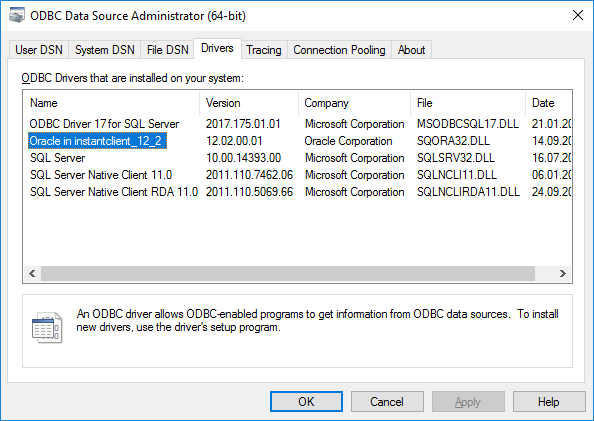
Проверяем в Administrative Tools. Запускаем ODBC Data Sources (64-bit).
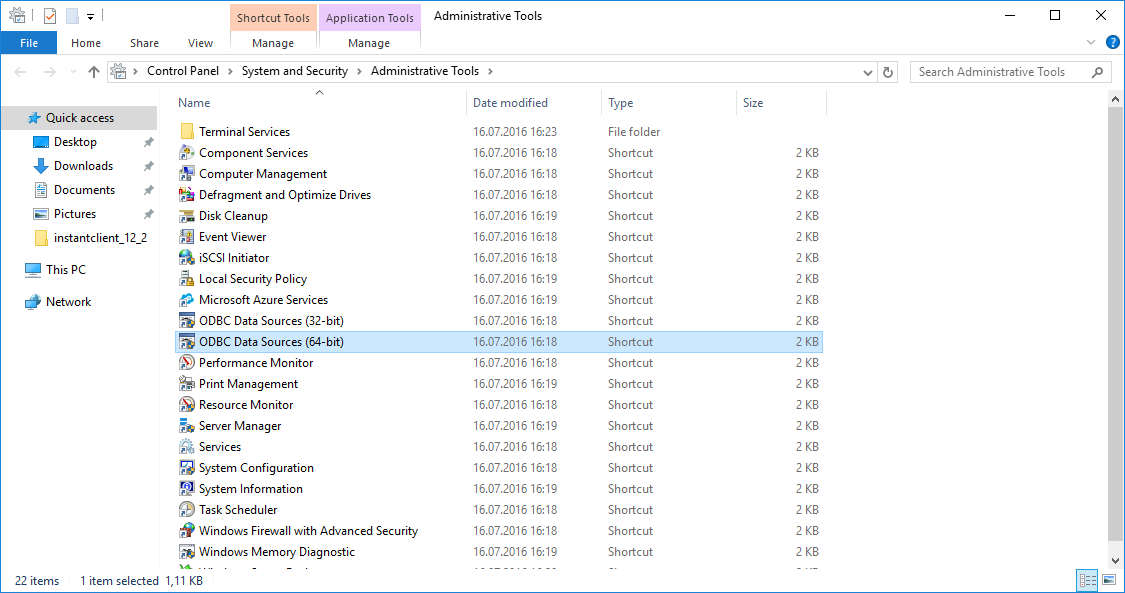
Во вкладке Drivers должен появится пункт «Oracle in instantclient_12_2».
Перезагружаем сервер, чтобы наши приложения подцепили новый PATH.
Ссылки
Установка Oracle Instant Client на Ubuntu