One additional point should be noted:
If you want to display a message box in an application that is neither a windows forms application or a forms application (such as a .NET console application), you should not drag in assembly references for either as seems to be the common mantra all over the internet.
Instead, you should use pinvoke and call into User32 as follows:
[DllImport("user32.dll", SetLastError = true, CharSet = CharSet.Auto)]
public static extern MessageBoxResult MessageBox(IntPtr hWnd, String text, String caption, int options);

/// <summary>
/// Flags that define appearance and behaviour of a standard message box displayed by a call to the MessageBox function.
/// </summary>
[Flags]
public enum MessageBoxOptions : uint
{
    Ok = 0x000000,
    OkCancel = 0x000001,
    AbortRetryIgnore = 0x000002,
    YesNoCancel = 0x000003,
    YesNo = 0x000004,
    RetryCancel = 0x000005,
    CancelTryContinue = 0x000006,

    IconHand = 0x000010,
    IconQuestion = 0x000020,
    IconExclamation = 0x000030,
    IconAsterisk = 0x000040,
    UserIcon = 0x000080,
    IconWarning = IconExclamation,
    IconError = IconHand,
    IconInformation = IconAsterisk,
    IconStop = IconHand,
    DefButton1 = 0x000000,
    DefButton2 = 0x000100,
    DefButton3 = 0x000200,
    DefButton4 = 0x000300,

    ApplicationModal = 0x000000,
    SystemModal = 0x001000,
    TaskModal = 0x002000,

    Help = 0x004000, //Help Button
    NoFocus = 0x008000,

    SetForeground = 0x010000,
    DefaultDesktopOnly = 0x020000,
    Topmost = 0x040000,
    Right = 0x080000,
    RTLReading = 0x100000,
}

/// <summary>
/// Represents possible values returned by the MessageBox function.
/// </summary>
public enum MessageBoxResult : uint
{
    Ok = 1,
    Cancel,
    Abort,
    Retry,
    Ignore,
    Yes,
    No,
    Close,
    Help,
    TryAgain,
    Continue,
    Timeout = 32000
}

var result = User32.MessageBox(IntPtr.Zero, "Debugging Break", "Your Console Application", (int)User32.MessageBoxOptions.Ok);
- Details
- Written by June Blender
- Last Updated: 23 December 2016
- Created: 15 December 2016
- Hits: 58459
MessageBox Control [System.Windows.Forms.MessageBox]
Displays a modal window with a message for the user and at least one button. The MessageBox closes only when the user clicks a MessageBox button. A MessageBox can contain text, buttons, and symbols that show information to the user and require their response.
MSDN Page: System.Windows.Forms.MessageBox
A modal window is a child of the parent form that opens on top of it. When a modal window opens, the parent form is temporarily disabled, but still visible. When the user clicks a modal window button, the modal window closes and control passes back to the parent window, which is re-enabled.
Message boxes are typically used to display important information that the user must acknowledge, such as error messages. Using a MessageBox to display user messages, instead of a custom form, helps to standardize your application and assure that it conforms to best practice design standards.
There is a WinForms MessageBox class (System.Windows.Forms.MessageBox), but there is no MessageBox control in PowerShell Studio Toolbox pane.
In this article
- Create a MessageBox
- Tips for using a MessageBox
- MessageBox Variations
Create a MessageBox
To create a MessageBox:
Use the Show static method of the MessageBox class.
[System.Windows.Forms.MessageBox]::Show('text', 'title')
For example:
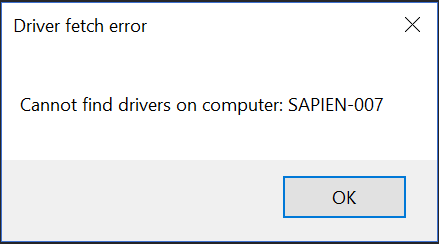
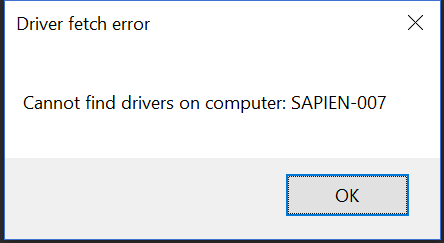
[System.Windows.Forms.MessageBox]::Show("Cannot find drivers on computer: $ComputerName", 'Driver fetch error')
Generates this message box when the value of $ComputerName is ‘SAPIEN-007’.
To create a MessageBox in PowerShell Studio:
- Use the msgbox or msgboxyesno snippets
- Replace the ‘Text’ placeholder with the text that appears in the message box.
- Replace the ‘Title’ placeholder with the window title.

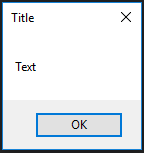
Here is the MessageBox that the msgbox snippet creates before the ‘Text’ and ‘Title’ placeholders are replaced.
Because the MessageBox class does not have constructors (special methods for creating an object of that class), you do not use the New-Object cmdlet or the New static method to create a MessageBox. Use the Show static method instead.
The Show method has 21 different overloads (like parameter sets) and you can use any overload to create your MessageBox.
Tips for using a MessageBox Control
- Unlike other controls in a PowerShell GUI application, you do not create a MessageBox in advance and write event handlers for it. Instead, you create it in the code where you use it.
- In PowerShell Studio, to add the code for a MessageBox, use the msgbox or msgboxyesno snippet. These snippets create a simple MessageBox with a window title, a message, an OK button and the system close button (X) in the upper right corner. For a more complex MessageBox, see MessageBox Variations.
- The first line of the msgbox and msgboxyesno snippets is an Add-Type command that adds the System.Windows.Forms assembly to the session. In PowerShell Studio, you need this command only when displaying a MessageBox in a .ps1 file. In a .psf file, you can comment-out this line or delete it.
#Add-Type -AssemblyName «System.Windows.Forms, Version=2.0.0.0, Culture=neutral, PublicKeyToken=b77a5c561934e089»
- The msgbox and msgboxyesno snippets come with single-quoted strings. If your message strings include variables, be sure to change to double-quoted strings. For more information, see about_Quoting_Rules.
[void][System.Windows.Forms.MessageBox]::Show('Text', 'Title') [void][System.Windows.Forms.MessageBox]::Show("Cannot find computer: $ComputerName", 'Computer name error') - The Show method parameter values must be strings (enclosed in quotations marks), integers that represent an enumeration value, or variables.
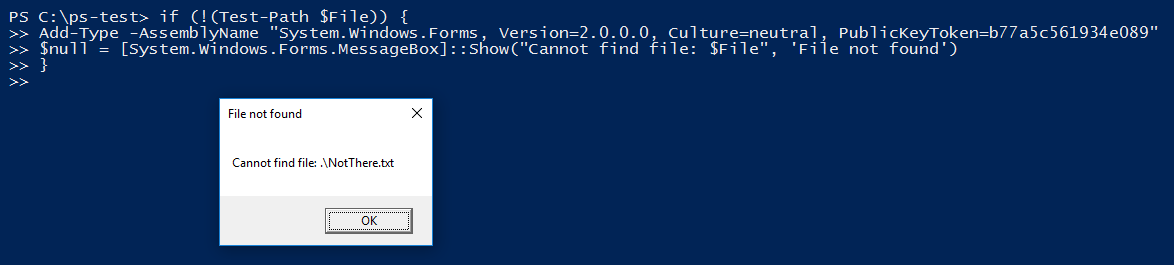
- When the user closes the MessageBox, the Show method returns a DialogResult value that represents the button that the user clicked to close the MessageBox, such as ‘OK’. To suppress the output, pipe it to Out-Null, assign it to $null, or cast it as [void]. For example:
$null = [System.Windows.Forms.MessageBox]::Show("Cannot find drivers on computer: $ComputerName", 'Driver fetch error') - If you’re using a more complex variation of the Show method, but can’t remember the parameters or parameter order, PowerShell Studio will prompt you.
Type:
[System.Windows.Forms.MessageBox]::Show(PowerShell Studio prompts with the parameters for different overloads of the Show method. To scroll through the options, use the up-arrow and down-arrow keys. To select an overload, press TAB. PowerShell Studio adds the parameters for you.

- You can display a MessageBox in your Form_Load event handler. For example, this code checks for a module and, if it’s not installed, it displays a MessageBox and then closes the form. This is handy because #Requires -Module generates a console error and prevents the script from running, but it does not display anything to the GUI app user.
$formShow_Load = { if (!(Get-Module -Name CoolNewThing -ListAvailable)) { $msg = "This app requires the CoolNewThing module. Install the module and try again.`n`nClosing this app." [System.Windows.Forms.MessageBox]::Show($msg, 'Required module not found', 'OK', 'Error') $formShow.Close() } } - You can also add a MessageBox to a console command or a script (.ps1). Be sure to include the Add-Type command that adds the System.Windows.Forms assembly to the session. You can find the Add-Type command in the msgbox and msgboxyesno snippets.
MessageBox Variations
The Show method of the MessageBox class has many variations or overloads, which are like Windows PowerShell parameter sets. This section lists and explains some of the most frequently used overloads of the Show method of MessageBox class .
- Message only
- Message and Title
- Message, Title, and Buttons
- Add Icon
- Set the Default Button
- Add MessageBox Options
- Add a Help Button
Message only
MSDN: https://msdn.microsoft.com/en-us/library/519bytz3(v=vs.110).aspx
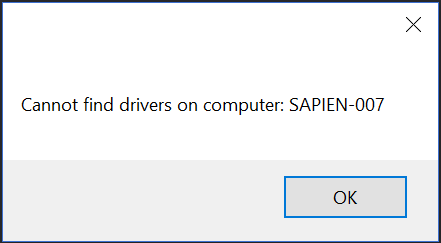
[System.Windows.Forms.MessageBox]::Show('text')
To create a MessageBox with text, but no title, enter a single string. To break a line or create paragraphs in the string, use the newline character, `n (backtick-n).
[System.Windows.Forms.MessageBox]::("Cannot find drivers on computer: $Computer")
Message and Title
MSDN: https://msdn.microsoft.com/en-us/library/20stz12s(v=vs.110).aspx
[System.Windows.Forms.MessageBox]::Show('text', 'title')
To create a Message box with text and title, call the Show method with two strings. The first string is the MessageBox text; the second string is the window title.
[System.Windows.Forms.MessageBox]::("Cannot find drivers on computer: $Computer", 'Driver fetch error')
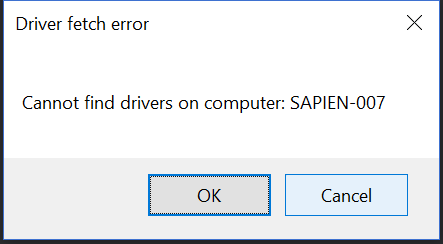
Message, Title, and Buttons
MSDN: https://msdn.microsoft.com/en-us/library/0x49kd7z(v=vs.110).aspx
[MessageBox]::Show(‘text’, ‘title’, MessageBoxButtons)
NOTE: When you specify MessageBoxButtons values other than ‘Ok’ that do not include a Cancel button, the system close button (X) in the upper right corner of the MessageBox is disabled.
[System.Windows.Forms.MessageBox]::Show('text', 'title', MessageBoxButtons)
To create a Message box with text and title and specified buttons (up to 3 buttons), call the Show method with two strings, and a MessageBoxButtons option, such as OK, YesNo, or YesNoCancel. By default, a MessageBox has an OK button. You can replace the OK button, but you cannot remove all buttons. To add a Help button, use a HelpButton overload.
$result = [System.Windows.Forms.MessageBox]::("Cannot find drivers on computer: $Computer", 'Driver fetch error', 'OKCancel')
When using multiple buttons, use the DialogResult value that the Show method returns to respond to the user’s button choice. For example:
$buttonStart={
    Try {Get-Service -ComputerName $textboxCn.Text.Trim() | Out-GridView}
    Catch {
        $result = [System.Windows.Forms.MessageBox]::Show('Failed. Get services on local computer?', 'Computer name error', 'YesNo')
        if ($result -eq 'Yes') { Get-Service | Out-GridView }
    }
}
Notice that when you specify MessageBoxButtons that do not include a Cancel button, the system close button (X) in the upper right corner of the MessageBox is disabled. The exception is ‘OK’, which is the default value.

Add Icon
MSDN: https://msdn.microsoft.com/en-us/library/365dky5y(v=vs.110).aspx
[MessageBox]::Show(‘text’, ‘title’, MessageBoxButtons, MessageBoxIcon)
[System.Windows.Forms.MessageBox]::Show('text', 'title', MessageBoxButtons, MessageBoxIcon)
This Show method overload adds a MessageBoxIcon option, such as Exclamation, Warning, or Stop. The icon that appears varies with the version of Windows on the local system.
For example:
$result = [System.Windows.Forms.MessageBox]::("Cannot find drivers on computer: $Computer", 'Driver fetch error', 'OKCancel', 'Error')
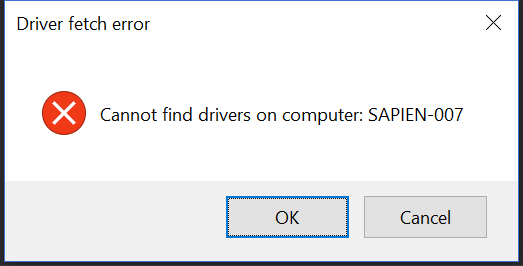
This Show method requires a MessageBoxButtons value. You cannot skip the parameter or insert an empty string. To omit the icon, use a value of ‘None’.
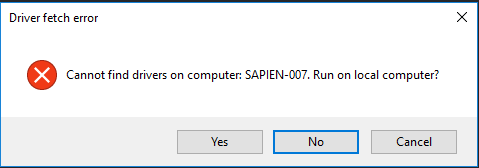
Set the Default Button
MSDN: https://msdn.microsoft.com/en-us/library/ctd56yay(v=vs.110).aspx
[MessageBox]::Show(‘text’, ‘title’, MessageBoxButtons, MessageBoxIcon, MessageBoxDefaultButton)
[System.Windows.Forms.MessageBox]::Show('text', 'title', MessageBoxButtons, MessageBoxIcon, MessageBoxDefaultButton)
This Show method overload adds a MessageBoxDefaultButton option, Button1, Button2, or Button3. The ButtonX values refer to left-to-right order of the buttons. Button1 is the default. When a button is the default, that button is highlighted and is clicked when the user presses the Enter key.
For example:
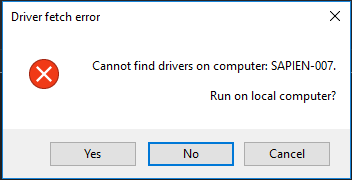
$result = [System.Windows.Forms.MessageBox]::("Cannot find drivers on computer: $Computer. Run on local computer?", 'Driver fetch error', 'YesNoCancel', 'Error', 'Button2')
Add MessageBox Options
[MessageBox]::Show(‘text’, ‘title’, MessageBoxButtons, MessageBoxIcon, MessageBoxDefaultButton, MessageBoxOptions)
MSDN: https://msdn.microsoft.com/en-us/library/ba3x8zfh(v=vs.110).aspx
[System.Windows.Forms.MessageBox]::Show('text', 'title', MessageBoxButtons, MessageBoxIcon, MessageBoxDefaultButton, MessageBoxOptions)
This Show method overload adds a MessageBoxOptions value. The RightAlign and RtlReading attributes are designed for aligning text near buttons and for right-to-left languages. The DefaultDesktopOnly and ServiceNotification values keep the MessageBox on top of other windows, which might be useful for very high priority messages in multi-window applications. You can also enter a value of 0, which satisfies the MessageBoxOption value requirement without selecting any of the options.
For example:
$result = [System.Windows.Forms.MessageBox]::("Cannot find drivers on computer: $Computer. Run on local computer?", 'Driver fetch error', 'YesNoCancel', 'Error', 'Button2', RightAlign)
Also, the MessageBoxOptions enumeration has a FlagsAtttribute that lets you select multiple enum values, rather than choosing just one.
$MBOptions = [System.Windows.Forms.MessageBoxOptions]"RightAlign, DefaultDesktopOnly"
[System.Windows.Forms.MessageBox]::Show("Cannot find drivers on computer: SAPIEN-007.", 'Driver fetch error', 'OK', 'Error', 'Button2', $MBOptions
Add a Help Button to a MessageBox
There are several Show overloads that create a Help button in a MessageBox.
IMPORTANT:
- You cannot use a MessageBoxOptions value of DefaultDesktopOnly or ServiceNotification with a help button in a message box.
- When the user clicks the Help button in the MessageBox, the form receives the HelpRequested event. To respond to this event, add a HelpRequested event handler to the form.
Use this syntax to add a Help button that displays the text in a file or opens a web page. This Show overload does not work properly in the Form_Load event handler.
MSDN: https://msdn.microsoft.com/en-us/library/tewzaxwc(v=vs.110).aspx
[MessageBox]::Show(‘text’, ‘title’, MessageBoxButtons, MessageBoxIcon, MessageBoxDefaultButton, MessageBoxOptions, HelpPathString)
[System.Windows.Forms.MessageBoxMessageBox]::Show('text', 'title', MessageBoxButtons, MessageBoxIcon, MessageBoxDefaultButton, MessageBoxOptions, HelpPathString)
Use this syntax to add a Help button with a custom response, such as launching a child form or starting a wizard.
MSDN: https://msdn.microsoft.com/en-us/library/szwxe9we(v=vs.110).aspx
[MessageBox]::Show(‘text’, ‘title’, MessageBoxButtons, MessageBoxIcon, MessageBoxDefaultButton, MessageBoxOptions, Boolean)
[System.Windows.Forms.MessageBoxMessageBox]::Show('text', 'title', MessageBoxButtons, MessageBoxIcon, MessageBoxDefaultButton, MessageBoxOptions, Boolean)
Display Help from a File or Web Page
To add a MessageBox Help button that displays the text from a text file or opens a web page, add the text file path to the Show method arguments.
For example, this script displays a MessageBox with a Help button that opens a Windows PowerShell About help file on disk.
$msg = 'Cannot interpret symbols or special characters in input string.'
$HelpFilePath = "$PSHOMEen-USabout_Special_Characters.help.txt"
[System.Windows.Forms.MessageBox]::Show($msg, 'Invalid input', 'OK', 'Stop', 'Button3', 0, $HelpFilePath)
The obvious risk of this strategy is that the file isn’t found. Before using this method use the Test-Path cmdlet to verify the file location and provide an alternative or use this method only with files installed with your application.
You can also use a URL in the HelpFilePath string value.
$msg = 'Cannot interpret symbols or special characters in input string.'
$HelpFilePath = 'http://go.microsoft.com/fwlink/?LinkID=113269'
[System.Windows.Forms.MessageBox]::Show($msg, 'Invalid input', 'OK', 'Stop', 'Button3', 0, $HelpFilePath)
Display Help in Other Ways
You can add a Help button to a MessageBox and then write an event handler to respond to clicking the Help button. This lets you respond to the Help button click in a variety of ways, such as by displaying a Help window child form or opening a web page.
This Show method overload adds a Boolean value. Enter $True to add a Help Button; $False to omit the Help button.
Remember to set the MessageBoxOptions to 0 or to a value other than DefaultDesktopOnly or ServiceNotification. To make the Help button the default, set the value of MessageBoxDefaultButton to the last button. In this case, with OK, Cancel, and Help buttons, Help is Button3.
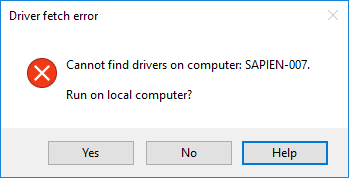
[System.Windows.Forms.MessageBox]::("Cannot find drivers on computer: $Computer. Run on local computer?", 'Driver fetch error', 'OKCancel', 'Error', 'Button3', 0, $True)
When the user clicks the Help button on the MessageBox, it raises the HelpRequested event on the parent form (not on the MessageBox). To respond to the Help button click event, add an event handler for the HelpRequested event to the parent form.
Add a HelpRequested event handler
When the user clicks the Help button on the MessageBox, it raises the HelpRequested event on the parent form (not on the MessageBox). To respond to the Help button click event, add an event handler for the HelpRequested event to the parent form.
To add the HelpRequested event handler:
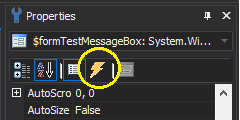
- Click the Designer tab and, in the Properties pane for the form, click the Event button (lightening icon).

- Double-click the HelpRequested event.
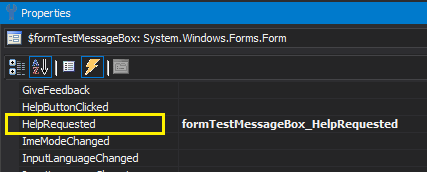
PowerShell Studio adds an event handler for the HelpRequested event (of the form) to your script.
This sample event handler opens a web page, but you can respond to the Help button click in many different ways.
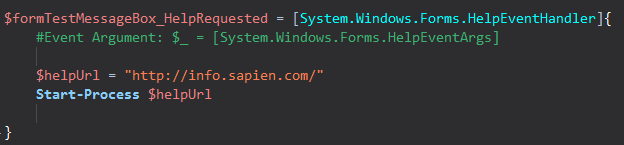
For more information:
- VIDEO! MessageBox: Display user messages in a PowerShell GUI app
- Manage Errors in a GUI Application
- Displaying Output in a GUI Application
- Spotlight articles? In PowerShell Studio, in the Toolbox or in the Properties pane, right-click a control and then click View Spotlight Article.
C# MessageBox in Windows Forms displays a message with the given text and action buttons. You can also use MessageBox control to add additional options such as a caption, an icon, or help buttons. In this article, you’ll learn how to display and use a MessageBox in C# WinForms app. You will also learn how to use C# MessageBox class dynamically in code samples.
C# MessageBox
MessageBox class has an overloaded static Show method that displays a message box with a message and action buttons. The action buttons can be OK and Cancel, Yes and No etc. Here are some of the options that can be used in C# message box.
Simple MessageBox
The simplest form of a MessageBox is a dialog with a text and OK button. When you click OK button, the box disappears.
The following code snippet creates a simple Message Box.
- string message = «Simple MessageBox»;
- MessageBox.Show(message);
MessageBox with Title
The following code snippet creates a simple MessageBox with a title.
- string message = «Simple MessageBox»;
- string title = «Title»;
- MessageBox.Show(message, title);

MessageBox with Buttons
A MessageBox can have different button combinations such as YesNo and OKCancel. The MessageBoxButtons enumeration represents the buttons to be displayed on a MessageBox and has following values.
- OK
- OKCancel
- AbortRetryIgnore
- YesNoCancel
- YesNo
- RetryCancel
The following code snippet creates a MessageBox with a title and Yes and No buttons. This is a typical MessageBox you may call when you want to close an application. If the Yes button is clicked, the application will be closed. The Show method returns a DialogResult enumeration.
- string message = «Do you want to close this window?»;
- string title = «Close Window»;
- MessageBoxButtons buttons = MessageBoxButtons.YesNo;
- DialogResult result = MessageBox.Show(message, title, buttons);
- if (result == DialogResult.Yes) {
- this.Close();
- } else {
- }

MessageBox with Icon
A MessageBox can display an icon on the dialog. A MessageBoxIcons enumeration represents an icon to be displayed on a MessageBox and has the following values.
- None
- Hand
- Question
- Exclamation
- Asterisk
- Stop
- Error
- Warning
- Information
The following code snippet creates a MessageBox with a title, buttons, and an icon.
- string message = «Do you want to abort this operation?»;
- string title = «Close Window»;
- MessageBoxButtons buttons = MessageBoxButtons.AbortRetryIgnore;
- DialogResult result = MessageBox.Show(message, title, buttons, MessageBoxIcon.Warning);
- if (result == DialogResult.Abort) {
- this.Close();
- }
- elseif(result == DialogResult.Retry) {
- }
- else {
- }

MessageBox with Default Button
We can also set the default button on a MessageBox. By default, the first button is the default button. The MessageBoxDefaultButton enumeration is used for this purpose and it has the following three values.
- Button1
- Button2
- Button3
The following code snippet creates a MessageBox with a title, buttons, and an icon and sets the second button as a default button.
- string message = «Do you want to abort this operation?»;
- string title = «Close Window»;
- MessageBoxButtons buttons = MessageBoxButtons.AbortRetryIgnore;
- DialogResult result = MessageBox.Show(message, title, buttons, MessageBoxIcon.Warning, MessageBoxDefaultButton.Button2);
- if (result == DialogResult.Abort) {
- this.Close();
- }
- elseif(result == DialogResult.Retry) {
- }
- else {
- }

MessageBox with Message Options
MessageBoxOptions enumeration represents various options and has the following values.
- ServiceNotification
- DefaultDesktopOnly
- RightAlign
- RtlReading
The following code snippet creates a MessageBox with various options.
- DialogResult result = MessageBox.Show(message, title, buttons,
- MessageBoxIcon.Warning, MessageBoxDefaultButton.Button2,
- MessageBoxOptions.RightAlign|MessageBoxOptions.RtlReading);

MessageBox with Help Button
A MessageBox can have an extra button called Help button. This is useful when we need to display a help file. The following code snippet creates a MessageBox with a Help button.
- DialogResult result = MessageBox.Show(message, title, buttons,
- MessageBoxIcon.Warning, MessageBoxDefaultButton.Button2,
- MessageBoxOptions.RightAlign, true );

We can also specify a help file when the Help button is clicked. The following code snippet references a help file.
- DialogResult result = MessageBox.Show(message, title,
- buttons, MessageBoxIcon.Question, MessageBoxDefaultButton.Button1, 0, «helpfile.chm»);
Summary
In this article, we discussed how to create and use a MessageBox in a Windows Forms application.
Последнее обновление: 31.10.2015
Как правило, для вывода сообщений применяется элемент MessageBox. Однако кроме сообственно вывода строки сообщения данный элемент может устанавливать
ряд настроек, которые определяют его поведение.
Для вывода сообщения в классе MessageBox предусмотрен метод Show, который имеет различные версии и может принимать ряд параметров.
Рассмотрим одну из наиболее используемых версий:
public static DialogResult Show(
	string text,
	string caption,
	MessageBoxButtons buttons,
	MessageBoxIcon icon,
	MessageBoxDefaultButton defaultButton,
	MessageBoxOptions options
)
Здесь применяются следующие параметры:
text: текст сообщения
caption: текст заголовка окна сообщения
buttons: кнопки, используемые в окне сообщения.
Принимает одно из значений перечисления MessageBoxButtons:
-
AbortRetryIgnore: три кнопки Abort (Отмена), Retry (Повтор), Ignore (Пропустить) -
OK: одна кнопка OK -
OKCancel: две кнопки OK и Cancel (Отмена) -
RetryCancel: две кнопки Retry (Повтор) и Cancel (Отмена) -
YesNo: две кнопки Yes и No -
YesNoCancel: три кнопки Yes, No и Cancel (Отмена)
Таким образом, в зависимости от выбора окно сообщения может иметь от одной до трех кнопок.
icon: значок окна сообщения. Может принимать одно из следующих значений перечисления MessageBoxIcon:
-
Asterisk, Information: значок, состоящий из буквы i в нижнем регистре, помещенной в кружок -
Error, Hand, Stop: значок, состоящий из белого знака «X» на круге красного цвета. -
Exclamation, Warning: значок, состоящий из восклицательного знака в желтом треугольнике -
Question: значок, состоящий из вопросительного знака на периметре круга -
None: значок у сообщения отсутствует
defaultButton: кнопка, на которую по умолчанию устанавливается фокус. Принимает одно из значений перечисления MessageBoxDefaultButton:
-
Button1: первая кнопка из тех, которые задаются перечислением MessageBoxButtons -
Button2: вторая кнопка -
Button3: третья кнопка
options: параметры окна сообщения. Принимает одно из значений перечисления MessageBoxOptions:
-
DefaultDesktopOnly: окно сообщения отображается на активном рабочем столе. -
RightAlign: текст окна сообщения выравнивается по правому краю -
RtlReading: все элементы окна располагаются в обратном порядке справа налево -
ServiceNotification: окно сообщения отображается на активном рабочем столе, даже если в системе не зарегистрирован ни один пользователь
Нередко используется один параметр — текст сообщения. Но посмотрим, как использовать остальные параметры. Пусть у нас есть кнопка, в обработчике
нажатия которой открывается следующее окно сообщения:
private void button1_Click(object sender, EventArgs e)
{
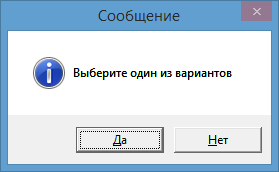
MessageBox.Show(
"Выберите один из вариантов",
"Сообщение",
MessageBoxButtons.YesNo,
MessageBoxIcon.Information,
MessageBoxDefaultButton.Button1,
MessageBoxOptions.DefaultDesktopOnly);
}
Однако нам не просто дается возможность установки кнопок в окне сообщения. Метод MessageBox.Show возвращает объект
DialogResult, с помощью которого мы можем узнать, какую кнопку в окне сообщения нажал пользователь. DialogResult представляет
перечисление, в котором определены следующие значения:
-
Abort: нажата кнопка Abort -
Retry: нажата кнопка Retry -
Ignore: нажата кнопка Ignore -
OK: нажата кнопка OK -
Cancel: нажата кнопка Cancel -
None: отсутствие результата -
Yes: нажата кнопка Yes и No -
No: нажата кнопка No
Используем обработку выбора пользователя, изменив обработчик нажатия кнопки следующим образом:
private void button1_Click(object sender, EventArgs e)
{
    DialogResult result = MessageBox.Show(
        "Окрасить кнопку в красный цвет?",
        "Сообщение",
        MessageBoxButtons.YesNo,
        MessageBoxIcon.Information,
        MessageBoxDefaultButton.Button1,
        MessageBoxOptions.DefaultDesktopOnly);

	if (result == DialogResult.Yes)
        button1.BackColor=Color.Red;

	this.TopMost = true;
}
И теперь, если в окне сообщения мы выберем выриант Yes, то кнопка окрасится в красный цвет.
A message box or dialog box is used to interact with the users of your application. The purpose of using a message box may include notifying about a particular action e.g. success message after entering a record. Similarly, an error message if an operation was unsuccessful. In both cases, you may display the “OK” button in the message box with the message.
In other cases, you may display a message box for the user confirmation before performing a critical action e.g. deleting a record permanently. In that case, a Yes/No button in the dialog box makes sense.
In this tutorials, I will show you how to create various types of C# message box with code.
How to make message box work in Visual Studio?
If you are working in Visual Studio then you have to include the System.Windows.Forms by following this:
- In your project name under “Solution Explorer” right click and select “Add Reference”.
- There you can see a few tabs. Select “.Net” tab.
- Now locate the System.Windows.Forms and press OK
The example of creating a simple message box
After taking the above steps, you need including the System.Windows.Forms namespace as used in the code below.
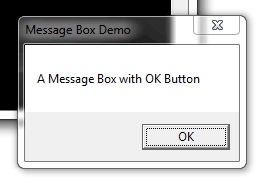
You may provide a message to be displayed and the title of the dialog box by using the MessageBox class’s show method. The following example simply displays a box with the OK button:
|
1 2 3 4 5 6 7 8 9 10 11 12 13 14 15 16 17 18 19 20 21 22 23 24 25 26 27 |
using System; using System.Windows.Forms; class msgbox_example { static void Main() { string box_msg = «A Message Box with OK Button»; string box_title = «Message Box Demo»; MessageBox.Show(box_msg, box_title); } } |
The result:
An example of Yes/No message box
The Yes/No dialog box can be useful for asking users to choose an option between the two. For example, “Are you sure you want to delete this record?” Similarly, “Do you want to really quit?” and so on.
The example below shows a Yes/No message box:
|
1 2 3 4 5 6 7 8 9 10 11 12 13 14 15 16 17 18 19 20 21 22 23 24 25 26 27 |
using System; using System.Windows.Forms; class msgbox_example { static void Main() { string box_msg = «Message Box with Yes / No Options»; string box_title = «Yes No Dialog»; MessageBox.Show(box_msg, box_title, MessageBoxButtons.YesNo); } } |
The result:

Adding Cancel button in above dialog
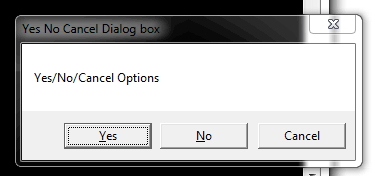
You may use the YesNoCancel Enum value for creating a dialog with the third button i.e. Cancel in addition to the above two buttons. The code below shows how with the output:
|
1 2 3 4 5 6 7 8 9 10 11 12 13 14 15 16 17 18 19 20 21 22 23 24 25 26 27 |
using System; using System.Windows.Forms; class msgbox_example { static void Main() { string box_msg_y_n_c = «Yes/No/Cancel Options»; string box_title_y_n_c = «Yes No Cancel Dialog box»; MessageBox.Show(box_msg_y_n_c, box_title_y_n_c, MessageBoxButtons.YesNoCancel); } } |
Adding an icon example
By using the MessageBoxIcon Enum, you may specify an icon to be displayed with the message in the dialog box. A number of values for various types of icons can be used. For example:
- Exclamation
- Information
- Question
- Warning
- Asterisk
- Error
- Hand
- Stop
- None
The following example shows a few message boxes with different icons:
|
1 2 3 4 5 6 7 8 9 10 11 12 13 14 15 16 17 18 19 20 21 22 23 24 25 26 27 28 29 |
using System; using System.Windows.Forms; class msgbox_example { static void Main() { MessageBox.Show(«Exclamation Icon message box», «Dialog with Icon», MessageBoxButtons.YesNo, MessageBoxIcon.Exclamation); MessageBox.Show(«Warning Icon message box», «Dialog with Icon», MessageBoxButtons.OKCancel, MessageBoxIcon.Warning); MessageBox.Show(«There was an error processing your request!», «Dialog with Icon», MessageBoxButtons.OK, MessageBoxIcon.Error); MessageBox.Show(«Operation cannot be successful, Do you want to retry?», «Dialog with Icon», MessageBoxButtons.RetryCancel, MessageBoxIcon.Stop); } } |
As you execute this code, four dialog boxes should display with respective icons and messages.
Performing actions on different buttons
The message box with OK button only may be used for information purpose to the user, without performing any action. However, in the case of boxes with OK, Cancel, Yes and No, Retry buttons, you may require performing some action based on the user’s selection.
So, how to catch which button is pressed by the user?
For that, you may use a variable that catches the returned value. Then it can be used in an if statement and you may perform the desired action.
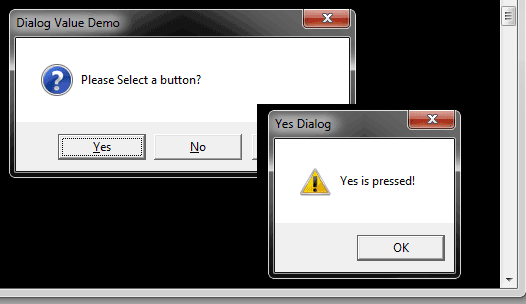
To demonstrate that, the following program displays a message box with Yes/No/Cancel buttons. As you click any button, another message box with “OK” button is displayed with its own message for each button:
|
1 2 3 4 5 6 7 8 9 10 11 12 13 14 15 16 17 18 19 20 21 22 23 24 25 26 27 28 29 30 31 32 33 34 35 36 37 38 39 40 41 42 43 44 45 46 47 48 49 |
using System; using System.Windows.Forms; class msgbox_example_value { static void Main() { var selectedOption = MessageBox.Show(«Please Select a button?», «Dialog Value Demo», MessageBoxButtons.YesNoCancel, MessageBoxIcon.Question); // If the no button was pressed … if (selectedOption == DialogResult.Yes) { MessageBox.Show(«Yes is pressed!», «Yes Dialog», MessageBoxButtons.OK, MessageBoxIcon.Warning); } else if (selectedOption == DialogResult.No) { MessageBox.Show(«No is pressed!», «No Dialog», MessageBoxButtons.OK, MessageBoxIcon.Exclamation); } else { MessageBox.Show(«Cancel is pressed», «Cancel Dialog», MessageBoxButtons.OK, MessageBoxIcon.Error); } } } |
This div height required for enabling the sticky sidebar
Introduction to C# MessageBox
In today’s applications, it is always required that a message is displayed to the user as a token of information or confirmation so that the user is aware of the status of the operation he performed. The message can be anything ranging from “The payment is successful” or a warning type like “Do you want to continue” etc. This is achieved in C# with the help of Message Box. A message box can be considered as an interface between the user and the application. It is nothing but a window that has text, images, or symbols to guide or convey something to the user. Until appropriate action is performed, and the message box is closed, it will not allow other actions to be performed.
Syntax:
Message Box is a class in the “Systems.Windows.Forms” Namespace and the assembly it is available is “System.Windows.Forms.dll”.The show method available in the class is used to display the message along with action buttons. The action buttons can be anything ranging from Yes to No, Ok to Cancel.
Example:
The following code will create a simple Message Box only with the OK button.
string msg = "Test";
MessageBox.Show(msg);
Types of Show Methods
Following are the types of show method:
| Syntax | Use |
| MessageBox.Show(String) | It will display only the message box with the string that is passed. An ok button is also present to close the dialog. Example: |
| MessageBox.Show( String, String) | It will display only the message box with the string that is passed as first parameter. The second parameter is the title of the Message Box. An ok button is also present to close the dialog. Example: |
| MessageBox.Show( String,String, MessageBoxButtons) | It will display the message box with the supplied text, title and the corresponding buttons to be displayed on the Message Box. For eg the below will display Yes and No buttons. |
| Show(String, String, MessageBoxButtons, MessageBoxIcon) | It will display the message box with the supplied text, title and the corresponding buttons to be displayed on the Message Box. It will also display the icon that is specified before the text. For eg the below will display Yes and No buttons with a question mark in front of message. |
| Show(String, String, MessageBoxButtons, MessageBoxIcon, MessageBoxDefaulButton) | It will display the message box with the supplied text, title and the corresponding buttons to be displayed on the Message Box. It will also display the icon that is specified before the text. The last parameter denotes which button must be selected by default on load. For eg the below will display Yes and No buttons with a question mark in front of message. |
| Show(String, String, MessageBoxButtons, MessageBoxIcon, MessageBoxDefaulButton, MessageBoxOptions) | It will display the message box with the supplied text, title, and the corresponding buttons to be displayed on the Message Box. It will also display the icon that is specified before the text. The last parameter denotes which button must be selected by default on load and the contents of the messagebox will be right-aligned. For eg the below will display Yes and No buttons with a question mark in front of message. |
Types of MessageBox Buttons
The following are the types of Buttons that are available in the MessageBox.Show() method. They are
- OK: It is defined as MessageBoxButtons.OK
- OK and Cancel: It is defined as MessageBoxButtons.OkCancel.
- Abort Retry and Ignore: It is defined as MessageBoxButtons.AbortRetryIgnore.
- Yes No and Cancel: It is defined as MessageBoxButtons.YesNoCancel.
- Yes and No: It is defined as MessageBoxButtons.YesNo.
- Retry and Cancel: It is defined as MessageBoxButtons.RetryCancel.
Types of MessageBox Icons
The following are the types of MessageBox icons method are:
- None: No icons are displayed in the Message box.
- Hand: A hand icon is displayed. It is defined as MessageBoxIcon.Hand.
- Question: A question mark is displayed. It is defined as MessageBoxIcon.Question.
- Exclamation: An exclamation mark is displayed. It is defined as MessageBoxIcon.Exclamation.
- Asterisk: An asterisk symbol is displayed. It is defined as MessageBoxIcon.Asterisk.
- Stop: A stop icon is displayed. It is defined as MessageBoxIcon.Stop.
- Error: An error icon is displayed. It is defined as MessageBoxIcon.Error.
- Warning: A warning icon is displayed. It is defined as MessageBoxIcon.Warning.
- Information: An info symbol is displayed. It is defined as MessageBoxIcon.Information.
Types of MessageBox Options
The following are the various Message Box options that are available.
- ServiceNotification: It is defined as MessageBoxOptions.ServiceNotification. This is used to display the message box on the current desktop which is active. The message box is displayed even when no user is logged on to the desktop.
- DefaultDesktopOnly: It is defined as MessageBoxOptions.DefaultDesktopOnly. This also displays on the currently active desktop. The difference between this and service notification is that here the message is displayed on the interactive window.
- RightAlign: It is defined as MessageBoxOptions.RightAlign. This is used to format the message in right alignment.
- RtlReading: It is defined as MessageBoxOptions.RtlReading. This denotes that message is displayed from right to left order.
Example of C# MessageBox
Following are the examples of c# message box are:
Input:
using System;
using System.Collections.Generic;
using System.ComponentModel;
using System.Data;
using System.Drawing;
using System.Linq;
using System.Text;
using System.Windows.Forms;
namespace test
{
public partial class testform : Form
{
public testform()
{
InitializeComponent();
}
private void testform_Load(object sender, EventArgs e)
{
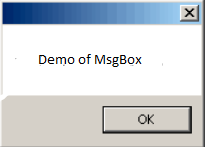
MessageBox.Show("Demo of MsgBox");
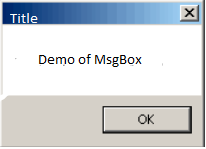
MessageBox.Show("Demo of MsgBox", "Title");
MessageBox.Show("Demo of Msgbox","Title",MessageBoxButtons.YesNo);
MessageBox.Show("Demo of Msgbox","Title",MessageBoxButtons.YesNoCancel);
MessageBox.Show("Demo of Msgbox","Title",MessageBoxButtons.OkCancel);
MessageBox.Show("Demo of Msgbox","Title",MessageBoxButtons.RetryCancel);
MessageBox.Show("Demo of Msgbox","Title",MessageBoxButtons.OK);
MessageBox.Show("Demo of Msgbox","Title",MessageBoxButtons.AbortRetryIgnore);
MessageBox.Show("Demo of Msgbox","Title",MessageBoxButtons.YesNoCancel,MessageBoxIcon.Question);
MessageBox.Show("Demo of Msgbox","Title",MessageBoxButtons.YesNoCancel,MessageBoxIcon.Hand);
MessageBox.Show("Demo of Msgbox","Title",MessageBoxButtons.YesNoCancel,MessageBoxIcon.Exclamation);
MessageBox.Show("Demo of Msgbox","Title",MessageBoxButtons.YesNoCancel,MessageBoxIcon.Asterisk);
MessageBox.Show("Demo of Msgbox","Title",MessageBoxButtons.YesNoCancel,MessageBoxIcon.Stop);
MessageBox.Show("Demo of Msgbox","Title",MessageBoxButtons.YesNoCancel,MessageBoxIcon.Error);
MessageBox.Show("Demo of Msgbox","Title",MessageBoxButtons.YesNoCancel,MessageBoxIcon.Warning);MessageBox.Show("Demo of Msgbox","Title",MessageBoxButtons.YesNoCancel,MessageBoxIcon.Information);MessageBox.Show("Demo of Msgbox","Title",MessageBoxButtons.YesNoCancel,MessageBoxIcon.Question,MessageBoxDefaultButton.Button2);
MessageBox.Show("Demo of Msgbox","Title",MessageBoxButtons.OK,MessageBoxIcon.Exclamation,MessageBoxDefaultButton.Button1);
}
}
}Output:
Conclusion – C# MessageBox
Thus, the article covered in detail about the Message box class in c# in detail. It explained about various message box show methods that are available, the various parameters of each method, and demonstrated that with an example. The article also covered in detail about various message box options, message box buttons, and message box icons in detail along with their use. To learn more in detail it is advisable to write sample programs and practice them.
Recommended Articles
This is a guide to C# MessageBox. Here we also discuss the introduction and types of show method along with an example and its code implementation. You may also have a look at the following articles to learn more –
- Assert in C#
- C# List vs Array
- ASP.NET CheckBox
- C# BinaryReader
The whole concept behind a message box is to display text to the user or to ask a question of some sort. So in practice we can use message boxes to display an error to the user, or maybe to ask the user to confirm something before continuing. A C# MessageBox is a read-only dialog box which means that the text displayed in the MessageBox cannot be edited by the end user.
With C#.NET it is very easy to display a message box. The following line of code will display the simplest form of message box available.
MessageBox.Show("Hello from daveoncsharp.com!");
MessageBox is the C# message box class which is part of the System.Windows.Forms namespace and Show() is the static method we must call in order to display the message box on screen. When we execute the code we would be shown a dialog which looks like the following when running under Microsoft Windows Vista:

Adding a Caption
A message box caption is the text which is displayed in the title bar of the message box. To add a caption to our message box we have to pass the text we want to display as another parameter in the Show() method. In this example we are going to write “Welcome” in the caption.
MessageBox.Show("Hello from daveoncsharp.com!", "Welcome");
Customizing Buttons
The C# MessageBox class allows you to customize your message box’s functionality and style by assigning different buttons. There are six different button styles which can be used and they are shown below:
| MessageBoxButtons | Buttons Displayed |
| OK | |
| OKCancel | |
| RetryCancel | |
| YesNo | |
| YesNoCancel | |
| AbortRetryIgnore |
Now let’s change our simple message box to display the YesNo buttons instead of the default OK button. To do this we have to add a third parameter to the Show() method of the MessageBox class as shown below (Note I have split the MessageBox.Show() method over three lines. This does not affect the compiler because C# still regards it as a whole line.):
MessageBox.Show("Hello from daveoncsharp.com!",
                "Welcome",
                MessageBoxButtons.YesNo);
Setting the Icon
With C# you can choose to display a number of predefined icons on your message box or you may choose to not display an icon at all. Below is a list of the available icons.
| MessageBoxIcon | Icon |
| Asterisk | |
| Error | |
| Exclamation | |
| Hand | |
| Information | |
| None | |
| Question | |
| Stop | |
| Warning |
You can select which icon to display, if any, by using the MessageBoxIcon enumeration and adding it as the next parameter to the Show() method of the MessageBox. This is shown below where we are displaying the Question icon.
MessageBox.Show("Do you want to continue?",
                "A Question",
                MessageBoxButtons.YesNo,
                MessageBoxIcon.Question);
Setting the Default Button
The default button is the currently selected or highlighted button, and if not manually set, the default button is decided by the operating system.The C# MessageBox accepts a parameter of type MessageBoxDefaultButton which is another enumeration and contains three values – Button1, Button2, and Button3. One of these values can be added as a parameter to the Show() method of the MessageBox class as seen below:
MessageBox.Show("Do you want to continue?",
                "A Question",
                MessageBoxButtons.YesNo,
                MessageBoxIcon.Question,
                MessageBoxDefaultButton.Button2);
Since our example message box is using MessageBoxButtons.YesNo, and therefore only has two buttons, we cannot make use of MessageBoxDefaultButton.Button3 as a third button does not exist. If we try and use Button3 in this situation, the value will be ignored and the default button will be set by the operating system.
So far our message box looks like this:

Capturing Button Return Values
Obviously, after you customize a message box’s buttons you will want to know which button the user clicked. This is very simple to do as the Show() method of the MessageBox class returns a value of type DialogResult which is another enumeration with the value of the selected button.
The below example is showing how different code can be executed according to which button the user selects.
if (MessageBox.Show("Do you want to continue?",
                    "A Question",
                    MessageBoxButtons.YesNo,
                    MessageBoxIcon.Question,
                    MessageBoxDefaultButton.Button2) == DialogResult.No)
{
    // The user clicked the 'No' button
}
else
{
    // The user clicked the 'Yes' button
}
Conclusion
This concludes my explanation of the simple properties of a C# MessageBox. There are a few other parameters which can be passed to the Show() method such as text alignment options for different cultures, and options to show a help button which links to a help file, but these are more advanced topics which I will be covering in the future.
Thanks for reading this article – I hope it was of some help. Please feel free to leave any comments below.
Stay tuned to this blog for more articles in the near future.
Dave