Sometimes you need to get full access to some file or folder in Windows 10. It can be a system file or folder, or one which was created by a user account that no longer exists. In most cases, the Windows operating system will prevent you from doing any operation on such files and folders. By adding a special context menu, you can quickly get full access to the files and folders.
NTFS is the standard file system of the Windows NT operating system family. Starting with Windows NT 4.0 Service Pack 6, it supported the concept of permissions which can be configured to permit or restrict access to files, folders, and other objects locally and over a network.
By default, almost all system files, system folders and even Registry keys in Windows 10 are owned by a special built-in user account called «TrustedInstaller». Other user accounts are set to only read the files.
As a user accesses each file, folder, registry key, printer, or an Active Directory object, the system checks its permissions. It supports inheritance for an object, e.g. files can inherit permissions from their parent folder. Also every object has an Owner which is the user account that can set ownership and change permissions.
If you are interested in managing NTFS permissions, refer to the following article:
How to take ownership and get full access to files and folders in Windows 10
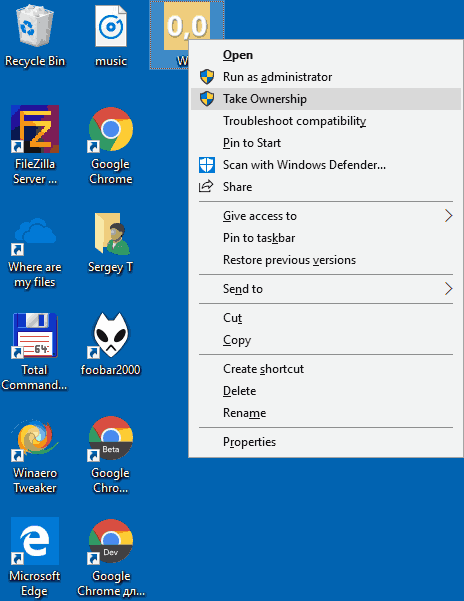
To save your time, you can add the ‘Take Ownership’ context menu. This will allow you to become the owner of the files and to instantly grant full access permissions to the files or folders.
Before proceeding, ensure that your user account has administrative privileges. Now, follow the instructions below.
- Download the following ZIP archive: Download ZIP archive.
- Extract its contents to any folder. You can place the files directly to the Desktop.
- Unblock the files.
- Double click on the Add_Take_Ownership_context_menu.reg file to merge it.

- To remove the entry from the context menu, use the provided file Remove_Take_Ownership_context_menu.reg.
You are done!
How it works
The context menu opens a new PowerShell instance as Administrator, and sequentially executes the following commands.
takeown /f — the command will change ownership for the selected object to the current user account. For directories, it will be executed with the arguments /r /d y. /r stand for recursive in order to process subfolders. The /d y argument is the default answer used when the current user does not have the «list folder» permission on a directory.
icacls /grant *S-1-3-4:F — the command gives the full access permissions to the current owner of the file system object (which is set to your current user account with the previous command). SID: S-1-3-4 is a well-known security identifier that represents the current owner of the object. When an ACE that carries this SID is applied to an object, the system ignores the implicit READ_CONTROL and WRITE_DAC permissions for the object owner.
Additionally, you may want to add a Change Owner context menu. Unlike the above, it will allow you to set ownership to one of the pre-defined system accounts.
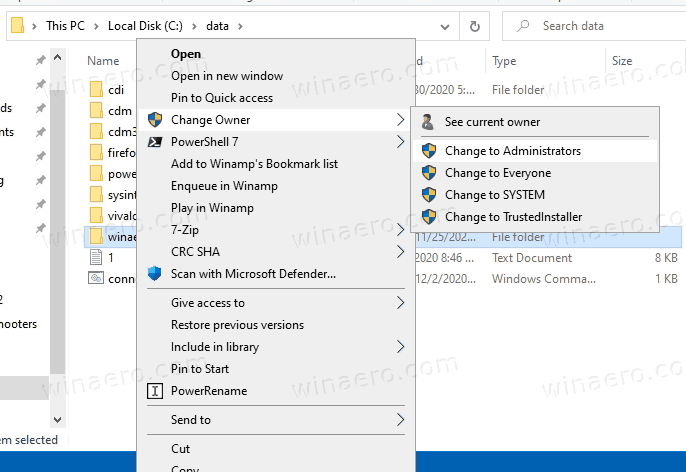
The context menu allows you to quickly change the owner to one of the following system accounts: the Administrators group, Everyone, SYSTEM, and TrustedInstaller. To learn more about the Change owner context menu, please refer to the following post.
How to Add Change Owner Context Menu in Windows 10
There, you will find ready-to-use Registry files, detailed instructions, and clarifications about how every context menu entry works. This will allow you to change the file, folder, or drive owner with one click.
Related articles:
- How to take ownership and get full access to files and folders in Windows 10
- How to restore the TrustedInstaller ownership in Windows 10
- Backup Permissions For Files and Folders in Windows 10
- Add View Permissions Context Menu in Windows 10
- Add View Owner Context Menu in Windows 10
- RegOwnershipEx 1.0.0.2 is out
- ExecTI – Run Programs as TrustedInstaller
Support us
Winaero greatly relies on your support. You can help the site keep bringing you interesting and useful content and software by using these options:
If you like this article, please share it using the buttons below. It won’t take a lot from you, but it will help us grow. Thanks for your support!
You are here:
Home » Windows 10 » Add “Take Ownership” To Right-Click Menu In Windows 10
Generally speaking, a user needs to take ownership of a file in the Windows operating system before renaming, editing, and deleting protected operating system files.
Unfortunately, like its predecessors, Windows 10 also doesn’t offer an easy way to take ownership of files. While it’s possible to take ownership of files from GUI and Command Prompt, the procedure is not straight-forward.
If you often need to take ownership of files to edit, modify or delete files, adding Take ownership option to the file right-click menu or file context menu is a good idea. By adding Take ownership option to the right-click menu, you can take ownership of files in a few seconds.
In order to add Take ownership option to the right-click menu in Windows 10, you need to make a couple of changes to the Windows Registry. Since not all users are comfortable with manually editing the Registry, we are providing a ready-to-use Registry file that you can merge to easily make necessary changes to the Windows Registry and add Take ownership option to the file context menu of Windows 10.
Add Take ownership to file/folder context menu in Windows 10
Follow the given below directions to add Take ownership option to the file context menu in Windows 10.
Step 1: Click here to download Take Ownership.zip file. Extract the downloaded zip file to get Install Take Ownership.reg and Uninstall Take Ownership.reg files.
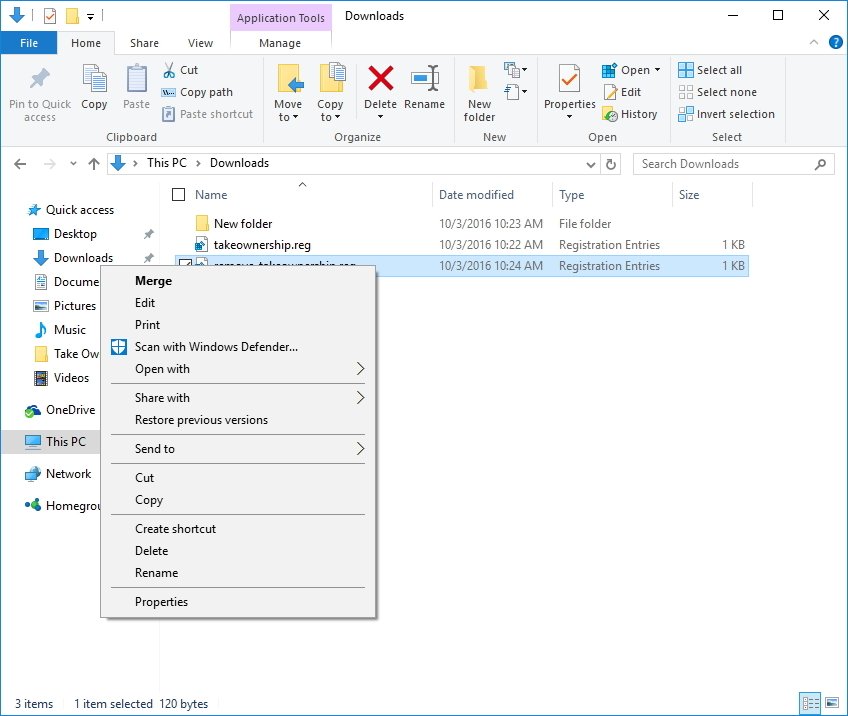
Step 2: Right-click on Install Take Ownership.reg file and then click Merge option.
Step 3: Click the Run button if you see the following file security warning.
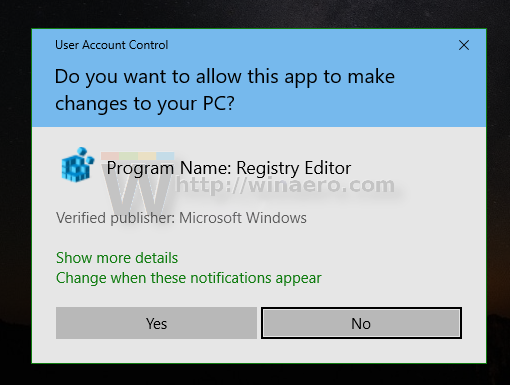
Step 4: Next, you will get the User Account Control prompt where you need to click the Yes button to continue.
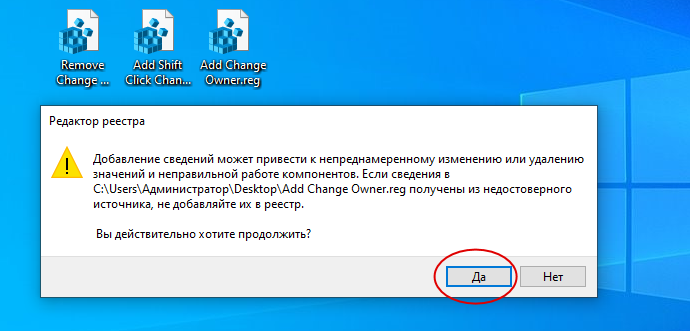
Step 5: When you see the Registry Editor dialog, click the Yes button to add the information to Registry.
Step 6: Finally, click the OK button.
Step 7: You should now see Take Ownership option when you right-click on a file or folder in Windows 10. If not, restart the Windows Explorer or restart your PC once. You should now see Take ownership option whenever you right-click on a file in Windows 10.
Remove Take ownership option from the file context menu
To remove Take Ownership option from file/folder context menu, please merge the Uninstall Take Ownership.reg file included in Take Ownership.zip file that you downloaded in the first step of this guide.
Take ownership of a file/folder
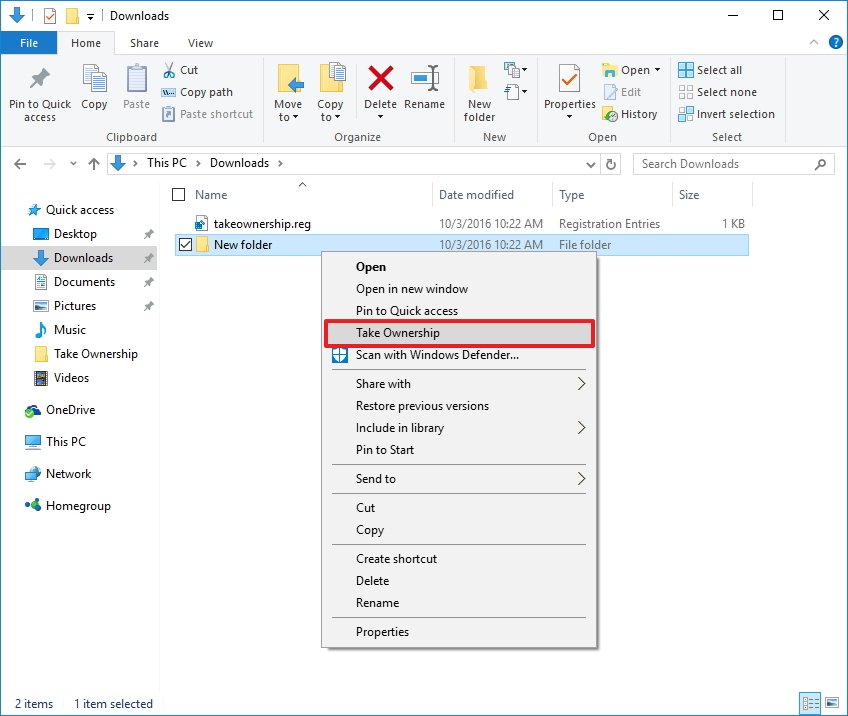
To take ownership of a file, right-click on a file, click Take ownership option, and click Yes button when you see the UAC prompt.
TakeOwnershipEx is a free tool out there to quickly take ownership of files in the Windows operating system.
Как изменить владельца в контекстном меню в Windows 10
Из этого руководства Вы узнаете, как добавить право владельца всех файлов, папок и дисков для всех пользователей из контекстного меню Windows 10 .
Это позволит вам иметь возможность мгновенно стать владельцем файла , папки (и всго содержимого или диска (и всего содержимого) путем изменения владельца к текущему пользователю и предоставить Owner_Rights SID (для текущего владельца) полный доступ разрешения .
Вы должны быть администратором чтобы иметь возможность добавлять, удалять и использовать контекстное меню «Стать владельцем».
Когда вы щелкаете правой кнопкой мыши или нажимаете и удерживаете файл, папку или диск, а затем щёлкайте / нажимаете на « Стать владельцем» , UAC сначала запрашивает разрешение на это.
Если пользователь вошел в систему как администратор, он просто щелкнет / коснется Да, чтобы подтвердить и стать владельцем. Владелец файла, папки или диска будет изменен на текущую учетную запись пользователя. Разрешения будут установлены, чтобы позволить текущему владельцу (Owner_Rights SID) полный контроль над файлом, папкой или диском.
Если пользователь вошел в систему как стандартный пользователь, то ему потребуется ввести пароль администратора, чтобы стать владельцем. Владелец файла, папки или диска будет изменен на выбранную учетную запись администратора, а не на обычного пользователя. Разрешения будут установлены, чтобы позволить текущему владельцу (Owner_Rights SID) полный контроль над файлом, папкой или диском.
Контекстное меню не будет доступна , когда вы щелкните правой кнопкой мыши только на диске C: , папка C: Program Files, папка C: Program Files (x86 ), папки C: ProgramData, C: Папка « Пользователи» и папка C: Windows. Это было сделано намеренно, поскольку владелец диска Windows «C:» и этими конкретными системными папками может сделать Windows нестабильной, поскольку он одновременно станет владельцем всего их содержимого.
Вы по-прежнему сможете использовать контекстное меню «Стать владельцем» для файлов и папок на всех дисках, кроме диска C и дисков FAT32.
Вот как это сделать:
Чтобы добавить «Стать владельцем» через контекстное меню:
1. Нажмите кнопку «Скачать» ниже, чтобы загрузить нужный файл .reg,
Add_Take_Ownership_to_context_menu.reg
Скачать
или
Add_Shift + Right-Click_Take_Ownership_to_context_menu.reg
Скачать
Чтобы добавить «Стать владельцем» с подтверждением в контекстное меню:
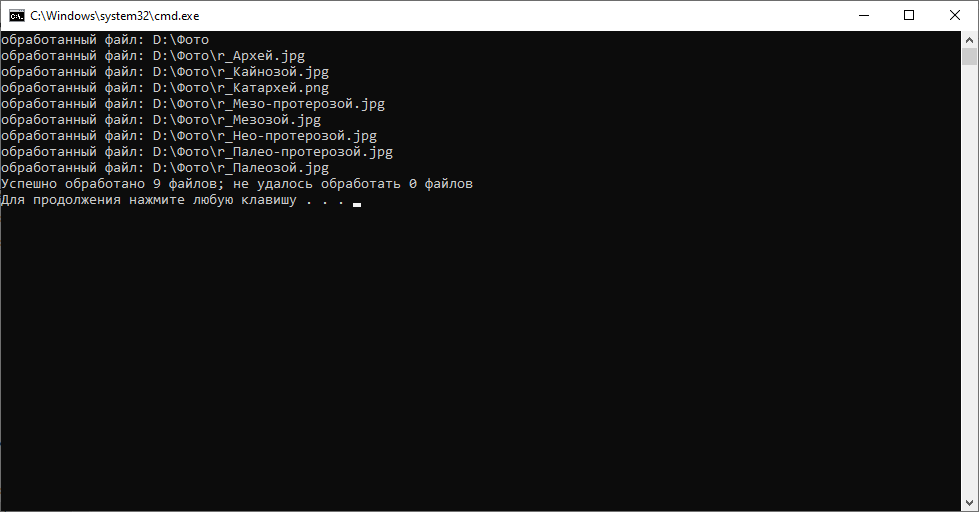
Эта опция подтверждает выполнение команды, когда вы используете контекстное меню «Стать владельцем», чтобы увидеть результаты выполнения команды. Это может быть удобно, чтобы проверить, была ли смена владельца и разрешений успешно обработана или нет.
1. Нажмите кнопку «Загрузить» ниже, чтобы загрузить нужный файл .reg,
Add_Take_Ownership_with_Pause_to_context_menu.reg
Загрузить
или
Add_Shift + Right-Click_Take_Ownership_with_Pause_to_context_menu.reg
Скачать
Чтобы удалить «Стать владельцем» из контекстного меню:
1. Нажмите кнопку «Загрузить» ниже, чтобы загрузить файл .reg,
Remove_Take_Ownership_from_context_menu.reg
Скачать
Работа с загруженными файлами
- Сохраните файл .reg на рабочий стол.
- Дважды щелкните / коснитесь загруженного файла .reg, чтобы объединить его.
- При появлении запроса нажмите / коснитесь « Выполнить» , « Да ( UAC )», « Да» и «ОК», чтобы утвердить слияние.
- По завершении можете удалить загруженный файл .reg,
Вот и все,
While you’ll have full control over any files or folders you create on Windows 10, certain files — like system files — are locked out. But other files, like those in other accounts or ones you might want to customize to change how Windows 10 works, are also locked out.
You can manually take ownership of these files, but if it’s a thing you need to do on a regular basis so you can edit, rename, and delete as you see fit, there’s an easier way that takes a bit of one-time work. With this Windows 10 guide we’ll show you how to create a right-click context menu option to make it quick and easy to take ownership of a file.
Important: Before you go through this guide, you should know that modifying the registry is risky, and it can cause irreversible damage to your installation if you don’t do it correctly. It’s recommended to make a full backup of your device before proceeding. Alternatively, you can create a system restore point, which will also help you to revert the changes you make using this guide.
To add a «Take Ownership» option to the right-click menu, do the following:
- Open Notepad.
- Copy and paste the following registry code into the text file:Windows Registry Editor Version 5.00[HKEY_CLASSES_ROOT*shellrunas]@=»Take Ownership»»NoWorkingDirectory»=»»[HKEY_CLASSES_ROOT*shellrunascommand]@=»cmd.exe /c takeown /f «%1» && icacls «%1» /grant administrators:F»»IsolatedCommand»=»cmd.exe /c takeown /f «%1» && icacls «%1» /grant administrators:F»[HKEY_CLASSES_ROOTDirectoryshellrunas]@=»Take Ownership»»NoWorkingDirectory»=»»[HKEY_CLASSES_ROOTDirectoryshellrunascommand]@=»cmd.exe /c takeown /f «%1» /r /d y && icacls «%1» /grant administrators:F /t»»IsolatedCommand»=»cmd.exe /c takeown /f «%1» /r /d y && icacls «%1″ /grant administrators:F /t»
- Click File.
- Click Save As.
- Under «Save as type,» select All Files, and name your file anything you want with the .reg extension.
- Click Save.
- Double-click your new .reg file to merge into the registry.
- Click Yes.
- Click OK.
Once you completed the steps, you can simply right-click any file or folder, and you should now see a new «Take Ownership» item on the menu. Then simply, right-click the file or folder, right-click it and select Take Ownership.
If you no longer want to have the option available in the right-click menu, then do the following:
- Open Notepad.
- Copy and paste the following registry code into the text file:Windows Registry Editor Version 5.00[-HKEY_CLASSES_ROOT*shellrunas][-HKEY_CLASSES_ROOTDirectoryshellrunas]
- Click File.
- Click Save As.
- Under «Save as type,» select All Files, and name your file anything you want with the .reg extension.
- Click Save.
- Double-click your new .reg file to merge into the registry.
- Click Yes.
- Click OK.
After you completed the steps, the option will be removed from the context menu.
More Windows 10 resources
For more help articles, coverage, and answers on Windows 10, you can visit the following resources:
- Windows 10 on Windows Central – All you need to know
- Windows 10 help, tips, and tricks
- Windows 10 forums on Windows Central
Get the best of Windows Central in in your inbox, every day!
Mauro Huculak is technical writer for WindowsCentral.com. His primary focus is to write comprehensive how-tos to help users get the most out of Windows 10 and its many related technologies. He has an IT background with professional certifications from Microsoft, Cisco, and CompTIA, and he’s a recognized member of the Microsoft MVP community.
A context menu is the result of an action on the Graphic User Interface. The most popular context menu is the one for right-clicking. Once you right-click on a file, folder, or drive, the resulting menu is that item’s context menu. Now, when using the PC you may want to assume full control of certain amenities such as folders or important files. How about having such a command right in the context menus? You can do this in Windows 10. Basically, you can own a file, an entire folder, or even the drive all in one instance. BUT don’t apply for the take ownership on the c: drive, because it has system users and permissions – which if messed up, will require a windows re-installation. Only do this on files, and folders, or external drives if you want.
Simply make the current user the owner of the resource in question and grant them elevated permissions. Of course, before changing ownership you have to be logged in as, or be having Administrator privileges. If not, UAC will prompt you to acquire Administrator privileges before proceeding. Standard users may be prompted to key in the Administrator password as well (the only difference is the ownership will be granted to the specified account with administrative privileges and NOT the standard user account). Otherwise, as an Administrator all you need to do is click “yes” and you’re good to go. However take note that application files such as CMD files, EXE files, etc. will not have “take ownership” in their context menus. Instead, they will continue to have the “run as Administrator” option.
Before proceeding with taking ownership there are a few things you have to take into account. The below procedure works for Windows 10 systems whose language is set to English.
Through Registry Files:
Download this file. This is a compressed file, and you will need to decompress or extract it using WinRar or WinZIP. After you’ve extracted the files, there will be two registry files in the folder. Run the one that says to Install, and if you wish to uninstall it, then run the one with the words uninstall in it.
When you run it, agree to the UAC prompt by clicking Yes, and then choose YES again when the registry editor wants you to confirm the addition. Once done, reboot the PC.
After the reboot, “Take Ownership” option will be added in both folder and file context menus. Once you right-click any folder or file, you immediately become the owner of that computer resource. You will be at liberty to carry out any changes you wish to on the specified file, folder, or drive.
More advanced computer users can manually take ownership of a drive, file, or folder. This is done through coding in the command prompt. The procedure varies slightly for files and folders. The steps are:
Run command prompt as administrator. Hold the Windows Key and Press X. Choose command prompt (admin)
Key in the following command
takeown /f filename
icacls filename /grant administrators:F
This will take ownership of a file and assign full permission to it. For a folder, the code is
takeown /f foldername /r /d y
icacls foldername /grant administrators:F /t
Manually through Registry:
We need to make some changes to your computer’s registry. This process can be considered a long and tedious task but, you only have to go through it once and life will be easy. Do note that Registry Editor is a very powerful tool in Windows and you should be very careful when making changes to it. Backup your registry or create a restore point of your Windows if you have important data on the PC.
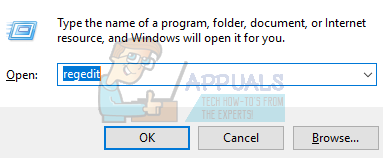
- Press Windows + R to launch your computer’s Run Type “regedit” in the dialogue and hit Enter. This will launch the Registry Editor.
We are going to make changes in two locations in the registry. The first location will add the “Take Ownership” to the context menu for files of any type while the second location will add the option to the context menu of any folder.
- Now navigate to this location when in the Registry Editor using the left side of the screen.
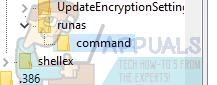
HKEY_CLASSES_ROOT > * > shell
- Now we need to create a new key inside the shell key. Right-click on the shell key and choose the option “New> Key”. We need to name the key “runas”. If you already have this key in your registry, you can skip this step and move on with the next one.
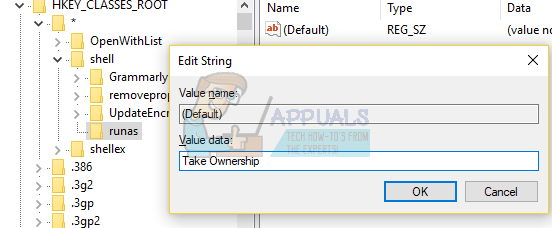
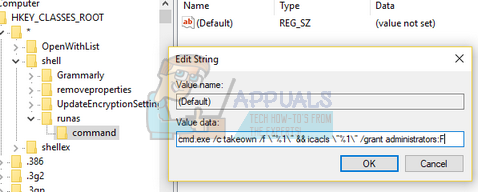
- Now we are going to change the Default value present inside the key runas we just created. Select the runas key and double click the “default” quickly to open its Properties.
- Once in the properties, type “Take Ownership” into the Value Data box present. Click “OK” to save your changes. This value will become the command when you open the context menu. You can also change it to any other name if you want.
- Now we are going to create a new value inside the runas key. Right click on the runas key and choose “New > String Value”. Name the new value as “NoWorkingDirectory”.
- Now we are going to create a new key inside the runas key. Right click on the runas key and choose “New > Key”. Name the new key as “command”.

- Now with command key selected, double-click on the Default value present on the right pane to open its properties.
- In the Value Data box present in the properties, type the following code (take care of the spaces and the numerical values). Click Ok when you are done.

- Now we need to create a new value inside the command key. Right-click the command key and select “New > String Value”. Name the new value as “IsolatedCommand”.
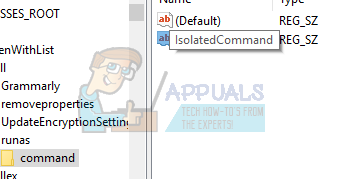
- After naming it, double click it to open its properties.
- In the Value Data box, type the following text and press Ok. This is the same command we added earlier to the default value.
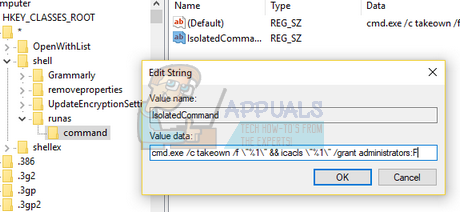
This will add the “Take ownership” command to the context menu for files.

Now we will add the context menu option to folders. We are going to make essentially the same changes we did earlier but to a different directory.
- Navigate to the following path in your Registry Editor.
HKEY_CLASSES_ROOT > Directory > shell
- Now we need to create a new key inside the shell key. Right-click on the shell key and choose the option “New> Key”. We need to name the key “runas”. If you already have this key in your registry, you can skip this step and move on with the next one.
- Now we are going to change the Default value present inside the key runas we just created. Select the runas key and double click the “default” quickly to open its Properties.
- Once in the properties, type “Take Ownership” into the Value Data box present. Click “OK” to save your changes. This value will become the command when you open the context menu. You can also change it to any other name if you want.
- Now we are going to create a new value inside the runas key. Right click on the runas key and choose “New > String Value”. Name the new value as “NoWorkingDirectory”.
- Now we are going to create a new key inside the runas key. Right-click on the runas key and choose “New > Key”. Name the new key as “command”.
- Now with the command key selected, double-click on the Default value present on the right pane to open its properties.
- In the Value Data box present in the properties, type the following code (take care of the spaces and the numerical values). Click Ok when you are done.
- Now we need to create a new value inside the command key. Right-click the command key and select “New > String Value”. Name the new value as “IsolatedCommand”.
- After naming it, double-click it to open its properties.
- In the Value Data box, type the following text and press Ok. This is the same command we added earlier to the default value.
This will add the “Take ownership” command to the context menu for folders.


Kevin Arrows
Kevin is a dynamic and self-motivated information technology professional, with a Thorough knowledge of all facets pertaining to network infrastructure design, implementation and administration. Superior record of delivering simultaneous large-scale mission critical projects on time and under budget.
Часто пользователи должны владеть файлом в операционной системе Windows, чтобы редактировать, переименовывать или удалять защищенные файлы в операционной системе. Однако в Windows 10 освоить файл или папку не так просто, как в других версиях. Если раньше осваивать файл через GUI (графический интерфейс) или командную строку, то теперь на Windows 10 это сделать невозможно.
Если вы регулярно используете опцию управления файлами для редактирования или удаления файлов, вы можете добавить опцию Принять владение в контекстное меню, чтобы использовать ее. Добавив опцию Принять владение в контекстное меню, вы сможете управлять файлами за секунды.
Чтобы добавить опцию «Принять владение» в контекстное меню Windows 10, вы должны внести некоторые изменения в реестр Windows. Однако не все пользователи знают, как управлять реестром Windows, и дальнейшее редактирование реестра Windows представляет собой высокий риск для системы.
Итак, чтобы добавить опцию Принять владение в контекстное меню Windows 10, вы можете использовать утилиту TakeOwnershipEx.
Выполните следующие действия, чтобы добавить параметры «Взять владение» в контекстное меню Windows 10:
Шаг 1:
Щелкните эту ссылку, чтобы загрузить Zip-файл Take Ownership.zip.
Затем распакуйте только что загруженный Zip-файл, и теперь вы увидите два файла: Install Take Ownership.reg и Uninstall Take Ownership.reg.
Шаг 2:
Щелкните правой кнопкой мыши файл Install Take Ownership.reg, затем нажмите «Объединить».
Шаг 3:
Нажмите кнопку «Выполнить», если на экране появится окно с предупреждением.
Шаг 4:
На экране появится окно управления учетными записями пользователей, в котором вы щелкните Да, чтобы продолжить.
Шаг 5:
В диалоговом окне редактора реестра нажмите Да, чтобы добавить информацию в реестр.
Шаг 6:
Наконец, нажмите ОК, чтобы закончить.
Шаг 7:
Теперь вы должны увидеть опцию Take Ownership в контекстном меню при щелчке правой кнопкой мыши по папке или любому файлу в Windows 10.
Если вы не видите вариант «Принять владение», перезапустите проводник Windows или компьютер.
2. Удалите опцию Принять владение в контекстном меню.
Чтобы удалить параметр «Принять владение» в меню, вызываемом правой кнопкой мыши, запустите файл Uninstall Take Ownership.reg, извлеченный из ZIP-файла Take Ownership.zip.
3. Создайте файл / папку.
Чтобы управлять любым файлом или папкой, щелкните файл и папку правой кнопкой мыши и выберите параметр «Принять владение». Нажмите Да, если появится окно UAC.
TakeOwnershipEx — это бесплатный инструмент, который позволяет пользователям быстро управлять файлами в операционных системах Windows.
См. Некоторые из следующих статей:
- Как автоматически войти в Windows 10 без ввода пароля
- Удаляйте следы файла подкачки каждый раз, когда вы выключаете компьютер с Windows 10
- Инструкция по активации подсветки клавиатуры в Windows 10
Удачи!
 Если при попытке изменить, открыть или удалить папку или файл в Windows вы получаете сообщения о том, что вам отказано в доступе, «Нет доступа к папке», «Запросите разрешение на изменение этой папки» и аналогичные, то вам следует изменить владельца папки или файла, о чем и поговорим.
Есть несколько способов стать владельцем папки или файла, основные среди которых — использование командной строки и дополнительные настройки безопасности ОС. Есть также и сторонние программы, позволяющие изменить владельца папки в два клика, на одного из представителей которых тоже посмотрим. Все описанное ниже подходит для Windows 7, 8 и 8.1, а также Windows 10.
Примечания: для того, чтобы стать владельцем того или иного элемента с использованием способов ниже, вы должны иметь права администратора на компьютере. Кроме этого, не следует изменять владельца для всего системного диска — это может повлечь нестабильную работу Windows.
Дополнительная информация: если вы хотите стать владельцем папки для того, чтобы удалить ее, а иначе она не удаляется, и пишет Запросите разрешение от TrustedInstaller или от Администраторы, используйте следующую инструкцию (там же есть видео): Запросите разрешение от Администраторы на удаление папки.
Использование команды takeown для того, чтобы стать владельцем объекта
Для того, чтобы изменить владельца папки или файла с помощью командной строки, имеются две команды, первая из них — takeown.
Для ее использования, запустите командную строку от имени Администратора (в Windows 8 и Windows 10 это можно сделать из меню, вызываемого правым кликом по кнопке Пуск, в Windows 7 — с помощью правого клика по командной строке в стандартных программах).
В командной строке, в зависимости от того, владельцем какого объекта вам нужно стать, введите одну из команд:
- takeown /F “полный путь к файлу” — стать владельцем указанного файла. Чтобы сделать всех администраторов компьютера владельцами, используйте параметр /A после пути к файлу в команде.
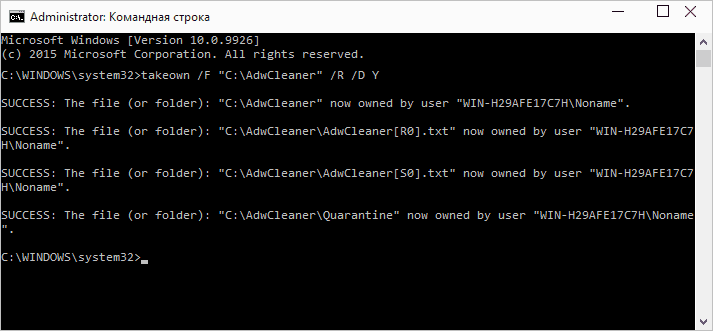
- takeown /F “путь к папке или диску” /R /D Y — стать владельцем папки или диска. Путь к диску указывается в виде D: (без слэша), путь к папке — C:Folder (также без слэша).
При выполнении данных команд вы получите сообщение о том, что вы успешно стали владельцем конкретного файла или отдельных файлов в указанной вами папке или на диске (см. скриншот).
Как изменить владельца папки или файла с помощью команды icacls
Еще одна команда, которая позволяет получить доступ к папке или файлам (изменить их владельца) — icacls, использовать которую следует так же, в командной строке, запущенной от имени администратора.
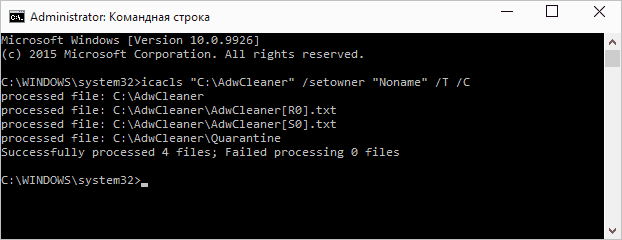
Для установки владельца используйте команду в следующем виде (пример на скриншоте):
Icacls “путь к файлу или папке” /setowner “Имя_пользователя” /T /C
Пути указываются аналогично предыдущему способу. Если требуется сделать владельцами всех администраторов, то вместо имени пользователя используйте Администраторы (или, если не сработает, Administrators).
Дополнительная информация: помимо того, чтобы стать владельцем папки или файла, вам может потребоваться также получить разрешения для изменения, для этого вы можете использовать следующую команду (дает полные права пользователю для папки и вложенных объектов): ICACLS «%1» /grant:r «имя_пользователя»:(OI)(CI)F
Получение доступа с помощью настроек безопасности
Следующий способ — использовать лишь мышь и интерфейс Windows, не обращаясь к командной строке.
- Кликните правой кнопкой мыши по файлу или папке, доступ к которому нужно получить (стать владельцем), в контекстном меню выберите пункт «Свойства».
- На вкладке «Безопасность» нажмите кнопку «Дополнительно».

- Напротив пункта «Владелец» нажмите «Изменить».

- В открывшемся окне нажмите кнопку «Дополнительно», а в следующем — кнопку «Поиск».

- Выберите в списке пользователя (или группу пользователей), которого нужно сделать владельцем элемента. Нажмите Ок, затем — снова Ок.
- Если вы изменяете владельца папки или диска, а не отдельного файла, отметьте также пункт «Заменить владельца подконтейнеров и объектов».

- Нажмите Ок.


На этом вы стали владельцем указанного объекта Windows и сообщения о том, что нет доступа к папке или файлу вас не должны больше потревожить.
Другие способы стать владельцем папок и файлов
Есть и другие способы решить проблему «отказано в доступе» и быстро стать владельцем, например, с помощью сторонних программ, встраивающих пункт «Стать владельцем» в контекстное меню проводника. Одна из таких программ — TakeOwnershipPro, бесплатная и, насколько я могу судить, без чего-то потенциально нежелательного. Аналогичный пункт в контекстное меню можно добавить и путем редактирования реестра Windows.
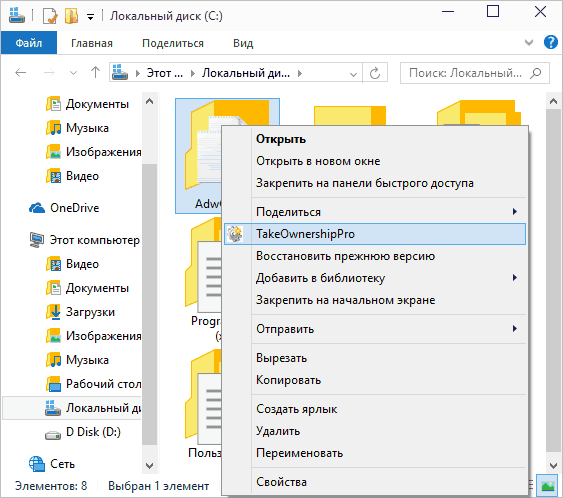
Однако, с учетом того, что подобная задача возникает сравнительно редко, я не рекомендую устанавливать стороннее ПО или вносить изменения в систему: на мой взгляд, лучше изменить владельца элемента одним из способов «вручную».
В процессе работы c Windows 10 иногда возникает необходимость получить доступ к папке или файлу, который создан пользователем другой учетной записи или записи, которая больше не существует. Получение доступа к таким данным может оказаться проблематичным, поэтому в таких случаях очень неплохо иметь под рукой опцию, которая позволяла бы быстро просматривать имя владельца объекта и заменять его.
Например, владельцем большинства системных файлов является TrustedInstaller, которые другие пользователи могут только читать, но не изменять.
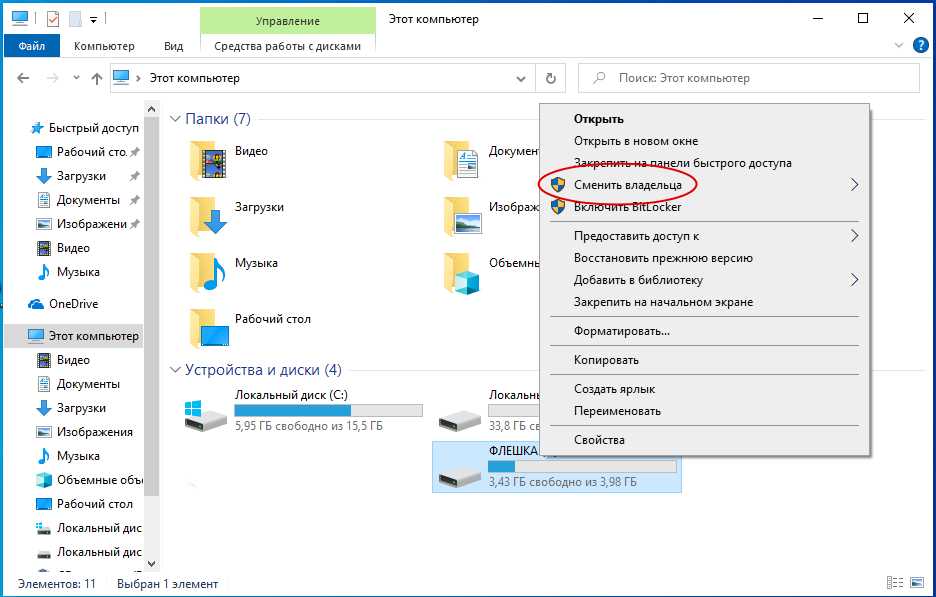
Чтобы изменить разрешения на такой файл, нужно зайти в его свойства, нажать «Дополнительно» и произвести ряд манипуляций по назначению файлу нового владельца. Вы можете существенно упростить эту процедуру, добавив пункты смены владельца непосредственно в контекстное меню файлов и каталогов.
Скачайте по ссылке yadi.sk/d/7KYVpxyaE9fz1A архив с твиками реестра и выполните слияния файла «Add Change Owner.reg».

Если вы хотите, чтобы новый пункт был доступен только при вызове контекстного меню с зажатой Shift, выполните слияния файла «Add Shift Click Change Owner.reg». Новый пункт меню «Сменить владельца» будет доступен для файлов, папок, ярлыков и разделов.
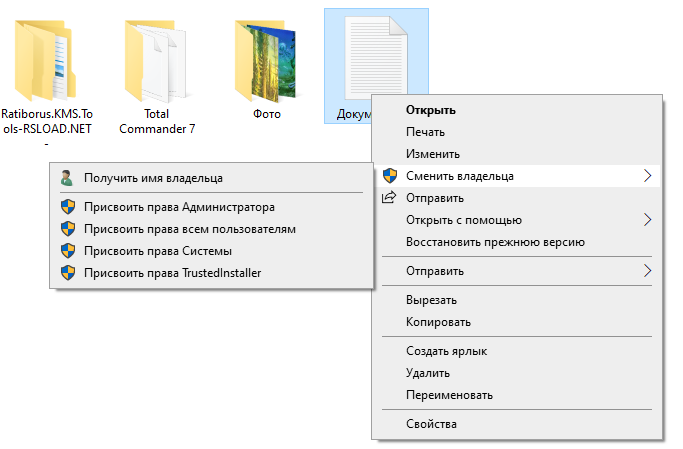
В результате в контекстном меню у вас появится новый пункт «Сменить владельца» с пятью подпунктами:
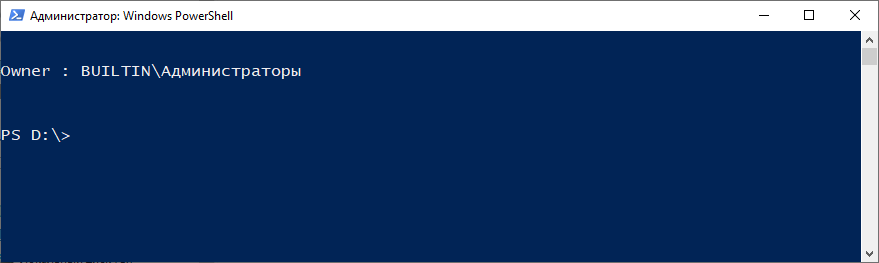
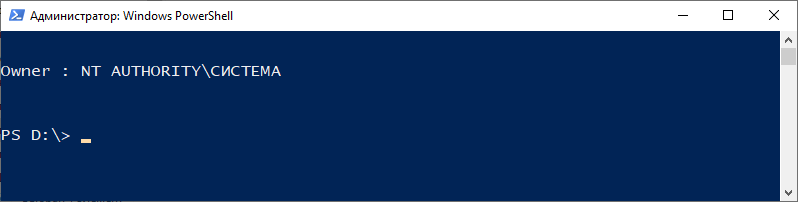
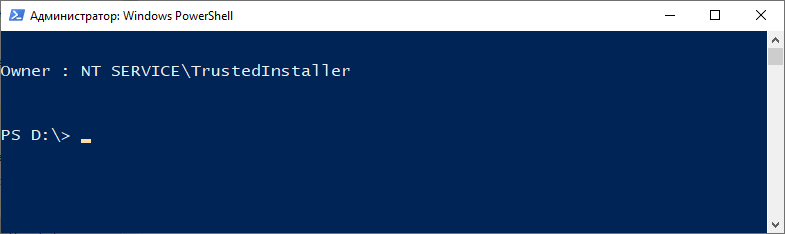
- Получить имя владельца — опция выводит в PowerShell имя текущего владельца файла, папки, ярлыка и раздела.
- Присвоить права Администратора — опция «передает» файл или каталог во владение пользователям, входящим в группу Администраторов.
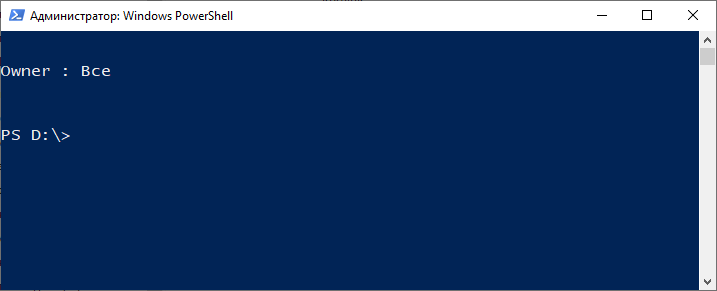
- Присвоить права всем пользователям — опция делает объект доступным всем пользователям.
- Присвоить права Системы — эта опция разрешает изменять файл только учетной записи «Система».
- Присвоить права TrustedInstaller — опция разрешает изменять файл только учетной записи «TrustedInstaller».
Содержащиеся в папках данные обрабатываются рекурсивно в командной строке, то есть если вы присвоите папке права TrustedInstaller, то эти права будут автоматически унаследованы всеми содержащимися в этой папке файлами. Исключение составляют системные каталоги с важными файлами, расположенные на диске C, например, Windows, Program Files, ProgramData, Users и некоторые другие, так как изменение прав доступа для них может повлечь за собой серьезные ошибки в работе операционной системы.
Если вы не найдете добавленных в меню опций для этих папок, то знайте, что так и должно быть. Для прочих каталогов и файлов интегрированные опции будут доступны всем пользователям, однако изменять права объектов без подтверждения смогут только администраторы.

Всем остальным пользователям будет необходимо подтверждать свои действия вводом пароля администратора, в том числе для объектов, владельцами которых они являются. Если опции смены владельца станут вам больше не нужны, выполните слияние файла «Remove Change Owner.reg», прилагаемого в архиве.
![]() Загрузка…
Загрузка…