Обновлено 23.01.2020
 Добрый день! Уважаемые читатели и гости одного из крупнейших IT блогов по системному администрированию Pyatilistnik.org. В прошлый раз мы с вами разобрались, что такое SSL сертификат, где и как их применяют и какие они бывают. Движемся дальше, в сегодняшней публикации я бы хотел вам рассказать, как вы можете вернуть и запускать в Windows Server 2019 оснастки Tsconfig.msc «Конфигурация узла сеансов удаленных рабочих столов (Remote Desctop Session Host Configuration)» и Tsadmin.msc «Диспетчер служб удаленных рабочих столов» (Remote Desktop Services Manager). Напомню их варианты использования, так как не все застали времена терминальных серверов на Windows Server 2008 R2.
Для чего нужны оснастки Tsconfig.msc и Tsadmin.msc
Бытует мнение, что все что новое оно априори должно быть лучше, в каких-то областях возможно это так, но не в компьютерном мире. Примеров этому очень много, например:
- Windows XP и Windows Vista
- Windows 7 и Windows 10
В случае с терминальными службами ситуация двоякая, с одной стороны Microsot сделала удобную общую оснастку в диспетчере серверов, а с другой лишила пользователей ряда оснасток и графических функция, которые они предоставляли. Microsoft по известной только им причине убрали оснастки из состава инструментов RDS фермы:
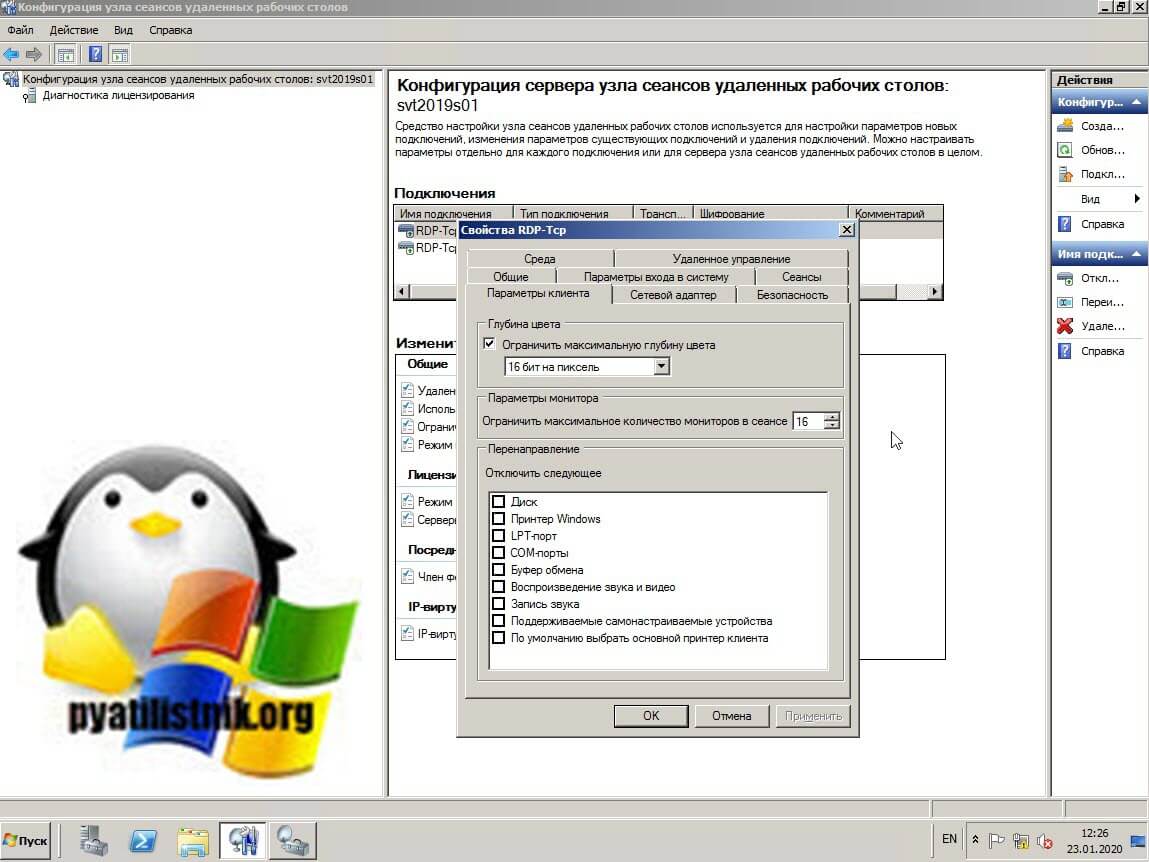
- Tsconfig.msc «Конфигурация узла сеансов удаленных рабочих столов (Remote Desctop Session Host Configuration)» — это оснастка позволяющая вам задавать список серверов лицензирования RDSH хоста, производить настройку уровней безопасности RDP, управлять настройками сеансов, параметрами схода на RDP, параметрами клиента, запрещая или разрешая перенаправление устройств и многое другое. Напоминаю, что благодаря это оснастки я смог настроить права входа на изолированный терминальный стол созданный для подрядчиков. Вот так выглядела эта оснастка, уверен, что начинающие системные администраторы ее даже и не видели.
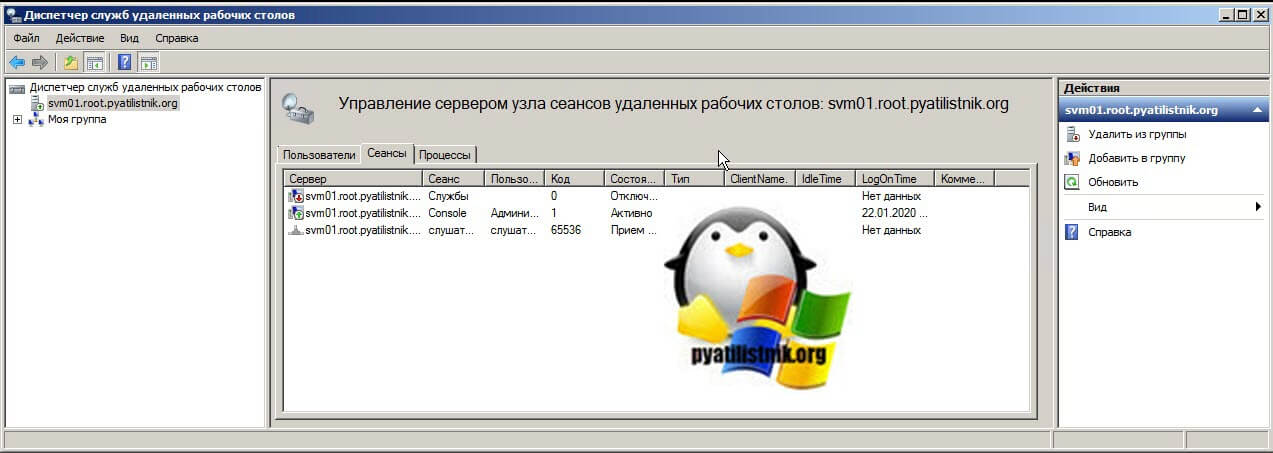
- Tsadmin.msc «Диспетчер служб удаленных рабочих столов» (Remote Desktop Services Manager) — это оснастка для взаимодействия и управления сессиями пользователей удаленного рабочего стола. Например вы можете удаленно завершить любой процесс пользователя, его разлогинить с терминального сервера, так же можете массово отправить сообщение пользователям RDP, в версиях Windows Server 2012 R2 и выше для этого мы использовали PowerShell, чтобы их оповестить. Сама оснастка выглядит вот так. Так же я бы советовал обратить внимание на утилиту Terminal Services Manager, она бесплатна и может выполнить все, что делает оснастка Tsadmin.msc. Эту утилиту как и делали энтузиасты для боле старших версий операционной системы Windows Server.
Алгоритм запуска TSADMIN.msc и TSCONFIG.msc в Windows Server 2019
Хорошо, что Microsoft не закрыла возможность регистрации и запуска оснасток TSADMIN.msc и TSCONFIG.msc в Windows Server 2012 R2 и выше. Хочу отметить, что данный метод не является официальным, но использовать его все же можно на свой страх и риск.
Суть метода заключается в том, что вам необходимо скопировать определенные библиотеки и сами оснастки Tsconfig.msc и Tsadmin.msc из Windows Server 2008 R2 или скачать их у меня если у вас нет уже в инфраструктуре таких серверов. так же необходимо для них прописать ключи реестра и права на них, это делается через выгрузку веток с 2008 R2 системы или скриптом, оба метода я покажу.
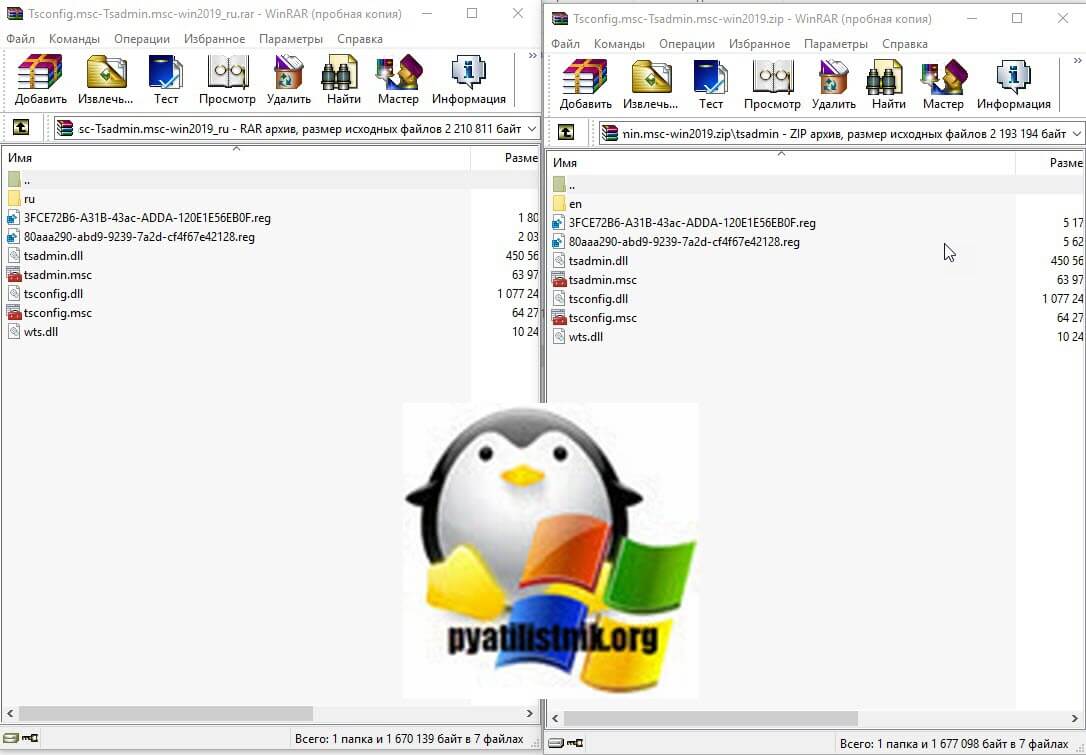
Если вы все скачали у меня, то состав архивов будет такой:
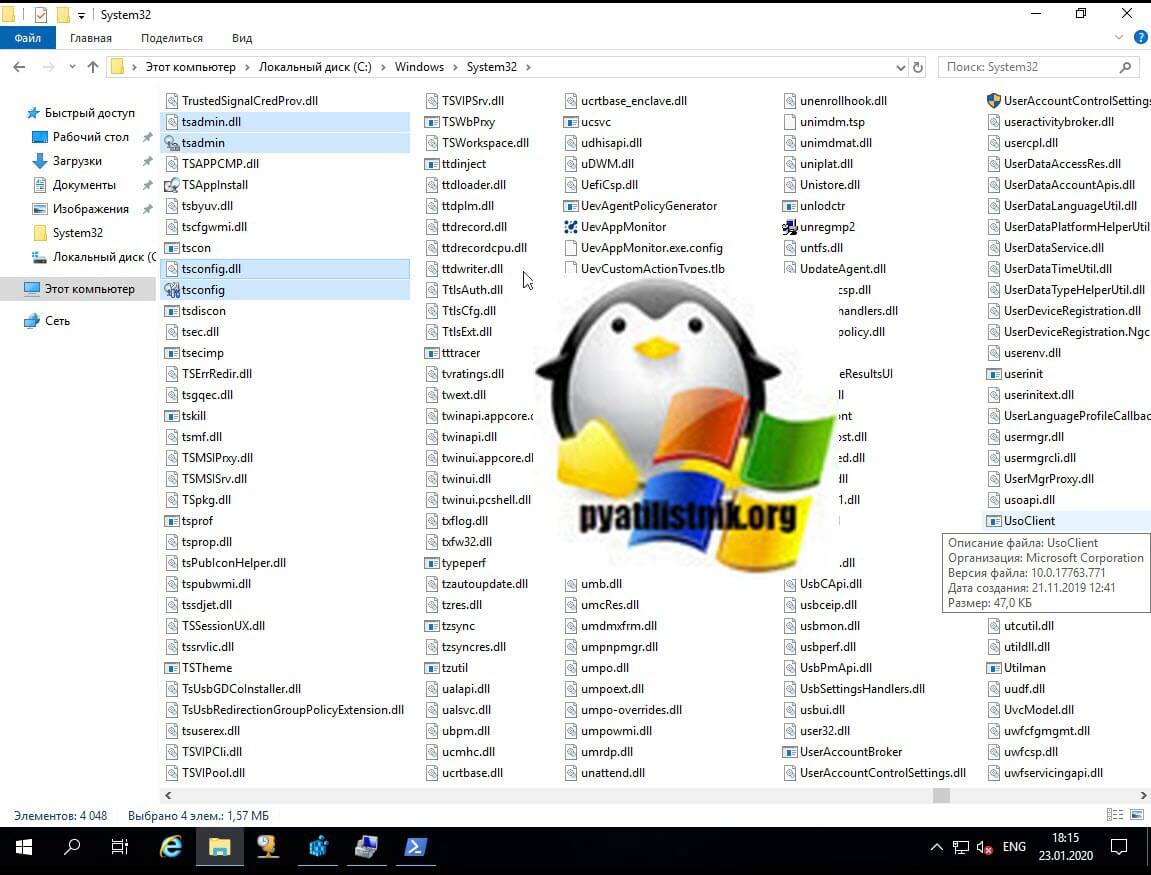
Если у вас есть своя Windows Server 2008 R2 (даже если ее нет вы можете быстро развернуть виртуальную машину), то вам необходимо скопировать вот такой список файлов из каталога C:WindowsSystem32
- c:windowssystem32tsconfig.msc
- c:windowssystem32tsadmin.msc
- c:windowssystem32tsadmin.dll
- c:windowssystem32tsconfig.dll
- c:windowssystem32wts.dll
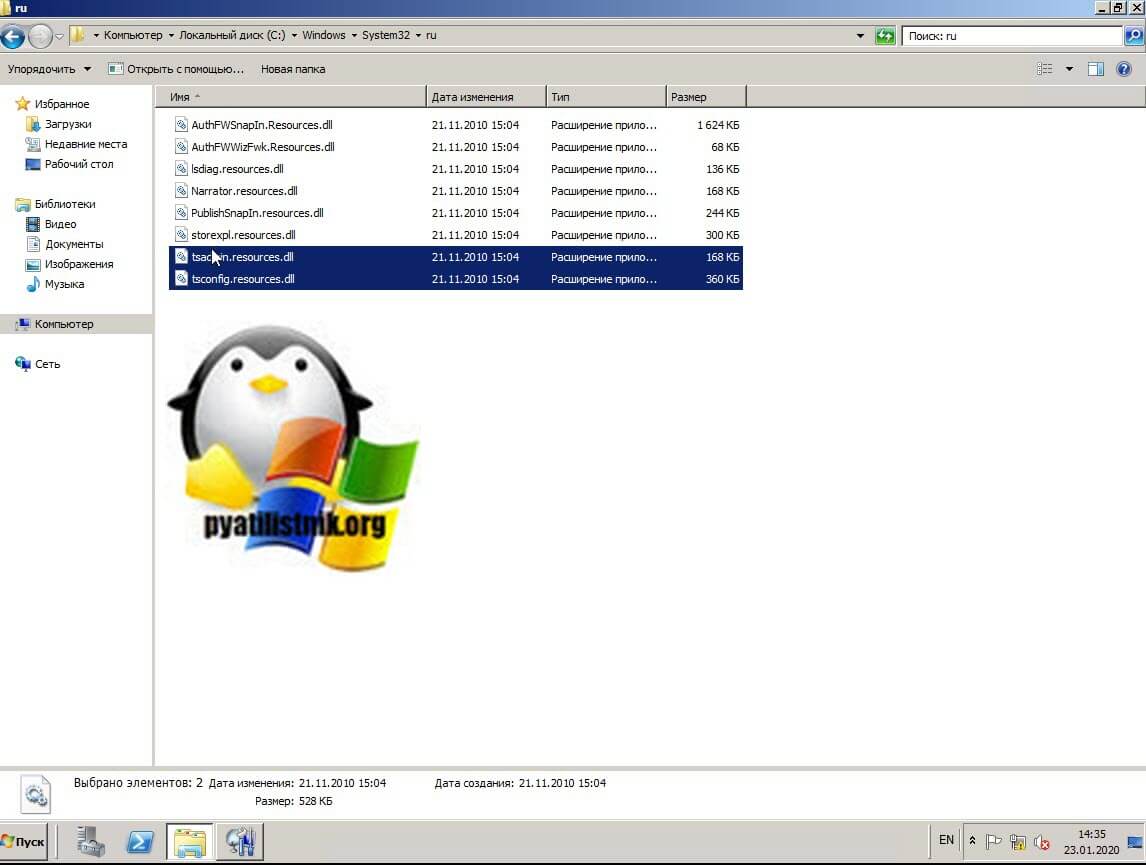
А так же языковые файлы они располагаются по пути C:WindowsSystem32ru или C:WindowsSystem32en в зависимости от языка в системе. В моем примере русская версия поэтому я буду копировать файлы для русской версии. Из каталога мне необходимо скопировать
- c:windowssystem32rutsconfig.resources.dll
- c:windowssystem32rutsadmin.resources.dll
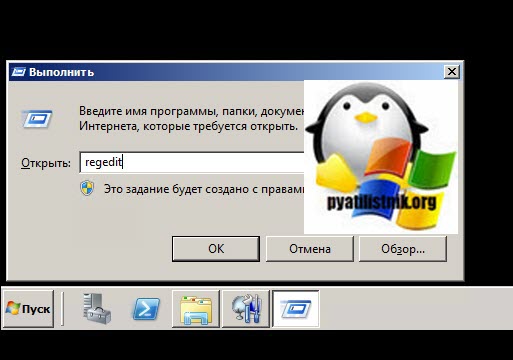
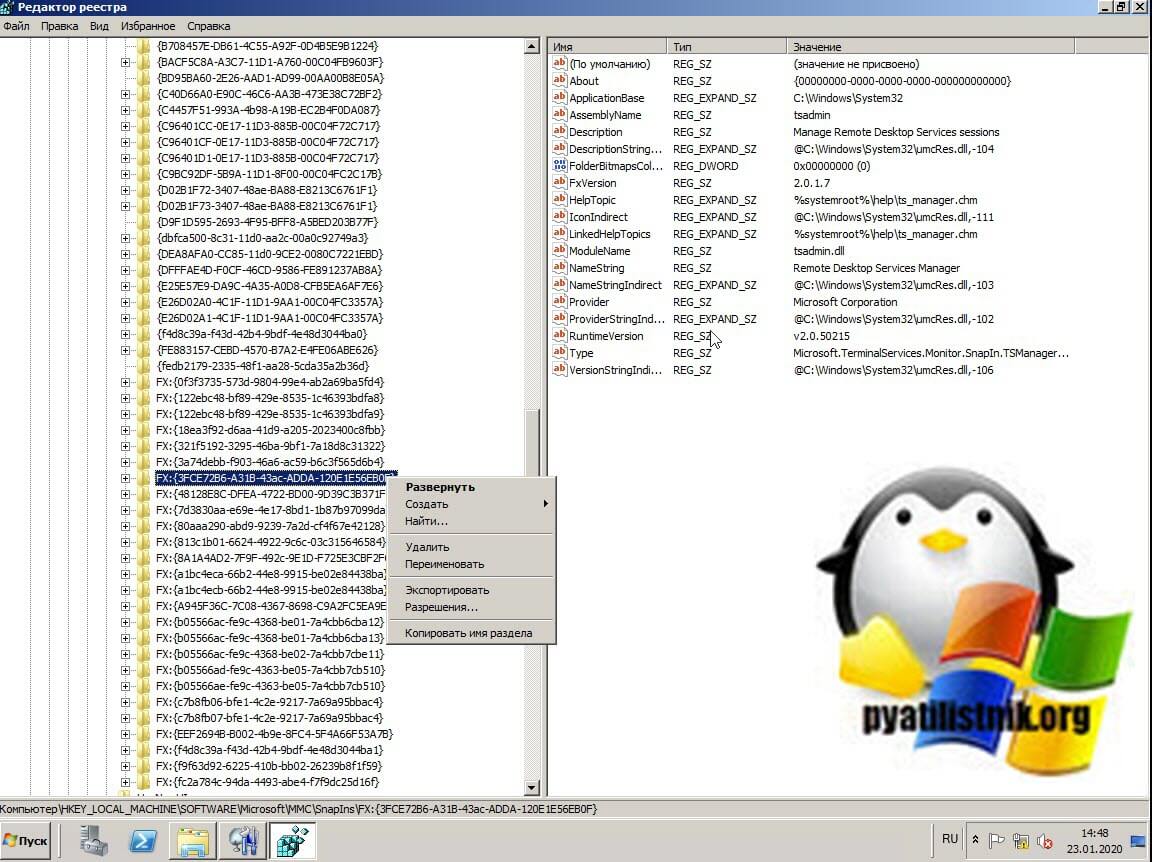
Следующим действием вам необходимо выгрузить две ветки реестра, если не хотите это делать, то их можно создать самому из кода, который я представлю ниже. Запустите редактор реестра Windows из окна выполнить, введя regedit.
Вам нужно найти вот такие ветки реестра и произвести их экспорт:
- HKEY_LOCAL_MACHINESOFTWAREMicrosoft MMCSnapInsFX:{3FCE72B6-A31B-43ac-ADDA-120E1E56EB0F}
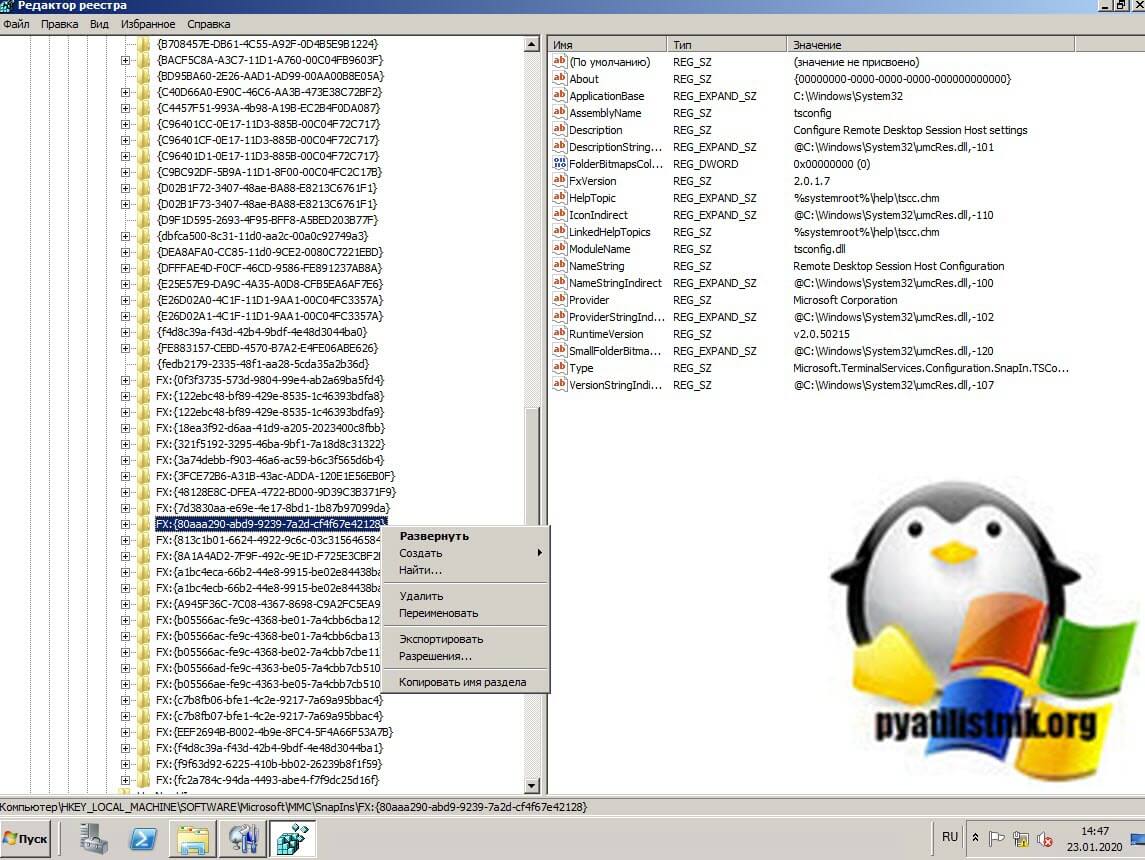
- HKEY_LOCAL_MACHINESOFTWAREMicrosoft MMCSnapInsFX:{80aaa290-abd9-9239-7a2d-cf4f67e42128}
Выбираем место сохранения ваших reg файлов. На выходе у вас будет два файла вот с таким содержимым, для оснастки tsconfig (80aaa290-abd9-9239-7a2d-cf4f67e42128)
Windows Registry Editor Version 5.00
[HKEY_LOCAL_MACHINESOFTWAREMicrosoft MMCSnapInsFX:{80aaa290-abd9-9239-7a2d-cf4f67e42128}]
«ApplicationBase»=hex (2):43,00,3a,00,5c,00, 57,00,69,00,6e,00,64,00,6f,00,77,00,
73,00,5c,00,53,00,79,00,73,00,74,00,65,00, 6d,00,33,00,32,00,00,00
«About»=»{00000000-0000-0000-0000-000000000000}»
«VersionStringIndirect»=»@C:\Windows\System32\umcRes.dll,-107»
«ProviderStringIndirect»=hex (2) :40,00,43,00,3a, 00,5c,00,57,00,69,00,6e,00,64,
00,6f,00,77,00,73,00,5c,00,53,00,79,00, 73,00,74,00, 65,00,6d,00,33,00,32,00,
5c,00,75,00,6d,00,63,00,52,00,65,00,73,00, 2e,00,64,00,6c,00,6c,00,2c,00,2d,
00,31,00,30,00,32,00,00,00
«SmallFolderBitmapIndirect»=hex(2) :40,00,43,00, 3a,00,5c,00,57,00,69,00,6e,00,
64,00,6f,00,77,00,73,00,5c,00,53,00,79, 00,73,00,74,00, 65,00,6d,00,33,00,32,
00,5c,00,75,00,6d,00,63,00,52,00,65,00,73,00, 2e,00,64,00,6c,00,6c,00,2c,00,
2d,00,31,00,32,00,30,00,00,00
«NameString»=»Remote Desktop Session Host Configuration»
«HelpTopic»=hex(2):25,00,73,00,79,00,73,00,74,00,65, 00,6d,00,72,00,6f,00,6f,00,
74,00,25,00,5c,00,68,00,65,00,6c,00,70, 00,5c,00,74,00,73,00,63,00,63,00,2e,
00,63,00,68,00,6d,00,00,00
«AssemblyName»=»tsconfig»
«RuntimeVersion»=»v2.0.50215»
«Description»=»Configure Remote Desktop Session Host settings»
«DescriptionStringIndirect»=hex (2) :40,00,43,00,3a, 00,5c,00,57,00,69,00,6e,00,
64,00,6f,00,77,00,73,00,5c,00,53,00,79, 00,73,00,74, 00,65,00,6d,00,33,00,32,
00,5c,00,75,00,6d,00,63,00,52,00,65,00,73,00,2e, 00,64,00,6c,00,6c,00,2c,00,
2d,00,31,00,30,00,31,00,00,00
«LinkedHelpTopics»=»%systemroot%\help\tscc.chm»
«NameStringIndirect»=hex (2) :40,00,43,00,3a,00, 5c,00,57,00,69,00,6e,00,64,00,6f,
00,77,00,73,00,5c,00,53,00,79,00,73,00, 74,00,65, 00,6d,00,33,00,32,00,5c,00,
75,00,6d,00,63,00,52,00,65,00,73,00,2e,00,64, 00,6c,00,6c,00,2c,00,2d,00,31,
00,30,00,30,00,00,00
«IconIndirect»=hex(2):40,00,43,00,3a,00, 5c,00,57,00,69,00,6e,00,64,00,6f,00,77,
00,73,00,5c,00,53,00,79,00,73,00,74,00, 65,00,6d,00,33,00,32,00,5c,00,75,00,
6d,00,63,00,52,00,65,00,73,00,2e,00,64, 00,6c,00,6c,00,2c,00,2d,00,31,00,31,
00,30,00,00,00
«FxVersion»=»2.0.1.7»
«Type»=»Microsoft.TerminalServices.Configuration. SnapIn.TSConfigSnapIn, tsconfig, Version=6.1.0.0, Culture=neutral, PublicKeyToken=31bf3856ad364e35»
«FolderBitmapsColorMask»=dword:00000000
«ModuleName»=»tsconfig.dll»
«Provider»=»Microsoft Corporation»
[HKEY_LOCAL_MACHINESOFTWAREMicrosoft MMCSnapInsFX:{80aaa290-abd9-9239-7a2d-cf4f67e42128}NodeTypes]
[HKEY_LOCAL_MACHINESOFTWAREMicrosoft MMCSnapInsFX:{80aaa290-abd9-9239-7a2d-cf4f67e42128}NodeTypes{f86e6446-aaff-11d0-b944-00c04fd8d5b9}]
[HKEY_LOCAL_MACHINESOFTWAREMicrosoft MMCSnapInsFX:{80aaa290-abd9-9239-7a2d-cf4f67e42128}Standalone]
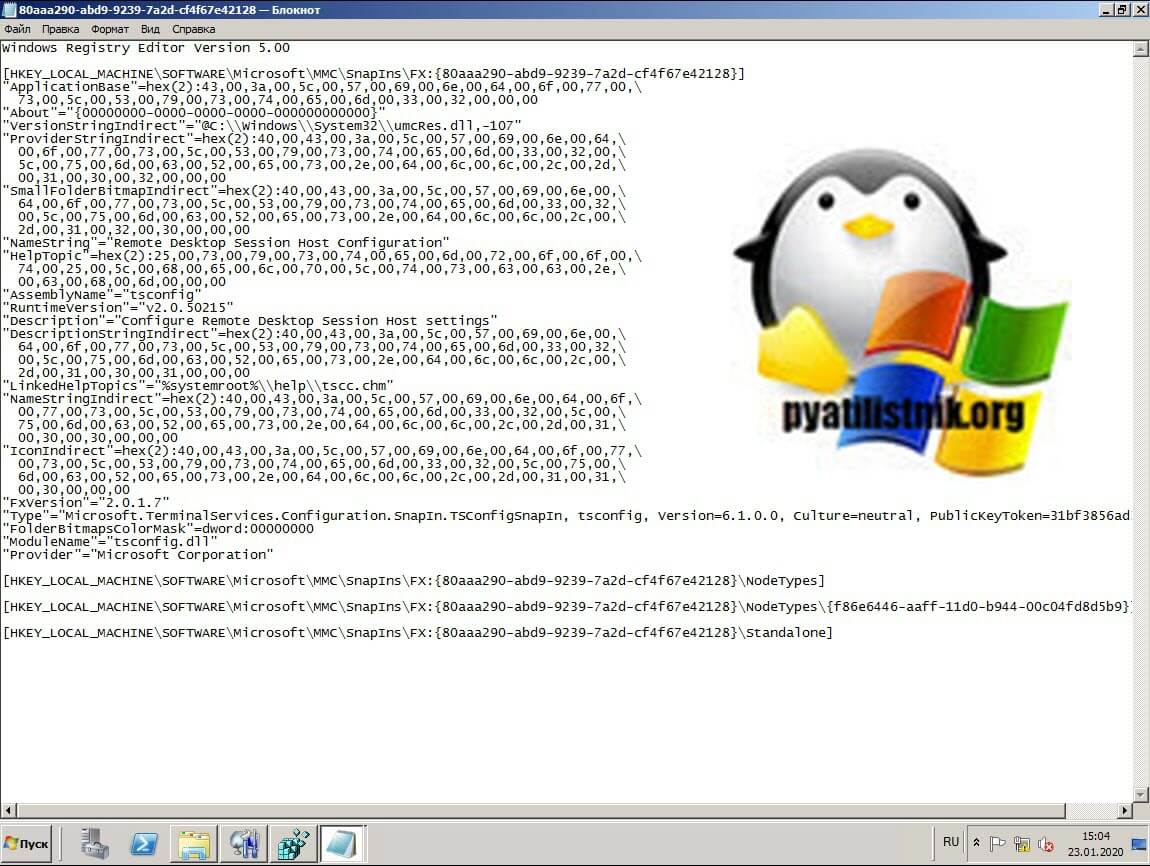
для оснастки Tsadmin.msc (80aaa290-abd9-9239-7a2d-cf4f67e42128)
Windows Registry Editor Version 5.00
[HKEY_LOCAL_MACHINESOFTWAREMicrosoft MMCSnapInsFX:{80aaa290-abd9-9239-7a2d-cf4f67e42128}]
«ApplicationBase»=hex(2):43,00,3a,00,5c,00,57, 00,69,00,6e,00,64,00,6f,00,77,00,
73,00,5c,00,53,00,79,00,73,00,74,00,65,00,6d,00,33,00,32,00,00,00
«About»=»{00000000-0000-0000-0000-000000000000}»
«VersionStringIndirect»=»@C:\Windows\System32\umcRes.dll,-107»
«ProviderStringIndirect»=hex (2):40,00,43,00, 3a,00,5c,00,57,00,69,00,6e,00,64,
00,6f,00,77,00,73,00,5c,00,53,00,79,00,73, 00,74,00,65,00,6d,00,33,00,32,00,
5c,00,75,00,6d,00,63,00,52,00,65,00,73,00, 2e,00,64,00,6c,00,6c,00,2c,00,2d,
00,31,00,30,00,32,00,00,00
«SmallFolderBitmapIndirect»=hex (2):40,00, 43,00,3a,00,5c,00,57,00,69,00,6e,00,
64,00,6f,00,77,00,73,00,5c,00,53,00,79,00, 73,00,74,00,65,00,6d,00,33,00,32,
00,5c,00,75,00,6d,00,63,00,52,00,65,00,73, 00,2e,00,64,00,6c,00,6c,00,2c,00,
2d,00,31,00,32,00,30,00,00,00
«NameString»=»Remote Desktop Session Host Configuration»
«HelpTopic»=hex(2) :25,00,73,00,79,00,73, 00,74,00,65,00,6d,00,72,00,6f,00,6f,00,
74,00,25,00,5c,00,68,00,65,00,6c,00,70,00, 5c,00,74,00,73,00,63,00,63,00,2e,
00,63,00,68,00,6d,00,00,00
«AssemblyName»=»tsconfig»
«RuntimeVersion»=»v2.0.50215»
«Description»=»Configure Remote Desktop Session Host settings»
«DescriptionStringIndirect»=hex (2):40,00,43,00,3a, 00,5c,00,57,00,69,00,6e,00,
64,00,6f,00,77,00,73,00,5c,00,53,00,79,00,73,00,74, 00,65,00,6d,00,33,00,32,
00,5c,00,75,00,6d,00,63,00,52,00,65,00,73,00,2e, 00,64,00,6c,00,6c,00,2c,00,
2d,00,31,00,30,00,31,00,00,00
«LinkedHelpTopics»=»%systemroot%\help\tscc.chm»
«NameStringIndirect»=hex (2):40,00,43,00,3a,00, 5c,00,57,00,69,00,6e,00,64,00,6f,
00,77,00,73,00,5c,00,53,00,79,00,73,00,74,00,65, 00,6d,00,33,00,32,00,5c,00,
75,00,6d,00,63,00,52,00,65,00,73,00,2e,00,64,00, 6c,00,6c,00,2c,00,2d,00,31,
00,30,00,30,00,00,00
«IconIndirect»=hex (2):40,00,43,00,3a,00,5c,00,57, 00,69,00,6e,00,64,00,6f,00,77,
00,73,00,5c,00,53,00,79,00,73,00,74,00,65,00,6d,00, 33,00,32,00,5c,00,75,00,
6d,00,63,00,52,00,65,00,73,00,2e,00,64,00,6c,00, 6c,00,2c,00,2d,00,31,00,31,
00,30,00,00,00
«FxVersion»=»2.0.1.7»
«Type»=»Microsoft.TerminalServices.Configuration. SnapIn.TSConfigSnapIn, tsconfig, Version=6.1.0.0, Culture=neutral, PublicKeyToken=31bf3856ad364e35»
«FolderBitmapsColorMask»=dword:00000000
«ModuleName»=»tsconfig.dll»
«Provider»=»Microsoft Corporation»
[HKEY_LOCAL_MACHINESOFTWAREMicrosoft MMCSnapInsFX:{80aaa290-abd9-9239-7a2d-cf4f67e42128}NodeTypes]
[HKEY_LOCAL_MACHINESOFTWAREMicrosoft MMCSnapInsFX:{80aaa290-abd9-9239-7a2d-cf4f67e42128}NodeTypes{f86e6446-aaff-11d0-b944-00c04fd8d5b9}]
[HKEY_LOCAL_MACHINESOFTWAREMicrosoft MMCSnapInsFX:{80aaa290-abd9-9239-7a2d-cf4f67e42128}Standalone]
напоминаю, что вы их можете создать вручную в виде обычного txt, вставить содержимое, а потом изменить тип файла на reg.
Регистрация оснасток Tsconfig.msc и Tsadmin.msc в Windows Server 2019
Теперь когда у вас есть все файлы необходимые для запуска и установки оснасток Tsconfig.msc и Tsadmin.msc, вы должны распаковать архив и положить файлы по тем же путям, приведу их сюда еще раз:
- c:windowssystem32tsadmin.dll
- c:windowssystem32tsconfig.dll
- c:windowssystem32wts.dll
- c:windowssystem32tsconfig.msc
- c:windowssystem32tsadmin.msc
- c:windowssystem32rutsconfig.resources.dll
- c:windowssystem32rutsadmin.resources.dll
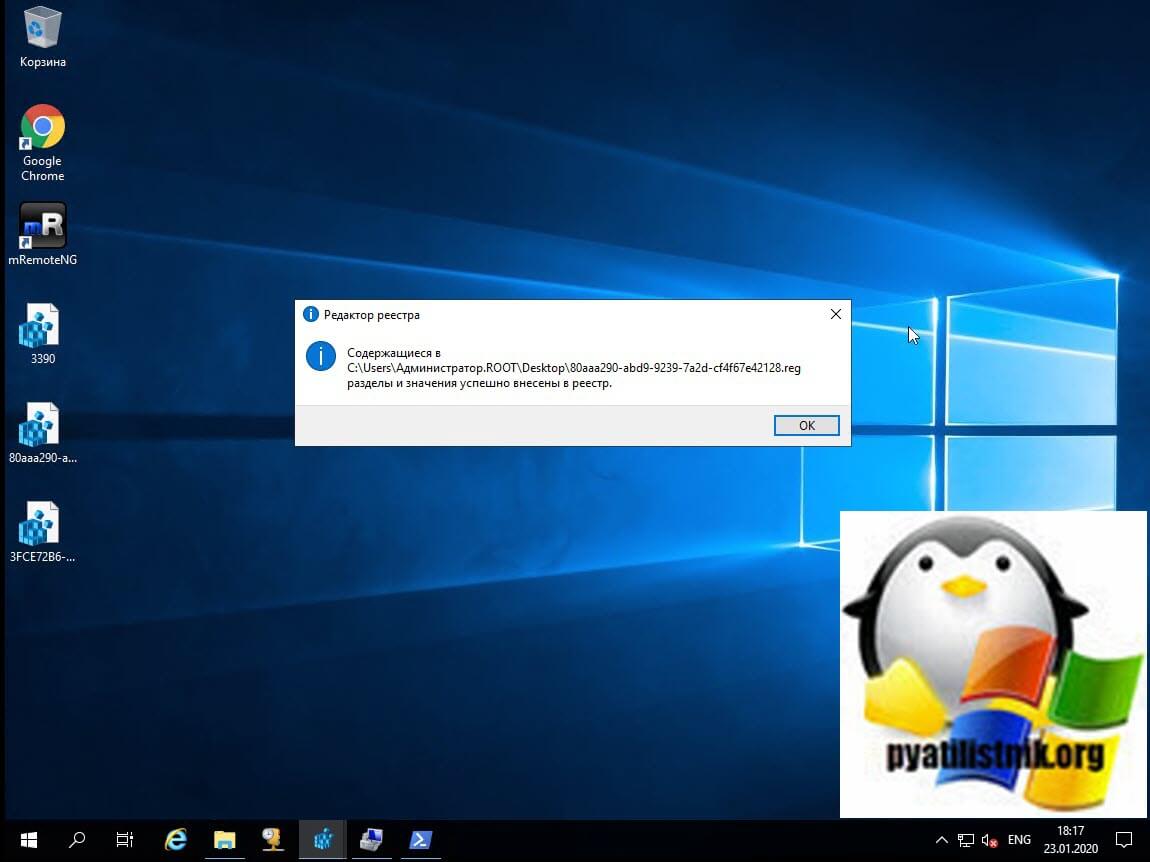
Далее вам необходимо на вашем сервере Windows Server 2019 запустить два ключа реестра, которые мы выгружали. При их запуске будет предупреждение, говорим «Да«.
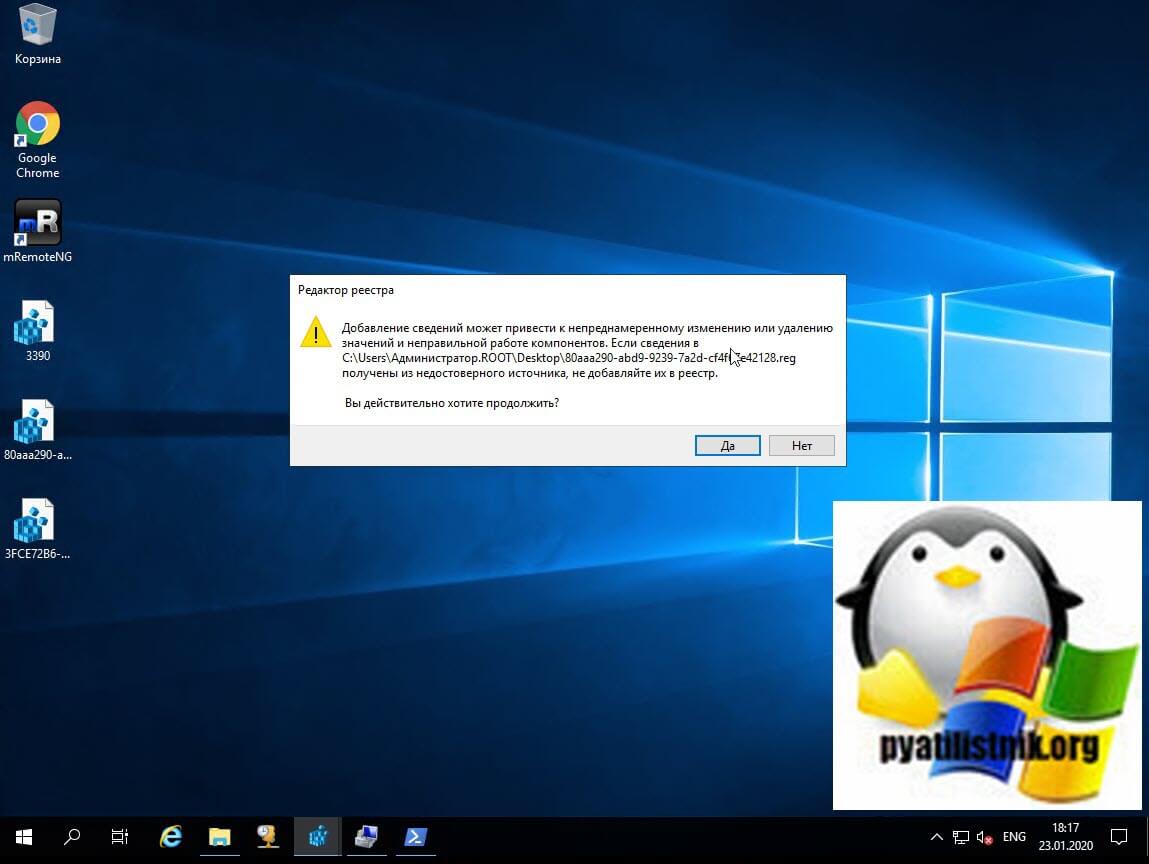
Файлы должны успешно импортироваться в реестр Windows.
Проверяем работу диспетчера служб удаленных рабочих столов
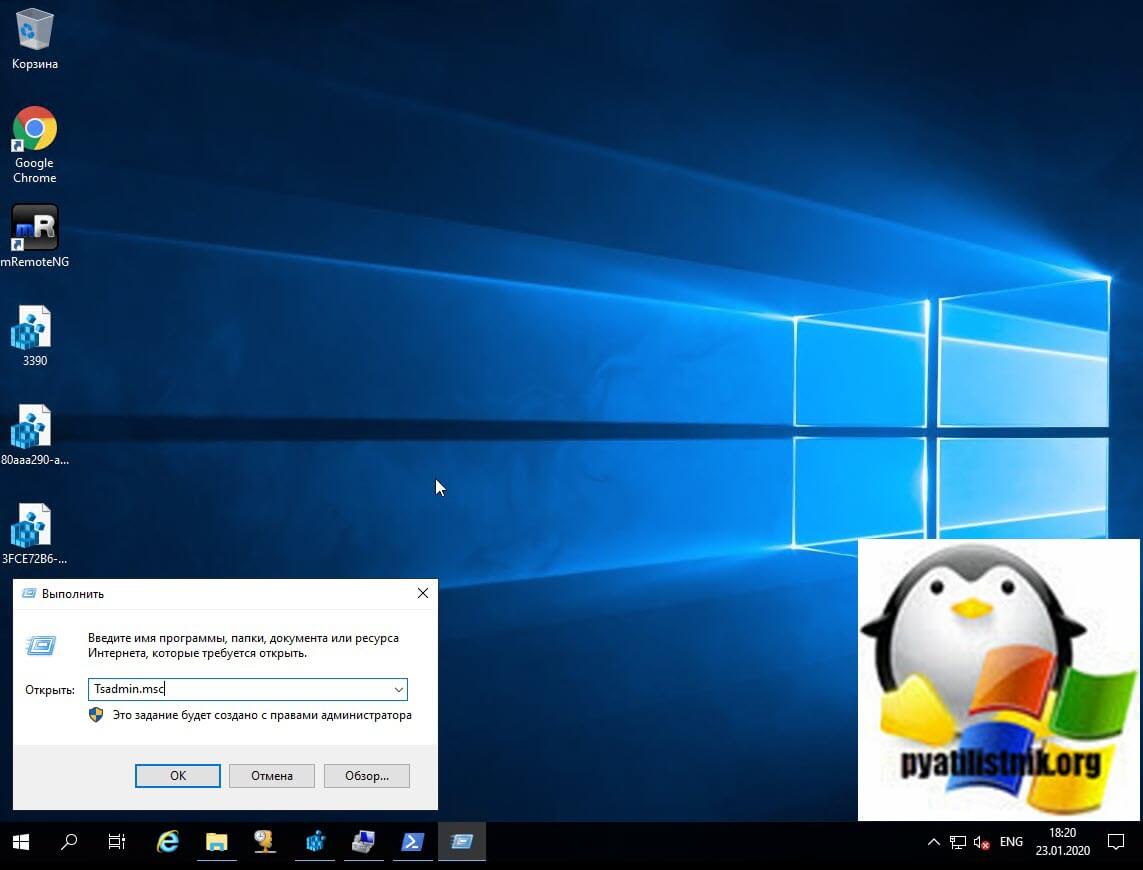
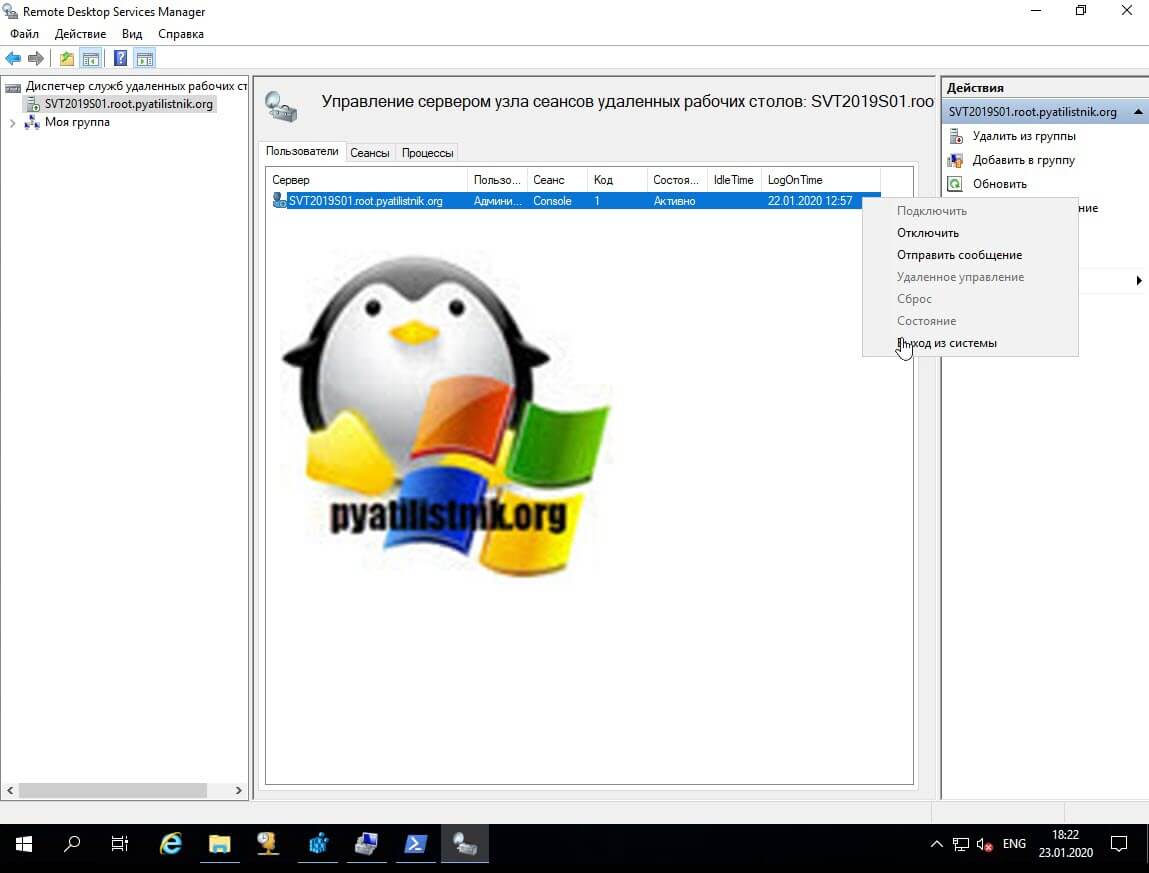
Попробуем запустить наши оснастки. Первой давайте запустим Tsadmin.msc. Для этого откройте окно выполнить и введите Tsadmin.msc. В итоге у нас запуститься «Диспетчер служб удаленных рабочих столов» (Remote Desktop Services Manager).
Работающие функции:
- отключение сеанса
- отправка сообщения
- сброс сессии
- статус сеанса
- регистрация сессии
- завершение процесса на вкладке процессов (одна из самых простых и важных функций инструмента)
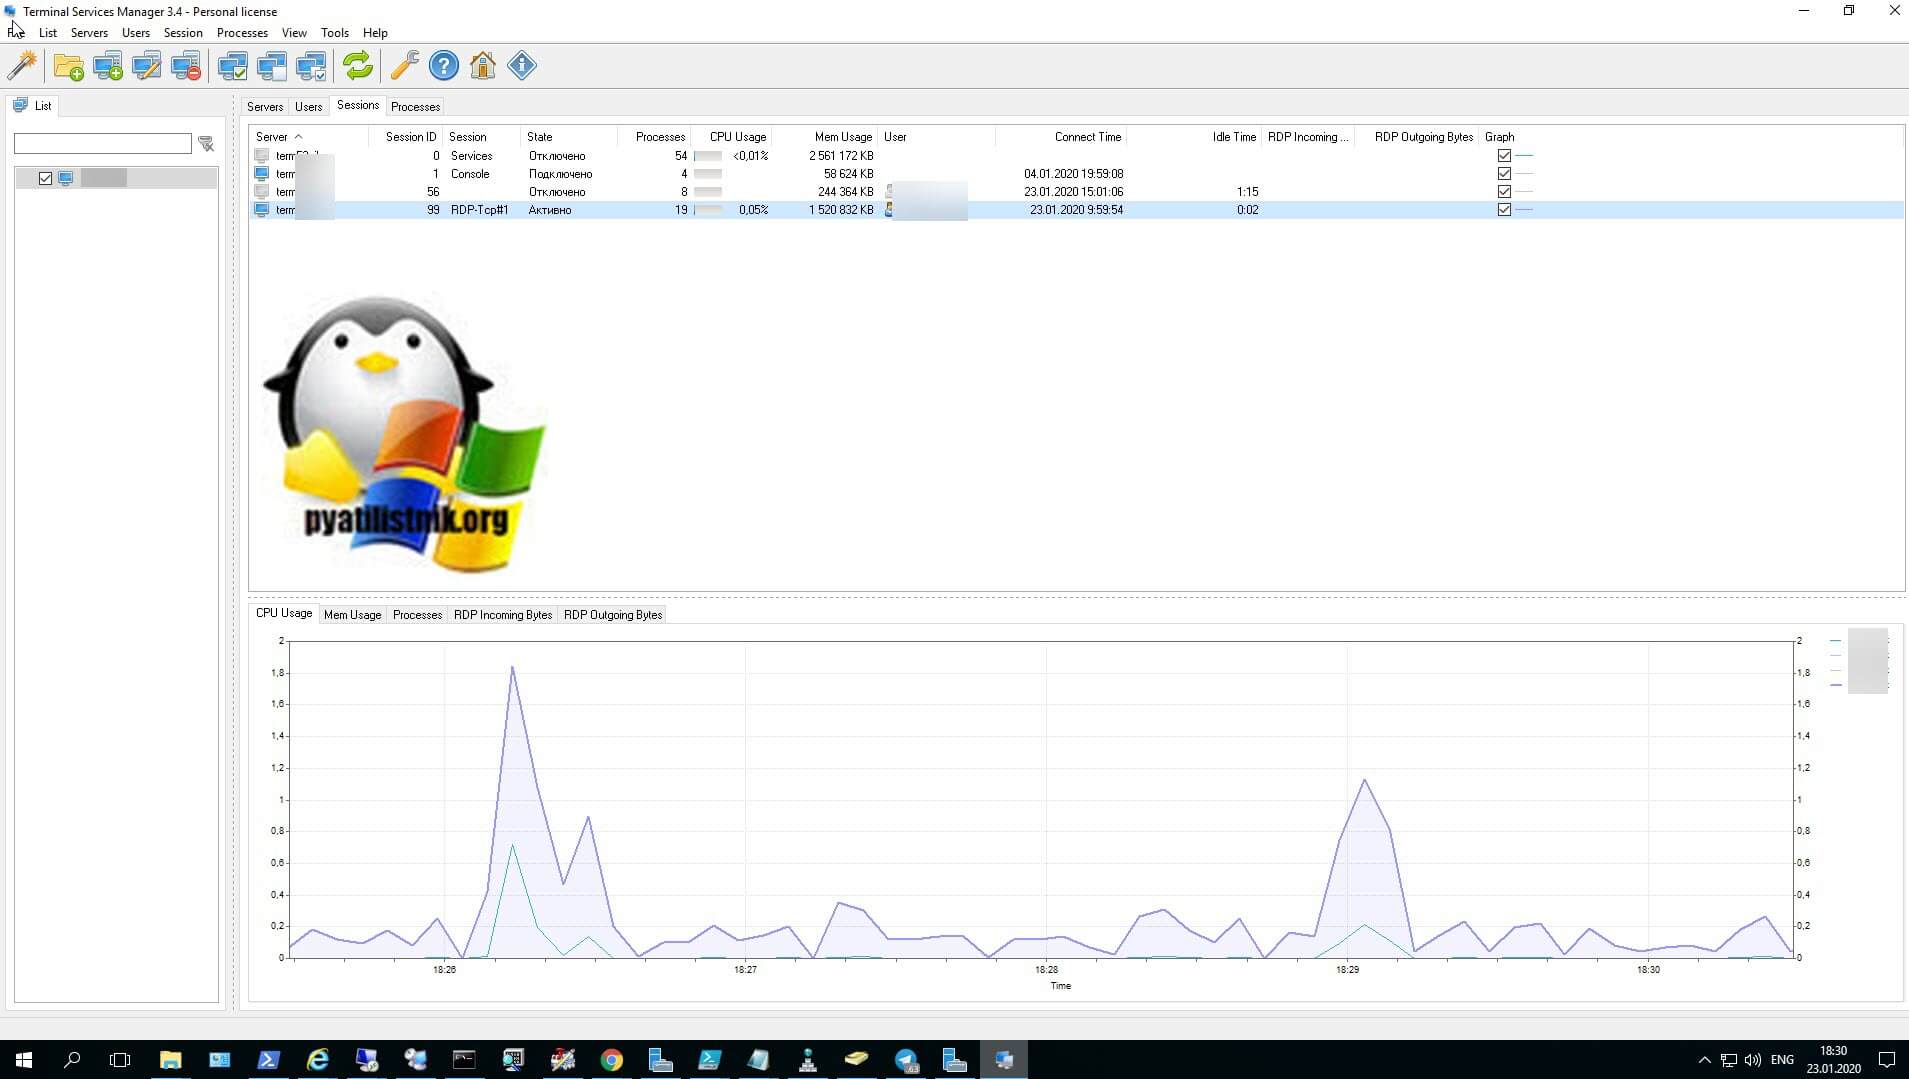
Так же хочу порекомендовать бесплатную утилиту Terminal Services Manager, о которой я подробно рассказывал, советую посмотреть, это аналог оснасток Tsadmin.msc для некого управления RDS фермой, делает все то же самое.
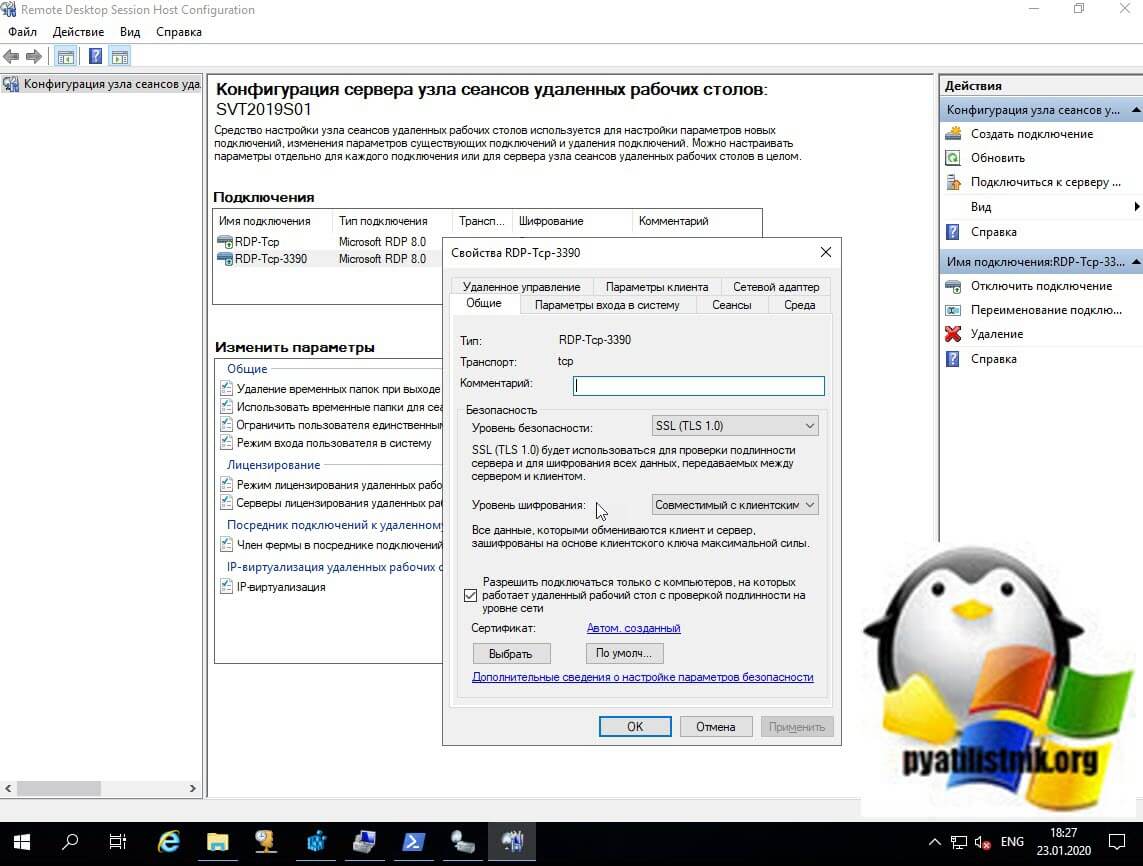
Проверяем работу конфигурации узла сеансов удаленных рабочих столов
Запустите через окно выполнить Tsconfig.msc.

У вас откроется оснастка «Конфигурация узла сеансов удаленных рабочих столов (Remote Desctop Session Host Configuration)». Тут вы увидите все привычные вкладки для настройки RDP подключения, кроме вкладки «Безопасность», которая доступна только в Windows Server 2008 R2, что весьма и весьма прискорбно, так как это была хорошая плюшка для тонкой настройки доступа по RDP.
На этом у меня все, с вами был Иван Семин, автор и создатель IT портала Pyatilistnik.org. Остались вопросы, пожелания или просто хотите поделиться опытом, то жду вас в комментариях.
Установим роли терминального сервера на Windows Server 2019 и лицензируем. Маленькая тонкость — сервер не в домене.
Подготовка Windows Server 2019
Для начала установим сам сервер. Всё необходимое вынесено в отдельную статью:
Установка Windows Server 2019 на виртуальную машину VMware
Не забываем про настройку:
Первоначальная настройка Windows Server 2019
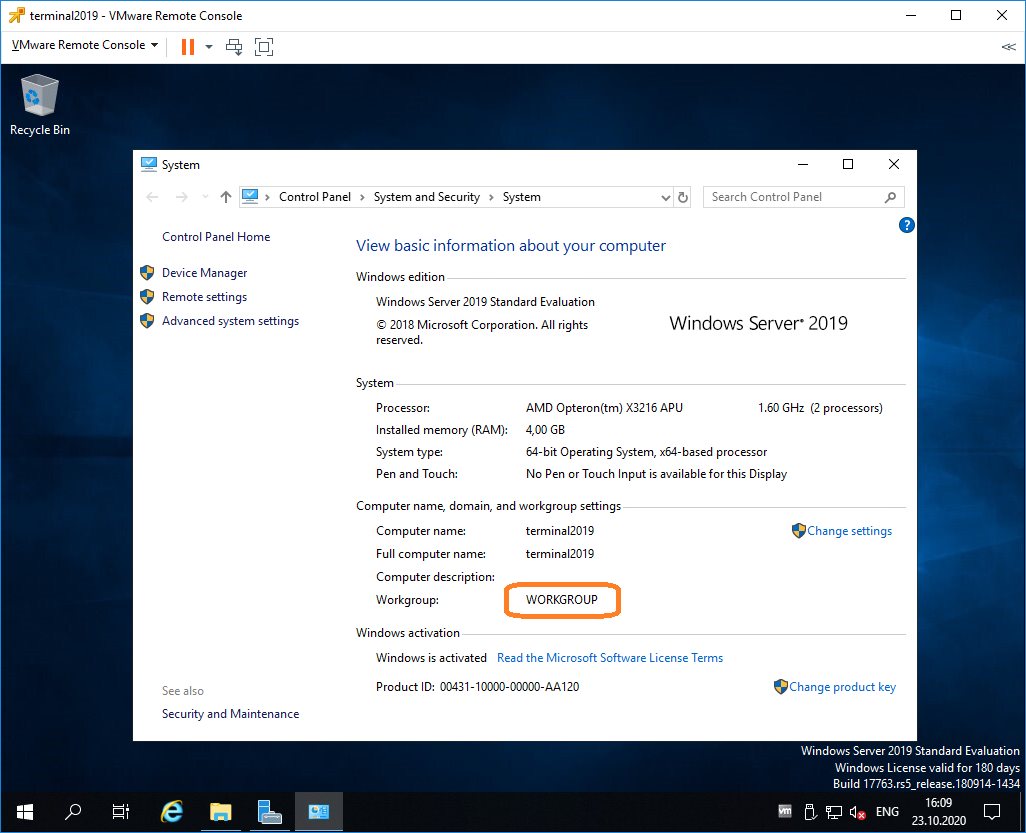
Итак, операционная система установлена и настроена. Сервер в рабочей группе WORKGROUP.
Установка роли терминального сервера
Нам понадобится установить две роли, можно выполнить установку одновременно, я предлагаю инструкцию с минимальным количеством перезагрузок.
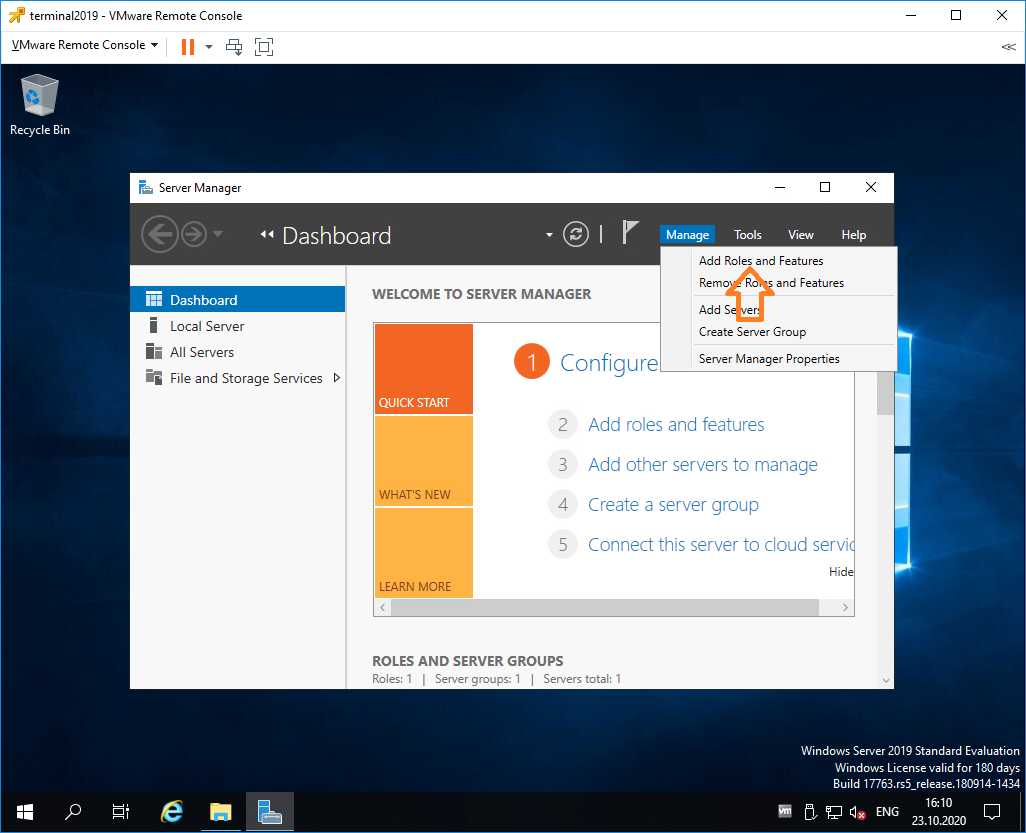
Роль Remote Desktop Licensing
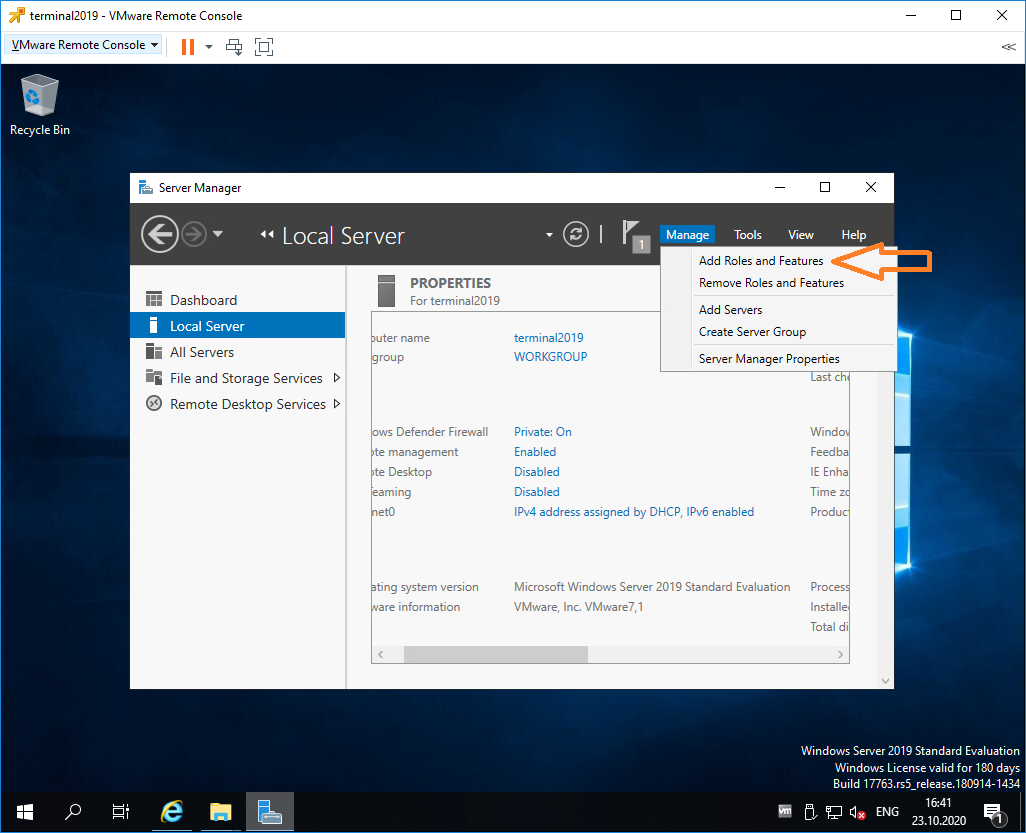
Входим в Server Manager. Справа вверху выбираем Manage > Add Roles and Features.
Попадаем в раздел Before You Begin.
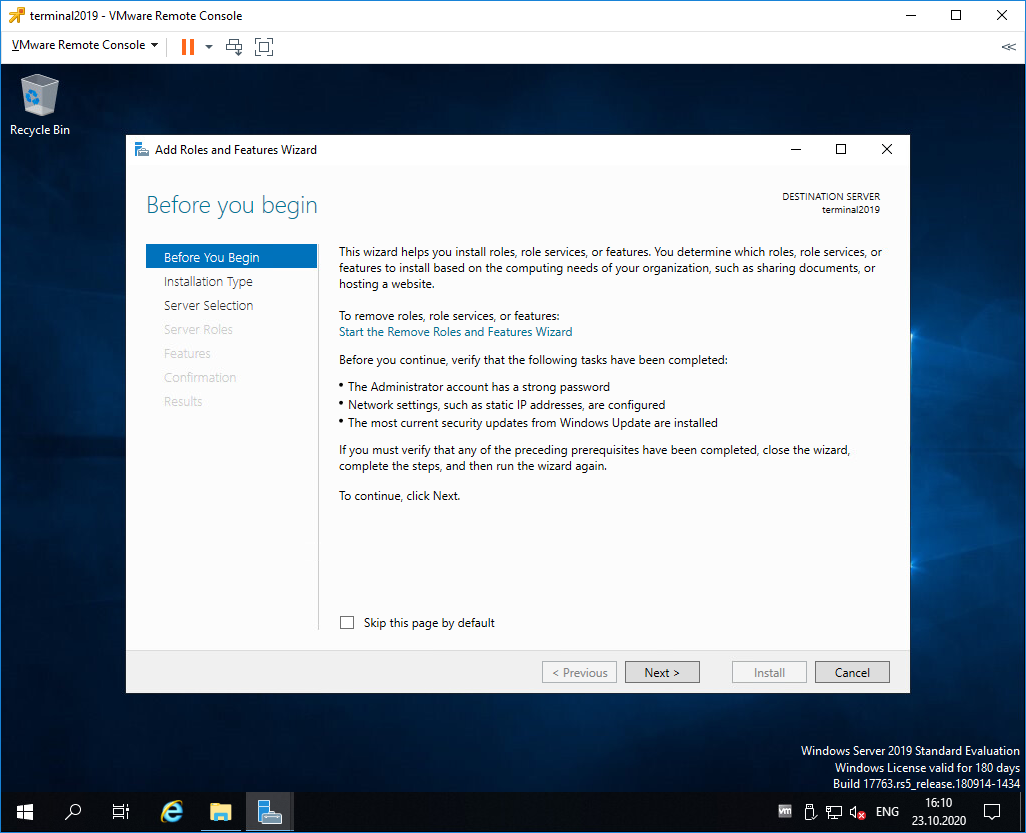
Это начальная страница, пропускаем. Next.
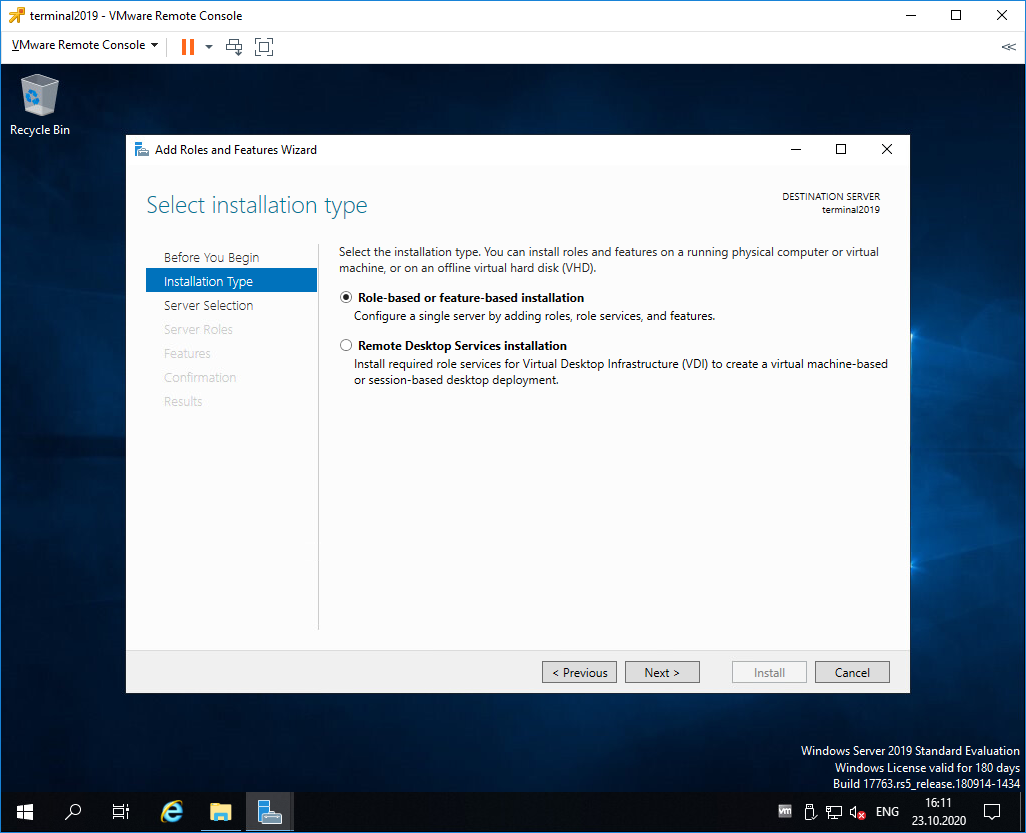
Попадаем в раздел Installation Type. Для установки сервиса удаленных рабочих столов предусмотрен специальный мастер Remote Desktop Services installation, но нам не удастся его использовать, поскольку сервер не в домене. Выбираем Role-based or feature-based installation. Next.

Попадаем в раздел Server Selection. Выбираем текущий сервер. Next.

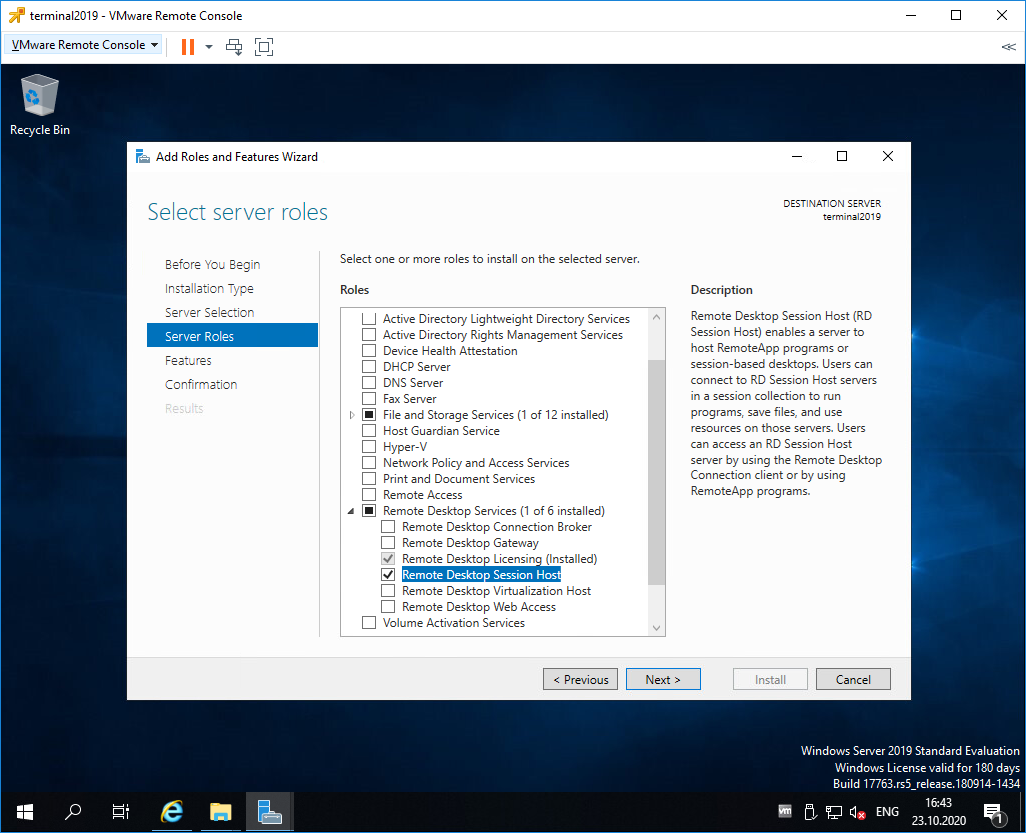
Попадаем в раздел Server Roles. Выделяем галкой роль Remote Desktop Services. Next.
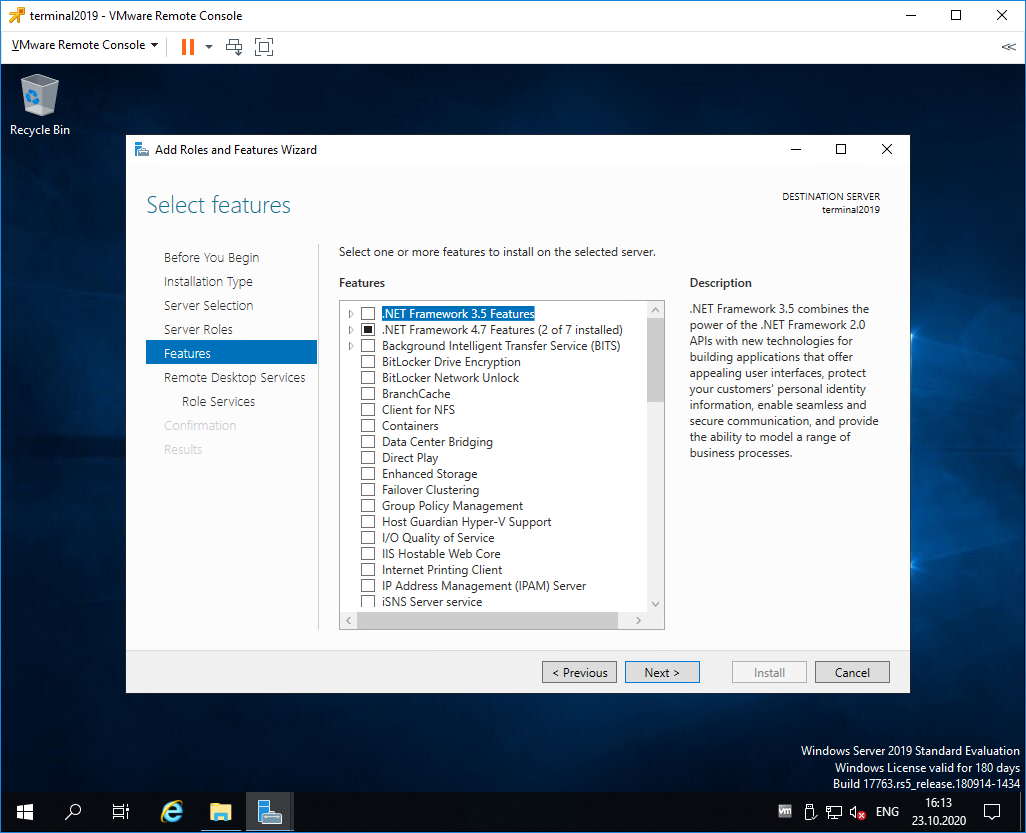
Попадаем в раздел Features. Здесь ничего дополнительно не выбираем. Next.
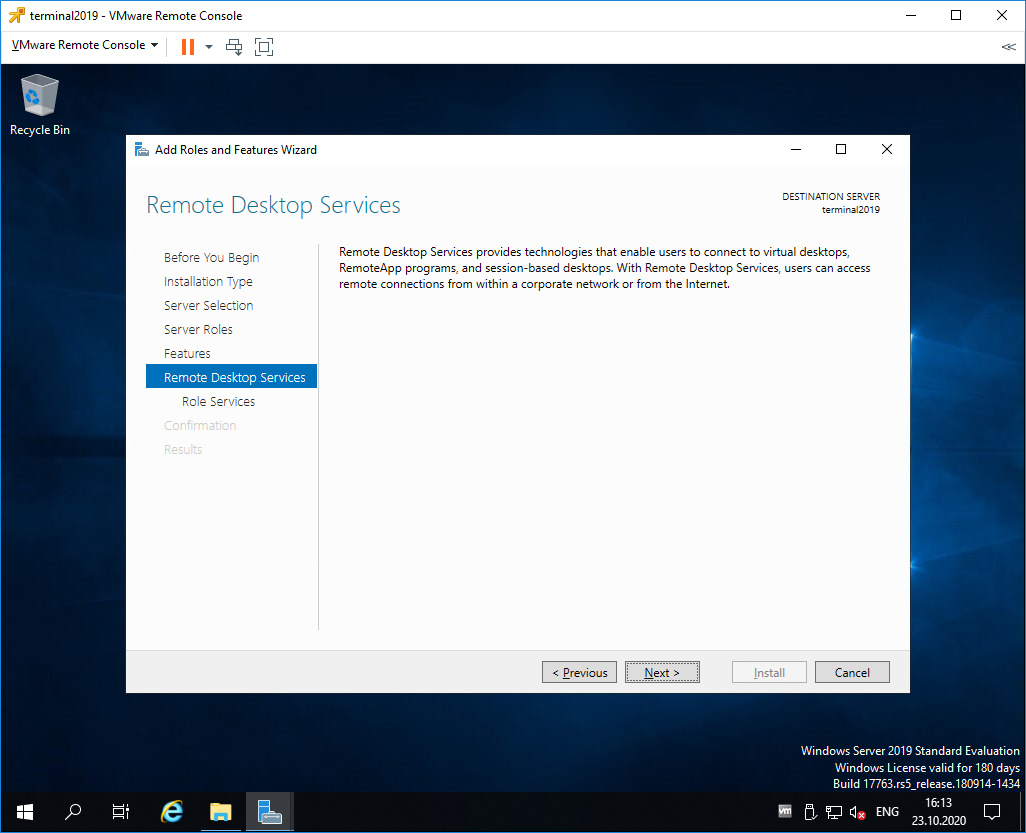
Попадаем в раздел Remote Desktop Services. Ненужное нам окошко. Next.
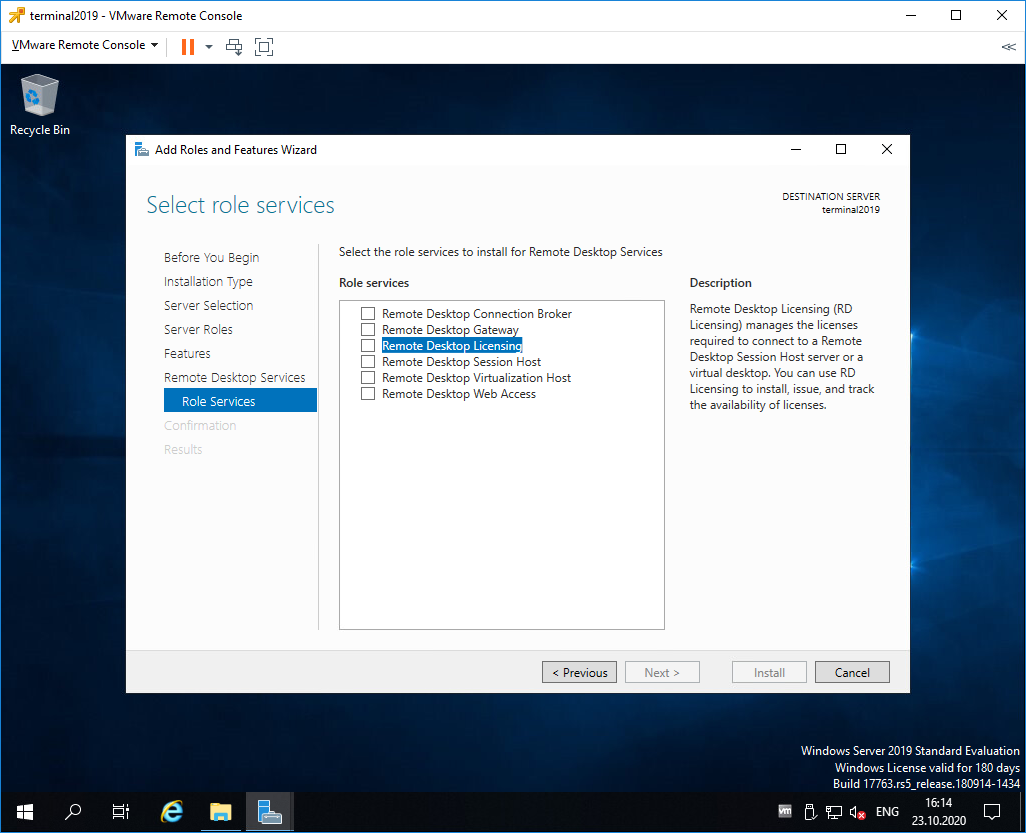
Попадаем в раздел Role Services. Первая роль, которую нам нужно установить, это Remote Desktop Licensing. Выделяем галкой.

Нам предлагают установить дополнительные фичи, которые требуются для данной роли. Соглашаемся, Add Features.

Remote Desktop Licensing выделено галкой, Next.
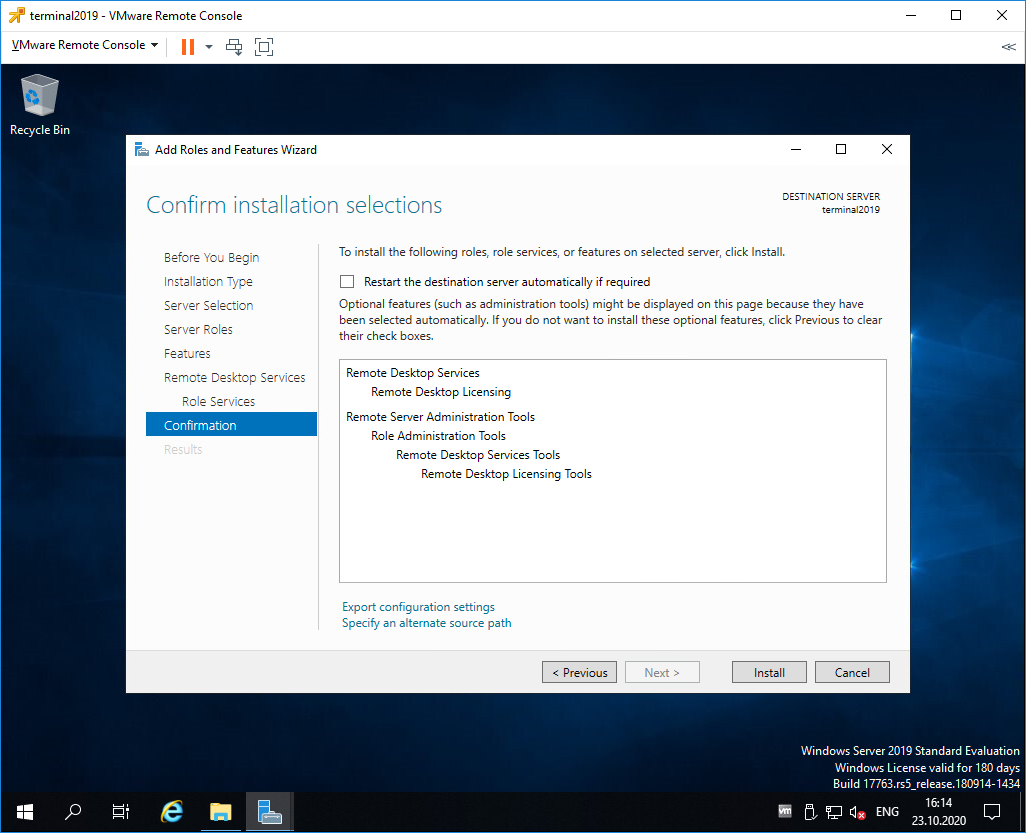
Попадаем в раздел Confirmation. Install.
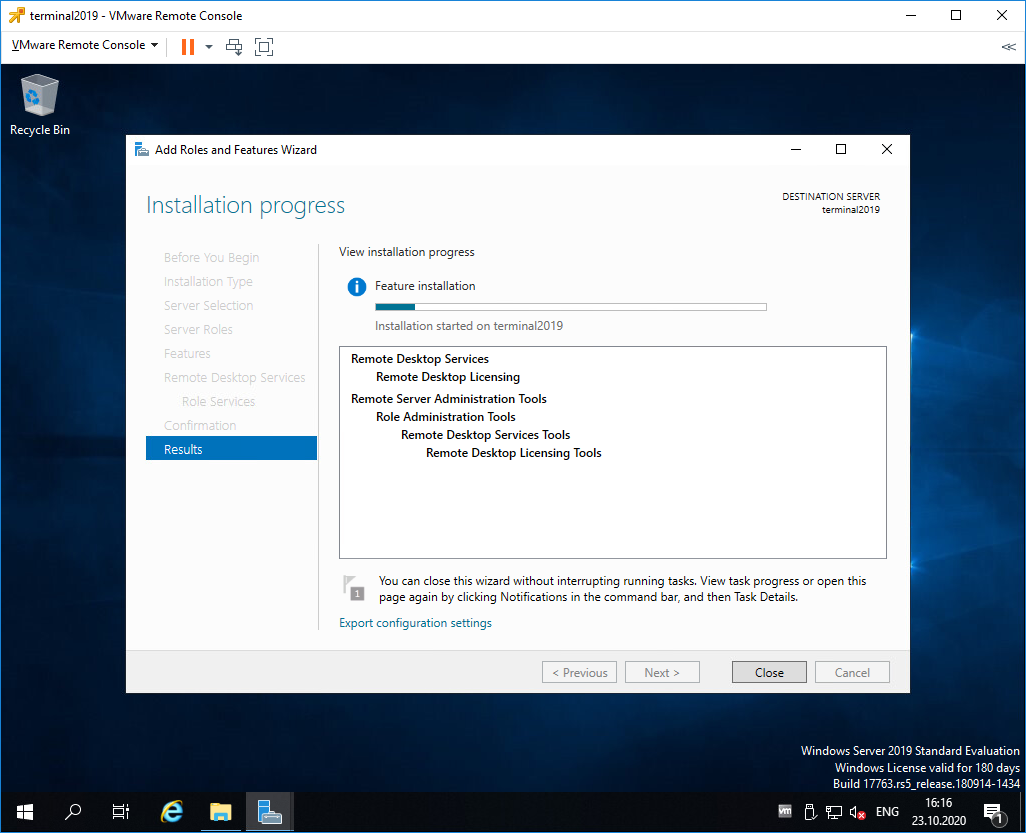
Начинается установка роли.
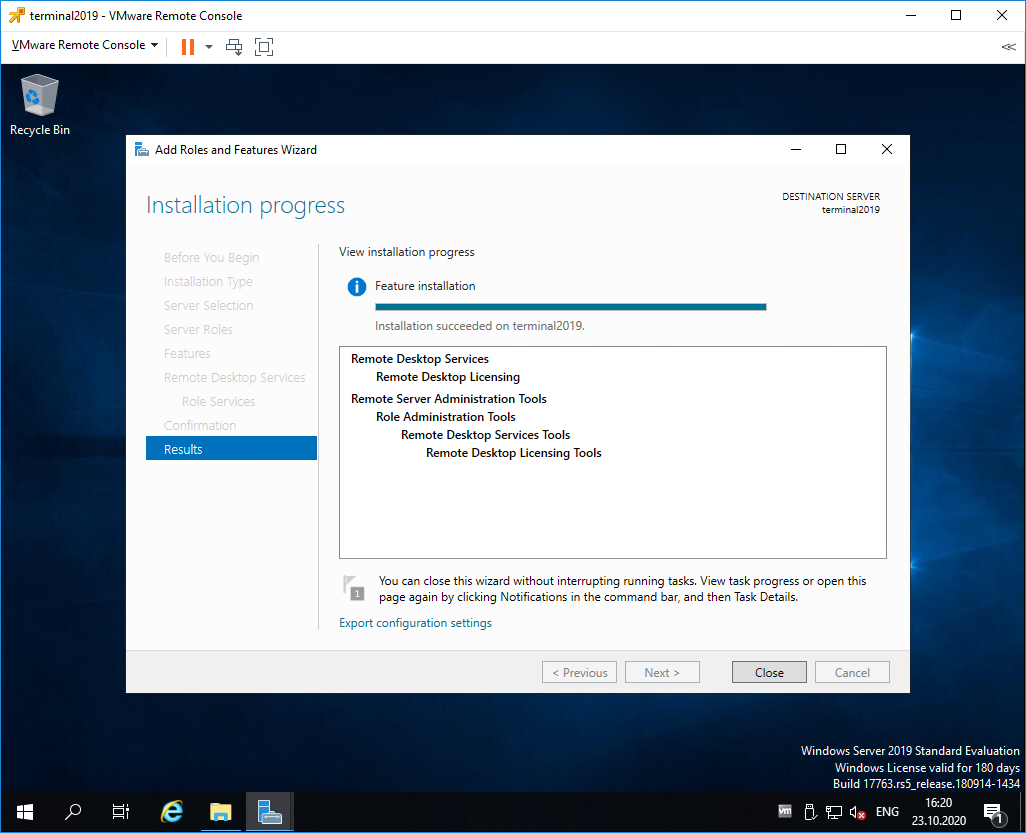
Роль Remote Desktop Licensing успешно установлена. Примечательно, что перезагрузка не требуется.

Открываем Windows Administrative Tools.
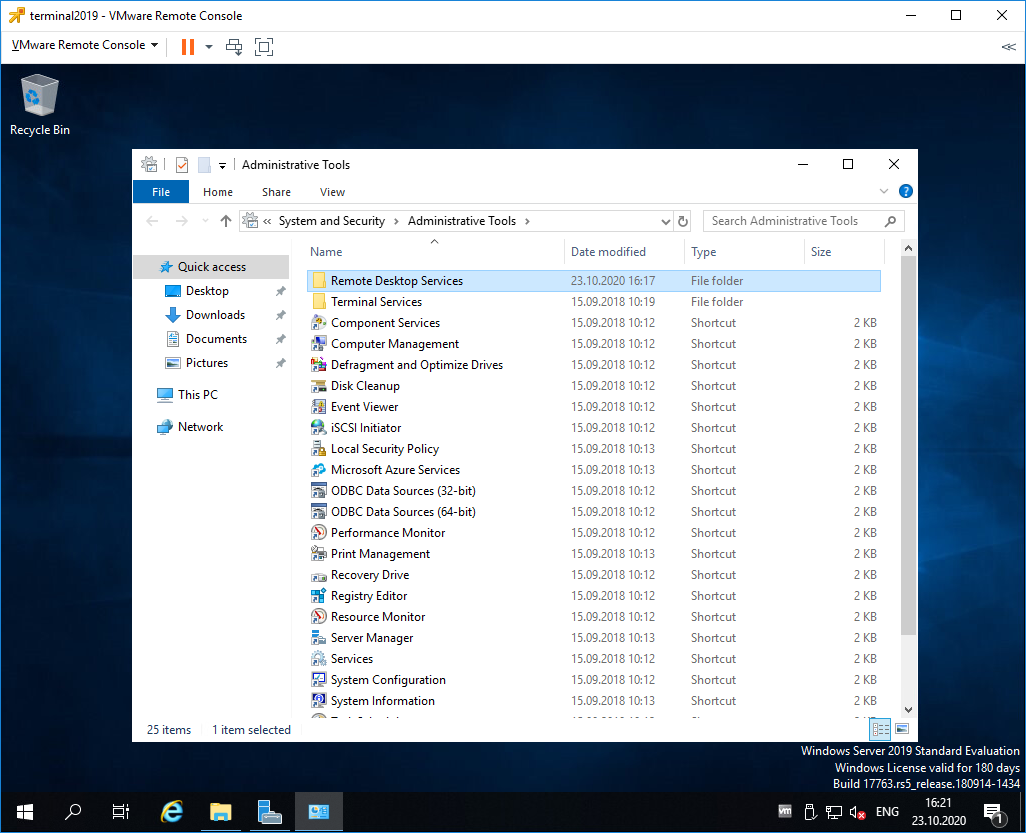
Переходим в папку Remote Desktop Services.
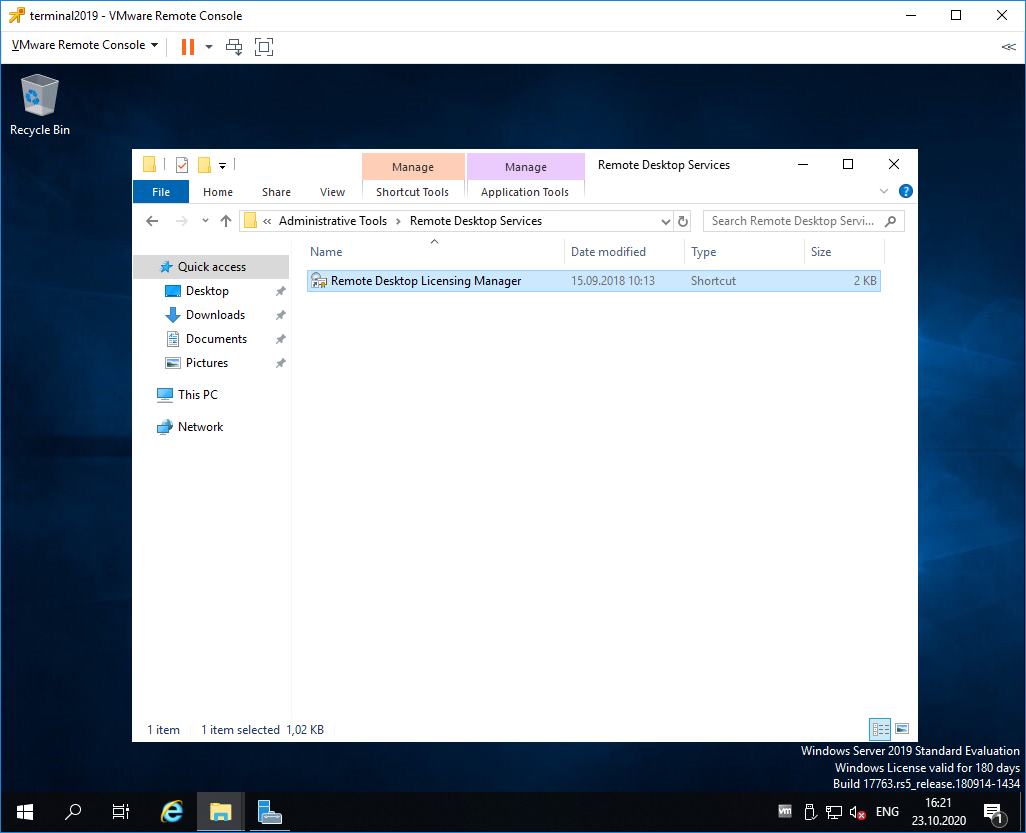
Запускаем оснастку Remote Desktop Licensing Manager.
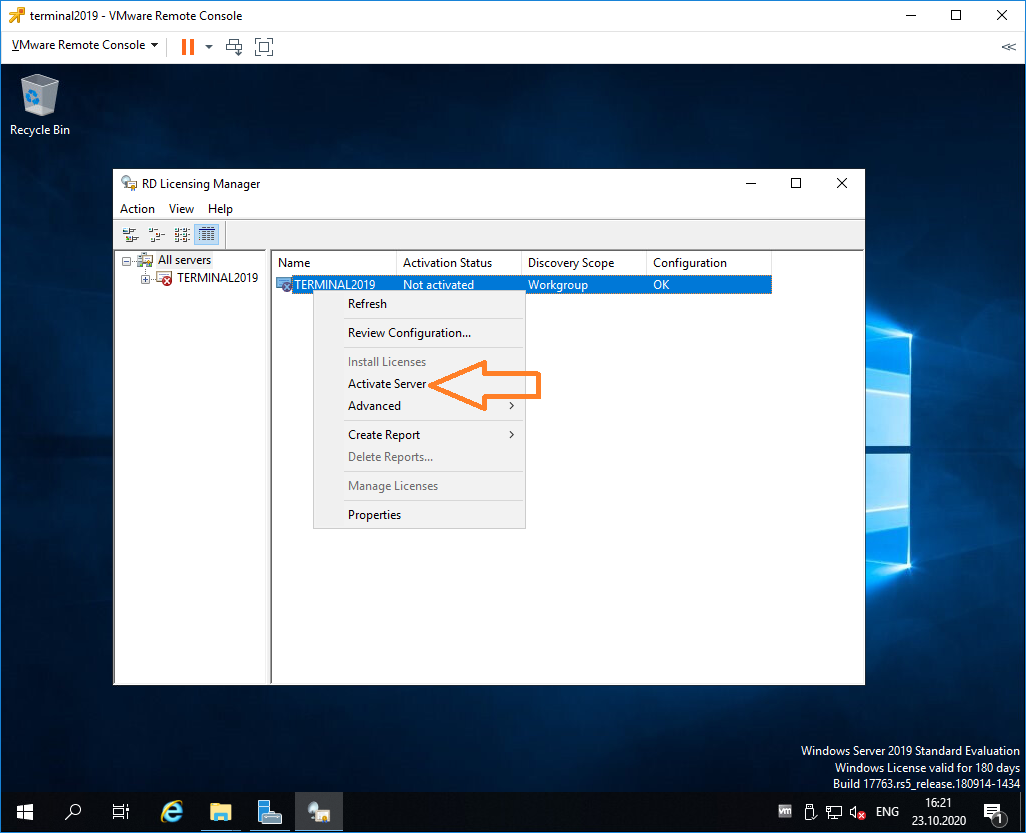
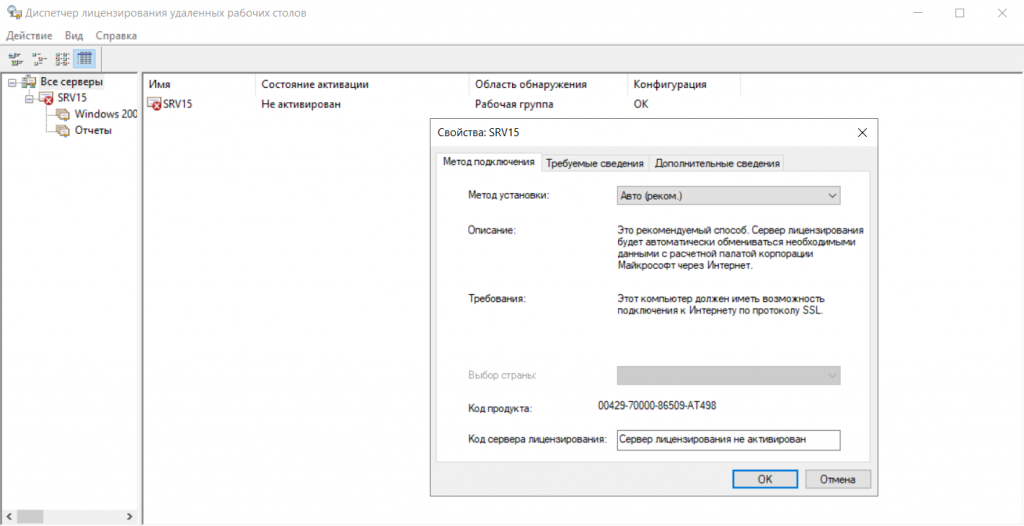
Выбираем наш сервер, правой кнопкой — активировать.
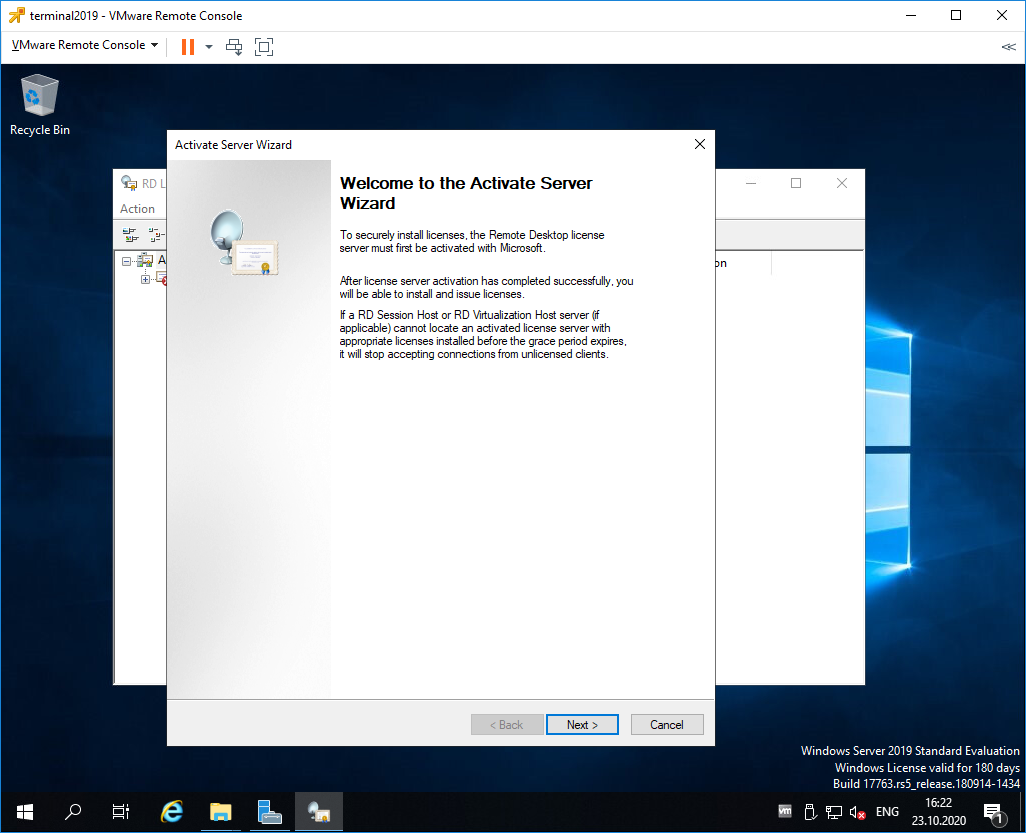
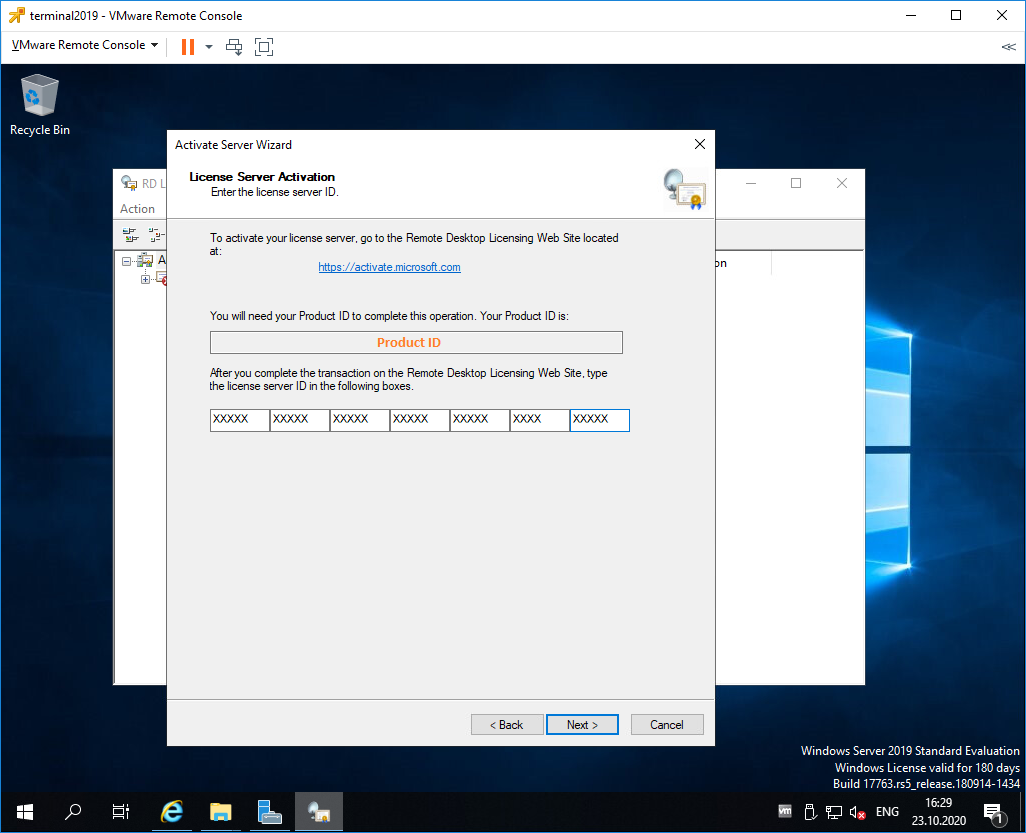
Открывается окно активации. Next.
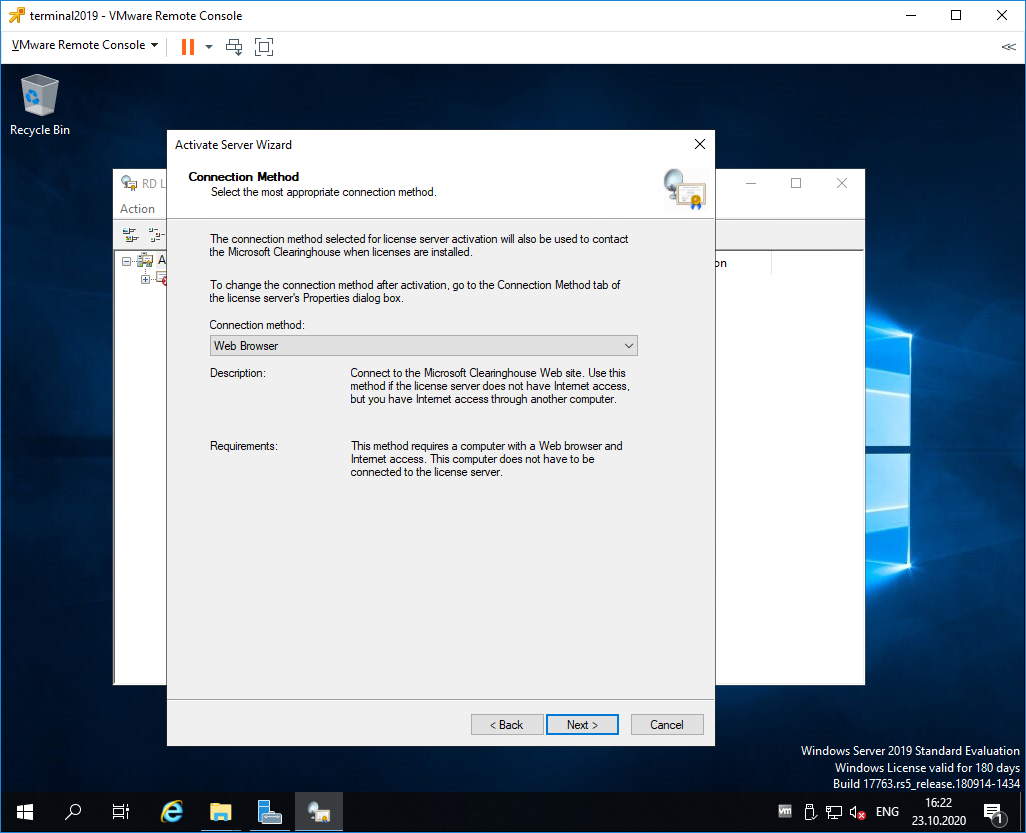
Выбираем метод соединения Web Browser. Next.
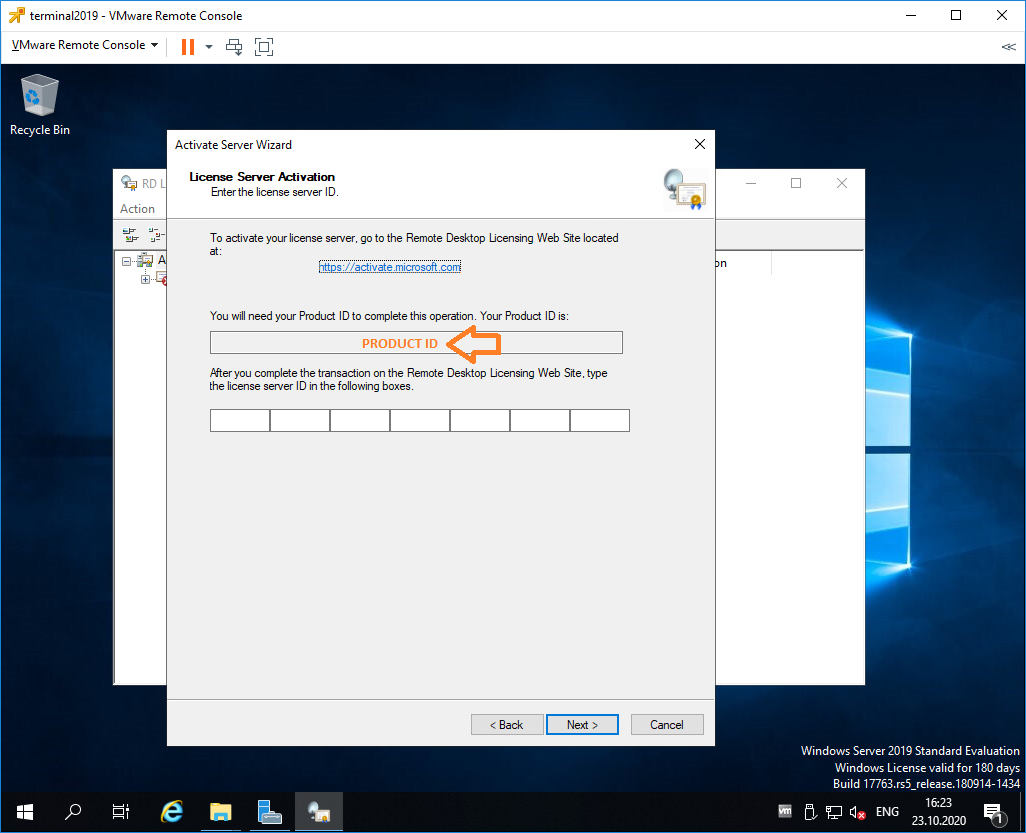
Получаем код продукта который нам понадобится для активации (Product ID). Копируем.
В браузере открываем сайт https://activate.microsoft.com/
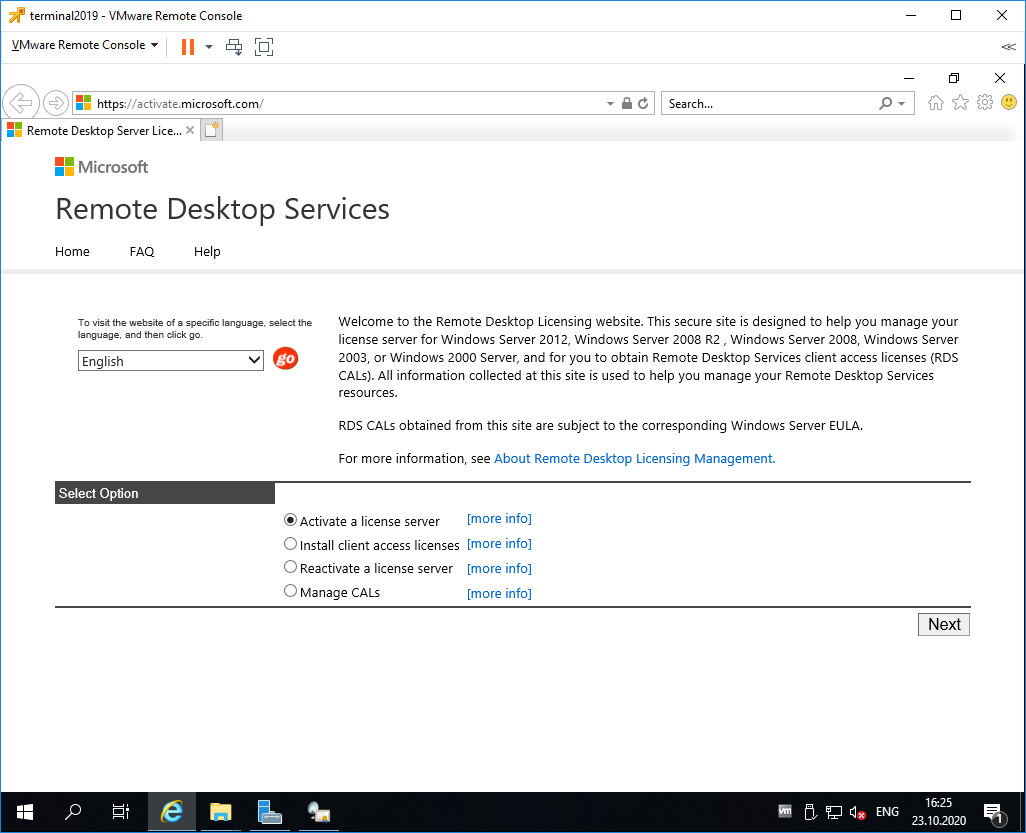
Выбираем «Activate a license server». Next.
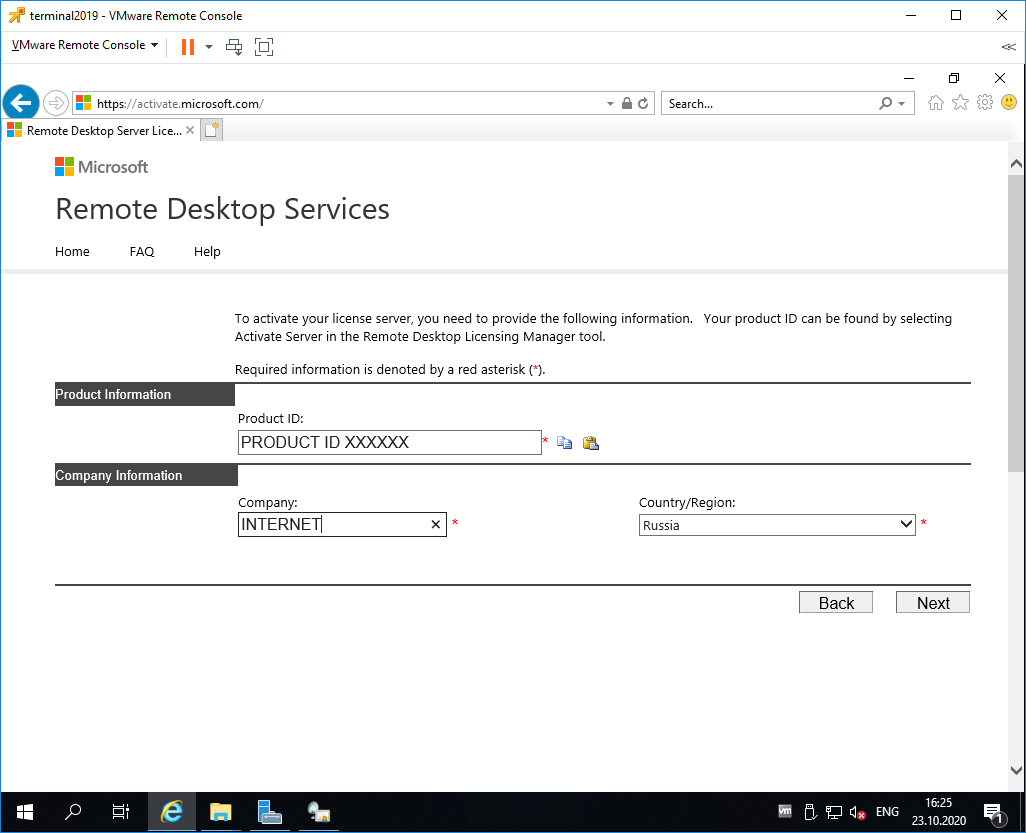
Вводим Product ID полученный ранее, организацию и любую страну или регион. Next. Next.
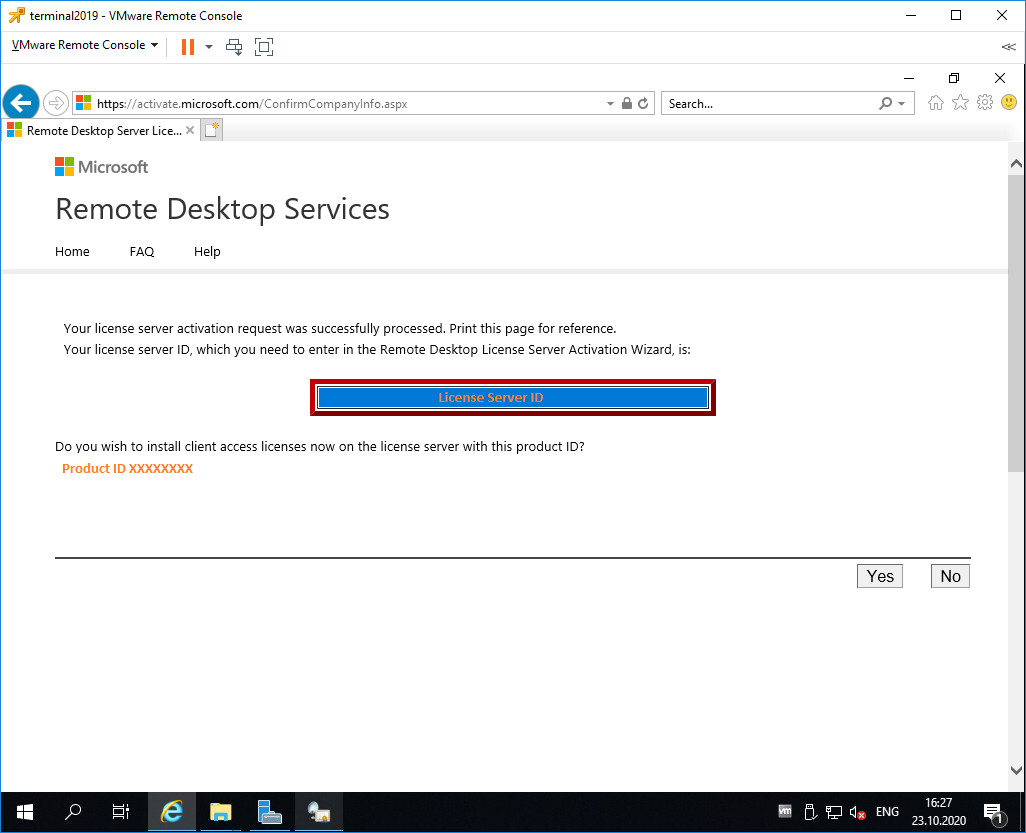
Если все сделано правильно, то мы получим необходимый код сервера лицензирования. Копируем его. На вопрос «Do you wish to install client access licenses now on the license server with this product ID?» отвечаем «Yes» и пока возвращаемся к терминальному серверу, к текущему окну ещё вернёмся.
Вводим код в открытом мастере, жмём Next.
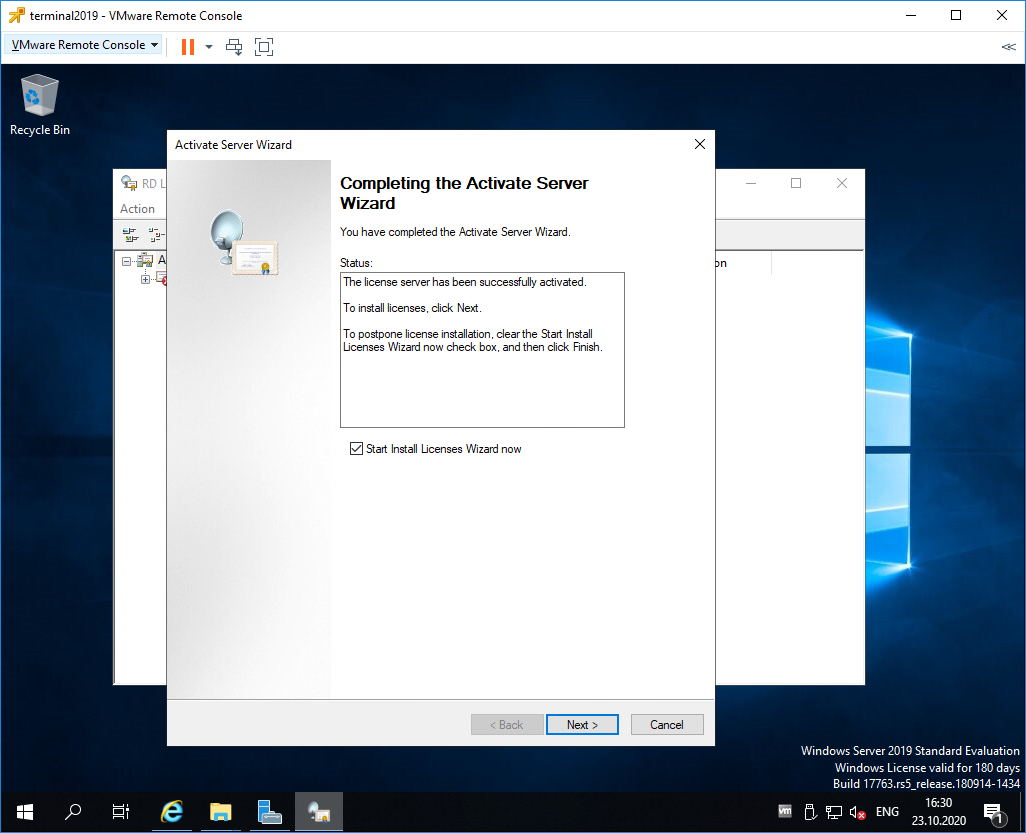
Устанавливаем галку «Start Install Licenses Wizard now». Next.
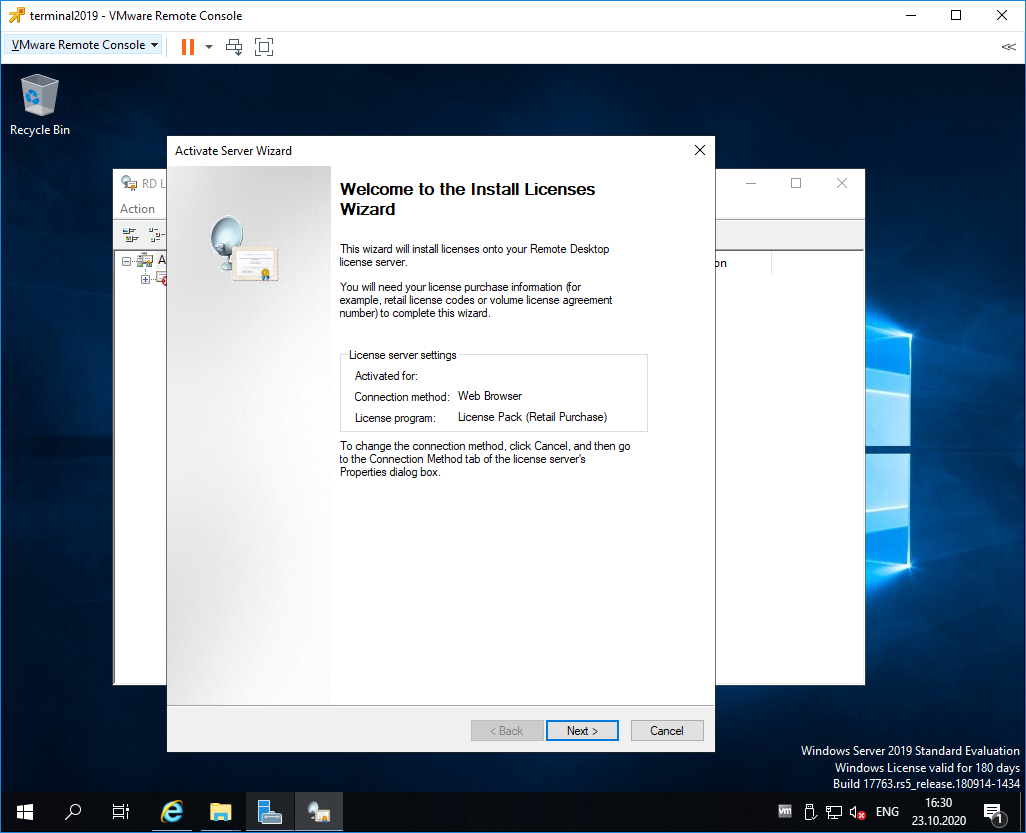
Открывается мастер установки лицензий. Next.

Нас просят ввести license key pack ID. Возвращаемся к браузеру.
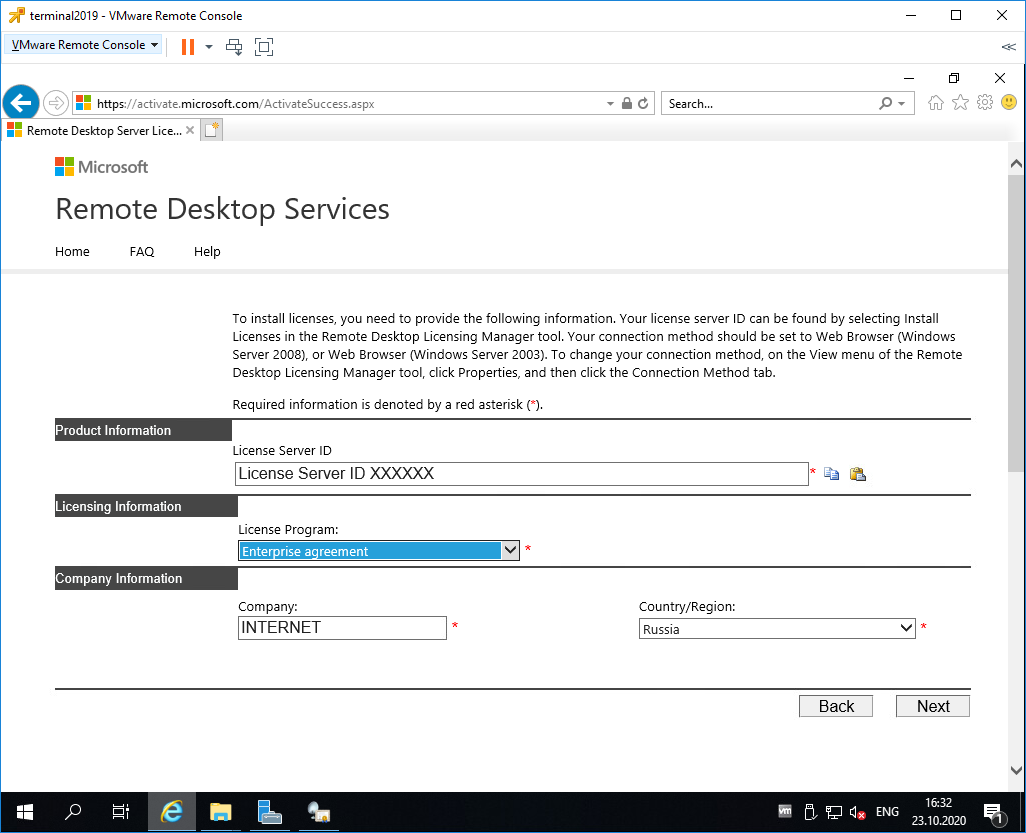
Вставляем License Server ID, в качестве программы лицензирования, по идее он уже должен сюда переместиться из предыдущего окна. License Program выбираем Enterprise agreement. Указываем компанию и страну. Next.
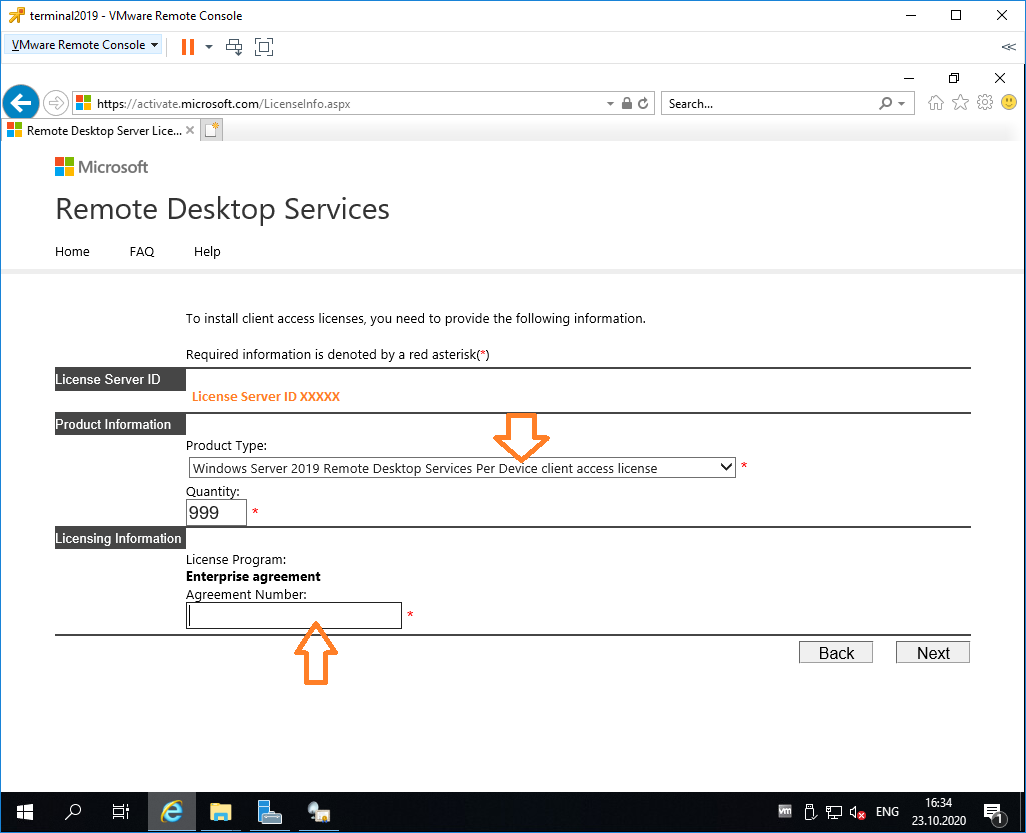
Выбираем тип продукта: Windows Server 2019 Remote Desktop Services Per Device client access license. Указываем количество лицензий. Обязательно соглашение Enterprise agreement, или ищем в интернете который подойдет…
Настройка и лицензирование терминального сервера Windows Server 2016
Не стоит выбирать лицензии Per User, иначе потом вы получите такую ошибку:
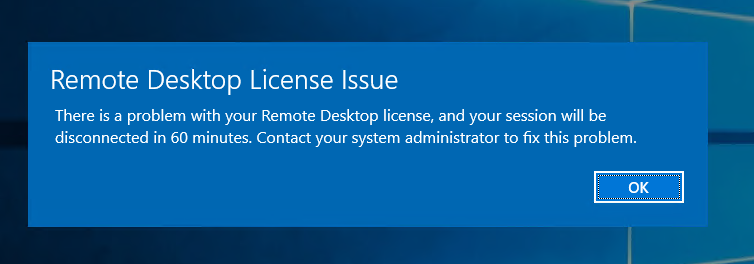
Next.
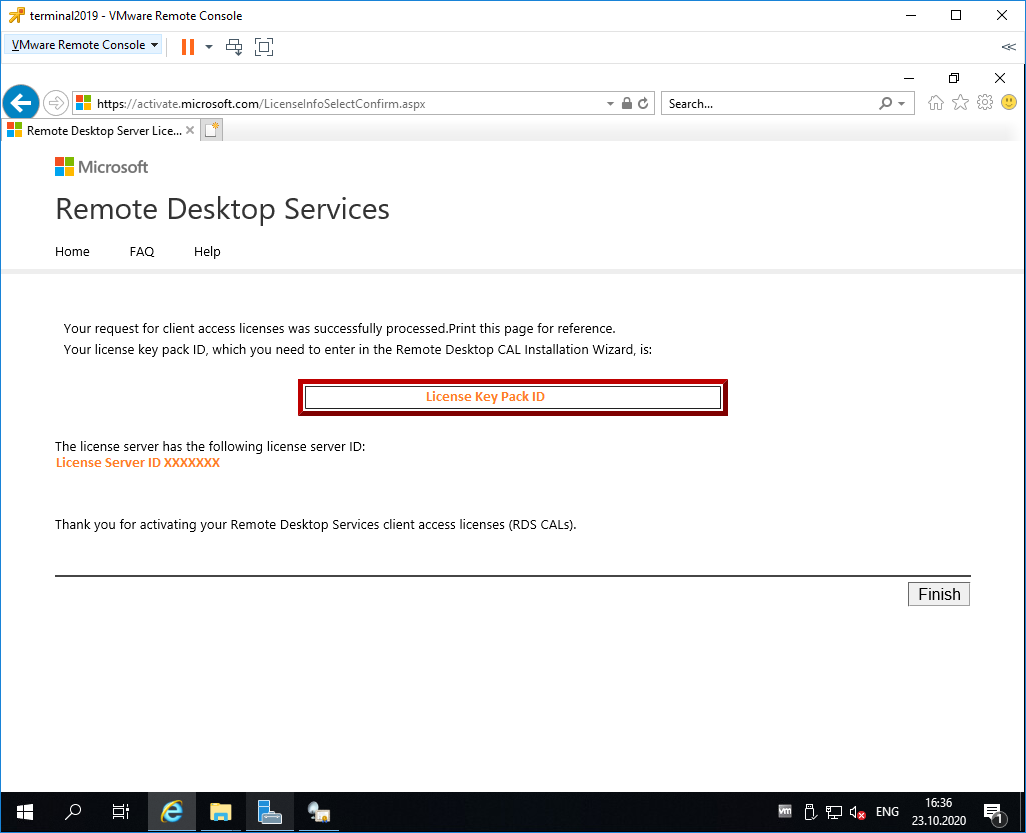
Ну вот мы и получили нужные нам клиентские лицензии. Копируем.
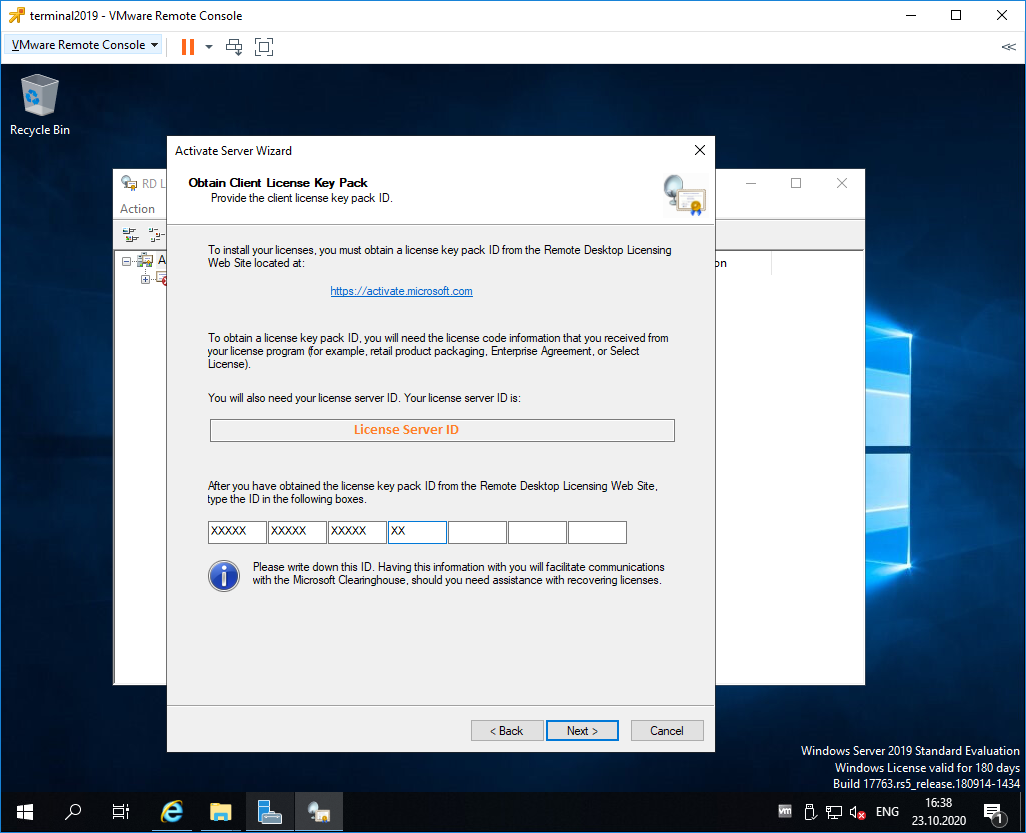
Вводим ключ в мастер. Next.
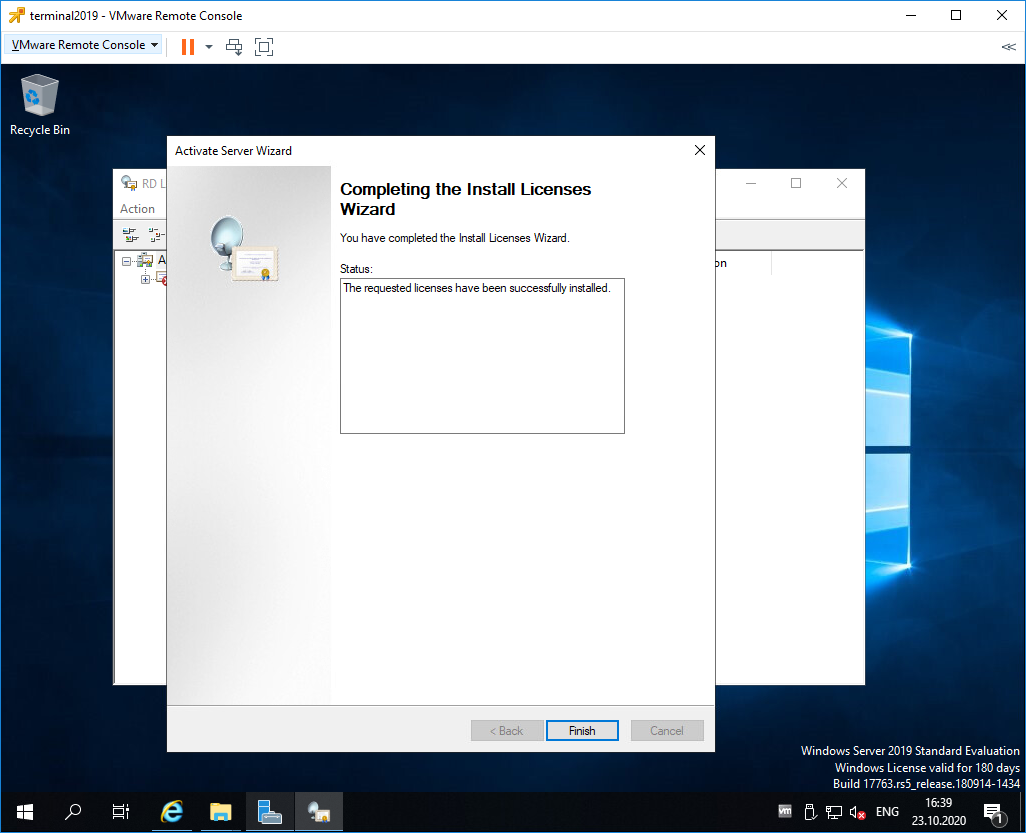
Finish.
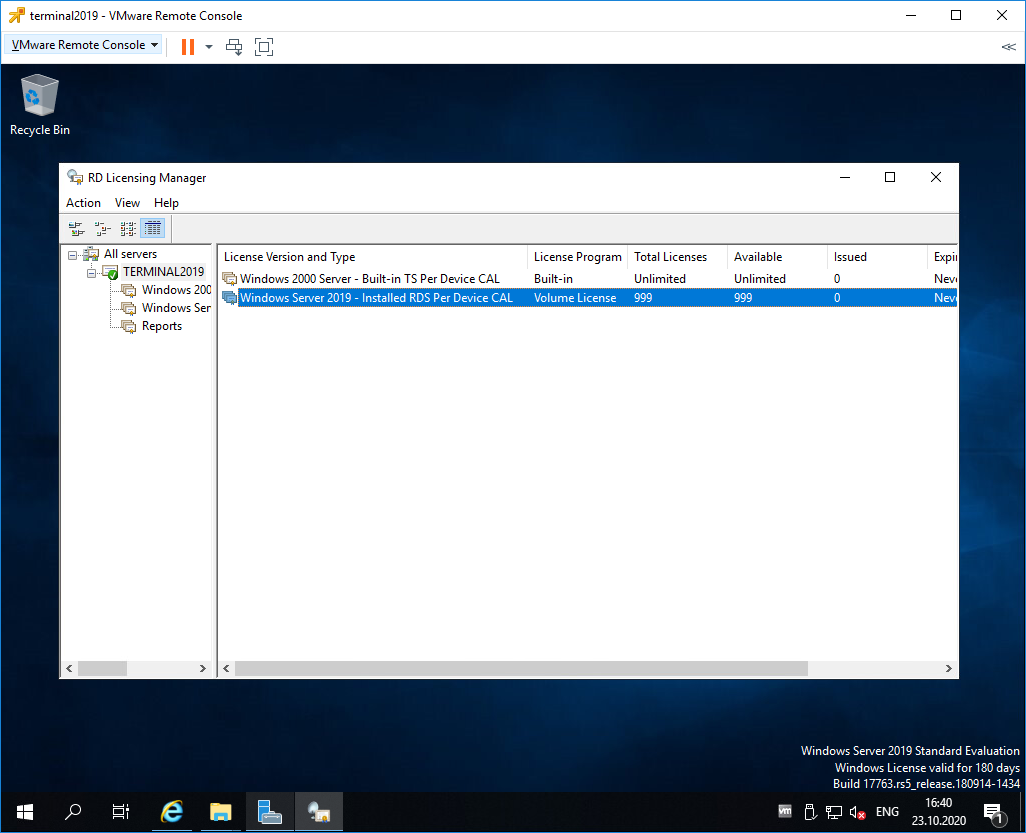
Возвращаемся к Remote Desktop Licensing Manager. Сервер активирован. Лицензии получены. Кстати, они начнут тратиться после окончания триального периода.
Роль Remote Desktop Session Host
Входим в Server Manager. Справа вверху выбираем Manage > Add Roles and Features.
Попадаем в раздел Before You Begin.

Это начальная страница, пропускаем. Next.
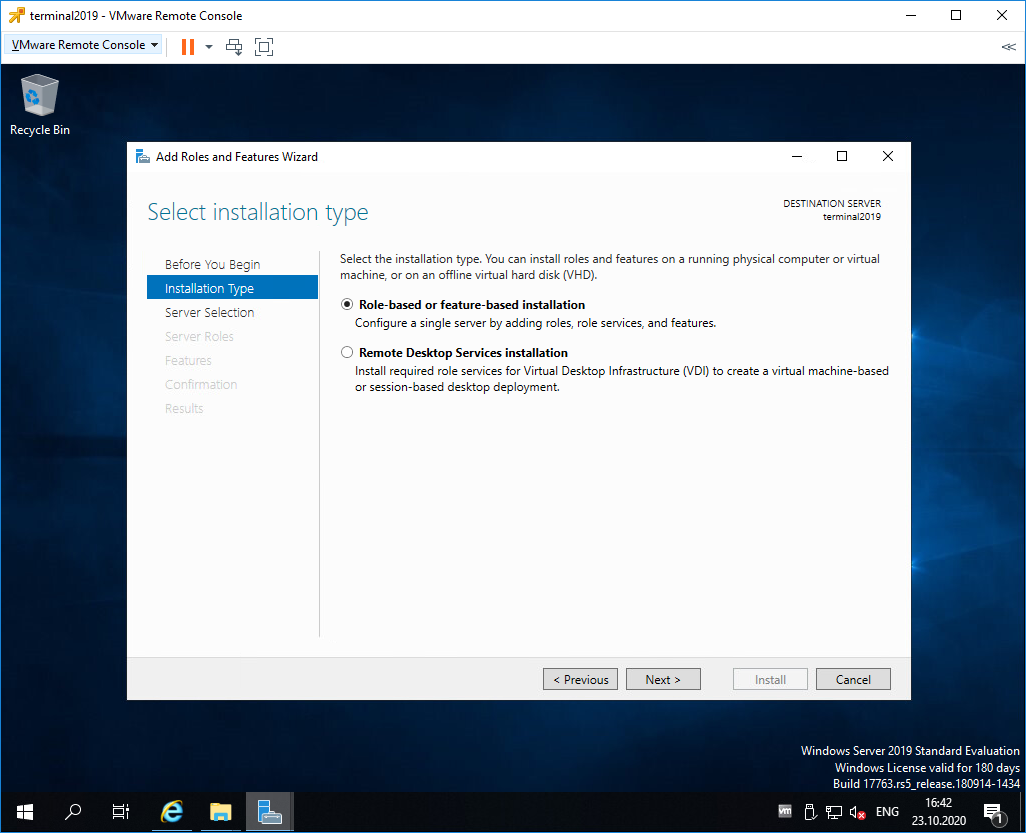
Попадаем в раздел Installation Type. Выбираем Role-based or feature-based installation. Next.
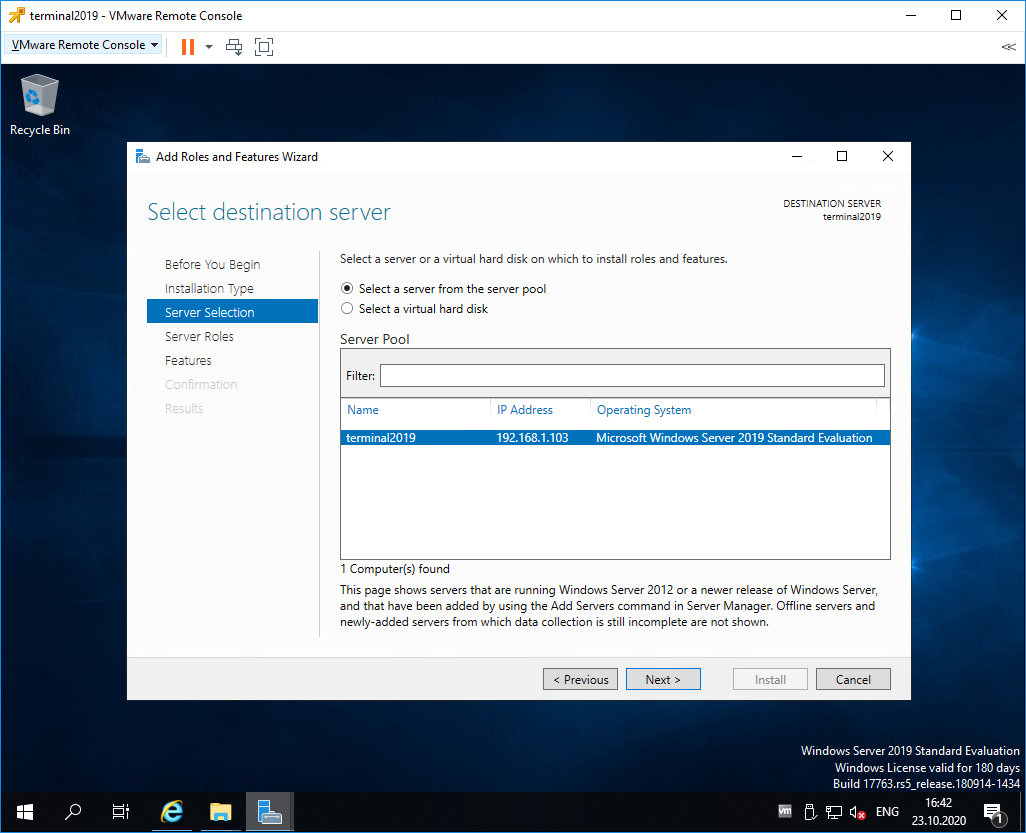
Попадаем в раздел Server Selection. Выбираем текущий сервер. Next.

Попадаем в раздел Server Roles. Выделяем галкой роль Remote Desktop Session Host.
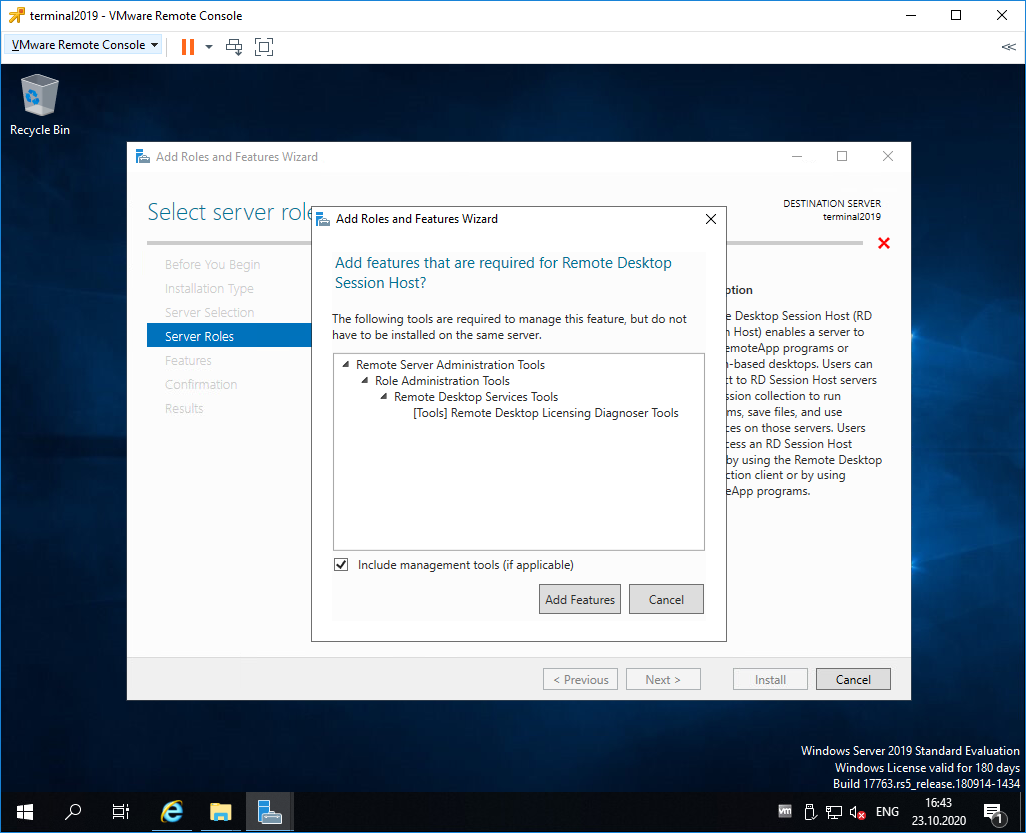
Нам предлагают установить дополнительные фичи, соглашаемся. Add Features.
Роль Remote Desktop Session Host выделена. Next.
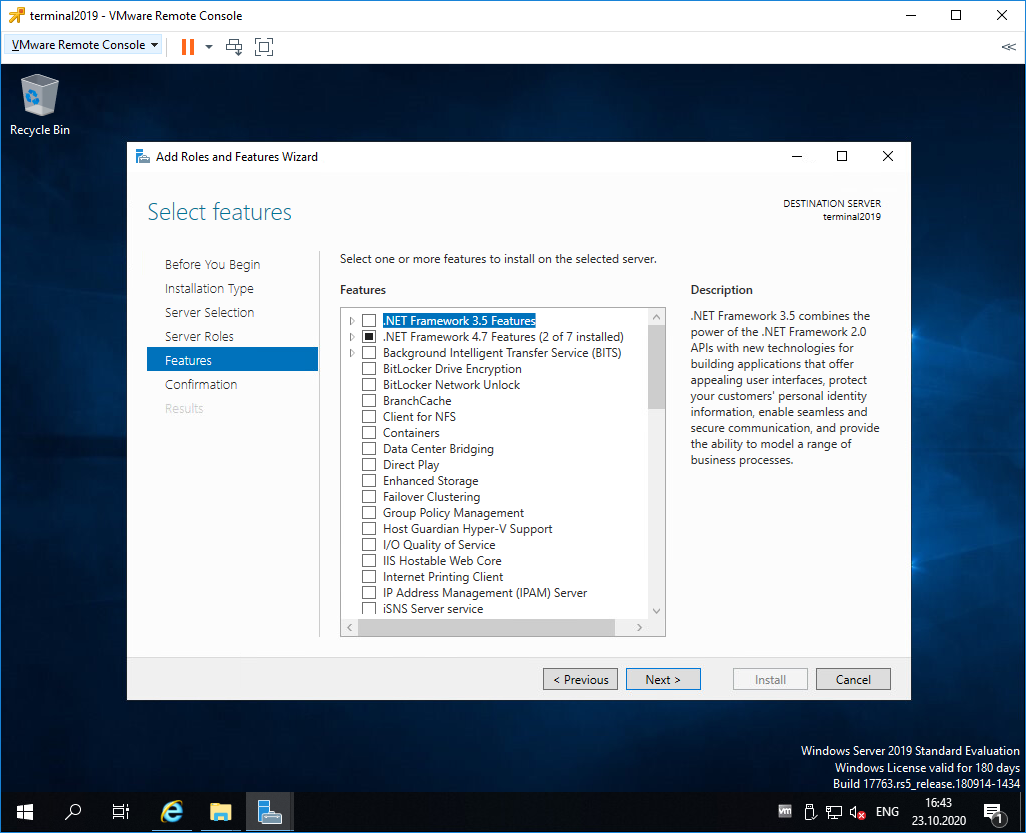
Попадаем в раздел Features, ничего не выделяем. Next.
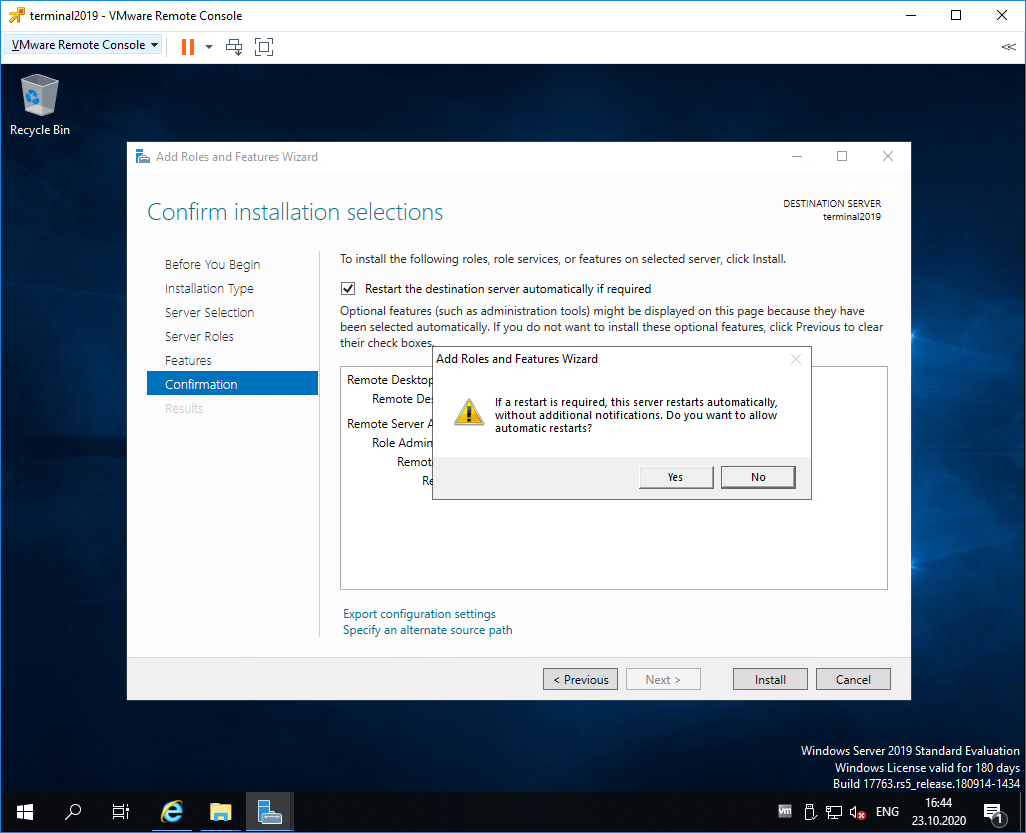
Попадаем в раздел Confirmation. Ставим галку Restart the destination server automatically if required. Отображается предупреждение, что сервер может быть перезагружен. Yes.
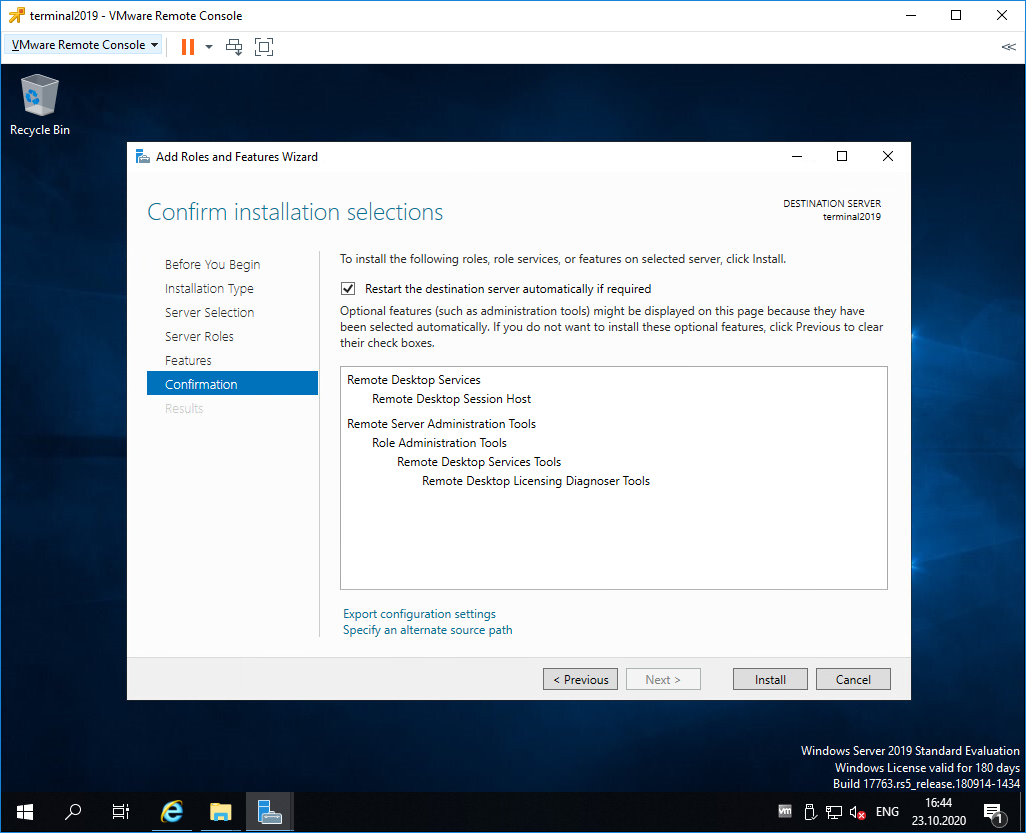
Install.
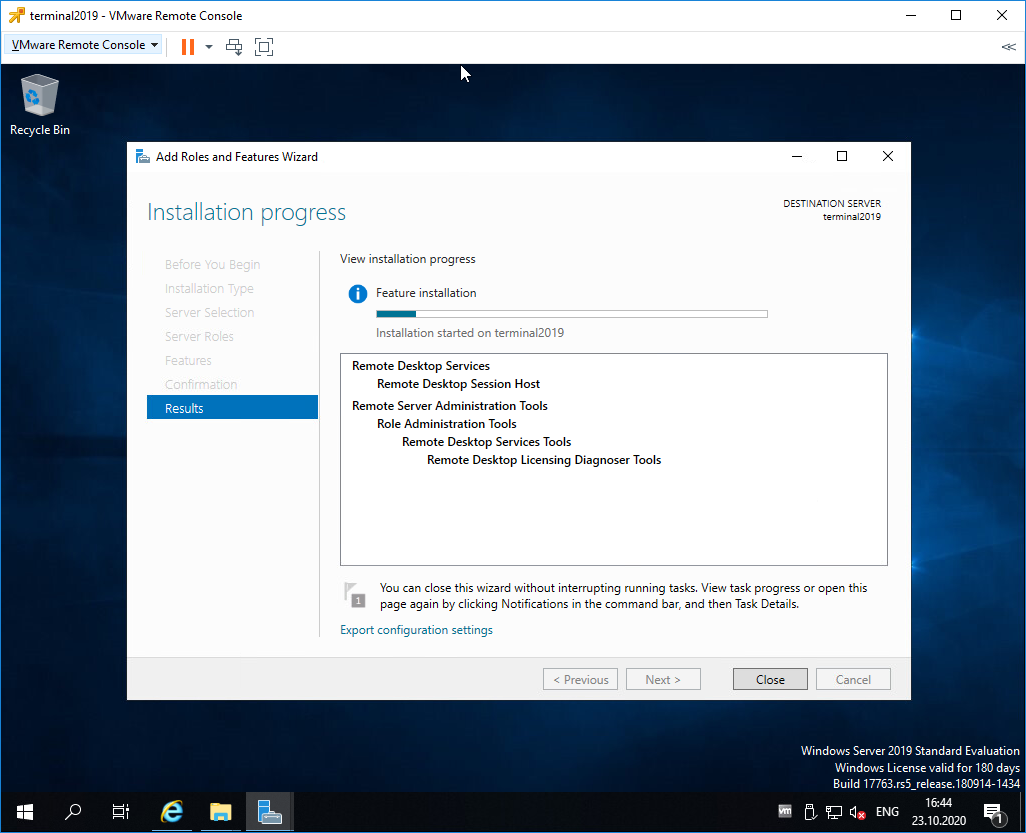
Начинается процесс установки роли.

Сервер перезагружается.
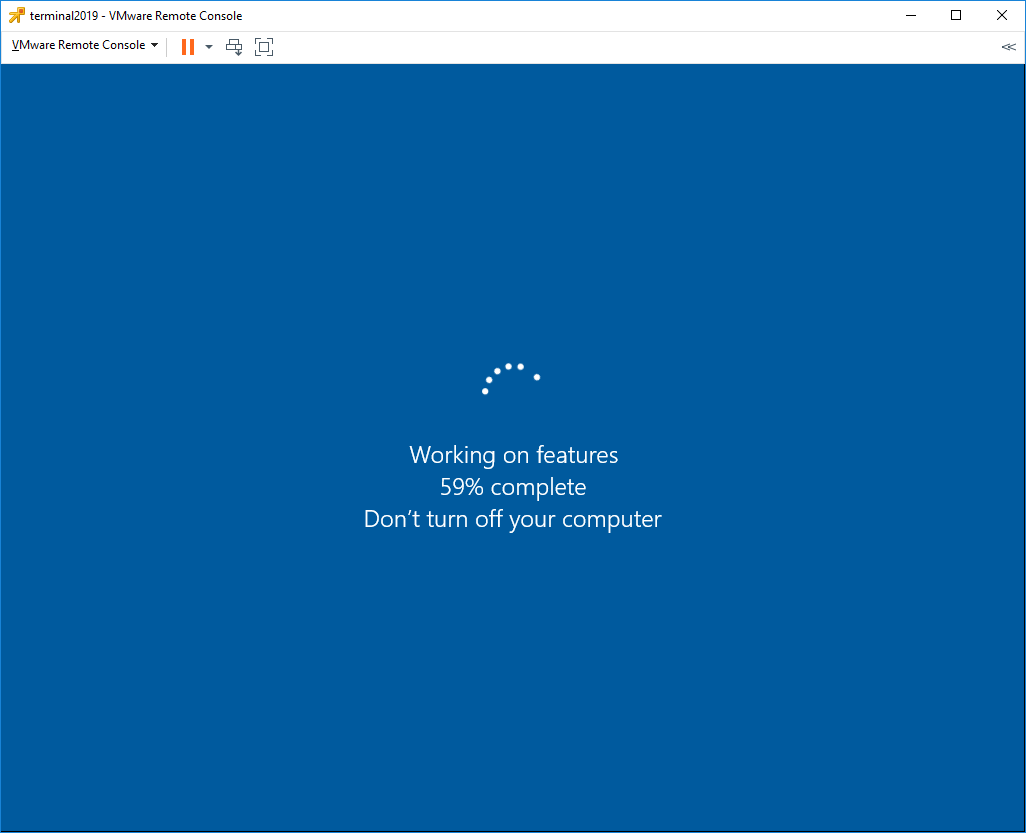
В процессе устанавливаются компоненты.
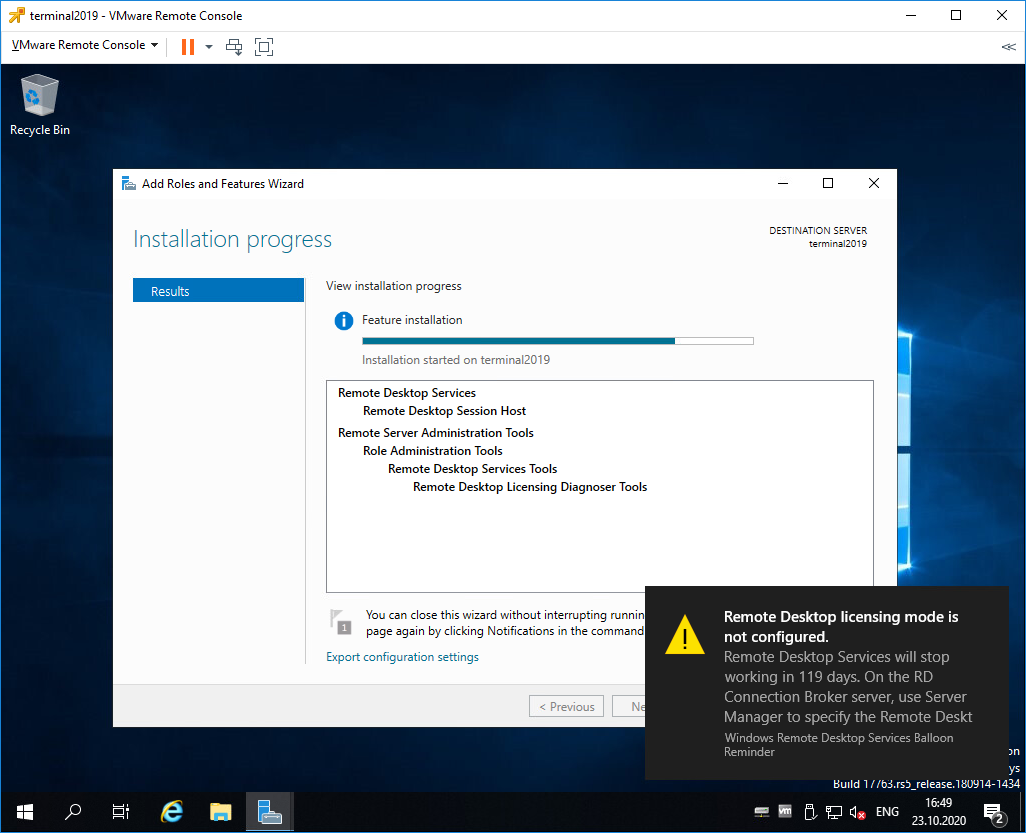
После перезагрузки автоматически продолжается установка роли. Триальный период работы терминального сервера — 119 дней.
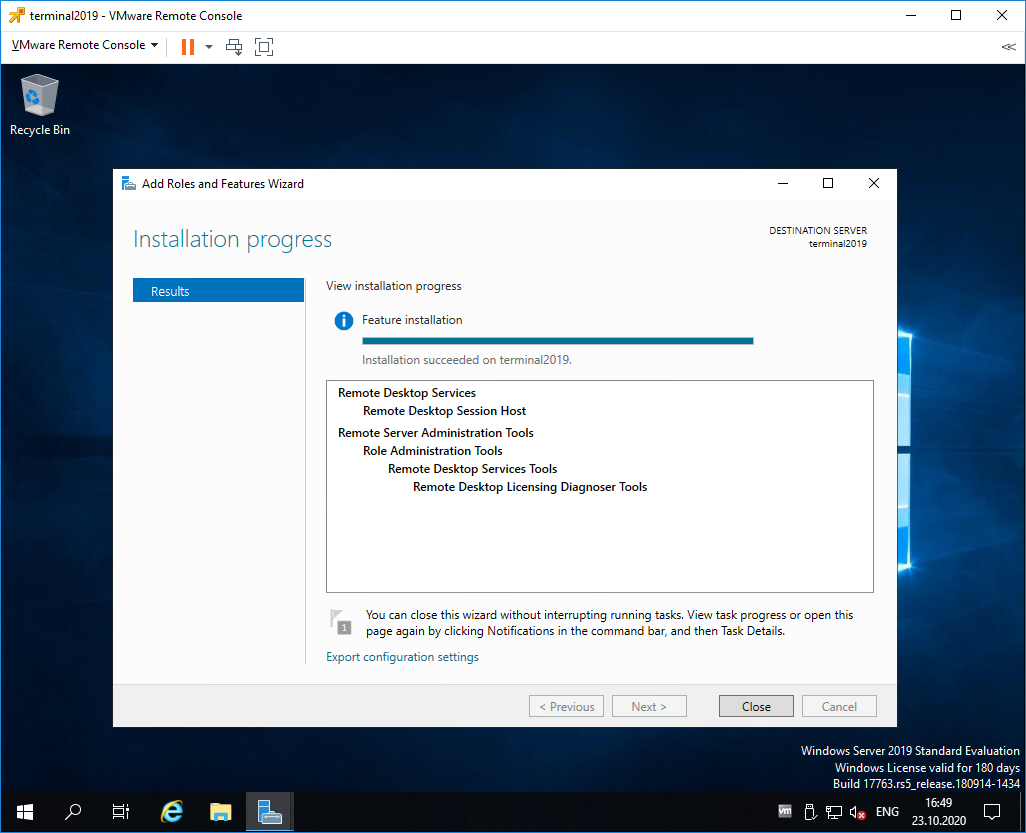
Роль Remote Desktop Session Host успешно установлена. Close.
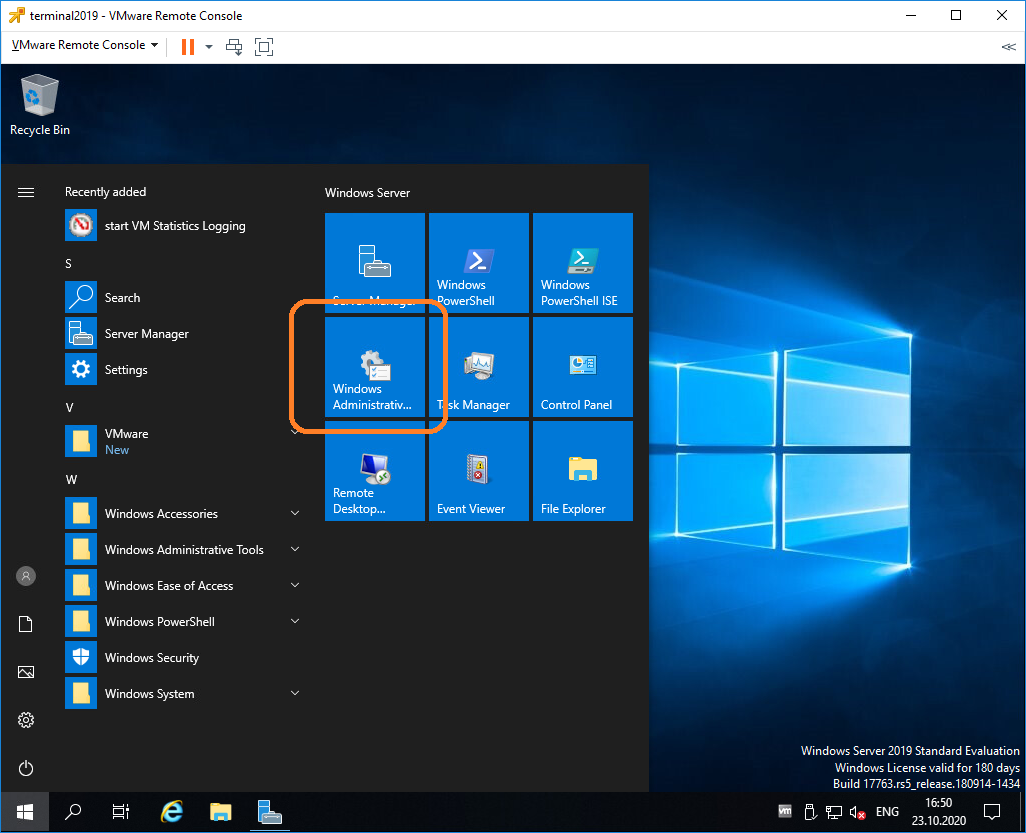
Открываем Windows Administrative Tools.
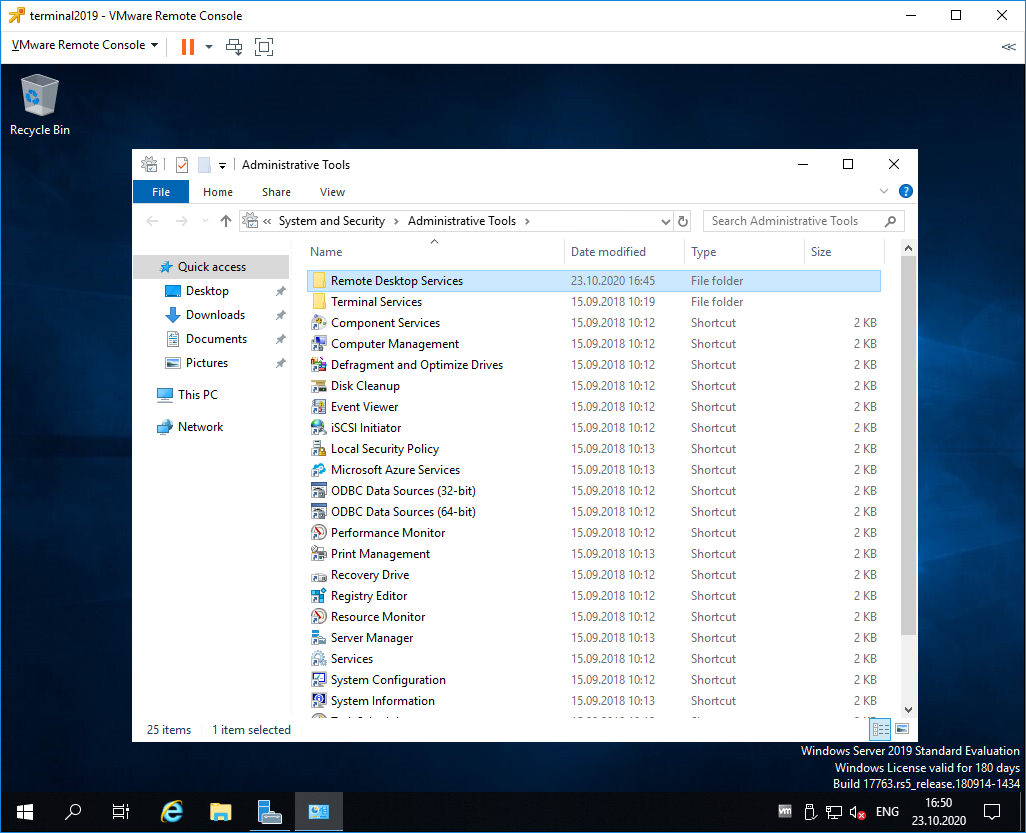
Переходим в папку Remote Desktop Services.
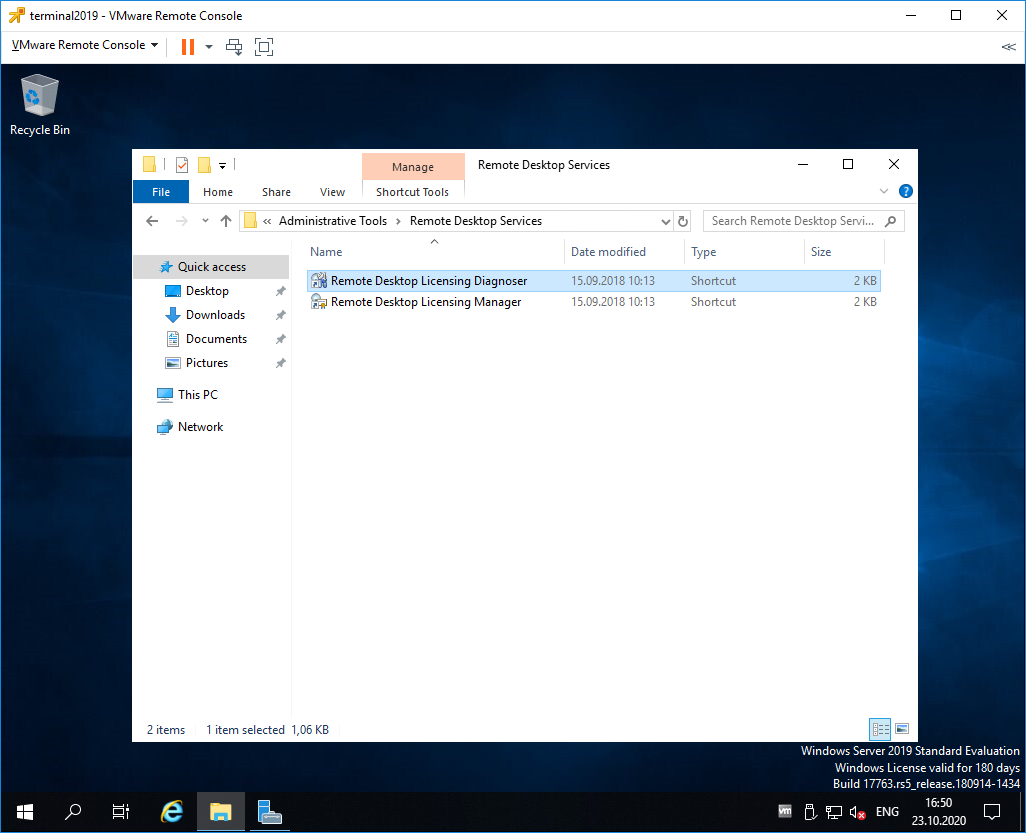
Запускаем оснастку Remote Desktop Licensing Diagnoser.
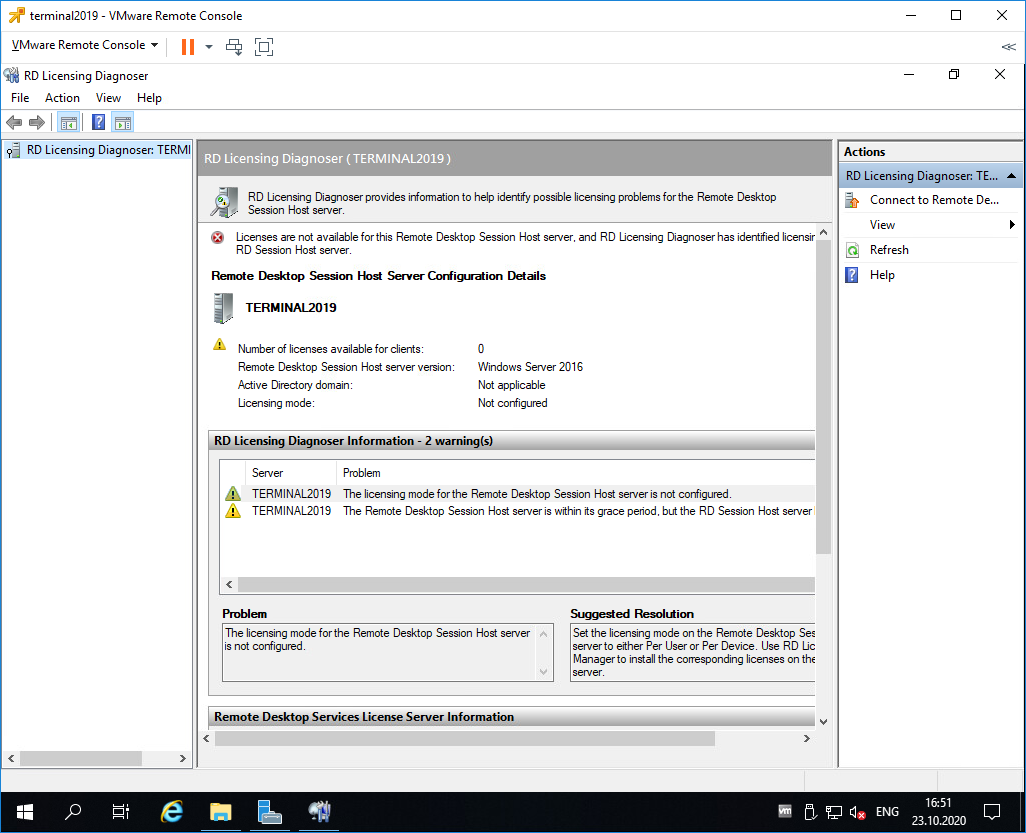
Видим ошибку.
The licensing mode for Remote Desktop Session Host server is not configured.
Выполняем gpedit.msc.
gpedit.msc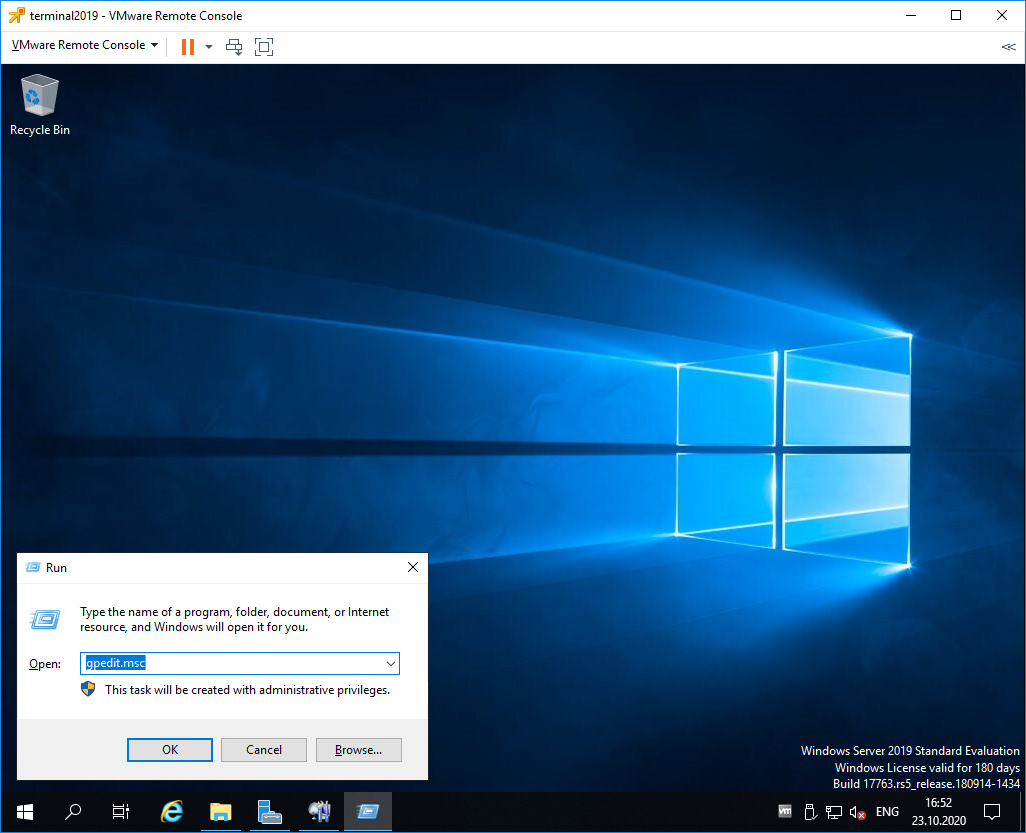
Откроется Local Group Policy Editor.
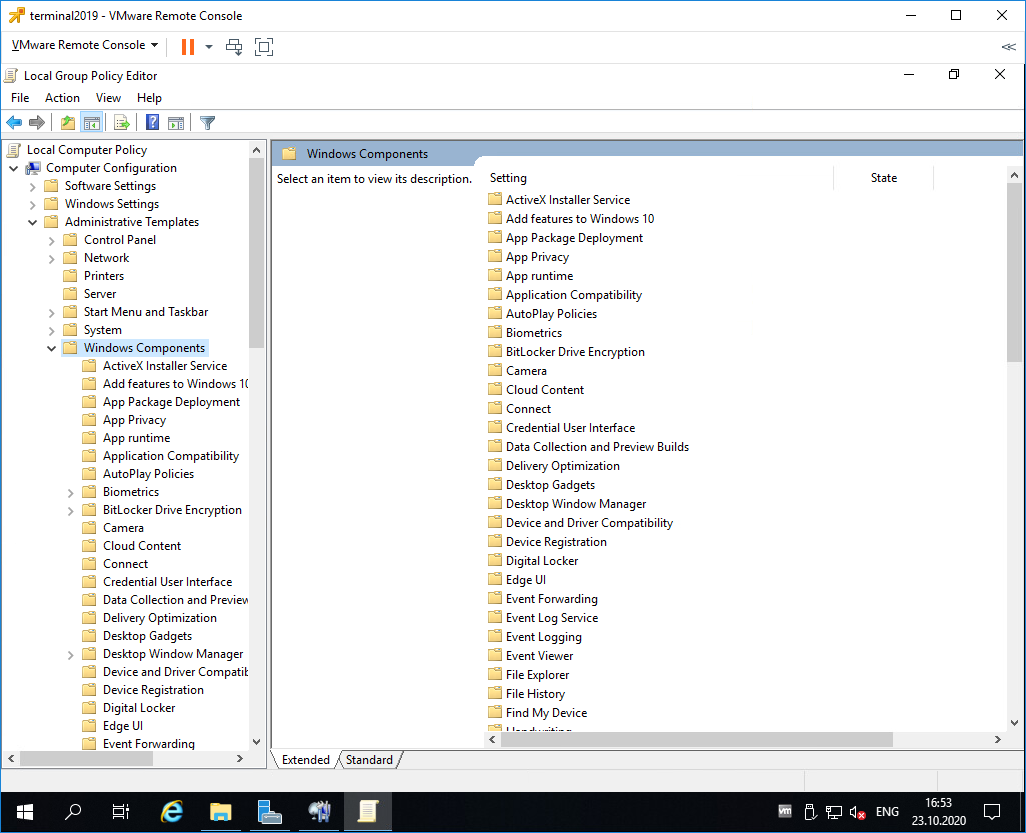
Раскрываем Computer Configuration > Administrative Templates > Windows Components > Remote Desktop Services > Remote Desktop Session Host > Licensing.
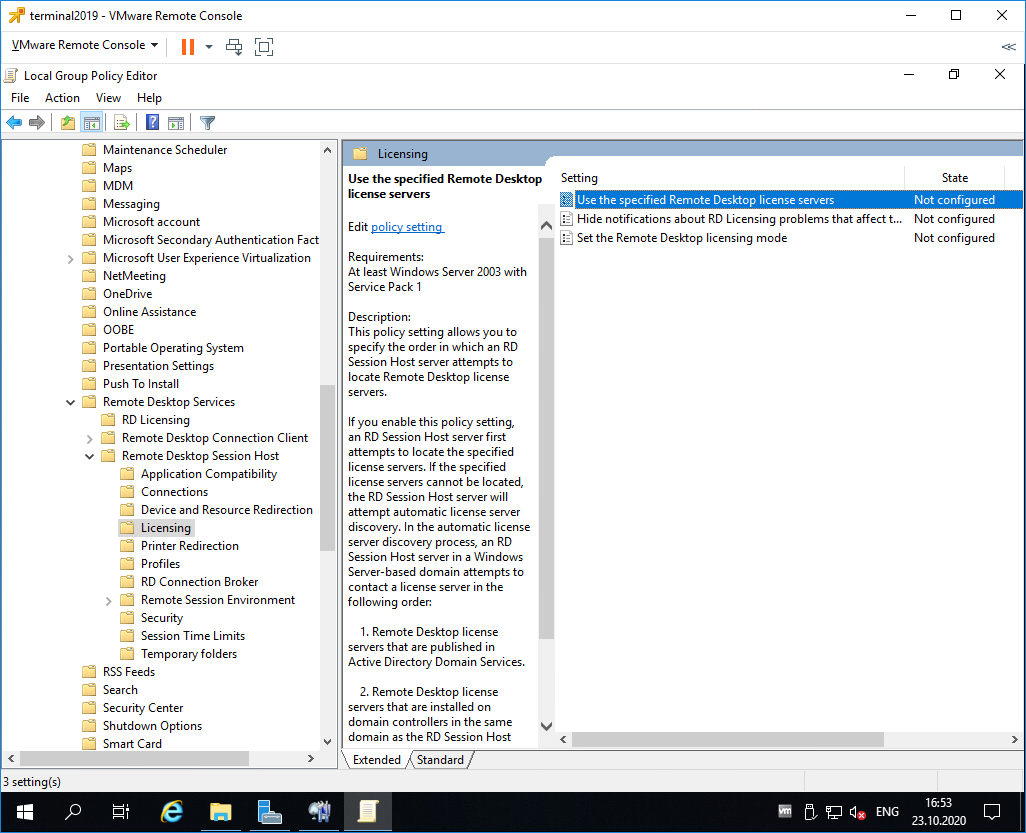
Редактируем Use the specified Remote Desktop license servers.
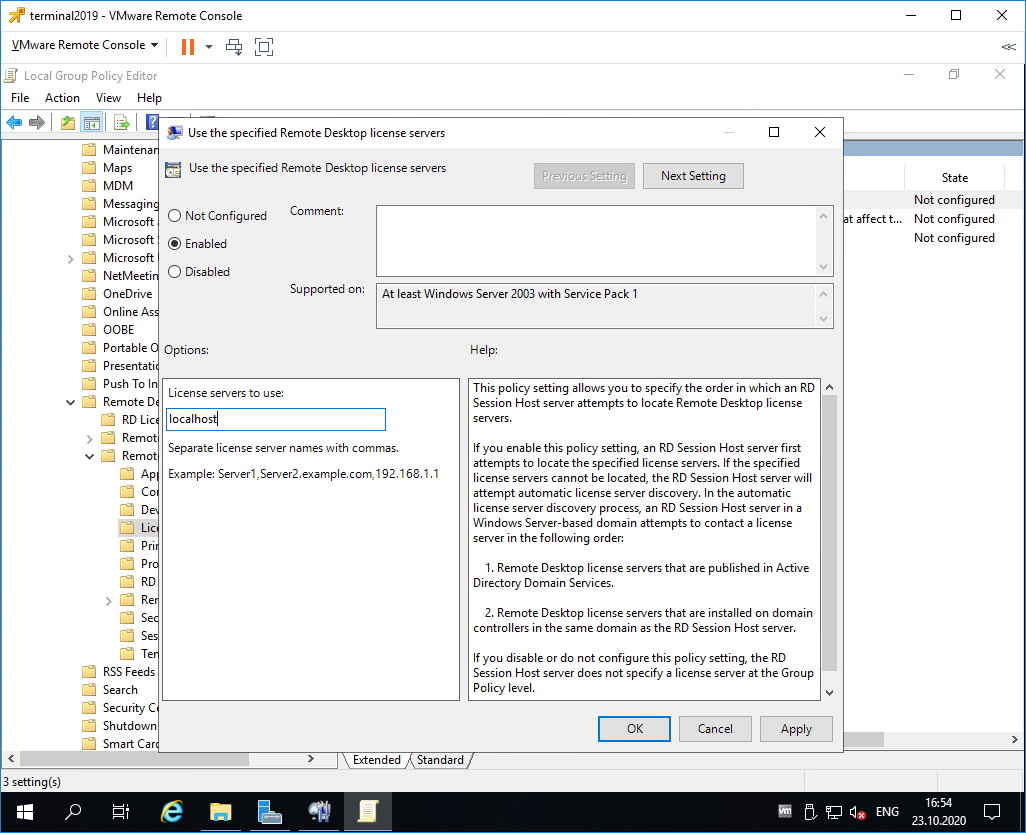
Включаем — Enabled. В поле «License server to use» прописываем сервер, с которого получать лицензии, в моём случае «localhost». OK.
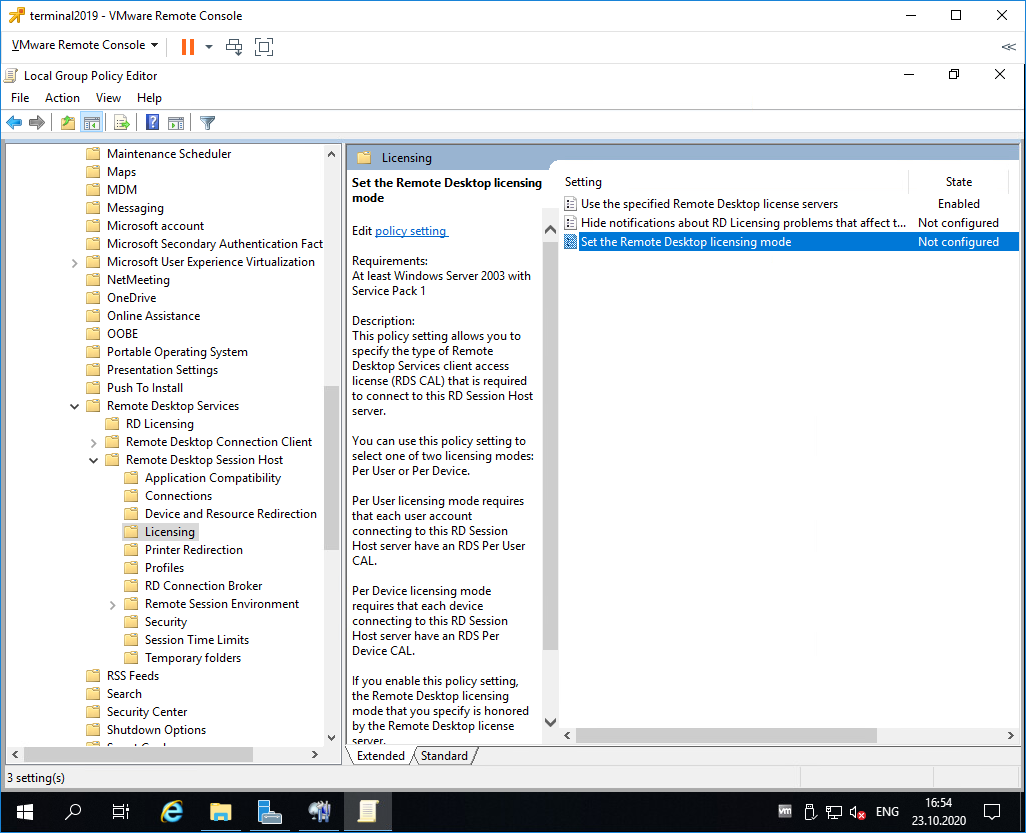
Редактируем Set the Remote Desktop licensing mode.
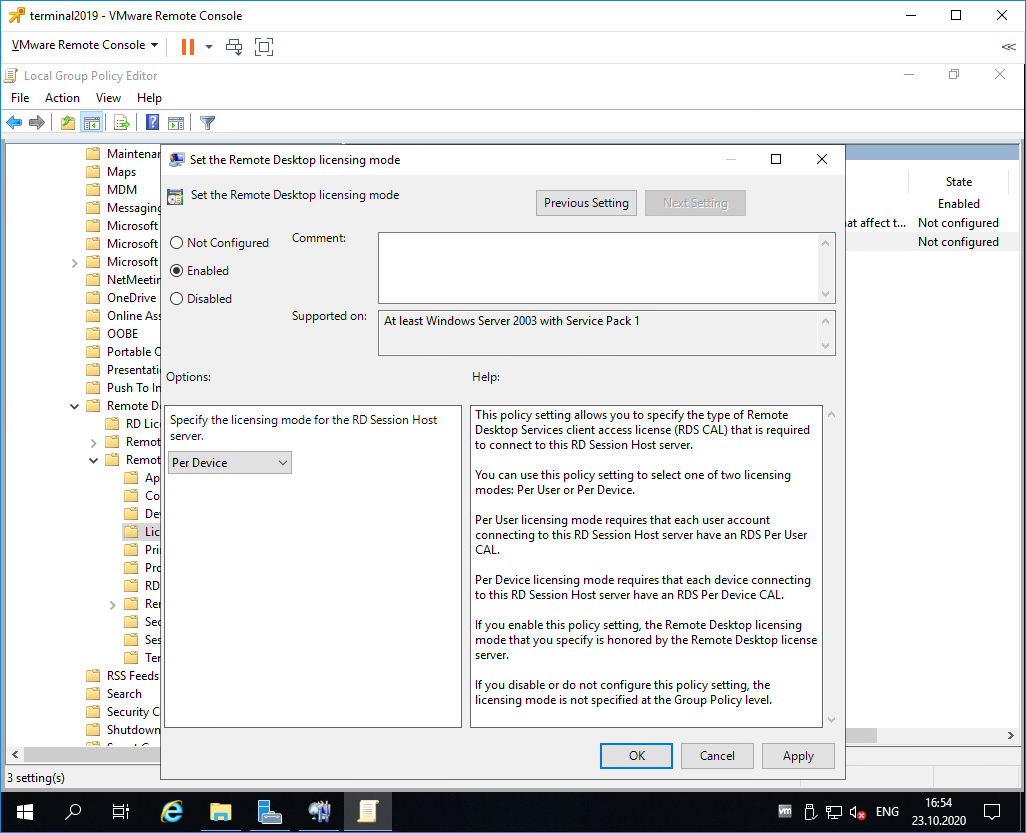
Включаем — Enabled. В поле «Specify the licensing mode for the RD Session Host server» устанавливаем значение Per Device. OK.
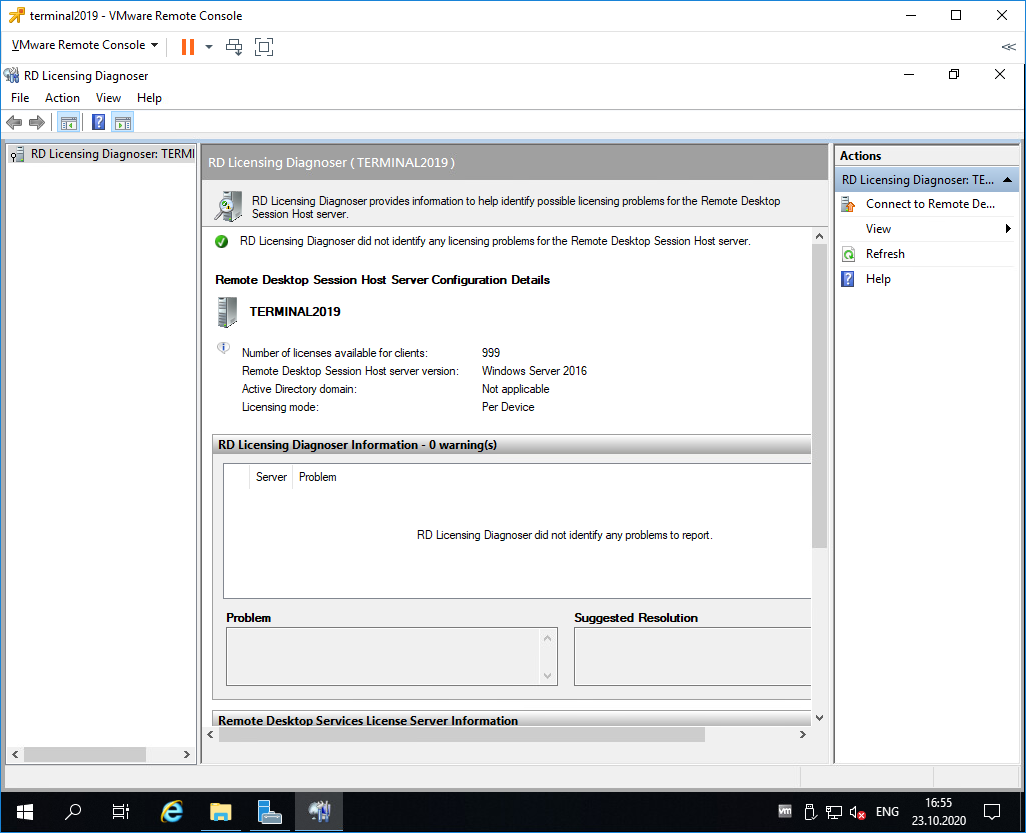
Снова запускаем оснастку Remote Desktop Licensing Diagnoser. Теперь всё зелёное, ошибок нет.
Практические испытания
Поскольку мы с вами системные администраторы 99 уровня, то нам нужно провести практические испытания терминального сервера.
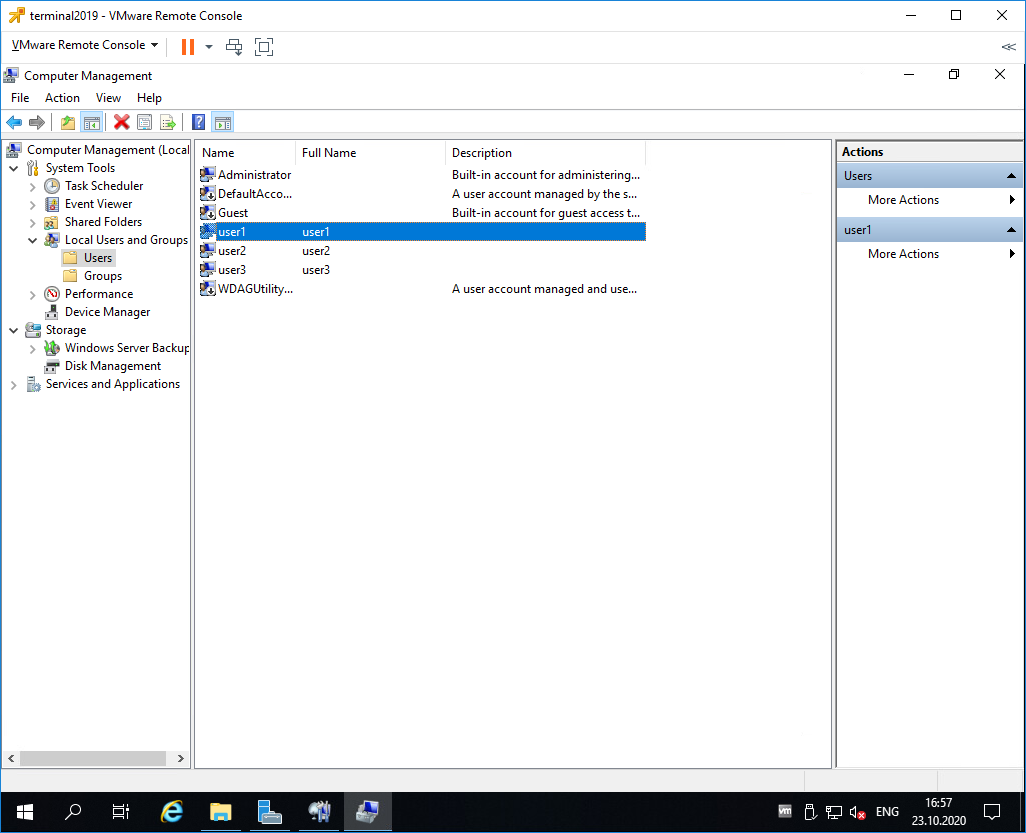
На терминальном сервере создаём трёх локальных пользователей: user1, user2, user3.
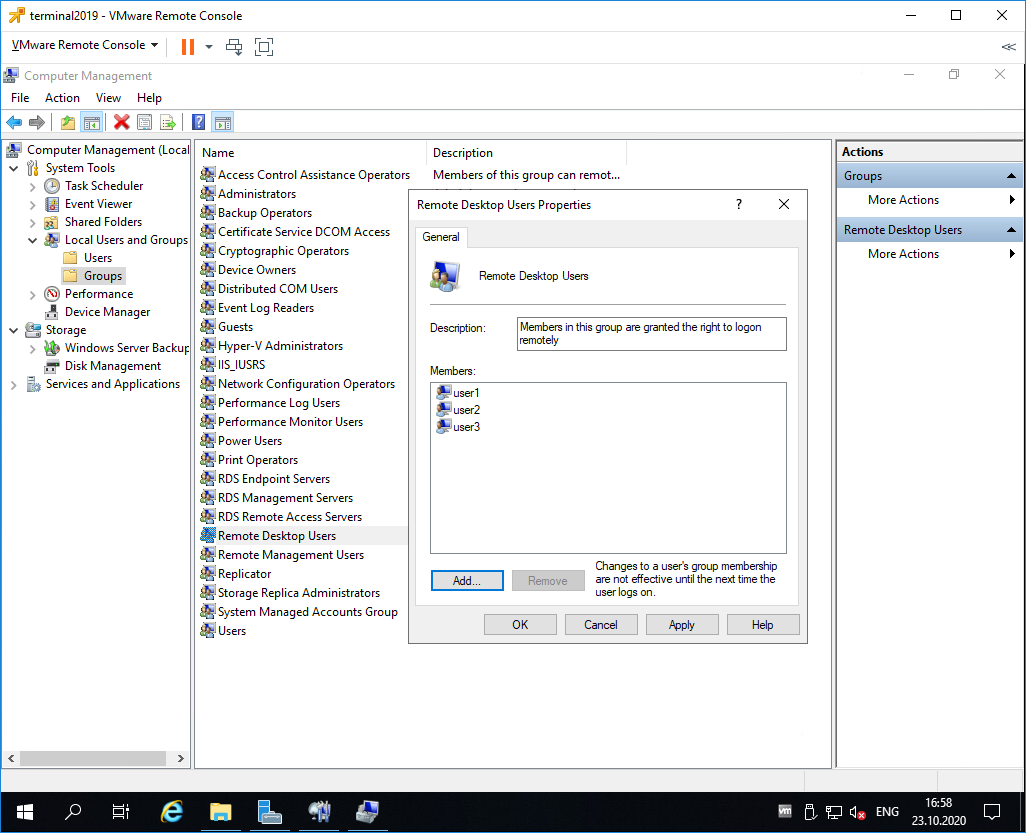
Включаем их в группу Remote Desktop Users.
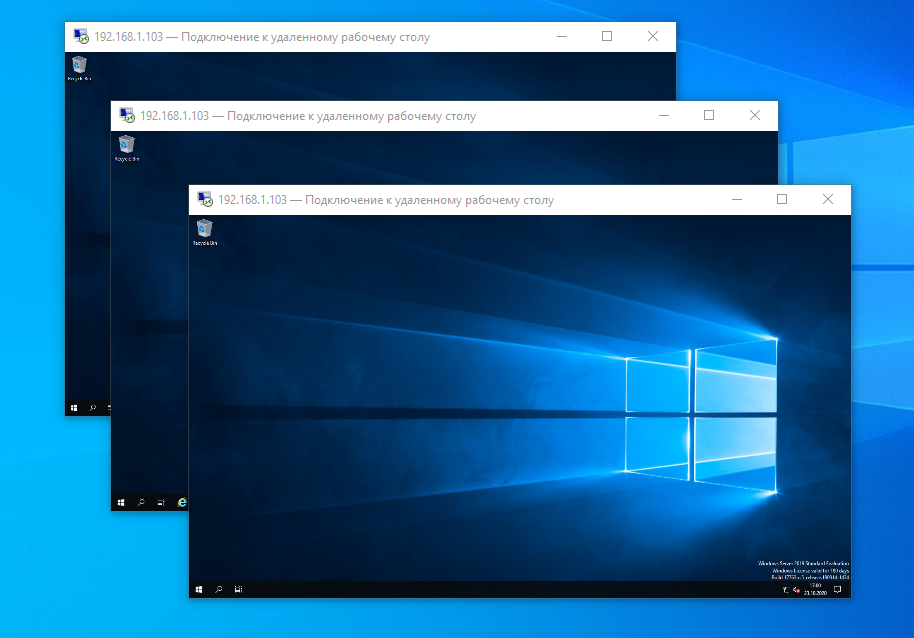
Коннектимся под этими пользователями к терминальному серверу по RDP.
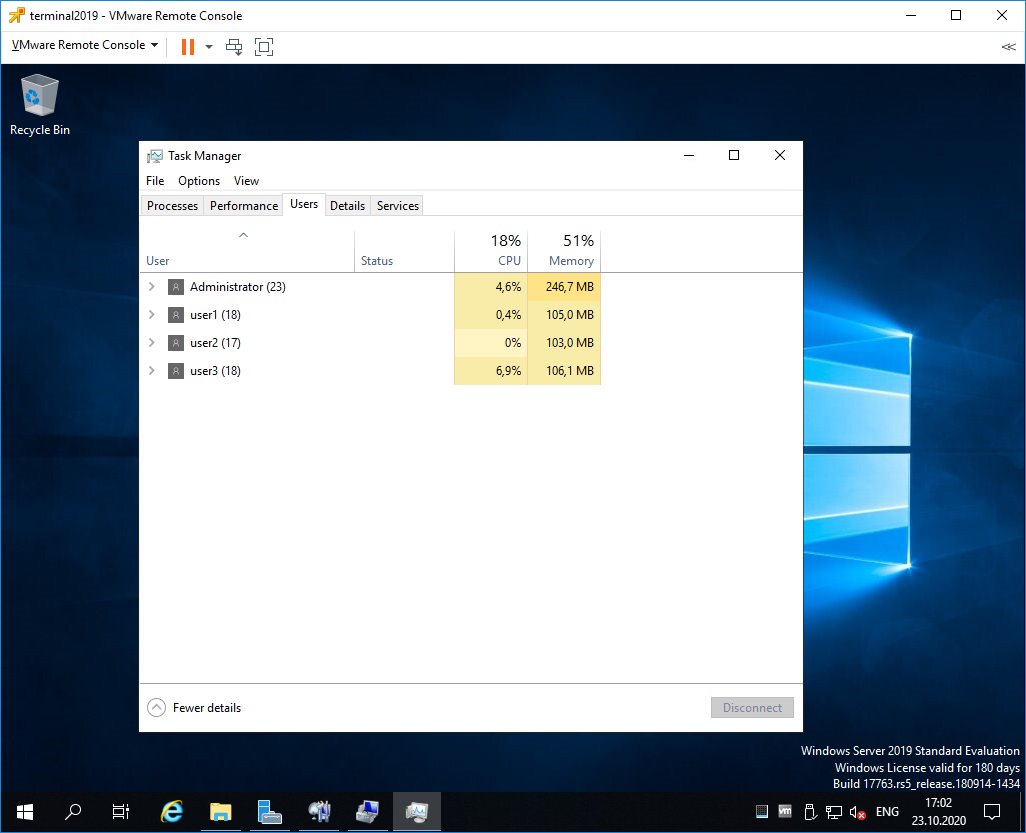
Есть три активных сеанса.
Заключение
Мы с вами успешно создали терминальный сервер Windows Server 2019 в рабочей группе WORKGROUP без домена. 120 дней терминальный сервер будет работать в триальном режиме, затем начнёт использовать лицензии Per Device. Для подключения к терминальному серверу требуется создать локальную учётную запись и включить её в группу Remote Desktop Users.
This guide shows how to install, configure, and maintain a terminal server farm based on the Remote Desktop Services (RDS) role on Windows Server. The article will help you to deploy Remote Desktop Services on Windows Server 2022, 2019, or 2016 in an Active Directory domain.
Contents:
- Remote Desktop Services (RDS) Components Architecture
- Creating a New RDS Deployment on Windows Server
- Create Remote Desktop Services Collections on Windows Server
- How to Publish RemoteApps in Remote Desktop Services?
- How to Deploy Remote Desktop Services Farm Using PowerShell?
Remote Desktop Services (RDS) Components Architecture
The RDS role in Windows Server includes the following components:
- Remote Desktop Session Host (RDSH) – RDS session hosts. These are the main workhorses of an RDS farm on which user apps run;
- Remote Desktop Connection Broker (RDCB) – an RDS connection broker. It is used to manage an RDS farm, distribute the workload, reconnect users to their sessions, store RDS collection settings, and published RemoteApps;
- Remote Desktop Gateway (RDGW) – provides secure access to the RDS farm from the Internet;
- RD Web Access (RDWA) – a web interface to access remote desktops and RemoteApps;
- Remote Desktop Licensing (RD Licensing) — a licensing service for managing RDS licenses (CALs).
In our small RDS deployment, there are only three Windows Server hosts with the following roles:
mun-rds1.woshub.com— RDSHmun-rds2.woshub.com– RDSHmun-rdsman.woshub.com– RDSH, RDWA, RDCB, and RD Licensing
Prerequisites to create an RDS farm:
- Install the same version of Windows Server on all RDS hosts, configure them, and join the AD domain;
- Open the ADUC console (dsa.msc) and move all hosts with the RDSH role to the same Active Directory OU (Organizational Unit). Thus, it will be easier to apply RDS settings using GPO;
- Create an Active Directory domain security group for RDSH servers (for example, mun-rdsh) and add all hosts to it;
- If you want to use User Profile Disks (UPD) to store RDS user profiles (or roaming profiles), you must create a shared network folder on a file server (it is recommended to place the shared folder on a File Server Failover Cluster running Windows Serveer). Grant Full Control permissions on the shared folder for the mun-rdsh group.
Creating a New RDS Deployment on Windows Server
Let’s see how to create and configure an RDS configuration using the Server Manager GUI.
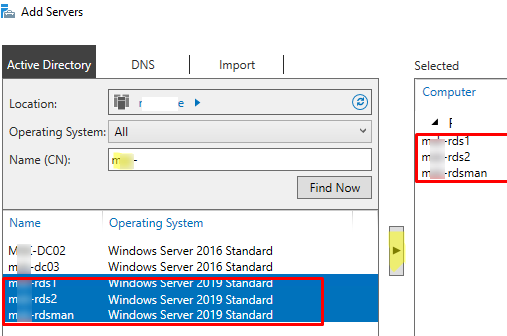
Open the Server Manager and add all RDS servers you want to the console. Click All Servers -> Add servers.
Click the Server Manager menu and select Add Roles and Features -> Remote Desktop Services installation -> Standard deployment –> Session-based deployment. 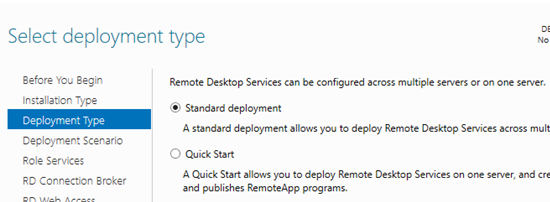
Quick Start mode is used to deploy all RDS roles on a single server. An RDS farm can have only one server running all RDS roles (RD Session Host, RD Web Access, and RD Connection broker). However, this configuration doesn’t provide fault-tolerance and workload balancing in Windows Server Remote Desktop Services.
Then specify which RDS roles you want to assign to your hosts. Select the servers for the corresponding roles in the RDS farm creation wizard. In my case, I want to build the following RDS configuration:
- RD Connection Broker –
mun-rdsman - RD Web Access —
mun-rdsman - RD Session hosts —
mun-rdsman,mun-rds1,mun-rds2
You can distribute RDS roles among servers in any other configuration.
Check Restart destination server automatically if required and click Deploy. Wait until the RDS roles are installed on all servers. 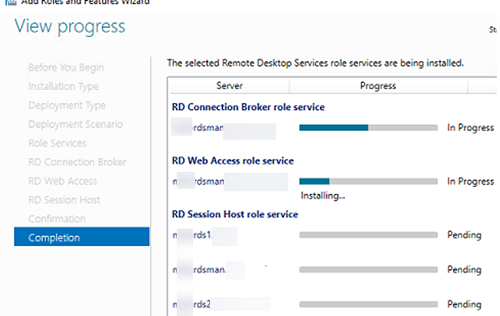
So, your RDS farm is created.
The next step is to install and configure the RDS licensing server. You can install the RD Licensing role on one of the servers on your farm or use an existing RDS licensing server in your domain. Check the detailed guide on how to install, configure and activate the RD Licensing role.
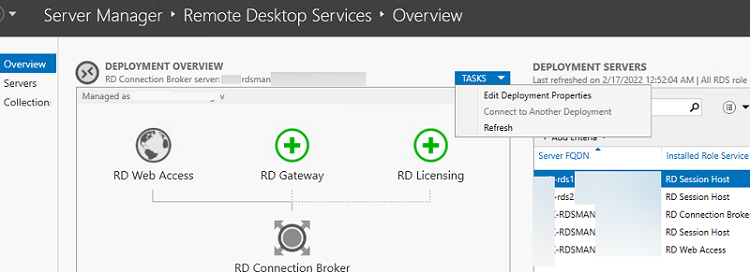
To manage your RDS deployment, open Server Manager -> Remote Desktop Services. The current RDS farm configuration is displayed on the Overview tab.
To change the RDS farm settings, select Tasks -> Edit Deployment Properties in the Deployment Overview section.
Here you can change:
- RD Gateway settings;
- Licensing server address and RDS CAL type (per user/per device);
- View RD Web Access URL;
- Add SSL certificates for RDS (we will skip this step it in the guide).
To build a fault-tolerant Remote Desktop Services farm, you have to provide high availability for the RD Connection Broker role. This is achieved by running multiple RDCB instances (Active/Active) on different servers with a shared SQL Server database that stores the connection broker configuration. You can use the SQL Server Always On high-availability group to make the RDCB SQL database high available. Earlier we published a detailed guide on how to configure a highly available RDS Connection Broker.
Create Remote Desktop Services Collections on Windows Server
The next step is to create collections of RDS sessions. Remote Desktop collections allow to split hosts in an RDS farm into separate groups or create different sets of settings and available Remote Apps for different groups of users.
Go to Collections and select Edit -> Create Session Collection.

Here you need to:
- Specify an RDS collection name:
rds-Mun-Managers; - Select which RDS hosts will serve collection users (one RDSH server may belong to one collection, it is not recommended to have hosts with different Windows Server versions in the same collection);

- In the User Groups tab, specify the groups of users allowed to connect to the collection. Remove the Domain users from the groups and add your group (
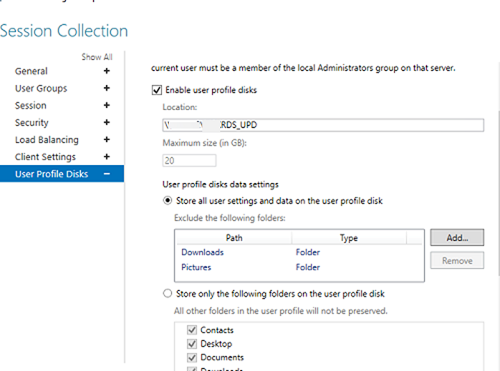
mun-Managers); - On the User Profile Disk tab, check Enable user profile disks if you want to use the UPD vhdx file format to store user profiles. In the Location of user profile disks field, specify the UNC path to your shared folder (for example,
\mun-fs01munrds_upd), in which user profile files in the UPD format will be stored and the maximum size of the disk (20 GB by default). When using UPD, if a user logs on to any RDS collection host, the user’s shared profile will always be loaded; - Click Create to create a new RDS collection;
- Make sure that the UPD file (UVHD-template.vhdx) with the user profile template is created in the specified directory.

To configure RDS collection settings, select the collection and click Tasks -> Edit Properties.
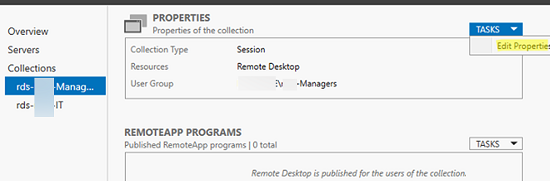
Here you can change basic collection options (name, description, access groups), and some other settings.
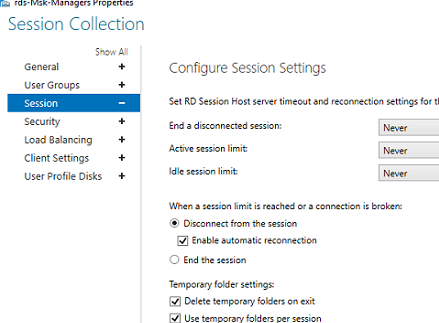
On the Session tab, you may configure reconnection/automatic disconnection options for inactive (idle) RDP sessions (learn more How to Configure Timeouts for RDP Sessions).
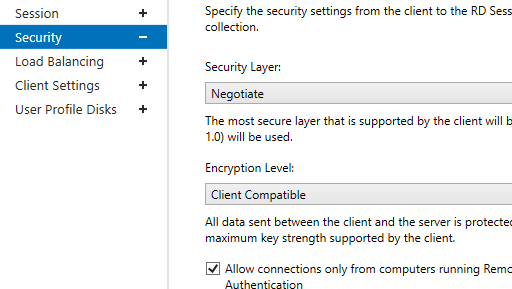
In the Security tab, you may select security (Negotiate, RDP Security level, or SSL/TLS) and encryption (Low, High, Client compatible, or FIPS compliant) settings for RDP sessions. Here you can enable/disable Network Level Authentication (NLA) for RDP.
In the Load Balancing tab, you may change RDS host Relative Weight in your farm. If server characteristics (RAM, CPU) in a collection are very different, you need to set a lower weight for the hosts with lower performance. After that, RDCB will distribute user sessions among RDS hosts depending on their weight.

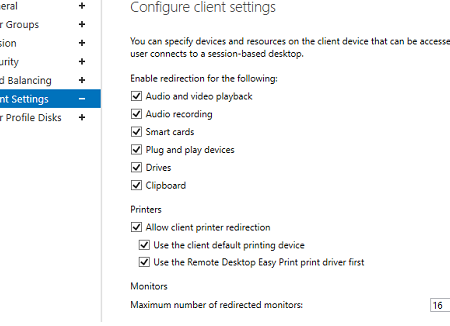
The Client Settings tab allows you to specify which local devices users are allowed to redirect to their RDP sessions. For example, you may enable or disable the redirection of printers, drives, audio devices, or the clipboard from a local user computer to the RDS session.
In the User Profile Disks tab, you may fine-tune UPD settings. You may exclude certain folders or files from sync. It allows to reduce the UPD profile size in a shared network folder and makes a profile load faster (remember that it is loaded over the network from the shared folder when a user logs on).
It is easier to configure and use UPD than roaming profiles or folder redirection. You cannot use the same UPD profile in more than one RDS collection.
To reduce the size of a user UPD disk, you can use the built-in PowerShell cmdlet Resize-VHD, which is used to resize Hyper-V virtual VHDX disks.
You can put any RDSH server into maintenance mode (RDS Drain Mode) through the HOST SERVERS section of the RDS collection. To do it, click a server and select Do not allow new connection. Then the Connection Broker will not send new user sessions to the RD host. In this mode, you can install Windows updates or update apps on the server without affecting the users.
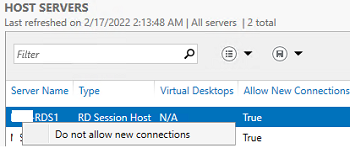
Here you can also add/remove an RDS host from a collection.
If the RD Session Host server fails, you can properly remove it from your Remote Desktop Services deployment by following this guide.
How to Publish RemoteApps in Remote Desktop Services?
RemoteApps are programs published for users on RDS servers. Thanks to RemoteApps, you may use apps installed on a terminal RDSH server as if they are running on a local user computer. The user doesn’t see the entire Windows Server RDS desktop and works only with those apps an administrator has published for them. Only the window of the program running on RDS will be displayed on the user’s computer.
If you don’t create RemoteApps, users will work directly on the Windows Server desktop. So remember to copy the app shortcuts a user may need to C:UsersPublicDesktop. Files from this folder will be displayed on the desktops of all users. If you want to install an MS Office 365 on your RDSH, note that Office must be deployed in the SharedComputerLicensing mode.
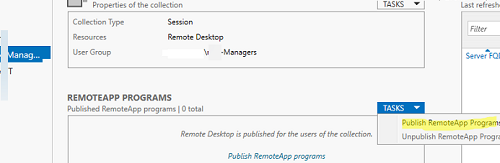
RemoteApps are created in the RDS collection settings. Select Tasks -> Publish RemoteApp Programs in the REMOTEAPP PROGRAMS section.
Windows will list all apps installed on the current RD host. You may select one of them. If there is no app you need in the list, but it is installed on other RDS hosts, click Add and specify the full path to the application’s executable (exe, bat, cmd, etc.).
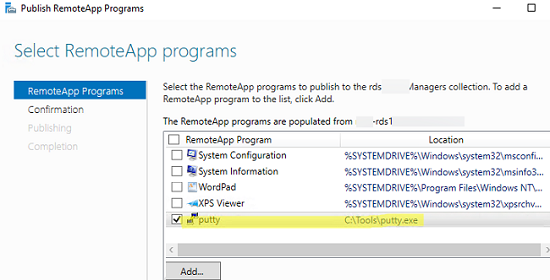
Publish the RemoteApp.
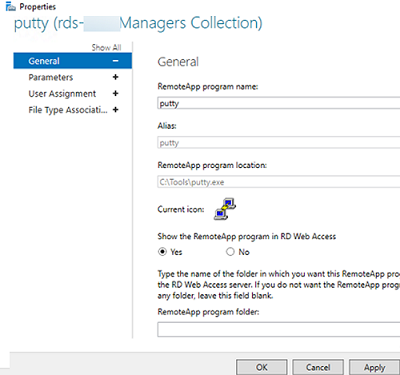
Then you can specify additional app options in the RemoteApp settings.
- Whether you want to show a published RemoteApp in the RD Web Access web interface;
- Set startup options (arguments) for the app (Command-line Parameters -> Always use the following command-line parameters);
- On the User Assignment tab, you can also set restrictions on whether a user or group may run the app.
If you want to change an icon of the published RemoteApp, open the following folder on the server with the RDS Connection Broker role:
C:WindowsRemotePackagesCPubFarmsrds-Mun-ManagersCPubRemoteApps
![]()
Replace the app icon with another ICO file.
Then a user can run a RemoteApp program from RD Web Access (https://mun-rdsman.woshub.com/RDWeb) or using a special *.RDP file.
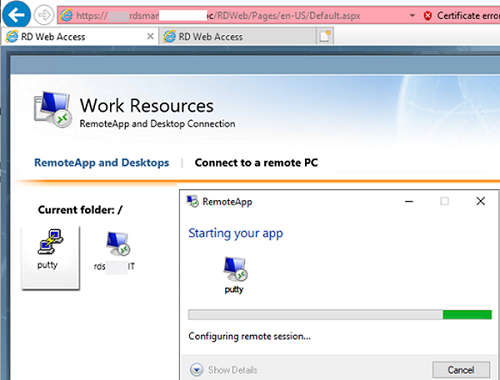
To run a published RemoteApp program, you need to add the following lines to the RDP file:
remoteapplicationmode:i:1
remoteapplicationname:s:putty
remoteapplicationprogram:s:"C:Toolsputty.exe"
disableremoteappcapscheck:i:1
alternate shell:s:rdpinit.exe
Some useful tips to use your RDS farm conveniently:
- You can configure HTML5 support for the RDWeb Access role. It allows users to connect to RDS servers using any browser or OS even without an RDP client;
- On the RD Web Access server, you can publish a link to change an expired user password (by default, if NLA is enabled you won’t be able to authenticate on an RDSH with an expired Active Directory user password);
- A user guide on how to change a password in an RDP session;
- An administrator can use RD Session Shadow connections to connect/view the desktop of a user session on an RDS server;
- To quickly find which RDS servers have sessions of a specific user, you can use PowerShell:
Import-Module RemoteDesktop

Get-RDUserSession -ConnectionBroker mun-rdsman.woshub.com | where {$_.UserName -eq "a.muller"} | Select HostServer - You can use PowerShell scripts to view RDP connection logs;
- To provide additional security, you can enable two-factor authentication (2FA) for users on your Windows RDS hosts using third-party tools.
How to Deploy Remote Desktop Services Farm Using PowerShell?
If you clearly see the structure of an RDS farm, you can quickly deploy your RDS configuration using PowerShell.
It is better to run the following PowerShell commands to create an RDS farm on another server since you will have to restart managed RDS hosts.
Set the server names in your RDS farm. In this example, I will install the RDCB and RDS licensing roles on separate servers (later it is recommended to enable a highly available RDCB configuration).
$RDSH1 = "mun-rds1.woshub.com"

$RDSH2 = "mun-rds2.woshub.com"

$RDSCB = "mun-rdcb.woshub.com"

$RDSGW = "mun-rdsgw.woshub.com"

Import-Module RemoteDesktop
Install RDS roles on the servers:
Add-WindowsFeature –ComputerName $RDSH1, $RDSH2 -Name RDS-RD-Server –IncludeManagementTools

Add-WindowsFeature –ComputerName $RDSCB -Name RDS-Connection-Broker -IncludeManagementTools

Add-WindowsFeature –ComputerName $RDSGW -Name RDS-Web-Access, RDS-Gateway –IncludeManagementTools
Restart all hosts:
Restart-Computer -ComputerName $RDSH1,$RDSH2,$RDSCB,$RDSGW
Create a new RDSessionDeployment instance:
New-RDSessionDeployment -ConnectionBroker $RDSCB -SessionHost $RDSH1,$RDSH2 –Verbose
Add RDWA and RDGW servers to your farm:
Add-RDServer -Server $RDSGW -Role RDS-WEB-ACCESS -ConnectionBroker $RDSCB

Add-RDServer -Server $RDSGW -Role RDS-GATEWAY -ConnectionBroker $RDSCB -GatewayExternalFqdn "rds.woshub.com"
You can list the RDS roles and hostnames in your farm:
Get-RDServer -ConnectionBroker $RDSGW
Install the RDS Licensing role using the Add-WindowsFeatures cmdlet:
Add-WindowsFeature –ComputerName $RDSCB -Name RDS-Licensing, RDS-Licensing-UI
Set a PerUser RDS licensing mode:
Invoke-Command -ComputerName $RDSCB -ScriptBlock {Set-RDLicenseConfiguration -Mode PerUser -LicenseServer $RDSCB -ConnectionBroker $RDSCB}

Add-RDServer -Server $RDSCB -Role RDS-LICENSING -ConnectionBroker $RDSCB
Add a licensing server to a domain security group using Add-ADGroupMember:
Add-ADGroupMember "Terminal Server License Servers" -Members "mun-rdcb$"
If you have a certificate for the RDS, you can add it to your farm configuration (you may use the free Let’s Encrypt SSL certificate for your RDS host):
$Path = "C:psRDSCert.pfx"

$Password = ConvertTo-SecureString -String "setCertificPAssw00rd11-" -AsPlainText -Force

Set-RDCertificate -Role RDGateway -ImportPath $Path -Password $Password -ConnectionBroker $RDSCB -Force

Set-RDCertificate -Role RDWebAccess -ImportPath $Path -Password $Password -ConnectionBroker $RDSCB -Force

Set-RDCertificate -Role RDPublishing -ImportPath $Path -Password $Password -ConnectionBroker $RDSCB -Force

Set-RDCertificate -Role RDRedirector -ImportPath $Path -Password $Password -ConnectionBroker $RDSCB -Force
To get information about the installed SSL certificates:
Get-RDCertificate
Then you can create RDS collections:
$CollectionName = "ITdept"

New-RDSessionCollection –CollectionName $CollectionName –SessionHost $RDSH1,$RDSH2 –ConnectionBroker $RDSCB –CollectionDescription “IT department management collection”
To allow access to RDS servers for groups:
$UserGroup =@("WOSHUBmun-admins","WOSHUBmun-devops")

Set-RDSessionCollectionConfiguration -CollectionName $CollectionName -UserGroup $UserGroup
To publish a RemoteApp program:
New-RDRemoteapp -Alias GoogleChrome -DisplayName GoogleChrome -FilePath "C:Program Files (x86)GoogleChromeApplicationchrome.exe" -ShowInWebAccess 1 -CollectionName $CollectionName -ConnectionBroker $RDSCB
In this article, we covered how to install and configure a Remote Desktop Services farm on Windows Server 2019/2022 using the Server Manager graphical interface and PowerShell. The RD Web Access and RD Gateway roles are not described here. We’ll show how to configure these roles in future articles.
A step by step guide to build a Windows Server 2019 Remote Desktop Services deployment.
I posted this before based on Windows Server 2012 R2 RDS and thought it was high time to update this post to a more modern OS version.
I will provide all the steps necessary for deploying a single server solution using the GUI tools.
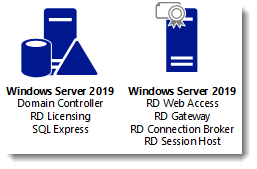
Although it is called a single server installation, we will need 2 servers as shown below.
Software used in this guide:
Windows Server 2019 ISO (evaluation can be downloaded here: https://www.microsoft.com/en-us/evalcenter/evaluate-windows-server-2019).
SQL Server 2017 Express x64 (free version can be downloaded here: https://www.microsoft.com/en-us/download/details.aspx?id=55994).
SQL Server 2016 Native Client (free version can be downloaded here: https://www.microsoft.com/en-us/download/details.aspx?id=52676. After clicking the download button select ENUx64sqlncli.msi). Although I’m installing SQL Express 2017, there are no newer client tools available.
SQL Server Management Studio (free, and can be downloaded here: https://docs.microsoft.com/en-us/sql/ssms/download-sql-server-management-studio-ssms).
And a certificate. I got mine for free from https://www.sslforfree.com/. This certificate needs to contain the FQDN you will use as the RD Web Access URL (mine is rds.it-worxx.nl in this guide). It needs to be in .pfx format and you need to have the private key in it.
This guide will not focus on building a domain using a single domain controller and adding the second server as a member server to this domain.
Also some basic knowledge is assumed in this guide. I will not detail how to create a Security Group and adding a computer account to it. I will also not detail how to install SQL Express, or adding logins to a SQL Server Instance security context. If you need extra help with this, Bing it or drop me a mail with details, and I will provide steps to continue.
I will be using Hyper-V on my Windows 10 1809 laptop and I have prepared 2 servers:
ITWDC (1 vCPU, 1024MB memory, dynamic, 60GB Harddisk)
Installed Windows
IPv4 192.168.0.4/24
Added .NET Framework 3.5 as a feature
Added Active Directory Domain Services as a role
Configured this server as a Domain Controller in a new forest: it-worxx.lab
ITWRDS (1 vCPU, 1024MB memory, dynamic, 60GB Harddisk)
Installed Windows
Added .NET Framework 3.5 as a feature
IPv4 192.168.0.10/24, DNS server 192.168.0.4
Configured it as a member server in the it-worxx.lab domain
Installing the Remote Desktop Services Roles
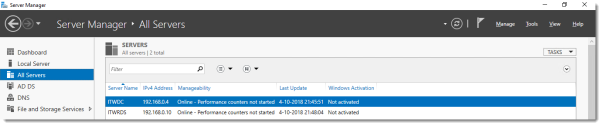
Log on to the Domain Controller, and in Server Manager right-click the All Servers node and add the second server using the Add Servers command (or select the All Servers node, click Manage and click Add Servers).
Now that all servers needed in this deployment scenario are present, click Manage, and click Add Roles & Features.
Before you begin
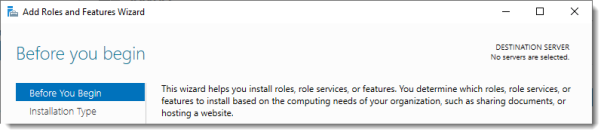
Click Next.
Select Installation Type
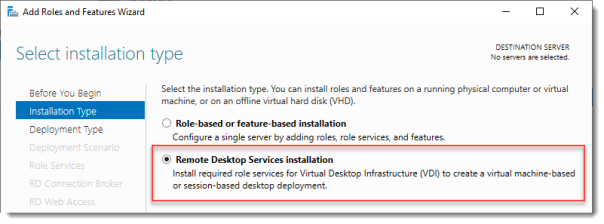
Select Remote Desktop Services installation.
Click Next.
Select Deployment Type

Although Quick Start might be a valid option for a single server deployment, leave the default selected. This will explain the steps necessary to install Remote Desktop Services in greater detail.
Click Next.
Select Deployment Scenario
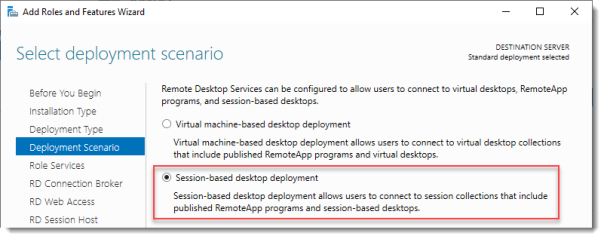
Select Session-based desktop deployment.
Click Next.
Review Role Services

Review the services that will be installed.
Click Next.
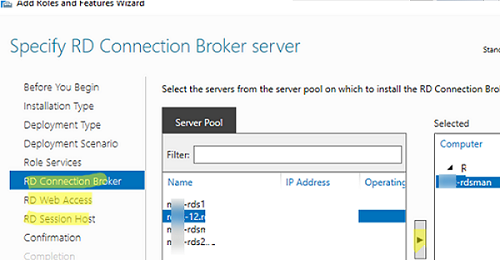
Specify RD Connection Broker server
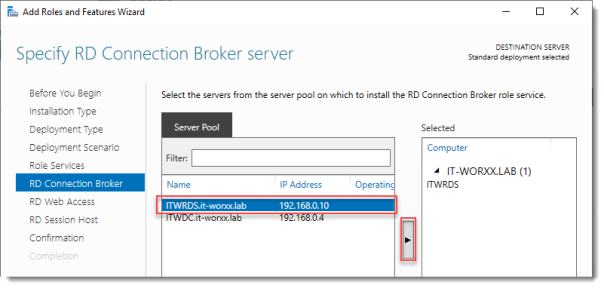
Click the member server and click the Add button.
Click Next.
Specify RD Web Access server
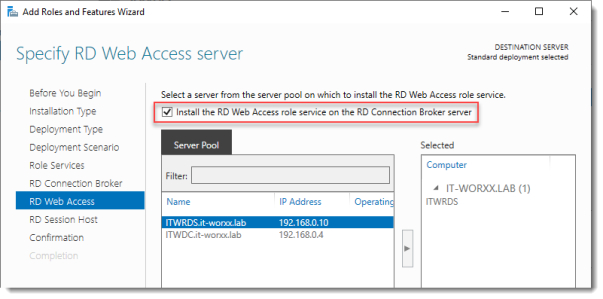
Check Install the RD Web Access role on the RD Connection Broker server.
Click Next.
Specify RD Session Host server
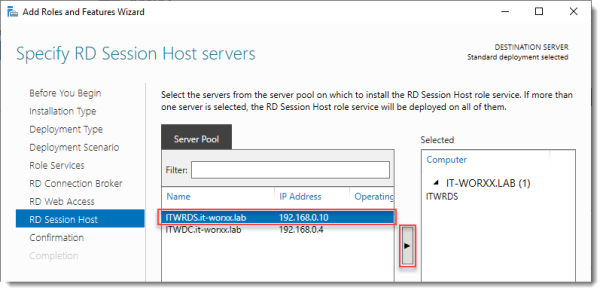
Click the member server and click the Add button.
Click Next.
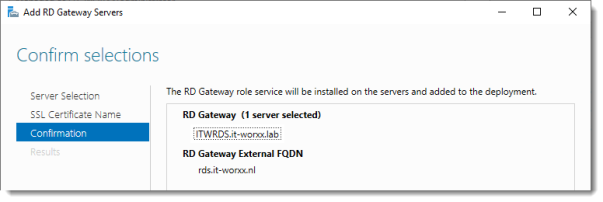
Confirm selections
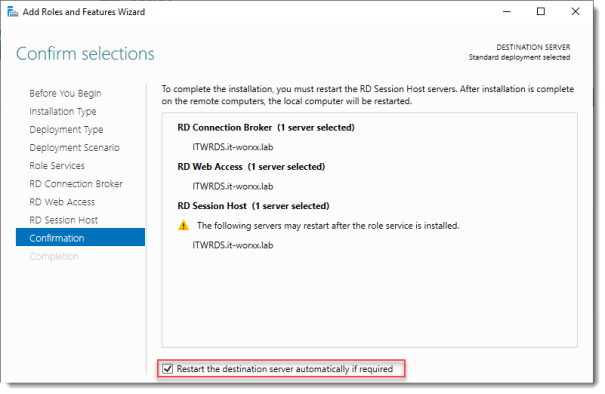
Check Restart the destination server automatically if required.
Click Deploy.
View progress
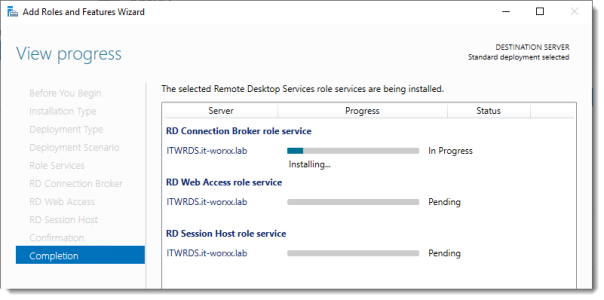
Wait until all role services are deployed and the member server has restarted.
Click Close.
In Server Manager click Remote Desktop Services and scroll down to the overview.
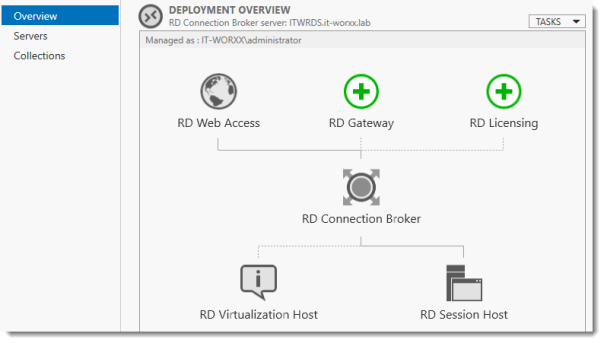
As you can see the deployment is missing a RD Gateway server and a RD Licensing server.
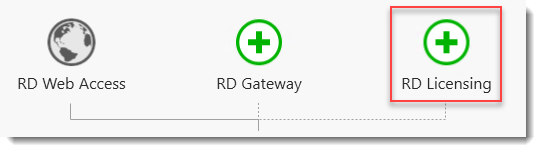
Click the Add RD Licensing server button.
Select a server
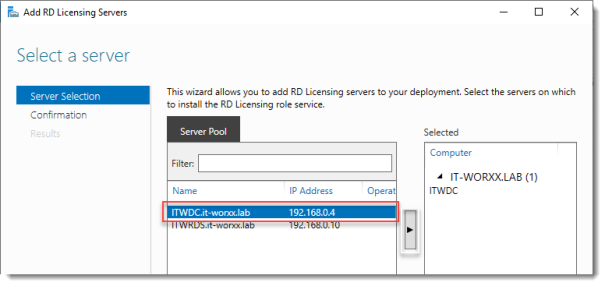
Click the domain controller and click the Add button.
Click Next.
Confirm selections
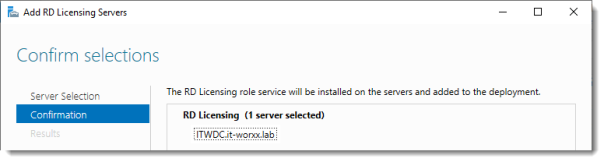
Click Add.
View progress
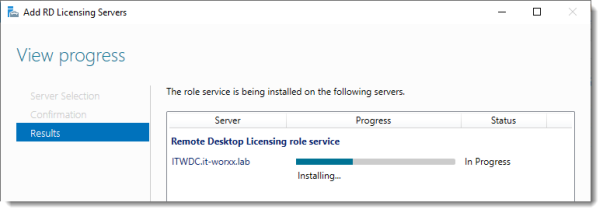
Wait until the role service is deployed. No restart is needed.
Click Close.
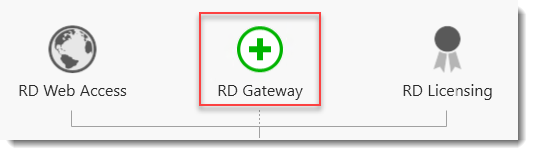
Click the Add RD Gateway server button.
Select a server
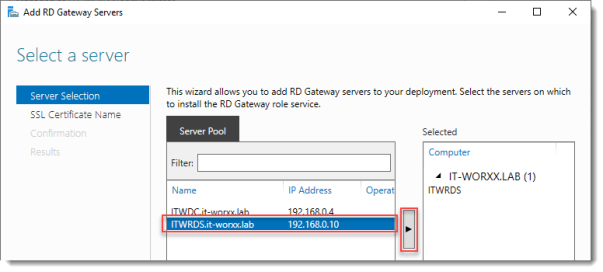
Click the member server and click the Add button.
Click Next.
Name the self-signed SSL certificate
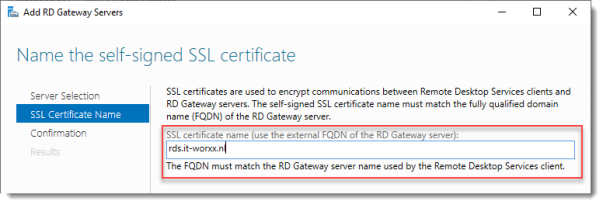
The wizard creates a self-signed certificate. We will deal with certificates in this deployment in a little bit. We will replace the self-signed certificate.
Enter the external Fully Qualified Domain Name which you will also use for the Web Access URL. In my case, for lack of a better name, I used “rds.it-worxx.nl”. I didn’t want to use “remote.it-worxx.nl” or “desktop.it-worxx.nl” or anything else.
Click Next.
Confirm selections
Click Add.
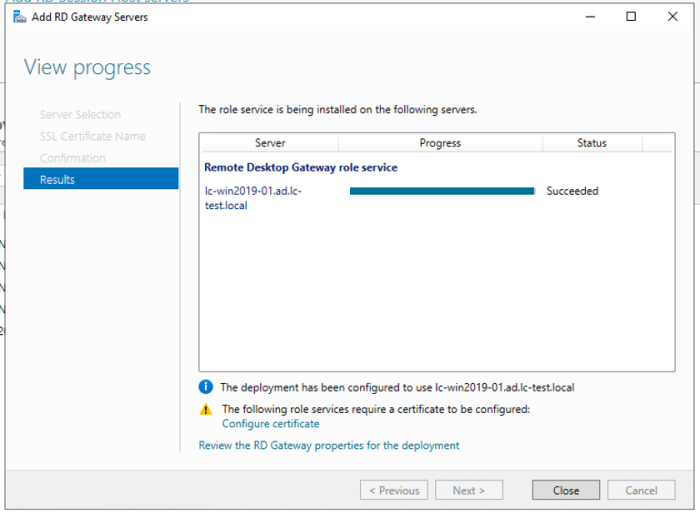
View progress
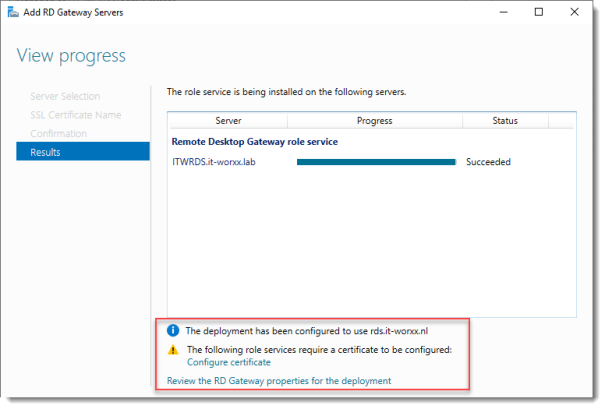
Wait until the role service is deployed. Again, no restart is needed.
Notice that “rds.it-worxx.nl” was configured for the deployment.
Also notice that even more certificate configuring is needed, but we’ll get to that later. Pay no attention to it for now. The same goes for the RD Gateway properties for the deployment. We’ll get to that later.
Click Close.
Review role installation and setting License Mode
Let’s have a quick look at the configuration we have so far.
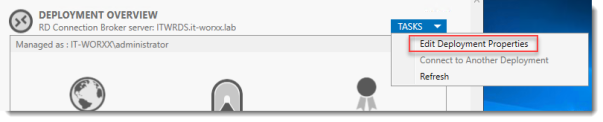
In Server Manager, Remote Desktop Services, Overview, click Tasks and click Edit Deployment Properties.
Configure the deployment
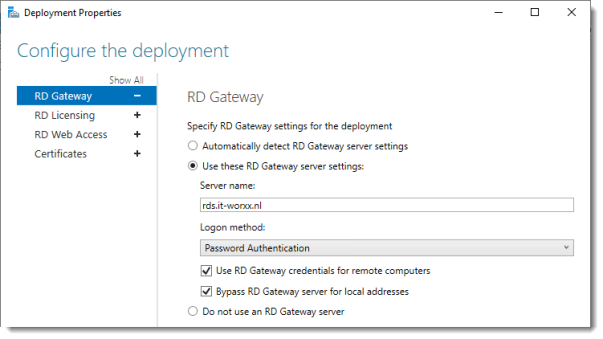
Review the RD Gateway settings and notice what settings are available.
Click RD Licensing.
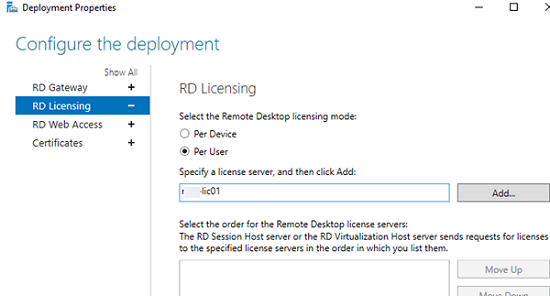
Configure the deployment
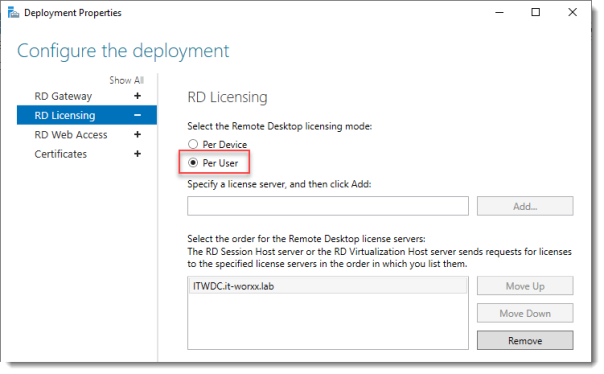
Notice that an RD License server is available, but no license type is selected yet.
I selected Per User, but since this is just a guide setup, it really doesn’t matter.
Click RD Web Access.
Configure the deployment
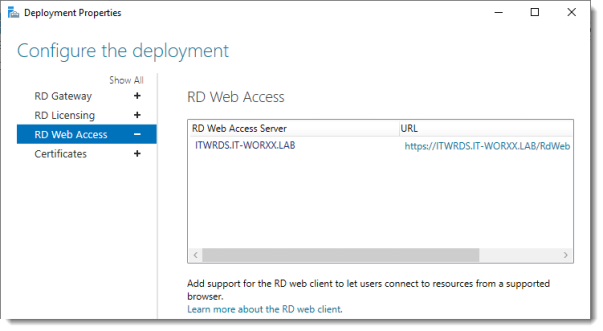
By default the RD Web Access IIS application is installed in /RdWeb.
If you want to know how to change this, check another post: https://msfreaks.wordpress.com/2013/12/07/redirect-to-the-remote-web-access-pages-rdweb/
This is for Windows Server 2012 R2 RDS, but it also works for Windows Server 2019 RDS.
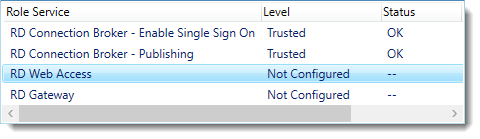
Click Certificates.
Configure the deployment
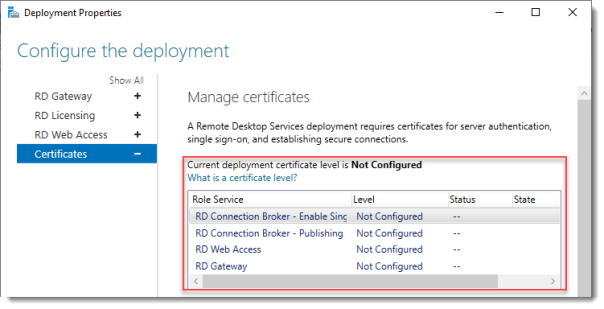
Notice that the certificate level currently has a status of Not Configured.
As you can see, certificates are used for different goals within the deployment.
The RD Gateway certificate is used for Client to gateway communication and needs to be trusted by the clients. Either install the self-signed certificate on all clients, or use a certificate for which the complete certificate chain is already trusted by all clients. As it said in the wizard, the external FQDN should be on the certificate.
The RD Web Access certificate is used by IIS to provide a server identity to the browser clients.
The RD Connection Broker actually has two goals for which it needs certificates. To enable single sign on (server to server authentication), and for publishing (signing RDP files). If you look in the deployment you’ll see that the Connection Broker is now configured to use “itwrds.it-worxx.lab”, so we have to change it to use an external FQDN as well.
If we use the same FQDN for all goals described above, we need only 1 certificate, and only 1 external IP address.
We’ll come back to this wizard later to assign the certificate. First order of business is to change the internal FQDN for the Connection Broker to an external FQDN.
Click OK (no reason why we shouldn’t commit the change we made on the licensing tab, remember?)
Changing the Connection Broker FQDN to an externally resolvable FQDN
Open DNS Manager on the domain controller and browse to Forward Lookup Zones.
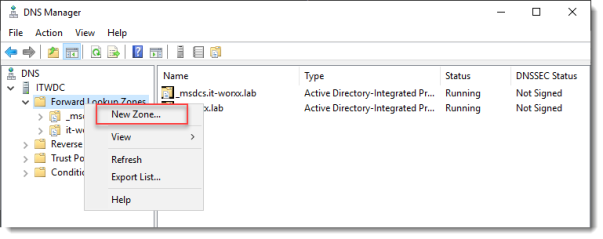
Right click Forward Lookup Zones and click New Zone… Go through this wizard accepting the defaults until you have to enter a Zone Name.
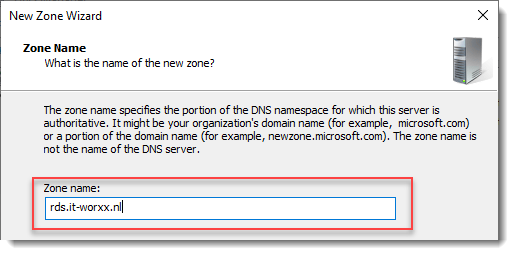
Enter the external FQDN which will also be used by the Connection Broker.
Finish the rest of the wizard accepting the defaults.
Browse to the newly created zone.
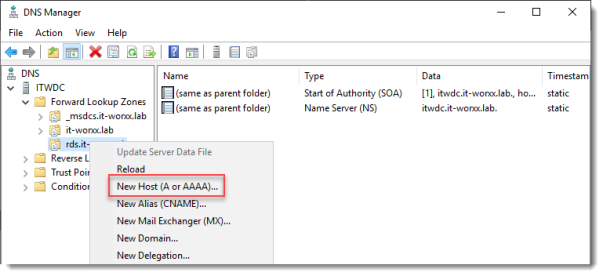
Right click the newly created zone and click New Host (A or AAAA)…
New Host
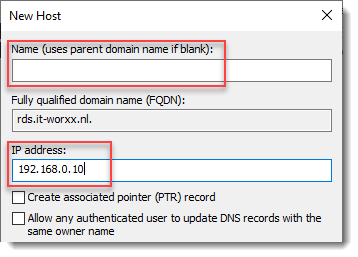
Leave the Name field blank, but enter the member server’s (holding the RD Connection Broker role) IPv4 address.
Click Add Host.
Now the configuration will be able to resolve “rds.it-worxx.nl” to the server holding the Connection Broker role, and this will work because “rds.it-worxx.nl” is also on the certificate that we will configure later.
Create a new Global Security Group called “RD Connection Brokers” and add the computer account for the member server to it as a group member.
We need this group to be able to convert the RD Connection Broker to a highly available RD Connection Broker. You’ll see why we need to do this in a few steps.
Reboot the member server to let it know it’s a member of the RDS Connection Brokers security group.
The next steps in re-configuring the RD Connection Broker depend on an SQL database shared by all Connection Brokers in the deployment. Without this configuration the RD Connection Broker will rely on the Windows Internal Database that was created during the initial deployment of the roles.
Install SQL Express on the Domain Controller (or use an existing SQL Server if you already have one).
It’s not best practice to install SQL onto a Domain Controller, but it’ll do for this guide.
Here’s a list of needed features:

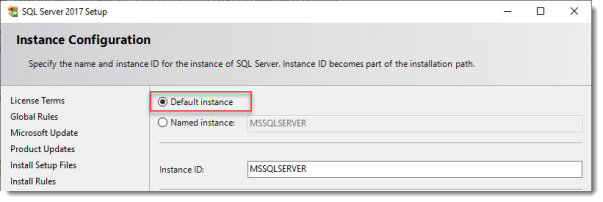
Use the Default Instance (so click Default, and do not leave the wizard’s selection on Named instance: SQLEXPRESS).
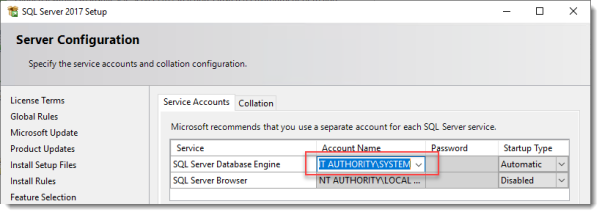
Set the SQL Service to start using SYSTEM because the default account of SQLSERVER cannot be used on a Domain Controller.
When the installation is done open SQL Configuration manager and browse to Client Protocols under SQL Native Client 11.0 Configuration.
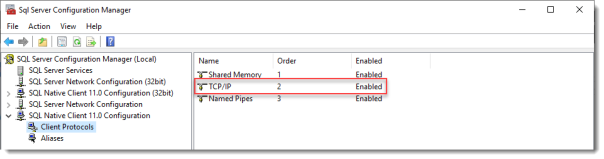
Check if TCP/IP is enabled under Client Protocols. SQL Express install enables this by default, but check it just to be sure, especially if you use an existing SQL Server.
Browse to Protocols for MSSQLSERVER under SQL Server Network Configuration.
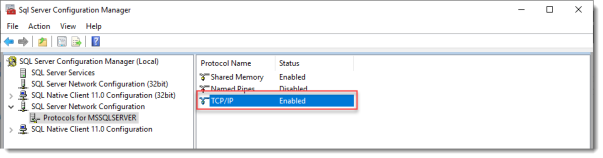
Enable TCP/IP. If this is a new SQL installation, this will be disabled by default.
Restart the SQL Server service if you changed this setting.
On the SQL Server, make sure port 1433 is not being blocked by Windows Firewall.

I added the SQL Server executable to the exception list to allow all inbound traffic, but TCP 1433 inbound should suffice.
If you installed SQL Server using the default folder locations, the sqlservr.exe executable is found in “C:Program FilesMicrosoft SQL ServerMSSQL14.MSSQLSERVERMSSQLBinn”.
Open SQL Server Management Studio, connect to the default instance on the Domain Controller and browse to Logins under Security.
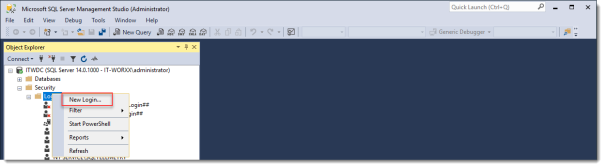
Remember the Management Studio is no longer available with the SQL Server download, but is a different download.
Right click Logins and click New Login…
Login – New
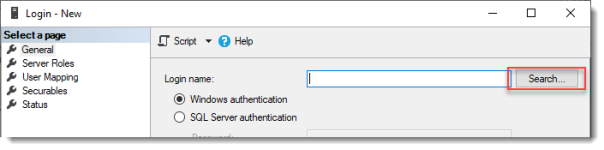
Click Search…
Select User, Service Account, or Group
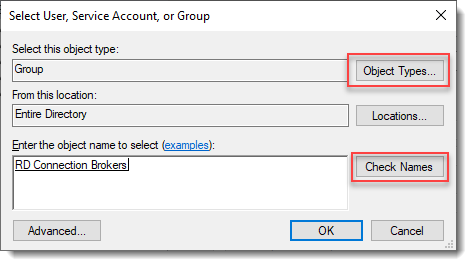
Click Object Types… and select Group.
Type the RDS Connection Brokers security group name and click Check Names.
Click OK.
Login – New
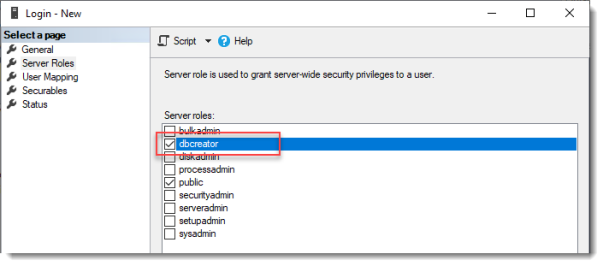
Click Server Roles and select dbcreator.
Click OK.
We have just effectively granted the RDS Connection Broker server the right to create databases.
We need this because the RDS Connection Broker service will try to migrate from WID (Windows Internal Database to a (high available) SQL Server instance when we convert the Broker to a high available broker.
Install the SQL Native Client on the member server (Client Components only). If you used the member server in this setup to install the SQL Management Studio, you can skip this step because the Native Client was installed with installing the Management Studio.
Everything we need is in place to convert the RD Connection Broker, so let’s do just that.
In Server Manager click Remote Desktop Services and scroll down to the overview.
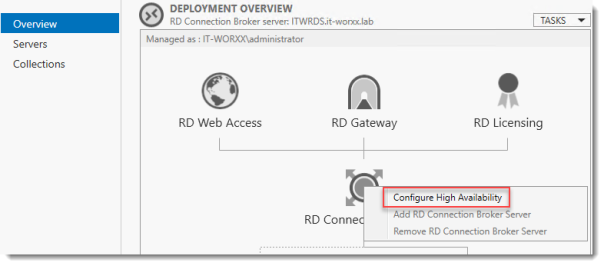
Right click RD Connection Broker and click Configure High Availability.
Before you begin
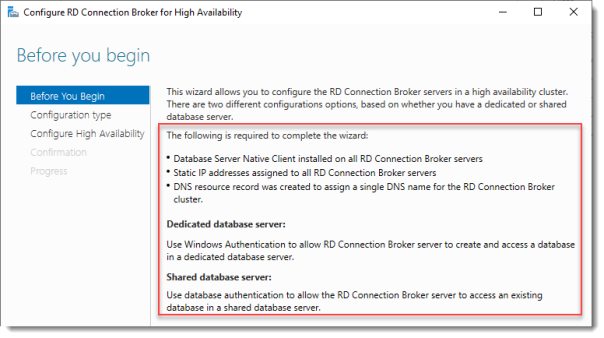
So we’re building a single node cluster here 
Look at the pre-requisites.
If you have more than one RD Connection Broker they need to be configured using DNS Round Robin.
Click Next.
Configure RD Connection Broker for High Availability
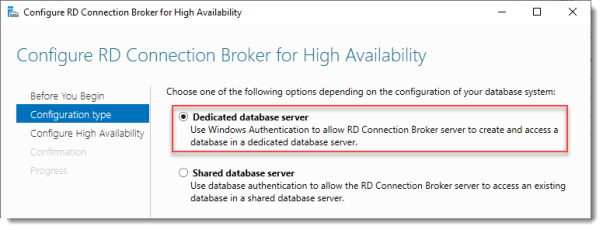
Since we just installed an SQL Server for this, leave the default selected. You’d use the other option for instance if you’d like to use Azure SQL for this deployment.
Click Next.
Configure RD Connection Broker for High Availability
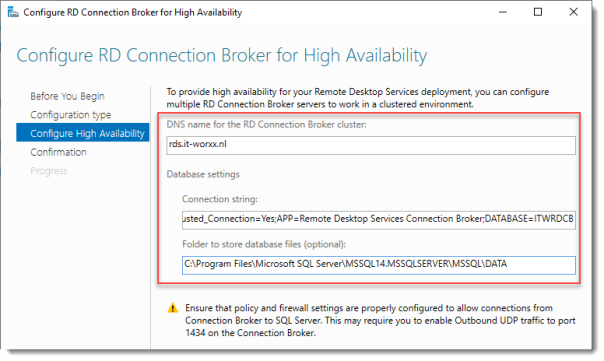
DNS name for the RD Connection Broker cluster:
The DNS Zone name we configured in DNS earlier: rds.it-worxx.nl
Connection string:
DRIVER=SQL Server Native Client 11.0;SERVER=ITWDC;Trusted_Connection=Yes;APP=Remote Desktop Services Connection Broker;DATABASE=ITWRDCB
Folder to store database files:
C:Program FilesMicrosoft SQL ServerMSSQL14.MSSQLSERVERMSSQLDATA
I used the instance default folder.
Click Next.
Confirmation
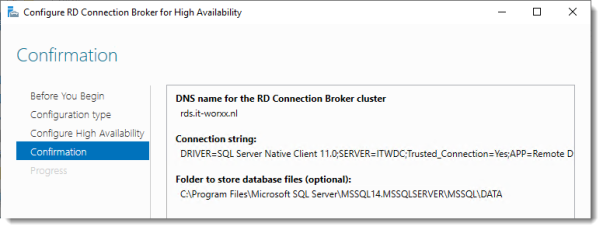
If you get an error before this page:
- Check if TCP/IP is enabled in client protocols and for your instance
- Check if you can reach port 1433 on the SQL Server from the member server
Click Configure.
Progress
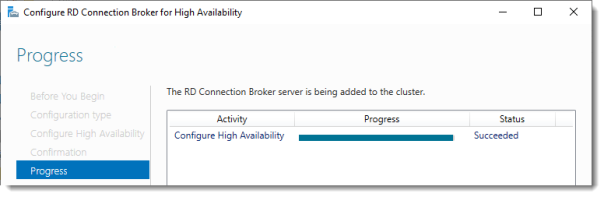
If you get an error on this page:
- Check SQL permissions for the security group
- Check if the database path you entered is correct
Click Close.
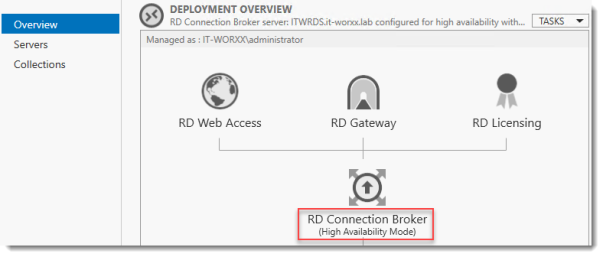
The RD Connection Broker is now in High Availability Mode, and configured as “rds.it-worxx.nl” and we are finally ready to complete the configuration.
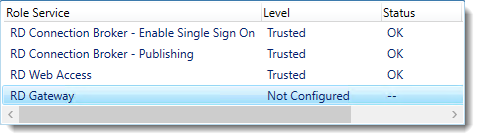
Configuring Certificates

In Server Manager, Remote Desktop Services, Overview, click Tasks and click Edit Deployment Properties, then click Certificates.
Configure the deployment

Click RD Connection Broker – Enable Single Sign On and click Select Existing certificate.
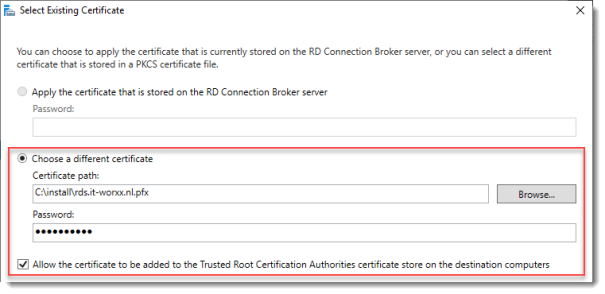
Browse to the .pfx file, enter its password, and check Allow the certificate..
Click OK.

So click Apply. This takes a little while, be patient.
Configure the deployment
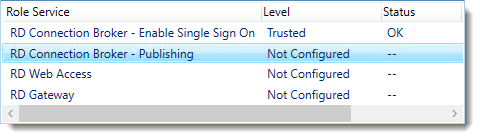
Click RD Connection Broker – Publishing and click Select Existing certificate.
Browse to the .pfx file, enter its password, and check Allow the certificate..
Click OK.
Click Apply. This again takes a little while, be a little more patient.
Configure the deployment
Click RD Web Access and click Select Existing certificate.

Note: Did you notice the warning when you select RD Web Access?
Browse to the .pfx file, enter its password, and check Allow the certificate..
Click OK.
Click Apply again. This takes another little while longer, be slightly more patient.
Configure the deployment
Last one. Click RD Gateway and click Select Existing certificate.
Browse to the .pfx file, enter its password, and check Allow the certificate..
Click OK.
Click OK to apply the final certificate step.
Configured all servers, configured certificates..
One thing left to do: Tell our RDS environment exactly what to publish.
Publishing resources to your users
In fact you can use this setup to either provide full desktop sessions on the Session Host, or you can choose to publish only applications on the Session Host.
Let’s publish full desktop sessions.

In Server Manager, Remote Desktop Services, Session Collections, click Tasks and click Create Session Collection.
Before you begin

Review the requirements. This won’t be an issue in this setup, but you could restrict access to this collection by selecting a select group of people.
Click Next.
Name the collection
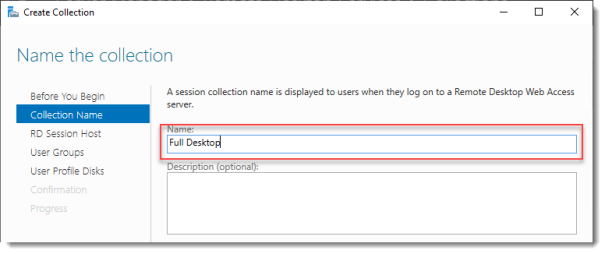
Enter a descriptive name. This name will be displayed under its icon in the Web Access interface.
Click Next.
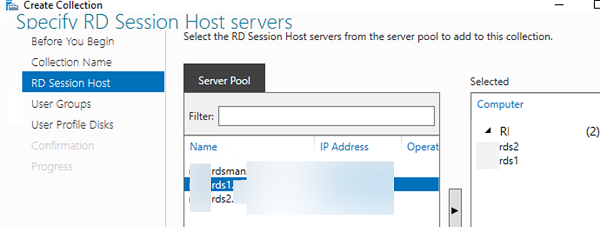
Specify RD Session Host servers

Click the member server and click the Add button.
Click Next.
Specify user groups
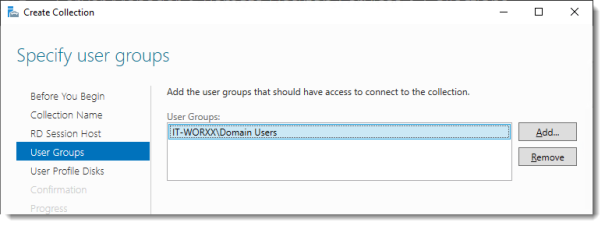
You can limit access to the resource here if you want. Add one or more groups to restrict access to these groups only. In this setup the default selection of Domain Users will do fine. Groups you specify here will be added to the list of groups of users that are allowed to connect using RDP to the Session Host server(s).
Click Next.
Specify user profile disks
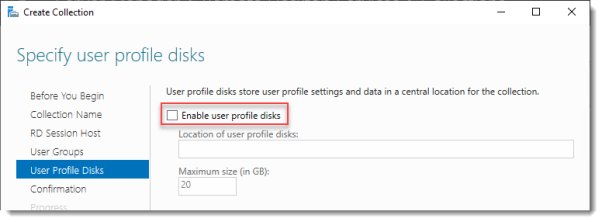
User profile disks are not in focus in this guide. Since I have no file shares configured in this setup, uncheck Enable user profile disks for now.
Click Next.
Confirm selections
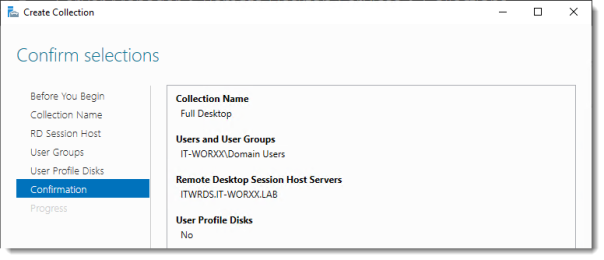
Review the information and click Create.
View Progress
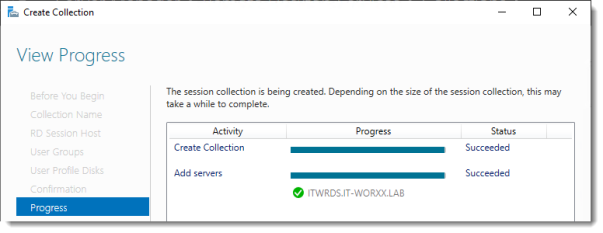
Wait until the collection is created and the server is added to the collection.
Click Close.
Time to test the setup!
Testing the setup
On a machine that has access to your test setup (you may have to add the external FQDN to your hosts file if you didn’t publish it to the internet) open https://rds.it-worxx.nl/rdweb
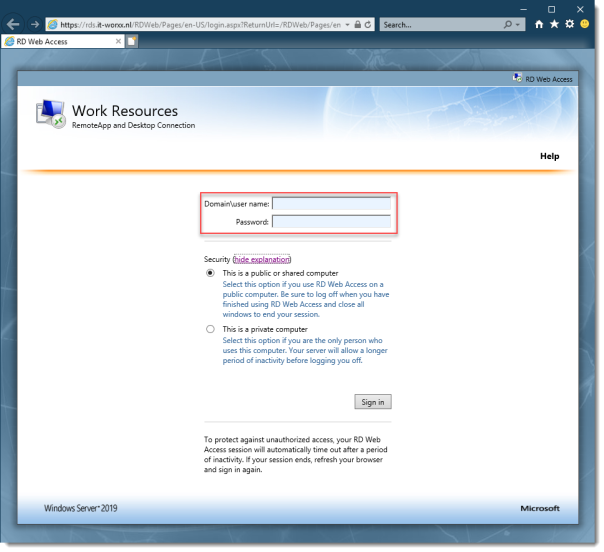
Hey! At least the RD Web Access application works 
Enter a valid username and password (IT-WORXXusername or username@it-worxx.lab).
Create a user for this, or simply use the domain admin account.
Click Sign in.
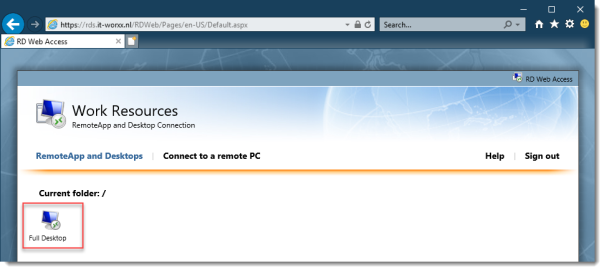
After logging in you are presented with the full desktop session collection we created.
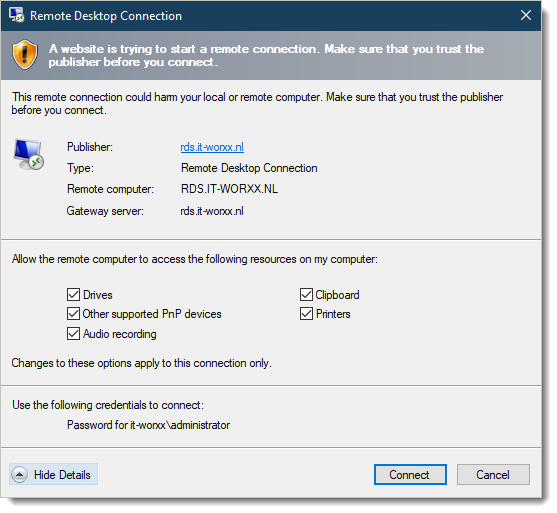
After clicking the Full Desktop icon you get the warning that devices are going to be redirected.
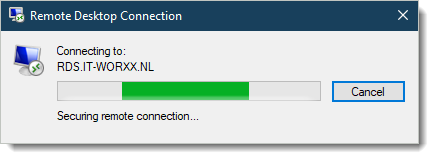
And when you click Connect, you connect
Enjoy.
Arjan
Краткая инструкция по быстрому развёртыванию сервера удалённых рабочих столов на ОС Microsoft Windows Server 2019 Standard по протоколу RDP.
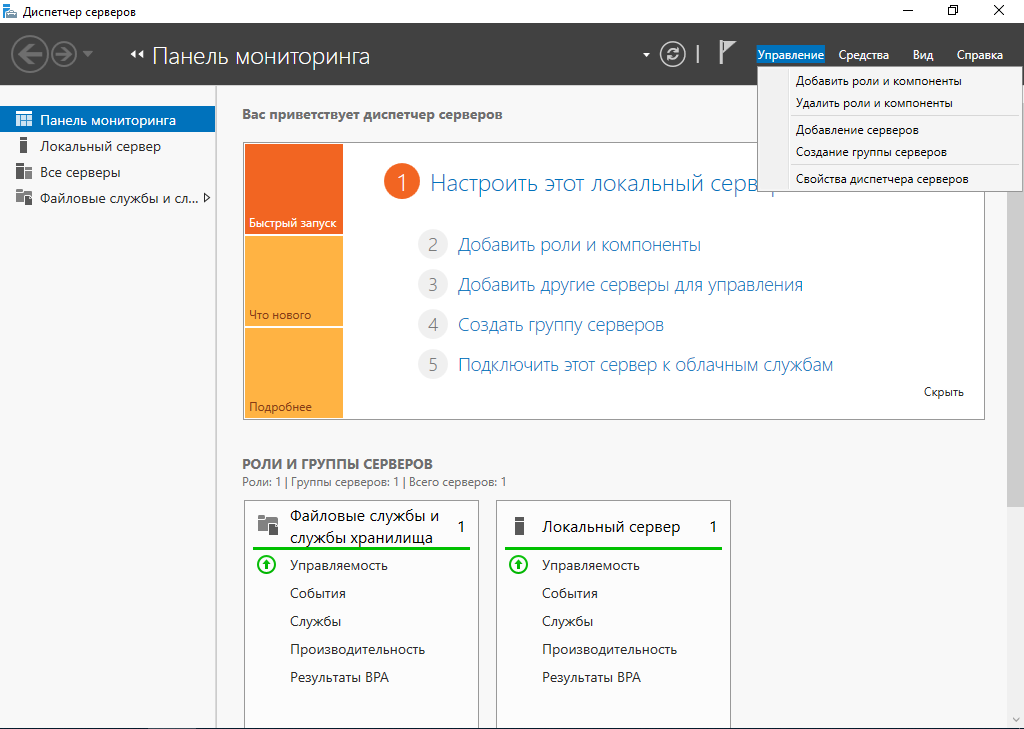
Для установки сервера терминалов запускаем Диспетчер серверов
В меню в пункте Управление выбираем Добавить роли и компоненты
В Типе установки выбираем Установка ролей и компонентов

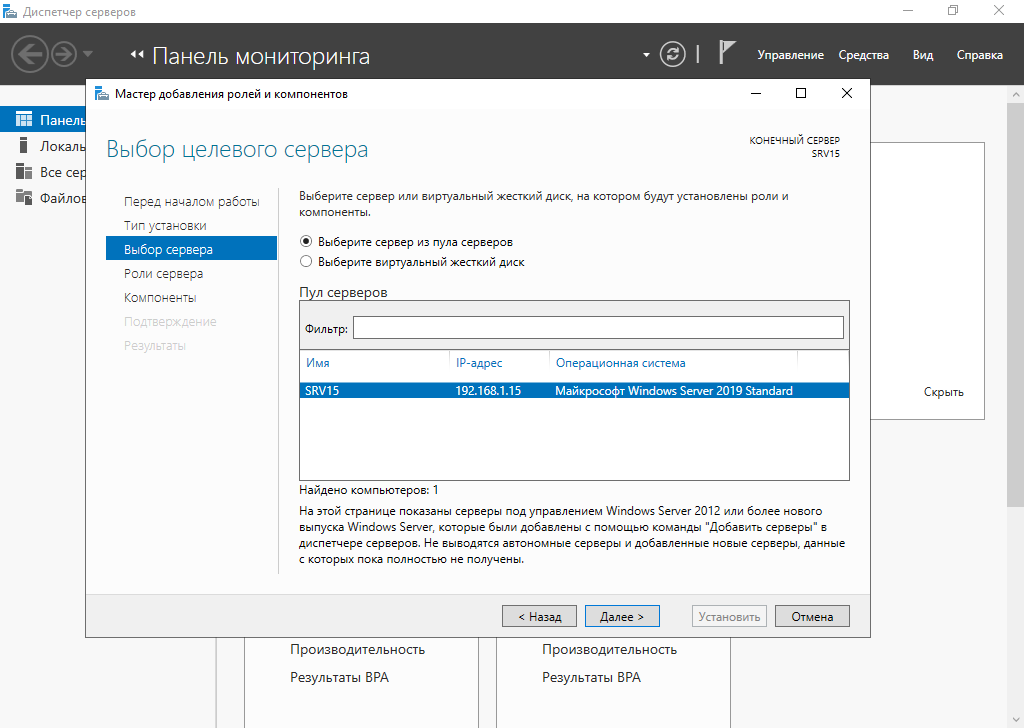
Выбор сервера — текущий сервер, к которому будут подключаться клиенты
В Ролях сервера ставим чек-бокс на пункте Службы удалённых рабочих столов

В пункте Компоненты пока оставляем всё как есть.
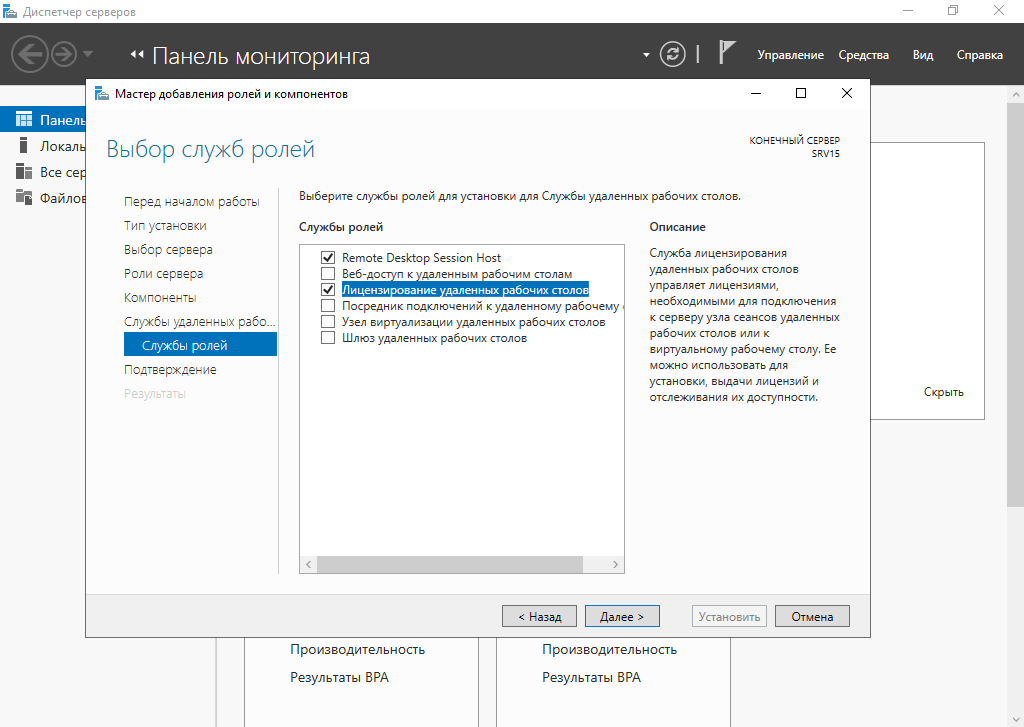
Переходим в меню Службы удалённых рабочих столов в Службы ролей и ставим чек-боксы на пунктах Remote Desktop Session Host и Лицензирование удалённых рабочих столов
Ставим чек-бокс на Автоматический перезапуск конечного сервера

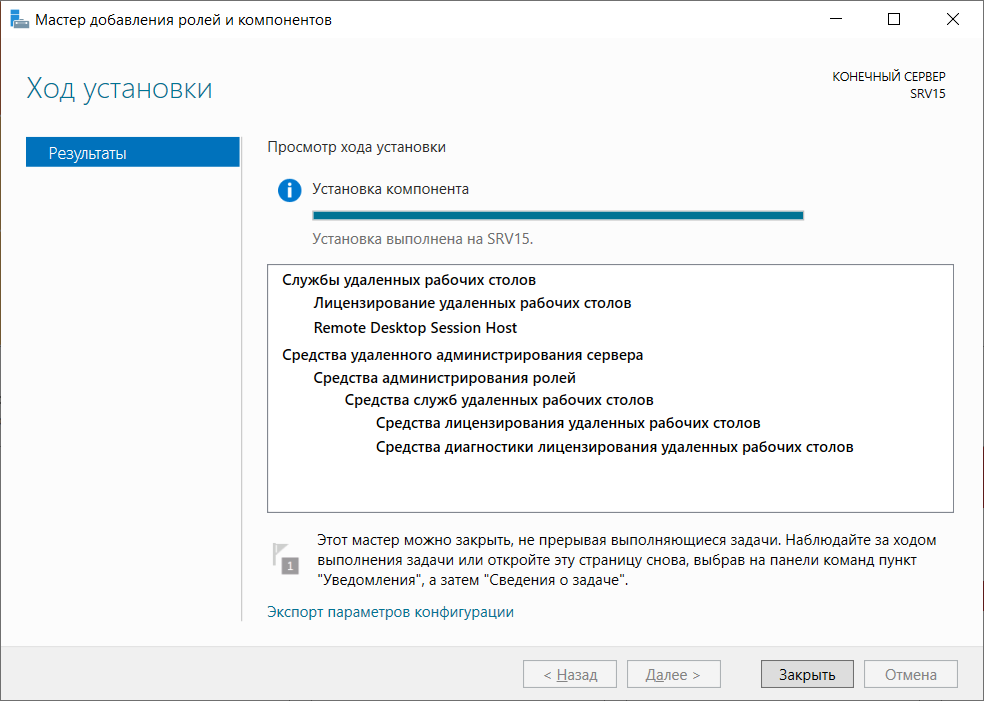
и сервер начнёт установку службы и необходимых компонентов.

После этого система перезапустится и продолжит устанавливать компоненты.
После перезагрузки машины система уведомит об успешном окончании установки
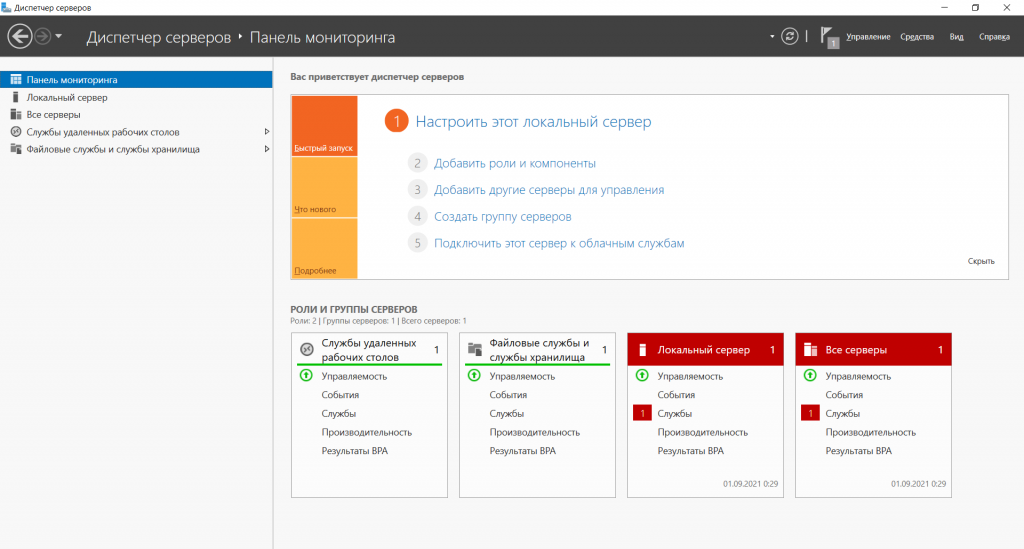
В Панели мониторинга в пункте Роли и группы серверов появится виджет Службы удалённых рабочих столов
В меню в пункте Средства переходим в Диспетчер лицензирования удалённых рабочих столов
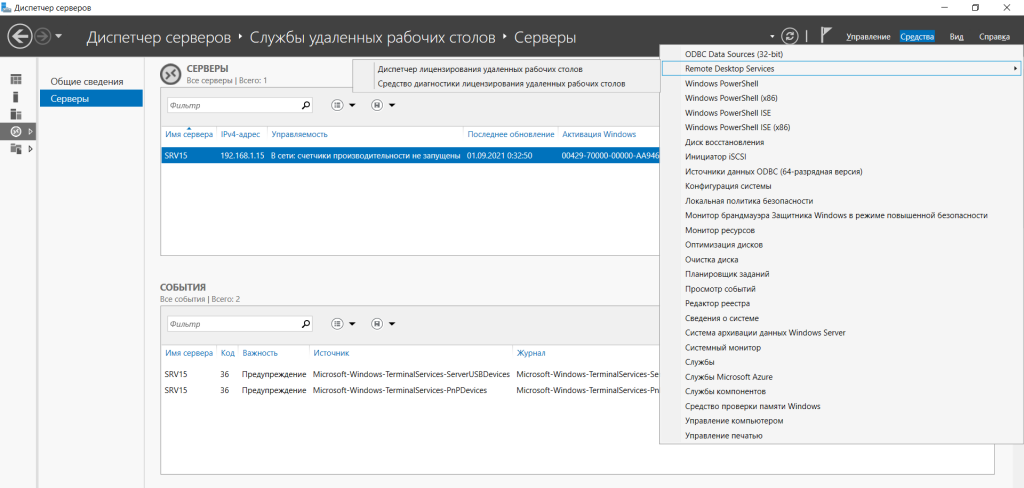
Появится консоль со списком серверов. Кликаем по нелицензированному серверу и вводим код сервера лицензирования
В Средствах диагностики лицензирования удалённых рабочих столов в Сведениях мы увидим сообщение о прохождении тестового периода использования сервера узла сеансов удалённых рабочих столов.

После окончания на клиентах можно запускать Подключение к удалённому рабочему столу или команду
# mstsc
На этом установка завершена.
Необходимо помнить о лицензировании сервера терминалов.
Установка службы удаленных рабочих столов (RDS) на Windows Server 2019 состоит из многих шагов, но в действительности это очень просто. Из статьи вы узнаете о том, как установить эту службу в доменной среде, которая требует наличия двух серверов.
Предварительные условия
Перед началом установки RDS необходимо убедиться, что выполняются два требования, а именно:
- все серверы подключены к домену;
- есть по крайней мере два доступных сервера.
Необходимо, чтобы было именно два сервера, так как для роли RD Licensing, согласно лучшим практикам Microsoft, требуется отдельный сервер. В данной инструкции мы будем использовать для этой роли контроллер домена, что не вполне соответствует лучшим практикам, но мы делаем это, чтобы упростить демонстрационную установку.
Установка базовых ролей службы удаленных рабочих столов
Для начала мы добавим к основному RDS-серверу следующие роли:
- RD Connection Broker (Посредник подключений к удаленному рабочему столу);
- RD Web Access (Веб-доступ к удаленным рабочим столам);
- RD Session Host (Узел сеансов удаленных рабочих столов).
Пошаговая установка
- В диспетчере сервера на основном RDS-сервере, на котором выполняется установка, откройте Add Roles and Features Wizard (мастер добавления ролей и компонентов) и выберите Remote Desktop Services installation(установку службы удаленных рабочих столов).

2. Для этой инструкции мы используем опцию Quick Start (Быстрый старт), но если вам требуется больше контроля над процессом установки, вы можете выбрать Standard Deployment (Стандартную установку), которая позволяет редактировать большее количество настроек.

3. Далее мы выбираем Session-based desktop deployment (Установка рабочих столов на основе сеансов), так как это стандартная модель подключения к удаленным приложениям и удаленным рабочим столам, используемая в большинстве установок RDS.

4. В разделе Server Selection (Выбор сервера), выберите сервер, на который мы устанавливаем RDS.

5. Чтобы начать установку, выберите Restart the destination server automatically if required (Автоматический перезапуск конечного сервера в случае необходимости) и кликните на Deploy (Установить).

6. Проверьте, что все роли успешно установлены перед тем, как переходить к следующим шагам.

Добавление дополнительного сервера
В этой инструкции мы используем доменный контроллер в качестве сервера лицензирования удаленных рабочих столов, но для упрощения установки этой роли мы можем добавить дополнительный сервер в диспетчере серверов.
- Чтобы добавить дополнительный сервер, кликните правой кнопкой мыши на All Servers (Все серверы), выберите Add Servers (Добавление серверов), а затем выберите нужный сервер в Active Directory.


2. Перейдите на экран Remote Desktop Services (Службы удаленных рабочих столов) и кликните на зеленом плюсе над RD Licensing (Лицензирование удаленных рабочих столов).

3. Откроется окно Add RD Licensing Servers (Добавление серверов лицензирования удаленных рабочих столов), в котором вы сможете выбрать дополнительный сервер для роли RD Licensing.

4. Кликните на Add (Добавление), чтобы установить роль на дополнительный сервер.

5. Убедитесь, что установка завершена и зеленый плюс над RD Licensing заменен на соответствующий значок.

Добавление роли RD Gateway Role
Теперь нам нужно добавить RD Gateway Role (роль службы шлюза удаленных рабочих столов) к основному RDS-серверу.
- На экране Remote Desktop Services (Службы удаленных рабочих столов) кликните на зеленом плюсе над RD Gateway (Шлюз удаленных рабочих столов).
- Выберите основной RDS-сервер для установки этой роли.

3. Присвойте самоподписанному SSL-сертификату полное доменное имя.

4. Кликните Next и потом Add, чтобы установить роль на основной RDS-сервер.
Настройка параметров установки
Теперь, когда все роли установлены, можно перейти к настройке параметров установки.
- Откройте экран Remote Desktop Services и в выпадающем списке Tasks (Задания) кликните на Edit Deployment Properties (Редактирование параметров установки).

2. На экране RD Gateway оставьте настройки по умолчанию и кликните на пункте меню RD Licensing.

3. Выберите Per User (По количеству пользователей) на экране RD Licensing. Вы можете выбрать любую из двух опций, но в целях обучения мы выбираем Per User.

4. Обратите внимание на URL на экране RD Web Access (Веб-доступ к удаленным рабочим столам). Позже мы будем его использовать для доступа к установленным приложениям.

5. В целях тестирования можно оставить сертификаты как Not Configured (Не сконфигурированные) и нажать OK, чтобы сохранить параметры установки.

Если вы хотите сконфигурировать сертификат, вам придется делать это для каждой службы роли по отдельности.
Верификация службы удаленных рабочих столов
По умолчанию после установки создается QuickSessionCollection, куда входят Calculator, WordPad и Paint в качестве удаленных приложений. Мы можем использовать это для тестирования установки RDP.
- Для тестирования IIS перейдите по ссылке, представленной на экране RD Web Access, или используйте https://localhost/rdweb/, если вы находитесь на RDP-сервере.

2. Подключитесь к сеансу IIS RDS с помощью доменной учетной записи.

3. Запустите удаленное соединение: то, которое вы сконфигурировали, или удаленное приложение по умолчанию.

Установка службы удаленных рабочих столов может состоять из многих шагов, но после изначальной настройки ее легко конфигурировать и использовать. Удаленные приложения обеспечивают значительную гибкость, как и возможность настраивать коллекции RDP-подключений для предложения их пользователям.