Ubuntu is a Linux based distribution that is totally free and open source. The program also provides support for Windows 10 and is used by a lot of people for software developing purposes. However, quite recently a lot of reports have been coming in where users are unable to use it and the Error “The WSL Optional Component is not Enabled. Please Enable it and Try Again” is seen while trying to do so.
What Causes “The WSL Optional Component is Not Enabled. Please Enable it and Try Again” Error on Ubuntu?
After receiving numerous reports from multiple users, we decided to investigate the issue and devised a set of solutions to fix eradicate it completely. Also, we looked into the reason due to which this issue is triggered and listed it as follows.
- Disabled Component: As the error message indicates, the error is triggered if the Windows Subsystem for Linux is disabled. Windows Subsystem for Linux is a very important feature and needs to be enabled in order for Ubuntu to work properly on Windows 10 because it provides all the important configurations and distributions needed for Ubuntu to run correctly.
Now that you have a basic understanding of the nature of the problem, we will move on towards the solutions. Make sure to implement the solutions carefully, in order to avoid conflict.
Method 1: Turning WSL ON Through Control Panel
There are a couple of methods which we can apply to rectify the problem. However, in this step, we will be taking the easiest route and enable WSL through the Control Panel. For that:
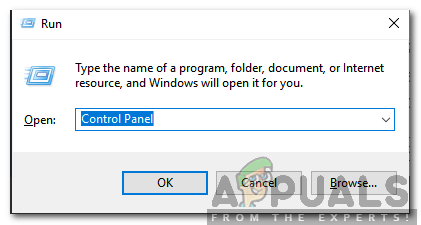
- Press “Windows” + “R” keys simultaneously to open the Run prompt.
- Type in “Control Panel” and press “Shift” + “Ctrl” + “Enter” to provide administrative privileges.

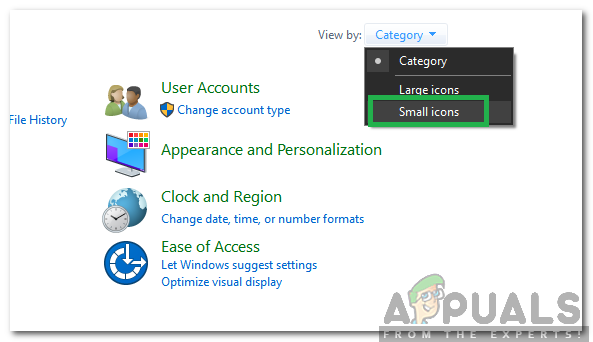
Typing in “Control Panel” and pressing “Shift” + “Ctrl” + “Enter” to provide administrative privileges - Click on the “View By” option and select “Small Icons“.

Clicking on “View By” and selecting “Small Icons” - Click on the “Programs and Features” option.
- Select the “Turn Windows Features On or OFF” option in the left pane.
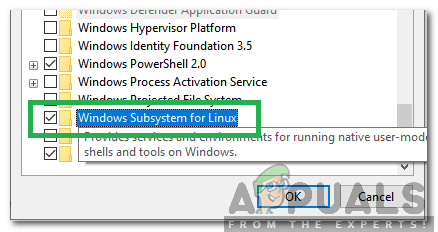
- Scroll down and select “Windows Subsystem for Linux“.

Checking the “Windows Subsystem for Linux” option” - Click on “OK” to enable the feature.
- Check to see if the issue persists.
Solution 2: Turning WSL ON Through PowerShell
We can also enable the WSL Feature by using the Command Prompt. Therefore, in this step, we will be implementing a command in the command prompt to enable the WSL Feature. For that:
- Press “Windows” + “R” keys simultaneously to open the Run prompt.
- Type in “Powershell” and press “Shift“+ “Ctrl” + “Enter” to provide administrative privileges.
- Type in the following command and press “Enter“.
Enable-WindowsOptionalFeature -Online -FeatureName Microsoft-Windows-Subsystem-Linux
- Wait for the command to be executed and check to see if the issue persists.

Enabling WSL


Kevin Arrows
Kevin is a dynamic and self-motivated information technology professional, with a Thorough knowledge of all facets pertaining to network infrastructure design, implementation and administration. Superior record of delivering simultaneous large-scale mission critical projects on time and under budget.
Back to top button
Easily enable the Windows Subsystem for Linux
by Hasibul Kabir
Hasibul Kabir is a Tech-Enthusiast Blogger, Web Developer & Hobbyist Game Developer. Writing about Technology, mainly Windows, Mac, and iOS, etc. is his main focus besides doing some… read more
Published on December 3, 2022
Reviewed by
Alex Serban

After moving away from the corporate work-style, Alex has found rewards in a lifestyle of constant analysis, team coordination and pestering his colleagues. Holding an MCSA Windows Server… read more
- When you try to launch something that requires Windows Subsystem for Linux, you may get an error indicating that this optional feature is not enabled.
- Enabling this feature can be necessary, and it will not slow down your PC’s performance.
- To turn on this feature on Windows, you can use PowerShell and another method described in this article.
XINSTALL BY CLICKING THE DOWNLOAD FILE
This software will repair common computer errors, protect you from file loss, malware, hardware failure and optimize your PC for maximum performance. Fix PC issues and remove viruses now in 3 easy steps:
- Download Restoro PC Repair Tool that comes with Patented Technologies (patent available here).
- Click Start Scan to find Windows issues that could be causing PC problems.
- Click Repair All to fix issues affecting your computer’s security and performance
- Restoro has been downloaded by 0 readers this month.
While running anything, have you ever seen an error like the Windows subsystem for the Linux option component is not enabled? If yes, go through this article for the ultimate solution.
Usually, when you try to run any software, service, or app that requires the Linux environment, you may get an error. In most cases, if you install the Ubuntu app from the Microsoft Store and open it, this problem will appear. When it occurs, you get the following message:
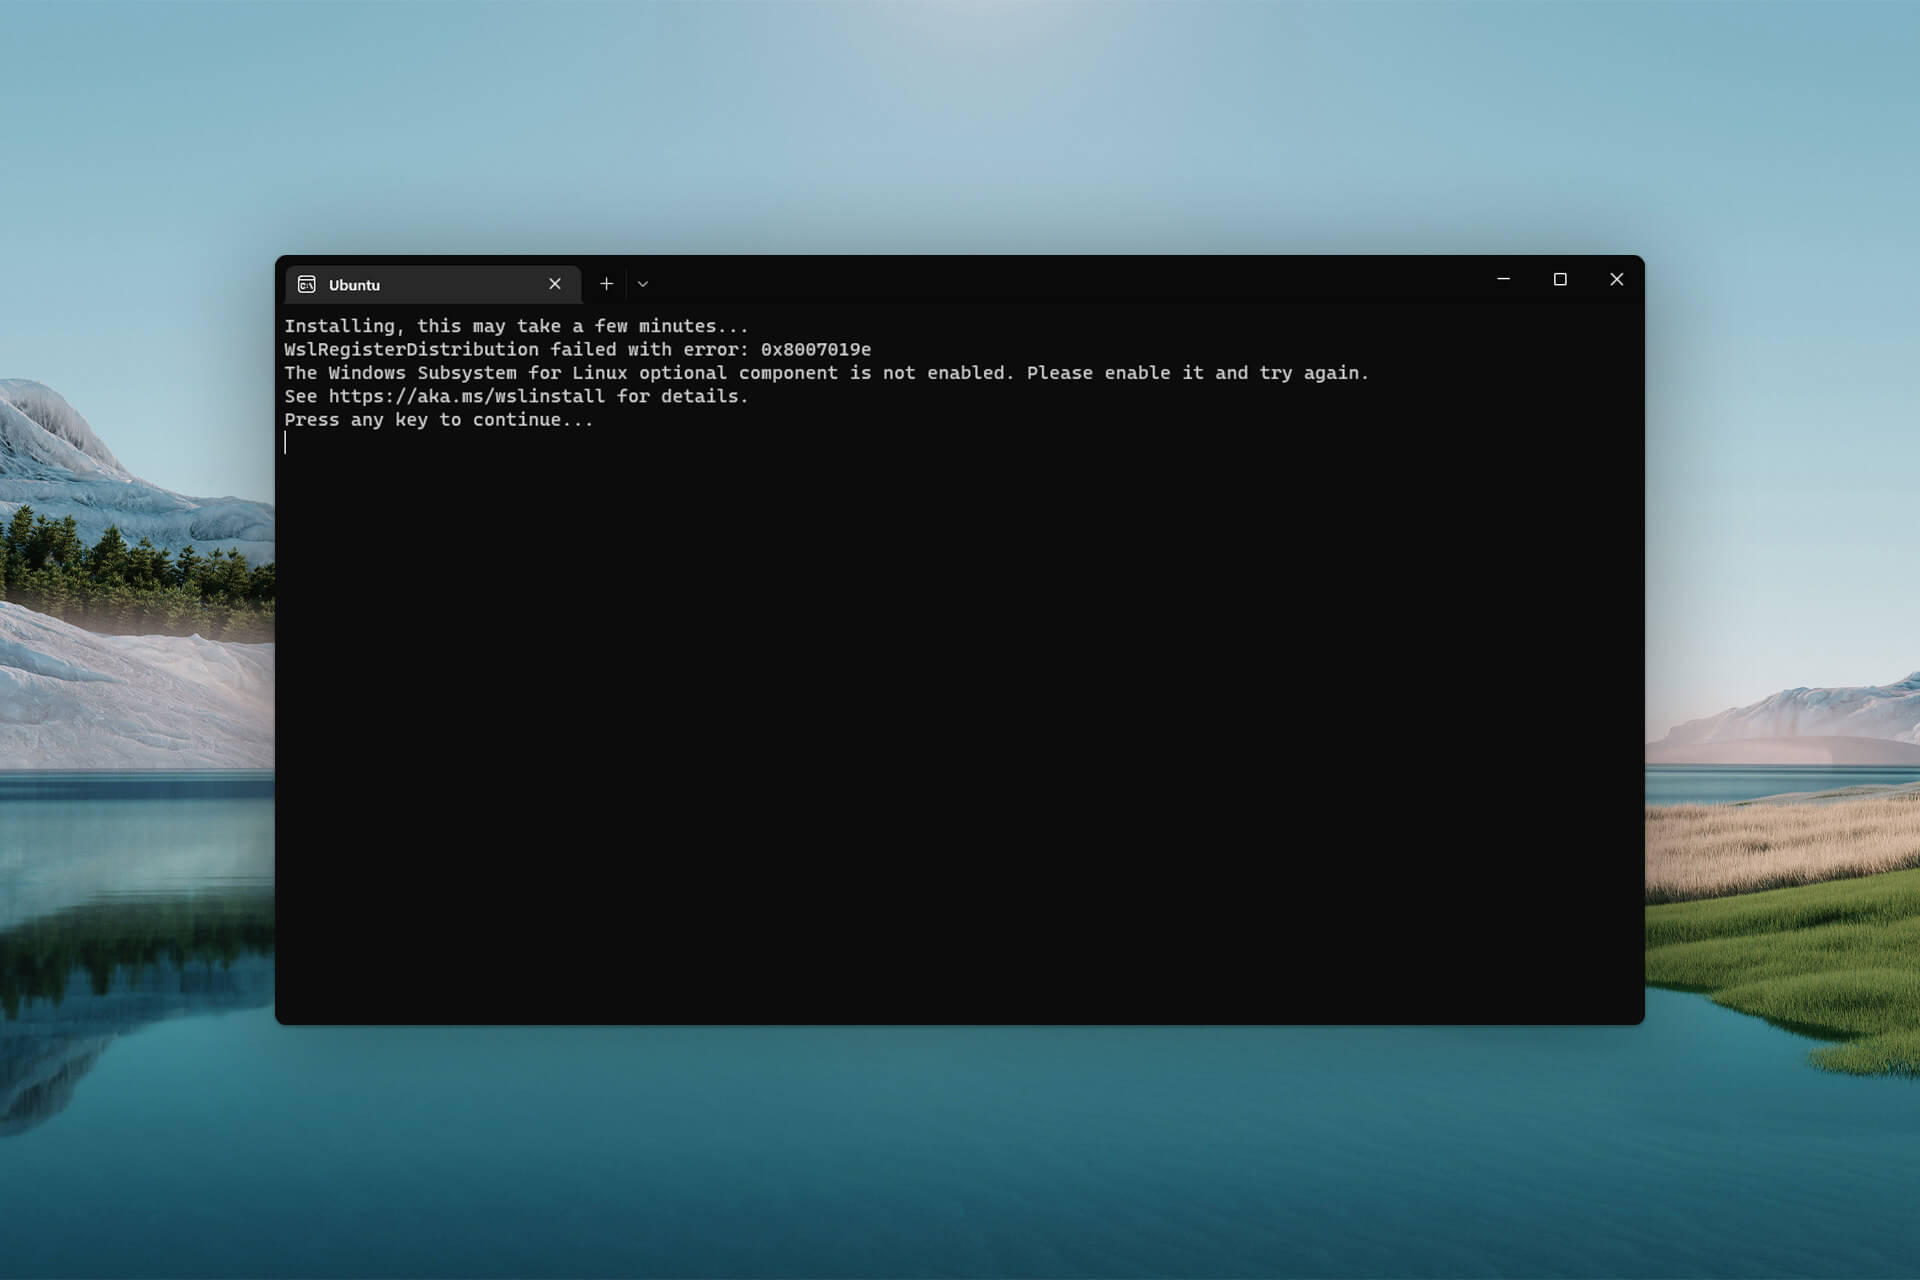
The Windows Subsystem for Linux optional component is not enabled. Please enable it and try again.
It also may show an error code 0x8007019e. But don’t worry, you can easily fix this problem if you take the proper steps.
Does the Windows Subsystem for Linux slow down a PC?
To make your development work much more pleasant, you may enable WSL. It does not hurt Windows performance.
Any services in the background take a few computing resources. The WSL is not different. However, according to the users, it doesn’t slow down the PC.
We have tested it by ourselves. Our research also has found that modern computers can easily handle Windows Subsystem for Linux without negatively affecting performance.
Moreover, it can be an essential feature for some users. So, you may need to turn it on, particularly when you face the error mentioned in this article.
How do I enable Windows Subsystem for Linux on Windows?
If you want to enable WSL on your PC, you can easily do it. But, before that, we suggest you do the following things:
- Update Windows to the latest version.
- Make sure you are using Windows 11 or 10, as other versions don’t support this feature.
Now, you can follow these methods mentioned below to enable Windows Subsystem for Linux.
1. Install the optional feature
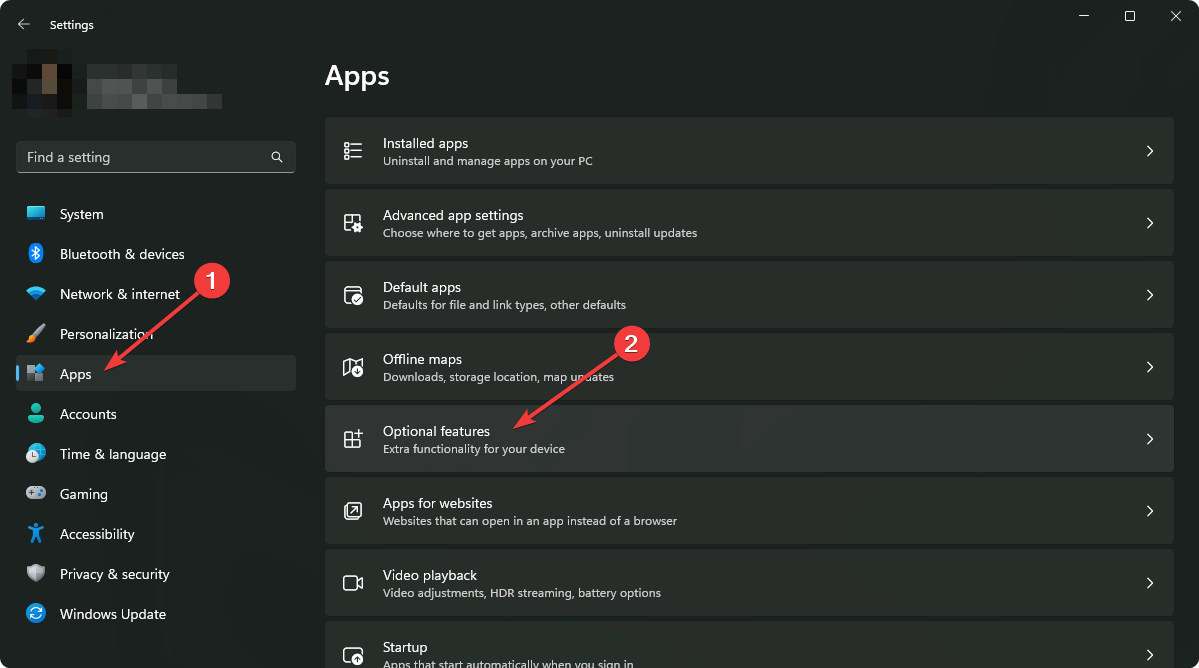
- Press Win + I on the keyboard to open Windows Settings.
- Go to Apps and click on Optional features.

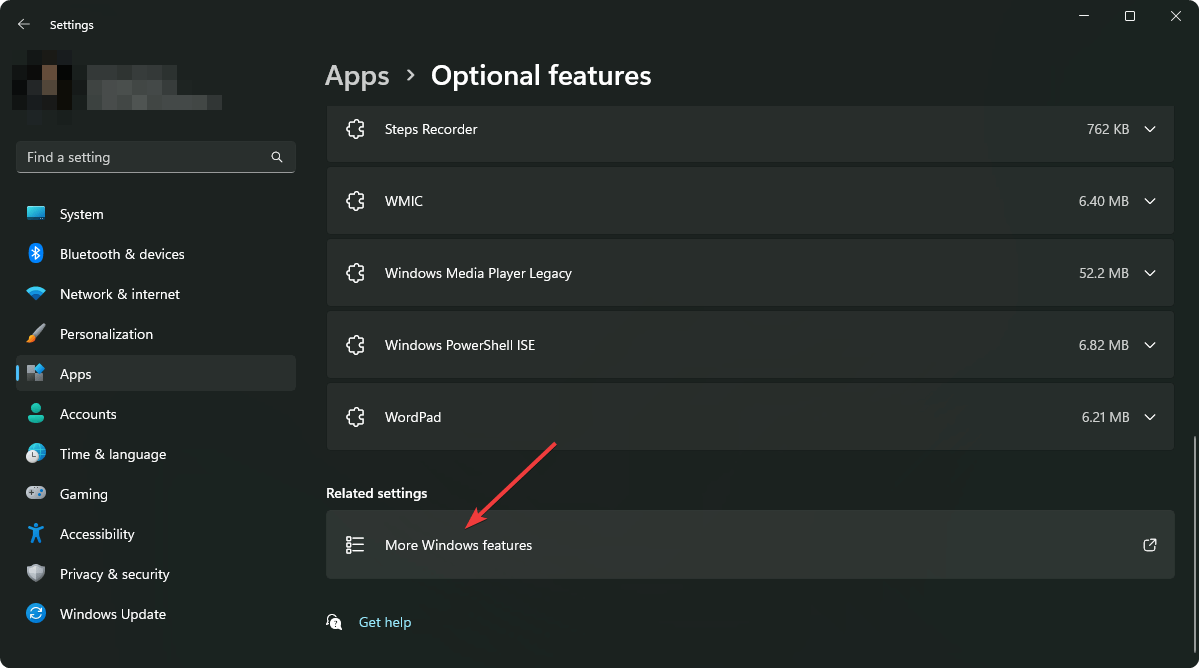
- Click on More Windows features to open the Windows Features window.
- Tick Windows Subsystem for Linux and click on OK.

- It will install the required components.
- Restart your PC after completing the process.

Alternatively, you also can search for the optionalfeatures on the Start Menu to find and open the Windows Features window. It can be necessary if you don’t find the exact options shown in the above steps.
After enabling the WSL, you can try to open the Ubuntu terminal or any other app or service that was showing the error. Hopefully, you will not see the same again.
2. Use the PowerShell command
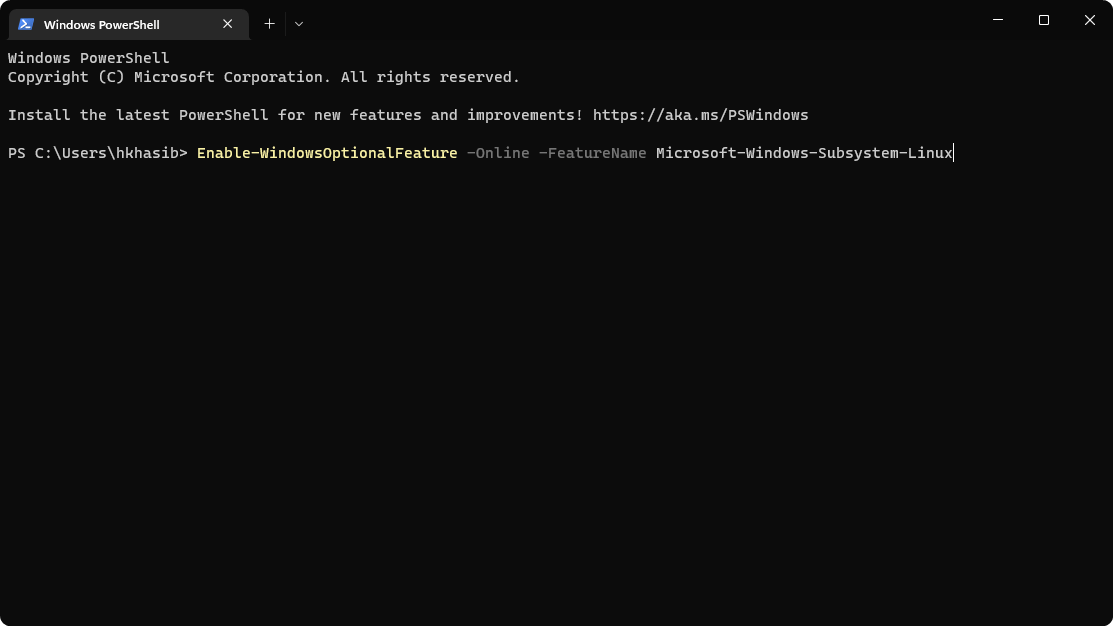
- Open the Start Menu, type PowerShell, and hit Enter.
- Now, type the following command and press Enter to execute it:
Enable-WindowsOptionalFeature -Online -FeatureName Microsoft-Windows-Subsystem-Linux
- Wait for a while.
- Restart your PC after PowerShell installs the required features.
Now, verify if it has solved the problem or not. If PowerShell can successfully enable this optional feature, you can use the Ubuntu terminal or any other app that requires WSL without any error.
- Looker vs. Power BI vs. Tableau: Which Tool Is Better For You?
- How to Change Real Time Update Speed in Task Manager
- Fix: HP Support Assistant Stuck on Creating a Restore Point
- How to Check Your Windows Experience Index on Windows 11
Some versions of Windows may require you to enable developer mode to use WSL. Though if you are using the latest builds, it is no longer necessary, you may still want to know how to enable it. In this case, follow these steps:
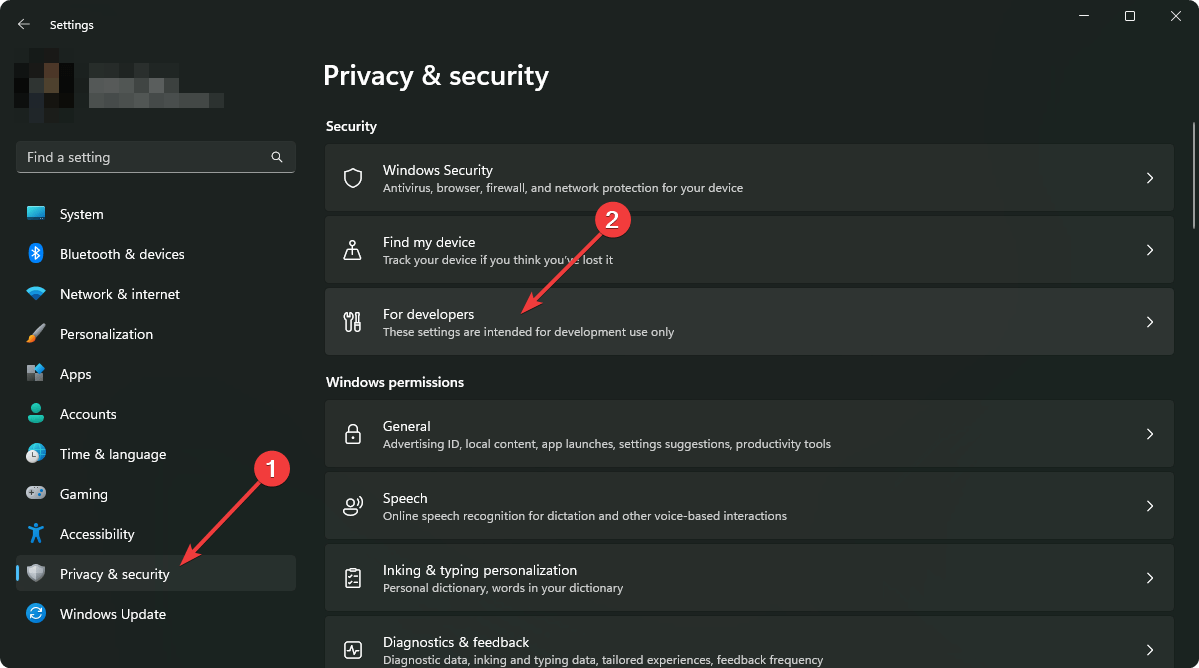
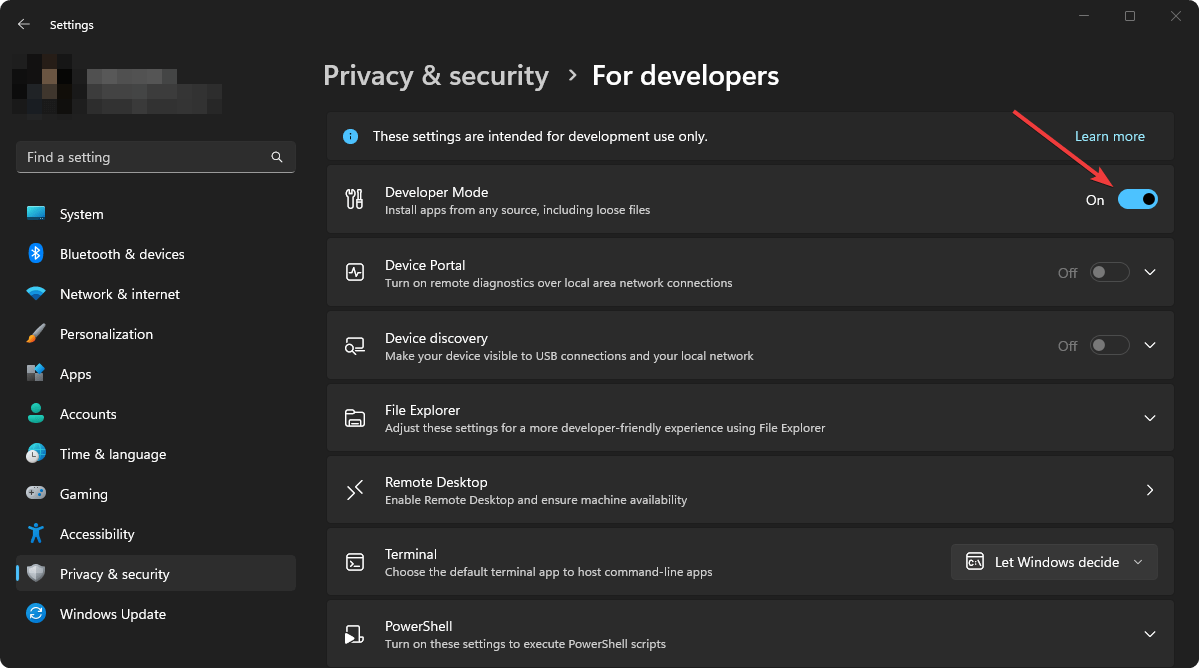
- Open Windows Settings.
- Go to Privacy & security and click on For developers.
- Turn the Developer Mode by tweaking the appropriate switch.
- Click on Yes on the popup window.
- Restart your PC.
For more detailed steps, learn how to enable Windows 11 Developer Mode. If the Developer Mode is a requirement, try to enable the latest WSL again and see if it works.
This article has explained how to fix Windows Subsystem for Linux is not enabled. If you have any opinions or suggestions, feel free to let us know in the comments box.
Still having issues? Fix them with this tool:
SPONSORED
If the advices above haven’t solved your issue, your PC may experience deeper Windows problems. We recommend downloading this PC Repair tool (rated Great on TrustPilot.com) to easily address them. After installation, simply click the Start Scan button and then press on Repair All.
![]()
Newsletter
Switch on and begin launching Linux apps and commands in Windows.

If you want to run a Linux terminal on Windows, it’s easier to use the Windows Subsystem for Linux. It’s pretty easy to set up, and within no time, you’ll be executing commands. But first, you need to enable the Windows Subsystem for Linux (WSL).
This article will show you how to enable Windows Subsystem for Linux, a gateway opener that allows you to install a Linux bash shell on Windows. You don’t need a virtual machine, let alone dual booting, which can be tough for beginners.
Requirements for Running Windows Subsystem for Linux on Windows 10
Before detailing how to enable Windows Subsystem for Linux, you should beware of the minimum requirements.
According to Microsoft, you should be running:
- Windows 10 (64-bit) version 2004 and higher with Build 19041 (or higher) or,
- Windows 11.
Here’s how to check what version of Windows 10 you have installed.
Some older Windows 10 versions can also work, but that means you’ll have to embrace the manual install route for WSL.
How to Enable Windows Subsystem for Linux
If you’re facing problems installing Linux bash shell on Windows 10, one of the issues might be you’ve not enabled Windows Subsystem for Linux. If that’s the case, you’ll bump into an error: «The Windows Subsystem for Linux optional component is not enabled. Please enable it and try again.»
Here’s how to enable Windows Subsystem for Linux component in Windows 10:
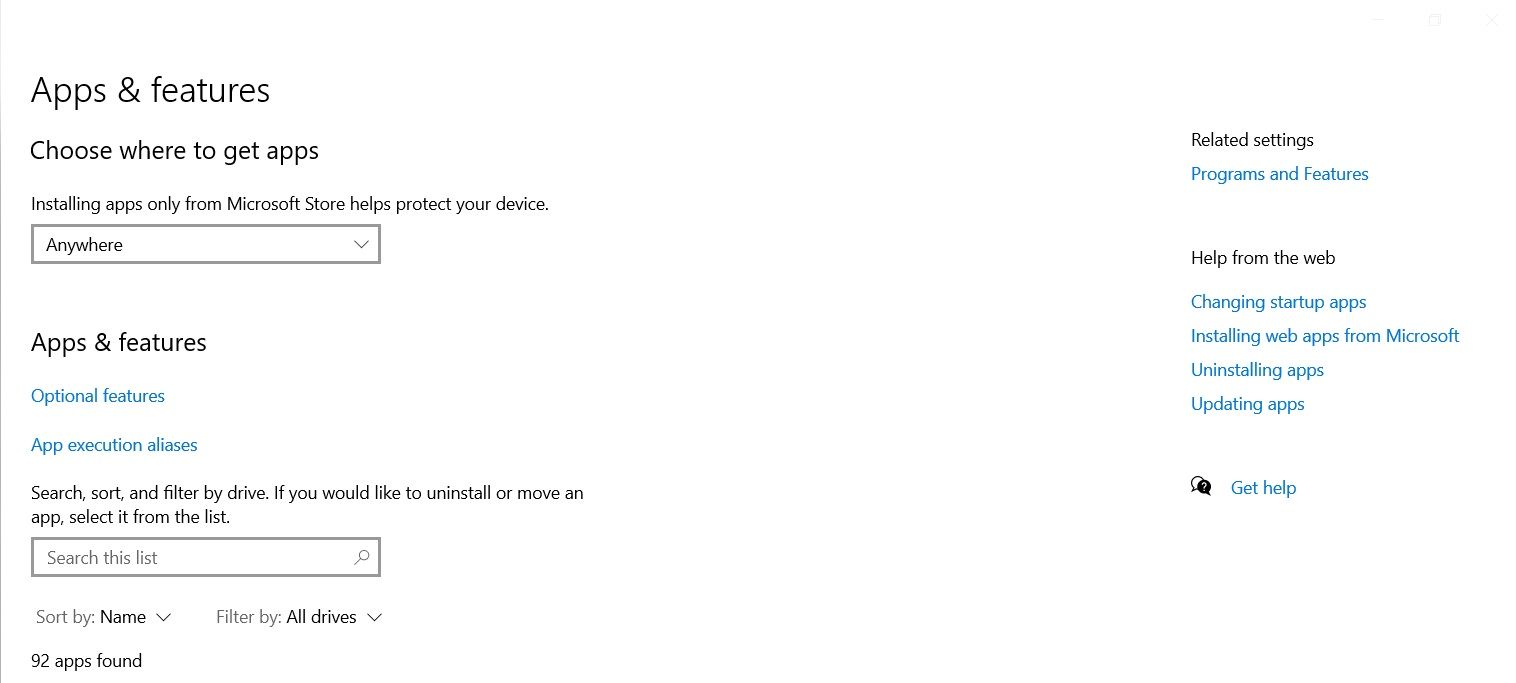
- Open Windows 10 Settings app.
- Select Apps.
- Click Programs and Features under the Related settings section on the right.

- Under the Programs and Features page, click Turn Windows features on or off on the left panel.
- Scroll down and enable Windows Subsystem for Linux.

- Click OK to save your changes.
- Hit Restart now to finish the process.

Next, you need to install Windows Subsystem for Linux. After that, you can install any supported Linux distro right inside your Windows PC.
Furthermore, you can also install a Linux desktop in Windows that gives you a graphical UI to work with.
Install Linux Distros on Windows the Right Way
For a smooth experience when installing Linux in Windows 10, enable Windows Subsystem for Linux first. It doesn’t take much of your time and will save you from errors during the installation.
Updated January 2023: Stop getting error messages and slow down your system with our optimization tool. Get it now at this link
- Download and install the repair tool here.
- Let it scan your computer.
- The tool will then repair your computer.
Ubuntu is a Linux-based distribution that is completely free and open source. The program also supports Windows 10 and is used by many people for software development. Recently, however, there have been many reports where users cannot use it and the error “The WSL Optional Component is not Enabled”. Please enable it and try again” will be displayed while you are trying.

Such an error can occur when you try to run Linux under Windows 10:
The WSL optional component is not enabled. Please enable it and try again.
See https://aka.ms/wslinstall for details.
Error: 0x8007007e
Press any key to continue…
And if you press a key, the application closes immediately.
This is because the Windows subsystem for Linux is not enabled in your case. You must activate it as described in step 1 of this manual. You can also do this after installing Linux from the Windows store.
Activate the WSL and install ubuntu.
January 2023 Update:
You can now prevent PC problems by using this tool, such as protecting you against file loss and malware. Additionally it is a great way to optimize your computer for maximum performance.
The program fixes common errors that might occur on Windows systems with ease — no need for hours of troubleshooting when you have the perfect solution at your fingertips:
- Step 1 : Download PC Repair & Optimizer Tool (Windows 10, 8, 7, XP, Vista – Microsoft Gold Certified).
- Step 2 : Click “Start Scan” to find Windows registry issues that could be causing PC problems.
- Step 3 : Click “Repair All” to fix all issues.

- Open the settings (click the Start button in the lower left corner or the notification icon in the lower right corner and then click the gear icon). In the search field, type “Windows Features”, then select “Enable or disable Windows functions”. Scroll down and check the box next to “Windows Subsystem for Linux”; click OK and restart. If’Windows Subsystem for Linux’ has'(beta)’ next to it, it means that you have not installed the Creators Update case.
- Open the Windows shop and search for’ubuntu 16.04 LTS’. Select’Get’. If you have installation problems, please consult this slightly outdated installation guide for troubleshooting (before updating Fall Creators).
- Select “Start”. You will be prompted to enter a username and password for Linux. The user name is case sensitive; it may be identical to your Windows user name, but you must avoid spaces or special characters in it. The password must be different from your Windows password; you must enter it when you install or update software from the Linux command line.
- We recommend that you select’Pin to Start’ and/or’Pin to taskbar’ for the ubuntu 16.04 executable file. If you want to launch’Pin to Start’ later, simply open the Windows store and search again for’ubuntu 16.04 LTS’.

Configuration of the ubuntu command line
- Open ubuntu 16.04 if it is not already open. Right-click on the ubuntu icon in the upper left corner and select Properties. Make sure that’QuickEdit Mode’ is enabled. You can now select text, including the commands in these instructions (with Control-c) and paste them into the command line by right-clicking or on the touchpad in the Ubuntu window.
- Note that you can use ubuntu commands and Linux software to modify your normal files under Windows. In general, you should not use Windows programs to modify Ubuntu files (i.e. Ubuntu system files and files in your Ubuntu home area). So it’s a good idea to store all your working files in the usual Windows folders and configure the links so that you can access them from the command line:
ln -sf /mnt/c/Users/your_windows_username/Downloads .
… the space between ‘Downloads’ and ‘.’ is required
… if you copy and paste the command then use the left arrow and delete to replace ‘your_windows_username’ with the actual name of the folder that your Windows files are stored in
… if the ‘your_windows_username’ folder has spaces in its name you need to put a ‘’ before each one e.g:
ln -sf /mnt/c/Users/your windows username/Downloads .
- You can now move to the folder by entering’cd Downloads’. If you do not want the link to be called’Downloads’, replace ‘…” with the name of your link, for example’MyFiles’. ln’ means’link’;’-s’ means’symbolic’, so if you delete the link, do not delete the original file (similar to Windows shortcuts);’-f’ means’force’, which makes no difference at this point, but if you change your mind about the location of the’MyFiles’ link, you will need to replace the original.
- Replace “Downloads” and repeat the operation for all other folders that you can access from the command line.
https://superuser.com/questions/1315709/ubuntu-on-windows-showing-wsl-as-not-enabled-even-though-windows-showing-wsl-as
Expert Tip: This repair tool scans the repositories and replaces corrupt or missing files if none of these methods have worked. It works well in most cases where the problem is due to system corruption. This tool will also optimize your system to maximize performance. It can be downloaded by Clicking Here

CCNA, Web Developer, PC Troubleshooter
I am a computer enthusiast and a practicing IT Professional. I have years of experience behind me in computer programming, hardware troubleshooting and repair. I specialise in Web Development and Database Design. I also have a CCNA certification for Network Design and Troubleshooting.
Post Views: 76
This article goes over WSL 1 and 2 for Feature Update 2004. This will help you know which WSL you are currently using for any Linux installs on your PC.
Source Article: https://docs.microsoft.com/en-us/windows/wsl/install-win10 I copy these because Microsoft is notorious for changing URLs and to make additions
Install the Windows Subsystem for Linux
Before installing any Linux distributions on Windows, you must enable the “Windows Subsystem for Linux” optional feature.
Open PowerShell as Administrator and run:
dism.exe /online /enable-feature /featurename:Microsoft-Windows-Subsystem-Linux /all /norestart
To only install WSL 1, you should now restart your machine and move on to Install your Linux distribution of choice, otherwise wait to restart and move on to update to WSL 2. Read more about Comparing WSL 2 and WSL 1.
Update to WSL 2
To update to WSL 2, you must meet the follow criteria:
- Running Windows 10, updated to version 2004, Build 19041 or higher.
- Check your Windows version by selecting the Windows logo key + R, type
winver, select OK. (Or enter the ver command in Windows Command Prompt). Please update to the latest Windows version if your build is lower than 19041. Get Windows Update Assistant. - Enable the ‘Virtual Machine Platform’ optional component
Before installing WSL 2, you must enable the “Virtual Machine Platform” optional feature.
Open PowerShell as Administrator and run:
dism.exe /online /enable-feature /featurename:VirtualMachinePlatform /all /norestart
Restart your machine to complete the WSL install and update to WSL 2.
Set WSL 2 as your default version
Run the following command in Powershell to set WSL 2 as the default version when installing a new Linux distribution:
wsl --set-default-version 2
Note: The update from WSL 1 to WSL 2 may take several minutes to complete depending on the size of your targeted distribution.
Troubleshooting WSL 2 set-default error

If you can’t set the default version after enabling the virtual machine platform and linux subsystem for windows. Then you need to do a kernel upgrade. This done by running the following msi file: https://wslstorestorage.blob.core.windows.net/wslblob/wsl_update_x64.msi
Install your Linux distribution of choice
Open the Microsoft Store and select your favorite Linux distribution.
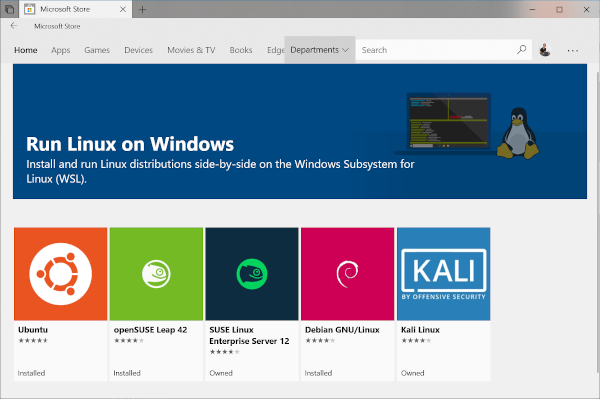
The following links will open the Microsoft store page for each distribution:
- Ubuntu 16.04 LTS
- Ubuntu 18.04 LTS
- Ubuntu 20.04 LTS
- openSUSE Leap 15.1
- SUSE Linux Enterprise Server 12 SP5
- SUSE Linux Enterprise Server 15 SP1
- Kali Linux
- Debian GNU/Linux
- Fedora Remix for WSL
- Pengwin
- Pengwin Enterprise
- Alpine WSL
From the distribution’s page, select “Get”.

Set up a new distribution
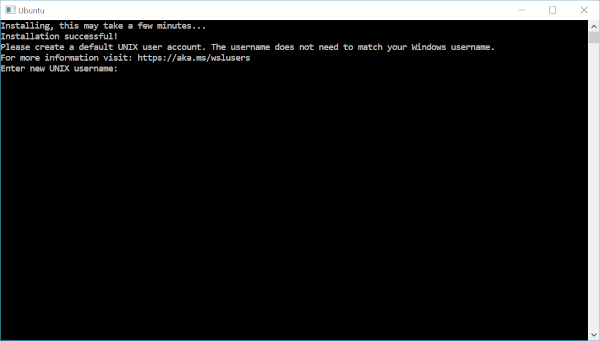
The first time you launch a newly installed Linux distribution, a console window will open and you’ll be asked to wait for a minute or two for files to de-compress and be stored on your PC. All future launches should take less than a second.
You will then need to create a user account and password for your new Linux distribution.
Set your distribution version to WSL 1 or WSL 2
You can check the WSL version assigned to each of the Linux distributions you have installed by opening the PowerShell command line and entering the command (only available in Windows Build 19041 or higher): wsl -l -v
To set a distribution to be backed by either version of WSL please run:
wsl --set-version <distribution name> <versionNumber>
Make sure to replace with the actual name of your distribution and with the number ‘1’ or ‘2’. You can change back to WSL 1 at anytime by running the same command as above but replacing the ‘2’ with a ‘1’.
Additionally, if you want to make WSL 2 your default architecture you can do so with this command:
wsl --set-default-version 2
Note: This will set the version of any new distribution installed to WSL 2.
Troubleshooting installation
Below are related errors and suggested fixes. Refer to the WSL troubleshooting page for other common errors and their solutions.
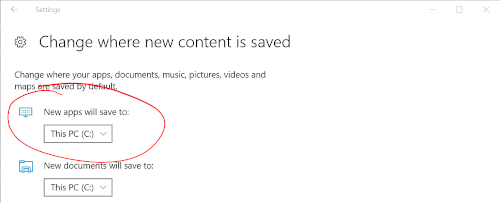
Installation failed with error 0x80070003
The Windows Subsystem for Linux only runs on your system drive (usually this is your C: drive). Make sure that distributions are stored on your system drive:
Open Settings -> Storage -> More Storage Settings: Change where new content is saved
WslRegisterDistribution failed with error 0x8007019e
The Windows Subsystem for Linux optional component is not enabled:
Open Control Panel -> Programs and Features -> Turn Windows Feature on or off -> Check Windows Subsystem for Linux or using the PowerShell cmdlet mentioned at the beginning of this article.
Installation failed with error 0x80070003 or error 0x80370102
Please make sure that virtualization is enabled inside of your computer’s BIOS. The instructions on how to do this will vary from computer to computer, and will most likely be under CPU related options.
Error when trying to upgrade: Invalid command line option: wsl –set-version Ubuntu 2
Please make sure that you have the Windows Subsystem for Linux enabled, and that you’re using Windows Build version 19041 or higher. To enable WSL run this command in a Powershell prompt with admin privileges: Enable-WindowsOptionalFeature -Online -FeatureName Microsoft-Windows-Subsystem-Linux. You can find the full WSL install instructions here.
The requested operation could not be completed due to a virtual disk system limitation. Virtual hard disk files must be uncompressed and unencrypted and must not be sparse.
Please check WSL Github thread #4103 where this issue is being tracked for updated information.
The term ‘wsl’ is not recognized as the name of a cmdlet, function, script file, or operable program.
Ensure that the Windows Subsystem for Linux Optional Component is installed. Additionally, if you are using an Arm64 device and running this command from PowerShell, you will receive this error. Instead run wsl.exe from PowerShell Core, or Command Prompt.
Conclusion
WSL 2 is still very new and as such is still rough around the edges. However, the performance increase is undeniable and is a substantial improvement over
Not able to launch Ubuntu,
The Windows Subsystem for Linux optional component is not enabled. Please enable it and try again.
See https://aka.ms/wslinstall for details.
Press any key to continue...
Output of WSL status:
PS C:WINDOWSsystem32> Get-WindowsOptionalFeature -Online -FeatureName Microsoft-Windows-Subsystem-Linux


FeatureName      : Microsoft-Windows-Subsystem-Linux
DisplayName      : Windows Subsystem for Linux (Beta)
Description      : Provides services and environments for running native user-mode Linux shells and tools on Windows.
RestartRequired  : Required
State            : Enabled
CustomProperties :
I have restarted many times and not able to launch Ubuntu1804.
Edit-1:
I have tried to launch .exe file using admin as well as the user privileges, through double-clicking the .exe file as well as from PowerShell itself.
asked Feb 7, 2020 at 5:10
![]()
5
I have tried to launch .exe file using admin as well as the user privileges, through double-clicking the .exe file as well as from PowerShell itself.
You are using Windows 10 Version 1607, which means you have to use lxrun.exe and bash.exe to manage your WSL instance. wsl.exe and wslconfig.exe are not applicable to Windows 10 version 1607.
Here are the steps you must follow to use WSL on Windows 10 version 1607.
The following instructions are for users running Windows 10
Anniversary Update or Windows 10 Creators Update:
- Enable Developer Mode
- Open PowerShell as Administrator and run: Enable-WindowsOptionalFeature -Online -FeatureName
Microsoft-Windows-Subsystem-Linux- Reboot
- Open a command prompt. Type bash and hit enter
The first time you run Bash on Ubuntu on Windows, you’ll be prompted
to accept Canonical’s license. Once accepted, WSL will download and
install the Ubuntu instance onto your machine, and a «Bash on Ubuntu
on Windows» shortcut will be added to your start menu.
Sources:
-
Get a Linux Distro for WSL on Windows 1703
-
Windows 10 Anniversary Update and Creators Update WSL Install & Uninstall Guide
answered Feb 7, 2020 at 8:52
![]()
RamhoundRamhound
40.3k34 gold badges100 silver badges127 bronze badges
4
This solved the issue for me:
- Run windows + R
- type SystemPropertiesAdvanced
- click settings in performance group
- In advanced tab, deselect the automatically manage paging file size for all drives
- Select custom size and enter 800 for initial size, 1024 for maximum size.
- Apply changes and restart.
Reference:
https://github.com/microsoft/WSL/issues/849#issuecomment-322163360
answered May 8, 2021 at 16:54
![]()
Linux, Windows 10
- 02.06.2019
- 12 360
- 0
- 04.10.2021
- 39
- 39
- 0

- Содержание статьи
- Установка Linux в Windows 10
- Использование Linux в Windows 10
- Возможные проблемы
- Добавить комментарий
Однажды генеральный директор Майкрософт Сатья Наделла заявил «Microsoft Loves Linux» (дословно переводится как Майкрософт любит Линукс), и словно в доказательство этого дела, в Windows 10 появилась возможность установки нескольких дистрибьютивов семейства операционных систем Linux, с которыми можно будет взаимодействовать из основной операционной системы. Установить их можно буквально в пару кликов, и в этой статье мы расскажем Вам как.
Установка Linux в Windows 10
Важный момент — использовать подсистему Windows для Linux можно только на 64-разрядных операционных системах.
- Первым делом нужно установить компонент «Подсистема Windows для Linux». Сделать это можно двумя способами — через старую панель управления, или через PowerShell.
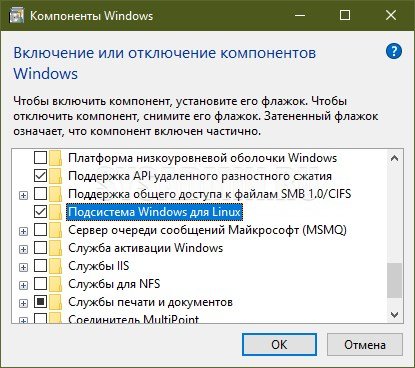
- Запускаем классическую Панель управления, выбираем «Программы и компоненты», и там на боковой панели нажимаем на «Включение или отключение компонентов Windows». В открывшемся окне нужно найти пункт «Подсистема Windows для Linux», отметить его галочкой и нажать «ОК». Затем, после установки компонента скорее всего понадобиться перезагрузка компьютера.
- Через PowerShell достаточно выполнить одну единственную команду:
Enable-WindowsOptionalFeature -Online -FeatureName Microsoft-Windows-Subsystem-LinuxПо завершению установки перезагрузка так же будет необходима.
- Запускаем классическую Панель управления, выбираем «Программы и компоненты», и там на боковой панели нажимаем на «Включение или отключение компонентов Windows». В открывшемся окне нужно найти пункт «Подсистема Windows для Linux», отметить его галочкой и нажать «ОК». Затем, после установки компонента скорее всего понадобиться перезагрузка компьютера.
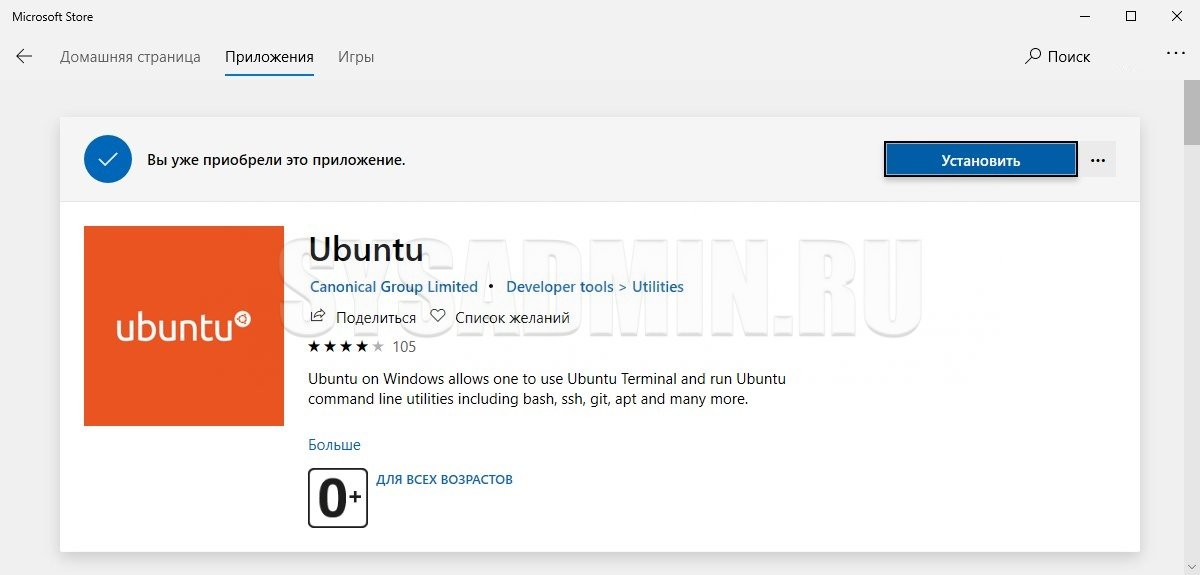
- После перезагрузки на Ваш выбор станет доступна установка любого дистрибьютива из Microsoft Store. На данный момент выбор следующий:
- Debian
- Kali Linux
- openSUSE
- SUSE Linux Enterprise Server
- Ubuntu
Для установки любого из выше перечисленных дистрибьютивов достаточно перейти по ссылке и нажать «Установить».

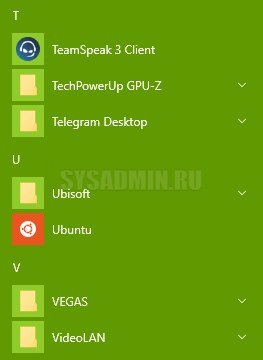
- После скачивания и установки, запустить нужный дистрибьютив можно следующими способами:
- Из самого магазина — достаточно нажать кнопку «Запустить».
- Из меню «Пуск».

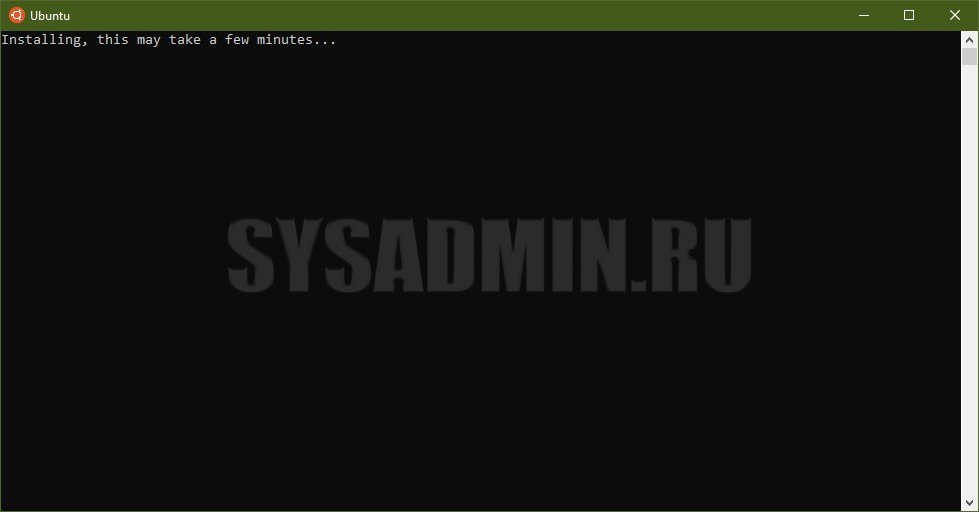
При первом запуске какое-то время будет идти установка ОС, после чего система будет готова к использованию.

Использование Linux в Windows 10
Ниже будет несколько полезной информации и советов по использованию Linux в Windows 10:
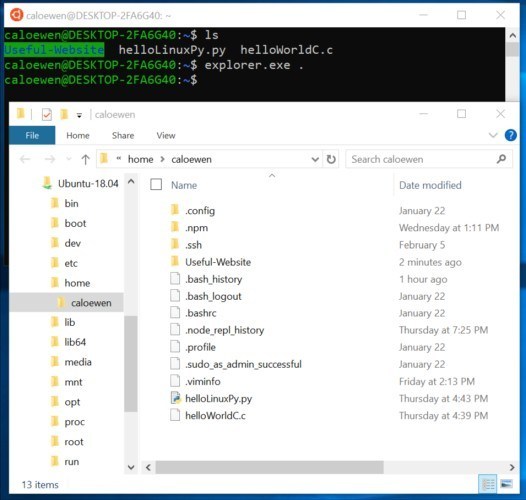
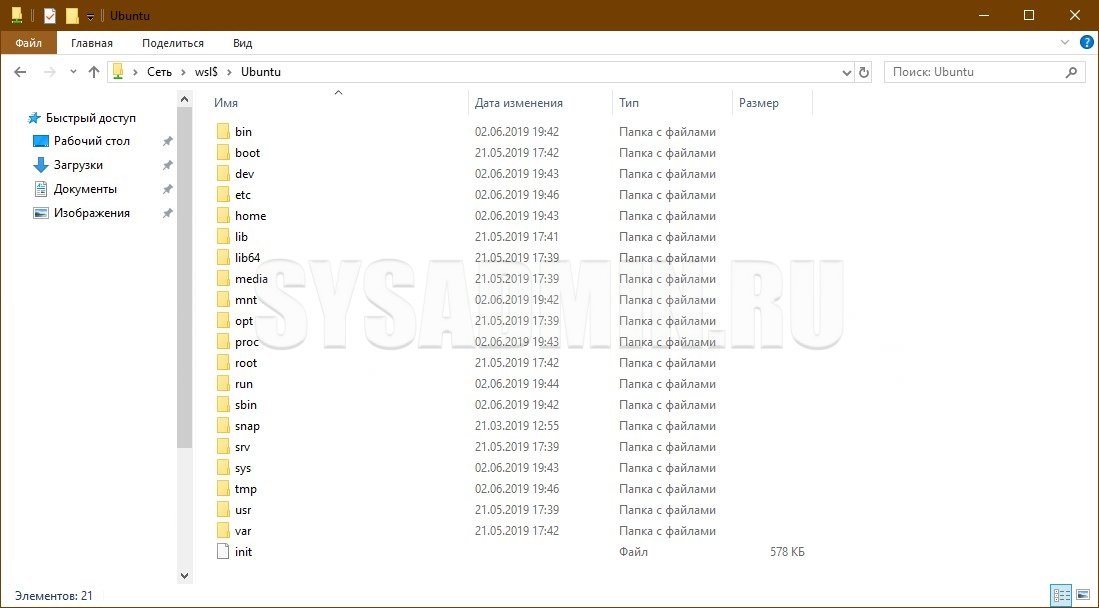
- Получить доступ к файлам установленной ОС Linux можно просто набрав в терминале следующую команду:
explorer.exe .После выполнения данной команды откроется проводник с открытой домашней директорией текущего пользователя Linux.

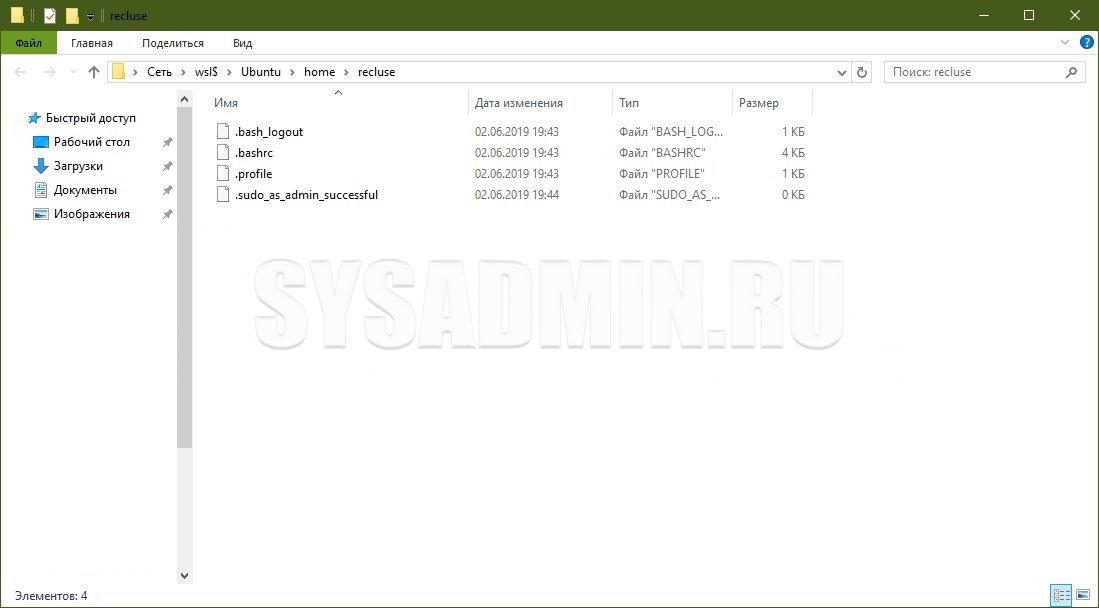
- Получить доступ к файлам Linux из Проводника можно просто указав в адресной строке проводника следующий путь:
\wsl$<ИМЯ-ДИСТРИБЬЮТВА>Т. е. если у Вас установлен дистрибьютив Ubuntu, то команда должна выглядеть следующим образом:
\wsl$Ubuntu
Возможные проблемы
Если при запуске свежеустановленного дистрибьютива из Магазина Майкрософт у вас висит окошко со следующим содержанием:
WslRegisterDistribution failed with error: 0x8007019e
The Windows Subsystem for Linux optional component is not enabled. Please enable it and try agent.
See https://aka.ms/wslinstall for details.
Press any key to continue…
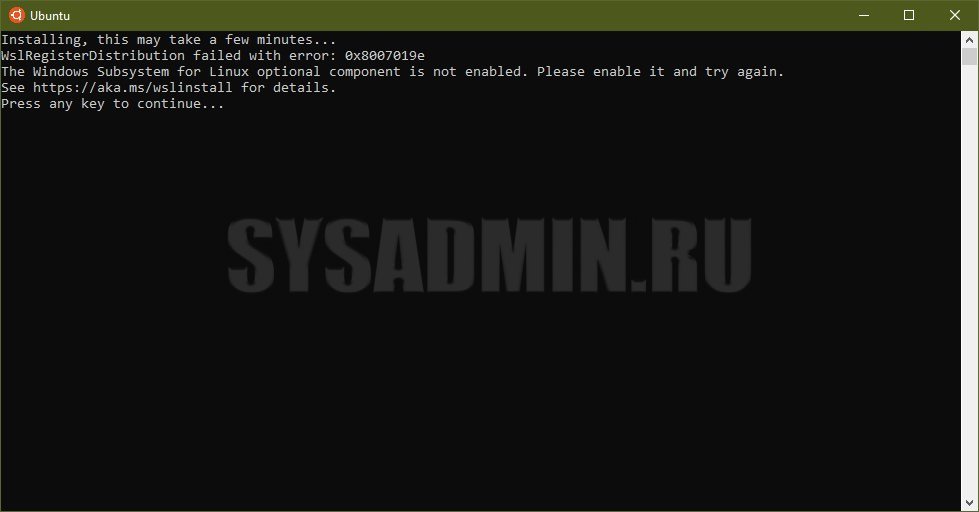
То это значит, что у вас не установлен компонент «Подсистема Windows для Linux». Про её установку можно прочесть в самом начале статьи.