This is the support section of the TinyPNG and TinyJPG Photoshop
plugin with installation instructions, additional help and tips &
tricks. You can also always download
your plugin, license and
invoice again.
Mac installation instructions
Installing the plugin on macOS is
pretty straightforward. The download page offers you two files. One
file contains the plugin and the other file your license. You will
need to copy both files to your Photoshop plugin folder as shown
below.
-
You will receive a link to the download page by email.
Download the two files. -
Open Finder and go to your Adobe Photoshop installation
folder. The default folder is Macintosh
HD/Applications/Adobe Photoshop … Here you will find a folder
named Plug-ins. -
Open a second Finder window and browse to your Downloads folder. Select
both TinyPNG-JPG.license and
TinyPNG-JPG.plugin and drag these two files to the
Plug-ins folder.
The plugin is now installed.
Using the plugin on Mac
Once you have installed the plugin you can start using it to save
compressed JPEG and PNG files with Adobe Photoshop.
-
Restart Photoshop and open an image file. Check
to make sure it is set to RGB, CMYK, lab or grayscale mode. -
From the file menu click on File > Export >
TinyPNG and TinyJPG….Notice the keyboard shortcut in the screenshot? Keep reading if
you want to use the plugin like a pro! -
The plugin dialog will appear with a preview of
your compressed PNG image. You can type in a file
name and optionally change the image scale
or the folder location. Press Save and you’re done!
Windows installation instructions
The download page offers a Windows installer and a license file. You
will need run the installer and then manually copy the license file
to your Photoshop plugin folder as shown below.
-
Once you have purchased the plugin you will receive a link to
the download page. Here you can download both
the installer and the license file. -
Now run the installer. This will copy the plugin to your Photoshop CS5,
CS6, CC, CC 2014, CC 2015, CC 2017, CC 2018,
CC 2019, CC 2020, CC 2021, CC 2022 and CC 2023 program folders.If you are using a virus scanner such as Avast Business Antivirus or AVG
AntiVirus and run into installation issues, you may need to temporarily
disable it. -
Use Explorer to copy the TinyPNG-JPG.license file from the
download folder to your Photoshop plugin folder. The plugin folder is
usually located in C:Program FilesAdobeAdobe Photoshop …Plug-ins.If you are using a 64 bit version of Windows, you may need to copy the
license file twice. Photoshop is usually located in
both Program Files and Program Files (x86).
The plugin is now installed.
Using the plugin on Windows
Once you have installed the plugin you can start using it to save
compressed PNG files with Adobe Photoshop.
-
Restart Photoshop and open an image file. Check
to make sure it is set to RGB, CMYK, lab or grayscale mode. -
From the file menu click on File > Export >
TinyPNG and TinyJPG….Notice the keyboard shortcut in the screenshot? Keep reading if
you want to use the plugin like a pro! -
The plugin dialog will appear with a preview of
your compressed PNG image. You can type in a file
name and optionally change the image scale
or the folder location. Press Save and you’re done!
Tips & tricks
Below you will find a few tips and tricks which may come in handy
when using the plugin.
-
You can save part of your image by creating
selections. Use the Marquee Tool to
create the selection and choose File > Export > TinyPNG
and TinyJPG. The preview window will now show this
selection and will say Exporting selection at
the bottom. Hit Save and your selection will be saved. -
You can also save part of your image by using
slices. Use the Slice Tool to create a
slice. The currently selected slice will be indicated by a
yellow border. Optionally give your slice a custom name by
right-clicking and selecting Edit Slice Options…. The
custom slice name will be used for the file name instead of the
image name. Then choose File > Export > TinyPNG and
TinyJPG. The preview window will now show the user slice
and will say Exporting slice at the bottom. -
In Photoshop you can add a keyboard shortcut to
the plugin. To do this select Edit > Keyboard
Shortcuts…. Navigate to Application Menus > File >
Export > TinyPNG and TinyJPG… and press your favorite key
combination. For example you can press ⌘+⇧+P. Photoshop will alert you in case
the combination is already taken. -
You do not need to worry about color profiles.
The images are converted automatically in sRGB for maximum
compatibility across browsers and devices. -
You can use Photoshop scripting to control the
plugin with JavaScript, VBScript or AppleScript. This is very
handy for manipulating images. Using this technique
we have created example scripts
that compress JPEG and PNG files and an example that exports
Layer Comps to optimised images. You can
download the scripts
and copy them into your Scripts folder in Photoshop. New menu
items will appear under File > Automate and under
File > Scripts after copying the scripts to Photoshop. -
The plugin supports batch automation. First you
will need to create a Photoshop action that uses the plugin.
When creating the action make sure to leave the suggested file
name unchanged. You can then choose File > Automate >
Batch…. In the dialog window that now appears you can
select the newly created action from the drop-down. Under
Source you can select the folder with all the images
you want to compress. The Destination needs to be set
to None, because the plugin saves the JPEG and PNG
files to its own folder. You can change this folder in the
actions panel. Double click on it to select a different
destination. -
MacOS supports tabbing through dialogs, but this
is switched off by default. You can switch it on in System
Preferences. Navigate to Keyboard and then click
on Shortcuts. Select the radio button All
controls shown at the bottom. Once switched on you can tab
through the preview dialog and use the spacebar to press
buttons. Full keyboard access can also be activated with the key
combination Ctrl+fn+F7. -
The plugin supports RGB, CMYK, lab and
grayscale images. There are some image formats the
plugin does not support. These are multichannel, duotone and
indexed image files. The TinyPNG and TinyJPG menu option will be
grayed out for these images. If you wish to export these image
formats with the plugin, you can first select Image > Mode >
RGB Color and the TinyPNG and TinyJPG menu option will be
active again. -
Photoshop artboards are supported. First select
any artboard or a layer within an artboard in your
Layers panel. Then choose File > Export > TinyPNG
and TinyJPG to bring up the preview window and save the
currently selected artboard. -
The plugin compresses images offline, on your
own computer. No information about your usage is shared and no
internet connection is required.
Known limitations
-
The Export menu can be greyed out. To
fix this you will need to change the color mode of the image by
selecting Image > Mode > RGB Color and Image > Mode
> 8-Bits/Channel. After making these changes you should be
able to export the image with the plugin. -
Optimising JPEG images with the plugin can
result in slightly bigger output than with the
web service and API. The reason this may happen is that in
Photoshop only the raw image data is available,
whereas the web service and the API also know the previous JPEG
compression level.
About your purchase
-
Your license is valid for either one computer
used by many people, or several computers used by one
person. Multi-user licenses are valid for either
multiple computers, or multiple
users. -
You can obtain additional licenses with the same
email address. Just purchase them one after another on the plugin page. All the plugins will be shown
on your download page together with the date of purchase. -
In case of problems during purchase please send us a message. If you can,
provide the email address and the last four digits of the credit
card number you used for your purchase. This helps us find your
order easily. -
You can download the invoice of your purchase on
the plugin download page. You can follow these instructions for
macOS or
Windows
to save it as a PDF.
Download again
Looking for your plugin, license or
invoice? Go to your
dashboard to view or download them again.
System requirements
The plugin is designed for Photoshop CS5, CS6, CC,
CC 2014, CC 2015, CC 2017, CC 2018,
CC 2019, CC 2020, CC 2021, CC 2022 and CC 2023.
The Mac plugin is compatible with OS X
10.9 (Mavericks), OS X 10.10 (Yosemite),
OS X 10.11 (El Capitan), macOS 10.12 (Sierra),
macOS 10.13 (High Sierra), macOS 10.14 (Mojave),
macOS 10.15 (Catalina), macOS 11 (Big Sur) and macOS 12 (Monterey).
If you are unsure which version of macOS
you are running, you can easily find this out. Click on the Apple icon
at the top left of your screen and choose About This Mac. A
dialog will appear with the macOS version number in the middle. If you
are using Photoshop CS5, make sure you
run CS5 in 64 bit
which is the default.
Please note that the Photoshop plugin is not supported on macOS using the M1 processor.
The Windows plugin is compatible with 32 and 64 bit
versions of Photoshop. It supports Windows 7, Windows 8,
Windows 8.1 and Windows 10. If you are unsure which version of
Windows you are using you can right-click on Computer and
then on Properties. The dialog that appears will tell the
version of Windows you have installed.
Reseller instructions
The Photoshop plugin can be obtained through software
resellers. In case you a reseller please read the following
instructions.
Pricing, maintenance and support costs
The reseller price for the Photoshop plugin is the same as the price
for regular customers. There are no special reseller discounts,
preferred supplier arrangements or exclusive reseller contracts.
Best-effort support is included in the price of the plugin and there
are no mandatory maintenance costs. Customers and resellers have
money back guarantee if the product is unsatisfactory. There are no
discount offers, but occasionally we give away a discount when a
company buys many plugins at once. For example, if a reseller orders
20 plugins, we may give away 1 or 2 plugins for free.
Payment procedure
Credit card and PayPal payments are supported. Resellers can use the
same order form
for the purchase as regular customers.
The order form asks for Personal information. Here the
reseller can fill in their reseller company name and email address.
The payment receipt and invoice will be send to this address.
Resellers from the European Union will also need to specify their
VAT number. Under Payment details the credit card
information can be filled in or the option to pay with PayPal can be
chosen.
Alternatively we can manually process the order without using the
order form. The reseller will need to send their purchase order
including number of plugins, operating system, end-user name,
end-user email address, credit card number, credit card expiry date
and CVC number. We can then process the credit card payment on
behalf of the reseller.
Shipment and delivery
The reseller is asked to provide the name and email address of the
end user. After purchase the software and license will be
transferred and shipped electronically to the end user. This is a
manual step in the process.
The end user will be granted download access on the
Photoshop dashboard. Here they can
download the software and license. It also shows the installation
instructions and allows downloading minor software updates in
future. The software can be mailed directly in case end users have
difficulty in accessing the dashboard.
The reseller can download the invoice and view all previous
purchases from their Invoices
dashboard.
Future plugin updates
We are continuously improving the plugin and the
compression logic. These updates are available freely from
the download page.
More help & support
We hope to further enhance the plugin and your feedback is
very valuable. If you need assistance or if you
have ideas for improvement we’d like to hear from
you! Send us a message and
possibly add some screenshots or examples of your ideas. We’ll work
with you from there.
TinyPNG Photoshop Plugin — это плагин сжатия файлов PNG для программы Photoshop систем Mac и Windows. Вы сможете сохранять сжатые файлы PNG непосредственно из Photoshop — после установки плагина появится меню, из которого вы сможете осуществлять предпросмотр, выбирать папку и сохранять изображения. Плагин поддерживает JavaScript, VBScript и AppleScript, а также пакетную автоматизацию, что позволяет сжимать сотни изображений за один раз. Изображения автоматически конвертируются в sRGB для максимальной совместимости.
Сколько стоит купить лицензию, варианты поставки
-
Артикул:
TNYP2334717 -
Тип поставки:
Электронная (e-mail) -
Язык (версия):
Английский -
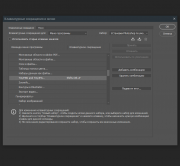
Срок поставки лицензионной программы или ключа активации:
3-14 рабочих дней ? -
Платформа:
Windows -
Тип лицензии:
Постоянная -
Тип покупателя:
Коммерческая - Оплата картой недоступна
- Только для юр. лиц и ИП
-
Артикул:
TNYP2334718 -
Тип поставки:
Электронная (e-mail) -
Язык (версия):
Английский -
Срок поставки лицензионной программы или ключа активации:
3-14 рабочих дней -
Платформа:
Mac OS -
Тип лицензии:
Постоянная -
Тип покупателя:
Коммерческая - Оплата картой недоступна
- Только для юр. лиц и ИП
Новости
Photoshop Scripts for TinyPNG and TinyJPEG
These JavaScripts that can be added to Photoshop to help with compressing JPEG
and PNG Images using the TinyPNG & TinyJPG Photoshop plugin.
For more information about the Photoshop plugin you can visit
tinypng.com/photoshop.
Installation
The scripts may be copied to the ‘Presets/Scripts’ folder in Adobe Photoshop.
This is usually found in the following locations:
Mac:
- /Applications/Adobe Photoshop (version)/Presets/Scripts/
- ~/Library/Application Support/Adobe/Adobe Photoshop (version)/Presets/Scripts
Windows:
- C:Program FilesAdobeAdobe Photoshop (version)PresetsScripts
Usage
New menu options will appear in the ‘File’ menu. The scripts will be executed
by simply selecting them.
File >
  Automate >
    Compress File...
    Compress Folder with JPEG Images...
    Compress Folder with PNG Images...
  Scripts >
    Layer Comps to Tinify...
Create your own
The scripts are written in JavaScript. You can easily create your own based on
these examples. Photoshop also comes with many build-in scripts which you can
look at to give more ideas of what is possible. If you are interested in
scripting in more detail you can also take a look at the blog article which
shows an example of how to
compress all images in a folder
with JavaScript.
License
This software is licensed under the MIT License. View the license.

TinyPNG — плагин для уменьшения размера изображений, сохраненных в форматах PNG и JPEG.
В программе используются уникальные алгоритмы сжатия, что позволяет оптимизировать изображение, сохранив все его характеристики. Теперь для уменьшения файлов PNG не нужно терять в качестве, как это было раньше — программа работает по наиболее эффективным алгоритмам. Подходит для Adobe Photoshop 2014 — 2021.
Скачать бесплатно TinyPNG 2.5.0 Plug-in for Adobe Photoshop
Пароль ко всем архивам: 1progs
Несмотря на использование сложных алгоритмов сжатия, сама программа проста в использовании:
- главный принцип работы программы — это снижение определенных цветов. Программа убирает только те цвета, удаление которых будет незаметным;
- в результате изображение остается прежним, а вот разница в размерах файлов может быть многократной;
- программа не предполагает дополнительных настроек и имеет только один алгоритм. Пользователю нужно лишь загружать файлы для обработки. Один файл должен быть не 20 Мб – с более «тяжёлыми» файлами программа пока что не работает.
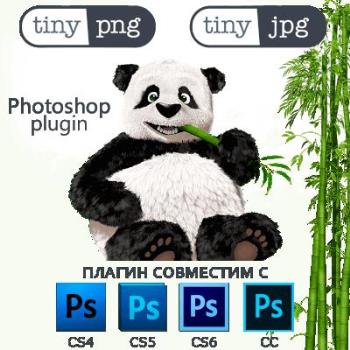
Если пользователь уже работает в программе PhotoShop, то можно добавить в неё плагин TinyPNG, что упростит использования приложения. Новая опция автоматически добавится в панель инструментов и можно будет не запускать это приложение отдельно.
Аналоги программы вы всегда можете найти в наших подборках:
Плагин оптимизирует изображения прямо из Photoshop с идеальным балансом качества и размера файла.
Используются интеллектуальные методы сжатия с потерями. Уменьшая количество цветов 24-битные PNG-файлы преобразоваваются в гораздо меньшие 8-битные индексированные цветные изображения. Все ненужные метаданные также удаляются. Разница в большинстве случаев мало заметна невооруженным глазом.
В результате получаем оптимизированные PNG-файлы со 100%-й поддержкой прозрачности и уменьшение размера до 70% или даже больше, тем самым ускоряя загрузку веб-страниц и приложений.
Плагин может пригодиться верстальщикам сайтов, дизайнерам или другим юзерам для оптимизиций логотипов, иконок, аватарок форумов, баннеров, шапок YouTube/сайтов/блогов, скриншотов, отдельных веб-элементов и т.д.
Системные требования:
·Windows 10 | 8.1 | 8 | 7 (x64-x86)
·Поддерживаемые версии Adobe Photoshop:
— Photoshop CC 2018 / 2017 / 2015 / 2014 / CC (2013) (x64-x86)
— Photoshop CS6 (x64-x86)
— Photoshop CS5 (x64-x86)
— Photoshop CS4 (x64-x86)
Microsoft Visual C++ 2015 Redistributable (x64-x86)
Торрент Плагин для фотошоп — TinyPNG and TinyJPG Photoshop Plugin 2.3.9 подробно:
Особенности и дополнительные возможности:
·Возможность быстро сохранить любой участок изображения используя инструмент «Marquee Tool» (Прямоугольная область)
Для этого: выделить необходимую часть изображения и вызвать плагин
·В настройках Photoshop’а можно добавить свои горячие клавиши для вызова плагина
Для этого выбрать:
Рдактирование > Клавиатурные сокращения… > Клавиатурные сокращения для: Файл > Экспортировать — Добавить комбинацию, например «Shift+Ctrl+P»
·Изображения автоматически преобразовываются в sRGB для максимальной совместимости между браузерами и устройствами
·Использование Сценариев Photoshop для управления плагином с помощью javascript или VBScript. Несколько сценариев, которые сжимают отдельные файлы или папки с изображениями JPEG и PNG можно скачать по ссылке ниже из сайта разработчика
·Плагин поддерживает автоматизацию пакетной обработки
·Плагин поддерживает RGB, CMYK, LAB и Grayscale
·Поддерживаются «Artboards» (Монтажные области)
·Плагин работает в автономном режиме только на компьютере. Подключение к Интернету не требуется, телеметрия не отправляется на серверы. Здесь имеется в виду сравнение с онлайн версией
Детальнее на сайте разработчика (на английском языке)
Процедура лечения:
·Найти в раздаче нужную разрядность и версию Photoshop’а
·Скопировать папку TinyPNG and TinyJPG
По пути: C:Program FilesCommon FilesAdobePlug-InsCCTinyPNG and TinyJPG
·Затем скопировать содержимое рядом находящейся папки …ApplicationFolder, но теперь уже в корневую папку Photoshop’а
По пути: C:Program FilesAdobeAdobe Photoshop **** (где вместо звёздочек, ваша версия фотошопа)
Готово! В Photoshop’е плагин находится: Файл > Экспортировать > TinyPNG and TinyJPG…
Скриншоты Плагин для фотошоп — TinyPNG and TinyJPG Photoshop Plugin 2.3.9 торрент:
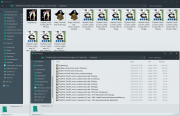
Скачать Плагин для фотошоп — TinyPNG and TinyJPG Photoshop Plugin 2.3.9 через торрент:
TinyPNG и TinyJPG — это высококачественные инструменты сжатия изображений. В статье вы узнаете, как установить и использовать Photoshop-плагин TinyPNG и TinyJPG очень просто, проще всего.
Adobe Photoshop CC Adobe Photoshop CC для Mac
Как установить и использовать плагины TinyPNG и TinyJPG в Photoshop
- Инструкции по установке плагинов TinyPNG и TinyJPG в Photoshop для Mac
- Установите плагин TinyPNG & TinyJPG Photoshop на Mac
- Используйте плагин TinyPNG & TinyJPG Photoshop на Mac
- Инструкции по установке плагинов TinyPNG и TinyJPG в Photoshop для Windows
- Установите плагин TinyPNG & TinyJPG Photoshop в Windows
- Используйте плагин TinyPNG & TinyJPG Photoshop для Windows
Инструкции по установке плагинов TinyPNG и TinyJPG в Photoshop для Mac
Установите плагин TinyPNG и TinyJPG Photoshop на Mac
Установить этот плагин на MacOS довольно просто. Страница загрузки предоставляет вам 2 файла. Файл содержит плагин, файл содержит лицензию. Вам необходимо скопировать оба файла в папку плагинов Photoshop, как показано ниже.
1. Вы получите ссылку на страницу загрузки по электронной почте. Загрузите два файла на свой компьютер.
2. Откройте Finder и перейдите в каталог установки Adobe Photoshop . Папка по умолчанию — Macintosh HD / Applications / Adobe Photoshop …. Здесь вы найдете папку с названием Plug-ins .

3. Откройте второе окно Finder и перейдите в папку Download. Выберите оба TinyPNG-JPG.license и TinyPNG -JPG.plugin , затем перетащите эти два файла в папку плагинов .

Этот плагин успешно установлен на Mac.
Используйте плагин TinyPNG & TinyJPG Photoshop на Mac
Установив этот плагин, вы можете начать использовать его для сохранения сжатых файлов JPEG и PNG с помощью графического программного обеспечения Adobe Photoshop.
1. Перезапустите Photoshop и откройте файл изображения. Убедитесь, что установлено RGB, CMYK, лабораторный режим или шкала серого.
2. В меню файла выберите Файл> Экспорт> TinyPNG и TinyJPG ….

Вы видите ярлык на скриншоте выше? Продолжайте читать, если вы хотите использовать этот плагин как профессионал.
3. В диалоговом окне плагина Photoshop отображается окно предварительного просмотра сжатого изображения PNG. Вы можете ввести имя файла и при желании изменить размер изображения или расположение папки. Нажмите Сохранить . Вот и все!

Инструкции по установке плагинов TinyPNG и TinyJPG в Photoshop для Windows
Установите плагин TinyPNG & TinyJPG Photoshop в Windows
Страница загрузки содержит установщик для Windows и файл лицензии. Вам нужно запустить этот установочный файл, а затем скопировать файл лицензии в каталог плагинов Photoshop, как показано ниже.
1. Как только вы приобрели этот плагин, вы получите ссылку на страницу загрузки. Здесь вы можете скачать как установочный файл, так и лицензию.
2. Теперь запустите установщик. Это действие скопирует этот плагин в папки Photoshop CS5, CS6, CC, CC 2014, CC 2015, CC 2017, CC 2018, CC 2019 или CC 2020.

Если вы используете инструмент для проверки на вирусы, такой как Avast Business Antivirus или AVG AntiVirus, и столкнулись с ошибкой установки, возможно, вам придется временно отключить ее.
3. С помощью проводника скопируйте файл TinyPNG-JPG.license из папки загрузки в каталог плагинов Photoshop. Каталог плагинов находится по адресу: C: Program Files Adobe Adobe Photoshop … Плагины .
Если вы используете 64-разрядную версию Windows, вам необходимо дважды скопировать файл лицензии. Photoshop всегда находится в файлах Program Files и Program Files (x86).

Теперь плагин Photoshop был успешно установлен на компьютер.
Используйте плагин TinyPNG & TinyJPG Photoshop для Windows
После установки этого плагина вы можете использовать его для сохранения сжатого файла PNG в Adobe Photoshop.
1. Перезапустите Photoshop и откройте файл изображения. Убедитесь, что он установлен в режим RGB, CMYK, лабораторный или в оттенках серого.
2. В меню файла выберите Файл> Экспорт> TinyPNG и TinyJPG.…

3. Появятся диалоговые окна плагинов Photoshop TinyPNG и TinyJPG с предварительным просмотром сжатого изображения. Вы можете ввести имя в поле «Имя файла», возможность изменить размер изображения или расположение папки. Нажмите Сохранить, чтобы завершить процесс.

Выше описано, как установить плагин Photoshop TinyPNG & TinyJPG на Mac и Windows. Надеюсь, что статья полезна для вас.

Обновлено: 30 ноября 2021
Просмотров: 3940
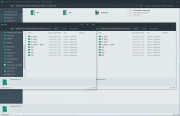
Cжатые изображения JPEG и PNG прямо из Photoshop. Палгин для Photoshop TinyPNG.
Всем наверно известен сервис по сжатию фото TinyPNG, а если не известно то сообщаю это один из наилучших сервисов онлайн для сжатия фото, JPG и PNG. Ссылку на него тут не буду публиковать найдете по названию «TinyPNG». Но суть статьи не в этом, а втом что хочу расказать и предложить почти бесплатно плагин для фотошопа с этого сервиса. Купил я его за 65$, а предлогаю за 300руб. не в целях обогощения, а для частичной компенсации потраченных денег.
Плагин устанавливал у себя на версии фотошопа СС 2020 v21.1.0 Инструкцию по установке и как уменьшать изображения приведу в этой статье.
Пример уменьшения только одним плагином при сохранении разрешения
Изображение до уменьшения
 Весит картинка до обработки 2,08 мегабайта
Изображение после обработки плагином
 Весит картинка после обработки 225 кб.
Как видите плагин справился с задачей на 100%, при этом хочу отметить, что исходник имее разрешение 4080*2720 пикселей и мы его не меняли
Установка
В архиве будет 2 файлика TinyPNG-JPG.license и TinyPNG-JPG-v2.5c.exe(скрины сделаны еще на старом расширении менять не стал принцип тот же)
 1. Запускаем TinyPNG-JPG-v2.5c.exe

2. Переносим файл TinyPNG-JPG.license по пути для 64 битных C:Program FilesAdobeAdobe Photoshop CC 2019Plug-ins

Использование
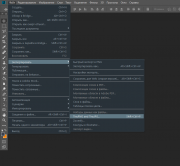
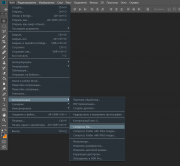
Запускаем фотошоп, открываем рабочую область с изображением далее жмем выберите /Файл/Экспорт/TinyPNG и TinyJPG
 Откроется окно, где так же есть некоторые настройки
 Вот в принципе и все.
Ссылка на плагин TinyPNG 2.5e стоимость 300 рублей

Сжатие изображений стало намного проще с помощью TinyPNG and TinyJPG. Сохраняйте сжатые изображения JPEG и PNG прямо из Photoshop. Установите плагин, и все будет готово. В Photoshop появится новый пункт меню, в котором вы можете изменить размер, просмотреть, выбрать папку и сохранить изображения.
Предварительный просмотр и сохранение напрямую
Нет необходимости делать дополнительные шаги в вашем рабочем процессе. Сохраняйте изображения напрямую с помощью исключительного сжатия JPEG и PNG.
Масштабирование изображения и частичный выбор
Масштабируйте изображения, чтобы сохранять их в разных размерах. Создайте выделение или пользовательский фрагмент для экспорта части изображения.
Автоматическое качество JPEG и PNG
Вам больше не нужно беспокоиться об оптимальных размерах файлов. Плагин анализирует ваше изображение и грамотно настраивает качество.
Беспроблемное управление цветом
Изображения конвертируются в sRGB для максимальной совместимости. Независимо от того, используете вы цветовые профили или нет — это просто работает.
Системные требования:
• Windows 7, Windows 8, Windows 8.1, Windows 10 (64-bit)
• Adobe Photoshop CC 2014, CC 2015, CC 2017, CC 2018, CC 2019, 2020, 2021
Размер: 16,02 Мб