Contents
-
Client Access — Browsing SMB shares
- Ubuntu Clients
- Windows Clients (XP,Server,Vista, Win7)
-
Samba Client — Manual Configuration
- Connecting using CIFS
- Connecting using SMBFS (deprecated)
The samba package is a meta-package intended to be installed on file and printer sharing servers. Clients do not need this meta-package (you are acting as a client if you need to access files on another computer). For example, installing samba is not necessary if you only need your Ubuntu system to do any of the following:
-
Access shared folders, drives and printers on a Windows computer (that is, act as a client with Windows servers). To do this, you only need the smbfs plugin. See MountWindowsSharesPermanently for more information.
- Have your Windows computer use (via a network) a printer that is attached to a Linux computer. CUPS can be configured to make the printer accessible to the network.
-
Share directories between two Linux computers. You can use NFS or setup an SSH server on one computer and access it from other computers using an scp or sftp client, or Places -> Connect to Server… and choose «SSH» as the service type.
Ubuntu Clients
Ubuntu and Gnome make it easy to access files on a Windows network share. Open the Places Menu, then click on Network. You will see a Windows network icon. Double-click to open it. The next window shows all the domains/workgroups found on your network. Inside each domain/workgroup you will see all the computers on the domain/workgroup with sharing enabled. Double-click on a computer icon to access its shares and files.
-
If you want to be able to share folders with nautilus (the file browser), install the nautilus-share package (installed by default in Ubuntu 9.10 Desktop edition):
sudo apt-get install nautilus-share
Alternate: From the menu at the top select «Location» -> «Connect to a server». In the «Service type» pull down select «Windows share». Enter the server ip address in the «Server:» box and the share name in the «Share:» box. Click «Connect» and then «Connect» again on the second dialog box
Alternate 12.04: Double clicking on ‘Windows network’ did not work for me. So I went to ‘Go’ menu in the nautilus file browser and clicked ‘Location’. I got an address bar at the top of the window. I entered «smb://192.168.2.148» (substitute the IP address of your Samba server) — I was presented with user/password window — After typing in user/passwd I was able to see the samba shares on the server and browse the files/folders.
Note: The default installation of Samba does not synchronize passwords. You may have to run «smbpasswd» for each user that needs to have access to his Ubuntu home directory from Microsoft Windows.
Windows Clients (XP,Server,Vista, Win7)
Microsoft Windows clients connect and browse through their corresponding network interface.
Example: XP clients can open Windows Network Neighborhood or My Network Places to browse available SMB shares.
Samba Client — Manual Configuration
This section covers how to manually configure and connect to a SMB file server from an Ubuntu client. smbclient is a command line tool similar to a ftp connection while smbfs allows you to mount a SMB file share. Once a SMB share is mounted it acts similar to a local hard drive (you can access the SMB share with your file browser (nautilus, konqueror, thunar, other).
Connecting to a Samba File Server from the command line
Connecting from the command line is similar to a ftp connection.
List public SMB shares with
smbclient -L //server -U user
Connect to a SMB share with
smbclient //server/share -U user
Enter you user password.
You can connect directly with
smbclient //server/share -U user%password
but your password will show on the screen (less secure).
Once connected you will get a prompt that looks like this :
smb: >
Type «help» , without quotes, at the prompt for a list of available commands.
Connecting using CIFS
CIFS is included in the smbfs package and is a replacement for smbfs (I know, the terminology here is a little confusing).
Reference : http://linux-cifs.samba.org/
As above, install by any method, smbfs, on Ubuntu 12.10, smbfs has been replaced by cifs-utils.
Allow non-root users to mount SMB shares
By default only root may mount SMB shares on the command line. To allow non-root users to mount SMB shares you could set the SUID, but I advise you configure sudo. You should configure sudo with visudo
You may either allow the group «users» to mount SMB shares, or add a group, samba, and add users you wish to allow to mount SMB shares to the samba group.
sudo groupadd samba
sudo adduser user samba
Change «user» to the username you wish to add to the samba group.
sudo visudo
In the «group» section add your group you wish to allow to mount SMB shares
Add a line  in the "group" section :
## Members of the admin group may gain root privileges
%admin ALL=(ALL) ALL
%samba   ALL=(ALL) /bin/mount,/bin/umount,/sbin/mount.cifs,/sbin/umount.cifs
Change «%samba» to «%users» if you wish to allow members of the users group to mount SMB shares.
The following will mount the myshare folder on myserver to ~/mnt (it will be in your home directory):
mkdir ~/mnt
sudo mount -t cifs //myserver_ip_address/myshare ~/mnt -o username=samb_user,noexec
Note: «samba_user» = the user name on the samba server (may be different from your log-in name on the client).
The «noexec» option prevents executable scripts running from the SMB share.
You will be asked for BOTH your sudo and then your samba_user password.
To umount,
sudo umount ~/mnt
Automagically mount SMB shares
In order to have a share mounted automatically every time you reboot, you need to do the following:
With any editor, create a file containing your Windows/Samba user account details:
gksu gedit /etc/samba/user
KDE users must use kdesu rather than gksu and instead of Gedit they can use Kwrite as editor.
… it should contain two lines as follows:
username=samba_user
password=samba_user_password
Note: «samba_user» = the user name on the samba server (may be different from your log-in name on the client). «samba_user_password» is the password you assigned to the samba_user on the samba server.
Save the file and exit gedit.
Change the permissions on the file for security:
sudo chmod 0400 /etc/samba/user # permissions of 0400 = read only
Now create a directory where you want to mount your share (e.g. /media/samba_share):
sudo mkdir /media/samba_share
Now, using any editor, and add a line to /etc/fstab for your SMB share as follows:
sudo cp /etc/fstab /etc/fstab.bak
gksu gedit /etc/fstab
Add a line for your SMB share:
//myserver_ip_address/myshare /media/samba_share cifs credentials=/etc/samba/user,noexec 0 0
The share will mount automatically when you boot. The «noexec» option prevents executable scripts running from the SMB share.
To mount the share now, without rebooting,
sudo mount /media/samba_share
You can unmount the share with :
sudo umount /media/samba_share
If you wish to increase security at the expense of convenience, use this line in /etc/fstab
//myserver_ip_address/myshare /media/samba_share cifs noauto,credentials=/etc/samba/user,noexec 0 0
The noexec» option prevents executable scripts running from the SMB share.
Edit /etc/samba/user, remove the password (leave just the samba user).
Now the share will NOT automatically mount when you boot and you will be asked for your samba password.
Mount the share with :
sudo mount /media/samba_share
CIFS may cause a shutdown error.
CIFS VFS: Server not responding.
There is a fix in the troubleshooting section of this forum post.
Back to top
Connecting using SMBFS (deprecated)
Note: This method still works, but as outlined under the «CIFS» section above is «deprecated» (no longer maintained and pending removal from the kernel).
Mounting a share on the local filesystem allows you to work around programs that do not yet use GnomeVFS to browse remote shares transparently. To mount a SMB share, first install smbfs:
sudo apt-get update
sudo apt-get install smbfs
To allow non root accounts to mount shares, change the permissions on the smbmnt program thus:
sudo chmod u+s /usr/bin/smbmnt /usr/bin/smbumount
Note: This may be a security risk as after setting the SUID bit anyone can mount a SMB share. I advise you configure sudo, as above.
The working line in /etc/sudoers is as follows (see CIFS section above):
%samba ALL=(ALL) /bin/mount,/bin/umount,/sbin/mount.cifs,/sbin/umount.cifs,/usr/bin/smbmount,/usr/bin/smbumount
This allows any user in the samba group to mount SMB shares (you will need to create a samba group and add users).
The following will mount the myshare folder on myserver to ~/mnt (it will be in your home directory):
mkdir ~/mnt
smbmount //myserver/myshare ~/mnt
To umount,
smbumount ~/mnt
In order to have a share mounted automatically every time you reboot, you need to do the following:
Open a shell as root
sudo -s
Create a file containing your Windows/Samba user account details:
vi /etc/samba/user
…it should contain two lines as follows:
username=george
password=secret
Change the permissions on the file for security:
chmod 0600 /etc/samba/user
Now create a directory where you want to mount your share (e.g. /mnt/data):
mkdir /mnt/data
Now edit the file system table (/etc/fstab) and add a line as follows:
//server/share /mnt/data smbfs credentials=/etc/samba/user,rw,uid=bob 0 0
…where ‘bob’ is the non-root user you log into ubuntu with, ‘server’ is the name or address of the Windows machine and ‘share’ is the name of the share.
To mount the share now, just use the following command as root. It will mount automatically on subsequent reboots.
mount /mnt/data
to be continued…
Ubuntu Client
On the Ubuntu client using the menu at the top, go to «Places» -> «Network». You will see an icon «Windows network» and should be able to browse to your shared folder. You will be asked for a password, leave it blank. Click the «Connect button.
(no need for a password).
If you would like to mount your SMB share using your (server) hostname rather than the IP Address, edit /etc/hosts and add your samba server (syntax IP Address hostname).
192.168.1.100 hostname
Where «hostname» = the name of your samba server.
Windows Client
On Windows open «My Computer» and navigate to «My Network Places». Navigate to your Ubuntu server and your share will be available without a password.
Alternate : From the menu at the top select «Tools» -> «Map Network Drive». Select an available letter for your SMB share (Default is z: ). In the «Folder:» box enter \samba_server_ipaddressshare. Tic (Select with the mouse) the option «Reconnect at login» if you want the share to be automatically mounted when you boot Windows. Click the «Finish» box. A dialog box will appear, enter your samba user name and password. Click «OK».
If you would like to mount your SMB share using your (server) hostname rather than the IP Address, edit C:WINDOWSsystem32driversetchosts and add your samba server (syntax IP Address hostname).
192.168.1.100 hostname
Where «hostname» = the name of your samba server.
Although Linux has made some inroads into the desktop market, its origins and future are very much server-based. It is not surprising therefore that Ubuntu has the ability to act as a file server. It is also extremely common for Ubuntu and Windows systems to be used side by side in networked environments. It is a common requirement, therefore, that files on an Ubuntu system be accessible to Linux, UNIX and Windows-based systems over network connections. Similarly, shared folders and printers residing on Windows systems may also need to be accessible from Ubuntu based systems.
Windows systems share resources such as file systems and printers using a protocol known as Server Message Block (SMB). In order for an Ubuntu system to serve such resources over a network to a Windows system and vice versa it must, therefore, support SMB. This is achieved using technology called Samba. In addition to providing integration between Linux and Windows systems, Samba may also be used to provide folder sharing between Linux systems (as an alternative to NFS which was covered in the previous chapter).
In this chapter we will look at the steps necessary to share file system resources and printers on an Ubuntu system with remote Windows and Linux systems, and to access Windows resources from Ubuntu.
1.1 Accessing Windows Resources from the GNOME Desktop
Before getting into more details of Samba sharing, it is worth noting that if all you want to do is access Windows shared folders from within the Ubuntu GNOME desktop then support is already provided within the GNOME Files application. The Files application is located in the dash as highlighted in Figure 23-1:
Figure 23-1
 |
You are reading a sample chapter from Ubuntu 20.04 Essentials. Buy the full book now in eBook ($14.99) or Print ($36.99) format. Includes 37 chapters. Learn more.
Preview Buy eBook Buy Print |
Once launched, select the Other Locations option in the left-hand navigation panel followed by the Windows Network icon in the main panel to browse available windows resources:
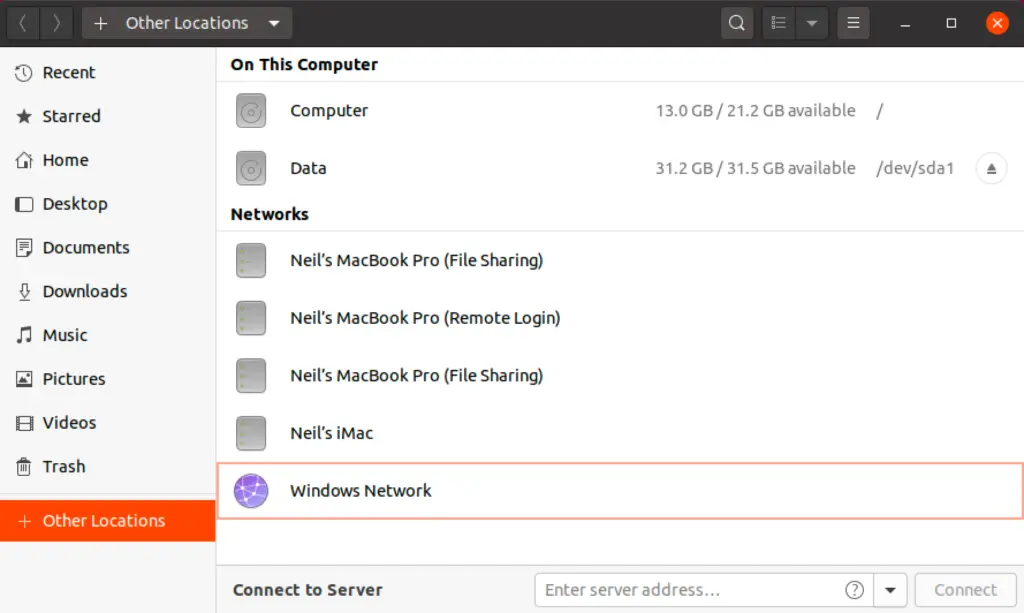
Figure 23-2
1.2 Samba and Samba Client
Samba allows both Ubuntu resources to be shared with Windows systems and Windows resources to be shared with Ubuntu systems. Ubuntu accesses Windows resources using the Samba client. Ubuntu resources, on the other hand, are shared with Windows systems by installing and configuring the Samba service.
1.3 Installing Samba on an Ubuntu System
The default settings used during the Ubuntu installation process do not typically install the necessary Samba packages. Unless you specifically requested that Samba be installed it is unlikely that you have Samba installed on your system. To check whether Samba is installed, open a terminal window and run the following command:
# apt -qq list samba-common samba smbclient
Any missing packages can be installed using the apt command-line tool:
|
You are reading a sample chapter from Ubuntu 20.04 Essentials. Buy the full book now in eBook ($14.99) or Print ($36.99) format. Includes 37 chapters. Learn more.
Preview Buy eBook Buy Print |
# apt install samba-common samba smbclient
1.4 Configuring the Ubuntu Firewall to Enable Samba
Next, the firewall currently protecting the Ubuntu system needs to be configured to allow Samba traffic.
If you are using the Uncomplicated Firewall (ufw) run the following command:
Alternatively, if you are using firewalld, run the firewall-cmd command as follows:
# firewall-cmd --permanent --add-port={139/tcp,445/tcp}
# firewall-cmd --reload
Before starting the Samba service a number of configuration steps are necessary to define how the Ubuntu system will appear to Windows systems, and the resources which are to be shared with remote clients. The majority of these configuration tasks take place within the /etc/samba/smb. conf file.
1.5 Configuring the smb.conf File
Samba is a highly flexible and configurable system that provides many different options for controlling how resources are shared on Windows networks. This flexibility can lead to the sense that Samba is overly complex to work with. In reality, however, many of the configuration options are not needed by the typical installation, and the learning curve to set up a basic configuration is actually quite short.
|
You are reading a sample chapter from Ubuntu 20.04 Essentials. Buy the full book now in eBook ($14.99) or Print ($36.99) format. Includes 37 chapters. Learn more.
Preview Buy eBook Buy Print |
For the purposes of this chapter we will look at joining an Ubuntu system to a Windows workgroup and setting up a directory as a shared resource that can be accessed by a specific user. This is a configuration known as a standalone Samba server. More advanced configurations such as integrating Samba within an Active Directory environment are also available, though these are outside the scope of this book.
The first step in configuring Samba is to edit the /etc/samba/smb.conf file.
1.5.1 Configuring the [global] Section
The smb.conf file is divided into sections. The first section is the [global] section where settings can be specified that apply to the entire Samba configuration. While these settings are global, each option may be overridden within other sections of the configuration file.
The first task is to define the name of the Windows workgroup on which the Ubuntu resources are to be shared. This is controlled via the workgroup = directive of the [global] section which by default is configured as follows:
Begin by changing this to the actual name of the workgroup if necessary.
|
You are reading a sample chapter from Ubuntu 20.04 Essentials. Buy the full book now in eBook ($14.99) or Print ($36.99) format. Includes 37 chapters. Learn more.
Preview Buy eBook Buy Print |
In addition to the workgroup setting, the other settings indicate that this is a standalone server on which the shared resources will be protected by user passwords. Before moving on to configuring the resources to be shared, other parameters also need to be added to the [global] section as follows:
[global]
.
.
        netbios name = LinuxServer
.
.
The “netbios name” property specifies the name by which the server will be visible to other systems on the network.
1.5.2 Configuring a Shared Resource
The next step is to configure the shared resources (in other words the resources that will be accessible from other systems on the Windows network). In order to achieve this, the section is given a name by which it will be referred to when shared. For example, if we plan to share the /sampleshare directory of our Ubuntu system, we might entitle the section [sampleshare]. In this section a variety of configuration options are possible. For the purposes of this example, however, we will simply define the directory that is to be shared, indicate that the directory is both browsable and writable and declare the resource public so that guest users are able to gain access:
[sampleshare]
        comment = Example Samba share
        path = /sampleshare
        browseable = Yes
        public = yes
        writable = yes
To restrict access to specific users, the “valid users” property may be used, for example:
valid users = demo, bobyoung, marcewing
1.5.3 Removing Unnecessary Shares
The smb.conf file is pre-configured with sections for sharing printers and the home folders of the users on the system. If these resources do not need to be shared, the corresponding sections can be commented out so that they are ignored by Samba. In the following example, the [homes] section has been commented out:
|
You are reading a sample chapter from Ubuntu 20.04 Essentials. Buy the full book now in eBook ($14.99) or Print ($36.99) format. Includes 37 chapters. Learn more.
Preview Buy eBook Buy Print |
.
.
#[homes]
#       comment = Home Directories
#       valid users = %S, %D%w%S
#       browseable = No
#       read only = No
#       inherit acls = Yes
.
.
1.6 Creating a Samba User
Any user that requires access to a Samba shared resource must be configured as a Samba User and assigned a password. This task is achieved using the smbpasswd command-line tool. Consider, for example, that a user named demo is required to be able to access the /sampleshare directory of our Ubuntu system from a Windows system. In order to fulfill this requirement we must add demo as a Samba user as follows:
# smbpasswd -a demo
New SMB password:
Retype new SMB password:
Added user demo.
Now that we have completed the configuration of a very basic Samba server, it is time to test our configuration file and then start the Samba services.
1.7 Testing the smb.conf File
The settings in the smb.conf file may be checked for errors using the testparm command-line tool as follows:
# testparm
Load smb config files from /etc/samba/smb.conf
rlimit_max: increasing rlimit_max (1024) to minimum Windows limit (16384)
WARNING: The "syslog" option is deprecated
Processing section "[printers]"
Processing section "[print$]"
Processing section "[sampleshare]"
Loaded services file OK.
Server role: ROLE_STANDALONE

Press enter to see a dump of your service definitions

# Global parameters
[global]
	dns proxy = No
	log file = /var/log/samba/log.%m
	map to guest = Bad User
	max log size = 1000
	netbios name = LINUXSERVER
	obey pam restrictions = Yes
	pam password change = Yes
	panic action = /usr/share/samba/panic-action %d
	passwd chat = *Entersnews*spassword:* %nn *Retypesnews*spassword:* %nn *passwordsupdatedssuccessfully* .
	passwd program = /usr/bin/passwd %u
	security = USER
	server role = standalone server
	server string = %h server (Samba, Ubuntu)
	syslog = 0
	unix password sync = Yes
	usershare allow guests = Yes
	wins support = Yes
	idmap config * : backend = tdb

[printers]
	browseable = No
	comment = All Printers
	create mask = 0700
	path = /var/spool/samba
	printable = Yes

[print$]
	comment = Printer Drivers
	path = /var/lib/samba/printers

[sampleshare]
	comment = Example Samba share
	guest ok = Yes
	path = /sampleshare
	read only = No
1.8 Starting the Samba and NetBIOS Name Services
In order for an Ubuntu server to operate within a Windows network both the Samba (SMB) and NetBIOS nameservice (NMB) services must be started. Optionally, also enable the services so that they start each time the system boots:
# systemctl enable smbd
# systemctl start smbd
# systemctl enable nmbd
# systemctl start nmbd
Before attempting to connect from a Windows system, use the smbclient utility to verify that the share is configured:
|
You are reading a sample chapter from Ubuntu 20.04 Essentials. Buy the full book now in eBook ($14.99) or Print ($36.99) format. Includes 37 chapters. Learn more.
Preview Buy eBook Buy Print |
# smbclient -U demo -L localhost
Enter WORKGROUPdemo's password:

	Sharename       Type      Comment
	---------       ----      -------
	print$          Disk      Printer Drivers
	sampleshare     Disk      Example Samba share
	IPC$            IPC       IPC Service (demo-server2 server (Samba, Ubuntu))
	Officejet_Pro_8600_C7C718_ Printer
	Officejet_6600_971B9B_ Printer
Reconnecting with SMB1 for workgroup listing.

	Server               Comment
	---------            -------

	Workgroup            Master
	---------            -------
	WORKGROUP            LINUXSERVER
1.9 Accessing Samba Shares
Now that the Samba resources are configured and the services are running, it is time to access the shared resource from a Windows system. On a suitable Windows system on the same workgroup as the Ubuntu system, open Windows Explorer and navigate to the Network panel. At this point, explorer should search the network and list any systems using the SMB protocol that it finds. The following figure illustrates an Ubuntu system named LINUXSERVER located using Windows Explorer on a Windows 10 system:
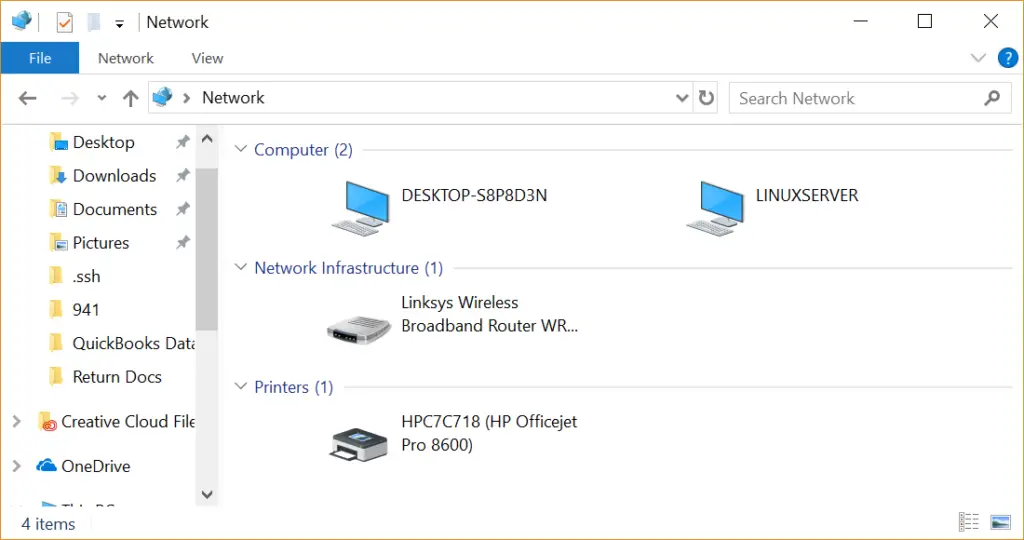
Figure 23-3
Double clicking on the LINUXSERVER host will prompt for the name and password of a user with access privileges. In this case it is the demo account that we configured using the smbpasswd tool:
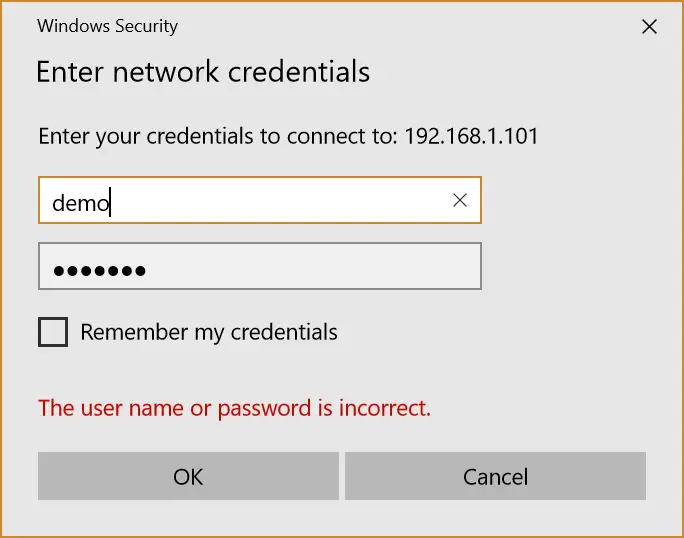
Figure 23-4
Entering the username and password will result in the shared resources configured for that user appearing in the explorer window, including the previously configured /sampleshare resource:
|
You are reading a sample chapter from Ubuntu 20.04 Essentials. Buy the full book now in eBook ($14.99) or Print ($36.99) format. Includes 37 chapters. Learn more.
Preview Buy eBook Buy Print |
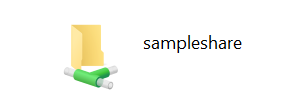
Figure 23-5
Double clicking on the /sampleshare shared resource will display a listing of the files and directories contained therein.
If you are unable to see the Linux system or have problems accessing the shared folder, try mapping the Samba share to a local Windows drive as follows:
- Open Windows File Explorer, right-click on the Network entry in the left-hand panel and select Map network drive… from the resulting menu.
- From the Map Network Drive dialog, select a drive letter before entering the path to the shared folder. For example:
\LinuxServersampleshare
Enable the checkbox next to Connect using different credentials. If you do not want the drive to be mapped each time you log into the Windows system, turn off the corresponding check box:
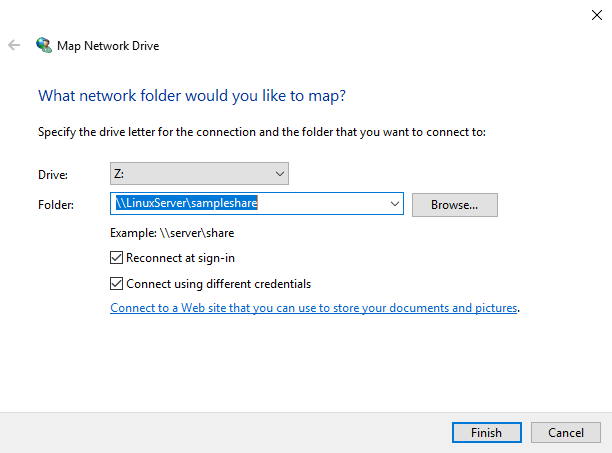
Figure 23-6
|
You are reading a sample chapter from Ubuntu 20.04 Essentials. Buy the full book now in eBook ($14.99) or Print ($36.99) format. Includes 37 chapters. Learn more.
Preview Buy eBook Buy Print |
With the settings entered, click on the Finish button to map the drive, entering the username and password for the Samba user configured earlier in the chapter when prompted. After a short delay the content of the Samba share will appear in a new File Explorer window.
1.10 Accessing Windows Shares from Ubuntu
As previously mentioned, Samba is a two way street, allowing not only Windows systems to access files and printers hosted on an Ubuntu system, but also allowing the Ubuntu system to access shared resources on Windows systems. This is achieved using the smbclient package which was installed at the start of this chapter. If it is not currently installed, install it from a terminal window as follows:
Shared resources on a Windows system can be accessed either from the Ubuntu desktop using the Files application, or from the command-line prompt using the smbclient and mount tools. The steps in this section assume that appropriate network sharing settings have been enabled on the Windows system.
To access any shared resources on a Windows system using the GNOME desktop, begin by launching the Files application and selecting the Other Locations option. This will display the screen shown in Figure 23-7 below including an icon for the Windows Network (if one is detected):
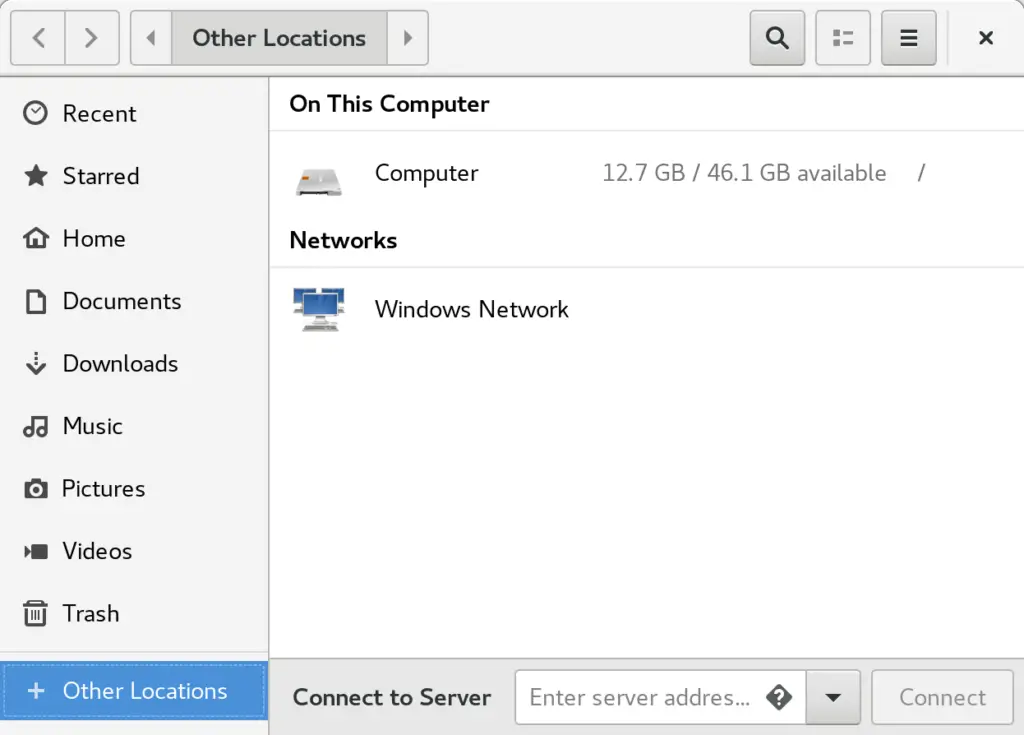
Figure 23-7
|
You are reading a sample chapter from Ubuntu 20.04 Essentials. Buy the full book now in eBook ($14.99) or Print ($36.99) format. Includes 37 chapters. Learn more.
Preview Buy eBook Buy Print |
Selecting the Windows Network option will display the Windows systems detected on the network and allow access to any shared resources.
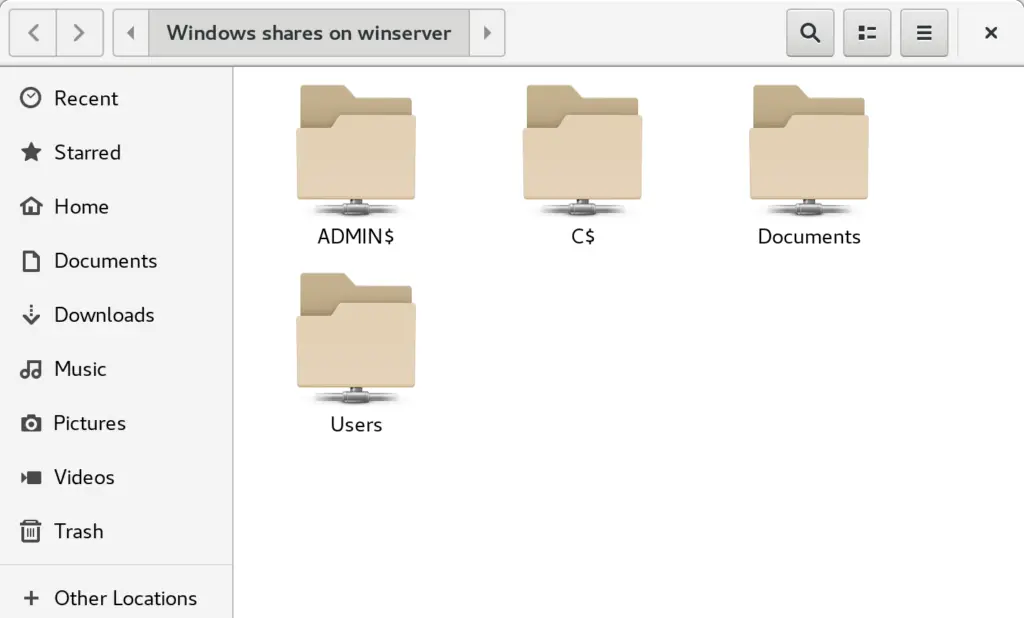
Figure 23-8
Alternatively, the Connect to Server option may be used to connect to a specific system. Note that the name or IP address of the remote system must be prefixed by smb:// and may be followed by the path to a specific shared resource, for example:
smb://WinServer10/Documents
1.11 Summary
In this chapter we have looked at how to configure an Ubuntu system to act as both a Samba client and server allowing the sharing of resources with Windows systems. Topics covered included the installation of Samba client and server packages and configuration of Samba as a standalone server.

In my previous article, Interoperability: Getting started with Samba, I covered installing and configuring Samba shares on a Linux server. The real power of Samba comes when Windows clients can communicate with Linux file servers. In this article, I will cover how you can access Samba shares from both Linux and Windows clients.
Install the Samba client packages
To access Samba share from Linux clients we need to install a few Samba client packages.
On the client machine, install the samba-common and samba-client packages.
# yum install samba-client samba-common -yCheck for available shares
Let’s check if we can access our shares from the server. We can use either the hostname or ip address of the server. If you use the hostname, make sure DNS is working.
# smbclient -U user -L 192.168.1.122

Enter SAMBAuser's password:

        Sharename       Type      Comment
        ---------       ----      -------
        print$          Disk      Printer Drivers
        myshare         Disk      my share
        IPC$            IPC       IPC Service (Samba 4.9.1)
        user      Disk      Home Directories

Reconnecting with SMB1 for workgroup listing.

        Server               Comment
        ---------            -------

        Workgroup            Master
        ---------            -------
        SAMBA                SAMBA-SERVER
Create a directory that we can use as our mount point. I’m going to create a directory under /mnt, but you can use any directory you would like to. You may need to configure SELinux on that directory.
# mkdir /mnt/myshareNow, mount the share.
# mount -t cifs -o username=user //192.168.1.122/myshare /mnt/share

Password for user@//192.168.1.122/myshare:  ********
Now that we’ve mounted our share, we can check the mounts with the following command:
# df -hPersistent mount
Let’s make that directory mount persistently so it can withstand a reboot. Using the text editor of your choice, edit the /etc/fstab file. You can do this in multiple ways, but I’m going to demonstrate two ways to mount the Samba share at boot in /etc/fstab.
# vim /etc/fstabThe first option provides a username and password for the Samba user in the fstab.
//192.168.1.122/myshare /mnt/share cifs username=user,password=password,_netdev 0 0The other option is to create a credential file. You can call this file anything, but I would like to call it cred. I would like to place credentials files in the home directory of the user. In our demonstration it will be /home/user/.cred.
//192.168.1.122/myshare /mnt/share cifs credentials=/home/user/.cred,_netdev 0 0The _netdev option is important since we are mounting a network device. Clients may hang during the boot process if the system encounters any difficulties with the network.
Now create that .cred file inside the user’s home directory.
# vim /home/user/.credNext, add the Samba user’s username and password.
username=user
password=password
Finally, mount all filesystems.
# mount -aAccess a share from a Windows client
I will be using Windows 10 as my client machine with a workgroup called SAMBA. We need to create a local user account on the Windows machine that matches the username and password of the Samba user account we created in my previous article. Although account creation is not necessary, this will make things simpler when accessing the share.
Like I mentioned above, this step is optional and you can skip it completely. Although there are multiple approaches to adding a new local user on a Windows machine, for the simplicity of this article I will be using PowerShell. Launch PowerShell as an administrator and issue following commands:
PS > $password = Read-Host -AsSecureString
PS > New-LocalUser -Name “user” -Password $password
Now that we have created a new local user account matching the Samba user account, we can log in to Windows with our newly created user account.
Access a share from Windows Explorer
To access the Samba share from Windows Explorer, start typing the IP address to our share in the search area. I am using the hostname of the Samba server. In my case, it is centos. You can also access the share by using the IP address of the Samba server.
You might be prompted to enter the username and password to access the share if you skipped the local user creation process. If you get prompted for credentials, enter the Samba username and password we created in the previous article.
You will need to enter the Samba share path every time you want to access the share. There is a better way to access the share by mapping a drive to Samba share in Windows.
Mapping a drive to a Samba share
To map a drive to the Samba share, open PowerShell and issue following command:
PS > NET USE M: \centosmyshareWrap up
Accessing a Samba share on Linux and Windows is easy. With this basic setup, you will be able to access file shares from client machines in your network. With somewhat more configuration, you can deploy Samba shares in a domain environment. Samba can do more than file share. If you would like to learn more about Samba, read this article about Windows and Linux interoperability. This is a basic set up, but you can do so much more with Samba.
[ Want to test your sysadmin skills? Take a skills assessment today. ]
 Обновлено: 30.01.2022
Опубликовано: 13.03.2021
Используемые термины: Samba, Ubuntu, SMB.
Samba позволяет настроить файловое хранилище различных масштабов — от малых офисов для крупных организаций. В данной инструкции мы рассмотрим процесс настройки файлового сервера. Сначала мы выполним установку и базовую настройку с предоставлением гостевого доступа. После будет приведены примеры разграничения доступа по пользователям, группам и пользователям Active Directory.
Подготовка сервера к работе
Настройка времени
Брандмауэр
Установка и запуск сервиса Samba
Создание первой шары с гостевым доступом
Настройка доступа к папке по логину и паролю
Доступ к папке для пользователей и групп
Помещение удаленных файлов в сетевую корзину
Настройка клиентов для подключения к шаре
Windows
Linux
Некоторые полезные опции Samba
hosts allow
hosts deny
interfaces
force user/group
include
Читайте также
Подготовка сервера
1. Время
Для корректного отображения дат, необходимо позаботиться о синхронизации времени. Для этого будем использовать демон chrony. Установим его:
apt-get install chrony
Разрешим автозапуск сервиса:
systemctl enable chrony
2. Брандмауэр
По умолчанию, в системах на базе Debian брандмауэр разрешает все соединения. Но если в нашем случае мы используем брандмауэр, необходимо открыть порты:
iptables -I INPUT -p tcp —dport 445 -j ACCEPT
iptables -I INPUT -p udp —dport 137:138 -j ACCEPT
iptables -I INPUT -p tcp —dport 139 -j ACCEPT
* где порт 445 используется для samba, а порты 137, 138 и 139 — для работы NetBIOS (использование имени компьютера для доступа).
Применяем настройки:
apt-get install iptables-persistent
netfilter-persistent save
Установка и запуск Samba
Установка выполняется из репозитория одной командой:
apt-get install samba
Разрешаем автостарт сервиса:
systemctl enable smbd
И проверим, что сервис запустился:
systemctl status smbd
Проверяем, что сервер самба позволяет к себе подключиться. Для этого можно с компьютера обратиться к серверу по SMB, например, на компьютере с Windows это можно сделать из проводника, прописав путь к серверу с двух слэшей:

* в данном примере мы подключаемся к серверу Samba с IP-адресом 192.168.1.15.
Если мы настроили сервер правильно, система откроет пустую папку. На данном этапе проверка закончена и мы можем переходить к созданию первой шары.
Разберем самый простой пример предоставления доступа к папке — анонимный доступ всем пользователям без запроса пароля.
Открываем на редактирование конфигурационный файл samba:
vi /etc/samba/smb.conf
И добавляем настройку для общей папки:
[Общая папка]
comment = Public Folder
path = /data/public
public = yes
writable = yes
read only = no
guest ok = yes
create mask = 0777
directory mask = 0777
force create mode = 0777
force directory mode = 0777
* где:
- [Общая папка] — имя общей папки, которое увидят пользователи, подключившись к серверу.
- comment — свой комментарий для удобства.
- path — путь на сервере, где будут храниться данные.
- public — для общего доступа. Установите в yes, если хотите, чтобы все могли работать с ресурсом.
- writable — разрешает запись в сетевую папку.
- read only — только для чтения. Установите no, если у пользователей должна быть возможность создавать папки и файлы.
- guest ok — разрешает доступ к папке гостевой учетной записи.
- create mask, directory mask, force create mode, force directory mode — при создании новой папки или файла назначаются указанные права. В нашем примере права будут полные.
Создаем каталог на сервере и назначим права:
mkdir -p /data/public
chmod 777 /data/public
Применяем настройки samba, перезагрузив сервис:
systemctl restart smbd
Пробуем подключиться к папке. Мы должны зайти в нее без необходимости ввода логина и пароля.
Теперь создадим каталог, в который вход будет разрешен только авторизованным пользователям.
Открываем конфигурационный файл samba:
vi /etc/samba/smb.conf
Добавляем настройку для новой папки:
[Папка сотрудников]
comment = Staff Folder
path = /data/staff
public = no
writable = yes
read only = no
guest ok = no
create mask = 0777
directory mask = 0777
force create mode = 0777
force directory mode = 0777
* эти настройки, во многом, похожи на те, что использовались в примере выше. Вот основные различия:
- path = /data/staff — используем новый путь до папки.
- public = no — запрещаем публичный доступ.
- guest ok = no — не разрешаем гостевое подключение.
Создаем каталог для новой папки:
mkdir /data/staff
Задаем права на созданный каталог:
chmod 777 /data/staff
Создаем пользователя в системе Linux:
useradd staff1
* где staff1 — имя пользователя.
Задаем пароль для пользователя:
passwd staff1
Теперь создадим пользователя в samba:
smbpasswd -a staff1
Перезапускаем samba:
systemctl restart smbd
Пробуем зайти на сервер — общую папку мы должны открыть без авторизации, а при попытке открыть папку сотрудников должно появиться окно ввода логина и пароля.
Если мы авторизованы на компьютере, с которого пытаемся подключиться к серверу, под той же учетной записью, что создали для доступа к папке, samba может и не потребовать аутентификации.
Теперь создадим папку, доступ к которой будут иметь ограниченное количество пользователей.
Открываем конфигурационный файл samba:
vi /etc/samba/smb.conf
Добавляем настройку для новой папки:
[Приватная папка]
comment = Private Folder
path = /data/private
public = no
writable = no
read only = yes
guest ok = no
valid users = admin, staff2, staff3, @privateusers
write list = admin, staff2
create mask = 0777
directory mask = 0777
force create mode = 0777
force directory mode = 0777
inherit owner = yes
* стоит обратить внимание на следующие настройки:
- path = /data/private — используем новый путь до папки.
- writable = no и read only = yes — в данном примере мы разрешим запись в каталог только некоторым пользователям. Поэтому общие настройки, разрешающие запись в папку, должны быть запрещены.
- valid users — список пользователей, которым разрешено подключаться к каталогу. В данном примере разрешения работают для пользователей admin, staff2 и staff3, а также для всех, кто входим в группу privateusers.
- write list — список пользователей, которые имеют доступ к папке на чтение и запись. В данном примере мы разрешаем это только для пользователей admin и staff2.
- inherit owner — опция позволяем включить наследование владельца при создании папок и файлов.
* если мы хотим, чтобы доступ к каталогу был полный у определенных пользователей (без разделения на тех, кто может только читать и тех, кто может также писать в папку), то опцию write list можно не указывать, а опции writable и read only оставить как в примерах выше.
Создаем каталог для новой папки:
mkdir /data/private
Задаем права на созданный каталог:
chmod 777 /data/private
Для применения настроек перезапускаем samba:
systemctl restart smbd
Создать группу пользователей можно командой:
groupadd privateusers
Добавить ранее созданного пользователя в эту группу:
usermod -a -G privateusers staff1
Подробнее о работе с учетными записями в Linux.
Проверяем возможность работы с новым каталогом.
Сетевая корзина
При удалении файлов из общей папки, данные удаляются навсегда. Но мы можем настроить сетевую корзину — скрытый каталог, в который будут перемещаться удаляемые с самбы объекты.
Открываем конфигурационный файл:
vi /etc/samba/smb.conf
Создаем шару:
[Recycle]
comment = Snap Directories
path = /data/recycle
public = yes
browseable = yes
writable = yes
vfs objects = recycle
recycle:repository = .recycle/%U
recycle:keeptree = Yes
recycle:touch = Yes
recycle:versions = Yes
recycle:maxsize = 0
recycle:exclude = *.tmp, ~$*
recycle:exclude_dir = /tmp
* где:
- vfs objects = recycle — использовать подсистему recycle.
- recycle:repository — где хранить удаленные объекты. В данном примере удаленные файлы попадут в скрытый каталог .recycle к котором создастся каталог с именем пользователя, удалившего файл или папку.
- recycle:keeptree — удалять объекты с сохранение дерева каталогов.
- recycle:touch — изменить ли дату изменения файла при его перемещении в корзину.
- recycle:versions — при удалении файлов с совпадающими именами, добавлять номер версии.
- recycle:maxsize — не помещать в корзину файлы, размер которых больше заданного параметра (в байтах). В данном примере, помещать файлы любого размера.
- recycle:exclude — исключить файлы.
- recycle:exclude_dir — исключить каталог.
Создаем каталог и задаем права:
mkdir /data/recycle
chmod 777 /data/recycle
Перезапускаем самбу:
systemctl restart smbd
Пробуем зайти в сетевой каталог Recycle и создать, а после удалить файл. Он должен оказаться к скрытой папке .recycle.
Для автоматической чистки сетевой корзины можно создать скрипт:
mkdir /scripts
vi /scripts/cleanrecycle.sh
#!/bin/bash
recyclePath=»/data/recycle/.recycle»
maxStoreDays=»30″
/usr/bin/find $recyclePath -name «*» -ctime +$maxStoreDays -exec rm {} ;
* в данном скрипте мы ищем все файлы в каталоге /data/recycle/.recycle, которые старше 30 дней и удаляем их.
Разрешаем запуск скрипта:
chmod +x /scripts/cleanrecycle.sh
Создаем задание в планировщике:
crontab -e
0 5 * * * /scripts/cleanrecycle.sh
* в данном примере мы будем запускать скрипт по очистке сетевой корзины каждый день в 05:00.
Подключение к шаре
Теперь разберем примеры подключения к нашим шарам из разных систем.
Windows
Для разового подключения можно использовать проводник, прописав в нем адрес сервера через косые линии:
Для подключения сетевого диска, который будет автоматически создаваться при запуске системы, в проводнике сверху нажимаем Простой доступ — Подключить как диск:

В открывшемся окне прописываем путь до сетевой папки и выбираем имя диска:

Сетевой диск настроен.
Но мы может сделать те же действия из командной строки:
net use x: \samba.dmosk.localAD ACL /persistent:yes
* где x: — имя сетевого диска; \samba.dmosk.localAD ACL — путь до сетевого каталога; persistent:yes — указывает на то, что нужно восстанавливать данный диск каждый раз при входе в систему.
Linux
Монтирование
В Linux мы можем монтировать удаленный каталог с помощью команды mount, например:
mount -t cifs «//192.168.1.15/ad» /mnt -o user=dmosk
* где 192.168.1.15 — IP-адрес сервера; mnt — каталог, куда монтируем сетевую шару; dmosk — пользователь, под которым выполняем подключение к сетевому каталогу.
** в систему должен быть установлен пакет cifs-utils.
Подробнее, процесс монтирования описан в инструкции Как в Linux монтировать шару CIFS.
SMB Browser
Также мы можем увидеть содержимое удаленных папок на samba при помощи клиента smb. Для начала установим данного клиента:
а) на Red Hat / CentOS / Fedora:
yum install samba-client
б) на Debian / Ubuntu / Mint:
apt-get install samba-client
После вводим команду:
smbclient -L 192.168.1.15 -U staff@dmosk.local
* где 192.168.1.15 — сервер samba, к которому мы пытаемся подключиться; staff@dmosk.local — учетная запись, под которой выполняется подключение.
… мы получим список каталогов, которые расшарены на сервере.
Также мы можем подключиться к конкретной папке, например:
smbclient \\192.168.1.15\ad -U staff@dmosk.local
Мы подключимся клиентом samba — можно выполнить запрос на показ содержимого:
smb: > ls
Или полный список возможных команд:
smb: > help
Некоторые опции Samba
Рассмотрим некоторые полезные опции, которые могут пригодится при настройке Samba.
1. hosts allow
Параметр задает список разрешенных хостов или сетей, с которых можно подключаться к серверу. Если его прописать в секцию с настройкой шары, то он будет действовать только для нее, если прописать в [global], то для всех общих папок.
Пример использования параметра.
hosts allow = comp1, 192.168.1., 192.168.160.0/255.255.252.0
* в нашем примере мы разрешим доступ только для компьютера comp1, компьютеров из сетей 192.168.1.0/24 и 192.168.160.0/22.
2. hosts deny
Параметр аналогичный hosts allow, только он наоборот — запрещает доступ для хостов и сетей. Например:
hosts deny = comp2, 192.168.2., 192.168.164.0/255.255.252.0
hosts deny = ALL EXCEPT 192.168.3.
3. interfaces
По умолчанию samba использует все сетевые интерфейсы, кроме локальной петли (127.0.0.1). Параметр interfaces позволит указать, на каком сетевом адаптере файловый сервер должен принимать запросы. Пример:
interfaces = ens32 192.168.1.15/24 192.168.2.15/255.255.255.0
4. Force User/Group
Опции force user и force group позволяют задать пользователя и группу, от которых будет работать подключение пользователя к samba. Параметр может оказаться полезным для создания шары из каталога с уже назначенным владельцем, которого мы не хотим менять.
Прописывается для шары:
force user = apache
force group = apache
* данная настройка позволит подключаться к шаре под пользователем apache.
5. Include
Позволяет подключить дополнительный файл с конфигурацией.
include = /etc/samba/conf.d/shares.conf
* данная опция будет дополнительно подключать конфигурацию из файла /etc/samba/conf.d/shares.conf (прописывается полный путь).
Читайте также
Возможно, эти инструкции будут также Вам полезны:
1. Установка и настройка samba в Linux CentOS.
2. Как настроить автоматическое монтирование дисков в Linux.
3. Настройка дисковых квот в Linux.
This post shows students and new users how to connect to shares on Windows 11 from the Ubuntu desktop.
By default when you open the Ubuntu file manager, it should find network shares that are automatically advertised across the local network. Similar to Windows systems, Ubuntu uses SMB protocol to connect to Windows shares that are advertised and shared.
Remote users can connect over the network and access shared files and folders as if they were directly connected to the local machines. This is a convenient way to make files and folders available to other people on your local network.
When shares are advertised Ubuntu and other desktop computers should be able to view and connect to the shared resources.
However, if the shares are not advertised, users on the same network will have to manually connect to the shares by typing the resource network address. The steps below will show you how to do that.
Ubuntu and Windows 11 should work seamlessly when it comes to filing sharing since both will still use SMB protocol. Some things and settings have changed so much that folks will have to learn new ways of using Windows.
Despite all these new changes in Windows 11, filesharing between Windows and Ubuntu should still work.
Enable Network Discovery in Windows 11
As we mentions above, shares must be advertised for other devices to view or access them. In Windows, Network Discovery needs to be turned for advertising of shares to be viewed from other devices.
If your Windows devices are not able to see or discover each other on your private network, it might likely be that Network Discovery is disabled.
To enable Network Discovery, continue below.
Windows 11 has a centralized location for the majority of its settings. From system configurations to creating new users and updating Windows, all can be done from its System Settings pane.
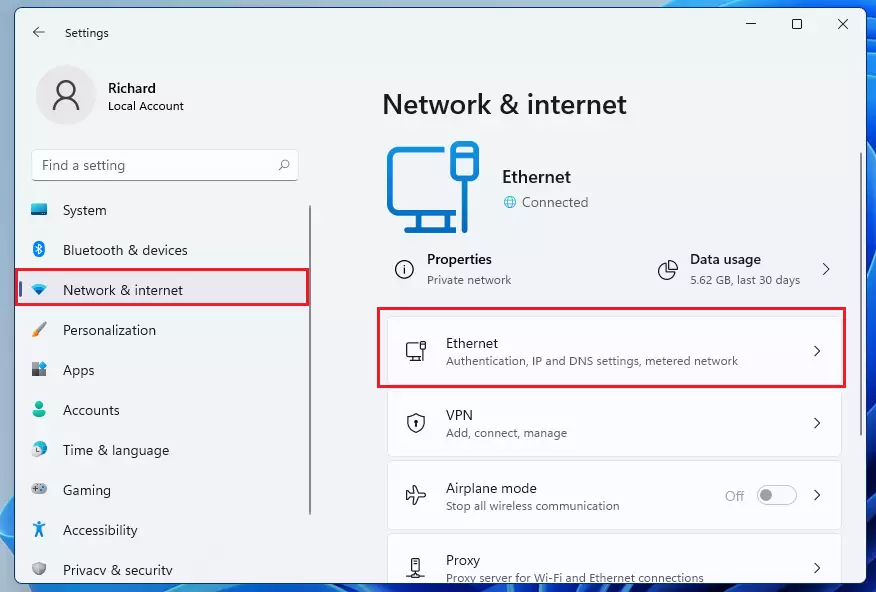
To get to System Settings, you can use the Windows key + I shortcut or click on Start ==> Settings as shown in the image below:

Alternatively, you can use the search box on the taskbar and search for Settings. Then select to open it.
Windows Settings pane should look similar to the image below. In Windows Settings, click Network & internet, then select Ethernet on the right pane of your screen shown in the image below.
In the Ethernet settings pane, under Network profile type, choose Private. This profile will allow devices in your network to be discovered. This profile should also be selected if you need file sharing or use apps that communicate over this network.
The private profile is suitable for homes, workplaces, and networks that are trusted.
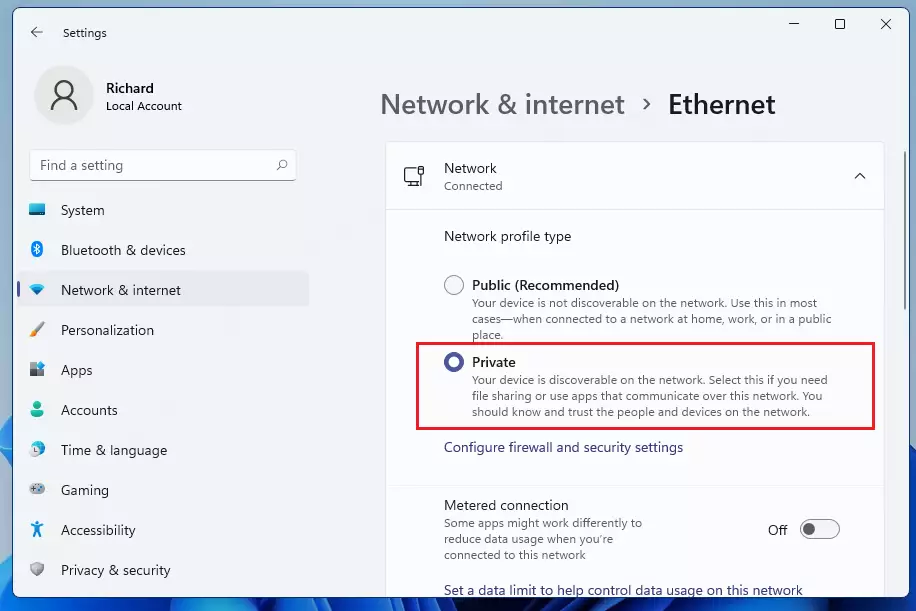
If you have other networks like Wi-Fi (if you’re connected to a wireless network) or Ethernet (if you’re connected to a network using a network cable), you can also set the profile type to Private.
When you’re done, exit and network discovery should be enabled.
Turn on Public Folder Sharing in Windows 11
Use the steps below to set up file sharing.
Windows 11 has a centralized location for the majority of its settings. From system configurations to creating new users and updating Windows, all can be done from its System Settings pane.
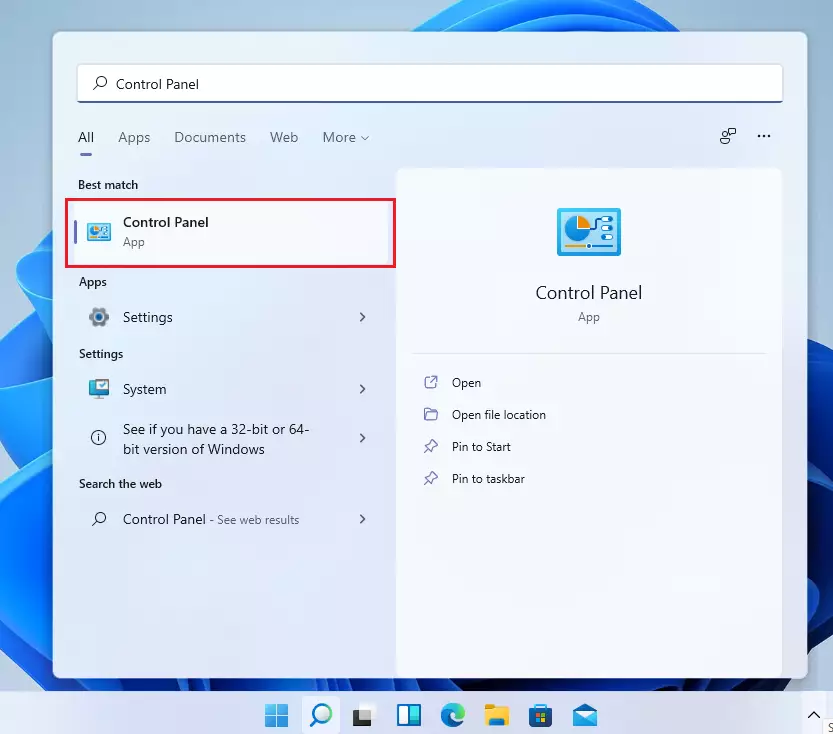
However, changing the account username is still done in the old Control Panel. To get to Control Panel, you can click on Start and start typing Control Panel as shown in the image below:
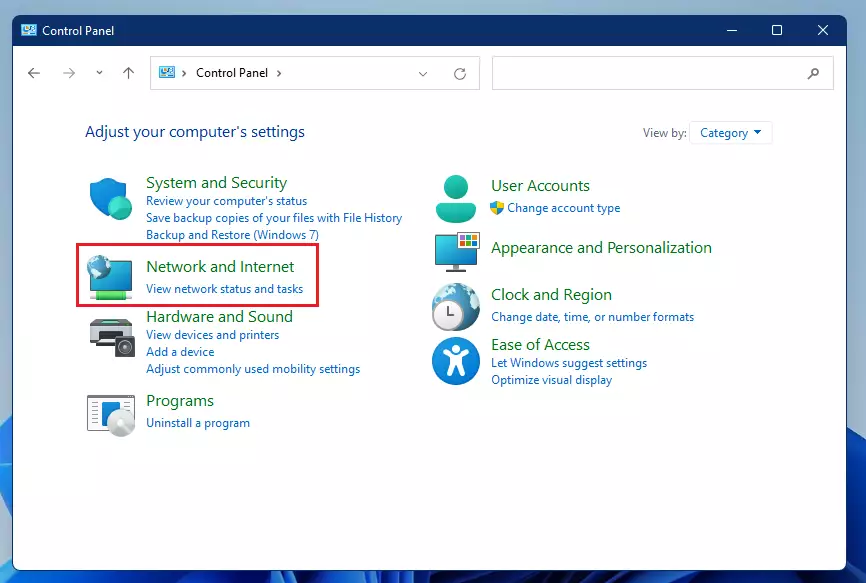
In the Control Panel, select Network and Internet as highlighted in the image below.
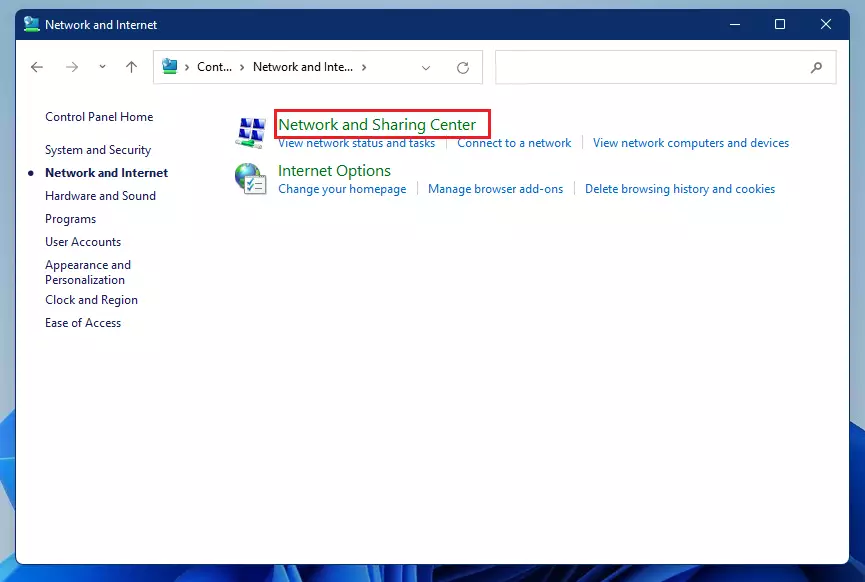
On the next pane, select Network and Sharing Center as highlighted below.
Next, select Change advanced sharing settings as highlighted below.

In the Advanced sharing center, select Private (current profile) and Turn on file and printer sharing.
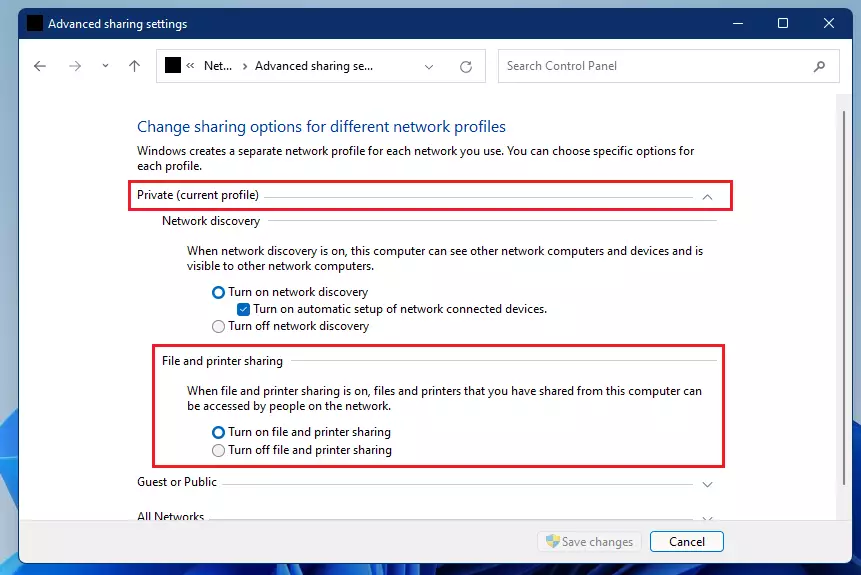
Save your changes and exit.
On the same Advance sharing options page, scroll down All networks.
There you should see settings for Public folder sharing, Media streaming, File sharing connections, and Password protected sharing. Windows should automatically turn on file and printer sharing in private networks. However, in some instances, this will not be enabled.
If you can not automatically find printers and shared resources in your private network, then the File sharing option may be disabled.
If you enable password-protected sharing, only people who have accounts on the local computer or in the domain environment will be able to access shared files and printers.

Make your changes and save, then exit.
The settings above can easily be done using the commands below when run as administrator.
netsh advfirewall firewall set rule group="File and Printer Sharing" new enable=Yes
netsh advfirewall firewall set rule group="Network Discovery" new enable=Yes
You must open the command prompt as administrator to run the commands above.
Access shares on Windows 11 from Ubuntu
Now that Network Discovery and file sharing are enabled, you can now connect to Ubuntu and view shares on Windows devices.
To browse Windows files over the network, open the File Manager application from the Activities overview (top left corner) or click File Manager on the dock and click Other Locations in the sidebar.
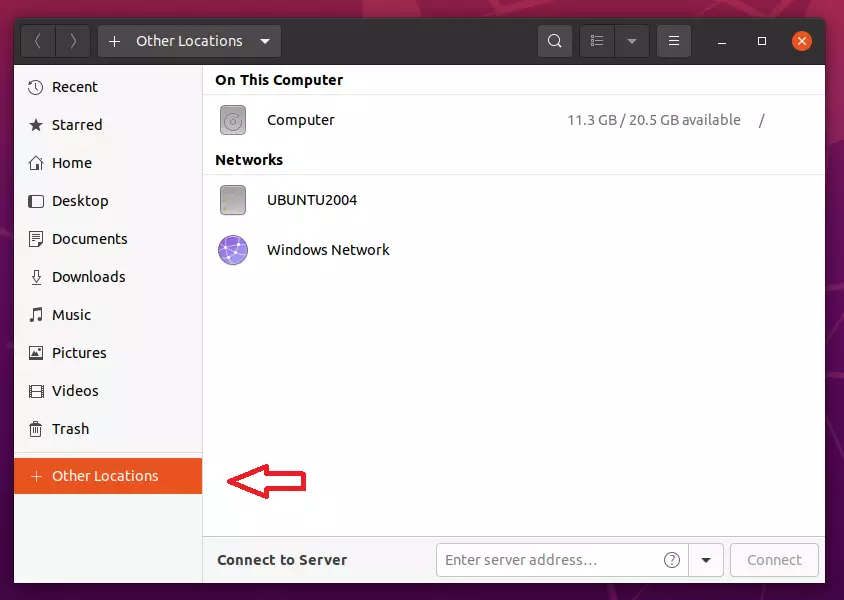
If Network Discovery is enabled and file sharing enable, you should see shared files and folders in the Windows Network folder above.
If not, run the commands below to install Samba.
sudo apt update
sudo apt install samba
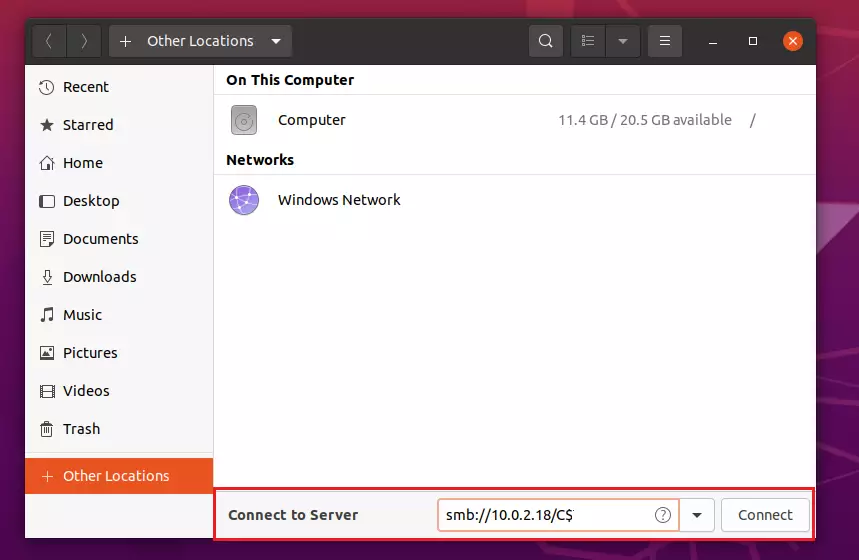
In the file manager, click Other Locations in the sidebar. In Connect to Server, enter the address of the server, in the form of a URL. Details on supported URLs are listed below If you have connected to the server before, you can select it from the Recent Servers list.
Then click the Connect button when you’re ready to connect.
smb://servername/Share_name
Another format with multiple shared folders:
smb://10.0.2.18/users/Richard/Documents
Windows computers use a proprietary protocol to share files over a local area network. Computers on a Windows network are sometimes grouped into domains for organization and to better control access. If you have the right permissions on the remote computer, you can connect to a Windows share from the file manager.
You should see Windows shares if you have access to them.
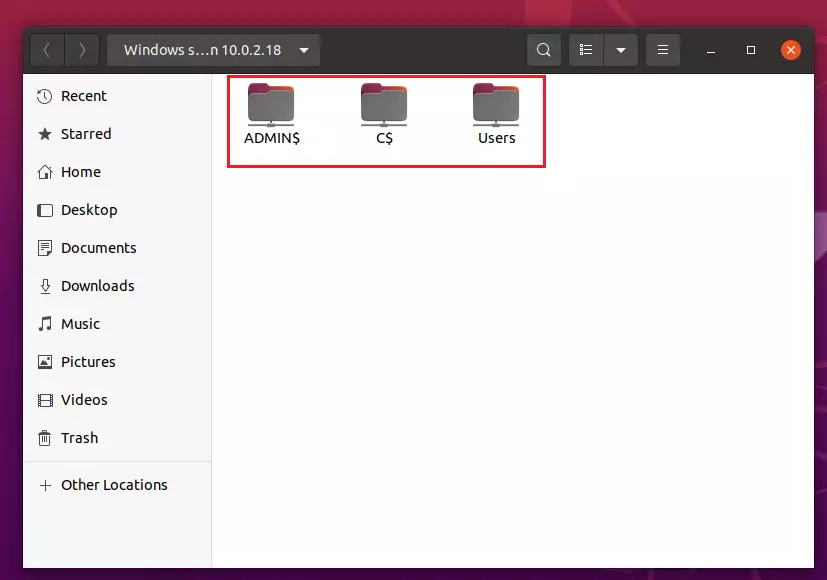
If accessing the shares and you’re prompted for login name and password, type in the Windows account login info. This account must have access to view the shared content.
How to access Ubuntu files from Windows
On the Ubuntu machine, we’ll want to create a folder to share with Windows systems. Run the commands below to create a folder called samba in the system root directory.
sudo mkdir /samba
After that, set the group ownership to sambashare and permission to allow members of the group to access the folder.
sudo chgrp sambashare /samba
sudo chmod 2770 /samba
After changing the folder permission to allow sharing, run the commands below to add your Ubuntu account to allow access via Samba.
Replace yourusername with your Ubuntu account.
sudo smbpasswd -a yourusername
Next, set Samba’s password and enable your Ubuntu account to access Samba shares.
sudo smbpasswd -a yourusername
sudo smbpasswd -e yourusername
Next, add your user account to the sambashare group.
sudo usermod -a -G sambashare yourusername
After that, open the Samba configuration file by running the commands below.
sudo nano /etc/samba/smb.conf
Then add these lines at the bottom of the file and save.
[share]
    path = /samba
    browseable = yes
    read only = no
    force create mode = 0660
    force directory mode = 2770
    valid users = @sambashare
After saving the file, restart Samba by running the commands below.
sudo systemctl restart smbd
sudo systemctl restart nmbd
At this point, you should be able to access the /samba folder on the Ubuntu system using your account. When prompted, type in your Ubuntu username and password.
That should do it!
Conclusion:
This post showed you how to enable Windows Network Discovery and enable file sharing to access shared content from Ubuntu. If you find any error above, please use the comment form below to report.
Samba is an open-source file-sharing protocol that allows us to share folders and other resources with the end-users. This article will elaborate on how to install and use Samba to share files on Ubuntu Linux distribution. We have executed all commands and set of procedures on Ubuntu 20.04 LTS system and Windows 10 in this article.
Prerequisites
You must have sudo privileges or you must log in from the root user account to install Samba on your system.
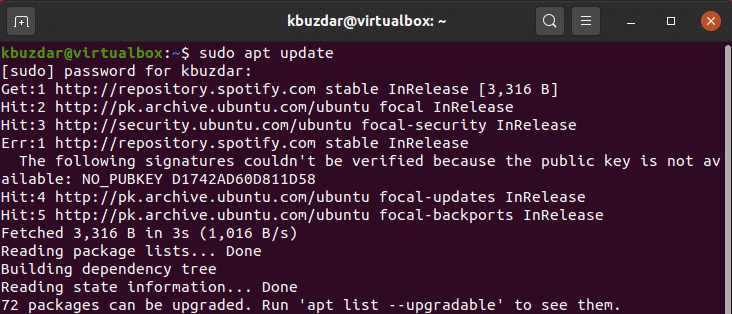
It is recommended to update your system apt packages repository before installing any new package or software. So, run the below-mentioned command to update the apt repository:
$ sudo apt update
Now, by executing the following command install Samba:
$ sudo apt install samba smbclient
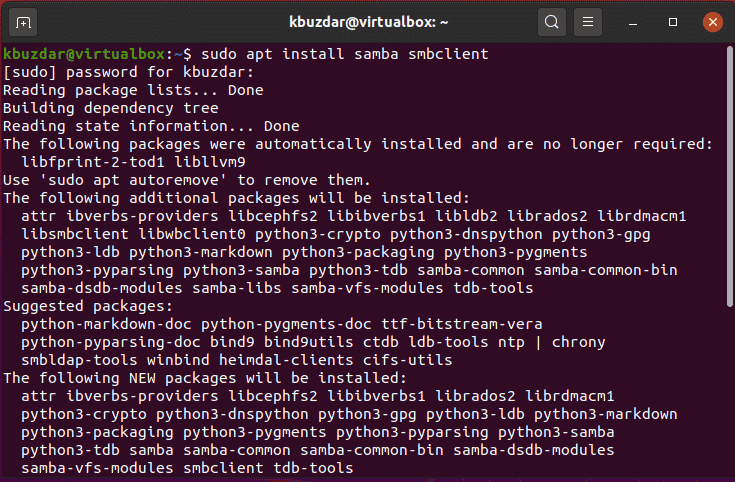
To further proceed with the installation process press ‘y’ and then hit ‘Enter’.
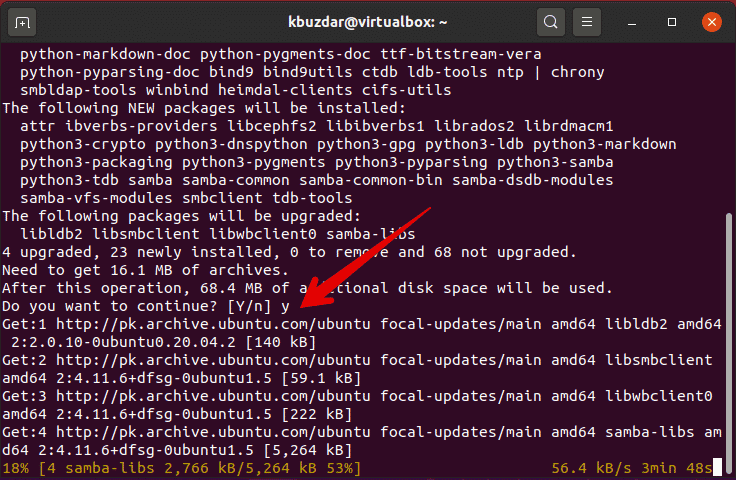
In a while, the installation of Samba will complete on your system.

You can check the Samba running service status by typing the following command:
$ sudo systemctl status smbd
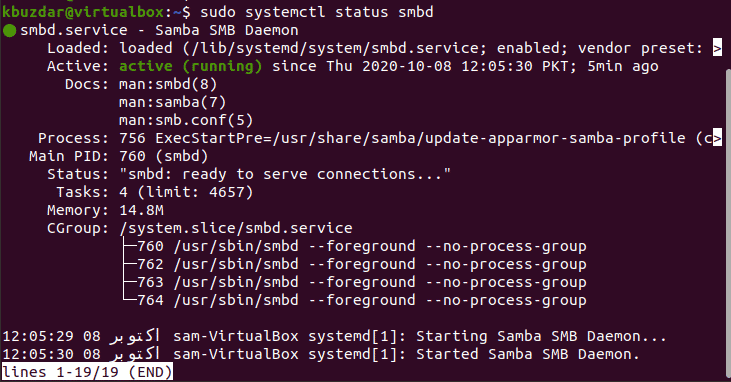
Now, we will enable the ‘Samba’ profile by changing the firewall access rules.
$ sudo ufw allow 'Samba'

Share folders using Samba
Once the installation of Samba is completed, now we can share folders or directories graphically by using the default Ubuntu file manager tool ‘Nautilus’.
Let’s play a demo on how to share directories through the Nautilus file manager.
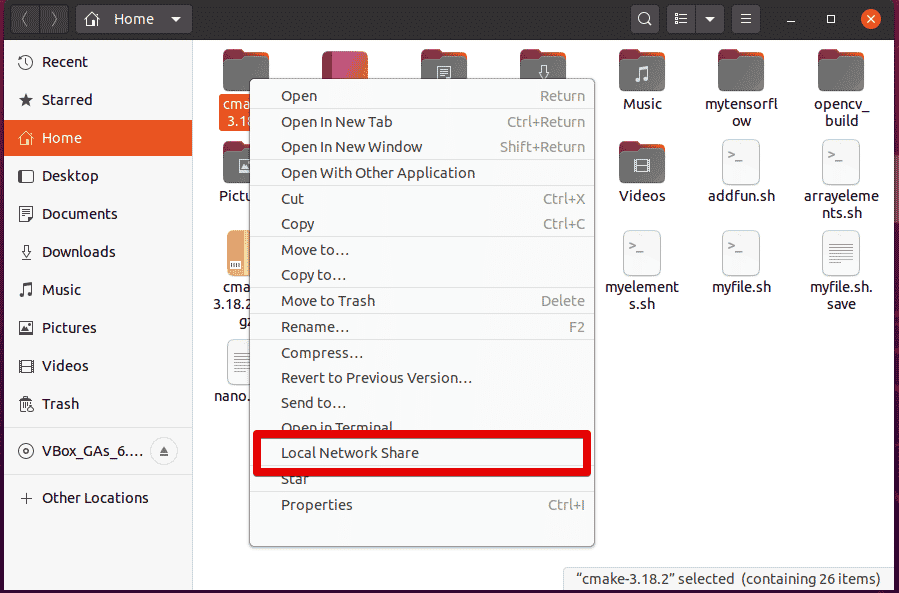
Go to the file manager and choose a folder that you want to share through your local network. Right-click on the required folder and then choose the ‘Local Network Share’ option from the displaying list items which is also red highlighted in the following image:
The following folder sharing dialog will be displayed on the system. You need to mark the following checkboxes to share the directory:

Check the ‘Share this folder’ checkbox and then, type the share name and you can also add a comment but, this is optional.
Only the owner of the share directory in the default Linux configuration can read or write to the files and directories in the Samba share.
Click on the ‘Create Share’ button.
After that, the following dialog will appear on your system. Click on the ‘Add the permissions automatically’.

You will see that share is enabled now and ready to use. Now, close the folder sharing dialog by clicking on the cancel option.
Once you share a folder, the folder icon should be changed which is shown in the below-mentioned screenshot:

Create Samba users
If you are a guest user then, you don’t need any user account authentication to access Samba shares directories. By using guest shares, everyone can access the sharing folder on the network. But, you need a Samba user account to allow access to Samba shares as an authorized person.
Note: you should know that local Linux server accounts are linked with the Samba user accounts. So, you can keep the same name of Samba users that matched with the local Linux server user’s accounts.
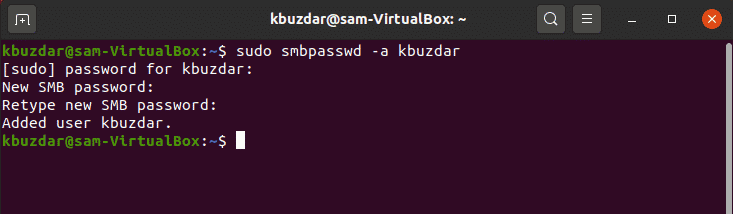
For example, we are creating a Samba user named ‘kbuzdar’ by running the following command:
$ sudo smbpasswd -a kbuzdar
In the above command, the name ‘kbuzdar’ is the name of my login user on Ubuntu.
Enter the new password for a user and press ‘Enter’. Again, retype the new password and hit ‘Enter’.
You will see on the terminal that the new Samba user is created successfully and a new password has been assigned to a newly created user.
Access Samba shares on Linux system
To access the Samba shares the Samba client program should be installed on your Ubuntu system.
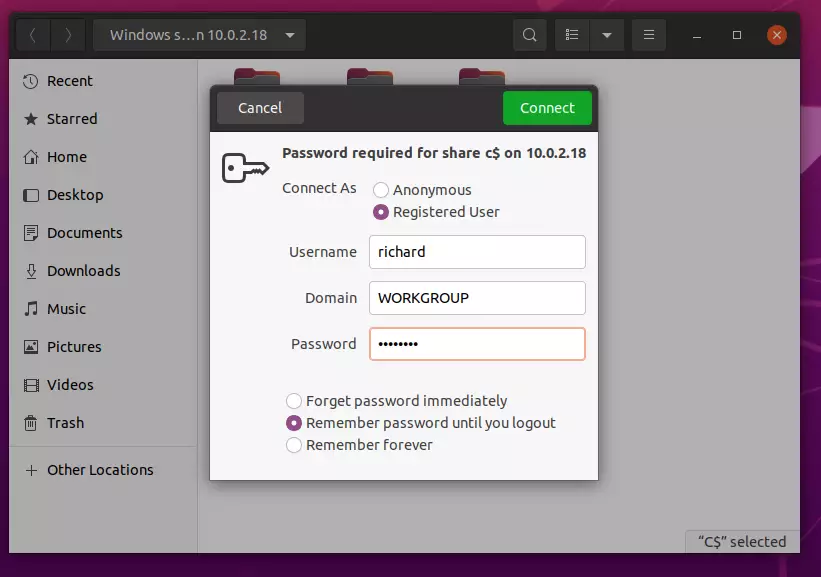
Click on the ‘other Locations’ and enter the address of Samba shares in connect to server field which is mentioned in the following screenshot:
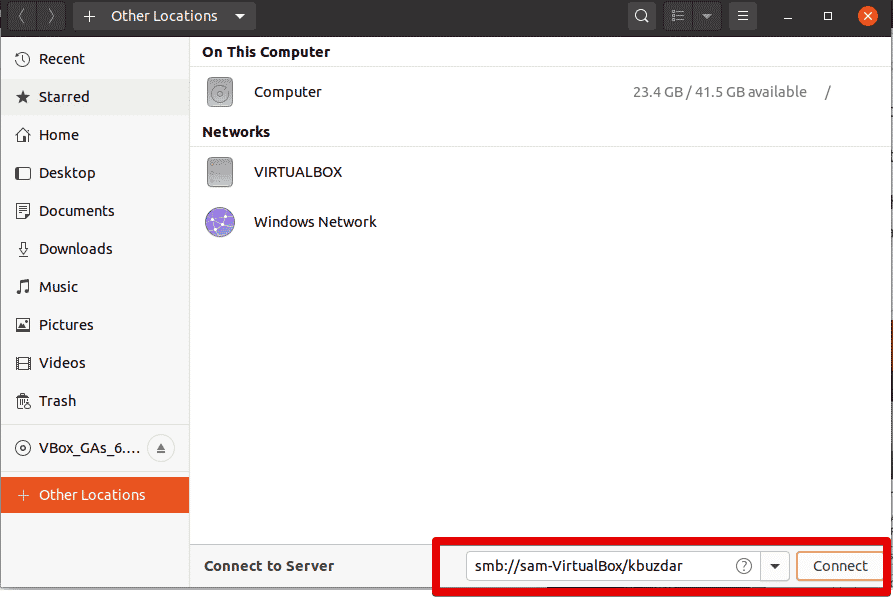
The following dialog will appear on your system:
In the above screenshot, you have both choices either you want to connect as an ‘Anonymous’ user or as a ‘Registered user’. Type Samba user credentials and then click on the ‘Connect’ button.

Click on your server or hostname.

Here, you can see that all Samba shares directories.

Now, just click on a particular directory and enter credentials.

You can then access the Samba shares folder’s content on your system.

Access Samba shares on Windows
Windows user can also connect to the Samba shares by using the following steps:
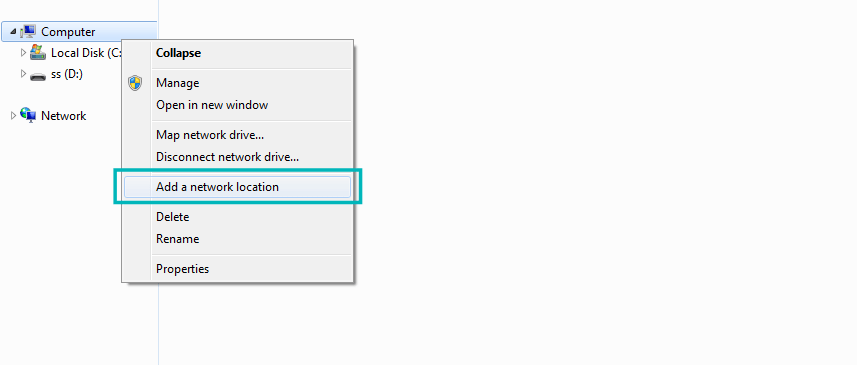
Open the file explorer and right-click on ‘This PC’ option. The following dropdown list will open. Select ‘Add a Network Location’.

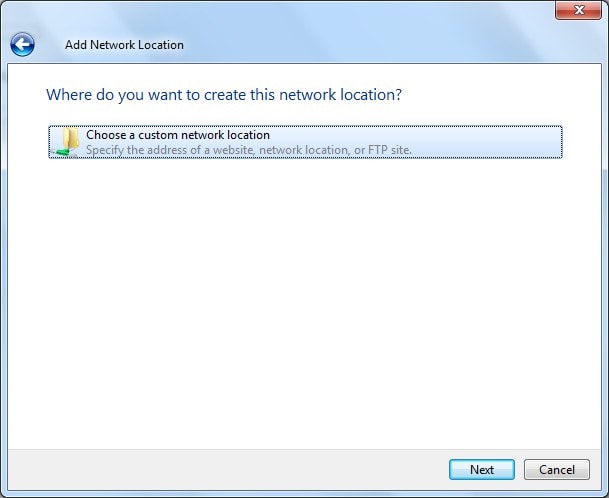
The following wizard will appear on the system. Click on Next.

Now, again click on Next to choose a custom network location.

Enter your server IP and Samba shares User name.

Enter the Samba account credentials now you can see the shares directories.

Access Samba Shares using Command Line
Create a directory that you want to share through Samba using the following syntax and assign privileges using the chown and chmod 2770 command:
$ mkdir /home/<folder-name>/<user-name>
$ mkdir /home/samba/kbuzdar

Now, enable user using the following command:
$ sudo smbpasswd -e kbuzdar

Make the copy of the smb.conf file for safety using the following command:
$ sudo cp /etc/samba/smb.conf ~
![]()
Edit the configuration file in your favorite text editor by running the following command:
$ sudo nano /etc/samba/smb.conf
Once the configuration file is loaded, add the following code at the end of the file:
[<folder_name>]path = /home/<user_name>/<folder_name>
valid users = <user_name>
read only = no
Replace the user_name and folder_name with your own details.
Now, restart the samba services by using the command as mentioned below:
$ sudo service smbd restart

To test any errors in the smb.conf file, run the below-given command:
testparm
Now, using the following command you can access samba share folders:
$ sudo apt install smbclient
The following command will list all samba shares folders:
$ smbclient -L //<HOST_IP_OR_NAME>/<folder_name> -U <user>
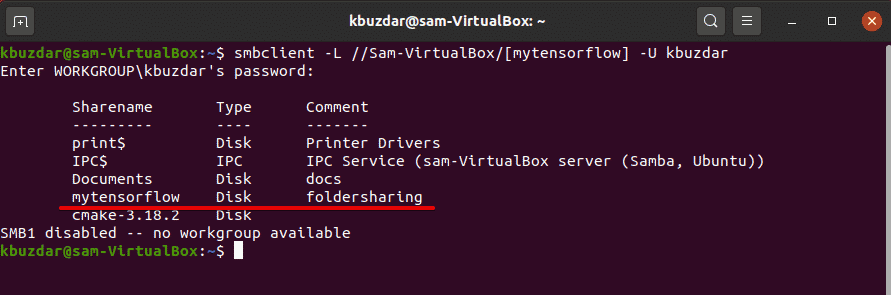
Type the following command to connect with samba share:
$ smbclient //<HOST_IP_OR_NAME>/<folder_name> -U <user>
![]()
Conclusion
From the above article, we have learned how to install Samba in Ubuntu 20.04 Linux system. We have implemented how to share folders via a local network using Samba shares. Enjoy the benefits of Samba on your system.

Karim Buzdar holds a degree in telecommunication engineering and holds several sysadmin certifications including CCNA RS, SCP, and ACE. As an IT engineer and technical author, he writes for various websites.
This is a complete tutorial to show you how to share folders over the local network between Windows and Ubuntu.
Do you have multiple devices in your home? Do you have to use Flash Drive or SD card to transfer data from Ubuntu to another computer? Do you find it annoying? We know you do. Because we don’t want you to waste your precious time while you can transfer your files, documents, and other large stuff quickly and easily, over the local network. It’s one-time setup and then with some clicks you will be able to share files between Ubuntu and Windows or any other Linux system. And don’t worry it’s easy and takes only a little time.
One more thing to add, while we performed this tutorial on Ubuntu, this tutorial should be valid for any other Linux OS.
Share folder on local network in Ubuntu
If you are using Ubuntu, there are two ways you can share your local files over the local network to access it from Windows or other Linux computers.
- Share it for everyone’s access on local network, without password
- Password protect the folders for restricted access
We’ll see both methods in this post and will let you decide which one you would prefer to use.
Method 1. Share folders on local network without password
You’ll have to do some settings on both Windows and Ubuntu.
Enable sharing on Ubuntu
To share a folder on the local network in Ubuntu, right click on the desired folder and select Local Network Share:
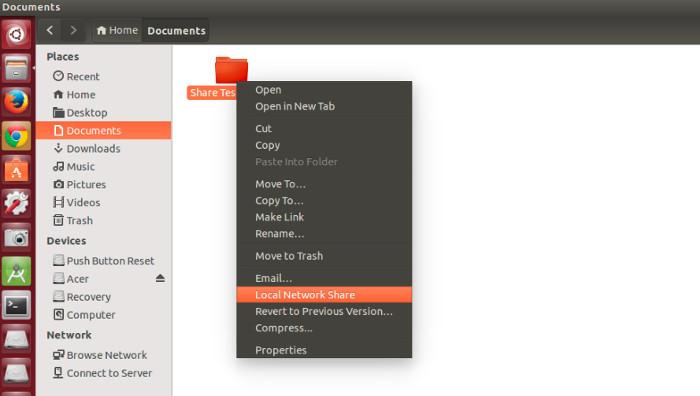
Possible troubleshoot: If you do not see the option of Local Network Share in right click menu, open a terminal and use the following command to install nautlius-share:
sudo apt-get install nautilus-shareYou’ll need to restart Nautilus. Either log out and log in back or use the command below:
nautilus -qWhen you click on Local Network Share, you will see the option of sharing the folder. Just check the option of Share this folder:
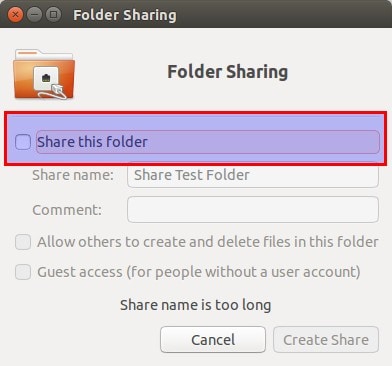
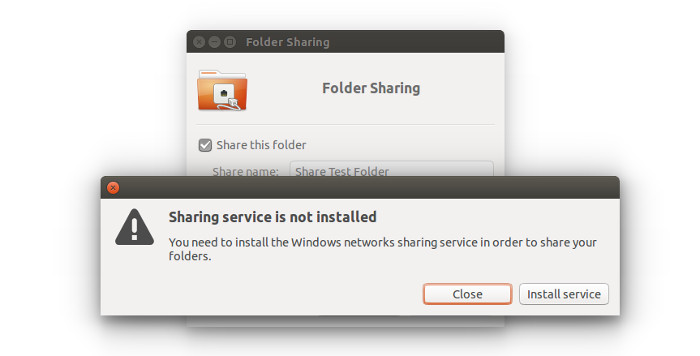
Possible troubleshoot: If you are prompted about Sharing service not being installed, like in the screenshot below, just click on Install service and follow the instructions.
When you check the option of Share this folder, you’ll see option of Create Share available for you. You can also allow other users to edit the files in the shared folder. Option for guest access can be checked as well.
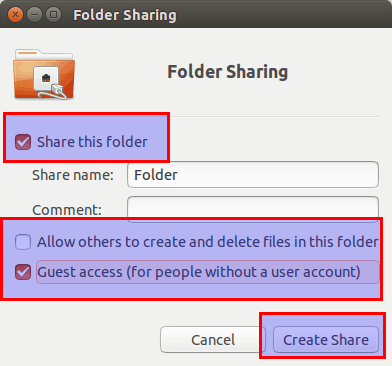
You’ll see that the folder icon have been changed to show that it has been shared. To stop sharing a folder, just uncheck the Share this folder option.
Now access the shared folder on Windows machine.
Step 2: Enable sharing on Windows
On Windows, right click on “This PC” or “My Computer”, and select “Add a new connection”.
Click on “next” button.
Now it’s time to enter server address and the name of folder which we’ve shared. Please enter in following format.
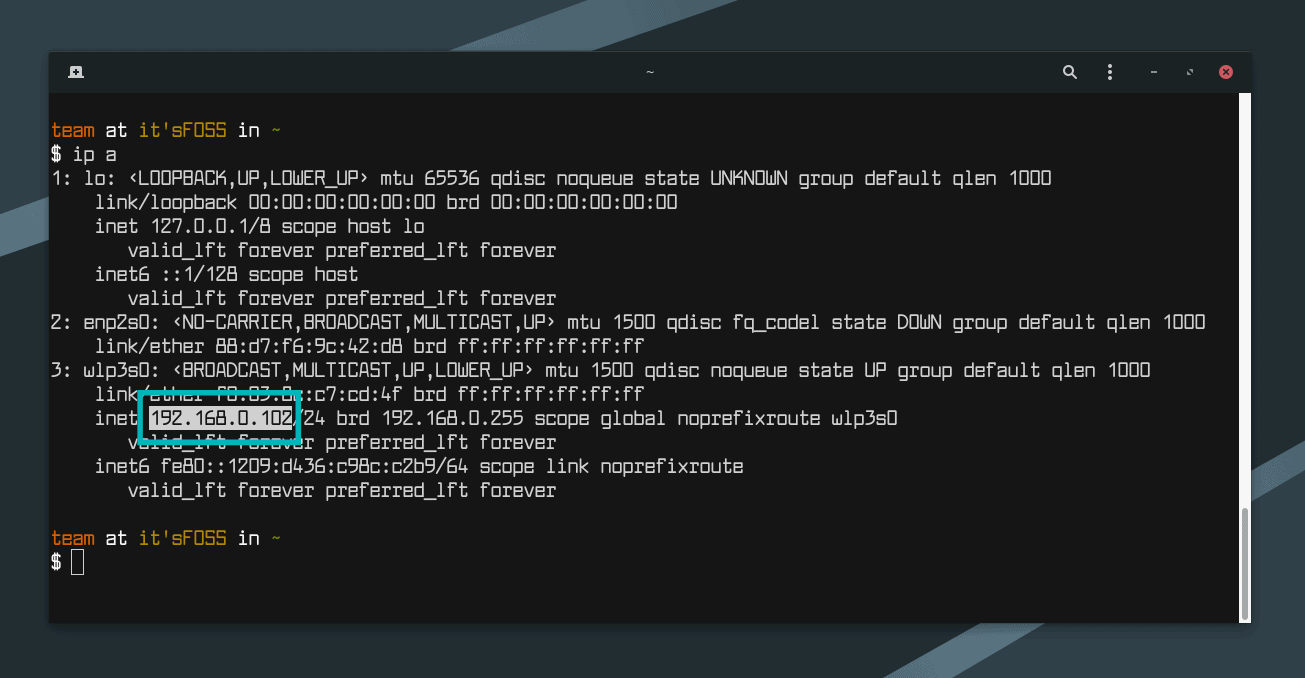
You can find your server’s address, i.e. IP address of Linux machine by entering ip a command.
In my case, IP address of Linux machine is 192.168.0.102 and folder I’ve shared is share.
Now add the location in the following manner:
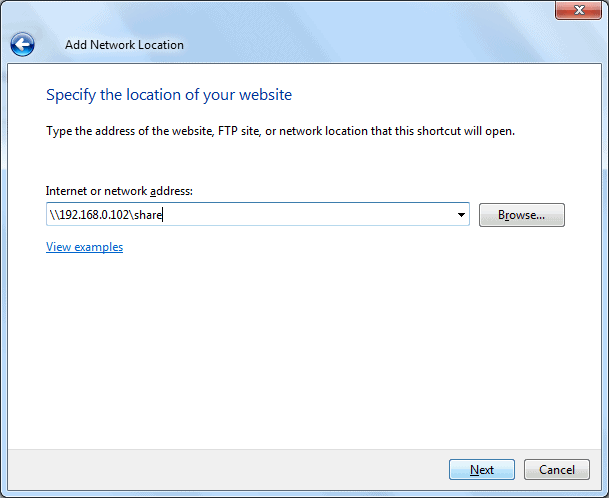
Now you will see this screen, just click next.
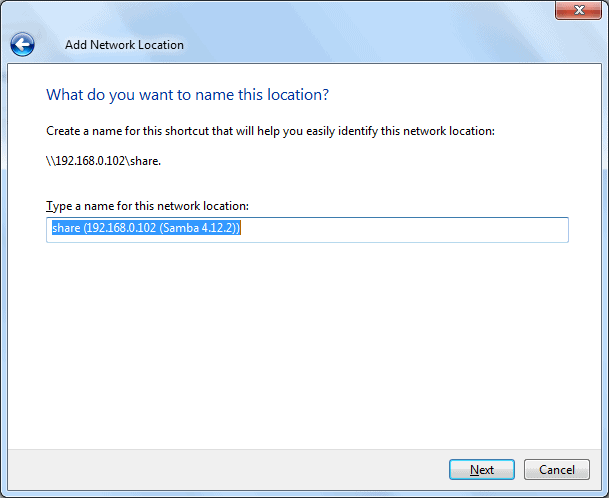
Now, you can access the shared folder in “This PC” or “My Computer” under “Network Location” section.
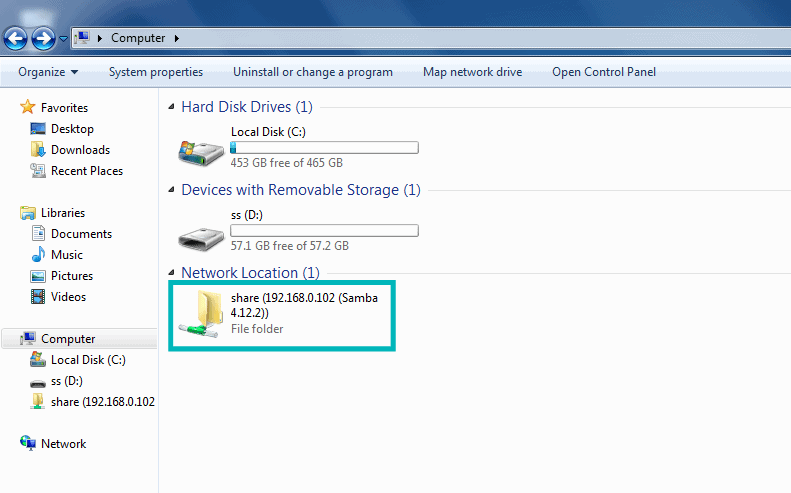
Now this was the easy way out. This provides access to anyone on your local network to access these files.
In normal condition, you should prefer this. I mean, devices on your home network should be generally known devices. But this could not be the case always. What if you want only certain people to access it?
This is where Samba server comes in picture. We’ll see that in the second part of the tutorial.
2. Share the folders on local network in Ubuntu with password protection
To do this, we need to configure Samba server. Actually, we did use Samba in the previous part of this tutorial. We just did not emphasize on it. Before we go on seeing how to set up Samba server for local network sharing in Ubuntu, let’s first have a quick look on what actually is Samba.
What is Samba?
Samba is the software package that allows you to share files, documents and printers across a network, irrespective of whether you are using Linux, Windows and Mac. It’s available for all major platforms and can work tremendously nice in all of them. Quoting from Wikipedia:
Samba a free software re-implementation of the SMB/CIFS networking protocol, and was originally developed by Andrew Tridgell. As of version 3, Samba provides file and print services for various Windows Clients and can integrate with a Windows Server domain, either as a Primary Domain Controller (PDC) or as a domain member. It can also be part an Active Directory domain.
Install Samba server on Ubuntu
You can easily install Samba on you Ubuntu box. Before installing update your system so that you can install any available updates.
sudo apt-get update && sudo apt-get upgradeNow install Samba serer and few other required stuffs with the following command:
sudo apt-get install samba samba-common system-config-samba python-glade2Once you’ve installed Samba server, it’s time to configure Samba from the graphical interface window to share files.
Configure Samba server on Ubuntu
Open Samba Configuration tool from the dash:
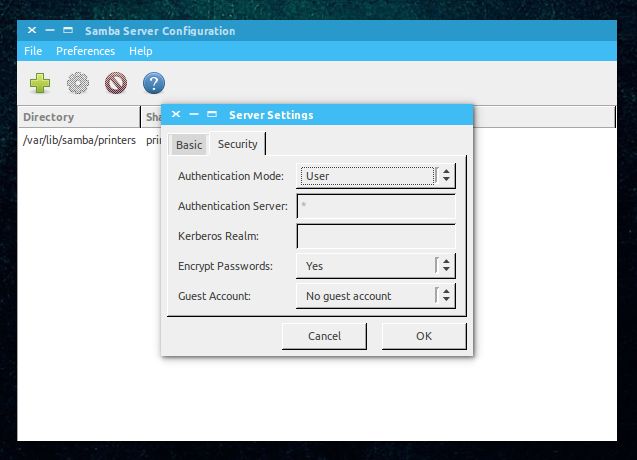
Go to Preference->Server Settings. Although the default settings are good and may be same you need. But you may need to make change to it in some cases.
Now in Server Settings you’ve two tabs, ‘Basic’ and ‘Security’. Under Basic tab you’ve the following options that mean:
- Workgroup – This is the name of the Workgroup of the computer you want to connect to. For example, if you want to connect to a Windows computer so you will enter the workgroup name of Windows computer, and in Windows you already have the same workgroup name as is set by default in Samba Server Settings. But if you have a different workgroup name on Windows then you will enter that workgroup name in this field. (In Windows 7 to get the workgroup name, right-click Computer icon and go to Properties, there you’ll see Windows Workgroup name.)
- Description – This is the name of your computer as seen by others. Don’t use spaces or non-internet friendly characters.
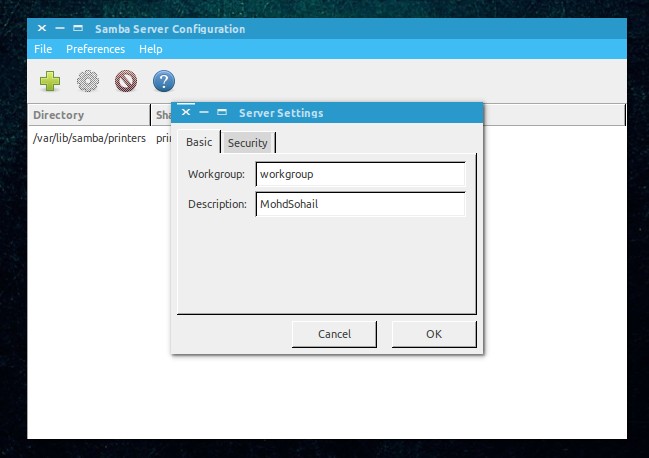
Allowing ‘Guests’ is not advisable so there is no reason to change security settings. Keep as it is.
It is all done! You’ve setup Samba Server. We are not far from sharing our first folder on network.
Create a system user for network file sharing
We will now create a system user for sharing file on network. This is how simple it is.
- Go to System Settings.
- Under Systems Settings Click User Accounts.
- Click unlock to Enable + (plus) icon.
- Click + (plus) icon to create a new system user.
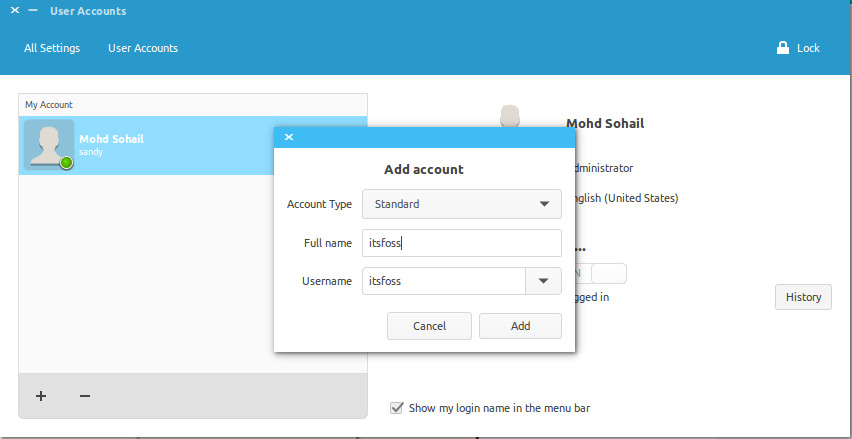
Now as you can see the above image, you can enter ‘Full name’. As you enter ‘Full name’ Username will be taken as Full name automatically. Because we are creating this user to share files so we will assign Account Type to ‘Standard‘.
Done above steps? Click add. You have created a system user. The user is not yet activated so we will activate it by setting up password for this account. Make sure Users accounts panel is unlocked. Click Account disabled and type a new password, then confirm password and click Change.

Yipee… Upto now we have installed and configured Samba and We have created a System user to share files on network from the account and we have activated our newly created account, too. Now We will move to Samba for the last step of configuring everything, then we will share a folder.
Add new Samba user
Open Samba and click Samba Users under Preference. Fill up the the simple dialogue. Here are couple of details about the fields:
Unix Username – In this case I am selecting the user that I just created.
Windows Username – You will enter this username when you are accessing from Windows Machine.
Samba Password – You will enter this password when you are accessing from Windows Machine.
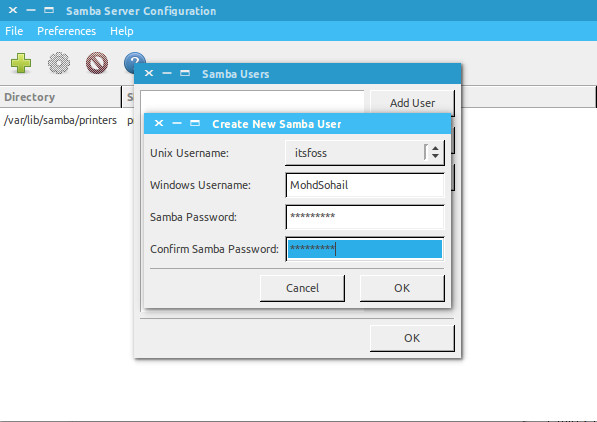
Once you’ve done click OK. Now take a deep breath. You have successfully created a network with the help of Samba. Now restart the network or Samba services and ready to share files with other machines.
sudo restart smbd && sudo restart nmbdShare folders or files over the network
To share files with Samba it’s simple with graphical user interface. Click the Plus icon in Samba and you will get dialogue like this:
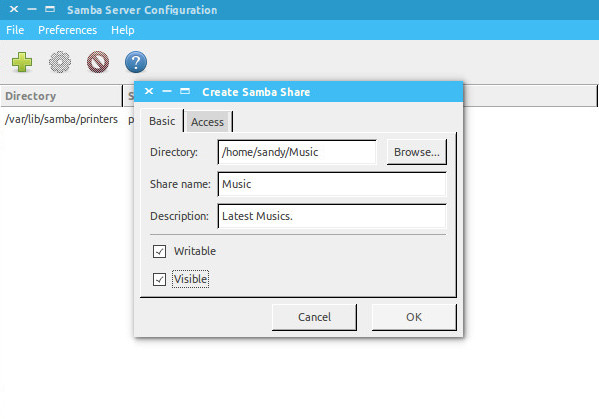
Complete the fields. In ‘Directory‘ browse the folder you want to share. Here are the details about the fields you will see here:
- Share name is the name of the folder that other would see.
- Description is simply about the content you are sharing on network.
- Writable You shared folders are ‘read only’ by default. You can set them to writable if you want others on network to change them.
- Visible As the name suggests when you click Visible, the shared folder will be visible to the people on network.
Now you can set permissions for the folder you are sharing. To do this click ‘Access’ tab and check the users you want to share the folder with. When you select Allow access to everyone, the folder will be accessible to everyone on the network.
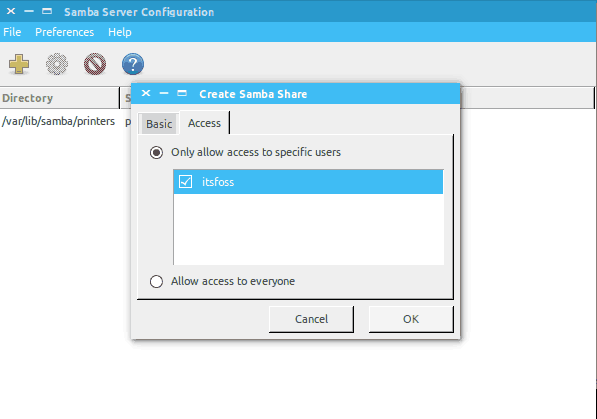
Finally click OK to complete the sharing. Now the folder is shared with the people you want. You have completed sharing file on network. Is there everything left? Yes! How to remove the folders from the network?
Remove shared folders
We will also need to remove some of the folders after sometime from network. It is very simple and here is how we can do that.
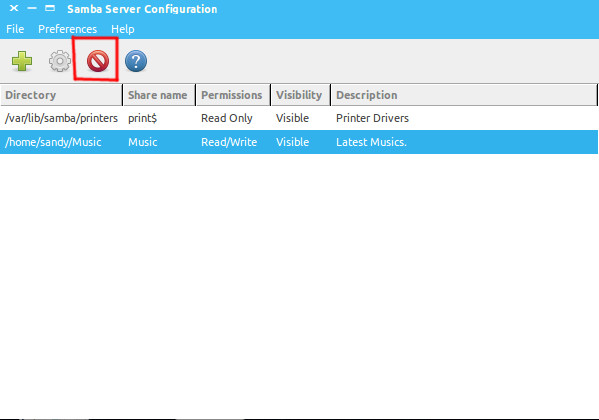
This is all done! We can also share files over network using terminal but that would not be as easy as this one. If you request for command line sharing then I will write a tutorial on how to share files over network with command line in Linux.
So, how do you find this tutorial to share files on local network in Ubuntu? I hope with this tutorial you can easily share files between Ubuntu and Windows. If you have questions or suggestions, feel free to ask it in the comment box below.
This tutorial was requested by Kalc. If you would like, you can request your own tutorial. We would be happy to help you out along with other readers facing the same issue.
With inputs from Abhishek Prakash.
If you have a network that comprises of both Windows and Linux machines and you want to enable sharing between them. You can achieve this by using a useful tool Samba. It is an open-source tool that allows you to access shared resources including files, printers, etc.
In this article, we will show you how to install and configure Samba as a file storage system for Windows and Linux OS. We will also show you how to access Samba shared files using other Linux and Windows client OS. Before accessing the shares, make sure you have the server and client OS in the same IP subnet.
For this article, I am using Ubuntu 18.04 LTS for the installation and configuration of Samba server.
Installation of Samba on Ubuntu
Launch the Terminal by pressing Ctrl+Alt+T key combinations then enter the following command to install Samba.
$ sudo apt install samba

Verify SAMBA installation
You can verify if the Samba has successfully installed and running by entering the following command. It will show the status of the Samba service.
$ sudo systemctl status nmbd

You can see the above status that the Samba is active and running.
Configuration of Samba
Once you have down with the installation, you will need to configure it.
1. First, we will need to create a Samba directory, where all the shared data will be stored. Open the Terminal and run the following command as sudo:
$sudo mkdir /samba
![]()
It will create new subdirectory samba in the root directory.
2. Make a backup of the configuration file by copying it in the same or another directory. To copy the file, run the following command as sudo:
$ sudo cp /etc/samba/smb.conf /etc/samba/smb_backup.conf
It will make the backup file in the same directory.
3. Now edit the configuration file.The configuration file of Samba is located in /etc/samba/ in a file named smb.conf. You can use Gedit, Nano or Vim to edit any config file. To edit the file using nano editor, open Terminal and run the following command as sudo:
$ sudo nano /etc/samba/smb.conf
![]()
Configuring Samba Shares
Now we will configure our new directory samba as a share. For this, we will have to add the following lines in the Samba configuration file.
Add the following line to the bottom of the smb.conf file.
[samba-share]
comment = Samba on Ubuntu
path = /samba
read only = no
browsable = yes
Where
- [samba-share] = name of the share
- comment= Add a brief description of the share
- Path= It is the directory of your share.
- Read only = It specifies whether or not a user is allowed to write
- Browsable = whether the share should be listed in the share list

Press Ctrl+O to save and Ctrl+X to exit.
Setting up Samba User Account
Now, set up a user account for Samba. Samba use system account for accessing the share but it does not accept the system account password. so we will need to set up a password for that account by entering the following command as sudo. When requested for the password, Type new password.
$ sudo smbpasswd -a username
Restart Samba Service
Once you have down with all the configurations, restart the Samba service by running the following command:
$ sudo systemctl restart smbd.service
Connecting Samba Share
As previously discussed, you should be in a LAN to access files from the Samba server. That means the IP of your Samba server and the clients who are connecting to it should be in the same network.
For instance, in my scenario, I have one Samba server and two clients: one is Linux and the other is Windows. All three machines are in the same network.
- IP of Samba (Server): 192.168.36.129/24
- IP of Linux (Client): 192.168.36.130/24
- IP of Windows (Client): 192.168.36.1/24
Samba server IP configuration
You can check the IP address of any machine by running ifconfig in Terminal.
$ ifconfig
Following is the IP configuration of my Samba server:

Method 1: Connecting from Linux
There are two ways through which you can connect Samba share from Linux client.
1. Using Command Line
2. Using GUI
Following is the IP configuration of my Linux client is:

1. Using the command line
To connect Samba share through the Linux command line, you will need a smbclient tool. To install smbclient, open the Terminal run the following command as sudo:
$ sudo apt install smbclient

Once the installation is completed, run the command by using the following syntax to access Samba share.
$ sudo smbclient //[IP_address or Host_name]/share_name –U username
- [IP_address or Host_name] is the IP address or the host name of the Samba server
- [share_name] is the name of the Samba share
- [username] is the name of the user that is accessing the share
It will prompt for the password. After you enter the password, you will be logged in to Samba CLI. You can type help to see a list of various commands.

2. Using GUI
To access Samba share via GUI, open Linux File Manager. Click on Connect to Server on the left pane of the File Manager window.

In a Connect to Server window, enter the Samba server address in the following syntax and click Connect.
smb:// [IP_address or Host_name]/[share_name]

The following screen will appear. From Connect As option, select Registered User.
Enter Samba username and password. Leave the Domain as default and click Connect.

You will see the connection has established. Now you can access the files on Samba server.

Method 2: Connecting From Windows
You can connect to Samba share using Windows OS in two ways:
1. Using Run utility
2. Using File Explorer
Following is the IP configuration of My Windows client machine:

1. Using Run utility
Press Windows key + R to launch the Run utility. Enter the address in the following syntax to access Samba share and press Enter.
\[IP-address][share_name]

It will be prompted for credentials. Enter credentials for Samba share, then click OK.

You will see the connection has established. Now you can access the files on Samba server.

2. Using File Explorer
Launch File Explorer in Window. In the left pane, right click on This PC. Then select Add a network location from drop-down options.

It will launch the Add Network Location wizard. Keep clicking on Next until the following screen appears. Add Samba share address in following the syntax and click Next.
\[Ip-address]share_name

In the next screen, you can change the name of the shared location. Click Next and then click Finish to complete the process.
When the above process is completed, it will prompt for credentials, enter the credentials for Samba share and click OK.

You will see the connection has established. Now you can access the files on Samba server.

Therefore, to wrap things up, we have learned how to install and configure Samba on Ubuntu 18.04 LTS to create shares. We have learned how to connect those shares using Linux and Windows OS.
Your home network might have a few Windows machines on the ground floor, a Mac in an upstairs bedroom, a PocketPC on a nightstand, and a Linux box or two in the basement, all networked with a generic router. For all the devices in this familiar family setup, or even a scenario with thousands of users, the Samba suite is an ideal solution for file and print sharing.
Several cross-platform file and print-sharing solutions exist, but Samba and the SMB/CIFS protocol may be the easiest to implement in a home networking environment. Windows machines and Macs come with the functionality to work with with Samba out of the box, and you should only need to install a single Samba package for Linux machines. GNOME and KDE offer Samba client functionality built in to their default file managers, Nautilus and Konqueror, respectively.
We’ll focus on configuring and using Samba for file and print-sharing in a typical home network with Linux and Windows machines. You can choose from several Samba configuration GUIs, but we’ll go the old-fashioned route and point our text editors to smb.conf. The configuration file is commonly found at /etc/samba/smb.conf or /usr/local/samba/lib/smb.conf. Note that you will need to be root to edit these, or use sudo.
Samba will run on nearly any Unix-like system and can be found in the repositories of just about every Linux distribution. Begin by using your distribution’s package manager to make sure it is installed.
Configuring Samba
Samba is a very mature and complex package, so its configuration file can be long and complicated. You will have to trust that your distribution supplied you with a reasonably sound default configuration and focus on changing just a few lines in smb.conf to make sure they are appropriate for the purposes of a home network. If you want to know more about any line, consult man smb.conf.
Remember that any line in the configuration file preceded by a semicolon (;) or hash mark (#) is a comment and will not be recognized as an active setting. To activate the line, remove the semicolon or hash. It’s a good idea to add your own comments preceded by one of these characters so that you will remember the logic behind your configuration the next time you load smb.conf.
The first option to consider is Samba’s security level. This line will appear under the [global] section of smb.conf, where all Samba-wide configuration is done. The other sections, addressed later in this article, relate to specific Samba services (shared resources). The security level will most likely be set to the value user and look like this:
security = user
For a home network, you may want to consider setting this to share. The main difference is that with the user setting you will be required to log into the Samba server before you can browse its resources. This is a wise precaution on untrusted networks, but will be inconvenient when using resources you would like your entire household to have access to, such as a printer. With share enabled, you can still require users to authenticate themselves with a password to access particular resources.
While still in the [global] section, let’s move on to printers. If you use the Common UNIX Printing System (CUPS) (which most distributions default to), the only thing you need to do to have Samba recognize your printers is set the following lines accordingly:
    printing = cups

    printcap name = cups
Since you may be configuring these printers (and perhaps other resources) to be accessible without user authentication, it is very important that you restrict access to only known and trusted hosts – the computers in your household. Consult your router’s manual for instructions on assigning specific IP addresses to each computer in your home network. Once you have a list of trusted hosts, enter them into the following lines in the [global] section:
    hosts allow = computer1 computer2 computerN

    hosts deny = ALL
Although you have specified that ALL hosts be denied, any host listed on the hosts allow line will still be given access. The format of the IP addresses assigned to each computer by your router will vary. For instance, if machines on your local network are given addresses of the format 192.168.0.x, the following lines will restrict Samba access to local hosts:
hosts allow = 192.168.0.
hosts deny = ALL
Note that the final digit of the IP address was left off on the hosts allow line. This specifies that any IP address in that range be allowed. For additional security against external access, look into blocking Samba ports with a firewall.
Sharing directories and printers
It’s time to move beyond [global] and configure specific shared resources. Begin with the [homes] section. By default, your distribution may have this section configured to allow users to access their home directory on the machine running the Samba server.
If you have security = share set, this feature may not work as expected and users may be presented with home directories without logging in. If you are the only one with a home directory on the machine running the Samba server anyway, which is likely in a home network environment, it is advisable to remove or comment out (using hash marks or semicolons) the [homes] section and add any useful directories as shared resources individually later on.
Now you can begin sharing specific directories. Use this as a template for a publicly shared folder for which it is not necessary for users to be authenticated:
[Share Name]
path = /location/of/directory
guest ok = yes
browseable = yes
read only = no
Share Name is whatever title you choose (to the client accessing your server, this will appear to be the name of the shared directory). The guest ok = yes line is what specifies this share as publicly accessible. The browseable = yes line will make the share appear available to all users. Set browseable = no to force users to manually type in the share name to access it. Of course, you can set read only = yes to restrict users from make changes to the directory remotely.
Use this as a template for private shares that users must enter a password to access:
[Share Name]
path = /location/of/directory

    valid users = user

    read only = yes
browseable = no
Here, user is the user name on the machine running the Samba server of the person with access privileges to the share. Use these two templates to add shares for all the files users may want to access from the server machine.
Your server should be fully configured now. With what you added to the defaults provided by your distribution, your completed smb.conf should look something like this:
[global]
security = share
workgroup = HOME
server string = %h server
log file = /var/log/samba/log.%m
max log size = 1000
dns proxy = No
hosts allow = 192.168.0.
hosts deny = ALL
printing = cups
printcap name = cups

[printers]
path = /var/spool/samba
printable = Yes
browseable = No

[print$]
path = /var/lib/samba/printers

[Public Directory]
path = /Public/Files
guest ok = yes
read only = no
browseable = yes

[Private Directory]
path = /private/files/
valid users = me
read only = yes
browseable = no
Before you leave the server machine you have a few more quick chores. First, enter any users that will be accessing the Samba server into the following command:
smbpasswd -a user
You will be prompted to enter a Samba password for each user. You can change the password at any time by logging in as the desired user and running smbpasswd. Now restart your Samba server using this command:
/etc/init.d/samba restart
Accessing Samba shares from Windows clients
Head over to a Windows machine to try out your new setup. Your new server should appear in Windows’ My Network Places (look for the shortcut on your desktop, by default). Alternatively, open the Start menu and click “Run…”, then enter:
server
Replacing server with the name or IP address of the machine running your Samba server. A Windows Explorer window with the browseable shares from your server should open up. If you’ve made a non-browseable share, access it using this link:
servershare name
Is is easy to make shared directories more accessible. In Windows XP, right click on the share in Explorer and choose “Map Network Drive…” You will be able to assign them a drive letter, such as Z:, so that they may be easily found in My Computer, even after a reboot.
In my testing on Windows XP with the security level set to share, printers are automatically be detected and available to use from the Windows machine. With user level security set, it was necessary to log into the server in a Windows Explorer window before trying to print. Your experience on other versions of Windows may vary.
Accessing SMB/CIFS shares from other Linux machines
Samba and Windows shares can be easily accessed from the default file managers of both Gnome and KDE. We’ll begin with accessing shares from Nautilus in Gnome. Open Nautilus and go to File -> Connect to Server.
Choose “Windows share” from the listbox and enter the server name or IP address of your Samba server. You can also click the “Browse Network” button and look in the “Windows Network” directory to search for the server manually. Click “Connect” and a Nautilus window will open with the browseable resources of your Samba server.
Accessing Samba shares with Konqueror is just as simple. To browse for your server, enter the URL remote:/ in Konqueror. For direct access, type the URL of the server in directly in this format:
smb://user@server/share
Note that user and share are optional criteria.
Configuring printers over Samba is similarly easy in both these desktop environments. In Gnome, go to System -> Administration -> Printing. In the printer configuration application, select Printer -> Add printer. You will be prompted for your password. In the add printer wizard, select “Network Printer” and then “Windows Printer SMB” from the listbox. You will be prompted for a user name and password on your Samba server. Identify your Host and Printer on the Samba server and then move on to the next screen. Select your printer model and then click Apply.
To do the same in KDE, open the configuration center by launching the command kcontrol. Navigate to the Printers module and go to Add -> Add Printer/Class… In the resulting dialog, click Next and then select “SMB shared printer (Windows).” Click Next again and configure the username and password of a “Normal account,” if using user level security. Click Next another time and then Scan to browse for your Samba server.
Alternatively, enter the server details manually. On the next screen, select your printer model from the list. Click through the next few screens and give your networked printer a title to finish up.
Troubleshooting
If you’ve experienced any problems getting any of this functionality to work, turn to the Samba troubleshooting checklist. A quick trick borrowed from that document for testing your Samba configuration file for obvious errors is to run the following command:
testparm smb.conf
Again, the exact path of your smb.conf may vary by distribution.
We have only explored basic Samba functionality here, tailored for a home network. More extreme usage scenarios are addressed in detail in the Samba by example guide.