If you are still running Windows Server, you should upgrade to Windows Server 2019 since Windows Server 2012 R2 will end the support. In this post from MiniTool Solution, you can see a full guide on the Windows Server upgrade. Also, some things that should be done before the upgrade are described here.
Windows Server is a family of operating systems created by Microsoft specifically for use on servers. Servers are extremely powerful machines designed to run continuously and provide resources to other computers. This means that in almost all cases, Windows Server is only used in business environments.
It Is Necessary to Upgrade Windows Server 2012 R2 to 2019
Since Windows Server 2012 R2 has ended mainstream support in 2018 and extended support in 2023, it’s recommended to upgrade Windows 2012 R2 to 2019.
Besides, there are other significant reasons.
1. The new system is more compatible with new services and applications.
Windows Server 2019 makes it easier to integrate Linux with new features such as Linux Containers on Windows, Windows Subsystem for Linux (WSL), and the new Windows Server 2019 application platform.
2. The new system is safer.
Windows Server 2019 is built on its strong security foundation. Now it not only blocks threats but also monitors and reacts to perceived threats. Windows Server 2019 is designed to be used with or in the cloud. Users can more easily connect their existing on-premises environments to Microsoft Azure.
Can You Upgrade Windows Server 2012 R2 to 2019?
Can you upgrade Windows Server 2012 R2 to 2019? The answer is Yes. You can upgrade Windows Server 2021 R2 to 2019. However, if you are upgrading Windows Server 2012 to 2019, you will need to upgrade Windows Server 2012 to 2016, and then upgrade from 2016 to 2019. Otherwise, you can only do a fresh install of 2019 to overwrite the existing OS and avoid data loss, it is necessary to back up the server in advance.
Before you upgrade Windows Server 2012 R2 to 2019, the following are some system requirements you need to meet:
Processor:
- 1.4 GHz 64-bit processor
- Compatible with x64 instruction set
- NX and DEP support
- Supports CMPXCHG16b, LAHF/SAHF and PrefetchW
- Supports secondary address translation (EPT or NPT)
Memory:
- 512 MB (2 GB for servers with Desktop Experience install option)
- ECC (Error Correcting Code) type or similar technology for physical host deployments
Disk space for system partition: A fresh or fresh installation requires 32 GB of free disk space. To perform an in-place upgrade, you should plan for at least 60 GB of free disk space.
Network Adapter Requirements:
- Ethernet adapter with at least gigabit throughput
- Compliant with PCI Express Architecture Specification
Other demands: DVD drive (if you plan to install the operating system from DVD media)
Another point you may need to consider is the price. How much will it cost to upgrade Windows Server 2012 R2 to 2019?
There are many factors affecting price, such as hardware, virtualization, etc. However, if you’re referring to the cost of upgrading licenses, the answer is clear. Microsoft typically doesn’t offer an upgrade sale, so you’ll need to buy a copy of Windows Server 2019 separately.
If you want to know the exact price, you can go to the Microfost official website.
Another issue worth considering is that some third-party applications may not be compatible with Windows Server 2019. So you had better check if the third-party applications support Windows Server 2019 before upgrading.
Public or private cloud companies may also support an in-place upgrade of Server 2012 R2 to 2019, but you will need to consult your cloud provider for details. Also, you cannot perform an in-place upgrade on any Windows Server that is configured to boot from a VHD. In-place upgrades from Windows Storage Server editions to Windows Server 2019 are also not supported. In this case, you can do a migration or a fresh install.
How to Upgrade Windows Server 2012 R2 to 2019
Before You Upgrade
If you decide to upgrade Windows Server 2012 R2 to 2019, there are some things you should pay attention to before the update to avoid some potential problems.
- Patch your Windows Server 2012 R2 with the latest updates.
- Insert and install Windows Server 2019 installation media.
- Before upgrading, Microsoft recommends that you collect some information about your device. You can use it for troubleshooting when an upgrade fails.
- Cannot run any virtual machines during an in-place upgrade.
- Create a system image for your system so that you can restore the system to a normal state if the update causes some system issues.
To create a system image, you can use the professional Windows backup software, MiniTool ShadowMaker. It is designed to back up the system by default. Besides, you can use it to back up files, disks, and partitions. Just download it by following the button below.
It is compatible with Windows 1110/8/8.1/7 and Windows Server 2019/2016/2012/2012 R2/2008/2008 R2/2003/2003 R2. Now get its trial edition by clicking the following download button and install it on your Windows Server.
Free Download
How to back up your PC before starting to update Windows Server 2012 R2 to 2019:
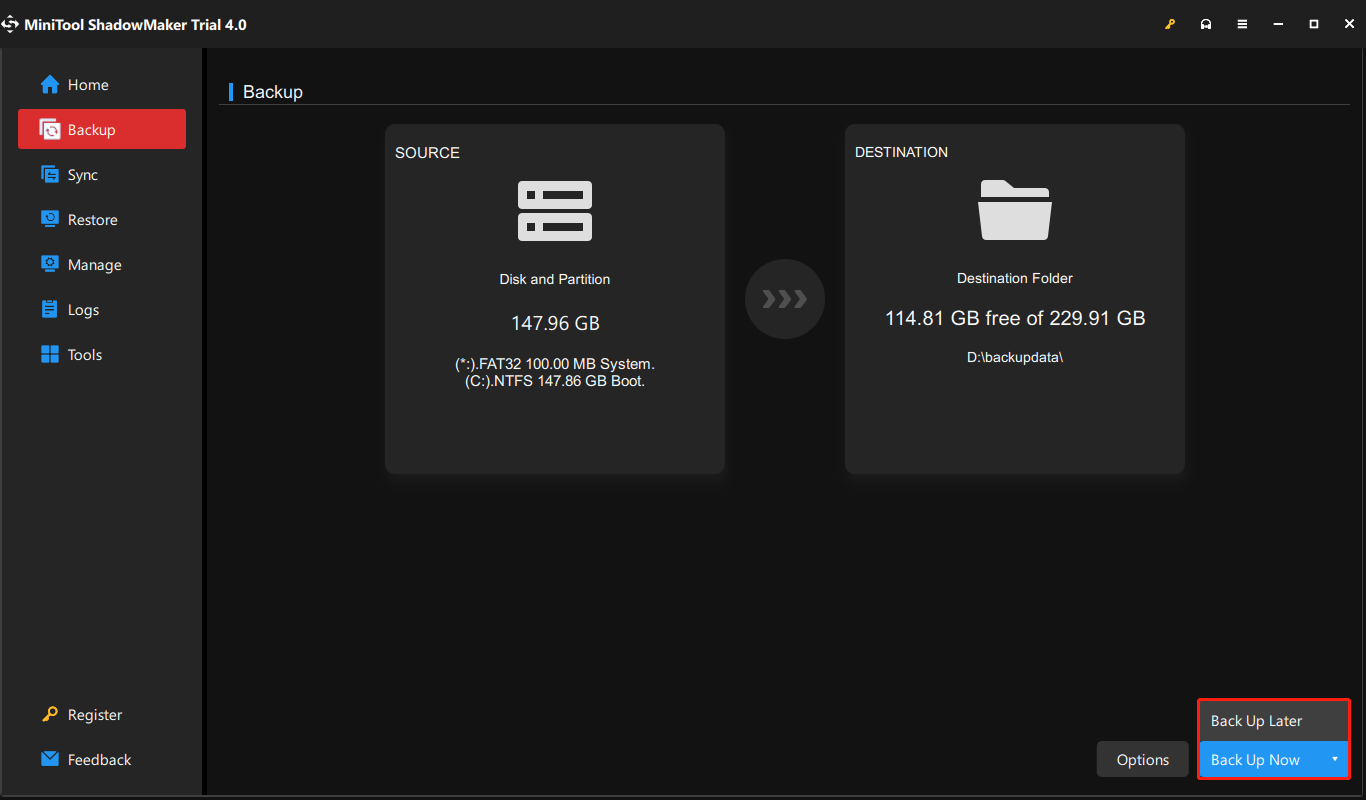
1. Double-click the icon of MiniTool ShadowMaker to launch it to its main interface.
2. When going to the Backup tab, you can see this software backs up the system by default. You only need to choose a destination to store the system image.
If you need to back up files, go to SOURCE to choose items that you want to back up and go to DESTINATION to select a storage path.
3. Click Back Up Now to start backing up immediately or click Back Up Later to delay the task.
It is recommended to create a bootable USB flash drive with MiniTool Media Builder so that you can perform a system recovery when your PC doesn’t work properly after Windows Server 2012 R2 to 2019 update.
Start to Upgrade
Now that you have completed the prerequisites you can perform the upgrade. In this section, you will use Windows Server Setup to choose upgrade settings. Windows Server Setup will use these settings to upgrade your version of Windows Server, during which time your computer will restart several times. Follow the guide below:
Step 1: Open File Explorer, and go to the Windows Server Setup media. Then open setup.exe. For example, if you’re using removal media the file path might be D:setup.exe.
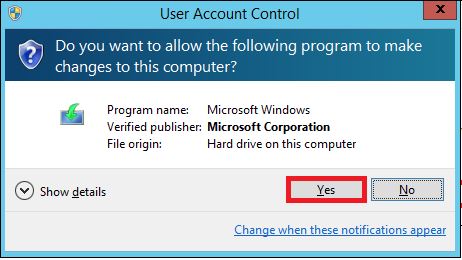
Depending on your security settings, User Account Control may prompt you to allow setup to make changes to your device. If you’re happy to continue select Yes.
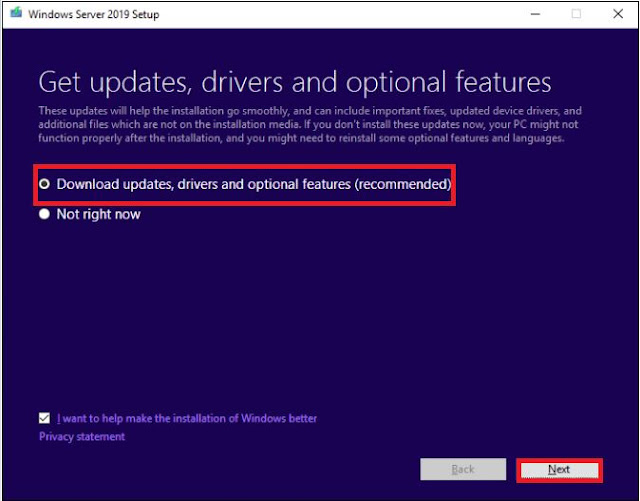
Step 2: By default, the setup will automatically download updates for the installation. After checking the default settings, click Next to continue.
If you don’t want Setup to automatically download updates, you can select Change how Setup downloads updates and choose the option appropriate to your environment, then select Next.
Step 3: If prompted, enter your product key, then select Next.
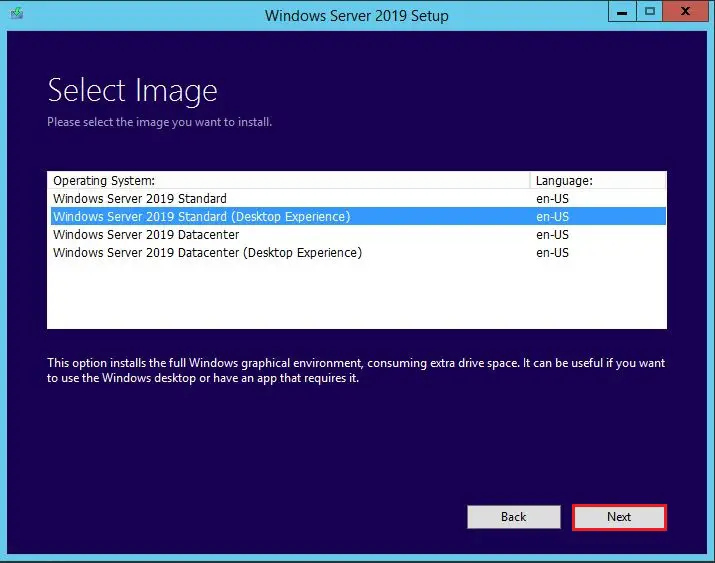
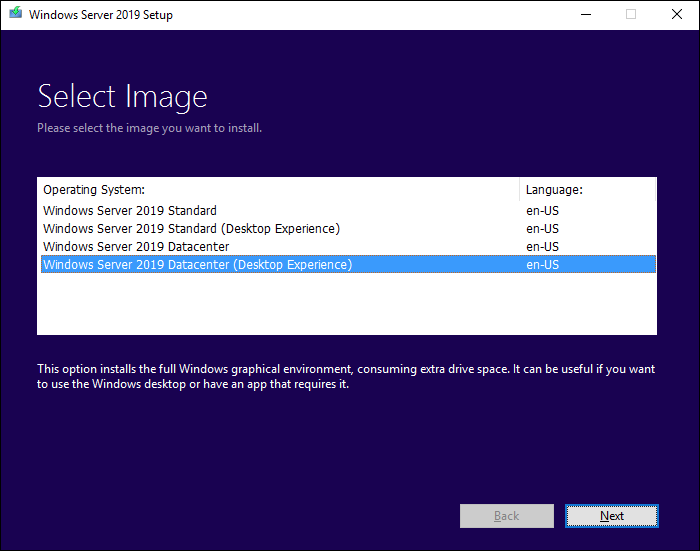
Step 4: Select the edition of Windows Server you want to install, then select Next.

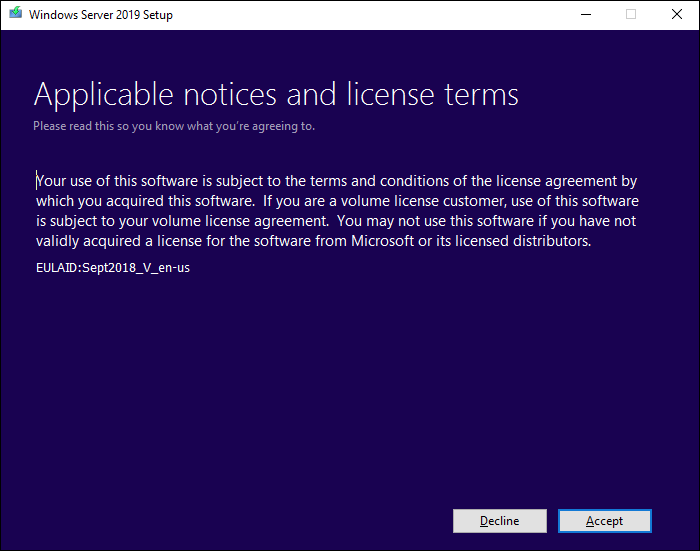
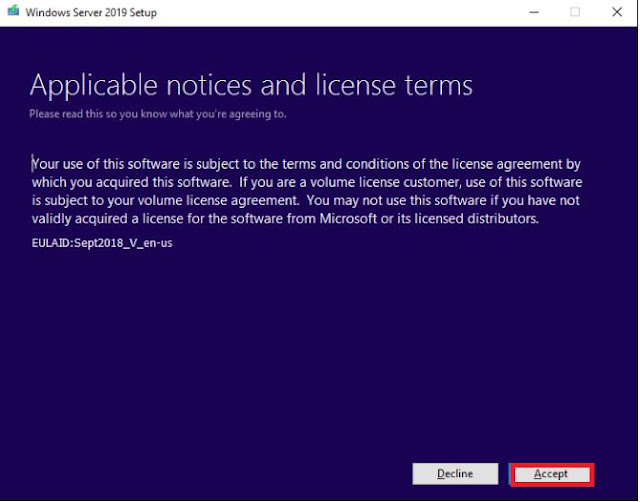
Step 5: Review the applicable notices and license terms, if you agree to the terms, select Accept.
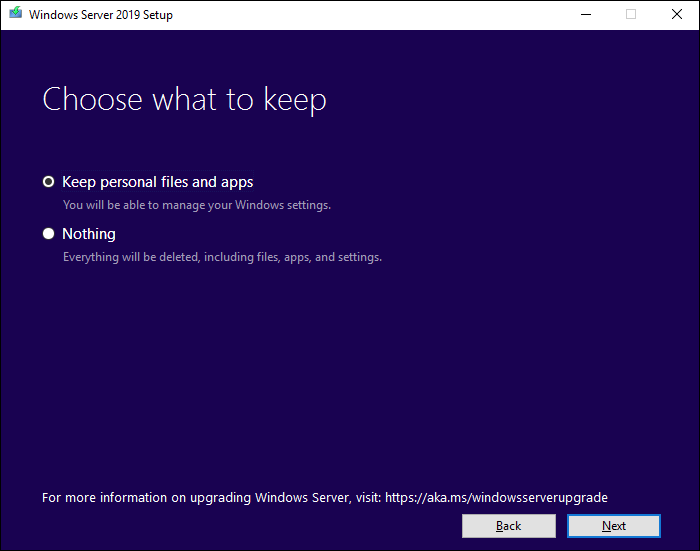
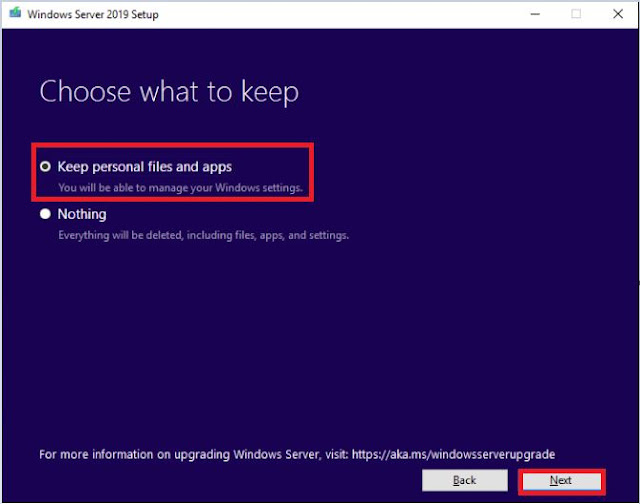
Step 6: Select Keep personal files and apps to choose to do an in-place upgrade, then select Next.
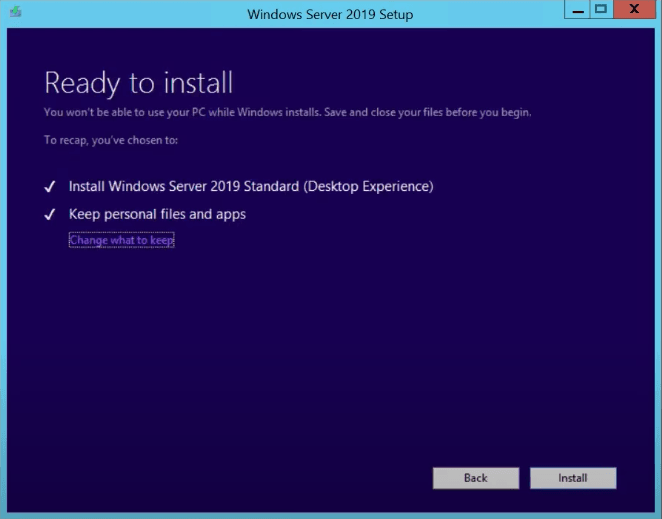
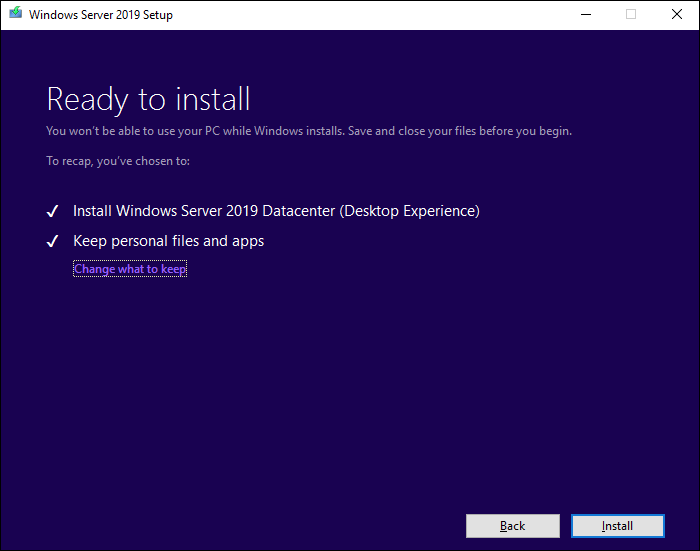
Step 7: After Setup finishes analyzing your device, the setup will display the Ready to install screen, to continue the upgrade select Install.
The in-place upgrade will start, and you should see a progress bar. After the upgrade finishes, your server will restart.
Check If Your Upgrade Was Successful
After the upgrade to Windows Server is done, you must make sure the upgrade was successful. To make sure your upgrade was successful:
Step 1: Open an elevated PowerShell prompt, and run the following command to verify the version and edition match the media and values you selected during setup.
PowerShellCopy
Get-ComputerInfo -Property WindowsProductName
Step 2: Make sure all of your applications are running and that your client connections to the applications are successful.
Bottom Line
Do you need to upgrade Windows Server 2012 R2 to 2019? How to Windows Server 2012 R2 to 2019? After reading this post, you know it. Also, what to do before the update is also told to you. Now, don’t hesitate to perform the Windows Server update by following the guide above.
On the other hand, if you have any questions or suggestions, remember to let us know. Leaving a comment below or contacting [email protected] is for you to choose.
Upgrade Windows Server 2012 R2 to 2019 FAQ
Can Windows Server 2016 be upgraded to 2019?
Yes, you can upgrade Windows Server 2016 to 2019. The steps are similar to is the same as the steps for upgrading 2012 R2 to 2019. You can take a reference from the content above.
Is Server 2012 R2 still supported?
The support for Windows Server 2012 R2 will end on October 10, 2023. After this date, Windows Server 2012 and 2012 R2 will stop receiving regular patches or critical security updates. Thus, you had better upgrade your Windows Server 2012 R2 as soon as possible.
How long can a server last?
However, according to a report by a leading analyst firm, the potential useful life of servers is between 7 and 10 years (typically 6 years for rack-mounted servers and 10 years for integrated systems).
Can SQL Server 2019 run on Windows Server 2012 R2?
In this article, I am going to upgrade Windows Server 2012 R2 standard to Windows Server 2019 standard. Locally upgrading of an operating system permits the Administrator to upgrade the currently installation of Windows Server to a new version without changing the existing settings & features.
The Windows Server 2019 in upgrade feature will permit you to upgrade the existing them (LSTC) long term servicing channel release like the Windows Server 2012 R2 – Windows Server 2016 – Windows Server 2019. The in places upgrade service permits organizations to handle upgrades to newer versions within the brief time possible. The straight upgrade is possible even when the existing Server Installation requires some dependencies before an upgrade.
Windows Server 2012 R2 Standard.

I have copied some folder before upgrading the Server.

Using the in-place upgrade to move to Windows Server 2019, use the DVD, USB Windows Server 2019 media to start the installation.
The existing installation will be discovered & you can perform the in place upgrade. The installation will not take more than 5 minutes, but it all depends on the speed of the server and running roles and features.
This following process shows an in-place upgrade from Windows Server 2012 R2 to 2019 using an ISO file.
Mount the ISO file and then click on setup
Watch Video: How to Upgrade Windows Server 2012 to Server 2019

Preparing

Get updates, click next to start (Download and install updates as the default option)

Getting Windows updates

Windows Server 2019 Setup

Specify the Windows product key and then click next.

Select the Server edition with the desktop experience option and then click next.
Accept user license terms and then click accept.

Choose the option for keeping personal files and programs because we intend to upgrade the Server. Select Next.

Upgrade making sure, ready to install.

Click on install to initiate the installation process.

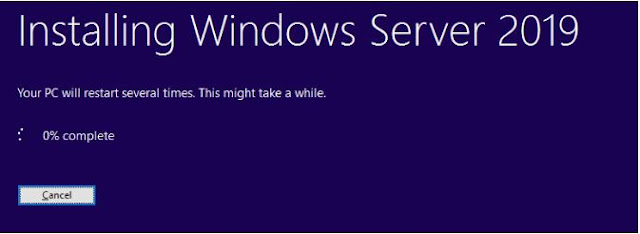
Installing Windows Server 2019.

Updating Windows Server.

Windows Server 2019 Successfully upgrade.

Windows Server 2019 Standard Desktop with folders.

Related: Migrate Active Directory Server 2012 to Server 2019
Reading Time: 3 minutes
Microsoft recommend upgrading your server OS to the latest version, but this is not always possible. Your business may be running third party applications that are not compatible with later Windows Server Operating Systems.
Before upgrading, always check whether the applications running on your current Operating System are supported. It will save you a lot of time and disappointment.
So let’s continue on the basis that you have carried out your checks and the applications currently running on your server supports Server 2019.
Firstly, ensure you have a full backup of your server, so in the event the upgrade goes horribly wrong, you have a backup.
Note: If you have Microsoft Endpoint Protection installed, you will be prompted to remove this app. This app is not compatible with server 2019
Now, that you are all set, you may be thinking, can I upgrade directly from server 2012 or server 2012 R2 to Server 2016? The answer is yes, you can and it’s a supported method. See support matrix from Microsoft below. So whether you decide to upgrade from Server 2012 to 2019 or from 2016 to 2019 a one hop in-place upgrade is supported.
Ok, so we now have a full system backup, and we know that third party apps are supported with server 2016/2019.
Before we get started with the upgrade, Microsoft recommend that you collect some information from your device, for diagnostic and troubleshooting purposes. Because this information is intended for troubleshooting purposes only, store the information at a location where it’s easy accessible and not on the server being upgraded.
To collect your info
- Open a command prompt, go to
c:Windowssystem32, and then type systeminfo.exe. - Copy, paste, and store the resulting system information somewhere off of your device.
- Type ipconfig /all into the command prompt, and then copy and paste the resulting configuration information into the same location as above.
- Open the Registry Editor, go to the HKEY_LOCAL_MACHINESOFTWAREMicrosoftWindowsNTCurrentVersion hive, and then copy and paste the Windows Server BuildLabEx (version) and EditionID (edition) into the same location as above.
Upgrade Server 2012 to 2019
1) Patch your server with the latest windows updates if not already up to date
2) Locate the Windows Server 2019 Setup media, and then select setup.exe
3) Select the Windows Server version you wish to upgrade to
4) Accept the licensing terms
5) If you’re running Microsoft Endpoint Protection on your server, setup will prompt for this app to be removed as it isn’t compatible with Windows Server 2019
6) Select Keep personal files and apps, and then select Next
7) After Setup analyses your server, setup will prompt you to proceed with your upgrade by clicking install
 Wait for the upgrade to complete

9) To ensure the upgrade completed successfully
– Open the Registry Editor, go to the HKEY_LOCAL_MACHINESOFTWAREMicrosoftWindowsNTCurrentVersion hive, and view the ProductName. You should see your edition of Windows Server 2019, for example Windows Server 2019 Standard. Make sure all of your applications are running and that your client connections to the applications are successful.
If you think something might have gone wrong during your upgrade, copy and zip the %SystemRoot%Panther (usually C:WindowsPanther) directory and contact Microsoft support.
- Remove From My Forums
-
Question
-
Всем привет, необходимо обновить следующие сервера:
• Microsoft Windows Server 2012 Datacenter
• Microsoft Exchange Server Standard 2013Подскажите пожалуйста, всю систему надо удалить и новую покупать, (2019 версии) или есть возможность upgrade?
Если необходимо удалить, подскажите порядок действий: покупаем новые лицензии, но в системе уже стоит старая, каков процесс удаления старого и установка на эти железы новые лицензии? Спасибо!
Answers
-
Более подробно объясню данный кейс:
В филиале банка уже имеется следующие лицензии:
- • Microsoft Windows Server 2012 Datacenter
• Microsoft Exchange Server Standard 2013
• Microsoft Lync Server 2013
А также телефоны HP 4110 IP Phone и HP 4120 IP Phone которые подключены к Lync. К этой инфраструктуре нужно докупить новые оборудования и новые телефоны, при том сохряняя функционала старого Lync.
Необходимо также: обновить Windows Server 2012 Datacenter и Exchange Server Standard 2013, Lync Server 2013 до последних версий.
Возможно ли обновить докупив только Software Assurance? Какие есть варианты в целом?
Конечно же SA нельзя «докупить» когда вам потребуется обновиться.
 SA должно быть активным с момента покупки ПО
(кажется требуется покупка SA в течении месяца после покупки ПО) по меньшей мере до момента выхода ПО на которое вы собрались обновляться. Это форма подписки и она требует оплаты от и до…Таким образом если SA не была куплена много лет назад когда вы первоначально закупили ПО или же не была активной (то есть оплачивалась) на октябрь 2018 года (когда вышел Server 2019), то обновиться используя SA вы не сможете.
В этом случае как я уже написал есть только один вариант — покупка ПО за полную стоимость. Я бы сказал что при это надо менять и оборудование, срок службы серверов и ПК типично составляет 3-5 лет. Это так же позволит избежать «обновления»
серверных ОС которое типично не рекомендуется. Вместо этого новые сервера и ПО подключаются в существующий домен и заменяют их. Это так же значительно безопаснее в плане утраты данных и позволит избежать простоя.Еще один момент: Lync (с 2015 года — Skype for Business) является наследственным продуктом и заменяется Microsoft Teams.
This posting is provided «AS IS» with no warranties, and confers no rights.
-
Marked as answer by
Wednesday, February 10, 2021 9:40 AM
- • Microsoft Windows Server 2012 Datacenter
 SA должно быть активным с момента покупки ПО
Windows Server 2019 is a new server in Microsoft family. you can easily upgrade your windows server 2012 r2 in windows server 2019 keeping your settings, server roles, and data intact. If you want to upgrade your windows server 2012R2 to server 2019 on the same hardware with all the server roles without formatting use the following steps.
Before you start to upgrade your Windows Server, collect all information from your server 2012 r2, for diagnostic and troubleshooting purposes. This information is required for use only if your upgrade fails, you must make sure that you store this information of another device.
1. Open a command prompt go to c:Windowssystem32, and then type systeminfo.exe and press enter.
2. Copy all resulting system information and store somewhere on another device.
3. Open a command prompt, type ipconfig /all and then Copy all resulting system information and store somewhere on another device.
4. Open the Registry Editor, Navigate to HKEY_LOCAL_MACHINESOFTWAREMicrosoftWindowsNTCurrentVersion hive, and then copy and paste the Windows Server BuildLabEx (version) and EditionID (edition) into the same location as above.
After collected the all data of your Windows Server-related information, take the backup of your operating system, apps, and virtual machines. You must also Shut down, Quick migrate, or Live migrate any virtual machines currently running on the server.
1. Extract Windows Server 2019 Setup ISO file and double click on setup.exe.
2. Click on Yes to start the setup process.
3. Internet Access requires download updates, drivers, and optional features (recommended) option and click on Next.
4. Setup will check your server configuration, you must wait some time to finish the step and click on Next.
5. Enter your server licensing key to continue.
6. Select the Windows Server 2019 edition what you want to install, and click on Next.

7. Click on Accept to accept the terms of your licensing agreement.
8. Setup will recommend that you Remove antivirus using Add/Remove programs.
9. Select Keep personal files and apps to choose to do an in-place upgrade and click on Next.
10. After Setup analyzes completed click on Install.

11. Once the server upgrade starts, it’s showing you the Upgrading Windows screen with its progress. After the upgrade finishes, your server will restart.
12 After your upgrade is done make sure the upgrade to Windows Server 2019 was successful.
13. Click on start and search Regedit
14, When registry editor opens, navigate to HKEY_LOCAL_MACHINESOFTWAREMicrosoftWindows NTCurrentVersion key, and view the ProductName. You should see your Windows Server 2019 edition.
Updating your Windows to newer versions will help your operating system become more stable, giving better performance. If you put off the updates, your VPS will get slower, more unstable overtime and you will also experience many unnecessary errors. You can follow the guide below to update your Windows.
For Windows Server 2019
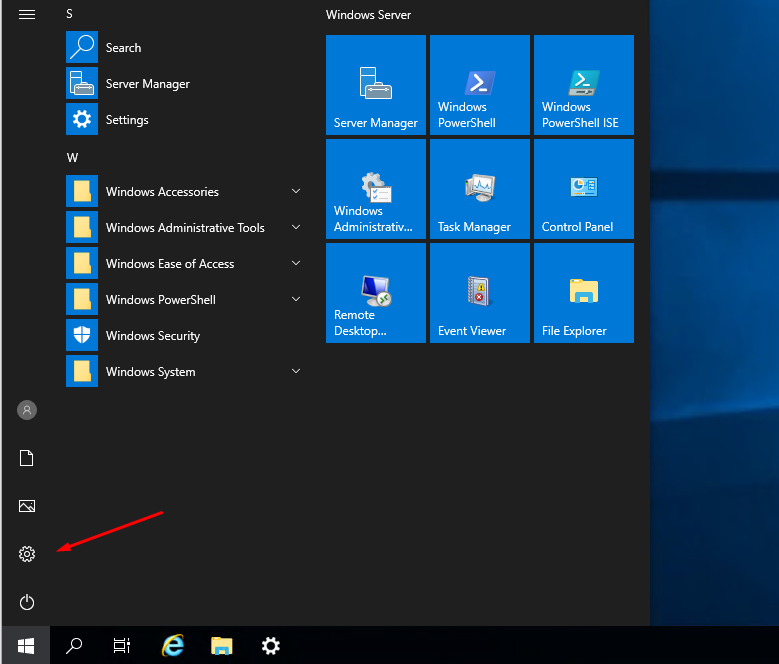
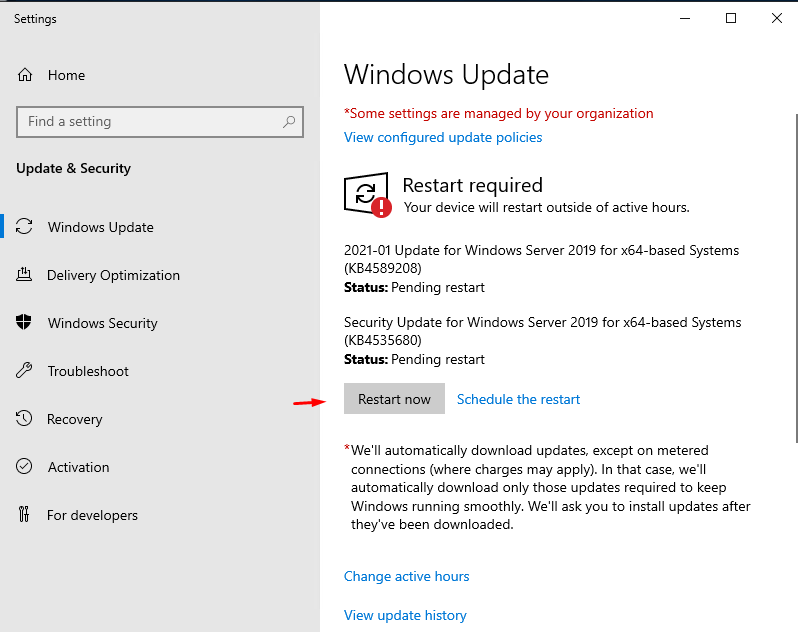
Step 1: To update to the latest version of Windows Server 2019, you need to access the Start Menu and choose Settings
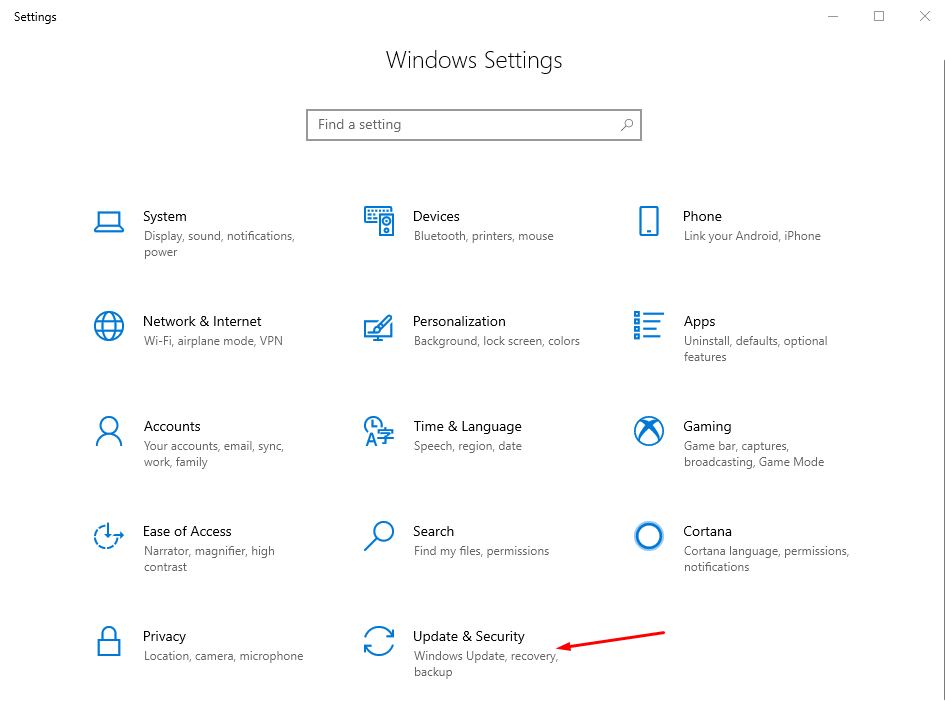
Step 2: Click on Update & Security.
Step 3: Here you choose Check for updates or Update or Resume updates or Restart now for the Windows Server 2019 update process to take place.
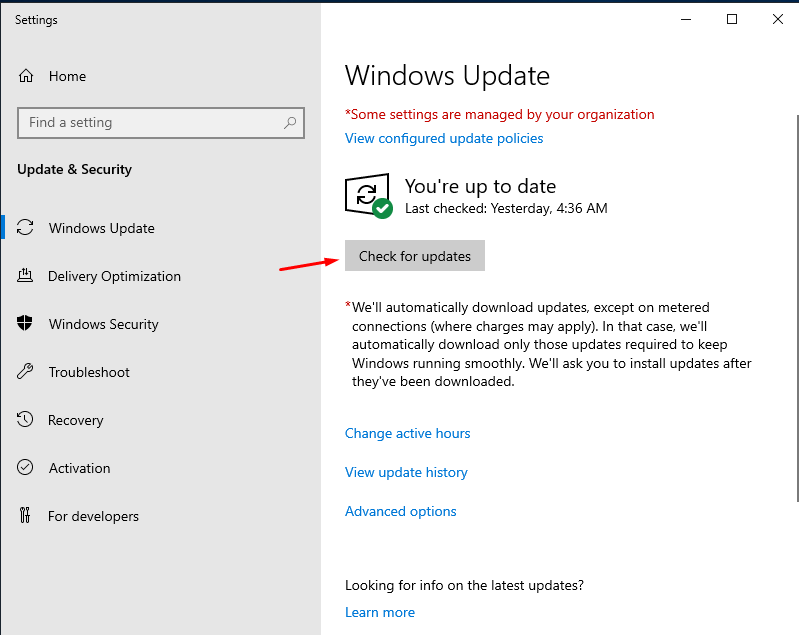
When Windows Server 2019 update process takes place you just need to wait for a few minutes. After the update is finish, you will need to restart your VPS.
You continue to do so until there is no updates available.
For Windows Server 2012
Step1: search for Windows update in the search bar

Step 2: Here you choose Check for updates or Update or Resume updates or Restart now for the Window Server 2012 updates to happen.

Windows Server 2012 updates should take a few minutes. After each update version you will have to restart your VPS.
You continue to run updates until there is none available.
| Workable Solutions | Step-by-step Troubleshooting |
|---|---|
| Windows Server Migration Checklist | #1. Download essential Windows server migration tool; #2. Find out your goals in Windows server migration…Full steps |
| Solution 1. Migration (Data, Apps, Account) | Step 1. Launch EaseUS Todo PCTrans on your source and target computers, connect both PCs via the internet…Full steps |
| Solution 2. In-place Upgrade (Everything) | Step 1. Create an image of all important data, apps, and even accounts on Windows Server 2012…Full steps |
Methods on this page are also applicable to Windows Server 2008/2008 R2/2012/2012 R2/2016/2019. It also works to upgrade and migrate Windows Server essentials to standards.
According to Microsoft, the new end-of-extended support date for Windows Server 2012 is October 10, 2023. The original date had been January 10, 2023.
It’s confirmed that Windows Server 2012 and Windows Server 2012 R2 supports will end by Oct.10th, 2023. And Microsoft has released two new Windows Servers — 2016 and 2019 for personal and enterprise users to explore their businesses on the new Windows Server systems. And it’s a smart choice to get things ready in advance. Therefore, it’s time to make a full plan of upgrading or migrating Windows Server 2012/2012 R2 to new Windows Server 2016/2019.
So how to successfully migrate your Windows Server 2012 to 2016 with all applications, data, and even accounts? If you are having the same doubts as listed here, stay calm and follow the provided tips in the following to get problems resolved:
- 1. Will I lose data while migrating Windows Server 2012 to 2016?
- 2. How do I upgrade Windows Server 2012 to 2019?
- 3. How to keep applications, data, accounts while migrating Windows Server 2012 to 2016/2019?
Windows Server Migration Checklist (2 Steps)
Here is a checklist that can be applied to upgrade and migrate Windows Servers applications, data, and accounts, etc., for all Windows Server users. Take the following two steps to get the right tool and resolution for Windows Server Migration:
- #1. Download Essential Windows Server Migration Tool
For most Windows Server users, the biggest challenge of migrating Windows Server is about how to fully transfer data, installed applications, and even Windows Server accounts to the new Windows Server machine. Advanced Windows Server PC transfer software — EaseUS Todo PCTrans Technician specializes in Windows Server data, app, account and settings migration between Windows Servers.
EaseUS Todo PCTrans Technician supports to transfer data, application, accounts via network or image on all Windows Servers, including Windows Server 2019/2016/2012/2012 R2/2008/2008 R2, etc.
EaseUS Todo PCTrans Technician
- ☆ Deploy & install Todo PCTrans on multiple PCs.
- Transfer unlimited files, programs, apps between Servers.
- Transfer account, domain account, and settings.
- Data rescue, find product key of installed programs.
- One license for multiple PCs.
- #2. Find Out Your Goals in Windows Server Migration
To find out the right way to migrate Windows Server, you should first find out your goals.
- If you want to transfer Windows Server OS to a new computer, try EaseUS Windows Server Migration Tool. You will successfully migrate Windows Server OS to a new computer without reinstalling the Server OS.
- If you only want to transfer Windows Server 2012 data, installed applications, account and settings to Windows Server 2016/2019 computer, follow Solution 1 listed below for help.
- If you want to perform an in-place upgrade from Windows Server 2012 to 2016/2019 or fresh install Windows Server 2016/2019 on old Windows Server 2012 but keep all data, installation apps, and account, follow Solution 2 on this page for help.
Solution 1. Migrate Windows Server 2012 to New Server 2016/2019 (Data, Apps, Account)
Applies to: Transfer data, installed applications, account and settings from Windows Server 2012 to new Windows Server 2016/2019 computers. No reinstallation is required.
To transfer Windows Server 2012 data, applications, and account, etc., to a new Windows server computer like 2016 or 2019, all you need is a reliable Windows Server PC Transfer software. EaseUS Todo PCTrans Technician is capable to help. It enables all levels of users to efficiently transfer everything from an old Windows Server computer to a new Server machine via the network connection.
See how to migrate Windows Server 2012 data, application, and even account to new Server step by step:
Step 1. Launch EaseUS Todo PCTrans on your source and target computers, connect both PCs via the internet.
1. At the «PC to PC» section, click «PC to PC» to continue.

2. Select your target computer via its device name, then enter its account password or verification code and select the transfer direction. Then click «Connect» to continue.
You can check the verification code on the right top of «PC to PC» mainscreen on the target computer.

Step 2. Select the categories Applications, Files, and Accounts to transfer via the internet.
If you want to transfer data selectively, click «Edit» under each category, and choose the specific items.

Step 3. Click «Transfer» to start transferring your apps/files/accounts from one computer to another computer via the Internet.

After the migration, you can restart the new Windows Server 2016 or 2019 computer and then continue using the software again. If some applications require reactivation, use your old key to activate the programs again.
Solution 2. In-place Upgrade Windows Server 2012 to 2016/2019, Keep Everything on Server
Applies to: In-place upgrade Windows Server 2012 to 2016 or 2019 and keep everything on the Server, including data, applications, and account, etc.
If you need to in-place upgrade Windows Server 2012 to newer Windows Server, keeping everything on the machine, follow the tutorial steps below carefully.
Step 1. Create an image of all important data, apps, and even accounts on Windows Server 2012
EaseUS Todo PCTrans with its Backup and Restore feature supports you to create an image backup of all important data, applications, accounts, etc., from Windows Server 2012 to an external hard drive.
Video Tutorial of Image Transfer using EaseUS Todo PCTrans:
Step 2. Perform in-place upgrade from Windows Server 2012 to 2016/2019, or fresh install Windows server 2016 on old Server PC.
If you don’t know how to perform Windows Server in-place upgrade, follow to the Microsoft tutorial: Upgrade Windows Server 2012 to Windows Server 2016 for help.
If you need to fresh install Windows Server 2016 or 2019 on the old Server machine, you need first download a Windows Server ISO and then follow the video below to clean install the Windows Server:
Video Tutorial to Install Windows Server 2016 produced by Server Academy on YouTube:
Step 3. Restore data, applications, accounts to new Windows Server via EaseUS Todo PCTrans using its Image Transfer feature.
If you lost some apps or data, you can use EaseUS Todo PCTrans Technician to selectively restore applications, data, and accounts to your new Windows Server 2016/2019.
Conclusion
On this page, we collected two solutions to help Windows Server users migrating Windows Server 2012 with data, applications, and accounts, etc., to Windows Server 2016/2019 using reliable PC transfer — EaseUS Todo PCTrans.
We also provide extra tips to help users to perform in-place upgrade or fresh install Windows Server 2016/2019 on old Windows Server machine. By following the provided tips, you can effortlessly move everything to the new Windows Server computer.
Windows Server 2012 Migration FAQs
If you have more questions about Windows Server migration, check the following questions and find answers here immediately.
1. Can Windows Server 2012 be upgraded to 2016?
Yes. Windows Server 2012 can be upgraded to 2016 in many ways. Here, we have collected all the possible ways that you can try to upgrade to Windows Server 2016 from 2012:
- Method 1. Use Windows Server migration tool: back up Windows Server 2016 OS and restore to the Windows Server 2012.
- Method 2. Perform in-place Windows Server upgrade from 2012 to 2016.
- Method 3. Clean install Windows Server 2016 on the old Windows Server 2012 computer.
2. Can Windows Server 2008 r2 be upgraded to 2016?
Sure. You can upgrade Windows Server 2008 r2 to 2016 by performing an in-place upgrade or fresh installing Windows Server 2016 on the computer. If you need to move data, applications, and account from the old Windows Server 2008 to new Windows server 2016, refer to Migrate Windows Server 20018 (R2) to 2016 step by step guide for help.
3. How do I migrate Windows Server 2012 R2 to 2019?
The ways to migrate Windows Server 2012 R2 to 2019 is similar to the ways as recommended on this page — migrating Windows Server 2012 to 216.
First, you need a reliable Windows PC transfer software that supports you to migrate old Windows Server data, apps, accounts to the new server computer.
Next, confirm your goals — to transfer data, apps, accounts between server machines, or to upgrade Windows server to 2019 but keep everything on the computer.
Last, take the right solution to migrate Windows Server 2012 R2 to 2019:
- If you need to migrate everything to a new Server computer, use the PC to PC feature in EaseUS Todo PCTrans Technician and migrate data, apps, accounts to Windows Server 2019 without losing anything.
- If you need to perform in-place upgrade or clean install Windows Sever 2019 on the old Server 2012 R2 computer, use Image Transfer feature in EaseUS Todo PCTrans to create an image of all important things, in-place upgrade or fresh install new Server, and then recover the image back to the computer.
As another part of my series for Windows Server 2019, this blog post covers the in-place upgrade feature. The in-place upgrade allows you to upgrade your existing LTSC versions of Windows Server 2012 R2 or Windows Server 2016 servers to Windows Server 2019. Windows Server 2019 In-place Upgrade will enable businesses to update to the latest version quickly. Especially if you have servers which you might need to install some dependencies for the applications. I saw a lot of customers who not have documented their server installations and neither used infrastructure as code to deploy them. For these customers, it can be hard to upgrade to newer versions of Windows Server. With the Windows Server 2019 In-Place Upgrade feature, this should get a lot easier. Especially since Windows Server 2019 brings a lot of improvements.
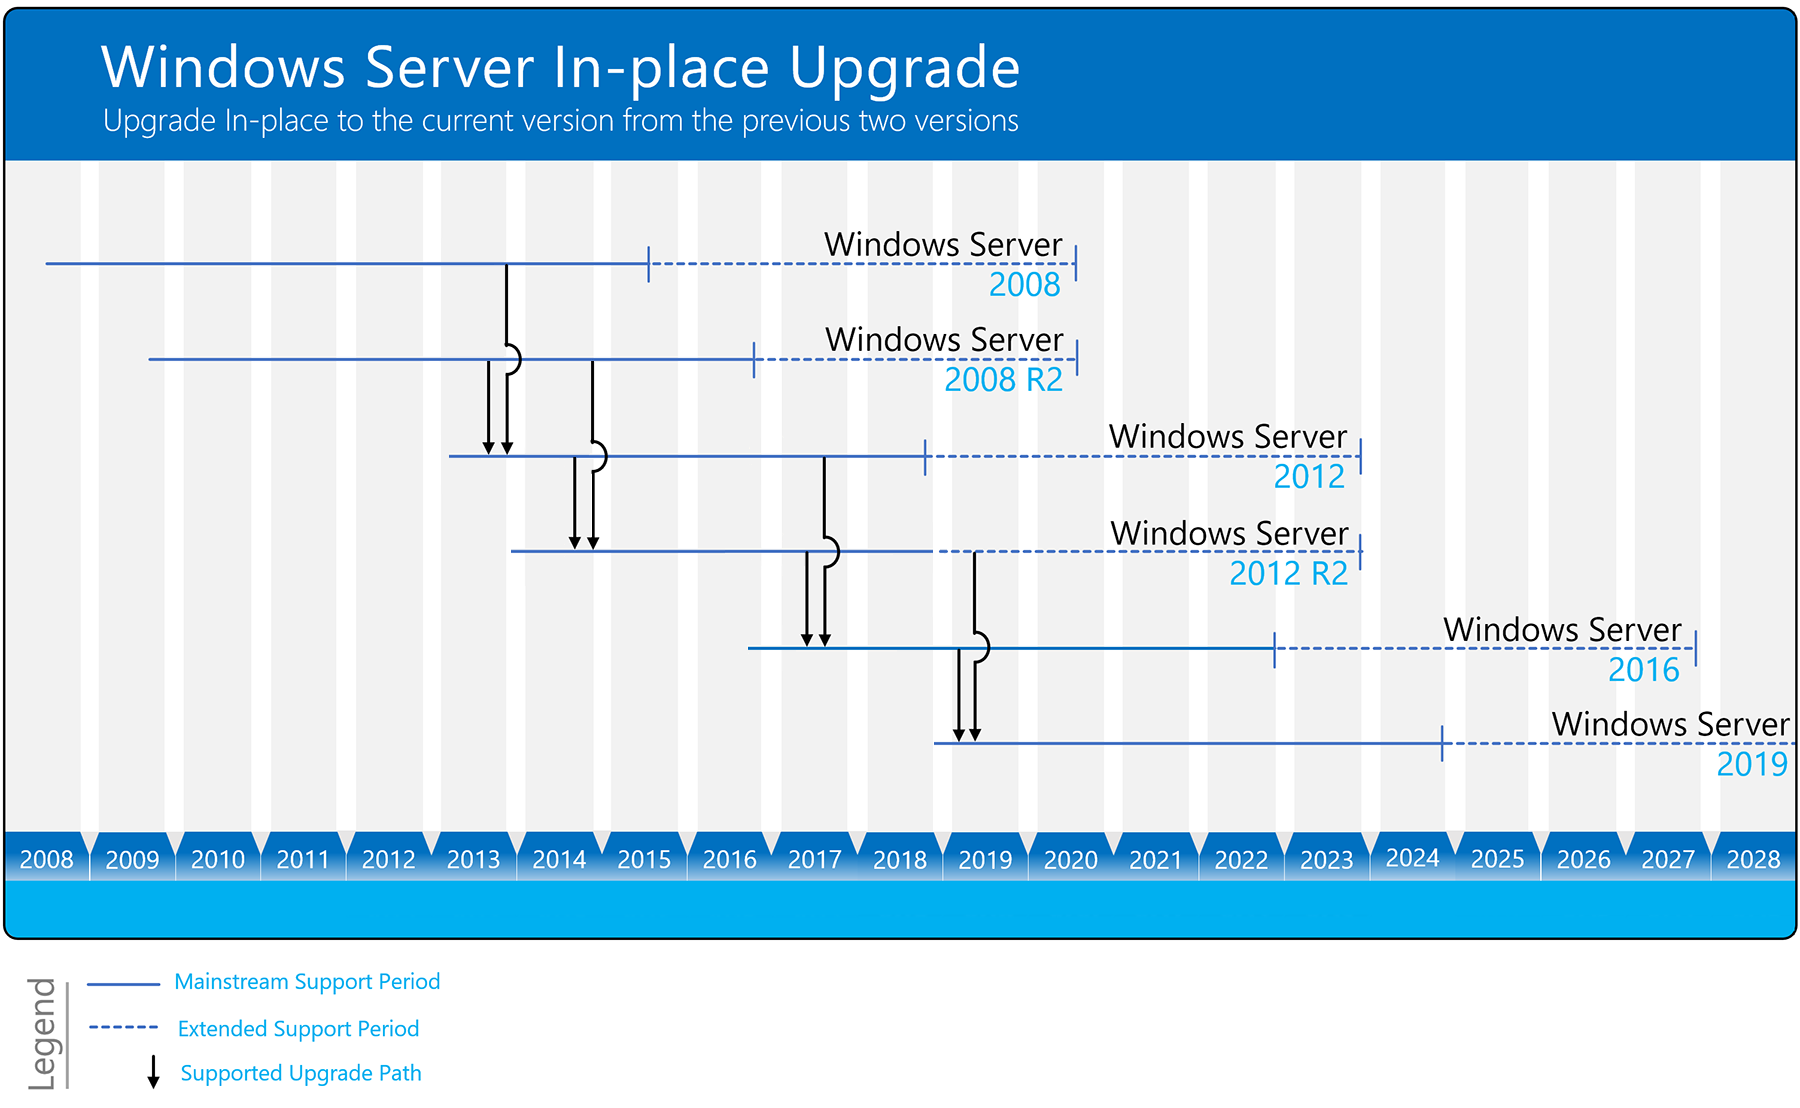
Upgrade Matrix
You can in-place upgrade to Windows Server 2019 from
- Windows Server 2012 R2
- Windows Server 2016
If you run older versions of Windows Server, you might have to upgrade to Windows Server 2012 R2 or Windows Server 2016 first.
Windows Server In-place Upgrade Matrix
To find out more about the in-place upgrade on the Microsoft Docs page.
How to in-place upgrade to Windows Server 2019
To in-place upgrade to Windows Server 2019, insert the Windows Server 2019 media into the existing server, by attaching an ISO file, copying the sources, adding a USB drive or even a DVD drive and start the setup.exe.
The setup will discover the existing installation and will let you perform an in-place upgrade. The installation will run for a couple of minutes; it will take quite some time depending on the speed of your server hardware and the installed roles and features.
Microsoft MVP Didier Van Hoye did write a great blog post about Upgrade testing. In that blog post, he has a quick look at upgrading to Windows Server 2019.
You can also find an overview of what is coming new in Windows Server 2019, in my blog: Windows Server 2019 – What’s coming next.
Tags: Hyper-V, in-place uprgade, Microsoft, setup, update, Upgrade, Windows Server, Windows Server 2012 R2, Windows Server 2016, Windows Server 2019 Last modified: April 25, 2020
About the Author / Thomas Maurer

Thomas works as a Senior Cloud Advocate at Microsoft. He engages with the community and customers around the world to share his knowledge and collect feedback to improve the Azure cloud platform. Prior joining the Azure engineering team, Thomas was a Lead Architect and Microsoft MVP, to help architect, implement and promote Microsoft cloud technology.
If you want to know more about Thomas, check out his blog: www.thomasmaurer.ch and Twitter: www.twitter.com/thomasmaurer