As you know the Windows Server 2008 and Windows Server 2008 R2 are out of support on January 14th, 2020. Customer will need to upgrade their Windows Server 2008 and Windows Server 2008 R2 to a newer version of Windows Server or migrate these servers to Microsoft Azure and get three years of extended security support for free, which will give you more time to upgrade your servers, redeploy your apps or rearchitect your applications. If you want to have more information about how to migrate your servers to Azure, check out the Azure migration center. There are many ways you can migrate your server applications to a newer version of Windows Server. This blog post covers how you in-place upgrade Windows Server 2008 R2 to Windows Server 2019. You can find more information about Windows Server 2019 installations and upgrades on Microsoft Docs.
To help you with Windows Server upgrades, the Windows Server team created Windows Server Upgrade Center, which gives you step-by-step guidance for modernizing your datacenter.
Upgrade path
You can directly do an in-place upgrade to Windows Server 2019 from Windows Server 2016 and Windows Server 2012 R2. This means, to upgrade from Windows Server 2008 R2 to Windows Server 2019, you will have two consecutive upgrade processes.
- First, you upgrade Windows Server 2008 R2 to Windows Server 2012 R2
- Secondly, you will upgrade Windows Server 2012 R2 to Windows Server 2019
 Windows Server Upgrade Paths Diagram
Not all server roles and applications are supported to be migrated in older versions of Windows Server. Read the specific documentation for your operating system scenario, for example upgrading roles to Windows Server 2016. As an alternative, you can also redeploy the applications on a fresh installation of Windows Server 2019.
Planning the Upgrade
Before you start in-place upgrade your servers, make sure you plan your upgrade and make sure you have all the information, to avoid surprises at the end of the migration. The Windows Server Upgrade Center helps you with a checklist which includes, for example, the following:
- What software and roles are installed on the server and are they supported and working with newer versions of Windows Server. I recommend doing a software inventory and check if the applications and roles are supported.
- Have some tests ready to check if the application still works after the upgrade. It is a good thing to run through these tests before the upgrade as well, so you can confirm everything is working correctly.
- If it is a physical server, do you have drivers and firmware updates for the new Windows Server version available?
- Think about backup software and antivirus, you might need to uninstall these during the update process and reinstall it after the upgrade is done.
- Make sure your server is up-to-date and fully patched before doing an in-place upgrade.
- Planning the timeframe for the upgrade. In-place upgrades take some time, make sure you have a long enough maintenance window planned. Also make sure you communicate the maintenance window, so users know that the application or service is not available.
- Make sure you have a backup of the server before you start the upgrade process, and make sure you can also restore from that specific backup.
- If possible, test the upgrade process with a non-production server.
- Make sure you have enough disk space for the upgrade.
- Gather your system information before the upgrade.
Collect system information
Before you start the upgrade process you should also collect the following system information. You can use the following to commands. Please save the output on another location.
mkdir C:info
systeminfo > C:infosysteminfo.txt
ipconfig /all > C:infoipconfig.txt
Please copy and save the systeminfo.txt and ipconfig.txt file on another system.
 Windows Server Systeminfo
Before proceeding with the In-place Upgrade
I know I have mentioned it before, make sure you have a backup you can restore of the server you are performing the in-place upgrade. Also, make sure that you are aware that the following upgrade processes cause downtime.
Upgrade Windows Server 2008 R2 to Windows Server 2012 R2
Insert the setup media for Windows Server 2012 R2 and start the setup.exe.
Click Install now.

If your server is connected to the internet, make sure you click on Go online to install updates now (recommended). This will download the latest updates to the installer.

Enter the Windows Server License Key for Windows Server 2012 R2 if needed. If you are not asked for the license key, you can skip that step.

Select the right Windows Server edition you want to install. Also make sure you select Server with a GUI or Server Core Installation, depending on your needs.

Read and accept the license terms. Select I accept the license terms.

For an in-place upgrade select Upgrade: Install Windows and keep files, settings, and applications.

The setup will check the application compatibility and create a compatibility report.

Next, press Confirm to start upgrading Windows.

The setup will complete and automatically reboot. When the upgrade is done, you will see the Windows Server 2012 R2 logon screen.

Post Upgrade to Windows Server 2012 R2
After the upgrade to Windows Server 2012, log in and check if the server has been successfully upgraded. Make sure you test if the applications are running like expected and if users can access the application. Make sure that the IP and firewall configuration of your server still allows clients to access your system.
You can run the following command to see that you successfully upgraded to Windows Server 2012:
systeminfo
 Windows Server 2012 Systeminfo
If there has been an issue with the upgrade, make a copy and zip the %SystemRoot%Panther (usually C:WindowsPanther) directory and contact support.
If everything works as expected, you can install the latest Windows Server 2012 R2 updates, and make sure your server is fully patched. Before you move to the Windows Server 2012 R2 to Windows Server 2019 upgrade, I also recommend that you create a backup of the server, in that case, you don’t lose the work you did from 2008 R2 to 2012 R2.
Upgrade Windows Server 2012 R2 to Windows Server 2019
Insert the setup media for Windows Server 2019 and start the setup.exe.
Click Install now.
If your server is connected to the internet, make sure you click Download and install updates, drivers and optional features (recommended). This will download the latest updates to the installer.
 Windows Server 2019 Update Installer
Enter the Windows Server License Key for Windows Server 2019 if needed. If you are not asked for the license key, you can skip that step.
 Windows Server 2019 Product Key
Select the right Windows Server edition you want to install. Also make sure you select Windows Server 2019 Datacenter (Desktop Experience) or Windows Server 2019 Datacenter (Core), depending on your needs.
 Windows Server 2019 select image edition
Read and accept the license terms. Select I accept the license terms.
 Windows Server 2019 license terms
For an in-place upgrade, select Keep personal files and app and click Next.
 Windows Server 2019 in-place upgrade
The setup will check the application compatibility and create a compatibility report.
Next, press Install to start upgrading Windows.
 Windows Server 2019 in-place upgrade install
The setup will complete and automatically reboot. When the upgrade is done, you will see the Windows Server 2019 logon screen.
 Windows Server 2019 Logon Screen 2
Post Upgrade to Windows Server 2019
After the upgrade to Windows Server 2019, log in and check if the server has been successfully upgraded. Make sure you test if the applications are running like expected and if users can access the application. Make sure that the IP and firewall configuration of your server still allows clients to access your system.
You can run the following command to see that you successfully upgraded to Windows Server 2019:
systeminfo
If there has been an issue with the upgrade, make a copy and zip the %SystemRoot%Panther (usually C:WindowsPanther) directory and contact support.
If everything works as expected, you can install the latest Windows Server 2019 updates, and make sure your server is fully patched. I also recommend that you create a backup of the server; in that case, you don’t lose the work you did.
I also highly recommend that you have a look at Windows Containers to modernize your applications. Check out our full video here on Microsoft Channel 9:
Conclusion
There are many ways you can upgrade or migrate your applications, in-place upgrade is just one of them, and might not always fit. However, in some scenarios, it is the easiest way to get to a newer version of Windows Server. I hope this gives you an overview about how you can do in-place upgrades from Windows Server 2008 R2 to Windows Server 2019. If you have any questions or tips for the upgrades, leave a comment below.
Windows Server 2008/2008 R2 have reached the end of support from Microsoft as of January 14, 2020. Running an in-place upgrade on Windows Server 2008/2008 R2 will allow upgrading to newer versions of Windows Server. Let’s see what the process looks like to run a Windows Server 2008/2008 R2 in-place upgrade to Windows Server 2019.
Contents
- Windows Server 2008/2008 R2 migration options
- Migrating on-premises Windows Server 2008/2008 R2 server to Azure
- Using Windows Server Storage migration
- In-place upgrade
- Windows Server 2008/2008 R2 in-place upgrade
- Upgrade path
- Windows Server 2008/2008 R2 in-place upgrade process
- Conclusion
- Author
- Recent Posts

Brandon Lee has been in the IT industry 15+ years and focuses on networking and virtualization. He contributes to the community through various blog posts and technical documentation primarily at Virtualizationhowto.com.
As most are aware, support for Windows Server 2008/2008 R2 has ended as of January 14, 2020. This means that if you have any Windows Server 2008/2008 R2 hosts running in your environment, you are currently in an unsupported state. There are many great options out there for migrating away from Windows Server 2008/2008 R2. In this post, we will focus on Windows Server 2008/2008 R2 in-place upgrade and see what this involves.
Windows Server 2008/2008 R2 migration options
To take a step back for a moment, there are a few options to get from Windows Server 2008/2008 R2 to a supported version of Windows Server. What are these options? When does an in-place upgrade make the most sense? The following are viable options for moving your production services and data to a supported version of Microsoft Windows Server:
- Migrate your on-premises Windows Server 2008/2008 R2 server to Azure
- Use Windows Server Storage Migration
- In-place upgrade
Migrating on-premises Windows Server 2008/2008 R2 server to Azure
Microsoft is dangling a carrot in front of businesses that may have production workloads still running inside Windows Server 2008/2008 R2 deployments. If you migrate these on-premises workloads to Azure, you will get another three years of extended security updates. Not only do you get three more years of updates and support, but it is free aside from the Azure cost.
This can be a good option for some who may already have a presence in Azure and who want the simplicity of rehosting the same exact server inside Azure. With free security updates, this allows much more time for deciding on a migration plan or refactoring of applications.
Three years of extended upgrade free when migrating to Azure (image courtesy of Microsoft)
Using Windows Server Storage migration
Windows Server Storage Migration is another option that allows using Windows Admin Center and the Windows Server Storage Migration module to migrate from a Windows Server 2008/2008 R2 platform to a supported platform such as Windows Server 2019.
Using Windows Server Storage Migration, you can completely move your data, permissions, and users and assume the identity of the server in an automated fashion; the heavy lifting is done for you. This enables easy migration of file servers running on legacy platforms up to a supported version of Windows Server.
Using the Storage Migration Service to migrate from Windows Server 2008
In-place upgrade
An in-place upgrade allows mounting the installation media for a newer version of Windows Server and running through the upgrade process on the legacy server. The Windows Server installation setup recognizes that an existing version of Windows Server is installed and will prompt you to choose between a clean installation or an upgrade. If an upgrade is chosen, the existing operating system, settings, and data are migrated (best effort) to the newer platform.
Windows Server 2008/2008 R2 in-place upgrade
There may be cases in which you simply want to keep your Windows Server 2008/2008 R2 server on-premises and upgrade it to a supported version of Windows Server and keep existing application installations in place. In this case, the in-place upgrade will most likely be the easiest option.
Upgrade path
It is important to note the upgrade path from Windows Server 2008/2008 R2 to newer Windows Server operating systems, such as Windows Server 2019. The below infographic from Microsoft helps to visualize the upgrade paths from Windows Server 2008/2008 R2 to Windows Server operating systems such as Windows Server 2012/2012 R2, Windows Server 2016, and Windows Server 2019.
Windows Server in-place upgrade to current versions of Windows Server (image courtesy of Microsoft)
If you want to perform an in-place upgrade from Windows Server 2008/2008 R2 all the way up to Windows Server 2019, what does the process look like?
You will need to perform two in-place upgrade processes. Since you can’t perform an in-place upgrade directly from Windows Server 2008/2008 R2 to Windows Server 2019, you have to first upgrade to Windows Server 2012 R2 and then perform an in-place upgrade to Windows Server 2019.
Windows Server 2008/2008 R2 in-place upgrade process
Before actually running the in-place upgrade from Windows Server 2008/2008 R2 to a newer version of Windows Server, it is best practice to audit your legacy Windows Server. It is important to consider the following:
- What roles and features are installed? Do these exist in the target version of Windows Server?
- What software and software components are installed? Are there supported versions for these in the target version of Windows Server?
- Do you have a good backup of the server? Other than creating a snapshot/checkpoint (if virtual), be sure to have a proper backup of the server.
- Do you have enough free space on your system drive to perform the upgrade? In-place upgrades require additional available free space to be successful.
- Start with the latest patch version available for your current legacy server. This helps to ensure you have the most current updates and patches available to ensure the in-place upgrade is successful.
- Test the upgrade in a lab environment if possible
Once you have considered these items and others that may be important for your particular environment, you should be able to begin the in-place upgrade.
Below is a screenshot of the Windows Setup dialog box, which opens when you run the Windows Server 2012 R2 installation media from a Windows Server 2008/2008 R2 server. Click Install Now.

Running the in place upgrade to Windows Server 2012 R2
The upgrade includes screens asking about pulling the latest updates, entering the license key for Windows Server 2012 R2, and choosing the operating system you want to install.

Select the operating system you want to install with Windows Server 2012 R2
You will eventually see the screen to choose which type of installation you want to install. Here, choose Upgrade: Install Windows and keep files, settings, and applications.

Choosing an upgrade for type of installation
After you click the Upgrade option, you will see the normal Windows installer screens that retain your settings and update your Windows Server installation. Your server will reboot several times.
Once the upgrade process has completed, you will see the freshly upgraded Windows Server 2012 R2 installation. It should contain your previous apps, data, and settings.
Windows Server in place upgrade to Windows Server 2012 R2 is successful
Now, if Windows Server 2012 R2 is not your final destination, you will need to perform another in-place upgrade to reach your target Windows Server version.
As you recall, we have to perform this same process over again to get from Windows Server 2012 R2 up to Windows Server 2019. After mounting the Windows Server 2019 install media on the newly upgraded Windows Server 2012 R2 server, we run the upgrade again. The installer will prompt you to download updates to the installer itself.
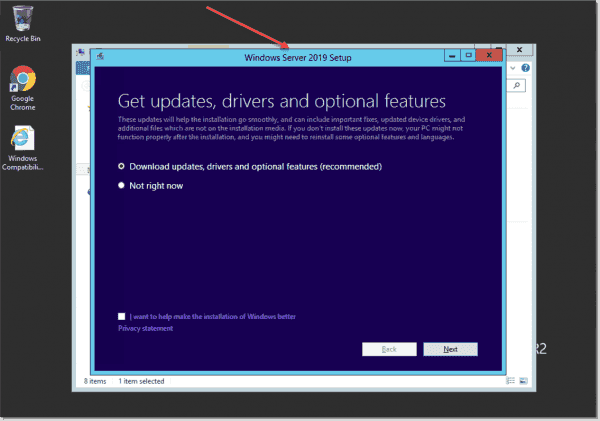
Starting the Windows Server 2019 upgrade in Windows Server 2012 R2
You will need to enter a valid Windows Server 2019 license key and also select the Windows Server 2019 image you would like to install.
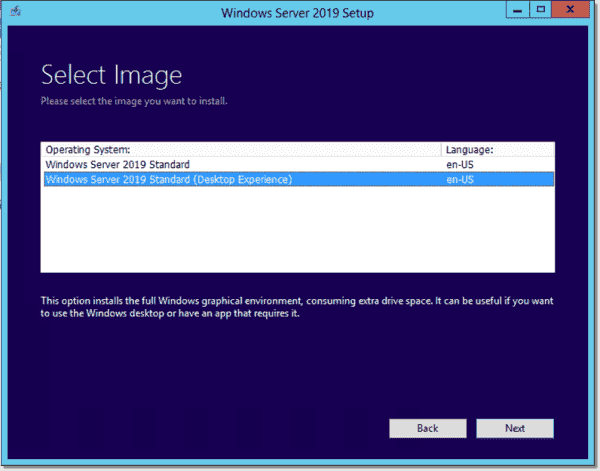
Choose the Windows Server 2019 image you want to upgrade to
The wording of the upgrade vs. clean install with the Windows Server 2019 installer is a bit less obvious. On the Choose what to keep page, select Keep personal files and apps for an upgrade. Select Nothing if you want to perform a clean installation.
You will want to choose the first option for an upgrade.

Choose between an upgrade and clean install with Windows Server 2019 installer
The upgrade is ready to proceed with keeping your files and applications.
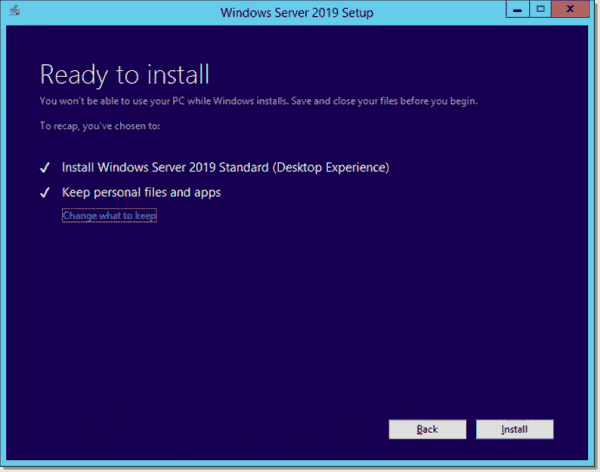
Ready to upgrade to Windows Server 2019
Just as with the upgrade to Windows Server 2012 R2, the server will reboot several times. After a short time, your server should successfully upgrade to Windows Server 2019.
Windows Server 2008 R2 successfully upgraded to Windows Server 2019
Conclusion
With the end of support from Microsoft for Windows Server 2008/2008 R2 reached as of January 14, 2020, moving production workloads off Windows Server 2008/2008 R2 should be a priority. While there are several ways to move your workloads to newer versions of Windows Server, the in-place upgrade may be the best option for those who want to keep their server on-premises and who have many custom applications, settings, and data that would be difficult to migrate to a different server.
The Windows Server 2008/2008 R2 in-place upgrade to Windows Server 2019 involves two in-place upgrades: one to Windows Server 2012 R2 and then an upgrade from 2012 R2 to Windows Server 2019. All in all, the process is straightforward and should be easy to accomplish with planned down time.
![]()
![]()
Hi,
I have at the a physical machine with windows 2008 R2 server( it is called
«Kolix») that holds all FSMO roles and 2 DCs with windows 2016 server (VMWARE machines, it are called,
«evaix» and «adamix»).
I want to upgrade the windows 2008 R2 to the windows 2019 server. Here are my steps:
1) Transfers all FSMO roles from windows 2008 R2 server «Kolix» to the
windows 2016 server «evaix». I am using here the
NTDSUtil tool in command line mode.
Transfer infrastructure master
Transfer naming master
Transfer PDC
Transfer RID master
Transfer schema master
Then I am going to the windows 2008 R2 server «Kolix» and
go the «Active Directory Sites and Services» and select
«Default-First Site-Name» and select
«Server» and then select «DSG»—>NTDS Setting» —>Proberties—> uncheck «Global Catalog»
2) I demote now windows 2008 R2 server «Kolix» with «dcpromo» and leave it as uncheked «Delet the domain because this server is the last domain controller in the domain.
Or should I check it? I would say I leave it as unchekced

3) After demoting I remove the roles «Active Directory domain Services»
3) I install now a fresh Windows 2019 server on the physical machine and join the existing domain and
promote it to existing domain
4) Now I transfer all the FSMO roles from the windows 2016 server
«evaix» to the new installed windows 2019 server back.
5) Now I am going to the DCs with windows 2016 server «evaix» and
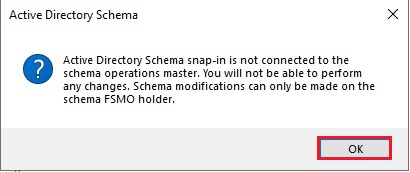
«adamix» and do a inPlace Upgrade into windows 2019 server. I run the setup.exe from windows server 2019 and get the following message:
In this case I am runing the following command:
adprep.exe /forestprep /forest my domainname
The next step:
ADPrep /domainprep /domain mydomainname
That is all. Have I forgotten what?
My next question is:
Should I run «adprep.exe /forstprep/forest my domainname» and «adprep.exe /domainprep/domain my domainname» on the step 3
fresh installation Windows 2019 server too?
I dont think so
thanks for help
Nick
-
Moved by
Tuesday, January 29, 2019 10:46 PM
From ADFS
Windows Server in-place upgrade to Windows Server 2019
Microsoft’s standard support cycle ends on the 10 year anniversary of the release for most products. As such, we are reaching the end of extended support for Windows 2008 and Windows 2008 R2 servers in January 2020. All the system/server administrators still have 2 months to migrate their critical applications to a new Windows server.
This requires new hardware or virtual systems where applications and data can be migrated to. Users must verify with the vendor to check compatibility of applications with new OS versions, such as server 2012, server 2016 or 2019.
If the application is compatible with a newer version of the server operating system and you have a development environment available in your organization, you are able to do an in-place upgrade from Windows Server 2008 R2 to Windows 2012 R2, Server 2016 or even Server 2019. Follow the below steps to complete an in-place upgrade.

In my Lab, I have a wiki web server running on Windows 2008 R2. We will perform 2 step upgrades to upgrade windows server 2008 R2 to Windows Server 2019 in this article. It will cover all the steps including testing for an upgrade and a web server.
I am using a free wiki software called MediaWiki.

In-place upgrade to 2012
The first step will upgrade to Windows server 2012 R2 as an in-place upgrade. Attached is the ISO for Windows Server 2012 R2.

Select Run the setup.

Select Install Now. On the next page check for security and driver updates.

This will download the update package. The download will take 5 to 10 minutes, depending on your internet speed.


Select the version you need to install.

Select Upgrade, which allows you to install the new Windows with old files, settings, and application

This process will take 30 to 45 minutes depending on your system configuration.

Your system is ready with Windows 2012 R2. Login with the same user name password as your Server 2008 R2. Verify the server version.

Check the web application which we are using on Server 2008 R2.

Upgrade to Windows Server 2019
The next steps will walk through the upgrade from Windows Server 2012 R2 to Windows Server 2019. Attached is the ISO for Windows server 2019. On the next page, check for security and driver updates.


Select the version you need to install

To upgrade the current version, select Keep personal files and apps. This allows you to perform an in-place upgrade from Windows Server 2012 R2 or Windows server 2016 to Windows Server 2019.


This will check system and storage availability for the in-place upgrade.

Select Install to start the install.


Once the system is up after the upgrade, use the same user name password to login to the server.

Test the web application we are running on the server.

If all went well, we have successfully upgraded from Windows Server 2008 R2 to Windows Server 2019.
Note: Check with the application vendor for application compatibility with the Server version you plan on upgrading to.
I hope this article helps you upgrade your old Windows 2008 to the version you need to support a more secure infrastructure for your application.
Thank you for reading!
Active Directory Migration – In this blog, we’ll move the roles on our Server2008 (Windows Server 2008 R2 SP1) AD server to Server2019 (new Windows Server 2019 Standard).
Before proceeding to migrate an Active Directory from Windows Server 2008 R2 to Windows Server 2019, you want to first install Windows Server 2019 on a replacement machine which can then be promoted to Active Directory Server 2019.
Install Windows Server 2019.
How to Install Windows Server 2019, Click here
Rename Windows Server 2019.
How to rename Windows Server 2019, Click here
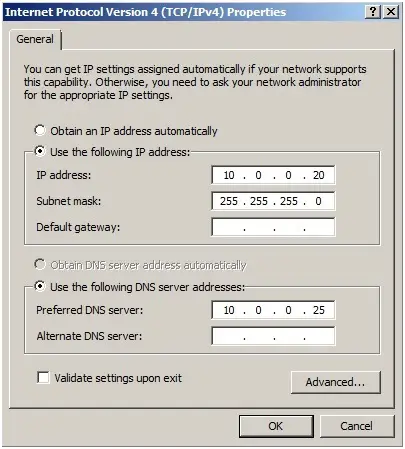
Configure the IP Addresses in Server 2019.
The next step is to configure the IP and the DNS Addresses on the new server.
Windows Server 2008
R2
Windows Server 2019
Computer Name: Server2008 Server2019
Domain Name:
xpertstec.local
IP Address (Static): 10.0.0.20
10.0.0.22
Subnet Mask:
255.255.255.0 255.255.255.0
Default Gateway: 10.0.0.1 10.0.0.1
Preferred DNS Server: 10.0.0.20 10.0.0.20
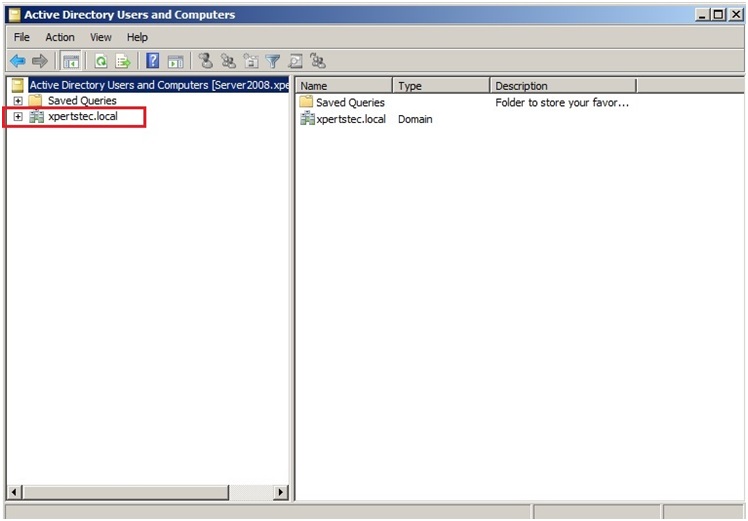
Active Directory Migration 2008
1- First, let’s have a glance at my environment. we have a domain controller xpertstec.local which is installed on Windows Server 2008 R2.
Raise the Forest Functional Levels and Domain Functional Levels in Windows Server 2008 R2.
2- Click Start and select Administrative Tools and then Active Directory Domains and Trusts.
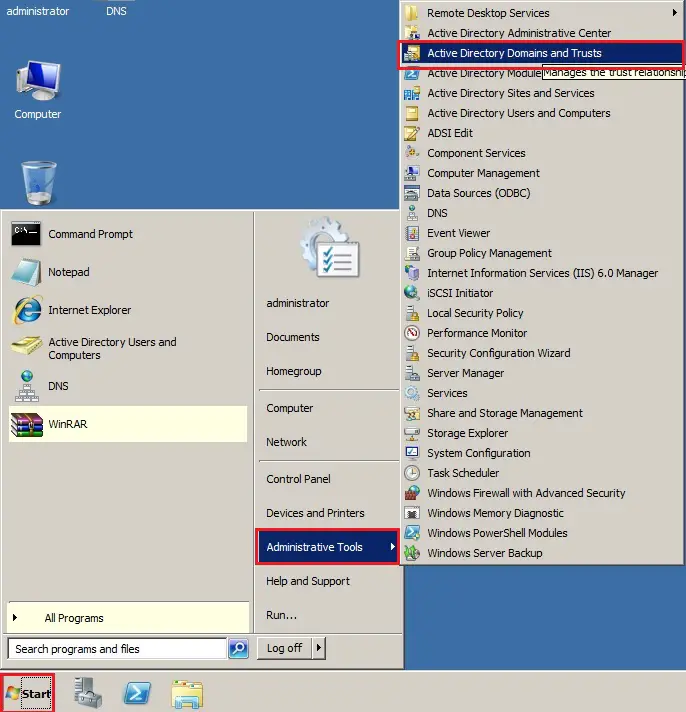
3- Right click on Active Directory Domains and Trusts and choose Raise Forest Functional Level.
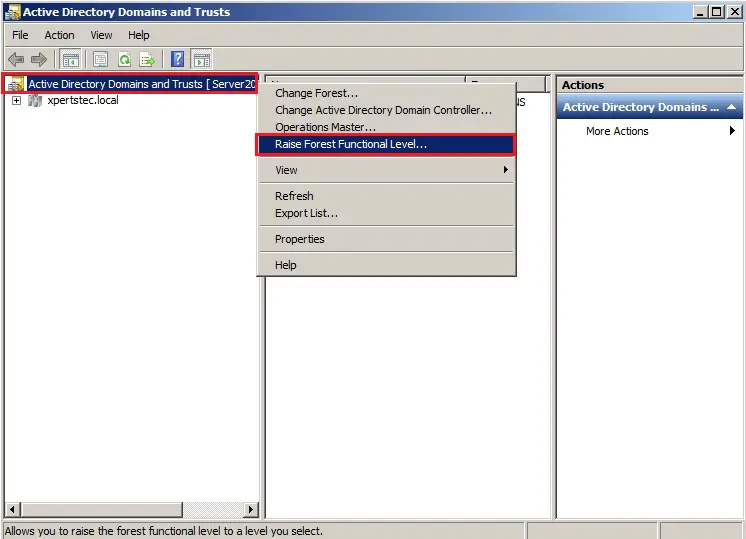
4- Select an available forest functional level “Windows Server 2008 R2 and click Raise.
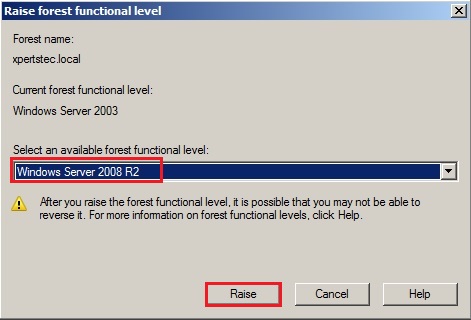
5- Now click on OK.
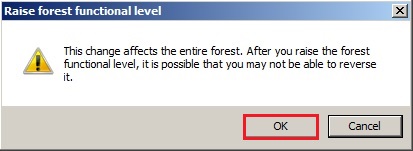
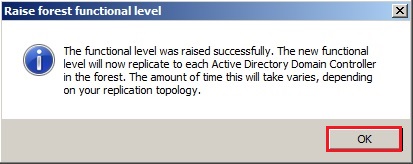
6- The forest functional level was raised successfully so click on ok.
Now Raising the Function Level of the Domain
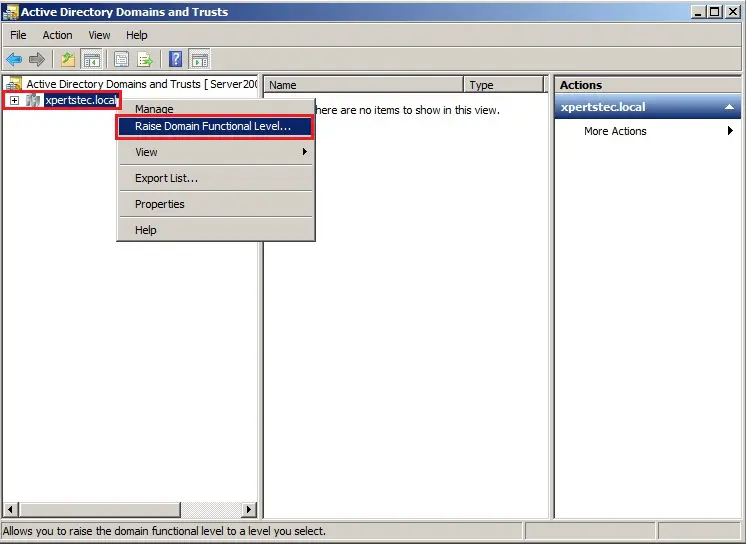
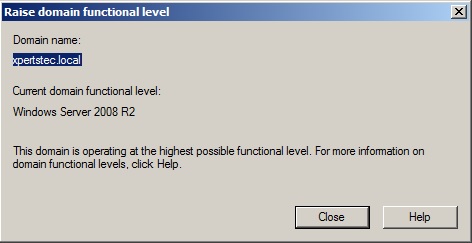
7- Right click on the Domain name (xpertstec.local) and click Raise Domain Functional Level.
8- It has already got raised the Domain Functional Level to Windows Server 2008 R2 so click on close.
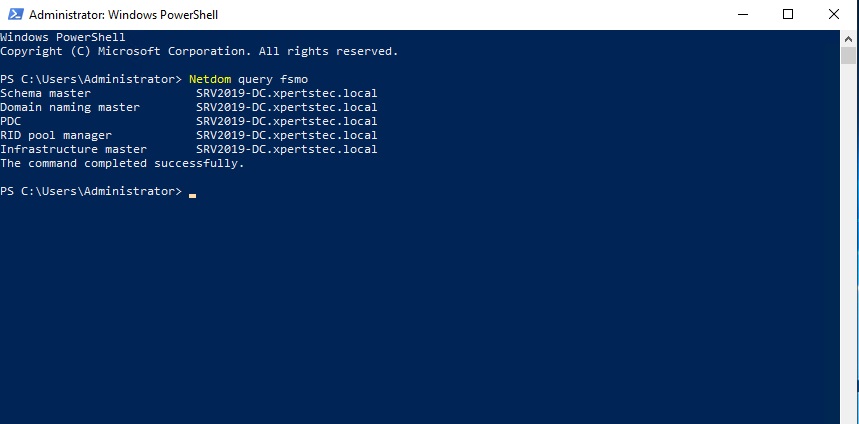
9- Now type the Netdom query fsmo command to check which server has installed FSMO roles.

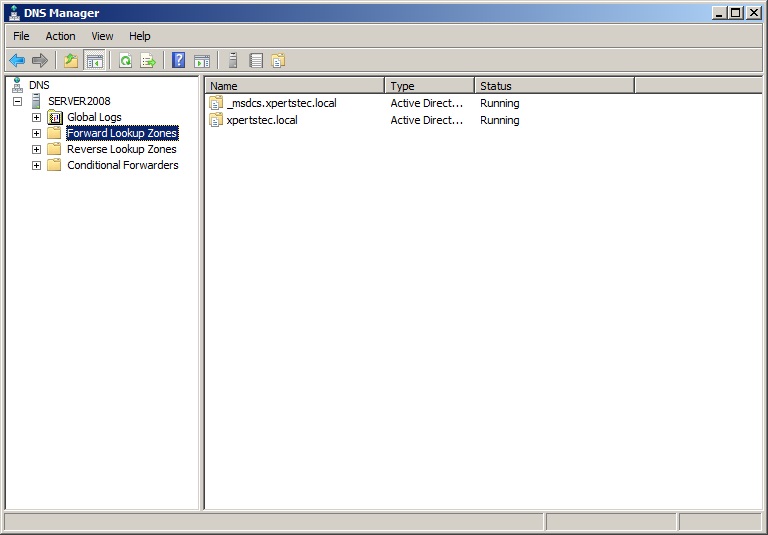
10- DNS Manager.
Active Directory Migration Steps
Join Windows Server 2019 to an Active Directory Domain.
How to Join Windows Server 2019 to an Active Directory Domain, Click here
Now sign in Windows Server 2019 with the domain administrator account.
Create Additional Domain Controller (ADC) In Windows Server 2019
How to Create Additional Domain Controller (ADC) In Windows Server 2019 so Click here
11- Now have a look at my active directory Domain Controllers Server2008. We can now see that our server Server2019 is in the domain role.

Transferring the Flexible Single
Master Operations (FSMO) Role
I have a Windows Server 2008 Domain Controller (server2008) and have a further Windows Server 2019 domain controller (Server2019). To finish the migration. We’d like to transfer 5 FSMO roles to the new domain controller.
- Schema Master
- Domain Naming Master
- PDC
- RID pool manager
- Infrastructure Master
12- To find which server is currently holding FSMO then run the following command. netdom query fsmo
The FSMO roles are currently with the Windows Server 2008 R2 Active Directory domain controller (server2008)
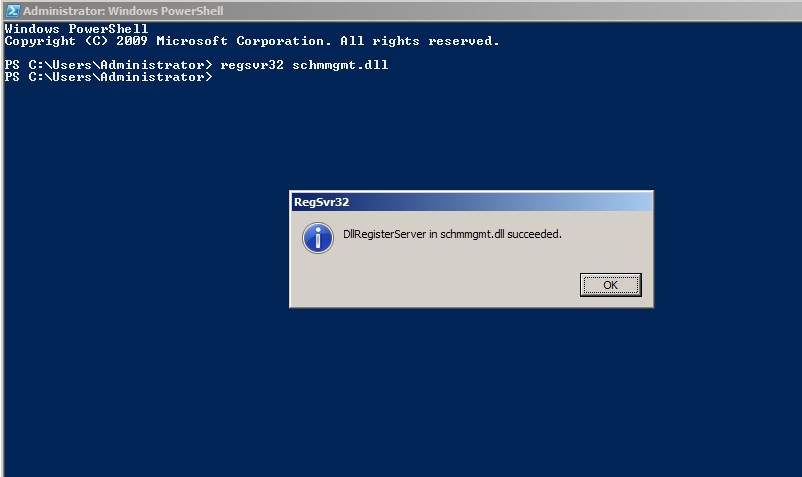
Using Active Directory Schema snap-in to transfer the Schema Master role 13- Open Command Prompt in administrative mode and type regsvr32 schmmgmt.dll and then click on ok.
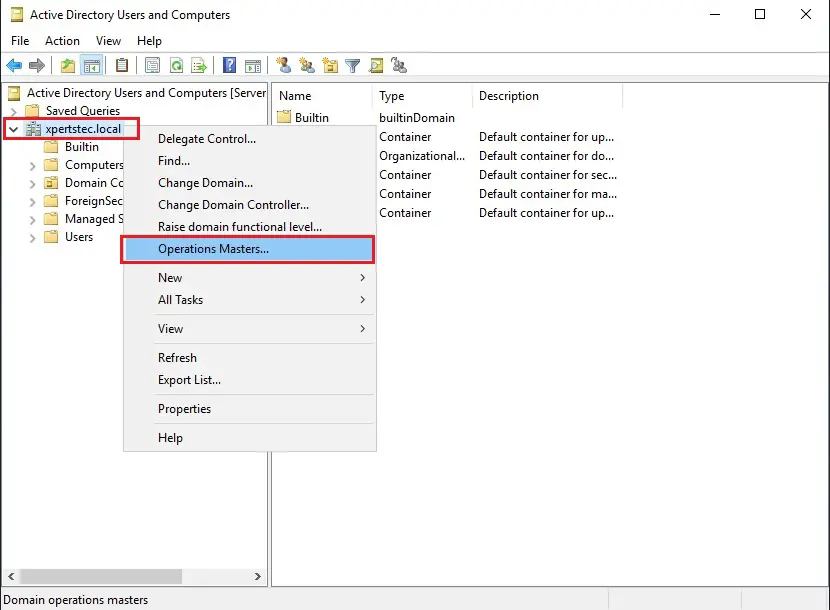
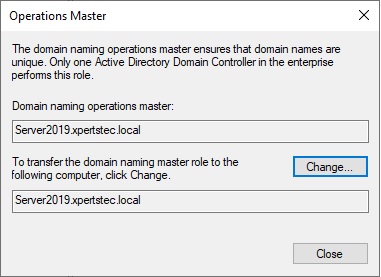
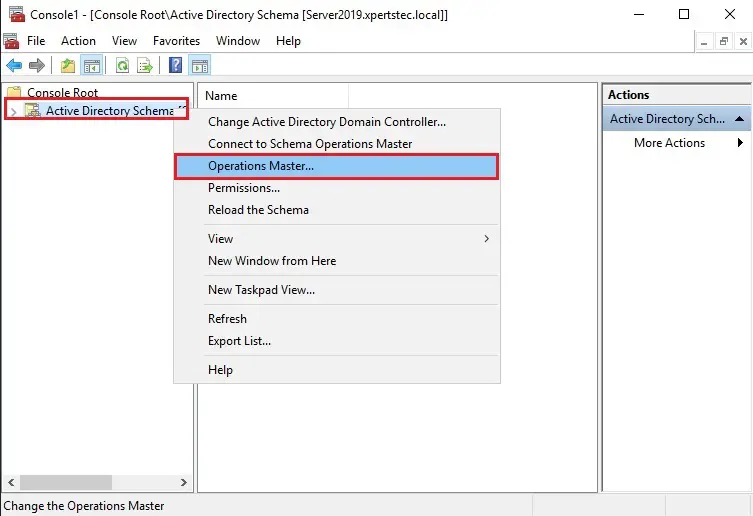
Operations Master Roles Tranfer
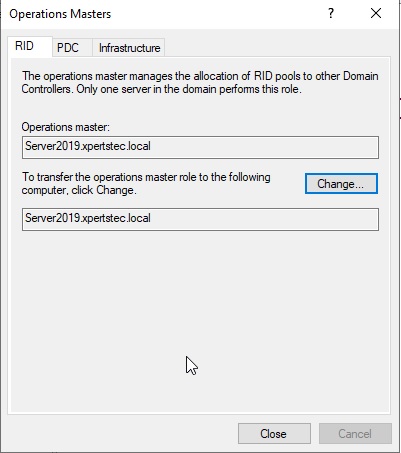
14- On the Server2019 server, open Active Directory Users and Computers, right click domain xpertstec.local and then click Operations Masters.
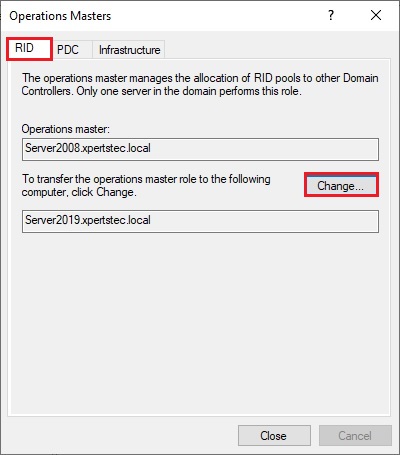
15- On the Operations Masters, Select the RID tab and select the Change button.
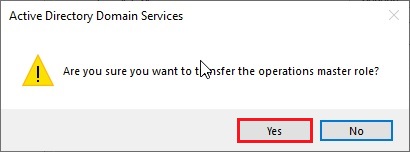
16- Now click Yes.
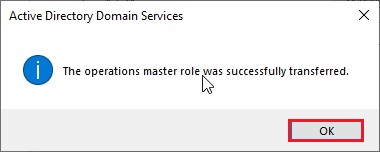
17- The operations master role was successfully transferred so click ok.
18- Now you can verify that Operation master now transferred to our new Server Server2019.xpertstec.local
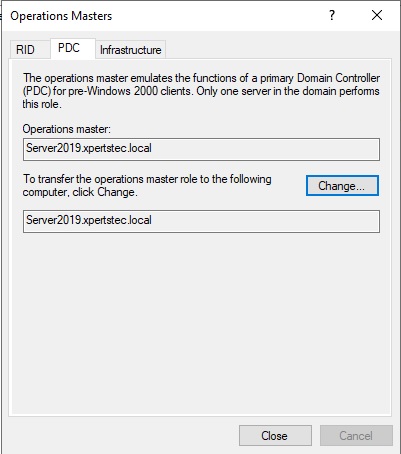
19- On the Operations Masters, select the PDC tab and then click the change button.
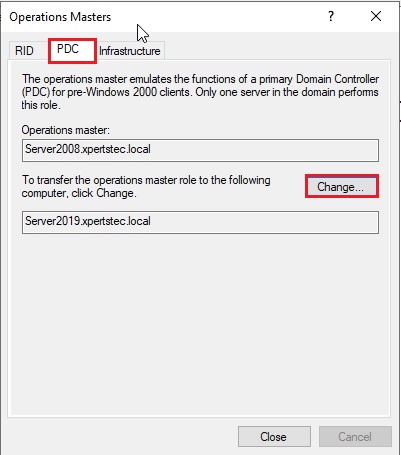
20- Now click Yes.
21- The operations master role was successfully transferred, then click ok.
22- Now you can verify that Operation master now transferred to our new Server Server2019.xpertstec.local
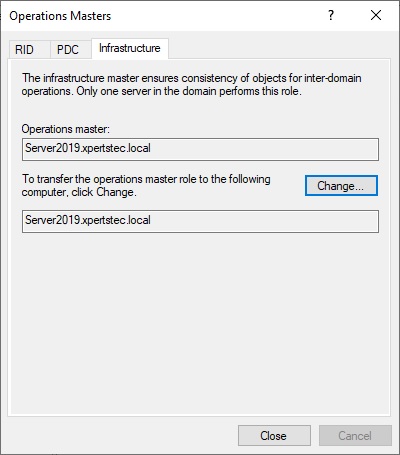
23- On the Operations Masters, select the Infrastructure tab and click on change button.
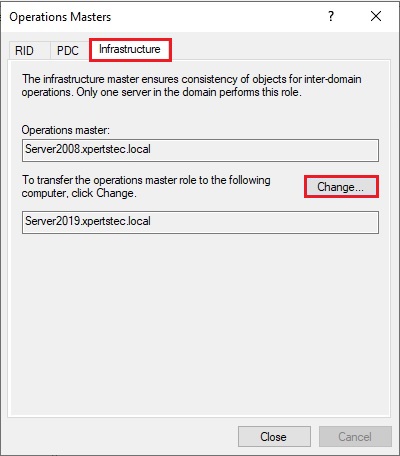
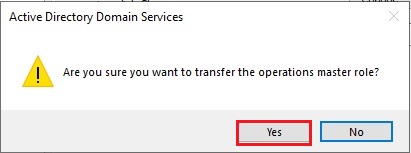
24- Then click Yes.
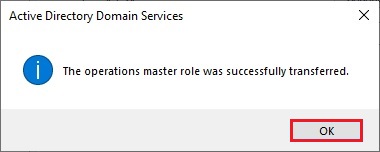
25- The operations master role was successfully transferred, then click ok.
26- Now you can verify that Operation master now transferred to our new Server Server2019.xpertstec.local
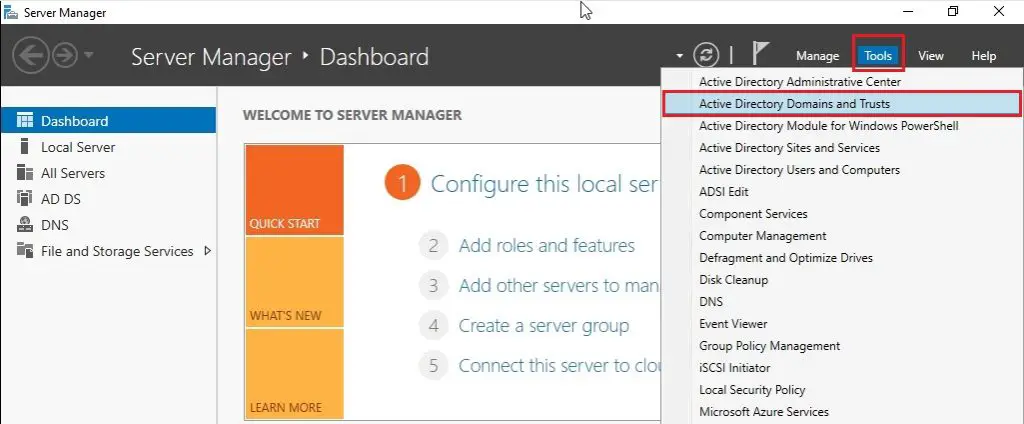
27- Open Server Manager and select Tools and then click Active Directory Domains and Trusts.
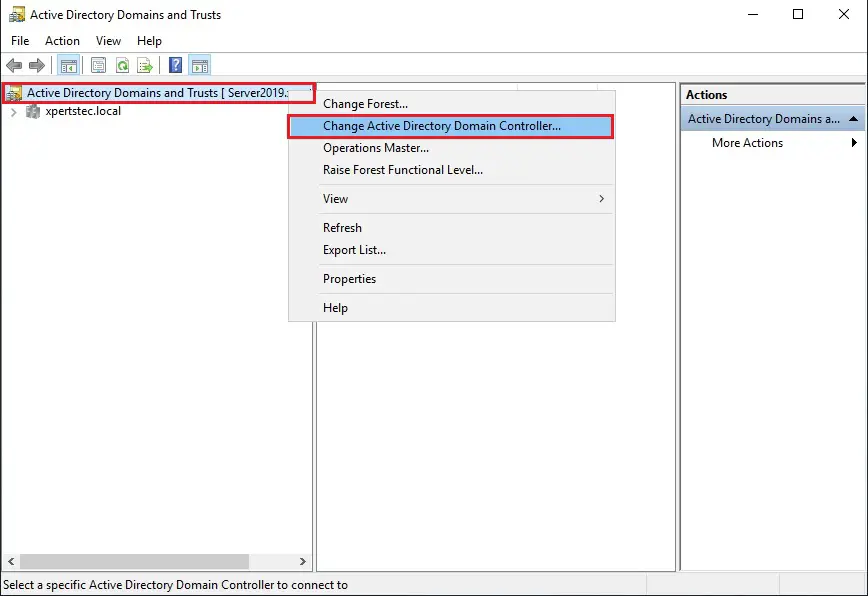
28- Right click on Active Directory Domains and Trusts and then select change active directory domain controller.
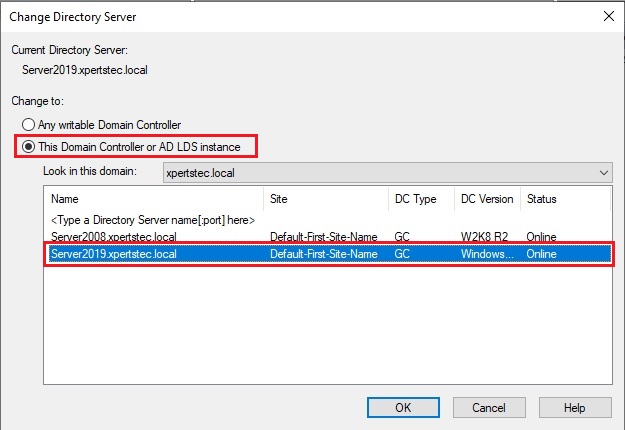
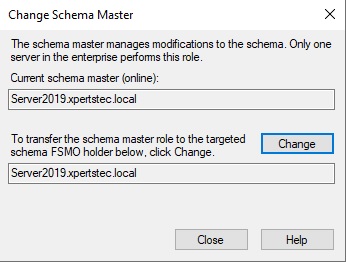
29- Select this Domain Controller or AD LDS Instance and click on the domain controller that you want to be the schema master role and then click ok.
Transfer Domain Master Role
30- Right click Active Directory Domains and Trusts and then select Operations Master.
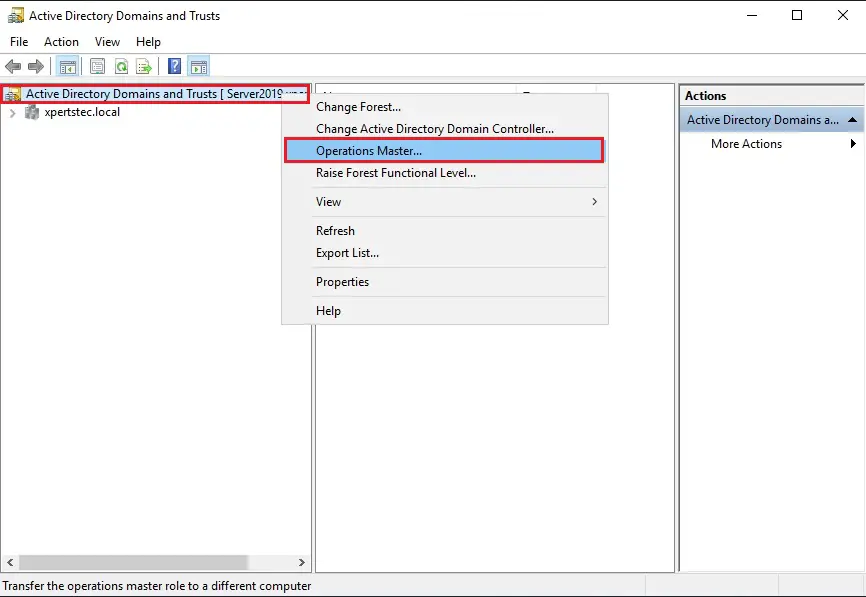
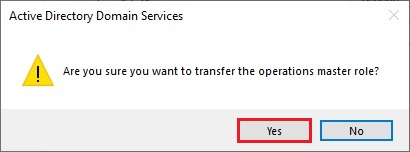
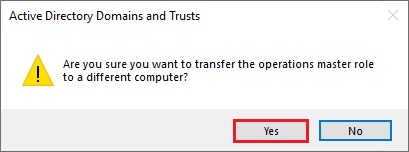
31- Now click on Change
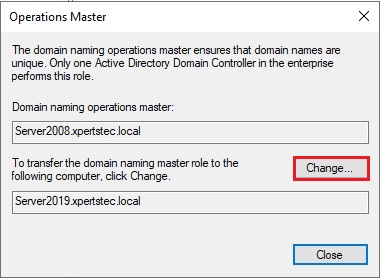
32- then click Yes.
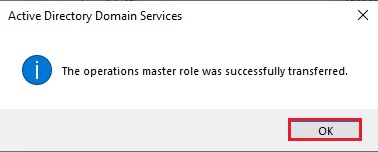
33- The operations master was successfully transferred then click ok.
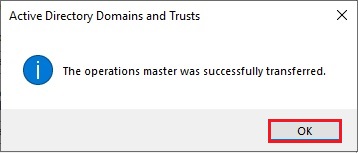
34- Confirmed the domain naming operation master role and click on Close.
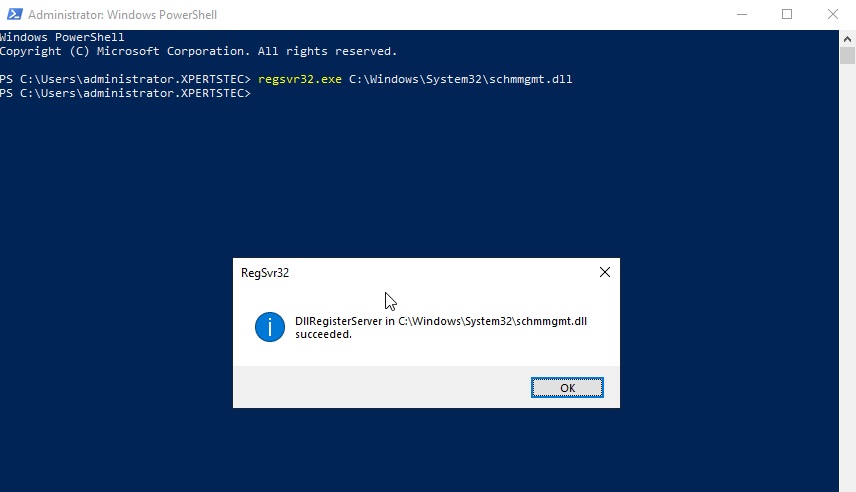
35- Now we need to move our Schema Master role, so we need to register the schmmgmt.dll open command prompt and run the command below.
Regsvr32.exe C: windows system32 schmmgmt.dll
The process was completed successfully so click on ok.
36- Open Microsoft Management Console mmc type mmc and then hit enter.
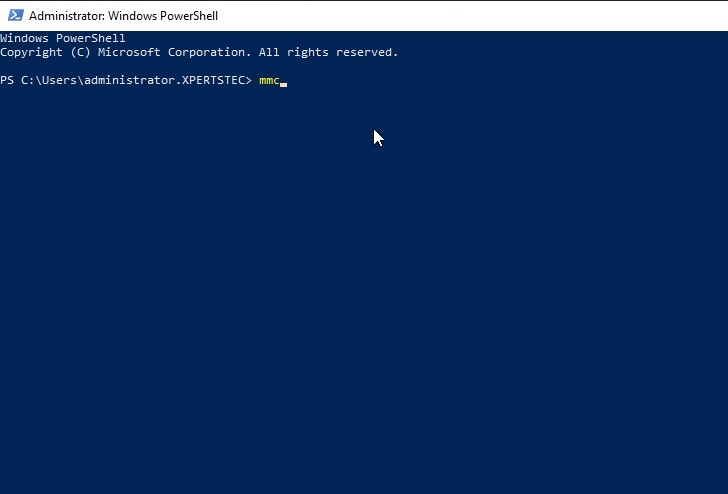
Console
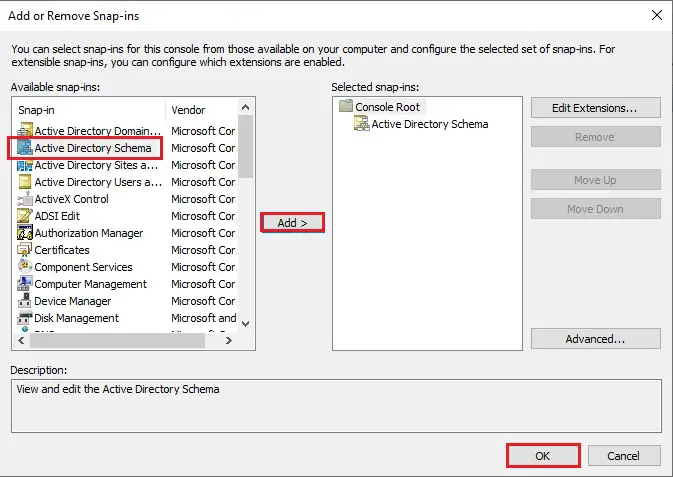
37- Select the File tab and then select Add/Remove Snap-in.
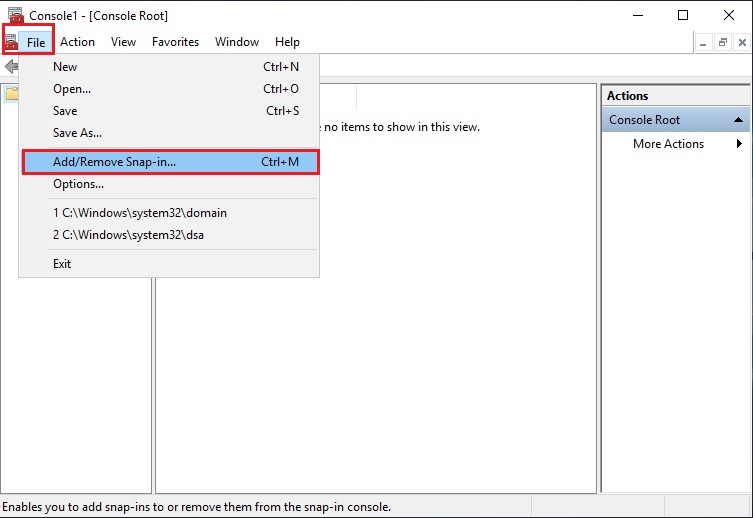
38- From the left side, under Available Snap-ins, Select Active Directory Schema, click Add button and then click ok.
39- Right click Active Directory Schema, and then select Change Active Directory Domain Controller.
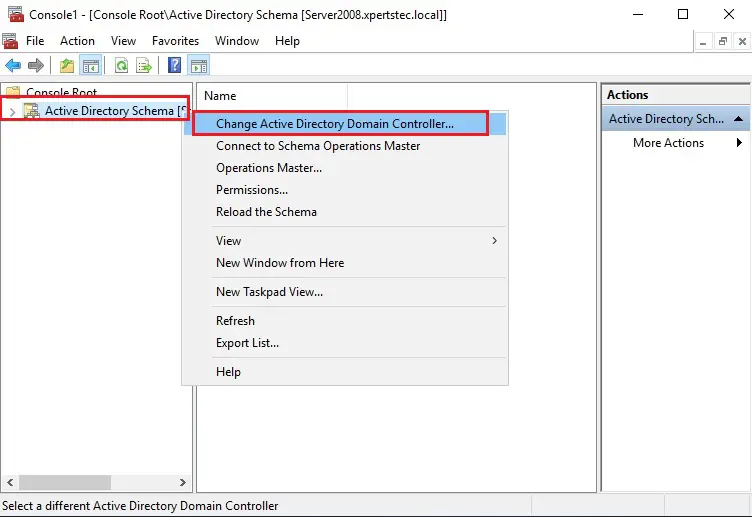
40- Select this Domain Controller or AD LDS Instance, click on the domain controller that you want to be the schema master role and then click on ok.
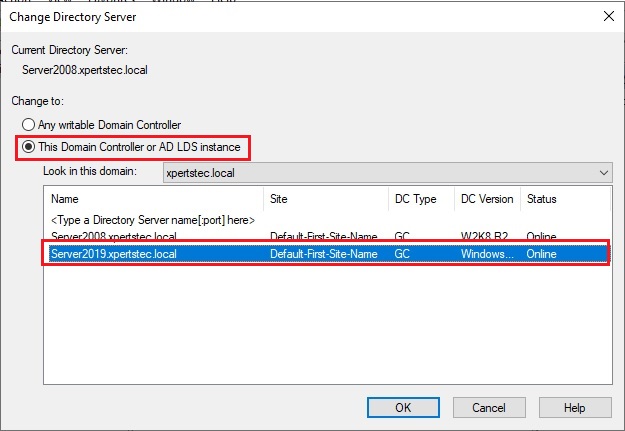
41- Now click OK.
42- In the console1, right click Active Directory Schema (Server2019.xpertstec.local) and then select Operations Master.
43- Select the Change button.
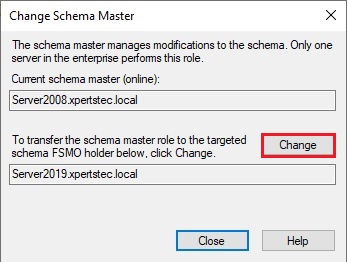
44- then click Yes.
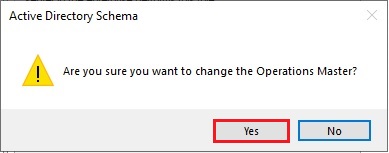
45- The active directory schema Operations Master successfully transferred then click ok.
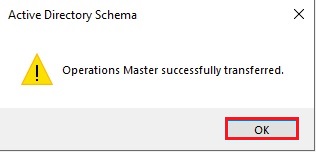
46- Now confirm your current schema master which is Server2019 and then click Close.
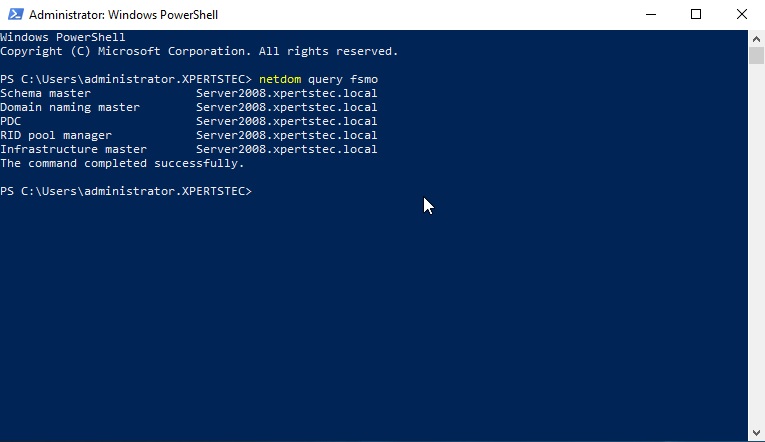
47- Now run the Netdom query fsmo command, so we can now see that our roles have been moved to our Windows Server 2019 Additional Domain Controller.
48- Now change the DNS address of our additional Domain Controller server to be the IP address of our Windows Server 2019 Domain Controller server.
After completing Active Directory Migration, Now the ultimate step is to get rid of (uninstalling) server2008 Active Directory domain controller.
Remove Active Directory Domain Controller 2008
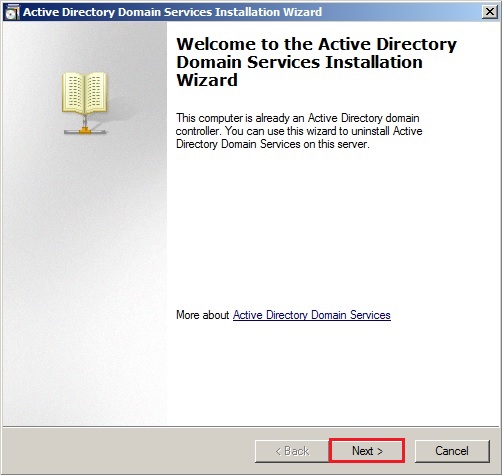
49- Open command prompt Type dcpromo and then hit Enter.
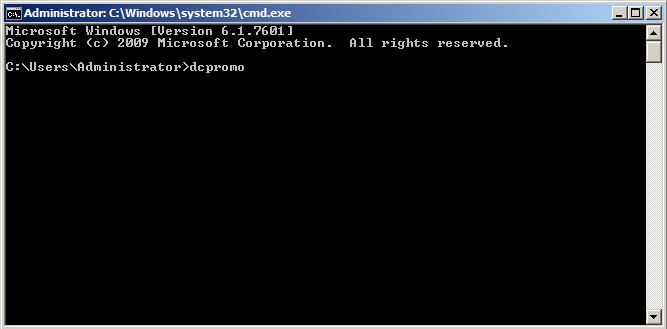
50- Click Next.
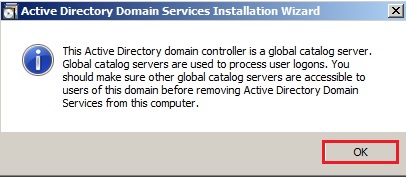
51- The Active Directory domain controller has the global catalog service, make sure your primary DC also has the service enabled and click on ok.
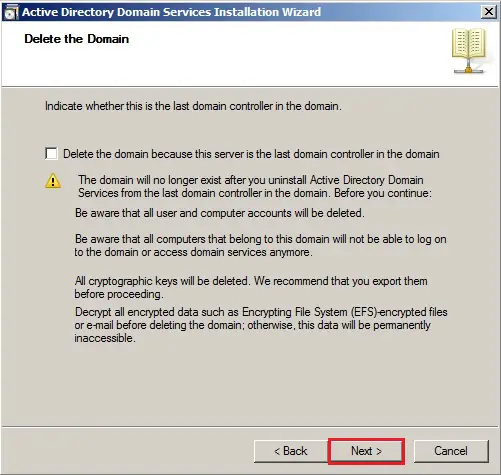
52- Confirmed that the delete this domain, because this server is the last domain controller in the domain, is UNCHECKED and then click next.
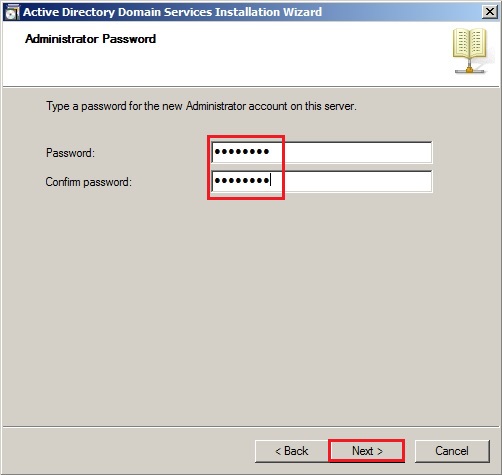
53- Type a password for the new Administrator account on this server and click next.
54- Review the remove active directory domain services Summary and click Next.
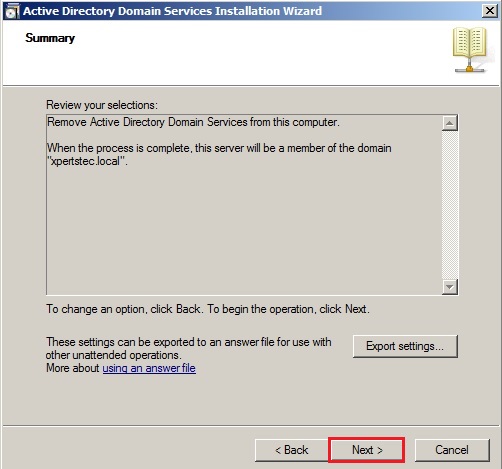
55- Check the Reboot on completion box to restart the server after the service has been removed

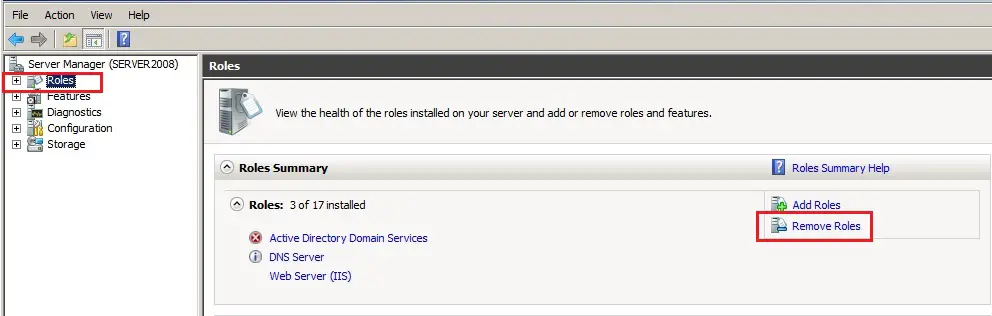
56- After rebooting server2008 DC. Now log in with the local administrator account and then open Server Manager.

57- In Server Manager click Roles under Roles Summary and click Remove Roles.
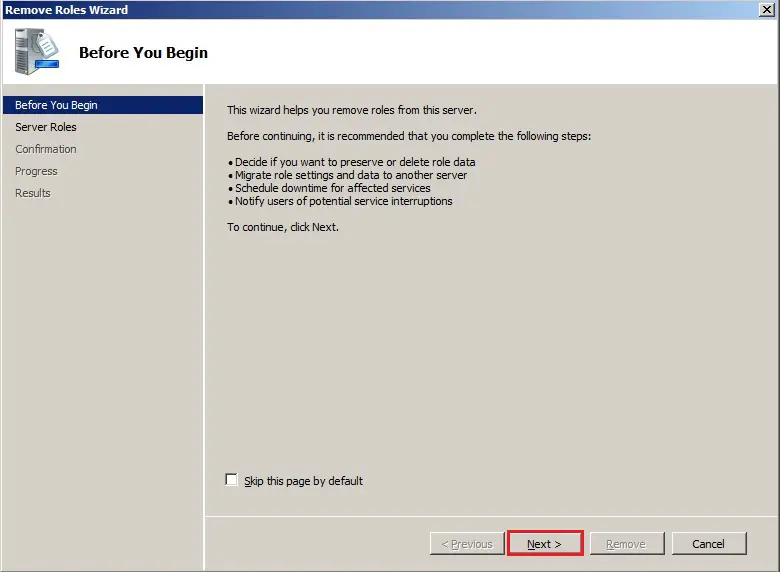
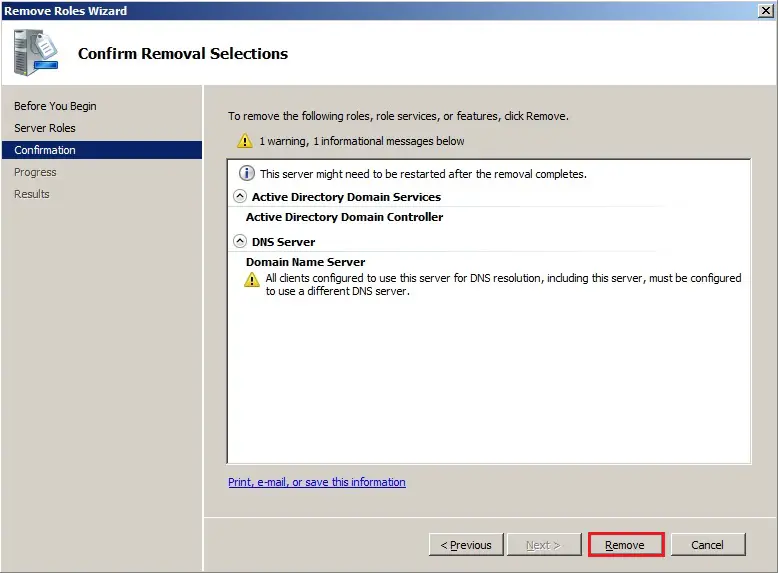
58- Remove active directory domain controller 2008 Roles wizard, click next.
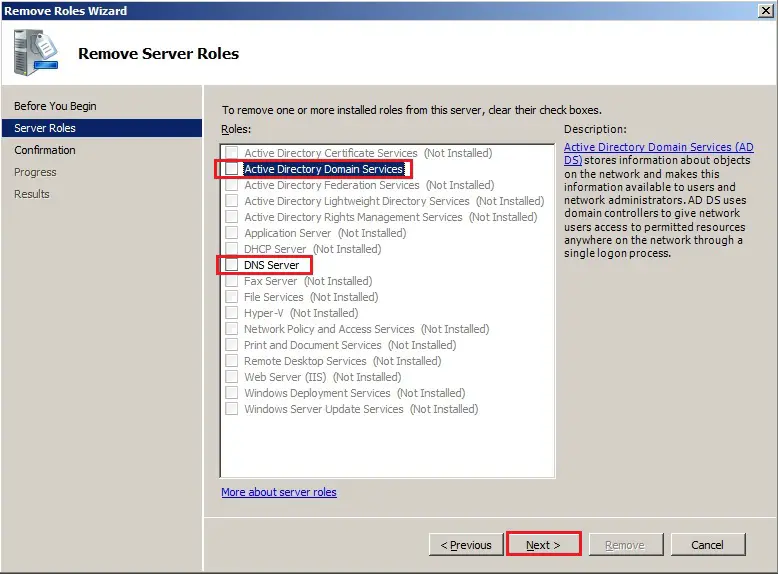
59- Uncheck Active Directory Domain Services and DNS Server box and click next.
60- Click Remove.
61- Now click Close.
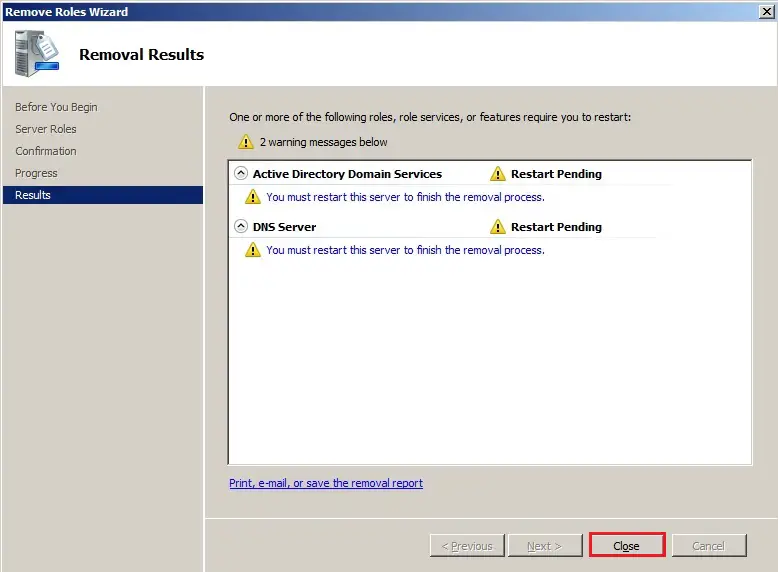
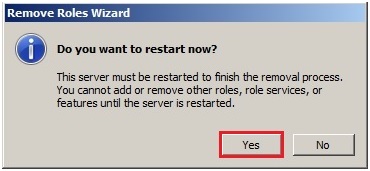
62- Do you want to restart now so click on Yes.
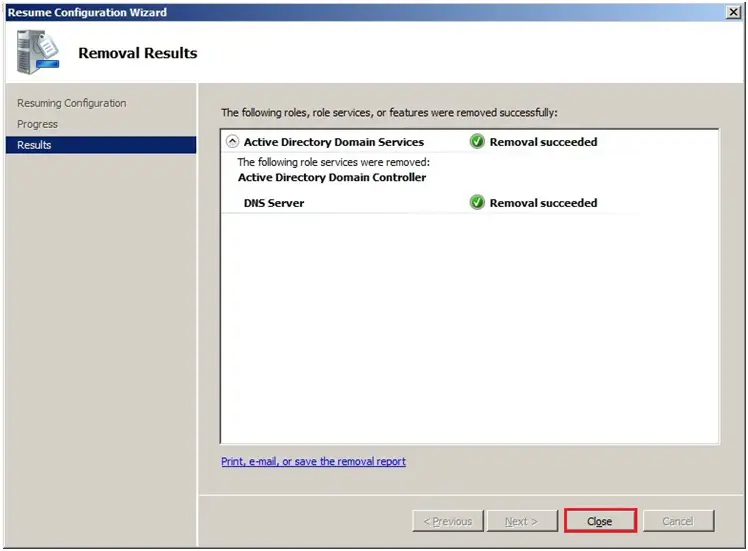
63- After rebooting server Log back to server2008, active directory domain services removal succeeded and click Close.
64- Disjoin the machine from the domain
Join to Workgroup
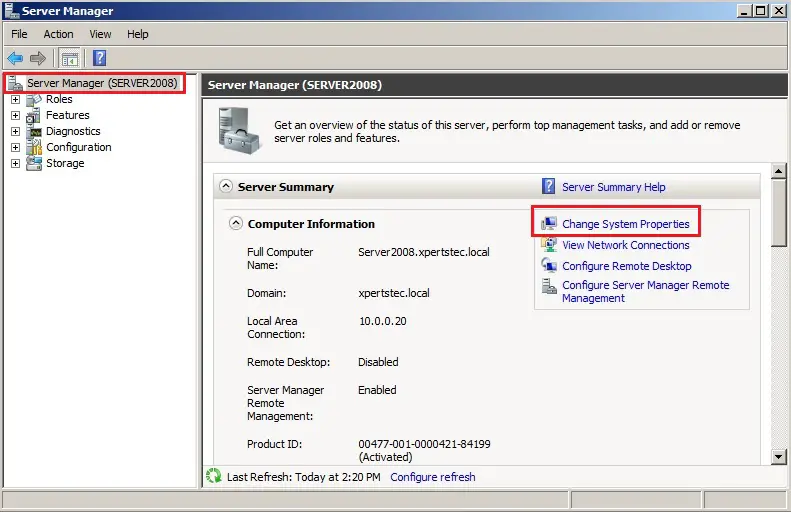
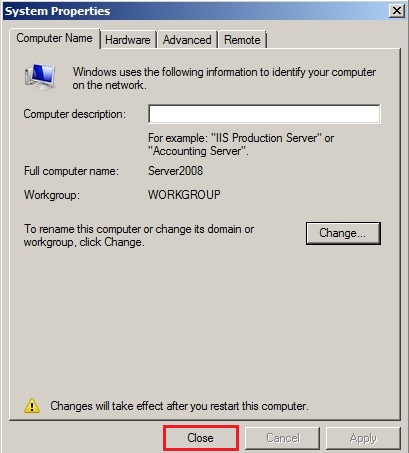
In the Server Manager, under Server Summary and click Change System Properties.
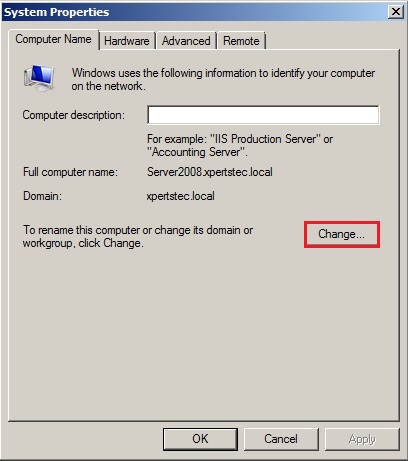
65- On the System Properties and click the change button.
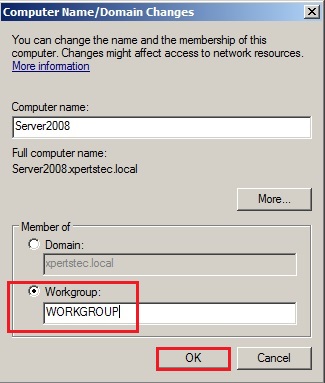
66- Select Workgroup type in a workgroup name and then click on ok.
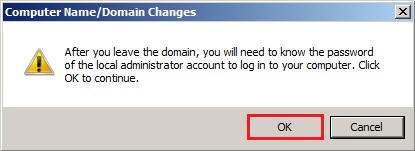
67- After leaving the domain Warning message so click ok.
68- Welcome to the workgroup and click on ok.
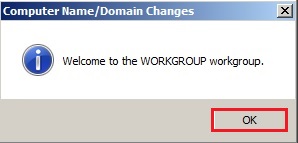
69- Click OK to restart the server.
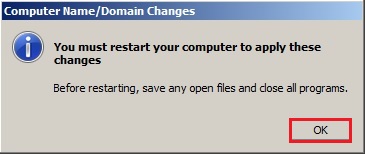
70- System Properties, click Close.
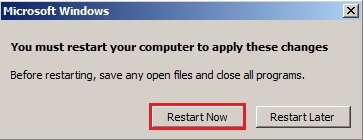
71- Click Restart Now or Restart Later and shut down this server.
Like and subscribe our YouTube channel to watch updated videos.
For more information click here
In our company we are planning to do Windows 2008 R2 migration due to End of Support it reached. We’re not that fans of living on edge but this time it appear to be wiser target to Windows Server 2019, not 2016 (so we’ll live with for years further).
While reading on this topic and looking for best practice approaches I can see many people recommend to do step-by-step migration (2008R2 -> 2012 -> 2016 -> 2019), but in our case it appears to be very lengthy and error-prone way, isn’t it? At the same time, looks like we can do that in one giant step (2008R2 -> 2019) so I would like to ask your advice, is it true?
asked May 6, 2019 at 13:24
![]()
3
If you want to upgrade the actual servers by performing an in-place upgrade (which I highly advise against), you need to go through multiple steps.
But if you want to add new 2019 Domain Controllers to replace the existing ones, then yes, you can definitely add 2019 DCs in a 2008R2 domain, after the standard preparatory steps (adprep).
Also make sure your SYSVOL uses DFS replication instead of FRS; which it should, but sometimes FRS just stays there because nobody bothered changing that after upgrading from 2003. FRS is not supported anymore and you can’t add a 2019 DC in domain which still uses it.
Also, take extra care if you have non-Windows (or old Windows such as XP) devices that use Active Directory for authentication; they might be not compatible with 2019 DCs due to their stronger security settings.
answered Dec 27, 2020 at 23:26
![]()
MassimoMassimo
69.3k57 gold badges197 silver badges319 bronze badges
According to Microsoft’s Upgrade Scenario Planner, you must upgrade to Windows Server 2019 from Server 2008 R2 in three steps:
- Upgrade to Server 2012
- Upgrade to Server 2016
- Upgrade to Server 2019
There’s no way around this. Attempting to skip one of these steps will not work because the installer for the new version of Windows Server will refuse to run if the prior version is not supported for upgrade.
answered May 6, 2019 at 13:55
![]()
4
We upgraded over 100 virtual 2008R2 Servers with only two version changes.
We had no issues with drivers because they were all VMs.
There was no DC among the machines, we join 2019 DCs to the AD and remove the old ones after that.
Maybe driver support issues could be a reason why the migration info from MS states that it needs to be a three step version upgrade.
This is what we do with every server 2008R2:
1. Go offline
2. Upgrade 2008R2 to Server 2012R2
3. Upgrade 2012R2 to Server 2019
4. Go online
5. Get Updates for Server 2019
answered Nov 27, 2019 at 15:26
![]()
1

kevinmhsieh

This person is a verified professional.
Verify your account
to enable IT peers to see that you are a professional.
mace
Windows Server Expert
-
check
239
Best Answers -
thumb_up
1390
Helpful Votes
Are you virtualizing? You probably should be. Backups and more importantly, RECOVERY is much easier. You can also run a second VM on the same host for other purposes, such as WSUS.
I see absolutely zero issue with running file services on your domain controller. I do that with all of my branch servers. You also only have 1 piece of hardware (assuming you retire your soon to be 8 year old server). I also run print services on my smaller DCs.
If you are only running IIS for WSUS, you can run that on the DC, but I would feel better if that was on a separate VM.
Storage Migration Service is new to 2019, so most of us have no experience with it. Since your last server was put in during 2011, my guess is that you don’t have much experience with server migrations, so I don’t know if you want to be an early tester of Microsoft’s technology and documentation.
In general, migrating to 2019 shouldn’t be really any different than migrating to 2012 R2 or 2016. The older methods all still work.
How many users do you have? Do you have DFS Namespace in place now? How many print queues?
Replacing a DC is easy. Replacing print server and file server can be more difficult, depending on whether or not DFS Namespace was used, and how your printers are assigned.
When replacing a DC, I like to make the new DC have the same IP as the old DC. It simplifies many things, like DHCP scopes, DHCP relays, and devices with static IP. You can give the old DC a new IP and then give the new DC the original IP address.
1 found this helpful
thumb_up
thumb_down