User Profile Disks (UPD, диски профилей пользователей) – новый функционал Remote Desktop Services в Windows Server 2012. User Profile Disks представляют собой альтернативу использованию технологий перемещаемых профилей (roaming profile) и перенаправления папок (folder redirection) в терминальных сценариях RDS. Идея UPD – данные пользователя и его приложений (т.е. его профиль) хранятся в виде отдельного виртуального vhdx диска на неком выделенном общем файловом ресурсе. Этот виртуальный диск монтируется в сессию пользователя при его входе на RDS-сервер, и отключается при выходе (конечно, с сохранением всех изменений в профиле).
В этой статье мы опишем особенности настройки и работы технологии User Profile Disks на сервере с ролью Remote Desktop Services на Windows Server 2012 / 2012 R2 / 2016.
Содержание:
- Настройка User Profile Disks в Windows Server RDS
- VHDX файл с UPD профилем пользователя
- Как расширить диск User Profile Disk с помощью PowerShell
Настройка User Profile Disks в Windows Server RDS
В первую очередь необходимо на любом файловом сервере организации создать общую сетевую папку, в которой будут храниться файлы с профилями пользователей в формате VHDX дисков (если вы хотите обеспечить высокую доступность UPD дисков, можно разместить файлы UPD на кластерном файловом ресурсе). В нашем примере, путь к такому каталогу будет выглядеть так: \srv01DemoLabOficeApps. Необходимо предоставить серверам, входящим в коллекцию RDS полные права доступа на данный каталог и файловую систему.
Совет. В рамках одной коллекции RDS для каждого пользователя может существовать только один vhdx файл с UPD профилем. Если пользователь подключается к ресурсам из двух разных RDS коллекций, для каждой из них будет создан отдельный vhdx файл с профилем пользователя.
Режим User Profile Disks включается и настраивается в параметрах коллекций Remote Desktop. Этот режим можно включить непосредственно при создании коллекции, или уже после того, как коллекция создана.


VHDX файл с UPD профилем пользователя
Перейдем в наш общий сетевой каталог с профилями пользователей. Теперь в нем хранится файл вида UVHD-template.vhdx.
Этот файл представляет собой шаблон диска с профилем пользователя. При первом RDP входе пользователя на сервер RDS, этот шаблон копируется и переименовывается в vhdx файл, содержащий в имени SID пользователя.
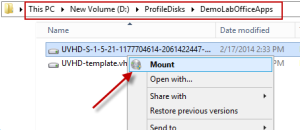
Посмотрим, что представляет собой диск с профилем пользователя. Для этого смонтируем его, щелкнув по vhdx файлу ПКМ и выбрав пункт Mount. Диск UPD можно использовать только в одной сессии на одном RDS хосте (монопольный доступ). Вы не сможете смонтировать UPD VHDX диск, если в настоящий момент его использует пользователь на RDS сервере).
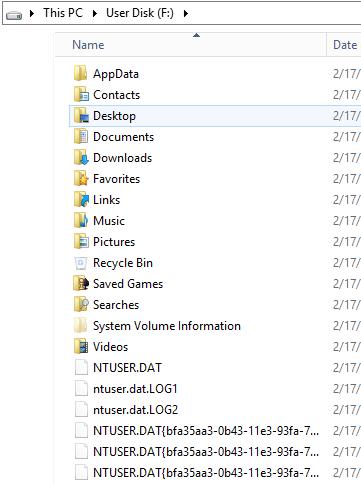
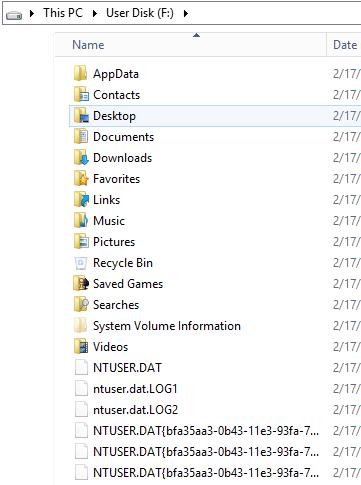
На стороне сервера RD Session Host .vhdx файл пользователя монтируется в каталог C:users<username> и выглядит таким образом:
Обратите внимание, что UPD диск привязан к версии Windows RDS сервера. Вы не сможете перенести UPD профиль пользователя с RDS сервера с одной версии Windows Server на другую.
Запись данных в файл vhdx ведется в реальном времени. Т.е. при копировании данных в профиль пользователя на сервере RDS, размер vhdx файла на общем хранилище увеличивается сразу.
В том случае, если в системе уже присутствует каталог с профилем пользователя, каталог со старым профилем переименовывается в формат <username>-BACKUP-<number>.
VHDX диск монтируется при старте сессии пользователя на VDI или RDS сервере. Список подключенных UPD дисков с профилями можно вывести с помощью утилиты mountvol.
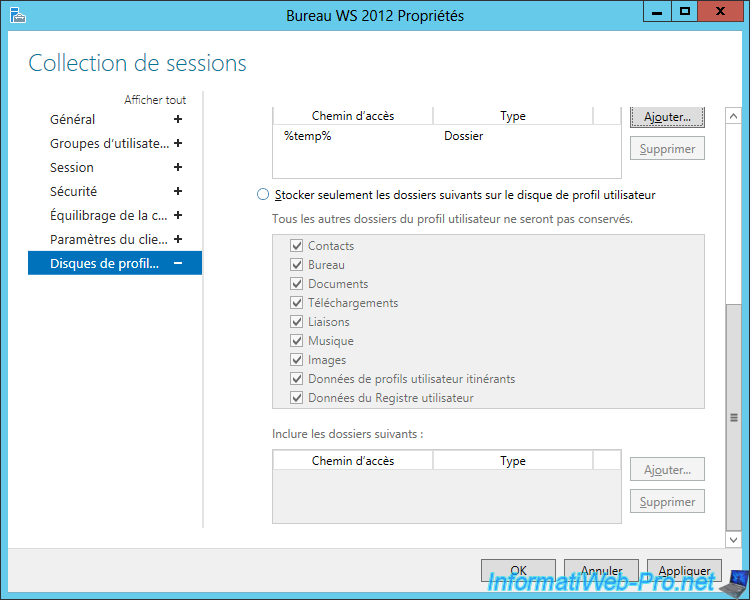
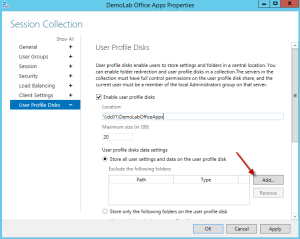
По-умолчанию диск с пользовательским профилем содержит в себе все содержимое профиля пользователя. Однако, в настройках RDS коллекции можно исключить определенные папки из списка синхронизируемых каталогов, либо указать, что должны сохранятся только определённые папки. Таким образом все изменения, которые вносятся в терминальной сессии пользователя в список исключенных папок профиля, не сохраняются на vhdx диске в сетевом каталоге.


Как расширить диск User Profile Disk с помощью PowerShell
Вы можете расширить виртуальный vhdx диск с UPD профилем конкретного пользователя с помощью PowerShell командлета Resize-VirtualDisk из модуля Hyper-V.
Net use U: \srv01DemoLabOficeApps
Resize-VHD -Path u:UVHD-<SID>.vhdx -SizeBytes 30GB
Net use U: /delete
Если вы используете командлет Resize-VHD с рабочей станцией под Windows 10, то в системе необходимо установить роль Hyper-V -> ПлатформаHyper-V -> Службы Hyper-V.
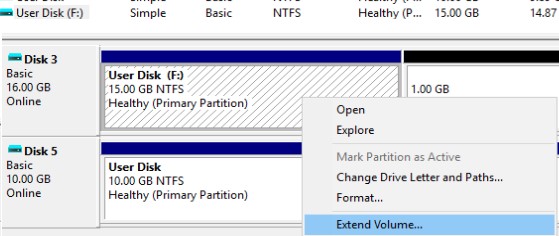
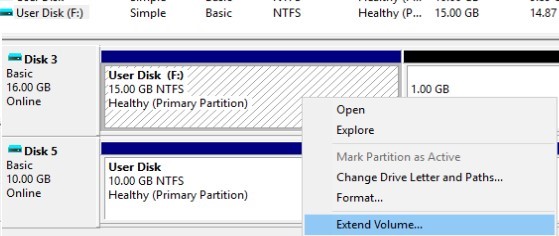
Теперь нужно расширить диск из графического интерфейса консоли Управления дисками (Disk Manager). Действие –> Подключить виртуальный жесткий диск -> Расширить том.
Либо воспользуйтесь таким PoSh скриптом:
<#
.Synopsis
This script extend size of VHDX file and resize the disk partition to Max
#>
Param(
[Parameter(Mandatory=$true,ValueFromPipeline=$true)]
[alias("Path")]
[string]$vhdxFile,
[Parameter(Mandatory=$true,ValueFromPipeline=$true)]
[alias("Size")]
[int64]$vhdxNewSize
)
begin{
try {
Mount-VHD -Path $vhdxFile -ErrorAction Stop
 }
catch {
Write-Error "File $vhdxFile is busy"
Break
}
$vhdx = Get-VHD -Path $vhdxFile
if ($vhdx.Size -ge $vhdxNewSize){
Write-Warning "File $vhdxFile already have this size!"
$vhdx | Dismount-VHD
Break
}
}
process{
Dismount-VHD -Path $vhdxFile
Resize-VHD -Path $vhdxFile -SizeBytes $vhdxNewSize
$vhdxxpart = Mount-VHD -Path $vhdxFile -NoDriveLetter -Passthru | Get-Disk | Get-Partition
$partsize = $vhdxxpart | Get-PartitionSupportedSize
$vhdxxpart | Resize-Partition -Size $partsize.SizeMax
}
end{
Dismount-VHD -Path $vhdxFile
}
Обратите внимание, что нельзя расширить UPD диск пользователя с активной RDS сессией.
Чтобы уменьшить размер файла UPD (при условии, что вы удалили данные пользователя внутри vhdx файла и размер файлов на диске меньше выделенного ему размера) можно воспользоваться командами:
resize-VHD \srv01DemoLabOficeAppsUVHD-<SID>.vhdx –ToMinimumSize
А затем:
Optimize-vhd -path \srv01DemoLabOficeAppsUVHD-<SID>.vhdx -mode full
Итак, мы рассмотрели основные особенности работы технологии User Profile Disks в RDS/VDI решениях на базе Windows Serer 2016 и 2012 R2. Настройка UPD намного проще чем процесс настройки перемещаемых профилей и перенаправляемых папок. Диски привязаны к коллекции RDS и не могут повредиться при попытке совместного использования профиля несколькими терминальными серверами (в отличии от обычных профилей). Диски профилей пользователей могут храниться на SMB шарах, CSV, SOFS, в SAN или на локальных дисках. Также Microsoft отмечает, что скорость загрузки рабочей среды пользователя в случае использования UPD уменьшается.
Если вы планируете использовать для хранения UPD профилей DFS сервера, то имейте в виду, что на них должна использоваться Windows Server 2012 R2. При использовании предыдущих версий Windows Server вы получите ошибку:
Unable to enable user disks on rVHDShare. Could not create template VHD. Error Message: The network location "\winitpro.runamespaceUPD1" is not available.
Также на стороне файлового сервера желательно использовать версию SMB 3.02 (Windows Server 2012 R2) или выше.
В любом случае, т.к. технология User Profile Disks относительно свежая, рекомендуется перед крупными внедрениями UPD откатать их работу и возможные проблемы в тестовой среде.
Table of Contents
- Preparation
- Configuration Steps
- 1. New folder
- 2. Setup share
- 3. Session collection
- 4. Enabling user profile disks
- Template
- Administrative access
- Credits
- Download from Gallery
Preparation
The following steps assume that you already have a basic Session-Based Desktop Deployment running, with an RD Connection Broker, an RD Web Access and at least 1 RD Session Host. As you probably know these roles can run on a single Windows Server 2012 box.
We also assume that a basic Deployment and Session Collection have been created. Besides basic deployment the only prerequisite for setting up UPD is having a central share where we can store the User Profile Disk itself. In this demo we’ll be using a virtual
machine running Windows Server 2012.
Configuration Steps
1. New folder
We create a new folder, in our case U:UPD
Figure 1: UPD folder
2. Setup share
Using the Server Manager console we create a new share. We won’t go over all the steps there, basically, we create a SMB share using the wizard, and leave the permissions intact. We then browse to the path to make sure it accessible.
Figure 2: UPD Share
3. Session collection
Within the Server Manager we open the Remote Desktop Services Management (RDMS), and open the properties of the Session Collection.
Figure 3: Session Collection Properties
4. Enabling user profile disks
We select the User Profile Disks tab, and select “Enable user profile disks”.
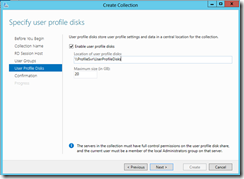
We then provide the UNC path of the share we just created, provide a maximum size, and (as a first step) we configure to store all user settings and data inside the profile disk.
Figure 4: User Profile Disk properties
That’s all for the configuration.
Template
When we go back to the share, we’ll see that a new file has been created called UVHD-template.vhdx. This is the template file we mentioned earlier in the introduction.
Figure 5: UHVD-template
For every new user that logs on to an RD Session Host in this Session Collection a new .vhdx file will be created based on the template. As you can see the users GUID will be used in the name of the file.
Note: Obviously searching for a specific UPD file is not that easy, since the filename consists of the users SiD. There is a PowerShell script on TechNet Gallery to get an overview about what user is connected to what UPD file:
Retrieve usernames for a User Profile Disks (UPD) share in VDI environment
Figure 6: UHVD files per user
As described earlier in the introduction, on the RD Session Host servers the .vhdx file is mounted underneath C:users<username>. Also, note that UPD makes sure that if an existing cached copy of a roaming profile is in place it will create a backup, by
renaming that folder to <username>-BACKUP-<number>. Since this is a mounted volume, it’s fully transparent for applications that need to read and write to the profile.
Figure 7: Mount point in C:Users<username>
Administrative access
When the user that owns the .vhdx is not logged on, administrators are also able to simply mount the .vhdx file to see what’s inside and even make modifications if necessary. Just be sure to unmount the file again before the user logs on again.
Figure 8: Mount a .VHDX file
Credits
Source:
http://virtualizationadmin.com/articles-tutorials/vdi-articles/general/working-with-user-profile-disks-on-session-based-desktop-deployments.html
Download from Gallery
Script to show users names per UPD file:
Retrieve usernames for a User Profile Disks (UPD) share in VDI environment
User Profile Disks (UPD) is a new feature of Remote Desktop Services in Windows Server 2012. User Profile Disks is an alternative to roaming profiles and folder redirection in the RDS scenarios. The point of UPD is that user and apps data (i. e., a user profile) are stored as a separate VHDX disk on dedicated file on the network shared folder. This virtual disk is mounted to the user session as soon as the user signs in to the RDS server, and unmounted when he logs out (all changes to the user profile are saved to the vhdx disk).
In this article, we’ll describe how to configure and use User Profile Disks on a server with Remote Desktop Services role running on Windows Server 2012 / 2012 R2 / 2016.
Contents:
- Configuring User Profile Disks on Windows Server RDS
- UPD: User profile as VHDX file
- Resizing User Profile Disks Using PowerShell
Configuring User Profile Disks on Windows Server RDS
First of all, it is necessary to create a shared folder on any corporate file server to store user profiles as VHDX disk (if you want to have high availability for UPD disks, you can place UPD files on a clustered file resource). In our example, the path to this folder looks like this: \rdvh1DemoLabOficeApp. Servers being a part of RDS collection have to be given full access permission to access this shared folder.
Tip. In a single RDS collection, there can exist only one VHDX profile file for one user. If a user connects to the resources from two different collections, a separate profile disk should be created for each of them.
User Profile Disks mode can be enabled and configured in the collection settings of Remote Desktop Services. This mode can be enabled when creating a new collection, or you can come back to it later.

In our example, the collection already exists, so in the Server Manager console, select this collection and in the upper left corner click Tasks -> Edit Properties.
Then in User Profile Disks section check Enable user profile disks, specify the path to the previously created shared folder (\rdvh1DemoLabOficeApps) and a maximum profile disk size (let it be 20 GB). Save the changes.
After you saved the changes, make sure that NTFS permissions for Profile Disks folder have been changed. In our case, the collection consists of one RDSH01 server, which is granted full control permission.
Full Control permissions has been granted to the RDSH01 server on the shared folder level.
When adding new RD Session Host servers to the RDS collection, the wizard automatically changes the folder permissions and gives access to the new servers. It is very convenient, since when scaling a terminal farm you don’t need to remember to set permissions for the profile folder.
UPD: User profile as VHDX file
Go to the network shared folder with user profiles. A UVHD-template.vhdx file is now being stored here.
This file is the user profile disk template. When a user logs on to the RDS server for the first time, this template is copied and renamed as a VHDX file, containing user SID in its name.
Tip. To match an UPD file name with the user name, you must use a separate script. For example, ShowUPDFolderDetails.ps1 or you can convert the SID to an account name by using the Get-ADUser cmdlet:
Get-ADUser -Identity S-1-5-21-32549751-3956249758-2943215497-23733695
Let’s see what a user profile disk contains. To do it, right-click the VHDX file and select Mount. The UPD disk can only be used in one session on one RDS host (exclusive access). You can’t mount an UPD VHDX disk if the user is currently using it on the RDS server.
As you can see, the VHDX disk contains a set of folders and files of a standard user profile. At logon, a user gets completely transparent access to the data stored in the profile.
On the side of RD Session Host server, a .vhdx user’s file is mounted to the C:users<username> and looks like this:
Note that the UPD drive is bound to the RDS server Windows OS version. You can’t transfer (use) an UPD user profile from an RDS server from one version of Windows Server to another.
Data is written to the vhdx file in real time. It means that when copying data to a user profile on an RDS server, the size of the vhdx file on the shared storage is incremented immediately.
If the user profile folder already exists in the system, the folder with an old profile is renamed to the <username>-BACKUP-<number>.
The VHDX disk is mounted when the user session starts on a VDI or RDS server. A list of connected UPD disks with profiles can be listed using the mountvol utility.
By default, a User Profile Disk contains all the user profile contents. However, you can exclude certain folders from the list of synchronized directories in the RDS collection settings, or specify that only certain folders should be saved. Thus, all the changes made during the user’s terminal session to the folders in the list of excluded directories are not saved into the VHDX disk on the shared folder.
The second option allows you to configure the saving only the specified directories in the UPD profile.
If necessary, the last option allows you to implement the scenarios for saving the settings of the Start Screen, which are stored in appsfolder.itemdata-ms file. In this example, we have only added the path to AppDataLocalMicrosoftWindows folder as an additional path to be saved in the UPD.
Resizing User Profile Disks Using PowerShell
You can extend the virtual vhdx drive with the user’s UPD profile using the PowerShell cmdlet Resize-VirtualDisk from the Hyper-V module.
Net use U: \rdvh1DemoLabOficeApps

Resize-VHD -Path u:UVHD-<SID>.vhdx -SizeBytes 40GB

Net use U: /delete
If you want to run the Resize-VHD cmdlet from a desktop with Windows 10, you must install the feature Hyper-V -> Hyper-V Platform -> Hyper-V Services.
Now you need to extend the volume from the GUI of the Disk Management console (Action -> Attach VHD -> Extend volume).
Or use following PowerShell script to automatically extend the vhdx file to the maximum available size:
<#

.Synopsis

This script extend size of VHDX file and resize the disk partition to Max

#>

Param(

[Parameter(Mandatory=$true,ValueFromPipeline=$true)]

[alias("Path")]

[string]$vhdxFile,

[Parameter(Mandatory=$true,ValueFromPipeline=$true)]

[alias("Size")]

[int64]$vhdxNewSize

)

begin{

try {

Mount-VHD -Path $vhdxFile -ErrorAction Stop

}

catch {

Write-Error "File $vhdxFile is busy"

Break

}

$vhdx = Get-VHD -Path $vhdxFile

if ($vhdx.Size -ge $vhdxNewSize){

Write-Warning "File $vhdxFile already have this size!"

$vhdx | Dismount-VHD

Break

}

}

process{

Dismount-VHD -Path $vhdxFile

Resize-VHD -Path $vhdxFile -SizeBytes $vhdxNewSize

$vhdxxpart = Mount-VHD -Path $vhdxFile -NoDriveLetter -Passthru | Get-Disk | Get-Partition

$partsize = $vhdxxpart | Get-PartitionSupportedSize

$vhdxxpart | Resize-Partition -Size $partsize.SizeMax

}

end{

Dismount-VHD -Path $vhdxFile

}
Note that you can’t extend the user’s UPD disk with an active RDS session.
To reduce the size of the UPD file (assuming that you deleted the user’s data inside the vhdx file and the file size on the disk is less than the size assigned to it), you can use the commands:
resize-VHD \rdvhDemoLabOficeAppsUVHD-<SID>.vhdx –ToMinimumSize
And then:
Optimize-vhd -path \rdvh1DemoLabOficeAppsUVHD-<SID>.vhdx -mode full
So, we have discussed the major peculiarities of User Profile Disks in RDS/VDI solutions running Windows Server 2016 and 2012 R2. UPD configuration is much easier than the configuration of roaming profiles or redirected folders. The disks are connected to the RDS collection and can’t be damaged when using the shared profile by several servers (unlike the standard profiles). The User Profile Disks can be stored in SMB shares, CSV, SOFS, SAN or on the local disks. Also, Microsoft notes that the speed of loading the user’s desktop environment in case of using UPD is reduced.
If you are planning to store UPD profiles on DFS servers, be aware that they must have Windows Server 2012 R2 installed. If you are using previous versions of Windows Server, you will get an error:
Unable to enable user disks on rVHDShare. Could not create template VHD. Error Message: The network location "\woshub.comnamespaceUserProfileDisk" is not available.
Also it is desirable to use the version SMB 3.02 on the file server side (Windows Server 2012 R2) or higher.
Anyway, since User Profile Disks is a relatively new technology, prior to mass UPD implementations, it is recommended to test their work and possible problems in a test environment.
RDS User Profile Disks are an alternative to roaming profiles and folder redirection in the RDS scenarios.
As part of our Server Management Services, we assist our customers to setup User Profile Disk in Windows.
Today, let’s see some of its benefits and how our Support Engineers configure it.
User Profile Disks (UPD)
User Profile Disks (UPD) is a new feature of Remote Desktop Services in Windows Server 2012.
The whole point of UPD is to store user and apps data in a separate VHDX disk on the network shared folder. This virtual disk is mounted to the user session as soon as we sign in to the RDS server, and unmounted when we log out.
Let us now focus on some key suggestions from our Support Engineers.
Benefits of RDS User Profile Disks
- Configuration and deployment is simple
- Maintain on pooled virtual desktops that get rolled back after logoff
- Less logon and logoff time
- Specific to the collection, cannot use on multiple computers simultaneously
- Administrators can have granular control of exactly which locations get saved to the virtual hard disk (VHDX)
- Stored on Server Message Block (SMB) shares, cluster shared volumes, SANs, or local storage.
Points to note before we configure RDS User Profile Disks
- User profile disks are for a single collection.
A user connecting to two different collections will have two separate profiles;
- Properties are set automatically upon creation and contain all profile data and registry settings by default.
These properties can be defined prior to creation or after in the ‘Session Collection’ properties from ‘Server Manager’;
- A form of central file share is required as the UNC path of this share is to provide in the wizard during initial configuration.
One major benefit of these file shares is that when more RDS hosts are added to support the collection, those hosts automatically add to the ACL of the share, not requiring an administrator to take any action in modifying security permissions;
- Single session.
If a user logs into one RDS host, they cannot connect to another and they cannot have more than one session active on a single host;
- User Profile Disks are created using a naming scheme that corresponds to a user’s GUID and makes identifying the UPD associated with a user a very risky task.
Best practices when working with RDS User Profile Disks
Given that a user will have a UPD respective to each collection, each will therefore require respective file shares. It’s advisable to name each file share according to the collection with which it associates.
Leverage the benefits of new file server technology in Server 2012 R2 – Scale Out File Server (SOFS)
+ SOFS differs from clustered file servers in that all file shares on all nodes are always active instead of being active on one node at any given time – active/active instead of active/passive
Configuring RDS User Profile Disks on Windows
First of all, it is necessary to create a shared folder on any corporate file server to store user profiles as VHDX disk.
For example, the path to our folder will be: \rdvh1DemoLabOficeApp.
Servers which are a part of RDS collection should have full access permission to access this shared folder.
In a single RDS collection, there can exist only one VHDX profile file for one user. If a user connects to the resources from different collections, we should create a separate profile disk for each.
We can configure RDS User Profile Disks in the collection settings of Remote Desktop Services. We can enable this mode while creating a new collection.
In our example, the collection already exists, so in the Server Manager console, we select this collection and in the upper left corner click Tasks -> Edit Properties.
Here. in User Profile Disks section we ‘Enable’ user profile disks, specify the path to the previous shared folder (\rdvh1DemoLabOficeApps) and a maximum profile disk size. Then we save the changes.
Once done, we make sure to change NTFS permissions for Profile Disks folder. In our case, the collection consists of one RDSH01 server, which has full control permission.
Hence, a full Control permissions is given to the RDSH01 server on the shared folder level.
When we add new RD Session Host servers to the RDS collection, the wizard automatically changes the folder permissions and gives access to the new servers.
It is very convenient, since when scaling a terminal farm we do not need to remember to set permissions for the profile folder.
[Need help to configure RDS User Profile Disks on Windows? We are available 24*7]
UPD: User profile as VHDX file
First, we have to go to the network shared folder with user profiles. There is a UVHD-template.vhdx file. This file is the user profile disk template.
When a user logs on to the RDS server for the first time, this template copies and renames as a VHDX file, with user SID in its name.
To match an UPD file name with the user name, we must use a separate script.
For example, we can convert the SID to an account name by using the Get-ADUser cmdlet:
Get-ADUser -Identity S-1-5-21-32549751-3956249758-2943215497-23733695-
What does User profile disk contain?
Right-click the VHDX file and select Mount. The UPD disk can only be used in one session on one RDS host (exclusive access). We cannot mount an UPD VHDX disk if the user is currently using it on the RDS server.
As we can see, the VHDX disk contains a set of folders and files of a standard user profile. At logon, a user gets completely transparent access to the data in the profile.
On the side of RD Session Host server, a .vhdx user’s file is mounted to the C:users and looks like this:
Note that the UPD drive is bound to the RDS server Windows OS version. We cannot transfer (use) an UPD user profile from an RDS server from one version of Windows Server to another.
Data is written to the vhdx file in real time. When copying data to a user profile on an RDS server, the size of the vhdx file on the shared storage increments immediately.
If the user profile folder already exists in the system, the folder with an old profile renames to the -BACKUP-.
The VHDX disk is mounted when the user session starts on a VDI or RDS server. A list of connected UPD disks with profiles can be listed using the mountvol utility.
-
The three options:
By default, a User Profile Disk contains all the user profile contents. However, we can exclude certain folders from the list of synchronized directories in the RDS collection settings.
Thus, all the changes made during the user’s terminal session to the folders in the list of excluded directories are not saved into the VHDX disk on the shared folder.
The second option allows us to save only specific directories in the UPD profile.
If necessary, the last option allows us to implement the scenarios for saving the settings of the Start Screen, in appsfolder.itemdata-ms file.
In this example, we have only added the path to AppDataLocalMicrosoftWindows folder as an additional path to be saved in the UPD.
[Stuck with User Profile Disks? We are here for you]
Resizing RDS User Profile Disks Using PowerShell
We can extend the virtual vhdx drive with the user’s UPD profile using the PowerShell cmdlet Resize-VirtualDisk from the Hyper-V module.
Net use U: \rdvh1DemoLabOficeApps
Resize-VHD -Path u:UVHD-.vhdx -SizeBytes 40GB
Net use U: /delete
If we want to run the Resize-VHD cmdlet from a desktop with Windows 10, we must install the feature: Hyper-V -> Hyper-V Platform -> Hyper-V Services.
Now we need to extend the volume from the GUI of the Disk Management console (Action -> Attach VHD -> Extend volume).
Or we use the following PowerShell script to automatically extend the vhdx file to the maximum available size:
<#
.Synopsis
This script extend size of VHDX file and resize the disk partition to Max
#>
Param(
[Parameter(Mandatory=$true,ValueFromPipeline=$true)]
[alias(“Path”)]
[string]$vhdxFile,
[Parameter(Mandatory=$true,ValueFromPipeline=$true)]
[alias(“Size”)]
[int64]$vhdxNewSize
)
begin{
try {
Mount-VHD -Path $vhdxFile -ErrorAction Stop
}
catch {
Write-Error “File $vhdxFile is busy”
Break
}
$vhdx = Get-VHD -Path $vhdxFile
if ($vhdx.Size -ge $vhdxNewSize){
Write-Warning “File $vhdxFile already have this size!”
$vhdx | Dismount-VHD
Break
}
}
process{
Dismount-VHD -Path $vhdxFile
Resize-VHD -Path $vhdxFile -SizeBytes $vhdxNewSize
$vhdxxpart = Mount-VHD -Path $vhdxFile -NoDriveLetter -Passthru | Get-Disk | Get-Partition
$partsize = $vhdxxpart | Get-PartitionSupportedSize
$vhdxxpart | Resize-Partition -Size $partsize.SizeMax
}
end{
Dismount-VHD -Path $vhdxFile
}
Note that we cannot extend the user’s UPD disk with an active RDS session.
To reduce the size of the UPD file, we can use the commands:
resize-VHD \rdvhDemoLabOficeAppsUVHD-.vhdx –ToMinimumSizeAnd then:
Optimize-vhd -path \rdvh1DemoLabOficeAppsUVHD-.vhdx -mode fullSo, we have discussed the major peculiarities of User Profile Disks in RDS/VDI solutions running Windows Server 2016 and 2012 R2.
UPD configuration is much easier than the configuration of roaming profiles or redirected folders. The disks connects to the RDS collection and cannot damage while using the shared profile by several servers.
We can store the User Profile Disks in SMB shares, CSV, SOFS, SAN or on the local disks.
If we are planning to store UPD profiles on DFS servers, we must install Windows Server 2012 R2. If we are using previous versions of Windows Server, we will get an error:
Unable to enable user disks on rVHDShare. Could not create template VHD. Error Message: The network location “\bobcares.comnamesp
Also it is desirable to use the version SMB 3.02 on the file server side (Windows Server 2012 R2) or higher.
Anyway, since User Profile Disks is a relatively new technology, prior to mass UPD implementations, we recommend to test their work and possible problems in a test environment.
[Need assistance to configure RDS User Profile Disks? We are happy to help.]
Conclusion
In short, RDS User Profile Disks is an alternative to roaming profiles and folder redirection in the RDS scenarios. Today, we saw how our Support Engineers configure the same.
PREVENT YOUR SERVER FROM CRASHING!
Never again lose customers to poor server speed! Let us help you.
Our server experts will monitor & maintain your server 24/7 so that it remains lightning fast and secure.
GET STARTED
var google_conversion_label = «owonCMyG5nEQ0aD71QM»;
When you create a collection on an RDS infrastructure to publish RemoteApp desktops or programs, you’ve probably noticed that you can enable user profile disks
These user profile disks allow your users to back up data from the desktops and/or RemoteApp programs published from your RDS server and retrieve them later on their next connections.
Because RDS collections can group multiple session hosts, it’s important that their data be kept in the same place and not on the session host server your user arrives at.
In addition, to avoid conflicts and various problems, it’s recommended that you store these user profile disks in different network shares or folders for each collection (1 network share or 1 folder per collection).
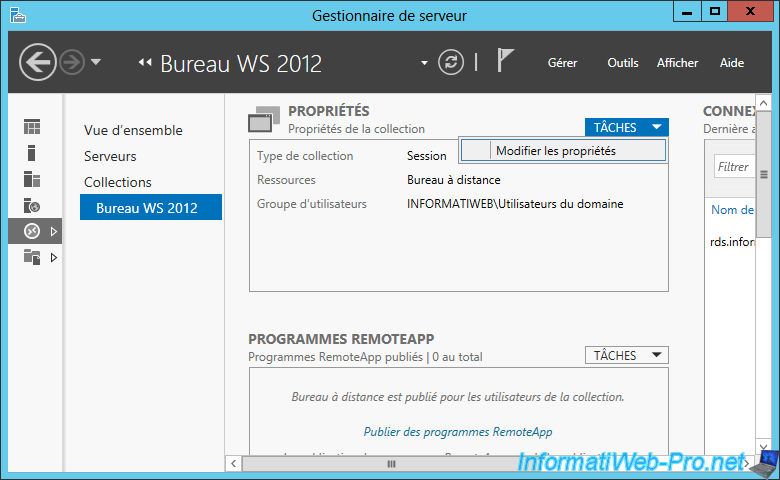
To enable, disable, or change the settings for these user profile disks, select the desired collection, and then click : Tasks -> Edit properties.
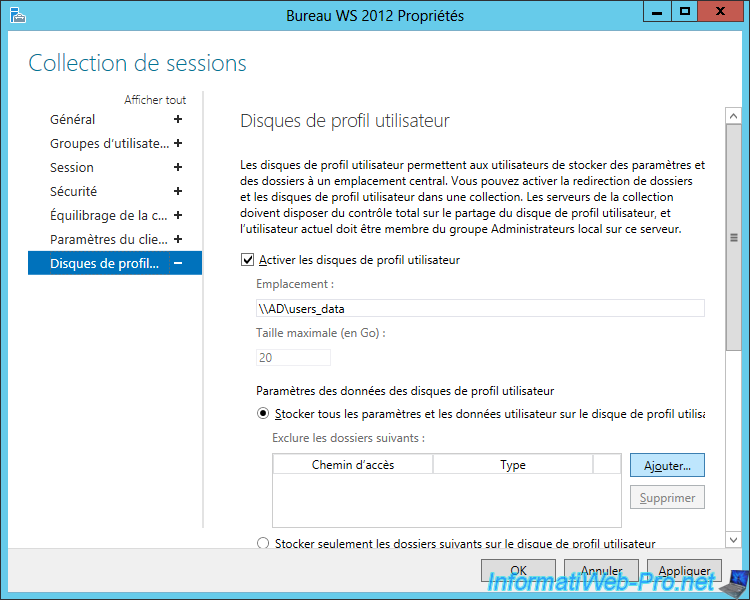
Go to the «User Profile Disks» section and check the «Enable user profile disks» box to enable them for this collection.
Create a shared folder on a file server (preferably highly available), then specify its network path in the «Location» box.
For more information, see our tutorial : Deploy a RDS infrastructure (session-based desktops)
As you can see, you can choose to :
- store all user settings and data, then exclude specific folders
- store only specific folders in the user’s profile disk
This choice will essentially depend on the needs of your user and what they can do or not on this desktop or these RemoteApp programs.
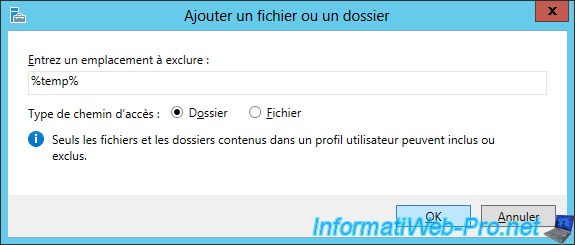
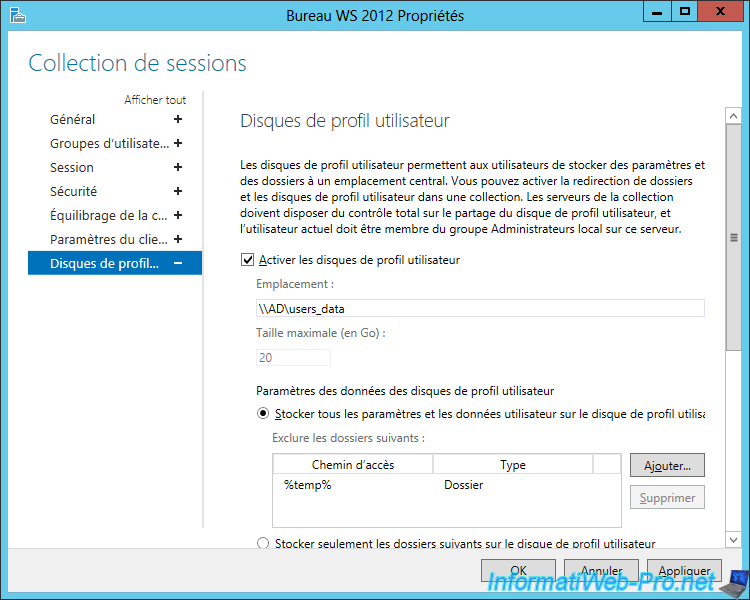
For example, for excluded folders, you can exclude the user’s temporary folder and/or other folders containing temporary files related to RemoteApp programs published in this collection.
If your user is not supposed to back up files from published RemoteApp programs, it may be interesting to choose the option «Store only the following folders on the user profile disk» and uncheck the boxes displayed.
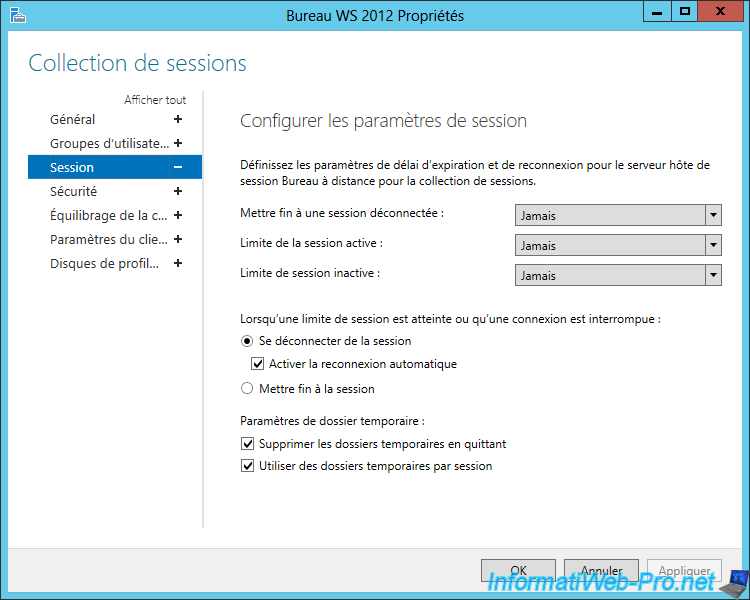
Note that it’s also possible to delete temporary folders when closing the user’s session by going to the «Session» section, then checking the «Delete temporary folders on exit» box.
First published on CloudBlogs on Nov, 13 2012
Hi, this is Rob Leitman. I’m a developer working on the Remote Desktop Virtualization team. This post describes the new user data management available in Windows Server 2012.
In an earlier post, we described the different options for
profile management in Windows Server 2008 R2
. For Windows Server 2012, we wanted to find a simpler way to manage user data—compared to using roaming profiles,
UE-V
, or folder redirection. (Of course, these technologies can be used together fruitfully. For more information, see
User State Virtualization
.)
The simpler way is user profile disks. User profile disks store user and application data on a single virtual disk that is dedicated to one user’s profile. One of the key challenges to pooled virtual desktop deployments is easily maintaining the user settings and data; this is because this information is discarded at logoff when a pooled virtual desktop image is rolled back to its initial state. User profile disks provide an easy way to store the user settings and data on a separate virtual disk that is reattached at logon, so the user data isn’t discarded when the virtual machine rolls back.
User profile disks are completely transparent to the user—users can save documents to their Documents folder (on what appears to be a local drive) and change their background wallpaper and app settings while, at the same time, all personal settings persist when connecting to different computers in a virtual desktop collection or session collection.
This provides Admins with the reduced management and storage benefits of pooled virtual desktops while still providing the personalization of personal virtual desktops.
User profile disks offer several advantages:
- Configuration and deployment is simpler than roaming profiles or folder redirection.
- User profiles can be maintained even on pooled virtual desktops that get rolled back after logoff.
- Logon and logoff times are reduced.
- Previously, profiles could be corrupted if used simultaneously on multiple computers. User profile disks are specific to the collection, so they can’t be used on multiple computers simultaneously.
- Administrators can have granular control of exactly which locations get saved to the virtual hard disk (VHDX).
- User profile disks can be stored on Server Message Block (SMB) shares, cluster shared volumes, SANs, or local storage.
- In pooled virtual desktop collections, user profile disks work with virtual machines running both Windows 8 and Windows 7 with Service Pack 1 (SP1).
Some things to remember about user profile disks:
- User profile disks are available only in pooled virtual desktop collections and session collections—not in personal virtual desktop collections.
- Share permissions are automatically set up by the management tools.
- Use Server Manager or Windows PowerShell to manage user profile disks.
-
User profile disks are for a single collection only. A user connecting to two different collections will have two separate profiles. If you want to synchronize settings, refer to
Microsoft User Experience Virtualization.
Setting up user profile disks
User profile disks can be enabled during session creation by using the wizard in Server Manager, as shown in the following image.
When you enable user profile disks, the ACL on the storage location will be set automatically.
To set properties for all user profile disks, click the collection in Server Manager, click
Tasks
in the Properties pane, and then click
Edit Properties
. Now, click
User Profile Disks
in the left pane, as shown in the following image.
These properties may also be set by using the Windows PowerShell cmdlet, as shown in the following command output.
PS C:Windowssystem32> import-module RemoteDesktop
PS C:Windowssystem32> Set-RDSessionCollectionConfiguration –?
NAME
Set-RDSessionCollectionConfiguration
SYNTAX
Set-RDSessionCollectionConfiguration [-CollectionName] <string> -DisableUserProfileDisk
[-ConnectionBroker <string>] [<CommonParameters>]
PS C:Windowssystem32> Set-RDSessionCollectionConfiguration -CollectionName QuickSessionCollection -EnableUserProfileDisk -MaxUserProfileDiskSizeGB 20 -DiskPath ProfileSvrUserProfileDisks
PS C:Windowssystem32>
Following is a list of definitions of the user profile disk properties in Server Manager and the equivalents in Windows PowerShell.
|
|
|
|
|
Enable user profile disks |
EnableUserProfileDisk |
Turn on this feature. |
|
DisableUserProfileDisk |
Turn off this feature. |
|
|
Maximum size (in GB) |
MaxUserProfileDiskSizeGB |
Maximum size of the virtual disk (VHDX) used to store a single user’s profile. |
|
Location |
DiskPath |
Location where all VHDX files are stored. |
|
Store only the following folders on the user profile disk / Include the following folders |
IncludeFolderPath |
List of folders in the user profile that will be preserved on the user profile disk. All other folders in the user profile will not be preserved. |
|
IncludeFilePath |
List of files in the user profile that will be preserved on the user profile disk. All other files in the user profile will not be preserved. |
|
|
Exclude the following folders |
ExcludeFolderPath |
List of folders in the user profile that will not be preserved on the user profile disk. All other folders in the user profile will be preserved. |
|
ExcludeFilePath |
List of files in the user profile that will not be preserved on the user profile disk. All other files in the user profile will be preserved. |
Note
: If you set
IncludeFolderPath
and/or
IncludeFilePath
, you may not set
ExcludeFolderPath
and/or
ExcludeFilePath
. Likewise, if you set
ExcludeFolderPath
and/or
ExcludeFilePath
, you may not set
IncludeFolderPath
and/or
IncludeFilePath
.
How user profile disks work
During first logon, a virtual disk (VHDX) is created from a
template disk
. This VHDX is attached to the virtual machine or RD Session Host server that the user is logging on to. The profile service is then notified to use this VHDX as the location for the user’s profile. When the user logs off, the VHDX is then detached from the virtual machine.
By default, the
entire user’s profile
is stored on the user profile disk. This includes the Documents folder, the user’s registry hive (holds application and Windows settings), and
much more
.
On subsequent logons to the collection, the VHDX is remounted to whatever virtual machine or RD Session Host server the user is logging on to. The user then has access to everything in his or her profile, even if this is a different virtual machine, or if the virtual machine has been rolled back to a clean state between logons.
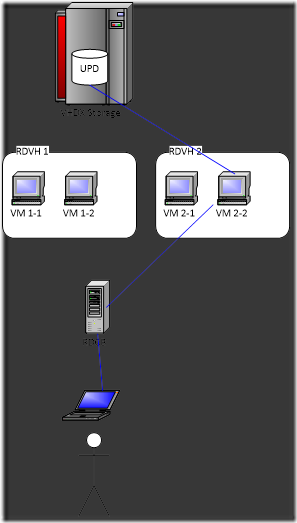
The following diagrams show how the VHDX moves as necessary to follow the user in a session-based desktop deployment:
1. On the initial logon, the user gets a session on RDSH1, and the user profile disk VHDX gets mounted as a drive on RDSH1.
2. On the next logon, the user gets a session on RDSH2, and the user profile disk VHDX is now mounted as a drive on RDSH2.
The same storage is used in both cases, so the user’s profile follows their session.
The process is similar for a virtual machine-based desktop deployment:
1. On the initial logon, the user initially gets assigned VM 1-1 on RDVH 1. The user profile disk is attached to the virtual machine that the user logs on to.
2. On the next logon, the user gets assigned to VM 2-2. (Due to rollback, all virtual machines are identical, so this works on any virtual machine the user gets—regardless of the RD Virtualization Host server to which that virtual machine belongs.) The user profile disk follows the user and is attached to VM 2-2.
Troubleshooting
To verify that user profile disks are working, you can run the
mountvol
command inside the user session without any parameters. This will show you a disk mounted at the location of the user’s profile, as shown here.
PS C:Userstestuser2> mountvol
Creates, deletes, or lists a volume mount point.
Possible values for VolumeName along with current mount points are:
?Volume{133621a2-d761-11e1-93e8-806e6f6e6963}
C:
?Volume{ac90ee68-0044-11e2-93f9-0019b9168fa8}
C:Userstestuser2
In addition, you can look in the user profile disk location and see the VHDX created for the user with the user’s SID contained in the file name, as shown in the following output.
PS C:Userstestuser2> dir contoso3userprofiledisks
Directory:
contoso3userprofiledisks
Mode LastWriteTime Length Name
—- ————- —— —-
-a— 9/21/2012 3:28 PM 239075328 UVHD-S-1-5-21-1602883023-82254803-4017812817-1606.vhdx
-a— 9/21/2012 3:12 PM 205520896 UVHD-template.vhdx
Summary
User profile disks offer many advantages for managing user profiles. I hope you take some time to try them out.
NOTE: Questions and comments are welcome. However, please DO NOT post a request for troubleshooting by using the comment tool at the end of this post. Instead, post a new thread in the
RDS & TS forum
.
Applies to: Windows Server 2012 and 2012 R2
Managing user profiles can be a big headache in any RDS deployment. Let’s face it, if you are not using a 3rd party solution to manage user settings, you are more likely to run into problems. The most common setup we see is the dreaded roaming profile solution. Well, Microsoft finally understands the issues people run into with profiles. So, with Server 2012 they have created their own solution which integrates directly into RDS as well as VDI. This new solution is called User Profile Disks.
User profile disks centrally store user and application data on a single virtual disk that is dedicated to one user’s profile. When the user logs on, their profile disk is attached to their session and detached when the user logs out. With this process, there is no copying of files on logon or logoff. Is this the most ideal solution for capturing user settings? No, but it’s simple, free, and better than using roaming profiles. The following will cover the process of enabling and configuring User Profile Disks for an RDS environment.
Requirements:
File Share per RDS Collection RDS CollectionIn a previous article, we looked at Collections, which give you the ability to group a set of RD Session Host servers with a common set of applications and publish them to users. These can be RemoteApp programs or Session Host and VDI desktops. Within these collections, you can enable and configure user profile disks. This can be done either at the creation of the collection or at a later time after the collection has been created. For our example, we will configure our user profile disks after the collection has been created.
Here is a screenshot of the User Profile Disk screen during the creation of the collection:
If the user profile disk was not configured while the collection was being created, you can go to the properties of the collection and edit the user profile disks there. But let’s not get ahead of ourselves yet. Before we begin configuring our user profile disks, we will first need a file share to house them. For this example I’ve created a new shared folder called: \dc01DemoLabOfficeApps. I named the folder the same name as my collection since user profile disks are for a single collection only. So if a user is connecting to resources from two different collections, the user will have two separate profiles. As a best practice measure, I named the share the same name as the collection which will make things easier in the event I need to troubleshoot an issue. When you create the folder share, you can use the default share permissions which is everyone: read.
After the shared folder is created, open Server Manager and within the Remote Desktop Services node, select the Collection. In the top right within the properties section, click on tasks and select Edit Properties.
In the user profile disk window, go ahead and enable user profile disks and enter the shared folder path. Then hit apply.
Once it’s completed, let’s go back and look at the security permissions of our profile disk share. Here you can see the RD Session Host RDSH01 which is the only server part of the collection, now has full control to the folder:
And if we look at the share permissions, RDSH01 has full control as well.
At any point, if I decide to add more RD Session Host servers to the collection, the wizard will automatically modify the security of the folder and give full control to the new session host servers’ computer account(s). That is one less thing for an admin to think about when they are adding new hosts into a collection.
Go ahead and open the folder. There you will see a new file called UVHD-template.vhdx.
This template will be used to create the user’s profile disk. After a user logs in for the first time, a new vhdx file will be created with the user’s SID as part of the file name.
So from the outside, when we look our user profile disk folder, we will just see a bunch of vhdx files with the user’s SID as the name. It would be nice to have an option to name the profile disks with the user’s username.
Lets go ahead and take a look inside the user’s profile disk. If we right click on the user’s vhdx file (disk), we can select the option to Mount the vhdx disk. (The disk will not mount if the user is currently logged into the collection. Also, if the share permissions are kept at the default which is read-only for everyone, you will need to go directly to the file location bypassing the shared folder)
Once the disk is mounted, it looks like nothing more than a regular user profile. If the user is logged in and browses to their profile, it will be transparent to them as well. The icon is only slightly different.
When using the default settings, the user’s profile disk will contain everything that is in a user profile.
However, you have the option of changing this. If there were certain folders you wish to exclude from the user profile disk, you can do so by adding the path under the “Exclude the following folders” section. When a user logs out, any folder in the exclusion list will not be preserved.
Another option you have is to only store specific folders on the user profile disk. Lets look at a scenario where we only wanted to keep the user’s roaming data for the user’s profile. This means folders like appdatalocal would automatically be excluded and not preserved when a user logs out. Here I have selected to only keep the user’s roaming profile and registry data.
When the user logs in, their profile will look normal within their session, but after the user logs out, their profile disk will look like the following:
And if we look under the appdata folder, we will only see the roaming directory.
This option is great since it is focusing on the real important pieces of a user’s profile, however in some cases this can cause problems, especially if the users are connecting to a desktop with a customized Start Screen. They will lose their settings once they log off because these settings are held within a file called appsFolder.itemdata-ms located in the directory (AppDataLocalMicrosoftWindows). Since we have the user profile disks configured for the roaming data of a user’s profile only, we will need to include this folder to our user profile disks. To do so, click on the add button and add the directory (AppDataLocalMicrosoftWindows).
Once completed, the directory (AppDataLocalMicrosoftWindows) will now be preserved in the user’s profile disk.
As you can see, user profile disks are very easy to setup and configure. Its a great out of the box feature for any 2012 RDS/VDI deployment. However, regardless of what profile solution is used, all common best practices should still be applied which includes the use of folder redirection.
© 2014 Eddie Kwasnik “the Wolf” All Rights Reserved
This entry was posted on February 24, 2014, 3:15 pm and is filed under MICROSOFT. You can follow any responses to this entry through RSS 2.0.
You can leave a response, or trackback from your own site.
При использовании дисков профилей User Profile Disk в ферме RD Connection Broker на базе Windows Server 2012 R2 рано или поздно может появиться задача расширения того или иного диска профилей. Выполнить эту задачу можно как с помощью графических средству управления, таких как, консоль Управление дисками (diskmgmt.msc) и Диспетчер Hyper-V (virtmgmt.msc), так и с помощью PowerShell для того, чтобы свести к минимуму пробег мыши. Для непосредственной процедуры расширения VHDX-диска воспользуемся командлетом Resize-VHD из PS-модуля Hyper-V. Для того, чтобы этот командлет отрабатывал без ошибок на рабочей станции с Windows 10, помимо Средств управления Hyper-V мне пришлось доустановить в систему Службы Hyper-V через оснастку Программы и компоненты (appwiz.cpl)
Чтобы сориентироваться в том, какой именно VHDX-файл нам нужно модифицировать в сетевой папке где расположены файлы дисков профилей, узнаем SID доменного пользователя запросившего расширение диска профиля:
Import-Module ActiveDirectory
Get-ADUser petya | Select -Property SID
Зная SID, сформируем полный путь к VHDX-файлу (имя файла формируется как UVHD-<SID>.vhdx) и запишем его в переменную $VDiskPath
В переменную $VDiskNewSize запишем новый размер (увеличенный) виртуального диска в байтах. Перед запуском скрипта на всякий случай сделаем резервную копию модифицируемого VHDX-файла. В процессе расширения диска нам потребуется эксклюзивный доступ к VHDX-файлу, поэтому на время расширения лучше попросить пользователя закрыть сессию в ферме RDS, чтобы диск его профиля не был занят. Выполним скрипт расширения:
Import-Module Hyper-V
#
$VDiskPath = "\MYDOMDFSRootRDS-ProfilesUVHD-S-1-5-21-2988499774-3619934774-1776546648-108997.vhdx"
$VDiskNewSize = 1347420160
[int]$VDiskBusy = 0
#
Try {
  #
  # Check if vdisk busy
  #
  Mount-DiskImage -ImagePath $VDiskPath -ErrorAction Stop
}
Catch{
    Write-Warning "Mount-DiskImage error:`n$_"
    $VDiskBusy = 1
    BREAK
}
#
If ($VDiskBusy -eq 0) {
  #
  Dismount-DiskImage -ImagePath $VDiskPath
  #
  # Resize vdisk
  #
  Resize-VHD -Path $VDiskPath -SizeBytes $VDiskNewSize
  #
  # Mount, extend partition and dismount vdisk
  #
  Mount-DiskImage -ImagePath $VDiskPath
  $VDiskVol = Get-DiskImage –ImagePath $VDiskPath | Get-Disk | Get-Partition | Get-Volume
  $PartSize = Get-PartitionSupportedSize -DriveLetter $VDiskVol.DriveLetter
  Resize-Partition -DriveLetter $VDiskVol.DriveLetter -size $PartSize.SizeMax
  Dismount-DiskImage -ImagePath $VDiskPath
}
В процессе работы скрипта происходит следующее:
А) Выполняется попытка смонтировать диск профиля (соответствующий VHDX-файл), чтобы убедиться в том, что файл не занят другими процессами, например открытой сессией пользователя.
Б) Если попытка монтирования диска прошла без ошибок, диск отсоединяется и выполняется операция увеличения его размера.
В) Диск снова монтируется, выполнятся расширение тома до его максимально возможного размера с последующим отсоединением диска.
В процессе работы скрипта происходящие изменения с виртуальным диском профиля можно наглядно увидеть в графической оболочке – в консоли Управление дисками (diskmgmt.msc)
Обновлено 31.08.2015
Александр Никитин расширил предложенный скрипт:
<#
.Synopsis
   This script extend size VHDVHDX file and resize partition to maximum.
.EXAMPLE
   .Extend-VHD.ps1 -Path c:somevhd.vhdx -Size 5GB
#>
#Requires -Version 3.0
#Requires -RunAsAdministrator
#Requires -Modules Hyper-V
Param(
[Parameter(Mandatory=$true,ValueFromPipeline=$true)]
[alias("Path")]
[string]$VHDPath,
[Parameter(Mandatory=$true,ValueFromPipeline=$true)]
[alias("Size")]
[int64]$VHDNewSize
)

begin{
    try {
        Mount-VHD -Path $VHDPath -ErrorAction Stop
    }
    catch {
        Write-Error "File $VHDPath is busy"
        Break
    }
    $vhd = Get-VHD -Path $VHDPath
    if ($vhd.Size -ge $VHDNewSize){
        Write-Warning "File $VHDPath already have this size!"
        $vhd | Dismount-VHD
        Break
    }
}

process{
    Dismount-VHD -Path $VHDPath
    Resize-VHD -Path $VHDPath -SizeBytes $VHDNewSize
    $partition = Mount-VHD -Path $VHDPath -NoDriveLetter -Passthru | Get-Disk | Get-Partition
    $partsize = $partition | Get-PartitionSupportedSize
    $partition | Resize-Partition -Size $partsize.SizeMax
}

end{
    Dismount-VHD -Path $VHDPath
}
The huge pain with using Profile Disks in Windows Server 2012 RDS is to dealing with TEMP profiles. When the user’s profile corrupts and started creating TEMP user profiles, Admins has to deal with fixing the issue and it’s NOT easy. But if you want to know how to fix it, here it is.
1. Delete User’s profile disk (.VHDX). To find the user’s correct profile disk, you have to check the NTFS security tab in properties of the xxxxx.vhdx file.
2. Check all Remote Desktop Session Host servers C:Users folder to check which server has the corrupt user profile. (hint: check \sessionhostc$users from your computer)
3. Once you find the server, Remote desktop to that server. You will see the following event log message on that server in System Logs.
Remote Desktop Services could not apply a user desktop for a user account with a SID of <GUID>. A temporary profile was enforced for the user. Verify that the user profile disk settings are correct. The error code is 0x800700AA.0
4. Open REGEDIT and expand to HKLMSOFTWAREMicrosoftWindows NTCurrentVersionProfileList
5. Click each sub key section and watch ProfileImagePath value. This value will say username in the path.
6. Once you find the correct key, Delete it.
7. Have user logon again to the RemoteApp or VDI. RDS will create new profile disk.
Hope that fixed your issue. If so, please leave me a thanks note.
Published by —Anand—
Being in Silicon Valley for years, I became a IT Infrastructure Geek by experience and surrounded by other Geeks everywhere. I try to help others by the solutions I found on odd occasions.
View all posts by —Anand—
Published
January 9, 2014May 2, 2014


