Windows 7 Enterprise Windows 7 Home Basic Windows 7 Home Premium Windows 7 Professional Windows 7 Starter Windows 7 Ultimate Windows Server 2008 R2 Datacenter Windows Server 2008 R2 Enterprise Windows Server 2008 R2 Standard Windows Server 2008 R2 Web Edition More…Less
INTRODUCTION
This article describes theWindowsNT Backup Restore Utility for Windows 7and for Windows Server 2008 R2. The utility restores backups that are made on Windows XP and on Windows Server 2003 to computers that are running Windows 7 and Windows Server 2008 R2. To download the utility, go to the «How to obtain this update» section.
Notes
-
Removable Storage Manager (RSM) is no longer included in Windows 7 or in Windows Server 2008 R2. If you want to restore a backup from a tape device, please perform the restore on one of the following operating systems:
-
Windows XP
-
Windows Server 2003
-
Windows Vista
-
Windows Server 2008
-
-
To download the NT Backup Restore Utility for Windows Vista or for Windows Server 2008, visit the following Microsoft Web site:
http://www.microsoft.com/download/details.aspx?FamilyID=7da725e2-8b69-4c65-afa3-2a53107d54a7
-
The Windows NT Backup Restore Utility for Windows 7 and for Windows Server 2008 R2 is not intended to remain on computers that are running Windows 7 and Windows Server 2008 R2 indefinitely and should be removed once you have restored backups that were made on Windows XP and on Windows Server 2003.
More Information
Update information
How to obtain this update
The following files are available for download from the Microsoft Download Center:
|
Operating system |
Update |
|---|---|
|
All supported x86-based versions of Windows 7 |
|
|
All supported x64-based versions of Windows 7 |
|
|
All supported x64-based versions of Windows Server 2008 R2 |
|
|
All supported IA-64-based versions of Windows Server 2008 R2 |
|

For more information about how to download Microsoft support files, click the following article number to view the article in the Microsoft Knowledge Base:
119591 How to obtain Microsoft support files from online services
Microsoft scanned this file for viruses. Microsoft used the most current virus-detection software that was available on the date that the file was posted. The file is stored on security-enhanced servers that help prevent any unauthorized changes to the file.
Prerequisites
To apply this update, your computer must be running one of the following operating system:
-
An English version of Windows 7 or of Windows Server 2008 R2.
-
A non-English version of Windows 7 or of Windows Server 2008 R2 that has the EN-US language pack installed.
You need to install En-Us Language Pack before installing Windows NT Backup Restore Utility if you use non-English environment.
Please see Workaround section for details of how to install this utility on non-English environment.
Registry information
To use the update in this package, you do not have to make any changes to the registry.
Restart requirement
You do not have to restart the computer after you apply this update.
Hotfix replacement information
This update does not replace a previously released update.
File information
The English (United States) version of this update installs files that have the attributes that are listed in the following tables. The dates and times for these files are listed in Coordinated Universal Time (UTC). The dates and times for these files on your local computer are displayed in your local time and with your current daylight saving time (DST) bias. Additionally, the dates and times may change when you perform certain operations on the files.
Windows 7 and Windows Server 2008 R2 file information notes
-
The files that apply to a specific product, milestone (RTM, SPn), and service branch (LDR, GDR) can be identified by examining the file version numbers as shown in the following table:
Version
Product
Milestone
Service branch
6.1.760
0.16xxxWindows 7 and Windows Server 2008 R2
RTM
GDR
-
GDR service branches contain only those fixes that are widely released to address widespread, extremely important issues. LDR service branches contain hotfixes in addition to widely released fixes.
For all supported x86-based versions of Windows 7
|
File name |
File version |
File size |
Date |
Time |
Platform |
|---|---|---|---|---|---|
|
Ntbackuprestoreutility.exe |
6.1.7600.16444 |
866,304 |
20-Oct-2009 |
09:46 |
x86 |
|
Ntbackuprestoreutility.chm |
68,630 |
26-Sep-2009 |
09:48 |
Not Applicable |
|
|
Ntbackuprestoreutility.exe.mui |
6.1.7600.16444 |
153,088 |
20-Oct-2009 |
09:58 |
Not Applicable |
For all supported x64-based versions of Windows 7 and of Windows Server 2008 R2
|
File name |
File version |
File size |
Date |
Time |
Platform |
|---|---|---|---|---|---|
|
Ntbackuprestoreutility.exe |
6.1.7600.16444 |
1,068,544 |
20-Oct-2009 |
09:39 |
x64 |
|
Ntbackuprestoreutility.chm |
68,630 |
26-Sep-2009 |
09:48 |
Not Applicable |
|
|
Ntbackuprestoreutility.exe.mui |
6.1.7600.16444 |
153,088 |
20-Oct-2009 |
09:58 |
Not Applicable |
For all supported IA-64-based versions of Windows Server 2008 R2
|
File name |
File version |
File size |
Date |
Time |
Platform |
|---|---|---|---|---|---|
|
Ntbackuprestoreutility.exe |
6.1.7600.16444 |
2,266,112 |
20-Oct-2009 |
09:30 |
IA-64 |
|
Ntbackuprestoreutility.chm |
68,630 |
26-Sep-2009 |
09:48 |
Not Applicable |
|
|
Ntbackuprestoreutility.exe.mui |
6.1.7600.16444 |
153,088 |
20-Oct-2009 |
09:58 |
Not Applicable |
More Information
After you install the NT Backup Restore Utility, follow these steps to start the utility:
-
Click Start
 .
. -
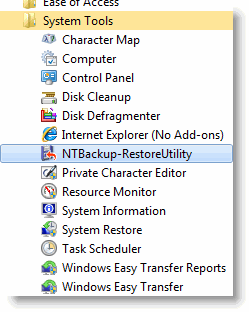
Click All Programs, click Accessories, and then click System Tools.
-
Click NTBackup-RestoreUtility.
-
For instructions about how to use the utility, click Help Topics on the Help menu.
 .
.Workaround
Here are the steps to install Windows NT Backup Restore Utility on non-English environment.
1. Install En-Us Language Pack on non-English environment
Please see following KB when Windows 7 is used.
Windows 7 language packs are available for computers that are running Windows 7 Ultimate or Windows 7 Enterprise
http://support.microsoft.com/kb/972813
En-us language pack can be downloaded from following site when Windows 2008 R2 is used.
Windows Server 2008 R2 Multilingual User Interface Language Packs
a) Download the package from KB974674
b) Start Command Prompt
c) Create temp folder. (Example: C:Temp)
d) Run following command
x86-based versions of Windows 7:
expand -f:* c:Windows6.1-KB974674-x86.msu c:temp
x64-based versions of Windows 7:
expand -f:* c:Windows6.1-KB974674-x64.msu c:temp
x64-based versions of Windows Server 2008 R2:
expand -f:* c:Windows6.1-KB974674-x64.msu c:temp
IA-64-based versions of Windows Server 2008 R2:
xpand -f:* c:Windows6.1-KB974674-ia64.msu c:temp
3. Install Package with pkgmgr as follows (PkgMgr is command line utility):
x86-based versions of Windows 7: pkgmgr /ip /m:c:tempWindows6.1-KB974674-x86.cab
x64-based versions of Windows 7: pkgmgr /ip /m:c:tempWindows6.1-KB974674-x64.cab
x64-based versions of Windows Server 2008 R2:
pkgmgr /ip /m:c:tempWindows6.1-KB974674-x64.cab
IA-64-based versions of Windows Server 2008 R2:
pkgmgr /ip /m:c:tempWindows6.1-KB974674-ia64.cab
Need more help?
Хотя в Windows Vista существует инструмент Windows Easy Transfer для переноса файлов данных со старого компьютера с Windows XP на новый с Windows Vista, есть еще один путь – восстановление из резервной копии.
Хотя в Windows Vista существует инструмент Windows Easy Transfer для переноса файлов данных со старого компьютера с Windows XP на новый с Windows Vista, есть еще один путь – восстановление из резервной копии. Однако, инструмент Backup and Restore (Резервное копирование и восстановление) из Vista абсолютно отличается от аналогичной программы из Windows XP, так что файлы резервных копий не совместимы. Что же делать, если есть необходимость или желание восстановить резервный файл из Windows XP в Windows Vista?
К счастью Microsoft предвидела этот вариант развития событий и предоставила дополнительную утилиту, называемую Windows NT Backup — Restore Utility, предназначенную для резервирования и восстановления, которую можно скачать и установить в Vista. Далее Вы можете ее использовать для восстановления резервных копий, сделанных в ХР, внутри Windows Vista.
Получение дополнительной утилиты.
Вы можете загрузить Windows NT Backup — Restore Utility с Центра загрузки Microsoft. После доступа к сайту просто введите Windows NT Backup в поле поиска и нажмите кнопку Go (Найти). Найдя страницу Windows NT Backup — Restore Utility (рисунок 1), нажмите кнопку Continue (Продолжить) для начала процесса проверки подлинности и подтверждения того, что Вы используете легальную копию Windows Vista.
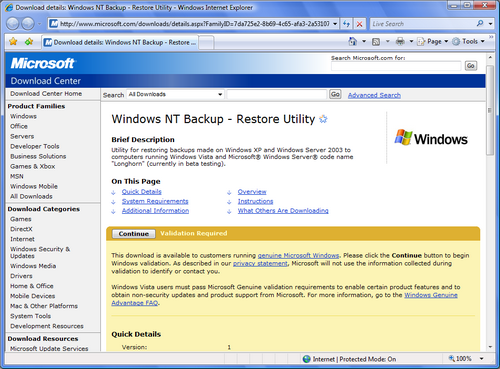
Рисунок 1. С помощью поиска Windows NT Backup на главной странице Download Center, Вы найдете Windows NT Backup — Restore Utility.
После прохождения процедуры подтверждения, Вы можете скачать подходящую версию утилиты – для систем 32-бита или 64-бит. Будьте уверены, что Вы нажали кнопку Save (Сохранить), а не Install (Установить) в диалоге File Download (Загрузка файла), так как сначала надо сделать некоторые подготовительные действия, прежде чем производить установку.
Подготовительные работы.
Перед тем, как на самом деле устанавливать Windows NT Backup — Restore Utility Вам необходимо включить функцию Removable Storage Management (Управление съемными носителями) (если этого не сделать, можно получить ошибку NTSMAPI.DLL). Чтобы это произвести, зайдите в Control Panel (Панель управления) из меню Start (Пуск) и щелкните на Programs (Программы). В появившемся окне найдите и выберите команду Turn Windows Features On or Off (Включение или отключение компонентов Windows) под заголовком Programs and Features (Программы и компоненты), как показано на рисунке 2. Когда Вы так сделаете, появится окно подтверждения действий системы User Account Control (UAC, Контроль учетных записей), где необходимо ответить соответствующим образом.
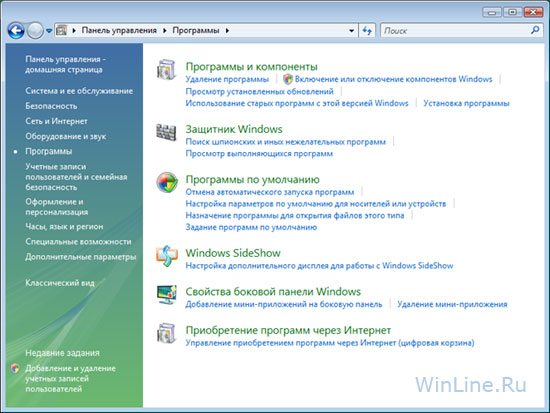
Рисунок 2. Вы найдете команду Turn Windows Features On or Off (Включение или отключение компонентов Windows) под заголовком Programs and Features (Программы и компоненты).
Когда Вы увидите диалог Windows Features (Компоненты Windows), найдите и поставьте галочку напротив опции Removable Storage Management (Управление съемными носителями) для включения функции, как показано на рисунке 3. Затем нажмите ОК. После этого Вы увидите диалоговое окно прогресса, показывающего процедуру включения Removable Storage Management (Управление съемными носителями) в течение минуты-двух.
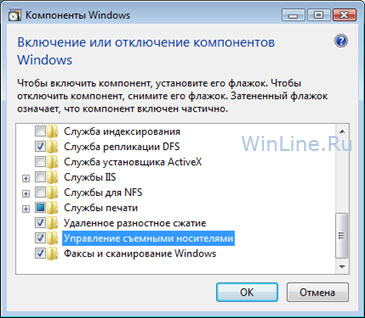
Рисунок 3. В Windows Vista Вы можете включить или выключить множество компонентов, например Removable Storage Management (Управление съемными носителями), без их установки или удаления.
Установка Windows NT Backup — Restore Utility.
После включения функции Removable Storage Management (Управление съемными носителями) Вы можете установить утилиту. Сначала найдите в скачанном дистрибутиве файл с расширением .msi и дважды его щелкните. После загрузки мастера установки, как показано на рисунке 4, просто следуйте инструкциям на экране. В процессе установки появится диалоговое окно UAC, ответьте на него соответствующе.
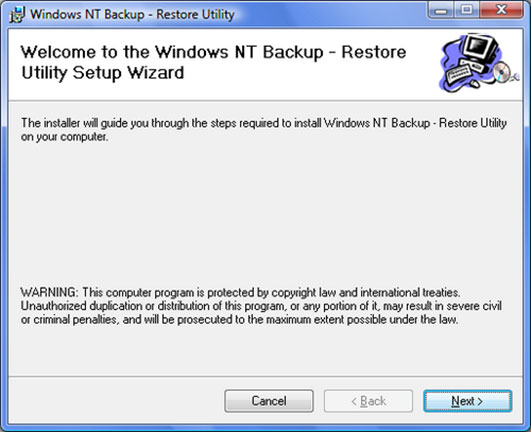
Рисунок 4. Мастер установки проведет Вас через процедуру инсталляции.
Восстановление резервной копии.
После установки утилиты Windows NT Backup — Restore Utility Вы можете запустить ее из меню Start (Пуск). Достаточно странно, но Vista напрочь не узнает утилиту и поэтому появляется диалоговое окно UAC, которое называет ее неопределенной программой. Для продолжения просто нажмите кнопку Allow (Разрешить).
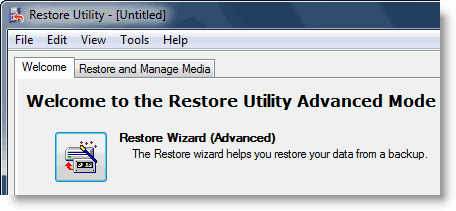
Вы увидите главное окно Windows NT Backup — Restore Utility, как показано на рисунке 5. Как видно, это окно содержит две закладки, позволяя использовать Restore Wizard (Мастер восстановления) на закладке Welcome (Добро пожаловать) или осуществить восстановление вручную на закладке Restore and Manage Media (Восстановление и управление носителем).
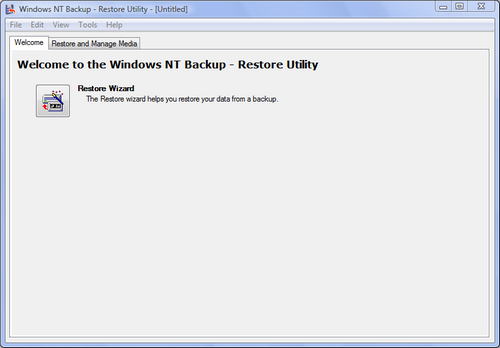
Рисунок 5. Главное окно Windows NT Backup — Restore Utility предоставляет два способа запуска процедуры восстановления.
Что предпочесть – дело Ваше, поскольку оба инструмента прекрасно справляются с возложенными на них обязанностями. Если Вы выберите закладку Restore and Manage Media (Восстановление и управление носителем), используйте команду Catalog a Backup File (Каталогизировать архивный файл) в меню Tools (Сервис) для навигации и открытия файла резервной копии. Затем задействуете панель Restore Files To (Восстановить файлы в) внизу окна для выбора места, куда необходимо восстановить файлы. Раз Вы настроили опции восстановления, как показано на рисунке 6, нажмите на кнопке Start Restore (Восстановить).
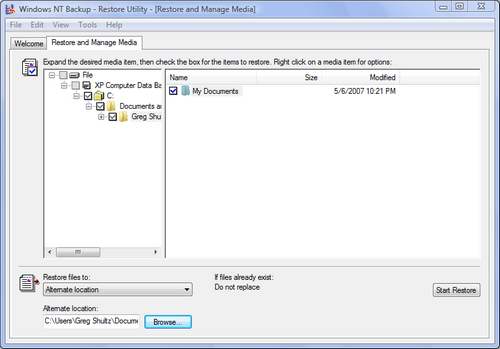
Рисунок 6. Для восстановления в ручном режиме воспользуйтесь закладкой Restore and Manage Media (Восстановление и управление носителем).
Утилита затем спросит Вас, установить ли дополнительные возможности. Нажатие на кнопку Advanced (Дополнительно) покажет диалоговое окно Advanced Restore Options (Дополнительные параметры восстановления), как показано на рисунке 7. Для получения полных прав доступа в Windows Vista к файлам, которые Вы восстанавливаете из Windows XP, проверьте, снята ли галочка с чекбокса Restore Security (Восстановление безопасности). Если Вы этого не сделаете, Вам вручную придется назначать владельца для всех восстанавливаемых файлов.
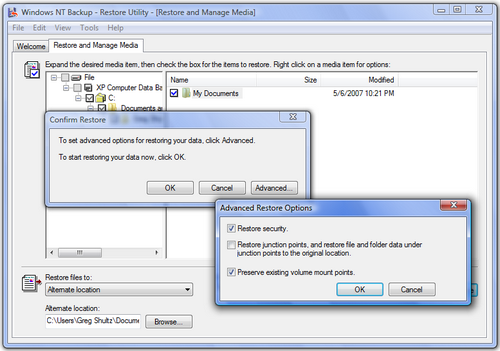
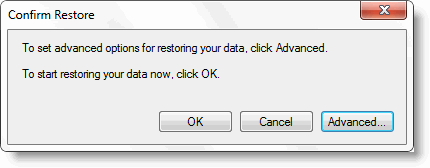
Рисунок 7. Вас спросят о необходимости установки дополнительных параметров до начала процесса восстановления.
После нажатия кнопки ОК диалога дополнительных параметров и подтверждения нажатием ОК операции восстановления, Вы увидите диалоговое окно Restore Progress (Ход восстановления), как показано на рисунке 8.
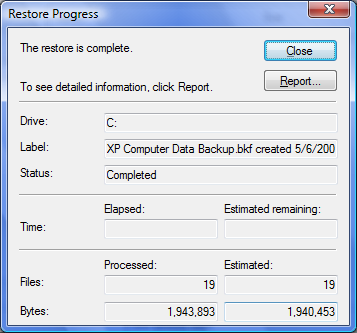
Рисунок 8. Диалоговое окно Restore Progress (Ход восстановления) будет информировать о прогрессе операции восстановления.
По завершении операции можете закрыть диалоговое окно Restore Progress (Ход восстановления) и окно программы Windows NT Backup — Restore Utility. После этого Вы можете использовать файлы, архивные копии которых были сделаны в Windows XP, в Вашей Windows Vista.
Restore NTBackup BKF File, To install the Windows Server 2003 Ntbackup program on Server 2008, Server 2012 and Windows 10 Windows computer you would like to follow the below steps.
Restore NTBackup .BKF File Windows Server 2008
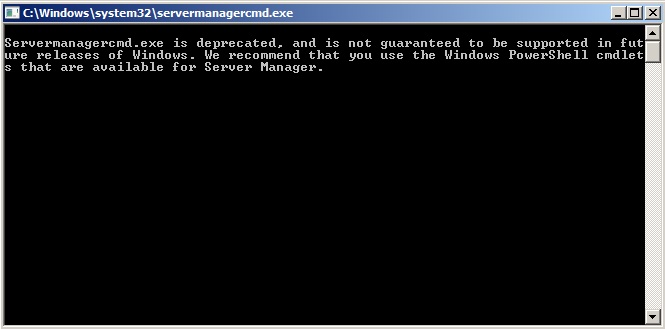
1- Click the Start button and click Run, type (or paste): servermanagercmd -install Removable-Storage and click ok.

2- Command prompt auto open.
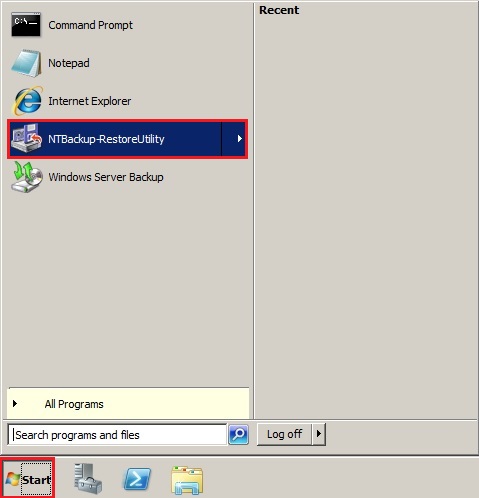
3- Click start and select Ntbackup-RestoreUtility.
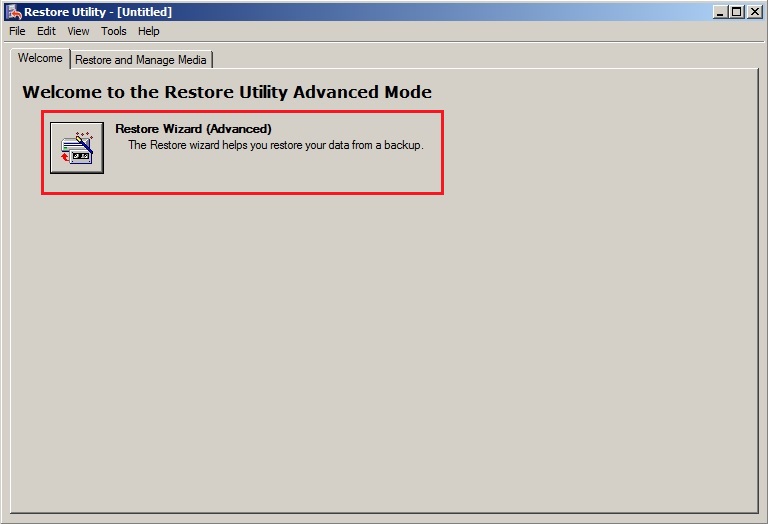
4- Welcome to the restore utility advanced mode and choose the Restore Wizard (Advanced).
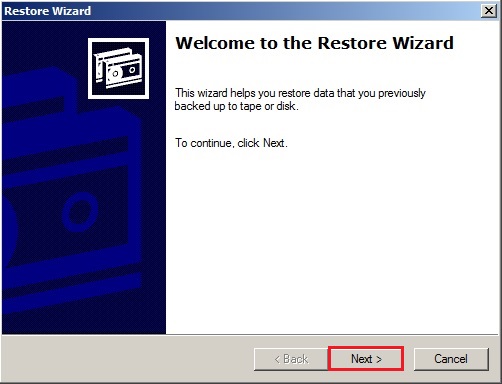
5- Click Next.
6- Select Restore files and settings and click on next.

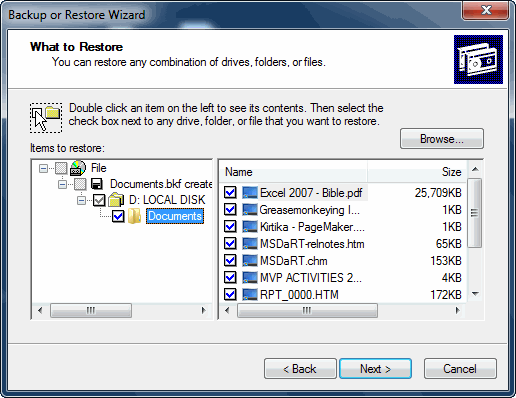
7- Under What to Restore, select Browse.
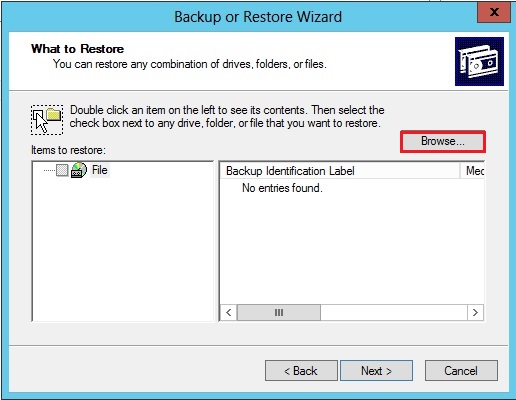
8- Click Browse and choose the .bkf files that you simply want to revive and click on ok.

9- Left side Expand the things to revive then select the files or folders which you would like to revive and click on next.

10 Select the Advanced button.

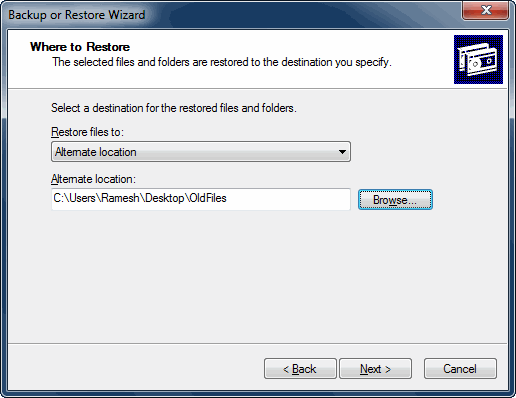
11- Under Restore files to select Alternate location.
Under Alternate location Select the folder where you want to restore and click next.

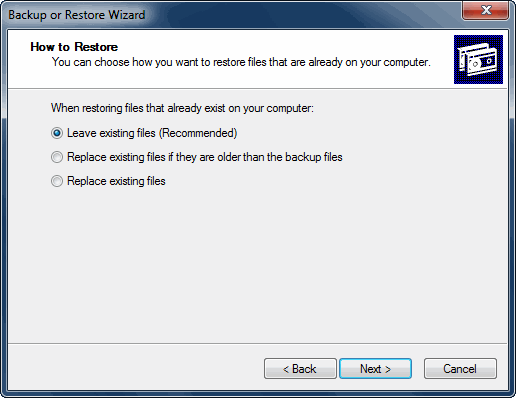
12- Select Leave existing files (Recommended) and click next.

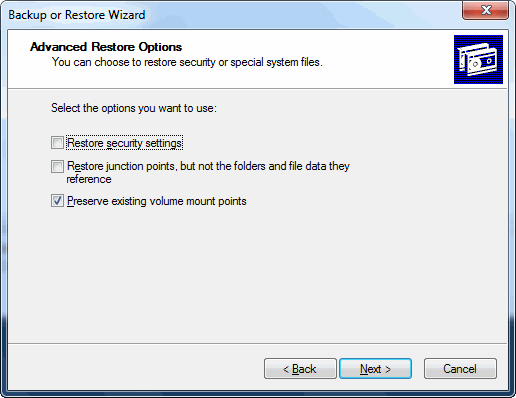
13- Select the options you want to use and click next.
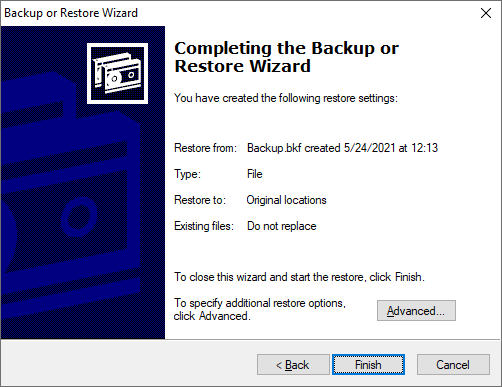
14- Click Finish to complete the Backup wizard.

15- Restore completed.

Restore NTBackup BKF File
Windows Server 2012 and Windows 10.
Download the nt5backup.cab Click nt5backup.cab
extract the rar file
ntbackup.exe
ntmsapi.dll
vssapi.dll
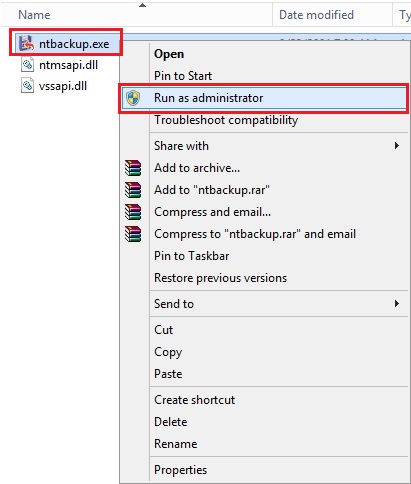
1- Right-click on NTBackup.exe and choose Run as Administrator.
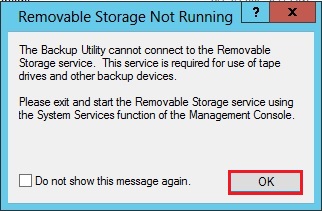
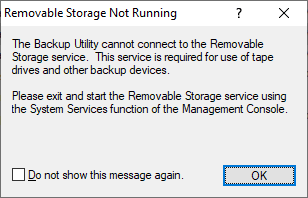
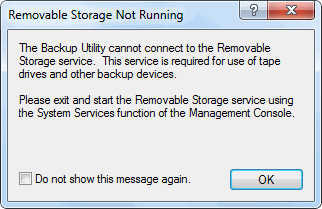
2- A popup message for removable storage not running and click on ok.
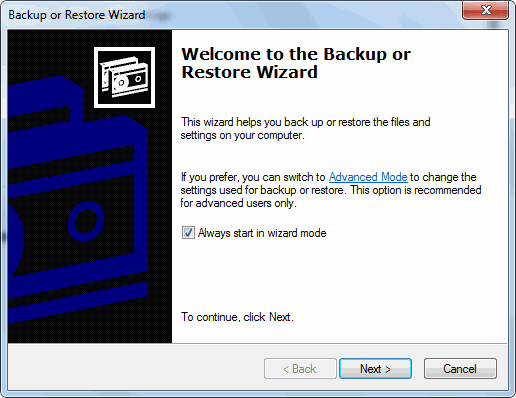
3- Click Next.
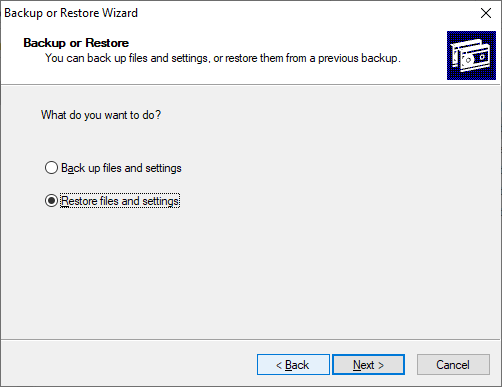
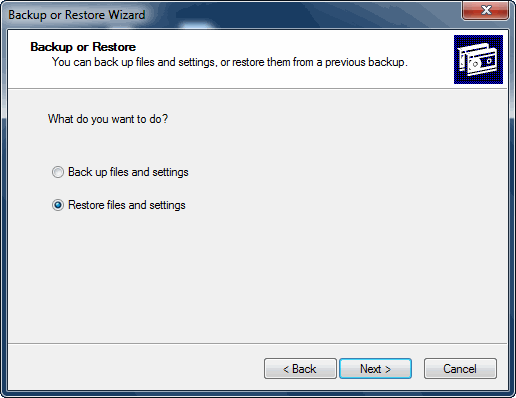
4- Select restore files and settings and click on next.
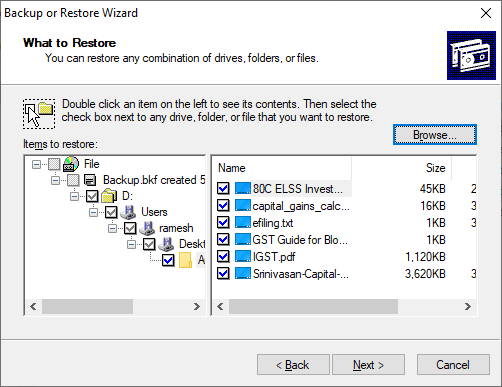
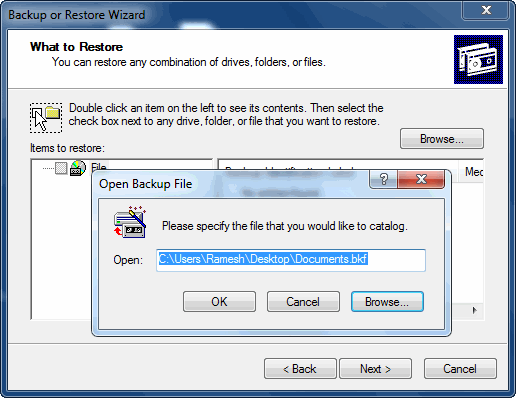
5- Under What to Restore, select Browse.

6- Click Browse and choose the .bkf files that you simply want to revive and click on ok.

7- On Left side Expand the things to restore, select the files or folders which you would like to restore and click on next.
8- Select the Advanced button.
9- Under Restore files to select Alternate location.
Under Alternate location Select the folder where you want to restore and click next.
10- Select Leave existing files (Recommended) and click next.
11- Select the options you want to use and click next.

12- Click Finish to complete the Backup wizard.

13- Restore completed.
Summary: This post explains how to successfully run NTBackup on Windows 10 and restore data from a .BKF file easily!
There are many users who have got backups done using the NTBackup Tool (also known as “Windows Backup Utility”) in earlier versions of Windows. After upgrading to Windows 10, they find that the NTBackup tool doesn’t exist on Windows 10. Also, Microsoft has taken down the Windows NT Backup Restore Utility (KB974674) from their servers.
Even if you have the NTBackup.msi setup package in hand, installing it and running ntbackup.exe may cause the following errors in Windows 10.
ntbackup.exe - Entry Point Not Found

The procedure entry point SetCatalogState could not be located in the dynamic link library C:WindowsSysWOW64ntbackup.exe.
The program can't start because NTMSAPI.dll is missing from your computer. Try reinstalling the program to fix this problem.
The ordinal 3 could not be located in the dynamic link library VSSAPI.DLL.
The good old NTBackup utility runs perfectly fine on Windows 10 if the supporting DLLs (below) are available in the same folder where NTBackup.exe is present. The three DLL files are:
- ntmsapi.dll
- vssapi.dll
- Query.dll
Windows 10 already includes an updated copy of Query.dll, but it doesn’t have the function or entry point named SetCatalogState in it. So, we need to use the Windows 7, Windows 8, or Windows 8.1 version of Query.dll (32-bit) module. The Windows 7/8/8.1 version of the file has the SetCatalogState entry point.
Follow these steps to run the NTBackup tool in Windows 10 and extract the contents of a .BKF file:
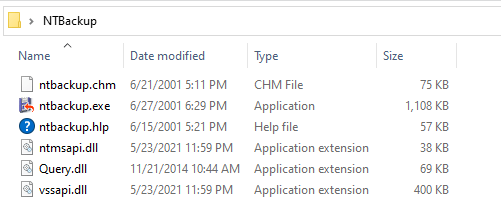
- Download ntbackup.zip and extract the contents to a folder — e.g.,
D:NTBackup. TheD:NTBackupfolder should have the following files now:
ntbackup.chm - SHA1: e6954cac72e4732d4e0d331df80cc947551c739a
ntbackup.exe - SHA1: 9904bbce6d19b343e879a4d6d02fbe978624265b
ntbackup.hlp - SHA1: 016cb814d9a91575f24668f14c0d2b934b1cd6d1
ntmsapi.dll - SHA1: df897f116f23a1424879d4c44cd064ca27d549e4
Query.dll - SHA1: fc6371f8992b85cec0c782f02a60cad3d5790d21
vssapi.dll - SHA1: 8d597a3765bda18396df0c0e8337e1f33a16c3b6
- Double-click
ntbackup.exeto run it. NTBackup will indicate that the Removable Storage service (removed in Windows Vista & higher) is not running. Never mind. This is required for tape backups. Click OK.
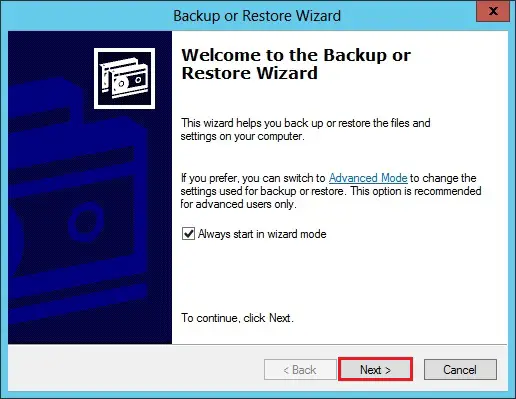
- In the Welcome to Backup or Restore Wizard page, click Next.

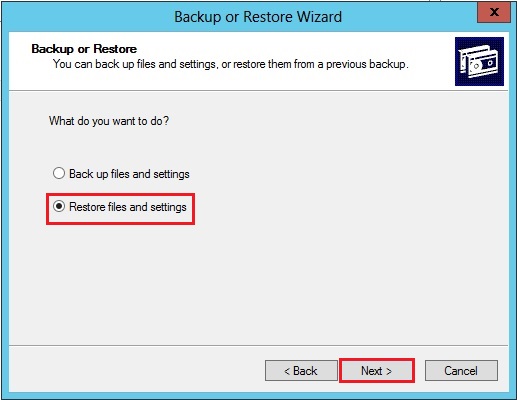
- Select “Restore files and settings”, and click Next.
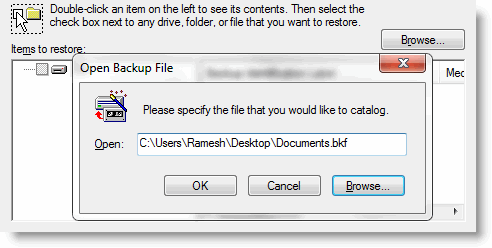
- Click Browse. Locate the .BKF file that you want to restore, and click OK.
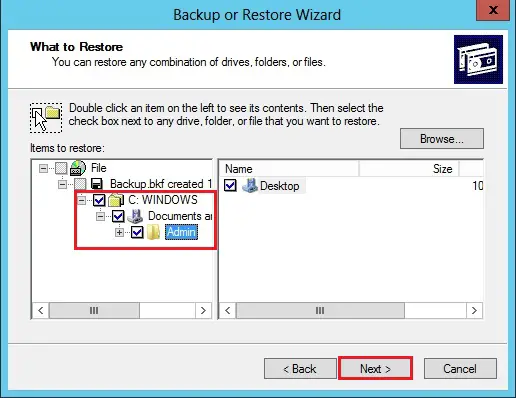
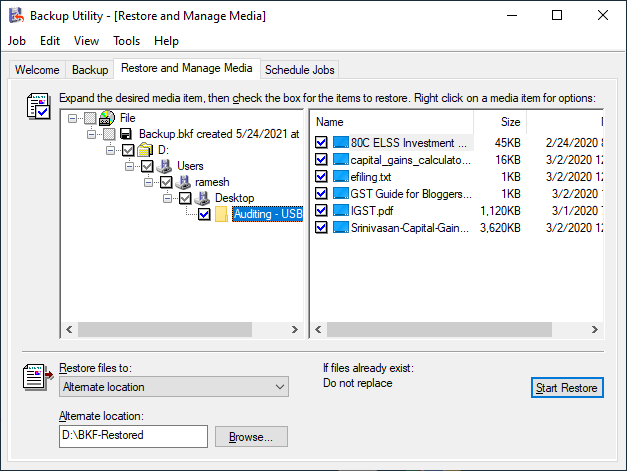
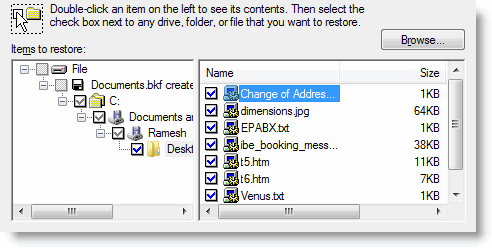
- Expand the catalog, select the files/folders you want to restore, and click Next.
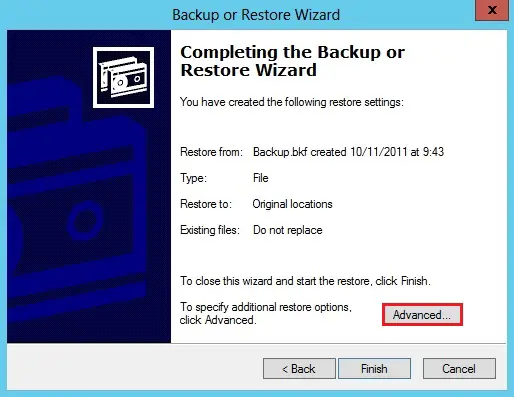
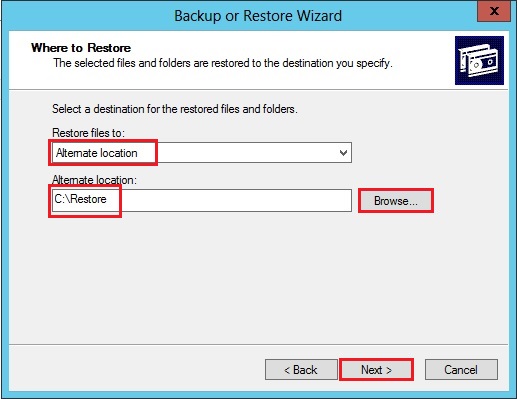
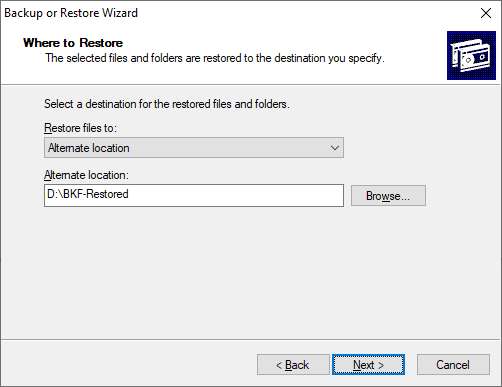
- By default, NTBackup restores the files to the original location. If you need to choose an alternate path or configure advanced restore settings, click Advanced.
- Mention the directory path where you want to restore the files.
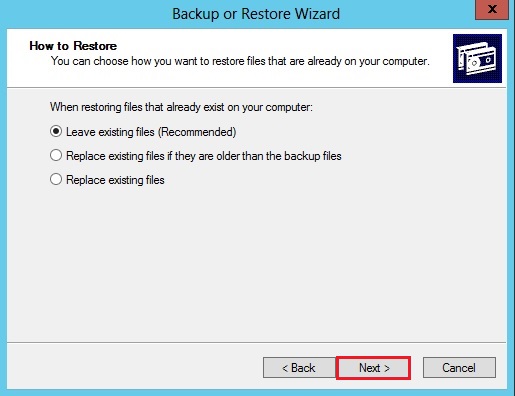
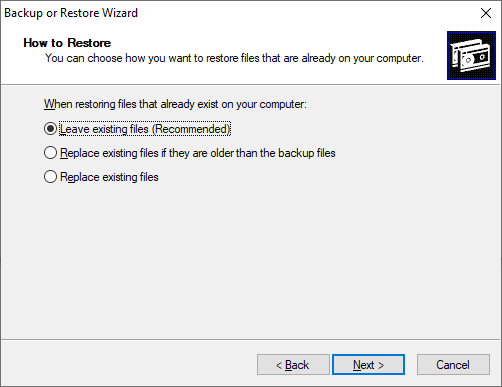
- You can choose one of the three options in this dialog:
- Leave existing files (Recommended)
- Replace existing files if they are older than the backup files
- Replace existing files
- Select the recommended option and click Next.
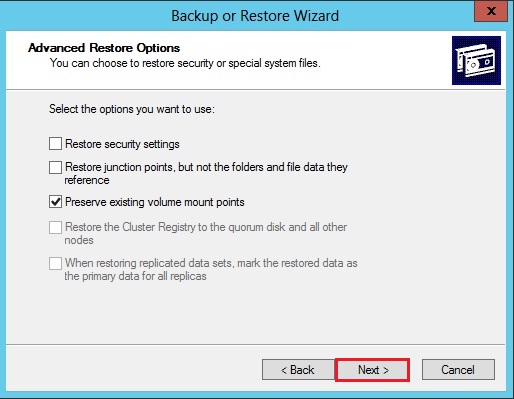
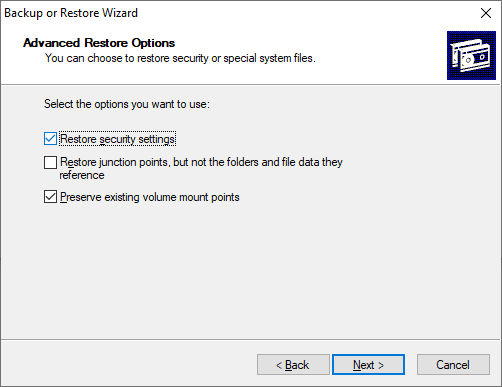
- On the Advanced Restore Options page, if you don’t want to restore the security settings, uncheck the option.
Restore security settings: Restores the access control lists (ACLs) and ownership data on files backed up from an NTFS volume.
Restore junction points, but not the folders and file data they reference: Required for restoring data on mounted drives. Junction points are physical locations that point to the mount point located on another hard disk. If you do not select this check box, the junction points are restored as common folders, and data pointing to these points becomes inaccessible.
Preserve existing volume mount points: Restores empty NTFS folders to which you have mounted volumes.
- Click Next.
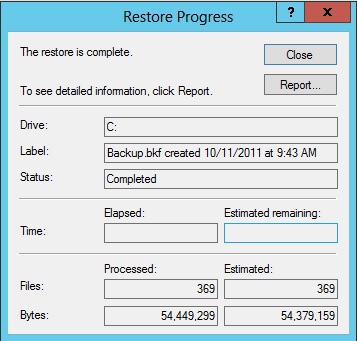
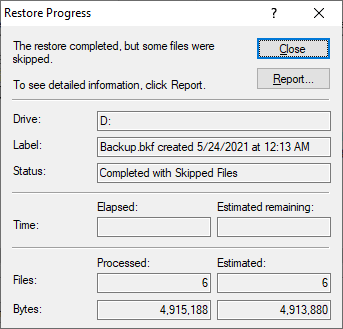
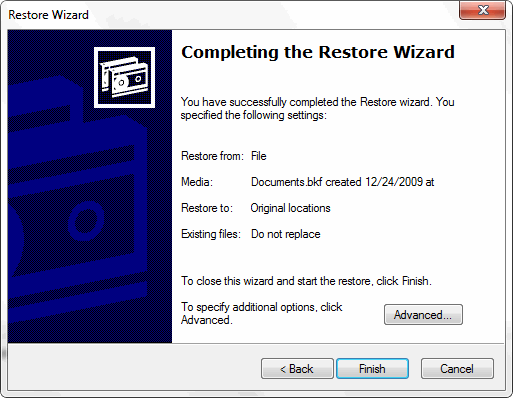
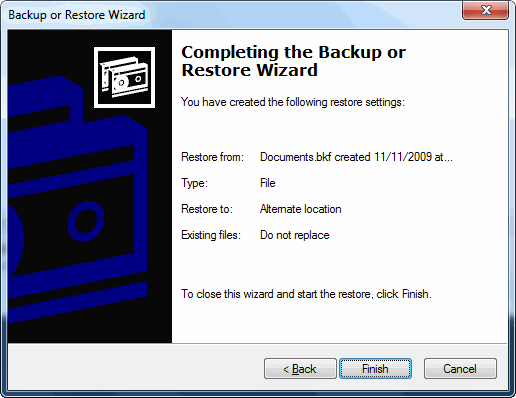
- Click Finish when you see the “Completing the Backup or Restore Wizard”
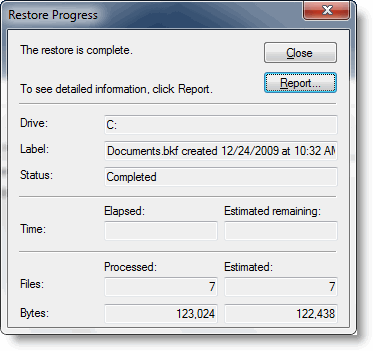
- You’ll see the Restore Progress window. Once the restore is complete, click on the Report… button to know the detailed status.
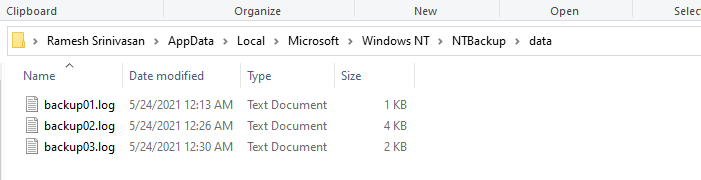
 The reports are also stored in the following folder:
C:Users%username%AppDataLocalMicrosoftWindows NTNTBackupdata

Here’s how the Advanced mode (versus “Wizard mode”) looks like. It presents a unified dialog where you can select the required tab (backup, restore, schedule) and select the output location.


 The reports are also stored in the following folder:
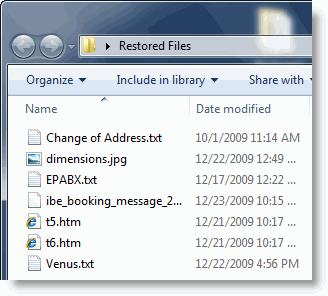
Whew! You’ve now restored the contents of an NTBackup .BKF file in Windows 10.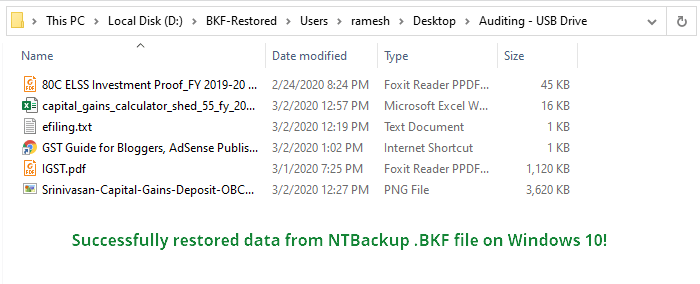
Issues running NTBackup? Run in compatibility mode
Some users have indicated that they had to use compatibility mode to successfully run ntbackup.exe on their Windows 10 computers. To enable the compatibility mode, right-click ntbackup.exe and click Properties.
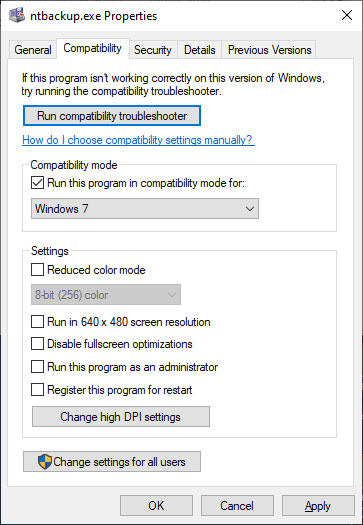
In the Compatibility tab, select Windows XP Service Pack 3, Windows 7 or Windows 8 from the drop-down list, and click OK.
Alternately, you may use your old Windows 7 DVD or ISO and run NTBackup on a virtual environment like Hyper-V or Oracle VM VirtualBox (Free). Once done, you should be able to run NTBackup or the NTBackup Restore tool from the virtual environment running Windows 7 or Vista, on a host computer running Windows 10. Your data inside the .BKF file(s) can be easily recovered.
[This article has been rewritten on May 24, 2021. Tested (and works perfectly) on Windows 10 version 21H1 build 19043.985.]
One small request: If you liked this post, please share this?
One «tiny» share from you would seriously help a lot with the growth of this blog.
Some great suggestions:
- Pin it!
- Share it to your favorite blog + Facebook, Reddit
- Tweet it!
So thank you so much for your support. It won’t take more than 10 seconds of your time. The share buttons are right below. 
From Wikipedia, the free encyclopedia
| Original author(s) | Arcada Software Conner Software Seagate Software |
|---|---|
| Developer(s) | Microsoft Veritas Software |
| Initial release | July 27, 1993; 29 years ago |
| Operating system | Microsoft Windows |
| Successor | WBAdmin, Backup and Restore |
| Type | Backup software |
| License | Proprietary commercial software |
| Website | docs.microsoft.com/en-us/windows-server/administration/windows-commands/ntbackup |
NTBackup (or Windows Backup) is the built-in backup application introduced in Windows NT 3.51 and included in Windows NT 4.0, Windows 2000, Windows XP, and Windows Server 2003. NTBackup comprises a command-line utility and a set of wizard interfaces that provide multiple options to create, customize, and manage backups, and it is integrated with Shadow Copy and Task Scheduler. NTBackup creates backups in a proprietary BKF file format to external sources including floppy disks, hard drives, tape drives, and ZIP drives.
NTBackup is replaced by Backup and Restore and WBAdmin starting with Windows Vista, which provide similar functionality and instead use the Virtual Hard Disk file format to backup content; however, in Windows Vista, it is possible to restore NTBackup by copying necessary files from Windows XP.[1] Windows Server Backup replaces NTBackup beginning with Windows Server 2008; neither Backup and Restore nor Windows Server Backup support the use of tape drives.[2]
For reading/restoring older backups, Microsoft has made available the NTBackup Restore utility for Windows Vista/Windows Server 2008 [3] and for Windows 7/Windows Server 2008 R2[4] which can only read BKF files.
When used with tape drives, NTBackup uses the Microsoft Tape Format (MTF),[5] which is also used by BackupAssist and Backup Exec and Veeam Backup & Replication[6] and is compatible with BKF.[7]
Features[edit]
NTBackup supports several operating system features including backing up the computer’s System State. On computers that are not domain controllers, this includes the Windows Registry, boot files, files protected by Windows File Protection, Performance counter configuration information, COM+ class registration database, IIS metabase, replicated data sets, Exchange Server data, Cluster service information, and Certificate Services database. On domain controllers, NTBackup can back up Active Directory, including the SYSVOL directory share.
NTBackup supports Encrypting File System, NTFS hard links and junction points, alternate data streams, disk quota information, mounted drive and remote storage information. It saves NTFS permissions, audit entries and ownership settings, respects the archive bit attribute on files and folders and can create normal, copy, differential, incremental and daily backups, backup catalogs, as well as Automated System Recovery. It supports logging and excluding files from the backup per-user or for all users. Hardware compression is supported if the tape drive supports it. Software compression is not supported, even in Backup to files.
NTBackup can use removable media devices that are supported natively by the Removable Storage Manager (RSM) component of Windows. However, RSM supports only those tape devices which have RSM-aware WDM drivers.[8]
NTBackup from Windows XP and newer includes Volume Shadow Copy (VSS) support and thus can back up locked files. In the case of Windows XP Home Edition, NTBackup is not installed by default but is available on the Windows XP installation disc.[9][10] Windows XP introduced a wizard-style user interface for NTBackup in addition to the advanced UI.
An expert system administrator can use the NTBackup scripting language to create a functional backup system. Scripting enables the system administrator to automate and schedule backups of files and system state, control the RSM to follow a media rotation strategy, reprogram the RSM to work with external HDD and NAS as well as tape, send email reminders to prompt users to insert the media and compile backup reports that include logs and remaining capacity. An alternative to scripting is GUI software such as BackupAssist, which automates NTBackup and can perform automatic, scheduled backups of Windows-based servers and PCs using NTBackup.
Third-party plug-ins can be used with the deprecated Removable Storage component in Microsoft Windows to support modern storage media such as external hard disks, flash memory, optical media such as CD, DVD and Blu-ray and network file systems exposing the pieces of media as virtual tape to NTBackup which is based on Removable Storage.
NTBackup can be used under Windows Vista and up by copying the NTBackup files from a Windows XP machine. To use tapes or other backup locations that use the Removable Storage Manager, you will need to turn it on in the Turn Windows features on or off control panel, but in Windows 7 and up, the component was removed.[11][12]
Corrupt or damaged backup files[edit]
Due to the large size typical of today’s backups, and faulty data transmission over unreliable USB or FireWire interfaces, backup files are prone to be corrupt or damaged. When trying to restore, NTBackup may display messages like «The Backup File Is Unusable», «CRC failed error» or «Unrecognized Media». Third-party, mostly commercial solutions may recover corrupt BKF files.[13]
References[edit]
- ^ Shultz, Greg (June 3, 2009). «Restore a lost feature and install XP’s Backup Utility into Windows Vista». TechRepublic. CBS Interactive. Retrieved January 19, 2021.
- ^ NTBackup replaced in Windows Server 2008
- ^ Windows NT Backup — Restore Utility
- ^ Description of the Windows NT Backup Restore Utility for Windows 7 and for Windows Server 2008 R2
- ^ Media Sets, Media Families, and Backup Sets: MSDN
- ^ «Archiving to Tape: Best Practices».
- ^ Win9x & XP & NT MSBackUp File Format and Data Recovery
- ^ Installed Tape Device Is Not Recognized by Removable Storage Manager
- ^ HOW TO: Install Backup from the CD-ROM in Windows XP Home Edition
- ^ How to use the Backup utility… in Windows XP…
- ^ Storage Networking Platform Features in Windows 7/Server 2008 R2 (Powerpoint) Archived 2012-02-15 at the Wayback Machine
- ^ «Running NT Backup under Windows 7».
- ^ How to recover corrupt or damaged BKF backup files
Further reading[edit]
- John Paul Mueller (2007). Windows Administration at the Command Line for Windows Vista, Windows 2003, Windows XP, and Windows 2000. John Wiley & Sons. ISBN 978-0470165799.
External links[edit]
- Microsoft
- Backup Basics from Microsoft
- NTBackup Guide for Windows XP Professional
- MSKB104169: Files that are automatically skipped by NTBackup
- Microsoft Tape Format (MTF) Specification Document by Seagate
- mftar: a filter to convert MFT/BKF files to the more common tar format (Linux and Unices)
Содержание
- 1 Способ 1: использование Утилита восстановления резервной копии Windows NT восстановить данные из файла .BKF
- 2 Способ 2. Использование NTBackup Tool для Windows XP для восстановления данных из файла .BKF
- 2.1 Восстановление файла .BKF с помощью NTBackup
Есть много пользователей, которые выполняют резервное копирование своих данных с помощью инструмента NTBackup в Windows XP, затем очищают установку или обновление Windows и позже понимают, что более новая версия Windows не включает инструмент NTBackup. В этом посте объясняются два метода восстановления данных из файла формата .BKF после обновления.
Способ 1: использование Утилита восстановления резервной копии Windows NT восстановить данные из файла .BKF
Microsoft выпустила утилиту восстановления резервной копии Windows NT для восстановления данных из архива .BKF. Вот пошаговое руководство со скриншотами о том, как восстановить архивы BKF NTBackup в Windows с помощью служебной программы Windows NT Backup Backup Restore.
- Загрузите и установите утилиту восстановления резервной копии Windows NT для Windows 7.
- Запустите утилиту восстановления резервной копии Windows NT (через меню Пуск, Программы, Стандартные, Системные инструменты.)
- Обычно файлы восстанавливаются в исходное местоположение. Если вам нужно указать альтернативное местоположение, нажмите кнопку «Дополнительно».
- Нажмите Готово.
- Чтобы настроить дополнительные параметры (Восстановление безопасности, Восстановление точек соединения, Сохранить точки монтирования тома), нажмите кнопку «Дополнительно». Чтобы продолжить с настройками по умолчанию, нажмите OK.
Архив .BKF теперь восстанавливается в исходное местоположение или указанную папку.
Способ 2. Использование NTBackup Tool для Windows XP для восстановления данных из файла .BKF
Исполняемый файл NTBackup для Windows XP прекрасно работает в Windows Vista 7, при условии, что вспомогательные библиотеки DLL (приведенные ниже) доступны в той же папке, где находится NTBackup.exe. Два DLL-файла:
- ntmsapi.dll
- vssapi.dll
Если вы запустите NTBackup.exe без этих двух модулей, появятся эти ошибки.
Программа не может запуститься, потому что NTMSAPI.dll отсутствует на вашем компьютере. Попробуйте переустановить программу, чтобы решить эту проблему.
Порядковый номер 3 не может быть расположен в библиотеке динамических ссылок VSSAPI.DLL.
Вы можете скачать два DLL-файла по этой ссылке.
Filename: ntmsapi.dll
MD5: C8A1D0DEAFEE5637E22633634AD5D6FF
Filename: vssapi.dll
MD5: 2F529CFEEAE8AD951E355CCE0789CE2D
Восстановление файла .BKF с помощью NTBackup
1. Загрузите файл nt5backup.msi с этого сайта.
2. Извлеките файлы внутри кабинетного файла в папку по вашему выбору.
3. Щелкните правой кнопкой мыши файл NTBackup.exe и выберите «Запуск от имени администратора».
4. NTBackup будет указывать, что служба съемного хранилища (удалена в Windows Vista выше). Не берите в голову! Это необходимо для резервного копирования на ленту. Нажмите ОК.
5. На странице приветствия мастера резервного копирования или восстановления нажмите кнопку Далее.
6. Выберите Восстановить файлы и настройки и нажмите Далее.
7. Нажмите Обзор. Найдите файл .BKF, который вы хотите восстановить, и нажмите OK.
8. Разверните каталог, выберите файлы / папки, которые вы хотите восстановить, и нажмите Далее.
9. Нажмите кнопку Дополнительно

10. Выберите Альтернативное местоположение в раскрывающемся списке и укажите путь к месту назначения.
Настройте параметры восстановления соответственно.
Нажмите Далее, а затем нажмите Готово.

Уф! Теперь вы восстановили содержимое файла NTBackup .BKF.
Утилита резервного копирования и восстановления Windows NT восстанавливает резервные копии, сделанные в Windows XP и Windows Server 2003, на компьютеры под управлением Windows 7 и Windows Server 2008 R2.
Утилита восстановления резервных копий Windows NT для Windows 7 и Windows Server 2008 R2 поможет вам восстановить резервные копии, сделанные в Windows XP и Windows Server 2003, на компьютеры под управлением Windows 7 и Microsoft Windows Server 2008 R2.
Утилита восстановления также помогает восстановить данные при случайной потере данных, если в вашей системе произошел сбой оборудования или носителя. Если исходные данные на вашем жестком диске случайно стерты, перезаписаны или становятся недоступными из-за неисправности жесткого диска, вы можете легко восстановить данные из архивной копии. Архивная копия может находиться на различных носителях резервного копирования, таких как логический диск, такой как жесткий диск, или отдельное устройство хранения, например съемный диск, или целая библиотека дисков, организованная в пул носителей.
Этот инструмент не предназначен для того, чтобы оставаться на вашем компьютере с Windows 7 на неопределенный срок, и его следует удалить после восстановления резервных копий, сделанных в Windows XP и Windows Server 2003. Вы можете удалить этот инструмент через панель управления, когда ваша работа будет завершена.
Утилита доступна в виде исправления / обновления. Вам необходимо запросить исправление, но теперь вы также можете загрузить его прямо по ссылкам, приведенным в конце этого сообщения.
После того, как вы загрузите и установите NT Backup Restore Utility, вы сможете получить доступ к файлу Ntbackuprestoreutility.exe, выбрав Пуск> Все программы> Стандартные> Системные инструменты> NTBackup-RestoreUtility.
Утилиту резервного копирования и восстановления Windows NT для 32- и 64-разрядных версий Windows 7 и Windows Server 2008 R2 можно загрузить из KB974674.
.