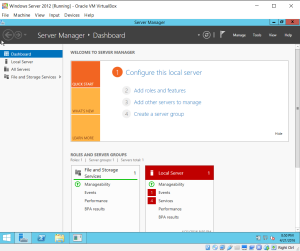
This post demonstrates how to install Windows Server 2012R2 evaluation version onto Oracle VirtualBox.
- First go to Windows Server 2012R2 evaluation downloading website “https://www.microsoft.com/en-in/evalcenter/evaluate-windows-server-2012-r2“
Choose ISO file type
Download ISO image of Windows Server 2012R2 evaluation

2. Start Oracle Virtual Manager, Select NEW.
Name: Windows Server 2012R2
Type: Microsoft Windows
Version: Windows 2012(64-bit)

3. Give 5120M memory size depending on availability.

4. Create an virtual hard disk.

5. Choose “VDI( VirtualBox Disk Image)“.

6. Choose “Dynamically allocated“.

7. Give size 30GB.

8. Also you can choose where the VDI image file located.

9. Click “create” to create “Windows Server 2012R2” virtual machine.

10. Now attach the ISO image to the virtual CD/DVD drive by :
a)Ensure the Windows Server 2012R2 VM is selected and click Settings.
b)Select Storage. Click on Empty under IDE Controller.
c)In the Attributes section, click on “+”sign for adding optimal disk.
d)Select “Choose a disk file”.
e)Browse to the location where you saved the Windows DVD ISO file and select it.
f)Click Open.
g)It should look similar to the following graphic.


11) Now we can install Windows 2012R2 .
a)Select the Windows Server 2012R2 VM in VirtualBox and click Start.
When the Install screen appears, click Next.

b)Click Install Now.

c)Select 2012 evalution Datacenter (Server with a GUI) and click Next. The Server Core installation includes a command prompt but not a graphical user interface (GUI).
d)Review the license terms, select the checkbox to accept the license terms, and click Next.

e) Select Custom: Install Windows only (advanced).

f) The 30 GB drive you created with the VM will be selected as Drive 0 Unallocated Space. Click Next.

g)The installation will begin .

h)When prompted, enter a password for the Administrator account in the Password and Retype password text boxes. Click Finish.


To log on Windows Server 2012R2, press the host key plus the Delete key to simulate the CTRL + ALT + DELETE key combination. The host key is the right-CTRL key by default.
OS, windows
August 6, 2018August 22, 2018
1 Minute
This blog will show how to download Windows Server 2012R2 180days evaluation and create a VM using Virtualbox VHD.
Reference:
Download Windows Server 2022/2019/2016/2012 R2 VHD for VirtualBox & VMware
- First download the VHD file from Microsoft website. Make sure to select the VHD option:
https://www.microsoft.com/en-us/evalcenter/evaluate-windows-server-2012-r2
NOTE: Once you use this VHD file to create a VM then this file cannot be used again to create another VM. So create a copy of this file so you wont have to download again to create another VM.
2. You must have latest version of VirtualBox. VirtualBox supports Windows 8.1 (2012 R2) from 4.2.16 version only.
3. Create a new virtual machine. Select Windows 2012(64bit) as OS.
Instead of creating new hard disk, select existing virtual hard drive option. Browse and select the downloaded VHD file .
9600.16415.amd64fre.winblue_refresh.130928-2229_server_serverdatacentereval_en-us.vhd
4. Start the VM and choose an Administrator password. Use the Input->insert CTRL-ALT-DEL when asked during login.
You can now use various windows tools like Active Directory, Server Manager in your VM. Enjoy!
Published
August 6, 2018August 22, 2018
I was thinking that if I can install Windows Server 2012 R2 on my Virtualbox will be cool. And it is, now I have my Windows Server 2012 R2 up and running on my VirtualBox 4.2.28 on Windows 7 host. Installing Windows Server on Virtualbox is pretty much the same with installing Windows 7 or Windows 8 on Virtualbox. But, Since Windows server is different from Windows 7, we need to adjust the guest machine so the server can run.
First, we create a new virtual machine as usual. Make sure you use 64 bit version on the virtual machine settings as follow
Next, add RAM to the new virtual machine. I suggest you to assign more RAM to the virtual machine. 4 GB of RAM is good to go.
Once the new virtual machine created, we need to adjust some settings such as Enable PAE/NX feature if your host processor support it. Also, adding more processor is a good way to get better performance.
OK, now we are ready to boot the new Windows Server virtual machine.
But ooops, in most cases, you will see the following error displayed on your Virtual machine display. Error code 0x000000C4 etc.
Don’t worry, we can fix this. Turn Off the VM and Open command prompt from Start | Run and type cmd. On the command prompt, type the following command
cd C:Program FilesOracleVirtualBox
And then execute this command
VBoxManage.exe setextradata “Windows Server 2012” VBoxInternal/CPUM/CMPXCHG16B 1
Don’t forget to change “Windows Server 2012” with your VM name. If your VM name does not use space, you don’t have to type quotes before and after it.
Now start the VM and this problem should fixed and you can boot Windows Server and install it as usual
This website uses cookies to improve your experience. By visiting this website I assume you are oke with this. But you still can opt-out if you like.Accept Reject Read More


