As you may know, Windows 7 doesn’t support USB 3.0 by default. This is also why the installation of Windows 7 from an USB 3.0 key requires a little manipulation beforehand.
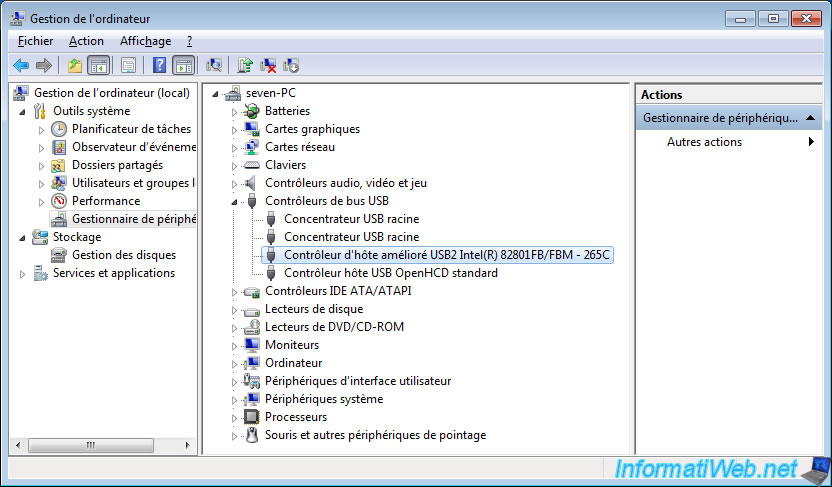
In short, because Windows 7 supports USB 2.0 by default and not USB 3.0, VirtualBox defaults to an USB 2.0 controller when you create a virtual machine to install Windows 7.
This is visible in the device manager in your virtual machine running Windows 7.
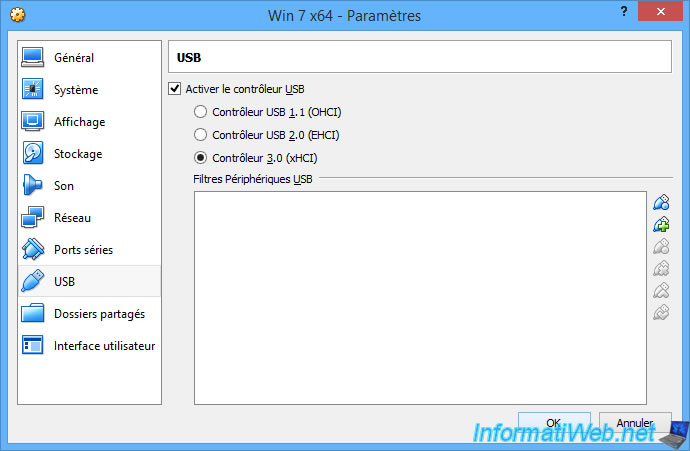
To use an USB 3.0 controller in a VirtualBox virtual machine under Windows 7, you must first go to the USB section of your virtual machine’s settings.
Then, select : Controller 3.0 (xHCI).
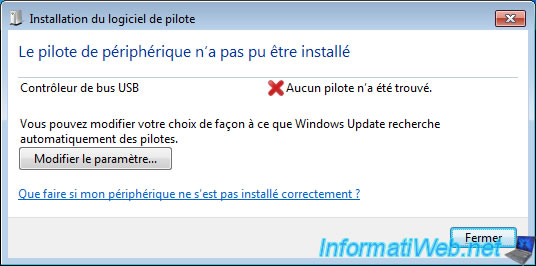
In the Windows 7 guest operating system, you will see that Windows couldn’t automatically install the driver for the used USB bus controller since it doesn’t support it by default.
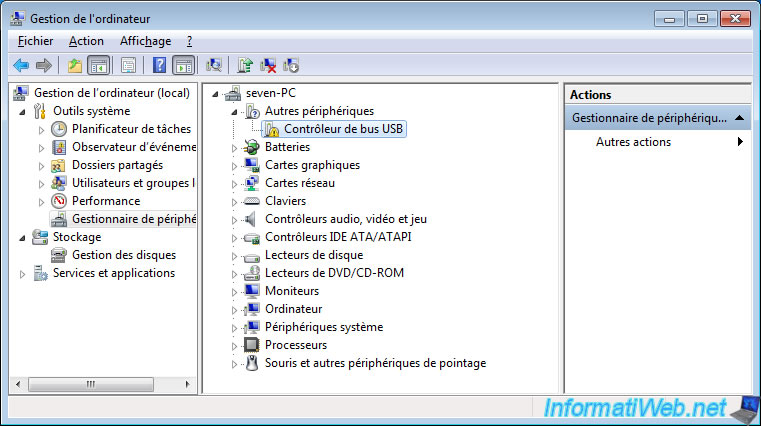
In the device manager, this «Universal Serial Bus (USB) Controller» will appear with a yellow icon as there is no driver for this device.
To solve this problem, you had to download and install the «USB 3.0 Driver: Intel® USB 3.0 eXtensible Host Controller Driver for Intel® 7 Series/C216 Chipset Family» provided by Intel.
Nevertheless, as was stated on the official website of Intel, this «product» was at the end of life.
And today, this page and this driver are no longer available from their official website.
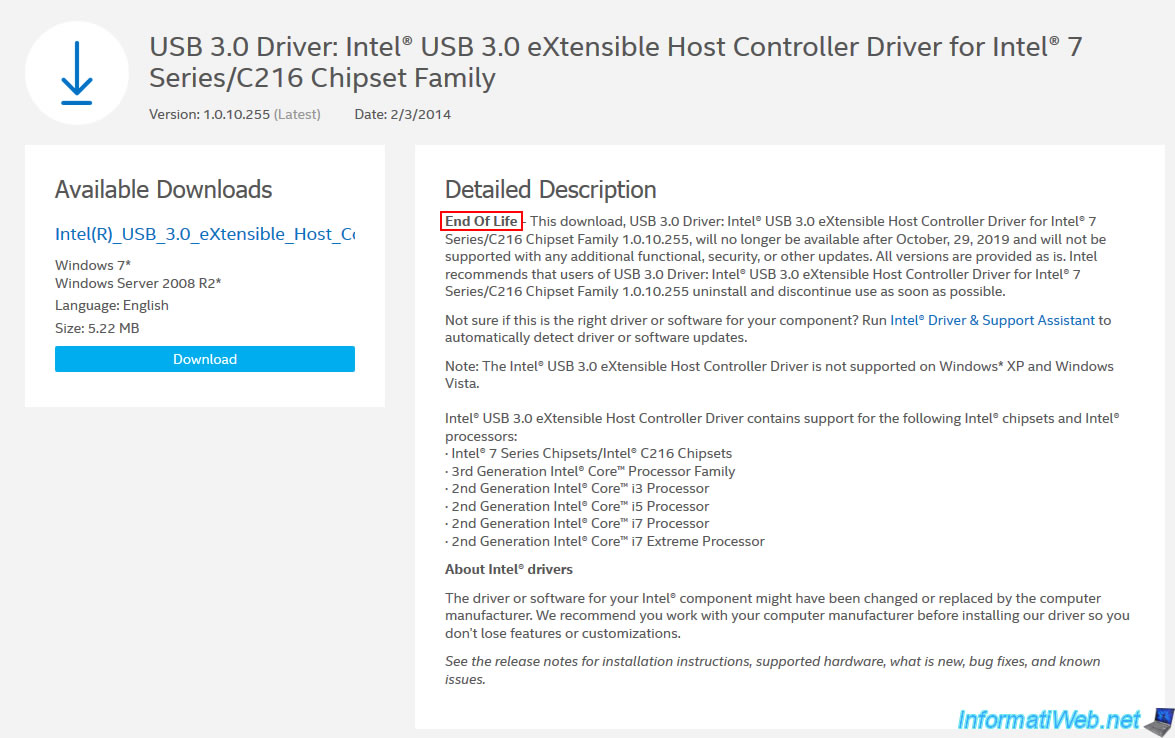
Fortunately, the «Archive.org» site had saved these pages, as well as the associated driver.
So, you can download this official «Intel USB 3.0 eXtensible» driver via the archive.org cache.
Note : it’s possible that Internet access on Windows 7 will no longer work correctly in 2022.
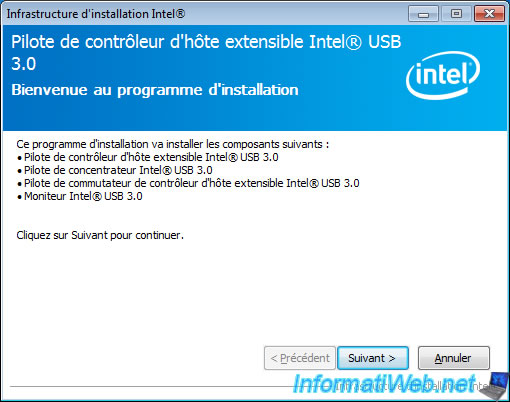
To install this driver in your virtual machine, download it via your physical PC then transfer the file to your virtual machine via copy/paste or drag/drop.
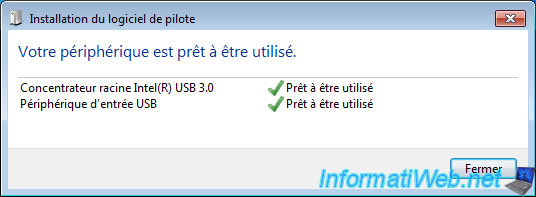
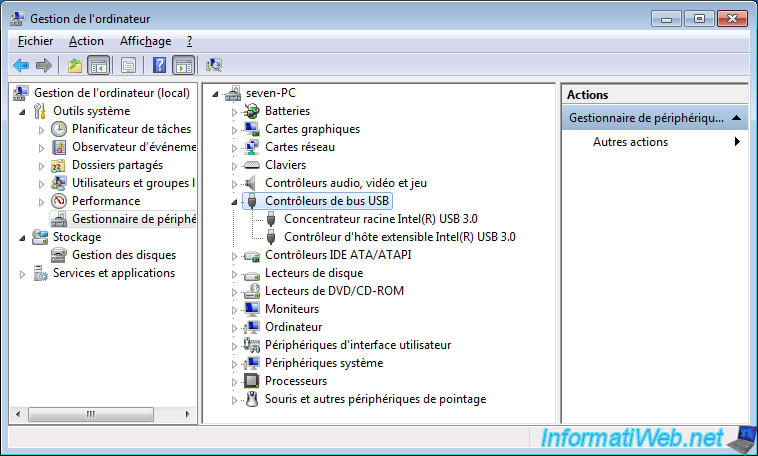
Once installed, Windows 7 will recognize this new USB 3.0 controller.
And you will find 2 new devices in the device manager :
- Intel(R) USB 3.0-Root-Hub
- Intel(R) USB 3.0 eXtensible-Hostcontroller
VB 5.0 — USB 3 drivers
- Reply with quote
VB 5.0 — USB 3 drivers
Hi All,
Trying to configure the VB 5.0 to work with USB 3.0 enabled.
So I’m using a Ubuntu host and windows 7 guest.
Windows 7 doesn’t recognize automatically the needed drivers.
I then mapped it to a huge resource of drivers I have and it recognized it as Intel(R)_USB_3.0_eXtensible_Host_Controller_Driver
I was installed successfully and then I got unidentified driver for the USB 3 hub.
Tried to install that from the same intel package and I got a blue screen.
If I try to run the Intel(R)_USB_3.0_eXtensible_Host_Controller_Driver installer, it doesn’t recognize the system as compatible for the drivers.
Does anyone have an idea what drivers are needed? Does anyone find a configuration that is working?
- ztslil
- Posts: 3
- Joined: 12. Jul 2015, 11:34
- Reply with quote
Re: VB 5.0 — USB 3 drivers
![]() by mpack » 12. Jul 2015, 12:08
by mpack » 12. Jul 2015, 12:08
Perhaps a better solution can be found if you employ some lateral thinking. What exactly are you trying to achieve?
- mpack
- Site Moderator
- Posts: 37920
- Joined: 4. Sep 2008, 17:09
- Primary OS: MS Windows 10
- VBox Version: PUEL
- Guest OSses: Mostly XP
- Reply with quote
Re: VB 5.0 — USB 3 drivers
![]() by mpack » 12. Jul 2015, 13:14
by mpack » 12. Jul 2015, 13:14
USB3 presumably is a means, not an end. What is the goal?
- mpack
- Site Moderator
- Posts: 37920
- Joined: 4. Sep 2008, 17:09
- Primary OS: MS Windows 10
- VBox Version: PUEL
- Guest OSses: Mostly XP
- Reply with quote
Re: VB 5.0 — USB 3 drivers
![]() by Perryg » 12. Jul 2015, 14:20
by Perryg » 12. Jul 2015, 14:20
AFAIK Windows -7 did not have native support for xHCI and needed MB manufactures to provide the driver needed. There are two drivers from Intel that are available and one will work. The file name I have does not mention enough to tell but I have posted the driver SS below.

- intel-xhci.png (13.12 KiB) Viewed 102035 times
Note: you need to enable the xHCI section in the guest settings before you try to install the device driver in the guest, and of course you need the right ( matching ) extension pack installed from VirtualBox.
- Perryg
- Site Moderator
- Posts: 34373
- Joined: 6. Sep 2008, 22:55
- Primary OS: Linux other
- VBox Version: OSE self-compiled
- Guest OSses: *NIX
- Reply with quote
Re: VB 5.0 — USB 3 drivers
![]() by ztslil » 13. Jul 2015, 20:47
by ztslil » 13. Jul 2015, 20:47
Hi Guys,
Thanks.
It seems like because I upgraded my VB from version 4 to the 5 Beta, something was saved in the drivers cache which crashed my machine every time I tried to install the USB 3 hub.
Eventually I found this install to be working for me:
http://www.dell.com/support/home/us/en/ … erId=DN16M
Thanks for all the assistance you guys, hope somebody else will find this thread useful.
- ztslil
- Posts: 3
- Joined: 12. Jul 2015, 11:34
- Reply with quote
Re: VB 5.0 — USB 3 drivers
![]() by Cybernut » 24. Jul 2015, 05:34
by Cybernut » 24. Jul 2015, 05:34
Poster jorgensen’s link (2 posts above) solved my VirtualBox 5’s USB 3 driver problem as well. Mac OS X (Yosemite) host and Windows 7 guest.
- Cybernut
- Posts: 1
- Joined: 24. Jul 2015, 05:21
- Reply with quote
Re: VB 5.0 — USB 3 drivers
![]() by confuscious28 » 24. Sep 2015, 12:43
by confuscious28 » 24. Sep 2015, 12:43
Peter Jorgensen is truly his messenger. Saved me after 24 hours of search.! Just go for Intel USB3.0 drivers if your host has Intel!
- confuscious28
- Posts: 1
- Joined: 24. Sep 2015, 12:38
- Reply with quote
Re: VB 5.0 — USB 3 drivers
![]() by mpack » 24. Sep 2015, 15:30
by mpack » 24. Sep 2015, 15:30
confuscious28 wrote:Just go for Intel USB3.0 drivers if your host has Intel!
… and your guest is Windows 7. There are no drivers for Vista and XP. Win8.x and later has native xHCI (USB3) support.
- mpack
- Site Moderator
- Posts: 37920
- Joined: 4. Sep 2008, 17:09
- Primary OS: MS Windows 10
- VBox Version: PUEL
- Guest OSses: Mostly XP
- Reply with quote
Re: VB 5.0 — USB 3 drivers
![]() by Andsetinn » 8. May 2017, 20:01
by Andsetinn » 8. May 2017, 20:01
jorgensen wrote:Below Intel driver worked for me on a Win8 i5 host and Win7 guest
The path that Jorgensen referred to above. I cannot even quote it. «You must be a member for 1 days and have 1 posts before you can post urls.»
This worked for me on a OSX host and Win7/32 guest.
- Andsetinn
- Posts: 1
- Joined: 8. May 2017, 19:58
Return to Windows Guests
Who is online
Users browsing this forum: Google [Bot] and 20 guests
If the USB 3.0 drive is not recognized in VirtualBox guest machine, continue below to fix the problem. A few days ago I tried to mount a USB 3.0 drive to an Oracle VirtualBox VM running Windows 7 without success. So, I decided to write this tutorial to help others with the same problem.
Problem in details: A USB 3.0 device or a USB 3.0 drive that is connected to a USB 3.0 port on the host machine, cannot be attached or recognized in VirtualBox Windows 7 guest machine.
This guide contains detailed instructions on how to capture a USB 3.0 drive on a VirtualBox VM machine running Windows 7.
How to FIX: Cannot Attach USB 3 Drives on Windows 7 VirtualBox Machines.
Step 1. Install VirtualBox Extension Pack
To enable the USB support (USB v2 or USB v3) on the Oracle VM VirtualBox Guest machine, you must install Oracle VM Extension Pack on the Host machine. To do that:
1. Shutdown the Guest VM machine.
2. Download and install the Oracle VM VirtualBox Extension Pack (on Host machine). *
* Note: If you are using an oldest VirtualBox build then download and install the extension pack for that version from here.
Step 2. Enable USB 3.0 Controller on VirtualBox Machine Settings.
To be able to use USB devices, in the VirtualBox Guest OS, you have to activate the USB controller in VM Settings. So, open the USB options of the guest machine, and…
1. Enable USB Controller
2. Select the USB 3.0 (xHXI) Controller check box.

Step 3. Install VirtualBox Guest Additions on Windows 7 Guest Machine.
To take advantage of all the features of VirtualBox, you must install Guest Additions, which contain device drivers and system applications that optimize the guest operating system for better performance and usability.
1. Start VM machine.
2. From the VM’s menu, go to Devices and click on Insert Guest Additions CD image…

3. The Guest Additions installer should start automatically after 2-3 seconds.* Click Next and follow the rest instructions to install VirtualBox Guest Additions.
* Note: If the installer doesn’t launch automatically, open explorer and run the «VBox WindowsAdditions» application on the loaded CD Image .

4. Restart Windows 7 VM and continue to next step.
Step 4. Install Intel USB 3.0 Drivers on Windows 7 Guest Machine.
The most important step to work with USB 3.0 drives in VirtualBox, is to install the USB 3.0 drivers on the Guest Windows 7 OS. *
* Note: Windows 10 & Windows 8.1. supports USB 3.0 and you don’t need to install any drivers.
1. Start the VM machine.
2. Download and install the corresponding USB 3.0 driver below according your Intel Generation Processor:
- For 2nd or 3rd Intel Core(TM) i3, i5, i7 processors, download this driver: Intel(R)_USB_3.0_eXtensible_Host_Controller_Driver.zip *
- For Intel® 8 Series/C220 Series Chipset Families and 4th Generation Intel® Core™ Processor U-Series Platform, download this driver.
Step 5. Attach the USB 3.0 Drive in the VM Machine.
Finally proceed and attach the USB 3.0 drive on the VM machine. To do that:
1. From the VM machine’s menu, go to Devices > USB and click the USB 3.0 drive that you want to mount it in guest OS.

2. Open Explorer and you should see the attached USB 3 drive inside the VM. *
* Note: If after following the above instructions you still have problems capturing USB 3.0 devices in VirtualBox, have a look here.
That’s it! Let me know if this guide has helped you by leaving your comment about your experience. Please like and share this guide to help others.
If this article was useful for you, please consider supporting us by making a donation. Even $1 can a make a huge difference for us in our effort to continue to help others while keeping this site free:

If you want to stay constantly protected from malware threats, existing and future ones, we recommend that you install Malwarebytes Anti-Malware PRO by clicking below (we
do earn a commision from sales generated from this link, but at no additional cost to you. We have experience with this software and we recommend it because it is helpful and useful):
Full household PC Protection — Protect up to 3 PCs with NEW Malwarebytes Anti-Malware Premium!
 |
Problem:
External USB 2.0 and 3.0 drive can’t get detected in Windows7 (Guest OS) in Virtual Machine
Solution:
Install Proper USB 3.0 Drivers insode Windows 7 and Set Appropriate Controller / Chipset to Virtual Machine.
Follow below mentioned steps:
- Download following softwares:
a. VM VirtualBox Extension Pack
https://www.virtualbox.org/wiki/Downloadsb. USB 3.0 Drivers
http://www.dell.com/support/home/in/en/inbsdt1/Drivers/DriversDetails?driverId=GVT5M - Open VirtualBox and Install Extension pack (Downloaded at step 1.a)
VirtualBox > Preferences > Extensions > Click on (+) button.
Navigate to the folder where you have downloaded the extension pack and Install it.
- Start «Windows 7» in Virtual Box
- Install Guest Additions
Devices > Insert Guest Additions CD Image.
Open Computer > Double Click on «VirtualBox Guest Additions» and Install it.
-
Install USB 3.0 Drivers
Navigate to the folder where you have downloaded drivers (in step 1.b)
Double click on downloaded exe file and install it.
-
Shut Down the Virtual Machine (Windows 7).
- Change Some Settings in VirtualBox
Click on «Windows 7» (in the list Virtual Machines you have installed)
Click on settings > Ports > USB > Check on USB 3.0 (xHCI) Controller > OK
-
Quit Virtual Box and Restart the main Machine (Host OS).
You USB 3.0 issue in Windows 7 is fixed now.
For Better Understanding Watch the Demonstration Video given below:
Demonstration:In case some of still face issue with USB 3.0, then you can execute following steps:
- Open Terminal and Run Following Command to Set proper Controller / Chipset
:To display the list of installed Virtual Machine Names.
Change the <virtualmachine_name> to Actual Name of the Virtual Machine in below command. (You can check it in the output of above command)
VBoxManage setextradata "<virtualmachine_name>" VBoxInternal/Devices/usbxhci/0/Config/ChipType uPD720201
:To set the Chip Type to uPD720201
After setting Chip Type, Try to Start your virtual Machine inside VirtualBox.
If It gives error and doesn’t start.Then, you can reset the Chip Type by Following Command.
VBoxManage setextradata "<virtualmachine_name>" VBoxInternal/Devices/usbxhci/0/Config/ChipType
Restart Machine and You are ready to use USB 3.0 in Windows7 in VirtualBox.
To Test External Drive:
- Connect you external Drive to USB port.
- If its detected by MacOS then «Eject» it. (Keep it Connected to USB port)
- Go to Virtual Machine (Windows 7),
Devices > USB > Click on the Name of the Connected External Drive.
Wait for some time and your external USB drive is ready to use.
Feel free to ask doubts in the comment section. I will try my best to solve it.
If you find this helpful by any mean like, comment and share the post.
This is the simplest way to encourage me to keep doing such work.
Thanks and Regards,
-Akshay P. Daga
You already know that VirtualBox is one of the best virtualization software out there. What you may not know is the VirtualBox Extension Pack. This is a combination of drivers that work to increase the functionality of the VirtualBox software. Among other things, this pack will help you use USB 2.0 and 3.0 ports with your virtual machine. This means that you can use devices attached to these ports and open them on the virtual machine created. There are many supported virtual machines including macOS Mojave to Windows 10 and all others in between, Android and Linux.
Other than USB 3.0 support, the virtualization software supports disk encryption, VirtualBox remote desktop protocol (RDP) and NVMe and PXE boot on Intel cards. The vRDP allows virtual machines to be controlled remotely even without network connection. Also supported is the ability to use the computer’s webcam with the virtual machine and AES encryption of data stored on the hard drive. The VirtualBox Extension Pack is cool but how do you install it? Here are the simple steps to follow:
1. Install VirtualBox Extension Pack
Step 1: Download the Extension Pack
You can only find the genuine VirtualBox Extension Pack on the VirtualBox download web page. Simple access the page and click on the latest version of the VirtualBox Extension Pack. The download process will start.

Download VM Extension Pack
Step 2: Start Installation
Open VirtualBox Extension Package file. There will be a pop-up message showing the features of the extension pack. Read through them and if they are what you need to proceed. Press the “install” button.

Install Orade VM VirtualBox Extension Pack
An installation wizard will guide you through the installation process. In order to continue, be sure to accept the license terms. It will take a minute or so for the installation to finish so be patient. Once the installation is over, the extension packages will be added to the “Extension” section of the Preferences window.
Note: For all functions of the extension package to be useful to you, ensure that you have the latest version of the VirtualBox virtualization software installed. You will be prompted to update just click on OK and you will have the latest version within a short time. You will be required to reboot the host operating system for the VirtualBox Extension pack to be effective. Do this before proceeding to enable USB 3.0, Mouse or Keyboard.
2. Enable USB 3.0 to fix Mouse and Keyboard not working problem on macOS
With this feature enabled, you will be able to use devices connected to USB 3.0 and 2.0 ports on your guest operating system. With faster data transfer speeds you will be happy to use these on your virtual machine for data transfer from various USB connected devices. You will be able to transfer photos, personal files and much more into your virtual machine even when the data is unavailable in the host system. To enable this:
1. Open the Oracle VM VirtualBox Manager and select the virtual machine for which you would like to enable the USB support or Mouse, Keyboard. At the top of the list of virtual machines, click on “Settings”. Two panes will be shown.

Open VirtualBox Manager
2. On the left pane, click on the button next to USB to select it. On the right panel, click on the USB 3.0 controller.

Enable USB 3.0 in VirtualBox
Bottom Line
The VirtualBox Extension Pack is a good addition to any virtual machine regardless of the operating system running it. It has many useful features but what stand out is the ability to connect USB 3.0 and 2.0. You can use various devices to transfer data directly to or from your virtual machine. Using your virtual machine just got better! Install the VirtualBox Extension Pack and enjoy!