В прошлом нашем посте мы рассказали как готовим стандартные клиентские виртуальные машины и показали на примере нашего нового тарифа с Ultralight windows vds за 99 рублей, как мы создавали стандартный образ Windows Server 2019 Core.
В службу поддержки стали поступать заявки как работать с Server 2019 Core без привычной графической оболочки. Мы решили показать работу с Windows Server 2019 Core и как установить на него GUI.

Не повторяйте это на рабочих машинах, не используйте Server Core как рабочий стол, отключите RDP, обезопасьте свою информационную систему, именно безопасность — это главная фишка «Core» инсталляции.
В одной из следующих наших статей мы рассмотрим таблицу совместимости программ с Windows Server Core. В этой статье мы затронем то, как установить оболочку.
Оболочка сторонними средствами
1. Сложный, но наиболее экономичный способ
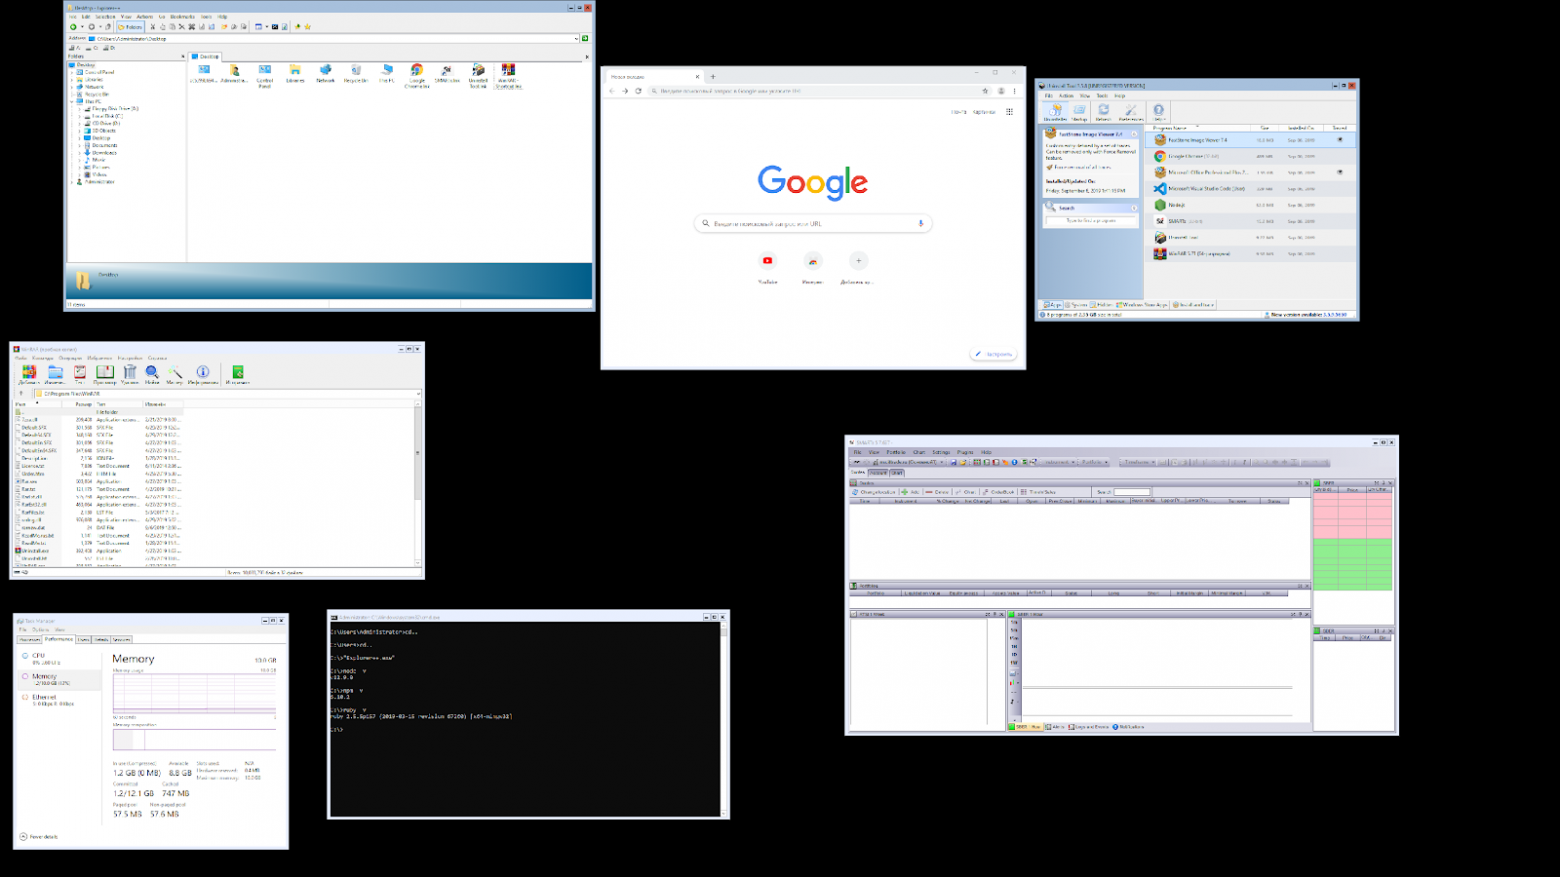
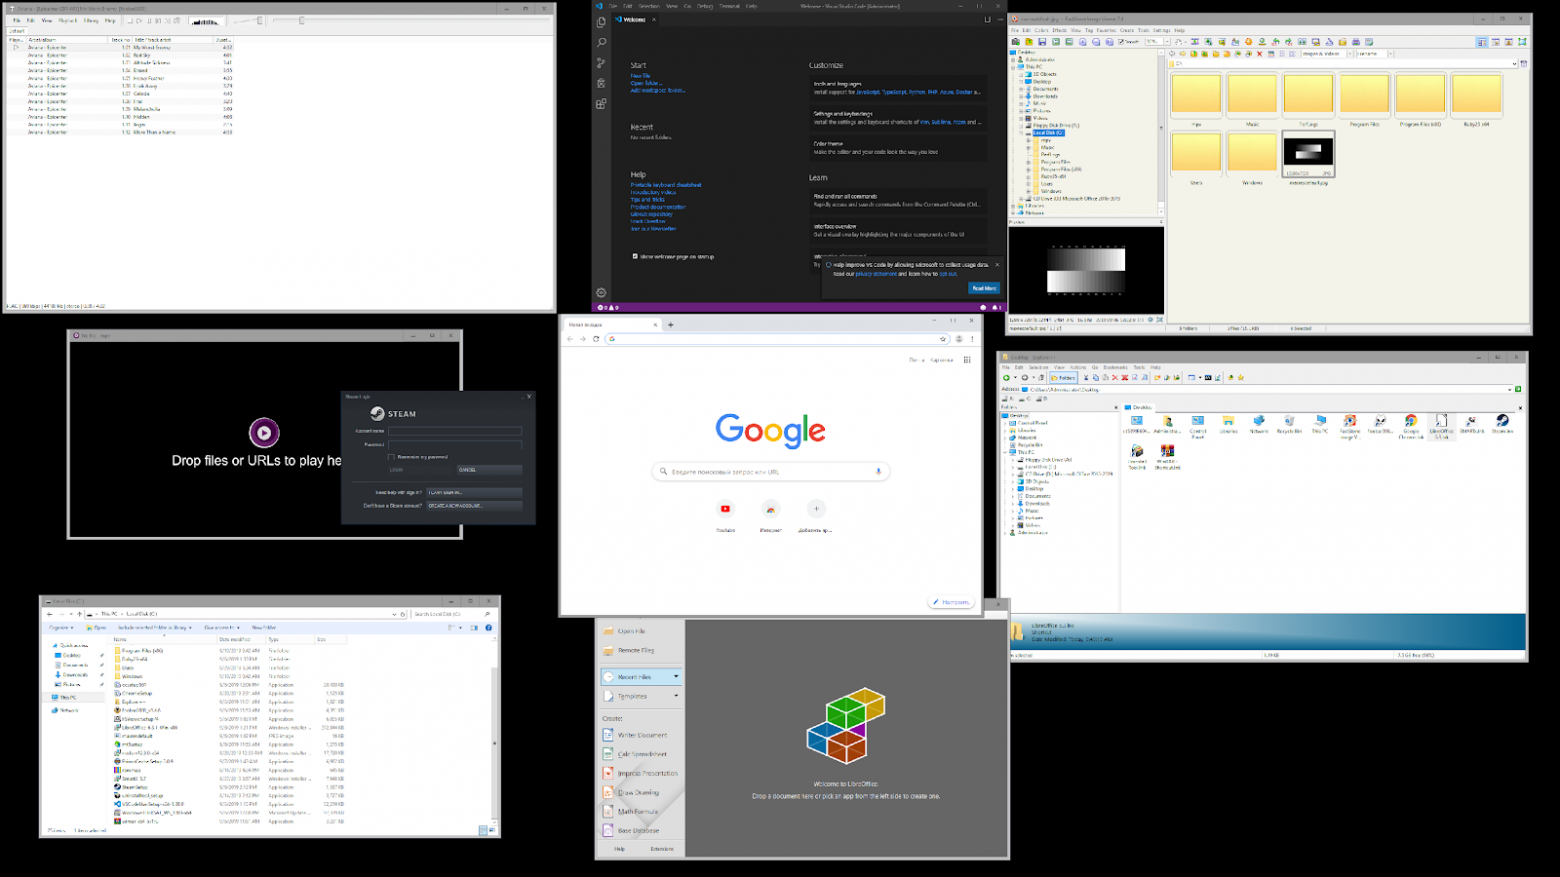
В Server Core из коробки нет привычного нам explorer.exe, чтобы облегчить нам жизнь, мы скачаем explorer++. Он заменяет все, что умеет оригинальный explorer. Рассматривался только explorer++, но подойдет почти любой файловый менеджер, в том числе Total Commander, FAR Manager и другие.
Скачиваем файлы.
Сначала нам нужно скачать файл на сервер. Это можно сделать через SMB (общую папку), Windows Admin Center и Invoke-WebRequest, он работает с параметром -UseBasicParsing.
Invoke-WebRequest -UseBasicParsing -Uri 'https://website.com/file.exe' -OutFile C:UsersAdministratorDownloadsfile.exeГде -uri это URL файла, а -OutFile полный путь куда его скачивать, указывая расширение файла и
C помощью Powershell:
На сервере создаём новую папку:
New-Item -Path 'C:OurCoolFiles' -ItemType DirectoryРасшариваем общую папку:
New-SmbShare -Path 'C:OurCoolFiles' -FullAccess Administrator
-Name OurCoolShare
На вашем ПК папка подключается как сетевой диск.

Через Windows Admin Center создаем новую папку выбрав пункт в меню.
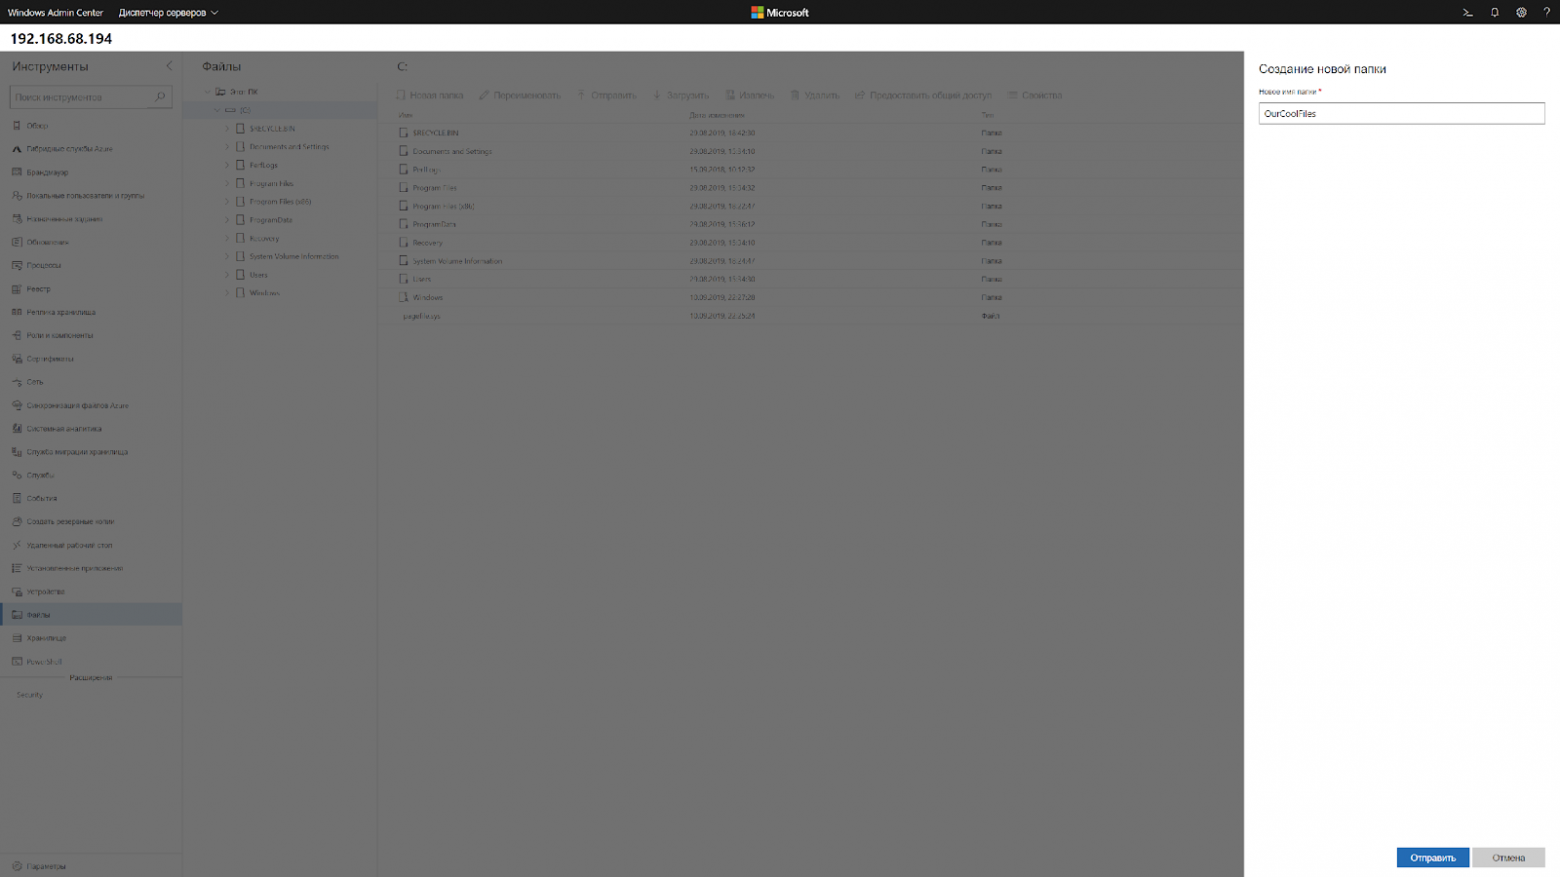
Переходим в общую папку и жмем кнопку отправить, выбираем файл.

Добавляем оболочку в планировщик.
Если вы не хотите запускать оболочку вручную при каждом входе в систему, то нужно добавить её в планировщик задач.
$A = New-ScheduledTaskAction -Execute "C:OurCoolFilesexplorer++.exe"
$T = New-ScheduledTaskTrigger -AtLogon
$P = New-ScheduledTaskPrincipal "localAdministrator"
$S = New-ScheduledTaskSettingsSet
$D = New-ScheduledTask -Action $A -Principal $P -Trigger $T -Settings $S
Register-ScheduledTask StartExplorer -InputObject $D
Без планировщика можно запустить через CMD:
CD C:OurCoolFilesExplorer++.exeСпособ 2. Запускаем родной Explorer
Remember, no GUI
Server Core App Compatibility Feature on Demand (FOD), вернет в систему: MMC, Eventvwr, PerfMon, Resmon, Explorer.exe и даже Powershell ISE. Подробнее можете ознакомиться на MSDN. Существующий набор ролей и компонентов он не расширяет.
Запустите Powershell и введите следующую команду:
Add-WindowsCapability -Online -Name ServerCore.AppCompatibility~~~~0.0.1.0Затем перезагрузите сервер:
Restart-Computer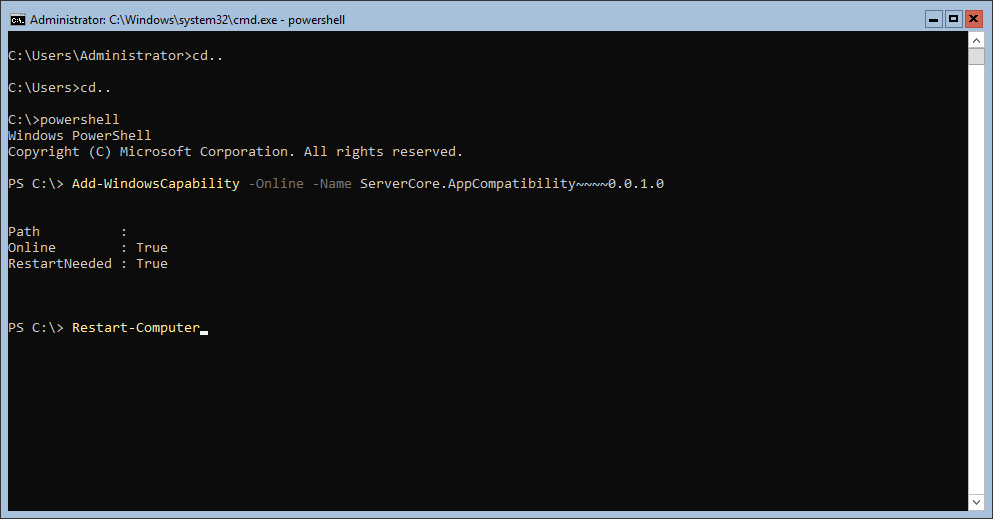
После этого вы сможете запускать даже Microsoft Office, но потеряете примерно 200 мегабайт ОЗУ навсегда, даже если в системе нет активных пользователей.

Windows Server 2019 c установленным Features on Demand
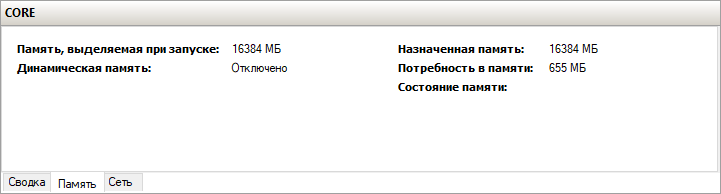
Windows Server 2019 CORE
На этом всё. В следующей статье мы рассмотрим таблицу совместимости программ с Windows Server Core.
Предлагаем обновлённый тариф UltraLite Windows VDS за 99 рублей с установленной Windows Server 2019 Core.

Обновлено 20.08.2019
 Добрый день! Уважаемые читатели и гости IT блога Pyatilistnik.org. В прошлый раз мы с вами разбирали причины синего экрана Windows, научились их диагностировать и решать. В сегодняшней публикации я вас научу производить установку Windows Server 2019 Core версию с последующей настройкой и введением в эксплуатацию. Думаю, что начинающим системным администраторам, данная информация окажется весь полезной и практичной.
Для чего устанавливать Windows Server 2019 Core версию
И так небольшая справка из истории, существует два режима работы операционной системы Windows Server:
- Это классическая установка с графическим интерфейсом, где пользователь имеет возможность взаимодействовать с большим количеством различных окон с настройками и 99% всех действий выполняется с помощью мышки. Это безусловно удобно, но менее безопасно.
- Второй вариант, это использование режима не имеющего графической оболочки, ну почти, это так называемый режим Core или Nano. Тут из операционной системы Windows Server 2019 Core выпилены все графические составляющие, за исключением некоторых исключений. Администратору предоставляется командная строка и оболочка PowerShell, через которую он может взаимодействовать в систему.
Неоспоримый плюс Core версии
- Операционная система Windows Server 2019 в режиме Core работает на порядок быстрее, чем ее графическая версия
- Уменьшается объем необходимого дискового пространства для системы, очень актуально в инфраструктурах, где есть нехватка HDD или SSD пространства.
- Уменьшается периметр возможной атаки на операционную систему, так как в ней меньше компонентов, меньше библиотек и возможных точек проникновения
- Требуется меньшее количество обновлений
- У вас все так же остается возможность удаленного. графического управления
Установка Windows Server 2019 Core
Несколько лет назад я вам рассказывал, про тот же процесс, но в Windows Server 2012 R2. И так у вас есть несколько вариантов развертывания:
- Вы будите, это делать на физический сервер, для это у вас может быть загрузка с WDS сервера или же вы можете создать загрузочную флешку с Windows Server 2019.
- Второй вариант, это подготовка сервера в виде виртуальной машины на разных гипервизорах, например Vmware ESXI 6.5 или Hyper-V.
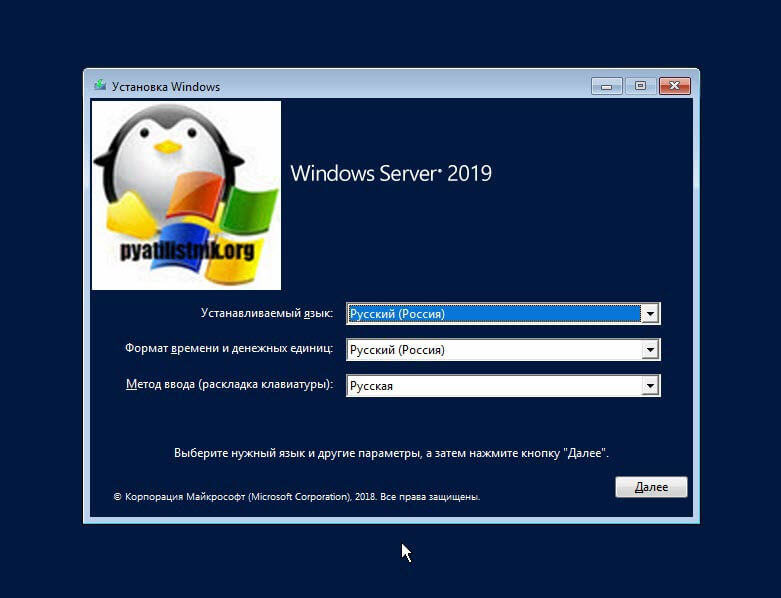
Выбрав удобный для вас механизм развертывания операционной системы, вы загружаете дистрибутив. На первом экране инсталляции выбираете если есть возможность язык интерфейса мастера установки, это ни как не влияет на сам язык Windows Server.
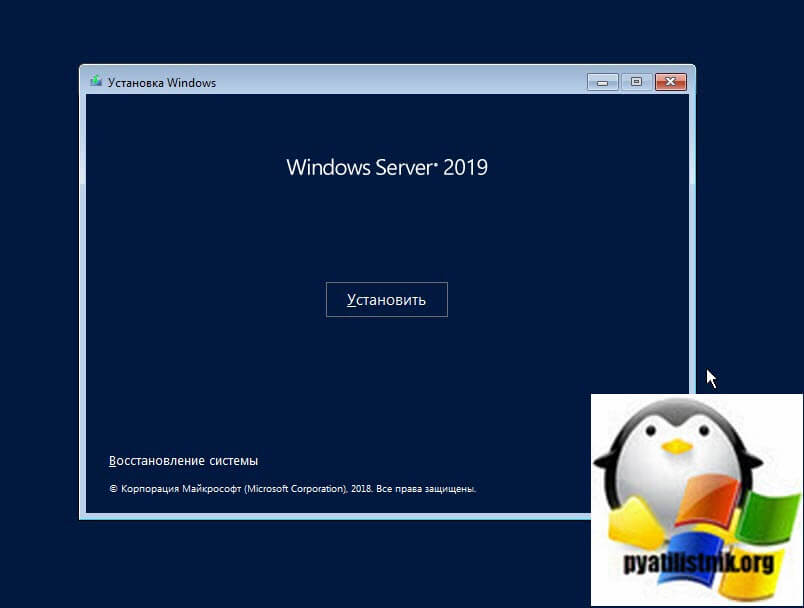
Далее, так как нам не требуется восстановление системы, то мы нажимаем по центру, кнопку «Установить«.
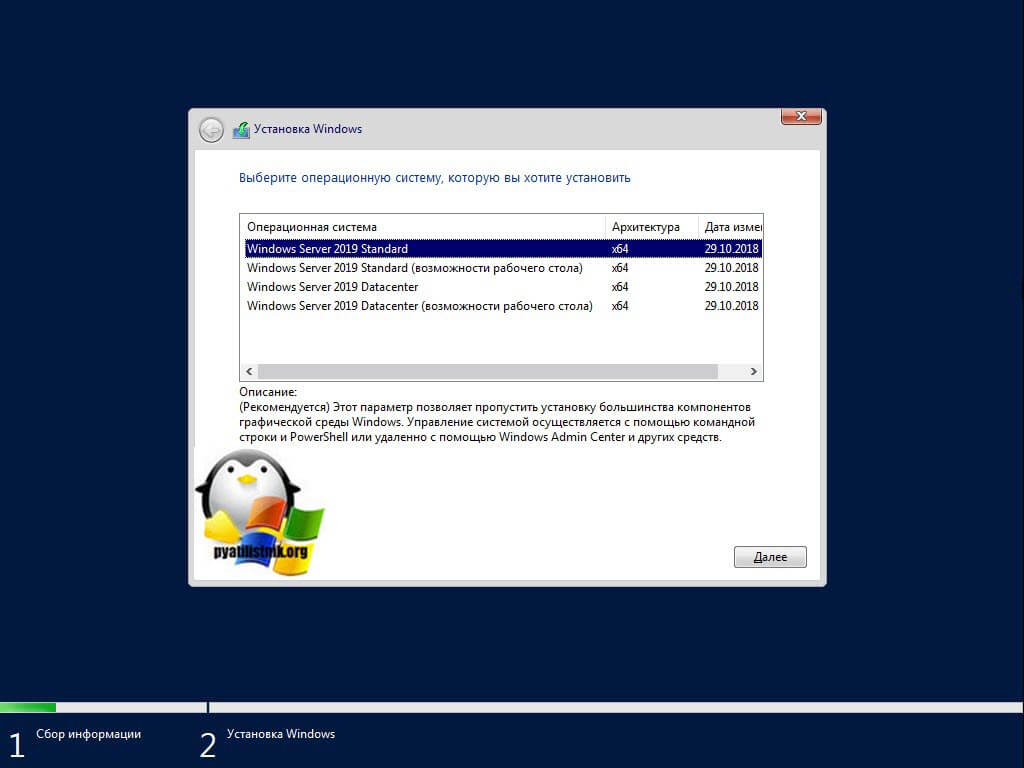
На следующем этапе, вам и нужно выбрать режим установки Windows Server 2019 Core, который не имеет возможностей рабочего стола, это и есть графический интерфейс. Я выберу версию Standard.
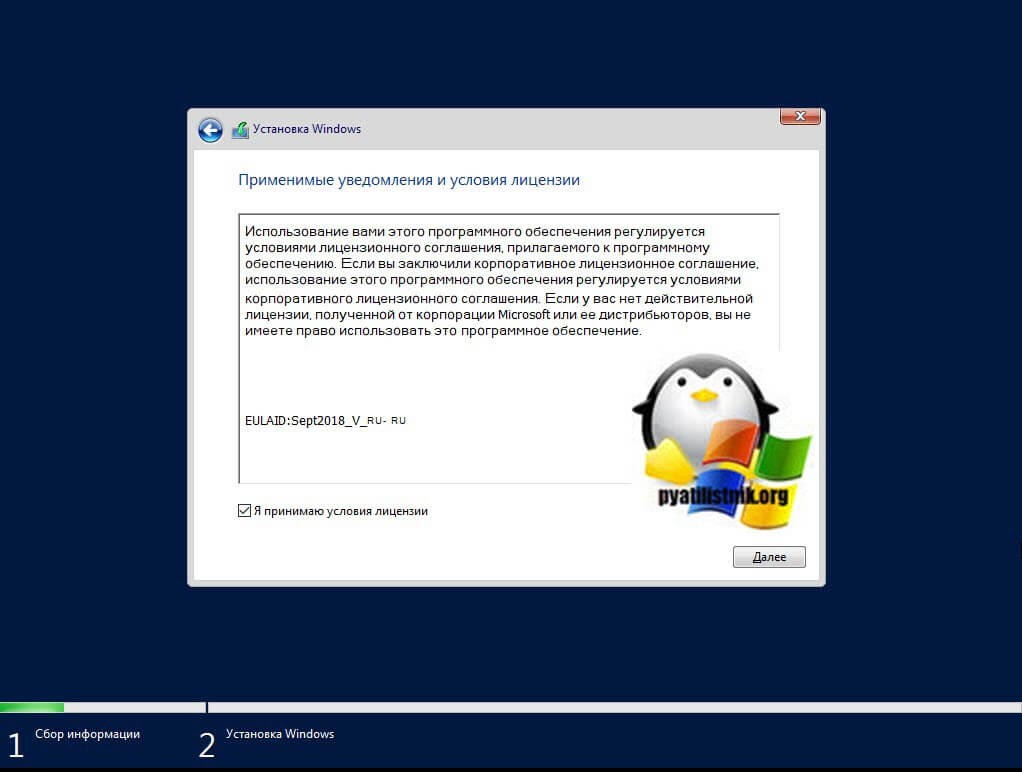
Принимаете лицензионное соглашения и делаем шаг вперед.
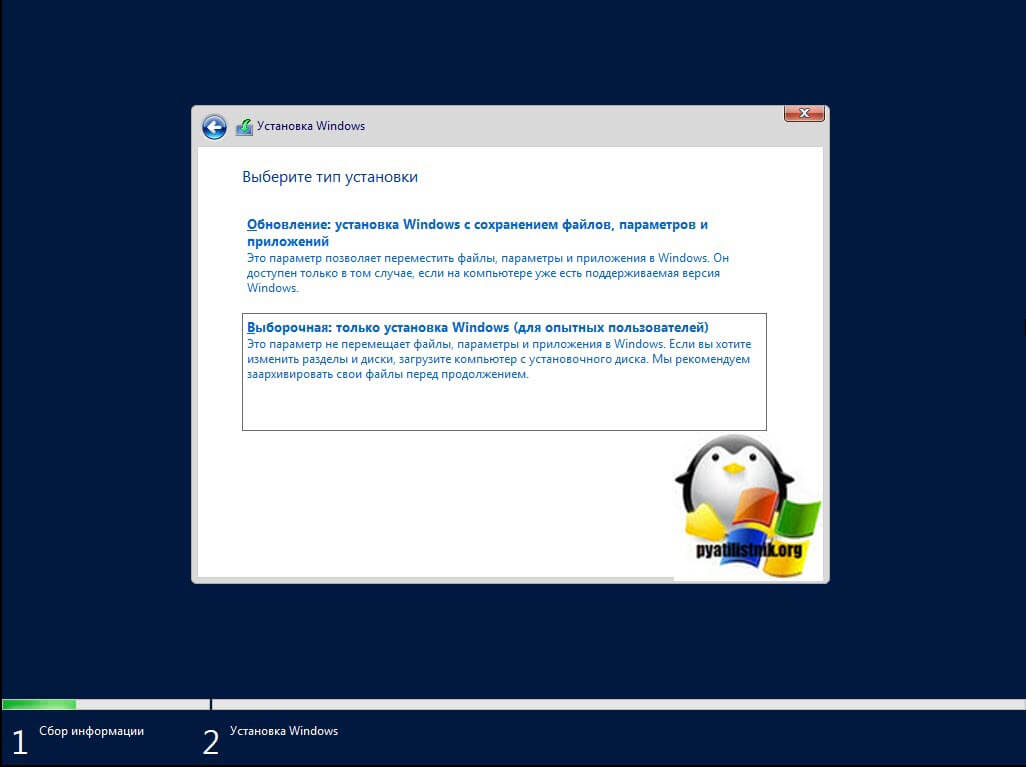
Так как нас не интересует обновление устаревшей системы ,то мы выбираем второй пункт «Выборочная установка, для опытных пользователей»
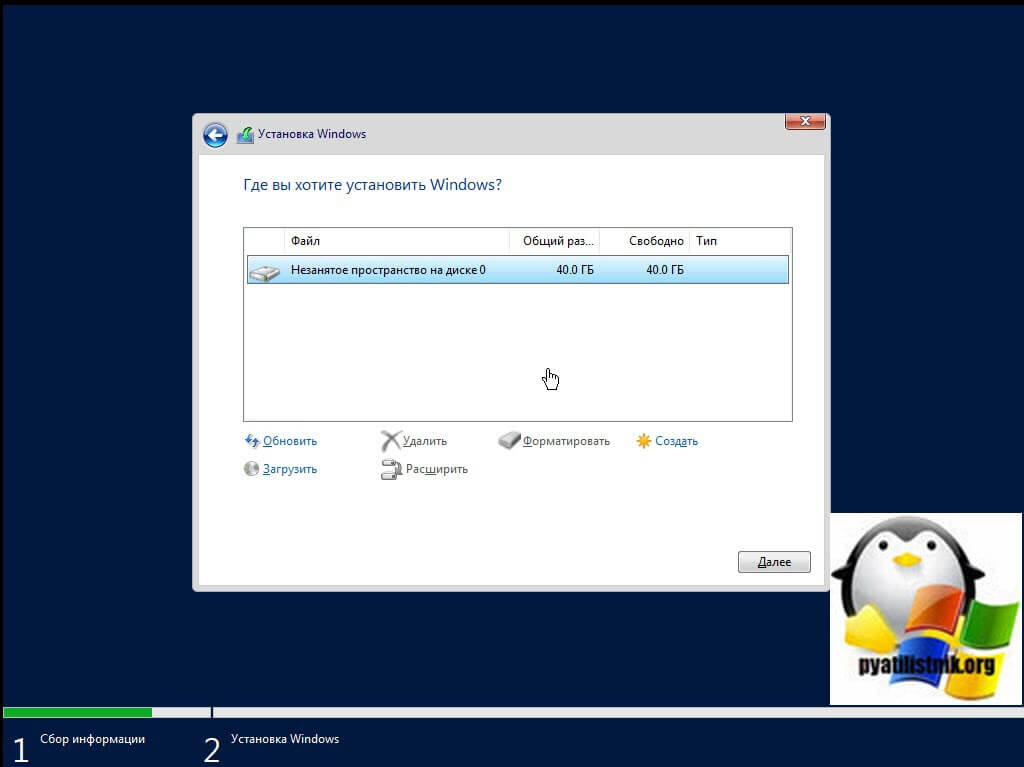
Остается только произвести разметку диска и продолжить инсталляцию Core версии. В моем случае, это один диск, объемом 40 ГБ, мне этого будет достаточно, более чем.
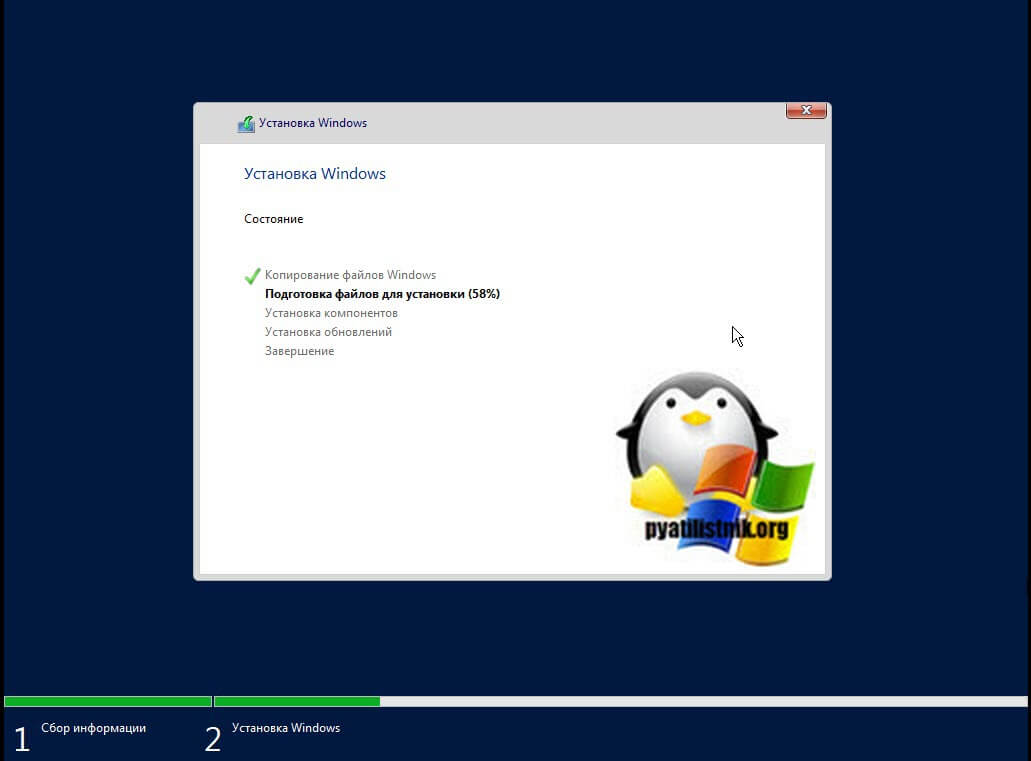
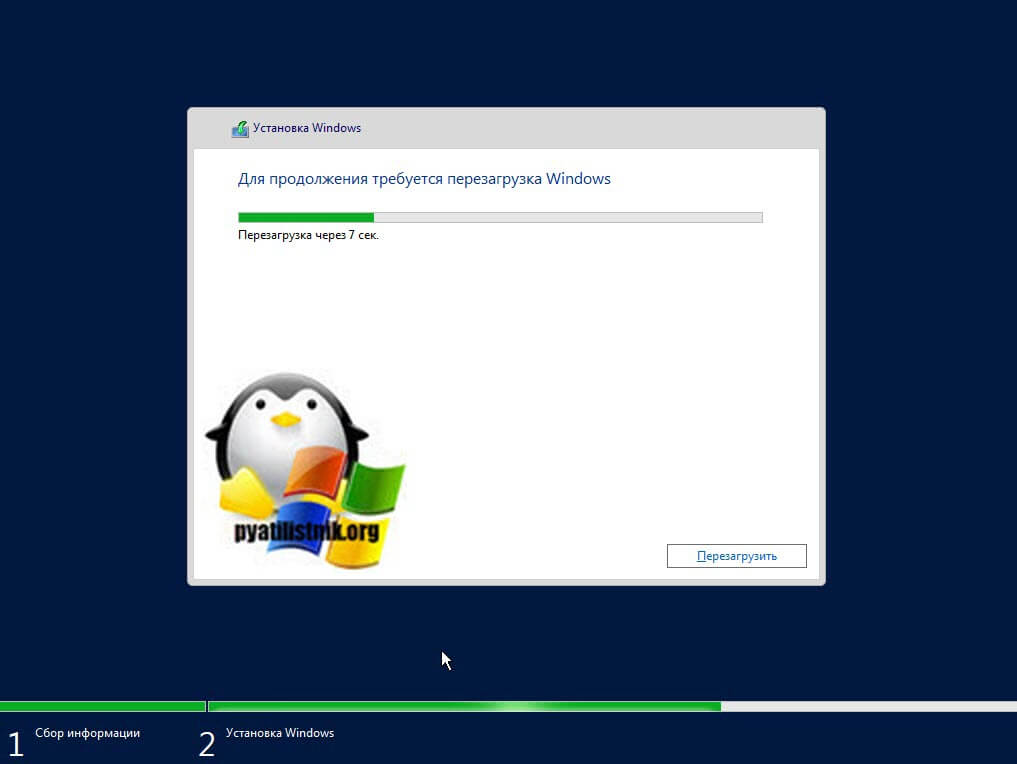
Начинается процесс копирования файлов Windows, затем идет подготовительный этап по установке файлов. Вам остается его дождаться, система уйдет в перезагрузку.
Далее начинается этап установки драйверов на ваше оборудование, установка обновлений.
После очередной перезагрузки Windows Server 2019 у вас появится окно командной строки в котором вам необходимо изменить пароль администратора.
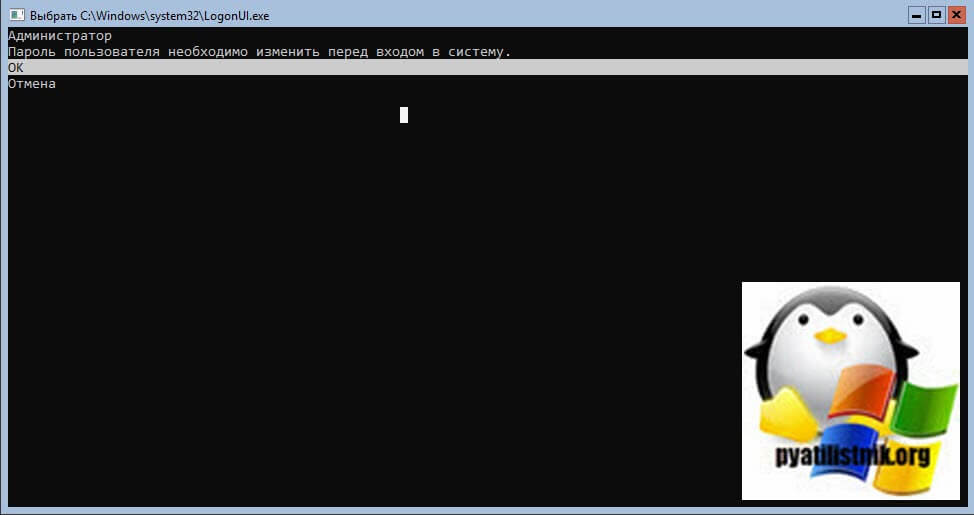
Задаем два раза ваш пароль на вход.

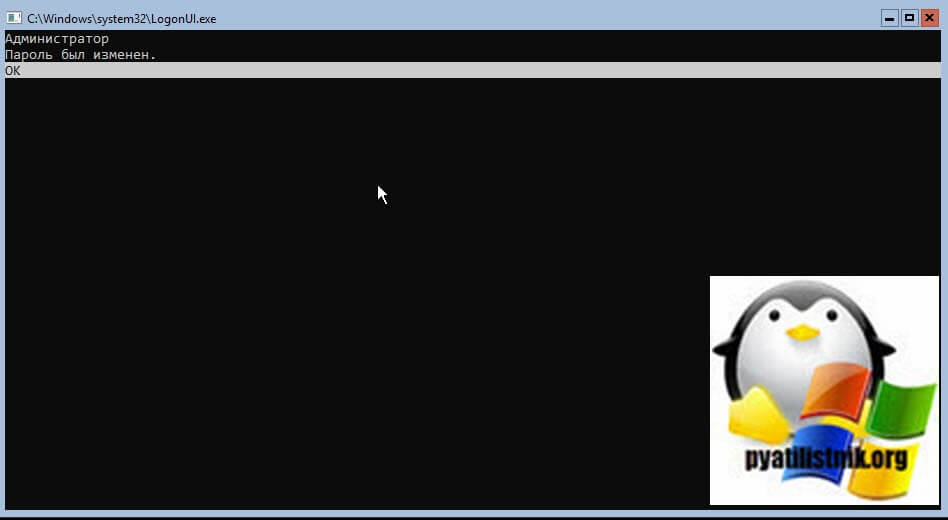
Если вы все ввели верно, то вам покажут, что пароль успешно изменен, на этом установку Windows Server 2019 Core можно считать оконченной и можно приступать к настройке.
Настройка Windows Server 2019 Core
Чтобы ввести такой сервер в эксплуатацию, вам необходимо произвести базовую настройку вашего Windows Server 2019, напомню, это:
- Правильно его назвать по стандартам вашей компании
- Задать статический IP-адрес
- Установить обновления
- Настроить удаленное управление
- Настроить фаэрвол
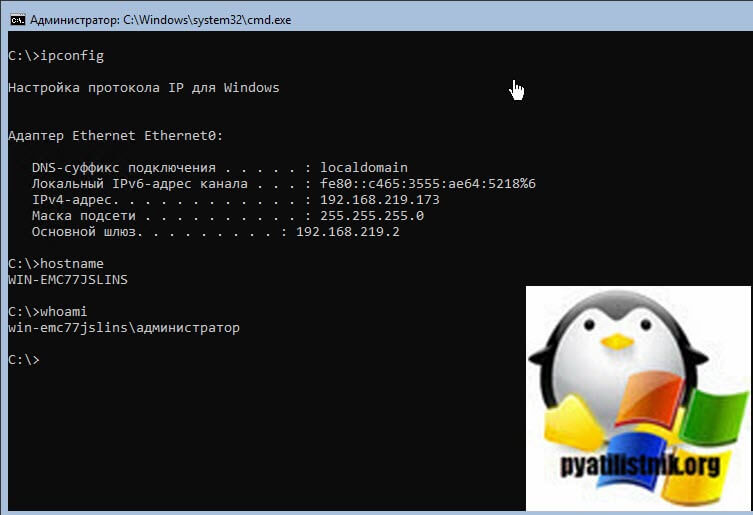
Напоминаю, что в командной строке вы легко можете использовать знакомые вам команды, например netsh, hostname, ipconfig, dir, cd и многое другое
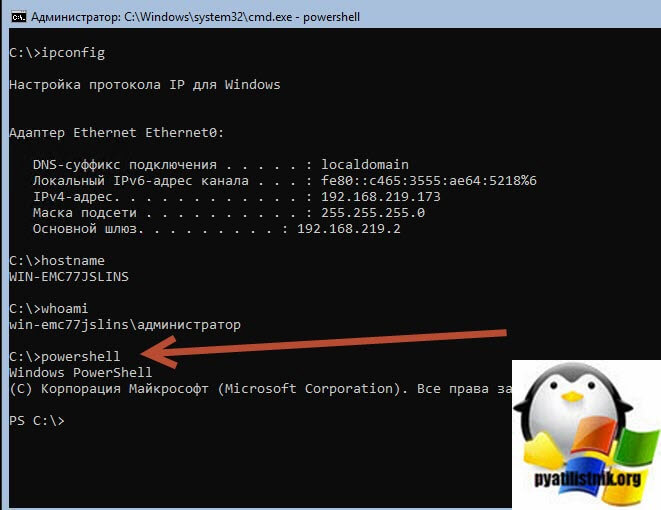
Все эти команды вы как администратор желательно должны знать, но так как на дворе 2019 год, то логично, что большее внимание нужно уделять PowerShell, который вы легко можете открыть в текущем cmd, но это путь более долгий.
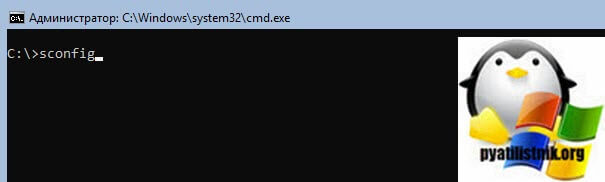
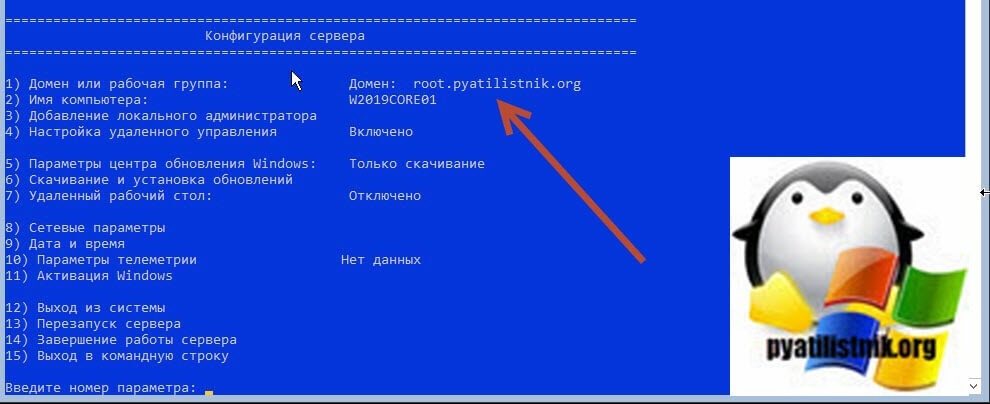
Разработчики еще начиная с версии Windows Server 2012, а может и раньше, вшили замечательный скрипт sconfig, который буквально в считанные минуты позволит вам выполнить поставленные задачи по настройке. В командной строке введите:
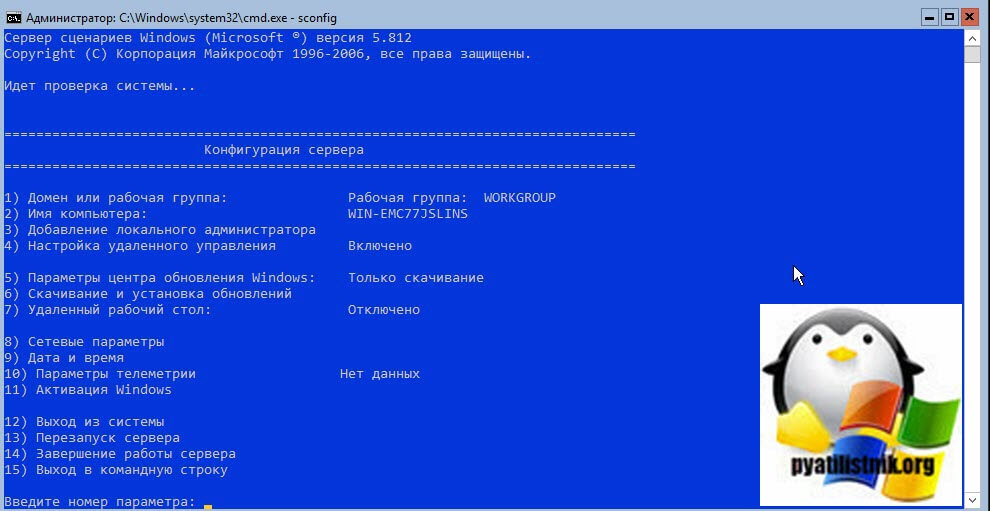
В результате у вас появится голубое окно с 15-ю пунктами:
-
- Домен или рабочая группа — тут вы можете присоединить сервер к домену или рабочей группе
- Имя компьютера — позволяет вам изменить имя системы
- Добавление локального администратора
- Настройка удаленного управления (WinRM), по умолчанию служба включена
- Параметры центра обновления Windows — установка последних фиксов и заплаток безопасности.
- Скачивание и установка обновлений
- Удаленный рабочий стол — включение RDP
- Сетевые параметры — настройка сети (Статические или DHCP)
- Дата и время
- Параметры телеметрии
- Активация Windows
- Выход из системы
- Перезапуск сервера
- Завершение работы сервера
- Выход в командную строку
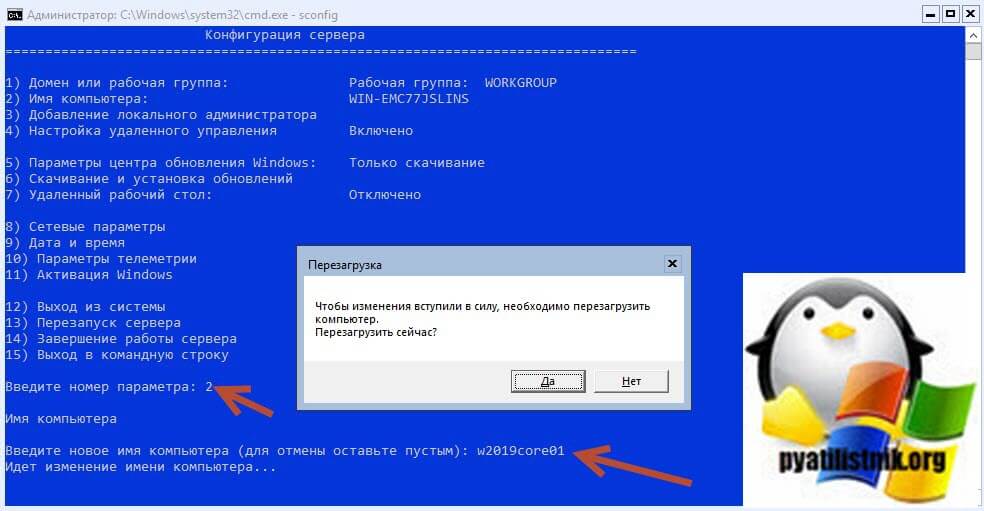
Давайте для начала зададим нужное имя нашему серверу Windows Server 2019 Core. Выбираем пункт 2 и нажимаем Enter. Как видим у меня сейчас не очень красивое имя WIN-EMC77JSLINS. Задаем новое имя сервера, у меня это будет w2019core01. Когда согласитесь сохранить изменения, вас попросят перезагрузить сервер, соглашаемся.
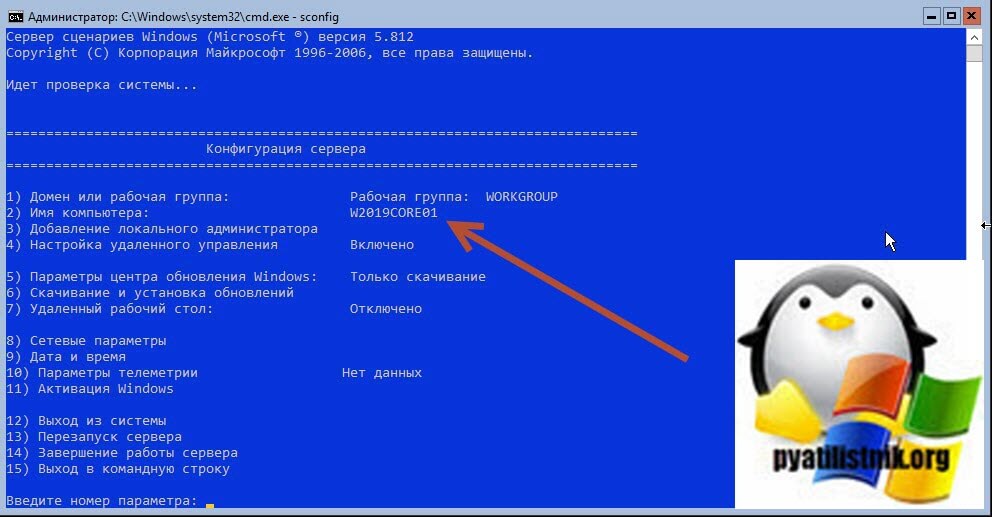
Как видим сервер после перезагрузки изменил имя.
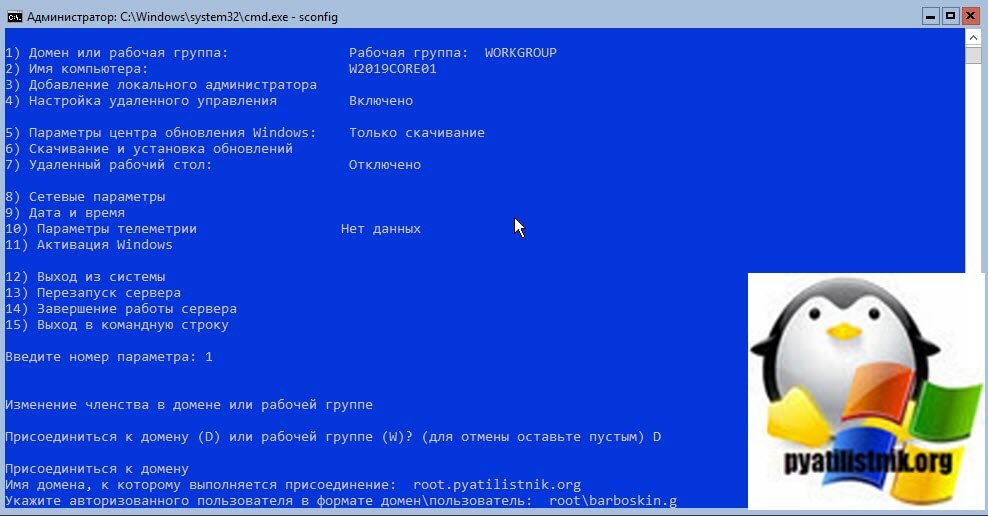
Далее я вам предлагаю ввести наш Windows Server 2019 Core в домен Active Directory. Для этого выбираем первый пункт. Вас спросят, что вы хотите сделать, так как мы хотим сделать сервер частью нашего предприятия, то нажимаем букву «D«. Укажем имя домена и имя пользователя от имени которого мы выполним присоединение, напоминаю, что по умолчанию, это может сделать даже любой пользователь Active Directory, как минимум 10 раз.
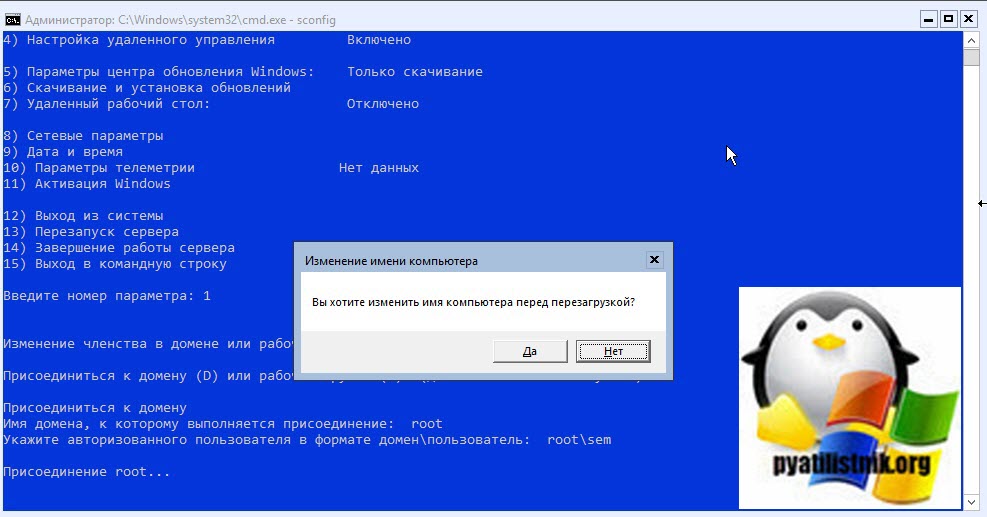
Вводим пароль от учетной записи два раза, если все хорошо, то вам выскочит окно, где вы можете изменить имя компьютера, мне это не нужно.
В результате у меня уже в статусе домен, видится нужное мне значение. На контроллере домена запись уже должна появиться, но я вам рекомендую все же перезагрузиться.
Следующим шагом я вам предлагаю настроить статический ip-адрес. Выбираем в sconfig 8-й пункт сетевые параметры. В моем примере у меня есть два сетевых интерфейса, я буду настраивать второй, имеющий выход во внутреннюю, доменную сеть. Выбираю второй пункт.
Как видим у вас четыре пункта:
- Установка адреса сетевого адаптера
- Установить DNS-серверы
- Очистить параметры DNS-сервера
- Вернуться в главное меню
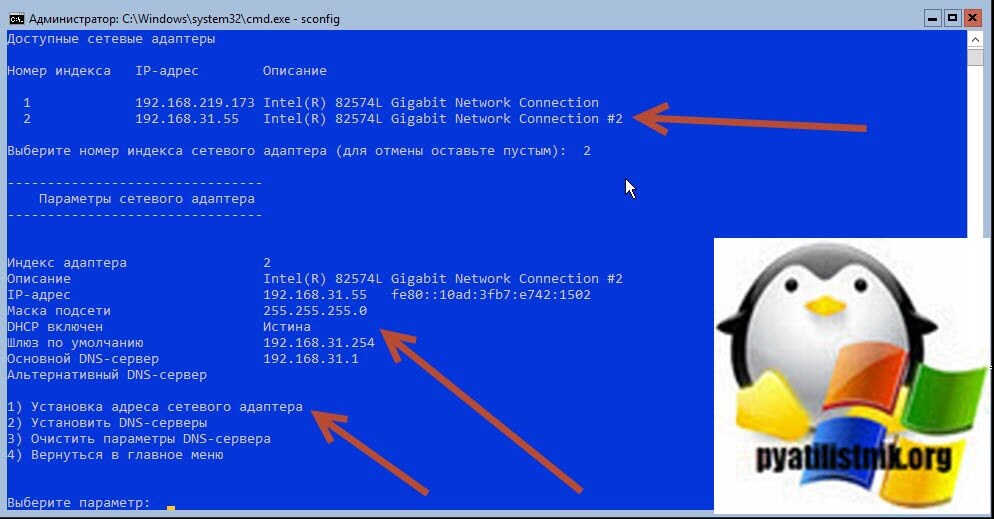
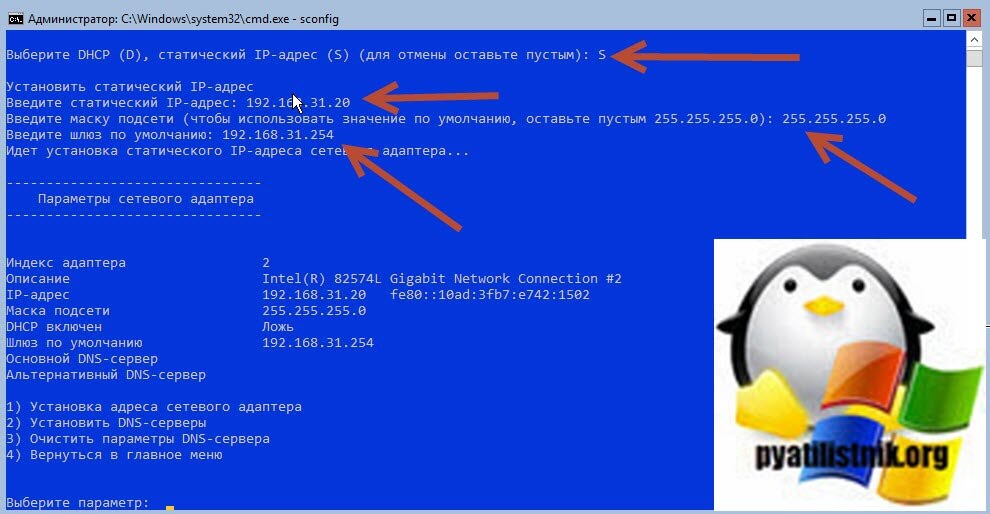
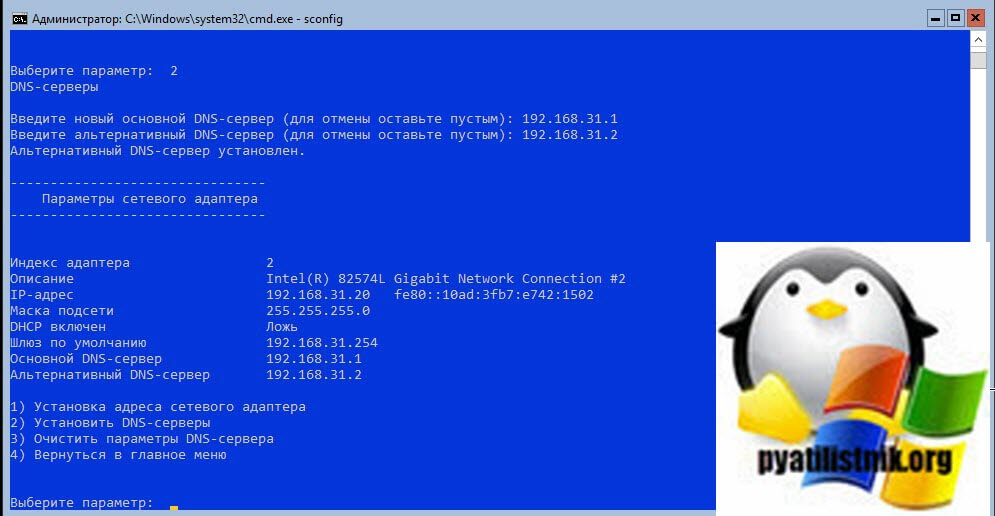
Выбираем первый пункт и зададим статический ip-адрес. На первом шаге вас спросят выбрать динамическое получение адреса с DHCP сервера, клавиша «D» или же статическое получение, выбираем «S«. Указываем ip адрес, в моем случае, это 192.168.31.20, задаем маску сети и основной шлюз. Ваши настройки сохранятся.
Теперь выбираем второй пункт и укажем DNS серверы. Лучше указывать два, для отказоустойчивости.
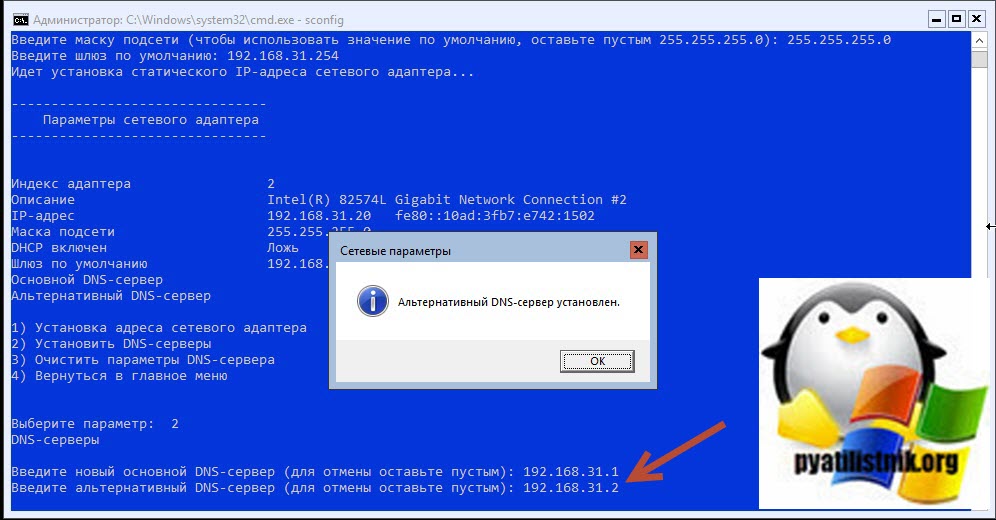
Проверяем наши сетевые настройки и возвращаемся в главное меню.
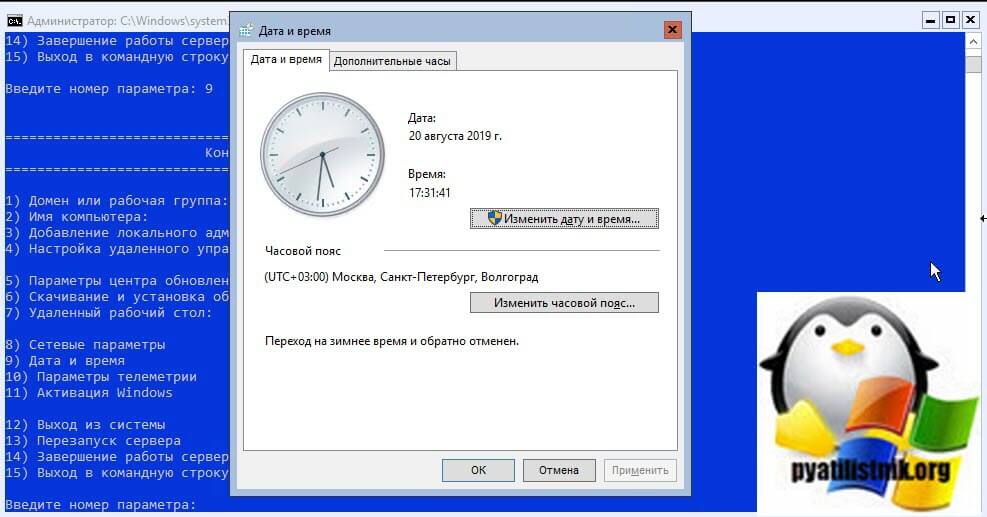
Далее я вам советую проверить дату и время, а так же часовой пояс, это очень важно. Выбираем пункт 9 «Дата и время». И о чудо в Windows Server 2019 Core есть графическое окно, да не удивляйтесь.
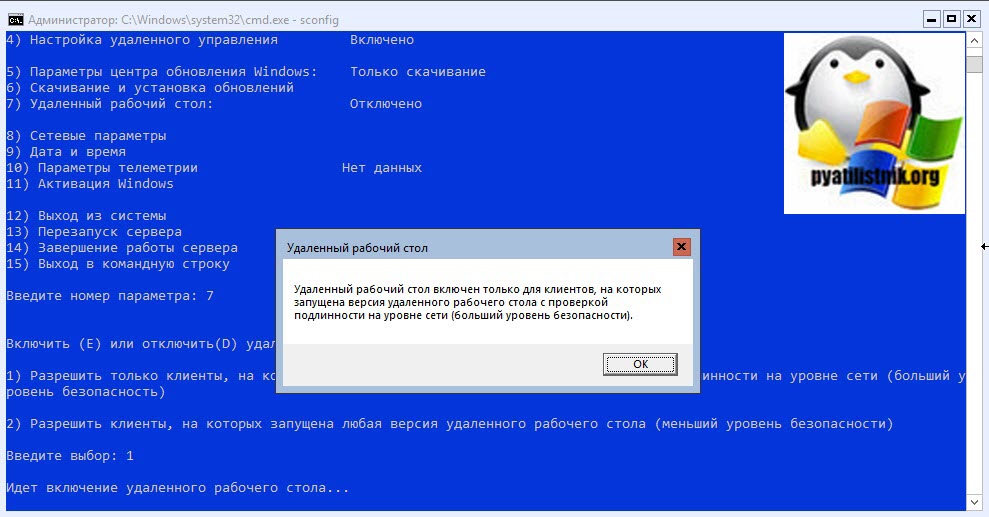
Давайте включим удаленный рабочий стол, чтобы была возможность подключаться при необходимости по RDP, хотя уверен, что это будет очень редко, так как есть более удобный механизм WinRM. Выбираем 7-й пункт.Тут будет два варианта, буква «E» включить или буква «D» отключить. Далее нужно выбрать будите ли вы использовать NLA или нет, я советую использовать, поэтому выбираем первый пункт:
- Разрешить только клиенты, на которых запущен удаленный рабочий стол с проверкой подлинности на уровне сети (Больший уровень безопасности)
- Разрешить клиенты, на которых запущена любая версия удаленного рабочего стола (Меньший уровень безопасности)

Вас уведомят, что удаленный рабочий стол включен.
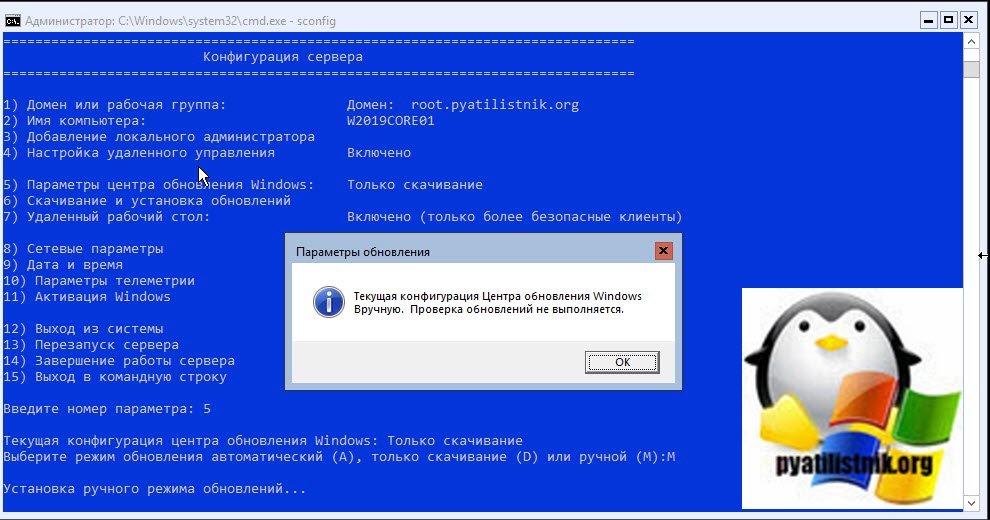
Остается не решенным еще вопрос по обновлению Windows Server 2019 Core. Для этого у нас есть два пункта 5 и 6. Выбираем пункт 5, вас спросят, как будут находится обновления, в каком режиме. На выбор будут автоматический, буква «A«, скачивание, буква «D» или ручной режим, буква «M«. Я выберу «M», так как я привык перепроверять получаемые обновления.
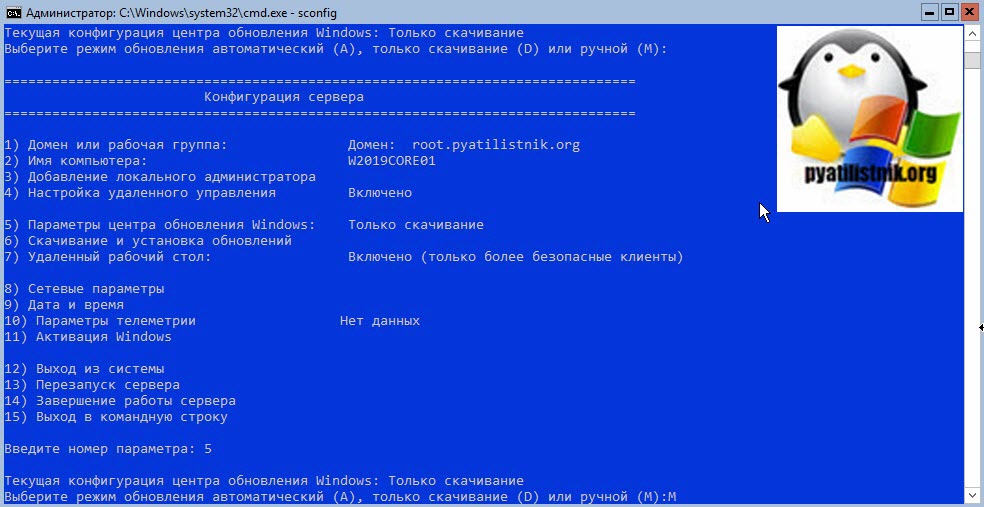
Вас уведомят, что настройки к центру обновления Windows применены.
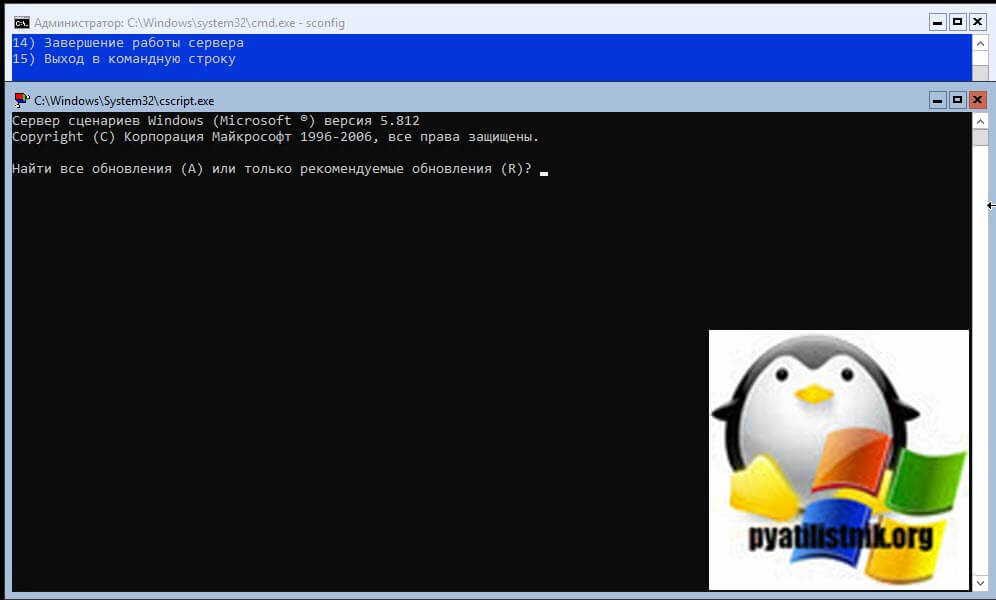
Выбираем 6 пункт и скачаем обновления. Вас спросят найти для всех продуктов или только рекомендуемые. я вам советую закрывать все, что можно, поэтому я выбираю пункт «A«.
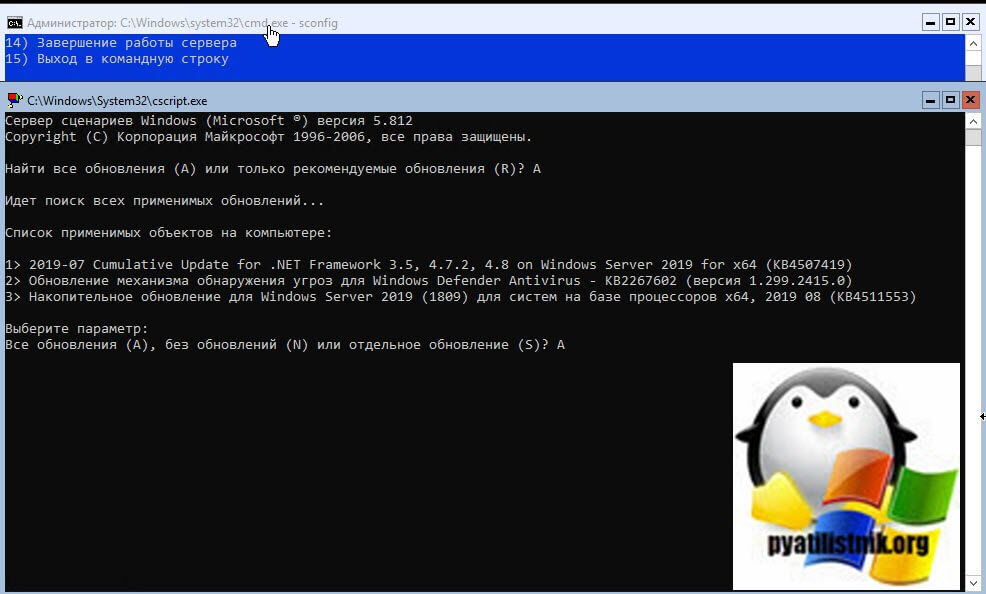
Начинается поиск обновлений, видим у меня нашлось 3 обновления, я могу поставить их все сразу или поодиночке. Я выберу все сразу, пишем «A«.
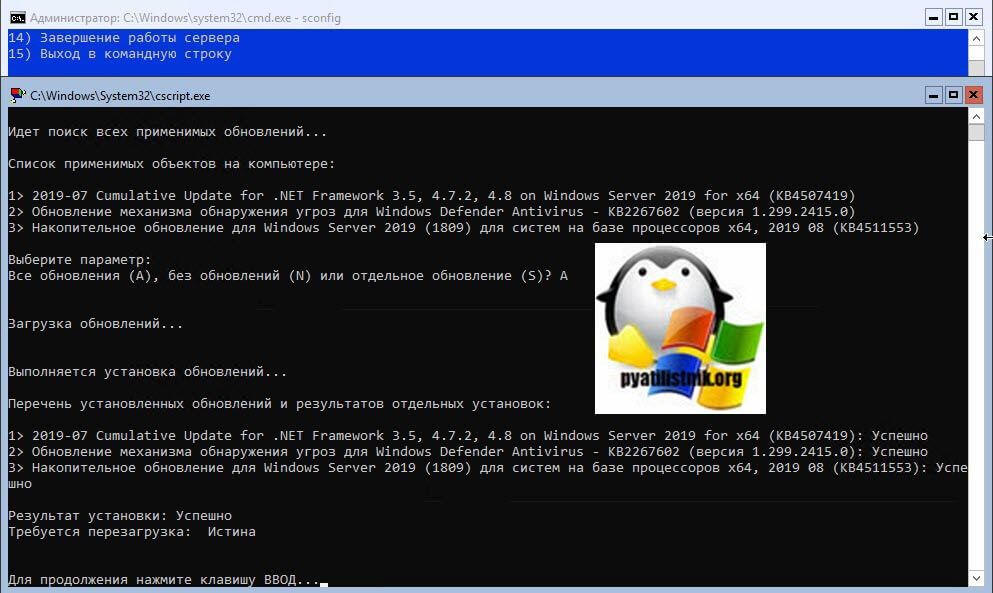
Производится загрузка обновлений. их установка через некоторое время вы увидите их статус.
Активация Windows Server 2019 Core
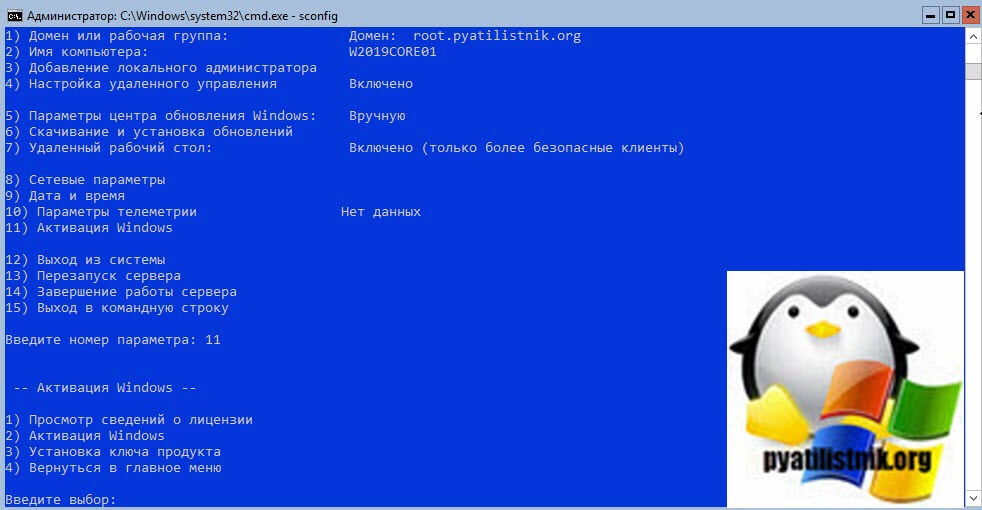
Остается еще активировать ваш сервер, надеюсь, что у вас в локальной сети развернут и настроен KMS сервер. Выбираем 11 пункт. В параметрах активации Windows, у вас будут пункты:
- Просмотр сведений о лицензии
- Активация Windows
- Установка ключа продукта
- Вернуться в главное меню
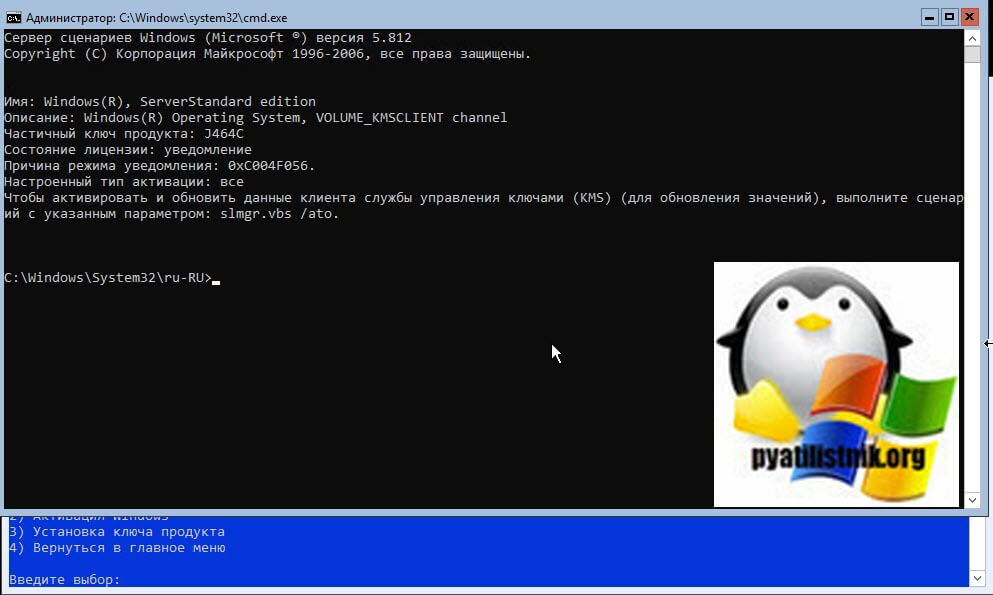
Просмотрим текущее состояние активации Windows Server 2019 Core. Выбираем пункт 1. У вас откроется окно командной строки, вы увидите работу скрипта slmgr. В моем примере я вижу редакцию ОС, ее тип Volume и то, что активация не выполнена, ошибка 0x0C004F056.
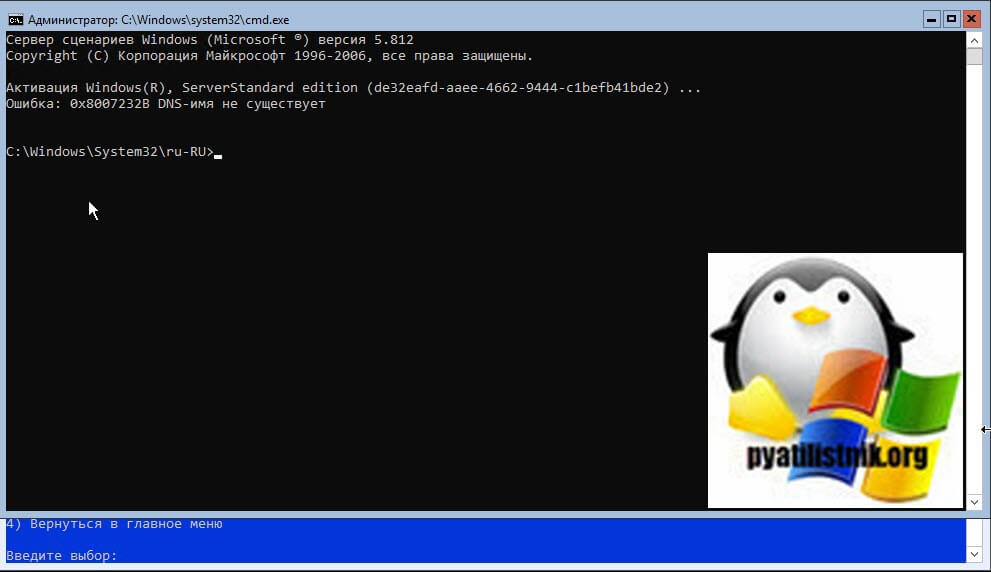
Попробуем активировать сервер, выбираем пункт 2. Если KMS есть, то все отработает, если его нет ,то получите ошибку «0x8007232B DNS-имя не существует».
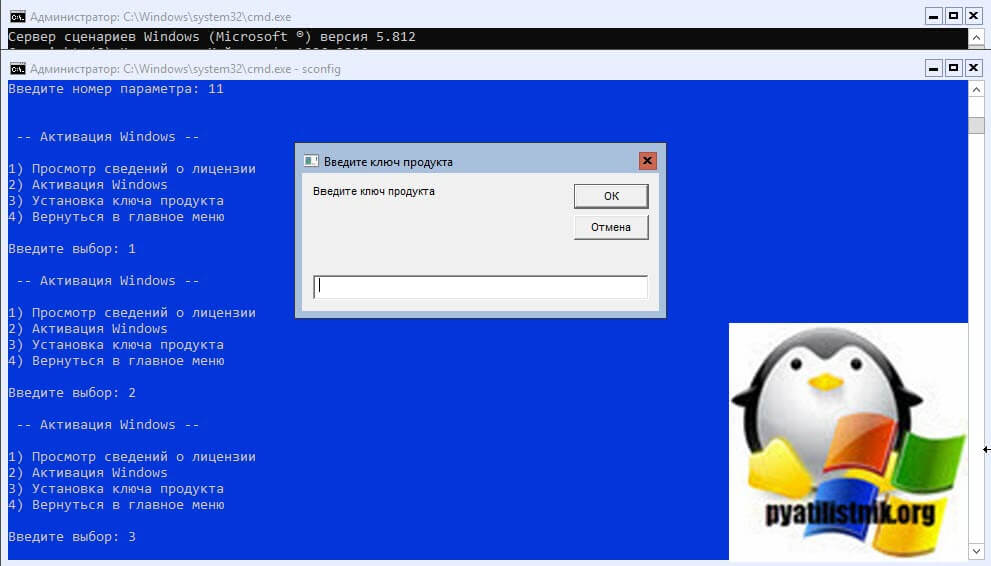
Если нужно поменять ключ продукта, то выберите пункт 3, и у вас откроется еще одно графическое окошко.
В Windows Server 2019 Core по умолчанию уже включена служба удаленно управления WinRM, поэтому дополнительно ее настраивать не нужно. В окне PowerShell введите:
Enter-PSSession -ComputerName w2019core01
В итоге я спокойно подключился и ввел команду ipconfig, где вижу ранее настроенный ip-адрес.

На этом я хочу закончить базовую установку и настройку Windows Server 2019 Core. В будущих статьях я вам расскажу ,как включать «Удаленное управление» через оснастку, научу настраивать правила брандмауэра. С вами был Иван Семин .автор и создать IT портала Pyatilistnik.org.
Hello World,
Today, it will be a quick post. We will basically perform a basic installation of Windows 2019 Server. This type of post is probably all around internet but we needed to test and check by ourselves if any major changes occurred. As you can guess, the installation nowadays is quite straight forward. The most difficult decision to take is which flavor/version of Windows 2019 Server to install. We will quickly go through some of the basics about Windows 2019 and then we will move on the installation part….
So,let’s start this !
Overview Windows 2019 Server
Windows Editions
As mentioned in our previous post, Windows 2019 server ship in 3 Editions
- Windows 2019 Essentials
- Windows 2019 Standard
- Windows 2019 Datacenter
When working on projects, most of the time the Windows 2019 Datacenter edition is used because there is no feature limitations and because it’s also a good choice when using it in highly virtualized environment. When using a Windows 2019 Standard edition, the licensing includes the right to run 2 additional Virtual machines while Datacenter allows you to run an unlimited of virtual machines without paying extra costs.
Windows Datacenter offers more features that the standard edition. Storage Replica, Storage Direct spaces, shielded virtual machines, software defined network… for example are not included in the Standard Edition.
Windows Servicing Channel Models
Another important element to take into account is the Windows servicing Channel a company want to use. As briefly explained in our previous post, a user can choose between two type of releases when working with Windows Server Operating system. You can choose between
- Long Term Service Channel (LTSC)
- Semi-Annual Channel (SAC)
This choice is important because it will define if a desktop interface can be used or not on top of your Server installation. Long Term service Channel (LTSC) would be the way forward if you need a desktop interface on your server and if you need to have a stable and predictable release cycle. Choosing LTSC release ensure that Desktop experience feature is available and you would benefit from a mainstream support for 5 years and extra 5 years for extended support.
Semi-annual Channel (SAC) release are made available twice a year and they will be supported for 18 months. The SAC release does not ship with any desktop interface and no option to install any. So, if you need a desktop interface (for example, you want to use Remote Desktop services), you should stick to the LTSC. SAC releases will probably include latest technology and features but no all companies can move to this aggressive cycle release
Step by Step installation
Assumptions
To perform this installation,
- we have downloaded the Windows 2019 Evaluation Edition which ships with Desktop Experience option.
- We have installed Windows 2019 and Hyper-v role on a physical machine (this is not explained on this post)
- We have created a virtual machine and installation will be performed on top of it
- We will install the Datacenter edition with Desktop experience in this guide
Quick Step by Step Guide
Step 1 – Your virtual machine is powered off
Step 2 – Open your virtual machine settings and mount the iso file, change the boot order if needed.
Step 3 – Boot your virtual machine
Step 4 – the windows installer will show up and will prompt you to Select your regional settings (Language and Keyboard layout)

click on picture for better resolution
Step 5 – The Wizard start and you can see the Install now button. click on it to proceed with the installation.

click on picture for better resolution
The setup wizard initialize and will prepare the next steps

click on picture for better resolution
Step 6 – in the selection dialog box, you can choose which Windows 2019 edition you want to use and with or without desktop interface. We have selected Datacenter + Desktop Experience option

click on picture for better resolution
Step 7 – In the license agreement page, accept it and proceed

click on picture for better resolution
Step 8 – In the installation page, select the option custom.

click on picture for better resolution
Step 9 – In the Disk page, accept default and proceed. The wizard will create all the necessary partition needed

click on picture for better resolution
Step 10 – In the Installing Windows step, you can relax and wait for the machine to reboot

click on picture for better resolution

click on picture for better resolution
Step 11 – The system will reboot perform some post actions

click on picture for better resolution
Step 12 – You will be presented with the Customize page where you basically need to provide password for the local admin account to be used

click on picture for better resolution
Step 13 – When done, you will be presented with the login page with the familiar background image used in Windows 2016 and Windows 10

click on picture for better resolution
Step 14 – You can login and start customize your installation by providing computer name, join the machine to a domain, set network settings, install roles and anything you would need to do have a functional server that meets your requirements. When you open server manager (or when started automatically), you will see a popup messaging inviting you to test the Windows Admin Center.

click on picture for better resolution
We are planning to install and play around with the new web interface that will provide another set of tool that can be used to manage remotely a server box. We might share our findings in a future post….
Final notes
As you can see, the process has not changed much. Installation process is quite straight forward and seems even simplify as almost no questions or customization settings are shown during the installation. Now that the installation has been performed, we will need to dig a little bit to see what has been changed and/or improved in this release. This might be the subject of a future post as well.
Till next time
See ya

- Remove From My Forums
-
Question
-
Hello!
Just downloaded Windows Server 2019 Preview, and booted it up in a virtual machine, just to try it. But, there is no GUI. Is there a way to enable it, or does the Preview of 2019 not feature one?
All replies
-
Sounds like you may have got the wrong one (just like I did) You’ll want this one below.
Windows Server vNext LTSC Preview — Build 17623

Regards, Dave Patrick ….
Microsoft Certified Professional
Microsoft MVP [Windows Server] Datacenter ManagementDisclaimer: This posting is provided «AS IS» with no warranties or guarantees, and confers no rights.
-
Edited by
Friday, March 30, 2018 2:37 AM
-
Proposed as answer by
Dave PatrickMVP
Wednesday, April 4, 2018 12:47 PM
-
Edited by
-
Hi,
I agree with Dave.
Please refer to the figure below
Best Regards,
Frank
Please remember to mark the replies as an answers if they help.
If you have feedback for TechNet Subscriber Support, contact
tnmff@microsoft.com -
there is no such options, only standard or data center.
it’s not the first time i Install Windows.
it doesn’t even have the GUI install interface when you install it «Server Graphical Shell»
i think the link MS provided is server core
can we have a link to download the full server ISO not the core.
-
there is no such options, only standard or data center.
it’s not the first time i Install Windows.
it doesn’t even have the GUI install interface when you install it «Server Graphical Shell»
i think the link MS provided is server core
can we have a link to download the full server ISO not the core.
You got the wrong download. Check my post.
Regards, Dave Patrick ….
Microsoft Certified Professional
Microsoft MVP [Windows Server] Datacenter ManagementDisclaimer: This posting is provided «AS IS» with no warranties or guarantees, and confers no rights.
-
No GUI for me here too and only two options to chose from for installation.
I got this download too; in fact there is only one download offered
The ISO I downloaded was 2.8 GB (2939480 KB). Maybe the link points to the core version instead to the full ISO….
-
Hi,
Please check the button which you enter again.
Choose language first and download.
The ISO was 4.4 GB.
Best Regards,
Frank
Please remember to mark the replies as an answers if they help.
If you have feedback for TechNet Subscriber Support, contact
tnmff@microsoft.com-
Proposed as answer by
frank_songMicrosoft contingent staff
Wednesday, April 4, 2018 7:59 AM
-
Proposed as answer by
-
Hi,
Just checking in to see if the information provided was helpful. Please let us know if you would like further assistance.Best Regards,
Frank
Please remember to mark the replies as an answers if they help.
If you have feedback for TechNet Subscriber Support, contact
tnmff@microsoft.com -
Hi,
I’ve just downloaded it too, and there is no GUI. I’ve downloaded 17650. In the install options those Desktop Experience options were not there.
-Steve.
-
17650 doesn’t have GUI
if need GUI, download 17623
-
The new site doesn’t have those options…
https://www.microsoft.com/en-us/software-download/windowsinsiderpreviewserver
-
Where do I get 17623 from? I just downloaded the VHDX for 17677 Semi-Annual, and still no GUI!
-
Ah ha! Downloaded 17677 LTSC & back with the GUI.
-
got it. LTSC preview has the guy option, semi annual does not
https://www.microsoft.com/en-us/software-download/windowsinsiderpreviewserver
-
Proposed as answer by
Clocktower
Monday, September 10, 2018 11:54 PM
-
Proposed as answer by
-
got it. LTSC preview has the guy option, semi annual does not
https://www.microsoft.com/en-us/software-download/windowsinsiderpreviewserver
I’d start a new thread.
Regards, Dave Patrick ….
Microsoft Certified Professional
Microsoft MVP [Windows Server] Datacenter ManagementDisclaimer: This posting is provided «AS IS» with no warranties or guarantees, and confers no rights.
-
Thank you! I had the same question and within minutes of reading your response, I was up and running (with the GUI version). Many Thanks!!!
-
When I try to install the LTSC using the iso I’m being prompted for a product key. I don’t see any place to get the key from.
John Marcum | Microsoft MVP — Enterprise Client Management
-
When I try to install the LTSC using the iso I’m being prompted for a product key. I don’t see any place to get the key from.
John Marcum | Microsoft MVP — Enterprise Client Management
I’d start a new thread.
Regards, Dave Patrick ….
Microsoft Certified Professional
Microsoft MVP [Windows Server] Datacenter ManagementDisclaimer: This posting is provided «AS IS» with no warranties or guarantees, and confers no rights.
-
For future readers of this thread, it is also possible the product key you are entering is hiding the Desktop Experience options. I suggest you skip the product key entry part of the setup process if you downloaded the release ISO which then should show
all 4 installation options. -
a «guy» option. I dont need a guy!!
- Remove From My Forums
-
Question
-
Hello!
Just downloaded Windows Server 2019 Preview, and booted it up in a virtual machine, just to try it. But, there is no GUI. Is there a way to enable it, or does the Preview of 2019 not feature one?
All replies
-
Sounds like you may have got the wrong one (just like I did) You’ll want this one below.
Windows Server vNext LTSC Preview — Build 17623
Regards, Dave Patrick ….
Microsoft Certified Professional
Microsoft MVP [Windows Server] Datacenter ManagementDisclaimer: This posting is provided «AS IS» with no warranties or guarantees, and confers no rights.
-
Edited by
Friday, March 30, 2018 2:37 AM
-
Proposed as answer by
Dave PatrickMVP
Wednesday, April 4, 2018 12:47 PM
-
Edited by
-
Hi,
I agree with Dave.
Please refer to the figure below
Best Regards,
Frank
Please remember to mark the replies as an answers if they help.
If you have feedback for TechNet Subscriber Support, contact
tnmff@microsoft.com -
there is no such options, only standard or data center.
it’s not the first time i Install Windows.
it doesn’t even have the GUI install interface when you install it «Server Graphical Shell»
i think the link MS provided is server core
can we have a link to download the full server ISO not the core.
-
there is no such options, only standard or data center.
it’s not the first time i Install Windows.
it doesn’t even have the GUI install interface when you install it «Server Graphical Shell»
i think the link MS provided is server core
can we have a link to download the full server ISO not the core.
You got the wrong download. Check my post.
Regards, Dave Patrick ….
Microsoft Certified Professional
Microsoft MVP [Windows Server] Datacenter ManagementDisclaimer: This posting is provided «AS IS» with no warranties or guarantees, and confers no rights.
-
No GUI for me here too and only two options to chose from for installation.
I got this download too; in fact there is only one download offered
The ISO I downloaded was 2.8 GB (2939480 KB). Maybe the link points to the core version instead to the full ISO….
-
Hi,
Please check the button which you enter again.
Choose language first and download.
The ISO was 4.4 GB.
Best Regards,
Frank
Please remember to mark the replies as an answers if they help.
If you have feedback for TechNet Subscriber Support, contact
tnmff@microsoft.com-
Proposed as answer by
frank_songMicrosoft contingent staff
Wednesday, April 4, 2018 7:59 AM
-
Proposed as answer by
-
Hi,
Just checking in to see if the information provided was helpful. Please let us know if you would like further assistance.Best Regards,
Frank
Please remember to mark the replies as an answers if they help.
If you have feedback for TechNet Subscriber Support, contact
tnmff@microsoft.com -
Hi,
I’ve just downloaded it too, and there is no GUI. I’ve downloaded 17650. In the install options those Desktop Experience options were not there.
-Steve.
-
17650 doesn’t have GUI
if need GUI, download 17623
-
The new site doesn’t have those options…
https://www.microsoft.com/en-us/software-download/windowsinsiderpreviewserver
-
Where do I get 17623 from? I just downloaded the VHDX for 17677 Semi-Annual, and still no GUI!
-
Ah ha! Downloaded 17677 LTSC & back with the GUI.
-
got it. LTSC preview has the guy option, semi annual does not
https://www.microsoft.com/en-us/software-download/windowsinsiderpreviewserver
-
Proposed as answer by
Clocktower
Monday, September 10, 2018 11:54 PM
-
Proposed as answer by
-
got it. LTSC preview has the guy option, semi annual does not
https://www.microsoft.com/en-us/software-download/windowsinsiderpreviewserver
I’d start a new thread.
Regards, Dave Patrick ….
Microsoft Certified Professional
Microsoft MVP [Windows Server] Datacenter ManagementDisclaimer: This posting is provided «AS IS» with no warranties or guarantees, and confers no rights.
-
Thank you! I had the same question and within minutes of reading your response, I was up and running (with the GUI version). Many Thanks!!!
-
When I try to install the LTSC using the iso I’m being prompted for a product key. I don’t see any place to get the key from.
John Marcum | Microsoft MVP — Enterprise Client Management
-
When I try to install the LTSC using the iso I’m being prompted for a product key. I don’t see any place to get the key from.
John Marcum | Microsoft MVP — Enterprise Client Management
I’d start a new thread.
Regards, Dave Patrick ….
Microsoft Certified Professional
Microsoft MVP [Windows Server] Datacenter ManagementDisclaimer: This posting is provided «AS IS» with no warranties or guarantees, and confers no rights.
-
For future readers of this thread, it is also possible the product key you are entering is hiding the Desktop Experience options. I suggest you skip the product key entry part of the setup process if you downloaded the release ISO which then should show
all 4 installation options. -
a «guy» option. I dont need a guy!!