Содержание
- Способ 1: Включение компонента Windows
- Способ 2: Команда для PowerShell
- Способ 3: Управление групповой политикой
- Вопросы и ответы
Перед началом ознакомления со следующими способами отметим, что использование SMBv1 в качестве средства удаленного доступа обычному пользователю чаще всего не нужно, поскольку проще его организовать при помощи других вспомогательных технологий. Более детальную информацию по этому поводу предлагаем прочесть в статьях по ссылкам ниже.
Подробнее:
Подключение к удаленному компьютеру
Способы подключения к удаленному рабочему столу в Windows 10
В Windows 10 существует отдельный модуль, позволяющий подключать различные компоненты. С его помощью активировать SMBv1 будет проще всего, а выглядит процесс так:
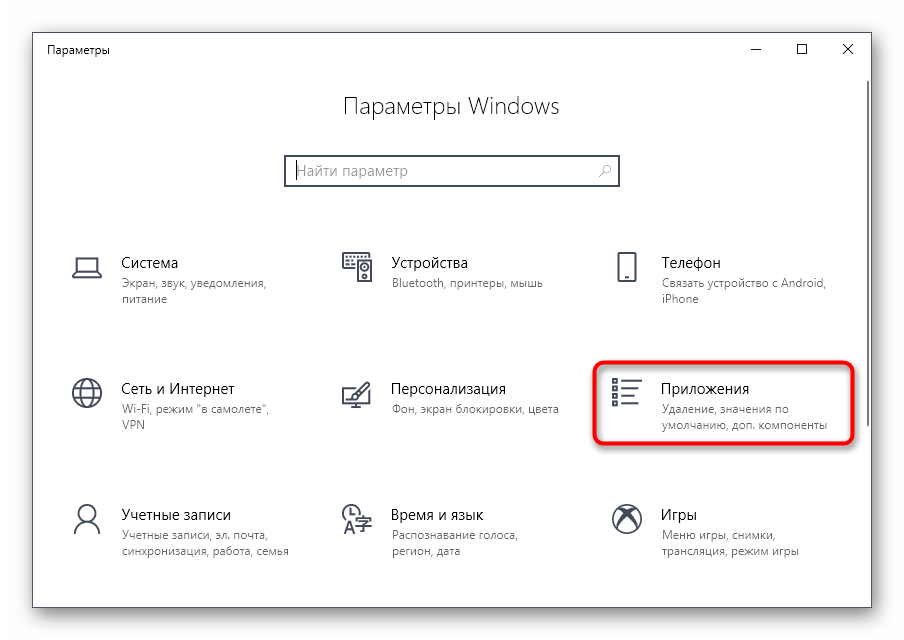
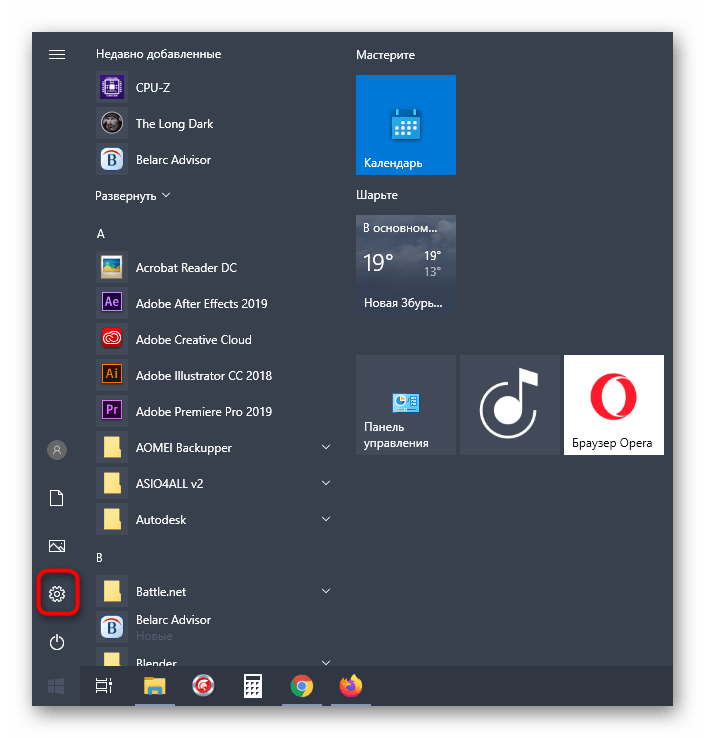
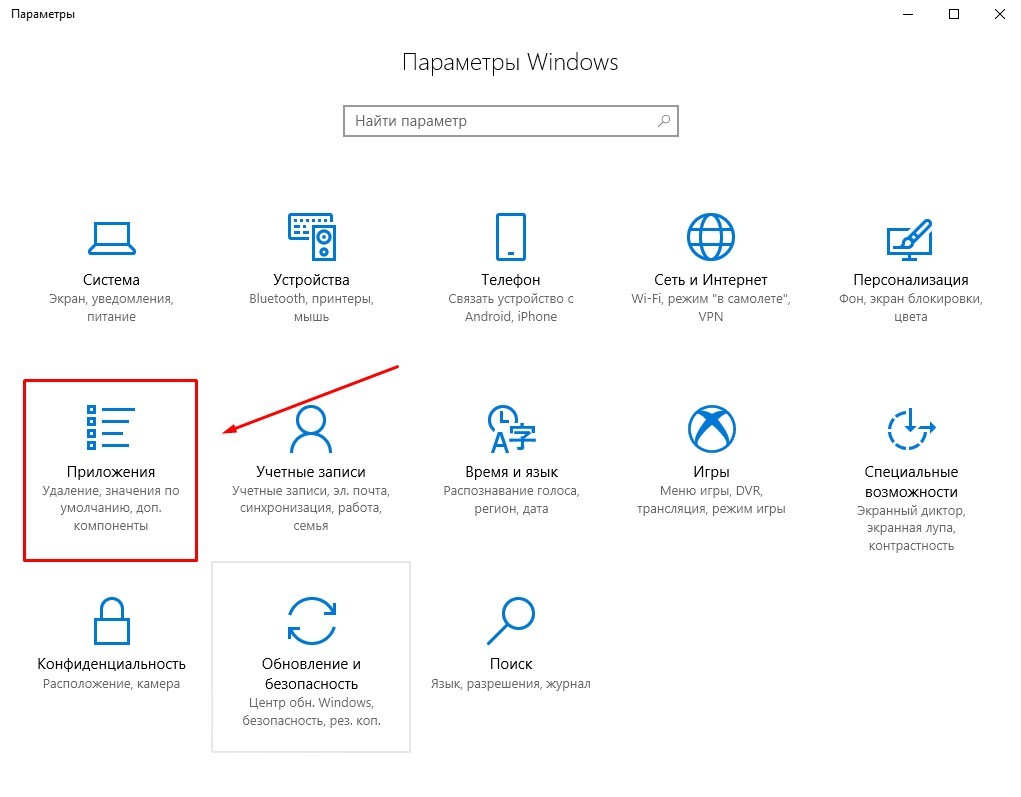
- Откройте «Пуск» и перейдите в меню «Параметры».
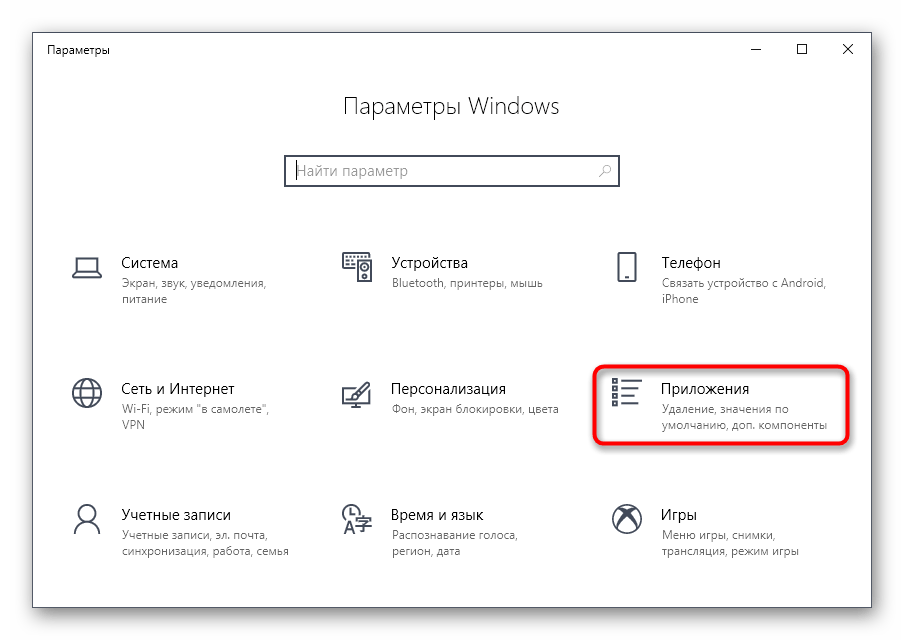
- Здесь выберите раздел «Приложения».
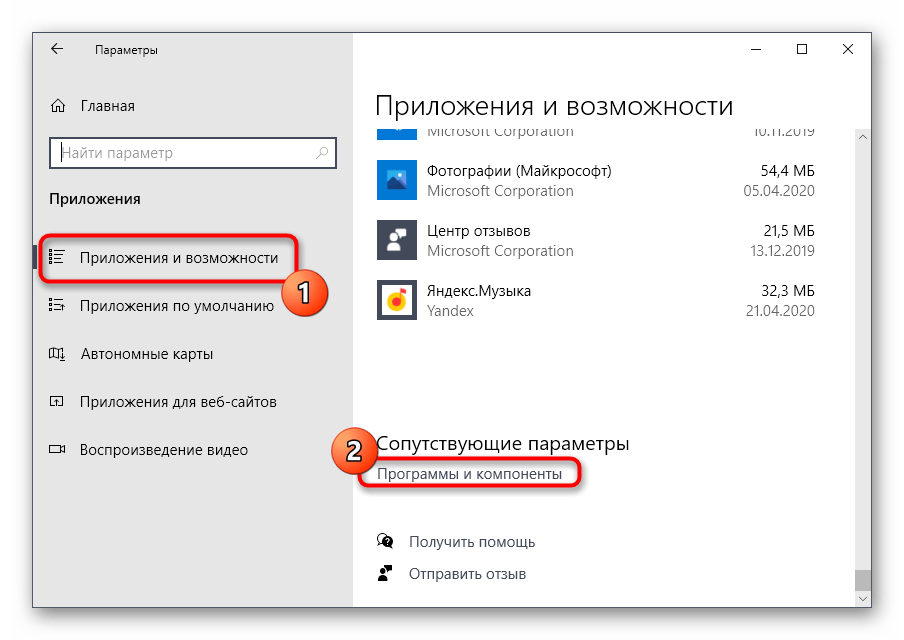
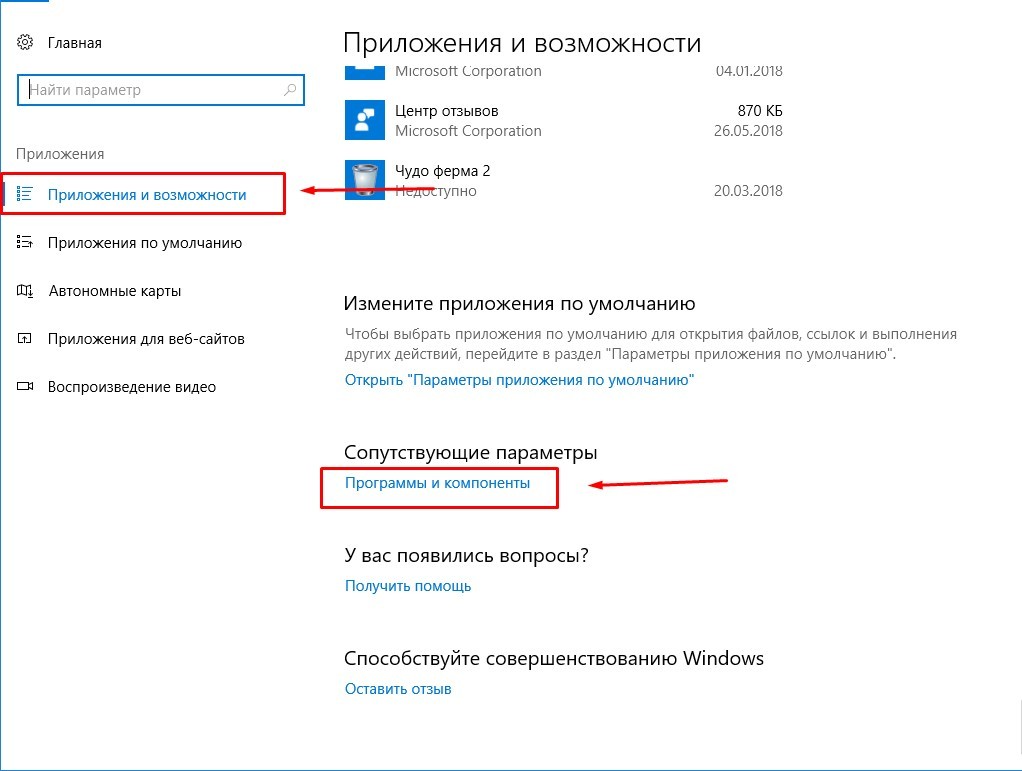
- В категории «Приложения и возможности» опуститесь в самый низ, где щелкните по кликабельной надписи «Программы и компоненты».
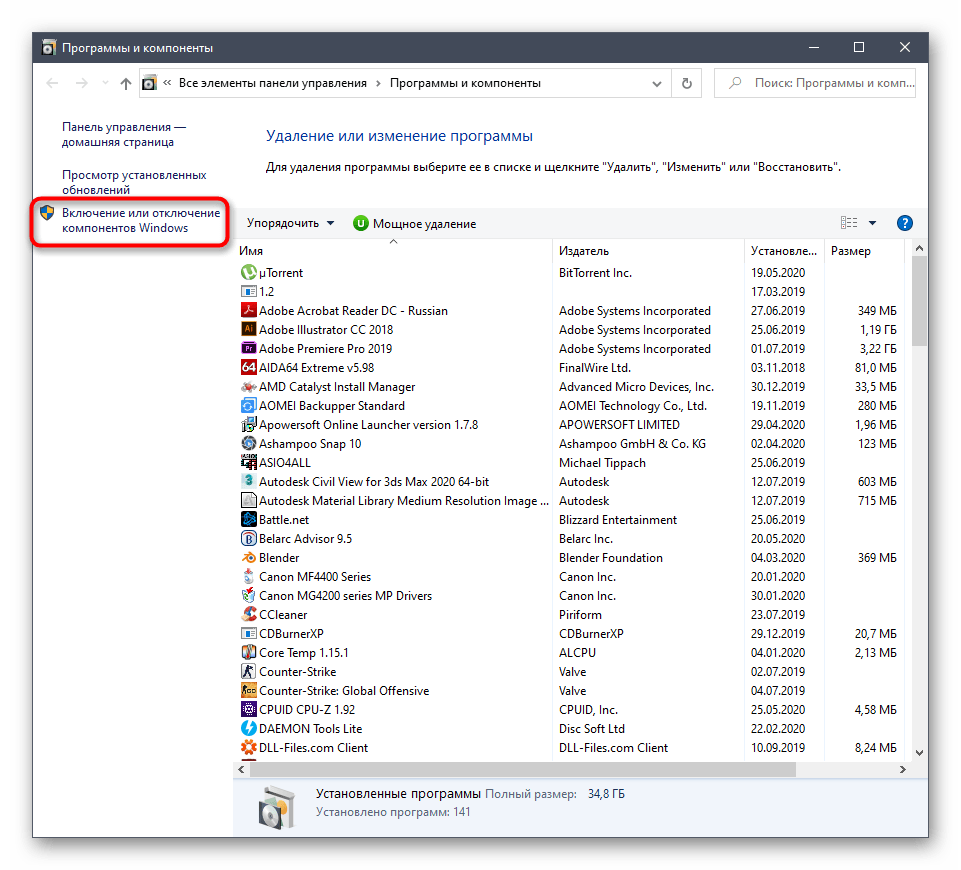
- Через левую панель вызовите окно «Включение или отключение компонентов Windows».
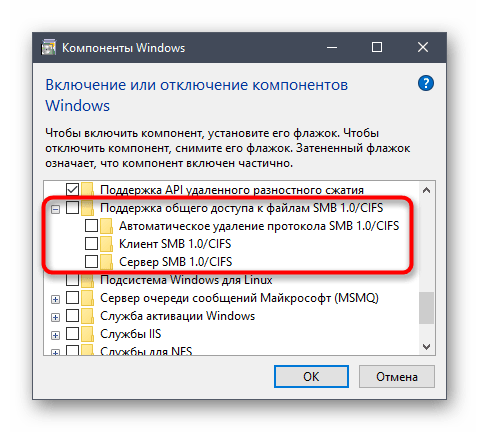
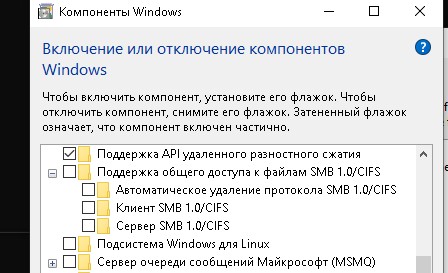
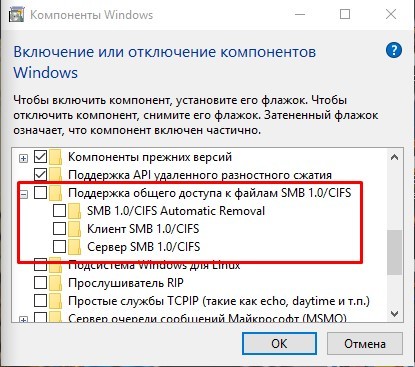
- Отыщите в меню директорию «Поддержка общего доступа к файлам SMB 1.0/CIFS», разверните ее и активируйте все подпапки, включая и главную категорию.

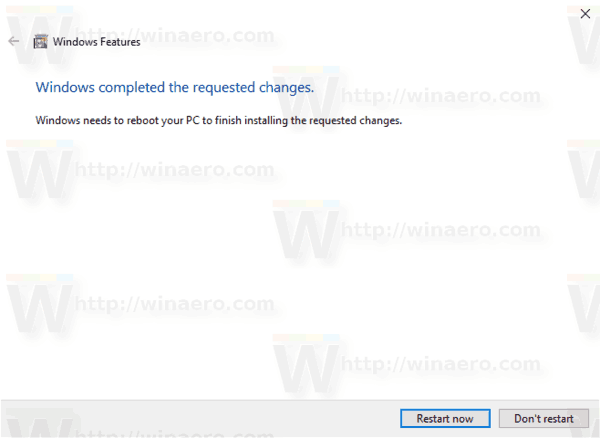
Если технология не активировалась сейчас, потребуется перезагрузить компьютер, ведь именно тогда происходит обновление параметров реестра, что и требуется для корректной работы SMB.
Способ 2: Команда для PowerShell
Если вы не боитесь взаимодействовать с оболочкой PowerShell, активировать SMBv1 можно через нее, вставив всего одну команду.
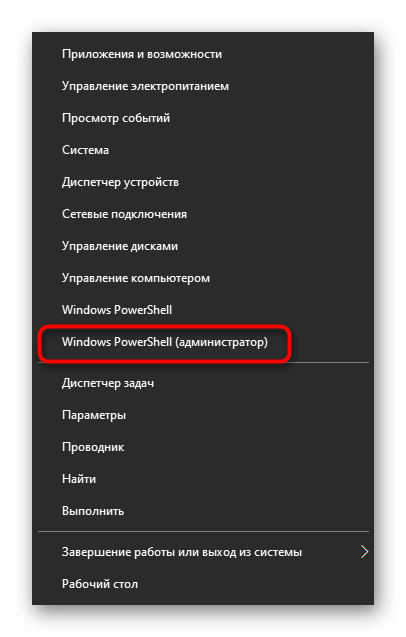
- Щелкните правой кнопкой мыши по меню «Пуск» и выберите «Windows PowerShell (администратор)».
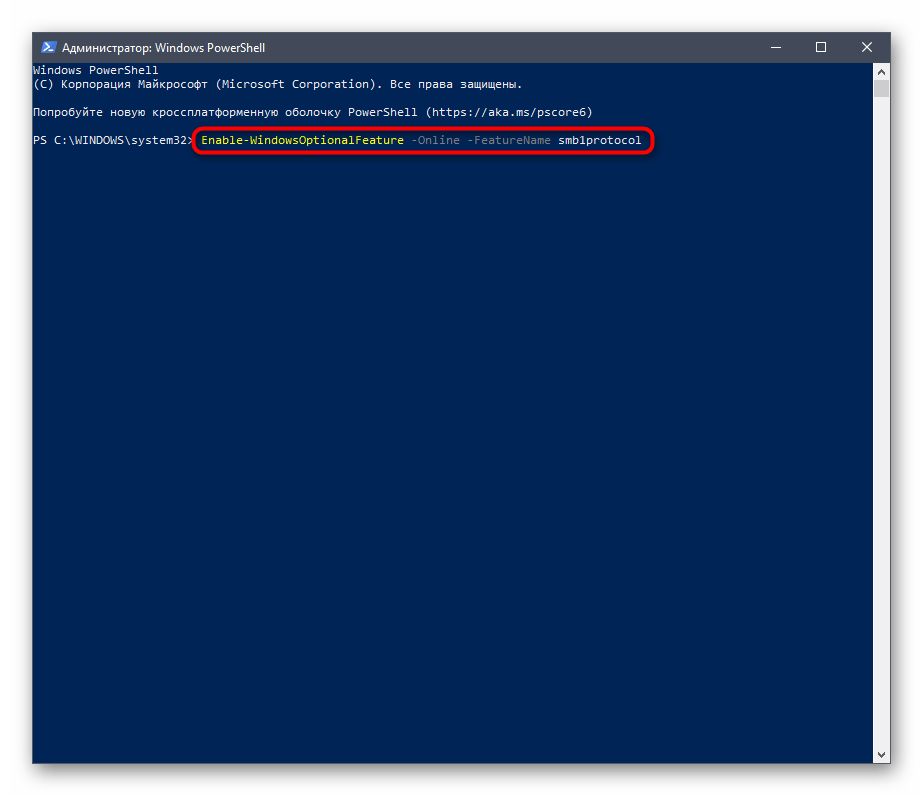
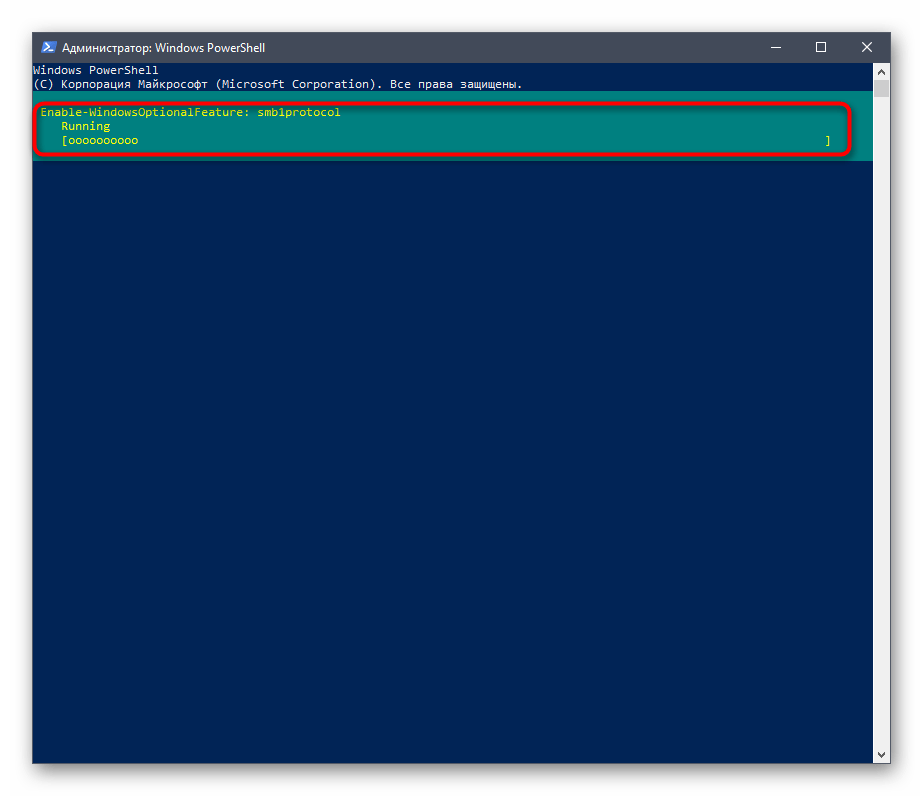
- В PowerShell вставьте команду
Enable-WindowsOptionalFeature -Online -FeatureName smb1protocolи нажмите на Enter. - Ожидайте завершения процедуры включения компонента, что займет несколько минут.
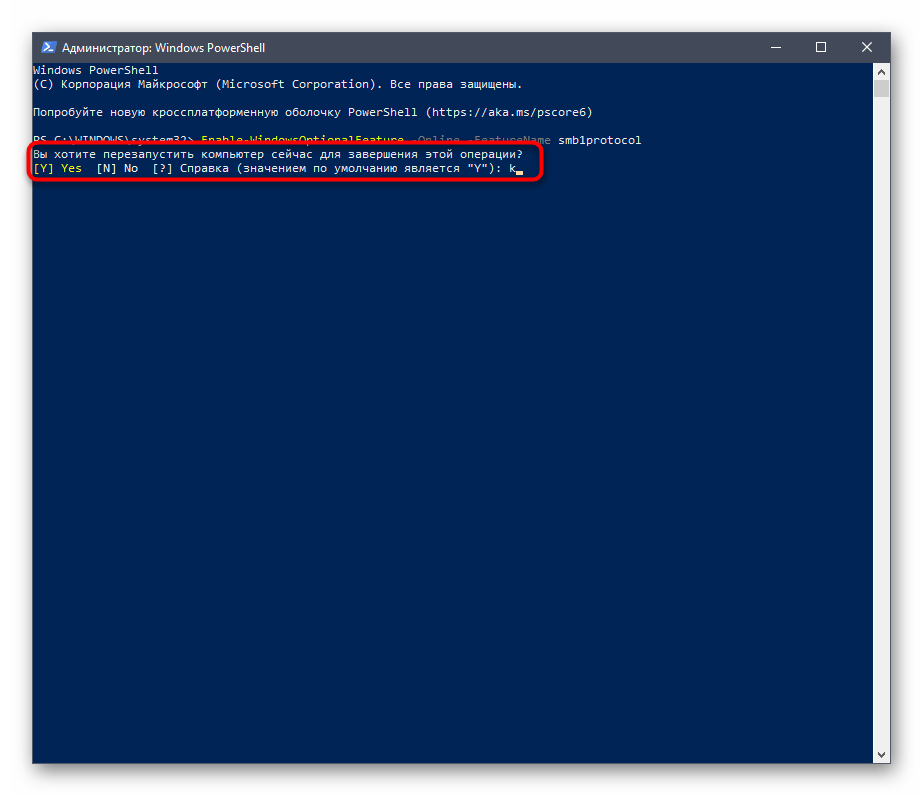
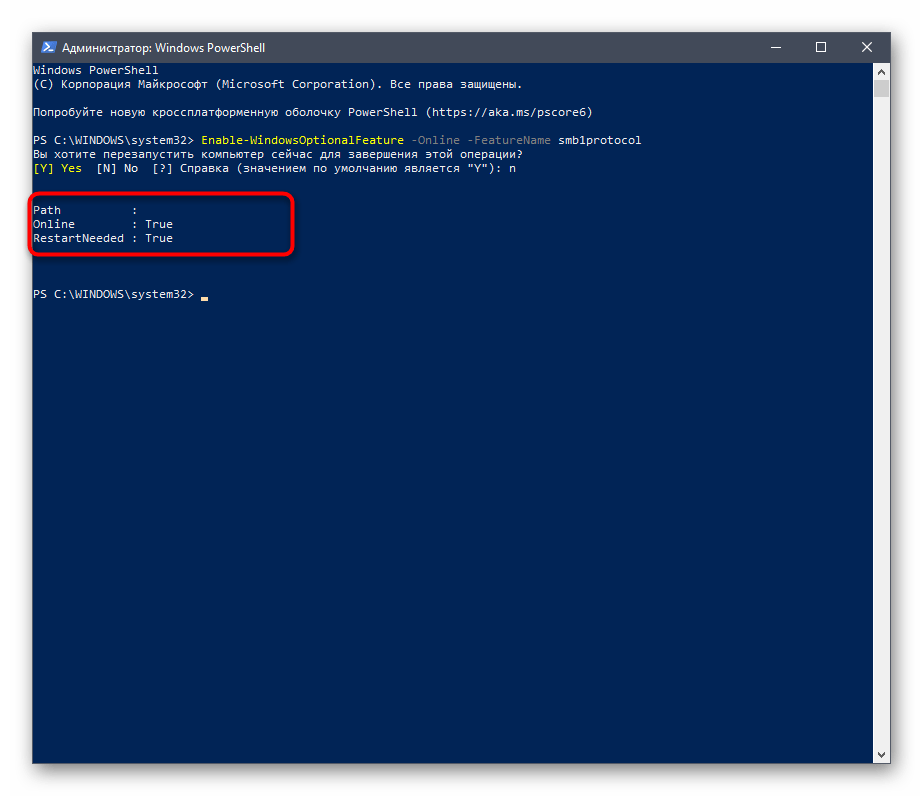
- После вам понадобится отправить компьютер на перезапуск, чтобы окончить операцию. Вы можете сделать это потом, выбрав сейчас отрицательный вариант ответа.
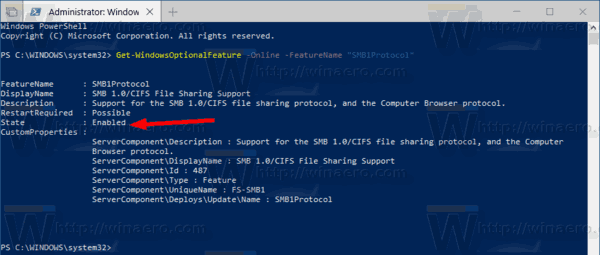
- Далее в PowerShell отобразится информация о том, что SMBv1 была успешно активирована и находится в рабочем состоянии.


Дополнительно отметим две другие команды для PowerShell, которые могут пригодиться при дальнейшей работе с рассматриваемым компонентом в Windows:
Get-WindowsFeature FS-SMB1— позволяет узнать, в каком состоянии сейчас находится SMBv1.Disable-WindowsOptionalFeature -Online -FeatureName smb1protocol— отключает работу компонента.
Способ 3: Управление групповой политикой
Отметим, что этот вариант подойдет только владельцам доменов, которые хотят настроить SMBv1 на всех локальных компьютерах. Рядовым пользователям мы не советуем задействовать этот вариант — им лучше остановиться на двух предыдущих.
- Для начала придется добавить средство управления групповыми политиками в ОС. Для этого откройте «Пуск» и перейдите в «Параметры».
- Откройте раздел «Приложения».
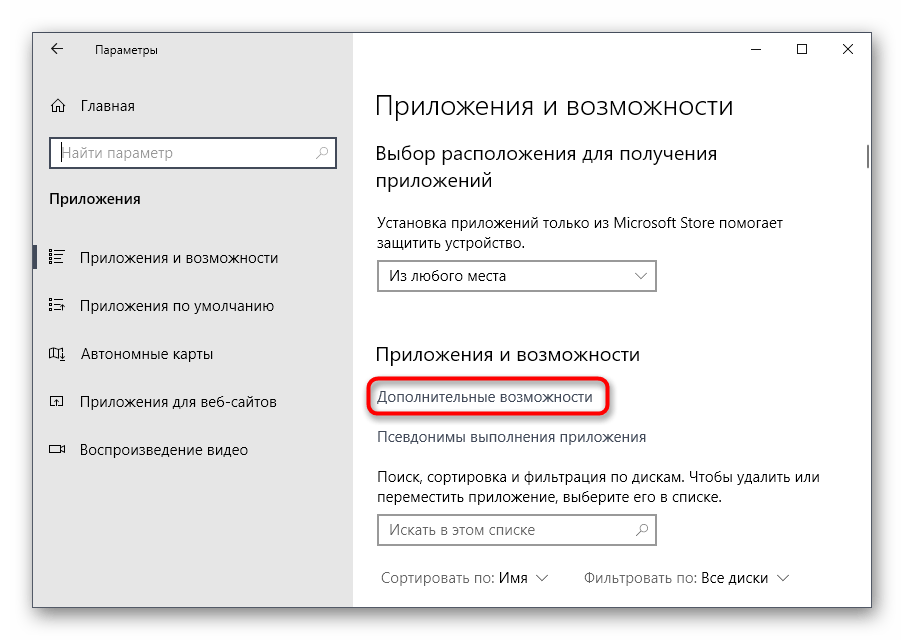
- В первой же категории вас интересует кликабельная надпись «Дополнительные возможности».
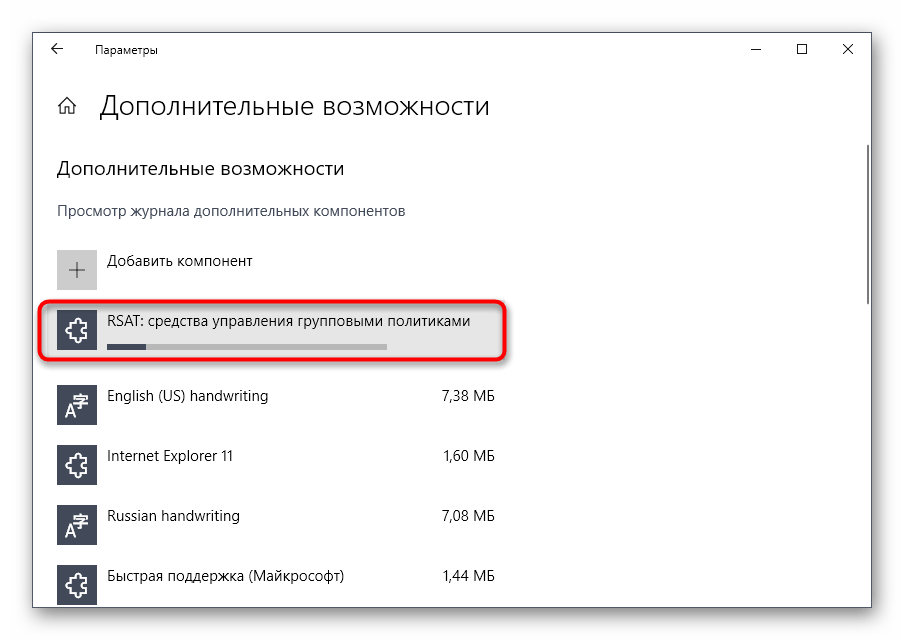
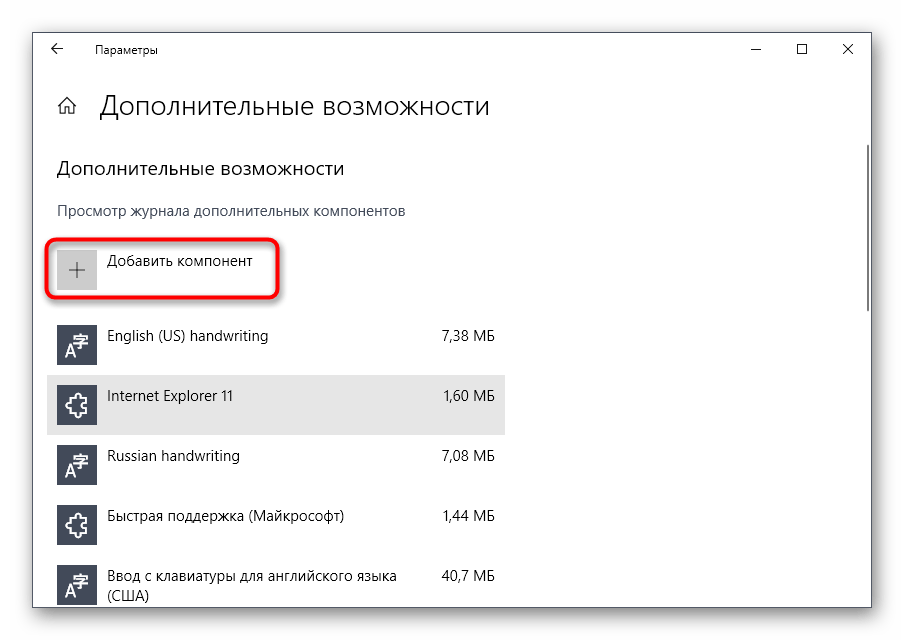
- Нажмите «Добавить компонент», чтобы перейти к его выбору.
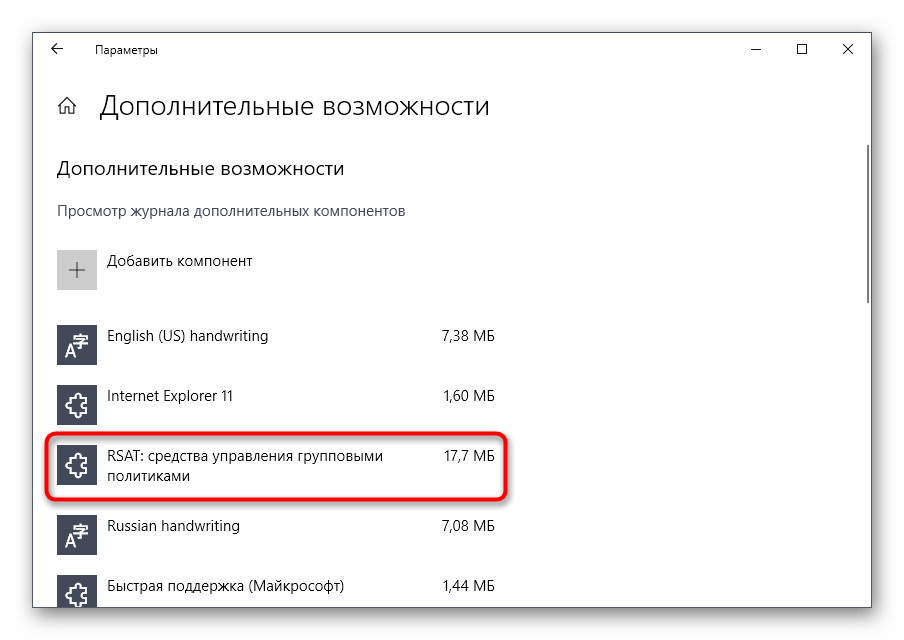
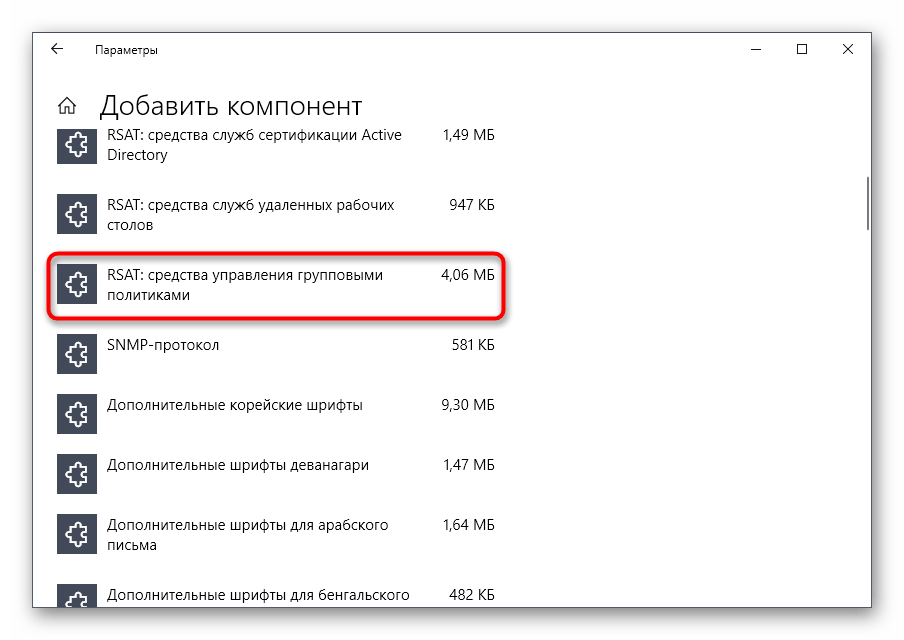
- В списке отыщите «RSAT: средства управления групповыми политиками» и запустите установку.
- Вернитесь в предыдущее меню и отслеживайте прогресс инсталляции.
- После проверьте компонент на наличие его в списке и перезагрузите компьютер, чтобы все изменения вступили в силу.
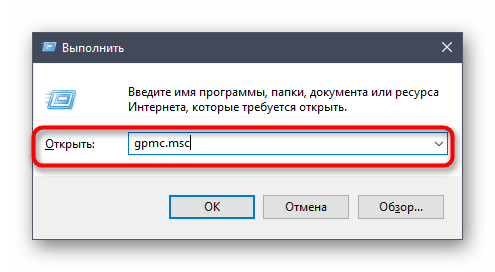
- Войдите в операционную систему под именем владельца домена, откройте утилиту «Выполнить» через Win + R и пропишите
gpmc.msc, нажав затем на клавишу Enter. - Ожидайте загрузки управления групповой политикой.
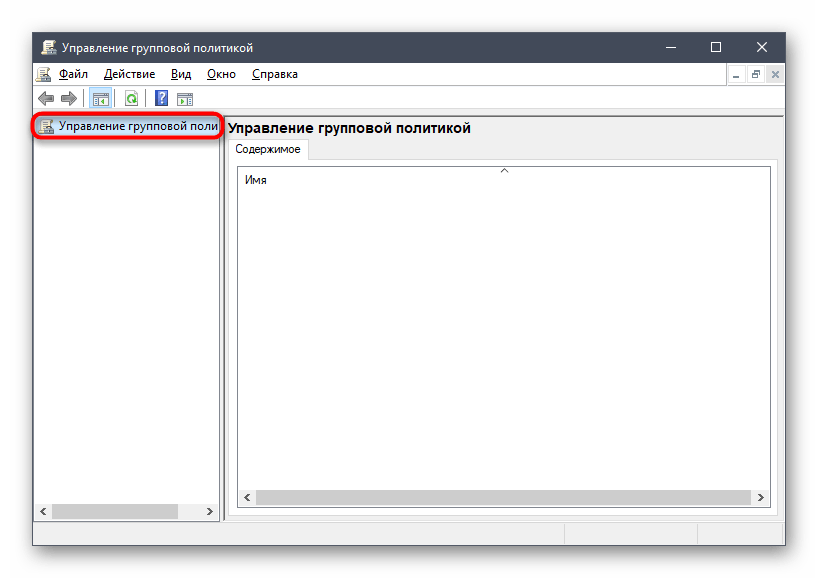
- Там откройте главный раздел «Управление групповой политики» и найдите реестр.


Остается только заполнить сведения реестра в соответствии с приведенным далее списком
- Действие:
Создать - Куст:
HKEY_LOCAL_MACHINE - Путь раздела:
SYSTEMCurrentControlSetServicesLanmanServerParameters - Имя параметра:
SMB1 - Тип параметра:
REG_DWORD - Значение:
1
Остается только сохранить изменения для реестра и перезапустить компьютер, чтобы они вступили в силу. Если захотите в будущем отключить параметр, измените его значение на «0».
Еще статьи по данной теме:
Помогла ли Вам статья?
По-умолчанию в Windows Server 2016/2019 и Windows 10 (начиная с билда 1709) отключена поддержка сетевого протокола для общего доступа к файлам в сетевых папках Server Message Block 1.0 (SMBv1). Этот протокол в большинстве случаев нужно только для обеспечения работы устаревших систем, например снятых с поддержки Windows XP, Windows Server 2003 и т.д. В этой статье мы рассмотрим, как включить или корректно отключить поддержку клиента и сервера SMBv1 в Windows 10 и Windows Server 2016/2019.
Если вашей сети не осталось устройств, которые поддерживают только протокол SMB 1.1, нужно полностью отключить протокол SMBv1 на всех Windows компьютерах в целях безопасности. Отключив SMB 1, вы защитите компьютеры Windows от большого количества уязвимостей, которые есть в этом устаревшем протоколе (самый известный публичный эксплоит для SMBv1 — EternalBlue). В результате клиенты при доступе к общим сетевым SMB шарам будут использовать новые более производительные, безопасные и
функциональные
версии протокола SMB.
В одной из предыдущих статей мы приводили таблицу совместимости версий протокола SMB на стороне клиента и сервера. Согласно этой таблице, старые версии клиентов (XP, Server 2003 и некоторые устаревшие *nix клиенты) могут использовать для доступа к файловым ресурсам только протокол SMB 1.0. Если таких клиентов в сети не осталось, можно полностью отключить SMB 1.0 на стороне файловых серверов (в том числе контролерах домена AD) и клиентских станциях.
В Windows 10 и Windows Server 2016 протокол SMBv1 разделен на два отдельных компонента – SMB клиент и SMB сервер, которые можно включать/отключать отдельно.
Содержание:
- Аудит доступа к файловому серверу по SMB v1.0
- Включение/отключение SMB 1.0 в Windows Server 2016/2019
- Включить/отключить SMB 1.0 в Windows 10
- Отключение SMBv1 с помощью групповых политик
Аудит доступа к файловому серверу по SMB v1.0
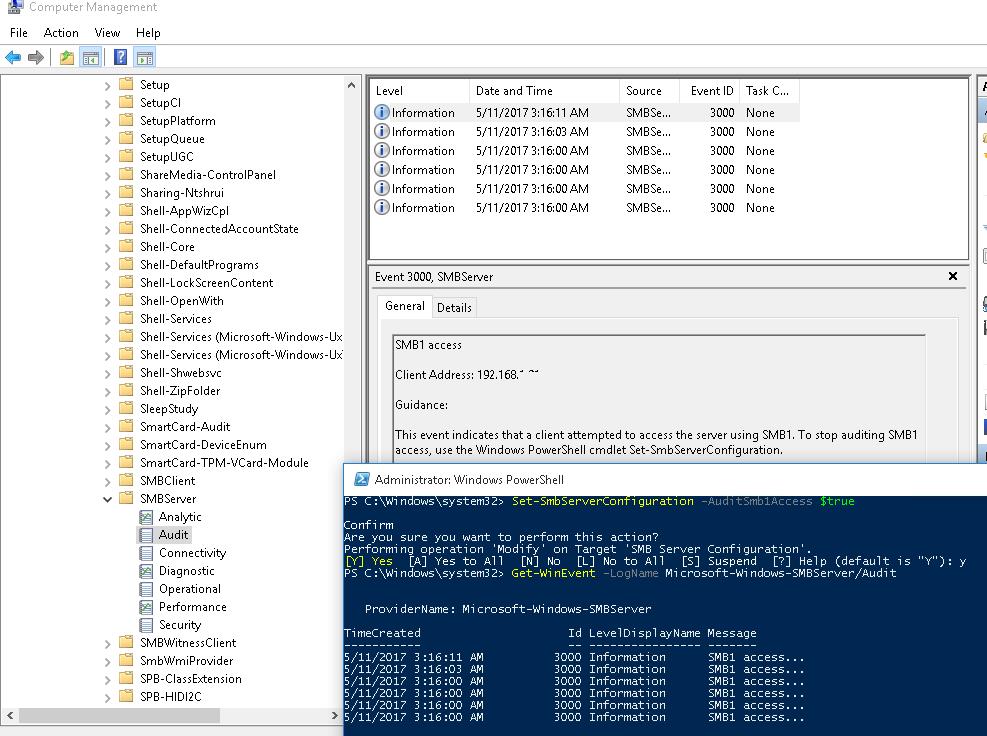
Перед отключением и полным удалением драйвера SMB 1.0 на стороне файлового SMB сервера желательно убедится, что в сети не осталось устаревших клиентов, которые используют для подключения протокол SMB v1.0. Для этого, нужно включить аудит доступа к файловому серверу по SMB1 протоколу с помощью команды PowerShell:
Set-SmbServerConfiguration –AuditSmb1Access $true
Через пару дней откройте на сервере журнал событий Applications and Services -> Microsoft -> Windows -> SMBServer -> Audit и проверьте, были ли зафиксированы попытки доступа к ресурсам сервера по протоколу SMB1.
В нашем примере в журнале обнаружено событие с EventID 3000 от источника SMBServer, в котором указано что клиент 192.168.1.10 пытается обратиться к сервереу по протоколу SMB1.
SMB1 access Client Address: 192.168.1.10

Guidance: This event indicates that a client attempted to access the server using SMB1. To stop auditing SMB1 access, use the Windows PowerShell cmdlet Set-SmbServerConfiguration.
Вам нужно найти в сети этот компьютер или устройство, при необходимости обновить ОС или прошивку, до версии поддерживающий, более новые протоколы SMB: SMBv2 или SMBv3.
В данном случае, мы проигнорируем эту информацию, но нужно учитывать тот факт, что в дальнейшем данный клиент не сможет получить SMB доступ к общим папкам на этом сервере.
Включение/отключение SMB 1.0 в Windows Server 2016/2019
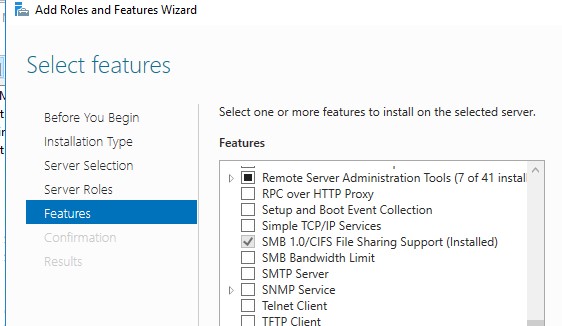
В Windows Server 2016, начиная с билда 1709, и Windows Server 2019 по умолчанию отключен протокол SMBv1. Чтобы включить поддержку клиентского протокола SMBv1в новых версиях Windows Server, нужно установить отдельный компонент SMB 1.0/CIFS File Sharing Support.
Вы можете установить компонент поддержки клиента SMBv1 с помощью Server Manager, или через PowerShell.
Проверить, что SMBv1 включен можно командой PowerShell:
Get-WindowsFeature | Where-Object {$_.name -eq "FS-SMB1"} | ft Name,Installstate

Чтобы установить компонент FS-SMB1, выполните:
Install-WindowsFeature FS-SMB1
Для удаления SMBv1 клиента (понадобится перезагрузка), выполните:
Uninstall-WindowsFeature –Name FS-SMB1 –Remove
Еще одна PowerShell команда, которая также позволяет удалить протокол SMB1Protocol:
Disable-WindowsOptionalFeature -Online -FeatureName SMB1Protocol -Remove
Чтобы ваш сервер мог обрабатывать доступ клиентов по протоколу SMBv1, кроме компонента FS-SMB1 нужно, чтобы поддержка протокола SMBv1 была включена на уровне файлового сервера SMB. Чтобы проверить, что на вашем сервере включен доступ по SMBv1 к сетевым папкам, выполните:
Get-SmbServerConfiguration
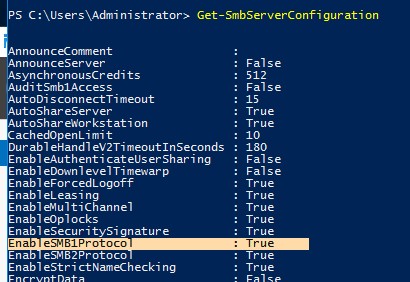
Строка “
EnableSMB1Protocol: True
” говорит о том, что у вас разрешен доступ по протоколу SMBv1 к сетевым папкам на сервере. Чтобы отключить поддержку сервера SMBv1 в Windows Server, выполните команду:
Set-SmbServerConfiguration -EnableSMB1Protocol $false -Force
Теперь с помощью командлета
Get-SmbServerConfiguration
убедитесь, что протокол SMB1 отключен.

Чтобы включить поддержку протокола SMBv1 на сервере, выполните команду:
Set-SmbServerConfiguration -EnableSMB1Protocol $True -Force
В Windows 7/8 и Windows Server 2008 R2/ 2012 для отключения клиента SMB нужно отключать службу и драйвер доступа по SMBv1 командами:
sc.exe config lanmanworkstation depend= bowser/mrxsmb20/nsi
sc.exe config mrxsmb10 start= disabled

Включить/отключить SMB 1.0 в Windows 10
Как мы уже говорили, начиная с Windows 10 1709, во всех новых билдах поддержка протокола SMB1 отключена (также отключен гостевой доступ по протоколу SMBv2).
В Windows 10 вы можете проверить статус компонентов SMBv1 протокола командой DISM:
Dism /online /Get-Features /format:table | find "SMB1Protocol"
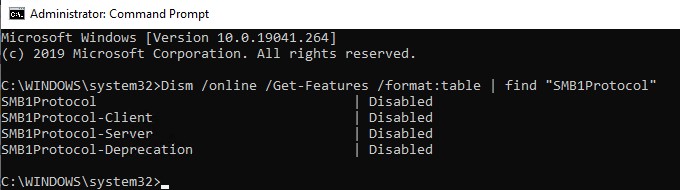
В нашем примере видно, что все компоненты SMBv1 отключены:
SMB1Protocol                                | Disabled
SMB1Protocol-Client                         | Disabled
 SMB1Protocol-Server                         | Disabled
SMB1Protocol-Deprecation                    | Disabled
В Windows 10 также можно управлять компонентами SMB 1 из панели управления компонентами (
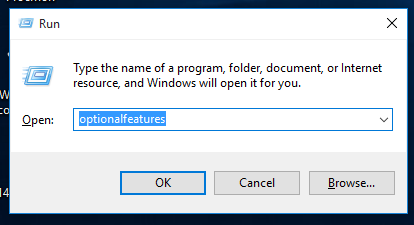
optionalfeatures.exe
). Разверните ветку Поддержка общего доступа к файлам SMB 1.0 /CIFS. Как вы видите здесь также доступны 3 компонента:
- Клиент SMB0/CIFS
- Сервер SMB0/CIFS
- Автоматическое удаление протокола SMB0/CIFS
Вы можете включить клиент и сервер SMBv1 в Windows 10 из окна управления компонентами или командой:
Dism /online /Enable-Feature /FeatureName:"SMB1Protocol"
Dism /online /Enable-Feature /FeatureName:"SMB1Protocol-Client"
Dism /online /Enable-Feature /FeatureName:"SMB1Protocol-Server"
Также можно включить сервер и клиент SMBv1 с помощью PowerShell:
Enable-WindowsOptionalFeature -Online -FeatureName SMB1Protocol-Server
Enable-WindowsOptionalFeature -Online -FeatureName SMB1Protocol-Client
Если после включения SMBv1 клиента, он не используется более 15 дней, он автоматически отключается.
Автоматическое отключение клиента SMBv1 это разовая операция. Если администратор включит SMBv1 вручную еще раз, он не будет отключаться автоматически.
Чтобы отключить поддержку клиента и сервера SMB1 в Windows 10, выполните следующие команды DISM:
Dism /online /Disable-Feature /FeatureName:"SMB1Protocol"
Dism /online /Disable-Feature /FeatureName:"SMB1Protocol-Client"
Dism /online /Disable-Feature /FeatureName:"SMB1Protocol-Server"
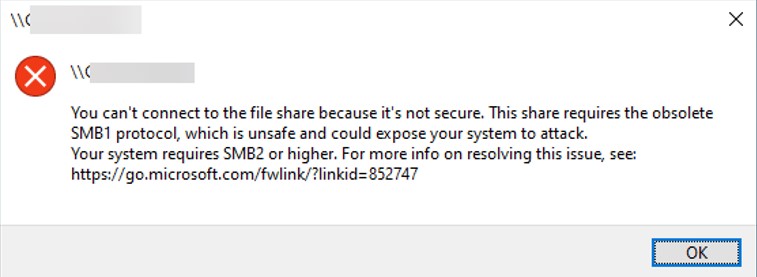
Если вы отключили поддержку SMBv1 клиента в Windows 10, то при доступе к сетевой папке на файловом сервере, который поддерживает только SMBv1 (протоколы SMBv2 и v3 отключены или не поддерживаются), появятся ошибки вида:
- 0x80070035 — не найден сетевой путь;
-
Вы не можете подключиться к общей папке, так как она небезопасна. Эта общая папка работает по устаревшему протоколу SMB1, который небезопасен и может подвергнуть вашу систему риску атаки. Вашей системе необходимо использовать SMB2 или более позднюю версию.
Unable to connect to file shares because it is not secure. This share requires the obsolete SMB1 protocol, which is not secure and could expose your system to attacks
;

-
Вы не можете подключиться к общей папке, так как она небезопасна. Эта общая папка работает по устаревшему протоколуSMB1, который небезопасен и может подвергнуть вашу систему риску атаки. Вашей системе необходимо использовать SMB2 или более позднюю версию.
You can’t connect to the file share because it’s not secure. This share requires the obsolete SMB1 protocol, which is unsafe and could expose your system to attack. Your system requires SMB2 or higher).
Также при отключении клиента SMBv1 на компьютере перестает работать служба Computer Browser (Обозреватель компьютеров), которая используется устаревшим протоколом NetBIOS для обнаружения устройств в сети. Для корректгого отобрражения соседних компьютеров в сети Windows 10 нужно настроить службу Function Discovery Provider Host (см. статью).
Отключение SMBv1 с помощью групповых политик
В доменной среде Active Directory вы можете отключить протокол SMBv1 на всех серверах и компьютеров с помощью групповой политики. Т.к. в стандартных политиках Windows нет политики настройки компонентов SMB, придется отключать его через политику реестра.
- Откройте консоль управления Group Policy Management (gpmc.msc), создайте новый объект GPO (disableSMBv1) и назначьте его на OU с компьютерами, на которых нужно отключить SMB1;
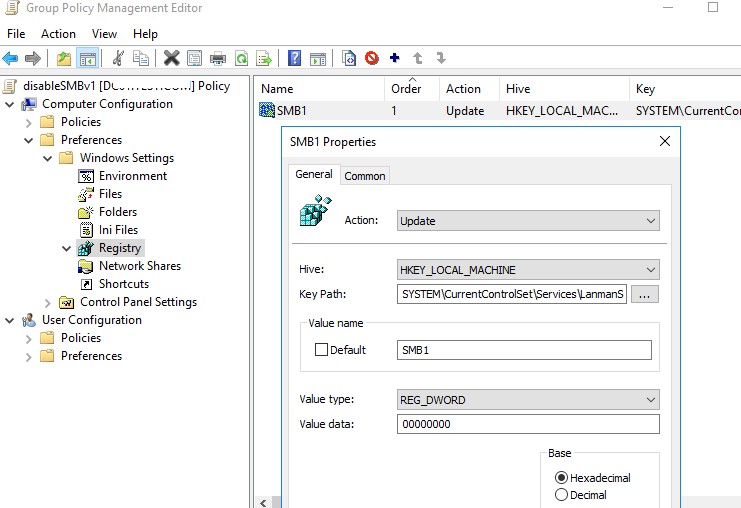
- Перейдите в режим редактирования политики. Выберите Computer Configuration -> Preferences -> Windows Settings -> Registry;
- Создайте новый параметр реестра (Registry Item) со следующими настройками:
Action:
Update
Hive:
HKEY_LOCAL_MACHINE
Key Path:
SYSTEMCurrentControlSetServicesLanmanServerParameters
Value name:
SMB1
Value type:
REG_DWORD
Value data:
0

Данная политика отключит через реестр поддержку компонента сервер SMBv1 на всех компьютерах.Если в вашем домене остались компьютеры с Windows XP/Server 2003, можно использовать отдельный WMI фильтр политики, чтобы исключить эти версии Windows из-под действия политики.
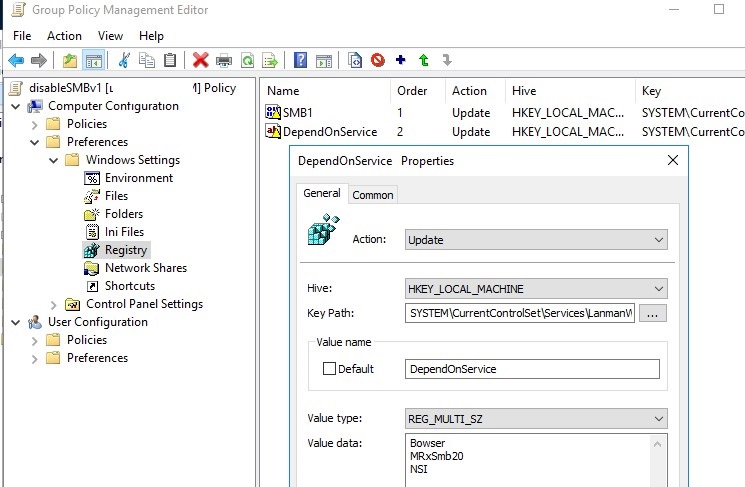
Если вы хотите через GPO отключить на компьютерах SMB клиент, создайте дополнительно два параметра реестра:
- Параметр Start (типа REG_DWORD) со значением 4 в ветке реестра HKLMSYSTEMCurrentControlSetservicesmrxsmb10;
- Параметр DependOnService (типа REG_MULTI_SZ) со значением Bowser, MRxSmb20, NSI (каждое значение с новой строки) в ветке реестра HKLMSYSTEMCurrentControlSetServicesLanmanWorkstation.
Осталось обновить настройки групповых политик на клиентах и после перезагрузки проверить, что компоненты SMBv1 полностью отключены.
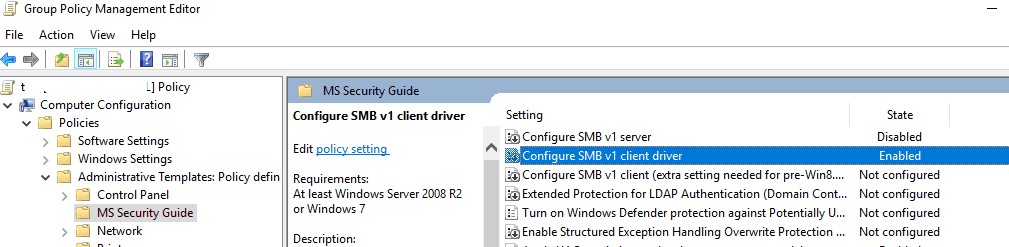
В групповых политиках Security Baseline из Microsoft Security Compliance Toolkit есть отдельный административный шаблон (файлы SecGuide.adml и SecGuide.ADMX), в которых есть отдельные параметры для отключения сервера и клиента SMB:
- Configure SMB v1 server;
- Configure SMB v1 client driver.
| title | description | author | manager | ms.topic | ms.author | ms.date | ms.custom |
|---|---|---|---|---|---|---|---|
|
How to detect, enable and disable SMBv1, SMBv2, and SMBv3 in Windows |
Describes how to enable and disable the Server Message Block protocol (SMBv1, SMBv2, and SMBv3) in Windows client and server environments. |
Deland-Han |
dcscontentpm |
how-to |
delhan |
12/12/2022 |
contperf-fy21q2 |
How to detect, enable and disable SMBv1, SMBv2, and SMBv3 in Windows
Applies to: Windows Server 2022, Windows Server 2019, Windows Server 2016, Windows Server 2012 R2, Windows Server 2012, Windows 11, Windows 10, Windows 8.1, Windows 8
This article describes how to enable and disable Server Message Block (SMB) version 1 (SMBv1), SMB version 2 (SMBv2), and SMB version 3 (SMBv3) on the SMB client and server components.
While disabling or removing SMBv1 might cause some compatibility issues with old computers or software, SMBv1 has significant security vulnerabilities, and we strongly encourage you not to use it.
Disabling SMBv2 or SMBv3 for troubleshooting
We recommend keeping SMBv2 and SMBv3 enabled, but you might find it useful to disable one temporarily for troubleshooting. For more information, see How to detect status, enable, and disable SMB protocols on the SMB Server.
In Windows 10, Windows 8.1, Windows Server 2019, Windows Server 2016, Windows Server 2012 R2, and Windows Server 2012, disabling SMBv3 deactivates the following functionality:
- Transparent Failover — clients reconnect without interruption to cluster nodes during maintenance or failover
- Scale Out — concurrent access to shared data on all file cluster nodes
- Multichannel — aggregation of network bandwidth and fault tolerance if multiple paths are available between client and server
- SMB Direct — adds RDMA networking support for high performance, with low latency and low CPU use
- Encryption — Provides end-to-end encryption and protects from eavesdropping on untrustworthy networks
- Directory Leasing — Improves application response times in branch offices through caching
- Performance Optimizations — optimizations for small random read/write I/O
In Windows 7 and Windows Server 2008 R2, disabling SMBv2 deactivates the following functionality:
- Request compounding — allows for sending multiple SMBv2 requests as a single network request
- Larger reads and writes — better use of faster networks
- Caching of folder and file properties — clients keep local copies of folders and files
- Durable handles — allow for connection to transparently reconnect to the server if there’s a temporary disconnection
- Improved message signing — HMAC SHA-256 replaces MD5 as hashing algorithm
- Improved scalability for file sharing — number of users, shares, and open files per server greatly increased
- Support for symbolic links
- Client oplock leasing model — limits the data transferred between the client and server, improving performance on high-latency networks and increasing SMB server scalability
- Large MTU support — for full use of 10 Gigabit Ethernet (GbE)
- Improved energy efficiency — clients that have open files to a server can sleep
The SMBv2 protocol was introduced in Windows Vista and Windows Server 2008, while the SMBv3 protocol was introduced in Windows 8 and Windows Server 2012. For more information about SMBv2 and SMBv3 capabilities, see the following articles:
- Server Message Block overview
- What’s New in SMB
How to remove SMBv1 via PowerShell
Here are the steps to detect, disable and enable SMBv1 client and server by using PowerShell commands with elevation.
[!NOTE]
The computer will restart after you run the PowerShell commands to disable or enable SMBv1.
-
Detect:
Get-WindowsOptionalFeature -Online -FeatureName SMB1Protocol
-
Disable:
Disable-WindowsOptionalFeature -Online -FeatureName SMB1Protocol
-
Enable:
Enable-WindowsOptionalFeature -Online -FeatureName SMB1Protocol
[!TIP]
You can detect SMBv1 status, without elevation, by running:Get-SmbServerConfiguration | Format-List EnableSMB1Protocol.
Windows Server 2012 Windows Server 2012 R2, Windows Server 2016, Windows Server 2019: Server Manager method

To remove SMBv1 from Windows Server:
- On the Server Manager Dashboard of the server where you want to remove SMBv1, under Configure this local server, select Add roles and features.
- On the Before you begin page, select Start the Remove Roles and Features Wizard, and then on the following page, select Next.
- On the Select destination server page under Server Pool, ensure that the server you want to remove the feature from is selected, and then select Next.
- On the Remove server roles page, select Next.
- On the Remove features page, clear the check box for SMB 1.0/CIFS File Sharing Support and select Next.
- On the Confirm removal selections page, confirm that the feature is listed, and then select Remove.
Windows 8.1, Windows 10, and Windows 11: Add or Remove Programs method

To disable SMBv1 for the mentioned operating systems:
- In Control Panel, select Programs and Features.
- Under Control Panel Home, select Turn Windows features on or off to open the Windows Features box.
- In the Windows Features box, scroll down the list, clear the check box for SMB 1.0/CIFS File Sharing Support and select OK.
- After Windows applies the change, on the confirmation page, select Restart now.
How to detect status, enable, and disable SMB protocols
[!NOTE]
When you enable or disable SMBv2 in Windows 8 or Windows Server 2012, SMBv3 is also enabled or disabled. This behavior occurs because these protocols share the same stack.
Server
Windows 8 and Windows Server 2012 introduced the new Set-SMBServerConfiguration Windows PowerShell cmdlet. The cmdlet enables you to enable or disable the SMBv1, SMBv2, and SMBv3 protocols on the server component.
You don’t have to restart the computer after you run the Set-SMBServerConfiguration cmdlet.
SMBv1
-
Detect:
Get-SmbServerConfiguration | Select EnableSMB1Protocol
-
Disable:
Set-SmbServerConfiguration -EnableSMB1Protocol $false
-
Enable:
Set-SmbServerConfiguration -EnableSMB1Protocol $true
For more information, see Server storage at Microsoft.
SMB v2/v3
-
Detect:
Get-SmbServerConfiguration | Select EnableSMB2Protocol
-
Disable:
Set-SmbServerConfiguration -EnableSMB2Protocol $false
-
Enable:
Set-SmbServerConfiguration -EnableSMB2Protocol $true
For Windows 7, Windows Server 2008 R2, Windows Vista, and Windows Server 2008
To enable or disable SMB protocols on an SMB Server that is running Windows 7, Windows Server 2008 R2, Windows Vista, or Windows Server 2008, use Windows PowerShell or Registry Editor.
Additional PowerShell methods
[!NOTE]
This method requires PowerShell 2.0 or later.
SMBv1 on SMB Server
Detect:
Get-Item HKLM:SYSTEMCurrentControlSetServicesLanmanServerParameters | ForEach-Object {Get-ItemProperty $_.pspath}
Default configuration = Enabled (No registry named value is created), so no SMB1 value will be returned
Disable:
Set-ItemProperty -Path "HKLM:SYSTEMCurrentControlSetServicesLanmanServerParameters" SMB1 -Type DWORD -Value 0 -Force
Enable:
Set-ItemProperty -Path "HKLM:SYSTEMCurrentControlSetServicesLanmanServerParameters" SMB1 -Type DWORD -Value 1 -Force
Note You must restart the computer after you make these changes.
For more information, see Server storage at Microsoft.
SMBv2/v3 on SMB Server
Detect:
Get-ItemProperty HKLM:SYSTEMCurrentControlSetServicesLanmanServerParameters | ForEach-Object {Get-ItemProperty $_.pspath}
Disable:
Set-ItemProperty -Path "HKLM:SYSTEMCurrentControlSetServicesLanmanServerParameters" SMB2 -Type DWORD -Value 0 -Force
Enable:
Set-ItemProperty -Path "HKLM:SYSTEMCurrentControlSetServicesLanmanServerParameters" SMB2 -Type DWORD -Value 1 -Force
[!NOTE]
You must restart the computer after you make these changes.
Registry Editor
[!IMPORTANT]
Follow the steps in this section carefully. Serious problems might occur if you modify the registry incorrectly. Before you modify it, back up the registry for restoration in case problems occur.
To enable or disable SMBv1 on the SMB server, configure the following registry key:
HKEY_LOCAL_MACHINESYSTEMCurrentControlSetServicesLanmanServerParameters
Registry entry: SMB1
REG_DWORD: 0 = Disabled
REG_DWORD: 1 = Enabled
Default: 1 = Enabled (No registry key is created)
To enable or disable SMBv2 on the SMB server, configure the following registry key:
HKEY_LOCAL_MACHINESYSTEMCurrentControlSetServicesLanmanServerParameters
Registry entry: SMB2
REG_DWORD: 0 = Disabled
REG_DWORD: 1 = Enabled
Default: 1 = Enabled (No registry key is created)
[!NOTE]
You must restart the computer after you make these changes.
Client
Here is how to detect status, enable, and disable SMB protocols on the SMB Client that is running Windows 10, Windows Server 2019, Windows 8.1, Windows Server 2016, Windows Server 2012 R2, and Windows Server 2012.
SMBv1 on SMB Client
-
Detect
sc.exe qc lanmanworkstation
-
Disable:
sc.exe config lanmanworkstation depend= bowser/mrxsmb20/nsi
sc.exe config mrxsmb10 start= disabled
-
Enable:
sc.exe config lanmanworkstation depend= bowser/mrxsmb10/mrxsmb20/nsi
sc.exe config mrxsmb10 start= auto
For more information, see Server storage at Microsoft
SMB v2/v3 on SMB Client
-
Detect:
sc.exe qc lanmanworkstation
-
Disable:
sc.exe config lanmanworkstation depend= bowser/mrxsmb10/nsi
sc.exe config mrxsmb20 start= disabled
-
Enable:
sc.exe config lanmanworkstation depend= bowser/mrxsmb10/mrxsmb20/nsi
sc.exe config mrxsmb20 start= auto
[!NOTE]
- You must run these commands at an elevated command prompt.
- You must restart the computer after you make these changes.
Disable SMBv1 by using Group Policy
This section introduces how to use Group Policy to disable SMBv1. You can use this method on different versions of Windows.
Server
SMBv1
This procedure configures the following new item in the registry:
HKEY_LOCAL_MACHINESYSTEMCurrentControlSetServicesLanmanServerParameters
- Registry entry: SMB1
- REG_DWORD: 0 = Disabled
To use Group Policy to configure this, follow these steps:
-
Open the Group Policy Management Console. Right-click the Group Policy object (GPO) that should contain the new preference item, and then click Edit.
-
In the console tree under Computer Configuration, expand the Preferences folder, and then expand the Windows Settings folder.
-
Right-click the Registry node, point to New, and select Registry Item.


In the New Registry Properties dialog box, select the following:
- Action: Create
- Hive: HKEY_LOCAL_MACHINE
- Key Path: SYSTEMCurrentControlSetServicesLanmanServerParameters
- Value name: SMB1
- Value type: REG_DWORD
- Value data: 0

This procedure disables the SMBv1 Server components. This Group Policy must be applied to all necessary workstations, servers, and domain controllers in the domain.
[!NOTE]
WMI filters can also be set to exclude unsupported operating systems or selected exclusions, such as Windows XP.
[!IMPORTANT]
Be careful when you make these changes on domain controllers on which legacy Windows XP or older Linux and third-party systems (that don’t support SMBv2 or SMBv3) require access to SYSVOL or other file shares where SMB v1 is being disabled.
Client
SMB v1
To disable the SMBv1 client, the services registry key needs to be updated to disable the start of MRxSMB10, and then the dependency on MRxSMB10 needs to be removed from the entry for LanmanWorkstation so that it can start normally without requiring MRxSMB10 to first start.
This guidance updates and replaces the default values in the following two items in the registry:
HKEY_LOCAL_MACHINESYSTEMCurrentControlSetservicesmrxsmb10
Registry entry: Start REG_DWORD: 4= Disabled
HKEY_LOCAL_MACHINESYSTEMCurrentControlSetServicesLanmanWorkstation
Registry entry: DependOnService REG_MULTI_SZ: «Bowser»,»MRxSmb20″,»NSI»
[!NOTE]
The default included MRxSMB10 which is now removed as dependency.
To configure this by using Group Policy, follow these steps:
-
Open the Group Policy Management Console. Right-click the GPO that should contain the new preference item, and then click Edit.
-
In the console tree under Computer Configuration, expand the Preferences folder, and then expand the Windows Settings folder.
-
Right-click the Registry node, point to New, and select Registry Item.
-
In the New Registry Properties dialog box, select the following:
- Action: Update
- Hive: HKEY_LOCAL_MACHINE
- Key Path: SYSTEMCurrentControlSetservicesmrxsmb10
- Value name: Start
- Value type: REG_DWORD
- Value data: 4
-
Then remove the dependency on the MRxSMB10 that was disabled.
In the New Registry Properties dialog box, select the following:
- Action: Replace
- Hive: HKEY_LOCAL_MACHINE
- Key Path: SYSTEMCurrentControlSetServicesLanmanWorkstation
- Value name: DependOnService
- Value type: REG_MULTI_SZ
- Value data:
- Bowser
- MRxSmb20
- NSI
[!NOTE]
These three strings will not have bullets (see the following screen shot).The default value includes MRxSMB10 in many versions of Windows, so by replacing them with this multi-value string, it is in effect removing MRxSMB10 as a dependency for LanmanWorkstation and going from four default values down to just these three values above.
[!NOTE]
When you use Group Policy Management Console, you don’t have to use quotation marks or commas. Just type each entry on individual lines. -
Restart the targeted systems to finish disabling SMB v1.


Auditing SMBv1 usage
To determine which clients are attempting to connect to an SMB server with SMBv1, you can enable auditing on Windows Server 2016, Windows 10, and Windows Server 2019. You can also audit on Windows 7 and Windows Server 2008 R2 if the May 2018 monthly update is installed, and on Windows 8.1 and Windows Server 2012 R2 if the July 2017 monthly update is installed.
-
Enable:
Set-SmbServerConfiguration -AuditSmb1Access $true
-
Disable:
Set-SmbServerConfiguration -AuditSmb1Access $false
-
Detect:
Get-SmbServerConfiguration | Select AuditSmb1Access
When SMBv1 auditing is enabled, event 3000 appears in the «Microsoft-Windows-SMBServerAudit» event log, identifying each client that attempts to connect with SMBv1.
Summary
If all the settings are in the same GPO, Group Policy Management displays the following settings.

Testing and validation
After completing the configuration steps in this article, allow the policy to replicate and update. As necessary for testing, run gpupdate /force at a command prompt, and then review the target computers to make sure that the registry settings are applied correctly. Make sure SMBv2 and SMBv3 are functioning for all other systems in the environment.
[!NOTE]
Don’t forget to restart the target systems.
-
Partition Wizard
-
Partition Magic
- How to Enable SMB1 on Windows 10? [Complete Guides]
By Ariel | Follow |
Last Updated April 21, 2020
Do you want to access files on network devices? Sometimes you may have to enable SMB1 Windows 10. How to enable SMB1 Windows 10? If you are also searching for this guide, this post of MiniTool is what you have been looking for.
Why You Need to Enable SMB1 Windows 10
As you might know, SMB (Server Message Block) is a client-server communication protocol. It can be used to share access to files, printers, and serial ports on a network. To read and write files, you can use SMB to connect to some network devices such as a router and NAS or another computer.
Since SMB Version 1 (SMB1) is an old and insecure networking protocol, Windows 10 no longer installs it by default. However, some users encountered the error messages like “You can’t connect to the file share because it’s not secure” and “The specified network name is no longer available” when attempting to access files.
At this time, you have to temporarily enable SMB1 Windows 10 in order to fix these errors. Here are the top 3 methods for Windows 10 enable SMB1.
Method 1. Enable SMB1 Windows 10 Using Control Panel
For those who don’t have direct access to the network devices running the SMB protocol, you can follow the steps below to enable SMB1 Windows 10 temporarily.
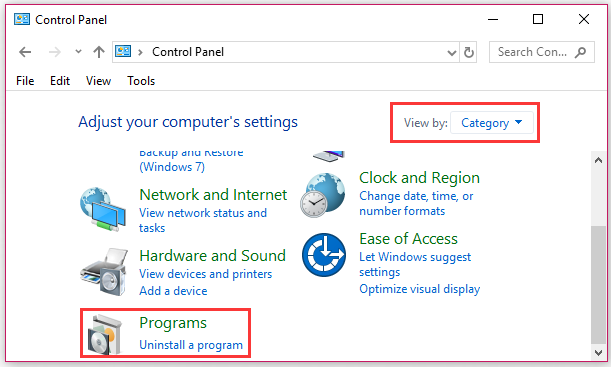
Step 1. Type control in the search box and select Control Panel from the best match.
Step 2. Change the View by to Category, and then click on the Programs section.
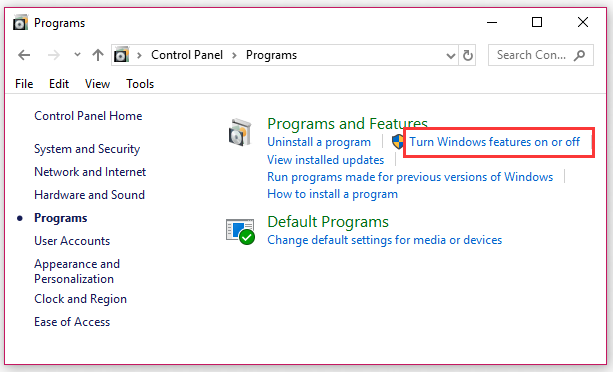
Step 3. Click on the Turn Windows features on or off link.
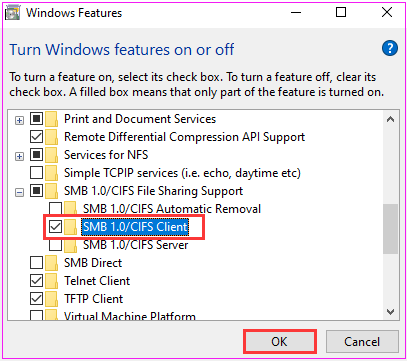
Step 4. Then expand the SMB 1.0/CIFS File Sharing Support section and select the checkbox for the SMB 1.0/CIFS Client.
Step 5. Click on the OK button to save this change and restart your computer.
Now you can check if this Windows 10 SMB1 enable operation to fix the network errors.
Method 2. Enable SMB1 Windows 10 Using PowerShell
Windows PowerShell can help you enable SMB1 Windows 10 as well. You can follow the detailed steps below:
Step 1. Type PowerShell in the search box, and then right-click the Windows PowerShell and select Run as administrator.
Step 2. Type the following command and hit Enter to check if the SMB1 is enabled.
Get-SmbServerConfiguration | Select EnableSMB1Protocol

Step 3. If the output is True, which indicates that the SMB1 is enabled. If the output is False, you can type the following commands and hit Enter to enable it.
Set-SmbServerConfiguration –EnableSMB1Protocol $true
If this method fails to Windows 10 enable SMB1, you can move on to the final method.
Method 3. Enable SMB1 Windows 10 Using Command Prompt
Apart from Windows PowerShell, you can use a similar utility – Command Prompt. It can also help you enable SMB1 on Windows 10. Here’s how to do that:
Step 1. Press Win + R keys to open the Run dialog box, and then type cmd in it and press Ctrl + Shift + Enter keys to open the elevated command prompt.

Step 2. Type the DISM /Online /Enable-Feature /All /FeatureName:SMB1Protocol command and hit Enter. After that, restart your computer.
Now, you can check if the Windows 10 SMB1 is enabled.
About The Author

Position: Columnist
Ariel is an enthusiastic IT columnist focusing on partition management, data recovery, and Windows issues. She has helped users fix various problems like PS4 corrupted disk, unexpected store exception error, the green screen of death error, etc. If you are searching for methods to optimize your storage device and restore lost data from different storage devices, then Ariel can provide reliable solutions for these issues.
-
Partition Wizard
-
Partition Magic
- How to Enable SMB1 on Windows 10? [Complete Guides]
By Ariel | Follow |
Last Updated April 21, 2020
Do you want to access files on network devices? Sometimes you may have to enable SMB1 Windows 10. How to enable SMB1 Windows 10? If you are also searching for this guide, this post of MiniTool is what you have been looking for.
Why You Need to Enable SMB1 Windows 10
As you might know, SMB (Server Message Block) is a client-server communication protocol. It can be used to share access to files, printers, and serial ports on a network. To read and write files, you can use SMB to connect to some network devices such as a router and NAS or another computer.
Since SMB Version 1 (SMB1) is an old and insecure networking protocol, Windows 10 no longer installs it by default. However, some users encountered the error messages like “You can’t connect to the file share because it’s not secure” and “The specified network name is no longer available” when attempting to access files.
At this time, you have to temporarily enable SMB1 Windows 10 in order to fix these errors. Here are the top 3 methods for Windows 10 enable SMB1.
Method 1. Enable SMB1 Windows 10 Using Control Panel
For those who don’t have direct access to the network devices running the SMB protocol, you can follow the steps below to enable SMB1 Windows 10 temporarily.
Step 1. Type control in the search box and select Control Panel from the best match.
Step 2. Change the View by to Category, and then click on the Programs section.
Step 3. Click on the Turn Windows features on or off link.
Step 4. Then expand the SMB 1.0/CIFS File Sharing Support section and select the checkbox for the SMB 1.0/CIFS Client.
Step 5. Click on the OK button to save this change and restart your computer.
Now you can check if this Windows 10 SMB1 enable operation to fix the network errors.
Method 2. Enable SMB1 Windows 10 Using PowerShell
Windows PowerShell can help you enable SMB1 Windows 10 as well. You can follow the detailed steps below:
Step 1. Type PowerShell in the search box, and then right-click the Windows PowerShell and select Run as administrator.
Step 2. Type the following command and hit Enter to check if the SMB1 is enabled.
Get-SmbServerConfiguration | Select EnableSMB1Protocol
Step 3. If the output is True, which indicates that the SMB1 is enabled. If the output is False, you can type the following commands and hit Enter to enable it.
Set-SmbServerConfiguration –EnableSMB1Protocol $true
If this method fails to Windows 10 enable SMB1, you can move on to the final method.
Method 3. Enable SMB1 Windows 10 Using Command Prompt
Apart from Windows PowerShell, you can use a similar utility – Command Prompt. It can also help you enable SMB1 on Windows 10. Here’s how to do that:
Step 1. Press Win + R keys to open the Run dialog box, and then type cmd in it and press Ctrl + Shift + Enter keys to open the elevated command prompt.
Step 2. Type the DISM /Online /Enable-Feature /All /FeatureName:SMB1Protocol command and hit Enter. After that, restart your computer.
Now, you can check if the Windows 10 SMB1 is enabled.
About The Author
Position: Columnist
Ariel is an enthusiastic IT columnist focusing on partition management, data recovery, and Windows issues. She has helped users fix various problems like PS4 corrupted disk, unexpected store exception error, the green screen of death error, etc. If you are searching for methods to optimize your storage device and restore lost data from different storage devices, then Ariel can provide reliable solutions for these issues.
In this article, we will see how to enable the SMB1 file sharing protocol. In modern Windows 10 versions, it is disabled for security reasons. However, if you have computers in your network that run pre-Windows Vista systems or Android or Linux apps that only work with SMB v1, you need to enable it to network with these devices.
The Server Message Block (SMB) Protocol is the network file sharing protocol of Microsoft Windows. The set of message packets defining a particular version of the protocol is called a dialect. The Common Internet File System (CIFS) is a dialect of SMB. Both SMB and CIFS are also available on VMS. It is worth mentioning that both SMB and CIFS are also available on other operating systems like Linux and Android via alternate implementations from third parties. For reference, see the
following MSDN article
.
Microsoft’s implementation of the SMB protocol comes with the following additions:
- Dialect negotiation
- Determining other Microsoft SMB Protocol servers on the network, or network browsing
- Printing over a network
- File, directory, and share access authentication
- File and record locking
- File and directory change notification
- Extended file attribute handling
- Unicode support
- Opportunistic locks
The SMBv1 protocol is outdated and insecure. It was the only choice till Windows XP. It was superseded by SMB2 and later versions which offer superior performance and better security. SMB v1 is not recommended for use any more by Microsoft. Starting in Windows Vista, Microsoft implemented a new version of SMB, known as SMB2. However, older Windows versions and many apps running on Android and Linux do not support recent versions of SMB, making it impossible to network Windows PC with such devices if only SMB v2/v3 are enabled.
SMB1 is disabled by default starting in Windows 10 version 1709 «Fall Creators Update». So, if you have to enable SMB1, here is how it can be done. Before proceeding, ensure that your user account has administrative privileges. Now, follow the instructions below.
To enable SMB1 in Windows 10, do the following.
- Press the Win + R keys to open Run and type
optionalfeatures.exeinto the Run box.
- Find SMB 1.0/CIFS File Sharing Support in the list and check the box next to it.
- Alternatively, you can expand it and enable only client or server, depending on what you want.

- Click on the «Restart button» if prompted.
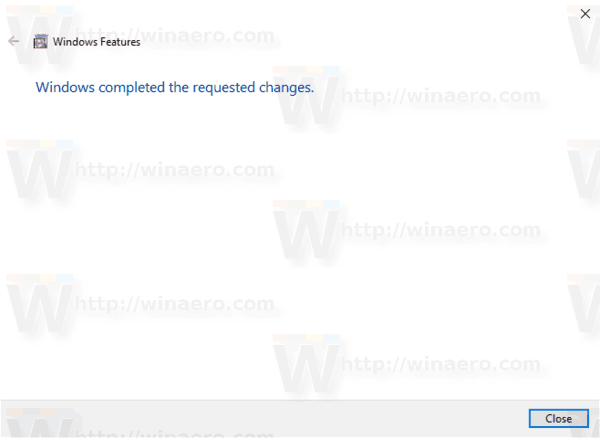
After that, you will get SMB1 working in Windows 10.
Disabling the options mentioned above will remove SMB1 support from the OS.
Alternatively, you can enable or disable SMB1 using PowerShell.
Enable or disable the SMB1 protocol in Windows 10 using PowerShell
- Open PowerShell as Administrator.Tip: You can add «Open PowerShell As Administrator» context menu.
- Type or copy-paste the following command:
Get-WindowsOptionalFeature -Online -FeatureName "SMB1Protocol"
It will show if you have the SMB1 protocol enabled or not.

- To enable the feature, run the command
Enable-WindowsOptionalFeature -Online -FeatureName "SMB1Protocol" -All
- To disable the feature, run the following command:
Disable-WindowsOptionalFeature -Online -FeatureName "SMB1Protocol"
- Confirm the operation and you are done.
That’s it.
Support us
Winaero greatly relies on your support. You can help the site keep bringing you interesting and useful content and software by using these options:
If you like this article, please share it using the buttons below. It won’t take a lot from you, but it will help us grow. Thanks for your support!

С момента создания ОС Windows одной из ее основных функций была передача файлов, а протокол SMB являлся определяющим компонентом этой системы. Однако новые технологии и обновления выявили определенные недостатки безопасности и риски для размещенной информации. Поэтому в «десятке» поддержка протокола SMB отключена по умолчанию. Что делать, если в нем возникла необходимость? Рассказываем, как в Windows 10 включить SMB1.
Как включить сетевой протокол в SMB1 в Windows 10
SMB1 необходим для обмена файлами в интернете между компьютерами. Он установлен практически на всех существующих ОС. В «десятке» он отключен, что блокирует возможность доступа к другим ОС, а также к более ранним версиям Windows.
Включение компонента Windows
В эту операционную систему встроен порт, разрешающий запускать нужные компоненты, и удобней всего активировать SMB 1 через него.
Настройка:
- нажмите: Пуск — Параметры;

- найдите: «Приложения» («Приложения и возможности»);
- выберите: «Программы и компоненты»;
- слева отыщите: «Включение или отключение компонентов»;

- в появившемся меню используйте: «Поддержка общего доступа к файлам 1.0/CIFS»;
- подключите все, что там отключено.

Проверьте, запущен ли протокол. Если нет, перезагрузите ПК (ноутбук). Это обновит параметры реестра на диске и восстановит работу ОС.
Команда для PowerShell
Если вы считаете себя продвинутым пользователем, можно запустить SMB1 через PowerShell. Для этого достаточно одной команды и нескольких, последовательных действий:
- нажмите Пуск — Windows PowerShell (Администратор);

- в появившемся окне введите: Enable-WindowsOptionalFeature -Online -FeatureName smb1protocol и активируйте ее через «Enter»;

- подождите, пока завершится подключение компонента.
Чтобы закончить операцию, перезапустите компьютер. После перезапуска PowerShell укажет, что протокол активен и работает в нормальном режиме.
После этого можно подключаться к любому серверу, в том числе такому, как Samba.
В дальнейшем для работы с SMB1 через PowerShell могут потребоваться еще две команды:
- Get-WindowsFeature FS-SMB1 — узнать, активен или отключен SMB1.
- Disable-WindowsOptionalFeature -Online -FeatureName smb1protocol — отключить работу SMB1.
Управление групповой политикой
Этот способ не подходит обычным пользователям. В основном, его используют владельцы доменов, желающие синхронизировать SMB1 в разных системах. Чтобы запустить процесс, вначале добавьте службу управления групповыми политиками:
- войдите: Пуск — Параметры —Приложения — Дополнительные возможности;

- чтобы выбрать, активируйте кнопку «Добавить компонент»;
- в выпадающем меню кликните «RSAT: средства управления групповыми политиками» и запустите его;
- дождитесь окончания процесса установки;

- убедитесь, что инсталлированный компонент присутствует в списке.

- После перезагрузки войдите в ОС под именем владельца домена, через «Win + R» вызовите строку «Выполнить» и введите gpedit.msc. Завершите операцию — «Enter».

- Затем дождитесь загрузки Управления групповой политики, после чего посетите главный раздел, содержащий реестр.

Внесите сведения для сервера согласно данного перечня команд regedit, через «Win + R» вызовите строку «Выполнить:
- действие: создать;
- куст: HKEY_LOCAL_MACHINE;
- путь раздела: SYSTEMCurrentControlSetServicesLanmanServerParameters;

- имя параметра: SMB1;

- тип параметра: REG_DWORD;
- значение: 1.

Сохранитесь и перезапустите ПК.
В дальнейшем, чтобы отключить SMB1, необходимо изменить значение на «0».
Почему Windows 10 не видит сетевые папки
Если папка не активна, убедитесь, что доступ открыт «для всех». А также проверьте правильность настроек системы безопасности и брандмауэра. В «десятке» проблемы могут возникать и после обновлений. Что включить или отключить в такой ситуации:
- убедитесь, что компьютеры открыты в сети, а если нет, разрешите доступ;
- удостоверьтесь, что рабочая группа настроена;
- если ничего не помогает, сбросьте параметры сети.
Периодически подобные проблемы возникают и из-за протокола SMB, который поддерживает «Обозреватель сети», контролирующий все работающие компьютеры.
В последних версиях ОС SMB1 автоматически не подключается, а обновиться до SMB2 не всегда удается. В таком случае единственный выход — запустить вручную первый вариант SMB.