VmWare Workstation Player 17 и Windows 98SE: виртуалка тормозит после активации 3D-ускорения
Тема в разделе «Hard & Soft», создана пользователем Burinis, 23 ноя 2022.
-
Burinis

- Регистрация:
- 5 сен 2018
- Сообщения:
- 73
После обновления программы VmWare Workstation Player до 17-й версии (через Касперского) начало происходить следующее: если я в настройках виртуалки с Windows 98SE поставлю галочку для 3d-ускорения (знаю, что оно не поддерживается Windows 98SE в новых виртуалках на VmWare, но мне эта галочка нужна для назначения видеопамяти), она после запуска начинает тормозить. До обновления такого не было.
Ставил виртуалку с этой программой, так как в ней Windows 98 идёт быстрее и стабильнее, звук там более-менее нормальный по сравнению с PCem.
Виртуализация у меня включена.
Как мне исправить это?Последнее редактирование: 23 ноя 2022
-
Burinis
- Регистрация:
- 5 сен 2018
- Сообщения:
- 73
Сейчас я попытался переустановить VMWare Player 17 вручную и начисто, но картина та же((( вот список изменений, если что. видимо, разрабы что-то поменяли. извините за небольшое отклонение от темы.
**************************
Добавил 23.11.2022 19:24: Ребята, сейчас я запустил установку Windows XP, но проблема та же(((
***************************
ладно) я пока снёс 17 версию и поставил более старую (16.2.4). видимо, разрабы что-то нахимичили в 17 версии.
Последнее редактирование: 23 ноя 2022
-
Сегодня минимальная версия windows для запуска в virtualboxvmware — windows 7. Все остальное — если хоть как-то работает и то хлеб.
Можно попробовать поставить Virtualbox 5.x версии, там по крайней мере ХП работает «полноценно». Для Win9x более древние версии нужны, для полноценной работы… -
Burinis
- Регистрация:
- 5 сен 2018
- Сообщения:
- 73
@Tigoro, а как вы узнали?
-
@Burinis, читать больше нужно по программам. XP и ниже не актуальны давно для бизнеса, где они действительно нужны в виртуалке, там знают что ставить и как настраивать (естественно не распоследние версии программ). Если нужно ХП с хоть какой-то поддержкой 3D — Virtualbox 5.x, не выше, благо под windows поставить ее можно (сейчас virtualbox 7 уже «стандарт»). Но нормальная поддержка только для win7 и выше. По Vmware не в курсе какие версии программ последние для разных версий windows, толком ей не пользовался.
Последнее редактирование: 23 ноя 2022
-
XP на 16 плеере нормально работает, даже с 3D.
-
@dolbokluv, по отзывам с 16.2.х изменения тоже прошли не в лучшую сторону для ХП; у кого-то в более ранних версиях — после 15.5.7 поддержка пропала. Vmware я как раз 16.1.x или 16.2.х поставил первый раз, как машины с macos стали доступны для amd )
У меня лично пока только проблемы со звуком были под vmware в некоторых машинах, нужно было вручную настройки добавлять в конфиг для работоспособности. Игрушки почти не запускал, а рабочий набор программ для виртуалок больше процессор, чем видео требует.
Касаемо фикса для звука — что-то такое требуется для linux vm под vmwareJust found the reason why sound card does not automatically connect on the Linux VM.
Following line is missing from the .vmx
sound.virtualDev = «hdaudio»
It should look something like the following:
sound.present = «TRUE»
sound.fileName = «-1»
sound.virtualDev = «hdaudio»
sound.autoDetect = «TRUE»
Checked this on VMware Player 15 & 16.
Suppose this is something VMware need to fix.Последнее редактирование: 23 ноя 2022
-
@Tigoro, как раз использую 16 версию плеера, для игр в Windows XP. Полет нормальный. Самое 3D что запускал это Warcraft 3 и NFS PU, обе игры работают нормально. Слышал что они приостановили или заморозили дальнейшую поддержку их tools-ов для XP, но то что есть, нормально работает.
На 17 не стал обновляться, решил подожать фиксов и патчей. -
@dolbokluv, 16 какой версии?
Warcraft 3 все же не показатель, хорошая оптимизация программы была — он у меня нормально работал на таком ведре, на котором по минимальным требованиям не должен был идти ) но шел. проблема только с массовыми скриптовыми роликами была (титры вроде, где куча персов носится разных профессий), все на пределе работало. -
@Tigoro, 16.2.4 build-20089737. Хост 10 винда.
-
Eraser
Чистильщик
Хелпер
- Регистрация:
- 29 дек 2001
- Сообщения:
- 9.965
Не вижу причин не использовать старые версии гипервизоров, если нужны старые гостевые ОС.
Hey all,
I’ve been using VMWare Workstation 16 Player (free) to run VMs of Win95, Win98 and WinXP. I’m mainly using them for a bit of nostalgia, and also a bit of late 90s Windows gaming.
Firstly, I’m fully aware that I can run many games (not all) through either DOSBox or by using compatibility settings/patches within Windows 10, but that’s not the point — my intention is to recreate the authentic 95/98/XP experience without investing in hardware that is sometimes rare and expensive (good luck finding a 3dfx Voodoo 2, for example).
First question is this: Display Scaling
For programs that have a maximum resolution of, say, 640×480, 800×600, etc., how do I use scaling to increase the size on my screen? I can’t seem to find any option within VMWare Player 16 to scale the display so that these programs take up my entire screen — instead they appear as a small display surrounded by black.
Second question: GPU Passthrough
Are there any definitive guides for configuring WinXP to use a Glide wrapper (like dgVoodoo) for 3D Acceleration? Also, is it possible on to have 3D Acceleration at all in Win95 or Win98? At the moment I can only run programs with software rendering, and would ideally like to allow the guest to use the host’s GPU for rendering… and then apply a Glide wrapper to that so I can have 3dfx Glide rendering.
Cheers for you help! I’m fairly new to the VM scene and a lot of the stuff I’ve Googled so far is for old versions of VMWare, etc.
Всем привет!
По заказу пользователя Bishik я решил посмотреть работу Win98 на виртуальных машинах, и, главное, можно ли там запускать игры.
Как и в прошлый раз: http://www.old-hard.ru/articles/virtual_3d_games
я буду снова пользоваться уже знакомыми виртуалками, VMWare, VirtualBox и Virtual PC 2007. Почему именно 2007, а не ХР Mode? Потому что XP Mode в восьмёрке уже отсутствует, да и в десятке, судя по Technical Preview, не предвидится.
Начал с VMWare Workstation 7. Конфигурация, конечно же, значительно проще, чем для ХР, и никаких выделений 2 ядер и 4 потоков быть не может, обычное одно ядро с одним потоком. 256 Мб ОЗУ для 98 хватит более чем, тут и 64 мб было неплохо.
20 Гб места для такой машины — это просто пропасть. Нам бы и 5 Гб хватило, на самом деле.
Установка длилась примерно полчаса. Работало всё достаточно быстро, разве что сам запуск Win98 был медленее, чем надо. Загрузка шла как-то не так, и иногда глючило графику. Ни звука, ни видеодрайверов не поставилось. Но для этого у нас есть расширения, которые устанавливаются на гостевую ОС отдельно.
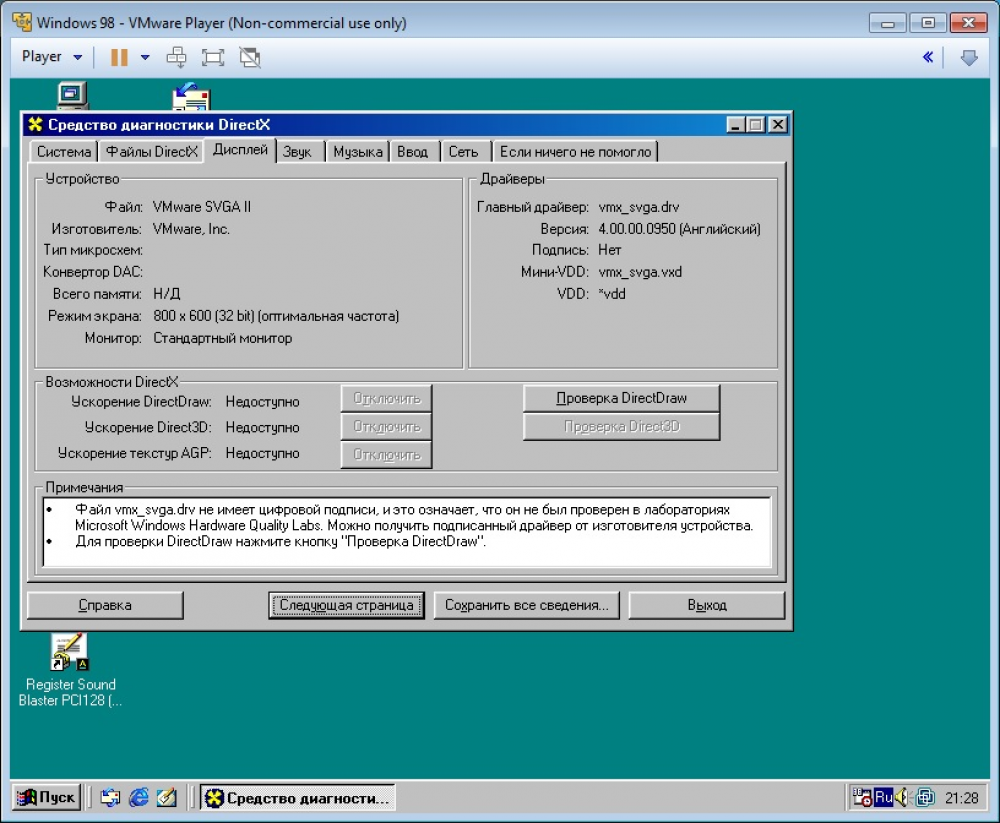
Система установилась нормально, и я принялся за установку игр, конечно же. Для начала затестим 3D на примере Half-Life. Расширения были установлены нормально. Конечно, многие функции в Win98 недоступны, но VMWare SVGA II взялась. Звук не появился.
Копировать в VMWare проще простого.
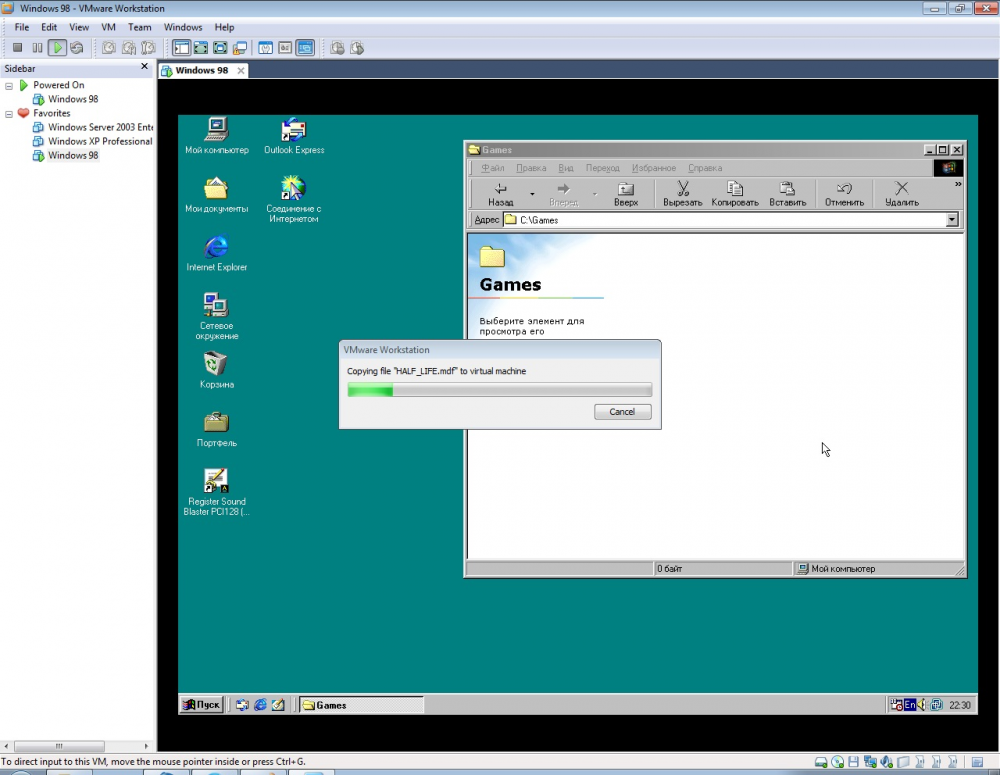
Очень удобно, когда можно всё просто кинуть в виртуальный экран, никакой возни. Установил HL1, поставил звуковой драйвер от Sound Blaster 128, взятый по совету из интернетов, попробовал запустить и тут же знатно обломался. VMWare Workstation 7 не смогла в ускорение. Софтовый режим тоже не заработал, и это предельно печально, ведь в системе всё работает очень быстро. Я погрешил на 7-ю версию и подумал, может, в 11-ой это исправили?
В 11-ой было аналогично. Эта ОС просто уже не поддерживается, такие дела. На сайте я обнаружил в этот раз бесплатный для домашнего пользования VMWare Player 7, который тоже результатов не дал. Там даже DirectDraw работает с очень большим трудом.
Зато на VMWare Player нормально работают 3D-игры в Windows XP! Не мог же я это не попробовать. Идёт медленее, чем в полноценной Workstation 11, но быстрее, чем с обработкой на процессоре, могу рекомендовать как реальную домашнюю замену.
Попытки подсунуть какой-нибудь графический драйвер от вороха видеокарт не увенчались успехом. Win98 уж слишком стара, я даже хотел попробовать VMWare Workstation 5, но на Win7 x64 она словила сильного клина и не стартанула в принципе. Итог всего этого один — нет ускорения 3D вообще. Даже несмотря на то, что используется эмуляция 440ВХ чипсета, это не помогло никак.
Следующим идёт VirtualBox. 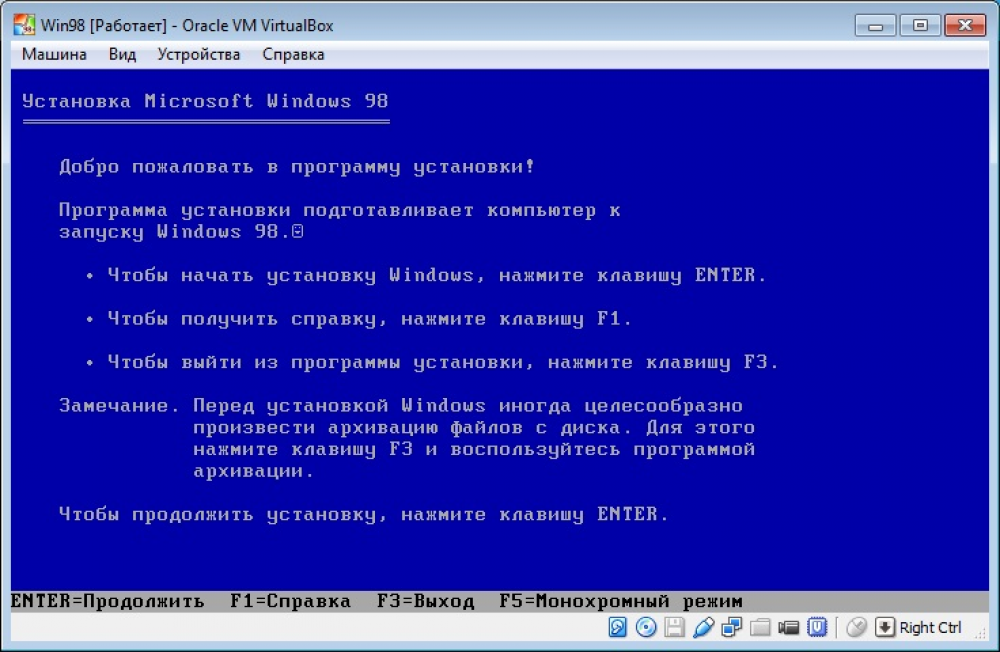
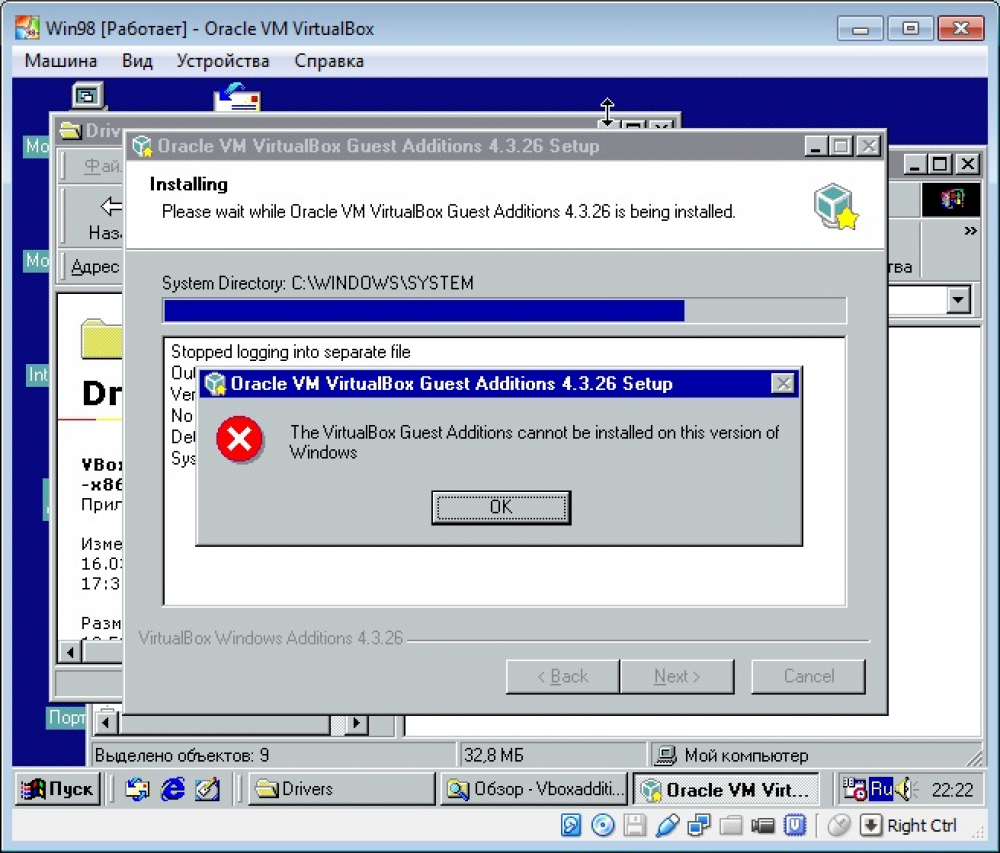
При первой попытке установить я получил ошибку, что какие-то файлы не найдены. Переустановил. Не понял. Убрал расширенную виртуализацию, все возможные костыли и дополнения, и только тогда с большим-большим скрипом VirtualBox соизволил установиться, эта была пятая попытка, и она мне удалась. Скачал расширения, попробовал — отказ.
Звук есть, а видео вообще никакого нет. Да и работает всё через лаги, для Win98 не годится никак, даже с терпением.
Вот тут я уже особо не надеялся, VirtualPC в WinXP показал себя слабовато. На удивление легко ставится Win98 без всяких проблем!
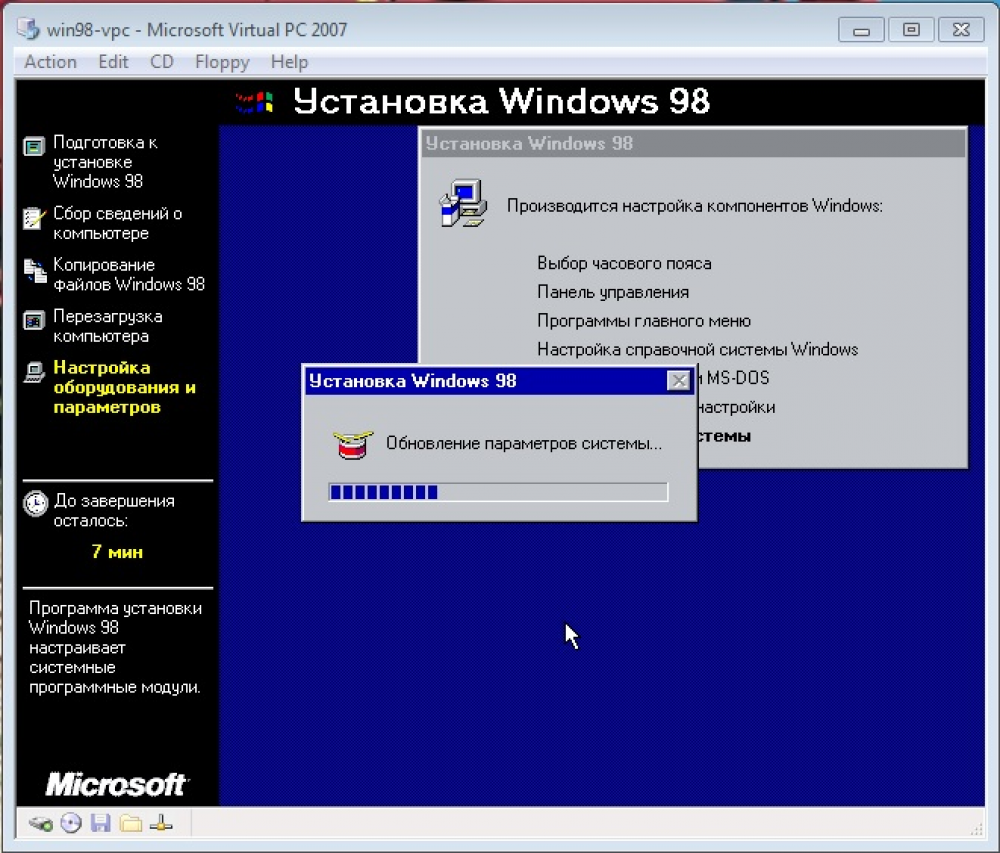
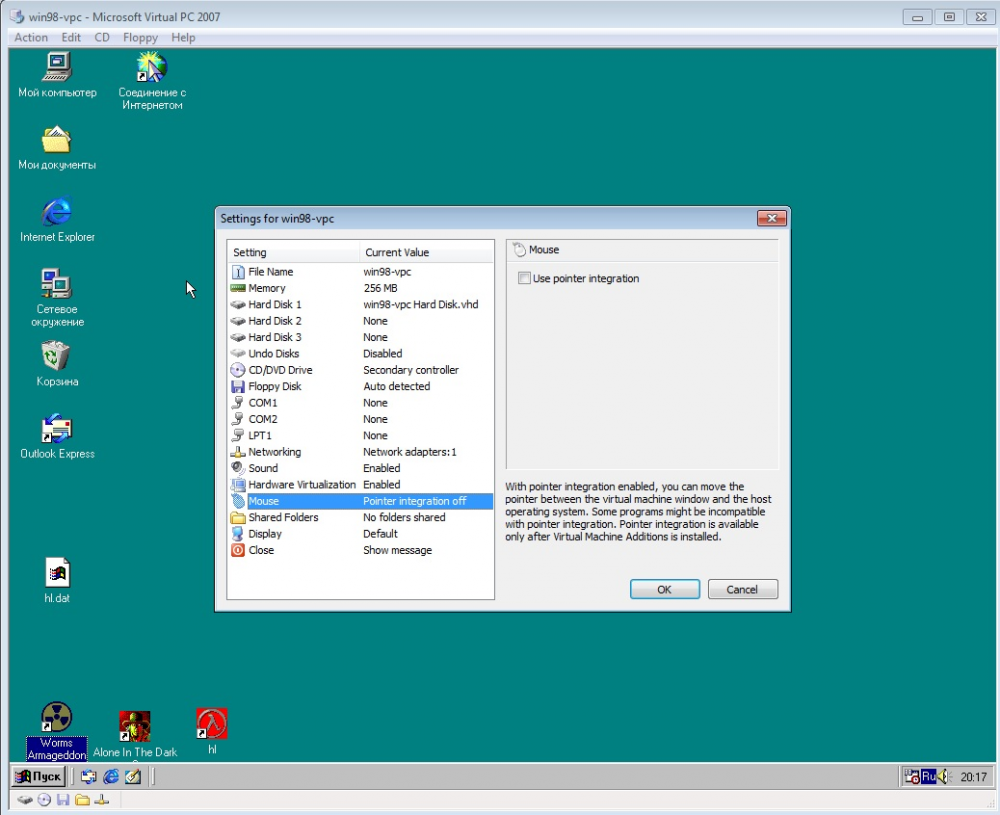
Установка пролетела минут за 15 вместо 39 положенных. Драйверы нашлись сразу, ведь VPC 2007 эмулирует компьютер от и до, вместе с Sound Blaster 16 и S3 Trio64. Видеоадаптер определился сразу же после установки расширений, и звук подтянулся без проблем. Надо обязательно убирать галочку Use pointer integration, а то управление мышью в играх глючить начинает.
Первое, что я попробовал, было Worms Armageddon. Эта игра уже плохо работала на ХР, а на семёрке вообще повисла намертво и сделала компьютеру больно.
На виртуалке она пошла замечательно, и я с удовольствием просадил два вечера!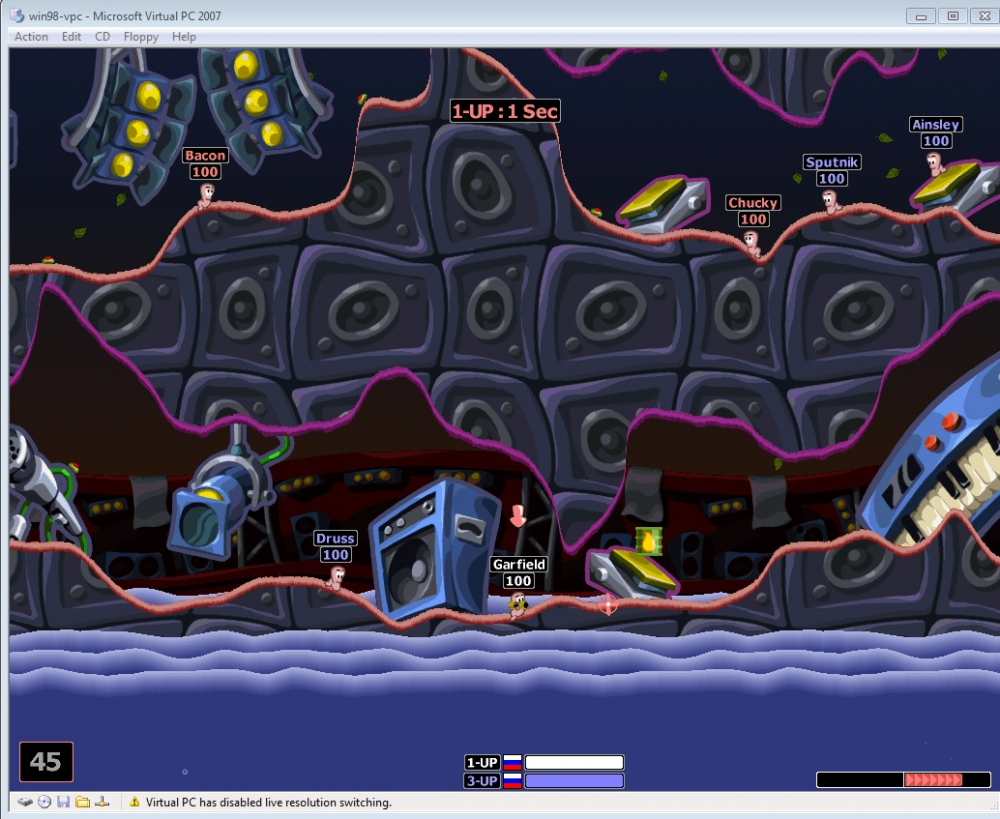
2D работает отменно. А что у нас будет с 3D? В софтовом режиме, конечно, но работает оно нормально. Получился этакий передутый пень 2 с нереально быстрым винтом и космической памятью.
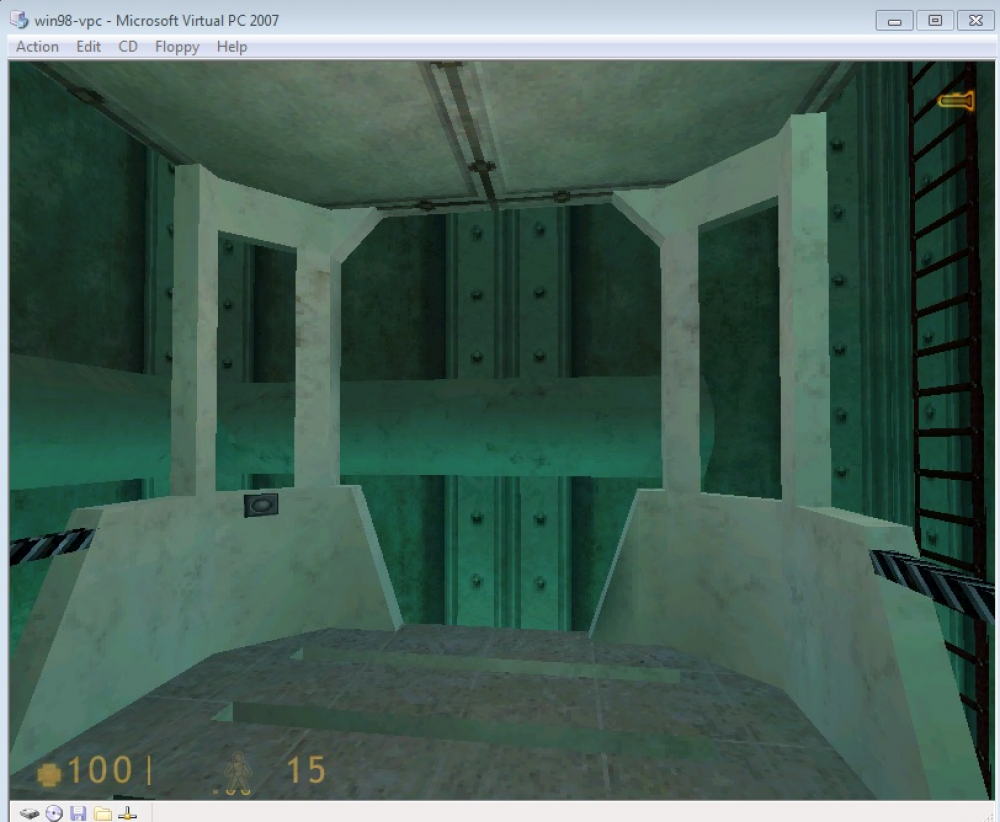
Но многие мощные игры и на ХР нормально работают, да и на семёрке некоторые из них стартуют без проблем. Но софтовый режим работает хорошо. Мощнее, чем на 533-ем селероне, это я точно могу сказать. DOS-игры тоже стартуют и работают нормально. Другое дело, что для них есть DOSBox, и надобность в запуске игр через Virtual PC 2007 в Win98 отпадает.

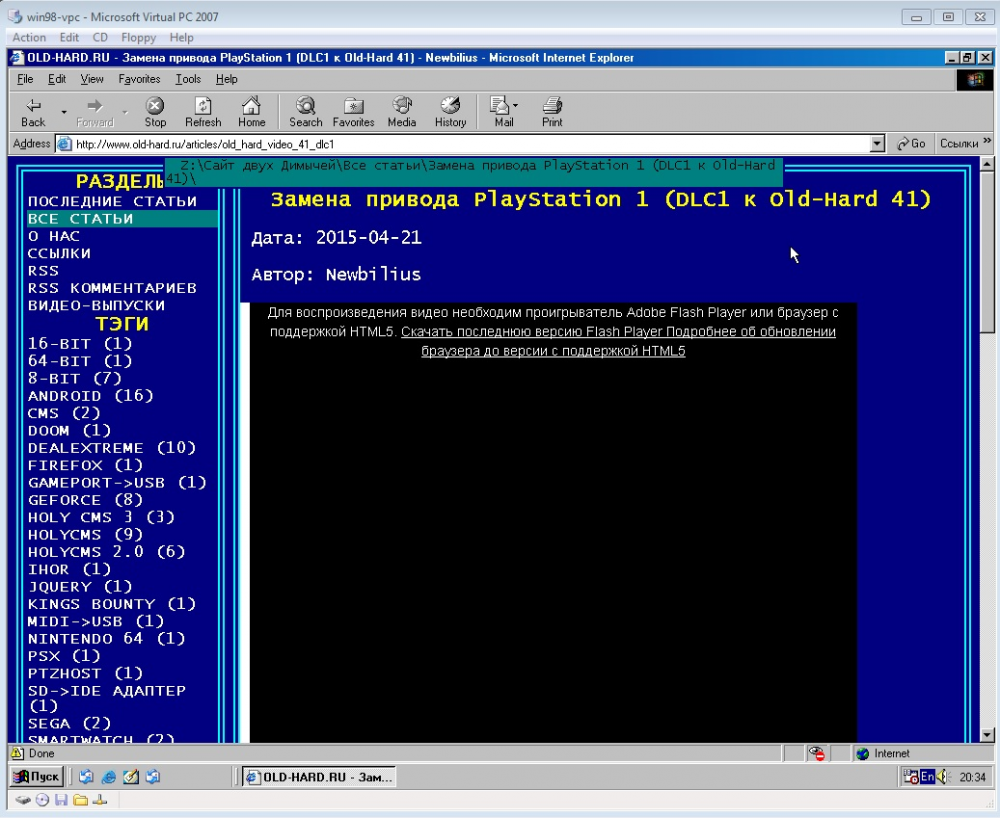
Ну и можно в интернет выйти, конечно. Обновился до IE 6, чтобы хоть как-то зайти на OLD-HARD.
Что можно сказать в итоге:
Победил Virtual PC 2007. Может, там и нельзя перекидывать файлы перетаскиванием, да и скорость работы ниже, чем в VMWare, но общая работа системы намного лучше и более близка к настоящему компьютеру. Вы получаете сильно перекочегаренный Pentium I-II-III с дохлым видеоадаптером на борту. Для DOS игр есть DOSBox, так что остаётся только капелька ностальгии и небольшая ниша игр, стартующих только на Win98.
Опять немного плюсов и минусов:
+ запускается и работает на всём, что горит;
+ не нужно занимать место другим компьютером;
+ легко переносить с одного компа на другой;
+ скорость работы достаточная для комфорта;
+ простота в освоении, не надо ничего особо уметь;
— не все игры могут нормально себя вести;
— дохлая видеокарта и только эмуляция SB16, не везде может сработать;
— работает на 10-20% от мощности хост-машины;
— не так лампово, как за отдельным компом;
На этом всё, и виртуалки будут отходить в дальний угол, до тех пор, пока я не захочу снова поиграть в то, что не работает из коробки. Наверное, надо будет рассмотреть никсы и потрогать виртуализацию там, но это уже как-нибудь в другой раз. Впереди у нас маячит поделие Франкенштейна ASRock P4i945GC.

-
- Apr 23, 2014
-
- 537
-
- 1
-
- 11,015
- 15
-
#1
I already know of DOSBox and I use it. These are games that are not DOS-based, and ergo cannot run in DOSBox.

-
- Mar 22, 2011
-
- 5,343
-
- 54
-
- 37,690
- 1,407
-
#6
Software rendering is available for most games from the late 90s, just don’t enable the 3D Acceleration option in the game and it will default to Software Rendering. There are some exceptions though, eg. games ported from the Nintendo 64 like Star Wars Rogue Squadron 3D or Turok that have no software renderer and must have 3D Acceleration, for those games you’re best off trying to run them natively rather than in VMWare.

-
- Jul 8, 2008
-
- 13,103
-
- 66
-
- 43,090
- 604
-
#2
-
- Apr 23, 2014
-
- 537
-
- 1
-
- 11,015
- 15
-
#3
-
- Mar 22, 2011
-
- 5,343
-
- 54
-
- 37,690
- 1,407
-
#4
There is no point in using Swiftshader, performance will be terrible, and you might as well just use Software Rendering for your old games and give up on 3D Acceleration, at least if you feel you must run the game in a Windows 98 VM.
If the game in question is not one that absolutely will not launch under any circumstances under modern OSes, you do have other options for getting 3D Acceleration to work. There are wrapper programs like dgvoodoo that will handle translation of the draw calls to older versions of DirectX that are no longer natively supported on current graphics drivers.
-
- Apr 23, 2014
-
- 537
-
- 1
-
- 11,015
- 15
-
#5
There is no point in using Swiftshader, performance will be terrible, and you might as well just use Software Rendering for your old games and give up on 3D Acceleration, at least if you feel you must run the game in a Windows 98 VM.
If the game in question is not one that absolutely will not launch under any circumstances under modern OSes, you do have other options for getting 3D Acceleration to work. There are wrapper programs like dgvoodoo that will handle translation of the draw calls to older versions of DirectX that are no longer natively supported on current graphics drivers.
Thanks for the response. How would I go about setting up software rendering in WIndows 98 under VMware? From what I hear, some games have errors due to VMware’s lack 3D support. It would be nice to still play these games in their proper OS, instead of basically using hacks to work on modern Windows.
From what I’ve gathered, what you’re saying is to try DirectX wrapper software such as the one you mentioned, and then it could possibly work on more modern versions of Windows? Also, how would I get around the 16-bit installers, and the installers that have static OS requirements that cannot be installed on any other OS?
-
- Mar 22, 2011
-
- 5,343
-
- 54
-
- 37,690
- 1,407
-
#6
Software rendering is available for most games from the late 90s, just don’t enable the 3D Acceleration option in the game and it will default to Software Rendering. There are some exceptions though, eg. games ported from the Nintendo 64 like Star Wars Rogue Squadron 3D or Turok that have no software renderer and must have 3D Acceleration, for those games you’re best off trying to run them natively rather than in VMWare.
| Thread starter | Similar threads | Forum | Replies | Date |
|---|---|---|---|---|
|
D
|
Question Asus Software Advice | PC Gaming | 5 | Jan 25, 2023 |
|
|
Question Random black screens during gameplay and casual use. Unable to resolve. | PC Gaming | 5 | Jan 21, 2023 |
|
F
|
Question epic crash related to DirectX ? | PC Gaming | 1 | Nov 22, 2022 |
|
D
|
Question NHL 2001 for PC no longer working! (DirectX 7) | PC Gaming | 3 | Oct 10, 2022 |
|
I
|
Question Incoming packets FiveM | PC Gaming | 30 | Sep 22, 2022 |
|
T
|
Question PC Stream — Physical setup and software tweaking. | PC Gaming | 3 | Jul 24, 2022 |
|
D
|
Question Two problems: No Smart Access Memory and no AMD Software | PC Gaming | 2 | Jul 3, 2022 |
|
B
|
Question G920 steering wheel restarts when pressing any pedal ? | PC Gaming | 5 | Apr 28, 2022 |
|
D
|
[SOLVED] New PC performing much worse than 6 year old PC | PC Gaming | 14 | Apr 25, 2022 |
|
|
Question Game Pad Mapping Software | PC Gaming | 2 | Mar 3, 2022 |


- Advertising
- Cookies Policies
- Privacy
- Term & Conditions
- Topics
-
- Dec 28, 2015
-
- 96
-
- 0
-
- 4,590
- 1
-
#1
-
- Jan 13, 2011
-
- 4,165
-
- 4
-
- 35,260
- 1,357
-
#2
Find modern version of that ancient game, or find real hardware to run it.
-
- Dec 28, 2015
-
- 96
-
- 0
-
- 4,590
- 1
-
#3

-
- Jun 14, 2014
-
- 12
-
- 0
-
- 4,570
- 4
-
#4
| Thread starter | Similar threads | Forum | Replies | Date |
|---|---|---|---|---|
|
E
|
VMware Virtual Drive SSD Lifespan, single or multaple files? | Apps General Discussion | 3 | Jan 5, 2019 |
|
P
|
Solved! Vm software for Gaming | Apps General Discussion | 18 | Nov 7, 2018 |
|
M
|
Game Disconnect on VM | Apps General Discussion | 1 | Aug 31, 2018 |
|
S
|
Oracle VM VirtualBox, VMware Workstation Windows 9x 3D-Acceleration | Apps General Discussion | 6 | Jul 24, 2018 |
|
M
|
How to run 144 hz on VMware(or any other vm) | Apps General Discussion | 9 | Jun 29, 2018 |
|
D
|
Win7 clone to be used on Win10 in a vmware environment | Apps General Discussion | 2 | May 8, 2018 |
|
S
|
VMware Workstation vs. Oracle VM VirtualBox | Apps General Discussion | 2 | Jan 23, 2018 |
|
S
|
Best Windows XP Emulator? | Apps General Discussion | 5 | Oct 15, 2017 |
|
W
|
esxi vSphere Hypervisor for optiplex 3010 | Apps General Discussion | 4 | Oct 12, 2017 |
|
S
|
VMware or VirtualBox for Windows XP? | Apps General Discussion | 1 | Aug 8, 2017 |
|
T
|
VMware esxi 6.5 hotkeys-help please | Apps General Discussion | 1 | Aug 2, 2017 |
|
S
|
Working Windows 98 Emulator with 3D-Acceleration? | Apps General Discussion | 1 | Jul 12, 2017 |
|
|
Vmware player secret dhcp | Apps General Discussion | 1 | Apr 19, 2017 |
|
S
|
VMware Workstation, PCem or VirtualBox? | Apps General Discussion | 1 | Apr 2, 2017 |
|
S
|
VMware Workstation Change Graphics Card | Apps General Discussion | 1 | Mar 4, 2017 |
|
S
|
VMware Workstation CS:GO? | Apps General Discussion | 2 | Feb 8, 2017 |
|
D
|
About VMware workstation 11 compatibility | Apps General Discussion | 1 | Nov 11, 2015 |
|
|
Mac oSX and VMware Workstation, dual boot | Apps General Discussion | 8 | Aug 24, 2014 |
|
K
|
Graphics performance of Mavericks in VMWARE WOrkstation 9 | Apps General Discussion | 1 | Nov 16, 2013 |
|
K
|
Playing World of Warcraft on a Virtual PC? | Apps General Discussion | 3 | May 4, 2013 |


- Advertising
- Cookies Policies
- Privacy
- Term & Conditions
- Topics
-
RaMDaY
Member Guru- Messages:
- 116
- Likes Received:
- 0
- GPU:
I’m trying to get a virtual machine up and running to play some of my older games in. I know there’s no drivers for Windows 98 drivers for a GeForce GTX 280 so does anyone know if there’s anything else I can do to get it running.
-
mumakil
Member- Messages:
- 46
- Likes Received:
- 0
- GPU:
It doesn’t matter which GPU you have, VMWare emulates a DirectX 9 capable Video Card called «VMWare SVGA II», which right after a Windows 98 installation will be available by installing the ‘VMWare tools’ within Win98, which can be found on ‘VMware Workstation’s ‘VM|Install VMWare tools’ menu.
If it doesn’t install the video driver immediately (it happened to me several times) you will need to force the ‘unsupported device’ on ‘device manager’ to find the driver which will be located under ‘C:Program FilesVMwareVmware toolsdriversvideo’. Thus, VMWare emulated system will use the emulated GPU through your GeForce; therefore, no Nvidia Card/drivers will be recognized into the virtual machine. I can’t tell you if it’s good enough for games because I never installed any 3D game on my Win 98 virtual machine so far…
P.S.: That’s why if you install Vista or Win7 on a virtual machine, you will never get the ‘Aero’ feature working, unless you do a ‘remote desktop’ trick (google it to learn how).
Hope to have helped!
Cheers!
Last edited: Jan 18, 2009
-
RaMDaY
Member Guru- Messages:
- 116
- Likes Received:
- 0
- GPU:
I installed the VMWare tools and have VMWare SVGA II but when I go the DirectX diagnostics tools it say I have no Direct3D Acceleration available. I guess I’ll have to install a game and see what’s up.
-
mumakil
Member- Messages:
- 46
- Likes Received:
- 0
- GPU:
With Win 98 virtual machine powered off, check the display settings and enable Directx 9 acceleration. For me DirectDraw is accelerated, but Direct3D keeps giving me errors every time I test it and is disabled.
-
RaMDaY
Member Guru- Messages:
- 116
- Likes Received:
- 0
- GPU:
Pretty much the samething here. I tried to run some a few early 3D games . No go.
Last edited: Jan 19, 2009
-
Virtual machines are not made for gaming purposes, so do not get youre hopes up. Maybe VMWare version 10 will have dx9 accelerated, if even then. You cant even get Aero working on Vista with vmware, that tells me how great the dx9 acceleration is?!
")
-
RaMDaY
Member Guru- Messages:
- 116
- Likes Received:
- 0
- GPU:
What does everyone suggest as being the best way to play early Windows games on modern hardware then? I’m guessing virtual machines with glide wrappers are not going to cut it.
Last edited: Jan 19, 2009
-
RaMDaY
Member Guru- Messages:
- 116
- Likes Received:
- 0
- GPU:
I’m trying to play old Windows games. Some of them run on glide and early version of Direct X. None of them are DOS games, An examples of a game I’m looking to run is «Die Hard Trilogy». When I set the compatibility to Windows 95/98 it gives me an error about not working with 64-bit architecture. Three Dirty Dwarves is another.
-
Hm. I’d install Windows 98 on a separate partit-i-on and then use some modded drivers for the GTX280.
Maybe use the latest official driver for 9x and then try to get it working with a modded inf in which your card is supported…
Have a look here, also:
http://www.msfn.org/board/NVidia-drivers-8269-t97140.htmlBesides that you need a Glide wrapper to get Glide without a 3dfx card working.
http://dege.f-r-e-e-w-e-b.hu/ (take the — out)
http://www.glidos.net/Last edited: Jan 20, 2009
-
pato
Member Guru- Messages:
- 182
- Likes Received:
- 7
- GPU:
Did you install directx9 at all?
Windows 98 doesn’t provide it out of the box -
Syranetic
Master Guru- Messages:
- 611
- Likes Received:
- 142
- GPU:
Buy a $20 dollar computer with Windows 98 preinstalled off Ebay.
-
mumakil
Member- Messages:
- 46
- Likes Received:
- 0
- GPU:
Yeah, that’s the best idea so far! I’m glad I still have my 1998 Compaq Presario with Pentium II 500Mhz and a Riva TNT 32MB GPU, which runs very well every game of that long forgotten era…


Share This Page


Установка легендарной Win98 заката тысячелетия на Vmware
Не многие из вас наверное застали и помнят времена, когда иметь компьютер дома мог позволить не каждый, а уж еще и с Dialup интернетом и подавно. Windows 98 – система, впервые вышедшая в 1998 году и показанная самим Биллом Гейтсом навела немало шороха и инновацией по сравнению с ее предшественником – Windows 95.

Сама система, как и 95-ая визуально мало чем отличалась. Отличилась однако Windows 98 более успешными продажами в США и знаменитой презентацией с синим экраном смерти. Чуть позже, в 1999 году даже вышло обновленное издание Windows 98 Second Edition исправляющее множество багов, добавив поддержку USB, модемов, обновленного браузера Internet Explorer 5 и других особенностей.
Именно в этой статье мы рассмотрим последнюю версию – Windows 98 SE, которую установим на современный ПК при помощи виртуальной машины Vmware Workstation.
Где взять ОС?
В этой статье я не буду подробно рассказывать, где взять эту старую ОС. К сожалению устаревшие Windows невозможно загрузить с официального сайта Microsoft, а их поддержка уже давно была прекращена.
Поэтому среди немногочисленных вариантов будет поиск лицензионной/пиратской копии на CD/дискете или же более современный вариант – Скачивание копии (образа) через интернет на файлообменниках/трекерах. Установочный диск весит максимум до 700мб – Размер обычного CD диска.
Почему выбор пал именно на Windows 98, а не на Windows 95? Да потому что та версия устанавливается сложнее, а работает она еще хуже, чем Windows 98. К тому же, на Windows 98 вас ждет встроенный интернет-браузер (IE5), стандарт Plug-and-Play, более удобный интерфейс, и вы сможете запустить на порядок больше программ с играми без поиска необходимых драйверов.

Процесс Установки
Перед началом установки нашей Windows 98 SE нам прежде всего понадобится виртуальная машина Vmware Workstation Player, которую можно скачать здесь с официального сайта. На выбор есть версия для Linux и Windows.
С помощью виртуальной машины можно установить любую ОС, но мы рассмотрим только Windows 98.
После скачивания VMware Можно приступать к первой настройке.

- Запустив Vmware Workstation Player в верхней части окна можно добавить новую операционную систему.
- В следующем окне нам предложат указать путь до установочного диска (для дисководов) или же выбрать образ диска (Iso формата). Выбираем второй вариант и указываем путь до образа диска, который вы скачали до этого. Программа автоматически обнаружит, что данный образ является Win98 и подберет все дальнейшие настройки за вас.

- В следующих пунктах вас спросят как назвать виртуальную машину и сколько выделить места на жестком диске под Windows 98. 8 Гб места вполне достаточно для данной ОС.
- Запускаем нашу Виртуальную машину и начинаем установку ОС. В предложенных пунктах выбираем Boot from CD-ROM и затем Start Windows 98 Setup From CD-ROM. Тем самым начнется установка Windows через установочный ISO образ. Займет этот процесс от 5 до 15 минут.


- Дальше дело за малым. Подтвердив все этапы с дальнейшей перезагрузкой и повторно указав загрузку с CD-ROM мы попадем в установку Windows 98 в которой вам понадобится ввести дату и время, имя пользователя и лицензионный ключ для активации ОС. Начнется установка системы, которая займет пару минут.

- После всех проделанных этапов Windows 98 будет считаться установленной и полностью готовой к работе, но в нашем случае еще предстоит установить драйвера от Vmware, настроить Звук и подключиться к интернету.
Добавление Драйверов, звука и интернета
Драйвера Vmware
Прежде всего рекомендуется установить драйвера для Vmware. Это позволит нам включить аппаратное ускорение GPU и прямой обмен файлов между главной и виртуальной ОС.
Для этого уже в запущенной системе заходим в Player и выбираем Manage > Install/Reinstall Vmware Tools

После установки драйверов и перезагрузки системы в системном трее рядом с часами у вас появится иконка Vmware Tools сигнализирующая об успешной установке всех инструментов.
Драйвера Звука
Следующим этапом будет установка звуковых драйверов. Для этого нам подойдут драйвера от Creative SoundBlaster Audigy (SBPCI-webdrvsv5_12). Найти эти драйвера можно на официальном сайте Creative или сторонних ресурсах как для Windows 95-98 так и для Windows 98SE.

После загрузки этих драйверов на ваш ПК, достаточно перетянуть файлы драйверов в окно запущенной виртуальной машины Win98. После этого данные файлы окажутся внутри Vmware и их можно будет запустить внутри Windows 98 для установки звука. Windows так же попросит вас указать путь до установочного диска Windows. Поэтому не спешите удалять образ Iso диска с системы.
Настройка доступа в Интернет
Никаких драйверов и настроек модема не потребуется. Все, что необходимо сделать – это запустить Internet Connection Wizard внутри Windows 98 и поэтапно следовать инструкции по настройке ниже.

- Выбрать последний пункт – I want to set up My Internet connection manually (LAN). Настроить подключение к интернету через Локальную Сеть
- Далее I connect through a local area network (LAN)
- Поставить галочку Automatic discovery of proxy server (опционально)

В следующем пункте выбрать No – не настраивать почтовый аккаунт и затем завершить настройку подключившись к интернету.

Поздравляем! На этом подключение к интернету успешно завершено и можно приступать к полноценной работе с Windows 98 SE. Рекомендую так же заменить стандартный браузер на Opera v9.64 для Win98, так как с ней станет проще взаимодействовать с современными сайтами.
Зачем сейчас нужна Win98?
Несмотря на то, что система уже кардинально устарела, она может использоваться и по сей день. Конечно Windows 98 не заменит современные ОС, но с основными задачами типа работы с документами и файлами справляется без особых проблем (необходимо лишь обзавестись всеми необходимыми драйверами и софтом).
Целесообразно установить такую устаревшую ОС можно разве что ради ностальгических чувств – поиграть в игры былых лет, которые не могут запуститься на современных ПК и поэкспериментировать с различными программами.
In this article, we will examine how to set up and run Microsoft Windows 98 on a new virtual machine using the VMware Workstation 17 Pro virtualization program on Windows 11.

How to Set Up Windows 98 using VMware Workstation 17 Pro on Windows 11 PC with Intel 12th Gen 12700H (Alder Lake) CPU
To improve Windows 95’s shortcomings and some additional security issues, Microsoft developed and released the Windows 98 operating system, codenamed Memphis, on June 25, 1998.
MS-DOS was a standard operating system at the time when computers were widely used by home users. But over time, Windows 98 was developed using MS-DOS and the previous Windows 95 system. In this operating system, a better graphical interface, multitasking support, and easier configuration of network connections were aimed for users.
With Windows 98, the need to use DOS has completely disappeared, but some applications can still be run over DOS without being installed on the system.
It can still be used today to update the firmware of some hardware to an old and outdated operating system. To do this, you may need to install the operating system your device supports, so you may need an old computer or a virtual machine.
If you are using an up-to-date operating system such as Windows 11, you can use VMware Workstation virtualization software to install and run old systems on your computer.
How to Create a New Virtual Machine for Windows 98
If you do not have a physical computer with old hardware, you can use a virtual computer and old systems on your host. Before starting the installation, install the Workstation program on your Windows 10 computer, and be sure to restart your computer.
Then, after downloading the Windows 98 ISO file for VMware to your computer by clicking here, you can prepare a new VM by following the steps below.
Step 1
After running the VMware 17 Pro software, click Create a New Virtual Machine from the options on the main screen of the program.
The Custom (Advanced) option is selected by default when the virtual machine creation wizard is opened. When you continue with the installation with this option, you will configure the hardware of the virtual computer better, so just click the Next button in this window.

Step 2
You can better select available hardware if you go with an older hardware version for Windows 98 in the virtual hardware compatibility window. In fact, if you select 5.x and continue, the hardware version will appear as 17.x when you prepare the virtual PC.
This is because you cannot change the hardware version without installing VMware Tools. However, to prepare a more stable guest machine, select 5.x compatibility at this stage and continue.

Step 3
You can choose which method you want to install the guest operating system using from this window. You can choose from this window with the physical installation media or ISO image as the installation method of a Windows or Linux system.
However, to create a more accurate VM first, check I will install the operating system later and click Next.

Step 4
To select a guest operating system, you must first select the platform of the system you will install, and then the operating system distribution from the Version section. In this window, select Microsoft Windows and then Windows 98, and click Next.

Step 5
You can change the name of the virtual machine to be displayed in the VMware Pro library from this window. To do this, type a new name in the Name field or use the default name specified by the program.
This step is important when preparing the VM because you need to configure the location where you want to install the VM, and where you want to store the VM. If your host’s hard disk has enough storage space, you can leave the VM’s installation location in the default C drive. However, in order to use the VM more efficiently and with performance, create a folder on a USB 3.0/3.1 external HDD device and install it in that folder.

Step 6
Configure 1 processor for the processor configuration for the VMware Windows 98 virtual machine. Even if you configure more processor settings, the system will use only 1 core.

Step 7
It is important to correctly configure the RAM size for the Win98 VM as the maximum RAM size this system can support is 1GB.
If you configure the RAM size of the Win98 virtual computer to 2 GB or 4 GB, the system will reboot and loop constantly.

Step 8
Select the NAT (Network Address Translation) structure for the network type configuration and click Next. If you choose NAT for the VM’s network connection, you should choose the Bridged type if you want to get an IP address different from your host’s IP block but want to get an IP address from the same IP block.

Step 9
In the I/O Controller window, select BusLogic for your virtual disk to work in harmony, efficiency and performance and click Next.

Step 10
Configure the disk type for the VM as IDE and continue. In this window, the NVMe disk type is disabled because this disk structure is not supported by Windows 98.
NOTE: If you are going to install the drivers for the hardware in your virtual PC, do not select SATA at this step. If you choose the SATA disk type, you cannot configure VMware hardware compatibility of drivers for installation and your virtual disk will fail.

Step 11
Since you will be installing a clean operating system, select Create a New Virtual Disk in the Select a Disk window and click Next.
If you have installed Win98 with an older version of the VMware program and you want to use the disk of that system in the new version, you must select the Use an existing virtual disk option.

Step 12
Configure the disk capacity of the virtual computer and select Store virtual disk as a single file to store the virtual disk as a single file type on your host disk and click Next.

Step 13
You can change the name of the disk file from this window, or if you plan to save it to a different location than the VM’s installation location, you can also change the location where the virtual disk will be saved via Browse.

Step 14
You will see the hardware settings you have configured in the summary window of the virtual machine. Now click on the Customize Hardware button to add the Windows 98 ISO file to the VM.

Step 15
Finally, to add the ISO image file to the virtual PC, click on the CD/DVD device, enable the Use ISO image file option, and then select the location of the ISO file you downloaded to your computer via the Browse button.

Step 16
For Windows 98 operating system, close the VM wizard after making sure that the USB compatibility type is configured as 1.1 in Workstation Pro.

Step 17
Close the hardware summary window of the virtual machine by clicking the Finish button.

Step 18
After creating and preparing the Microsoft Windows 98 virtual computer, you can click the Power on this virtual machine button to run it and start the installation.

How to Install Windows 98
It is important to prepare a new virtual machine for the system you will install using VMware Workstation on your Windows 10 computer because old operating systems have minimum system requirements.
After running the Windows 98 machine, you should continue from this step as if you were installing it on a physical computer.
Step 1
After powering up your virtual computer, the Microsoft Windows 98 CD-ROM Startup Menu will open. You can see two ways to install using a Hard Disk or CD-ROM in the Boot menu.
Continue the installation by pressing Enter on the Boot from CD-ROM option on the boot screen.

Step 2
Likewise, press Enter on the Start Windows 98 Setup from CD-ROM option.

Step 3
You can start the installation process by pressing Enter on the Microsoft Windows 98 Setup screen. You can also press F1 to get more information about the installation on this screen, and press F3 to exit the wizard.

Step 4
After starting the installation, you need to configure the unallocated disk space on the disk configuration screen. Press Enter in Configure unallocated disk space option and continue.

Step 5
In Windows 9x systems, when you have a disk size of more than 512MB, you will encounter a large disk setting. In order to use the 8GB virtual disk size you have assigned to the VM, press Enter on the Yes, and enable the large disk support option.

Step 6
Press Enter for the setup wizard to reboot your system. After this process, your system will restart and when the boot screen appears, follow the same steps until step 4.

Step 7
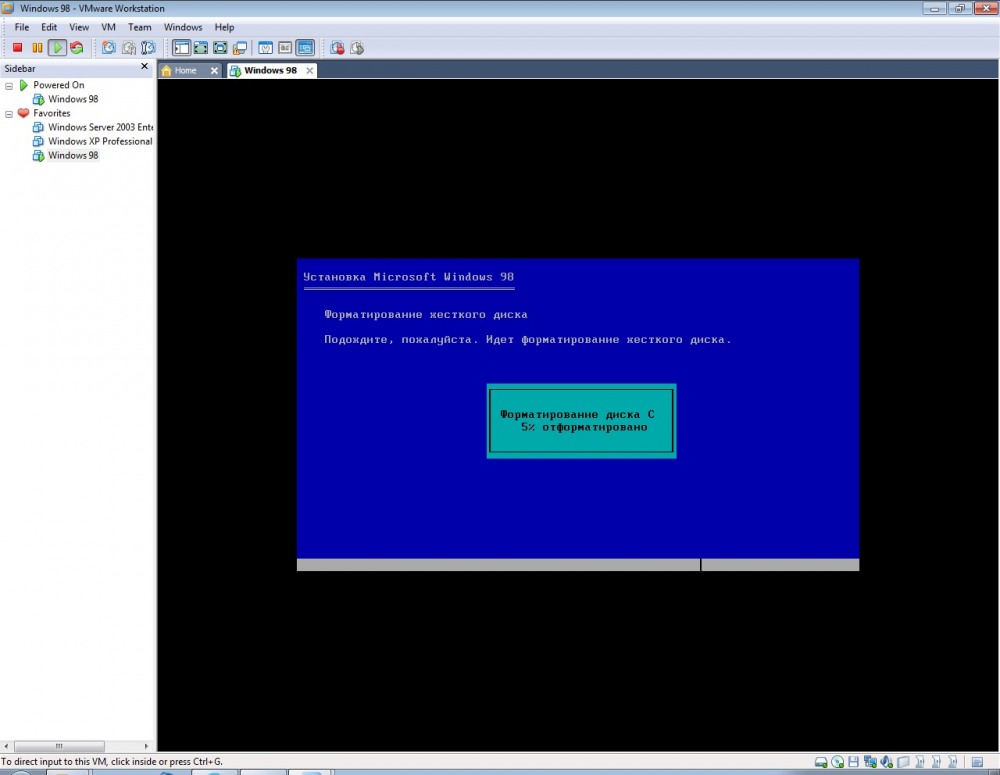
After configuring the large disk space usage, the wizard will automatically start formatting the C drive.

Step 8
After the setup wizard formats your virtual disk, press Enter to continue.

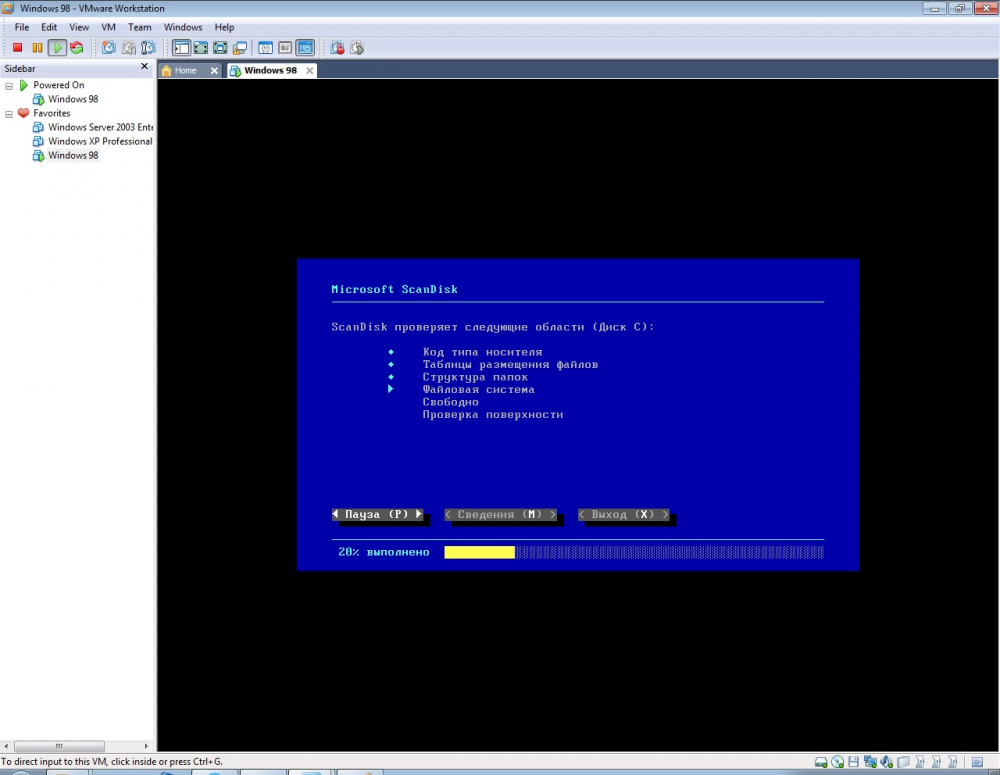
Step 9
In this step, the Microsoft ScanDisk tool will open and scan and verify your system’s file integrity, such as operations.

Step 10
After confirming the integrity of the installation media and system files with Microsoft ScanDisk, your system will restart and the necessary files for installation will begin to be copied.

Step 11
When Windows 98 Setup is opened, click the Continue button in the window that states that the installation will take between 30 and 60 minutes depending on the speed of your computer.

Step 12
Wait while the wizard prepares to do the rest of the installation process.

Step 13
In the Select Directory window, you can configure the directory where you will install Windows 98 as a different location, but select the default location C:WINDOWS and click Next.

Step 14
Wait while the Windows installation directory and installed components are checked.

Step 15
In the Setup Options window, continue with the Typical checked by default. If you want to configure all the available options, such as the components to be installed in your virtual system, you can choose the Custom option.

Step 16
If you want to configure the system applications or tools that you want to use on your system in the Windows Components window, continue with the option below. In this step, we recommend installing the most common system components.

Step 17
In the Identification window, type a new name for your virtual computer and continue without changing the workgroup. You can also fill in the Description field to write a description for your virtual PC.

Step 18
In the location configuration step, select the country you live in and click Next.

Step 19
Click Next to start copying Win98 system files.

Step 20
When your virtual computer restarts, Win98 system files will start to be copied. Copying system files will take time depending on the speed of your system.

Step 21
After the operating system files are copied, restart your VM.

Step 22
Wait while the Microsoft Windows 98 system boots up.

Step 23
Wait while the setup wizard updates the configuration files.

Step 24
If you have a computer with Intel’s 12th-generation processor, you may not be able to install Win98 on the virtual machine. So shut down your VM in the second phase of the operating system as you need to patch.

Step 25
Open the virtual machine settings and click the Add button to add a new device. In the Hardware Type window, select Floppy Drive and click Finish.

Step 26
To add a bootable image file to the floppy drive, enable the Use Floppy Image File option and then add the Patch.ima file you downloaded to your PC from the button below via the Browse button.
Win98 Fix CPU – Floppy Boot – Intel 12th Alder Lake (patcher9x-0.6.14-boot.ima)
To run 9x versions of Windows on the latest CPUs, you can download patcher9x-0.6.14-boot.ima from the article published on the Vogons website or from the Github link.

Step 27
When your Win98 virtual system boots, type the “patch9x” command in the A:> drive and press Enter. In the next step, press Enter and select “1” to execute the operation, and press Enter again.
In order for your virtual operating system to work on your current computer, turn off and on your system after editing the relevant files.

Step 28
After the necessary configuration files are prepared, the User Information window will open. In this window, type a name for the user account of your Win98 system. If you are going to use your VM in a corporate environment, you can also write the company information.

Step 29
To accept the license agreement of the Win98 operating system, select the option I accept the agreement and click Next.

Step 30
In the Product Key window, type your Windows 98 product key and click Next to continue.

Step 31
After configuring all the settings of the operating system, click Finish to continue to boot the system.

Step 32
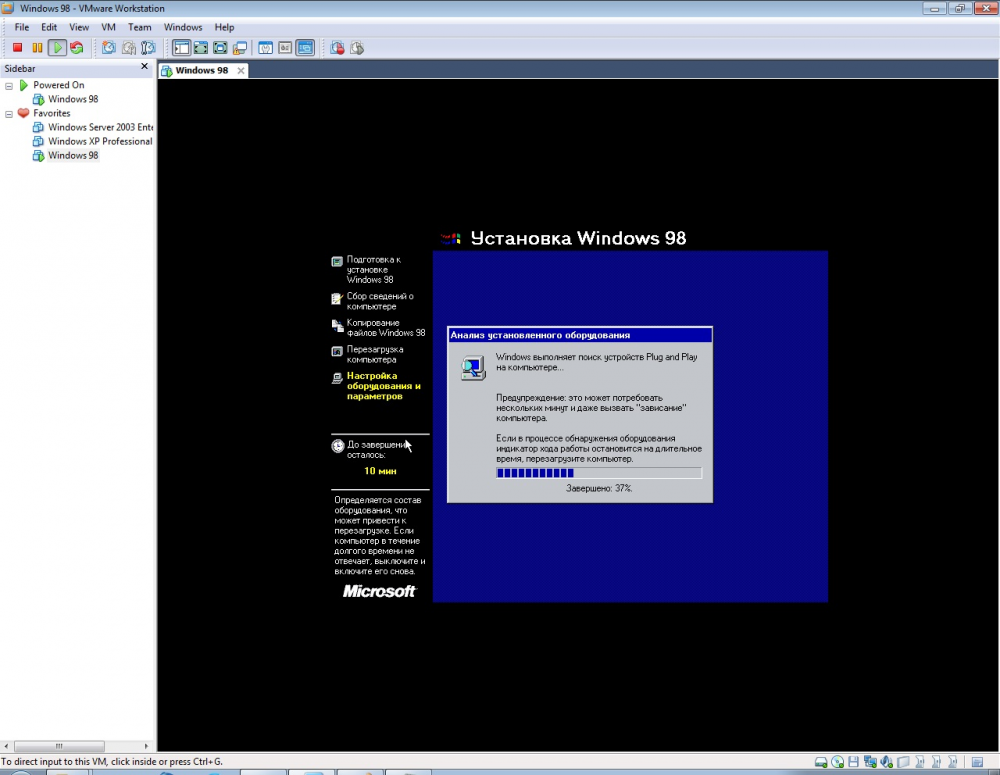
When your virtual VM restarts, the setup wizard will scan for hardware to identify plug-and-play devices. Do not restart your computer until the hardware scan is complete.

Step 33
Wait while the wizard configures your virtual computer’s hardware and Plug and Play devices.

Step 34
In this step, rearrange your date and time settings to the location you live in and close the window.

Step 35
Wait while the setup wizard updates the system settings.

Step 36
When the Enter Network Password window opens, type your user name to log in to the system with the user name you created and click OK.

Step 37
Wait while the personalized settings are configured.

Step 38
After typing your username, you will be greeted with the Microsoft Win98 desktop screen.

Step 39
You can check your system information by right-clicking on My Computer and then clicking Properties.

How to Install VMware Tools
After installing an operating system on virtual machines, the first thing you need to do is to install VMware Tools. With this software, you can install system drivers that are not installed on VMs. In this way, you can use the VM in full-screen resolution or use your host’s USB and Webcam devices.
Step 1
To install VMware Tools on a Microsoft Win98 guest machine, click VM / Install VMware Tools from the menu. When you receive the warning that the guest operating system has locked the CD-ROM, click the Yes button to continue.

Step 2
In the virtual machine, VM Tools will start as in the image below and will be prepared for installation.

Step 3
Click Next when the installation wizard of the virtual machine tools starts.

Step 4
Select Complete as the installation type of VM Tools and click Next.

Step 5
Click the Install button to start the installation of the virtual PC tools.

Step 6
When you encounter the 25010 warning during the HTML Help Runtime inspection, click Yes to install the HTML Help engine.

Step 7
After installing VMware Tools, click OK when the virtual machine presents you with an Eject request, and then click Finish to close the wizard.

Step 8
You can now use your virtual PC in a full-screen resolution supported by your host. If your VM is not adapting to full screen resolution, open Display Properties and configure the screen resolution to 1024×768 or higher and click View / Fit Guest Now after saving the settings.

Step 9
In addition, one of the other benefits of VM Tools is that it enables file transfer between the host and the VM by drag and drop method.
Create a new text document on your host’s system and drag and drop it onto your VM and you will see the file transfer done successfully.

How to Configure the Internet Connection
After installing your Guest virtual system, you may want to check the Internet connection at the first stage.
Step 1
To check your Internet connection via VM, open MS-DOS prompt and ping Google servers with the ping 8.8.8.8 command and test your network connection.

Step 2
Go to Start / Programs / Internet Explorer and open Internet Explorer.

Step 3
Since you already have a network connection when the Internet Connection Wizard opens, select option 3 and click Next.

Step 4
When you try to access the Google search engine through the Internet Explorer web browser, you can now see that your connection is OK.

How to Install Drivers
After installing Windows 98FE, you can configure the network connections and use them for testing purposes only. However, you can experience the system more professionally by installing drivers for devices such as audio and USB.
You can download the Win98 USB and audio drivers from the table at the bottom of the article to your computer.
Step 1
First, right-click on My Computer and click Properties from the pop-up options. When the System Properties window opens, click the Device Manager tab and check the drivers for the devices that are not installed on your system.
The Driver list that VMware Tools could not install is as follows.
- PCI Multimedia Audio Device
- PCI System Peripheral

Step 2
After checking the uninstalled drivers, shut down your virtual computer. Then click VM / Manage / Change Hardware Compatibility from the menu to configure the compatibility of the VM so that the hardware can be found appropriately by the system.

Step 3
When the VMware hardware version change wizard opens, click Next and continue. In the next window, change the Hardware Compatibility value to Workstation 5.x to install the drivers for the virtual machine and click Next.

Step 4
After changing the hardware compatibility to Workstation 5.x, select Alter this virtual machine and click Next. After converting the VM to version 5.x, click the Close button.

Step 5
After running your virtual system, you will see that new devices such as Standard Floppy Disk Controller are determined on the screen this time.

Step 6
Some drivers will be updated automatically, but you have to manually install the drivers for devices such as USB.
When the Intel 82371AB/EB PCI to USB Universal Host Controller device is found by the system, click Next and proceed to the next step. In the add new hardware wizard, click Next to have Windows install the best drivers.
Check CD-ROM Drive and click Next to install the USB driver. In this step, make sure the Win98 ISO file is mounted on the VM.

Step 7
Select The Updated Driver option because Windows has found a more recent driver version for USB and click Next. Windows will install the USB Controller driver to C:WINDOWSINFUSB.INF.

Step 8
Also, install the drivers of the AMD PCNET Family Ethernet Adapter (PCI-ISA) device found by the system by following the same steps.
")
Step 9
One of the biggest problems in using Win98 VM is the sound driver. After changing the hardware version, the audio device will be automatically found by the system.
An important point here is that if you try to install the sound driver with Workstation 16.x or 17.x version, you will get a Windows Protection Error. Therefore, you must change the hardware version of the VM.
Click the Cancel button when the system finds the PCI Multimedia Audio Device.

Step 10
You have to manually install the driver for the audio device, because the CD-ROM cannot automatically install the drivers for this device.
Copy the Eapci8m.ecw file in the Audio Driver that you downloaded to your computer from the table at the bottom of the article into C:WINDOWSSYSTEM.

Step 11
Now, copy the Creative Ensoniq AudioPCI Driver (epw9xup) file to the VM and run it. After running the setup file, the Audio device will be automatically scanned again and the drivers will be installed.

Step 12
After copying the EAPCI8M.ECW file to the corresponding location, open Device Manager and open the settings of the Creative Ensoniq AudioPCI device and select MIDI Synthesizer Waveset setting “Export 8 MB GM/GS Waveset 5” and click OK.
After installing Creative Ensoniq AudioPCI Driver you will get an error like below because you need to configure the MIDI settings of the system.
The Creative Ensoniq AudioPCI driver cannot load MIDI waveset. MIDI playback
has been disabled.
Step 13
You will no longer receive MIDI alerts when you restart your system. In addition, you can see the AudioPCI Mixer application launched in the taskbar.

How to Use USB Flash Memory
We recommend using a USB flash drive so that you can quickly copy large files to your virtual machine.
Step 1
Now, plug a USB Flash Memory into your system on your host PC. In the New USB Device Detected window opened automatically by VMware, check the “Connect to the host” option and click OK.

Step 2
Create a new folder or document inside the USB disk on your host and then click VM / Removable Devices / Name of your USB / Connect in Workstation Pro’s tool menu to connect it to your VM.

Step 3
You must also manually install the USB Mass Storage Controller driver to be able to use flash drives in the VM. First, install the Generic USB Hub driver found by the system from the Windows ISO file.

Step 4
You must also manually install the USB Mass Storage Controller driver to be able to use flash drives in the VM.
Likewise, download the USB Mass Storage Controller Driver (nusb320-Eng-98FE) file to your computer and double-click on it to start the installation. When the Native USB Driver window opens, extract the contents of the archived file to C:USB.
")
Step 5
Click the Refresh button in Device Manager and scan for hardware again. This time, install the Generic USB Hub driver manually. For Generic USB Hub, select “Search for the best driver for your device” and click Next. Select the folder you extracted to C:USB for USB Hub Driver and click OK.
After installing the driver for the DataTraveler 3.0 device, if the system cannot find the USBNTMAP.SYS file, you can find it in C:USB.

Step 6
Finally, you can see that the USB flash memory 3.0 device is now running smoothly on it. Also, you can see the “KINGSTON DataTraveler 3.0” device when you check “Disk Drives” via Device Manager.

How to Delete the Virtual Machine
If for some reason you no longer want to use the Win98 guest machine that you have installed with Workstation on your host PC, we recommend that you delete it completely from your host disk.
Right-click the VM you want to delete from the left panel of Workstation Pro and click Manage / Delete From Disk, then click Yes.

Video 1
Video 2
Video 3
Windows 98 FE (First Edition) Driver Download
Windows 98 FE (First Edition) ISO
Audio Driver (Creative Ensoniq AudioPCI)
USB Driver (USB Mass Storage Controller)
Windows 98 SE (Second Edition) Driver Download
Windows 98SE (Second Edition) ISO
Sound Driver (Creative SB PCI (WDM))
Installing Old Versions
Workstation Version
YouTube Video
Slide
Related Articles
♦ How to Install Windows 10 on a Virtual Machine
♦ How to Install Windows XP on a Virtual Machine
♦ How to Install Windows 7 on a Virtual Machine
♦ How to Install Windows Me on a Virtual Machine
♦ How to Install Windows Vista on a Virtual Machine
Oracle VM VirtualBox, VMware Workstation Windows 9x 3D-Acceleration
-
Thread starterSandi1987
-
Start dateJul 23, 2018
-
#1

-
- Dec 22, 2012
-
- 3,822
-
- 644
-
- 126
-
#2
Maybe it would be best to explain what it is you are after.

-
#3
now whether it supports 9X 3d acceleration is a different matter. I did not check more than opening it and see where the option is
-
#4
Windows 9x in VirtualBox it’s even worse.
What about Bochs emulator? Is it good?
EDIT:
I tried Bochs and i can’t boot Windows 95.
-
#5
- Advertising
- Cookies Policies
- Privacy
- Term & Conditions
- About us
-
This site uses cookies to help personalise content, tailor your experience and to keep you logged in if you register.
By continuing to use this site, you are consenting to our use of cookies.