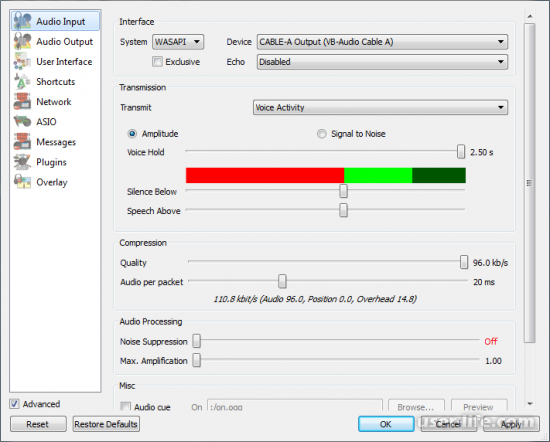
One of the more popular audio mixers used is Voicemeeter. Though it is a powerful tool it is not the simplest to use and can sometimes not be the right fit for everyone. So when it comes time to uninstall Voicemeeter many users can run into issues with getting rid of the software completely. To assist with this we will go through the steps needed to remove Voicemeeter as well as how to verify the software and its components are completely uninstalled from your computer.
Note: A common plugin that is used in conjunction with Voicemeeter is the VB-Cable driver. VB-Cable adds a virtual audio input and output that can be configured to what the user needs. Due to it being used with Voicemeeter so often I have included steps for uninstalling the plugin as well. If you do not have VB-Cable installed you can skip these steps.
How to Uninstall and Remove Voicemeeter
Using Windows 10’s App Removal
-
Step 1

How to Uninstall Voicemeeter 16 Press the Start button (1) then click Settings (2)
-
Step 2

How to Uninstall Voicemeeter 17 Select “Apps” from the available options.
-
Step 3

How to Uninstall Voicemeeter 18 From the list of apps scroll down to where you see Voicemeeter and VB-Cable.
-
Step 4
Let’s start with uninstalling VB-Cable. Select VB-Cable from the Apps list, press Uninstall, then Uninstall again on the popup.
-
Step 5

How to Uninstall Voicemeeter 19 Another window will open, click the “Remove Driver”. Very quickly another window box should open saying the uninstall was successful and to restart to complete it.
-
Step 6
Restart your computer. Until the computer is restarted the VB-Cable inputs will continue to appear installed.
-
Step 7
Repeat steps 1 through 3, selecting Voicemeeter then Uninstall this time.
-
Step 8

How to Uninstall Voicemeeter 20 In the window that opens, click “Remove”, then OK on the uninstallation success message.
-
Step 9
Once again restart your computer. Once your computer is back up Voicemeeter should be uninstalled.


Using the original Installers
Another option for uninstallation, particularly if you cannot locate the Voicemeeter options on your Apps list, is to use the original installers.
If you no longer have the installers you can download them from here https://vb-audio.com/Voicemeeter/
-
Step 1
Make sure you download the version you have installed, either standard Voicemeeter, Banana, or Potato. If you aren’t sure which version you have you can open Voicemeeter and it will display it at the top left.
Voicemeeter standard

How to Uninstall Voicemeeter 21 Banana

How to Uninstall Voicemeeter 22 Potato

How to Uninstall Voicemeeter 23 Once you have identified the version you have, download the installer for it onto your computer.
-
Step 2

How to Uninstall Voicemeeter 24 Next, you will need to run the installer, making sure to right-click and run as administrator when you do.
-
Step 3
How to Uninstall Voicemeeter 25 You will see the window popup for Voicemeeter, which should have the “Remove” option. Click Remove and you should get a popup saying the removal was successful and to restart to complete it.
-
Step 4
Restart your computer and verify Voicemeeter has been removed.
Note: This same process will need to be done for VB-Cable if you have that installed as well.


Manually Uninstalling Inputs/Outputs Using Device Manager
If the previous methods have failed to remove all traces of the Voicemeeter devices the last method is to attempt to remove the remaining devices using Device Manager.
-
Step 1

How to Uninstall Voicemeeter 26 In the taskbar search bar type “Device Manager”
-
Step 2
Click on Device Manager.
-
Step 3
The Device Manager will open in a new window. Click on the arrow next to “Audio Inputs and Outputs” to see a complete list of devices.
-
Step 4

How to Uninstall Voicemeeter 27 Here you can right-click and uninstall each of the Voicemeeter (and VB-Cable) inputs/outputs you see.
-
Step 5
Once these are removed you will need to restart your PC. Once restarted, open Device Manager and check to make sure all of the inputs/outputs are now gone.


Issues with Uninstalling Voicemeeter
If you have issues uninstalling Voicemeeter, usually in the form of the software still showing up after it should be uninstalled or virtual inputs still showing up under sound devices then hopefully the previously detailed steps should help resolve those issues.
However, in some cases, users have had audio issues occur after Voicemeeter is completely removed. This is most often due to old audio settings being broken due to the previous Voicemeeter inputs now being gone. In this case, it is best to revisit your audio devices and make sure your speakers/headset and Mic are set to be your default Playback and Recording devices (they should have the green checkmark like in the picture).

Make sure that any streaming or recording software you use with unique audio settings are adjusted as well.
How to Make Sure Voicemeeter is Uninstalled Completely
The fastest way to make sure Voicemeeter is uninstalled completely is to check your sounds settings. Once the software is uninstalled you will no longer see any Audio devices listed as “Voicemeeter Input/Output”. This can be done quickly by Right-clicking on the speaker icon of your taskbar then selecting “Sounds”.

In the window that opens you will need to select the “Playback” and “Recording” tabs at the top. In each of these tabs, you can scroll through the list (yours will look different and include any mics, speakers, etc. you have attached to your computer) making sure you DO NOT see any labeled as Voicemeeter input/output like below.

If the Voicemeeter devices are missing from your Sounds settings then it is fully uninstalled!
Conclusion
Once you take your time and make sure to install each of the components followed by a restart the process should go rather smoothly. Whatever the reason you had to uninstall Voicemeeter hopefully these steps helped you get it removed completely.

About the Author
Marcus
Marcus is a Systems Engineer from The Bahamas with a love for gaming and writing. He is passionate about using his experience to help others get the most out of the technology they use.
Содержание
- Способ 1: Ручное удаление Virtual Audio Cable
- Шаг 1: Удаление программы
- Шаг 2: Очистка остаточных файлов
- Шаг 3: Удаление драйвера
- Шаг 4: Чистка параметров реестра
- Способ 2: Удаление Virtual Audio Cable при помощи специального ПО
- Вопросы и ответы

Первый метод заключается в полностью ручном удалении Virtual Audio Cable со своего компьютера. Выполняется он в несколько этапов, поэтому целесообразнее разделить инструкцию на шаги для простоты понимания.
Шаг 1: Удаление программы
Для начала потребуется использовать стандартное средство удаления программ, которое встроено в операционную систему. Однако стоит учитывать, что оснастка «Приложения», запускающаяся через «Параметры», не видит необходимый софт, поэтому в Windows 10 его придется найти другим путем.
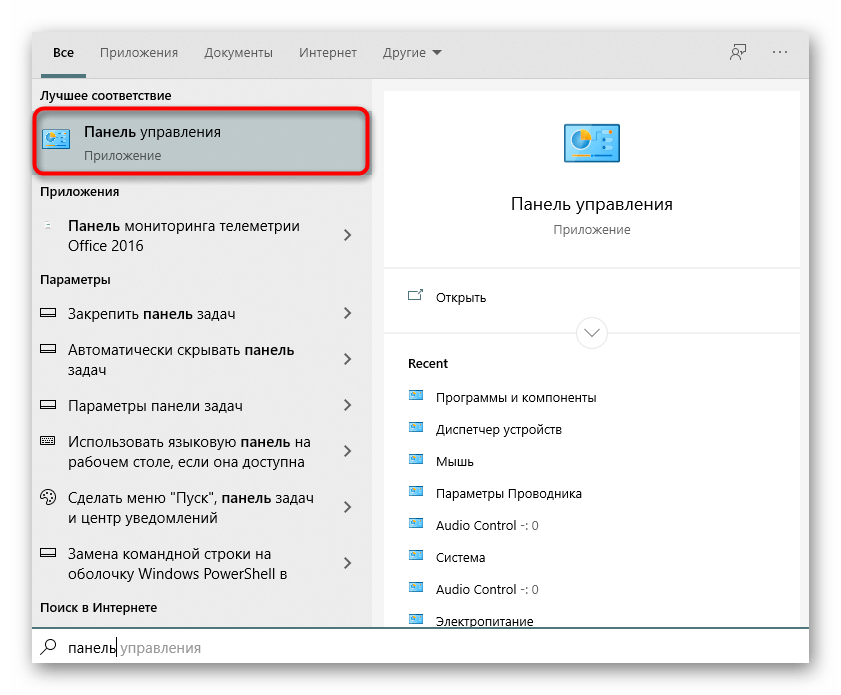
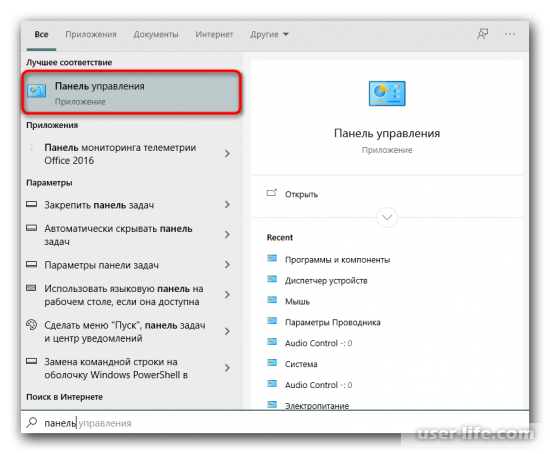
- Откройте «Пуск» и через поиск отыщите «Панель управления».
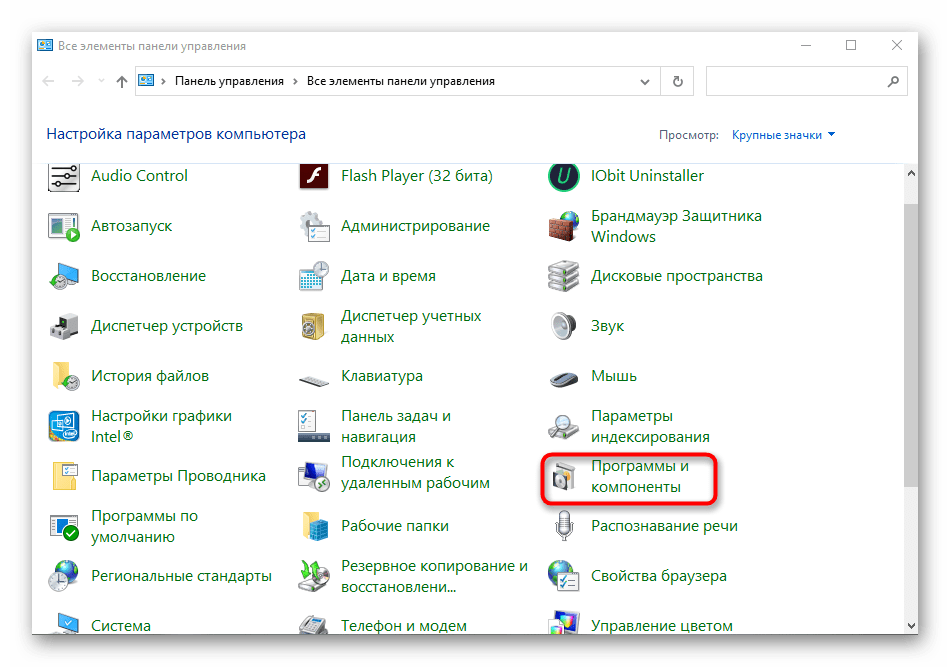
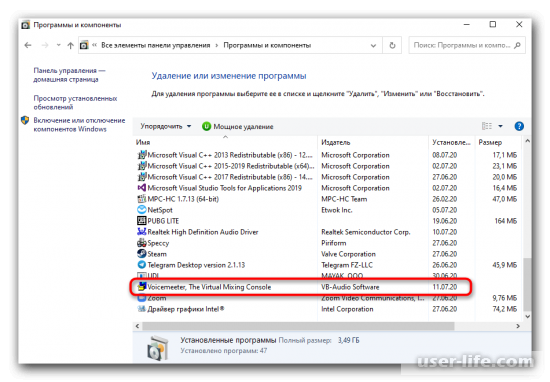
- В списке перейдите к разделу «Программы и компоненты».
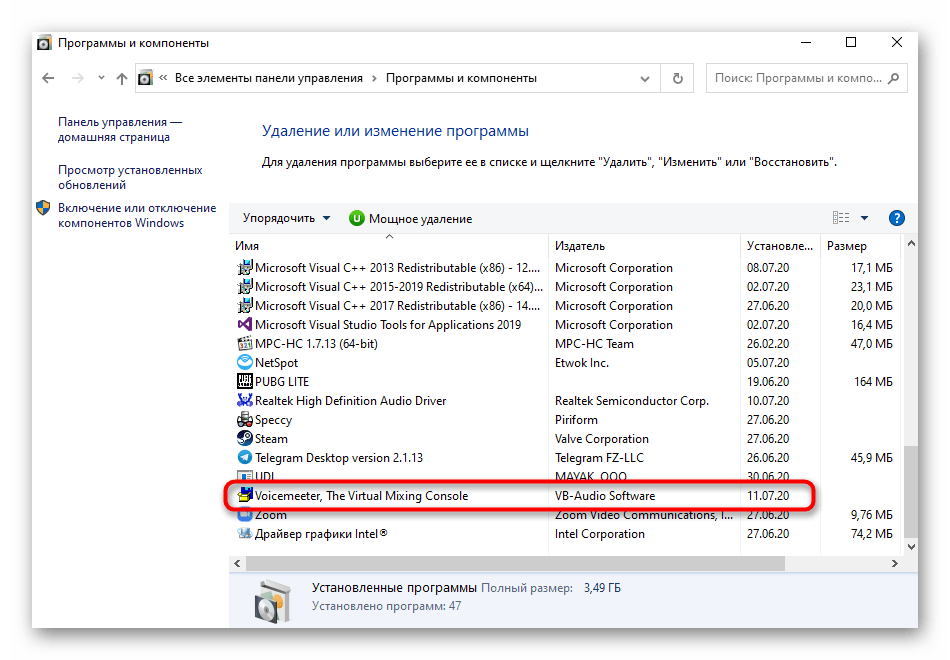
- Остается только найти в самой таблице программу Voicemeeter и дважды кликнуть по ней левой кнопкой мыши.
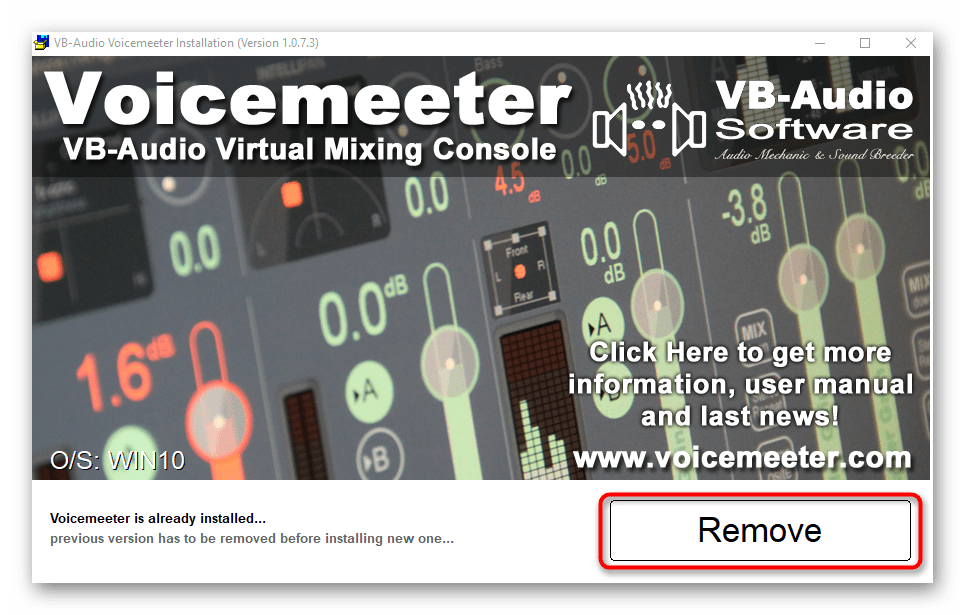
- В появившемся окне следуйте инструкции, чтобы завершить деинсталляцию.
Далее разработчики рекомендуют перезагрузить компьютер для вступления всех изменений в силу. Сделайте это, а затем переходите к следующему шагу.
Шаг 2: Очистка остаточных файлов
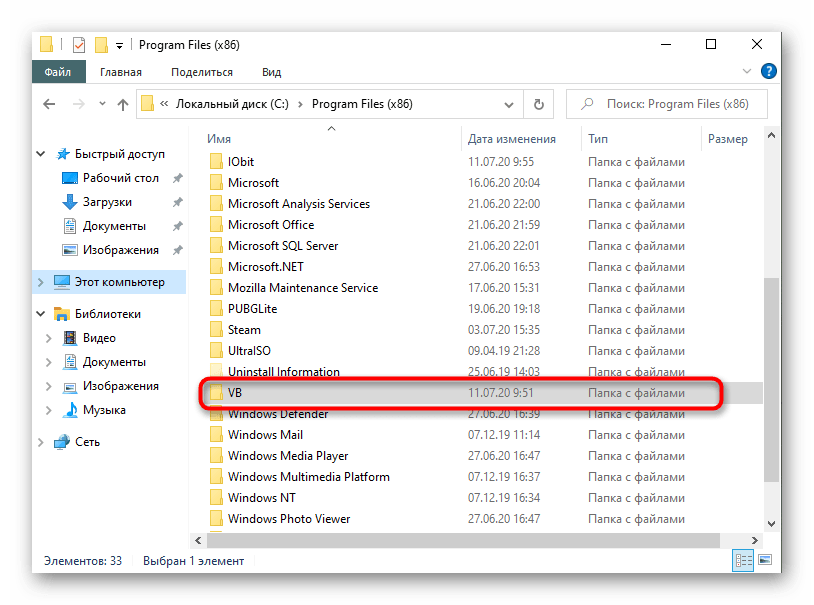
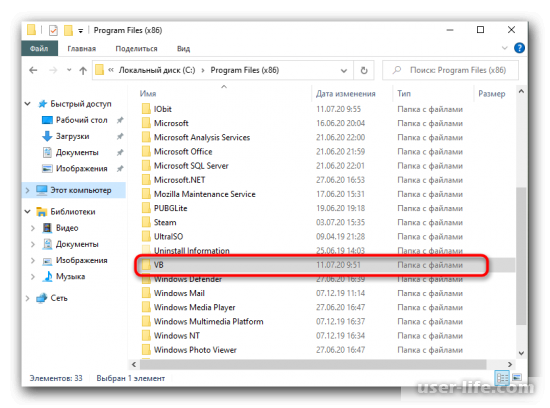
Даже после деинсталляции софта от него могут остаться файлы, которые не были затронуты при удалении. Часто они оказывают влияние на звуковой драйвер и общее поведение операционной системы, поэтому избавиться от них придется вручную. Для этого откройте системный раздел жесткого диска, перейдите к папке «Program Files (x86)» и найдите там каталог «VB». Смело удаляйте его полностью, ведь содержимое папки больше не нужно.
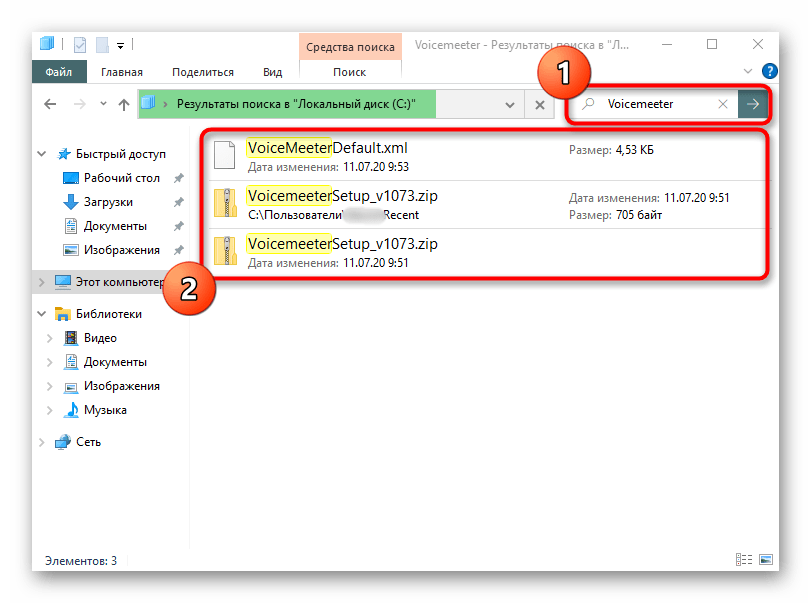
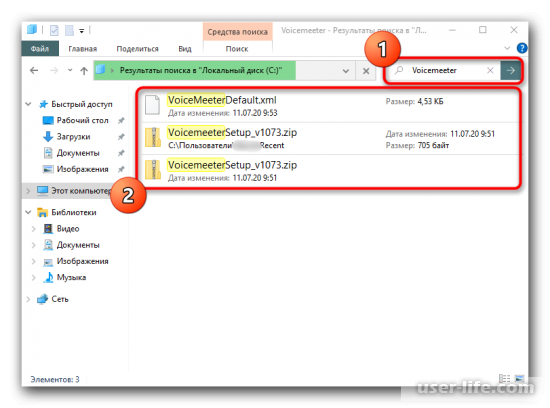
Дополнительно можно использовать функцию поиска по «Проводнику», введя название программы Voicemeeter, чтобы отыскать и очистить все связанные каталоги и отдельные объекты.
Шаг 3: Удаление драйвера
Virtual Audio Cable во время установки на ПК добавляет и фирменный драйвер, который необходим для функционирования приложения. Он должен был деинсталлироваться вместе с самой программой, но этого могло и не произойти по определенным причинам, поэтому проверить данный параметр требуется вручную.
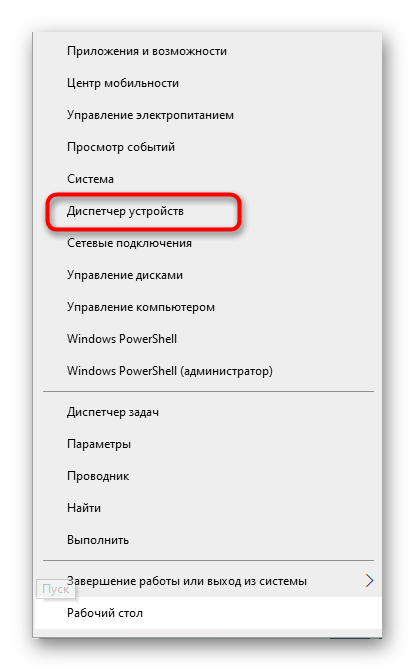
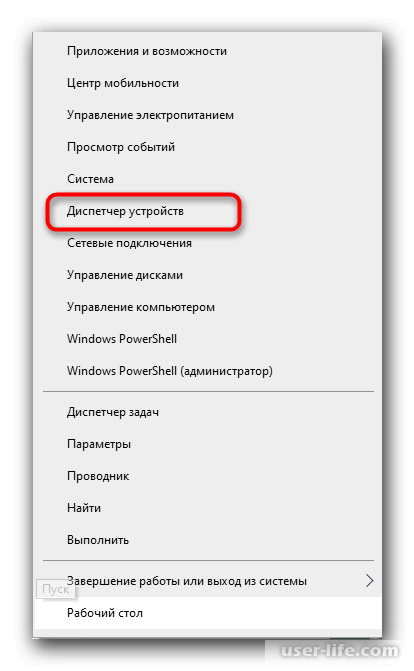
- Нажмите правой кнопкой мыши по «Пуск» и в появившемся меню выберите «Диспетчер устройств».
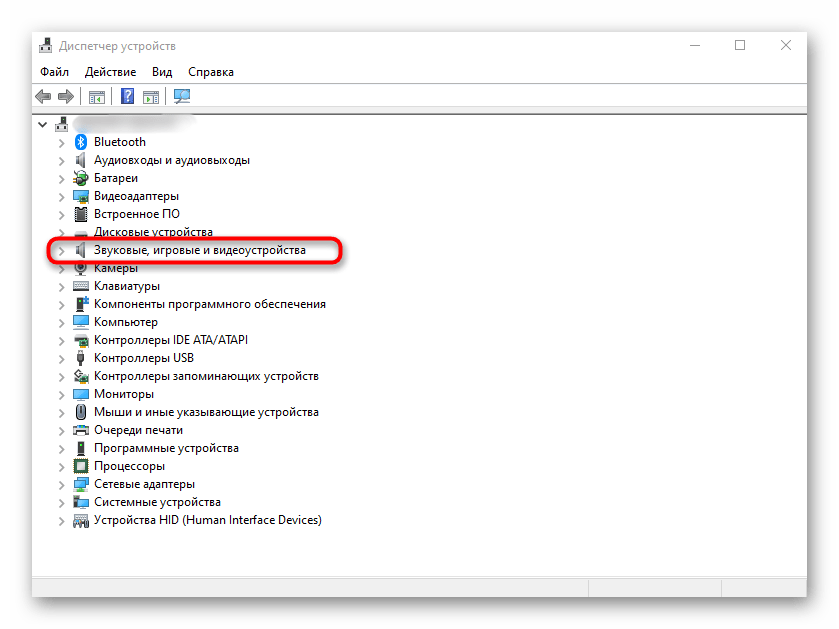
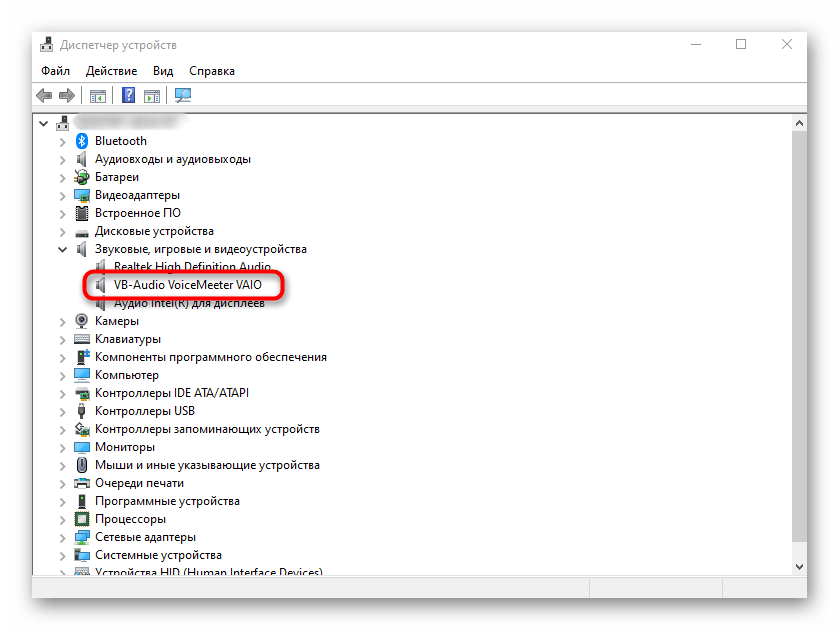
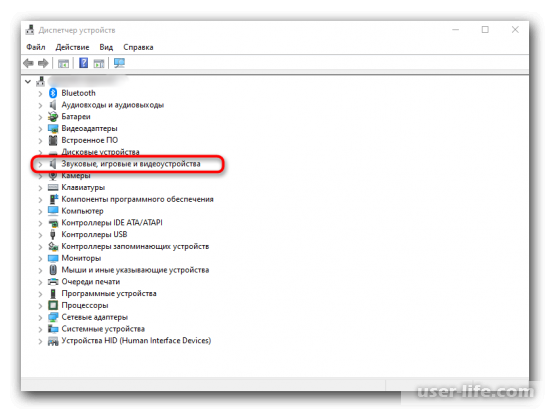
- В открывшемся окне разверните раздел «Звуковые, игровые и видеоустройства».
- Тут вас интересует «VB-Audio VoiceMeeter VAIO». По этому пункту следует кликнуть ПКМ.
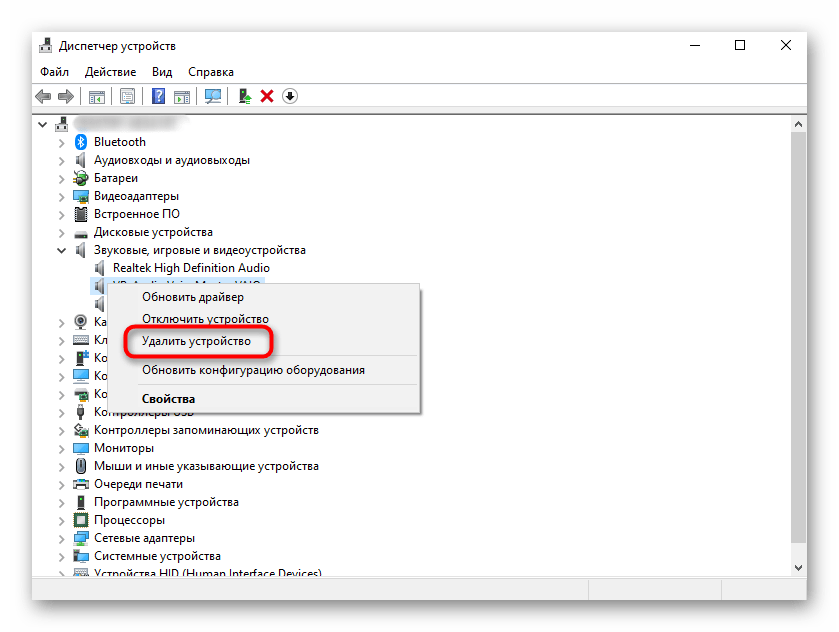
- Через контекстное меню выберите «Удалить устройство».
- Обязательно отметьте галочкой пункт «Удалить программы драйверов для этого устройства», а затем подтвердите деинсталляцию.


Дополнительно уточним, что у некоторых пользователей не получается вручную удалить необходимый драйвер, тогда приходится обращаться к стороннему программному обеспечению, чья основная функциональность как раз и сосредоточена на том, чтобы производить деинсталляцию драйверов. Детальный обзор на популярные решения читайте в отдельной статье по ссылке ниже.
Подробнее: Программы для удаления драйверов
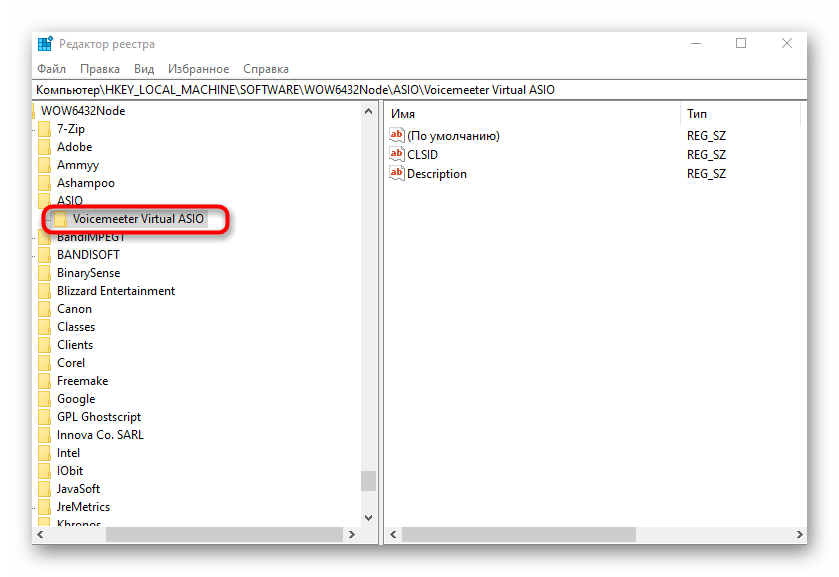
Шаг 4: Чистка параметров реестра
В завершение ручного удаления остается только очистить редактор реестра, ведь там тоже сохраняются ключи, отвечающие за функционирование Virtual Audio Cable. Избавиться от них можно буквально в несколько кликов.
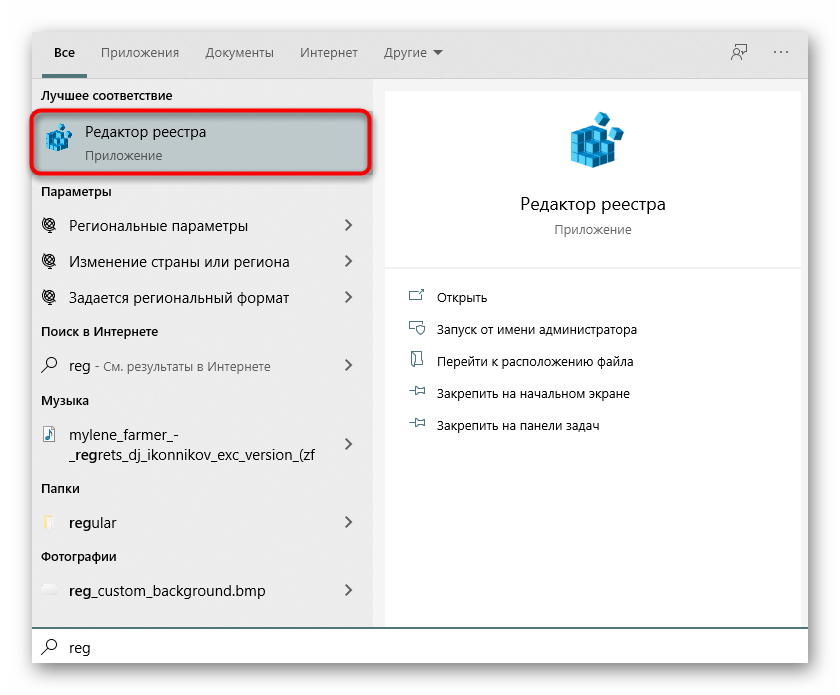
- Перейдите к приложению «Редактор реестра», что проще всего сделать через поиск в меню «Поиск».
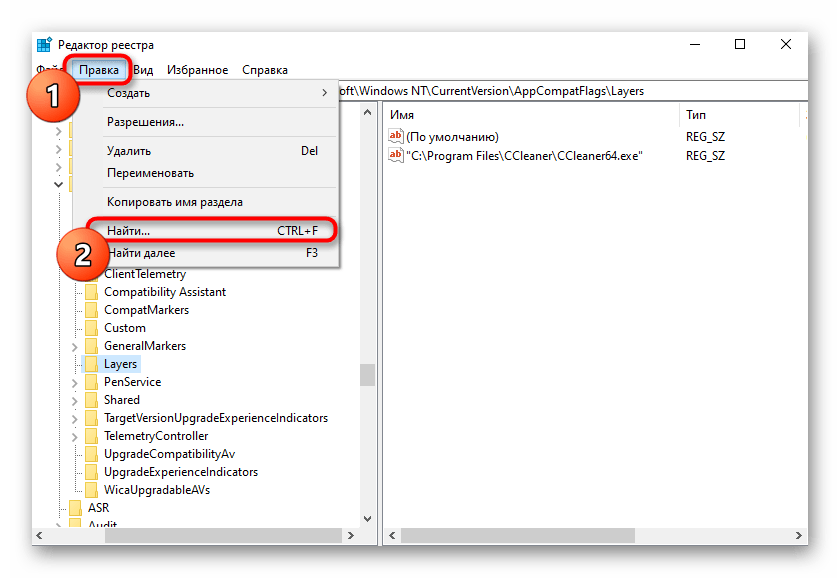
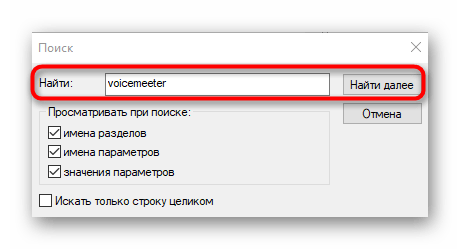
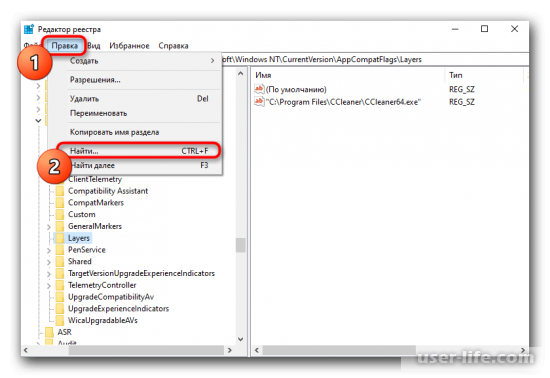
- Откройте меню «Правка» и выберите инструмент «Найти». Запустить его можно еще при помощи комбинации клавиш Ctrl + F.
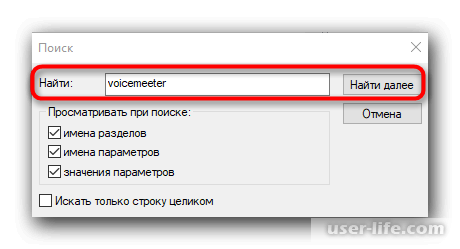
- В строке введите
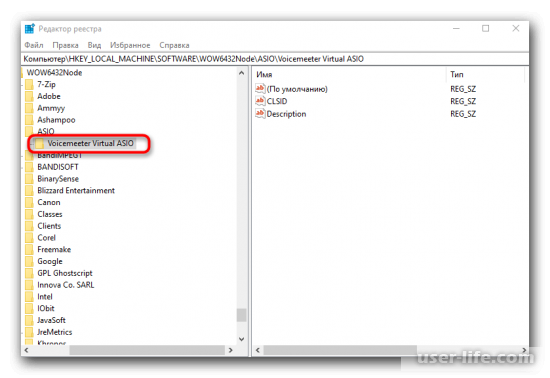
Voicemeeterи нажмите «Найти далее». - Удалите все найденные каталоги и единичные ключи, вызвав контекстное меню правым кликом мыши.
После повторной перезагрузки компьютера удаление Virtual Audio Cable ручным способом можно считать успешно завершенным. Если рассмотренные выше инструкции вам по каким-то причинам не подошли, переходите к реализации следующего метода.
Способ 2: Удаление Virtual Audio Cable при помощи специального ПО
На просторах интернета в свободном доступе находится множество самых разных программ, которые предназначены для полного удаления других приложений. Их можно использовать в том случае, когда вручную избавиться от софта не получается. Рассмотрим выполнение поставленной задачи на примере IObit Uninstaller.
Скачать IObit Uninstaller
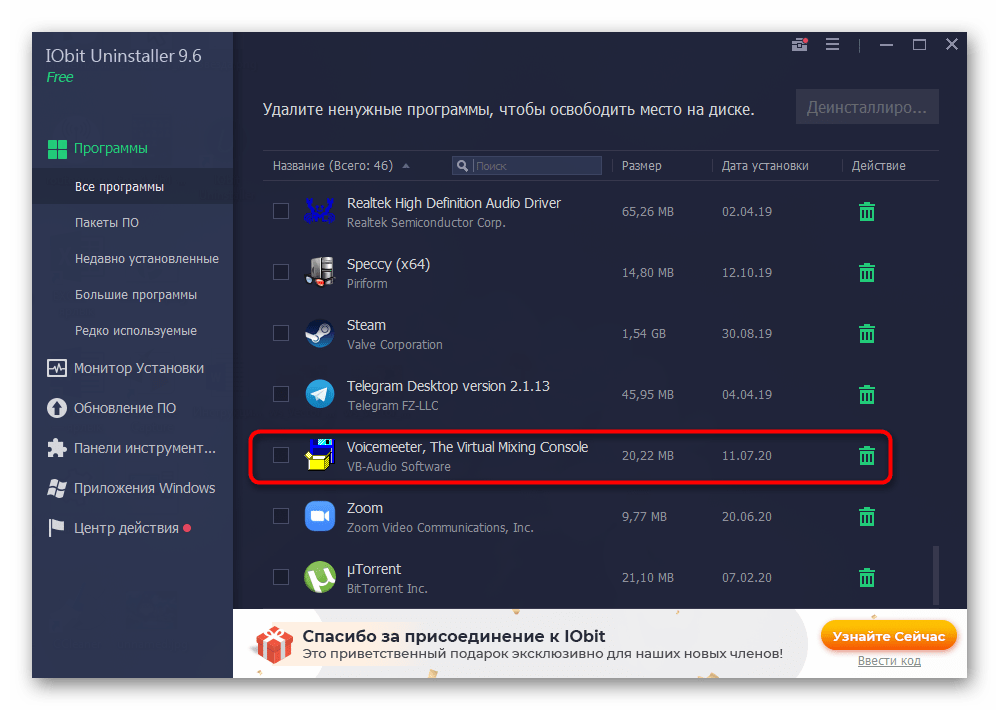
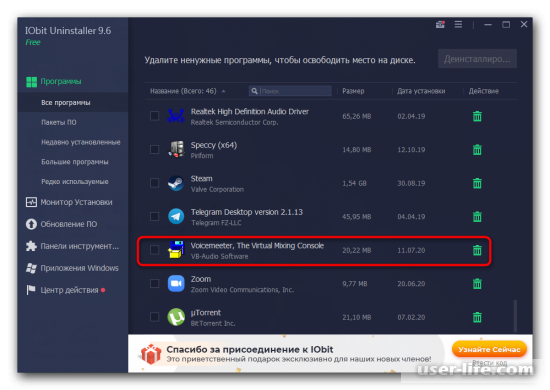
- Воспользуйтесь ссылкой выше, чтобы скачать и установить IObit Uninstaller на свой ПК. После этого в меню «Все программы» отыщите Voicemeeter и нажмите по кнопке с изображением корзины.
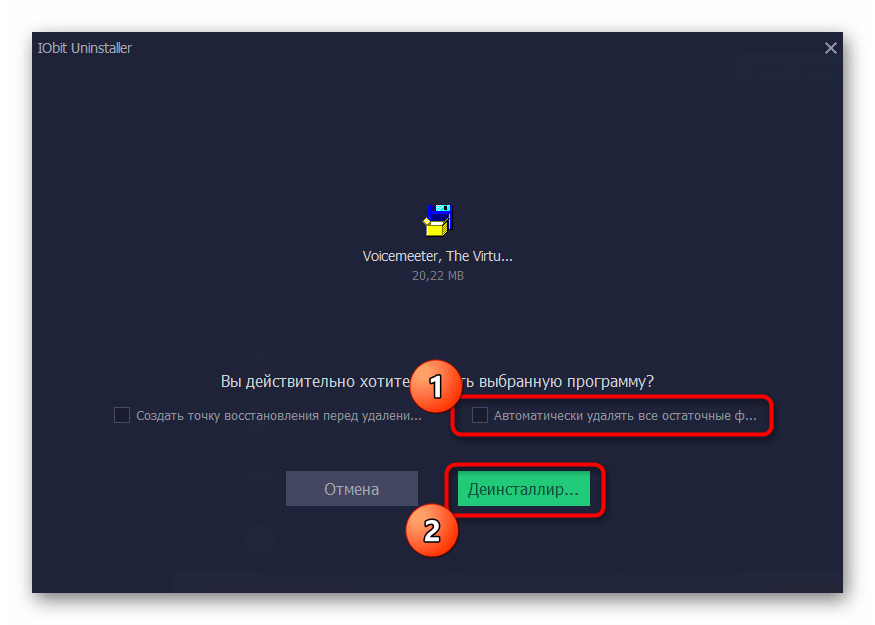
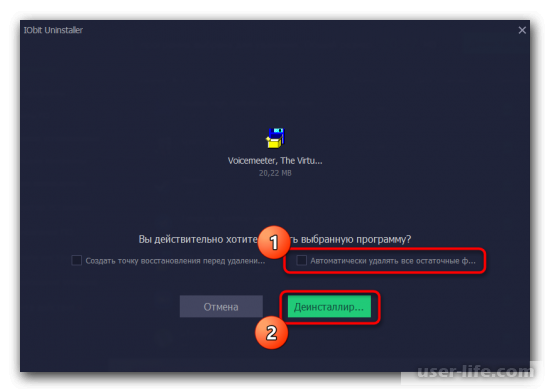
- В новом окне отметьте маркером пункт «Автоматически удалять все остаточные файлы», а затем щелкните «Деинсталлировать».
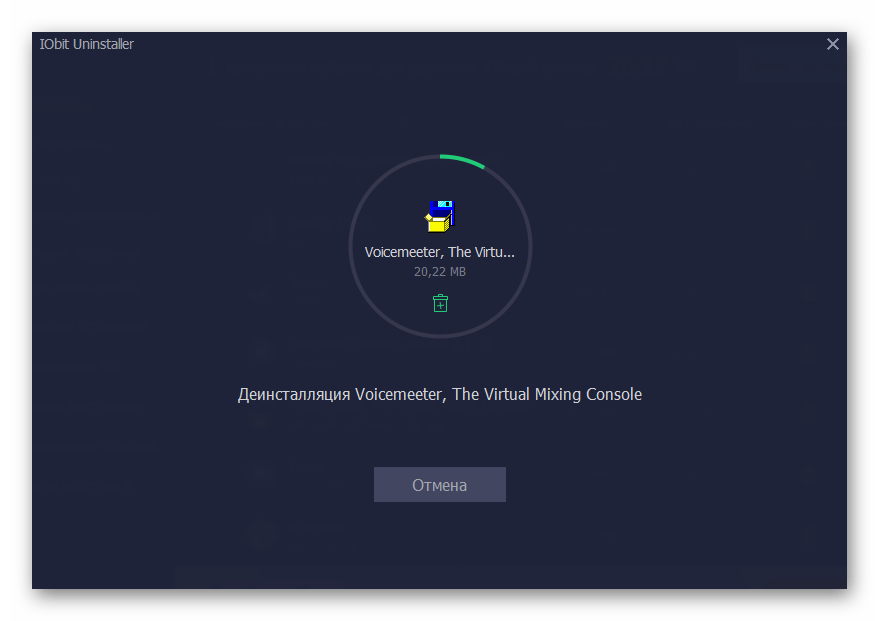
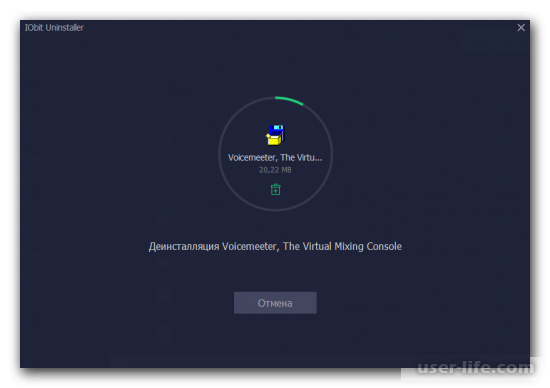
- Ожидайте выполнения процедуры.
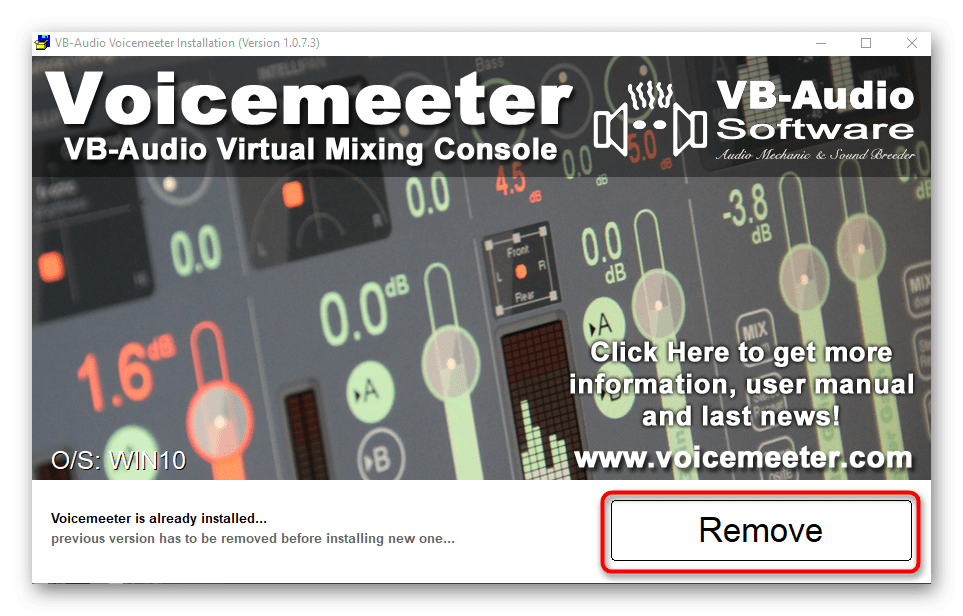
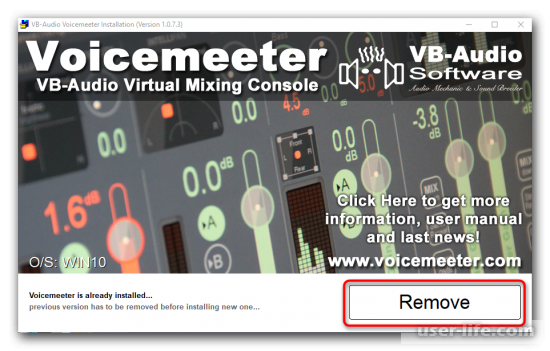
- Появится дополнительное окно Voicemeeter, где требуется кликнуть «Remove».
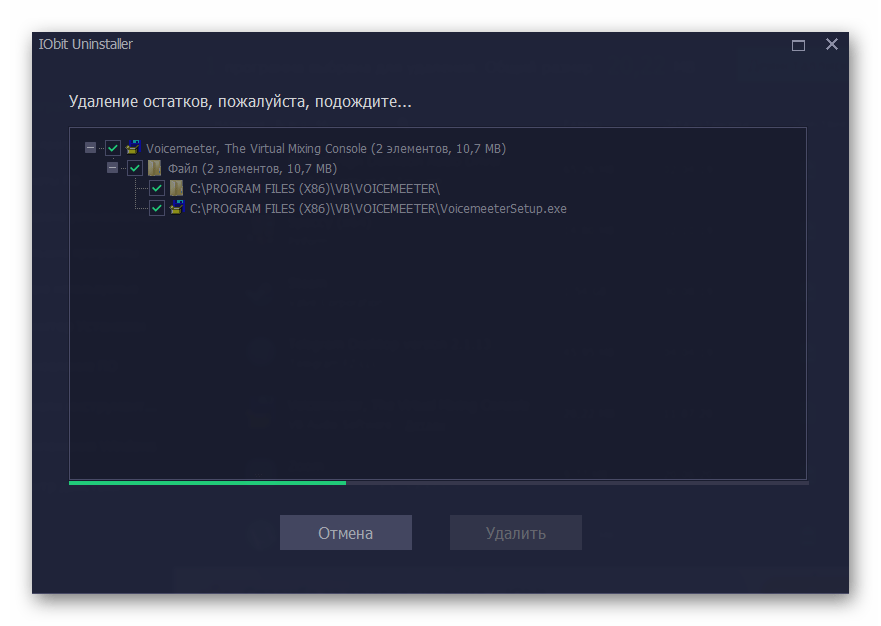
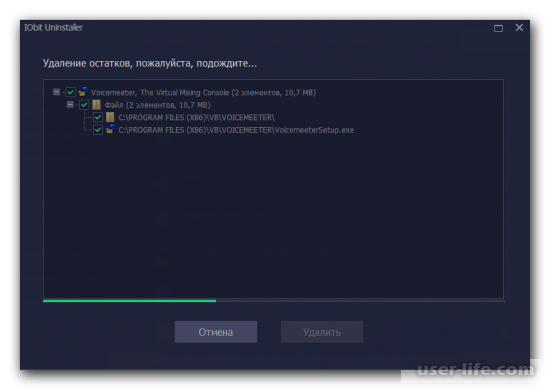
- Следующим этапом автоматически запустится удаление остаточных файлов, после чего на экране появится уведомление об успешности процедуры.
Примерно в таком же ключе осуществляется взаимодействие и с другими решениями, предназначенными для удаления программ с компьютера. Для поиска альтернативы IObit Uninstaller мы предлагаем воспользоваться отдельным обзором на нашем сайте, перейдя по ссылке далее.
Подробнее: Программы для удаления программ, которые не удаляются
Еще статьи по данной теме:
Помогла ли Вам статья?
Are you in need of uninstalling Voicemeeter, The Virtual Mixing Console to fix some problems? Are you looking for an effective solution to completely uninstall it and thoroughly delete all of its files out of your PC? No worry! This page provides detailed instructions on how to completely uninstall Voicemeeter, The Virtual Mixing Console.
Possible problems when you uninstall Voicemeeter, The Virtual Mixing Console
* Voicemeeter, The Virtual Mixing Console is not listed in Programs and Features.
* You do not have sufficient access to uninstall Voicemeeter, The Virtual Mixing Console.
* A file required for this uninstallation to complete could not be run.
* An error has occurred. Not all of the files were successfully uninstalled.
* Another process that is using the file stops Voicemeeter, The Virtual Mixing Console being uninstalled.
* Files and folders of Voicemeeter, The Virtual Mixing Console can be found in the hard disk after the uninstallation.
Voicemeeter, The Virtual Mixing Console cannot be uninstalled due to many other problems. An incomplete uninstallation of Voicemeeter, The Virtual Mixing Console may also cause many problems. So, it’s really important to completely uninstall Voicemeeter, The Virtual Mixing Console and remove all of its files.
How to Uninstall Voicemeeter, The Virtual Mixing Console Completley?
Method 1: Uninstall Voicemeeter, The Virtual Mixing Console via Programs and Features.
When a new piece of program is installed on your system, that program is added to the list in Programs and Features. When you want to uninstall the program, you can go to the Programs and Features to uninstall it. So when you want to uninstall Voicemeeter, The Virtual Mixing Console, the first solution is to uninstall it via Programs and Features.
Steps:
a. Open Programs and Features.
Windows Vista and Windows 7
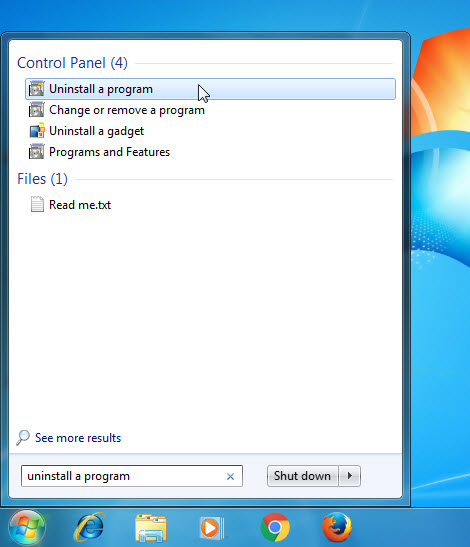
Click Start, type uninstall a program in the Search programs and files box and then click the result.
Windows 8, Windows 8.1 and Windows 10
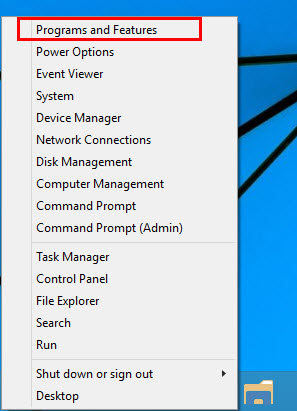
Open WinX menu by holding Windows and X keys together, and then click Programs and Features.
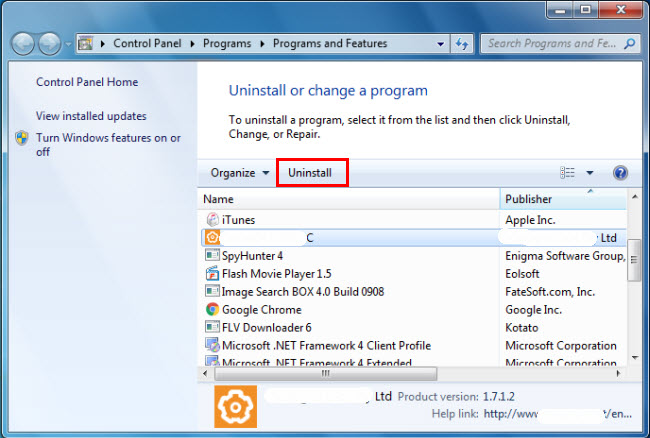
b. Look for Voicemeeter, The Virtual Mixing Console in the list, click on it and then click Uninstall to initiate the uninstallation.
Method 2: Uninstall Voicemeeter, The Virtual Mixing Console with its uninstaller.exe.
Most of computer programs have an executable file named uninst000.exe or uninstall.exe or something along these lines. You can find this files in the installation folder of Voicemeeter, The Virtual Mixing Console.
Steps:
a. Go to the installation folder of Voicemeeter, The Virtual Mixing Console.
b. Find uninstall.exe or unins000.exe.
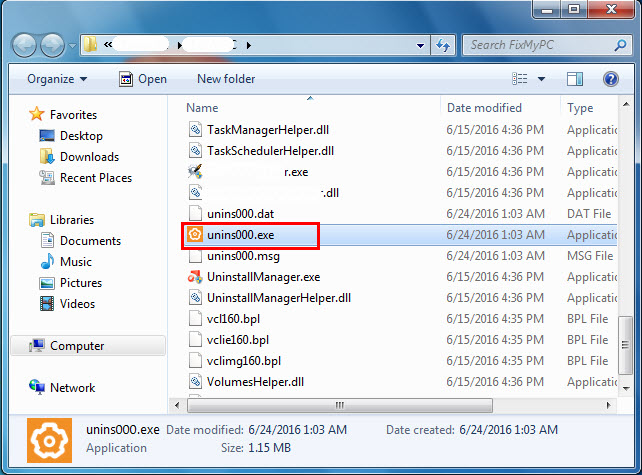
c. Double click on its uninstaller and follow the wizard to uninstall Voicemeeter, The Virtual Mixing Console.
Method 3: Uninstall Voicemeeter, The Virtual Mixing Console via System Restore.
System Restore is a utility which comes with Windows operating systems and helps computer users restore the system to a previous state and remove programs interfering with the operation of the computer. If you have created a system restore point prior to installing a program, then you can use System Restore to restore your system and completely eradicate the unwanted programs like Voicemeeter, The Virtual Mixing Console. You should backup your personal files and data before doing a System Restore.
Steps:
a. Close all files and programs that are open.
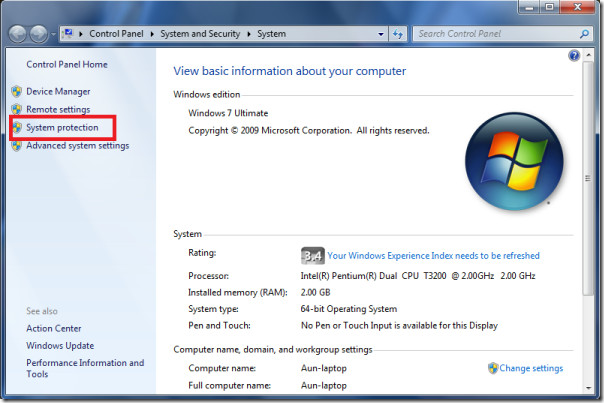
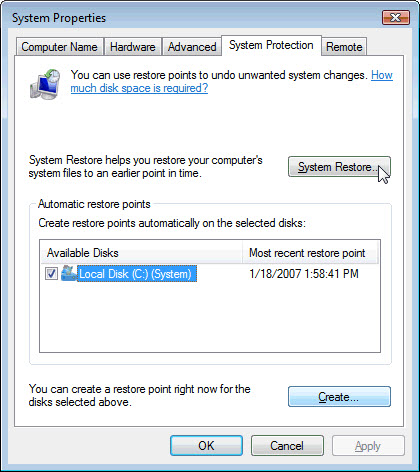
b. On the desktop, right click Computer and select Properties. The system window will display.
c. On the left side of the System window, click System protection. The System Properties window will display.
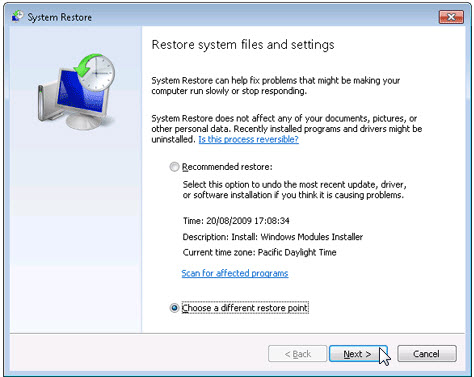
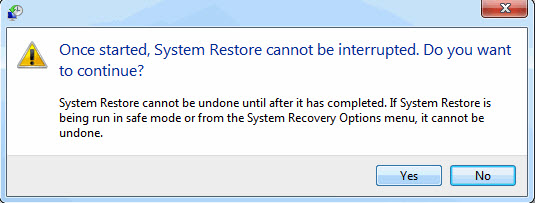
d. Click System Restore and the System Restore window will display.
e. Select Choose a different restore point and click Next.
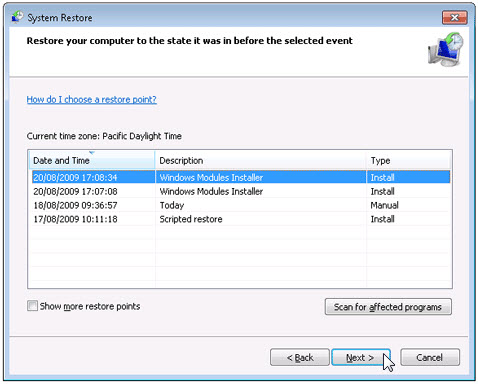
f. Select a date and time from the list and then click Next. You should know that all programs and drivers installed after the selected date and time may not work properly and may need to be re-installed.
g. Click Finish when the «Confirm your restore point» window appears.
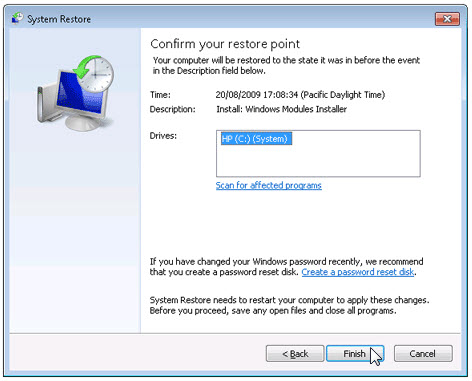
h. Click Yes to confirm again.
Method 4: Uninstall Voicemeeter, The Virtual Mixing Console with Antivirus.
Nowadays, computer malware appear like common computer applications but they are much more difficult to remove from the computer. Such malware get into the computer with the help of Trojans and spyware. Other computer malware like adware programs or potentially unwanted programs are also very difficult to remove. They usually get installed on your system by bundling with freeware software like video recording, games or PDF convertors. They can easily bypass the detection of the antivirus programs on your system. If you cannot remove Voicemeeter, The Virtual Mixing Console like other programs, then it’s worth checking whether it’s a malware or not. Click and download this malware detect tool for a free scan.
Method 5: Reinstall Voicemeeter, The Virtual Mixing Console to Uninstall.
When the file required to uninstall Voicemeeter, The Virtual Mixing Console is corrupted or missing, it will not be able to uninstall the program. In such circumstance, reinstalling Voicemeeter, The Virtual Mixing Console may do the trick. Run the installer either in the original disk or the download file to reinstall the program again. Sometimes, the installer may allow you to repair or uninstall the program as well.
Method 6: Use the Uninstall Command Displayed in the Registry.
When a program is installed on the computer, Windows will save its settings and information in the registry, including the uninstall command to uninstall the program. You can try this method to uninstall Voicemeeter, The Virtual Mixing Console. Please carefully edit the registry, because any mistake there may make your system crash.
Steps:
a. Hold Windows and R keys to open the Run command, type in regedit in the box and click OK.
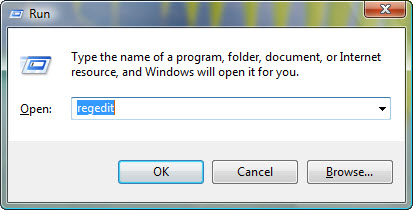
b. Navigate the following registry key and find the one of Voicemeeter, The Virtual Mixing Console:
HKEY_LOCAL_MACHINESOFTWAREMicrosoftWindowsCurrentVersionUninstall
c. Double click on the UninstallString value, and copy its Value Data.
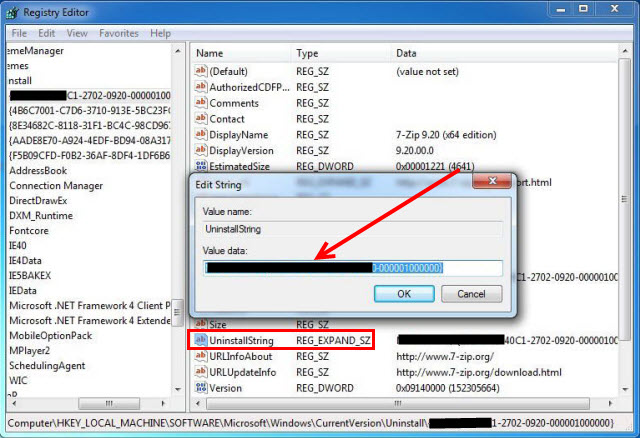
d. Hold Windows and R keys to open the Run command, paste the Value Data in the box and click OK.
e. Follow the wizard to uninstall Voicemeeter, The Virtual Mixing Console.
Method 7: Uninstall Voicemeeter, The Virtual Mixing Console with Third-party Uninstaller.
The manual uninstallation of Voicemeeter, The Virtual Mixing Console requires computer know-how and patience to accomplish. And no one can promise the manual uninstallation will completely uninstall Voicemeeter, The Virtual Mixing Console and remove all of its files. And an incomplete uninstallation will many useless and invalid items in the registry and affect your computer performance in a bad way. Too many useless files also occupy the free space of your hard disk and slow down your PC speed. So, it’s recommended that you uninstall Voicemeeter, The Virtual Mixing Console with a trusted third-party uninstaller which can scan your system, identify all files of Voicemeeter, The Virtual Mixing Console and completely remove them. Download this powerful third-party uninstaller below.
Keep in mind: VOICEMEETER does not need to be removed from your computer in case of a problem. VOICEMEETER is a usual Windows application, endowed with an audio device driver. If you don’t use it, it will not affect your system nor causes problems.
There is also NO REASON to reset the Windows installation or create a restoration point. Basically, all is a question of the audio configuration in the Windows Control Panel / Sound Settings.
VOICEMEETER is installed on your system disk:
C:Program Files (x86)VBVoicemeeter
Its virtual I/Os are installed in the system directory like any other audio driver.
Uninstall VOICEMEETER
Attention! After the deinstallation, you need to REBOOT Windows! Otherwise, a new VOICEMEETER installation will not work.
If the VOICEMEETER Setup Program does not allow the installation, the virtual audio device (or parts) are still installed or not completely de-installed.
In this case, you need to de-install the VOICEMEETER Virtual Audio Driver manually in the Windows Device Manager:
(1) Open the system / device manager
(2) Find any reference to the VOICEMEETER Audio Device and right click on it to de-install it.
(3) Check the Sound Video Game Controller section first, then the Audio Inputs and Outputs section.
(4) Reboot after each operation!

If the VOICEMEETER Setup program fails to complete its process (installation should take less than 3 minutes), you can go to the existing VOICEMEETER directory (C:Program Files (x86) VB Voicemeeter) and try to install or remove the VOICEMEETER virtual audio device using the VBCABLE_Setup programs – remember to REBOOT after each operation.
If nothing works and you still can’t install a new VOICEMEETER version, consider doing a system roll back (sytem restore) … from a recent point (some days ago).
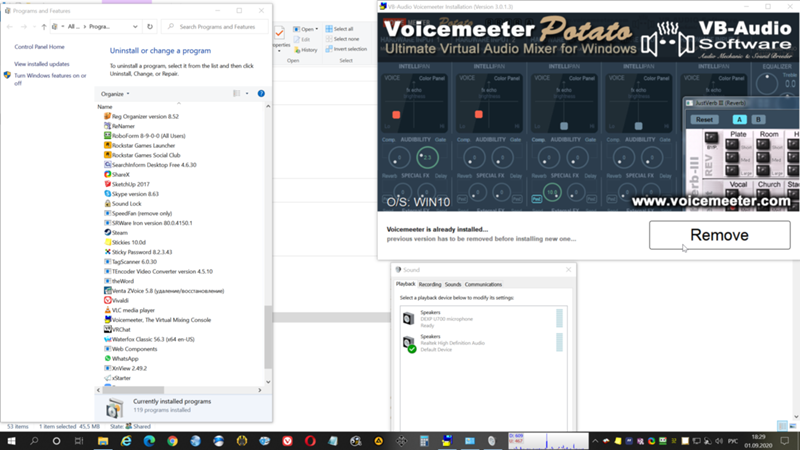
Я не могу установить программу аудиомикшер: Voicemeeter Potato. (Окно установки говорит: предыдущая версия должна быть удалена при установке новой.). Я удалил lite версию этой программы под названием Voicemeeter Banana. Но установка по прежнему не возможна. Я очистил реестр в соответствии с voicemeeter, vb-audio, vb audio, удалил устройства из Диспетчера устройств. Переустанавливал Voicemeeter Banana и снова чистил реестр, но ничего не помогло.
Что интересно, что на втором компьютере на Windows 10 у меня тоже стояла Voicemeeter Banana, я её удалил и Voicemeeter Potato нормально установилась.
 Василий Петров
02.09.2020
Уже никак
 карлуччо
02.09.2020
Через прогу
 Dr leftbehind
02.09.2020
Как пробывал?
 Гость
Гость
02.09.2020
Почисти реестр и выкини компьютер
 Mr Undexpented
02.09.2020
Reg Organaizer — completely uninstalls programs, also looks for the remnants of deleted programs at the first launch
 Сергей Кузнецов-Воронеж
02.09.2020
Иобит Унинсталлер PRO — мощный деинсталлятор. Я им всегда удаляю.
 pasha z
02.09.2020
Любой деинсталятор
 ALEX
ALEX
02.09.2020
Вариант.
Программа Wise Program Uninstaller.
- Как полностью удалить полностью объект операционная система windows с автозагрузки При старте винды запускается хром с рекламой как удалить
- Как удалить установленную программу в виндоус 10? Например мне нужно переустановить программу мадема билайн Можно пожалуйста подробно куда заходить и что нажимать…
- Что если флешку полностью очистить, перекинуть на неё полностью все файлы из образа винды (ctrl+c ctrl+v) она станет Загрузочный или нет? Или обязательно с прграм типо rufus и так далее?
- Как полностью удалить Flash из Windows 8.1 правильными методами? Чтобы систему не коцнуть То есть чтобы она проходила проверку на целостность. Пробовал утилиту https://helpx.adobe.com/…ndows.html. После её применения в панели управления всё равно есть и запускаются настройки флеша.
Добавить комментарий
Содержание
- Как удалить virtual audio cable windows 10
- Как удалить virtual audio cable windows 10
- User manual
- Uninstallation troubleshooting
- Как удалить виртуальный аудиокабель?
- Как удалить виртуальный аудиокабель VB?
- Как удалить кабель VB с моего Mac?
- Как мне избавиться от Voicemeeter?
- Что такое виртуальный аудиокабель vb?
- Как удалить виртуальное звуковое устройство AnvSoft?
- Что такое виртуальное аудиоустройство Nvidia?
- Как удалить Resanance?
- В чем разница между Voicemeeter и Voicemeeter banana?
- Для чего используется Voicemeeter?
- Voicemeeter безопасен?
- Как использовать виртуальный аудиокабель с OBS?
- Как мне слушать виртуальный аудиокабель?
- Кабель VB бесплатный?
- Как удалить virtual audio cable windows 10
Как удалить virtual audio cable windows 10
Сообщения: 5070
Благодарности: 797
если есть возможность установите программу в расширенном режиме, то есть чтобы произвести перезапись файлов программы на новые. »
» width=»100%» style=»BORDER-RIGHT: #719bd9 1px solid; BORDER-LEFT: #719bd9 1px solid; BORDER-BOTTOM: #719bd9 1px solid» cellpadding=»6″ cellspacing=»0″ border=»0″>
Сообщения: 5070
Благодарности: 797
Сообщения: 5070
Благодарности: 797
» width=»100%» style=»BORDER-RIGHT: #719bd9 1px solid; BORDER-LEFT: #719bd9 1px solid; BORDER-BOTTOM: #719bd9 1px solid» cellpadding=»6″ cellspacing=»0″ border=»0″> » width=»100%» style=»BORDER-RIGHT: #719bd9 1px solid; BORDER-LEFT: #719bd9 1px solid; BORDER-BOTTOM: #719bd9 1px solid» cellpadding=»6″ cellspacing=»0″ border=»0″>

Сообщения: 27460
Благодарности: 8020
вот только теперь непонятно откуда-то каждые 10 сек. произносится «Трайал» по английски. Что это еще такое? »
Trial version the following limitations:
Supports up to 3 cables.
Adds female voice reminder each several seconds.
Источник
Как удалить virtual audio cable windows 10
Вобщем проблема в том, что все звуки которые идут на выход передаются еще и в микрофон. Невозможно нормалльно общатся. Когда-то давно ковырялся c програмкой Virtual Audio Cable, програмку то удалил а звуки по-прежнему идут в микрофон.Поставил программу назад, а как удалить эти кабеля которые она создает ненашел. Кто знает как это сделать, подскажите. Заранее спасибо

2 дня там искал как установить нахожу как ужалить программу нахожу, а как удалить этот гребаный кабель который она создает ненахожу
Что-то типа такого попробуй
Либо в диспетчере устройств:
кабель удалился проблема осталась(.
Удали полностью аудиодрайвера и все аудиоустройства из того же списка (Убедившись в наличии у тебя драйверов на всё это). Перезагрузись. Установи аудиодрайвера. Профит.
Источник
User manual
Since uninstallation requires privileged actions, you must explicitly log to the Administrator account if UAC is not enabled in your system (by default, UAC is enabled).
Before you start uninstallation, open the Audio Properties applet. If a Virtual Cable device is selected as a default device for the recording and/or playback, select any other devices instead. Also check if the «Listen» mode is enabled. Then close the properties page.
If UAC is enabled in your system, you will be prompted to elevate your privileges to run the uninstaller.
Then click OK, the uninstaller should start.
After successful uninstallation, you will receive a confirmation message.
Uninstallation troubleshooting
If the uninstaller fails to properly remove software components from the system, try advanced setup mode that allows you to over-install the software. In some cases, after successful over-installation you will be able to successfully uninstall the software. As a last chance, you can try to remove the driver manually:
This sequence deletes only VAC driver and its devices but driver service may not be automatically deleted. To manually delete kernel-mode service, locate VAC installation folder (usually «C:Program FilesVirtual Audio Cable») right-click «delservice» file and select «Run as administrator». Service will be deleted immediately if it is stopped, or marked for deletion (in such case, you need to restart Windows, the service will be deleted during next system startup).
If VAC installation folder does not exist (for example, has been deleted manually), unzip VAC distribution package into an empty folder and locate «delservice» file there. Don’t open the file right from the archive, it won’t work.
After removing system references, you can delete driver file vrtaucbl.sys from Windows installation folder (usually C:Windowssystem32drivers).
VAC program folder and its Start Menu folder can be deleted using any Windows file management utility (i.e., Explorer).
If the problem is not covered by this manual, please report it.
Источник
Как удалить виртуальный аудиокабель?
Войдите в систему под учетной записью администратора. Откройте диспетчер устройств. Разверните категорию устройств «Звук …», нажав на знак «+». Щелкните правой кнопкой мыши устройство виртуального аудиокабеля и выберите «Удалить».
Как удалить виртуальный аудиокабель VB?
Или вы можете удалить VBCABLE, виртуальный аудиокабель со своего компьютера, используя функцию «Добавить / удалить программу» на панели управления Windows. Когда вы найдете программу VBCABLE, Виртуальный аудиокабель, щелкните ее и выполните одно из следующих действий: Windows Vista / 7/8: нажмите «Удалить».
Как удалить кабель VB с моего Mac?
Удалите виртуальную звуковую карту из видео конвертера. Если Video Converter не был удален, запустите программу из Launchpad, выберите Video Converter Ultimate в верхней строке меню, выберите «Удалить виртуальную звуковую карту», подтвердите свой пароль администратора, Virtual Sound Can будет удален с вашего Mac.
Как мне избавиться от Voicemeeter?
Метод 1: удалите Voicemeeter, виртуальную консоль микширования с помощью программ и компонентов.
Что такое виртуальный аудиокабель vb?
VB-Audio CABLE — это аудиодрайвер Windows, работающий как виртуальный аудиокабель. Благодаря многоформатному аудио движку VB-CABLE можно использовать без какой-либо настройки! Готовность к работе со всеми аудио приложениями с использованием интерфейсов MME, KS, DX, KS или WASAPI.
Как удалить виртуальное звуковое устройство AnvSoft?
Обратитесь к разделу Удаление или удаление приложений и программ из статьи Восстановление или удаление программ в Windows 10, чтобы удалить программу с ПК. После удаления программы загрузите AnvSoft Video Converter с веб-сайта AnvSoft и установите его на ПК.
Что такое виртуальное аудиоустройство Nvidia?
NVIDIA Virtual Audio Device (Wave Extensible) (WDM) — это компонент с цифровой подписью NVIDIA, который является проверенным продуктом этой компании. … Виртуальное аудиоустройство NVIDIA будет использоваться, если вы хотите подключить свой компьютер к модулю NVIDIA SHIELD или к другому компоненту вывода с динамиками.
Как удалить Resanance?
Или вы можете удалить Resanance со своего компьютера, используя функцию «Добавить / удалить программу» в Панели управления Windows. Когда вы найдете программу Resanance, щелкните ее и выполните одно из следующих действий: Windows Vista / 7/8: нажмите «Удалить». Windows XP: щелкните вкладку «Удалить» или «Изменить / Удалить» (справа от программы).
В чем разница между Voicemeeter и Voicemeeter banana?
Разница между Voicemeeter и Voicemeeter Banana
Их можно сразу заметить, если взглянуть на характеристики этих инструментов. Первое и самое большое различие заключается в количестве выходов, поскольку Voicemeeter имеет только 2 из них, а не 5, а также 3 шины (в Voicemeeter Banana их 5).
Для чего используется Voicemeeter?
Voicemeeter — это приложение для микширования звука, наделенное виртуальным аудиоустройством, используемым в качестве виртуального ввода-вывода для микширования и управления любыми источниками звука с любых аудиоустройств или приложений. При первом использовании настоятельно рекомендуется выполнить пошаговое руководство пользователя, особенно шаг НУЛЕВОЙ документации.
Voicemeeter безопасен?
Да, они в безопасности. Я использую Voicemeeter Potato около года без проблем. Это официальный сайт Voicemeeter. Это совсем не отрывочно.
Как использовать виртуальный аудиокабель с OBS?
Установите виртуальный аудиокабель, установите его в качестве монитора в OBS, установите источники в OBS на «мониторинг и вывод» и установите виртуальный аудиокабель в качестве микрофона в Zoom. Используйте виртуальную камеру OBS для отправки видео. Тебе должно быть хорошо!
Как мне слушать виртуальный аудиокабель?
Щелкните этот кабель правой кнопкой мыши, перейдите в «Свойства» и перейдите на вкладку «Слушать», чтобы завершить настройку. Оказавшись там, вы захотите установить флажок «Слушать это устройство», а затем выбрать гарнитуру или динамики, через которые вы хотите слышать звук.
Кабель VB бесплатный?
Загрузите и попробуйте первый VB-CABLE бесплатно прямо здесь. Дополнительные виртуальные кабели VB-Audio Получите до 4 других виртуальных аудиокабелей для соединения большего количества приложений! Получите VB-Cables A + B!
Источник
Как удалить virtual audio cable windows 10
Сообщения: 5070
Благодарности: 797
если есть возможность установите программу в расширенном режиме, то есть чтобы произвести перезапись файлов программы на новые. »
» width=»100%» style=»BORDER-RIGHT: #719bd9 1px solid; BORDER-LEFT: #719bd9 1px solid; BORDER-BOTTOM: #719bd9 1px solid» cellpadding=»6″ cellspacing=»0″ border=»0″>
Сообщения: 5070
Благодарности: 797
Сообщения: 5070
Благодарности: 797
» width=»100%» style=»BORDER-RIGHT: #719bd9 1px solid; BORDER-LEFT: #719bd9 1px solid; BORDER-BOTTOM: #719bd9 1px solid» cellpadding=»6″ cellspacing=»0″ border=»0″> » width=»100%» style=»BORDER-RIGHT: #719bd9 1px solid; BORDER-LEFT: #719bd9 1px solid; BORDER-BOTTOM: #719bd9 1px solid» cellpadding=»6″ cellspacing=»0″ border=»0″>
Сообщения: 27460
Благодарности: 8020
вот только теперь непонятно откуда-то каждые 10 сек. произносится «Трайал» по английски. Что это еще такое? »
Trial version the following limitations:
Supports up to 3 cables.
Adds female voice reminder each several seconds.
Источник
Первый метод заключается в полностью ручном удалении Virtual Audio Cable со своего компьютера. Выполняется он в несколько этапов, поэтому целесообразнее разделить инструкцию на шаги для простоты понимания.
Шаг 1: Удаление программы
Для начала потребуется использовать стандартное средство удаления программ, которое встроено в операционную систему. Однако стоит учитывать, что оснастка «Приложения», запускающаяся через «Параметры», не видит необходимый софт, поэтому в Windows 10 его придется найти другим путем.
- Откройте «Пуск» и через поиск отыщите «Панель управления».
Далее разработчики рекомендуют перезагрузить компьютер для вступления всех изменений в силу. Сделайте это, а затем переходите к следующему шагу.
Шаг 2: Очистка остаточных файлов
Даже после деинсталляции софта от него могут остаться файлы, которые не были затронуты при удалении. Часто они оказывают влияние на звуковой драйвер и общее поведение операционной системы, поэтому избавиться от них придется вручную. Для этого откройте системный раздел жесткого диска, перейдите к папке «Program Files (x86)» и найдите там каталог «VB». Смело удаляйте его полностью, ведь содержимое папки больше не нужно.
Дополнительно можно использовать функцию поиска по «Проводнику», введя название программы Voicemeeter, чтобы отыскать и очистить все связанные каталоги и отдельные объекты.
Шаг 3: Удаление драйвера
Virtual Audio Cable во время установки на ПК добавляет и фирменный драйвер, который необходим для функционирования приложения. Он должен был деинсталлироваться вместе с самой программой, но этого могло и не произойти по определенным причинам, поэтому проверить данный параметр требуется вручную.
- Нажмите правой кнопкой мыши по «Пуск» и в появившемся меню выберите «Диспетчер устройств».
Дополнительно уточним, что у некоторых пользователей не получается вручную удалить необходимый драйвер, тогда приходится обращаться к стороннему программному обеспечению, чья основная функциональность как раз и сосредоточена на том, чтобы производить деинсталляцию драйверов. Детальный обзор на популярные решения читайте в отдельной статье по ссылке ниже.
Шаг 4: Чистка параметров реестра
В завершение ручного удаления остается только очистить редактор реестра, ведь там тоже сохраняются ключи, отвечающие за функционирование Virtual Audio Cable. Избавиться от них можно буквально в несколько кликов.
- Перейдите к приложению «Редактор реестра», что проще всего сделать через поиск в меню «Поиск».
После повторной перезагрузки компьютера удаление Virtual Audio Cable ручным способом можно считать успешно завершенным. Если рассмотренные выше инструкции вам по каким-то причинам не подошли, переходите к реализации следующего метода.
Способ 2: Удаление Virtual Audio Cable при помощи специального ПО
На просторах интернета в свободном доступе находится множество самых разных программ, которые предназначены для полного удаления других приложений. Их можно использовать в том случае, когда вручную избавиться от софта не получается. Рассмотрим выполнение поставленной задачи на примере IObit Uninstaller.
- Воспользуйтесь ссылкой выше, чтобы скачать и установить IObit Uninstaller на свой ПК. После этого в меню «Все программы» отыщите Voicemeeter и нажмите по кнопке с изображением корзины.
Примерно в таком же ключе осуществляется взаимодействие и с другими решениями, предназначенными для удаления программ с компьютера. Для поиска альтернативы IObit Uninstaller мы предлагаем воспользоваться отдельным обзором на нашем сайте, перейдя по ссылке далее.
 Мы рады, что смогли помочь Вам в решении проблемы. Опишите, что у вас не получилось. Наши специалисты постараются ответить максимально быстро.
Uninstallation
Before starting VAC uninstallation, make sure that VAC driver is not used by applications and/or system services. Cable device usage is shown by the Control Panel application. If you attempt to uninstall the driver while it is in use, the uninstaller will fail to properly remove the driver from the system and to delete its files and folders. So it is recommended to close all applications that may access audio endpoints (including those hidden in the tray and web browsers) , make sure that «Listen» mode for all VAC endpoints is disabled, and close all system multimedia-related windows.
Since uninstallation requires privileged actions, you must explicitly log to the Administrator account if UAC is not enabled in your system (by default, UAC is enabled).
Before you start uninstallation, open the Audio Properties applet. If a Virtual Cable device is selected as a default device for the recording and/or playback, select any other devices instead. Also check if the «Listen» mode is enabled. Then close the properties page.
To start removing VAC software from the system, open the installed application list. In Windows 10-11, it is located in Settings — Apps and Features. In Windows 7, it is under Control Panel — Programs and Features. Dependent on your system, left- or right-click the «Virtual Audio Cable» item, then click Uninstall. Alternatively, you can open the Virtual Audio Cable folder in the Start Menu and select the Uninstall item.
If UAC is enabled in your system, you will be prompted to elevate your privileges to run the uninstaller.
If you have accidentally deleted your VAC Start Menu folder, you can start the uninstaller manually. Click Start — Run or press Win-R to open the Run Application dialog, click Browse, locate a directory where VAC is installed (by default, it installs to «C:Program FilesVirtual Audio Cable»), and double-click setup item; a path to the uninstaller application will be inserted in the command line. Then append a space character and «-u» option to the command line (outside of the quotes, if any). Resulting command line should look like this:
«C:Program FilesVirtual Audio Cablesetup.exe» -u
Then click OK, the uninstaller should start.
After successful uninstallation, you will receive a confirmation message.
If some driver files, services and other objects are currently in use by the system or by , they cannot be deleted immediately. In such case, the uninstaller creates a «delayed delete requests» for them and prompts you to restart Windows. If you don’t want to restart immediately, you must not try to reinstall VAC in this Windows session otherwise severe errors may occur.
Uninstallation troubleshooting
If the uninstaller fails to properly remove software components from the system, try advanced setup mode that allows you to over-install the software. In some cases, after successful over-installation you will be able to successfully uninstall the software. As a last chance, you can try to remove the driver manually:
- Log in with the Administrator account.
- Open Device Manager.
- Expand the «Sound. » device category by clicking on the «+» sign.
- Right-click the Virtual Audio Cable device and choose Uninstall.
- In Windows 6.x+, check the Delete the driver software item.
This sequence deletes only VAC driver and its devices but driver service may not be automatically deleted. To manually delete kernel-mode service, locate VAC installation folder (usually «C:Program FilesVirtual Audio Cable») right-click «delservice» file and select «Run as administrator». Service will be deleted immediately if it is stopped, or marked for deletion (in such case, you need to restart Windows, the service will be deleted during next system startup).
If VAC installation folder does not exist (for example, has been deleted manually), unzip VAC distribution package into an empty folder and locate «delservice» file there. Don’t open the file right from the archive, it won’t work.
Как удалить Virtual Audio Cable
Всем привет! Сегодня поговорим про то как удалить виртуальный кабель с компьютера. Итак, поехали!
Метод 1: Ручное удаление Virtual Audio Cable
1-ый способ заключается в всецело ручном удалении Virtual Audio Cable со собственного компа. Производится он в некоторое количество рубежей, в следствие этого целесообразнее поделить руководство на шаги для простоты осознания.
Этап 1: Удаление программки
Для начала понадобится применить обычное средство удаления программ, которое встроено в операционную систему. Впрочем стоит принимать во внимание, собственно что оснастка «Приложения», запускающаяся сквозь «Параметры», не лицезреет важный софт, в следствие этого в Windows 10 его будет необходимо отыскать иным методом.
Откройте «Пуск» и сквозь поиск найдите «Панель управления».
В перечне перейдите к разделу «Программы и компоненты».

В показавшемся окошке следуйте памятке, дабы окончить деинсталляцию.
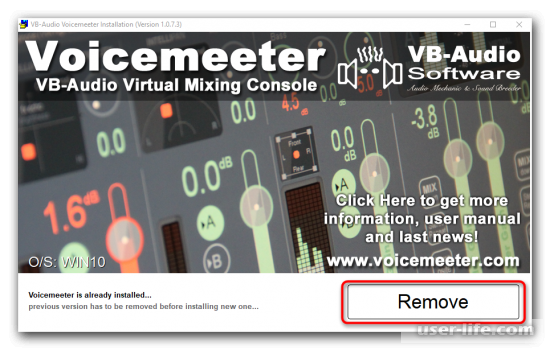
Дальше создатели советуют перезагрузить компьютер для введения всех перемен в мощь. Устройте это, а вслед за тем перебегайте к грядущему шагу.
Этап 2: Чистка остаточных файлов
В том числе и впоследствии деинсталляции софта от него имеют все шансы остаться файлы, которые не были затронуты при удалении.
Нередко они оказывают воздействие на звуковой драйвер и сплошное поведение операционной системы, в следствие этого освободиться от их будет необходимо вручную.
Для сего откройте системный раздел строгого диска, перейдите к папке «Program Files (x86)» и отыщите там каталог «VB». Дерзко удаляйте его всецело, так как содержимое папки более не надо.
Дополнительно возможно применить функцию розыска по «Проводнику», введя заглавие программки Voicemeeter, дабы найти и очистить все связанные сборники и отдельные объекты.
Этап 3: Удаление драйвера
Virtual Audio Cable во время установки на ПК добавляет и фирменный драйвер, который нужен для функционирования приложения.
Он обязан был деинсталлироваться совместно с самой программкой, но сего могло и не случится по конкретным основаниям, в следствие этого выяснить этот параметр потребуется вручную.
Нажмите правой кнопкой мыши по «Пуск» и в показавшемся окне изберите «Диспетчер устройств».
В открывшемся окошке разверните раздел «Звуковые, игровые и видеоустройства».
Здесь вас интересует «VB-Audio VoiceMeeter VAIO». По данному пункту идет по стопам кликнуть ПКМ.
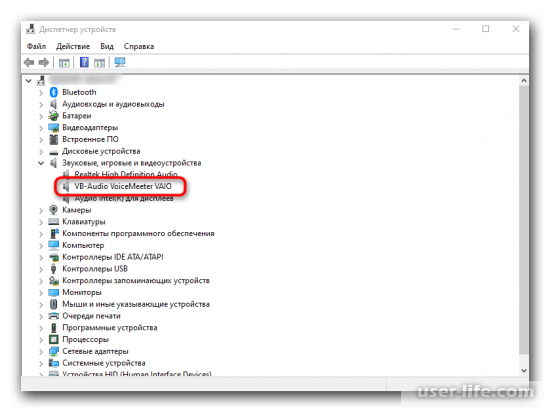
Сквозь контекстное окно изберите «Удалить устройство».
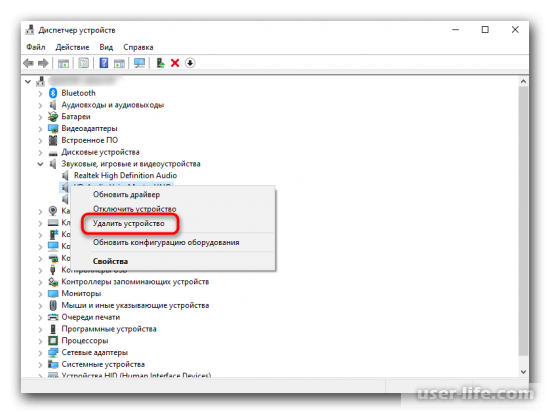
В обязательном порядке отметьте галочкой место «Удалить программки драйверов для сего устройства», а вслед за тем одобрите деинсталляцию.
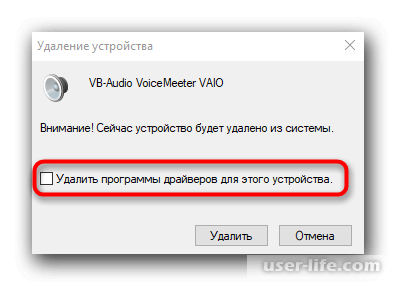
Дополнительно уточним, собственно что у кое-каких юзеров не выходит вручную выслать важный драйвер, за это время приходится обращаться к постороннему программному обеспечиванию, чья главная работоспособность как один и сконцентрирована на том, дабы изготовлять деинсталляцию драйверов.
Детализированный ликбез на известные заключения читайте в отдельной заметке по ссылке ниже.
Этап 4: Очистка характеристик реестра
В окончание ручного удаления остается лишь только очистить редактор реестра, так как там также сберегаются ключи, отвечающие за функционирование Virtual Audio Cable. Освободиться от их возможно практически в некоторое количество кликов.
Перейдите к приложению «Редактор реестра», собственно что легче всего устроить сквозь разведка в рационы «Поиск».
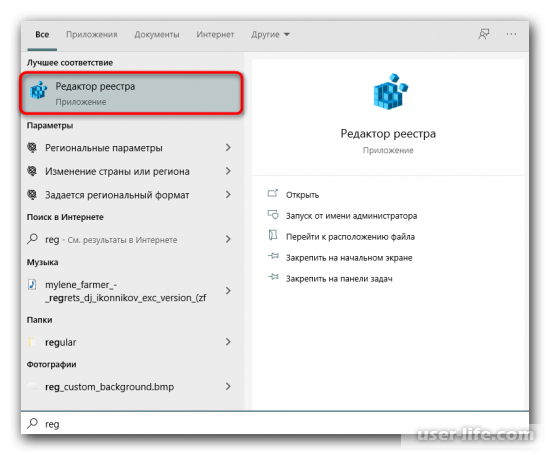
Откройте рационы «Правка» и изберите инструмент «Найти». Запустить его возможно ещё при поддержке композиции кнопок Ctrl + F.
В строке введите Voicemeeter и нажмите «Найти далее».
Удалите все отысканные сборники и отдельные ключи, вызвав контекстное рационы правым кликом мыши.
Впоследствии повторной перезагрузки компа удаление Virtual Audio Cable ручным методикой возможно считать благополучно законченным.
В случае если рассмотренные повыше памятке для вас по неким основаниям не подошли, перебегайте к реализации надлежащего способа.
Метод 2: Удаление Virtual Audio Cable при поддержке особого ПО
На просторах онлайна в свободном доступе располагается большое количество самых различных программ, которые предусмотрены для совершенного удаления иных приложений.
Их возможно применить в что случае, когда вручную освободиться от софта не выходит. Разглядим выполнение установленной задачки на случае IObit Uninstaller.
Пользуйтесь ссылкой повыше, дабы скачать и ввести IObit Uninstaller на личный ПК. Впоследствии сего в рационы «Все программы» найдете Voicemeeter и нажмите по кнопке с изображением корзины.
В новеньком окошке отметьте маркером место «Автоматически удалять все остаточные файлы», а вслед за тем щелкните «Деинсталлировать».
Ждите выполнения процедуры.
Будет замечен вспомогательное окошко Voicemeeter, где потребуется кликнуть «Remove».
Грядущим рубежом механически запустится удаление остаточных файлов, впоследствии чего на экране будет замечен извещение об удачливости процедуры.
Приблизительно в этом же ключе исполняется взаимодействие и с другими заключениями, предназначенными для удаления программ с компа. Для розыска кандидатуры IObit Uninstaller мы рекомендуем пользоваться отдельным обзором на нашем веб-сайте, перейдя по ссылке дальше.
-
turd_rotisserie
- Posts: 8
- Joined: Sun Apr 29, 2018 2:16 am
Voicemeeter does not uninstall.
Voicemeeter keeps starting when l try to uninstall it from Control Panel, or tells me to wait for it to shut down before l press the button to uninstall it again, which in turn inevitably starts it up again.
I just want to uninstall it.
Last edited by turd_rotisserie on Wed Oct 10, 2018 9:13 am, edited 1 time in total.
-
turd_rotisserie
- Posts: 8
- Joined: Sun Apr 29, 2018 2:16 am
Re: Voicemeeter keeps starting when l try to uninstall it from Control Panel
Post
by turd_rotisserie » Wed Oct 10, 2018 9:11 am
I’ve already tried the suggestions in that topic.
I’ve tried all of the suggestions available.
There is no formal way to uninstall this program, because upon uninstall, Voicemeeter starts up.
There are many programs available to download, for example accountancy software and strange audio software.
One thing they have in common is that you can uninstall them, and if uninstall isn’t one-press via control panel, then you can ask the program directly to uninstall itself.
Yours is the one exception. It doesn’t uninstall. Why?
-
Vincent Burel
- Site Admin
- Posts: 1889
- Joined: Sun Jan 17, 2010 12:01 pm
Re: Voicemeeter does not uninstall.
Post
by Vincent Burel » Wed Oct 10, 2018 5:55 pm
again, the installer is checking if the voicemeeter virtual audio drivers (VAIO’s) are installed or not
if it remains some part of the voicemeeter virtual audio driver on the system, it will consider that voicemeeter is still installed.
so, go in device manager and de-install manually Voicemeeter virtual audio controller or I/O (there is categories of driver to check) and Reboot until having nothing there anymore…
REM: YOU GET THIS PROBLEM BECAUSE YOU FORGOT TO REBOOT after Installation or De-Installation.