The problem is that you’ve previously accepted an SSH connection to a remote computer and that remote computer’s digital fingerprint or SHA256 hash key has changed since you last connected. Thus when you try to SSH again or use github to pull code, which also uses SSH, you get an error. Why? Because you’re using the same remote computer address as before but the remote computer is responding with a different fingerprint. Therefore, it’s possible that someone is spoofing the computer you previously connected to. This is a security issue.
If you’re 100% sure that the remote computer isn’t compromised, hacked, being spoofed, etc then all you need to do is delete the entry in your known_hosts file for the remote computer. That will solve the issue as there will no longer be a mismatch with SHA256 fingerprint IDs when connecting.
On Mac here’s what I did:
1) Find the line of output that reads RSA host key for servername:port has changed and you have requested strict checking. You’ll need both the servername and potentially port from that log output.
2) Back up the SSH known hosts file cp /Users/yourmacusername/.ssh/known_hosts /Users/yourmacusername/.ssh/known_hosts.bak
3) Find the line where the computer’s old fingerprint is stored and delete it. You can search for the specific offending remote computer fingerprint using the servername and port from step #1. nano /Users/yourmacusername/.ssh/known_hosts
4) CTRL-X to quit and choose Y to save changes
Now type ssh -p port servername and you will receive the original prompt you did when you first tried to SSH to that computer. You will then be given the option to save that remote computer’s updated SHA256 fingerprint to your known_hosts file. If you’re using SSH over port 22 then the -p argument is not necessary.
Any issues you can restore the original known_hosts file: cp /Users/yourmacusername/.ssh/known_hosts.bak /Users/yourmacusername/.ssh/known_hosts
A secure internet connection is not just the ideal — it’s essential. In fact, we’re going to go as far as saying it’s the number one priority for your website. The “Warning: Remote host identification has changed” error protects your connection from certain malicious attacks, although in some cases, you can inadvertently cause the error too.
The error is related to your Secure Shell (SSH) keys and the server “fingerprint” a client will check for. If Secure Shell thinks there’s an issue, it will block access to your server and throw an error. But you can fix this in a few steps.
Over the next few minutes, we’re going to show you how to fix the “Warning: Remote host identification has changed” error for both Windows and Mac. First, though, let’s give you some more details on the error message itself.
A secure internet connection is not just the ideal — it’s essential 💪 While it may be annoying, this error protects your connection from attacks. 🙅♀️ Learn more ⬇️Click to Tweet
What the “Warning: Remote Host Identification Has Changed” Error Is
One of the most secure ways to connect to a web server is to use SSH. It’s a command-line tool that lets you access an insecure network securely. Consider it like a “super-SFTP” type of setup, although it’s not a 1:1 comparison in practice.
You can access your site from almost anywhere you can use the internet, as long as you have the right login credentials. What’s more, most macOS and Linux machines have an SSH client built into the Operating System (OS). For Windows, you’ll use a dedicated interface (and we’ll talk about this in more detail later).
As for the “Warning: Remote host identification has changed” error, it relates to the security checks your client will do. An SSH connection uses dedicated “keys” — small files stored on your computer — as authentication. It’s sort of like a Secure Sockets Layers (SSL) handshake, and in fact, there are some high-level similarities between SSH and SSL.
One aspect the keys help with is to provide a permanent fingerprint of its host server. This will make sure the connection is accurate and that you’re not subject to a “machine-in-the-middle” attack.
If the client thinks those fingerprints differ from what it understands to be correct, you’ll get the “Warning: Remote host identification has changed” error at the point of login:
[[email protected] ~]$ ssh [email protected]

@@@@@@@@@@@@@@@@@@@@@@@@@@@@@@@@@@@@@@@@@@@@@@@@@@@@@@@@@@@

@ WARNING: REMOTE HOST IDENTIFICATION HAS CHANGED! @

@@@@@@@@@@@@@@@@@@@@@@@@@@@@@@@@@@@@@@@@@@@@@@@@@@@@@@@@@@@

IT IS POSSIBLE THAT SOMEONE IS DOING SOMETHING NASTY!

Someone could be eavesdropping on you right now (man-in-the-middle attack)!

It is also possible that a host key has just been changed.

The fingerprint for the RSA key sent by the remote host is

xx:xx:xx.

Please contact your system administrator.

Add correct host key in /home/hostname /.ssh/known_hosts to get rid of this message.

Offending RSA key in /var/lib/sss/pubconf/known_hosts:4

RSA host key for user has changed and you have requested strict checking.

Host key verification failed.
As errors go, this is detailed and clear — it tells you what’s happened, a potential reason for why, and how you might fix it.
However, there’s one aspect we can touch on a little further before showing you how to fix the “Warning: Remote host identification has changed” error.
How the known_hosts File Helps SSH Authentication
You’ll notice that the error message references a known_hosts file. The name should give you a clue as to what it contains, but for clarity, it’s a list of SSH remote hosts known to the computer. It’s used as a reference client file for the authentication process.
When you first connect to a server, you’ll often get a confirmation request through your interface, asking whether you want to connect. If so, this fingerprint will become part of your known_hosts file.
Of course, if the fingerprint differs from what is in the known_hosts file, this could indicate a malicious user is targeting you. In other cases, you may already know why there’s a difference, although it pays to be vigilant regardless.
How To Fix the “Warning: Remote Host Identification Has Changed” Error (on Windows and Mac)
You can work to fix the “Warning: Remote host identification has changed” error for both Windows and macOS. However, you have more flexibility for doing so on Mac.
We’ll cover lots of the ways you can make things right again, starting with Windows.
1. Windows
It’s important to note that Windows machines might not have a known_hosts file. However, if you use the OpenSSH client, there is a file. To find it, open the Windows search bar, and navigate to your user folder with the %USERPROFILE% command.
This will open the directory within the File Explorer. There will also be a .ssh folder within:

The file we want in this folder is known_hosts. You can open this with Notepad (or your favorite text editor). Inside will be a list of keys:

Here, you can delete the key that’s causing the problem, then resave the file.
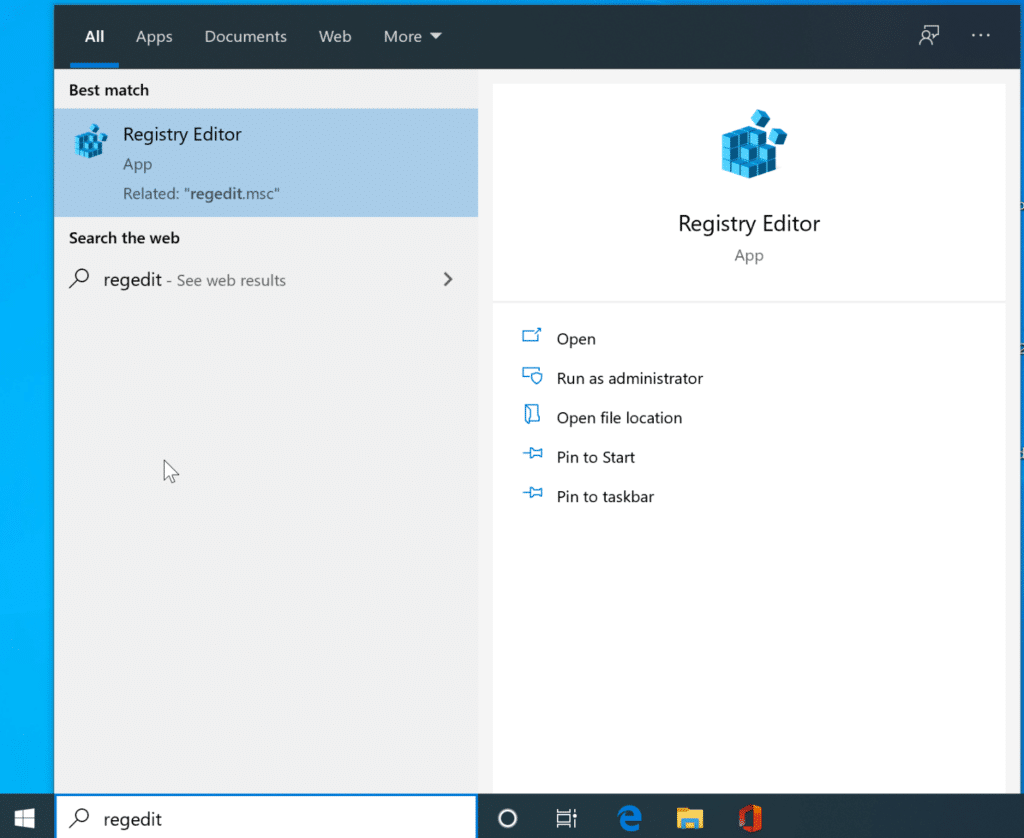
Some users may prefer the PuTTY client. The keys sit in the Registry, although they perform the same purpose as OpenSSH.
You’ll want to open the Windows Registry Editor (otherwise known as “regedit”). You can do this in whatever way you’re comfortable, but the quickest way is to type the app’s name into Window’s search bar:

Here, look for the following destination within regedit:
HKEY_CURRENT_USER/Software/SimonTatham/PuTTY/SshHostKeys/You’ll see a list of entries here relating to the saved connections on your computer. Your job is to delete whichever one is causing an issue:

Once you click on the Delete button, you’ll also need to confirm that you want to remove the key:

Clicking Yes here means the key will be gone for good, and you shouldn’t get the “Warning: Remote host identification has changed” error any longer.
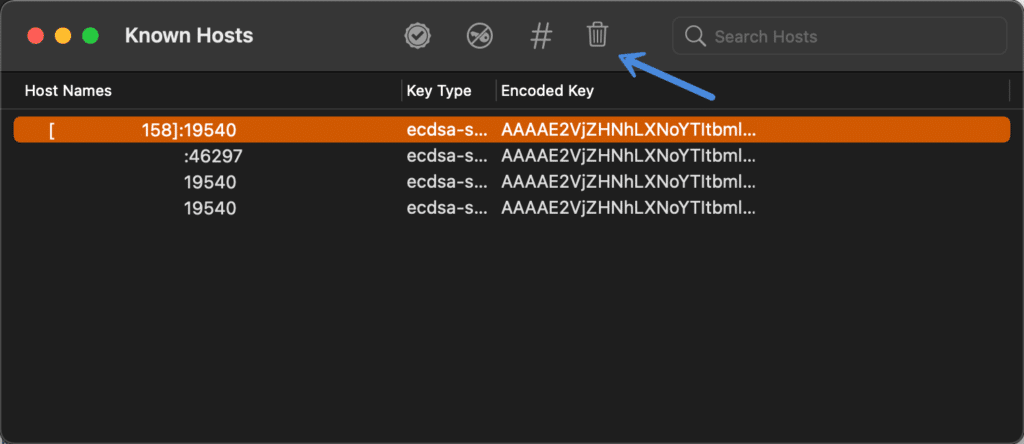
2. Mac
The Mac has a couple of ways to fix the “Warning: Remote host identification has changed” error — either through a premium app such as SSH Config Editor or the Terminal. The results will be the same, so we advise you to choose whichever option is more comfortable (and budget-friendly).
Our preferred approach is to access the file within a Terminal window (or iTerm2 if you use that app), and also open it with a dedicated Nano or Vim editor. This is because it’s accessible to everyone and straightforward to use regardless of your experience level.
Here, we’re going to use Nano. First, open your Terminal using whatever process is most comfortable:

From here, run the nano ~/.ssh/known_hosts command in your window. This will open a new Nano instance and display the keys within your known_hosts file:

You should delete the key causing the “Warning: Remote host identification has changed” error, then save your changes.
You might also want to delete the entire known_hosts file, especially if you only use SSH for one or two sites. To do this, you can run rm .ssh/known_hosts in a Terminal window.
There’s one more method to alter the known_hosts file on Mac: using the ssh-keygen utility from the command line. This is great if you don’t want to dig into the file itself, or if you want to work with only one site or key.
To achieve this, open a Terminal window and run ssh-keygen, followed by your server hostname. For example:
ssh-keygen -R server.example.comThis won’t ask you if you want to delete the specified lines, so make sure you’re removing the right ones before proceeding:

Once this is done, you shouldn’t get the “Warning: Remote host identification has changed” error from there on out.
Ever seen this error? 😅 It’s not always a bad thing (it’s protecting your connection from malicious attacks!), but it can be accidentally caused by your own activity. 😬 Learn more in this guide ⬇️Click to Tweet
Summary
Web security isn’t just about installing plugins and creating a strong password. The connections you use to log into servers need your utmost attention. If you don’t want to be subject to a machine-in-the-middle attack, you’ll want to use SSH access when you log in.
However, the system works almost too well. You may get the “Warning: Remote host identification has changed” error for a few reasons, and some are innocent.
Regardless, you can fix the error in no time through a Command Prompt or Terminal, using just a handful of commands.
Get all your applications, databases and WordPress sites online and under one roof. Our feature-packed, high-performance cloud platform includes:
- Easy setup and management in the MyKinsta dashboard
- 24/7 expert support
- The best Google Cloud Platform hardware and network, powered by Kubernetes for maximum scalability
- An enterprise-level Cloudflare integration for speed and security
- Global audience reach with up to 35 data centers and 275+ PoPs worldwide
Test it yourself with $20 off your first month of Application Hosting or Database Hosting. Explore our plans or talk to sales to find your best fit.
Linux
- 03.04.2018
- 21 390
- 4
- 12.03.2019
- 19
- 19
- 0
- Содержание статьи
- Описание ошибки
- Причина возникновения ошибки
- Как ее исправить
- Комментарии к статье ( 4 шт )
- Добавить комментарий
Данная ошибка может появляться при попытке подключения к другому компьютеру через ssh и sftp протоколы.
Описание ошибки
Полностью она выглядит так:
@@@@@@@@@@@@@@@@@@@@@@@@@@@@@@@@@@@@@@@@@@@@@@@@@@@@@@@@@@@
@ WARNING: REMOTE HOST IDENTIFICATION HAS CHANGED! @
@@@@@@@@@@@@@@@@@@@@@@@@@@@@@@@@@@@@@@@@@@@@@@@@@@@@@@@@@@@
IT IS POSSIBLE THAT SOMEONE IS DOING SOMETHING NASTY!
Someone could be eavesdropping on you right now (man-in-the-middle attack)!
It is also possible that a host key has just been changed.
The fingerprint for the ECDSA key sent by the remote host is
SHA256:5VLqurxCsGZoX78FWhcaEQkHwAtq+Xzp1tBfOxKQQzE.
Please contact your system administrator.
Add correct host key in /home/ajiekceu4/.ssh/known_hosts to get rid of this message.
Offending ECDSA key in /home/ajiekceu4/.ssh/known_hosts:5
remove with:
ssh-keygen -f «/home/ajiekceu4/.ssh/known_hosts» -R sysadmin.ru
ECDSA host key for sysadmin.ru has changed and you have requested strict checking.
Host key verification failed.
Причина возникновения ошибки
Как видно из описания, данная ошибка может появляться в том случае, когда на устройстве, к которому вы пытаетесь подключиться, изменился ключ и он не совпадает с тем ключом, который вы уже получали ранее, когда осуществляли подключение к этому устройству в предыдущие разы. Причины могут быть разные:
- Был изменен сертификат на устройстве и соответственно поменялся ECDSA ключ (из соображений безопасности, например);
- Переустановлена ОС на устройстве и соответственно изменился сертификат;
- Кто то пытается вас обмануть;
Как ее исправить
Если вы точно знаете, что сертификат на удаленном устройстве, к которому вы пытаетесь подключиться изменился и это не попытка вас обмануть со стороны заинтересованных лиц, то исправить эту ошибку очень просто. Необходимо просто удалить текущий ключ для данного домена (в нашем примере sysadmin.ru), сделать это можно командой, которая описана в самом тексте ошибки:
ssh-keygen -f "/home/ajiekceu4/.ssh/known_hosts" -R sysadmin.ruВ случае успеха, вывод команды должен быть примерно таким:
# Host sysadmin.ru found: line 10
/home/ajiekceu4/.ssh/known_hosts updated.
Original contents retained as /home/ajiekceu4/.ssh/known_hosts.old
После этого, необходимо еще раз попытаться подключиться к удаленному хосту и подтвердить установку нового ключа, написав «yes»
ssh root@sysadmin.ru
The authenticity of host 'sysadmin.ru (88.99.12.44)' can't be established.
ECDSA key fingerprint is SHA256:5VLaarxCsGZcv78FWphaEQkHwAtq+Zzp1tBfOXKQQzE.
Are you sure you want to continue connecting (yes/no)? yes
Warning: Permanently added 'sysadmin.ru' (ECDSA) to the list of known hosts. 
Perhaps the most common error during SSH and SFTP use is the iconic «Warning: remote host identification has changed». Without action, this message makes it difficult to connect to your VPS server as normal.
Today we’re going to walk you through why this happens, whether you should be concerned about your server’s security, and how to remedy it if you judge it to be safe.
Why the error happens
The Warning: remote host identification error typically occurs when the unique fingerprint of your server does not match what was stored in your known_hosts file when you first connected. One common reason this key changes is because you have changed your root password or rebuilt your VPS server.
When you make these changes, your SSH client will notice that something about your connection has changed and surface a security warning. This is a good thing, because it raises awareness if an attacker is attempting to perform a man-in-the middle attack.
In a man-in-the-middle attack, an attacker will sit between your connect and your server with a fake SSH server holding the same IP. They’ll then forward your traffic to the real SSH server, leaving you unaware that they’re spying on and collecting everything you do.
To protect against this, your SSH client assumes that an attack is unlikely to occur the first time you connect to your server and stores its information. This way, if an attacker sits between your connection, it’s able to tell that the server’s unique certificate or key does not match.
When to remove your known_hosts entry
So, how do you tell the difference between a man-in-the-middle attack and a false positive caused by server changes? If there is no obvious reason for a false positive to occur, you should always exercise caution. If you have made the following changes recently, you can rest a little easier:
- Changed your VPS password or SSH key
- Rebuilt your server
- Assigned the same IP address for multiple remote systems
- Destroyed your server, then launched a new one that happened to have the same IP address
- Switched operating systems or reinstalled
Of course, it can be possible to make one of these changes and then forget about it when you go to connect to your VPS at a later date. If you share a VPS between multiple people, one of them may have also made a change without telling you. If there’s any uncertainty, we recommend you check the «Security» tab of your BitLaunch account. This will show a full list of major changes that have been made to your servers with their timestamp.
If you don’t believe you’re the victim of a man-in-the-middle attack, you can connect to your server again by simply removing the existing entry in your known_hosts file. There a few ways of doing this:
With a text-editor
You can browse to your known_hosts location with any text editor and deleting the line corresponding to your server’s IP. The known_hosts file may be stored in the following locations:
- Windows:
%USERPROFILE%\.ssh or %USERPROFILE%\ssh - Linux and macOS:
.ssh/known_hosts
With ssh-keygen in the command-line
A potentially faster and more universal method to remove the line from your known_hosts is through ssh-keygen. You can use the following command to quickly delete the invalid key:
ssh-keygen -R "your.server.ip"
When you remove a fingerprint via this method, you old information will be stored in known_hosts.old.
Connecting to your server again after utilizing either method will store your server’s new fingerprint in your known hosts file as if it were the first time you connected.
Check out our other SSH tutorials:
How to fix the ssh permission denied (publickey) error
The SSH permission denied (publickey) error is a frustrating one. Here’s how to fix it in a few simple steps.
 BitLaunch

SSH vs RDP: Which is best for VPS server hosting?
RDP and SSH are the two main protocols used to connect to remote servers. This is what you need to know about each.
BitLaunch News and GuidesBitLaunch
How to Connect to SSH with PuTTY
When connecting to your Linux-based VPS from a Windows system, the most common way of doing that is via SSH, using PuTTY. PuTTY is a free utility which will allow command-line access to your server.
BitLaunch News and GuidesBitLaunch

Creating an SSH Key with PuTTY
An SSH key is a credentialing system using the Secure Shell (SSH) Protocol. While perhaps not as convenient, they are much more difficult to hack than passwords, as they can be up to 4096 bits in length, making them immune from most brute force attacks.
BitLaunch News and GuidesBitLaunch

Давайте разберемся с известнейшей проблемой, часто возникающей при подключении по протоколу ssh!
По умолчанию, для большей безопасности, в настройках ssh значение параметра StrictHostKeyChecking установлено в ‘yes’. Именно поэтому при первом подключении к удаленному хосту можно увидеть следующее:
The authenticity of host '192.168.0.166 (192.168.0.166)' can't be established.
ECDSA key fingerprint is f0:74:54:33:93:bd:73:d1:ef:d6:fe:47:d3:93:e0:7f.
Are you sure you want to continue connecting (yes/no)? yes
Warning: Permanently added '192.168.0.166' (ECDSA) to the list of known hosts.
Введя в консоли ‘yes’, мы подтверждаем, что действительно хотим подключиться к этому хосту и отпечаток его ssh-ключа добавляется в файл ~/.ssh/known_hosts.
При повторной попытке подключения к хосту после изменения ключа на удаленном сервере (как правило, он меняется если была переустановлена операционная система или sshd), появляется сообщение с ошибкой:
@@@@@@@@@@@@@@@@@@@@@@@@@@@@@@@@@@@@@@@@@@@@@@@@@@@@@@@@@@@
@    WARNING: REMOTE HOST IDENTIFICATION HAS CHANGED!     @
@@@@@@@@@@@@@@@@@@@@@@@@@@@@@@@@@@@@@@@@@@@@@@@@@@@@@@@@@@@
IT IS POSSIBLE THAT SOMEONE IS DOING SOMETHING NASTY!
Someone could be eavesdropping on you right now (man-in-the-middle attack)!
It is also possible that a host key has just been changed.
The fingerprint for the ECDSA key sent by the remote host is
ae:a6:0b:8d:14:e4:3c:67:f0:a3:ec:a9:9e:2a:26:72.
Please contact your system administrator.
Add correct host key in /root/.ssh/known_hosts to get rid of this message.
Offending ECDSA key in /root/.ssh/known_hosts:75
  remove with: ssh-keygen -f "/root/.ssh/known_hosts" -R 192.168.0.166
ECDSA host key for 192.168.0.166 has changed and you have requested strict checking.
Host key verification failed.
lost connection
Для устранения данной проблемы необходимо удалить строку с указанным ssh-ключом из файла /root/.ssh/known_hosts. Сделать это можно несколькими способами.
Первый (указан в самом сообщении с ошибкой):
ssh-keygen -f "/root/.ssh/known_hosts" -R 192.168.0.166
# Host 192.168.0.166 found: line 75 type ECDSA
/root/.ssh/known_hosts updated.
Original contents retained as /root/.ssh/known_hosts.old
Второй вариант удаления ключа:
sed -i '75d' /root/.ssh/known_hosts
Примечание. Номер строки с ssh-ключем, который нужно удалить, указывается с помощью ‘75d’.
Третий вариант удаления ключа (с использованием perl):
perl -pi -e 's/Q$_// if ($. == 75);' /root/.ssh/known_hosts
После проделанных действий пробуем подключиться по ssh к удаленному хосту — проблема должна исчезнуть.
Whether you’re connecting with an SFTP client or SSH via the terminal, a common error that comes along is the “warning: remote host identification has changed!” This prevents you from connecting to your website or server. This happens to me now and then, and it’s very annoying, as I’m usually in a hurry to fix something. This error brings me to a halt.

Below I’ll walk you through a few quick and easy ways to resolve the error and get connected again.
The error below typically occurs when your SSH keys or server’s connection information has changed. For example, if you recently migrated your website to a new hosting provider, your IP address would be different.
The connection information (IP address and credentials) on your Mac is stored in your known_hosts file. On Windows, it’s stored in the registry. When you use an SFTP client (my favorite is ForkLift) or SSH client (PuTTY), it uses the information to connect to the webserver.
[user@hostname ~]$ ssh root@user
@@@@@@@@@@@@@@@@@@@@@@@@@@@@@@@@@@@@@@@@@@@@@@@@@@@@@@@@@@@
@ WARNING: REMOTE HOST IDENTIFICATION HAS CHANGED! @
@@@@@@@@@@@@@@@@@@@@@@@@@@@@@@@@@@@@@@@@@@@@@@@@@@@@@@@@@@@
IT IS POSSIBLE THAT SOMEONE IS DOING SOMETHING NASTY!
Someone could be eavesdropping on you right now (man-in-the-middle attack)!
It is also possible that a host key has just been changed.
The fingerprint for the RSA key sent by the remote host is
xx:xx:xx.
Please contact your system administrator.
Add correct host key in /home/hostname /.ssh/known_hosts to get rid of this message.
Offending RSA key in /var/lib/sss/pubconf/known_hosts:3
RSA host key for xxx.xxx.xx.xxx has changed and you have requested strict checking.
Host key verification failed.- How to fix your known_hosts file on Mac
- How to fix your known_hosts files on Windows
How to fix your known_hosts file on Mac
There are a couple of ways to go about fixing your known_hosts file on a Mac. I prefer using an app, as it’s quick and easy. I never have to remember terminal commands. But I’ll walk you through both methods.
Option 1: Fix known_hosts file with an app (easiest method)
An awesome app called SSH Config Editor lets you manage your SSH client configuration file and other settings. There is a pro version, and I always recommend supporting developers when you can. If you’re on a tight budget, the free version is enough to manage your known_hosts file. Follow the steps below.
Step 1
Install the free SSH Config Editor app.
Step 2
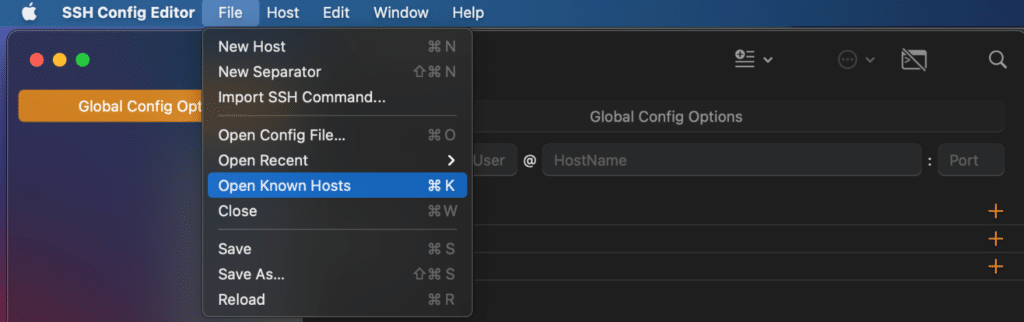
Open SSH Config Editor and click on “File → Open Known Hosts.”
Step 3
Find and highlight the entry that is having the issue. If you aren’t sure which one to choose, you should look up your old and current IP address. If you’re hosting with a provider like Kinsta, this is called your “Site IP address” and can be found in your MyKinsta dashboard.
Then click the trash can icon to delete the entry. Another option would be to remove all the entries.
Step 4
Click “Remove” on the following prompt:
Do you want to remove “[xx.xxx.xx.xxx]:xxxxxx” from known hosts?
Step 5
Close the window and click “Save” on the following prompt:
Do you want to save the changes made to the document “known hosts”?
You should now be able to connect to your website and or server again.
You probably won’t need the SSH Config Editor app that often, so I don’t recommend pinning it to your dock. Just leave it installed for the occasions when you do get the connection error.
Option 2: Fix known_hosts file from the terminal
The second option is to clean up the entry from your known_hosts file using the terminal. Follow the steps below.
Step 1
Open the Terminal app. The quickest way is to launch Spotlight and search for “terminal.” Or you can find it under “Utilities → Terminal.”

Step 2
Paste the following command.
nano ~/.ssh/known_hostsStep 3
Remove the entry that is having the issue. If you aren’t sure which one to choose, look up your old and current IP address. Another option would be to remove all the entries.
Step 4
Type Ctrl + X (^X) to exit and select Y for yes when prompted if you want to save the modified buffer.

You should now be able to connect to your website and or server again.
Alternatively, you could delete your entire known_hosts file and let it repopulate. Enter the following command in the terminal.
rm .ssh/known_hostsHow to fix your known_hosts file on Windows
Before switching from Windows to Mac, I actually never encountered this error. But I’m documenting the following for you just in case. On Windows, they don’t have a known_hosts file, the information (IP address and credentials) is stored in the registry. Follow the steps below.
Step 1
Open your start menu and search “regedit.” Click “Enter.”
Step 2
Browse to the following registry folder:
HKEY_CURRENT_USERSoftWareSimonTathamPuTTYSshHostKeys
Step 3
Within the “SshHostKeys” folder, remove the entry that is having the issue. If you aren’t sure which one to choose, look up your old and current IP address. Another option would simply be to remove all the entries.
Click “Yes” when you get the following prompt:
Deleting certain registry values could cause system instability. Are you sure you want to permanently delete this value?
Close the Registry Editor. You should now be able to connect to your website and or server again.
Summary
It’s always annoying to run across errors like these. You would think by now they would have easier ways built into the operating systems to resolve them. For now, we’ll have to resort to our step by step troubleshooting processes.
Hopefully, now you have connected again and are back at work! If this was helpful or you had a problem, leave a comment below.
Question
What does «WARNING: REMOTE HOST IDENTIFICATION HAS CHANGED!» mean and how do I correct the problem?
Cause
When host keys on a remote system have changed, either because they were manually regenerated or because ssh was re-installed, the new host key will not match the one stored in the user’s known_hosts file, and ssh will report the error then exit.
Answer
Example:
# ssh myuser@cupcake
@@@@@@@@@@@@@@@@@@@@@@@@@@@@@@@@@@@@@@@@@@@@@@@@@@@@@@@@@@@
@ WARNING: REMOTE HOST IDENTIFICATION HAS CHANGED! @
@@@@@@@@@@@@@@@@@@@@@@@@@@@@@@@@@@@@@@@@@@@@@@@@@@@@@@@@@@@
IT IS POSSIBLE THAT SOMEONE IS DOING SOMETHING NASTY!
Someone could be eavesdropping on you right now (man-in-the-middle attack)!
It is also possible that the RSA host key has just been changed.
The fingerprint for the RSA key sent by the remote host is
d7:3b:a3:5b:88:d2:f4:96:80:0d:8e:a0:8d:44:a2:d2.
Please contact your system administrator.
Add correct host key in /home/myuser/.ssh/known_hosts to get rid of this message.
Offending key in /home/myuser/.ssh/known_hosts:4
RSA host key for cupcake has changed and you have requested strict checking.
Host key verification failed.
If you are confident that the host key changed for a known reason (i.e. a re-install of the openssh filesets on the server), then you can use the ssh-keygen command, as the user who received the error, to remove the offending key.
# ssh-keygen -R cupcake
/home/myuser/.ssh/known_hosts updated.
Original contents retained as /home/myuser/.ssh/known_hosts.old
Alternately, you can run the ssh-keygen as root, but you will need to specify the known_hosts file reported in the error.
# ssh-keygen -R cupcake -f /home/myuser/.ssh/known_hosts
/home/myuser/.ssh/known_hosts updated.
Original contents retained as /home/myuser/.ssh/known_hosts.old
Then try the ssh again. You will be prompted to confirm that you trust the new host key.
# ssh myuser@cupcake
The authenticity of host ‘cupcake (127.0.0.1)’ can’t be established.
RSA key fingerprint is d7:3b:a3:5b:88:d2:f4:96:80:0d:8e:a0:8d:44:a2:d2.
Are you sure you want to continue connecting (yes/no)?
After you type ‘yes’, ssh will add the new key to your known_hosts file and proceed.
Warning: Permanently added ‘cupcake’ (RSA) to the list of known hosts.
Last unsuccessful login: Mon Dec 6 13:51:17 CST 2010 on /dev/lft0
Last login: Wed Feb 16 07:00:03 CST 2011 on ssh from icecream.austin.ibm.com
**************************************************************
* *
* *
* Welcome to AIX Version 6.1! *
* *
* *
**************************************************************
$
[{«Product»:{«code»:»SWG10″,»label»:»AIX»},»Business Unit»:{«code»:»BU058″,»label»:»IBM Infrastructure w/TPS»},»Component»:»Network communications»,»Platform»:[{«code»:»PF002″,»label»:»AIX»}],»Version»:»Version Independent»,»Edition»:»»,»Line of Business»:{«code»:»LOB08″,»label»:»Cognitive Systems»}}]
If you have been having problems with your remote host identification, don’t worry – you are not alone. Many people are experiencing this issue right now. Luckily, there are a few ways that you can fix it.
In this blog post, we will discuss three of the best methods for fixing this problem.
understanding remote host identification in SSH
If you receive the error message “The remote host identification has changed”, it means that the key stored for the host you’re trying to connect to has changed.
This can happen for a variety of reasons but is often caused by connecting to a different server than the one you originally connected to (for example, your server has been rebuilt by a new one).
Whenever we connect to a server via SSH, that server’s public key is stored in our home directory. The file is called known_hosts.
When we reconnect to the same server, the SSH connection will verify the current public key matches the one we have saved in our known_hosts file.
If the server’s key has changed since the last time we connected to it, we will receive this error.
Example of remote host identification has changed
@ WARNING: REMOTE HOST IDENTIFICATION HAS CHANGED!

IT IS POSSIBLE THAT SOMEONE IS DOING SOMETHING NASTY!

Someone could be eavesdropping on you right now (man-in-the-middle attack)!
It is also possible that a host key has just been changed. The fingerprint for the RSA key sent by the remote host is x. Please contact your system administrator.
Add correct host key in /home/ec2-user/.ssh/known_hosts to get rid of this message.
Offending RSA key in /home/ec2-user.ssh/known_hosts:222 RSA host key for www.howtouselinux.com has changed and you have requested strict checking.
Host key verification failed.
Methods to fix the problem of remote host identification has changed
There are a few different ways that you can fix this problem:
- Manually edit the “~/.ssh/known_hosts” file and remove the old key for the host you’re trying to connect to. This will allow you to connect to the new server without any problems.
- Use the “ssh-keygen -R” command to remove the old key from your “~/.ssh/known_hosts” file.
- Use the “-o StrictHostKeyChecking=no” option when connecting to the server. This will prevent ssh from checking the “~/.ssh/known_hosts” file, and will allow you to connect to the new server.
We will explain details.
Remove old host key info from SSH known_hosts file
If you are having problems with your remote host identification, the first thing you should do is remove the old host key information from your SSH known_hosts file. To do this, follow these steps:
- Open up a terminal window.
- Type in the following command: vi ~/.ssh/known_hosts.
- Search for the hostname with problem
- Press dd to delete this entry
- Save the changes and close the file with :wq!
Remove old host key info with ssh-keygen command
To fix the problem of remote host identification has changed , we can also remove the old host key info with ssh-keygen command.
Open up a terminal session, and type one of the following command.
- ssh-keygen -R hostname
- ssh-keygen -R ipaddress
- ssh-keygen -f “/home/ec2-user/.ssh/known_hosts” -R “192.168.0.106”
By following these steps, you will remove the old host key information from your SSH known_hosts file, and it should fix the problem.
Disable stricthostkeychecking option in SSH command
The stricthostkeychecking option in SSH is a security feature that verifies the host key information for each connection.
If there is a problem with the host key information, the connection will not be allowed to proceed.
This option can be disabled, which will allow the connection to proceed even if there is a problem with the host key information.
- Open up a terminal window.
- Type in the following command: ssh -o StrictHostKeyChecking=no hostname
This command removes the old host key for the device in the known_hosts file and replaces old host key with the new host key.
Understanding SSH Key with Examples