If you’re having problems with Windows 11 on your PC or you want a fresh copy of Windows 11 without the clutter of old files or apps, you can reinstall Windows 11 to try and fix your issues and return your PC to a cleaner state.
Check your disk space
If your PC isn’t performing as expected or if you’re having issues with Windows 11, it may be because of low disk space. Before you reinstall Windows 11, try freeing up disk space to see if that helps. For more info, see Free up drive space in Windows.
Before you begin
If you have personal data and files that you want to save, back them up to an external hard drive, USB thumb drive, SD card, or cloud location (such as OneDrive) before you begin to reinstall Windows 11.
Windows 11 must be activated after it’s reinstalled. Usually this happens automatically after you go online. For more info, see «Activating after reinstalling Windows» in Activate Windows.
In Windows 11, you must link your Microsoft account to the Windows 11 digital license on your PC before you can reactivate Windows. For more info, see «Associate your Windows license with your Microsoft account» in Reactivating Windows after a hardware change.
If you reinstall Windows 11 after you make a significant hardware change to your PC (such as replacing the motherboard), it may no longer be activated. You can use the Activation troubleshooter to reactivate Windows. For more info, see Using the Activation troubleshooter.
When you reinstall Windows 11, you’ll need to select the edition of Windows that matches your digital license. For example, if you’re running Windows 11 Home, you’ll need to install Windows 11 Home again.
To see which edition of Windows you’re running, go to Start > Settings > System > About . Your edition is listed under Windows specifications.
Types of reinstalls for Windows 11
The following chart provides info about the different options that you can choose for each type of reinstall including what happens to your apps, files, personal data, and how much disk space is required for the reinstall. Use this chart to help you decide which option to use to reinstall Windows 11.
We recommend that you first try to «Reset Windows 11,» then, if needed, «Reinstall Windows 11 using installation media,» and then, if needed, try a «Clean install of Windows 11 using installation media.»
Notes:
-
Reinstalling Windows 11 using installation media while choosing to ‘Keep nothing’ (a clean install) will automatically enable reserved storage if the partition you reinstall Windows to is 20GB or larger. Reserved storage sets aside disk space to be used by updates, apps, temporary files, and system caches, thus improving the day-to-day function of your PC by ensuring that critical OS functions always have access to disk space.
-
For devices with reserved storage, a reset or reinstall will first use the reserved storage space before using other disk space. For more info, see How reserved storage works in Windows.
|
Reinstall type |
Reinstall options you can choose |
What happens to your apps |
What happens to your personal |
What happens to data stored in other folders or drives |
Disk space required |
|
Reset Windows 11 |
Keep my files |
Apps that didn’t come with your PC are removed. |
Preserved |
Preserved |
Medium |
|
Reset Windows 11 |
Remove everything |
Apps that didn’t come with your PC are removed. |
Deleted |
Deleted |
Low |
|
Reinstall Windows 11 using installation media |
Keep Everything (Default) |
All apps and settings are preserved. |
Preserved |
Preserved |
High |
|
Reinstall Windows 11 using installation media |
Keep Personal Data |
All apps are removed. |
Preserved |
Preserved |
Medium |
|
Reinstall Windows 11 using installation media |
Keep Nothing |
All apps are removed. |
Deleted |
Deleted |
Low |
|
Clean install of Windows 11 using installation media |
N/A (This reinstall option deletes and recreates all disk partitions.) |
Deleted |
Deleted |
Deleted |
Very low |
Reset Windows 11
This option will take your device back to a state similar to when you turned it on for the first time, removing programs you have installed and removing personal files, depending on which option you select. Windows will handle everything automatically, and you won’t need to use an external storage device. Resetting your device is less impactful than the clean install option, though it will require sufficient disk space.
You can reset your PC from Settings or the Windows Recovery Environment (WinRE), which can be accessed through the sign-in screen. For the steps to reset Windows 11, see Reset or reinstall Windows.
If your PC doesn’t have sufficient space available to reset Windows 11, you’ll receive a notification. In this scenario, either free up additional space or use the steps in the next section to reinstall Windows 11.
Reinstall Windows 11 using installation media
This option will use a tool to create installation media which you can use to completely wipe the disk and install a fresh copy of Windows 11. This option requires you to use an external storage device such as a USB drive, and will give you an option to choose what to keep during installation.
Before you begin, make sure you have the following:
-
An internet connection
-
An external storage device such as a USB drive, SD card, or external hard drive with at least 8GB of available space.
Create the installation media
First, create the installation media that you’ll use to reinstall Windows 11.
-
Make sure you’ve backed up any files on your device that you wish to save onto an external storage device such as a USB drive, SD card, or external hard drive, or upload your files to OneDrive.
Note: If you use an external storage device to back up files, make sure it’s a different one than the one you’ll be using to download Windows 10 installation media.
-
Download the Windows 11 installation media to a separate external storage device that has at least 8GB of available space. Everything on this drive will be deleted to complete the download, so make sure it’s empty before you proceed. Here’s how:
-
On a working PC, go to the Microsoft software download website and select Download tool now.
-
When the download is complete, open the tool from your desktop, and then select Yes when asked if you’d like to allow the app to make changes to your device.
-
When the Windows 11 Setup guide appears, accept the license terms and agreements.
-
Select Create installation media (USB flash drive, DVD, or ISO file) for another PC, and then select Next.
-
Choose a language, edition, and architecture (64-bit or 32-bit), and then select Next.
-
Select USB flash drive, and then select Next.
-
Follow the steps to create installation media, and then select Finish.
-
Use the installation media to reinstall Windows 11
Connect the installation media you created to your PC and reinstall Windows 11.
-
Open File Explorer and select the drive with the installation media.
-
From the root directory of the drive, double-click setup.exe, and then select Yes when asked if you’d like to allow the app to make changes to your device.
-
Select Change to determine what to keep: Select one of the following options, and then select Next:
-
Keep personal files and apps – This will preserve your personal data, apps, and settings.
-
Keep personal files only – This will preserve your personal data and settings, but all your apps will be removed.
-
Keep nothing – This will remove all personal data, settings, and apps.
Warning: You cannot undo a reinstallation of Windows 10. Be sure to back up your files first if you choose the Keep nothing option.
-
-
To finish, select Install to start reinstalling Windows 11 on your PC.
Your PC will restart several times during the reinstallation.
Clean install of Windows 11 using installation media
Warning:
-
A clean installation is an advanced option to help you start fresh on your device. We recommend following the below steps only if you’re confident in making these changes. For more help, contact support.
-
This will remove all your personal files, apps and drivers you installed, apps and customizations from your PC manufacturer, and changes you made in Settings.
This option will use a tool to create installation media which you can use to completely wipe the disk and install a fresh copy of Windows 11. This option requires you to use an external storage device such as a USB drive, and may take a few extra steps, though it will delete everything for the cleanest installation. This type of clean install deletes and recreates system partitions. It will delete all personal files on your device and the partition on your hard drive currently being used for your recovery drive.
Before you begin, make sure you have the following:
-
An internet connection
-
An external storage device such as a USB drive, SD card, or external hard drive with at least 8GB of available space
Create the installation media
First, create the installation media that you’ll use to perform a clean install of Windows 11.
-
Make sure you’ve backed up any files on your device that you wish to save onto an external storage device such as a USB drive, SD card, or external hard drive, or upload your files to OneDrive.
Note: If you use an external storage device to back up files, make sure it’s a different one than the one you’ll be using to download Windows 11 installation media.
-
Download the Windows 11 installation media to a separate 8GB-sized external storage device. Everything on this drive will be deleted to complete the download, so make sure it’s empty before you proceed. Here’s how:
-
On a working PC, go to the Microsoft software download website and select Download tool now.
-
When the download is complete, open the tool from your desktop, and then select Yes when asked if you’d like to allow the tool to make changes to your device.
-
When the Windows 11 Setup guide appears, accept the license terms and agreements.
-
Select Create installation media (USB flash drive, DVD, or ISO file) from another PC, and then select Next.
-
Choose a language, edition, and architecture (64-bit or 32-bit).
-
Follow the steps to create installation media, and then select Finish.
-
Use the installation media to perform a clean install
Connect the installation media you created to your PC and perform a clean install of Windows 11.
-
Next to Advanced startup, select Restart now.
-
Select Use a device, and then choose the device corresponding to the external storage device you’re using.
Note: If the Use a device option isn’t available, visit your device manufacturer’s website for details on how to boot from a USB flash drive.
-
When the first Windows screen appears, choose the options that best suit your needs, and then select Next.
-
Select Install now, and then check the I accept box. Select Next, and then select Custom: Install Windows only (advanced). Your device will now display a list of drives and partitions. If multiple disks are displayed, you’ll only need to delete all partitions from the disk where you want to install Windows.
-
Highlight each drive/partition in the list and select Delete. When the Windows Setup notification appears, select OK.
-
Complete step 5 for every drive in the list except the one that says Unallocated Space. When you’re finished, only Drive 0 Unallocated Space should remain.
-
Select Next.
-
The Windows setup screen will now display Installing Windows. When the installation is complete, your device will restart. When this happens, it may try to restart from the external storage device. If the initial Windows setup screen requests you choose you language/keyboard layout, remove the external storage drive from your device and select OK. This will restart your device.
-
Once the installation is complete and your device has restarted, select the preferences and settings you’d like for your device.
If you’re having problems with Windows 10 on your PC or you want a fresh copy of Windows 10 without the clutter of old files or apps, you can reinstall Windows 10 to try and fix your issues and return your PC to a cleaner state.
Check your disk space
If your PC isn’t performing as expected or if you’re having issues with Windows 10, it may be because of low disk space. Before you reinstall Windows 10, try freeing up disk space to see if that helps. For more info, see Free up drive space in Windows.
Before you begin
If you have personal data and files that you want to save, back them up to an external hard drive, USB thumb drive, SD card, or cloud location (such as OneDrive) before you begin to reinstall Windows 10.
Windows 10 must be activated after it’s reinstalled. Usually this happens automatically after you go online. For more info, see «Activating after reinstalling Windows 10» in Activate Windows.
Note: If Windows 10 was activated on your device after upgrading from Windows 7 or Windows 8.1, you have a digital license for Windows 10 that can automatically activate Windows 10 after you reinstall it. For more info, see «Activating after reinstalling Windows 10» in Activate Windows.
In Windows 10 (version 1607 or later), you must link your Microsoft account to the Windows 10 digital license on your PC before you can reactivate Windows. For more info, see «Associate your Windows 10 license with your Microsoft account» in Reactivating Windows after a hardware change.
If you reinstall Windows 10 after you make a significant hardware change to your PC (such as replacing the motherboard), it may no longer be activated. If you were running Windows 10 (Version 1607) before the hardware change, you can use the Activation troubleshooter to reactivate Windows. For more info, see Using the Activation troubleshooter.
Note: If you weren’t running Windows 10 before making the hardware change, or if the troubleshooter can’t re-activate Windows, contact support.
When you reinstall Windows 10, you’ll need to select the edition of Windows that matches your digital license. For example, if you’re running Windows 10 Home, you’ll need to install Windows 10 Home again.
Types of reinstalls for Windows 10
The following chart provides info about the different options that you can choose for each type of reinstall including what happens to your apps, files, personal data, and how much disk space is required for the reinstall. Use this chart to help you decide which option to use to reinstall Windows 10.
We recommend that you first try to «Reset Windows 10,» then, if needed, «Reinstall Windows 10 using installation media,» and then, if needed, try a «Clean install of Windows 10 using installation media.»
Notes:
-
Starting with the Windows 10 May 2019 Update (version 1903), reinstalling Windows 10 using installation media while choosing to ‘Keep nothing’ (a clean install) will automatically enable reserved storage if the partition you reinstall Windows to is 20GB or larger. Reserved storage sets aside disk space to be used by updates, apps, temporary files, and system caches, thus improving the day-to-day function of your PC by ensuring that critical OS functions always have access to disk space.
-
For devices with reserved storage, a reset or reinstall will first use the reserved storage space before using other disk space. For more info, see How reserved storage works in Windows 10.
|
Reinstall type |
Reinstall options you can choose |
What happens to your apps |
What happens to your personal |
What happens to data stored in other folders or drives |
Disk space required |
|
Reset Windows 10 |
Keep my files |
Apps that didn’t come with your PC are removed. |
Preserved |
Preserved |
Medium |
|
Reset Windows 10 |
Remove everything |
Apps that didn’t come with your PC are removed. |
Deleted |
Deleted |
Low |
|
Reinstall Windows 10 using installation media |
Keep Everything (Default) |
All apps and settings are preserved. |
Preserved |
Preserved |
High |
|
Reinstall Windows 10 using installation media |
Keep Personal Data |
All apps are removed. |
Preserved |
Preserved |
Medium |
|
Reinstall Windows 10 using installation media |
Keep Nothing |
All apps are removed. |
Deleted |
Deleted |
Low |
|
Clean install of Windows 10 using installation media |
N/A (This reinstall option deletes and recreates all disk partitions.) |
Deleted |
Deleted |
Deleted |
Very low |
Reset Windows 10
This option will take your device back to a state similar to when you turned it on for the first time, removing programs you have installed and removing personal files, depending on which option you select. Windows will handle everything automatically, and you won’t need to use an external storage device. Resetting your device is less impactful than the clean install option, though it will require sufficient disk space.
You can reset your PC from Settings or the Windows Recovery Environment (WinRE), which can be accessed through the sign-in screen. For the steps to reset Windows 10, see Reset or reinstall Windows.
If your PC doesn’t have sufficient space available to reset Windows 10, you’ll receive a notification. In this scenario, either free up additional space or use the steps in the next section to reinstall Windows 10.
Reinstall Windows 10 using installation media
This option will use a tool to create installation media which you can use to completely wipe the disk and install a fresh copy of Windows 10. This option requires you to use an external storage device such as a USB drive, and will give you an option to choose what to keep during installation.
Before you begin, make sure you have the following:
-
An internet connection
-
An external storage device such as a USB drive, SD card, or external hard drive with at least 8GB of available space.
Create the installation media
First, create the installation media that you’ll use to reinstall Windows 10.
-
Make sure you’ve backed up any files on your device that you wish to save onto an external storage device such as a USB drive, SD card, or external hard drive, or upload your files to OneDrive.
Note: If you use an external storage device to back up files, make sure it’s a different one than the one you’ll be using to download Windows 10 installation media.
-
Download the Windows 10 installation media to a separate external storage device that has at least 8GB of available space. Everything on this drive will be deleted to complete the download, so make sure it’s empty before you proceed. Here’s how:
-
On a working PC, go to the Microsoft software download website and select Download tool now.
-
When the download is complete, open the tool from your desktop, and then select Yes when asked if you’d like to allow the app to make changes to your device.
-
When the Windows 10 Setup guide appears, accept the license terms and agreements.
-
Select Create installation media (USB flash drive, DVD, or ISO file) for another PC, and then select Next.
-
Choose a language, edition, and architecture (64-bit or 32-bit), and then select Next.
-
Select USB flash drive, and then select Next.
-
Follow the steps to create installation media, and then select Finish.
-
Use the installation media to reinstall Windows 10
Connect the installation media you created to your PC and reinstall Windows 10.
-
Open File Explorer and select the drive with the installation media.
-
From the root directory of the drive, double-click setup.exe, and then select Yes when asked if you’d like to allow the app to make changes to your device.
-
Select Change to determine what to keep: Select one of the following options, and then select Next:
-
Keep personal files and apps – This will preserve your personal data, apps, and settings.
-
Keep personal files only – This will preserve your personal data and settings, but all your apps will be removed.
-
Keep nothing – This will remove all personal data, settings, and apps.
Warning: You cannot undo a reinstallation of Windows 10. Be sure to back up your files first if you choose the Keep nothing option.
-
-
To finish, select Install to start reinstalling Windows 10 on your PC.
Your PC will restart several times during the reinstallation.
Clean install of Windows 10 using installation media
Warning:
-
A clean installation is an advanced option to help you start fresh on your device. We recommend following the below steps only if you’re confident in making these changes. For more help, contact support.
-
This will remove all your personal files, apps and drivers you installed, apps and customizations from your PC manufacturer, and changes you made in Settings.
This option will use a tool to create installation media which you can use to completely wipe the disk and install a fresh copy of Windows 10. This option requires you to use an external storage device such as a USB drive, and may take a few extra steps, though it will delete everything for the cleanest installation. This type of clean install deletes and recreates system partitions. It will delete all personal files on your device and the partition on your hard drive currently being used for your recovery drive.
Before you begin, make sure you have the following:
-
An internet connection
-
An external storage device such as a USB drive, SD card, or external hard drive with at least 8GB of available space
Create the installation media
First, create the installation media that you’ll use to perform a clean install of Windows 10.
-
Make sure you’ve backed up any files on your device that you wish to save onto an external storage device such as a USB drive, SD card, or external hard drive, or upload your files to OneDrive.
Note: If you use an external storage device to back up files, make sure it’s a different one than the one you’ll be using to download Windows 10 installation media.
-
Download the Windows 10 installation media to a separate 8GB-sized external storage device. Everything on this drive will be deleted to complete the download, so make sure it’s empty before you proceed. Here’s how:
-
On a working PC, go to the Microsoft software download website and select Download tool now.
-
When the download is complete, open the tool from your desktop, and then select Yes when asked if you’d like to allow the tool to make changes to your device.
-
When the Windows 10 Setup guide appears, accept the license terms and agreements.
-
Select Create installation media (USB flash drive, DVD, or ISO file) from another PC, and then select Next.
-
Choose a language, edition, and architecture (64-bit or 32-bit).
-
Follow the steps to create installation media, and then select Finish.
-
Use the installation media to perform a clean install
Connect the installation media you created to your PC and perform a clean install of Windows 10.
-
Under Advanced startup, select Restart now.
-
Select Use a device, and then choose the device corresponding to the external storage device you’re using.
Note: If the Use a device option isn’t available, visit your device manufacturer’s website for details on how to boot from a USB flash drive.
-
When the first Windows screen appears, choose the options that best suit your needs, and then select Next.
-
Select Install now, and then check the I accept box. Select Next, and then select Custom: Install Windows only (advanced). Your device will now display a list of drives and partitions. If multiple disks are displayed, you’ll only need to delete all partitions from the disk where you want to install Windows.
-
Highlight each drive/partition in the list and select Delete. When the Windows Setup notification appears, select OK.
-
Complete step 5 for every drive in the list except the one that says Unallocated Space. When you’re finished, only Drive 0 Unallocated Space should remain.
-
Select Next.
-
The Windows setup screen will now display Installing Windows. When the installation is complete, your device will restart. When this happens, it may try to restart from the external storage device. If the initial Windows setup screen requests you choose you language/keyboard layout, remove the external storage drive from your device and select OK. This will restart your device.
-
Once the installation is complete and your device has restarted, select the preferences and settings you’d like for your device.
Need more help?

Reinstalling Windows isn’t as simple as just clicking through an installer. You’ll want to have important data backed up first, and then you’ll need installation media and a product key before continuing—and those are just the basics. This checklist will walk you through reinstalling Windows and ensure you won’t forget anything.
First: Back Up Your Files

You may also want to ensure programs you use are backing up your critical settings, like your browser’s data. For example, if you use Chrome, ensure you’ve signed into Chrome with your Google account and enabled the browser sync features. This ensures your bookmarks and other data can be accessed afterwards. Mozilla Firefox and Microsoft Edge have similar sync features.
Consider all the important data on your computer and ensure it’s backed up. If you’re still using POP3 for your email, which you shouldn’t be, all your emails may be stored on your PC and need to be backed up before continuing. If you’re using web-based email or even just IMAP in a desktop email client, your emails are stored with your email service and you don’t need to back them up. If you play a lot of PC games, check whether those games sync their saves online with a feature like Steam Cloud, or whether you need to back them up yourself.
You can back up many program’s settings at once through backing up your AppData folder, or by backing up individual folders in AppData.
Make a List of Your Installed Programs
RELATED: How to Create a List of Your Installed Programs on Windows
You may also want to create a list of your installed programs, just in case. You won’t be left wondering what the name of that useful little utility was. You can just check the list and see what you had installed before you reinstalled Windows.
You can create a list of your installed programs and print it to a text file using the PowerShell tool included in Windows. You don’t need any additional software. However, if you have CCleaner installed, you can also do this by launching CCleaner and clicking Tools > Uninstall > Save to a text file. This feature is in the free version of CCleaner; you don’t need the paid version. Be sure to add the text file to your backups!
If you have any important programs you’ve installed from disc, be sure you’ve found their installation discs. But, these days, many people should be able to download everything from the Internet and won’t need discs to install programs.
Get the Product Keys You Need
Ensure you have any product keys you might need before continuing. At a minimum, you’ll need a product key to install Windows. This is actually more complicated than it seems, as many modern PCs have these product keys “baked in” to the UEFI firmware on their motherboards, and Windows will automatically detect them during installation.
For example, “BIOS OEM Key” in the screenshot above means the product key for the installed version of Windows is embedded in our computer’s BIOS (or UEFI firmware, technically). We don’t have to write it down, and Windows will automatically use it when we reinstall the same version of Windows.
RELATED: How to Find Your Lost Windows or Office Product Keys
Follow our instructions to track down your Windows product key. If it’s printed on a sticker or your computer itself—or if you purchased Windows and were given a product key—you already know it. Otherwise, you may need to do some digging. This can be a little complicated. Be careful, as the key you see displayed in Windows may not actually be the key you need to activate your PC. This is particularly common on Windows 7. In these cases, you need the key printed on the sticker on your PC instead of the key that appears to be in use on your PC.
You may also have Microsoft Office or other applications installed with a product key, and you’ll need that product key to reinstall them. If you already know all the product keys you need or know you’re just using a service like Office 365, which doesn’t require these product keys, you can skip this part. To see the various product keys used on your PC for applications like Microsoft Office, we recommend NirSoft ProduKey.
Be sure to write down the keys you need or otherwise make a copy before reinstalling your operating system, as they’ll be erased from your drive.
Create Your Windows Installation Media
RELATED: Where to Download Windows 10, 8.1, and 7 ISOs Legally
Microsoft now allows you to create Windows installation media really easily. It’s all official and legal, and all you need is a legitimate product key. You can do this for Windows 7, 8.1, or 10—any version of Windows you might be using. These tools will also guide you through creating a USB installer drive, or burning the installation media to a DVD.
You can even use these tools to create Windows installation media for another PC. Just be sure to choose the correct operating system version, edition (Home or Pro), and 32-bit or 64-bit installation media the PC requires.
RELATED: How to Easily Reinstall Windows 10 Without the Bloatware
If you’re using Windows 10, you can skip the process of creating installation media and use the “Fresh start” feature to wipe everything away and get a fresh installation. Unlike the standard “reset this PC” feature, this will also erase bloatware installed by your manufacturer.
Consider Downloading Drivers Ahead of Time
You may want to consider downloading the hardware drivers your computer requires from its manufacturer’s website before continuing.
This is more useful if you’re using an older version of Windows, such as Windows 7. Windows 10 has more integrated drivers and should be able to automatically get more hardware devices up and running.
RELATED: Should You Use the Hardware Drivers Windows Provides, or Download Your Manufacturer’s Drivers?
This can save a bit of time afterwards, but isn’t absolutely required except in one situation. In some cases, Windows may need you to install Wi-Fi or Ethernet drivers the computer requires before it can connect to the Internet. In this case, you’ll need to have either downloaded the drivers ahead of time, or download them on another PC afterwards and move them to the offline computer using a USB drive. Once your computer has internet access again, you can download all your other drivers whenever you want.
To check for any drivers your PC may require, visit its manufacturer’s website, look for a download page, and download the drivers for the version of Windows you plan to install. Place them on a USB drive or another external storage device. If you built your own PC, you’ll need to check the manufacturer’s website for each individual hardware component.
Deauthorize iTunes
RELATED: What You Need to Know About Deauthorizing iTunes
If you’ve purchased content from iTunes, you’ll also want to deauthorize iTunes on your PC before continuing.
Because of the outdated way iTunes DRM works, you must deauthorize iTunes on your PC before uninstalling it. You’re only allowed to have five authorized computers at once, and don’t want to waste one of those on a Windows installation that no longer exists. If you don’t deauthorize it now, the only way you can deauthorize it later is through the “Deauthorize All” button, and you can only use that button once per year.
Yes, it’s annoying and not user friendly. We’re thankful that most other programs have moved on from these outdated DRM schemes and at least allow easier management of authorized computers, so you probably don’t have to worry about other programs. For example, if you have Office 365 installed, you can always go into your Microsoft account online and deauthorize individual computers at any time.
Reinstall Windows
If you’ve followed the above steps and feel ready to continue, it’s now time to reinstall Windows. All the programs you have installed and system settings changes you’ve made will be erased. Any personal files on your computer may or may not be erased, depending on which option you choose while reinstalling Windows.
The process is pretty simple. Take the installation media you created earlier and either plug in the USB drive or insert the disc. Reboot your PC and boot from the removable device. Depending on your PC and its settings, this may happen automatically or you may need to either change your boot order or select a boot device.
RELATED: How to Install Windows 10 on Your PC
Once you’ve launched the Windows installer, reinstalling Windows is just a matter of clicking through the installation wizard. We’ve demonstrated the process of installing Windows 10, and Windows 7 is similar. You may need to enter the product key during the installation process.
Remember, if you’re using Windows 10, you can also just try using the Fresh Start feature instead of doing a full reinstall.
Quickly Install Your Favorite Programs with Ninite
RELATED: Ninite Installs All Your Favorite Windows Programs at Once
When you’re done reinstalling Windows, we recommend Ninite for quickly installing programs—all at once, without clicking through different installation wizards, and without any annoying bloatware. It can install many of our favorite utilities, including VLC for watching videos, 7-Zip for extracting archives, and Paint.NET for basic image editing.
You can also use portable apps to get up and running more easily on a new PC. Place a number of portable apps in a cloud storage folder on a service like Dropbox, Google Drive, or OneDrive, or place it on a USB drive. You can then run those programs directly from the folder on any PC without any installation required.
READ NEXT
- › Beginner Geek: How to Reinstall Windows on Your Computer
- › Complete Guide to Breathing New Life Into Your Old PC or Laptop
- › Which Files Should You Back Up On Your Windows PC?
- › CCleaner Was Hacked: What You Need to Know
- › How to Create a Full-Disk Backup of Your PC with Macrium Reflect
- › Why Does Every PC Game Install Its Own Copy of DirectX?
- › How to Screen Record on iPhone
- › This Huge Curved Ultrawide Monitor From LG Is $337 Today
There are some very good reasons why you might want to reinstall Microsoft Windows. Whether it is 2000, XP, or Vista, the registry can become corrupted or it can accumulate settings for programs long-since forgotten, leading to sluggish performance. Or you can find yourself with a stubborn Trojan Horse. The only way to be 100 percent sure that you have rid yourself of some particularly nasty viruses is to reload Windows.
I have wanted to document the steps needed to properly reinstall Windows for a long time now. I always end up missing something after the reload and find myself scrambling to find IDs, passwords, configuration settings, or favorite Web sites lost in the reinstall.
Be sure to set aside a large block of time to do the reinstall. Don’t do it before a term paper is due or your business presentation slide show. A weekend is a good time.
An OS reinstall is also a good time to decide to upgrade. If you want to upgrade to Vista, there are a lot of options available to you. For more information about these options and the pros and cons of Vista, please read Vista Confusion.
This article focuses on Vista but the concepts apply to all versions of Window. This blog post is also available in PDF format in a TechRepublic download.
When you run the Windows Vista set-up program, you will see a window with two options: Update and Custom (Advanced). The Update option is not available when reinstalling Windows Vista. Under the Custom option, you will be doing what is known as a Clean Install. Follow these 10 steps and you will, hopefully, not find yourself having to scramble for files or information that you need after the reinstall.
Please Note: I have gone to great care to test and retest this documentation. It is still possible that there are errors or missing information or that I have not covered your specific reinstallation configuration. Please provide feedback in the forum if you find any issues.
Before reinstallation
1. Document your login IDs, passwords, and settings.
If you are using your browser to store the passwords for Web sites, you will be in for a rude awakening after reinstalling Windows — they will be gone. Your browser is a poor place to keep your Web site IDs and passwords.
One possible option is to store your information in a spreadsheet. However, if you keep your IDs and passwords in a password-protected Excel or OpenOffice Calc spreadsheet, be aware that there are programs that can recover/discover the password for most .xls files. I suggest you use stronger encryption techniques to better protect Excel 2002, 2003, and 2007 spreadsheets.
If you do have Excel 2002 or later, secure your spreadsheet from hackers and then make sure you don’t lose your password! Next, add your IDs and passwords. Create a row in your spreadsheet for your ISP, e-mail, Web hosting company, personal Web sites, and any other password-protected logins. This file is also a good place to keep your e-mail POP3, SMTP, and newsserver name.
If you don’t have Excel you can keep the IDs and passwords on a piece of paper securely locked away in a safe place or you can choose one of the software alternatives available. RoboForm is a popular way to secure your browser login user name and password but is not freeware. GuardID Systems offers a product called ID Vault that is supposed to be a secure way to store your IDs and passwords — for a small price. Do not keep your IDs and passwords in a Notepad or Word document unsecured and “in the clear,” readable by anyone with access to your computer or to a hacker.
2. Export your e-mail and address book, bookmarks/favorites, and cookies.
You can export your e-mail and contacts from Outlook Express, Outlook, MS Mail, and most third-party e-mail programs. I have a folder called Mail Exports under my Archive folder where I export my e-mail. You can export from the various mailboxes. Select the Inbox, Outbox, Sent Items, and Drafts. Unless you have a special reason otherwise, you can exclude the Deleted and Junk mail boxes.
I don’t bother exporting my contacts. If I need a contact, I pull it up from an archived e-mail. You might want to export your contacts though, especially if you have a large number.
I used to always forget about bookmarks for my favorite Web sites. I had to spend time searching for a favorite site after Windows was reinstalled. I made a promise that I would export my IE Favorites and Firefox Bookmarks the next time I did a Windows reinstall. You can also export feeds and cookies.
3. Download the latest applications and drivers.
There is a core set of applications that you know you will be using. One good way to identify these core apps is to take a look at your desktop and Start menu. You can save an image of your desktop to a non-system folder and use that as a guide to reinstalling your core apps. You can also look at your installed programs in Programs and Features located in the Control Panel.
I have a logical drive named Documents and on that drive a folder called Downloads. I keep all my apps and drivers downloaded from the Internet there. These add up in a hurry. To keep it organized, I have a lot of subfolders including one for Apps and one for Drivers.
Once you have a list of your core apps, download the latest versions from the Internet and save them to your DownloadsApps folder or a non-system folder of your choice.
Some of your core apps may be on DVD, CD, or even floppy. Pull out your media and set it in a stack ready for reinstallation later.
Download the latest version of your favorite anti-virus software. I like Alwil Software’s Avast! The free home version includes real-time protection for e-mail, instant message, Web browser, Outlook Exchange, and four other types of real-time protection. If you can, download a file containing the latest virus definitions.
How do you know what drivers you will need? There are two basic types of drivers. I separate them here because updating them is usually handled differently:
Motherboard Specific Drivers – Auto Update
- System and Chipset (usually Intel)
- Onboard Sound
- Onboard Video (some motherboards)
- Onboard LAN
Many motherboard manufactures and computer vendors have an application that will check all the motherboard-related drivers to see if they are current. If your manufacturer or vendor provides this type of application, go to their Web site and download the latest version now.
If you don’t have access to an update utility, you have to manually identify the motherboard-related drivers that you will need:
Other drivers – Manual Update
- Sound Card (if your computer has a sound card)
- Video Card (if your computer has a video card)
- Modem
- RAID (Intel Matrix RAID, JMicron RAID, or other if you have a RAID-controller card)
- Other Unique Devices
If you do not already know the type of video card, sound card, modem, RAID, or other unique devices in your system, you can identify them by opening the Device Manager (Figure A).
Figure A

The expanded items in the Device Manager show the devices installed on my computer requiring a manual driver download and install.
If you aren’t running RAID, you should not need to identify any Storage controllers. If you are running RAID, you will need to have the driver file available on a floppy disk or CD if installing XP or previous versions of Windows. You also need to know the exact driver/controller name — Intel 82801 GR/GH SATA RAID for my system. Unlike previous versions of Windows, Vista recognizes your hard drives during setup and you can get your RAID drivers from there.
I don’t have a sound card in my system, but if you do, expand the Sound, video and game controllers item to determine the sound card installed in your computer.
Mike Smith has put together a handy Windows Reinstall Checklist (PDF) that you might want to print and use.
After identifying the drivers you need to install, download them and save them to a non-system logical drive. Do not pull them from old floppies or CDs unless you are sure that new drivers are not available.
4. Housecleaning and backing up your data.
Now is the time to clean up your hard drive by deleting unneeded or unwanted files. Cleaning up years of accumulated files that you no longer need or want is no fun. If you want to make it less of a chore, you can start a week or more in advance of the reinstall. Spend one or two hours each day deleting the files you are sure that you want to send to the great bit-bucket in the sky.
This is also an excellent time to do a thorough anti-virus scan of all your drives. You don’t want to back up infected files.
Then do a full backup, which is easy for me to say, right? You can spend hours doing a full backup, but this is a good investment of your time. Back up anything that you don’t want to lose. It is especially important if you are one of the unfortunate ones without a Windows OEM disc or a vendor reinstall disc. Many computer vendors put the Windows setup and installation files on a separate partition or folder on the hard drive. If you have a vendor built computer, Windows Reinstall – OEM Computers is a must-read.
If you will be reinstalling Vista on a different partition, you will need almost 15GB of free space minimum on a logical drive/partition to load Vista. I like to create a partition of 30-40GB for the 32-bit version of Vista and 40-50GB for the 64 bit version. Do a full format of the logical drive/partition that will be your new system partition so that you will have a clean Vista-ready partition.
Warning! If you will be dual booting using XP and Vista, do not use XP to create the partition that you will install Vista on. For a very helpful guide to issues dual booting XP and Vista please read Dual Booting Windows Vista & Windows XP by Bert Kinney.
5. Service packs
As of October 2008, the latest service packs are SP3 for XP and SP1 for Vista. There are five ways to retrieve and install the latest service packs. Some of these methods reduce or eliminate your risk to security vulnerabilities. Some are alternative methods you can use if you are having problems installing the service pack from Windows Update. If you are not concerned about either of these two issues, you can skip this section entirely and move on to item 6.
There are five ways to get the latest Windows service pack:
- Download it via Windows Update
- Download it from the Microsoft Web site
- Order it on CD/DVD disc
- Order the latest copy of Windows that includes the latest service pack (should be noted in the product description)
- Install Windows Server Update Services (WSUS) or the System Center Configuration Manager (SCCM) if available and if the computer is networked on a local Intranet
The update is much smaller when done through the Update utility found in the Control Panel. I planned to recommend that it is best to download the latest service pack and install it manually. Doing this would install important security updates in the service pack before connecting to the Internet. After a request for information from Microsoft I received the following response as to why that is not recommended:
“Microsoft strongly recommends using Windows Update to download and install Windows Vista SP1 on single PCs.
If a customer prefers to install Windows Vista SP1 from a DVD and has Internet access, they should first visit Windows Update and install all recommended and optional drivers and updates (the SP1 DVDs will have this advice on their packaging).
Customers should know that the install program on the DVD does not include the same logic that Windows Update uses to check for device drivers prior to SP1 installation. To make this change, the installer would need to be substantially modified, which would take a significant amount of time. Additionally, one of the benefits of Windows Update is that it can dynamically add or remove filtered devices over time, as is necessary. If the DVD were to ship with the set of filters included, they could not be added or modified as the driver landscape changed over time.
We also want customers to know that if they have any problems during or after installing SP1, they can call Microsoft Customer Support Services (CSS) free of charge with questions or for help.”
Note the emphasis added. Both options require connecting to the Internet before installing SP1.
I spoke with a Microsoft technician specializing in Windows Update. He informed me that there are two primary reasons why you might want to manually install SP1. I added reason three as my reason for a manual install.
- You cannot download SP1 from Windows Update or it will not install properly.
- During high demand times SP1 may not be available to some users for up to a week or possibly longer due to a limitation placed on the number of downloads.
- You want the security updates included in SP1 installed before connecting to the Internet.
The technical representative understood why I might want to install SP1 so that my system would be more secure before connecting to the Internet. He said it was possible to do this. However, SP1 does not include all the security patches since its release, even if you download it today. You will still have to start Windows Update to get these security updates.
In case you were wondering, SP1 installs 23 important security updates and 551 hot fixes, and some of those security updates are cumulative. If you want a closer look at the details, you can review Hotfixes and Security Updates Included in Windows Vista Service Pack 1.
The service packs for Vista are large — 434.5 MB for the 32-bit version and 726.5 MB for the 64-bit version. If you are still using dial-up you might be able to download the 32-bit version, but it would be easier to have a friend with broadband download the 64-bit version for you. Read the knowledge base article KB936330 carefully before installing the service pack.
I downloaded the Vista 64 bit SP1, and it took approximately 42 hours over four days. Oh the sacrifices I make for you, my patient reader! Use a download manager if you want to download the Vista service pack. I don’t recommend you do this over dial-up. At $3.50, just order the SP1 CD or DVD.
During reinstallation
6. Load Windows.
Tip: When installing Vista in Windows, the installer takes over the entire screen. But you can still have access to Windows and features like Disk Manager by clicking on the [Windows] key. I have not had problems doing this when stuck and needed information or wanted to delete files on the target partition or format the target partition, but it might be dangerous to do while the installer is busy.
Don’t forget to have your product key handy. If you have a RAID setup you will need to load the RAID drivers (be sure to get the right driver — 32 bit or 64 bit) and know the RAID controller name. For more information about installing Windows on a RAID system see Want Speed and Data Safety? Consider RAID. Rarely, you may have to have drivers for a device where Windows will be installed. As an example, some older motherboards require that you load SATA drivers in order to recognize SATA drives.
Perhaps the best way to reinstall Windows is the simple and straightforward “insert Windows disc into optical drive, format target partition and install to target partition” method. You should, if you can, start with a nice clean partition to install Windows on.
You can reinstall Vista from within your current Vista installation in addition to the traditional CD/DVD bootup install. If reinstalling from within Windows, connect to the Internet so the installer can check online for the latest installer updates.
You can replace your existing installation, even from within the existing installation, or you can load Windows onto a different partition that you prepared in item four. If you do reinstall Windows in a different partition, the original installation must be removed per the EULA. You cannot format the target partition if it is the same as the one with the current Windows installation.
Starting with Vista, the system boot files and boot manager are located in a folder called Boot. Gone is boot.ini, and replacing it is something called a Boot Configuration Data store(BCD). If you are running a dual-boot system the Boot folder may not be located on logical drive C:. The boot files are system files and will be hidden unless you have unchecked Hide protected operating system files when configuring Explorer. If you want to load Windows onto a different logical drive, be careful that you do not delete the Boot folder when removing the original Windows installation. You also do not want to format the logical drive where the Boot folder is located.
Tip: Microsoft includes a comprehensive help file called Installing Windows. It is a good idea to read this before reinstalling Windows.
After reinstallation
7. Reconfigure personal settings.
I have a routine that I follow — one that I developed over the years. Personal settings are, well personal. I have a list of my personal settings that I like to make immediately upon Windows startup. I offer these changes as suggestions and not recommendations.
Read How to Personalize Windows Vista for a step-by-step how-to guide or click on the specific topic below:
- Gadgets
- Display resolution
- Desktop background
- Power settings
- Explorer settings
- Cookies handling
- Defrag schedule
- Indexing options
- Desktop shortcuts
For those of you who are Vista experts, you might notice that there is something conspicuously missing from my list. I do not recommend changing the default settings that leave User Account Control (UAC) turned on, but this is how to turn it off if you must.
If the Windows personalization aren’t enough for you, there is a freeware version of TweakVI for Vista. You can easily spend the better part of a day going through all the tweaks available, and some of them are even useful. If you have kids and they have a computer, there are some tweaks that are useful for hiding administrative tools that you don’t want them to access. Lo and behold, you can even get your Vista product key plus lots of other detailed information about your system.
You no doubt have a list of your own, many of which have long-since been forgotten that you suddenly remember after reloading Windows. You might want to keep a list of these personalized setting so that you will have it the next time you have to reinstall Windows.
8. Enable previous versions and create a “clean install” restore point.
You will need to enable Previous Versions if you are using this feature in Vista Business, Ultimate, or Enterprise for a specific logical drive or folder. If you aren’t using Previous Versions, you should be, especially if you are a programmer. For information about how to turn this feature on in Vista, see Previous Versions in Vista Business, Ultimate, and Enterprise in the #2 Give examples section.
I always like to immediately create a restore point once Windows is installed and personalized. You can create a restore point in the same Window that Previous Versions is enabled.
Warning! If you are dual booting XP or Server 2003 and Vista or Server 2008, XP / Server 2003 will delete the Vista / Server 2008 restore points. If Previous Versions is enabled, the shadow copies of your files will also be gone. There is no simple solution for this. Be sure that Vista is installed properly before booting into XP in case you need to use a system restore point.
XP users with SP1 or greater and Server 2003 users need not feel left out. They have a similar feature called Shadow Copies.
9. Configure network, install service packs, patches, and security updates.
There are other security updates and patches that may be required. For example, I had a Micron Millenium PC that had an atapi.sys patch that had to be installed immediately after installing Windows.
Install all security updates, patches, and fixes before connecting to the Internet.
How you install SP1, your modem drivers, anti-virus, malware, firewall etc. (items 9.a – 9.e below) depends on which method you choose. Please use the instructions column of Table A to get the right order for the method you have chosen. If you skipped item 5, use the instructions for method one.
Table A — The Five Vista SP1 Installation Methods
|
Method |
Instructions |
Notes |
|
Method One Windows Update |
9.a Install anti-virus, anti-virus definitions, malware
9.b Install modem drivers and set up network connection 9.c Run Windows Update 9.e Create Restore Point |
The Windows Update installer will have to download files to update itself, and then it will have to restart. |
|
Method Two Firewall Application Blocking Windows Update |
9.a Install anti-virus, anti-virus definitions, malware, and firewall9.b Install modem drivers and set up network connection9.c Run Windows Update
9.e Create Restore Point |
Comodo Firewall ProThe Windows Update installer will have to download files to update itself, and then it will have to restart. |
|
Method Three Windows Update Manual Install |
9.a Install anti-virus, anti-virus definitions, malware9.b Install modem drivers and set up network connection9.c Run Windows Update
9.d Install SP1 manually 9.e Create Restore Point |
The Windows Update installer will have to download files to update itself, and then it will have to restart. |
|
Method Four Manual Install Windows Update |
9.d Install SP1 manually9.e Create Restore Point9.a Install anti-virus, anti-virus definitions, malware
9.b Install modem drivers and set up network connection 9.c Run Windows Update |
|
|
Method Five (Stand-alone) Manual Install |
9.d Install SP1 manually9.e Create Restore Point |
9.a Install anti-virus, malware, and firewall (optional)
Install your anti-virus, spyware, and adware. Restart the computer if prompted before connecting to the Internet. Don’t forget to configure the anti-virus app to set the scan sensitivity. Set it to High or maximum for a thorough scan and set the real-time protection to High. If you have a file containing virus definitions, load these now.
If you have a third-party firewall you want to use instead of Windows Firewall, install it now.
9.b Setup and configure network connection.
Install your modem/network drivers. Create and configure your network connection(s).
9.c Run Window Update to scan for new drivers and updates.
Next, connect to the Internet and use Windows Update to scan for drivers and updates. Use Windows Server Update Services or the System Center Configuration Manager (SCCM) if available and if the computer is networked on a local Intranet. The discussion below is centered on those using Windows Update.
It had been so long since I started Windows Update manually that I had completely forgotten about its strange behavior. The Windows Update Window will show that it is looking for updates, and then it will close. It took me awhile to remember that although it appears that Windows Update has died a look at the notification icons on the taskbar shows that Windows Update is busy downloading updates (Figure B).
Figure B

Task Manager shows Windows Update process wuaudt.exe running.
When I ran Windows Update after installing SP1, there were 28 important updates (Figure C) and thirteen of those were security updates (Figure D). I asked if there was a way to get the security updates created after SP1 in a downloadable cumulative security update file and was told that they are available only via Windows Update.
Figure C

Windows Update Window shows 28 important updates, totaling 159.4 MB after manually installing Vista SP1.
Figure D

Clicking View Available Updates reveals the 28 important updates since the release of SP1 — already marked for update.
9.d Install SP1 manually (optional).
Install the service pack from either a disc or a file. A manual install of Vista SP1 (Figure E) requires about 7GB of free space for the 32-bit version and 13GB for the 64-bit version.
Figure E

These updates are installed after manually installing Vista SP1.
9.e Create a new Restore Point.
After SP1 is successfully loaded, I immediately create another restore point manually and call it Clean Install with SP1 or a similar identifiable name. I do this before installing any drivers and apps. I know I will be installing a lot of drivers and apps and some of those, like video card drivers and apps, may be problematic. If I begin to have problems after loading numerous apps and drivers, it is nice to be able to go back to the Clean Install with SP1 point and restart loading the apps and drivers.
Please read Remove All Remnants of the Windows Vista SP1 Installation by Greg Shultz for instructions about how you can recover disk space gobbled up by the SP1 installer.
10. Reload your drivers and apps.
One thing is almost certain now that Windows has been reinstalled — some of the generic drivers that Windows has installed are not optimal. If you are lucky enough to have an auto-update utility from your motherboard manufacturer, install the latest version that you downloaded earlier, connect to the Internet, and fire up the update app.
Do NOT update the BIOS. This option may be available in your motherboard update app and it may be called a BIOS update, but it is more commonly known as a BIOS flash. A BIOS flash is not a driver update. You also want to avoid any option labeled Update All.
Next, pull out your list of drivers requiring manual installation and install them now.
I keep my apps on a separate logical drive labeled Vista x64 Apps. It is a good idea to now go to the logical drive/folder where you keep your app files and wipe it clean. This is the fastest way to clean out the deadwood files that you will never use again. If you have all your apps on one logical drive and nothing else is stored there, it is best to format the logical drive before reloading your apps. Some programs like your newsreader usually store information like group messages on this logical drive. Export this information to your Archive folder if you don’t want to lose it before formatting the logical drive.
If you are running Intel’s Matrix RAID, install the Intel Matrix Storage Manager.
It is finally time to reload all your applications. Take a peek at the desktop JPEG you created earlier or use a list of your core apps to determine what apps you want to install. Install to a fully formatted non-system logical drive.
There are two basic strategies when reloading your apps. You can reload the apps you use the most and load additional apps when needed or load a full list of apps up front. I prefer to load the core apps and load additional apps only when needed.
Take it from experience — it is not a good idea to load a lot of apps requiring a system restart and postpone the restart. Install a few at a time, restart the computer, and see if all is still well. If you do find a problem, you can return to the last known good restore point or uninstall the offending app. If you find no problems, consider manually creating a new restore point.
Don’t forget to reload your e-mail messages, e-mail contacts, browser favorites, and other data that you exported earlier back into your newly reloaded apps.
The final word
Even a casual glance at this list reveals that loading Windows is the easy part of your reinstall project. The prep work and configuration will occupy most of your time; plan the actual date and time of the install accordingly.
There is one more final bit of housekeeping to do. If you reinstalled Windows in a folder with an existing installation of Windows, you should decide what to do with the Windows.old folder. You will not find this folder if there was insufficient space on your system partition during the Windows setup.
If you are reinstalling Vista, the Windows.old folder will be too large for a single-layer DVD but may fit on a dual-layer DVD. You can archive it to a backup drive, or if you have followed the steps carefully in this article and are satisfied that you have all your Windows-specific data, simply zap it into oblivion.
Congratulations! By completing the 10 steps outlined here, you have prepared your computer for years of maintenance-free service. You have also protected yourself from data loss due to a hard drive failure.
Author’s Note:
I would like to thank:
- Microsoft for their technical help with my Vista SP1 questions.
- Michael at Comodo for his advice and “sanity check” of my firewall rules.
TechRepublic’s Windows Vista Report newsletter, delivered every Friday, offers tips, news, and scuttlebutt on Vista development, as well as a look at new features in the latest version of the Windows OS. Automatically sign up today!
![]()
Download Article
Easily refresh your computer by reinstalling Windows
![]()
Download Article
This wikiHow teaches you how to reinstall Windows 10 from the Settings menu, from a recovery drive, or by using installation media.
-

1
Click the Start
menu. It’s usually at the bottom-left corner of the screen.
- If you’re using a laptop, make sure you plug it into a power source before starting the installation.
- If you’re unable to access the Windows desktop and you created a recovery drive, see this method.
- If you can’t access the Windows desktop and haven’t created a recovery drive, see this method.
-
2
Click Settings
. It’s at the bottom-left corner of the Start menu.
Advertisement
-
3
Click Update & security. It’s the icon of two curved arrows.
-
4
Click Recovery. It’s in the left panel.
-
5
Click Get started under “Reset this PC.” It’s near the top of the right panel. A pop-up will appear.[1]
-
6
Choose what to do with your files.
- Click Keep my files to avoid losing personal data. Though any apps you’ve installed since you got your computer will be removed, your personal files (such as images and documents) will remain intact.
- Click Remove everything to erase all data on the computer, including your personal files, before reinstalling Windows.
-
7
Follow the on-screen instructions and click Reset when prompted. The options vary depending on your setup, but you’ll always be notified of which types of files will be removed and which will remain. Once you click Reset, the PC will reboot and begin to reinstall Windows.
- If you chose to remove everything, you’ll be asked if you want to clean the hard drive in addition to deleting your files (a good idea if you’re giving the computer to someone else), select Remove files and clean the drive if so.[2]
- If you chose to remove everything, you’ll be asked if you want to clean the hard drive in addition to deleting your files (a good idea if you’re giving the computer to someone else), select Remove files and clean the drive if so.[2]


Advertisement
-
1
Connect your USB recovery drive to the PC. If you created a recovery drive when the PC was working properly, you can use it to reinstall Windows.
- Use this method if you were unable to reinstall Windows 10 from the desktop or if your computer will not boot into Windows.
- If you don’t have a recovery drive, you can use a Windows 10 installation disc or drive.
- If you’re using a laptop, make sure you plug it into a power source before starting the installation.
-
2
Turn on the computer. If the computer was already on, reboot it now that the USB drive is attached. The PC will then boot from the recovery drive to the “Choose an option” screen.[3]
- If you don’t see the “Choose an option” screen, you may need to edit the PC’s BIOS settings so that the PC knows to boot from the USB drive. See Set Your Computer to Boot from USB Flash Drive#Boot from the Flash Drive to learn how.
-
3
Click Troubleshoot. A list of options will appear.
-
4
Click Recover from a drive. This will wipe all data off the PC and install a fresh version of Windows 10.
-
5
Follow the on-screen instructions to complete the installation. Once Windows is reinstalled, you’ll be prompted to set the computer up as if it were new.


Advertisement
-
1
Go to the Microsoft software download site on a working computer. If you’re unable to boot your computer and don’t have a recovery drive, you can download installation media from Microsoft and create your own installation disc or flash drive.[4]
- You’ll need either a blank USB flash drive with at least 8 GB of storage OR a blank DVD (Dual Layer preferred) and DVD burner drive.
- If you’re using a laptop, make sure you plug it into a power source before starting the installation.
-
2
Click Download tool now. It’s the blue button near the center of the page. A file manager window will appear.
-
3
Click Save to download the tool. It may take several minutes for the download to complete.
-
4
Double-click the downloaded tool. It’s called “MediaCreationTool1809.exe” (the number at the end may vary). It should be in the Downloads folder.
- You may have to click Yes or Allow to run the tool.
-
5
Review the agreement and click Accept. After a few seconds, you’ll be asked what you want to do.
-
6
Select Create installation media and click Next. Windows 10 will now download to the computer.
-
7
Click Accept when prompted. This downloads additional updates for the installation media.
-
8
Follow the on-screen instructions to create installation media. You’ll be prompted to select the type of media you’re creating (USB flash drive or DVD), and then walked through the media creation process. Once the media is created, remove the drive or DVD from the working computer.
-
9
Connect the installation media to the PC on which you want to reinstall Windows. Connect the USB flash drive or insert the DVD, depending on the type of media you created.
-
10
Turn on the computer. If the computer was already on, reboot it now that the USB drive is attached (or DVD is inserted). The PC will boot from the inserted media and start the install process.
-
11
-
12
Click Install now. You’ll be prompted to enter the Windows product key, which you’ll usually find on a sticker that’s attached to your PC.
- If you upgraded to Windows 10 from an earlier version for free or purchased Windows from the Microsoft Store, click Skip. Windows will activate itself automatically once installed.[5]
- If you upgraded to Windows 10 from an earlier version for free or purchased Windows from the Microsoft Store, click Skip. Windows will activate itself automatically once installed.[5]
-
13
Accept the terms and click Next. The remaining steps will walk you through the installation process.
-
14
Follow the on-screen instructions to reinstall Windows. You’ll be asked if you want to format the hard drive in addition to reinstalling—this is up to you, but it’s typically only necessary if you’re going to be giving the computer to someone else. Once Windows is reinstalled, you’ll be prompted to set the computer up as if it were new.


Advertisement
Add New Question
-
Question
Does installing Windows in one partition erase data from the other partition (i.e., the whole hard drive), or only on that partition where it is being installed?

It depends on the settings that you choose. In the most cases, only the partition where it is being installed will be erased.
-
Question
UEFI boot: how does that actually work?
The UEFI is a more modern form of BIOS that uses the TPM to validate the master boot record before it boots. Basically, it protects your computer against bootkits by ensuring that only the authentic boot is loaded.
-
Question
How to reinstall the USB port?
Markpenguin8232
Community Answer
You cannot simply «reinstall» a USB port, unless you are talking about hardware,which I assume you are not. What I’m going to assume yo meant is «how to erase the USB after flashing the ISO to it». In which case, hit Windows+R, type «diskmgmt.msc», press Enter, select the disk which says «Removable» under it, and press the Del key on every partition on the disk that isn’t allocated. The USB should only have unallocated space, now right-click on the unallocated space, and click «New Simple Volume». Keep clicking «Next» until you see «Finish». You may want to change the settings, in which case stop at a menu and change the settings. Changing the volume label is on the last screen.


Ask a Question
200 characters left
Include your email address to get a message when this question is answered.
Submit
Advertisement
Thanks for submitting a tip for review!
References
About This Article
Article SummaryX
To reinstall Windows 10 from your settings, click the Start menu, which is usually located at the bottom-left corner of the screen. From there, click the Setting button or the gear icon, which should be at the bottom-left corner of the Start menu. Select “Update and Security,” which has an icon that looks like 2 curved arrows. When you’re ready to update, click “Recovery,” then “Get Started” under “Reset this PC.” Follow the on-screen prompts, then click “Reset.” If you’re using a laptop, remember to plug it in before you get started! Keep reading to learn how to reinstall Windows from a recovery drive.
Did this summary help you?
Thanks to all authors for creating a page that has been read 121,642 times.
Is this article up to date?
Some users welcome reloading Windows 10 but may be tempered by things to backup before reinstalling Windows. This guide walks you through a backup checklist and how to do it with free backup software.
💻What You Get: See a detailed checklist and free backup software.
⚙️Time You Consume 3-4 Mins.
💰Cost(?): Completely Free.
Page Content:
What to Backup Before Reinstalling Windows?
How Do I Backup My Computer Before Reinstalling Windows?
Restore from Backup After Reinstalling Windows
Before reinstalling Windows, it’s essential to figure out why you want to do it. Are you having performance issues? Are you trying to get rid of a virus? Or are you simply looking for a fresh start? Once you know your reasons, you can reinstall with confidence. But wait for a while. That said, there are a few potential drawbacks to reinstalling Windows.
If you don’t back up your files first, you could lose important data. And if you don’t know what software you’re using, the process can be time-consuming and frustrating. We recommend taking the time to prepare and do your research. Reinstalling Windows can be a great way to fix problems and breathe new life into your PC.
Preparation: You Must Have!
1. Download a new performance-based software — EaseUS Todo Backup Free.
EaseUS Todo Backup Free is a free backup and restore solution for all data. It offers a simple and convenient way to backup and restore all data with just a few clicks, supporting full, incremental, and differential backups. This software runs on Windows 10/11, but the functions apply to all versions of Windows.
2. Scan your drive with anti-virus software. Surely we don’t want to back up some virus-infected files that harm your new OS again.
It seems that almost every time I re-install windows on my PC, I end up forgetting to back up something……it never ceases to amaze me how often I forget to backup something (sometimes important, sometimes trivial) — superuser.com
Well, it’s a question that comes from a long time ago but is keep bothering other people. Follow to see things to do before resetting windows 10.
1. Backup personal data — IDs, login passwords, settings, accounting data file (like Quickbook), Paper.
When reinstalling Windows, it is essential to back up personal data such as IDs, login passwords, settings, and accounting data files. This will ensure that all of the necessary information is preserved and can be easily restored after the reinstallation is complete. Backing up this data beforehand will save time and frustration in the long run.
2. Back up all files (from Microsoft Office or other file processors), Email, video, and audio.
You will need to back up all of your files whenever you reinstall Windows. This includes any files you have created using Microsoft Office or other file processors, as well as any Email, video, or audio files you have. Without backing up your files, you risk losing them forever.
3. Backup bookmarks/favorites (Chrome, Firefox, Edge, etc.)
Holding the password of each account on the browser is not a once for all approach.
If anything goes wrong with the upgrade, you’ll still have access to all your favorite websites.
4. Back up applications and drivers.
The main reason to back up the latest applications and drivers is to prevent data loss in the event of a system crash or other unforeseen problem. It is always a good idea to have a backup in case you need to roll back to a previous version of an application or driver.
5. Back up the database for the Server computer.
Backing up your database ensures that you have a copy of all your data in case something goes wrong during reinstallation.
Video Guide — The Definitive Checklist to Reinstalling Windows 10
- 00:00:39 — Backup your files
- 00:02:14 — Sync and save your settings
- 00:03:20 — Save a list of your applications and product keys
- 00:05:32 — Extract settings from your apps
- 00:06:30 — unlink apps / remove PC associations
- 00:07:21 — Keep drivers / installation files ready
- 00:08:58 — Write down drive letters and Windows product key
How Do I Backup My Computer Before Reinstalling Windows?
Steps to back up all critical files to an external hard drive:
Step 1. To begin the backup process, click the Select backup contents button.

Step 2. Four data backup categories are listed: File, Disk, OS, and Mail.

Step 3. Lists of both local and network files are shown on the left-hand side of the screen. Expanding the directory so that you can choose the files to back up.

Step 4. Follow the guidance on the screen and choose the place where you want to store the back up.

Make sure that the backup is encrypted and set the backup schedule by clicking Options in Backup Options. You can also choose to start the backup at a certain time in Backup Scheme by clicking Options. There are many other customizable options that you can look into.

Step 5. You can store the backup file either on your computer, in EaseUS’s cloud service, or on a network-attached storage device (NAS).

Step 6. EaseUS Todo Backup enables customers store backup copies of their files on a third-party cloud drive or on the company’s own cloud storage.
If you want to back up your data on a third-party cloud drive, select Local Drive and scroll down to add Cloud Device. Then fill in your account information.

Click EaseUS Cloud, then sign up and log in with your EaseUS account if you wish to store backup files to EaseUS’ own cloud storage service.

Step 7. Click on Backup Now to start a backup. When the backup process is done, it will display as a card on the left-hand side of the screen. A right-click will let you see more about how to handle the backup job in more depth.

After using the best free backup software for windows 10, you can continue to install windows 10 without losing data. Then go to the next part for restoring data files as the same.
Restore from Backup After Reinstalling Windows
Step 1. Launch EaseUS Todo Backup, click «Browse to Recover«.

Step 2. Guide to your backup destination, choose the backup file you want to recover. (The backup file created by EaseUS Todo Backup is a pbd file.)
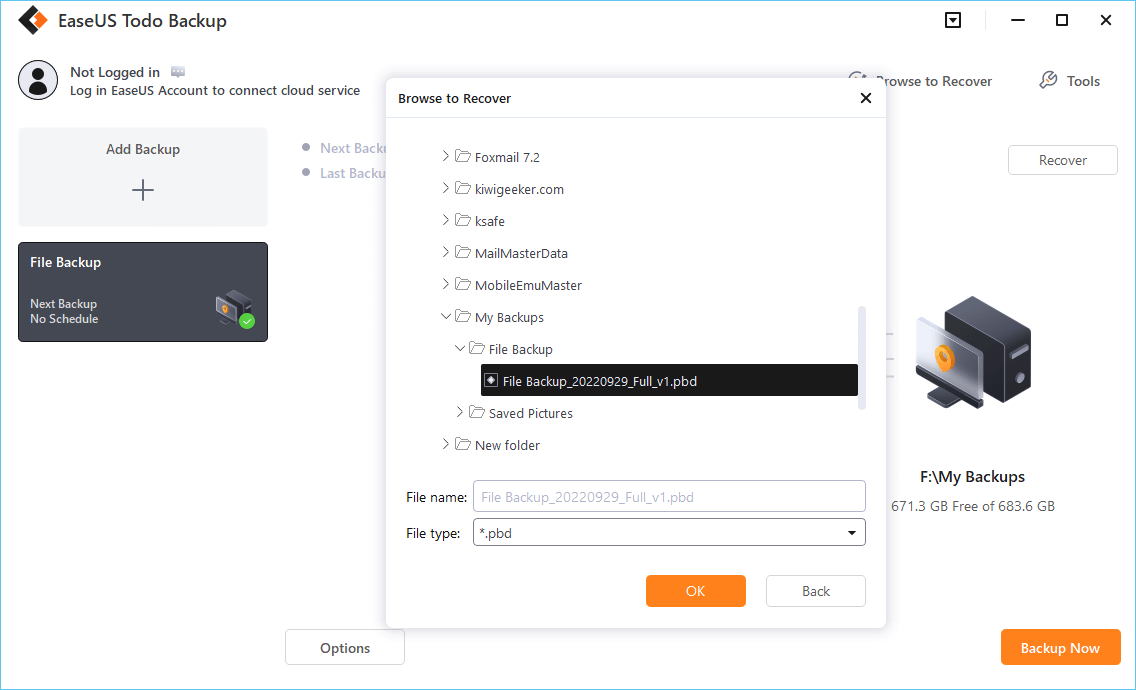
Step 3. Choose the recovery location. You can recover data to a specific location or to original location.

Step 4. Click «Proceed» and the recovery would start.
Backup Before Reinstalling Windows FAQs
1. Do I need to backup my files before reinstalling Windows 10?
You need to backup to prevent reinstalling crashes during a clean install.
2. What folders to backup when reinstalling Windows? -Reddit
- «Documents» folder
It contains all your files, such as photos, music, and documents. Backing up this folder will ensure you do not lose any critical data.
- «AppData» folder
It contains a lot of information about your installed programs and settings.
- «Desktop» folder
It contains shortcuts to your most-used programs and files.
3. Do I really need to back up everything when installing Windows 10 — quora.com
If you keep your files, you will not need to back up everything as Windows 10 will automatically save them. However, if you choose to do a clean install, you must back up any personal files you want to keep before proceeding.
4. How to reinstall Windows 10 without losing any games or app? — quora.com
You can create a backup of all your important files, including any game saves you don’t want to lose. Then, uninstall any apps you want to keep using after the reinstall. Reinstall OS and restore apps.
5. Would backing up my files and then performing a clean install prevent Windows 10 from breaking down? — quora.com
While this may prevent Windows 10 from breaking down in the short term, it is not a long-term solution. Over time, as more files are added, and more software is installed, the chances of Windows 10 breaking down again increase.
Before reinstallation
- Document your login IDs, passwords, and settings. …
- Export your e-mail and address book, bookmarks/favorites, and cookies. …
- Download the latest applications and drivers. …
- Housecleaning and backing up your data. …
- Service packs. …
- Load Windows. …
- Reconfigure personal settings.
Is it worth doing a clean install of Windows 10?
You should do a clean install of Windows 10 rather than an upgrade keeping files and apps to avoid issues during a big feature update. … They roll out as updates, but they require full reinstallation of the operating system to apply new changes.
What are the best things to do with a clean Windows 10 installation?
8 Important Things to Do After Installing Windows 10
- Run Windows Update and Configure Update Settings. …
- Make Sure Windows Is Activated. …
- Update Your Hardware Drivers. …
- Install Essential Windows Software. …
- Change Default Windows Settings. …
- Set Up a Backup Plan. …
- Configure Microsoft Defender. …
- Personalize Windows 10.
Will a clean install of Windows 10 delete my files?
A fresh, clean Windows 10 install will not delete user data files, but all applications need to be reinstalled on the computer after the OS upgrade. The old Windows installation will be moved into the “Windows. old” folder, and a new “Windows” folder will be created.
How do I clean my computer Windows 10?
Disk cleanup in Windows 10
- In the search box on the taskbar, type disk cleanup, and select Disk Cleanup from the list of results.
- Select the drive you want to clean up, and then select OK.
- Under Files to delete, select the file types to get rid of. To get a description of the file type, select it.
- Select OK.
Which is better Windows 10 upgrade or clean install?
The clean install method gives you more control over the upgrade process. You can make adjustments to drives and partitions when upgrading with installation media. Users can also manually back up and restore the folders and files that they need to migrate to Windows 10 instead of migrating everything.
How long does a clean install of Windows 10 take?
Depending on your hardware, it can usually take around 20-30 minutes to perform a clean install without any issues and be on the desktop. The method in the tutorial below is what I use to clean install Windows 10 with UEFI.
When to do a clean install of Windows?
If your Windows system has slowed down and isn’t speeding up no matter how many programs you uninstall, you should consider reinstalling Windows. Reinstalling Windows may often be a faster way to get rid of malware and fix other system issues than actually troubleshooting and repairing the specific problem.
What programs should I install on Windows 10?
In no particular order, let’s step through 15 essential apps for Windows 10 that everyone should install right away, along with some alternatives.
- Internet Browser: Google Chrome. …
- Cloud Storage: Google Drive. …
- Music Streaming: Spotify.
- Office Suite: LibreOffice.
- Image Editor: Paint.NET. …
- Security: Malwarebytes Anti-Malware.
Does Windows 10 install drivers automatically?
Windows 10 automatically downloads and installs drivers for your devices when you first connect them. Even though Microsoft has a vast amount of drivers in their catalog, they are not always the latest version, and many drivers for specific devices are not found. … If necessary, you can also install the drivers yourself.
Do I need to reinstall drivers after Windows 10?
A clean install erases the hard disk, which means, yes, you would need to reinstall all your hardware drivers.
Does installing Windows 11 delete everything?
Re: Will my data be erased if I install windows 11 from insider program. Installing Windows 11 Insider build is just like update and it will keep your data.
Answer: Yes, Windows 10 does have a built-in repair tool that helps you troubleshoot typical PC issues.
Will upgrading to Windows 10 lose my files?
Programs and files will be removed: If you are running XP or Vista, then upgrading your computer to Windows 10 will remove all of your programs, settings and files. … Then, after the upgrade is done, you will be able to restore your programs and files on Windows 10.
Disclosure: We are not providing any kind of paid support. Beware of scammers. This page may contain affiliate links read disclaimer
 There can be many valid reasons for reinstalling Microsoft Windows on your computer. However, if you perform Windows reinstall without proper preparation, then you may end up searching for passwords, IDs, settings and other crucial info or data. Therefore, prior to starting the reinstallation process on your computer, you must know things to do / what to backup before reinstalling Windows 11, 10, 7 PC so that you don’t end up in a mess afterwards.
Before reinstalling Windows, you need to backup the following things:
1. Take backup of your personal files (Mandatory)
Most users have a personal collection of photos, music, videos or documents on their computer. If you have such a collection, then it’s better to take a backup of those files. Also, reinstalling Windows is a good time to clean up unwanted files from your computer. If you have a lot of accumulated files on your computer, then start a few days prior to the reinstallation date and spend one hour daily in deleting useless files.
The following folders need to be backed up:
- C:Users[user name]Desktop
- C:Users[user name]Documents
- C:Users[user name]Pictures
- C:Users[user name]Downloads
2. Browser Bookmarks and Saved Passwords (Mandatory)
If you use an email program like Outlook Express, MS Mail, etc., then you should export all your emails and address book entries to some safe place so that you can recover them afterwards. You can take backup of all the emails in the Inbox, Sent Items, Outbox and Drafts, unless you think it’s not required.
Take a backup of the bookmarks on your web browsers by using the export bookmark feature of your browsers. You can easily export bookmarks and then import them to your favorite browsers after reinstalling Windows. If you are using special settings and add-ons on your web browser, then make a list of these details as well.
Make sure all your browsers are linked to an account those are syncing properly, so that when you login with the same account on newly installed windows then you’ll all the saved passwords and bookmarks and settings too.
3. Take backup of your Licenses / Product Keys (Mandatory)
Make sure that you have backed up all the purchased license keys like
- Windows license key (How to check Windows license key)
- MS office License key
- Antivirus License key.
- Others purchased program license keys.
Save the License key of your installed programs.
4. Make a list of Installed Programs (Mandatory)
If you are reinstalling Windows after a long time, then most probably you would not know how many programs are installed on your computer. Therefore, make a list of all the programs, which are currently installed on your computer, so that you can reinstall them afterwards. Doing this is important, otherwise, some day you will suddenly realize that you don’t have a necessary application installed on your computer.
If you are upgrading your Windows OS, then it’s better to download the latest versions of the currently installed programs. New versions of a program are usually better in compatibility with the higher versions of the Windows OS. Since, you are upgrading your Windows it’s better to upgrade your applications as well.
5. Username and Passwords (Mandatory)
We all visit multiple websites and use several applications that require unique username and password for access or registration. Make a list of all such usernames, passwords, serial numbers, license codes, etc. so that after reinstall you can easily get access to all your favorite websites and applications.
While taking backup you can create an Excel spreadsheet for storing this information. Benefit of using an Excel spreadsheet is that it can be password protected, which is necessary for securing such sensitive information. However, if you want to open Excel file after reinstalling Windows, then you will have to install MS Office before you could open that file. Using WordPad or Notepad can be risky as you cannot secure such files with a password.
If you don’t have Excel installed on your computer, then you can use a piece of paper to note down all the usernames and passwords.
6. Take backup of drivers for hardware (Optional)
There are a core set of drivers that you will have to install on your Windows depending upon the hardware installed on your computer. Such drivers may include sound driver, video driver, motherboard driver, printer driver, etc. Make a list of all such hardware connected to your computer, then collect their drivers in one folder and backup that folder at a safe place. You can backup drivers in a CD, DVD, pen driver, etc.
If you are upgrading your Windows, then make sure that the drivers you are collecting as backup are fully compatible with the new Windows version you will be installing.
7. Service Packs (Optional)
If the Windows you are using has its latest service packs installed, then you must take backup of that service pack before reinstalling Windows. You can get the latest service pack for your Windows by using Windows Update, from Microsoft Website, through CD/DVD, etc.
When deciding what to backup before reinstalling Windows you should keep in mind the objective of the whole exercise. The primary objective is to make sure that the transition from the old Windows to the new Windows installation is smooth and efficient. You will have to spend some extra time in this process, but eventually it will save you from a lot of chaos and trouble.
Содержание
- How to: 10 things to do after installing Windows 10
- Comments (3)
- Things You Need to Do Before and After Installing Windows
- Before Re-installing Windows
- 1. Back Up Files, Application Settings, and Configurations
- 2. Make Sure You Have All the Product Keys
- 3. Download Drivers
- 4. Make a List of All Installed Programs
- 5. Make Sure You Have Up-to-Date Installation Media
- After Re-installing Windows
- 1. Install Device Drivers
- 2. Update Windows
- 3. Download and Install All Your Software
- 4. Configure Windows and Application Settings
- 5. Create a Backup Image for Future Use
- 5 comments
- Popular Posts
- 12 Things You Should Do Before Installing a Windows 10 Feature Update
- Before You Begin: Am I Eligible to Upgrade?
- 1. Check Manufacturer’s Website to Find Out if Your System is Compatible
- 2. Download and Create Backup Reinstall Media for Your Current Version of Windows
- 3. Make Sure Your System Has Enough Disk Space
- 4. Connect to a UPS, Ensure Battery is Charged and PC is Plugged In
- 5. Disable Your Antivirus Utility – In fact, uninstall it…
- 6. Disable All Background Software
- 7. Disable Peripherals and External USB Devices
- 8. Update or Disable Display Adapters
- 9. Disconnect from the Internet When Using an ISO
- 10. Skip “Get Important Updates”
- 11. Switch to a Local User Account
- 12. Run these Commands to Resolve Any System Integrity Issues
- Conclusion
- 78 Comments
How to: 10 things to do after installing Windows 10
Technical Level : Basic
If you just performed an upgrade or new installation of Windows 10, here are some things you should right away.
This article can now be found in its entirety at Groovypost.com
Top Things to Configure After Upgrading to Windows 10
Learn more:
Was this article helpful?
Sorry this didn’t help.
Great! Thanks for your feedback.
How satisfied are you with this article?
Thanks for your feedback, it helps us improve the site.
How satisfied are you with this article?
Thanks for your feedback.
Wow, just got a free install of Win 10 and I have issues and errors I cannot fix. I am not techie, but can follow most directions, unless they instruct you to do actions that are not fully explained or I don’t know how to do.
I did try and get Autologin on my desk top. I downloaded a file, it shows up in my files, but does not work. I keep having to sign in. Other issues exist. I now have NO sound and no recognition of the driver I did have in Win 7. Not sure what to do there. Well, you get the picture. I’d like answers to my Win 10 «fails», in a simpler explanation and fix. It’s frustrating and I wish I had Not changed to 10. I will try to fix, but not finding answers. Oh, another BIG issue is that with some instructions they show a start menu or action that does not look like the box I get when I click Start. sigh.
Was this comment helpful?
Sorry this didn’t help.
Great! Thanks for your feedback.
How satisfied are you with this comment?
Thanks for your feedback, it helps us improve the site.
How satisfied are you with this comment?
Thanks for your feedback.
Was this comment helpful?
Sorry this didn’t help.
Great! Thanks for your feedback.
How satisfied are you with this comment?
Thanks for your feedback, it helps us improve the site.
How satisfied are you with this comment?
Thanks for your feedback.
Wow, just got a free install of Win 10 and I have issues and errors I cannot fix. I am not techie, but can follow most directions, unless they instruct you to do actions that are not fully explained or I don’t know how to do.
I did try and get Autologin on my desk top. I downloaded a file, it shows up in my files, but does not work. I keep having to sign in. Other issues exist. I now have NO sound and no recognition of the driver I did have in Win 7. Not sure what to do there. Well, you get the picture. I’d like answers to my Win 10 «fails», in a simpler explanation and fix. It’s frustrating and I wish I had Not changed to 10. I will try to fix, but not finding answers. Oh, another BIG issue is that with some instructions they show a start menu or action that does not look like the box I get when I click Start. sigh.
Was this comment helpful?
Sorry this didn’t help.
Great! Thanks for your feedback.
How satisfied are you with this comment?
Thanks for your feedback, it helps us improve the site.
Things You Need to Do Before and After Installing Windows

When your computer is not behaving as it should, re-installing Windows is sometimes the only way to go. Just insert the installation media and follow the wizard. That being said, the problem starts after installing Windows. For instance, you cannot connect to the Internet due to driver issues or you forget to install some applications, lose application settings and configurations, etc. If you have a plan beforehand, the reinstallation procedure will be much smoother.
Before Re-installing Windows
Here are some simple things you need to do before reinstalling Windows.
1. Back Up Files, Application Settings, and Configurations
This is the first thing you need to do when considering a re-installation. Skim through your C: drive and back up any personal files like images, videos, and documents. Especially, look in general folders like Desktop, Documents, Pictures, Downloads, etc.
After that you need to back up the settings and other data of your favorite applications. For instance, if you are using the Thunderbird email client, you can back up the profile folder. This helps you restore the Thunderbird application without manually adding all the email accounts again. Each application has its own way to export settings and configurations, so take your time and back up those settings. Since you can easily import those settings and configurations with just a few clicks, it helps you save a ton of time after re-installing Windows.
2. Make Sure You Have All the Product Keys
To activate some premium software like Windows, Office, etc., you need to have product keys. It is a good idea to have those products keys beforehand. This lets you activate the software as soon as you install it. You can use free software tools like ProduKey or Belarc Advisor to quickly find and copy the product keys of different software. One thing to keep in mind is that you might not get the product keys of all your premium software. If you find that the you are missing a product key for premium software, you can try to recover it from your email inbox or simply contact the developer.
3. Download Drivers
Device drivers are a big issue for Windows systems. Though Windows 10 tries to install generic drivers automatically, it is good to have all the required drivers beforehand, especially video and network drivers. Head to your laptop or motherboard manufacturer website and download their latest drivers. The drivers contained in the CD/DVD you get when you buy the laptop or motherboard are usually outdated and may sometimes cause unnecessary problems.
4. Make a List of All Installed Programs
This is one of the most overlooked parts, but it always helps to make a list of all the software installed on your system. Besides the installed software, also note down any portable software you are using.

5. Make Sure You Have Up-to-Date Installation Media
Unlike Windows 7, Microsoft is updating Windows 10 twice every year. So before you proceed to reinstall, make sure you have the up-to-date installation media. If you are unsure, you can download the latest ISO from the official Microsoft website and create a bootable USB drive.
After Re-installing Windows
1. Install Device Drivers
The first thing to do after installing Windows is to install all the drivers you downloaded earlier. This will ensure that all the hardware devices work properly and that you can connect to the Internet.

2. Update Windows
After installing hardware drivers, you need to install Windows updates. More often than not these updates contain bug fixes, security patches, and feature updates. To update a Windows 10 machine, open the Settings app by pressing the keyboard shortcut “Win + I,” navigate to “Update and Security -> Windows Update” and click on the “Check for updates” button.

3. Download and Install All Your Software
Next, download and install all the required software. Use the list you created earlier to make sure that you are installing all your favorite applications. For general purpose software like browsers, media players, image viewers, etc., use Ninite. This free software automates everything and installs common software with just a single click.

4. Configure Windows and Application Settings
After installing all the required software, it is time to configure the Windows settings. When I say Windows settings, I’m talking about common settings like unhiding file extensions, disabling unwanted startup items, setting up Windows Hello, changing default apps, etc.

Restore all the backed-up application settings one by one. Every app has its own way to import the settings and configurations. For instance, to restore Thunderbird all you have to do is copy the profile folder to the “AppData” folder and you are done.
5. Create a Backup Image for Future Use
This step is optional. However, creating a backup image after installing and configuring your system is always the best thing to do. This backup image lets you quickly restore Windows if anything bad happens in the future. Of course, you still have to update Windows and other software after restoring Windows, but that is much better than actually re-installing and going through the whole process.

Do comment below sharing your thoughts and experiences about re-installing Windows.
Vamsi is a tech and WordPress geek who enjoys writing how-to guides and messing with his computer and software in general. When not writing for MTE, he writes for he shares tips, tricks, and lifehacks on his own blog Stugon.
Fantastic guide! Thank you!
Before: Are you going to completely flush your data and format the drives (to get rid of malware)?
Scan your system and all files for viruses and malware. You don’t want to go to all this effort and time, just to move bad stuff right back onto your fresh installation.
Backup wanted downloads, music, videos (and what else. ), browser favorites, email contacts and passwords. Have the product keys, logons and (router!) passwords on paper and drivers and basic system protection (anti-malware) application on thumb drive.
Check router for security updates.
Think of privacy and security settings that you want to set during installation, like account email logon. Do you want a private new account?
Test your installation and backup media BEFORE you wipe it out!
Before installing Windows check your sanity, after installing Windows just remove it. “joke”
Before installing Windows: Think twice.
After installing Windows: Uninstall Windows, install Linux.
That’s the right way of repairing a defective or broken windows installation.
Comments are closed.
Popular Posts

6 Ways to Check Hard Disk Health on Windows 10

8 Ways to Quickly Turn Off Your Screen in Windows 10

Latest Windows 10 Update Problems and How to Fix Them

13 Cool 4K Desktop Backgrounds for Windows 10

5 of the Best Ebook Readers for Windows 10

How to Remove Old and Useless Drivers in Windows 10

5 Lightweight Browsers for Windows 10

Find and Open Files Using Command Prompt in Windows 10

How to Increase the Maximum Volume in Windows 10

How to Fix Webcam or Camera Not Working in Windows 10
Affiliate Disclosure: Make Tech Easier may earn commission on products purchased through our links, which supports the work we do for our readers.
12 Things You Should Do Before Installing a Windows 10 Feature Update

Microsoft has put an immense amount of work into making sure Windows 10 updates happen smoothly. But inevitably, there are a handful of users who experience difficulty during the upgrade. This is due to the millions of configurations that exist and the complexity of making a product like Windows 10 work on the vast majority of them.
In this post, we’ll show you a few things to do in advance of the Windows 10 update. Some of these are simple safeguards that everyone should do. Others are more conservative measures that might only be worth your time if your Windows 10 PC is mission critical.
In this guide, we’ll walk through: backing up your data, creating recovery media, and disabling software and hardware that might interfere with the upgrade. Use this guide for reference for what you need to do to make sure the Windows 10 update goes off without a hitch.
Before You Begin: Am I Eligible to Upgrade?
The latest cumulative update for Windows 10 now advertises the Windows 10 update to users who might be interested in becoming early adopters. In Settings > Update & security > Windows Update, you’ll see a message that says “Good news! The Windows 10 Spring Creators Update is on its way. Want to be one of the first to get it?” If you are excited to be among the first, follow the “Yes, show me how” link to join the upgrade. If you don’t see the link, make sure you have the latest public updates installed already.
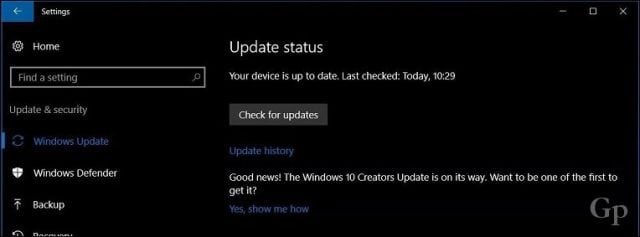
1. Check Manufacturer’s Website to Find Out if Your System is Compatible
Manufacturers of various brands actually do a good job of maintaining a list of systems that are compatible with specific versions of Windows 10. Check the following links to see if your system is supported by the Creators Update. If an OEM indicates a particular model is not compatible with Windows 10 1803, it is possible you could still install the update using the clean install method. Of course, the best way to do this is to ensure you have a good backup plan. Windows 10 has included a rollback feature since the first release, but it’s not perfect, so I wouldn’t count on it too much.
2. Download and Create Backup Reinstall Media for Your Current Version of Windows
You don’t want to burn your bridges while trying to upgrade to the latest Windows 10 Feature Update. It’s pretty much a sure bet that on the day Microsoft releases the new version, they will remove the previous version of Windows 10 from the Media Creation Tool. That means, you won’t be able to download the older Windows 10 release anymore or earlier versions such as 1511 or 1507, if you need to go back. It turns out, some systems while compatible with a particular version of Windows 10, might not work with the latest release. Reference our comprehensive guides for backing up your system before initiating the installation. If it’s still before the latest Windows 10 Feature Update is launched, you can use the Media Creation Tool now to download a backup copy of the Anniversary Update, Creators Update ISO or you can update your recovery drive, which will create a bootable copy of version you currently have installed, which you can use for reinstallation.

3. Make Sure Your System Has Enough Disk Space
Windows 10 requires a minimum 10 GB of free space; just to be safe, the bare minimum I would recommend is 16 GBs. Recent Windows 10 Feature Updates setup is more sensitive to disk space challenges. Now would be a good time to invest in a USB thumb drive or external hard disk with a minimum 16 GB of free space. Setup can use such storage devices to help facilitate the upgrade just in case.
You can also run the routine clean-up chores such as Windows 10’s built-in storage clean up tools and the good old disk cleanup wizard. If you still can’t make a dent in cleaning up enough space for the upgrade, check out our tutorial for Jam Software’s TreeSize, a free utility that makes it easy to find those stubborn large files.
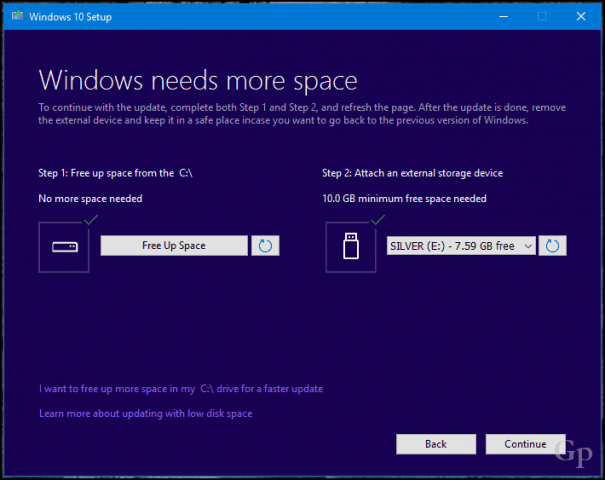
4. Connect to a UPS, Ensure Battery is Charged and PC is Plugged In
In a perfect world, the Windows 10 Feature Update would download in 25 minutes, then install within 10 to 15 minutes. This might be the case for many users, but for other users, it won’t be such smooth sailing. While Microsoft has made significant progress in reducing the size of Windows updates, the new version of Windows 10 will be a large update. That’s just the Windows update part—the installation is the most complex sequence of setup. Windows 10 will have to decompress files, move around key operating system files and personal files, and reconfigure everything to work with your hardware. Essentially, Windows is giving you a clean installation of the new operating system without disrupting your configuration or personal data. It’s a delicate balancing act which can actually extend the time it takes to complete the upgrade. So, make sure your laptop’s battery is working and charged up, and if you are upgrading a desktop, connect it to a UPS. There’s nothing more disastrous than an interrupted Windows update.
5. Disable Your Antivirus Utility – In fact, uninstall it…
Trust me on this one. Contrary to what industry experts might say, security software remains one of the most common causes of issues during major operating system upgrades. After all, it’s doing what it’s supposed to do: blocking changes to your system configuration. Antivirus software will sometimes detect and assume an unexpected update making a major modification to system files might be an attack in progress. The same goes for software such as your firewall. To avoid false positives, Microsoft usually recommends updating the antivirus software before upgrading; you could try your luck and see if it works. If it doesn’t, then you likely know the reason why. Below are some links to instructions on how to disable popular security utilities. After the upgrade is complete, you can always reinstall your antivirus utility.
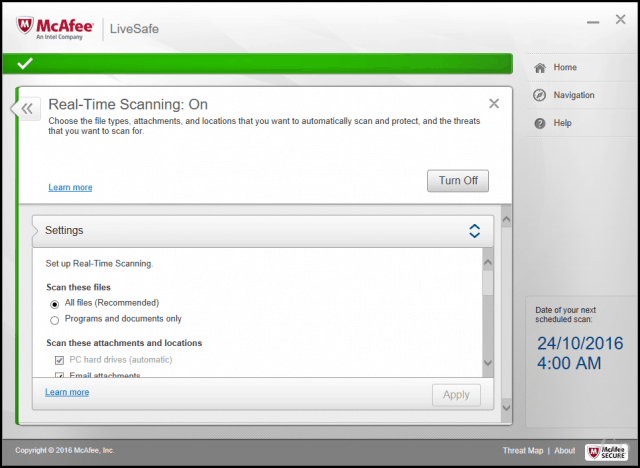
6. Disable All Background Software
Startup programs can also interfere with setup; disabling them by performing a clean boot can help.
7. Disable Peripherals and External USB Devices
It turns out devices such as your smart card reader can confuse setup. This is especially the case if you are performing an offline upgrade using USB media. Common USB storage devices such as external hard disks can also confuse setup, so, if you have those attached, disconnect them. The same goes for peripherals such as your printer and scanner. The best recommendation is to have a simple configuration, no more than a keyboard and mouse.
If you have an SD card reader, eject your media before upgrading. You can also uninstall your SD card reader as an extra measure. Press Windows key + X > Device Manager > Memory technology devices. Right-click SD Controllers, then click uninstall. If there is more than one, right-click each, then click Uninstall.
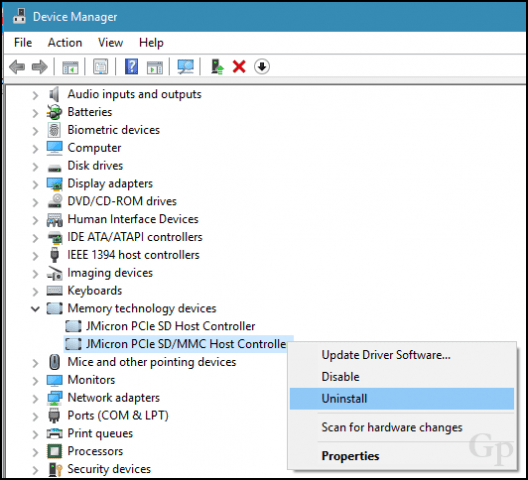
8. Update or Disable Display Adapters
Some installations call for more advanced preparation. Your display adapter can actually be an upgrade blocker, too. This commonly occurs when you see a black screen during the installation then setup automatically rolls back. Uninstalling your video card driver is known to help. Also, if you have multiple displays connected, only keep one attached for the duration of the installation. In some cases, updating the video card driver to the latest version can help too.
To uninstall a video card driver, press Windows key + X > Device Manager > Display Adapters and Right-click your video card driver then click uninstall.
9. Disconnect from the Internet When Using an ISO
If you plan on using the ISO media to upgrade, disconnect from the Internet during setup. There are multiple ways to do this: you can disconnect the Ethernet cable manually, or if you are connected to a wireless network, you can manually disable Wi-Fi by turning off the Wireless switch on your laptop. An easier way to do it is to open Action Center (press Windows key + A), then click Airplane Mode. This will disable all network technologies. Proceed with the upgrade.
If you are updating through Windows Update when the download reaches 100% disconnect from the Internet LAN (Ethernet) or Wi-Fi then proceed with the installation.

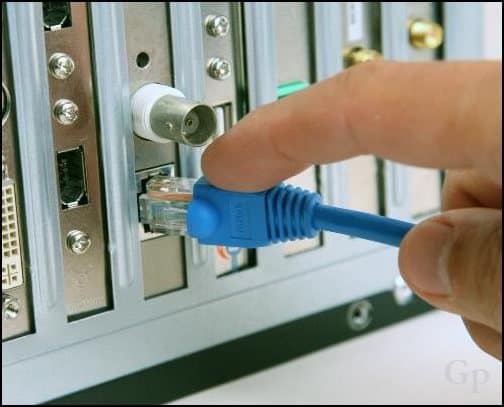
10. Skip “Get Important Updates”
I noticed over the past few releases of Windows 10, the upgrade wizard can take it’s own sweet time to start if you choose the option to Get important updates. I recommend you choose Not right now. If you do choose it and setup appears to be taking ridiculously long to move past this stage, close the setup wizard and restart your machine.
11. Switch to a Local User Account
Computers connected to a Windows Server Domain should either switch to a local user account on the machine or leave the domain before attempting setup. See the section of the following article, Leave a Domain: How to Join a Windows 10 PC to a Domain – groovyPost
12. Run these Commands to Resolve Any System Integrity Issues
The Deployment Image Servicing and Management (DISM) command is a handy diagnostic tool for resolving file integrity issues that might prevent a successful install. Users can run the following commands as part of their prep routine before initiating the upgrade.
Press Windows key + X, click Command Prompt (Admin) then type each command then hit Enter on your keyboard.
Dism /Online /Cleanup-Image /CheckHealth
Dism /Online /Cleanup-Image /ScanHealth
Dism /Online /Cleanup-Image /RestoreHealth
Another command you should run is the cleanup driver. Press Windows key + X, click Command Prompt (Admin) then type the following command and hit Enter on your keyboard. Restart your computer when complete. This should help with the notorious failed or non-responsive installation during the driver migration.
rundll32.exe pnpclean.dll,RunDLL_PnpClean /DRIVERS /MAXCLEAN
Conclusion
The point of this guide isn’t to scare you into avoiding a Windows 10 Creators Update upgrade. For most users, the upgrade can and will be successful without performing any of the steps above. But for those who seem to have bad luck or can’t afford a failed upgrade, knowing common causes of upgrade issues can save you a lot of time and hassle.
With each new Windows revision, there will always be the unexpected and it will be a learning experience in the process. You can check out our handy Windows 10 article for more details about resolving some of the common install errors users are likely to encounter. Our vibrant Windows 10 forum is also a great resource for finding solutions too.
Have you upgraded to latest Windows 10 Feature Update? How did it go? Let us know in the comments.
#10 could be an issue if there is a critical fix released by MS that could cause the upgrade to fail.
In addition, there is a way to include the latest CU during the installation on the ISO or USB key [most likely since you may not have enough room on the DVD.
With all windows upgrades since windows 95.
I have found the easiest and I think the best way is to partition your hard drive into at least 2 parts or have a small hdd for just the operating system and a large hdd for all your storage.
Install fresh, which OS of your choosing, windows or linux onto the small partition 80GB is more than enough.
If you are lucky and have 2 hdds, then install to smaller one. when installed, add the second drive that has all your data.
This method works 99% of the time without a hitch. Clean start install programs as and when needed.
Keeping your system lean,
I’m assuming this is a typo. I don’t remember version 1507.
“versions such as 1511 or 1507”
1507 – July 2015 (Threshold)
1511 – November Update (Threshold 2)
1607 – Anniversary Update (Redstone)
1703 – Creators Update (Redstone 2)
Rosa Maria Gonzalez
Since I updated to Creaters four days ago my life has become a nightmare. Word 2016/Office 365 stop working properly. I can’t paste any text copied from Word onto other programs (Internet, Outlook, Publisher, etc.), I can’t print, I can’t save pdf documents, I can’t choose the folder in which I want to save a new documents. This is an ESSENTIAL function for my work and this has represented an important interruption to my work. No forum nor Morgana appears to have suggestions on how to get this solve. The system worked perfectly until the update.
1703 has pc admin rights now.CD with MSI drivers and utilies dont run.Corel video studio wont open,also Handbrake software….win 10 v 1703 is a nightmare for sure
Cant use my vpn after update.
Beware of the “Clean install Windows 10”, it has the version 1703.
Updated yesterday and lost most, 98%, of my favorites list.
Same problem here….but….it was actually real simple to go back to the Version 1607. And it cleared up all the problems I had after updating to Version 1703. I am still puzzled why my desktop computer would not accept Version 1703.
Read an article about updating to the Creators Edition version 1703 (Redstone 2) (don’t remember who it was from) saying everyone should wait until you see the update available thru Windows Update because of all the problems people have encountered when they manually installed the new version.
I just wondered if the new version update thru Windows Update (1 1/2 months since the supposedly update was released on April 11, 2017) will get here before the next update release due in Sep/Oct 2017.
I tried the new update version about 2 weeks after the release date and had nothing but problems like the ones reported here(BSOD, computer crashes, some programs not working properly).
As big as Microsoft is and as long as they been in this business, they should review and test these new OS versions a lot longer that trying to put them out every 6 months.
This is one good example of a rush to put out a new version that resulted in a huge number of problems.
Ok, due to all these horror stories, this update is scaring the last meal I ate right out of me.
Watch what you eat
Given your name, that might not be such a bad thing…
After the Creator update installed on a relatively new Dell PC that came with Windows 10, only a handful of folders and files displayed in Windows Explorer. None of Microsoft’s FAQ suggestions worked. I finally found them buried in the OS C; drive with no clue how to make them easily accessible. Am now into 4th hour of remote control by Microsoft tech support, reinstalling Windows 10 – utterly ridiculous, especially since I don’t give a fig for most of the new features!
I can’t use the Windows Defender after the update. How am i going to fix this? Thanks!
If you have another antivirus program installed, then Windows Defender will be disabled from doing daily/automatic scans. You still can do an on demand scan by going into the settings, clicking on Update & Security, then Windows Defender, then Open Windows Defender Security Center, then Virus & threat protection, then you can click on Quick Scan or Advanced scan to perform a virus & threat scan thru Windows Defender.
I’ve tried installing the Creators Update several times using various methods (except automatic Windows Update), but every time, it seems to complete, reboots several times then reinstalls the previous version.
I’ll wait until it comes through the automatic update system, then try the suggestions here.
Same problem.Did you find the solution?
Just today (2 June 2017) I allowed Windows to install the Creators Update. After reboot, the touchscreen stopped working. The listing for the touchscreen (HID-compliant touchscreen) disappeared from Device Manager. I tried everything I could think of to fix the thing. Nothing worked. Finally I rolled back to the previous build (1607). Now everything works again.
I didn’t get the warning about creating a backup before going with the Windows 10 update. All my other updates were simple. This update has created a nightmare! I lost Google Chrome and FVDSpeedDial where all my favorites are. I’ve tried reinstalling Google Chrome but all I get is a blank white screen and a note that says it’s trying to contact FVD Speed Dial and it hangs right there.
Everything was so simple before the update. Now everything is complicated and I DON’T LIKE EDGE.
I can’t fix it and I’m going to have to PAY someone else to fix it for me (besides the inconvenience of having to lug my computer out to the car and over to my computer guy).
after the 21th time of this cumulative, waist of time, nightmare from HELL. It quit trying to install and all is good in the neighborhood, SO FAR…
I have a client who has W10 1607. For the past 4 days the PC has INSTALLED 1703 DURING business(active) hours, then rebooted, then failed the update, then restored to the previous version of windows. Causing my client to loose his desktop for 2 to 3 hours per day. GEEEZUS what a nightmare. Found this post, and thought, ok I will have to leave the PC naked and vulnerable (no video drivers, no antivirus, no firewall, no internet, no domain) just to get this piece of shit update? and then if it doesn’t work, I have wasted what, 3 to 6 hours of my time and his money, (in an overnight situation because he can’t be without his PC during the day anymore), uninstalling all this software, watching the update fail, then reinstalling it so he can use the PC the next day…. I am not complaining about the recommendations, but the fact that this is what is required to get a MS update to go? OHhhh for the days of SKIP THIS UPDATE in windows update settings.
After the update 1703. Microsoft Edge will open,but it closes again and will not work!
I have same problem on both my laptop and desktop. Windows support suggested adding me as a user using a local account login. What a paraphernalia! After about 30 minutes online, gave up – Edge would still not fire up. So installed IE from app default settings and then downloaded Chrome.
Just an update to my May 26 post re problems with auto update to a six-month old Dell that came with Windows 10 — after 3 calls to Microsoft tech support, most of the problems were fixed. The hardest one was to restore the display fonts on Web pages, browser toolbars, Outlook, other Office programs. Unfortunately, I lost programs in the process including Dell Support and Assist (really!), iTunes, et. al. Like one of the other commenters, I now have to decide whether to pay someone to help me re-install all these things (my go-to woman can do it remotely, so no lugging of computer to car) or attempt to do it myself. What a colossal mess!
After forcing new update, which failed twice (What a crap!), it took over 20 hrs of downloading, installing, waiting and diagnosing to finally get the Error number: “Feature update to Windows 10, version 1703 – Error 0x80246010”. Unfortunately, the MS has no fix for that – the “wu170509.diagcab” troubleshooter downloaded from MS web could not fix it. The MS community was not helpful either. How on earth, the MS can force innocent PC users to accept the “improvement” which turns their PCs into bricks 🙁
I don’t have such words I can use to appreciate this great Post!
However, In Simple, This Post & Tricks are awesome!
Love it,
Yasar,
Last year, or maybe two years ago, a major Windows update destroyed my PC and it cost me $200 to retrieve my files and have Windows reinstalled. This year, update 1703 fails to completely install, and it has tried to install twice now, but after a few hard reboots it “reinstalls an older version”. I am still looking for a program that will prevent any Windows 10 updating.
Constandt W Van Wyk
I tried on 3 occasions to download Windows Creator 1703 and each time I received the message “Problem installing some updates. Feature update to WIN 10 1703 error 0x80240ff. The update not applicable to your computer.” I then came across Windows 10 Office Assistant and proceeded to download by using this tool. I am pleased to report the update downloaded and installed without a hitch. It did however report that “LifeCam VX-3000 doesn’t work on this version of windows.” I tried to downloaded the installation software but it would not install, repeating the same error message. That is my only gripe that I now have a functional webcam device manufactured by Microsoft but it is not compatible on Microsoft’s latest operating system. Shame on you, Microsoft.
Constandt W Van Wyk
I am getting more confused whilst following up on why my Microsoft LifeCam VX-3000 won’t work on Windows 10 Creator version. Under Device Manager under Image Devices Microsoft LifeCam VX-3600 is shown, and on opening Properties it shows (a) this device is working properly; (b) the best driver for this device is installed; (c) under Events it shows 1. device install required; 2. device migrated 21 July 2017; 3. driver service added (VX3000); 4. device installed (vx3000.inf).
May someone kindly explain to me what needs to be done and recommend a site where the required software can be obtained. I ran the installation cd and received an error message: LifeCam doesn’t work on this version of windows..
It is a shame that a fully functional webcam device has become useless.
Followed your advise. Installation failed: Error 0x80200013.
I guess no one is offering assistance any more…
Thanks for visiting my blog. Providing extensive tech support in the comments section just isn’t possible for our small writing staff. If you need help, please use our new Windows 10 help forum which we’ve created for this purpose.
Feature update to Windows 10, version 1703 has stopped all kinds of things from working any longer. I can’t even type in the search box to launch programs. What the heck has happened?
After win10 creator update, my sony vaio is running 100% disk most of the time BEFORE I do anything. I just did refresh install (all my apps gone… thank you very much) and now is 100% disk all the time. How do I undo this crap? How do I get back to last stable windows…. WINXP?
Constandt W Van Wyk
IMHO the last stable windows operating system was Windows 7. I never had a day’s problem. I only upgraded to Windows 10 when it was advertised via media that Microsoft will no longer support aforementioned OS. The first version of Windows 10 was acceptable but thereafter it went from bad Anniversary version to worse Creators version. From what I read on the internet chats Millions of webcams were made useless by the latest upgrade. Shame on Microsoft.
go team Linux, yeah.
My HP laptop recently tried to install the upgrade and overheated during the install. The BIOS shut down the PC and then restarted when it cooled down. Guess what, the install was doing restart cycles with the root record set to boot from the RAM disk that no longer existed… so the whole install crapped out and my system was unbootable. Luckily I had an image backup and finally got it restored. Now Microsoft wants to do the upgrade again and I’m trying to stall it until I have the time to baby sit the install and try to keep the system running.
I have a Windows 10 Surface Pro 4 – loved it until Windows 10 Creator. Issues – crawling internet – AT&T fiber and Quicken 2017 Premier would not update accounts and crawled too. On the third rebuild I stopped Windows 10 Creator vs 1706 from installing on my Pro4. Internet and Quicken 2017 runs great! As I was researching the version 1706, I really didn’t like the way it takes over my machine. I could not remove the .net framework 4.07 so my Quicken 2017 could run correctly and now every couple of days I have to push out the date to install updates.
I found a solution that works for me and may help a bunch of other people if only more people knew how to stop the upgrade.
As mentioned earlier, I have a HP Envy 15 laptop that is no longer supported by HP and is not compatible with the Creator’s upgrade for Windows 10 although it runs the Anniversary version just fine. In my case, I originally thought the system overheated during the upgrade but then after baby sitting another second attempt I saw that the system crashes on the first reboot after the upgrade is 25% installed. My BIOS screen flashes 2 times and then the system crashes and I get an error saying hardware is missing and my system needs to be repaired.
I tried calling Microsoft support twice and got nowhere, they refuse to provide support for any system that is not compatible. Even to the point where they cannot tell you how to stop the forced upgrade from Windows Update now that that is happening. I finally got them to escalate my issue to Level 2 support and when they called back 2 days later they confirmed that the solution that I had found was in deed the correct solution on how to stop the upgrade. I just wish they would instruct the first level support people on how to provide this information.
So here’s the solution.. you have to download the Windows Update Show-Hide tool (wushowhide.diagcab) then the trick is to let Microsoft download the Creator’s upgrade to your machine and then run this tool BEFORE the Windows Update service catches the download and sets up to install it, typically over night. When you run the tool you can then HIDE the upgrade and it will NOT be installed by Windows Update until whenever you unhide the upgrade if you ever deem necessary. This is the fix that was confirmed by Microsoft Level 2 support.
Hope that helps.
Thank You! I’ll try this.
Upgrade went smooth on my 8 year old HP Pavillon. It is even faster than before! Very unusual for Windows which has a tendency to cause things the other way. However, I am as scare as one can get
to upgrade my newest laptop which I use for work and that runs in dual boot with Linux.
I am reading that on MSI laptops it is creating big issues withe several applications for gaming as well. I am not a gamer, but still…
No sir, thank you.
Well, I had several issues with the installation of the 1607 and I needed to re-install it losing not only lots of apps but also lots of days. I am pretty sure that it happened because windows 10 insists to update and reboot while you are using it!
I have set the Wi-Fi and Ethernet connections as metered for it not to upgrade. Based on all my readings regarding 1703, I will simply leave it the way it iis for a while.
Will Windows 10 Creator work with antivirus software like Vipre, Malwarebytse and SuperAntispyware Free Edition. It did not specify these software packages in your 12-step guide.
It works with Malwarebytes, I have it installed on all 4 of my computers.
thank you for the response I have 1703 installed now still having a little internet problems but all my antivirus software is working.
Installation of 1703 gets to 78%, then reboots and “reverts to previous version” without any mention of any error. This has already happened three times, and MS is very happy to use gigabytes and gigabytes of my internet connection by downloading the whole thing again and again. Without giving me even a freaking error code. These people have no shame.
Martin, have you tried downloading the Windows 10 Creators Update, Version 1703 Media Creation Tool, then installing Version 1703?
After downloading the Media Creation Tool and before installing Version 1703, disconnect from the internet(either disconnect the Ethernet cable or disable your WiFi).
After the installation is complete, reconnect the Ethernet cable or enable your WiFi, then check for updates.
Make sure, if you use the Media Creation Tool, you make and ISO Image which you can save either to your computer or a USB drive.
Hi Danny, I have installed from USB many times, and I have a USB drive with the CU installation files. I actually did the first attempt for an upgrade from USB, but it failed without an error message. A second attempt, now with Windows Update, gave me a specific error message that I was able to correct and proceed with the install (after a new download, of course).
My point is that Microsoft’s default behaviour is that after every failed installed through Windows Update, it will start downloading all the files again; and again and again. Over the last 4 days (when I was upgrading 5 computers at home), downloaded data exceeded our average by 40GB. Because of the plan I have it was not a big deal, but it is ridiculous.
This can be easily avoided, by just checking the download already in the computer, but that seems to be too complicated for MS.
I agree with the frustrations with Microsoft. They make it very difficult to get support when you need it.
I have tried different ways to download these major updates. I found, if you have more that 1 computer to update, do 1 at a time and let it completely update.
After waiting 3 1/2 months for the update for 2 of my computers, I just downloaded the Media Creation Tool, saved it as an ISO file to my PC and created an USB drive for my other computer. When I started to install the update, I disconnected the Ethernet cable or disabled the WiFi so as not to be connected to the internet while installing the update. After the update was installed, then I connected the Ethernet cable or enabled the WiFi to connect to the internet to check for updates.
This way worked best for me. Had no problems doing it this way. Hope I don’t have to wait another 3 1/2 months for the next major update, “The Fall Creators Update” due out on October 17. Just might have to do it again the way I did my last 2 computers.
Just have to wait and see what happens and hope for the best.
So after months of trying it looked like the only way I could update my computer was to disconnect all internal SSDs and HDDs that didn’t contain my Windows installation. Seriously never would have expected that, found the solution here https://social.technet.microsoft.com/Forums/en-US/0d47fc1e-0bf9-461e-a478-62b7c87bec16/update-error-reboot-0x80070002-0x20009?forum=win10itprogeneral after finally getting an error (which didn’t appear before) through updating via ISO.
I have downloaded and installed Microsoft Windows 10 Fall Creators update version 1709 on my Dell 5755 laptop, running an Intel Duel Band Wireless AC-3160 card. After the install I lose my Wi Fi capability, Wi Fi is turned off and when I try to turn it on it pops up with “no connections found” and turns right back off. I have tried all the troubleshooting steps including the one in CMD, I have download the latest wireless driver for my laptop from Dell and from Intel, Version 17.33.9.3 release date October 16, 2017. And nothing works, if I roll back to previous version of Windows my Wi Fi works fine. I have downloaded and installed version 1709 3 different times and nothing works except rolling back to previous version of windows. It actually has downloaded a 4th time through windows update and I haven’t installed this time. Any help would be appreciated.
just so you know it totally removed viper antivirus software from my system.
Thanks for your reply Tony, I have Vipre Internet security 2017, and the 3 times that I installed 1709 it did not remove Vipre, it still works. Just lost my Wi Fi capability. I called Microsoft today and they want me to install the update again, for the 4th time, and they are going to call Saturday, said they can connect to my laptop and install a driver that comes with 1709 that will make my Wi Fi work. Not sure what to think about that. Microsoft support in India is who I spoke with.
They did call on Saturday as scheduled. The tech told me that other folks are having the same issue with Wi Fi not working after updated to Fall Creators version 1709. She told me nothing we can do to fix this, the engineers at Microsoft are aware of the issue and are working on a fix as it is on their end. The fix should take about a week and they would call me when it is ready, that has been well over a month and no word. She told me to disable Windows update in services and roll back to previous version of windows. I rolled back and now my wi fi works fine but my web cam does not work, my one drive does not work. They both worked fine before the update to 1709,
I don’t have 2017 viper I have a lifetime 2015 viper from HSN for 10 computers. It also did this save thing to my laptop I had to reinstall it. I will reinstall it on my desktop when I get the time. My wife purchased a FIXMESTICK from HSM and it cleaned a lot of things from all my drives that were ad virus’s and it seams to be running faster now. it said you should run it once a mount.
My instalation lasted for about 10 hours. But it works fine…my question now is-may I or should I delete the old version(running out of space messages are coming in…)Thank you!
so basically microsoft is targeting specific hardware now eh?
ok then let’s go check to how install Ubuntu
1709 Fall Creators Update: Nightmare! Four machines, different makes and models. Mice not recognized: wireless and wired, many different models including Logitec. Mail trashed. Databases including contacts, appointments, maintenance records, software keys, financial, all trashed. An outrage. If you can avoid it, wait for the Destructors update in the Spring.
Hell yes.
About damn time.
I’ve been pulling my hair out on this one.
If you follow the 12 steps EXACTLY, it should go.
I tried about everything, and this was the only thing that actually WORKED.
Hi,
I am not a techie person but the MS Windows Fall Creators ver.1709 update has left my laptop in a mess. I wish I had read this article before I said, Ok install.
My Office 2013 doesn’t work but Microsoft won’t help because I don’t pay the monthly for 365, my Photoshop and countless other software or not working correctly. My touchpad is on/off. I read that others had problems if they tried to roll back the Fall update, too. So, I don’t know what to do.
Running all the software in compatibility mode did not help.
Have ASUS laptop.
I use a Dell Z440 and it failed multiple times trying to go from 1703 to 1709. Google showed several people mentioned my exact same error but apparently had a different cause. Their fixes didn’t work for me. Here’s where I get less “common” and what I believe finally fixed me. My C drive is an SSD (common). I have a platter D drive where I keep the lion’s share of my personal files(surely not uncommon). If you right click on system folders like Desktop, Music, Documents, etc, you are able to set (via a Microsoft interface) a custom location for them(apparently not common). I’ve re-routed 7 folders under my user profile to my spacious platter. Taking a guess (after seeing other people suggesting unhooking external USB drives) I unplugged my internal D drive, logged in as a different user and ran the update. Surprise, it completed without a hitch! Shut down the computer, plugged D back in, logged in as myself… uh oh. No desktop icons, etc. Open Disk Management and my platter reports as a Foreign Disk. Right-click Import and breathe a sigh of relief as I see my directories are unharmed. Reboot one more time and all is well when I log in. Thanks M$.
I spent three days trying to figure out why Microsoft Word 2016 and Outlook were taking 5X longer to load after the Version 1709 Update. It use to take 8 seconds to load Outlook and Word as it continuous to do on my two other computers but on my HP h9-1215t desktop it was taking 25 seconds to load. Bottom line after spending 15 hours of my life that I will never get back, it was the Fall Creators Update (Windows 10 Pro Version 1709) that was the cause. The update didn’t impact my two other computers so I am a little lost as to why my desktop (the big machine in my environment) was the only computer impacted. I can go through all of the steps I went thru to isolate the problem, but I tried every trick in the book included reinstalling Win 10 Pro using the Media Creation tool and then uninstalling Office 2016 using the fix-it tool and then reinstalling Office 2016. None of this solved the MS Office programs loading issues caused by the Fall Creators Update (1709). I even attempted the update a second time with the same resultant issues with MS Office 2016. My backup policy allowed me to reimage my SSD to Version 1703 which solved the MS Office 2016 problems but of course the Version 1709 update will attempt to update again although I’ve used the wushowhide.diagcab to hopefully disallow Build 1709. There is a Common Issue cited by Microsoft for Version 1709 stating “Office documents open slower after Windows 10 Fall Creators Update” saying that the active Antivirus API for Office has a bug causing a 1 second delay in opening of each Office document that will be fixed in a future Windows update. I would guess that this bug is also causing the excessive delay in opening the MS Office 2016 products to the tune of 4X longer than under Version 1703. Do you know how many times a day I check my Outlook email? The Version 1709 bug is painful. I have only one more scheme, which would be to do a clean install of Windows 10 Pro. This would take me at least 4 days to rebuild the programs on my desktop. Some other funnies I’ve noticed with Version 1709. Regedit that use to take a couple of minutes to export the registry now takes over 10 minutes. Same for Norton Utilities which now runs like molasses. Also the registry file is 50% smaller in Build 1709 than the one associated with Build 1703. Build 1709 also enabled a number of devices that I had disabled in the device manager, i.e., the wireless card (since I have an adequate LAN). The update history is down to
three entries whereas it use to be around 75 (which seems like a improvement).
Two identical HP desktops installed with MS source media Windows 10 Home 64-bit. One is loaded with MS Office and a bunch of other stuff, one has nothing on it but backup software. The loaded one updated silently overnight, no problems at all. The backup one has nothing but problems. Removed everything from it – drivers, backup software, anything that was in Programs cpl – tried every single published TechNet-Support-Forums activity to trick into updating, and it still fails. Leads me to suspect a hardware issue since there is literally NOTHING on this pc except Windows 10 Home. I’ve decided to just ignore the “update failed” message since I do not use it for anything except file storage and back ups.
Hello everyone.
When trying to install this update, I get error 0xc1900208. I get a warning that I should uninstall Avira (which I don’t have installed).
What I did:
– Searched for files or folders named “Avira”. Found nothing.
– Searched the registry. Found nothing.
– Ran Avira’s registry cleaning tool. Nothing found and no result.
– Searched the registry for “UBCD4Win” as suggested by someone on Microsoft’s site. No result.
If anyone has any ideas about this issue and wants to share them, they’re welcome.
you get the error 0xc1900208
because you’re running a program is not compatible with Windows 10
The question how to reinstall Windows is often asked on the internet, so in this article I will show you how to reinstall Windows 10 and list some tips you should know about Windows reinstallation.
Under These Situations You May Need to Reinstall Windows
After running a Windows OS for a long time, you may encounter the following situation:
It takes several minutes to start the computer and make everything prepared. In addition, programs such as Microsoft Office, Photoshop, and Browsers should respond for a long time. Then, you made a virus scanning, but nothing is found.
Well, do you know what slows down the computer? Most of the time, the gradually increased file trashes, defragments, and so on are culprits. Under this situation, merely cleaning and defragging hard disk plays a minor role, and users had better reinstall Windows. After all, many tests show this is a good solution, and it also solved my problem.
Of course, making a system reinstallation might help you get out of trouble under many other conditions, for instance:
- Anti-virus programs failed to clear some strong viruses.
- System crashes due to system file corruption or boot file damage.
- Get black screen or blue screen error without knowing exact reason.
Now that reinstalling Windows can help us solve many problems, how to make a wonderful reinstallation? Just reinstall Windows from USB flash drive or CD/DVD disc directly? It is of course not, and users need to do lots of preparations as well as pay much attention to some instructions.
So in this post, I will show users what they should do before, during, and after reinstalling Windows.
Make the Following Preparations before Reinstalling Windows
1.Prepare Windows Installation USB drive or CD/DVD Disc
You can install Windows from either Windows installation CD/DVD or USB flash drive. If there is no such disk, create one by using Windows 10 Media Creation Tool.
2.Backup All Needed Data Saved on the System Disk
Generally, users would like to reinstall Windows to its original place. To be specific, if the old Windows OS is saved on partition C now, they are always hoping to reinstall system to the place where partition C is located.
However, doing reinstallation will result in data loss no matter you delete the original partition or not. Therefore, when the partition is storing useful files, please backup or transfer these files out in advance. If there are dozens of GB files to backup, users had better clone the entire partition rather than copy files, because it will help save much time.
Tip: If you forget to make such a backup and Windows has been reinstalled to the original boot partition, there still might be a chance to recover needed files.
Buy Now
Nevertheless, many users are more likely to make a clean reinstallation, namely installing Windows on an unpartitioned hard disk. How to reinstall Windows 10 without losing data? For this demand, they need to backup all needed files, and then clean the whole hard disk.
The fastest way to create a backup for all important files is copying the disk, and detailed steps are as follows:
Step 1. Download MiniTool Partition Wizard Free Edition and install it on computer.
Free Download
Step 2. Launch the program to get its main interface. Then choose the system disk and select Copy Disk from the left action panel.
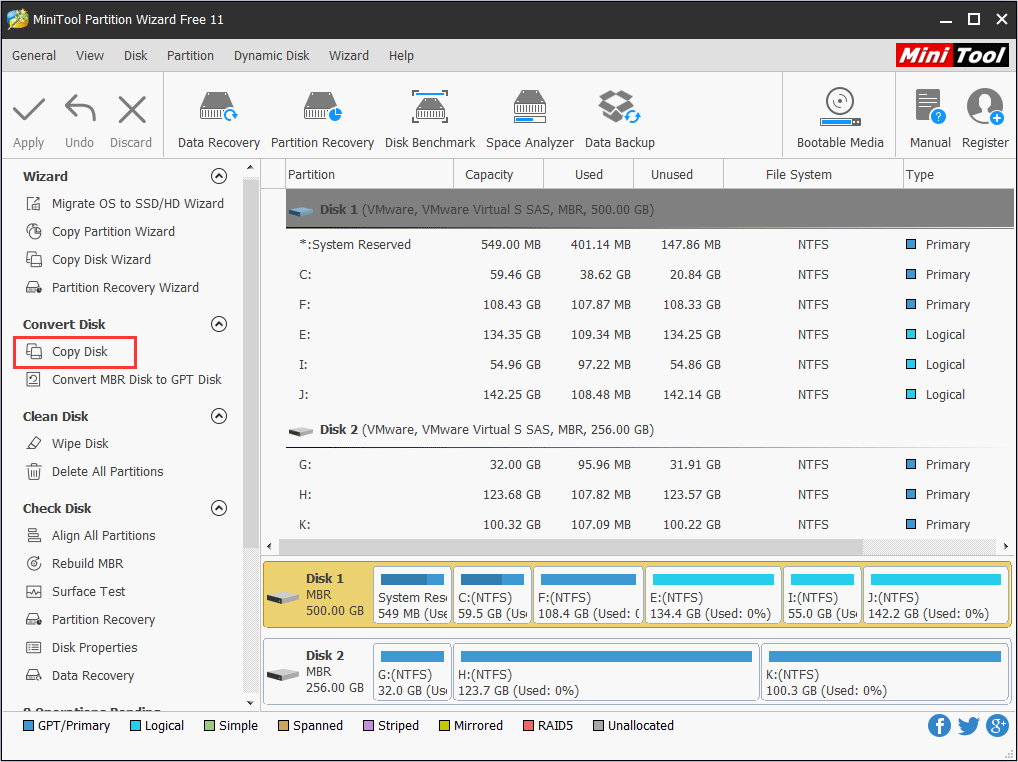
Step 3. Then, select the disk that will be used to hold the backup and click Next.
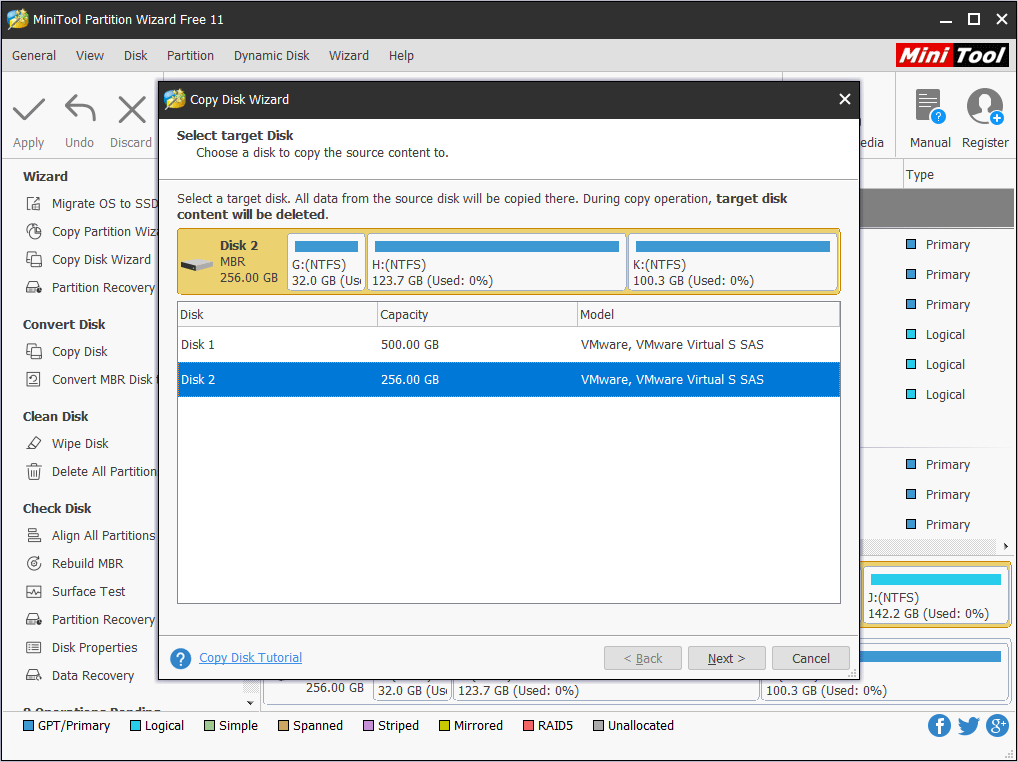
Step 4. This note is to remind you that all the data on the target disk will be destroyed. Please make sure the target disk is empty or does not contain any important files. Then click Yes.
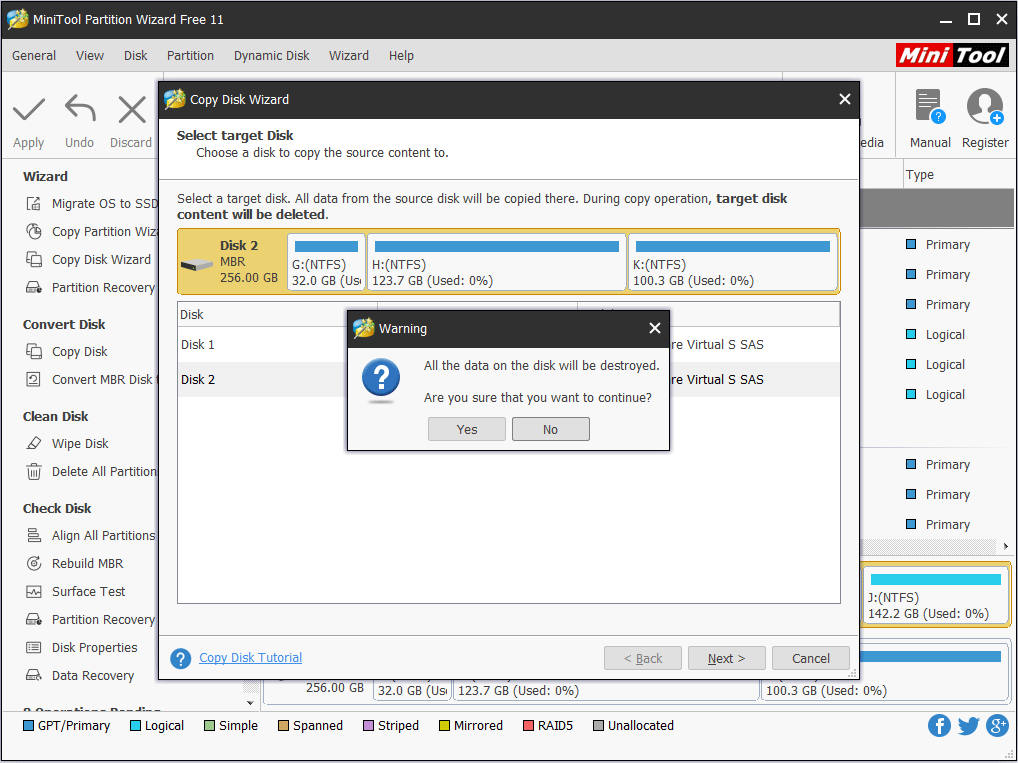
Step 5. Edit partition size and location, and then click Next.
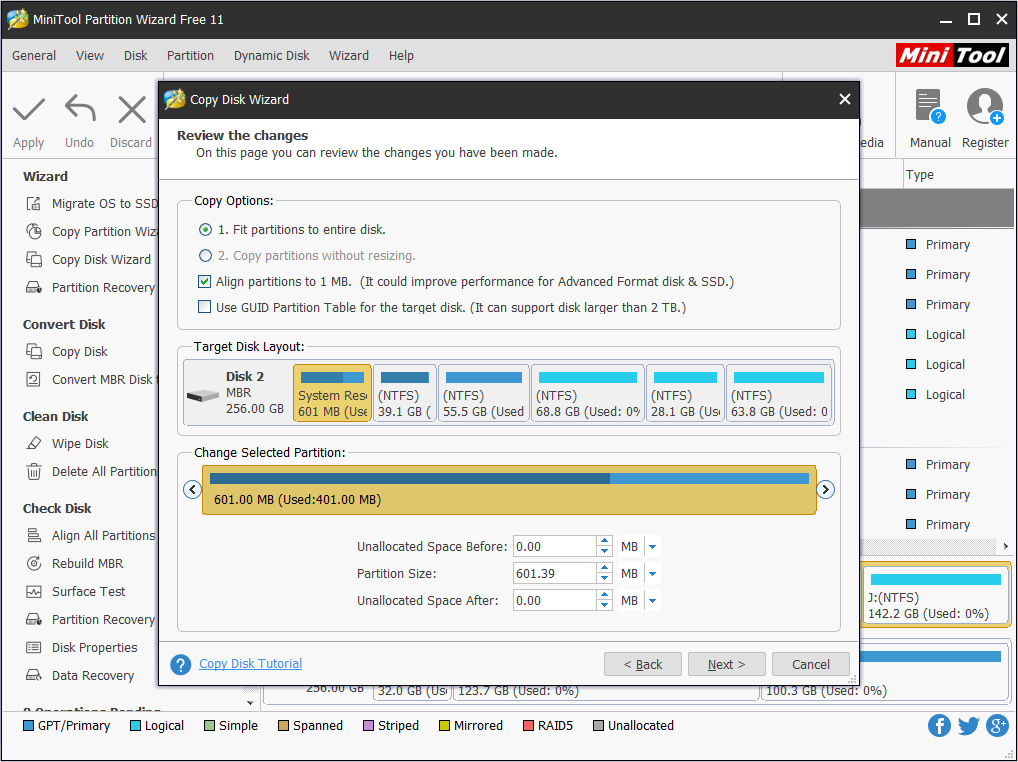
Step 6. You will get a boot note as below. Click Finish to go back to the main interface.
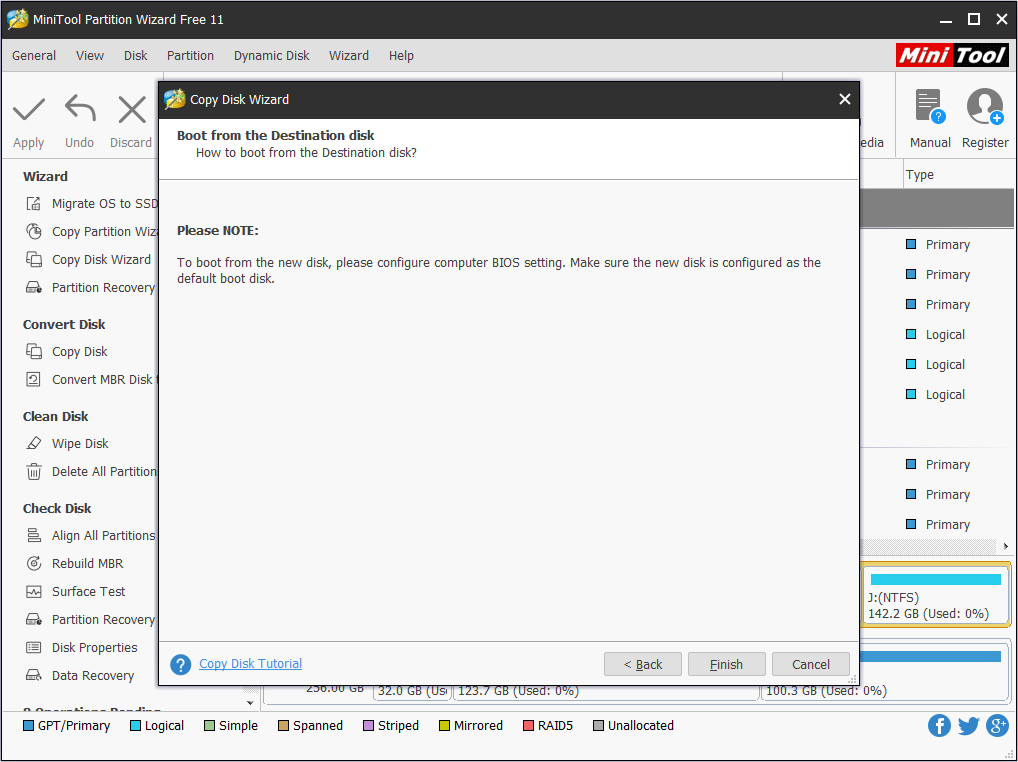
Step 7. Click Apply on the upper left corner to allow the pending operations.
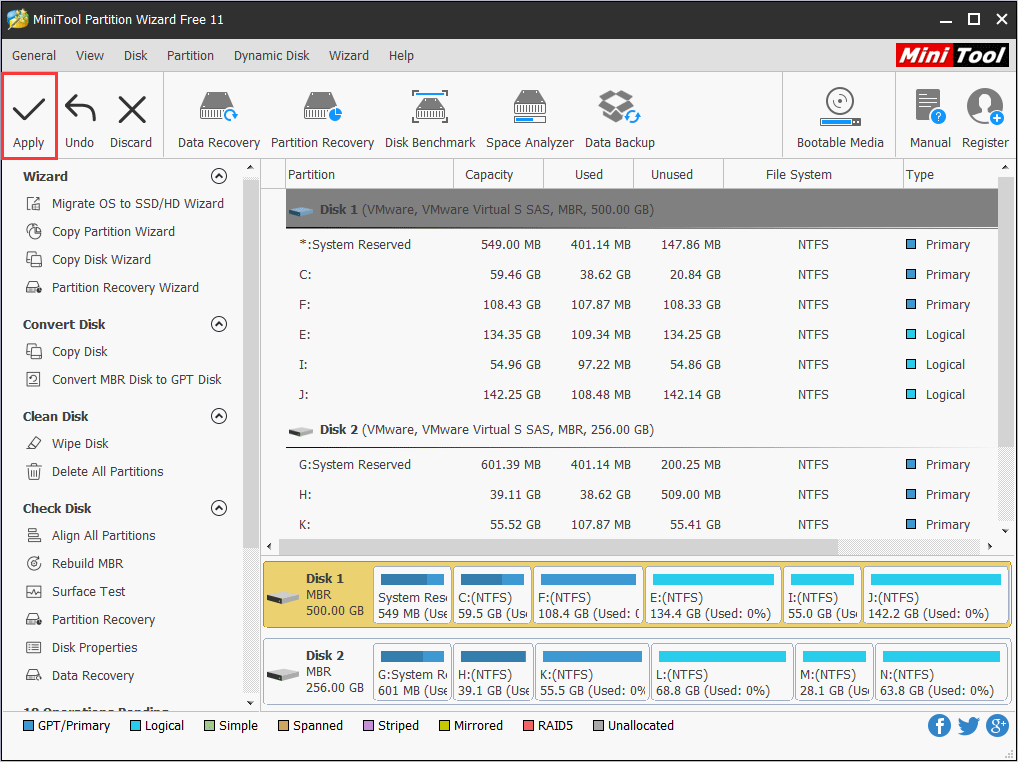
Then MiniTool Partition Wizard will ask for a restart to make all changes performed in boot mode as the system disk is being used now.
3. Remove All Non-essential Peripherals
Before starting the reinstallation, users had better remove all peripherals that are not required to reinstall Windows, such as card reader, earphone, and removable hard disk. With these devices connected, you may receive error message. Now all preparations have been done, so you can start reinstalling Windows OS. Please follow steps below.
How do I Reinstall Windows 10 – Detailed steps
Reinstall Windows 10 on a Normal PC
If you can boot into Windows 10, you can follow the steps to reset your PC.
Step 1. Right-click the Windows 10 Start menu and select Setting.
Step 2. Locate Update & Security and click on it.

Step 3. Click on Recovery to open the Recovery section, and then you can use the Reset this PC option. This will give you the choice of whether to keep your files and programs or not.

Reinstall Windows 10 on a PC that Failed to Start
This part I will show you how to reinstall Windows 10 with USB flash drive. You can follow the detailed steps as below.
Step 1. Create a bootable USB flash drive with Windows 10 Media Creation tool. You need to use a working computer to do this if yours won’t boot into Windows.
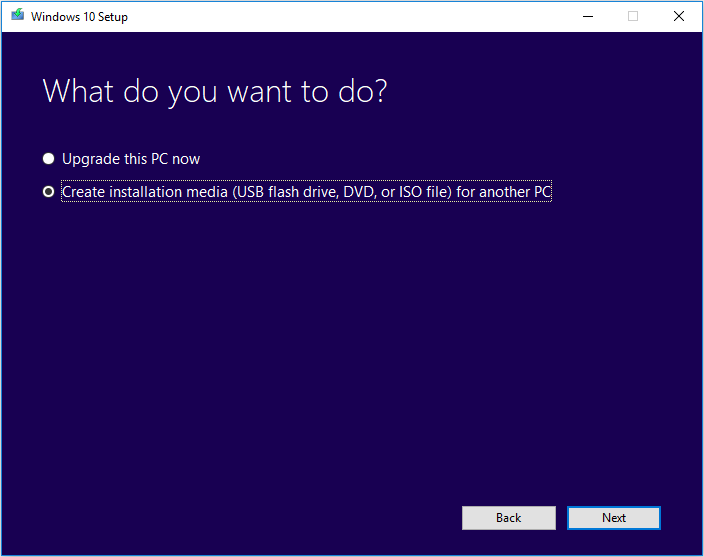
Step 2. Enter the BIOS by pressing Delete or F2 (the key to enter BIOS can be different due to different manufacturers) and set the bootable USB drive as the first boot device. Then boot from the USB drive.
Step 3. When the PC has successfully booted from your USB flash drive, you’ll see a Windows logo and then a screen as below. Then, specify preferred language, time and currency format, and the keyboard or input method and click Next.
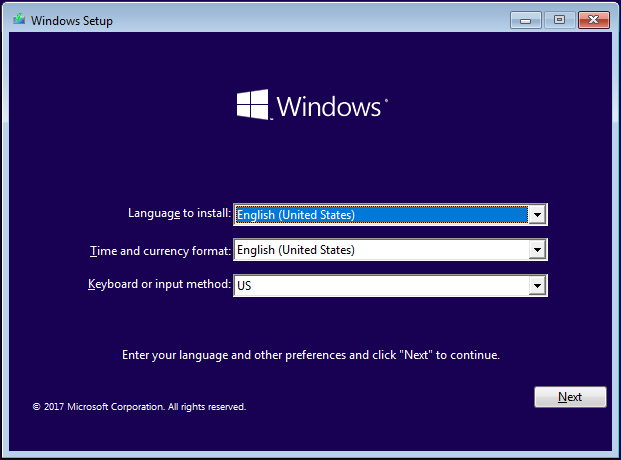
Step 4. Then click on Install now.
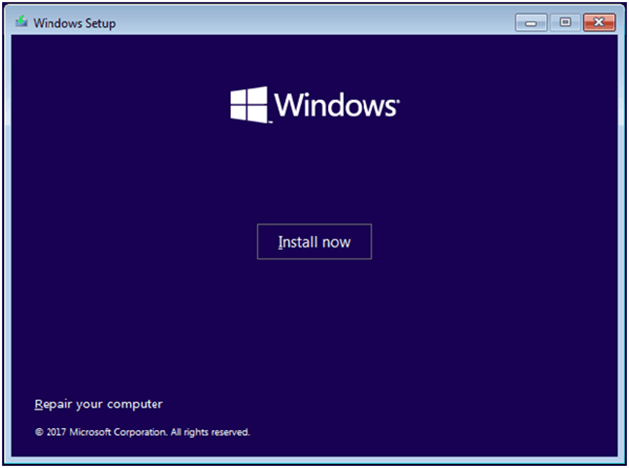
Step 5. Follow the on-screen instructions to complete the setup configurations and let it install. The installation process will start and your PC will reboot. When it’s finished, you just need to log in with your account.
During the installation, it will ask you to input a product key for Windows activation. You can choose to skip it or not. If you skip it, you also need to input a product key to activate Windows when the installation is completed. Or there will be a watermark on the Desktop to remind you to activate Windows.
Optimize Computer after Reinstalling Windows Operating System
After Windows is installed successfully, users need to optimize system by doing some necessary operations. If you want to make your Windows OS run better, it’s very necessary to do the following operations:
1. Align Partition(s) If the Reinstallation Is Made on SSD or 4k-sector HDD
Tip: If you are using the traditional 512-sector mechanical hard disk, you can skip this step directly.
4K alignment is a quite important issue for solid state drive (SSD) and 4k advanced format hard disk. Running programs on misaligned partition will slow down computer programs largely, and running Windows OS on misaligned partition will increase system boot time, access time, shutdown time, and so on.
Therefore, it is quite necessary for SSD or 4k-sector hard disk users to check whether their partitions are aligned after reinstallation is done. Next, let’s see detailed steps to align partition(s) in Windows.
Step 1. Download MiniTool Partition Wizard Free Edition by clicking the following button. Then install it on your computer.
Free Download
Step 2. Launch MiniTool Partition Wizard to get its main interface. Select the system disk and click Align All Partitions from the left action panel, which will detect the entire disk and then tell you how many partitions to align in total.
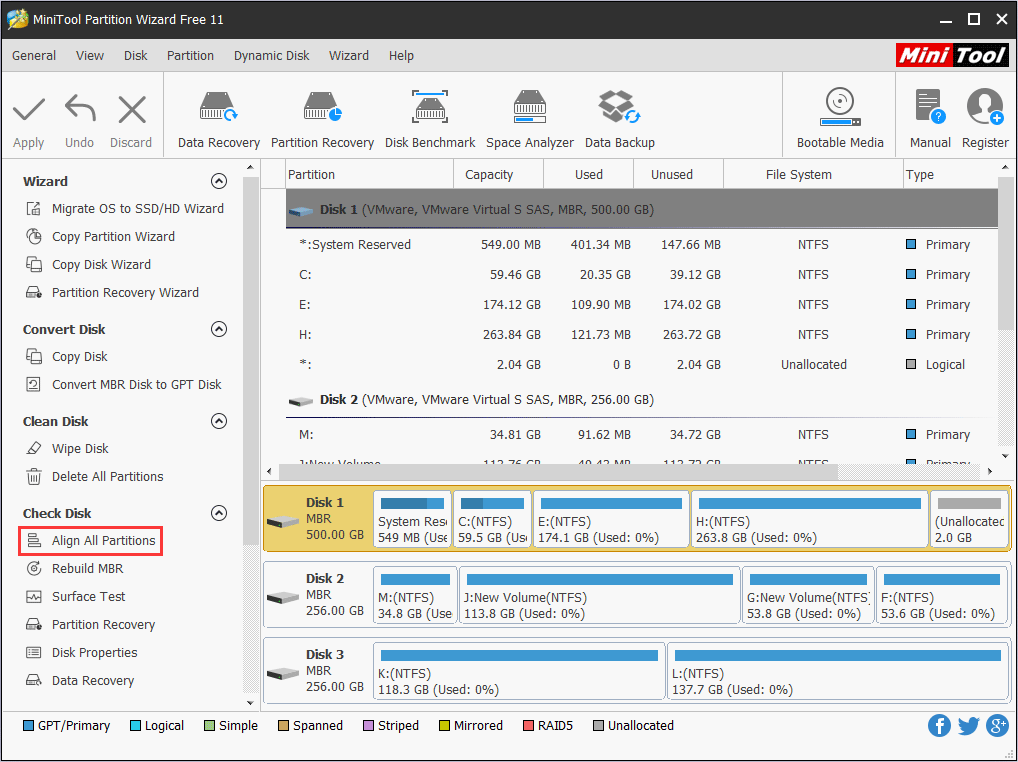
Note: If you want to align boot partition only, select the partition and choose Align Partition feature from the left side.
Step 3. MiniTool Partition Wizard will tell you how many partitions need to be aligned. Click OK to continue. If all partitions on the disk are already aligned, MiniTool Partition Wizard will tell you that the disk does not need to change partitions alignment.
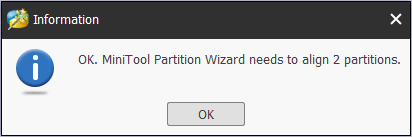
Step 4. click Apply to perform all changes.
2. Extend System Partition If It Does Not Have Much Free Space
As we know, temporary files, caches, Windows updates, and some programs will be saved to system partition automatically, which may make the very partition run out of space in one day.
Therefore, it is very necessary to enlarge the system partition if it does not have much free space left. Moreover, allocating more space to system partition will make Windows run more smoothly. Well, how to extend such a partition?
Firstly, open Windows Disk Management tool to get its main window. Then, right click the boot partition to see whether Extend Volume feature is available. If it can be chosen, enlarge the partition by following instructions.
If the option is grayed out, turn to the professional partitioning tool MiniTool Partition Wizard since it can enlarge system partition by taking free space from any other existing partition or unallocated space on the same hard disk.
To extend system partition, you need to create a bootable USB drive with MiniTool Partition Wizard Pro embedded Bootable Media Builder and boot from it.
Step 1. Launch MiniTool Partition Wizard Bootable Edition. Select the system partition and choose Extend Partition.
Note: In MiniTool Partition Wizard Bootable Edition, all partitions including the system reserved partition and EFI system partition will be given a drive letter, so the original system partition’s drive letter may not be C.
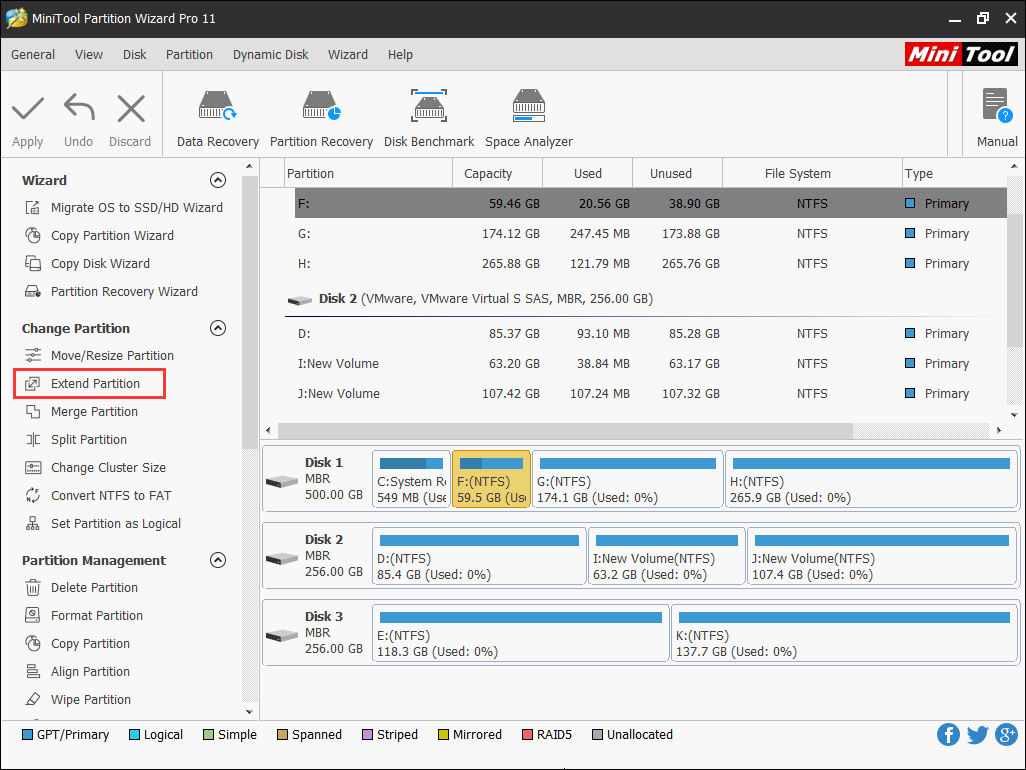
Step 2. Select an existing partition or unallocated space on the same disk to take some free space, and then drag sliding button to decide how much space to take. Then, click OK.
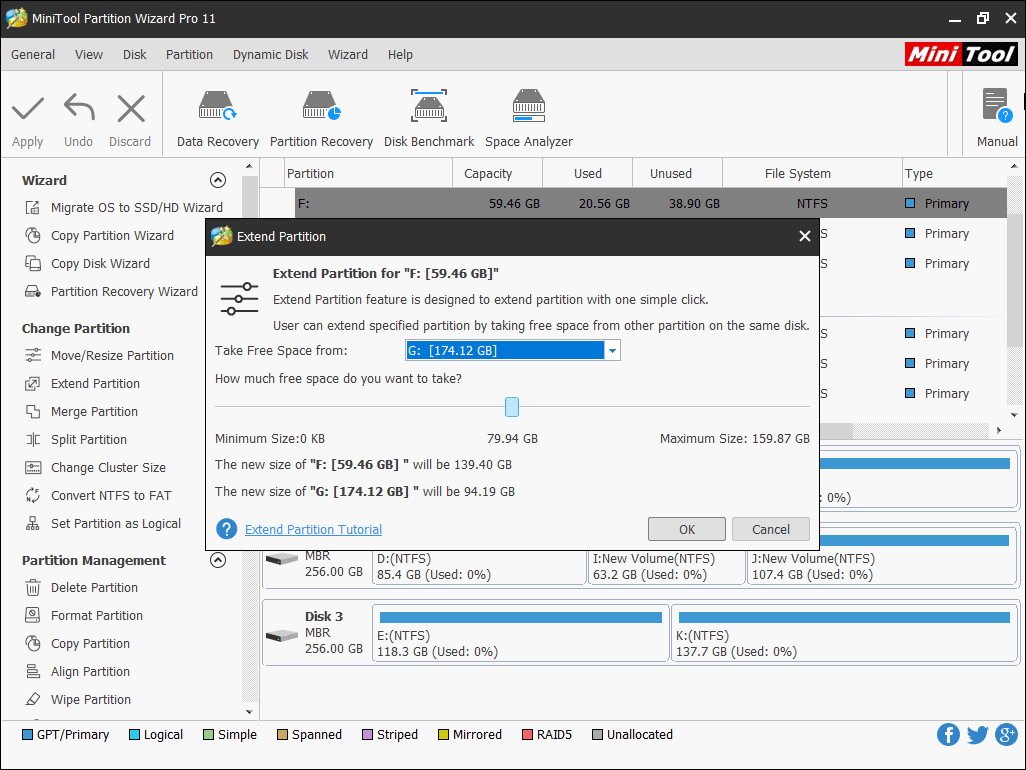
Step 3. Click Apply button on the upper left corner to allow the pending operations.

3. Install Important and Recommended System Updates
Installing updates can fix errors as well as bugs, but it should be done on the condition that there is network connection. Once the connection is available, please click Start button and type Windows Update in Search box. Then, click Check for updates. At last, follow instructions to install all essential and recommended system updates.
4. Install Necessary Hardware and Software Drivers
Reinstalling Windows may make previous hardware and software drivers missing. If you want to make the computer run normally, please install necessary drivers one by one, which can be got from your manufacturer’s website or third-party websites.
5. Do Other Necessary Operations
After all necessary updates and driver are installed, users can restore their backup to a specific partition. It is not recommended to restore personal files to partition C as system crash can leads to data loss.
Then, check whether the restored data can be used as usual. Next, download and install other necessary apps. Furthermore, if you fear of system crash, please create restore point or make a backup for your system.
By following the steps in this post, I successfully reinstalled Windows 10 without a hassle and learned some useful tips for Windows reinstallation. I’ d like to share this post with more friends who want to reinstall Windows 10.Click to Tweet
Bottom Line
Now all operations which had better be done before, during and after Windows reinstallation have been shown. If you don’t know how to reinstall Windows 10 without CD, follow steps and instructions in this post, you can reinstall Windows operating system easily and get a wonderful Windows OS.
If you have any question about how to reinstall Windows 10, you can leave a message on the following comment zone and we will reply as soon as possible. If you need any help when using MiniTool software, you can contact us via [email protected].
There comes a time in every Windows user’s life when things start to feel slower. Perhaps you’ve been installing and uninstalling a ton of applications, or you’ve been mucking around with obscure Windows settings (or worse, the registry). Maybe you even decided to live life on the wild side, like me, and signed up for Microsoft’s Windows Insider program, which recently caused my desktop system to screech to a halt. Whoops.
- Off
- English
No matter the reason, it never hurts to give Windows 10 a top-to-bottom refresh—a new, clean installation of the OS, that is. Yes, you’ll have to reinstall your apps and set up your accounts again, but that doesn’t take as much time as you think. And there are plenty of ways to make this process as painless as possible.
If you’re forgetful, make a list of your installed programs
My annual (or whenever) Windows 10 reinstall is a great time to clean house. I tend to avoid writing down or generating lists of the programs I’ve installed on my system prior to the wipe-and-reinstall. Why? If I can’t remember to install an app when I’m staring at a fresh copy of Windows 10, I probably didn’t need it that badly—or forgot it even existed.
If you know you’ve installed some obscure programs that you don’t need that often, but you’d rather not say goodbye to them forever, that’s fine. It’s easy to generate a list of everything you’ve previously put on your PC. Pull up Powershell by clicking on the Start button and typing that in, and then copy and paste this into the prompt:
Get-ItemProperty HKLM:SoftwareWow6432NodeMicrosoftWindowsCurrentVersionUninstall* | Select-Object DisplayName, DisplayVersion, Publisher, InstallDate | Format-Table –AutoSize
G/O Media may get a commission

It’s a camera. For your car.
The Ring Car Cam’s dual-facing HD cameras capture activity in and around your car in HD detail.
You can copy and paste the result into a text file, or you can have Powershell generate one itself via this command:
Get-ItemProperty HKLM:SoftwareWow6432NodeMicrosoftWindowsCurrentVersionUninstall* | Select-Object DisplayName, DisplayVersion, Publisher, InstallDate | Format-Table –AutoSize > *****
You’ll want to replace the ***** with a location for the text file, like:c:UsersDavidDesktopStuff.txt
You can also export a list of your installed applications via the Command Prompt. Pull that up, similar to how you loaded Powershell, and type in “wmic” and hit Enter. Then, enter this string:
output:C:UsersDavemDesktopInstalledProgramsWMIC.txt product get name,version
Obviously, you’ll want to replace my location with yours. You’ll get a prompt that you messed this up if you copy and paste that line of code (unless you happen to also use “davem” as your folder name).
Back up your stuff
I’m not you, so I can’t give you precise instructions for what you do need to save on your system before reinstalling Windows 10. If you’re nervous about any kind of data loss, you could go the hardcore route and clone (or make an image of) your primary drive before you delete anything. You can then take all the time you need to analyze the contents of your old drive and copy over everything you want to preserve before you delete that clone or image.
Most people probably don’t need to go to those lengths, however. When I have to reinstall Windows 10, I usually copy the entire contents of my system’s User folder (normally found in C:Users) to a separate drive. That usually takes care of everything I care about, although I’ll do a quick run through any major folders on C: to make sure I haven’t accidentally stored data somewhere else, like one of my virtual machine’s hard drives or something.
If you don’t have a spare drive, even a portable one, I’d really recommend investing in something right now. Whether you buy another hard drive, an SSD, a portable drive, or a NAS box, it will be useful for instances like these and you’ll have another place to store backups of your data—assuming, of course, that you’re already sending it to the cloud via whatever service you prefer. You can never have too many backups. Or, at least, that’s what you’ll be thinking when your single backup solution fails.
If you only have a single hard drive, but it’s a biggie, you could also cheap out and partition part of it to hold a clone or image of your primary partition’s contents. It’s an inelegant solution, but it works.
Deauthorize your apps
In case you have a few apps that you have to authorize and can only use on a limited number of systems—CalMAN calibration software comes to mind, as does Office 365 and, of course, iTunes—you’ll want to make sure you deauthorize these before you wipe your system and reinstall Windows 10. (You don’t actually need to do this in advance for Office 365, I just wanted to mention it as an example of authorizations and use limits.)
In my case, iTunes is the only app I ever have to mess with, and only because I’d rather not use the option to deauthorize all of my systems if I can avoid it. You only get one of those “nukes” per year, after all.
You’ll probably know of any other limited apps on your system, but it’s worth scrolling through the Start menu to refresh your memory.
Preserve whatever you don’t want to download later
I’m lucky, in that I can dump most of my critical files (my games) across a few secondary hard disk drives and SSDs on my desktop PC. I don’t do this for the speed or capacity boosts (my primary drive, a 500GB SSD, would be overwhelmed by my Steam collection, whereas my secondary 2TB drive is perfect for my pile o’ games). I also do it because it’s a lot easier to reinstall Windows 10 when I don’t have to worry about reinstalling hundreds of gigabytes worth of games, too.
If you can, I recommend keeping your games off your primary hard drive whenever possible. In my case, I dump everything I can easily redownload onto separate drives. That includes games on Steam, Battle.net, Origin, Epic Games, GoG, et cetera.
Because of this, I don’t need to make a backup of anything game-related before I reinstall Windows 10 (unless some game stupidly dumped a save game in My Documents, which I haven’t often found to be the case). It’s all there, right on my other drives. When facing a new, clean version of Windows 10 that doesn’t have any of my gaming services, I download and install them right on top of where they are already located.
If all goes well, I then won’t have to re-download or reinstall any games. While I usually have to reset my settings for each gaming service’s app, and sometimes have to gently let the app know where the previously downloaded games are (cough Battle.net cough), that’s a fraction of the time it would take to find and re-download everything I previously installed—or, rather, everything that’s already installed and waiting for me to play it.
Save your open browser tabs
If you don’t feel like bookmarking all of your open browser tabs before wiping your drive and reinstalling Windows 10, there’s an easier way to save everything you’ve been viewing (or swearing you’ll get to). Grab the OneTab extension for Chrome or Firefox, and you’ll be able to export everything that’s open or save it as a more easily clickable webpage of links.
This step is one that’s easily forgotten in the pre-installation chaos, but if you don’t do it, you’ll have to sift through your (cloud-based) browser history to find everything you lost. It’s not the hardest task, especially since your browser will likely show you all of your previously closed tabs en masse at some point in your history, but it’s a little annoying to deal with.
Install the Windows 10 ISO onto a USB flash drive
Discs? Pffft. Does your desktop or laptop even have an optical drive anymore? The fastest and easiest way to reinstall Windows 10 is to do it from a USB flash drive. (If you don’t have one sitting around that’s at least 4GB big, now’s a great time to pick one up.)
Download Microsoft’s media creation tool, and then use that to grab the latest Windows 10 ISO directly from Microsoft. While your download is chugging along, go grab a utility called “Rufus” as well. You’ll use this to “burn” your ISO file to a USB flash drive instead of a disc, for lack of a better way to describe the process.
Once you’ve downloaded your ISO, launch Rufus and click on the little image of a disc, which looks like this:
Select the Windows.ISO file you downloaded, and then click the “Start” button to begin creating your bootable USB drive. Once done, you can begin reinstalling Windows (when you’re ready) by pulling up the drive in File Explorer and double-clicking on “setup.exe.” Otherwise, you can also reboot your system and mash whatever key configuration you need to press to boot from a secondary source (your USB flash drive). You might also have to go into your system’s BIOS to boot from your USB flash drive or, barring that, to change the boot order and prioritize your flash drive above your hard drive.
Save any other settings you don’t want to look up later
This is a quick catch-all, but don’t forget to copy and paste any other application settings that you don’t want to deal with figuring out later. In my case, I always export my VPN profiles or write down their settings, at minimum, so I can quickly get them up and working again once I’ve reinstalled Windows 10. I also make sure to find the color profile I previously created when calibrating my monitor. (This also ensures I don’t forget to set that up on a new version of Windows, which my absentminded self has definitely missed sometimes.)
Consider using a Microsoft account
While most people probably set up a Microsoft account to use with Windows 10 (which makes it incredibly easy to authenticate your copy of the OS, among other things), a few of you might still be running local accounts for whatever reason. It’s easy to switch from a local account to a Microsoft account within Windows 10 itself, and you might want to do this before you reinstall the OS so you can quickly synchronize your settings from your old copy of Windows to your new one.
If not, you’ll be prompted to use one to log into your system during Windows 10’s setup process. You can still use a local account if you must, but authenticating with a Microsoft account is pretty convenient. (Don’t forget, you can also log into windows using a PIN, rather than your Microsoft account’s password, if you don’t want to type in something huge and complicated each time your computer boots.)
Getting apps back onto your fresh, new Windows 10
One of the first websites I turn to after installing a new version of Windows 10 is Ninite—check all the apps you want on your PC, and you’ll be able to download a single executable that automatically installs everything you’ve selected. Between that and the various game services I’ve already talked about, that usually takes care of most of the critical apps I need on my system.
However, I did want to give a quick shoutout to the Microsoft Store. Yes, that app. While I rarely use it, there are a few instances where you might want to consider the Microsoft Store version of an app instead of something you’d download from another company’s site. Take iTunes for instance—the Microsoft Store version can stay updated without needing an extra Apple Software Update utility.
While some apps are pretty similar between their “regular” and Microsoft Store versions (Spotify, for example), I generally find it easier to install and uninstall apps via the latter. If nothing else, you’ll have a quick list of everything you’ve used in your “My Library” portion of the app, in case you’re a little forgetful.
Make a backup once you’ve finished the basics
Once you have a general version of Windows 10 set up to your liking—all your preferences are set and all the regular programs you use are installed—I think it’s a great idea to image your entire installation before you start downloading a bunch of crap from the web or what-have-you.
Go grab Macrium Reflect and create a backup image of your entire C: drive, assuming that’s where you installed Windows and your programs. This way, you’ll have a great “operating system + everything I like” version of Windows that you can use the next time you want to restore your system back to a “clean” version of the OS.
Sure, you’ll probably have to download a bunch more Windows 10 updates than if you used Microsoft’s .ISO, but you also won’t have to go through the process of setting up and installing the OS, as well as your apps.