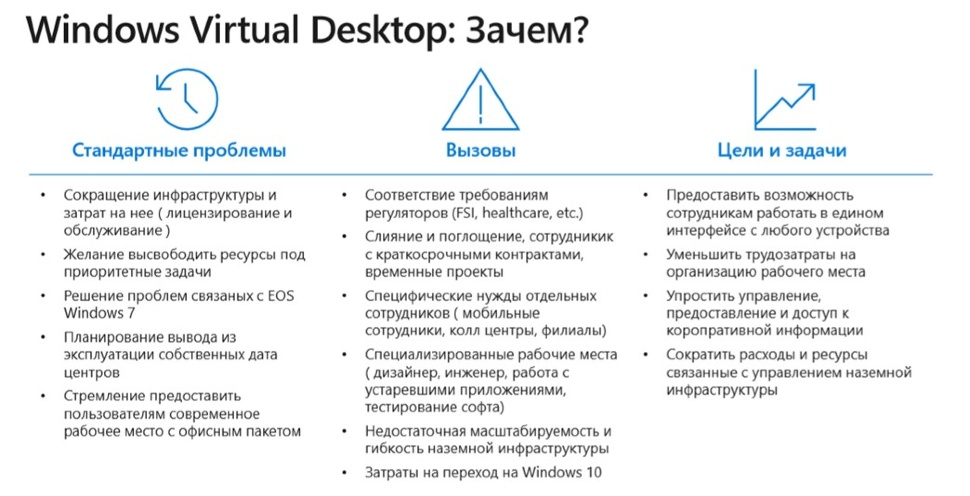
Виртуальный рабочий стол Windows, который предназначен для реализации удалённой работы, так необходимой в текущих реалиях. Что это такое и как его подключить разбираемся в статье.
Виртуальный рабочий стол Windows (Windows Virtual Desktop)
– это облачное решение для виртуализации рабочих столов и приложений, которое становится крайне востребованным в текущих реалиях.
Windows Virtual Desktop функционал:
- создать масштабируемые и гибкие удаленные рабочие места, многосессионная Windows 10 дает возможность проводить несколько параллельных удаленных сеансов одновременно
- предоставить терминальный доступ сотрудникам к корпоративной сети, в котором они смогут использовать комплект корпоративного ПО
- обеспечить защищенный доступ к рабочему месту, а также безопасную передачу данных
- перейти в облако и минимизировать расходы в соответствие с потребностями
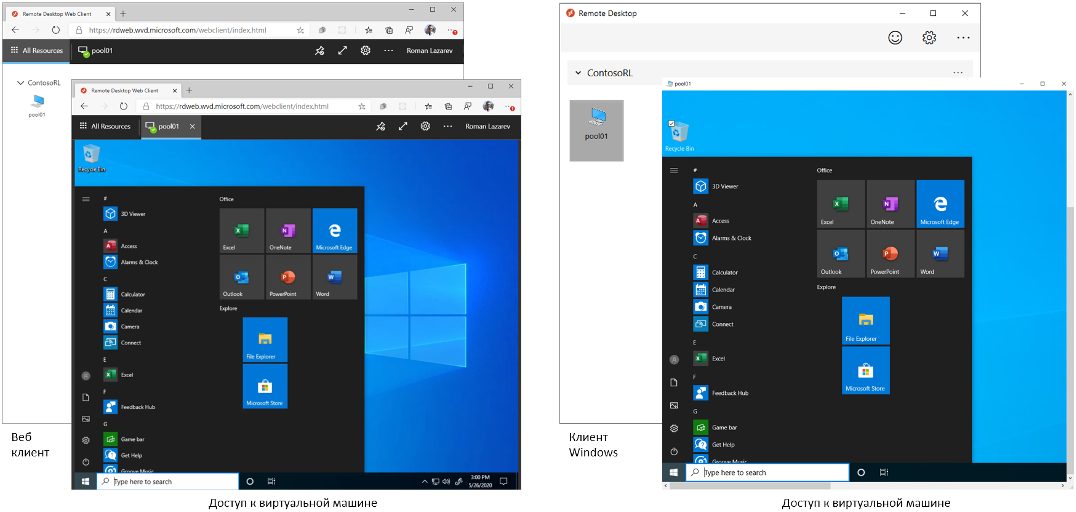
- виртуальный рабочий стол Windows поддерживают следующие клиенты удаленного рабочего стола: Windows, Web, Mac, iOS, Android
Соответствующая лицензия Windows или Microsoft 365 позволяет использовать виртуальные рабочие столы и приложения Windows 10 Корпоративная и Windows 7 Корпоративная без дополнительной платы:
- Microsoft 365 E3/E5
- Microsoft 365 A3/A5/Student Use Benefits
- Microsoft 365 F3
- Microsoft 365 бизнес премиум
- Windows 10 Корпоративная E3/E5
- Windows 10 для образовательных учреждений A3/A5
- Windows 10 VDA на каждого пользователя
По запросу для организаций доступны бесплатные триальные версии Microsoft 365, которые вы можете использовать 30 дней на 25 пользователей. Для их заказа заполните короткую форму.
Как настроить полноценную удаленную работу через Windows Virtual Desktop для ваших сотрудников?
Шаг 1. Создать аккаунт Microsoft Azure.
Чтобы создать клиент виртуального рабочего стола Windows, нужна учетная запись Microsoft Azure.
Шаг 2. Создать клиент Azure Active Directory
Он необходим для управления доступом пользователей к виртуальному рабочему столу Windows. После создания клиента в Azure Active Directory необходимо синхронизировать облачные и локальные удостоверения.
Шаг 3. Разрешить подключение через порт 443
Ваши сотрудники будут подключаться к виртуальному рабочему столу Windows с помощью WebSocket через порт 443. При подготовке инфраструктуры убедитесь, что порт также открыт для подключения клиента удаленного рабочего стола к виртуальному рабочему столу Windows.
Компоненты Azure, влияющие на стоимость развертывания Виртуального рабочего стола Windows:
- хранилище виртуальных машин и операционной системы (ОС)
- диск данных (только для личных рабочих столов)
- хранилище профилей пользователей
- работа в сети
Используйте резервирование виртуальных машин или настройте почасовое использование, чтобы платить только за фактическое использование и экономить до 70% стоимости ВМ.
|
Количество пользователей |
100 |
|
Часов в месяц* |
720 |
|
Виртуальные машины: Multi Instance — D4as v4 (4vCPU 16GB Ram 32GB Temporary storage) |
14,375 руб./час |
|
Диск SSD 128Gb |
600 руб. |
|
Нагрузка |
Тип |
Сессия |
Кол-во машин |
Стоимость машин |
Стоимость дисков |
Стоимость общая |
На пользователя в месяц |
|
Light |
Pool |
Multi |
4 |
41975 |
2400 |
44375 |
443,75 ₽ |
|
Medium |
Pool |
Multi |
6 |
62963 |
3600 |
66563 |
665,63 ₽ |
|
Heavy |
Pool |
Multi |
12 |
125 925 |
7200 |
133 125 |
1331,25 ₽ |
|
Power |
Pool |
Multi |
23 |
241 356 |
13 800 |
255 156 |
2551,56 ₽ |
Цена указаны примерные.
Сроки внедрения — от нескольких часов до нескольких дней.
Если вы планируете использовать Windows Virtual Desktop, и тем более, если вы уже используете Windows Virtual Desktop — свяжитесь с нами любым удобным способом, чтобы узнать подробнее о скидках и рассчитать свою экономию.
Разработка под Windows, Виртуализация, Облачные сервисы, Блог компании Microsoft, Microsoft Azure
Рекомендация: подборка платных и бесплатных курсов таргетированной рекламе — https://katalog-kursov.ru/
Все переходим на «удалёнку»! Это стало главной задачей примерно 2 месяца назад, когда мир изменился. Компаниям, которые мы обслуживаем как архитекторы облачных решений, в дополнение к настройке VPN к своей инфраструктуре понадобились удалённые рабочие столы. Удалённые рабочие столы для компаний нельзя назвать новой потребностью, которая ранее не была закрыта в компаниях вообще – у многих были и есть крупные локальные фермы VDI и терминальные сервера. Из-за массовости и скорости необходимого перехода на первый план у заказчиков, в разной степени, появились следующие проблемы:
- Инфраструктура: скорость развёртывания удалённого доступа, в том числе необходимые для этого мощности
- VPN: безопасный доступ к корпоративной инфраструктуре в реалиях сложности предоставления доступа с домашних устройств, количество сессий VPN которое могут выдержать роутеры и т.д.
- Доступ к рабочим станциям: удалённый доступ к ноутбукам, которые у некоторых заказчиков по политикам безопасности должны находиться локально в компании и т.д
Многим нужно было решить эту задачу «по щелчку». Да, в корпоративном ИТ «по щелчку» редко что происходит, потому требуется заказать оборудование, лицензии, выделить сотрудников для проведения работ. Но с облачным Windows Virtual Desktop «щёлкать» будет проще и быстрее.
В этой статье мы расскажем о том, как планировать архитектуру при развёртывании Windows Virtual Desktop. Также обратим ваше внимание на несколько партнёрских решений, которые смогут качественно дополнить внедряемое.

Примечание: вы можете попробовать этот сценарий в Azure самостоятельно.
Предоставление сервиса удалённых рабочих мест (VDI) и терминальных серверов в масштабах компании, даже небольшой, требует существенного объёма работы от администраторов. Большая часть времени уходит на настройку и интеграцию множества компонентов, из которых состоит эти сервис. Microsoft предлагает посмотреть на эту задачу по новому с Windows Virtual Desktop (WVD). WVD это облачный сервис по виртуализации десктопов и приложения на базе Microsoft Azure. Главные преимущества WVD включают:
- Интеграцию и управление компонентами, отвечающими за предоставление удалённых десктопов и приложения. Их обеспечивает Microsoft, предоставляя бесплатно как сервис с SLA.
- Лицензии на использование ОС и доступа к ней. Они уже включены во многие популярные пакеты Microsoft и не требуют дополнительных затрат, минимизируя стоимость решения в целом.
- Сервис предоставляет возможность использования Windows 10 в формате терминального сервера, минимизируя стоимость сессии.
WVD Fall 2019 Release (GA) и Spring 2020 Update (Preview)
30 апреля в WVD стал доступен новый функционал, который сгруппирован под названием Spring 2020 Update. Этот функционал сейчас доступен в Public Preview и на него не распространяется SLA. На GA функционал, предоставляемый в рамках предыдущей версии — Fall 2019 Update, предоставляется с SLA 99.9%. ВМ, на базе которых предоставляются пулы для пользовательских сессий, покрываются своим SLA 99.95%. Функционал, связанный с Spring 2020 Update, планируется к переводу в GA в течение 2020 года. Так же будут подготовлены инструменты миграции экземпляров, построенных на базе Fall 2019 release, в новую версию.
При развёртывании сервиса и работе с документацией необходимо обращать внимание на релиз, к которому применяется данная инструкция. Он чаще всего будет выглядеть так:
- This content applies to the Fall 2019 release that doesn’t support Azure Resource Manager Windows Virtual Desktop objects.
- This content applies to the Spring 2020 update with Azure Resource Manager Windows Virtual Desktop objects.
Главными изменениями сервиса в Spring 2020 Update являются:
- Управление жизненным циклом объектов сервиса через Azure Portal без необходимости развёртывания дополнительного веб приложения и использования отдельного набора PowerShell команд.
- Возможность назначения приложений на группы пользователей
- Использование Azure RBAC для управления ролями, необходимыми для использования сервиса, а не выделенными ролями.
- Встроенная возможность масштабирования, без необходимости использования внешнего приложения на основе Logic Apps
Если вам необходим гарантированный SLA и запуск в прод, то сейчас лучше выбрать Fall 2019 release. Если же вы только пробуете и хоте испытать новые возможности WVD, то начните с Spring 2020 Release.
Оценка стоимости
Бюджетную оценку по использованию сервиса, можно произвести на базе Azure Pricing Calculator. Для этого из списка сервисов необходимо выбрать Windows Virtual Desktop. Калькулятор подразумевает наличие необходимых лицензий на Windows Client или Windows Server OS (детали здесь):
На странице Windows Desktop Pricing в разделе Personal Desktop и Multi-session Desktop example scenarios приведены ссылки на расчёты в калькуляторе, которые компонуют необходимые дополнительные ресурсы, такие как облачное хранилище для контейнеров профилей, сетевой трафик и т.д. с точки зрения стоимости преимущества использования WVD максимально проявляет себя при использовании Windows 10 Enterprise multisession в сценарии использования совместного пула. При интеграции с локальным ЦОД в расчёт стоит дополнительно включать стоимость Azure VPN Gateway и исходящего трафика.
Архитектура Microsoft Windows Virtual Desktop
Понимание архитектуры WVD позволит вам принять правильные решения при планировании и развёртывания сервиса, а также выстроить корректные ожидания от его производительности.

Для обсуждения, давайте разобьём архитектуру на блоки:
- Клиенты
- Windows Virtual Desktop
- Ресурсы в подписке заказчика
- Корпоративная сеть (aka on-prem, он-прем)
Клиенты
Конечный пользователь может подключаться к сервису как с использованием тонкого клиента через веб браузер, так и через толстый клиент на Windows, Mac, iOS, Android (все клиенты здесь). После авторизации пользователь видит иконки для подключения к удалённым десктопам или приложениям RemoteApp. Доступ к удалённым десктопам происходит по протоколу RDP поверх HTTPS. Дополнительным преимуществом использования толстого клиента на Windows является то, что опубликованные приложения синхронизируются в меню Старт.
Доступ происходит к единой публичной отказоустойчивой (SLA 99.5%) точке сервиса по адресу https://rdweb.wvd.microsoft.com/. Кастомизировать URL возможно с использованием сервиса Azure Front Door как описано здесь.
При логине в сервис используется учётная запись в Azure Active Directory (aka Azure AD), который вам необходимо иметь или создать. В облачной Azure AD необходимо создать учётные записи для пользователей или настроить синхронизацию УЗ через Azure AD Connect из вашей локальной сети. Для повышения безопасности доступа при аутентификации пользователя можно настроить использование Azure MFA, а так же создать другие дополнительные политики аутентификации с использованием Conditional Access (как описано здесь)
Для усиления безопасности функции клиента можно ограничить через кастомные настройки RDP, такие как отключение работы буфера обмена (clipboard), проброса локальных дисков внутрь удалённой сессии и т.д. Настройка производится как описано здесь, полный список свойств, которые можно использовать, можно посмотреть здесь.
Windows Virtual Desktop
Это управляемая Microsoft-ом часть сервиса Windows Virtual Desktop, отвечающая за авторизацию пользователей, безопасный доступ к пулам десктопов, логгирование событий сервиса. Подключение к ВМ происходит с использованием подхода «reverse connect» – авторизации/аутентификации подключения по WebSocket по 443-порту с инициацией со стороны ВМ. Таким образом из Интернет не предоставляется прямой доступ к ВМ и нет открытых в Интернет портов. Процесс открытия сессии выглядит следующим образом:
- Пользователь, через клиент Remote Desktop (RD), запрашивает токен в Azure AD. Он получает его после аутентификации и проверки в том числе с использованием MFA, Conditional Access и Intelligent Security Graph.
- Клиент предоставляет токен в Web Access и через Broker происходит обращение в СУБД Azure SQL DB для получения списка ресурсов (приложений и десктопов), к которым может подключаться пользователь.
- После выбора ресурса клиент RD подключается к Gateway.
- Брокер оркеструет подключение от Агента WVD к Gateway-ю.
- Трафик ходит от агента RD десктопа к ВМ хоста через WebSocket

Облачная часть
При создании экземпляра сервиса WVD, в Azure AD создаётся конфигурационная запись WVD tenant (тенанта). В Azure SQL DB управляемой части сервиса хранятся т.н. метаданные, относящиеся к ресурсам этого тенанта: соответствие десктопов и приложений пользователям, конфигурация пулов, список опубликованных приложений и так далее. В Fall 2019 Release эти данные хранятся в ЦОДах в США (см здесь). По мере развития сервиса Spring 2020 Release появится возможность хранить метаданные в других регионах, в том числе в West Europe.
Сессионные ВМ, на базе которых предоставляются десктопы и приложения, а так же профили пользователей хранятся в регионе Azure (ЦОДе), который вы выберите при развёртывании этих компонентов. Для максимальной производительности все компоненты сервиса стоит располагать в едином регионе.
Свой ближайший ЦОД вы сможете выбрать с использованием инструмента Windows Virtual Desktop Experience Estimator, который измерит задержку (RTT – round trip time) от вашего рабочего места до ЦОДа и обратно. По опыту работы для большинства пользователей из России ближайшим является регион West Europe.

Конечные пользователи и их техническая поддержка смогут в процессе работы мониторить производительность удалённого подключения с использованием Connection Experience Indicator for RDS & WVD.

Необходимым условием развёртывания экземпляра сервиса является присоединение виртуальных машин пула к AD DS. AD может быть как облачной на базе Azure AD (AAD DS), так и на базе локального AD. При настройке WVD для большинства сценариев подходит использование Azure AD DS, он достаточно быстро и просто настраивается. AAD DS также поддерживает работу с групповыми политиками.
Если вам необходима интеграция с локальным AD, тогда необходимо настроить VPN из Azure в локальную инфраструктуру. Об этом подробнее расскажем в разделе «локальная часть». Для развёртывания AAD DS в виртуальной сети в Azure необходимо создать выделенную подсеть. При развёртывании AAD DS будет необходимо указать УЗ, которую можно будет использовать для введения ВМ в домен. Для данной УЗ будет необходимо произвести процедуру сброса пароля для синхронизации хэша пароля в формате, который использует сервис по процессу, описанному здесь. После развёртывания AAD DS, необходимо в настройках сервиса указать его как источник DNS записей для вашей виртуальной сети.
При создании пула сессионных ВМ вы можете воспользоваться предложенным размером ВМ – D4s_v3 (4 vCPU, 16GB памяти) или указать более подходящий вам. Критичным может оказаться выбор размера ВМ в пуле. Одним из подходов к определению размера ВМ является разделение пользователей по типам: Light, Medium, Heavy и Power, которым будут соответствовать конфигурации как описано здесь.
Это подход может помочь при бюджетной оценке решения и первом подходе, но реальность внесёт свои коррективы. Для эмпирической оценки мощностей необходимых для обеспечения работы ваших пользователей можно использовать бесплатную версию SysTrack Windows Virtual Desktop Assessment.

Ресурсы в пулах представляются в двух вариантах – pooled и dedicated – совместные и выделенные ВМ. При использовании «совместного» пула несколько пользователей могут подключаться на одну ВМ в формате терминального сервера, в «выделенном» — ВМ закрепляется за конкретным пользователем. При начале работы с WVD можно начинать рассмотрение с ВМ серии:
- Ds_v3 – сбалансированное соотношение vCPU и памяти
- Fs_v2 – высокое соотношение vCPU к памяти
- NVs_v3 – специализированные ВМ с GPU для работы с 3D графикой
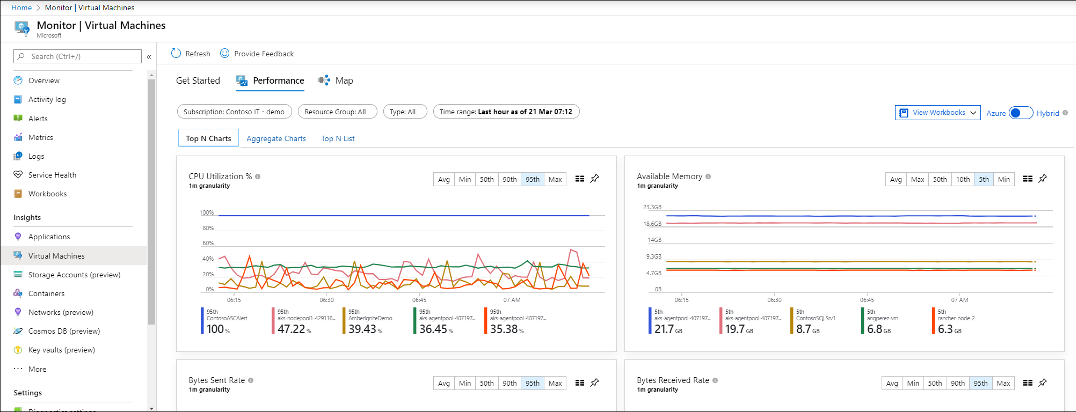
При выборе типа виртуальной машины стоит обратить внимание на её максимальную производительность, представленную в таблицах как в примере ниже. Все размеры виртуальных машин можно посмотреть здесь.

Рекомендуемым типом диска для ВМ в пулах WVD является SSD диск типа «Premium». Диск для данного типа в стандартных образах ОС имеет размер 128GB (P10) и соответствующей этому размеру производительность – 500 IOPS (кратковременная пиковая до 3.5K IOPS), 100 MiB/sec. Производительность локального диска можно поднять, увеличив его размер до 2TB (P40).
По умолчанию профили пользователей размещаются на локальных дисках виртуальных машин в пуле. Ограничение такого подхода, является как сравнительно небольшая максимальная производительность локальных дисков, так и доступность профиля при выходе ВМ из строя при сбое или апгрейде. Вторым вариантом является размещение профиля на сетевом диске. Существует несколько технологий удалённого хранения профиля пользователей — Roaming user profiles (RUP), User profile disks (UPD), Enterprise state roaming (ESR). Каждый из этих подходов имеет свои ограничения при обеспечении работы подробно описанные здесь.
В 2018 году Microsoft приобрёл технологию FSLogix, которая решает многие вызовы при работе с профилями. При подключении к удалённому десктопу или запуске удалённого приложения, через сервис WVD, FSLogix динамически подключается к сетевому ресурсу и с него подключает контейнер c профилем пользователя. FSLogix так же интегрируется с облачным решением Azure Files (SLA 99.9%) и AD – как облачным так и локальным. Ввиду высокой скорости работы и соотношения цена/функционал связка FSLogix/Azure Files/Azure AD является отличным вариантом для использования совместно с WVD.
Для высокой масштабируемости и производительности Azure Files (до 100K IOPS, 5GBps пропускной способности при задержке в 3ms) рекомендуется использовать редакцию Premium. При использовании редакции Premium производительность папки завязана на её размер, и как результат на стоимость. Более подробно о расчёте производительности и цены для редакцию Premium смотрите здесь. Стоит обратить внимание на возможности в Premium редакции накапливать «кредиты» и использовать их для кратковременного ускорения при пиковых нагрузках.
Ввиду необходимости подключения контейнера FSLogix к ВМ с ACL соответствующими пользователю необходимо интегрировать сервис с AD – облачным или локальным. Интеграция Azure Files c Azure AD доступна в GA, тогда как интеграции с локальным AD сейчас находится в Preview. Подключение ВМ к Azure Files так же возможна с применением Private Endpoint, которые предоставляют доступ к сервису с использованием приватной адресации в Azure.
Сценарии и преимущества других вариантов хранения профилей с использованием FSLogix таких как Azure NetApp Files или Storage Spaces Direct описаны здесь. При использовании контейнеров FSLogix необходимо обратить внимание на их размер по умолчанию (30GB) и ознакомиться с возможными инструментами для управления ими.
Для оценки производительности ВМ в пуле, можно воспользоваться встроенным средством Azure Monitor.
Также вы можете рассмотреть бесплатное комплексное решение для мониторинга, включающее в себя метрики сервиса VWD — Azure Monitor for RDS and Windows Virtual Desktop от компании Sepago. Для полного функционирования решения необходимо развернуть агенты Sepago внутри ВМ вашего пула. Для сбора и хранения метрик используется Azure Log Analytics, который тарифицируется отдельно (см Log Analytics -> Pay as you Go).

При развёртывании WVD необходимо заранее запланировать распределение подсетей внутри виртуальной сети Azure. В зависимости от конфигурации, которую вы развёртываете, вам могут потребоваться:
- одна или несколько подсетей для пулов WVD
- подсеть для AAD DS или доступ к ней через пиринг виртуальных сетей
- подсеть для Azure VPN GW или Network Virtual Appliance для организации доступа в локальную сеть
Поддерживаемыми ОС для ВМ в пулах являются Windows 7, 10 Enterprise, Windows Server 2012 R2, 2016, 2019. WVD предоставляет возможность использовать Windows 10 Enterprise в режиме одновременного подключения нескольких пользователей (multisession), без ограничения их количества и необходимости использования лицензии RDS CAL. По сути вы получаете функционал терминального сервера, ранее доступный только на Windows Server, на базе Windows 10, поддерживающий современные приложения. Такую версию Windows 10, по лицензионному соглашению, можно запустить только в Azure.
При необходимости включения в образ дополнительного ПО это можно сделать несколькими способами:
- Развернуть ВМ в Azure, кастомизировать, сделать образ и использовать его при развёртывании пула (детали процесса здесь)
- Взять образ локальной ВМ и загрузить его в Azure (детали процесса здесь)
- Рассмотреть применимость технологии MSIX app attach, которая позволяет подключать приложения без их установки
По опыту: заказчики устанавливали SAP и 1C клиенты, архиваторы, PDF просмотрщики, language pack. Настроить использование часового пояса можно вне процесса кастомизации образа через его редирекцию с использованием GPO.
Локальная часть
Интеграция с корпоративными приложениями и ресурсами «локального» ЦОД может осуществляться через site-to-site VPN, построенный на базе Azure VPN Gateway или Network Virtual Appliance (NVA). При развёртывании Azure VPN Gateway необходимо создать отдельную подсеть с зарезервированным названием GatewaySubnet с минимальным размером в /27. NVA развёртываются на базе ВМ, без определённых требований к наименованию подсети. В случае использования NVA, направить трафик на него возможно с помощью User Defined Routes.
NVA может как передавать весь трафик для фильтрации в локальном ЦОД, так и фильтровать его в облаке. При использовании Azure VPN GW установить ограничения трафика на L4 можно с помощью Network Security Group (NSG), которую необходимо применять на подсеть с ВМ, входящими в пул. При фильтрации трафика, стоит принять ко вниманию, что для корректного функционирования WVD пулу ВМ необходим доступ к списку URL. NSG позволяют предоставлять доступ к сервисам на базе Service Tags (коллекции IP адресов, которые относятся к каждому сервису). Фильтровать трафика в Azure на базе URL можно через NVA (в облаке или локальном ЦОДе) или через Azure Firewall. Для минимизации задержек рекомендуется использовать решение для фильтрации, расположенное в Azure.
При развёртывании VPN-решения стоит обратить внимание на его пропускную способность. При использовании NVA производительность определяется лицензией и сетевой картой выбранной вами ВМ. Для развёртывания Azure VPN GW используется SKU соответствующей производительности. Необходимо обратить внимание, что в дополнение к почасовой стоимости Azure VPN GW или ВМ для NVA также оплачивается исходящий из облака трафик.
Пропускная способность, необходимая для работы разных профилей пользователей, доступна здесь. Для расчёта передаваемого объёма траффика для «бюджетной» оценки можно использовать следующие цифры:
Light: 75Kbps
Medium: 150Kbps
Heavy: 500Kbps
Power: 1000Kbps
Для точной оценки объёма используемого трафика его следует замерить на сетевом оборудовании или ПО, таком как бесплатная версия SysTrack Windows Virtual Desktop Assessment
Заключение
Удалённая работа стала реальностью почти для всех нас и вероятно может остаться такой на достаточно длительное время. Microsoft понимает это и делает создание и поддержание инфраструктуры для предоставления удалённых рабочих мест и приложений максимально простым и экономически доступным. Используя WVD для обеспечения удалённой работы вы сможете достигать большего быстрее.
Полезные ссылки
Попробуй Azure бесплатно
Развертывание и масштабирование виртуализированных рабочих столов и приложений Windows в Azure
Об авторе

Роман Лазарев – Старший Архитектор Облачных Решений. Последние 4 года работаю в Microsoft в роли выделенного архитектора и доверенного советника для крупнейших Российских компаний использующих облако Microsoft Azure. Linked In
As many of you know Microsoft integrated a special Enterprise edition in the Insider Preview 17713:
Windows 10 Enterprise for Remote Services
If you search for this, you only find a few blog posts about this version – most focus on Microsoft Windows Virtual Desktops (WVD). The actual content is mostly only showing multiple RDP session at the same time on a Windows 10 VM – like you know it from the Microsoft Remote Desktop Session Host (RDSH) (or to keep the old name: Terminal Server). Only Cláudio posted two post during the last days about this topic which lead to some interesting discussions. You can find them here and here.
When using Office 365 and other programs there are some limitations when running them on RDSH – often it’s even not supported. When now Windows 10 allows multiple users to connect to one VM they have the full Windows 10 experience and on the other side they are still sharing one VM (like with RDSH).
When booting an official Windows 10 1809 Iso I saw that there is still Windows 10 Enterprise for Virtual Desktops available. As I didn’t find any blog posts having a look at this version I decided to have a look myself.
[Update]
Christoph Kolbicz posted the following on Twitter – thus you can also use other ISOs of Windows 10:
If you installed Enterprise and want to get #WVD, you can also simply upgrade it with this key: CPWHC-NT2C7-VYW78-DHDB2-PG3GK – this is the KMS Client key for ServerRdsh (SKU for WVD). Works with jan_2019 ISO.
[/Update]
Disclaimer:
I am not a licensing expert and quite sure some of the following conflicts with license agreements. During the tests in my Lab I only wanted to figure out what’s possible and where the limitations are. Beside that some of the things described are not supported (and I bet will never be supported) – but I like to know what’s technical possible 
Installing Windows 10 Enterprise for Virtual Desktops and logging in
Ok let’s get to the technical part. I connected an 1809 Iso, booted a VM and got the following Windows-Version selection. After selecting Windows 10 Enterprise for Virtual Desktops the normal Windows Installer questions followed.
After a reboot I was presented with this:
No question for domain join or user – just a login prompt. So, I started to search and only found one hint on twitter (about the Insiders Build) that the only options are to reset the password with a tool or add a new user. Before you are wondering: Yes it’s possible to create another Administrator Account for Windows without having login credentials. As I already tested that in the past (and didn’t want to test out which password reset tool fits) I decided to take that way.
[Update]
Jeremy Stroebel gave me the following hint on Twitter – this way you can skip the steps below to create a local Administrator-User and continue at Multiple RDP-Connections – Not Domain Joined.
Easier, boot to safe mode and it logs right in… then add your user.
[/Update]
Ok time to boot another time from the ISO and open the Command Prompt (press Shift + F10 when the setup shows up).

Now we need to replace the Utility Manager (from the normal Login-Screen) with the cmd.exe. The Utility Manager from the Login-Prompt is always started with Admin-Rights….
To replace the Utility Manager with a cmd enter the following commands:
move d:windowssystem32utilman.exe d:windowssystem32utilman.exe.bak
copy d:windowssystem32cmd.exe d:windowssystem32utilman.exe

That’s it. Time to boot Windows again. Now press the Utility Manager Icon on the bottom right side. Voila: A command prompt (with elevated rights):

The next step is to create an account and add this one to the local admin group. Therefore, you need to enter the following commands:
net user username /add
net localgroup administrators username /add

And voila – you can now login with your just created user (without a password):

Multiple RDP-Connections – Not Domain Joined
For my first tests I just wanted to connect multiple users to the machine without joining the VM to the AD to prevent impacts by policies or something else. I created three local users:

When I logged of my created Administrator all three had been available on the Welcome-Screen to Login:
A RDP connection was not possible at this time. So let’s check the System Properties => Remote Settings. As you can see Remote Desktop was not allowed:
I enabled Allow remote connections to this computer” and added the three created users to the allowed RDP Users:

Time for another RDP-Test. The first user logged on successfully – but the second received the message that already two users are logged on and one must disconnect:

That was not the behavior I expected. After searching a little bit around and finding no solution I tried the old “Did you try a reboot yet?” method. And now something interesting happened. When shutting down this was shown:

And after booting Windows showed this:
All Windows Updates had been installed before and I added no other Windows features, functions or any programs. So what was installed now?
The Welcome-Screen after the reboot also looked different:

Before you could see the created users and select one for login – now you need to enter username and password. Looks quite familiar to an RDSH host after booting or?
So logging in with the local admin again and directly this message was displayed:
Time for another RDP-Test. And guess? This time I was able to connect multiple RDP-Sessions at the same time:
So it looks like the “RDSH”-Role is installed when RDP was enabled and Windows is rebooted. Time for the next tests.
Multiple RDP-Connections – Domain Joined
After everything worked fine I thought it’s time to test how everything behaves in a Domain. I reverted to a snapshot where I just had created the local Admin-User. I logged in and joined the machine to the domain:

After a reboot I logged in with a Domain Admin to Allow Remote Connections to this Computer.

Interestingly this was already enabled. Furthermore it was not possible to disable it any longer. There had been no policies applied to enable this setting – only the default Domain Policy was active.
So let’s go on and allow the Domain Users to connect.

Like before the logon of a third user was denied:

But as we already know a reboot is necessary to install the missing features. Like before magically some features are installed:

Now several domain users are able to connect to the Windows 10 VM at the same time using RDP.

Citrix Components
The next logical step for me was to try to install a Citrix Virtual Delivery Agent on the VM. So connect the Virtual Apps and Desktop 7 – 1811 iso and start the Component selection. But what’s that?

Next to the VDA it’s also possible to select all other roles – which are normally only available on a Server OS! (Just a quick reminder: None of the things I test here are designed or supported to work under such circumstances).
Delivery Controller
I couldn’t resist and selected Delivery Controller. After accepting the license agreement the Component selection appeared. I selected all available Components.

The first prerequisites are installed without issues – but the installation of the Microsoft Internet Information Service (IIS) failed. The error just showed something failed with DISM.

So I just installed the IIS with all available components manually.

But even after installing all available IIS components the Delivery Controller installation still failed at the point Microsoft Internet Information Service.

I decided to first have no deeper look into this issue and remove all components that require the ,IIS: Director and StoreFront.

The installation of the other components worked without any issues – as you can see all selected components are installed on Windows 10 Enterprise for Virtual Desktops.

The Citrix Studio opens and asks for a Site Configuration – as on every supported Server OS.

Time to create a Site on our Windows 10 Delivery Controller.

The Summary shows that the Site was successfully created.

And the Citrix Studio now shows the option to create Machine Catalog.

And a last check of the services: Everything is running fine.

Virtual Delivery Agent
Before we now can create a Machine Catalog we need a Master VDA. So let’s create another VM with Windows 10 Enterprise for Virtual Desktops. Repeat the steps from above (Domain-Join with two reboots) and connect the Citrix Virtual Apps and Desktops ISO. This time we select Virtual Delivery Agent for Windows 10 Enterprise for Virtual Desktops. To be able to create multiple VMs from this Master-VM using MCS select Create a master MCS image.

The next step is to select the Additional Components – like in every other VDA Installation.

Now I entered the name of the Windows 10 VM where I previously installed the Delivery Controller.

The summary shows the selected components and the Requirements.

The installation started….

….and finished without any errors.

The VDA was successfully installed on Windows 10 Enterprise for Virtual Desktops.

Machine Catalog
Time to deploy some VMs – so switch back to the Studio and start the Machine Catalog Configuration.

The first step is to select the Operation System. Normally this is easy: Server OS for Windows Server 2016 / 2019 – Desktop OS for Windows 10. But this time it’s tricky – we have a Desktop OS with Server OS functions. I first decided to take Desktop OS – although I thought Server OS might fit better.

Select the just created Master-VM and configure additional Settings like CPU, RAM, etc..

Finally enter a name for the Machine Catalog and let MCS deploy the configured VMs.

Delivery Group
As we have now a Machine Catalog with VMs it was time to create a Delivery Group – thus we can allow users to access the VM(s).

I selected the created Machine Catalog…

… and added a Desktop to the Delivery Group.

The Summary shows the configured settings.

Now we have everything ready on the Delivery Controller – just the user access is missing.
As the installation of StoreFront failed I added the Windows 10 Delivery Controller to my existing StoreFront Deployment.

After logging in the User can see the just published Desktop. Unfortunately, the user is not able to start the published Desktop.

So back to the Delivery Controller. Oh – the VDA is still unregistered with a “!” in front of the Status.

Let’s check the VDA-Event-Log:
The Citrix Desktop Service was reused a connection to the delivery controller ‘win10-multi-01.lab.jhmeier.com.
The registration was refused due to ‘SingleMultiSessionMismatch’.

Looks like my feeling was correct that the Machine Catalog should have the Operating System Server OS. I created another Machine Catalog and Delivery Group – this time with the type Server OS.

Let’s boot a VDA and check the Status: Registered.

Time to check the user connections. After logging on to StoreFront the user now sees the second published Desktop – Type Server OS.

And this time the connection is possible. As you can see we have now multiple users connected using ICA to the same Windows 10 VDA.

At this point I would like to sum up what worked and what didn’t work until now:
What worked:
- Multiple RDP connections to one Windows 10 VM – Domain-Joined and not Domain-Joined
- Multiple ICA connections to Domain-Joined Windows 10 VDA
- Delivery Controller on Windows 10 (including Studio and License Server)
What did not work:
- Installation of Citrix Components that require an IIS (StoreFront and Director)
If the last point can be fixed it would be possible to create an “all-in” Windows 10 Citrix VM. Thus you could run all Citrix Infrastructure Components on one VM – not supported of cause but nice for some testing. Beside that it’s really interesting to see that next to the VDA also a lot of the Delivery Controller Components just work out of the box on Windows 10 Enterprise for Virtual Desktops.
When we look at the behaviour of the Citrix Components it looks like all Server features (including RDSH) that the Citrix installer uses to detect if it is a Desktop- or Server-OS are integrated into Windows 10 Enterprise for Virtual Desktops.
That’s it for now – I have some other things I will test with this Windows 10 Edition – if I find something interesting another blog post will follow
| title | description | ms.date | ms.topic | ms.assetid | author | ms.author | manager |
|---|---|---|---|---|---|---|---|
|
Create Windows 10 Enterprise virtual desktops for stations |
Learn how to create Windows Server 2016 desktops for station |
07/22/2016 |
article |
63f08b5b-c735-41f4-b6c8-411eff85a4ab |
evaseydl |
evas |
scottman |
Create Windows 10 Enterprise virtual desktops for stations
This optional configuration in MultiPoint Services is primarily intended for situations where an essential application requires its own instance of a client operating system for each user. Examples include applications that cannot be installed on Windows Server and applications that will not run multiple instances on the same host computer.
[!NOTE]
These Virtual Desktops, also known as VDI, are much more resource intensive than the default MultiPoint Services desktop sessions, so we recommend that you use default MultiPoint Services sessions when possible.
Prerequisites
To prepare to create station virtual desktops, ensure that your MultiPoint Services system meets the following requirements:
| Hardware | Requirements |
|---|---|
| CPU (multimedia) | 1 core or thread per virtual machine |
| Solid State Drive (SSD) | Capacity >= 20GB per station + 40GB for the MultiPoint Services host operating system
Random Read/Write IOPS >= 3K per station |
| RAM | 2GB per station + 2GB for the Windows MultiPoint Server host operating system |
| Graphics | DX11 |
| BIOS | BIOS CPU setting configured to enable virtualization – Second Level Address Translation (SLAT) |
-
Stations — Set up the stations for your MultiPoint Services system. For more information, see Attach additional stations to MultiPoint Services.
-
Domain — In a domain environment, the Windows MultiPoint Server computer has been added to the domain, and a domain user has been added to the local Administrators group on the MultiPoint Services host operating system.
Procedures
Use the following procedures to:
-
Create a template for virtual desktops
-
Create virtual desktops from the template
-
Copy an existing virtual desktop template
Create a template for virtual desktops
Before you can create a template for your virtual desktops, you must enable the Virtual Desktop feature in MultiPoint Server.
To enable the Virtual Desktop feature
-
Log on to the MultiPoint Server host operating system with a local administrator account or, in a domain, with a domain account that is a member of the local Administrators group.
-
From the Start screen, open MultiPoint Manager.
-
Click the Virtual Desktops tab, click Enable virtual desktops, and then click OK, and wait for the system to restart.
Your next step is to create a Virtual Desktop template. You are literally creating a virtual hard disk (VHD) file that you can use as a template to create station virtual desktops for MultiPoint Manager. You can either use the physical installation media for Windows or an .ISO image file to as source for the template. You can also use a .VHD of the Windows installation. Note that to use a physical installation disc, you must insert the disc before you start the wizard.
To create a Virtual Desktop template
-
Log on to the MultiPoint Server host operating system with a local Administrator account or, in domain, a domain account that is a member of the local Administrators group.
-
From the Start screen, open MultiPoint Manager.
-
Click the Virtual Desktops tab.
-
Copy a Windows 10 Enterprise .iso file to the local SSD.
-
On the Virtual Desktops tab, click Create virtual desktop template.
-
In Prefix, enter a prefix to use to identify the template and the virtual desktops created with the template. The default prefix is the host computer name.
The prefix is used to name the template and the virtual desktop stations. The template will be <prefix>-t. The virtual desktop stations will be named <prefix>-n, where n is the station identifier.
-
Enter a username and password to use for the local Administrator account for the template. In a domain, enter the credentials for a domain account that will be added to the local Administrators group. This account can be used to log on to the template and all virtual desktop stations created from the template.
-
Click OK, and wait for template creation to complete.
-
The new template will be listed on the Virtual Desktops tab. The template will be turned off.
Your next step is to configure the template with the software and setting that you want on the virtual desktops. You must do this before you create any virtual desktops from the template.
To customize a virtual desktop template
-
Log on to the MultiPoint server host operating system with a local administrator account or, in a domain, with a domain account in the local Administrators group.
-
From the Start screen, open MultiPoint Manager.
-
Click the Virtual Desktops tab.
-
Select the template that you want to customize, click Customize template, and then click OK.
[!NOTE]
Only the templates that have not been used to create virtual desktop stations are available. If you want to update a template that is already in use, you must make a copy of the template by using the Import template task, described later, in Copy an existing virtual desktop template.The template opens in a Hyper-V VM Connect window, and auto-logon is performed using the built-in Administrator account.
-
At this point you can install applications and software updates, change settings, and update the administrator profile. All changes made to the template’s built-in administrator profile will be copied to the default user profile in the virtual desktop stations that are created from the template.
If you are connecting your stations over a domain, we recommend that you create a local user account and add it to the local Administrators group during customization.
[!NOTE]
If the system restarts while a template is being customized, auto-logon using the built-in Administrator account might fail after the system restarts. To get around this problem, manually log on using the local Administrator account that you created, change the password of the built-in Administrator account, log off, and then log back on using the built-in Administrator account and the new password. (You will need to delete the profile that was created when you logged on using the local Administrator account.) -
After you finish configuring your system, double-click the CompleteCustomization shortcut on the administrator’s desktop to run Sysprep and then shut down the template. During customization, the Sysprep tool removes all unique system information to prepare the Windows installation to be imaged.
Create virtual machine desktops from the template
With your virtual desktop template configured the way you want your desktops to be, you are ready to begin creating virtual desktops. A virtual desktop will be created for each station that is attached to the MultiPoint Server computer. The next time a user logs on to a station, they will see the virtual desktop instead of the session-based desktop that was displayed before.
[!NOTE]
This procedure only works when MultiPoint Server is in station mode. If the system is in console mode, you can switch to station mode from MultiPoint Manager. If you are using default MultiPoint settings, you can also start station mode by restarting the computer. By default, the MultiPoint Server computer always starts in station mode
To create virtual desktops for your stations
-
Log on to the Windows MultiPoint server from a remote station (for example, from a Windows computer by using Remote Desktop Connection) using a local administrator account or, in a domain, a domain account in the local Administrators group.
[!NOTE]
Alternatively, you can log on to the server using a local station. However, when you create a station virtual desktop, you will have to log off the station that you used to create the virtual desktop in order to connect the other station to the new virtual desktop. -
From the Start screen, open MultiPoint Manager.
-
If the computer is in console mode, switch to station mode:
-
On the Home tab, click Switch to station mode.
-
When the computer restarts, log on as Administrator.
-
-
Click the Virtual Desktops tab.
-
Select the virtual desktop template that you want to use with the stations, click Create virtual desktop stations, and then click OK.
When the task completes, each local station will connect to a virtual machine-based virtual desktop.
[!NOTE]
If a user account is logged on to any of the local stations, you will need to log out of the session to get the station to connect to one of the newly created station virtual desktops.
Copy an existing virtual desktop template
Use the following procedure to create a copy of an existing virtual desktop template that you can customize and use. This can be useful in the following situations:
-
To copy a master template from a network share onto a MultiPoint Server host computer so that virtual desktop stations can be created from the master template.
-
To create a copy of a template that is currently in use so that you can make additional customizations.
To import a virtual desktop template
-
Log on to the MultiPoint server as an administrator.
-
From the Start screen, open MultiPoint Manager.
-
Click the Virtual Desktops tab.
-
Click Import virtual desktop template, and use Browse to select the .vhd file (template) that you want to import. When you import a template, a copy is made of the original .vhd. By default, MultiPoint Services stores .vhd files in the C:UsersPublicDocumentsHyper-VVirtual hard disks folder.
-
Enter a prefix for the new template, and then click OK.
-
If you are making further customizations to a local template, you might change the prefix name by incrementing a version number at the end of the prefix. Or, if you are importing a master template, you might want to add the version of the master template to the end of the default prefix name.
-
When the task completes, you can customize the template or use it as it is to create stations.
 В Windows 10 впервые были представлены виртуальные рабочие столы, ранее присутствующие в альтернативных ОС, а в Windows 7 и 8 доступные только с помощью сторонних программ (см. Виртуальные рабочие столы Windows 7 и 8).
В некоторых случаях виртуальные рабочие столы могут сделать работу за компьютером действительно удобнее. В этой инструкции — подробно о том, как пользоваться виртуальными рабочими столами Windows 10 для более удобной организации рабочего процесса.
Что такое виртуальные рабочие столы
Виртуальные рабочие столы позволяют вам распределить открытые программы и окна по отдельным «областям» и удобно между ними переключаться.
Например, на одном из виртуальных рабочих столов могут быть открыты привычным образом организованные рабочие программы, а на другом — приложения личного и развлекательного характера, при этом переключиться между этими рабочими столами можно будет простым сочетанием клавиш или парой кликов мышки.
Создание виртуального рабочего стола Windows 10
Для того, чтобы создать новый виртуальный рабочий стол выполните следующие простые действия:
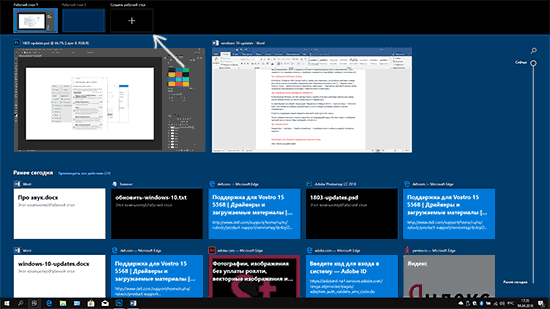
- Нажмите по кнопке «Представление задач» на панели задач или нажмите клавиши Win+Tab (где Win — клавиша с эмблемой Windows) на клавиатуре.
- В правом нижнем углу нажмите по пункту «Создать рабочий стол».

- В Windows 10 1803 кнопка создания нового виртуального рабочего стола переместилась на верх экрана и внешне изменилась кнопка «Представление задач», но суть та же самая.

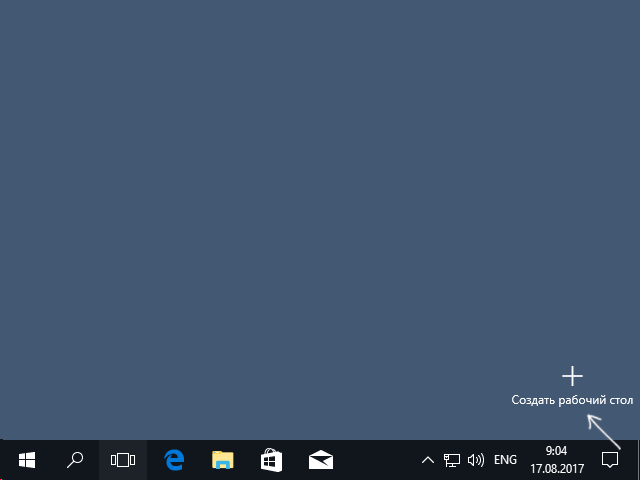
Готово, новый рабочий стол создан. Чтобы создать его полностью с клавиатуры, даже не заходя в «Представление задач», нажмите клавиши Ctrl+Win+D.
Не знаю, ограничено ли количество виртуальных рабочих столов Windows 10, но даже если и ограничено, почти уверен, вы не столкнетесь с ним (пока пытался уточнить информацию об ограничении нашел сообщение о том, что у одного из пользователей «Представление задач» зависло на 712-м виртуальном рабочем столе).
Использование виртуальных рабочих столов
После создания виртуального рабочего стола (или нескольких) вы можете переключаться между ними, размещать приложения на любом из них (т.е. окно программы будет присутствовать только на одном рабочем столе) и удалять ненужные рабочие столы.
Переключение
Для переключения между виртуальными рабочими столами вы можете нажать мышью по кнопке «Представление задач», а затем — по нужному рабочему столу.
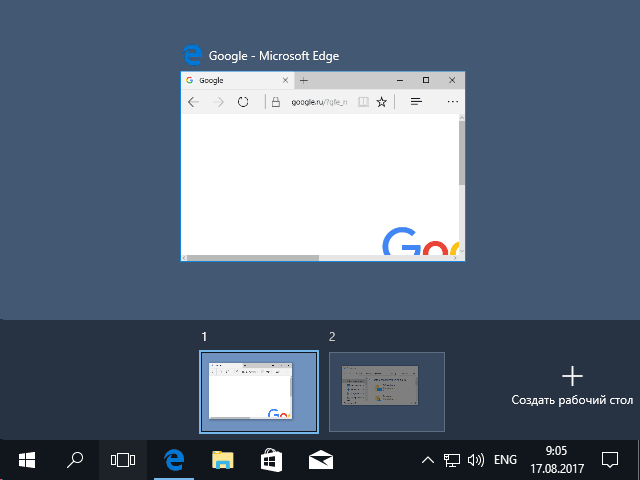
Второй вариант переключения — с помощью горячих клавиш Ctrl+Win+Стрелка_Влево или Ctrl+Win+Стрелка_Вправо.
Если вы работаете на ноутбуке и он поддерживает жесты несколькими пальцами, дополнительные опции переключения можно выполнять жестами, например, проведите тремя пальцами вверх, чтобы увидеть представление задач, со всеми жестами можно познакомиться в Параметры — Устройства — Сенсорная панель.
Размещение приложений на виртуальных рабочих столах Windows 10
Когда вы запускаете программу, она автоматически размещается на том виртуальном рабочем столе, который активен в настоящий момент времени. Уже запущенные программы вы можете перенести на другой рабочий стол, для этого вы можете использовать один из двух способов:
- В режиме «Представление задач» нажать правой кнопкой мыши по окну программы и выбрать пункт контекстного меню «Переместить в» — «Рабочий стол» (также в этом меню можно создать новый рабочий стол для этой программы).
- Просто перетащить окно приложения на нужный рабочий стол (также в «Представление задач»).
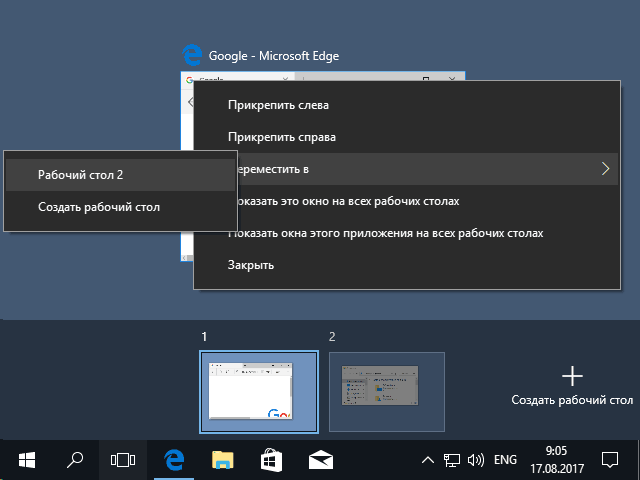
Обратите внимание, что в контекстном меню есть еще два интересных и иногда полезных пункта:
- Показать это окно на всех рабочих столах (думаю, в пояснениях не нуждается, если отметить пункт, вы будете видеть это окно на всех виртуальных рабочих столах).
- Показать окна этого приложения на всех рабочих столах — здесь имеется в виду, что если программа может иметь несколько окон (например, Word или Google Chrome), то все окна этой программы будут отображаться на всех рабочих столах.
Некоторые программы (те, которые позволяют запуск нескольких экземпляров) могут быть открыты сразу на нескольких рабочих столах: например, если вы запустили браузер сначала на одном рабочем столе, а затем на другом — это будут два разных окна браузера.
Программы, которые могут быть запущены только в одном экземпляре ведут себя иначе: например, если вы запустили такую программу на первом виртуальном рабочем столе, а потом попробуете запустить на втором, вас автоматически «перенесет» к окну этой программы на первом рабочем столе.
Удаление виртуального рабочего стола
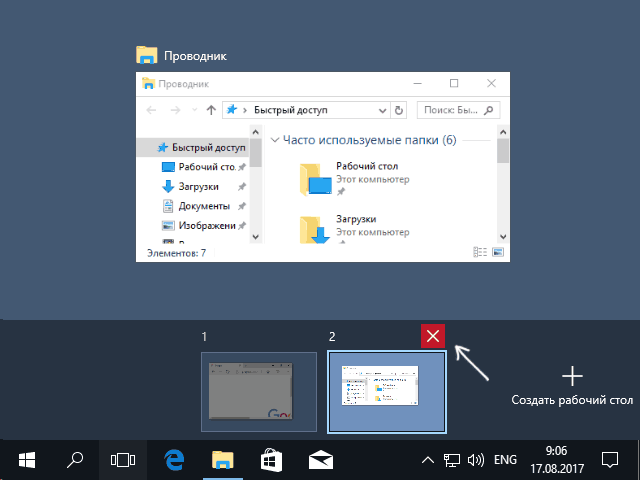
Для того, чтобы удалить виртуальный рабочий стол, вы можете перейти в «Представление задач» и нажать «Крестик» в углу изображения рабочего стола. При этом, открытые на нем программы не закроются, а переместятся на рабочий стол, находящийся слева от закрываемого.
Второй способ, без использования мыши — использовать горячие клавиши Ctrl+Win+F4 для закрытия текущего виртуального рабочего стола.
Дополнительная информация
Созданные виртуальные рабочие столы Windows 10 сохраняются при перезагрузке компьютера. Однако, даже если у вас есть программы в автозапуске, после перезагрузки все они откроются на первом виртуальном рабочем столе.
Однако, есть способ «победить» это с помощью сторонней утилиты командной строки VDesk (доступна на github.com/eksime/VDesk) — она позволяет, помимо прочих функций управления виртуальными рабочими столами, запускать программы на выбранном рабочем столе примерно следующим образом: vdesk.exe on:2 run:notepad.exe (будет запущен блокнот на втором виртуальном рабочем столе).