If you’re working on a Windows PC and want the apps and content from another device to show on your PC screen, you’ll want to consider mirroring that device‘s screen or projecting it to your PC. Note that you’ll need a device that supports Miracast. Here’s how to mirror another screen or project to your PC:
-
Select Start > Settings > System > Projecting to this PC .
-
Under Add the “Wireless Display” optional feature to project to this PC, select Optional features.
-
Next to Add an optional feature, select View features, then enter “wireless display.”
-
Select the check box next to Wireless Display from the list of results, select Next, then select Install.
-
After “Wireless Display” is installed, select Back to manage your projecting preferences on the Projecting to this PC page in Settings.
-
On the PC you’re projecting to, launch the Wireless Display app by entering “wireless display” in the search box on the taskbar, and selecting Wireless Display in the list of results.
Note: The Wireless Display app is available on devices running Windows 11 version 22H2 and newer. If you’re running an earlier version of Windows, launch the Connect app by entering «connect» in the search box on the taskbar, and selecting Connect in the list of results.
To find out which version of Windows you’re running, see Which version of Windows operating system am I running?
-
On the device you’re projecting from, go to the screen mirroring settings (sometimes called cast settings), and select your PC to connect to it. If you’re projecting from a PC, you can also select Windows logo key + K and select the PC you’d like to connect to.
-
Select Start > Settings > System > Projecting to this PC .
-
Under Add the “Wireless Display” optional feature to project to this PC, select Optional features.
-
Select Add a feature, then enter “wireless display.”
-
Select the check box next to Wireless Display from the list of results, then select Install.
-
After “Wireless Display” is installed, manage your projecting preferences on the Projecting to this PC page in Settings.
-
On the PC you’re projecting to, launch the Connect app by entering “Connect app” in the search box on the taskbar, and selecting Connect in the list of results.
-
On the device you’re projecting from, go to the screen mirroring settings (sometimes called cast settings), and select your PC to connect to it. If you’re projecting from a PC, you can also select Windows logo key + K and select the PC you’d like to connect to.
Need more help?
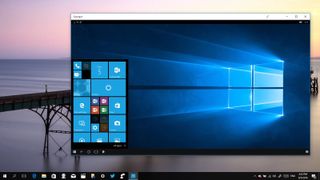
The Windows 10 Anniversary Update doesn’t add a few new features and change a few things — it continues Microsoft’s quest to bring devices closer together. One new feature is part of this quest: «Project to this PC».
Project to this PC is very similar to remote desktop, but with the difference that the remote device is the one establishing the connection to the new Connect app. You can project a Windows 10 Mobile phone or remote PC to your computer screen using Miracast wireless technology or through a local network without the need for an username and password.
In this guide, we’ll walk you through the steps to project devices to your computer screen on the Windows 10 Anniversary Update and later version.
How to use the ‘Project to this PC’ feature on Windows 10
Project to this PC has two parts: you first need to customize the settings, and then use the Connect app to establish a connection.
Customizing ‘Project to this PC’ on Windows 10
To customize the experience do the following:
- Open Settings.
- Click on System.
- Click on Project to this PC.
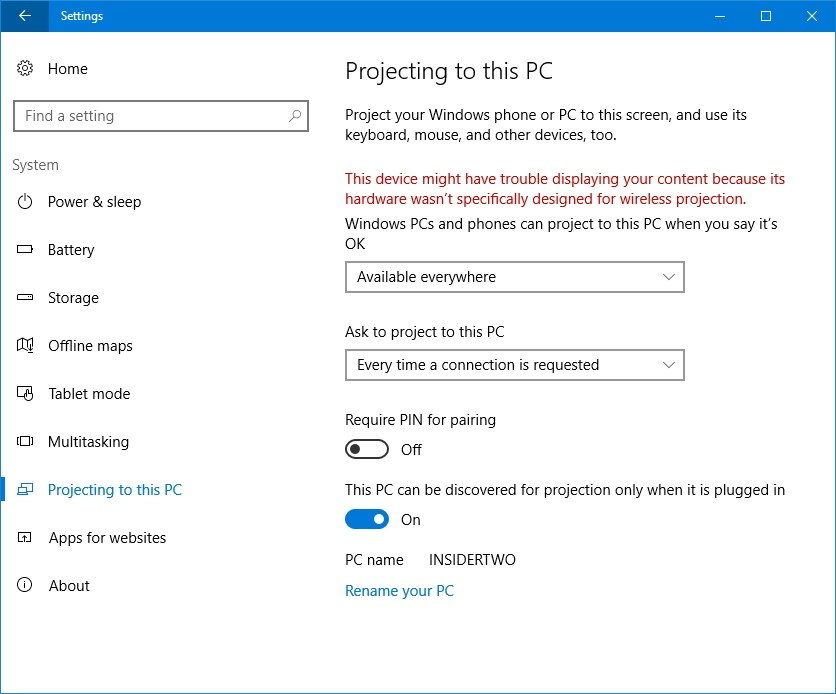
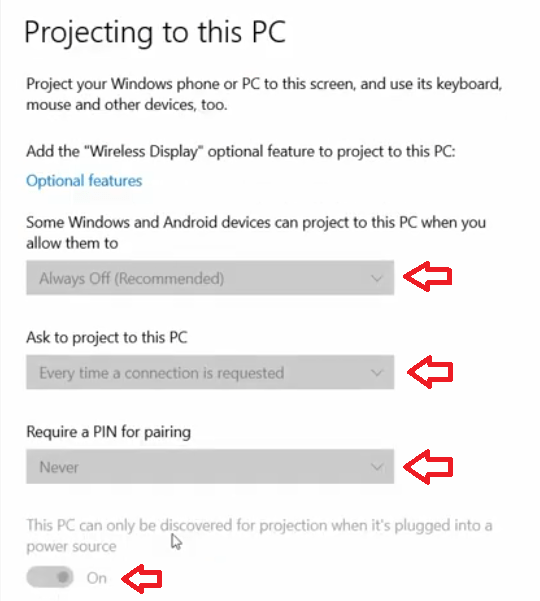
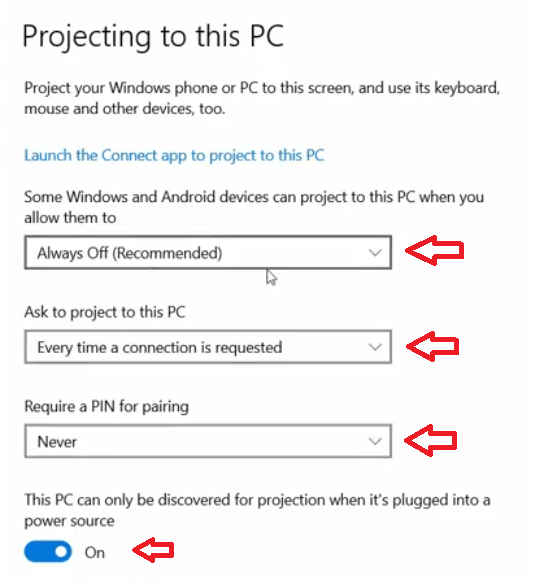
In order to make your device discoverable by the other device you’re trying to project, you have to customize the «Windows PCs and phones can project to this PC when you say it’s OK» option.
From the drop-down menu, you need to choose one of the following:
- Available anywhere on secure networks
- Available anywhere
- Always Off
You can also select to «ask to project to this PC»:
- First time only
- Every time a connection is requested
In addition, Project to this PC offers the option to pair devices using a pin with the Require PIN for pairing option. If you don’t enable this option, you’ll connect directly without any extra steps.
Because users are likely to use this feature on a laptop, there is also an option to make your computer discoverable only when it’s plugged in. (So, if you’re trying to use this feature and you’re unable to connect, you probably have this option turned on, and your laptop is running on battery mode.)
You even get a link to rename your PC to make easier to discover the device on the remote host.
Projecting a device to your computer
Once you have configured all your settings, open the Connect app on the device you’re trying to project a remote screen. Then on the remote device, such as your phone or another Windows 10 PC, do the following:
- Open Action Center.
- Click the Connect button.
- Click the name of the device you’re trying to project.
- Check the Allow input from a keyboard or mouse connected to this display option as necessary.
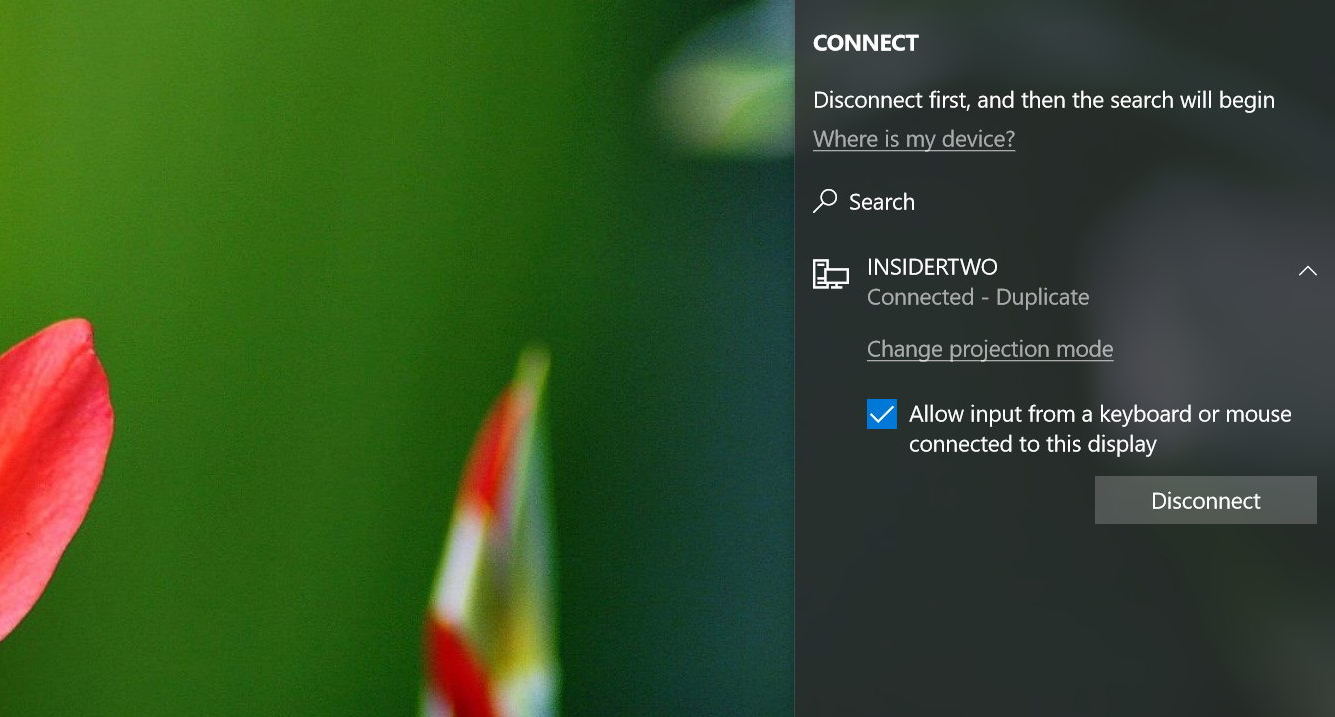
Once connected, you’ll also be able to control the remote screen with your keyboard and mouse. However, keep in mind that the experience performance will vary depending on the device you’re using and network speeds.
This is also a great alternative to use Continuum for Windows 10 Mobile, when you don’t have a display adapter to use your phone as a PC.
The secret feature
The best part about this new feature is that you’re not only limited to project your main computer screen, you can also use «Project to this PC» to transform your computer into a secondary monitor for another PC.
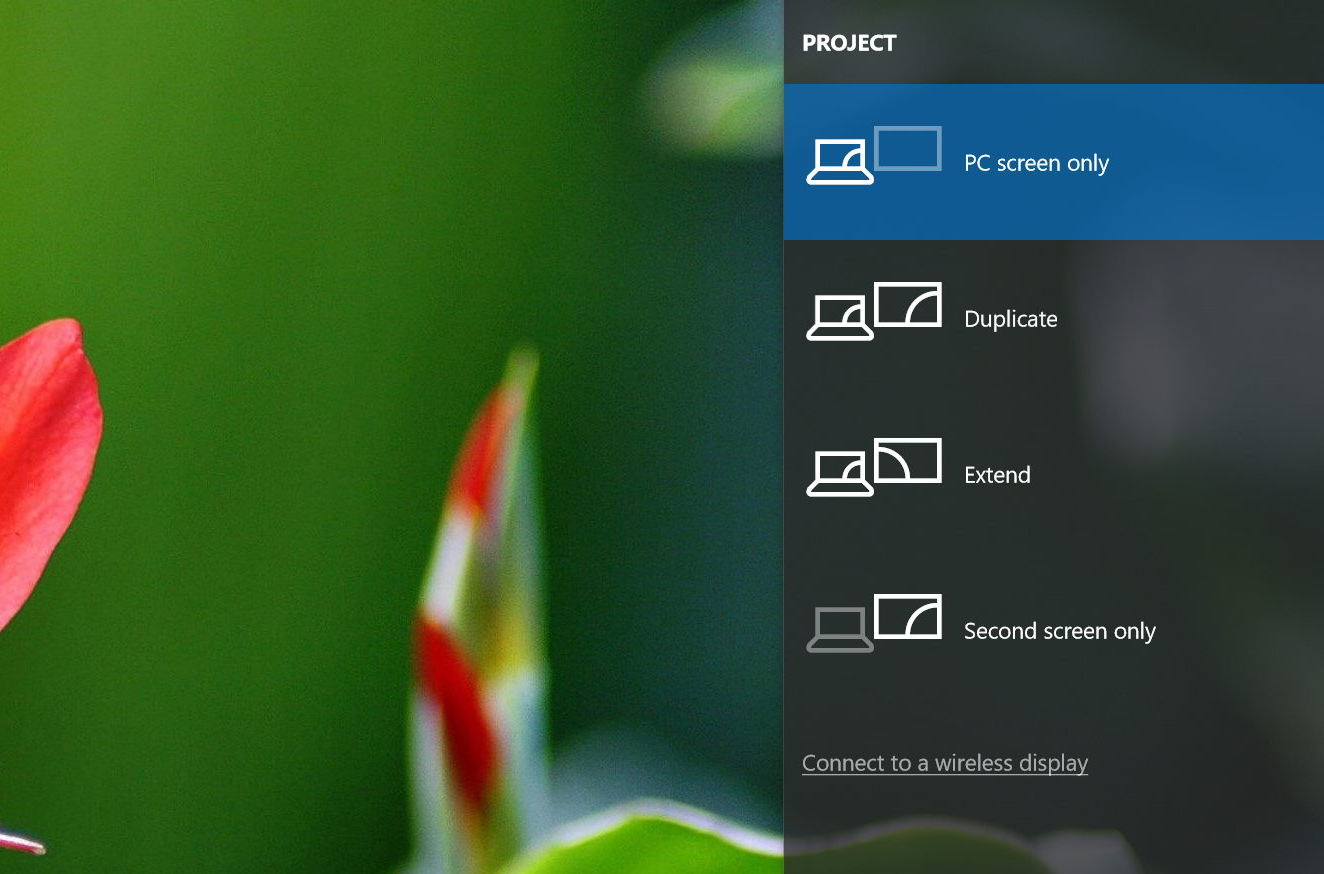
When you connect another PC to your main computer screen there is a «Change projection mode» option (see above image). When you click this option, you’ll also get the Windows Project options, including: Disconnect, Duplicate, Extend, and Second screen only. If you click the Extend option you will be able to expand your workspace real estate as you were connecting a secondary monitor.
Wrapping things up
Microsoft is touting the «Project to this PC» as a business feature to help you quickly show PowerPoint, Word, or another type of documents to a colleague, but anyone can use it.
It’s important to note that devices projecting to the Connect app on your main PC are not required to be running the Anniversary Update (version 1607). This feature will work perfectly OK with devices running the November 2015 Update (version 1511) or later.
These instructions also apply to Windows 10 Mobile devices — the only difference is that you’ll have access to the Continuum experience, not just the phone screen.
Do you like the new Project to this PC feature on Windows 10? Have you tried it? Tell us in the comments below.
More Windows 10 resources
For more help articles, coverage, and answers on Windows 10, you can visit the following resources:
- Windows 10 on Windows Central – All you need to know
- Windows 10 Anniversary Update
- Windows 10 help, tips, and tricks
- Windows 10 forums on Windows Central
Get the best of Windows Central in in your inbox, every day!
Mauro Huculak is technical writer for WindowsCentral.com. His primary focus is to write comprehensive how-tos to help users get the most out of Windows 10 and its many related technologies. He has an IT background with professional certifications from Microsoft, Cisco, and CompTIA, and he’s a recognized member of the Microsoft MVP community.

on
May 10, 2021, 12:55 PM PDT
How to install and activate the Windows 10 Projecting to this PC feature
No longer installed by default, you must first install the Windows 10 Projecting to this PC software before you can use it to create a second display using a wireless connection.
We may be compensated by vendors who appear on this page through methods such as affiliate links or sponsored partnerships. This may influence how and where their products appear on our site, but vendors cannot pay to influence the content of our reviews. For more info, visit our Terms of Use page.

Most of us do not have access to the same level of IT resources at home as we do at the office. This often means that the acquisition of a second or third display monitor is just not in the home office budget. However, with a little ingenuity, an unused laptop and the Windows 10 Projecting to this PC feature, that small obstacle can be overcome.
TechRepublic has covered how to use the Windows 10 Projecting to this PC feature to create a wireless multiple-monitor configuration before, but there is a new twist to this method that may prevent its successful implementation for many users. This how-to tutorial shows you how to amend default Windows 10 settings and install the necessary software, so that you can use the Projecting to this PC feature to create a second display.
SEE: How to reopen offices and keep employees and customers safe (TechRepublic Premium)
How to install and activate the Windows 10 Projecting to this PC feature
Settings for the Windows 10 Projecting to this PC feature are located on the System settings screen. Click to the Start button and select the Settings button (gear icon) on the left-hand menu. Click the System tab and then scroll down the left-hand navigation bar and select the Projecting to This PC link, as shown in Figure A.
Figure A
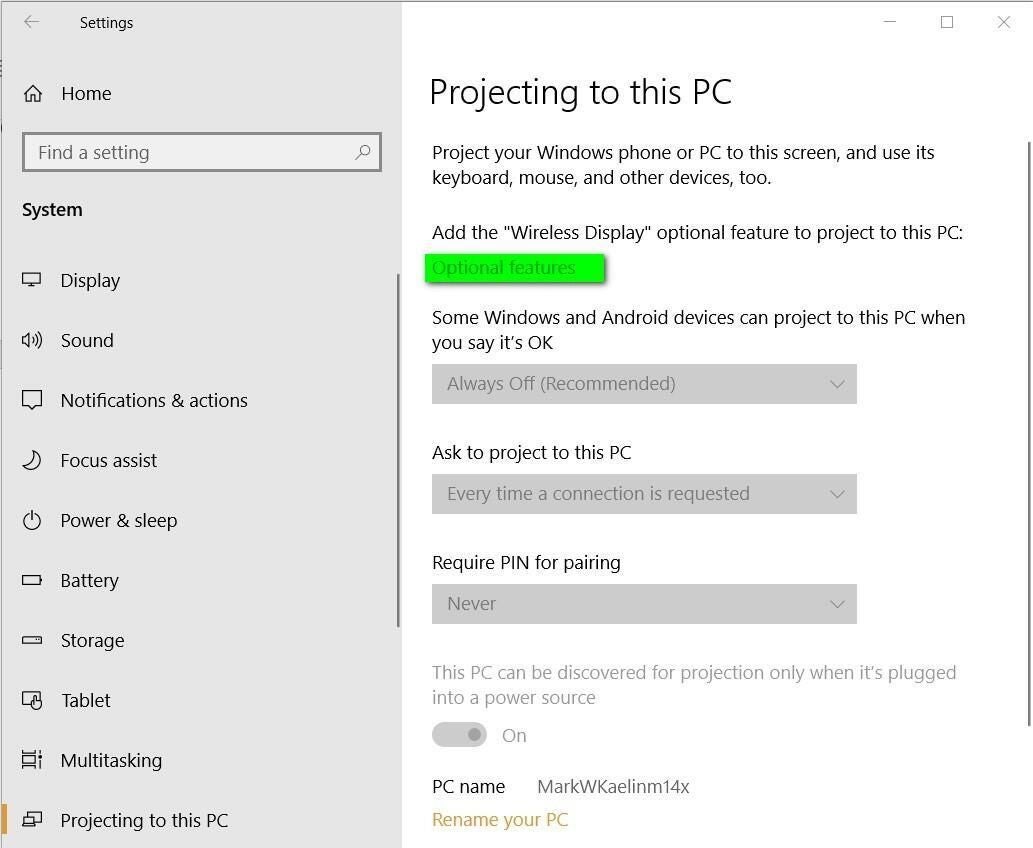
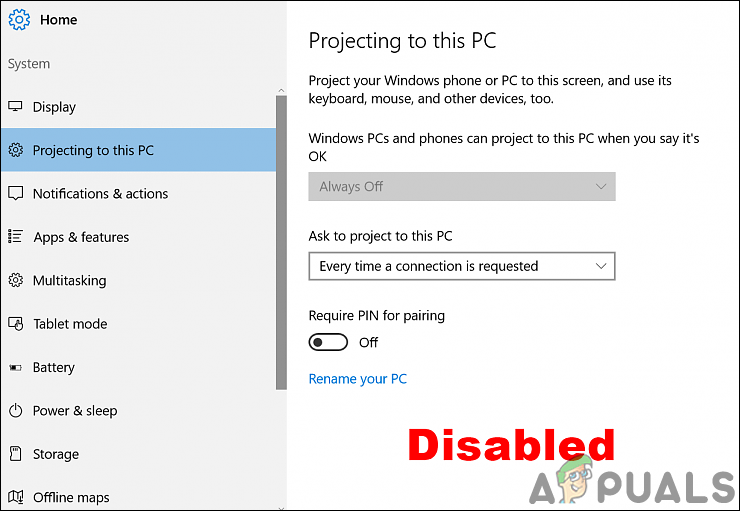
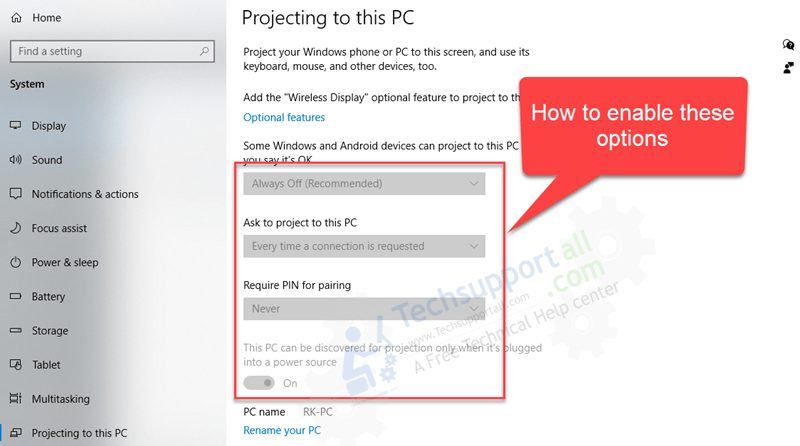
As you can see, all the Windows 10 Projecting to this PC feature settings are grayed out. This is because the software that makes that feature possible is no longer installed by default. Projecting to this PC is considered an optional feature. Therefore, we will have to install it manually.
SEE: 69 Excel tips every user should master (TechRepublic)
Before you start, be sure you are connected to the internet because we have to download some software from Microsoft.
Since you are presumably looking at the screen in Figure A, click the Optional features link on the page to start the optional features install process, as shown in Figure B.
Figure B

On this screen you will see some of the other optional Windows 10 features you have installed on your PC. For our purposes, click the Add a Feature button. From the ensuing list of features (Figure C), search for “wireless display.”
Figure C

Put a check the in the checkbox to add the feature and click the Install button. It will take a few minutes to download and install the software.
When you return to the settings screen for Projecting to this PC, as shown in Figure D, you will see that the feature is no longer grayed-out and is active.
Figure D

Now you can begin the process outlined in How to use Windows 10’s Projecting To This PC feature to create a wireless multiple-monitor configuration to get all the productivity benefits you seek from a second or third display.
Also See
-
Tips for creating a productive home office in the remote work era
(TechRepublic) -
Monitors that business pros and gamers need
(TechRepublic) -
How to use the Windows 10 Assessment Tool to measure system performance
(TechRepublic) -
Windows 10 21H1: A small but significant update, with bigger changes to come in 21H2
(TechRepublic) -
This portable dual monitor is the most affordable way to add a second screen to your laptop
(ZDNet) -
Must-read coverage: Windows 10
(TechRepublic on Flipboard)
-
Microsoft
-
Software
The Projecting to this PC is a Windows feature that allows users to wirelessly connect to another computer monitor. This only works if the hardware of both devices supports the Miracast. It uses the Connect app to project the display of one device to another. However, you can also disable this feature on a system if you don’t need it. If it is already disabled, then you can enable it. In this article, we provide you methods through which you can enable or disable the Projecting to this PC feature in Windows 10.
Enabling or Disabling Projecting to this PC
All the below methods do the same job of enabling and disabling this feature. You can use any one of the methods to accomplish the task. Mostly we will be showing you methods through which you can disable this feature. However, in each method, we will also provide the step for enabling it back too.
The Local Group Policy Editor is only available in the Windows 10 Pro, Windows 10 Education, and Windows 10 Enterprise. If you are using the Windows Home version, then skip to the Registry Editor method.
Method 1: Using the Local Group Policy Editor
The Local Group Policy Editor is a Windows feature that controls the working environment of the operating system. The setting that you want to use is already available in the Local Group Policy Editor. A user just needs to edit the policy to enable or disable the Projecting to this PC feature. Follow the below steps to see how it works:
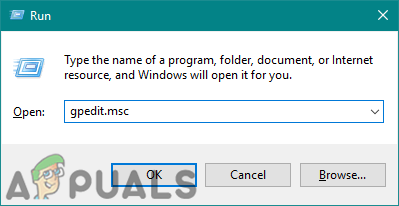
- Open the Run dialog box by pressing the Windows and R keys together on your keyboard. Then, type “gpedit.msc” and press the Enter key to open the Local Group Policy Editor window.

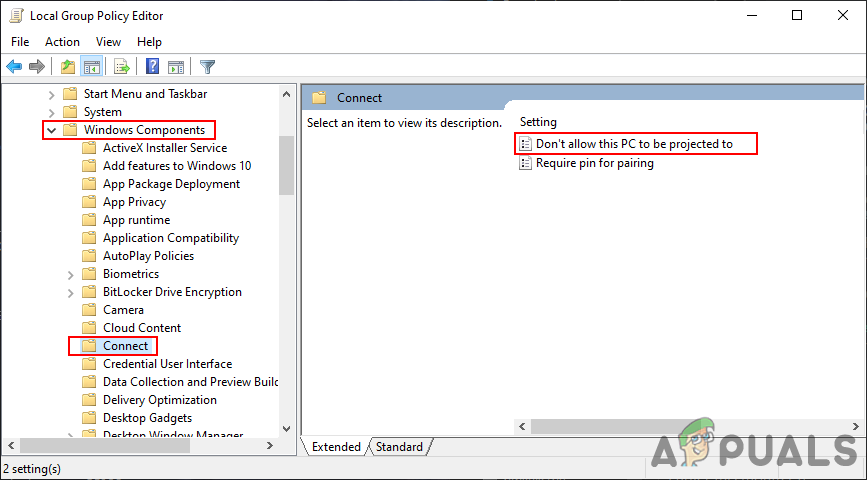
Opening the Local Group Policy Editor - In the Local Group Policy Editor window, navigate to the following location:
Computer ConfigurationAdministrative TemplatesWindows ComponentsConnect

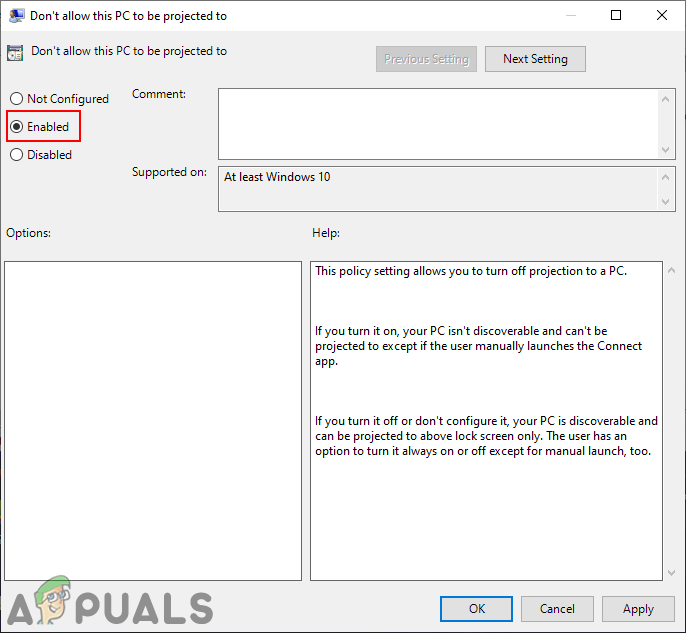
Navigating to the setting - Double-click on the setting named “Don’t allow this PC to be projected to” and it will open in another window. Now change the toggle option from Not Configured to Enabled.

Enabling the setting - Click on the Apply button and then the Ok button to save the changes. This will disable the Projecting to this PC feature.
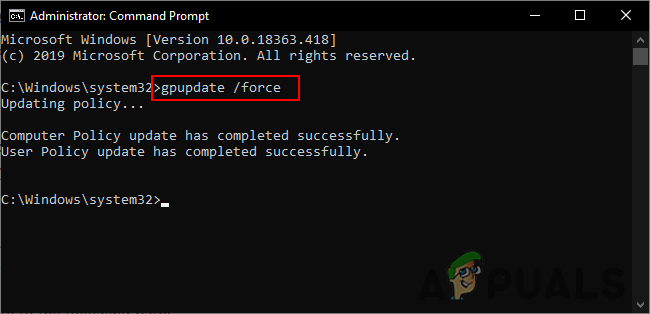
- The policy will automatically update the settings on your system. However, if it doesn’t update, then open the Command Prompt as an administrator.
- Now type the following command in Command Prompt (Admin) to force an update for the policy that you configured. You can also update the group policy by restarting the system.
gpupdate /force

Updating the Group Policy configuration - You can always enable it back by changing the toggle option to Not Configured or Disabled.
Method 2: Using the Registry Editor
The Windows Registry Editor is a graphical tool through which users can view and make changes in the Windows Registry. It stores all the low-level settings for your Windows operating system. This is also the only available method for Windows Home users. Unlike the Group Policy method, you have to create the missing value/key for the setting in the Registry Editor. Follow the below steps to configure the setting in the Registry Editor:
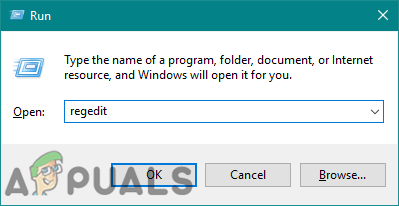
- Open the Run dialog box by pressing the Windows + R key together.
- Now type “regedit” in the box and press the Enter key to open the Registry Editor.
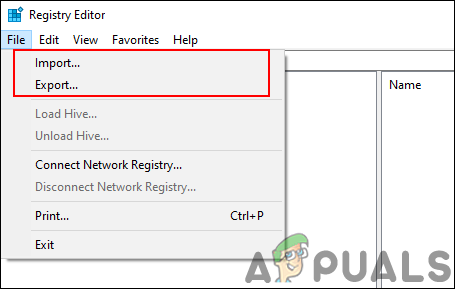
Note: If prompted by the UAC (User Account Control) window, click on the Yes button.Opening the Registry Editor - If you want to create a registry backup, click on the File menu and then choose the Export option from the list. Name the file and provide the location where you want to save it, then click on the Save button.

Creating a Registry backup Note: To recover the registry, click on the File menu and choose the Import option from the list. Select the backup file that you previously created.
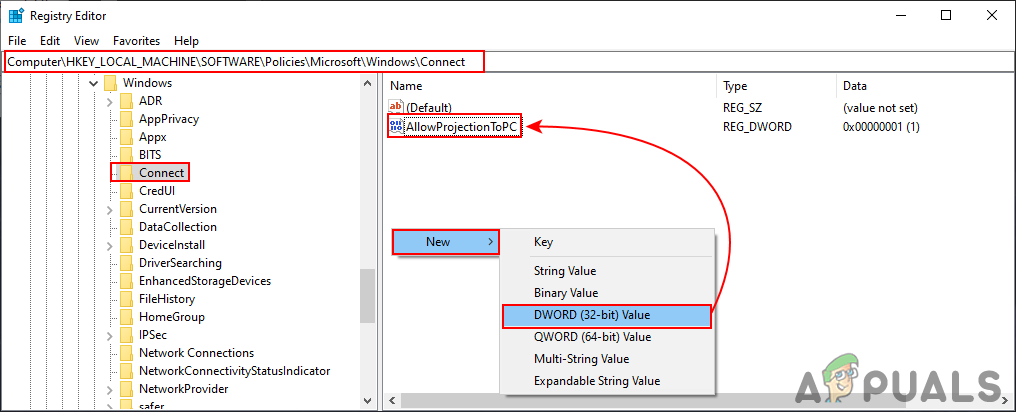
- Navigate to the following path in the Registry Editor window:
HKEY_LOCAL_MACHINESoftwarePoliciesMicrosoftWindowsConnect
Note: If the Connect key is missing, right-click on the Microsoft key, and choose the New > Key option. Rename the key as “Connect“.
- In the right pane of the Connect key, right-click and choose the New > DWORD (32-bit) Value option. Rename this value as “AllowProjectionToPC“.

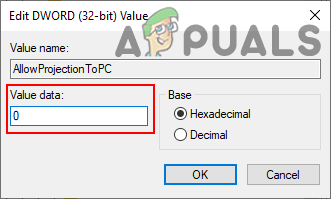
Creating a new value - Double-click on the value to edit it. Now change the value data to 0 to disable the value and change the value data to 1 to enable the value. You can also remove the value to set it back to the default setting.

Changing the value data - Once the changes are made, make sure to reboot the computer to apply these changes to your system.

Kevin Arrows
Kevin is a dynamic and self-motivated information technology professional, with a Thorough knowledge of all facets pertaining to network infrastructure design, implementation and administration. Superior record of delivering simultaneous large-scale mission critical projects on time and under budget.
Back to top button
-
MiniTool
-
MiniTool News Center
- Projecting To This PC And Screen Mirroring On Windows 10
By Sarah | Follow |
Last Updated June 25, 2021
![]()
It’s not a difficult thing to show apps and content from another screen to your own PC screen on Windows 10. You should enable the Projecting to this PC feature and then modify the screen mirroring settings or cast settings. MiniTool decides to show you more details about the screen mirroring on Windows 10 in case you don’t know the feature at all.
What’s Projecting to this PC?
Back in 2015, Microsoft enables you to mirror your screen to any dongles or devices (cast Windows 10 to TV or streaming box) by releasing the Windows 10 Miracast. Later, Microsoft makes it possible to turn your PC into a wireless display by introducing the Projecting to this PC feature. You can cast the content of screen from a phone, tablet, or PC running Windows 10 to your own PC. This process is known as Windows 10 screen mirroring or making Miracast-capable wireless display Windows 10.
How To Connect Laptop To TV Without An HDMI Cable?
Tip: You should be very careful when performing actions on a Windows 10 computer; otherwise, your valuable data may be deleted by mistake. If that really happens to you, please get this powerful tool immediately to recover deleted files from your PC.
Free Download
How to Enable or Disable Windows 10 Projecting to This PC
Please enable the “Projecting to this PC” feature for screen share Windows 10. You must confirm you’re your device supports Miracast.
Method 1: Enable via Settings
Do this if you don’t know whether the “Projecting to this PC” feature is enabled or not: access the feature via Settings.
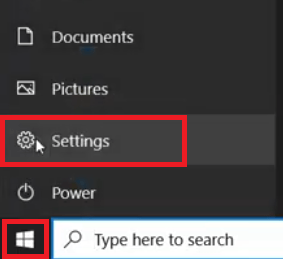
- Click on the Start button at the bottom left of your PC screen.
- Move your cursor up to click on the Settings icon (it looks like a gear).
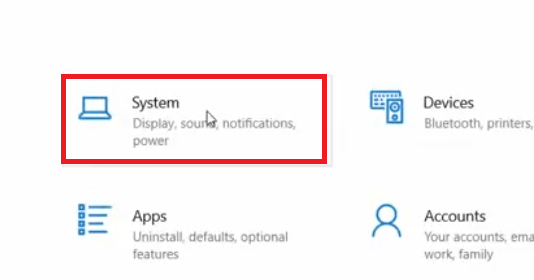
- Select System (Display, sound, notifications, power) from the Settings window.
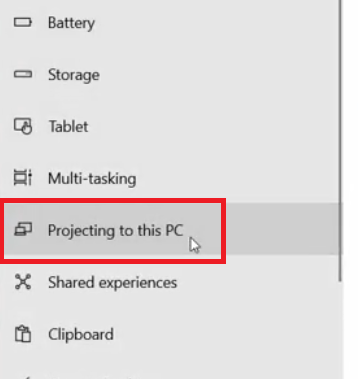
- Shift to Projecting to this PC in the left pane.
- Adjust settings in the right pane.
Do this if all the Windows 10 Projecting to this PC feature settings are grayed out: install the Windows 10 connect app.
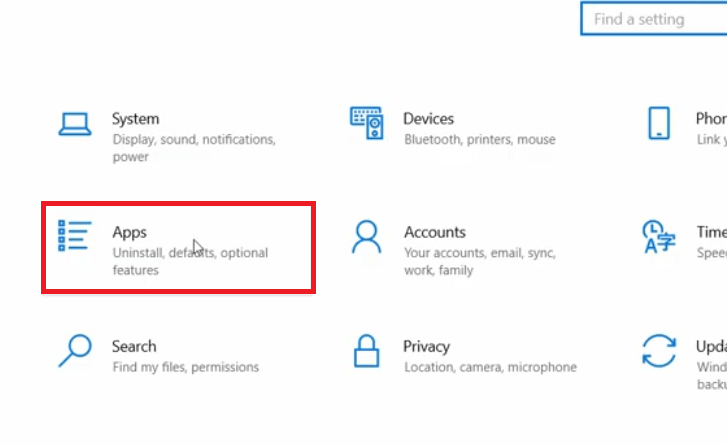
- Go back to the Windows Settings window and select Apps.
- Click on the Optional features link to start the install process.
- Click Add a feature to bring up the Add an optional feature dialog window.
- Type wireless display into the search box.
- Check Wireless Display from the search result and click Install.
- Finish the downloading and installing process.
- Repeat the steps to access Projecting to this PC.
- Modify the settings according to needs.

How Do You Troubleshoot Second Monitor Not Detected On Windows?
Method 2: Enable Using Group Policy Editor
- Press Windows + R to open Run.
- Type gpedit.msc and click OK to open Local Group Policy Editor.
- Expand Computer Configuration, Administrative Templates, and Windows Components to select Connect in the left pane.
- Double click on the Don’t allow this PC to be projected to policy in the right pane.
- Select Disabled or Not Configured.
- Click Apply and then OK.
- Close the Local Group Policy Editor and restart your computer.
How to deal with the gpedit.msc not found error?

Method 3: Enable Using Registry Editor
- Press Windows + R.
- Type regedit.
- Click OK or press Enter.
- Go to this path in Registry Editor: HKEY_LOCAL_MACHINESOFTWAREPoliciesMicrosoftWindowsConnect.
- Double click on AllowProjectionToPC in the right pane.
- Change the value data to 0 or remove it. Then, click OK.
- Close the Registry Editor and restart your computer.
If you can’t find the Connect key in step 4, please right click on Windows -> choose New and then Key -> name the new key as Connect -> right click on the blank area in the right pane -> choose New and then DWORD (32-bit) Value -> name it as AllowProjectionToPC.
What about screen mirroring and projecting to your PC? You should follow this guide below.
Windows 10 Cast to Device (PC)
Repeat the steps mentioned in method 1 to install Windows 10 connect app first. Then, follow these steps to start screen mirroring and projecting to your PC.
- Open Settings -> select System -> shift to Projecting to this PC -> set your projecting preferences.
- On your PC: press Windows + S to open Windows search -> type Connect -> select Connect app from the result.
- On the device you’re projecting from: access the screen mirroring settings or cast settings -> select your PC and connect to it.
That’s how you can set screen share Windows 10.
How to record your screen on Windows 10?
About The Author

Position: Columnist
Sarah has been working as an editor at MiniTool since she graduated from university. Sarah aims at helping users with their computer problems such as disk errors and data loss. She feels a sense of accomplishment to see that users get their issues fixed relying on her articles. Besides, she likes to make friends and listen to music after work.
Many people use multiple devices simultaneously while at work. Windows 10 provides various features for such multitaskers. It might be a possibility that while working on a Windows 10 PC, you require to mirror the screen of another Windows 10 or Android device.
Windows 10 users use different third-party apps for screen-casting on the PC. However, there is an in-built option known as Projecting to this PC that would let you project your other Windows 10 devices and some Android devices to the current Windows 10 system.
To fix various Windows 10 problems, we recommend Outbyte PC Repair:
This software will repair common computer errors, protect you from file loss, malware damage, hardware failure, and optimise your computer for peak performance. In three simple steps, you can resolve PC issues and remove virus damage:
- Download Outbyte PC Repair Software
- Click Start Scan to detect Windows 10 issues that may be causing PC issues.
- Click Repair All to fix issues with your computer’s security and performance.
This month, Outbyte has been downloaded by 26,078 readers.
The best part of this feature is, it also lets you use the mouse and keyboard of the connected device. That means you can virtually control the other devices from your Windows 10 system.
Let us discover how to use Projecting to this device option of Windows 10 for making multi-device tasking easier.
Add Wireless Display Optional Feature
From Windows 10 version 2004 onwards, the “Wireless Display” comes under optional feature and is not installed by default. However, it is necessary to install Wireless Display to enable the Projecting to this PC option.
When you open the “Projecting to this PC option” on Windows 10 2004 and further versions, you will see this screen that will ask you to add the Wireless Display feature.

To add it, follow these steps:
- Open Windows Settings from the Start Menu
- Select System settings
- From the left pane, choose Projecting to this PC.
- Click on the Optional Features option.

- On the next window, click on Add a feature.

- Search for Wireless Display, check the box, and click on Install.

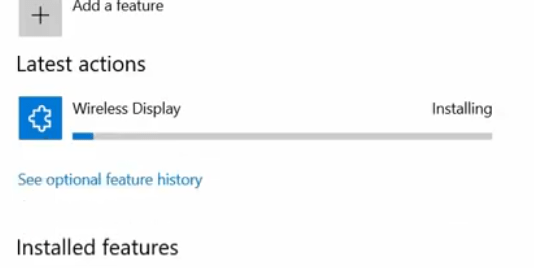
- Wireless Display will begin installing.


Enable Projecting to this PC Option
After installing and enabling the Wireless Display feature, you can now switch ON the Projecting to this PC option. Follow these steps for that.
-
Open Windows Settings from the Start Menu
-
Select System settings

-
From the left pane, choose Projecting to this PC.
-
Now first, configure the options for projecting as per your preference. Second, click on Launch the Connect app to project to this PC.
-
Your system would now be ready to host.


To project and control other devices on the host PC, follow these steps.
- From the device that you want to project, go to Project and click on Connect to a wireless display.

- Look for the host device and click on its name.
- After the connection is established, check the “Allow mouse, keyboard, touch, and pen input from this device” so that you could control this system from host.

- On the host PC, you will see that another device is ready to project.

- In a few seconds, the projection would start.


In our test, we were successfully able to project another Windows 10 device to the host. However, the Android device was unable to mirror. Though it is clearly mentioned in the setting that even some Android devices can be projected.

So, you can try on your own to project an Android device. If your device is unable to get projected you can try other methods to cast Android to Windows 10.
How “Projecting to this PC” can be beneficial?
Windows 10 Projecting to this PC can be useful in the following ways:
- If you use two devices simultaneously, you can control both of them on a single screen. This will maintain your workflow and enhance your productivity.
- If your colleague has any technical issue with their system, you can fix it right from your device through screen sharing.
- You can stream a video from your tablet or other small screen devices to the Windows PC. The quality would remain as it is.
Final Words
Most users use remote desktop applications to take control of another system on their Windows 10 device. However, that requires both devices to be connected with high-speed internet. If you are working on two devices simultaneously in a room, you don’t need to use any remote desktop clients. Instead, use Windows 10 in-built Projecting to this PC option for managing two machines on a single screen.

Peter is an Electrical Engineer whose primary interest is tinkering with his computer. He is passionate about Windows 10 Platform and enjoys writing tips and tutorials about it.
One of the new features added to the Windows 10 Anniversary Update is called Projecting To This PC. It’s designed to allow you to use a Wi-Fi connection to project the display from a Windows 10 computer or phone to another Windows 10 computer using a wireless network.
What does projecting to this PC mean?
In a nutshell, Projecting to this PC is a feature that lets you wirelessly connect to another computer’s monitor and use it as your second monitor. … That being said, in order to make Projecting to this PC to work, you will need both computers’ hardware that supports Miracast.
How do I stop Windows 10 from projecting?
All editions can use Option Two below.
- Open the Local Group Policy Editor.
- In the left pane of Local Group Policy Editor, navigate to the location below. ( …
- In the right pane of Connect in Local Group Policy Editor, double click/tap on the Don’t allow this PC to be projected to policy to edit it. (
3 июн. 2020 г.
How do I turn off screen projection?
- Press and hold the Windows logo key, typically located between the left “Ctrl” and “Alt” keys.
- Press the “P” key. A pop-up offering different display options appears on your screen.
- Click “Projector Only.” Your laptop screen is now hidden, but the presentation slides still appear on the projector or external monitor.
How do I do projecting on my computer?
Screen mirroring and projecting to your PC
- Select Start > Settings > System > Projecting to this PC .
- Under Add the “Wireless Display” optional feature to project this PC, select Optional features.
- Select Add a feature, then enter “wireless display.”
- Select it from the list of results, then select Install.
Why is Windows 10 projecting not working?
Step 1: Open Local Group Policy Editor. Step 3: In the right pane of Connect, double-click on Don’t allow this PC to be projected to policy to edit it. Step 4: Select Disabled or Not Configured option if you allow this PC to be projected. … If you like you can continue to project other devices to your PC.
Why can’t my PC project to another screen?
Your PC can’t project to another screen, Try reinstalling the driver or using a different video card. The problem could be with loosely connected hardware, the display adapter driver, or a recent Windows Update which messed up the settings.
How do I stop my laptop from projecting?
Microsoft has a built in hot key feature for toggling between projection settings.
- While holding down the Windows Logo key, Press P key once. …
- Continue holding the Windows Logo key, press P repeatedly until the desired option is selected, …
- Release the Windows Logo key, click on the desired option with mouse cursor.
6 авг. 2019 г.
How do I change my screen projection?
Screen Resolution: Go to the virtual desktop of your PC and then right click on the wallpaper. You should get a dropdown menu wherein you can select the “Screen Resolution” option. It controls not only resolution but screen mirroring and other screens (or projectors) connected to your notebook PC.
How do I change my projection settings?
Press and hold the “Windows Key” on your keyboard and then tap the “P” key while still holding the “Windows Key.” Tapping “P” will cycle through the available display options.
How do I hide my laptop screen with HDMI?
Solution
- Plug the monitor’s power cord into an outlet, then plug the video cable into the video output port on the laptop and the video input port on the monitor. Turn the monitor on.
- Right-click the Windows desktop and select Display Settings from the drop-down list. …
- Select Show only on 2 from the drop-down list.
How do you fix protected content Cannot be viewed on this device?
“Unable to view the protected content on this device” is likely to be the cause of the firewall. We just need to turn off the network firewall.
How do you make your screen invisible to others?
The ultimate privacy screen.
As YouTube user Brusspup demonstrates, if you have an old LCD monitor lying around you can make your screen virtually invisible to anyone but yourself. The trick works by removing the polarizing filter from your monitor and inserting the filter into the lens area of a pair of old glasses.
How do I mirror my computer screen?
To cast on Android, head to Settings > Display > Cast. Tap the menu button and activate the “Enable wireless display” checkbox. You should see your PC appear in the list here if you have the Connect app open. Tap the PC in the display and it’ll instantly start projecting.
How do I get miracast on my PC?
- Select the Start Menu, then select Settings.
- Select System.
- Select Display on the left.
- Look under the Multiple Displays section for “Connect to a wireless display”. Miracast Available Under Multiple displays, you will see “Connect to a wireless display”.
How do I screen mirror to my laptop?
To mirror your screen to another screen
- Open the Control Center by swiping up from the bottom of the device screen or swiping down from the top right corner of the screen (varies by device and iOS version).
- Tap the “Screen Mirroring” or “AirPlay” button.
- Select your computer.
- Your iOS screen will show on your computer.
Disclosure: We are not providing any kind of paid support. Beware of scammers. This page may contain affiliate links read disclaimer
Windows 10 is an operating system that gives its users several features which can enhance their productivity. One such feature is to help other devices project their screens onto your Windows 10 display. Since this capability is an advanced feature, it needs to be properly configured for its efficient working. Therefore, while trying to use this feature most users encounter errors. In this tutorial, we will tell you how to fix the “Projecting to This PC” feature disabled error on your Windows 10 computer.
Projecting to This PC feature allows you to wirelessly connect with a monitor on another computer and use it as your second monitor. You can also project the screen to another computer or device on your computer screen. It’s like growing your screen size without spending any extra money. You can play movies, games, etc. on your smartphones while watching them on your large computer screen, or else, you can display presentations on a smart TV while you are working with them on your laptop. This feature truly enhances your productivity and working capability if you can use it wisely.
What are the Common errors in “Projecting to This PC”?
While working with Projecting to This PC feature is available on Windows 10 and several users encounter errors. The most common errors are:
Although all these errors may seem to be different, but they all have the same solution. We will describe that solution below in our simple to follow step-by-step guide.
How to Fix “Projecting To This PC” Option Disabled (Grayed Out) in Windows 10
In the step-by-step guide given below we will describe the solution to this problem, please follow the steps in the exact order as they have been mentioned.
Before you apply the solution, we will be sharing the link below, you must make sure that your computer is connected to an uninterrupted and reliable internet connection. While executing this solution you will have to download and install some apps on your computer for which an active internet connection is a must.
- Click on the ‘Start’ button and choose ‘Settings’ from the menu.

- In the Settings page, click on the ‘System’ option.

- In the System page, click on the ‘Projecting to this PC’ option.

- Now, you can see that all the options are greyed, which means you can’t change them. To solve this problem, you will have to install the Wireless Display feature on your Windows 10. Let’s do that.

- Go back to the Settings page and choose ‘Apps’ option.

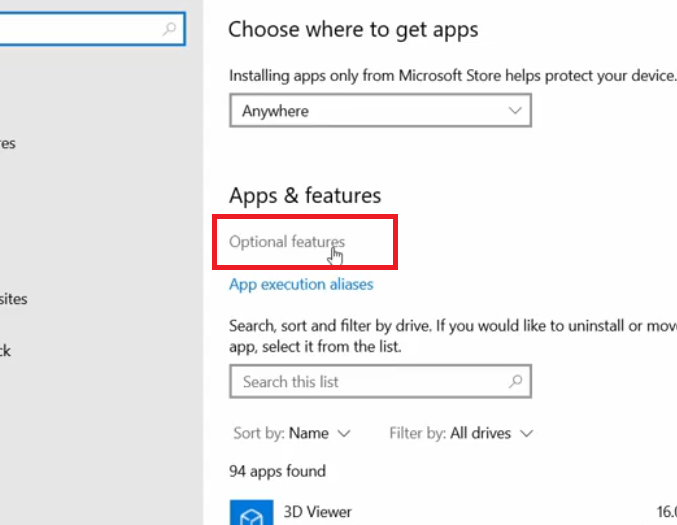
- Under Apps & features section, click on the “Optional Features” link to proceed.

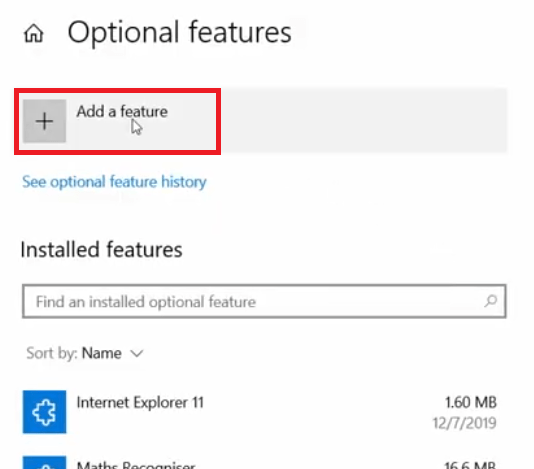
- In the Optional features page, click on the ‘Add a feature’ button.

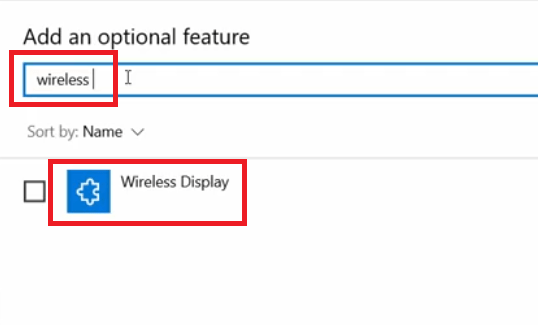
- In the pop-up box, search ‘wireless’ and in the results locate ‘Wireless Display’.

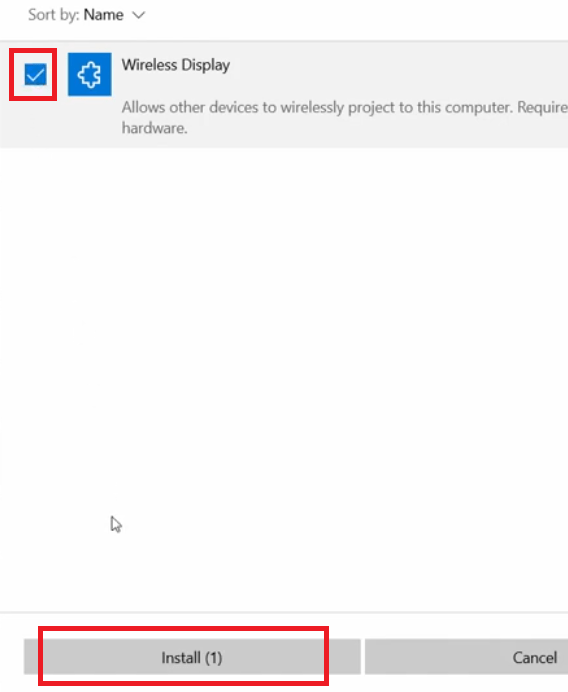
- Click the check-box in front of the ‘Wireless Display’ to select the app, then click on the ‘Install’ button to start the installation.

- Wait for Windows to download and install the Wireless Display app on your computer.

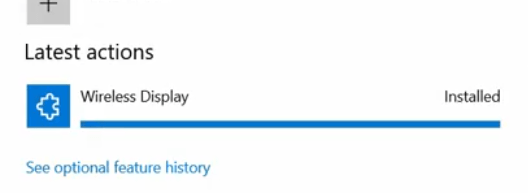
- When you see “Installed“, it means the app has been successfully installed on your computer.

- Go back to the Settings page and choose ‘System’ option.

- In the System page, click on the ‘Projecting to this PC’ option.

- Now, you can see all the options that are enabled and you can change them according to your requirements. You can click on the “Launch the Connect app to project to this PC” link to start using this feature.

That’s it, you have successfully enabled the Projecting on this PC feature on your Windows 10 computer. Your computer is now ready to project its display screen on another device and to project the display screen of some other device on your monitor screen.
My Views
The solution on how to fix the “Projecting to This PC” option disabled in Windows 10 given above is going to help all those users who are unable to use this amazing feature. However, you must know that there are some hardware requirements that your computer must fulfill before it can utilize this feature. The solution given above is only going to work for Windows 10 computers which fulfills those hardware requirements.