Affiliate Disclosure
BinaryFork uses affiliate links. That means that when you will decide to buy or download something by clicking a link on our website, we may earn a small commission at no extra cost to you. This commission is meant to keep our website up and running. More details
- If you need to install Windows 10 from scratch this is a quick and easy-to-follow guide.
- Installing Windows 10 is the first thing you must do after buying or assembling a new computer.
- For beginners, it might seem a daunting task, but it’s really not, as you’ll see if you follow through till the end.
While most people know how to use a computer, fewer know how to install Windows 10 without help from a friend or a professional. Without an operating system, your computer won’t work. This is the core software a computer needs to start. On top of that, you’ll add the software you use every day.
Installing an OS is really not rocket science, so I thought a step-by-step guide would be helpful for some of you.
Windows 10 is by far the most popular choice right now, but there are other options as well, MacOS for Apple devices and various Linux distros for those who are not afraid to type commands to get things done faster than with a mouse and keyboard.
CONTENTS
- 1 Requirements for Installing Windows 10
- 2 Install Windows 10: Steps to Follow
Requirements for Installing Windows 10
- A computer with at least a storage drive, preferably unformatted. Minimum hardware requirements are listed here.
- A bootable USB disk 8 GB or larger.
- A working computer with an Internet connection so you can download Windows and create a bootable disk.
If you already have an install medium (DVD or USB key) you don’t need a working computer to create the installer disk.
Recommended read: How to download Windows 10
A lot of laptops or prebuilt computers that ship with Windows preinstalled are actually set up for the first few steps of the guide and will boot directly the first time into the Windows 10 installer.
So even if you don’t need to create an install disk you still need to go through the steps necessary to set up Windows 10.
Prebuilt computers might add/change a few steps to the installer for the manufacturer’s custom software, but basically, the concept remains the same.
Install Windows 10: Steps to Follow
Here are all the Windows 10 installation steps, from start to finish. If you don’t know how to install Windows 10, or any other Windows operating system for that matter, this guide will get you through, even if you don’t consider yourself proficient enough when it comes to computers.
1. Insert the bootable DVD into the optical bay or the USB disk into your computer.
Note: if using a tower case insert the USB drive into one of the rear ports. Front-panel USB connectors can cause a lot of issues during the install process.
2. Press the F8 key multiple times while the computer starts to open the Boot Manager menu.
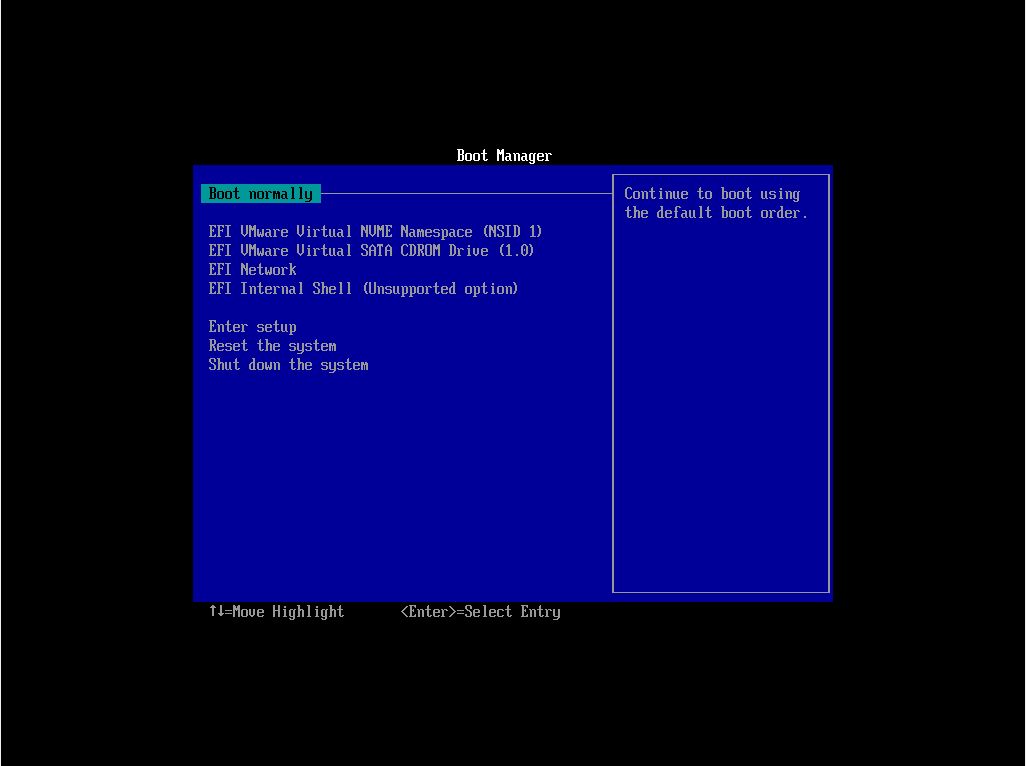
3. Select the drive unit that contains the Windows 10 installer. Some drives could show up twice. If that’s the case I recommend you chose the version that uses EFI or UEFI. This is the modern way to install Windows 10 and it’s not possible to change without reinstalling Windows.
4. A message to Press any key to boot from the CD or DVD… appears. Doing so will start the Windows 10 install process and the Windows 10 logo will appear.


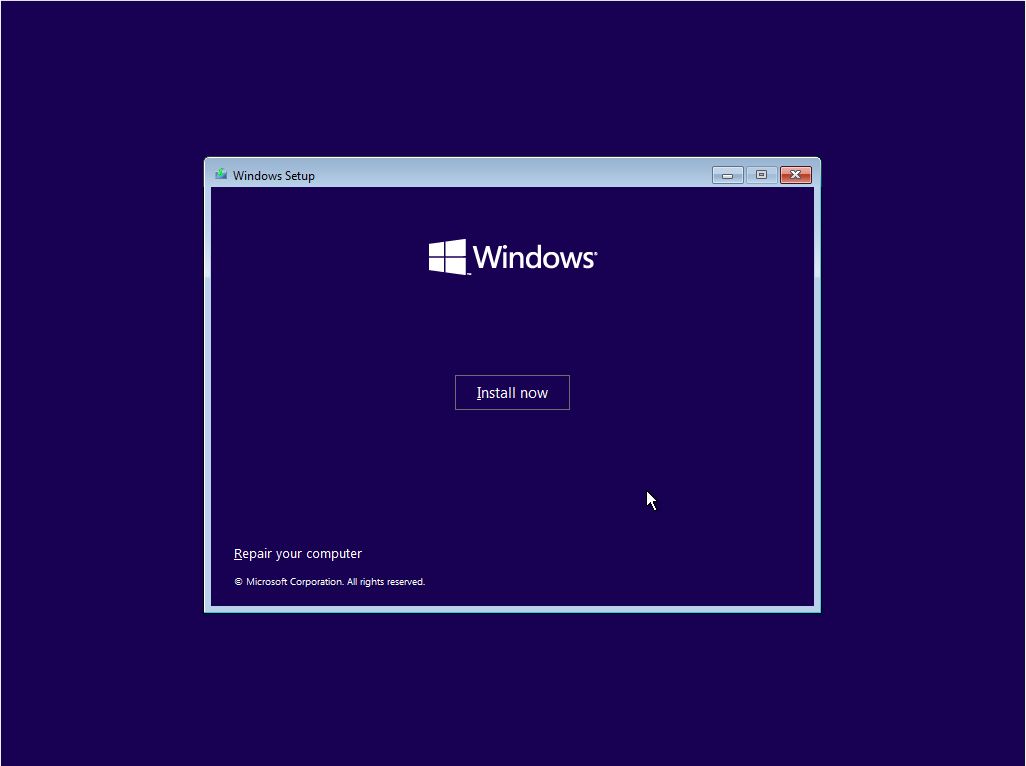
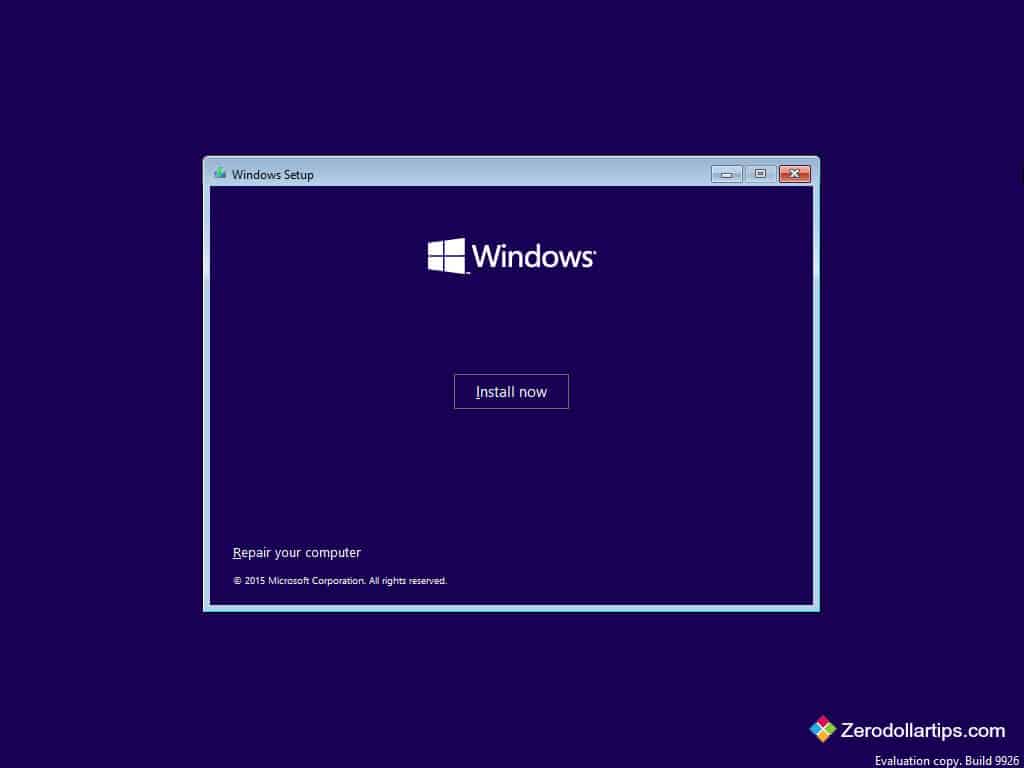
5. The first step is to choose to Install now. There’s also an option to Repair your computer. We won’t be doing that now.
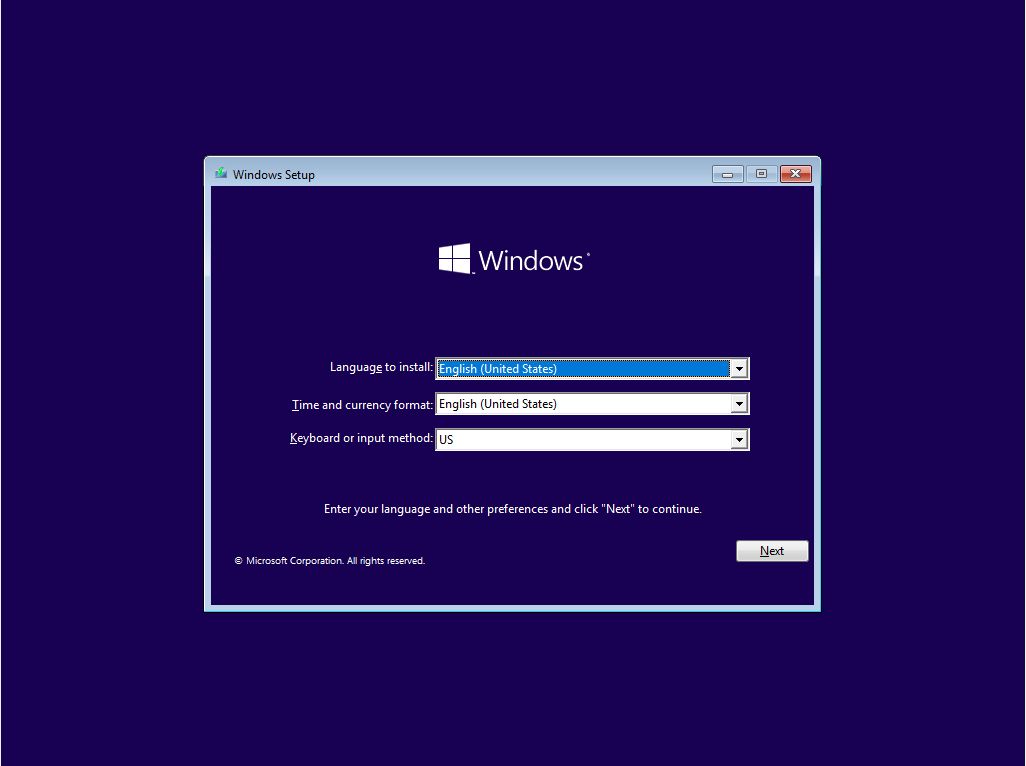
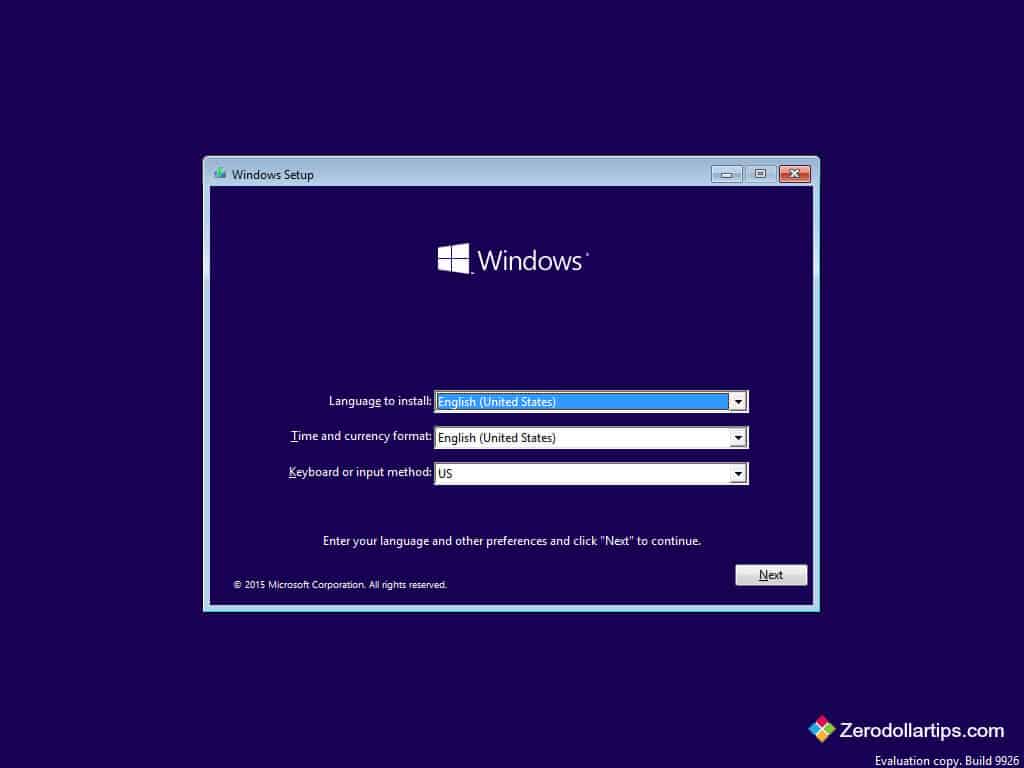
6. Next we’ll need to choose the language of the interface, the time and currency format, and the keyboard layout. You can mix and match these to your liking and don’t have to reflect the actual location where you’ll be using the PC or the actual keyboard layout. You can change them later after the install if needed.
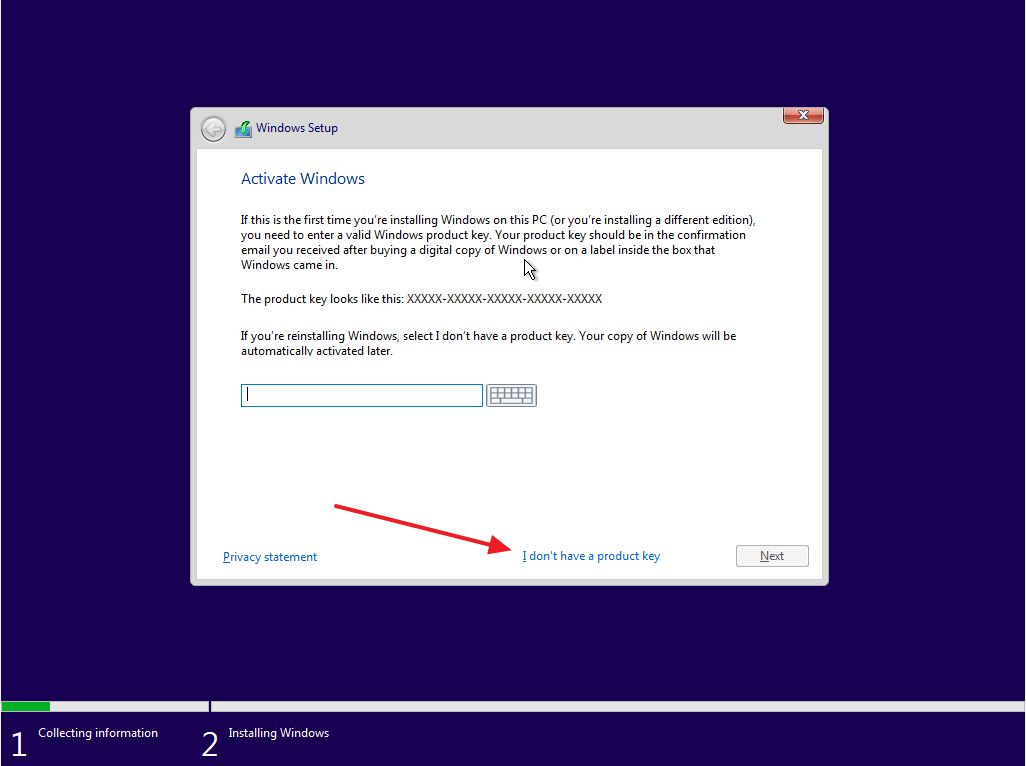
7. Next step is to enter the Windows 10 product key. You can skip this step if you want to activate Windows later on. Make sure you enter the correct code. It’s made up of 25 characters ( 5 groups of 5 letters and numbers).
8. Select the Windows edition you want to install. It must match the product key entered earlier or else Windows won’t activate. If you’re interested in Windows 10 editions and differences we have an article detailing them.
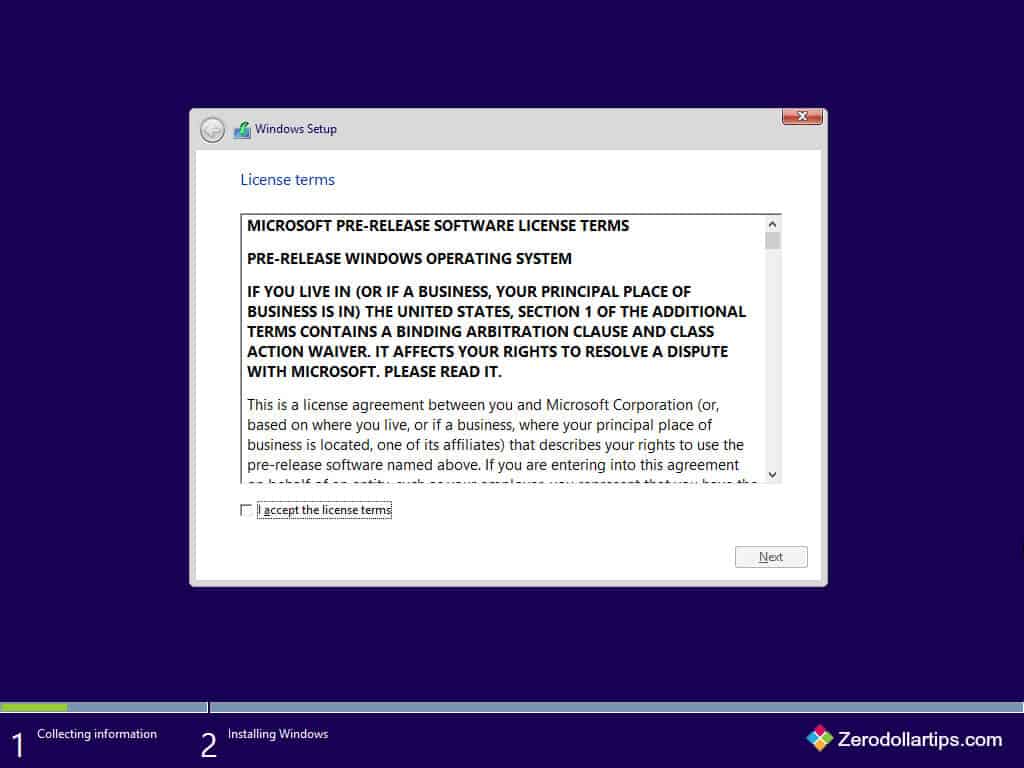
9. To proceed you need to agree to licensing terms (EULA).
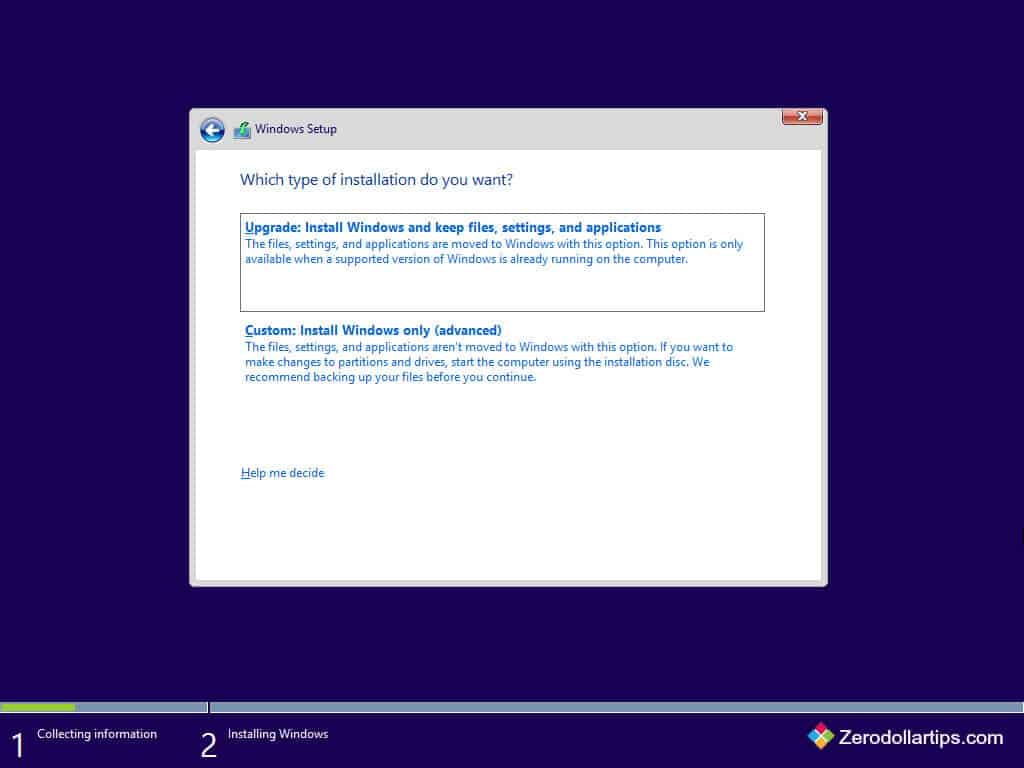
10. Select the installation type: Upgrade an existing installation of Windows (version 7, 8, or 10) or Custom. Since it’s a new computer we’ll be choosing the latter option.
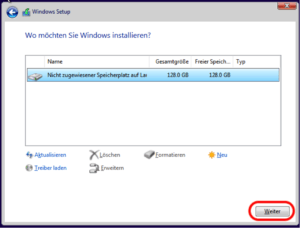
11. Now it’s time to let the installer know the disk where Windows files will be copied. At this step, you can partition the existing disk into smaller virtual disks (recommended for bigger disks). If you only have one unformatted disk just select it and hit Next. The installer will create all needed partitions.
I’ll be doing an advanced setup guide for this install step so check back to this page. I’ll make sure to link it back here. I think it will be a must-read if you’re reinstalling Windows, installing it on a multi-disk computer, and especially if you want to dual-boot.
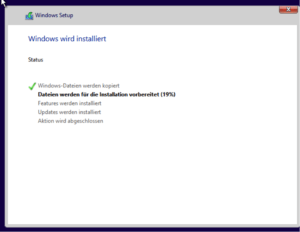
12. The setup will now start to copy files from the install disk to their final destination.
13. At this step you’ll be asked to select the geographical region, and keyboard layout again. They can differ and will override the settings from step 6. Optionally, you can add more keyboard layouts (use WIN + Shift to switch between them while using Windows).

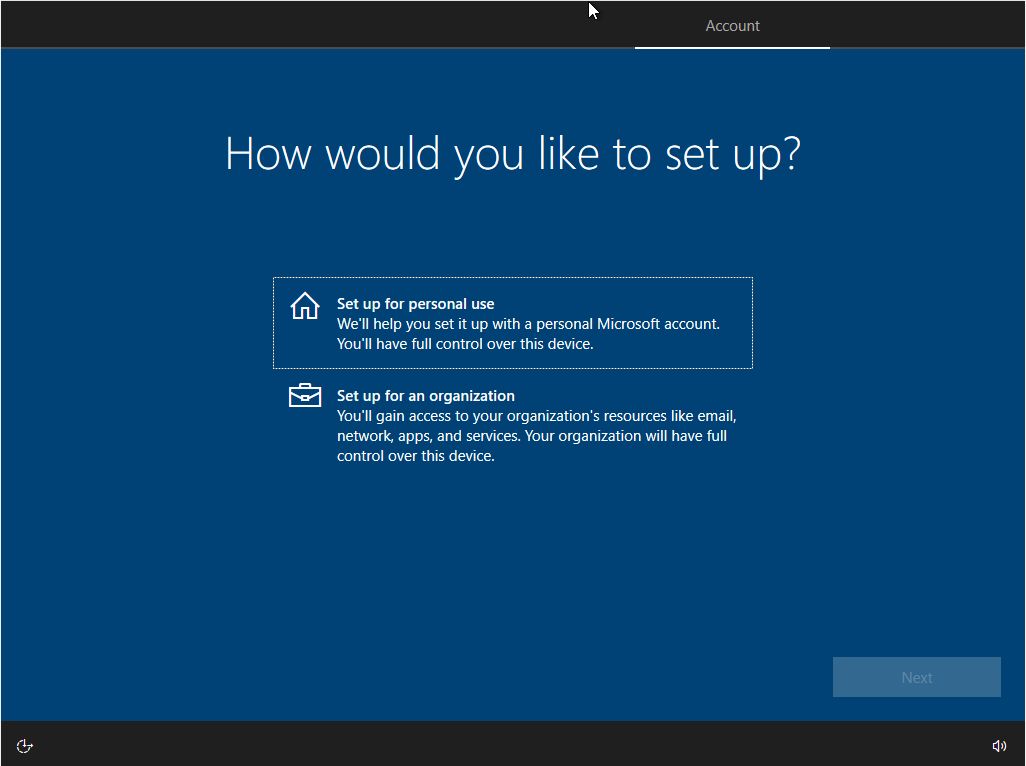
14. Now it’s time to select the type of predefined set-up: for Personal use or Organization, in which case a system administrator will enforce some settings for you. We’ll be using Personal for our guide.
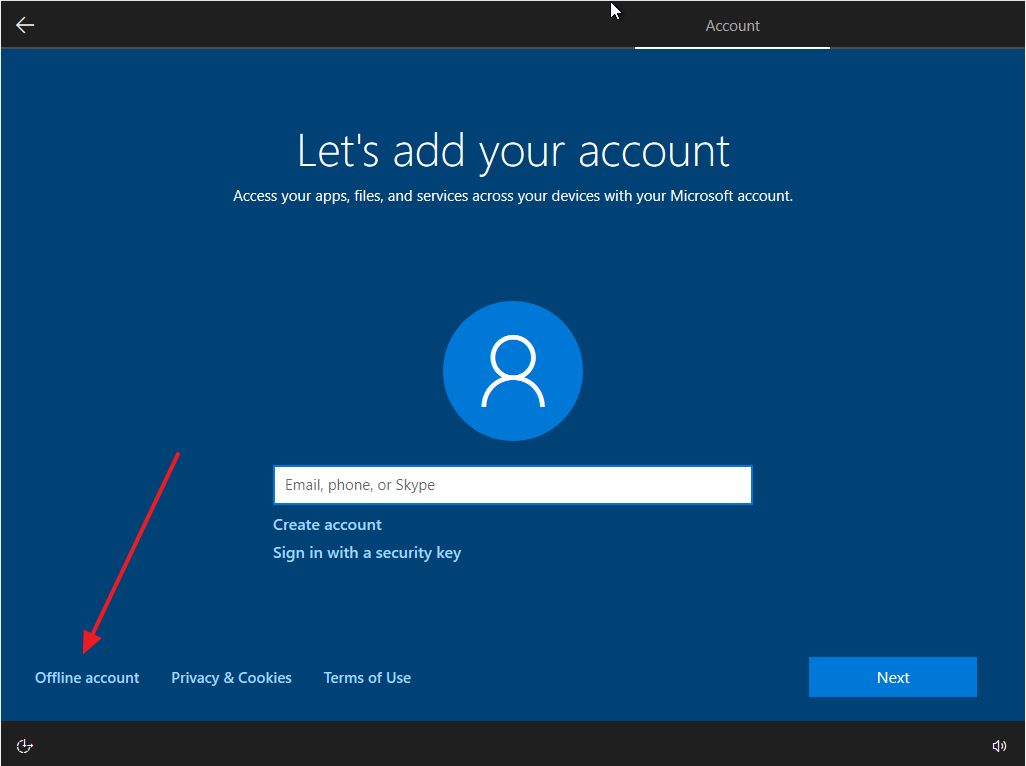
15. Now we’ll create the first user account which will also act as the administrator for this computer. Microsoft will push you towards using a Microsoft online account, but you can also set up an offline account. For privacy reasons, I suggest you set up the latter. You can read about the difference here.
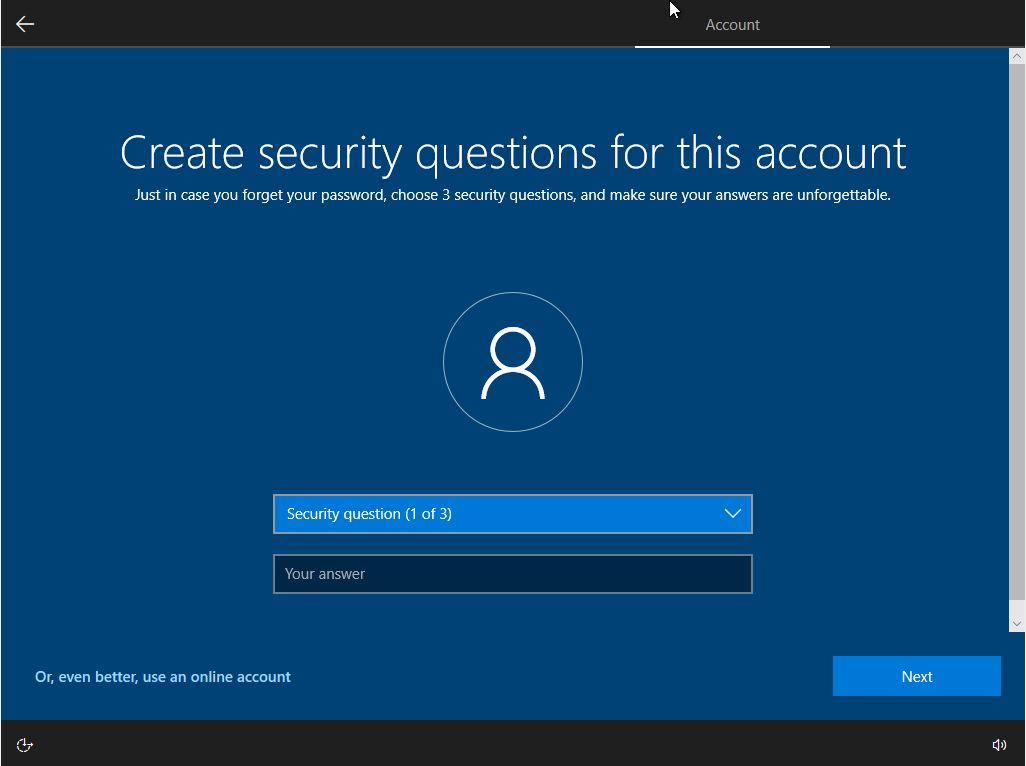
16. I didn’t remember this step, but it seems you now have to select 3 security questions that will help you recover your account in case you forget the password.
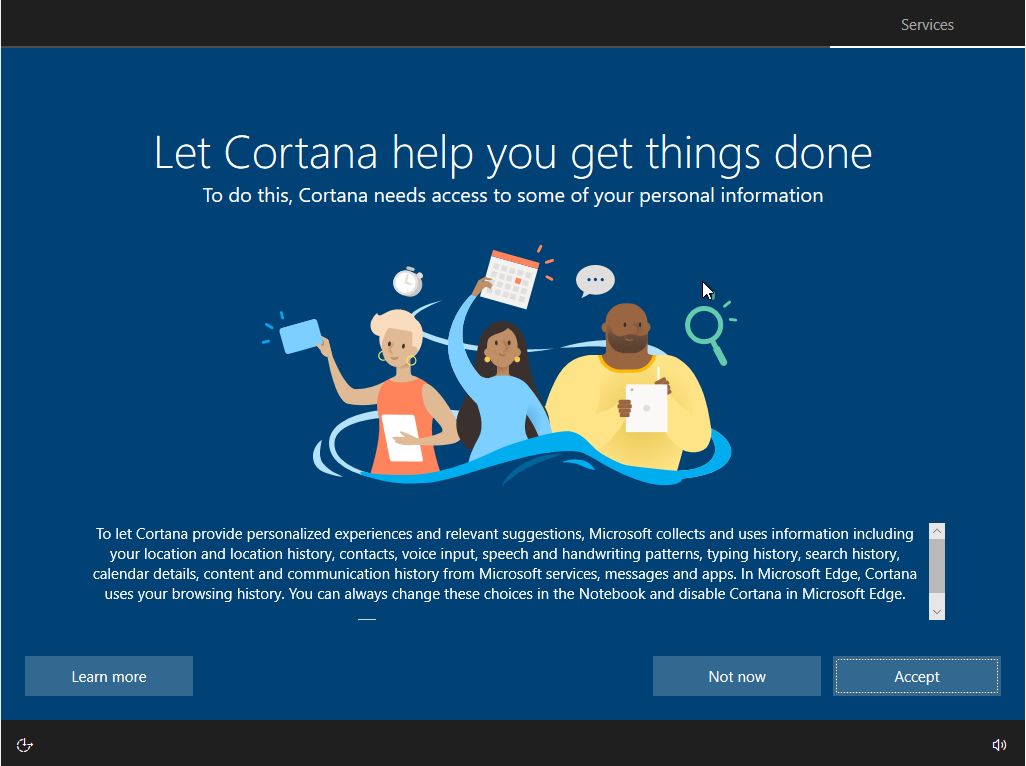
17. Privacy settings and Cortana are next. I personally disable everything that’s possible at this step. Some telemetry data will still be sent to Microsoft servers, but I’m planning an article on how you can disable almost everything that’s affecting privacy in Windows 10, so stay tuned.
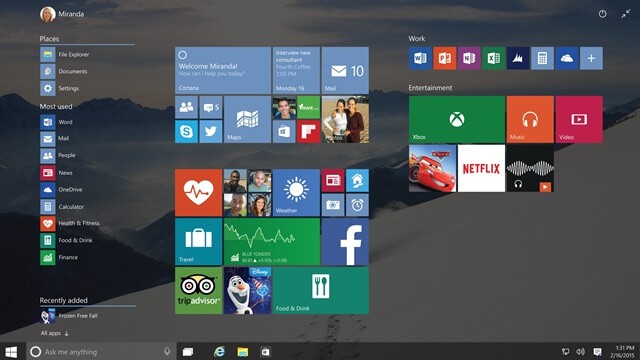
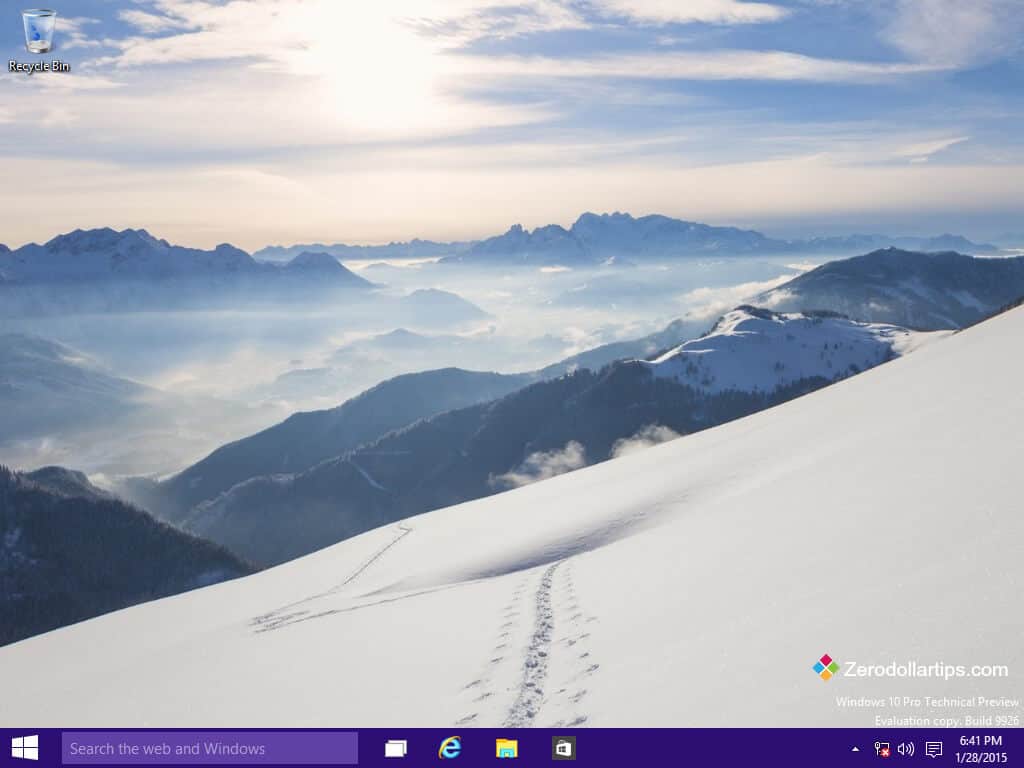
18. After a few moments and a couple of different screens you’ll be greeted with the familiar Windows 10 desktop for the first time.

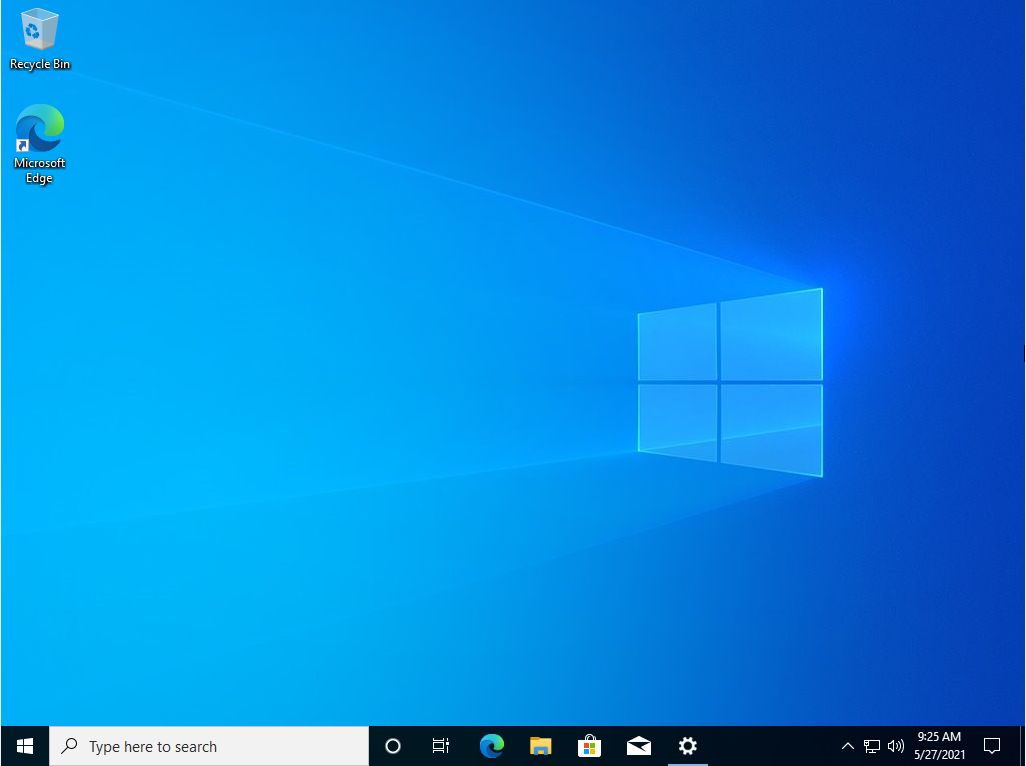
That’s it. You’ve successfully installed Windows 10 on your new computer.
What’s next? You can now use your computer, but there are a few things I think you must set up before everything is perfect. I’ll do a guide on that too, so don’t forget to subscribe to BinaryFork to get notified when that article is ready.
Looking for other installation guides? We have one for Windows 11 and one for Ubuntu Linux.

I’m obsessed with technology, science, and gadgets. I write about them since 2003. I make websites because I like to build stuff. I’m also passionate about digital marketing and graphic design. I watch movies and play games in my spare time. I’m also reading books, mostly SciFi.
![]()
Download Article
![]()
Download Article
Want to install a fresh version of Windows 10 on your PC? If you’re running another operating system or setting up a new PC, you can easily install Windows 10 from an installation disc or USB flash drive. Upgrading from an earlier version like Windows 7 or 8.1 is even easier—no flash drive or DVD required! This wikiHow article will walk you through installing or upgrading to Windows 10 on any PC.
-

1
Connect a blank USB flash drive or insert a blank writable DVD. You can install Windows 10 by creating a bootable USB flash drive or DVD that contains the Windows 10 installation files. You’ll need a USB flash drive that’s at least 8GB, or any blank DVD to get started.[1]
- If you already have Windows 10 installed on the PC and just want to reinstall it, it’ll be easiest to reinstall it from within Windows 10 instead of creating installation media.
- If you want to upgrade from Windows 7 or Windows 8.1, you won’t need to create an installation disc or drive. However, you will need to follow most of this method to start the upgrade.
-
2
Make sure you have a product key. If you bought Windows 10 through Microsoft using your Microsoft account, your product key is already linked to your account. If you bought Windows 10 from another retailer, you’ll have a 25-character product key that you’ll need to have handy to activate Windows.[2]
- If you don’t have a product key or you’re installing Windows 10 on a new hard drive, make sure you’ve linked your Windows 10 digital license to your Microsoft account before you start the installation.[3]
Head to Settings > Update & Security > Activation from the current installation—if the activation status says Windows is activated with a digital license, click Add an account and follow the on-screen instructions to link your Microsoft account. - If you’re upgrading from an earlier version and your PC qualifies for a free upgrade, you won’t need a product key.
Advertisement
- If you don’t have a product key or you’re installing Windows 10 on a new hard drive, make sure you’ve linked your Windows 10 digital license to your Microsoft account before you start the installation.[3]
-
3
-
4
Click Download tool now. This is a blue button in the middle of the page. This downloads the Media Creation Tool, which you’ll use to create your installation media (or start your upgrade).
-
5
Double-click the downloaded file. Its name begins with «MediaCreationTool» and ends with «.exe.» You’ll find it in your default download folder, which is usually called Downloads.
- Click Yes when prompted to allow the installer to run.
-
6
Click Accept to accept the license. It’s in the bottom-right corner of the window.
-
7
Select «Create installation media» and click OK. This option lets you create a Windows installation disc or drive that will work on any compatible PC, not just the one you’re using now.
- If you’re updating your PC from an earlier version of Windows, select Upgrade this PC now instead, and then follow the on-screen instructions to install Windows 10. You’re done!
-
8
Select your preferences and click Next. If you’re installing Windows on the current PC, you can keep the default options. If you need to install on a different PC, make sure you choose the language and edition for which you have a license, and select the architecture (64-bit or 32-bit) that matches the PC you’re going to install on.
- If you’re not sure about the architecture, you can choose Both from the menu.
-
9
Choose an installation type and click Next. An ISO file is a type of file that can be burned to a DVD, so choose that option if you plan to create a DVD. Otherwise, choose the USB flash drive option.
-
10
Create your installation media. The steps are a little different depending on what you’re doing:
- Flash drive: Select your flash drive from the list, click Next, and wait for the installation files to install. When the process is complete, click Finish.
- DVD/ISO: Click Save to save the ISO file to your computer—it may take a while because the file is large and has to be downloaded. Once downloaded, you’ll see a progress screen that monitors the download. When the download is complete, click Open DVD burner on the «Burn the ISO file to a DVD» screen, select your DVD burner, and then click Burn to create your DVD.


Advertisement
-
1
Connect your Windows 10 installation media. If you created a flash drive, connect it to the PC on which you want to install Windows 10. If you made a DVD, insert it into the drive now.
-
2
Boot the PC into the BIOS. If your PC is not already set up to boot from your flash or optical drive, rebooting from your installation media won’t work. You’ll need to make a quick change in your BIOS to change the boot order. There are a few ways to get in:
- Windows 8.1 or 10: From Windows, open Settings, select Update & Recovery or Update & Security, and go to Recovery > Restart now > Troubleshoot > Advanced Options > UEFI Firmware Settings > Restart.
-
Any PC: Reboot the PC and immediately start pressing (over and over again) the keyboard key required by your PC to enter «Setup,» or the BIOS. The key varies by computer, but here are some of the most common keys:
- Acer and Asus: F2 or Del
- Dell: F2 or F12
- HP: ESC or F10
- Lenovo: F1, F2, or Fn + F2
- Lenovo ThinkPads: Enter + F1.
- MSI: DEL
- Microsoft Surface Tablets: Press and hold the volume-up button.
- Samsung and Toshiba: F2
- Sony: F1, F2, or F3
-
3
Go to the Boot tab. You’ll use the arrow keys to select it.
- The Boot tab may instead say Boot Options or Boot Order, depending on your computer’s manufacturer.
-
4
Select a device from which to boot. You have a couple of options here:
- For a USB flash drive, select the Removable Devices option.
- For a disc installation, select the CD-ROM Drive or Optical Drive option.
-
5
Press the + key until your boot option is first. Once either Removable Devices or CD-ROM Drive is at the top of the list, your computer will select your choice as its default boot option.
- On some computers, you’ll instead press one of the function keys (e.g., F5 or the arrow keys to navigate an option up to the top of the menu. The key will be listed on the right side of the screen.
-
6
Save your settings. You should see a key prompt (e.g., F10 at the bottom of the screen that correlates to «Save and Exit». Pressing it will save your settings and restart your computer.
-
7
Wait for your computer to restart. Once your computer finishes restarting, you’ll see a window here with your geographical data. You’re now ready to begin setting up your Windows 10 installation.


Advertisement
-
1
Click Next when prompted. You can also change the options on this page (e.g., the setup language) before continuing if need be.
-
2
Click Install Now. It’s in the middle of the window.
-
3
Enter your Windows 10 key, then click Next. If you don’t have a Windows 10 key, instead click Skip in the bottom-right corner of the screen.
- If you’ve already installed Windows 10 on this PC and were signed in with your Microsoft account, your key should be linked to your account. When prompted, just sign in with your Microsoft account and Windows will locate your key.[4]
- If you’ve changed hardware in the PC, such as replacing the motherboard, you can activate Windows after installing by going to Settings > Update & Security > Activation > Troubleshoot > I changed hardware on this device recently. Sign in with your Microsoft account when prompted, choose This is the device I’m using right now, and then click Activate.
- If you’ve already installed Windows 10 on this PC and were signed in with your Microsoft account, your key should be linked to your account. When prompted, just sign in with your Microsoft account and Windows will locate your key.[4]
-
4
Follow the on-screen instructions to install Windows 10. You’ll be asked to perform a few tasks, such as connecting to Wi-Fi and choosing some preferences. Once the installation is complete, you’ll have a fresh new installation of Windows 10.
- If you’re upgrading from an earlier version of Windows, you’ll be asked if you want to upgrade the current operating system or do a custom install. If you choose Upgrade, you’ll preserve existing apps and files.


Advertisement
Add New Question
-
Question
Will I lose my data if I reinstall Windows 10?

Based on step 5 above, when it prompts «Which type of installation do you want?», you should select «Upgrade» to keep your files and settings. If you select «Custom», you will have a clean installation and all of the files and settings of your previous version of Windows will be cleaned.
-
Question
What button do I press for boot options?
This is commonly F12, but can vary, depending on manufacturer. Your system will tell you which key to press upon first turning on the machine.
-
Question
My laptop has the key embedded in its motherboard, so do I need to enter it again?
It should detect the key if it’s on your motherboard. If not, you can re-enter the key.
See more answers
Ask a Question
200 characters left
Include your email address to get a message when this question is answered.
Submit
Advertisement
-
If you don’t enter a Windows 10 activation key when prompted to do so, you’ll receive a free trial of Windows 10. After the trial ends, you’ll be prompted to purchase and enter an activation key.
Thanks for submitting a tip for review!
Advertisement
About This Article
Article SummaryX
1. Insert your installation DVD or drive.
2. Restart the PC.
3. Select the option to boot from the media.
4. Select your language preferences and click Next.
5. Click Install Now.
6. Enter your product key and click Next.
7. Accept the terms.
8. Follow the on-screen instructions.
Did this summary help you?
Thanks to all authors for creating a page that has been read 715,360 times.
Is this article up to date?
In this article, we will examine how to install a clean Microsoft Windows 10 step by step on a new PC / Laptop.

How to Install Windows 10 Enterprise 1809 LTSC
Windows 10 is an operating system designed and developed by Microsoft for personal computers, tablets, embedded devices. Windows 10 is the first release released after the Windows 8 operating system.
Let’s examine the basic system requirements before starting to install it.
1 gigahertz (GHz) or faster processor or SoC is sufficient.
1 gigabyte (GB) for 32 bit or 2 GB for 64 bit is sufficient.
16 GB for the 32-bit operating system, 20 GB for the 64-bit operating system
DirectX 9 or later with the WDDM 1.0 driver is sufficient.
What are Win 10 Versions?
You can review the Windows 10 versions in the following table.
- Home Version
- Home N Version
- Home Single Language Version
- Pro Version
- Pro N Version
- Enterprise Version
- Enterprise N Version
- Enterprise LTSB Version
- Enterprise LTSB N Version
- Enterprise LTSC Version
- Enterprise LTSC N Version
- Education Version
- Education N Version
- Mobile Version
- Mobile Enterprise Version
What are Win 10 Build Versions?
You can review the Windows 10 build versions in the following table.
Version
Servicing option
Availability date
OS build
Latest revision date
2004
Semi-Annual Channel
05/27/2020
19041.388
07/14/2020
1909
Semi-Annual Channel
11/12/2019
18363.997
07/21/2019
1903
Semi-Annual Channel
05/21/2019
18362.997
07/21/2019
1809
Semi-Annual Channel (Targeted)
11/13/2018
17763.134
11/13/2018
1809
Long -Term Servicing Channel (LTSC)
11/13/2018
17763.134
11/13/2018
1803
Semi-Annual Channel
7/10/2018
17134.441
11/27/2018
1803
Semi-Annual Channel (Targeted)
4/30/2018
17134.441
11/27/2018
1709
Semi-Annual Channel
1/18/2018
16299.820
11/27/2018
1709
Semi-Annual Channel (Targeted)
10/17/2017
16299.820
11/27/2018
1703
Semi-Annual Channel
7/11/2017
15063.1478
11/27/2018
1703
Current Branch (CB)
4/11/2017
15063.1478
11/27/2018
1607
Current Branch for Business (CBB)
11/29/2016
14393.2639
11/27/2018
1607
Current Branch (CB)
8/2/2016
14393.2639
11/27/2018
1607
Long-Term Servicing Branch (LTSB)
8/2/2016
14393.2639
11/27/2018
1507 (RTM)
Long-Term Servicing Branch (LTSB)
7/29/2015
10240.18036
11/13/2018
Which is the Latest Win 10 Version?
The latest version of Windows is the Version 2004 update, released on May 27, 2020. The latest Build version is 19041.388.
How to Build Windows 10 on a Laptop or Desktop Computer
To make a clean installation of Windows 10 on the computer you buy or on the computer you use, you first need the ISO file.
After downloading ISO, you will need a Flash Memory of 8 GB minimum. You must burn the operating system that you downloaded to your computer into a Bootable Flash Memory.
You can download the Windows operating system using Microsoft’s Media Creation Tool and prepare Bootable Flash Memory. Or you can burn a Windows ISO file to Flash Memory using a tool such as Rufus.
You do not need to have a Flash Memory to it. Otherwise, you can install it with your computer’s CD/DVD Drive. For example, you can burn the Windows ISO file you downloaded to a DVD media using a program such as Nero, and start the installation.
How to Configure Windows 10 Enterprise
Before you begin the installation step by step, prepare a Bootable Flash Memory using Microsoft’s Media Creation Tool. You can download only Home and Pro versions of Windows to your computer using the Media Creation Tool.
Download the Windows 10 Enterprise LTSC ISO file that we published in the previous article to your computer and print the ISO file to Flash Memory.
Then, follow the steps below to install the Windows 10 operating system step by step on a PC.
Step 1
Restart your computer after creating a USB media for a UEFI-supported setup. While the computer is restarting, press the key on the keyboard (Del + F2 + F11 + F12 + ESC + F10) to switch to the BIOS configuration screen.
On the BIOS configuration screen of your computer, go to the Boot setting and then configure the following settings to enable the UEFI option.
Note: Don’t forget to save your settings!
OS Type: Windows UEFI Mode
Secure Boot State: Enabled
Fast Boot: Disabled
After configuring the settings for Windows 10 UEFI installation, insert your Flash Memory/DVD installation media into your computer and restart your computer again.
After you see the message in the picture below, press any key on your keyboard to start the installation.

Step 2
Preparing Microsoft Windows 10 operating system installation.

Step 3
In the Windows Setup window, configure the display language, time, and currency, as well as your keyboard layout. Then click Next.
If you want to use Windows in a different language, you can configure your system language in this step.

Step 4
Click Install Now to start the system setup.

Step 5
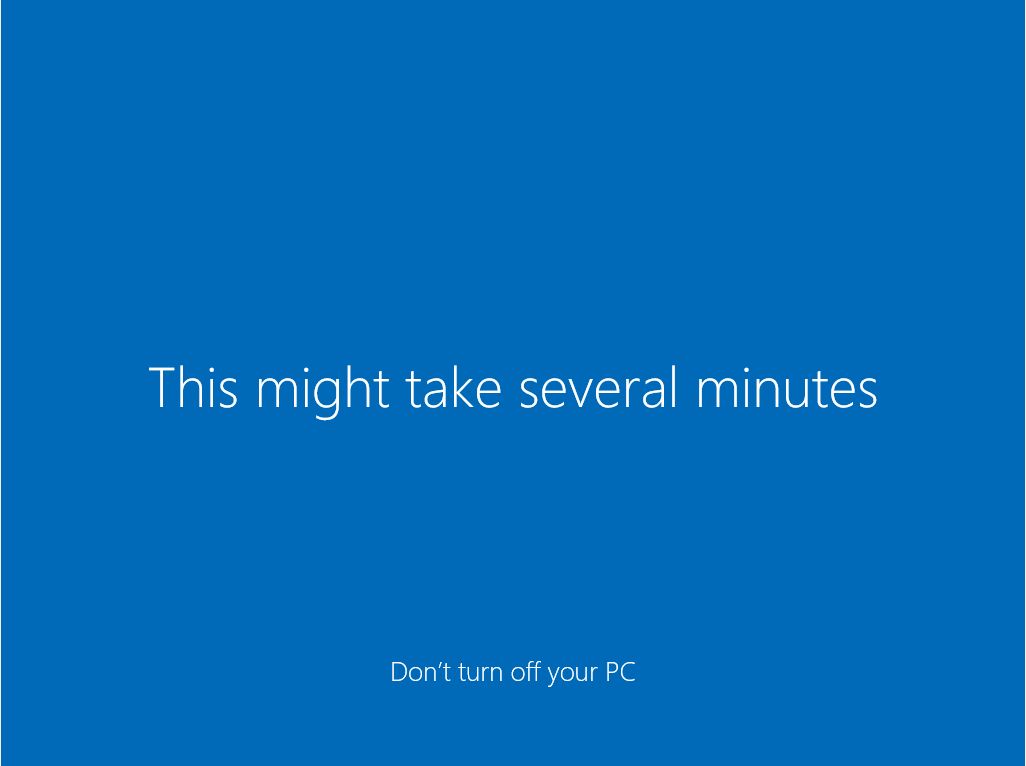
Wait while your computer is starting Windows, and do not turn off your computer!

Step 6
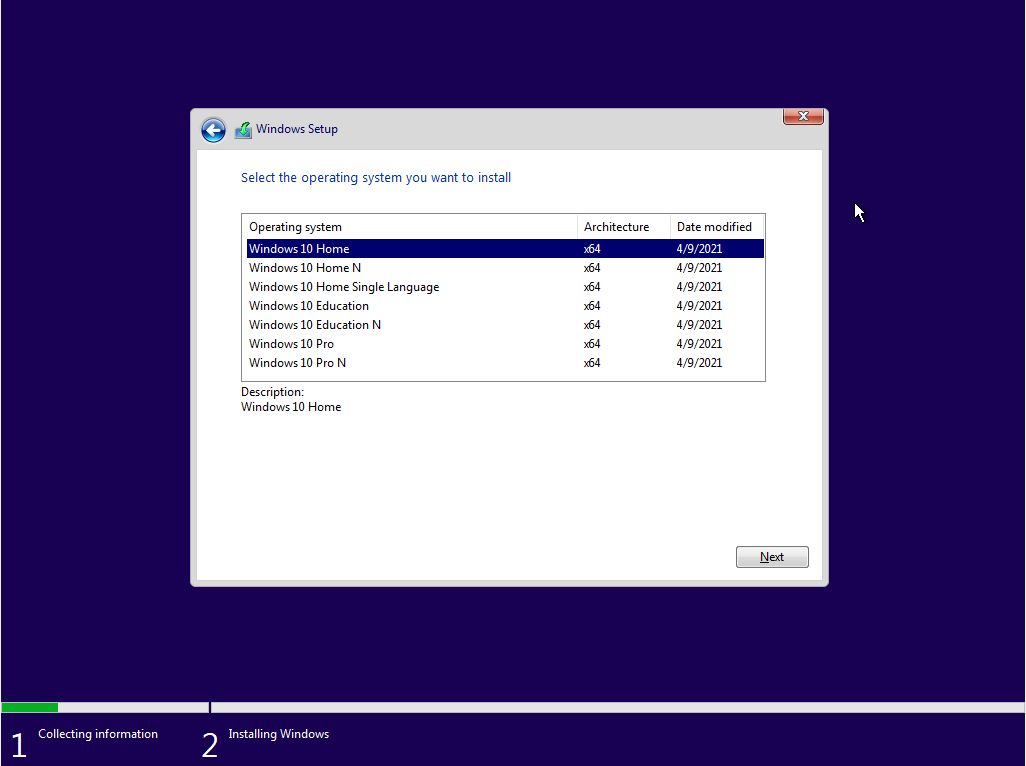
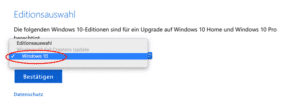
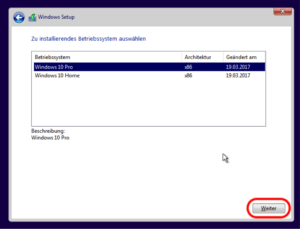
You will see the versions in the Select the operating system you want to install window. In this article, we will not install a Windows 10 Home or Pro version, so there are no options in the following window.
Select Enterprise LTSC version and click Next.

Step 7
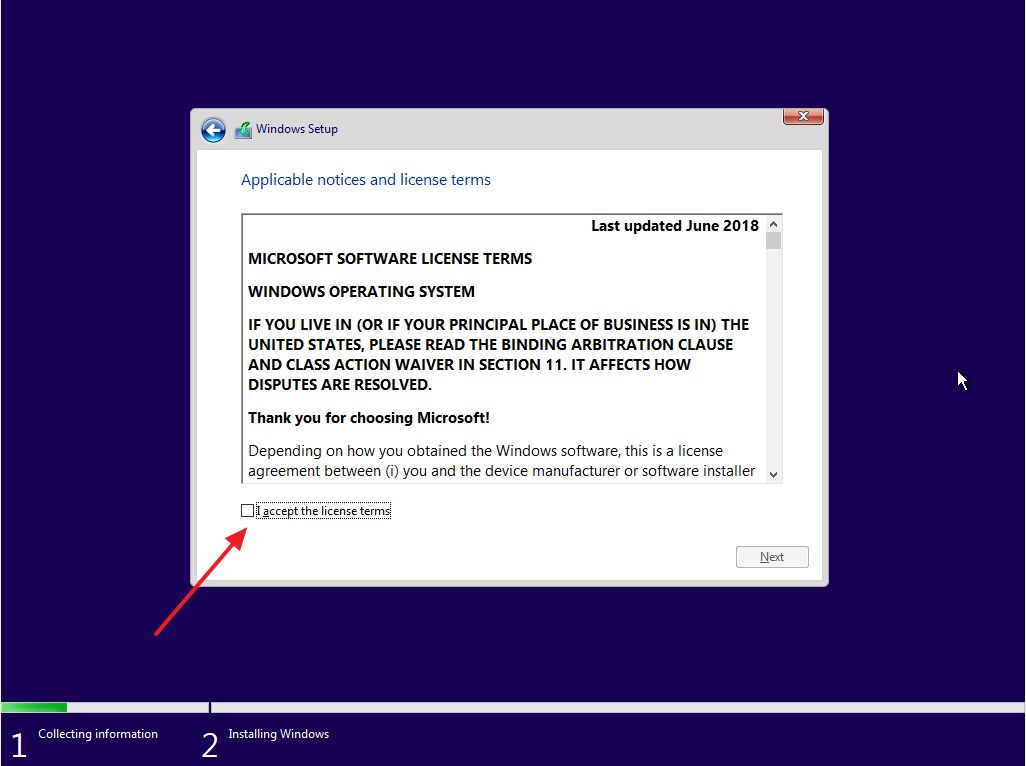
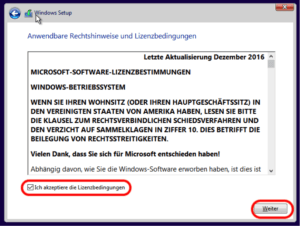
To accept the Win 10 license agreement, select I accept the license terms and then click Next.

Step 8
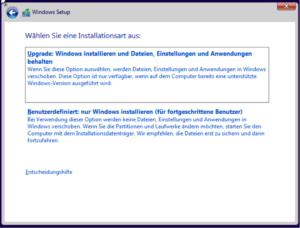
If you want to install Windows on the system you are using (Windows 7, 8, 8.1), you can do this either from scratch or by upgrading.
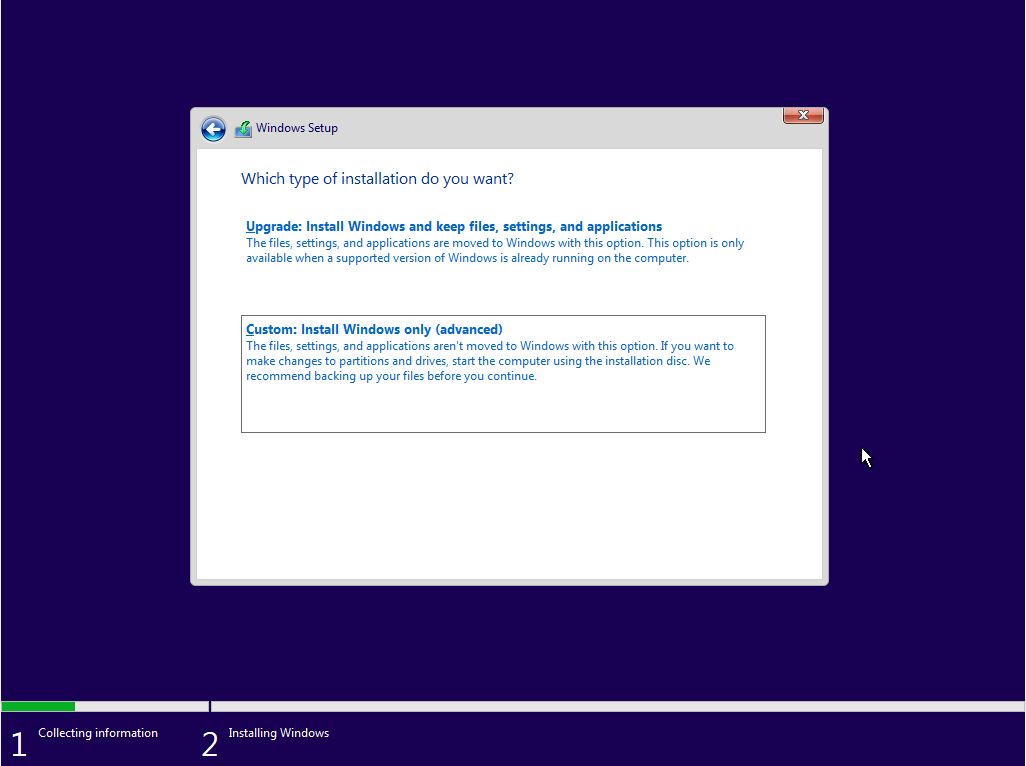
To install a clean Win 10, click Custom: Install Windows only (advanced).

Step 9
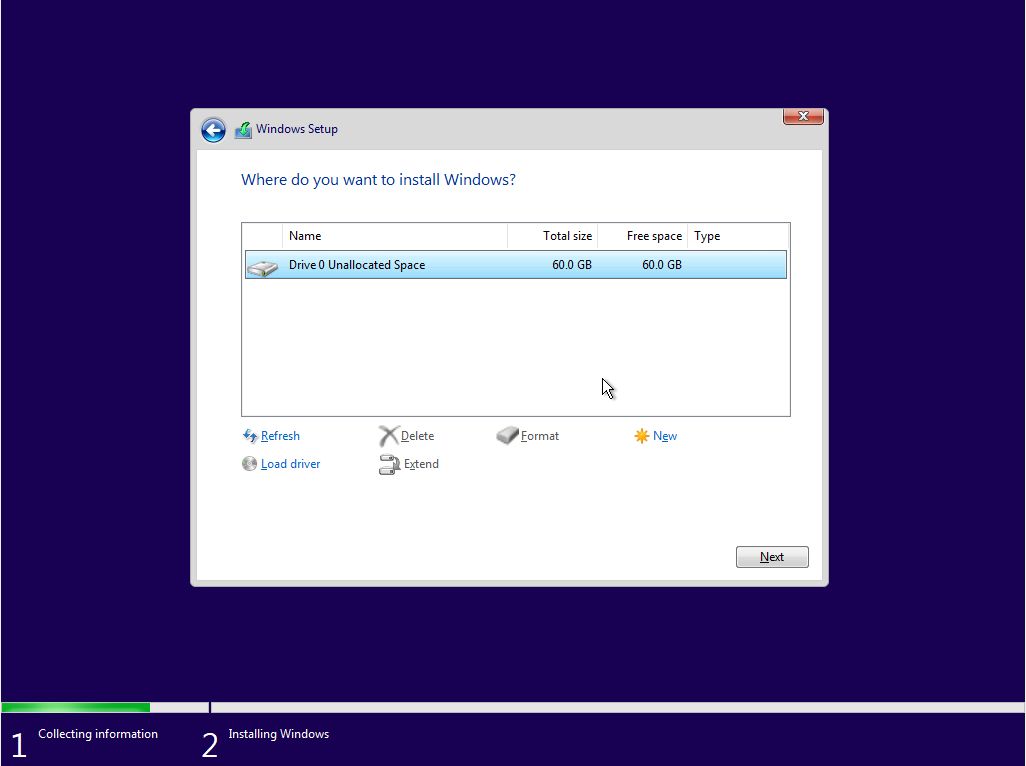
You will see your hard disk or SSD disk inserted into your computer. To configure the disk you want, click on it and then click New.

Step 10
If you want to use the entire area of your disk, click on the Apply button without making any changes to the Size section. If you don’t want to use all of the disk space, you can type the size you want to separate in Size for Windows setup and create a new Partition.

Step 11
Click OK in the “to ensure that all Windows features work correctly” window.

Step 12
After clicking the OK button, you will create Partitions as below on your hard drive for Windows UEFI setup.

Step 13
Preparing files for Microsoft Windows operating system installation.

Step 14
The setup wizard will reboot your system after copying the necessary files for Windows. If you do not want to wait for the restart time, you can click the Restart Now button.

Step 15
Preparing Microsoft Windows 10…

Step 16
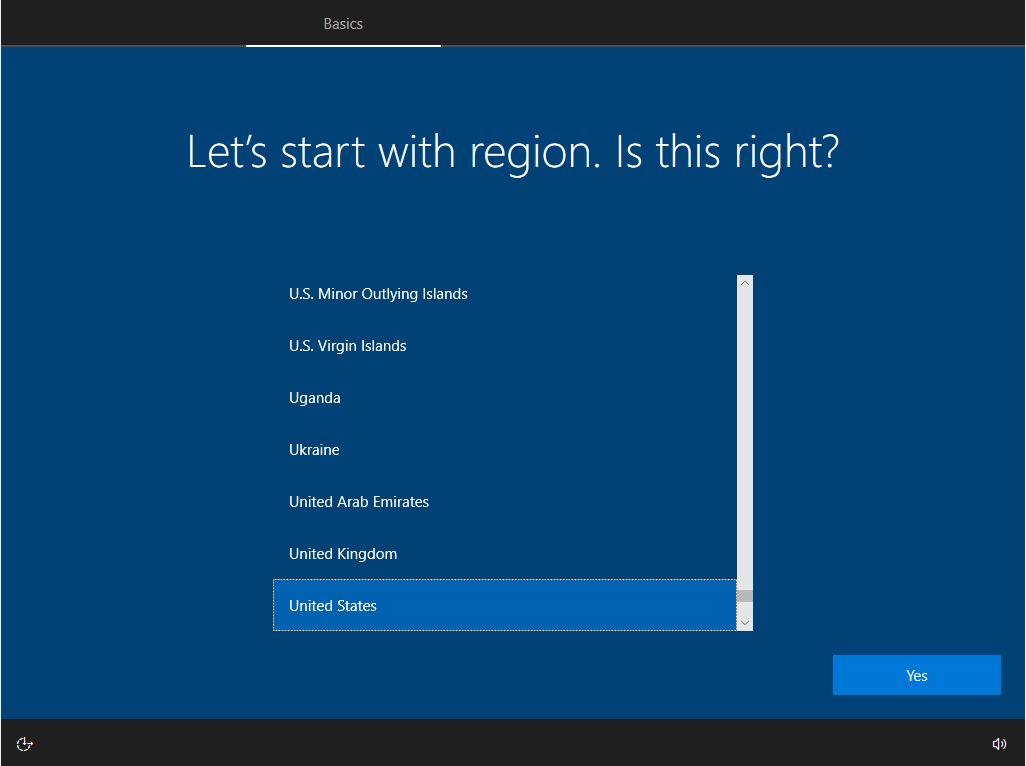
Select the location where you live and click Yes.

Step 17
Select your keyboard layout and click Yes.

Step 18
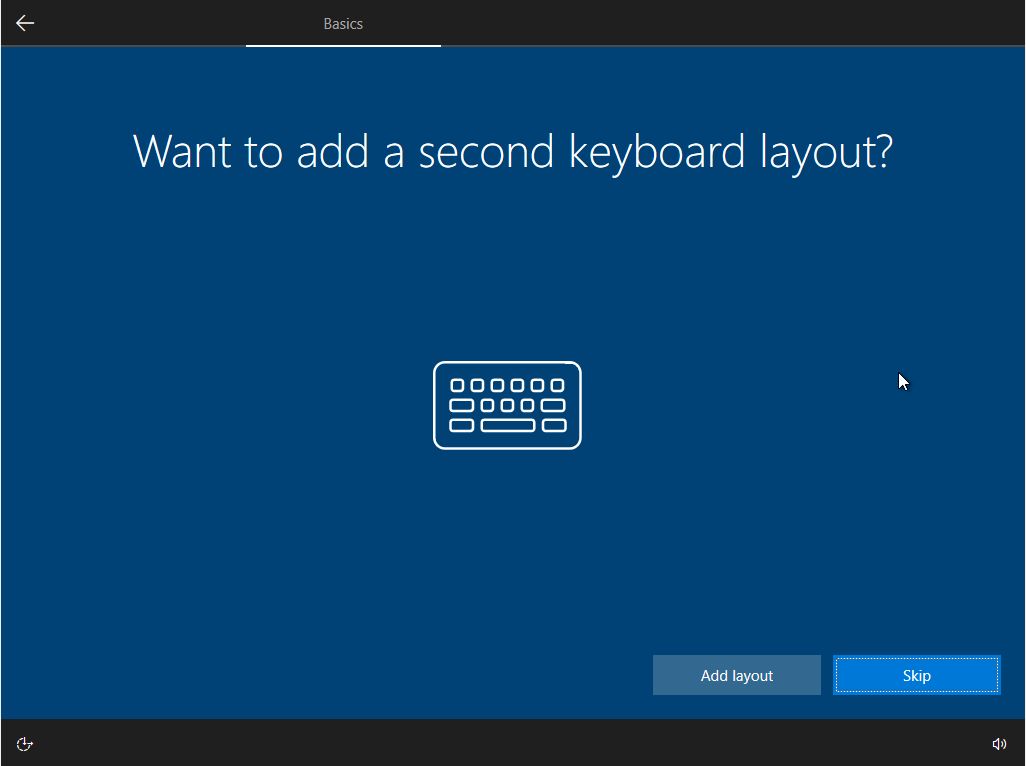
In the “Want to add a second keyboard layout?” window, click on the Skip button.

Step 19
In this step, you can sign in to Microsoft. If you have a Microsoft account, you can sign in to this window. Or, if you want to set up a local account, click Domain join instead.

Step 20
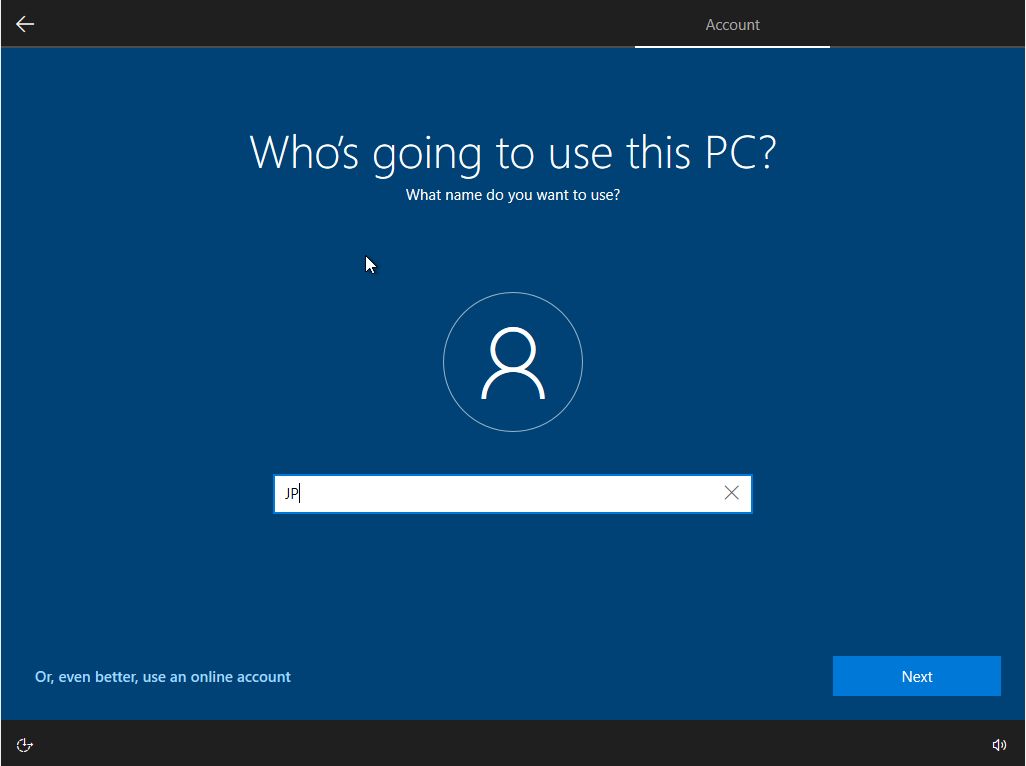
Type your Win10 user name and click Next.

Step 21
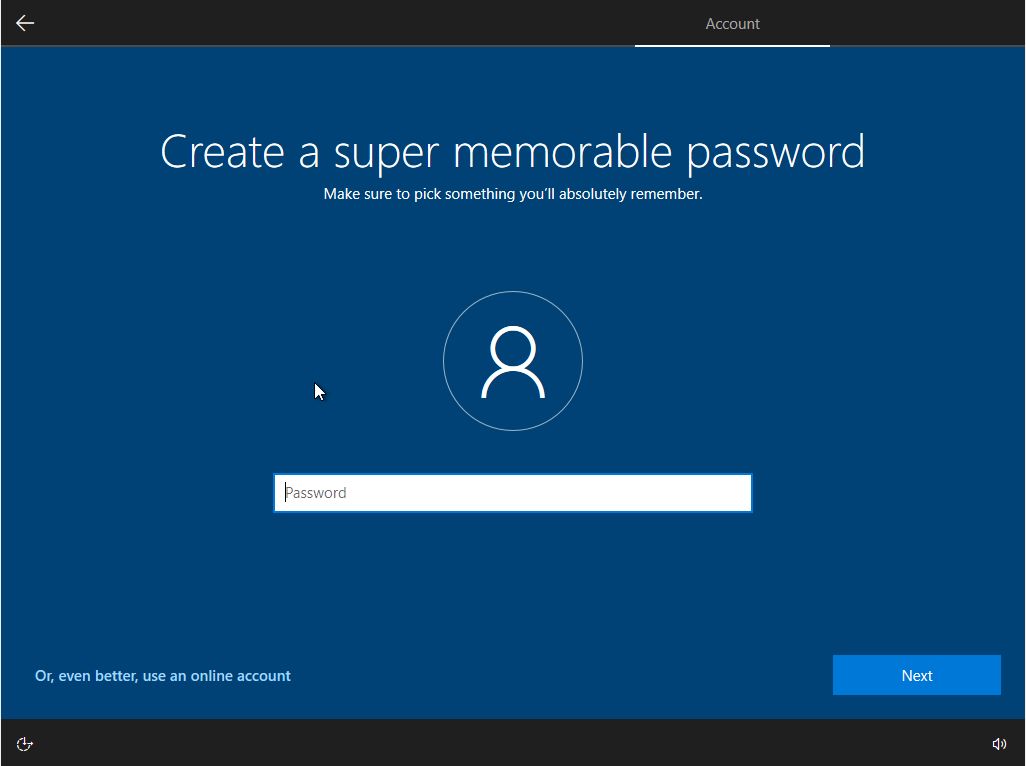
If you wish to set a password to remember, enter your password and click Next. If you do not want to assign a password to your Windows operating system, leave the box blank and click Next.

Step 22
If you want to send your user data to Microsoft, click Yes.

Step 23
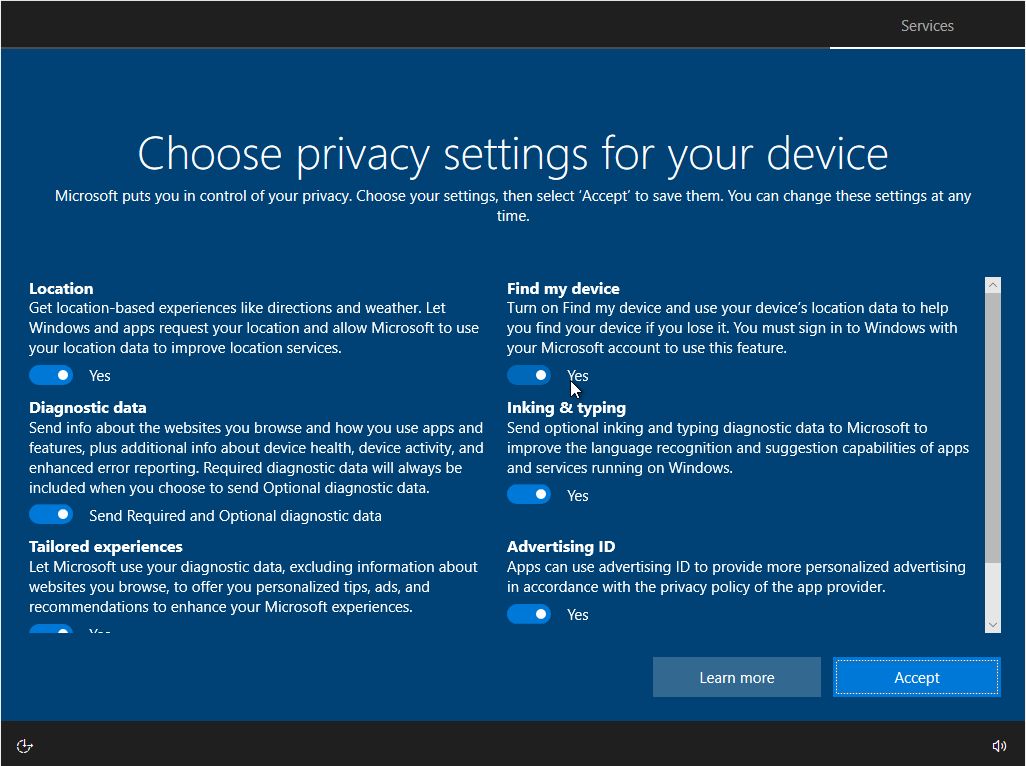
Read your computer’s privacy setting descriptions carefully and make a decision. After configuring the privacy settings, click on the Accept button.

Step 24
Preparing your Windows 10 desktop…

Step 25
You have successfully completed Windows 10 installation steps on a desktop/laptop! You can find out the features of your system by clicking on the Right Key on this PC and clicking on Properties.

Video
Final Word
In this article, we have talked about Windows 10 system requirements, versions, and build versions. Then, we have prepared the installation media to make a clean Windows 10 UEFI installation on PC / Laptop. Thanks for following us!
Related Articles
♦ How to Install SecureCRT
♦ How to Disable Windows Defender
♦ How to Find Wifi Password
♦ How to Change System Language
♦ Download Net Framework 3.5
Download & Install Windows 10 step-by-step. Windows 10 is the latest Windows Operating System produced by Microsoft. It is the latest one after Windows 8.1. If you have been facing any errors in your current Windows Operating System and wish to update your system to Windows 10 Operating System, you might want to clean the format and reset your system before installing Windows 10 on your PC.
If you have Windows 7 or Windows 8.1 version license, then you can upgrade it to Windows 10. Also, it is highly recommended that you perform several other tasks before installing Windows 10 and minimize the chances of your data getting lost.
Note: Windows Vista or Windows XP are not eligible for the free upgrade to Windows 10.
Before installing the Windows 10 into your system you must check the system requirements. This tutorial will guide you with the details of how to install Windows 10 and get the most out of it.
Note: Install Windows 10 might erase everything from the primary disk so always take a backup of the data.
The following are the system requirements that must be met before the Windows 10 installation process begins.
- Processor: 1GHz or system on a Chip (SoC)
- Memory: 1GB for 32-bit or 2GB for 64-bit
- Storage: 32GB for 64-bit or 32-bit
- Graphics card: DirectX 9 or later with WDDM 1.0 driver
- Display: 800×600
Note: Are you thinking of ways to install Python into your operating system?
Install Windows 10 using a Boot USB Drive
Install Windows 10 using the Boot Drive is a straightforward task. Within minutes you might get Windows 10 installed into your operating system. The reason to install windows 10 using Boot drive is if your operating system doesn’t have an optical drive or you are out of DVDs.
The USB stick is portable, and hence it is an easy and quick way to install Windows 10. The easiest way to install Windows 10 using a USB Boot Drive is to use the Windows 10 Media Creation Tool.
Steps to install Windows 10 using a USB Boot Drive is as follows:
Step 1: Head to the Microsoft Download Windows 10 Page. Or Click here. https://www.microsoft.com/en-us/software-download/windows10
Step 2: Click on the Download tool now.
Step 3: The installation won’t take long. Wait until the download is complete and launch the application.
Step 4: Click on Accept
Step 5: What do you want to do?
-
- You would be asked with two options: whether you want to upgrade the PC or you want to create installation media for another PC. Here I have clicked Create Installation media for another PC.
- Click on Next.
Step 6: Select Language, architecture, and edition
-
- Set your preferred language, edition, and architecture. On a safer side, use the recommended option for this PC.
- Click on Next.
Step 7: Choose the media to use
-
- USB Flash Driver or an ISO file. Here we select USB Flash Driver.
Note: The USB needs to be of at least 8 GB.
-
- Click on Next.
Step 8: Download the Windows 10 Installation File.
-
- Click on Next again, and now you can download the Windows 10 Installation files. Check out Install Google Chrome in Windows and Mac Step-by-Step
With all the above Installation steps, you can carry out clean installation using the Boot drive.
Install Windows 10 from Microsoft
I suppose you do not wish to upgrade and want to install Windows 10 freshly, you must carry out this procedure. The steps below to install Windows 10 for free from Microsoft will help you with a clean installation.
Step 1: Visit the Microsoft Download Windows 10 page (https://www.microsoft.com/en-us/software-download/windows10) and click on “Download Tool Now.”
Step 2: After downloading is complete, select Create installation media for another PC option in the Windows 10 Setup
Step 3: The next step is to select Language, edition, and Architecture.
-
- Language: English (United States)
- Edition: Windows 10
- Architecture: 64-bit (x64)
Note: If your operating system is a 64-bit CPU, you will probably want to install the 64-bit version. In case your Pc is a 32-bit, then you must install the 32-bit version.
Step 4: This step is optional. If you wish to Install Windows 10 in the current operating system, you must check on “Use the recommended options for this PC.”
Step 5: The next step is which media to use: USB flash driver or an ISO File.
Step 6: Set up Language, time and currency format, and keyboard layout. Click on “Next”
-
- Language: English (United States)
- Time and Currency Format: English (United States)
- Keyboard Layout: US
Step 8: Setup Activate Windows
-
- Enter the Windows 10 key here if you have never installed or activated Windows 10 in your current operating system. You can instead use the Windows 7, Windows 8, or Windows 8.1 version key to install Windows 10.
- If you have already used the Free Windows 10 Upgrade key Click on “I don’t have a product key.” Click on this will generate a digital license associated with your PC hardware.
Step 9: Choose the Type of Installation
-
- Click on Custom if you wish to freshly and cleanly install Windows 10 and remove everything from the PC.
- However, if you have changed your mind, you can choose the Upgrade option.
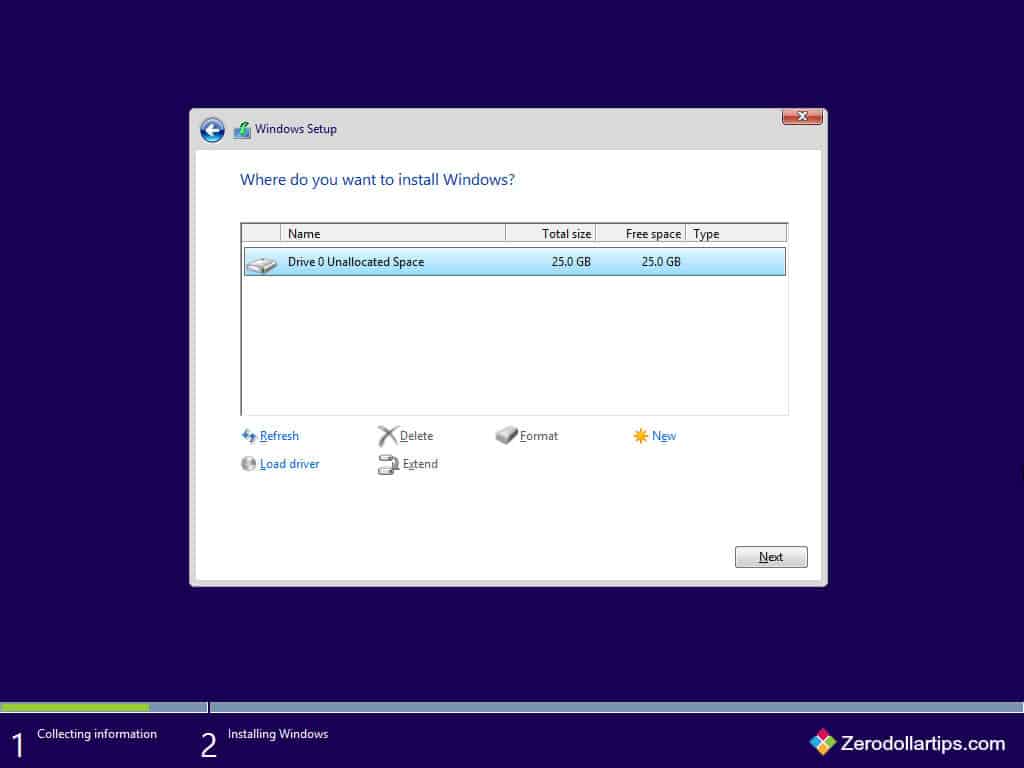
Step 10: Where do you want to install Windows 10?
Choose the Hard Drive in which you need to install Windows 10 and erase it. Also, it would help if you had a big block of Unallocated Space. Click on New to format a new drive and click on Next.
Note: Before deleting the partition files, make sure you have a proper backup of those files.
With these 10 Steps of Installing Windows 10, you have learnt how to install Windows 10. After following the above steps, Windows 10 will install on its own. However, it might restart a few times while its installation process is still on. Once the installation is done, you will see the regular Windows 10 interface.
There are high chances of committing mistakes or errors, or you may face glitches while carrying out the Windows Installation. The problem that is encountered the most are as follows:
-
- Windows Update Troubleshoot
- Low disk space
- ISO image issue
- Code error
- Incompatible hardware
Conclusion:
Checkout for the Windows 10 Keyboard shortcuts that will help you to speed up your working with the new version. If the system doesn’t work correctly, then it is the best option to delete everything from the hard drive and start to install Windows 10 from scratch. Do not forget to verify the Windows 10 Activation process.
Related Blog
#51 most used Davinci Reslove Shortcuts you should know
Google Earth Shortcuts for Beginners
GIMP Shortcuts for Windows | GIMP Shortcuts for Mac
Presentation skills – Download Google Slides Shortcuts PDF
#21 iTunes Shortcuts for Windows and Mac
Hope you have liked our blog on Download & Install Windows step-by-step. Suggestions are always welcomed for the blog you looking forward to hearing from us. Connect with us and Take your Office Productivity to Next Level.
[vc_row][vc_column][vc_column_text]
Prepare for installation and install Windows 10 operating system
This guide will help you step by step on how to download Windows 10
Burn DVD or copy USB stick and then use it on your computer
can install.
1) Step 1: Download the Windows installation files
2) Step 2: Prepare a bootable operating system DVD or USB stick
for devices without a DVD reader
3) Step 3: Install the operating system on your device
Preparation step 1: Download the Windows 10 installation files
To be able to install your desired Windows system, you need one
so-called “ISO” file. This contains all the necessary installation files.
You will receive the download links for installing the necessary ISO files by email with your key.
If you already have an ISO file, you can do this
skip.

Download Windows 10 installation file
Please click on the “Downloads” link available from myKey
is provided. On the Microsoft website please select “Windows 10”.
DO NOT use the version with “K” or , if selectable
“KN” or “N” – these are modified versions that do not match myKey
sold product keys are compatible.
This download image is suitable for installing Windows 10 Home and
Windows 10 Pro. You can sign up for your desired version later during the
Decide installation yet.
Preparation Step 2: Prepare a bootable operating system DVD or
USB stick for devices without a DVD reader
Here you can choose between DVD or USB stick installation
- a) You burn the installation files onto a DVD. It is important that not
simply burn the ISO file onto the DVD,
a special burning process is made bootable. There are two here
Methods that we recommend. If one fails, please try the
other. Windows XP and Windows Vista users definitely need to
Use method 2. - b) You prepare a USB stick specifically so that it becomes bootable and that
Operating system can be started with it if the computer e.g. Not
has a DVD drive. There are two programs here that we
recommend Windows USB / DVD Download Tool and Rufus, see also
Method 3 and 4.
There are several ways to burn a bootable DVD to Windows, we show
First, the simplest function that can be used directly from the system.
Burn a bootable Windows 10 operating system DVD (method 1)
From version Windows 7 it is very easy to create a bootable DVD with the
to burn in-house tools. (If you are still using Windows XP or Vista
please scroll to “Method 2”).
1) When the download is finished, find the downloaded file in the
Explorer and right click on it to
Select “Burn Disk Image” .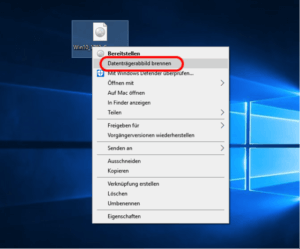
2)Now the “Windows burner for disk images opens. Select the drive used, insert a blank DVD and click on “Burn”.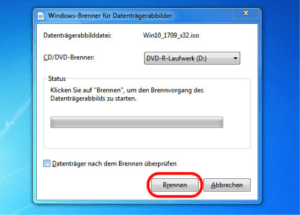
When the process is finished, you can use the DVD for installation.
Burn a bootable Windows operating system DVD from Windows XP (method 2)
Under Windows XP and Vista there are unfortunately no native tools to create a bootable DVD. However, there is a very established freeware called “imgburn” that can be used to burn operating system bootable system DVDs with ease. The software is compatible with Windows XP and Windows Vista.
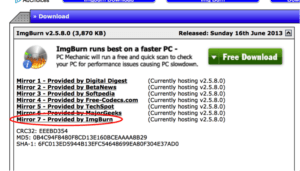
1)Go to the Webseite http://www.imgburn.com/index.php?act=download and click „Download“

2) Now click on “Mirror 7” and download the program
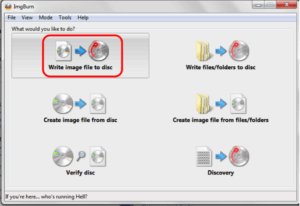
3) Install and open the Programm. You will find it „Programm“- Folder
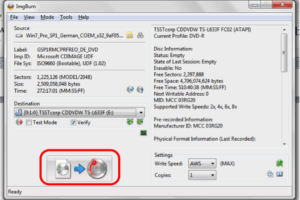
4) Select „Write Image file to disk“
5) Now click on “Source” and select the downloaded Windows ISO file to be burned
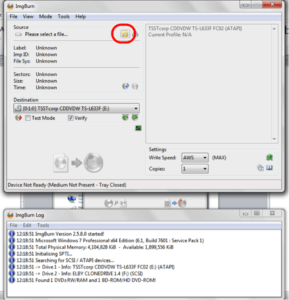
6) Insert a blank DVD and click the burn button (marked with red in the photo).
Create a bootable USB stick in Windows 10 (method 3)
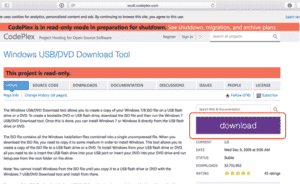
1) A bootable USB stick can be easily created with the “Windows USB / DVD Download Tool”. It comes directly from Microsoft and can be downloaded here http://wudt.codeplex.com/. Please be patient, the website loads very slowly. Click “download” on the right side of the website.
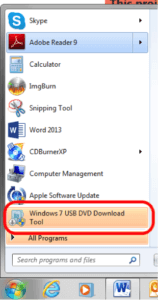
2) Install the program and open it. It should be in the “Programs” folder.
3) Now select the Windows operating system ISO file to be copied to the USB stick (“Browse”) and click on “Next”.
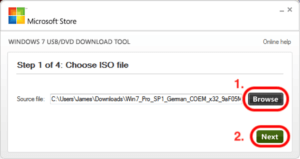
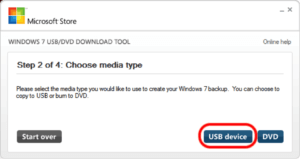
4) Now select “USB device”
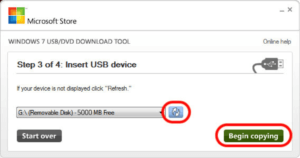
5) Now insert the USB stick, if it is not displayed, click on the small “update” symbol. Attention: The USB stick will be deleted completely! If there is important data on it, be sure to copy it to another location.
Now click on “Begin copying”. The bootable USB stick is created. This can take a few minutes.
Create a bootable USB stick from Windows XP or Vista (method 4)
Do you still have an older operating system such as Windows XP or Vista and want to burn the operating system to DVD or prepare a USB stick? Or did method 3 not work? We show you how to do it here. The “Windows USB / DVD Download Tool” mentioned above is less suitable for this, since some .NET components are installed here, which may no longer work. Therefore, the use of the freeware “Rufus” is recommended.
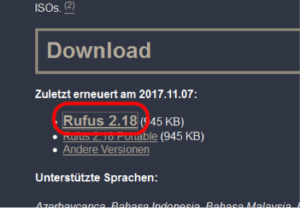
1) Go to http://rufus.akeo.ie
2) Find the “Download” area and be sure to download version 2.18 – this is the last one that still supports Windows XP and Vista. If a newer version is offered, go to “Other versions” to download this version.
3) Install and open the Programm.
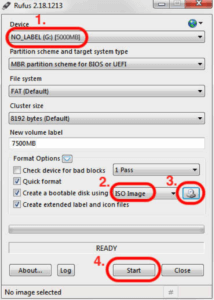
4) Now select the USB stick to which the Windows operating system should be copied (1), select “ISO Image” (2), and click on the file search icon next to it (3). Select the ISO file that you want to put on the stick and confirm the entry. Rufus automatically makes the correct settings.
Please note that the USB stick must be larger than the ISO file! You must also know that all data on the stick will be deleted. So make sure to backup the data if there is any on it!

5) Click on “Start” and wait until the files have been copied onto the stick properly.

You now have a bootable Windows DVD or USB stick.
Preparation Step 3: Install the operating system on your device
Have you now followed the instructions and created a boot DVD or bootable USB stick? Now you have to get your PC to boot from it and start the Windows 7 installation process.
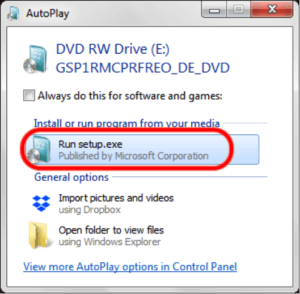
Method 1 (the simplest): insert operating system DVD
This is the easiest method, but it doesn’t always work. Simply insert the DVD and double-click “setup.exe” when the “AutoPlay” window opens.
For example, this is how it looks when you install Windows 7:
If the window does not open automatically, please open the Explorer and double-click “setup” manually.
The boot process should now start.
Method 2: Set boot order in BIOS
Regardless of whether you want to start from a DVD or a bootable USB stick, you must first tell the computer that it should boot from your medium, otherwise it will simply boot the system that is already installed.
The correct setting is determined via the so-called “boot order” in the BIOS. Here you set which device (DVD, hard drive, USB stick) should be booted first.
Insert the DVD or insert the USB stick into a free USB slot (we recommend the USB slots on the back of the device, as these often have a faster port) and restart the device.
Now it is important that you get into the so-called BIOS . The possibility to get into this only appears briefly during the start-up process. This is usually done by clicking the F2, F8, F12 or ESC key . The request can e.g. “Boot Menu” or “BIOS Setup” are called.
Select the start order “DVD” or “USB Flash Device”, confirm the selection and restart your computer.
Note : If USB booting is not available for selection in the BIOS, it may be that your computer is too old and unfortunately does not support booting from a USB stick.
Windows 10 Installation Step by Step
After you have successfully followed the above steps, your system will now boot and is in the process of installing the system. Here is a series of options that we will now go through together:
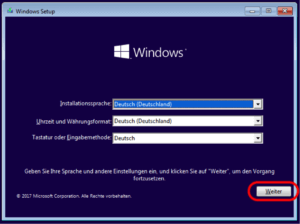
Select the desired language and region.
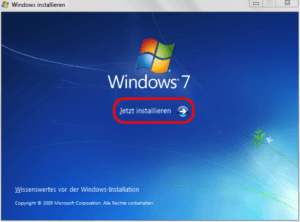
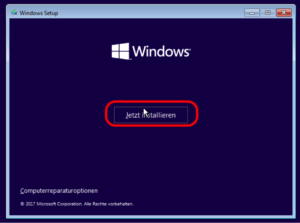
Now click on “Install now”.
Now you can enter your Windows 10 product key.

Now accept the license terms and click on “Next”.
Now you can choose whether you want to upgrade an existing system (“Upgrade: Windows ….”) or whether you want a so-called “Clean Install” (“Custom: …”). The latter will delete all data if you install it on an existing partition. Please note that the upgrade only works if the same bit version is selected as for the original system. So it is possible to upgrade from a 32bit system to a Windows 10 system, but not from e.g. from 64bit to 32bit.
It is only possible to upgrade from Windows 7 to Windows 10, unfortunately older versions such as Windows XP or Vista are no longer supported.
In any case, make sure to backup your data , as there is always a risk of data loss!
In this guide, we opted for a clean reinstallation, ie “user-defined”.
Now select the partition on which Windows 10 is to be installed. If necessary, delete or format them beforehand (“delete” or “format” command), you can also create a new partition (“new”).
Now Windows is installed. This can take some time.
 [/vc_column_text][/vc_column][/vc_row]
How to Install Windows 10 on Your PC?
If this question is running in your mind, today you will get the complete and exact solution from this step by step Windows 10 installation guide.
Finally, Microsoft has made worldwide available the most awaited and latest Windows operating system “Windows 10” along with multiple convenient ways to install Windows 10 on PC and upgrade to Windows 10 for free from the qualified version of Windows. Just after the release of the final version of Windows 10 operating system, most of the Windows users are willing to grab it as soon as possible.
If you are also excited to use the latest exclusive features of Windows 10 operating system (The Edge browser, Cortana, Windowed Windows Store apps, Virtual desktops/Task View, Action Center, stylish start menu, Revamped core apps, The Xbox app, Continuum, Unified settings etc) and want to perform a Windows 10 clean install or reinstall Windows 10 on your PC then this guide is completely dedicated to you.
But before starting the Windows 10 installation process, please read these Windows 10 guides:
- Top 10 Reasons to Upgrade to Windows 10
- 10 Things You Must Know Before Installing Windows 10
Important note: Zerodollartips.com team recommends you to backup all the files before installing Windows 10 on your computer.
Windows 10 installation process is quite easier than the other version of Windows. Only you have to perform few simple clicks and the Windows 10 operating system will be on your PC. Follow the below mentioned steps carefully in order to clean install Windows 10 or reinstall Windows 10 on your Computer:
Step (1): First of all, Download Windows 10 ISO file from the official Download Windows 10 page of the Microsoft.
Step (2): When ISO file downloading process is completed, transfer the downloaded ISO file to installation media such as a USB flash drive or DVD. Follow this guide in order to Create a Bootable Windows 10 USB Flash Drive.
Once the Windows 10 bootable USB flash drive or DVD drive is ready then you can start Windows 10 installation on any computer according to your wish. Just connect the bootable USB flash drive or DVD to the PC and start following below given steps.
Step (3): Simply, double-tap or double-click the setup.exe from the installation media to boot.
Step (4): Select your language, time and currency format, keyboard or input method and then click on Next.
Step (5): On install now screen, click on “Install now” button to start the setup.
Step (6): Check “I accept the license terms” option to agree with the windows license terms and click on Next.
Step (7): On next screen, you will see two options under the heading “Which type of installation do you want?“
- In case, you already have an existing Windows installation and want to keep all your existing files, applications and settings then click on Upgrade option.
- If the Upgrade option isn’t supported for your existing version of Windows (Click here to know which Windows version supports free upgrade to Windows 10), or if you want a clean copy of Windows installation then click on Custom option.
Step (8): If you have selected “Upgrade” option then no need to follow this step. But if you have selected “Custom” installation, select the windows partition where you want to install Windows 10 and then click on Next.
Attention Please: If you select a partition with an existing Windows installation (previous version of Windows), setup program will automatically move existing files on the partition to a folder named “Windows.old“. Read the tutorial: How to Delete Windows.old folder in Windows 10
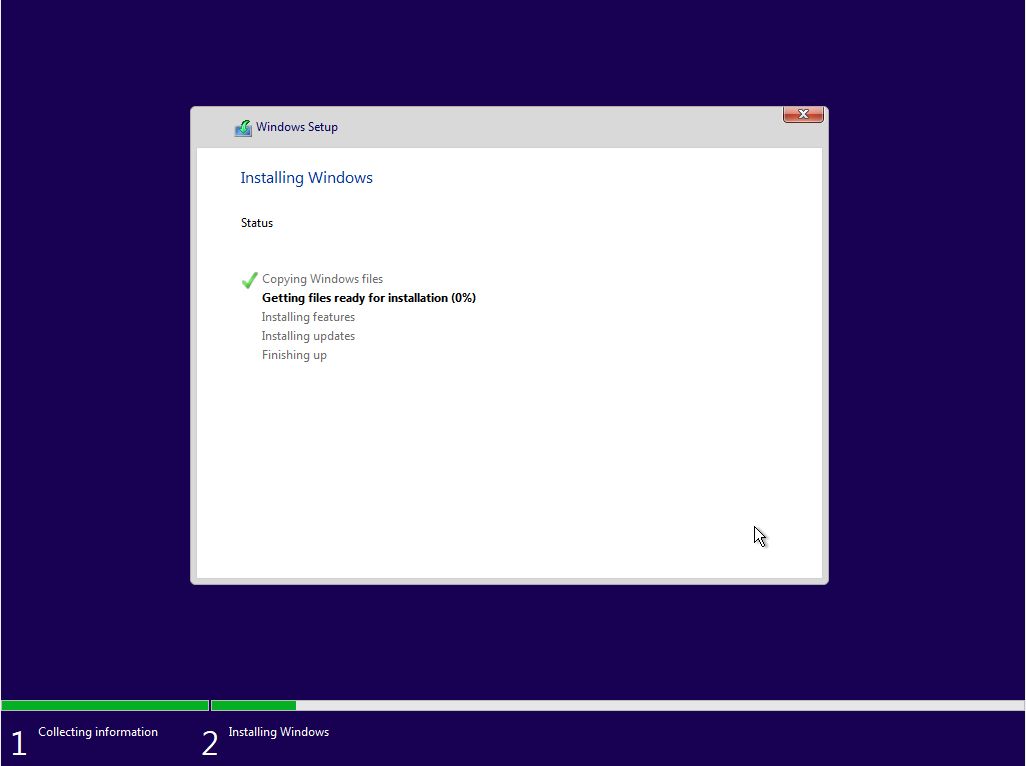
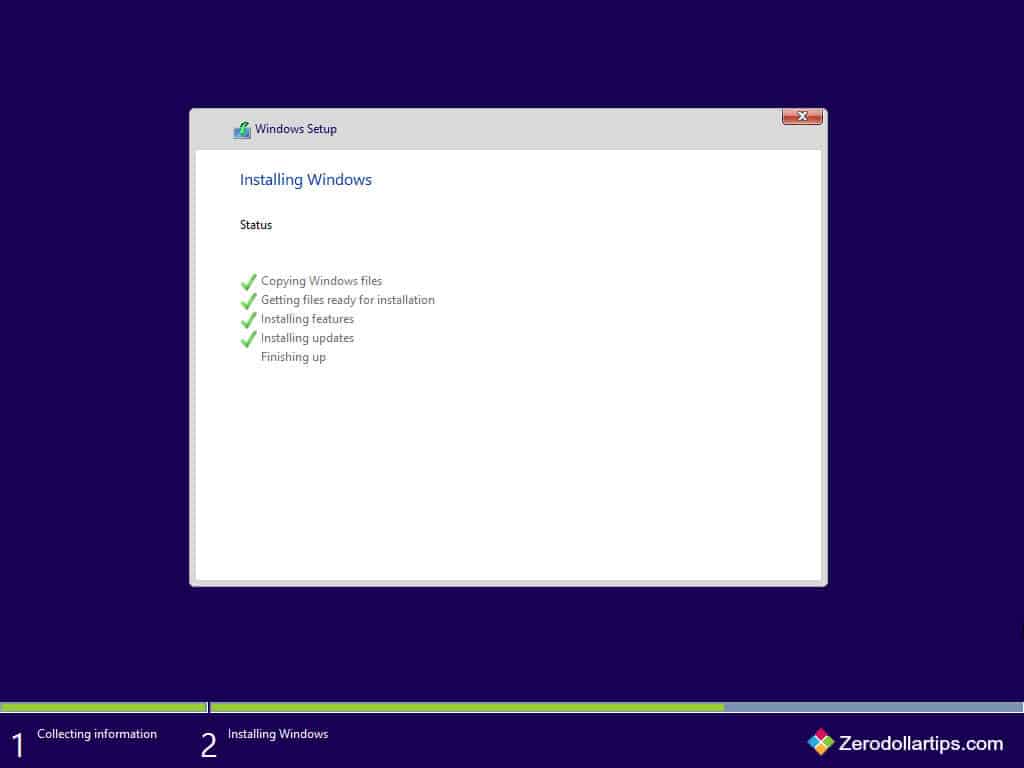
Step (9): Now, the Windows 10 installation process will start. You need to keep patience until all installing windows setup (Copying Windows files, Getting files ready for installation, Installing features, and Installing updates etc.) doesn’t complete.
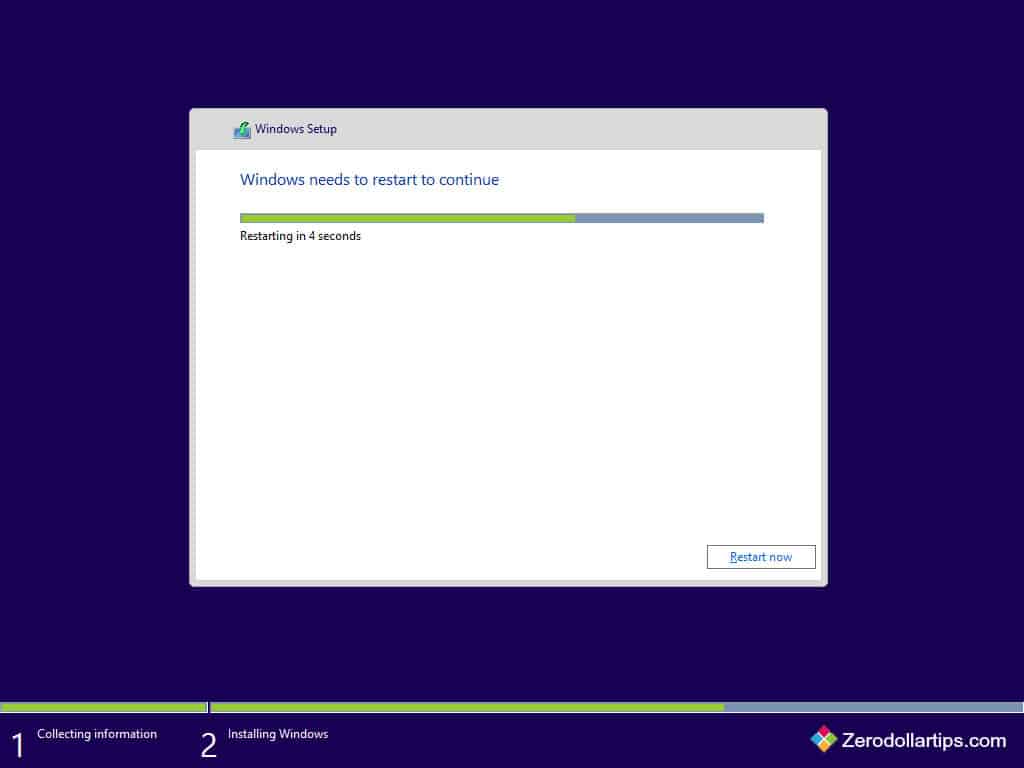
Step (10): Once Installing Windows updates is completed, your PC will automatically restart in 15 seconds. To restart instantly, click on Restart now button.
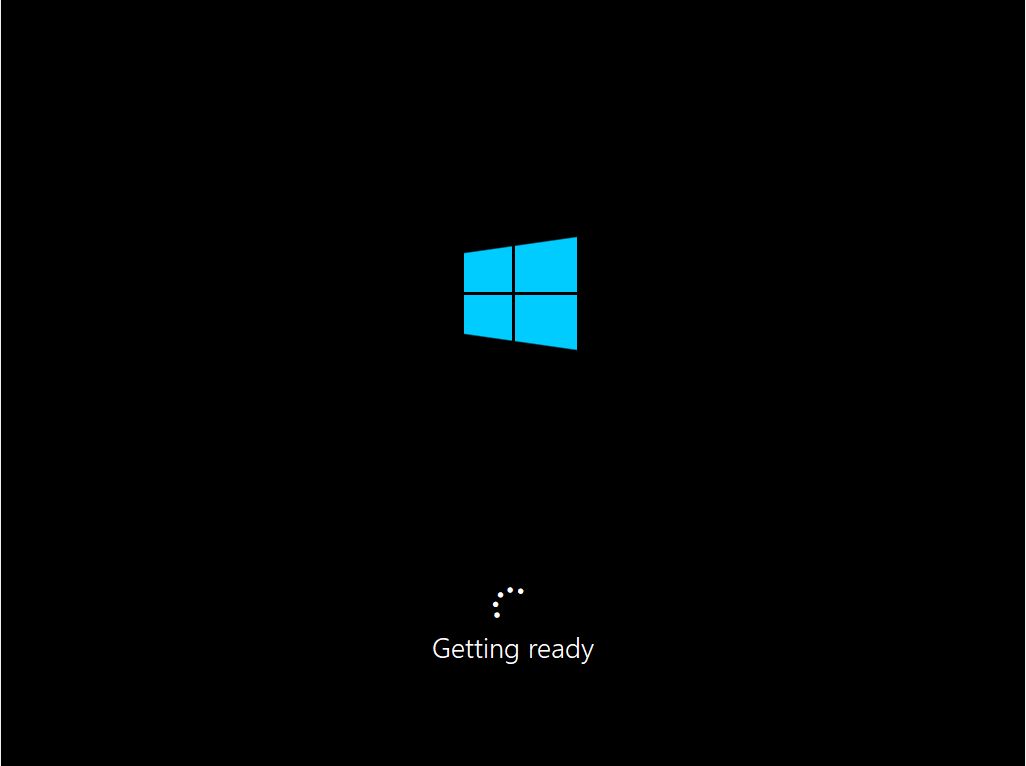
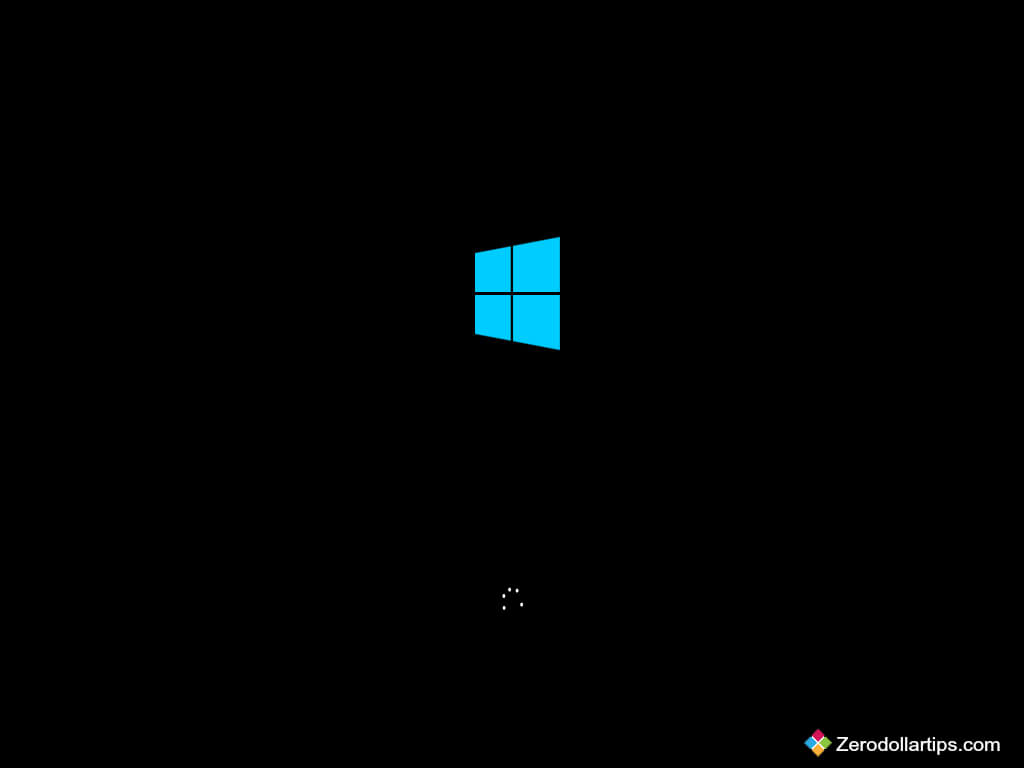
Step (11): After the restart, you’ll view that the boot screen followed notifications like Getting devices ready, Getting devices ready by %, and Getting ready.
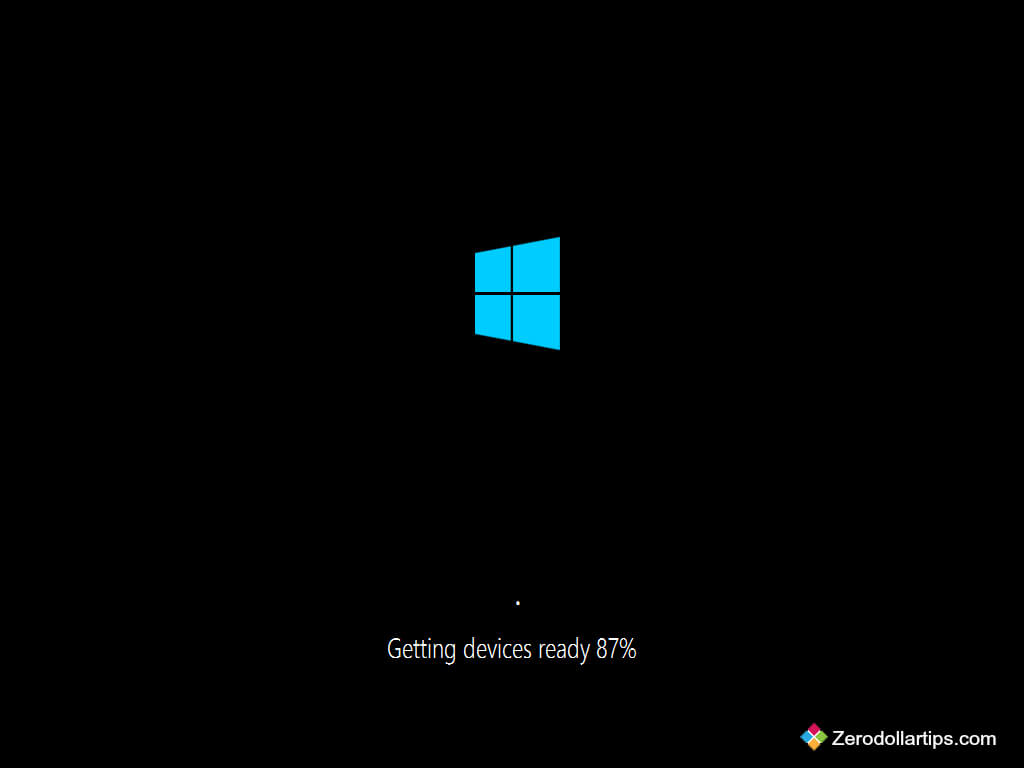
Step (12): Once again, your computer will be restarted automatically.

Step (13): Now from the Windows settings screen, click on “Use express settings” button if you wish to keep the default settings on your system, or click on “Customize” button if you wish to change the default settings.
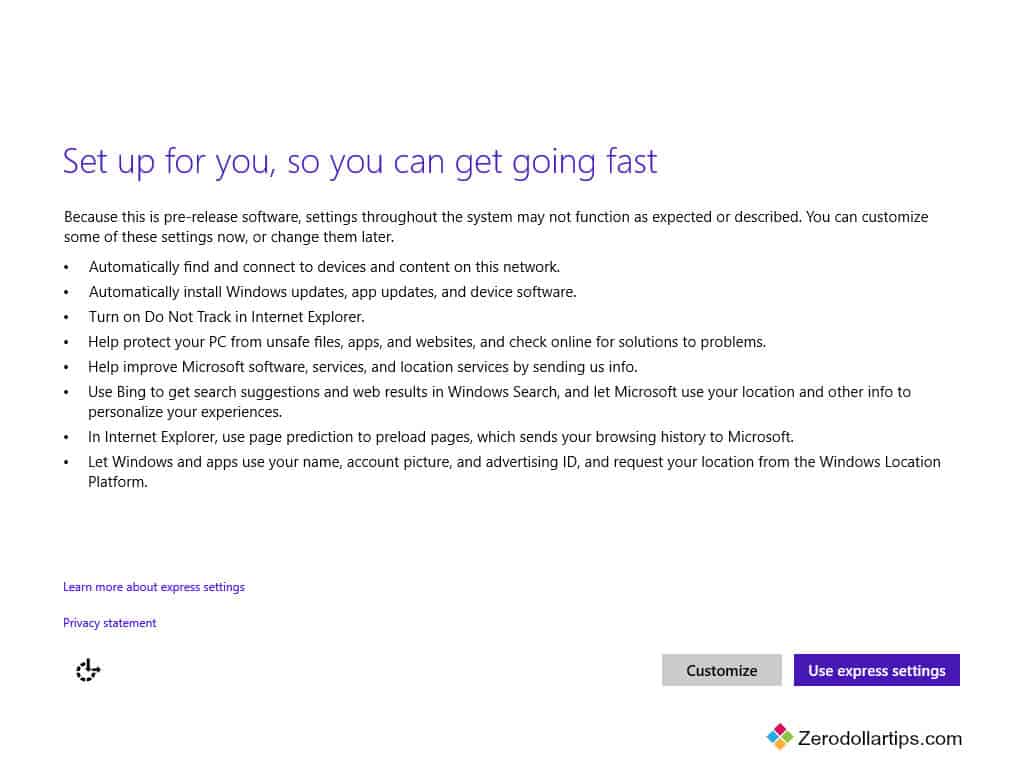
For example: Here we selected the “Customize” option to change the default settings in Windows 10.
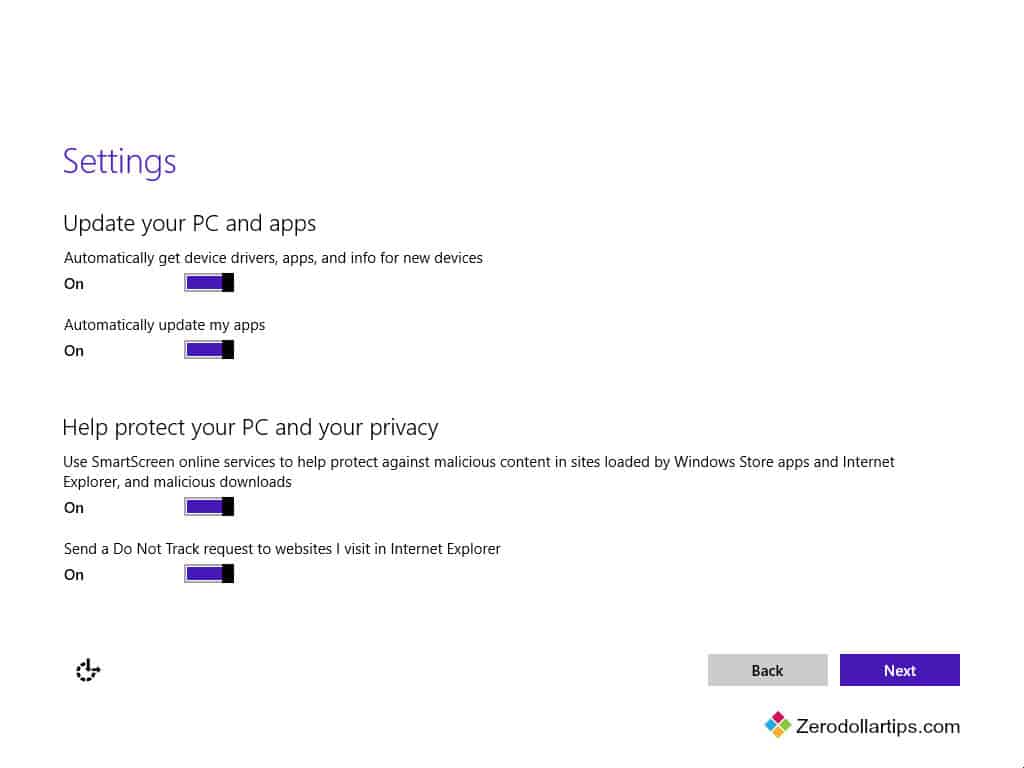
Step (14): After clicking on Customize button, the settings screen will appear. On Settings screen, make changes according to your wish and then click on Next.
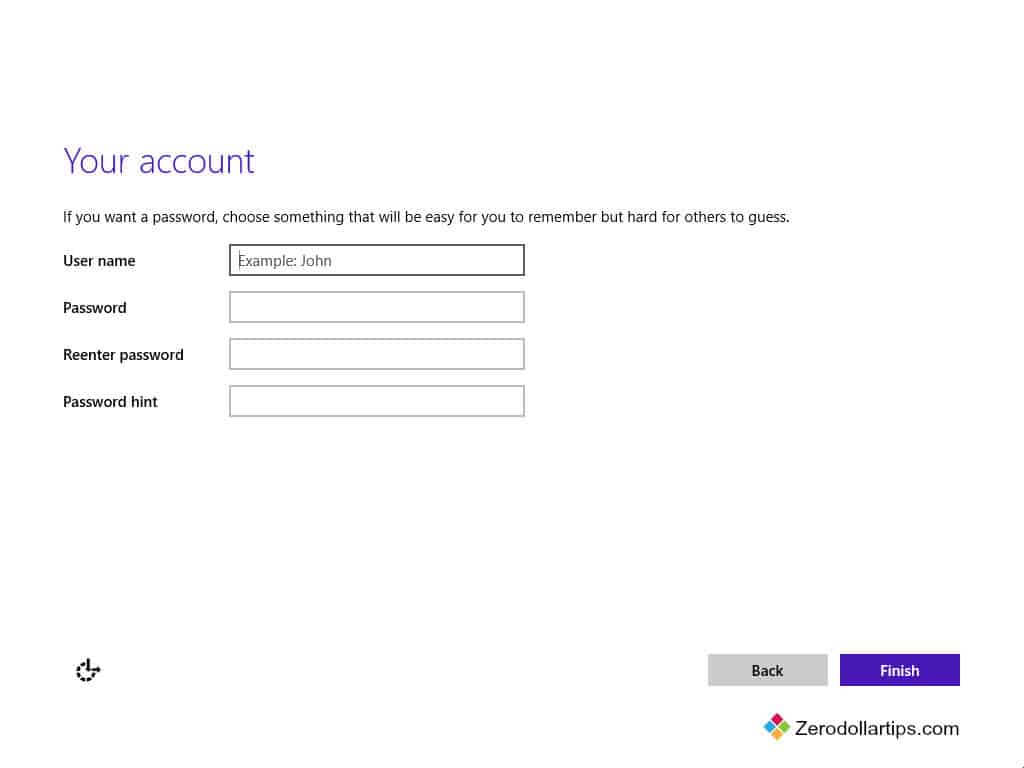
Step (15): Enter the user name, password, and password hint. Click on Finish button.
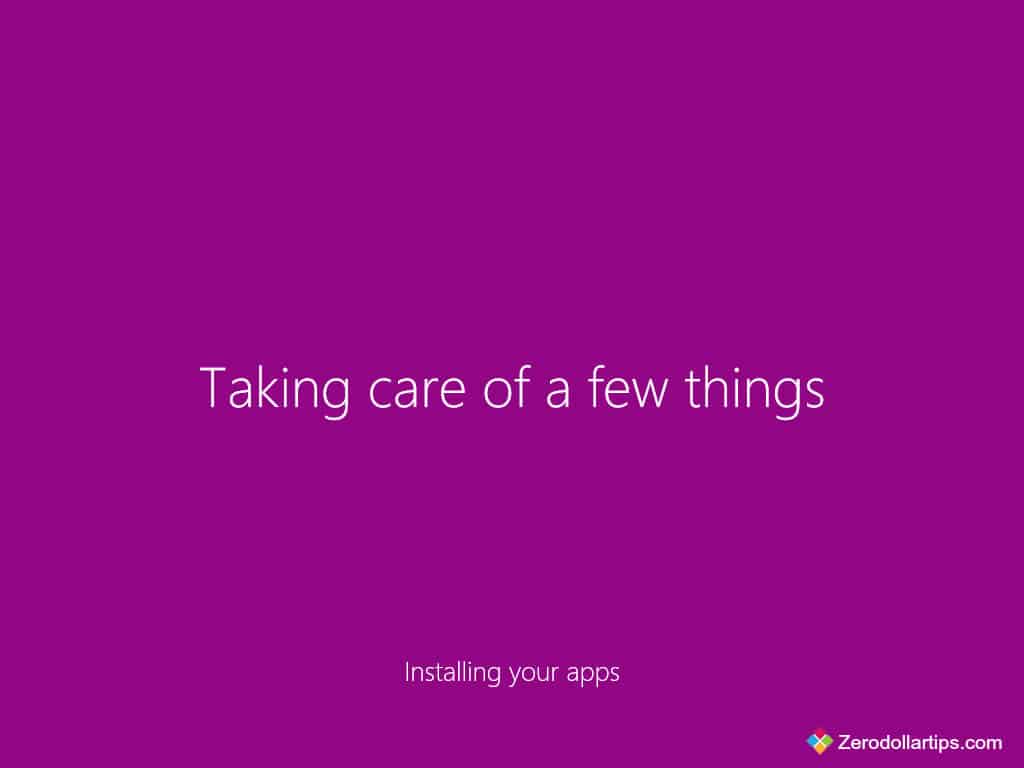
Step (16): After that, the settings will be finalize.
Step (17): Now, the different colourful animation will start appearing on your computer screen as shown below. You have to just sit and wait until you see Windows 10 is completely installed.

↓

↓

↓
↓

↓
↓
Step (18): Once you got the Windows 10 desktop, you are done!
Congratulations! You have successfully installed Windows 10 on your computer. Now start enjoying new and improved features of Windows 10 operating system.
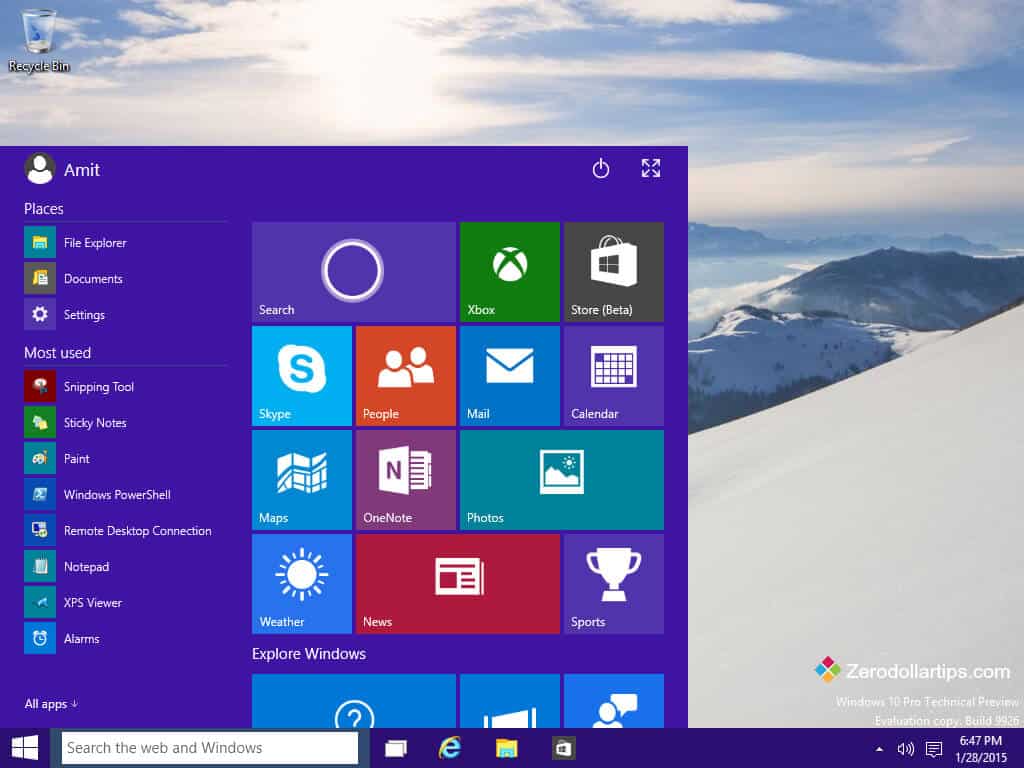
Some of new Windows 10 Features are like Start Menu Returns, Cortana on Desktop, Xbox App, Project Spartan Browser, Improved Multitasking, Universal Apps, Office Apps Get Touch Support, Continuum, Action Center, and Unified Settings etc.
If you think – the step by step guide for Installing Windows 10 is useful for you then please share your view with us through comments. I hope you found a well explained tutorial on how to install Windows 10 on your PC?
Other Similar Windows 10 Tutorials that May Interest You:
- How to Disable Startup Programs in Windows 10
- How to Remove Watermark in Windows 10 and Windows 8
- How to Set Auto Shutdown in Windows 10
- How to Run Disk Error Checking in Windows 10
- How to Turn off AutoPlay in Windows 10
- How to Fix: Stuck Caps Lock and Num Lock Keys in Windows 10
- How to Create 4 Digit PIN Logon in Windows 10
- How to Install and Use Third Party Themes in Windows 10
- How to Open a Command Prompt at Boot in Windows 10
- How to Recover WiFi Password on Windows 10
- How to Disable Windows 10 Lock Screen
- How to Boot Windows 10 in Safe Mode [Quick ways]
- How to Run Skype on Windows 10 without any Issues
- How to Enable or Disable SmartScreen on Windows 10
Installing Windows 10 may be required if you bought a laptop without a preinstalled operating system. Also, you may need to reinstall Windows 10 in case of problems with the OS. In any case, you need to know how to install Windows 10 yourself, so as not to overpay the computer masters. In fact, installing Windows 10 is a very easy process. The main thing is to understand the main points.
Before you start looking at the most complete guide to installing Windows 10 on a computer and apply the knowledge gained in practice – take a USB flash drive with at least 8 GB of memory in your hands. When the flash drive is in your hands, you can start installing the distribution kit.
Our team tried to write the most complete instructions for installing Windows 10. But if you have any questions, you can always ask them in the comments!
Installing windows 10 – preparation stage
The flash drive is the main tool with which the operating system will be installed. The first step is to prepare the USB stick. There is no difference whether the flash drive will be 3.0 or 2.0, and this will not affect anything else except the write / install speed. The next stage is the presence of an image from which you will need to write the system to the drive. The image, or as it is also called, the installation files of the Windows 10 system can be found on various Internet resources. Most often, Windows images that “walk on the Internet” are supplemented with various modifications. Such images can limit the functionality of Windows 10 or are crammed with software that does not bring anything good to the end user.
The danger of installing pirated Windows was and will be. If you have no experience of interacting with them and you do not want to become an “accidental victim” of cybercriminals, it is recommended to install a legal version of the OS.
But you can find a clean, legal or original Windows 10 “without modifications” and write it to a USB flash drive in this way:
- Insert the flash drive into the USB port of the computer (it will be displayed in the system with a characteristic sound and can be seen through the explorer).
- Open any browser (Edge, Mozilla, Google and others). The computer or laptop from which you enter the browser must be connected to the Internet.
- In any address bar / search engine in Russian, write “Download Windows 10”.

- The only place that has a clean, legal image is at microsoft.com. You can download the Windows 10 installation right here. No other sites will give the desired result, but the search engine algorithm will give it, and you will receive a link to the desired page.
- Then press the button “Download the tool now”.
- And you download MediaCreationTool.
- The browser is no longer needed, you can close it. Next, run the tool as administrator. The next stage is the preparation of the flash drive itself. If the flash drive is 3.0, then the preparation time on an average computer takes about 15 minutes.
- Accept the license agreement after reviewing its contents.

- Wait a while until the program offers you several options.
- If you have Windows 10, 7 or 8 on this PC, the first item allows you to update your OS to the latest current version. To create an installation USB drive, select Create Installation Media. Choose the second item and click “Next”.
- Uncheck the “use recommended settings” checkbox. And if required, choose your language, bit depth (if in doubt, or make a USB flash drive universal, put “both” in the bit width field). But remember that 32-bit Windows is needed only for some ancient devices with less than 4 GB of RAM. That is, always install 64-bit Windows 10.
- Next, you have a choice between an ISO file or a USB device. If you don’t want to make a bootable USB flash drive now, but you need a system image, choose the ISO file. This will save the image in ISO format to your PC’s hard drive so you can use it in the future for recording without having to go back to the Internet.
- To write the system to a USB flash drive, you need to select “USB device”.
- You need to be careful here. If several drives or flash drives are connected to the computer, you should choose the correct one, because before recording, the program will completely format the flash drive into the FAT32 file system necessary for operation.
- You can make sure that the desired drive is under the same letter, you can use the explorer.

- Next comes a long procedure for creating the media itself, divided into two stages. The first step is downloading the image. The second stage is installing the distribution kit on a USB flash drive.
- After complete installation, the files will be on the media, and the data carrier itself can be used to install Windows 10 from a USB flash drive to a laptop or PC.


In addition to the official program Media Creation Tools, you can use other popular utilities for recording the system image to a USB flash drive:
- Ultra ISO;
- Rufus;
- WinToFlash;
- Universal USB Installer.
You can even use the command line to write the Windows 10 distribution to a USB flash drive.
But the easiest way to understand and implement is the way to work with the official Media Creation Tools, so stick with it.
Installing Windows 10: Different Ways to Install
In general, installing Windows 10 from a USB flash drive comes down to one thing – you run the system installation file and use the installation wizard to install Windows on your computer. But, there are differences in how and in what “environment” you can run the installer. The next method should be chosen based on the needs of what the computer provides you.
Clean install of Windows 10
The mistake of many newbies is that to install the system, they turn on the computer, wait for Windows to load (which needs to be reinstalled) and try to start the installation from the flash drive. It is not advisable to do this, since this method will more often lead to a failed installation of the system.
For a complete and high-quality installation of the OS, it is recommended to do a clean installation of Windows 10. “clean” means the installation of the operating system on a drive prepared and formatted for this task.
The drive can be a hard drive, an SSD, or a dedicated “area” of a drive that you can create from a drive before or during a clean install. Installation sequence:
- Connect the USB flash drive with the distribution kit to the computer prepared for reinstalling Windows.
- Choose to launch the flash drive through a different boot environment (Boot menu, UEFI, BIOS).
- Select the correct installation options and format the hard drive for subsequent installation on it.
- Run the installation and wait for it to complete.
Operating system boot environment BIOS and UEFI
Below is a list of interfaces from which to download the OS installer. The easiest way to work is through the Boot menu.
Installing Windows 10 via UEFI
As soon as you turn on the computer, the motherboard emits a short signal, and information about the manufacturer of the motherboard, PC or laptop appears on the screen, with the help of a certain key you can enter the UEFI interface.
All modern motherboards contain this interface by default. And thanks to him, you can download the installation distribution from a USB flash drive. Installing Windows 10 via UEFI starts like this:
- In the turned off computer, insert the installation USB flash drive with Windows 10 into the USB port.
- Press the Power button to turn on the PC.
- As soon as you heard a squeak and saw the motherboard splash screen, press the Del key on the computer (press continuously until UEFI opens). You can also log in using the F2 or F1 keys. On laptops, this is also F1 and F2. HP notebook PCs enable UEFI with the F10 key.
- In the UEFI interface that opens, find the advanced menu (Advanced mode). Depending on the interface, it can be placed at the bottom or top of the screen. Also, the extended menu can be called with the F7 key.
- Working with an ASUS motherboard, press F7 – go to the “Boot” section – in the Boot Option # 1 line, select USB Flash.

- If your PC has an MSI motherboard – press F7 – Setting – Boot – select “Boot option” from below – set USB: Key “name of the connected flash drive”.

- Booting from AsRock is easier – click on the “Boot” tab and set the Windows flash drive to “Boot Method # 1”.

- For Gigabyte – go to the “Setting” section and click “Boot Option # 1” on your flash drive.

If the Boot Option offers a choice between “name of the stick” and “UEFI: name of the stick”, always choose UEFI. After changing the boot priorities, press F10 and select “Save and Exit”. The download will go from the storage medium you specified.
Installing Windows 10 via BIOS
If your PC motherboard works with BIOS, this means that you are installing Windows 10 through the BIOS. In this case, you can encounter various difficulties both with operation and during the installation process.
It should be understood that only the keyboard works in the BIOS, and all manipulations are carried out through it. Remember:
- Movement – arrows up, down, left, right;
- Apply / Expand – Enter;
- Cancel / go back – Esc;
- Save parameters and exit – F10.
There are various types of BIOS such as Award, AMI, and Phenix-Award.
Due to minor changes in the interface, there is a difference in setting download priorities, but using the AMI example, it is easy to figure out where the required parameter is located:
- Connect the USB flash drive and start the PC.
- After a short sound, press the button to enter the BIOS (computers – Del, laptops – F2, F12, Fn + F2, etc.).
- Go to the “Advanced” – “USB Configuration” section.

- In this section, next to the “USB Function” and “USB 2.0 Controller” parameters, check that “Enabled” is selected.

- Use Esc to go back and go to the “Boot” – “Hard Disk Drives” tab.

- Put your USB flash drive as the first in the list of loading media.

- Install boot from HDD to the second location.

- Then press F10 to save the changes and click “OK”.

- The system will offer to reboot the system while saving the specified parameters. Click OK. The reboot will start automatically. You don’t need to touch anything. We are waiting for the download from the USB flash drive to occur.


Boot-menu
We repeat almost everything that we did when loading UEFI, with a difference in the keys pressed:
- Plug in your USB flash drive and start your computer.
- As soon as the logo of the motherboard appears, press the keys to call the Boot menu. They are different for each motherboard. If your motherboard is from Asus, press F8, F11-F12 if MSI, Gigabyte motherboards are installed, and F9 if Asrock.
- If Windows 8 or 10 is currently installed on the computer, then select the USB flash drive as the bootloader with the inscription “UEFI: USB flash drive name”.

Windows 10 setup wizard
Installation of Windows 10 takes place in several stages: preparation for installation, installation, settings after installation. Thanks to the installation wizard, it’s easy:
- Loading data from a USB flash drive starts a window where you select the language, time format and input method.

- If everything suits you, click “Next” and then “Install”.

- The OS offers to go through activation now. If there is no key, click “I do not have a key.” You can activate Windows 10 later, or even use it without a digital license.
- Next, select the OS you want to install. The “Home” version is sufficient for standard work on a computer. The Pro version is installed because of the additional functions for configuring Windows required in the IT field. Education is an OS focused on learning and students.
- Then read the license terms and accept them.
- To start a new installation of Windows 10, click “Custom”.
- Here you need to choose which drive Windows 10 will be installed on and prepare this drive for installation. To do this, select your hard drive and click “Format”. The formatting function will erase all data from the disk. Then click “Create”.
- At this stage, you set the number of GB for your system and set the necessary markup for its deployment. If you select less than the maximum GB, the drive will be divided into multiple parts. One of these parts (or a whole disk) can be implemented for OS installation. After choosing the number of GB, click “Apply”.
- Then click “OK” that the OS has created a system subkey to save its initial settings.
- After creating the “System” and “Main” section, select “Main” and click “Next”.
- Done. The installation process has begun. The installation time of Windows 10 directly depends on the speed of reading the flash drive and the speed of writing to the hard drive or SSD. On average, if you install an operating system from a USB 3.0 flash drive to an SSD drive via a USB 3.0 port, the installation time will take about 10 minutes. If it works via USB 2.0 and the distribution is deployed to an old hard drive, it can take up to an hour.


Typical Windows 10 installation
You can install Windows 10 on an SSD or hard drive directly from a running OS of the same family. If everything is done correctly, and this OS does not crash, then you can install the distribution kit even on the disk from which your Windows is running now. There will be no mistakes.
The only difference is that a Windows.old folder will be created, which will contain data for restoring the previous operating system.
If this method suits you, then the installation proceeds according to a similar principle:
- Connect the USB flash drive with the distribution kit to your computer and run “Setup.exe”.

- After checking for updates, checking your PC, and accepting the license agreement, Windows 10 Setup will start the installation process.
- Wait for updates to check.
- Then close everything on your PC and click Install.
- Also, you can click on the “Change the components selected for saving” button and choose whether to save or not save your data.
- The installation proceeds in the same way as described for a clean installation of Windows 10. You need to select the disk on which the OS will be recorded. If this is the same drive from which Windows is currently running, you do not need to format it. Just select the drive and click “Next”. The installation wizard will notify you that a Windows.old folder will be created with the files and folders of the current OS. Click “OK”.

- As soon as you decide on the drive, the installation of the OS on the PC will begin. At some point, the PC will restart and the installation will continue outside of Windows 10. Everything will complete in the same way as if you installed the system from scratch.


Additional ways to install Windows 10
There are several other ways to install Windows. All of them are related to the fact that Windows 10 is already installed on your PC and you want to reinstall it.

For these purposes, there are several functions from the recovery section (Win + I – Update and Security):
- Reset the PC to its original state – rollback to the initial settings of the computer if it fails. In this case, the loading of the primary parameters will be pulled up from the recovery environment. If the PC fails to do this, you can connect a USB flash drive with Windows 10 boot files so that the PC can do a recovery via a flash drive.


- Revert to previous version – the option to install the previous version of Windows 10 from the Windows.old folder or alternative backup folders that the OS created. A good solution in terms of if the previous version worked well and the new one works with a lot of bugs.
- The “Windows Security” section in the defender, the “New Start” option is the same as launching the installer from a USB flash drive in Windows 10 itself, only without bootable media. If an option is available, you can work with it.


The disadvantage of all methods of restoring or installing the operating system is that such a process does not give a 100% guarantee of installing Windows. Since the system is being reinstalled due to unstable operation, this could affect these functions as well.
In the end, often, instead of a “successful rollback”, you get a return to this state, a wasted time and a “Problem when returning a PC to its original state” window.

Also, these methods do not allow you to change the type of system. If you need to change “Home” to “Pro” – do a clean install.
Problems installing Windows 10
Sometimes there may be problems before starting the installation or during the process. In this section, we will analyze the errors during the installation of Windows 10 that users most often encounter.
The selected disk contains an MBR partition table

A common problem that is solved by converting MBR to GPT partitions when installing Windows 10. The bottom line is that now for hard drives and their interaction with a modern OS, you need GPT partitioning. An outdated MBR is not suitable, so it needs to be converted. In this case, all data on the disk will be deleted:
- In the local disk selection window, press Shift + F10. Enter the command “diskpart” to launch a special program for working with disk partitioning.

- Run the “List Disk” command which will show all active disks on the PC.

- Select the disk with the MBR partition and run the “clean” command.
- Then enter the “convert GPT” command followed by the “exit” command.


When everything goes well, you can use the “mark up area” or partition the drive through the disk setup and start installing Windows 10 on a GPT partition.
Could not create new or find existing section

An error during the installation of Windows 10 manifests itself in the event that the system has nowhere to create system files or there are partitions on the only hard disk that you created manually. The solution to the problem is quite simple:
- Delete the main partition where you plan to install the OS.

- If there are several partitions, and the data on them is not valuable, delete them all.
- Allocate unallocated space, create the desired partition (or several partitions) and continue installation on one of them.
- If it doesn’t work, just restart your computer and try again to install the OS of the partition you just created.

Installing Windows 10 – error codes
If the installation of Windows 10 is interrupted and an error appears with a specific code, try to solve it using the following methods:
0x8007025d – problem with installation files, reading or writing them.

You need to check the availability of space on the hard disk, whether the hard disk is working properly, whether the OS image and the flash drive itself are working correctly.
You can also do the:
- run the USB flash drive according to the instructions for a clean installation if this condition is not met;
- disconnect all unnecessary USB devices from the PC before installation;
- use a different flash drive with a distribution kit or a different image;
- disconnect the Ethernet cable during the OS deployment period.
0x80070570 — Indicates that there may be installation problems due to hard disk failure or RAM failure
-
- Disconnect the PC and remove the RAM sticks. Wipe dust off them and ports. A regular eraser works well for this, with which you erase a pencil. Also, you can swap the bars and put them in free slots. You can check the RAM using MemTest86 +. Write the utility to a USB flash drive and run it through the Boot-menu. Press “1” to start scanning.

- If there are problems with the image or USB flash drive, reinstall the bootable USB flash drive or change the USB flash drive.
- You can check the hard disk for errors using the Viktoria program. It can be downloaded and installed on a USB flash drive, then run under boot-menu. If there are bad ones, they can be eliminated by the program itself, if there are bad sectors, everything leads to the fact that the disk is crumbling and needs to be replaced.
- Disconnect the PC and remove the RAM sticks. Wipe dust off them and ports. A regular eraser works well for this, with which you erase a pencil. Also, you can swap the bars and put them in free slots. You can check the RAM using MemTest86 +. Write the utility to a USB flash drive and run it through the Boot-menu. Press “1” to start scanning.

0xc0000005 – the error appears at the very beginning, and it seems that the installation of Windows 10 is frozen.
It manifests itself most often if the computer already has one Windows of the previous version installed on the second hard disk, for example Windows 7. To solve, just physically disconnect the second disk with the operating system during installation.
0x80300001 – ошибка проявляется в случае, если на диск с разметкой MBR устанавливается Windows 10 разрядностью x64.
You can fix it by converting MBR to GPT. If this does not fix the problem, you should start compatibility mode in UEFI:
-
- Open the settings called “BIOS Features”.

- Then select “Windows 10 Features” or Windows 8.

- Next click on “Boot Mode Selection -” UEFI Only “.

- Do a similar operation for the “Storage Boot Option Control”.

- Click F10, click “Yes” and repeat the installation process anew.
- Open the settings called “BIOS Features”.


0x80300024 is a problem with hard drives.
You should either manually format the disk on which you are installing or disconnect the drives not used for recording, if there are several of them. This is implemented through weaning drives in UEFI or physically disconnecting them in the system unit. Additionally, it is worth checking if the AHCI mode is enabled. It must be active. If it does not help, check the disk or try to install the OS on a different media.

0xc1900101 – the error often occurs when installing the OS from the update center to Windows 10.
The easiest way to fix the error is to run a clean boot of the Windows. Also, you should check if there is enough space for the installation. If there are many drives, they should be deactivated.

Installing Windows 10, error code 0x8007000d – manifested due to the inability to read or damage the installation files of the operating system
Try putting a different image on a USB flash drive, replace the USB flash drive and also make sure that the USB port you are using is working if you are installing Windows 10 on a laptop.
Required driver not found
If you see the error “no drivers found when installing Windows 10” when installing the OS, then you are doing something wrong.
To avoid the error, follow these steps:
- Connect the USB stick with the distribution to USB 2.0 and start the installation.
- Write down the installation files with any other program mentioned in the first section of this article.
- Please use a different USB drive.
- Re-download the installation file and write to the media.
If you’re trying to deploy an OS on a PC with older hardware, USB 2.0 can play a key role in a successful Windows 10 installation.
Windows 10 installation failed – this can happen when the computer is quite old and cannot install the OS via USB 3.0 without proper help (drivers). Also, the error appears if there was an attempt to install the OS from a DVD-R that is damaged or poorly readable by the drive.
Final stage of installation
After installing Windows 10, the window with the primary settings is pulled up. Go through all the steps to complete the settings:
- Select the country in which you are staying (this is necessary in order to correctly define the interface at least).
- Choose a keyboard layout too.
- You can choose several language packs for the keyboard.
- The installation of Windows 10 updates will start automatically. Provided that the computer is connected to the Internet. If you do not want to install updates, then at this stage it is better to disconnect the router or Ethernet connection from the PC.
- Wait while the system installs the latest updates. Do not turn off your PC to avoid compromising system stability.
- Wait until the end of the update procedure.
- After that, Windows 10 will report the success of the update installation and you will find yourself on the settings screen.
- At this point, select “Configure for personal use.”
- Then you need to sign in to your Microsoft email account or create one. If you don’t want to pull up the profile, you can create a local account with administrative rights. Later, you can authorize the Microsft account on the local profile. To create a local profile with admin rights, click “Offline account”.
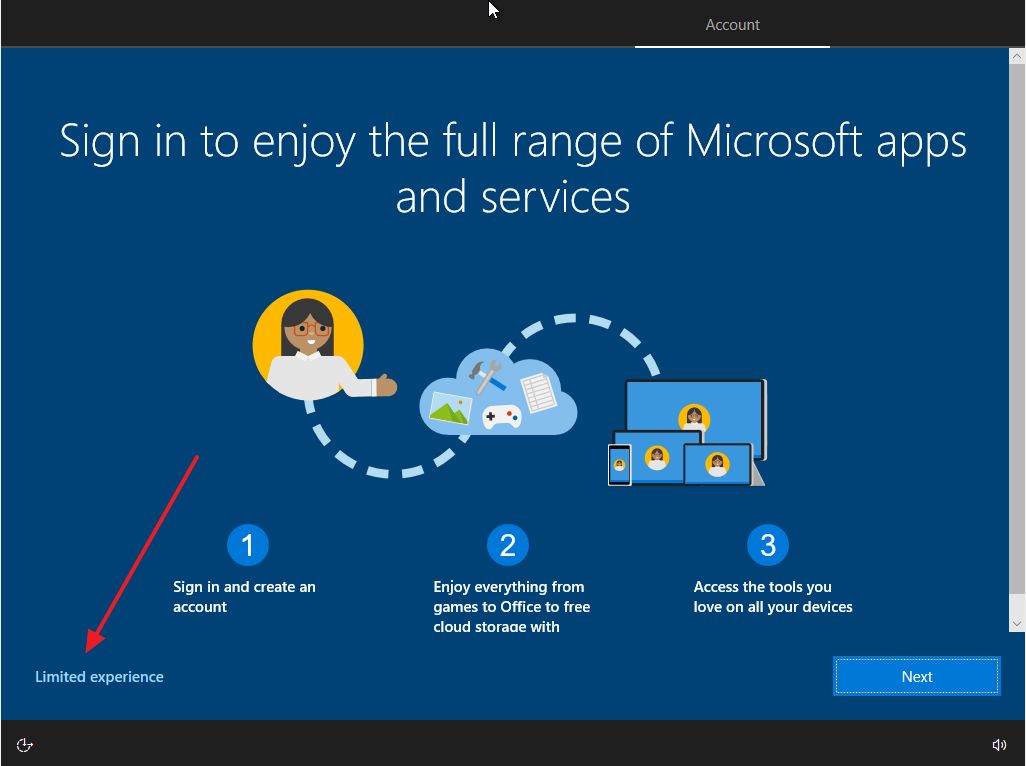
- Click on “Limited Features”.
- Give a “Name” to the account. Some programs may not install correctly or work if the name is not in English. Therefore, it is recommended to work with a profile linked under an English name.
- Then come up with a quality password. If you do not use a password, then access to the desktop will be provided unimpeded after pressing the Power button to turn on the PC.
- The telemetry stage is very important. Review each item and decide if you want to leave it on or deactivate it.
- After pressing the “Accept” button, wait a couple of minutes.
- Done. The desktop will boot with only one basket and a control panel.


Once the installation is complete, you can start configuring Windows.
Windows 10 configuration settings
The Windows 10 operating system has a lot of settings that will be needed in certain circumstances of using Windows. But first you need to go through the main ones, which will come in handy in any case.
Account
There are two types of account that are used in Windows:
- Local is an account that is not tied to Microsoft services. It is limited by the OS itself in many ways, and it is best used if security and interaction with services and the Microsoft store are not critical during operation.
- Microsoft Profile – Provides a complete set of features for interacting with the OS. The downside of working through a Microsoft account is the multiple data provided to the company about the user. Most of this data can be turned off, though.
Setting up a profile, setting passwords and transferring from local to Microsoft profile and vice versa is done in one place: “Profile” – “Accounts” – “Your data”.

For example, to change your account to a local one, you should click on “Sign in with a local account instead.”
The password can be set or changed in the Login Options section. In addition to the password, there are other ways for further authorization.
A pin code is convenient for a PC. You can configure or change it without leaving the “Parameters” interface.

Telemetry
Microsoft uses a variety of options to collect information. You can control those that do not affect the security of the system and, if unnecessary, disable:
- Location
If you use a laptop or tablet on Windows 10 and often travel with it, then it makes sense to leave for some applications and the OS itself to access your location.
Applications such as maps, device search programs, weather data will provide relevant information for you. If you work on a stationary PC, you can simply disable geotagging, in most cases it is not needed.
To disable, go to “Options” – “Privacy” – “Location” – “Edit” – “Off”. Below you can pull up programs that can be provided with access to your geodata.

- Synchronization of data.
When you work with the OS through a Microsoft account, there are many options that need to be synchronized with the account. At the same time, data is stored not only on a PC, but also on Microsoft servers.
If you do not need synchronization, you can turn it off: Win + I – Accounts – “Synchronize your settings” – completely disable “Synchronization settings” or selectively for each item.
Additionally, you can disable your Microsoft account and go to local. This will de facto deactivate synchronization, but will deprive you of many different aspects, including access to the Microsoft Store, some security settings, and working with the cloud.

- Cortana – voice assistant
To enable Cortana: go to “Settings” – “Time and Language” – in the “Country or Region” line, select the United States.

It should be remembered that the voice assistant has its own telemetry parameters, which are adjusted independently of the others in the “Coratana Search setting” section.

- The lock screen is a space that can be seen not only by you, but also by other people in the vicinity.
Если вы не хотите, чтобы экран блокировки показывал лишнюю и личную информацию, нужно его изначально настроить: зайдите в «Параметры» – «Система» – «Уведомления и действия».
In the section, you can turn off everything that you do not want to see on the lock screen. If you work with Cortana, you can prevent the voice assistant from working when your PC is locked.

- Advertising identifier – used by the system to target advertisements based on interests for the user.
Naturally, this is a common practice among large corporations, and if you want to turn off the collection of information and the recommended, then you can do it simply: “Options” – “Privacy” – “General” – “Turn off”.

Installing drivers for Windows 10
Installing drivers after installing Windows 10 is done automatically, along with updates. The advantage is that there is always the right driver in the Microsoft databases for modern hardware.
But it is not always possible to install the correct device driver automatically. In this case, you need to refer to another database. For example, to the official website of the manufacturer of a PC, laptop or its component.
It is important to work and download drivers only from the manufacturers’ official websites. Otherwise, you can install the necessary driver, but in the bargain, pick up malware on the newly installed Windows 10.
It is not recommended to download software and drivers for the device from unverified sources!
Required drivers for Windows 10
- Network;
- CPU + Integrated Graphics;
- Controllers;
- Audio;
- Video adapters.
The OS finds all the necessary drivers on its own, and for video cards, they often use programs from the supplier in order to constantly keep abreast of the latest versions.
For NVIDIA, the GeForce Experience program is used. For AMD, it is recommended to go to the official website and download the driver from there.
You can see what drivers are required for installation in the device manager.

If the driver is not installed, an exclamation mark will be displayed next to the device icon, or it will be located in the “unknown device” section. Device Manager opens by right-clicking on Start and selecting from the context list by name.
Windows 10 security
There are three main areas of Windows 10 security to follow and tweak right away:
- Login password – protects your data from prying eyes when the computer is locked (Win + L);
- Restore point – protects the system from damage, as it saves a backup copy of the working OS, to which you can “roll back”. If you give an analogy, then this is a kind of preservation, to which you can return if “something went wrong” in the system.
- Network security + activity on the PC – regulated by Windows Defender or an alternative antivirus, if you install one on the system.
Setting a Windows 10 login password
If you linked your Microsoft account, then you should have the default password. It can and should be made complex to improve security. But in order not to constantly enter it in the unlock field, use the pin code. You can configure it like this:
- Open Options – Accounts – Login Options.

- Select a Pin code and set it.

- Now, in the blocking window, you can choose whether to enter using a pin code or password.


There are also other identification methods that are best used on laptops or laptops.
Recovery point
You can configure a restore point so that it is done automatically, or you can remember to do it manually. The first option is preferable and is configured like this:
- In the Start search bar, type “create a restore point”.
- Select your local disk (system) and click Configure.

- Click “Enable System Protection” and select the percentage of disk space that can be used by the system for this function.

- If you need to restore the system, click “Restore” here. The OS will pull up the last recommended restore point.

- But you can choose another point.


Antivirus
If you adhere to the canons of safe surfing the Internet, use only white programs in your work, do not go to phishing pages from mailing lists, and so on – leave Windows Defender as the main one.
Otherwise, it is recommended to adopt one of the paid antiviruses, which will provide complete protection against network attacks and prevent attempts of malicious activity on the PC.

Here are the top five AV-Test home antiviruses:
- AhnLab V3 Internet Security 9.0;
- Avast Free AntiVirus 20.8;
- AVG Internet Security 20.8;
- Avira Antivirus Pro 15.0;
- Bitdefender Internet Security 25.0.
Based on the latest report for October 2020: Eset ranks 8 in the top, Kaspersky Anti-Virus – 12, and Windows Defender – 15.
Our recommendation is to use the paid version of Malwarebytes antivirus. There will be no problem. For some reason, it was not included in the rating, although it detects many more threats.
Tips for caring for Windows 10
So that the installation of Windows 10 from a USB flash drive does not become a habit, you should take good care of the operating system and from time to time rake the data stream that passes through the computer. Unnecessary – delete, necessary – sort. For this, various processes are used on the PC.
Defragmentation Windows 10
If fragmentation is the removal of all information from the media, then defragmentation is the search and collection of all the divided parts of a file on disk into one place. The procedure allows the hard disk to work more efficiently. It can be done manually, or you can schedule it to be repeated at least once a month:
- To start defragmentation, open Explorer, right-click on the disk and select Properties. Then, go to “Service” and click “Optimize”.

- Select the drive and click “Optimize”.

- To configure the execution according to the schedule, click “Change parameters”, select the frequency “monthly” and click “OK”.


Scanning System
From time to time, you need to check all files and folders on your computer for malware or the consequences of its operation. Antiviruses or the built-in Windows Defender will help with this:
- In the search box, enter “Windows Security” and select the found environment.

- Go to the “Virus and threat protection” section and click “Scan options”.
- Click “Full Scan”.
- And below the button “Scan now”.


Get rid of all detected viruses and potentially unwanted software immediately or work with them through the sandbox.
Browser cache
Cache data can take up a lot of disk space. Therefore, they can be cleaned up once a month. This is how it is done for the Google Chrome browser:
- Press the keyboard shortcut Ctrl + H.
- Then click “Clear History”.
- Select a period and “Pictures and other files saved in the cache”.

- Click “Delete data”.

Cleaning the Windows 10 Registry
There are programs that allow you to optimize your PC in a few mouse clicks. One of these programs is Auslogics Boostspeed, which allows you to:
- Clear cache and cookies in any browsers at once;
- Delete junk entries from the operating system registry;
- Erase temporary files;
- Fix various bugs.

The main thing is to download the utility from the official site and use it periodically to optimize and clean it from garbage.
All in all, installing Windows 10 today is a pretty straightforward process
The Windows 10 installation process does not require any special knowledge or computer skills. To create bootable media, you need a USB flash drive and Internet access.
To install, you need to find out how to enter the UEFI or boot menu and load a USB flash drive from it. And before starting the installation, specify the correct drive.
After installing Windows 10 on your PC, take care of the stable operation of all components in the system and adjust the security settings. For long-term use, remember to optimize your operating system so that you can use it for many years.
 Windows 10 предлагает множество функций восстановления системы, среди которых — возврат компьютера в исходное состояние и точки восстановления, создание полного образа системы на внешнем жестком диске или DVD, а также запись USB диска восстановления (который стал лучше, чем в предыдущих системах). В отдельной инструкции также собраны типичные проблемы и ошибки при запуске ОС и способы их решения, см. Windows 10 не запускается.
В этой статье описано, как именно реализованы возможности восстановления Windows 10, в чем заключается принцип их работы и какими способами можно получить доступ к каждой из описанных функций. На мой взгляд, понимание и использование данных возможностей очень полезно и может существенно помочь в решении проблем с компьютером, которые могут возникнуть в будущем. См. также: Восстановление загрузчика Windows 10, Проверка и восстановление целостности системных файлов Windows 10, Восстановление реестра Windows 10, Восстановление хранилища компонентов Windows 10.
Для начала — об одной из первых опций, которую часто используют для восстановления системы — безопасном режиме. Если вы ищите способы попасть в него, то способы сделать это собраны в инструкции Безопасный режим Windows 10. Также к теме восстановления можно отнести и такой вопрос: Как сбросить пароль Windows 10.
Возврат компьютера или ноутбука в исходное состояние
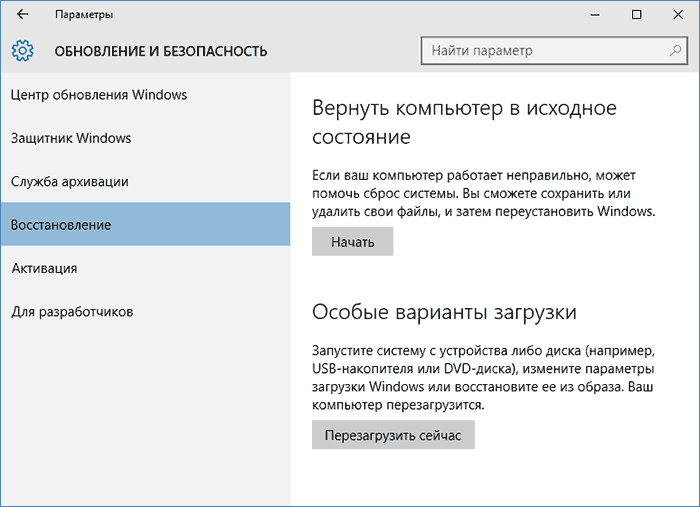
Первая функция восстановления, на которую следует обратить внимание — возврат Windows 10 в исходное состояние, доступ к которой можно получить, нажав по значку уведомлений, выбрав пункт «Все параметры» — «Обновление и безопасность» — «Восстановление» (есть еще один способ попасть в этот раздел, без входа в Windows 10, описан ниже). На случай, если Windows 10 на запускается, вы можете запустить откат системы с диска восстановления или дистрибутива ОС, о чем — ниже.
Если в пункте «Вернуть в исходное состояние» нажать «Начать», вам будет предложено либо полностью очистить компьютер и переустановить Windows 10 (при этом, загрузочная флешки или диск не требуются, будут задействованы файлы, имеющиеся на компьютере), либо сохранить ваши личные файлы (установленные программы и настройки, тем не менее, будут удалены).

Еще один простой способ получить доступ к этой возможности, даже без входа в систему — на экране входа в систему (там, где вводится пароль), нажать по кнопке питания и, удерживая клавишу Shift, нажать «Перезагрузка». На открывшемся экране выберите «Диагностика», а затем — «Вернуть в исходное состояние».
Плюсы данного способа восстановления — вам не требуется иметь дистрибутив системы, переустановка Windows 10 происходит автоматически и тем самым минимизирует вероятность некоторых ошибок, совершаемых начинающими пользователями. Более того, в последних версиях системы через эти же параметры возможно Восстановление Windows 10 из облака, то есть сброс на заводские настройки происходит с использованием оригинального образа на серверах Майкрософт.
Главный минус — в случае выхода из строя жесткого диска или серьезного повреждения файлов ОС восстановить систему таким образом не получится, но тут могут пригодиться следующие два варианта — диск восстановления или создание полной резервной копии Windows 10 встроенными средствами системы на отдельном жестком диске (в том числе внешнем) или DVD дисках. Подробнее о способе и его нюансах: Как сбросить Windows 10 или автоматическая переустановка системы.
Автоматическая чистая установка Windows 10
В Windows 10 версии 1703 Creators Update появилась новая функция — «Начать заново» или «Start Fresh», выполняющая автоматическую чистую установку системы.
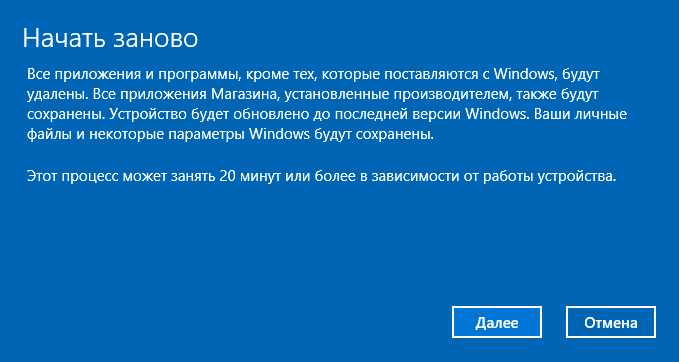
Подробно о том, как это работает и в чем отличия от сброса, описанного в предыдущем варианте, в отдельной инструкции: Автоматическая чистая установка Windows 10.
Примечание: под диском тут понимается USB-накопитель, например, обычная флешка, а название сохранилось с тех пор, когда была возможность записывать CD и DVD диски восстановления.
В предыдущих версиях ОС диск восстановления содержал лишь утилиты для попыток автоматического и ручного восстановления установленной системы (весьма полезные), в свою очередь диск восстановления Windows 10, помимо них, может содержать и образ ОС для восстановления, то есть с него можно запустить возврат в исходное состояние, как это было описано в предыдущем разделе, автоматически переустановив систему на компьютере.
Для записи такой флешки, зайдите в панель управления и выберите «Восстановление». Уже там вы найдете необходимый пункт — «Создание диска восстановления».
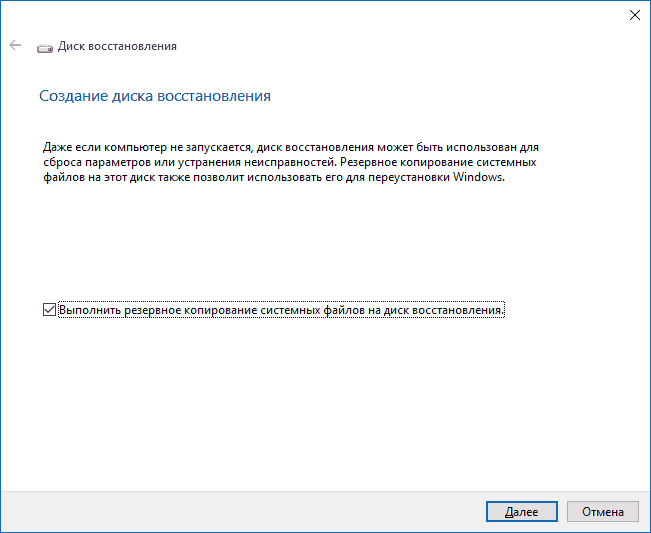
Если при создании диска вы отметите пункт «Выполнить резервное копирование системных файлов на диск восстановления», то итоговый накопитель может быть использован не только для действий по исправлению возникших проблем вручную, но и для быстрой переустановки Windows 10 на компьютере.
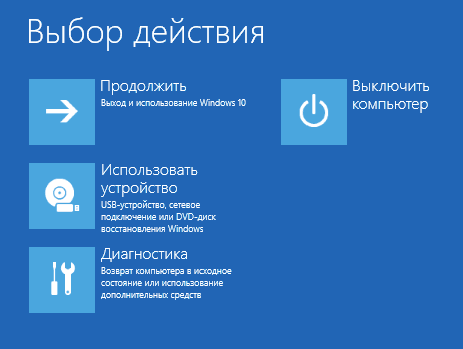
После загрузки с диска восстановления (нужно будет поставить загрузку с флешки или использовать boot menu), вы увидите меню выбора действия, где в разделе «Диагностика» (и в «Дополнительные параметры» внутри этого пункта) вы можете:
- Вернуть компьютер в исходное состояние, используя файлы на флешке.
- Зайти в БИОС (Параметры встроенного ПО UEFI).
- Попробовать восстановить систему с помощью точки восстановления.
- Запустить автоматическое восстановление при загрузке.
- Использовать командную строку для восстановления загрузчика Windows 10 и других действий.
- Восстановить систему из полного образа системы (описано далее в статье).

Иметь такой накопитель в чем-то может быть даже удобнее, чем просто загрузочную флешку Windows 10 (хотя и с нее можно запустить восстановление, нажав соответствующую ссылку внизу слева в окне с кнопкой «Установить» после выбора языка). Подробнее про диск восстановления Windows 10 + видео.
Создание полного образа системы для восстановления Windows 10
В Windows 10 сохранилась возможность создавать полный образ восстановления системы на отдельном жестком диске (в том числе внешнем) или нескольких DVD-дисках. Ниже описан лишь один способ создания образа системы, если вас интересуют другие варианты, изложенные более подробно, см. инструкцию Резервная копия Windows 10.
Отличие от предыдущего варианта заключается в том, что таким образом создается своего рода «слепок» системы, со всеми программами, файлами, драйверами и настройками, которые имеются на момент создания образа (а в предыдущем варианте мы получаем чистую систему с сохранением разве что личных данных и файлов).
Оптимальное время создание такого образа — сразу после чистой установки ОС и всех драйверов на компьютере, т.е. после того, как Windows 10 была доведена до полностью работоспособного состояния, но еще не захламлена.
Чтобы создать такой образ, зайдите в Панель управления — История файлов, а затем внизу слева выберите «Резервная копия образа системы» — «Создание образа системы». Еще один путь — зайти в «Все параметры» — «Обновление и безопасность» — «Служба архивации» — «Перейти в раздел «Архивация и восстановление (Windows 7)» — «Создание образа системы».

На следующих этапах вы можете выбрать, куда будет сохранен образ системы, а также какие именно разделы на дисках нужно добавить в резервную копию (как правило, это раздел, зарезервированный системой и системный раздел диска).

В дальнейшем, вы можете использовать созданный образ для быстрого возврата системы в то состояние, которое вам требуется. Запустить восстановление из образа можно с диска восстановления или выбрав «Восстановление» в программе установки Windows 10 (Диагностика — Дополнительные параметры — Восстановление образа системы).
Точки восстановления
Точки восстановления в Windows 10 работают так же, как и в двух предыдущих версиях операционной системы и часто могут помочь откатить последние изменения на компьютере, вызывавшие проблемы. Подробная инструкция по всем возможностям инструмента: Точки восстановления Windows 10.
Для того, чтобы проверить, включено ли автоматическое создание точек восстановления, вы можете зайти в «Панель управления» — «Восстановление» и нажать «Настройка восстановления системы».
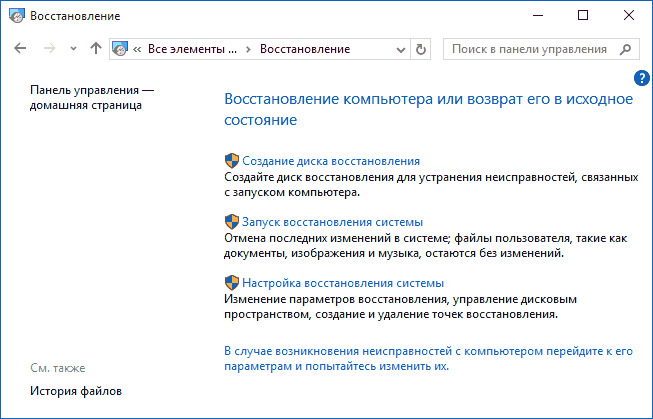
По умолчанию, защита для системного диска включена, также вы можете настроить создание точек восстановления для диска, выбрав его и нажав кнопку «Настроить».

Точки восстановления системы создаются автоматически при изменении каких-либо системных параметров и настроек, установке программ и служб, также имеется возможность их создания вручную перед каким-либо потенциально опасным действием (кнопка «Создать» в окне настроек защиты системы).
Когда потребуется применить точку восстановления, вы можете зайти в соответствующий раздел панели управления и выбрать пункт «Запуск восстановления системы» или же, если Windows не запускается, загрузиться с диска восстановления (или установочного накопителя) и найти запуск восстановления в Диагностика — Дополнительные параметры.
История файлов
Еще одна функция восстановления Windows 10 — история файлов, позволяющая хранить резервные копии важных файлов и документов, а также их предыдущие версии и возвращаться к ним при необходимости. Подробно об этой возможности: История файлов Windows 10.
В заключение
Как видите, средства восстановления в Windows 10 представлены достаточно широко и вполне эффективны — для большинства пользователей их будет более чем достаточно при умелом и своевременном использовании.
Конечно, дополнительно можно использовать средства наподобие Aomei OneKey Recovery, программы резервного копирования и восстановления Acronis, а в крайних случаях — скрытые образы восстановления производителей компьютеров и ноутбуков, но не стоит забывать и о стандартных возможностях, уже присутствующих в операционной системе.
Вы можете скачать средство восстановления устройств Windows на компьютере и использовать его для устранения проблем с программным обеспечением на телефоне. Средство установит самую последнюю версию Windows, подходящую для вашего телефона, и удалит все данные, включая приложения, игры, SMS, журнал вызовов, музыку и фотографии. Прежде чем использовать это средство, узнайте, устранена ли проблема при перезапуске или сбросе телефона.
Скачивание средства восстановления устройств Windows
-
USB-кабель для подключения телефона к компьютеру.
-
Компьютер с Windows 7, Windows 8, Windows 8.1 или Windows 10.
-
Не менее 4 ГБ свободного места на компьютере.
Он работает на телефонах Acer, Alcatel, BLU, ESCAPE (One M8 и 8X), LG, Lumia, NEO, UniStrong, VAIO и Yezz под управлением Windows Phone 8 или более поздней версии. Он также работает на устройствах HP.
Нет, необходимо использовать компьютер с Windows 7, Windows 8, Windows 8.1 или Windows 10.
Перед запуском средства попробуйте перезапустить и сбросить телефон, чтобы узнать, устранена ли проблема.
Если это не работает, создайте резервную копию своих данных, а затем скачайте средство и используйте его для переустановки Windows на телефоне. В процессе установки будет удалено все содержимое на телефоне, включая приложения, текст и фотографии, поэтому важно сначала создать резервную копию своих данных, если это возможно.
Некоторые устройства позволяют использовать защиту от сброса, чтобы сбросить и повторно использовать телефон без разрешения. Убедитесь, что защита от сброса выключена. В противном случае вам нужно будет знать имя пользователя и пароль основной учетной записи для устройства, чтобы использовать его. Перейдите в раздел Параметры > Обновления и безопасность > Поиск телефона > Защита от сброса и выберите Выключить.
-
Скачайте средство.
-
Чтобы установить его, следуйте инструкциям на экране, а затем выберите пункт Запустить приложение.
-
Для подключения телефона к компьютеру используйте USB-кабель. Если после подключения ваш телефон не будет обнаружен автоматически, отсоедините кабель, выберите пункт Мой телефон не обнаружен и следуйте инструкциям на экране. Если телефон по-прежнему не обнаружен, попробуйте перезапустить его, пока он подключен.
-
Когда ваш телефон будет обнаружен, выберите пункт Установить программное обеспечение. Установка может занять некоторое время в зависимости от скорости подключения к Интернету, и вы не сможете использовать телефон, пока это не будет сделано.
Да. При использовании этого средства на телефоне, работающем под управлением предварительной сборки, будет установлена самая последняя версия Windows, одобренная производителем вашего телефона. Чтобы снова начать получать предварительные сборки, необходимо скачать Windows Insider Preview для телефонов , чтобы скачать приложение Windows За кулисами на телефоне, а затем выполнить действия по установке За кулисами Preview.
Не сразу. Резервные копии Windows 10 несовместимы с телефонами под управлением Windows 8.
Не рекомендуется восстанавливать резервную копию Windows 10 на телефоне с Windows 8. Чтобы избежать перезаписи резервной копии телефона после перехода на Windows 10, переименуйте устройство. Для этого выберите элементы Параметры > Система > О системе и нажмите кнопку Изменить имя.
Телефон можно вернуть обратно в Windows 8 с помощью средства восстановления устройств Windows.
Нужна дополнительная помощь?
Windows 10, как и предыдущие версии этой операционной системы, полностью не защищена от сбоев, воздействия компьютерных вирусов, выхода из строя оборудования и прочих проблем. Поэтому, если у вас возникли неполадки при работе или загрузке ОС, можете воспользоваться встроенными средствами для возвращения операционной системы в работоспособное состояние.
Восстановление Windows 10 можно осуществить несколькими способами.
Если компьютер загружается:
- С помощью точки восстановления.
- Сброс к заводским настройкам.
- История файлов.
Если компьютер не загружается:
- Использование диска восстановления.
- С помощью установочного диска.
Теперь разберем эти варианты восстановления более подробно.
Содержание
- Способ 1 – С помощью точки восстановления системы
- Способ 2 — Сброс к заводским настройкам
- Способ 3 – История файлов
- Способ 4 – Использование диска восстановления
- Способ 5 – С помощью установочного диска
Способ 1 – С помощью точки восстановления системы
Windows периодически сохраняет информацию о программах, системных настройках, драйверах, реестре и драйверах в точках восстановления системы. Это происходит перед значимыми изменениями в ОС, такими как установка программ, драйверов или обновлением системы. Также точку восстановления можно создать вручную. Как это сделать можете прочитать в этой инструкции.
Стоит отметить, что после восстановления ваши данные останутся нетронутыми, а драйвера, программы и обновления, установленные после создания точки восстановления, будут удалены.
1. Запустите окно свойств системы (сочетание клавиш Windows + Pause) и откройте пункт «Защита системы».
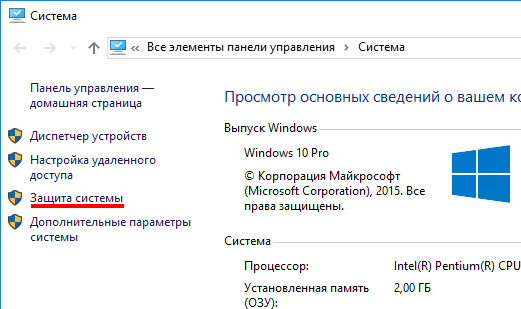
2. Нажмите кнопку «Восстановить», а потом «Далее». В списке доступных точек восстановления выберите нужный пункт и опять нажмите «Далее».

3. Еще раз проверьте выбранные параметры, нажмите кнопку «Готово», а затем «Да» в окне предупреждения. Начнется процесс восстановления, при этом компьютер будет перезагружен.
Способ 2 — Сброс к заводским настройкам
В Windows 10 есть возможность вернуть настройки системы в исходное состояние. При этом можно сделать полный сброс или с сохранением пользовательских файлов. Преимущество этого метода в том, что если вы захотите переустановить систему вам не нужно производить установку Windows c нуля, достаточно просто выполнить сброс.
Чтобы воспользоваться этой функцией, нужно перейти в следующий раздел: «Параметры компьютера -> Обновление и безопасность -> Восстановление -> Вернуть компьютер в исходное состояние» и нажать кнопку «Начать».
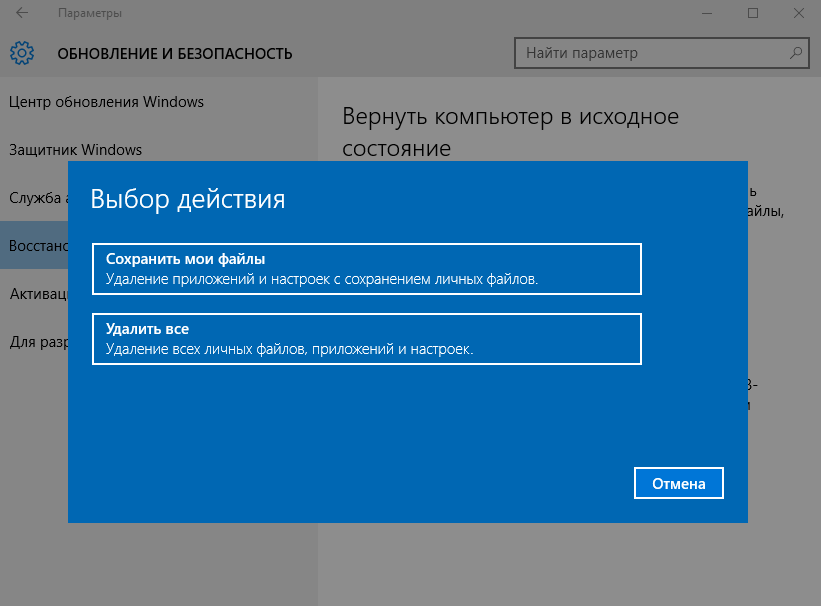
Более детально процесс сброса к заводским настройкам мы рассмотрели в этой статье: https://compconfig.ru/winset/sbros-windows-10.html
Способ 3 – История файлов
Этот метод непосредственно не связан с восстановлением системы, но в совокупности с остальными способами тоже может быть полезным.
«История файлов» позволяет делать резервные копии ваших файлов в автоматическом и ручном режиме. Вам достаточно активировать эту функцию и указать, какие папки нужно сохранять. Система будет автоматически делать резервные копии ваших документов с периодичностью, которую можно настроить. При необходимости вы сможете легко восстановить файлы нужной вам версии.

Как включить, настроить и использовать этот инструмент вы можете прочитать в этой статье: https://compconfig.ru/winset/istoriya-faylov-windows-10.html
Способ 4 – Использование диска восстановления
Если Windows 10 не загружается, вы можете попробовать произвести реанимацию системы с помощью диска восстановления, который позволит вам получить доступ к дополнительным параметрам запуска.
Если у вас еще нет диска восстановления, воспользуйтесь этой инструкцией:
Как создать диск восстановления Windows 10
После загрузки с USB-диска восстановления перейдите в раздел «Диагностика -> Дополнительные параметры».

Здесь вы можете использовать несколько вариантов реанимации компьютера:
- Восстановление Windows с помощью точки восстановления. Это вариант мы уже рассматривали выше. Смысл его тот же, только запуск производится другим путем.
- Восстановление образа системы. Этот метод известен еще с Windows 7. Если вы ранее создали образ системы в Windows, то можно легко его восстановить через диск восстановления. Как создается образ системы в Windows 10 можно прочитать здесь: https://compconfig.ru/winset/kak-sozdat-obraz-windows-10.html
- С помощью следующего пункта вы можете попробовать автоматически исправить ошибки при загрузке.
- Для более продвинутых пользователей есть возможность запустить командную строку для восстановления системы или других целей.
- Ну и последний вариант – это возвращение Windows к предыдущей сборке.
Также следует отметить, что если при создании диска восстановления системы вы произвели запись системных файлов на диск, то у вас будет возможность переустановить Windows с этого диска. Но если вы покупали компьютер с предустановленной Window 8 (8.1) со скрытым разделом восстановления, то будет восстановлена версия системы, которая изначально поставлялась с компьютером.
Способ 5 – С помощью установочного диска
Если Windows не загружается, и у вас нет диска восстановления, вы можете использовать установочный диск для реанимации компьютера.
Установочный диск можно записать на USB-носитель или DVD-диск, используя средство для создания носителя, которое можно скачать здесь.
Загрузившись с установочного носителя, вы увидите окно, в котором нужно выбрать языковые параметры и нажать кнопку «Далее».

В следующем окне нужно нажать на ссылку «Восстановление системы» в нижнем левом углу.

Далее зайдите в раздел «Поиск и устранение неисправностей». Здесь вы увидите 2 варианта для восстановления:
- Вернуть компьютер в исходное состояние. Будет произведен сброс к заводским настройкам с сохранением файлов пользователя или без. Этот инструмент мы уже рассматривали выше (способ 2).
- Дополнительные параметры. Как и на диске восстановления системы откроется список инструментов, с помощью которых можно вернуть работоспособность Windows с помощью точек восстановления, образа системы и т.д.

Мы рассмотрели основные способы восстановления Windows 10. Обычно их вполне достаточно чтобы вернуть систему в работоспособное состояние. Сюда можно было еще добавить чистую установку Windows, но это уже крайняя мера и к восстановлению системы имеет косвенное отношение.
Overview of Windows Recovery Tools
In the past, PCs would ship with a CD/DVD disc that included an image of the system. If the OS has problems someday, you could easily restore the OS to the factory settings. But nowadays, manufacturers start to simplify the way of restoring Windows. They just put an image of the system on a hidden partition of your main drive, so does a Windows recovery USB drive. In addition to letting you reinstall Windows, it includes several troubleshooting tools for emergency use, especially when your system won’t boot.
In Windows 10, for example, there are several Windows recovery tools (options) that solve different OS problems.
| Windows Recovery Tools (Options) | Solve What Kind of Problems |
|---|---|
| Reset your PC | Your PC isn’t working well and it’s been a while since you installed an app, driver, or update. |
| Windows recovery drive | Your PC won’t start and you’ve created a recovery drive. |
| Windows installation media | Your PC won’t start, you haven’t created a recovery drive, and resetting your PC didn’t work. |
What Windows 10 Recovery Tool Should I Use?
Windows 10 recovery tool is used to create a Windows 10 recovery USB or CD/DVD disc. You should make a Windows 10 recovery drive before your PC dies. Both Microsoft and third-party software manufacturers provide reliable recovery tools. Here we picked up two of the best Windows recovery tools for you regarding the effectiveness and ease of use. One is the Windows 10 built-in tool and the other is EaseUS Todo Backup, a third-party backup and recovery software.
Pros of EaseUS Todo Backup:
- With EaseUS Todo Backup, users can make a full/differential/incremental backup.
- The backup image created by EaseUS Todo Backup can be stored in the network, local, and cloud.
- The backup image created by TB is independent, which would not be affected by Windows updates and will not be damaged.
Next, you’ll learn how to create a Windows 10 recovery USB with both the built-in tool and third-party software. Each way is able to solve a none-bootable Windows OS issue and revert your OS back to a working system point.
How to Create a Windows 10 Recovery USB with 2 Built-in Tools
- Applies to: Windows 10 32-bit and 64-bit operating system
- Reference: Microsoft Official Support
- Notice:
- The recovery drive created this way can help you troubleshoot and fix problems with your PC, even if it won’t start. If you back up system files to this drive, you’ll also be able to use it to reinstall Windows. If you chose not to back up system files when you created your recovery drive, Reset this PC and Recover from a drive that won’t be available.
#1. To create a Windows 10 recovery drive, follow the below steps:
Step 1. Insert the USB drive into your computer. In Windows 10 Control Panel, click «Recovery».
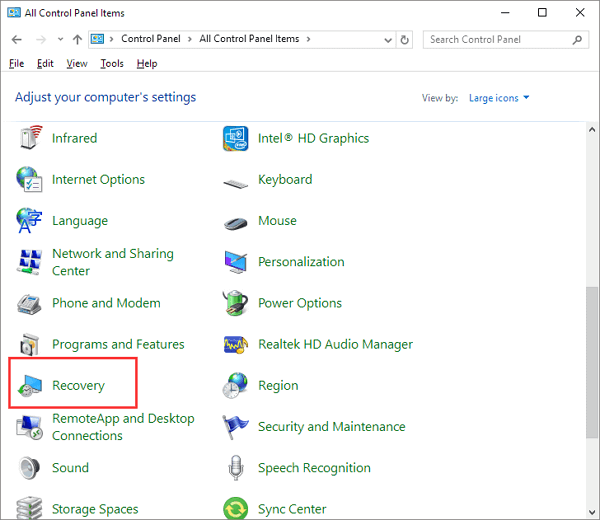
Step 2. You’ll arrive at the Advanced recovery tools area, choose «Create a recovery drive».
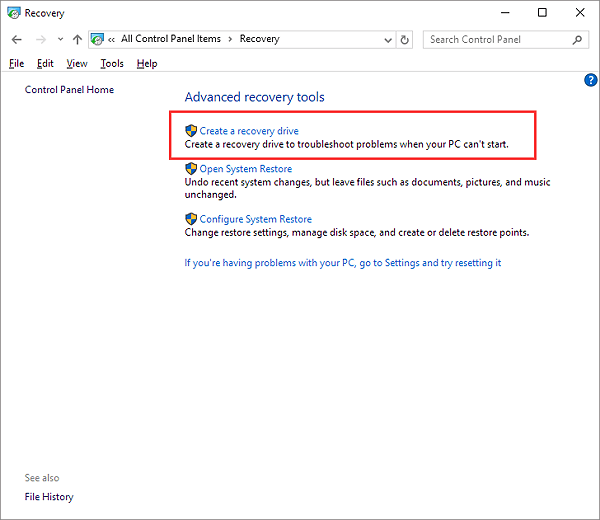
Step 3. Tick the option «Back up system files to the recovery drive» if you wish to use the drive to reinstall Windows or restore a previous version of Windows. Click «Next».
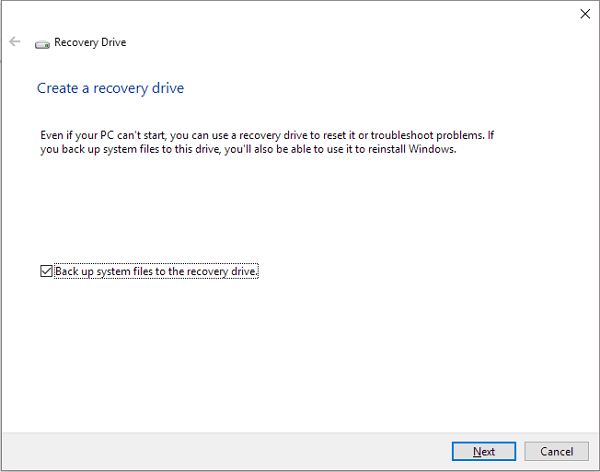
Step 4. Wait until the wizard prepares to copy files to your flash drive.
Step 5. Select your USB flash drive as the recovery drive and click Next.
Step 6. Confirm the warning message that «everything on the drive will be deleted. If you have any personal files on this drive, make sure you’ve backed up the files» and click «Create».
Step 7. When the final message «The recovery drive is ready» appears, click «Finish».
To Recover Windows 10 Using the Windows 10 Recovery Drive:
Step 1. Connect the recovery drive and turn on your PC.
Step 2. Select «Troubleshoot» and choose one recovery option.
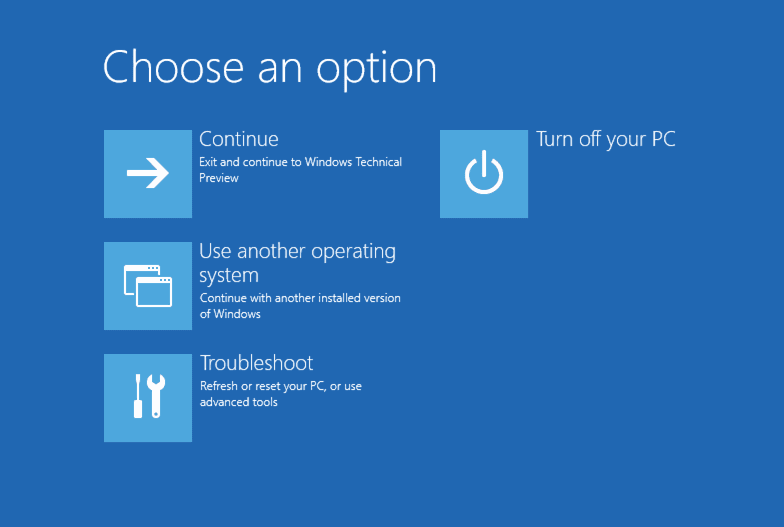
- Restore from a system restore point by selecting «Advanced Options» > «System Restore». This will remove recently installed apps, drivers, and updates that might be causing your PC problems, but it won’t affect your personal files.
- Select «Reset this PC» and then choose to keep or remove your files.
- Select «Recover from a drive». This will reinstall Windows 10, and it’ll also remove your personal files, apps, and drivers you installed, and changes you made to settings.
#2. To create a Windows 10 installation media recovery tool, follow several steps:
Step 1. On a working PC, go to the Microsoft software download website.
Step 2. Download the Windows 10 media creation tool and then run it.
Step 3. Select Create installation media for another PC.
Step 4. Choose a language, edition, and architecture (64-bit or 32-bit).
Step 5. Follow the steps to create installation media, and then select Finish.
How to Create a Windows 10 Recovery USB with Third-party Software
To use EaseUS Todo Backup to make a Windows 10 recovery drive for the purpose of restoring from the OS crash or corruption, you’ll first download the Windows backup software on a working PC. Then follow the below step-by-step guide to create a bootable USB drive. Don’t forget to proceed to create a Windows 10 system backup image for the future Windows 10 recovery to a working restore point.
In a word, the standard procedure of creating a third-party Windows 10 recovery drive includes:
- Create a bootable EaseUS Todo Backup USB drive
- Create a Windows 10 system image
- Boot from the recovery USB and perform a system recovery
- Notice:
- Create Emergency Disk is only for data & system restore when your PC can’t start properly and you wish to restore from a backup image. It’s not for any system repair purpose.
To create a Windows 10 recovery USB with EaseUS Todo Backup:
Step 1. Prepare a USB drive which can be written and read.
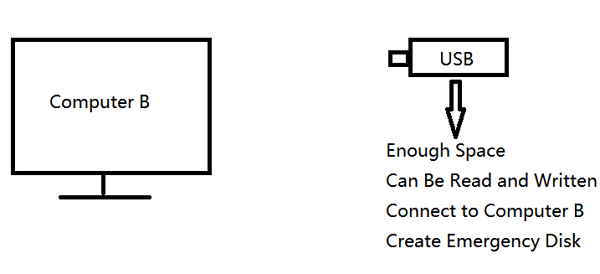
Step 2. Launch and install EaseUS Todo Backup on the Computer B.
Step 3. Find and click «Tools» and choose «Create Emergency Disk«.

Step 4. Choose the Boot disk location. You can create an ISO file, a bootable USB or CD/DVD disc.

Step 5. Then click «Create» to start.
Now you have created your own EaseUS Todo Backup bootable USB recovery disk. Go back to the main window of EaseUS Todo Backup. You need to create a backup image according to your demand. For example, system backup, file backup, etc.
To create a Windows 10 system image:
Step 1. On the main page, click «Select backup contents«.

Step 2. Among the four available categories, click OS.

Step 3. EaseUS Todo Backup will automatically select your system partition, you only need to select the backup destination.

Step 4. Both Local Drive and NAS are available for you to save the backup file.

Step 5. After finishing the backup process, you can check the backup status, recover, open, or delete the backup by right-clicking the backup task on the left.

To recover Windows 10 using the recovery drive:
Step 1. Connect the recovery drive and keep tapping «F2» while turning on your PC. Choose to boot from EaseUS Todo Backup.
Step 2. After accessing EaseUS Todo Backup, choose your system image or other backup images and click «Recovery».
Conclusions and FAQs About Windows Recovery Tools
Windows recovery tools are useful, and sometimes essential to have one when your operating system gets something wrong and crashes, freezes, gets stuck in the black screen of death and blue screen of death. As Windows 10 has occupied the largest market share nowadays, it’s good to know how to use the Windows 10 recovery tools within the OS or from third-party tools to create a risk-free recovery USB drive/disk.
Moreover, there are some other frequently asked questions that might arouse your interest. Read on and get the answers.
1. Can I download a Windows 10 recovery disk?
Go to the official download website (https://www.microsoft.com/en-us/software-download/windows10), and there you can download the Windows media creation tool on Windows 10, 8.1, 8, and 7 computers.
2. How do I use Windows 10 recovery USB?
To use the recovery USB drive, all you need to do is to change your boot drive to the bootable USB drive.
- Turn off the computer.
- Insert the recovery USB drive into a USB port on the computer and turn on the computer.
- Use the Down arrow key to select the USB drive, and then press the Enter key.
- Click the language for your keyboard.
- Click Troubleshoot.
3. Does Windows 10 have a repair tool?
Windows 10 uses troubleshooters as the general repair tool to help you solve problems with your PC. To run a Windows 10 repair troubleshooter, select Start > Settings > Update & Security > Troubleshoot.
Содержание
- 1 Windows 10 загружается
- 2 Windows 10 не загружается
- 3 Способ 1 – С помощью точки восстановления системы
- 4 Способ 2 — Сброс к заводским настройкам
- 5 Способ 3 – История файлов
- 6 Способ 4 – Использование диска восстановления
- 7 Способ 5 – С помощью установочного диска
- 8 Зачем нужно восстанавливать систему
- 9 Все способы восстановления
- 10 Как восстановить реестр
- 11 Ошибки при восстановлении системы
- 12 Как вернуть ноутбук к заводским настройкам
- 13 Сколько по времени длится восстановление
- 14 Что делать, если после восстановления появился черный экран
- 15 Не загружается Windows после восстановления
- 16 Сбился ключ активации после восстановления
- 17 Восстанавливаем разрешение экрана
Восстановление операционной системы Windows 10 необходимо, когда «десятка» функционирует ненадлежащим образом либо не загружается после инсталляции программ, приложений, установки обновлений и драйверов. Так же проблемы могут проявиться после вирусной атаки или неверных действий пользователя. В статье рассмотрены основные аспекты восстановления Windows 10 и приведены пошаговые инструкции с описанием вариантов действий.
Windows 10 загружается
В этом случае операции по восстановлению некорректно работающей «десятки» проводятся в обычном или безопасном режимах. Последний вариант иногда может сработать, если операционка не грузится обычным образом.
Как задействовать безопасный режим?
При безопасной загрузке можно выполнять большое число полезных операций, включая:В «десятке» имеются два варианта безопасной загрузки, при этом старый способ через клавишу F8 во время старта компьютера уже не действует. Несмотря на это, запуск Windows 10 в безопасном режиме осуществляется следующим образом:
Возможен и другой путь:
Восстановление системы в безопасном режиме рекомендовано лишь в случае недоступности этой процедуры при обычной загрузке.
Через точку восстановления
Применение данной опции позволяет отменить последние изменения в «операционке», тем самым вернув последнюю к предыдущему (рабочему) состоянию. Откатываем Windows 10 через точку восстановления следующим образом:
После отката системы машина будет перезагружена. Если проблемы не исчезли, попробуйте произвести возвращение на более раннюю точку.
Создаём точку восстановления
При необходимости возможно создать точку восстановления в ручном режиме. Рекомендуемый алгоритм:
В окне «Свойства системы» вы можете также настроить параметры отката, управлять дисковым пространством и удалять точки восстановления. Здесь же можно включить данную функцию, если она по какой-то причине деактивирована.
Сброс на заводские настройки
Откат на заводские настройки рекомендуется, если не сработал способ с точкой восстановления. Вариант этот рискованный, так как при выполнении сброса к настройкам по умолчанию удаляются все параметры, драйвера, приложения и устанавливаются стандартные.Это потенциально грозит самыми разными неожиданностями, вплоть до полной неработоспособности Windows, хотя процедура может выполняться и с сохранением ваших файлов (исключая установленные приложения, которые полностью удаляются). Алгоритм отката на заводские настройки таков:
Сброс системы будет иметь следующие последствия:Возврат к заводским настройкам может занять продолжительное время, после чего ПК перезагрузится.
История файлов
Следует сразу сказать, что сохранение истории файлов производится только на отдельный физический накопитель (жёсткий диск, флешку) и по умолчанию опция, скорее всего, у вас будет отключена. Краткая инструкция, как задействовать и работать с этой полезной функцией, далее:
- Чтобы активировать сохранение, запустим панель управления. Перейдём на вкладку «История файлов». В блоке «Хранение истории файлов» нажимаем кнопку «Включить».
- Для восстановления истории выбираем «Восстановление личных файлов». В окне с восстанавливаемыми папками нажимаем на значок со стрелкой и затем «Заменить файлы в папке назначения».
В процессе копирования элементов пользователь может сам выбирать при необходимости замену или пропуск отдельных файлов. Также есть возможность включения запроса на операцию применительно каждой папки или файла.
Восстанавливаем реестр
Использование резервной копии (её «десятка» генерирует в автоматическом режиме по умолчанию) для восстановления реестра — процедура не сложная, но она может вызвать непредсказуемые последствия. Поэтому данный способ лучше оставить на самый крайний случай, когда другие варианты не сработали.Восстановление реестра производится по следующему алгоритму:
- Пройдём по пути C:WindowsSystem32configRegBack. Перенесём лежащие в ней файлы в папку config с заменой. Перезагружаем компьютер.
- Чтобы создать резервную копию вручную, выполняем активацию редактор реестра. Для этого задействуем сочетание Win+R, в поле утилиты «Выполнить» вводим «regedit» и подтверждаем («ОК»). Далее щёлкаем правой кнопкой мыши по строке «Компьютер» и нажимаем «Экспортировать».
- Выберем место назначения для сохраняемого файла. Вводим имя и нажимаем «Сохранить».
Внесение данных через сохранённый файл резервной копии реестра осуществляется его запуском. Однако, как уже писалось, вариант этот опасный и не всегда действенный.
Windows 10 не загружается
Рассмотренные выше способы по восстановлению применимы, когда операционка загружается в обычном или безопасном режимах. Но что делать, если система отказывается запускаться? Рассмотрим варианты решения данной проблемы.
Диск восстановления
Образ для восстановления поможет при наличии самых разных проблем с Windows, включая ситуации, когда она не запускается. Маловероятно, что у обычного пользователя под рукой найдётся флешка с таким образом. Хотя этот нужный инструмент может понадобиться в самый неожиданный момент.Создать этот образ несложно, но для этого понадобится ещё один компьютер с установленной «десяткой». Также необходима любая флешка ёмкостью памяти от 2 Гб.Алгоритм создания и использования:
- Подключаем к ПК флешку. Открываем «Панель управления», следуем во вкладку «Восстановление компьютера». Здесь понадобится «Создание диска восстановления». Снимаем выделение «Выполнить резервное копирование …». Жмём «Далее».
- Теперь нужно выбрать USB-устройство для записи из доступных носителей и щёлкнуть «Далее».
- Запустится процесс формирования и записи образа восстановления, который может занять определённое количество времени.
- Для использования образа будет необходимо загрузится с носителя. Для этого в процессе запуска компьютера нажимаем несколько раз одну из клавиш Delete, F2, F8, F11 (самые распространённые варианты, зависящие от конфигурации ПК) и выбираем загрузку с флешки. В появившемся окне «Выбор действия» жмём «Поиск и устранение неисправностей».
- Теперь станут доступны несколько вариантов действий. Возможны несколько опций: либо выбор возврата ПК к прежнему состоянию (включая режим с полным сохранением личных данных) либо через «Дополнительные параметры» восстановление операционки иными способами.
Любая выбранная операция сопровождается подробным описанием того или иного действия и рекомендациями.
Установочный диск
Чтобы восстановить систему с помощью установочного диска вам потребуются загрузочная флешка (диск) с аналогичной редакцией «десятки». Если таковой у вас нет, на другом ПК под управлением Windows скачайте с сайта Microsoft средство MediaCreationTool и следуйте инструкциям по созданию установочного диска (потребуется флешка ёмкостью не менее 8 Гб).Если имеется скачанный образ Windows (опять же редакция и разрядность которого должны совпадать с восстанавливаемой системой), проще всего создать установочный диск, воспользовавшись утилитой Rufus. Загрузите её с официального сайта, и действуйте в следующем порядке:
- Запускаем программу (Rufus не требует установки). В поле «Устройства» выбираем сменный носитель, куда будет осуществляться запись. Имейте в виду, вся информация на флешке будет уничтожена.
- В поле «Метод загрузки» выбираем образ диска для записи. Параметры образа — «Стандартная установка Windows», схема раздела — MBR или GPT (смотрите в конфигурации вашего ПК). Жмём «Старт».
После того, как загрузочный диск будет готов, действуйте по следующей схеме:
- Вставляем переносной накопитель в проблемный компьютер. Выбираем загрузку с носителя. Выбираем язык и метод ввода (раскладку клавиатуры) и нажимаем «Далее».
- В следующем окне необходимо активировать «Восстановление системы».
Далее порядок действия идентичен рассмотренному алгоритму в инструкциях касательно работы с диском восстановления (шаги 4, 5).
Восстановление загрузчика в командной строке
Восстановить загрузчик из командной строки можно либо с использованием образа восстановления, либо запустив загрузочный диск. Для этого выполним следующее:
- На экране дополнительных параметров (как сюда попасть см. инструкции выше) активируем пункт «Командная строка» либо там, где выбираем язык и раскладку клавиатуры жмём сочетание Shift+F10.
- В появившейся консоли вводим команды (именно в таком порядке и после каждой жмём Enter): diskpart, list volume. Появятся все подключенные диски. Скорее всего системный (с загрузчиком) будет обозначен как «Том 0 C Системный» или что-то подобное. Запоминаем букву диска и набираем exit. Жмём Enter.
- Далее выполним bcdboot c:windows (или ваша буква системного раздела). В завершении Windows сообщит об успешном создании новых файлов загрузчика.
После проведённых манипуляций закройте терминал и перезагрузите машину.Восстановление Windows 10 — довольно сложная и обширная тема, все аспекты которой невозможно рассмотреть в рамках одной статьи. Если у вас появились вопросы, скорее всего, на нашем сайте вы найдёте ответы и на них.
Восстановление Windows 10 можно осуществить несколькими способами.
Если компьютер загружается:
- С помощью точки восстановления.
- Сброс к заводским настройкам.
- История файлов.
Если компьютер не загружается:
- Использование диска восстановления.
- С помощью установочного диска.
Теперь разберем эти варианты восстановления более подробно.
Способ 1 – С помощью точки восстановления системы
Windows периодически сохраняет информацию о программах, системных настройках, драйверах, реестре и драйверах в точках восстановления системы. Это происходит перед значимыми изменениями в ОС, такими как установка программ, драйверов или обновлением системы. Также точку восстановления можно создать вручную. Как это сделать можете прочитать в этой инструкции.
Стоит отметить, что после восстановления ваши данные останутся нетронутыми, а драйвера, программы и обновления, установленные после создания точки восстановления, будут удалены.
1. Запустите окно свойств системы (сочетание клавиш Windows + Pause) и откройте пункт «Защита системы».
2. Нажмите кнопку «Восстановить», а потом «Далее». В списке доступных точек восстановления выберите нужный пункт и опять нажмите «Далее».
3. Еще раз проверьте выбранные параметры, нажмите кнопку «Готово», а затем «Да» в окне предупреждения. Начнется процесс восстановления, при этом компьютер будет перезагружен.
Способ 2 — Сброс к заводским настройкам
В Windows 10 есть возможность вернуть настройки системы в исходное состояние. При этом можно сделать полный сброс или с сохранением пользовательских файлов. Преимущество этого метода в том, что если вы захотите переустановить систему вам не нужно производить установку Windows c нуля, достаточно просто выполнить сброс.
Чтобы воспользоваться этой функцией, нужно перейти в следующий раздел: «Параметры компьютера -> Обновление и безопасность -> Восстановление -> Вернуть компьютер в исходное состояние» и нажать кнопку «Начать».
Более детально процесс сброса к заводским настройкам мы рассмотрели в этой статье: https://compconfig.ru/winset/sbros-windows-10.html
Способ 3 – История файлов
Этот метод непосредственно не связан с восстановлением системы, но в совокупности с остальными способами тоже может быть полезным.
«История файлов» позволяет делать резервные копии ваших файлов в автоматическом и ручном режиме. Вам достаточно активировать эту функцию и указать, какие папки нужно сохранять. Система будет автоматически делать резервные копии ваших документов с периодичностью, которую можно настроить. При необходимости вы сможете легко восстановить файлы нужной вам версии.
Как включить, настроить и использовать этот инструмент вы можете прочитать в этой статье: https://compconfig.ru/winset/istoriya-faylov-windows-10.html
Способ 4 – Использование диска восстановления
Если Windows 10 не загружается, вы можете попробовать произвести реанимацию системы с помощью диска восстановления, который позволит вам получить доступ к дополнительным параметрам запуска.
Если у вас еще нет диска восстановления, воспользуйтесь этой инструкцией:
Как создать диск восстановления Windows 10
После загрузки с USB-диска восстановления перейдите в раздел «Диагностика -> Дополнительные параметры».
Здесь вы можете использовать несколько вариантов реанимации компьютера:
- Восстановление Windows с помощью точки восстановления. Это вариант мы уже рассматривали выше. Смысл его тот же, только запуск производится другим путем.
- Восстановление образа системы. Этот метод известен еще с Windows 7. Если вы ранее создали образ системы в Windows, то можно легко его восстановить через диск восстановления. Как создается образ системы в Windows 10 можно прочитать здесь: https://compconfig.ru/winset/kak-sozdat-obraz-windows-10.html
- С помощью следующего пункта вы можете попробовать автоматически исправить ошибки при загрузке.
- Для более продвинутых пользователей есть возможность запустить командную строку для восстановления системы или других целей.
- Ну и последний вариант – это возвращение Windows к предыдущей сборке.
Также следует отметить, что если при создании диска восстановления системы вы произвели запись системных файлов на диск, то у вас будет возможность переустановить Windows с этого диска. Но если вы покупали компьютер с предустановленной Window 8 (8.1) со скрытым разделом восстановления, то будет восстановлена версия системы, которая изначально поставлялась с компьютером.
Способ 5 – С помощью установочного диска
Если Windows не загружается, и у вас нет диска восстановления, вы можете использовать установочный диск для реанимации компьютера.
Установочный диск можно записать на USB-носитель или DVD-диск, используя средство для создания носителя, которое можно скачать здесь.
Загрузившись с установочного носителя, вы увидите окно, в котором нужно выбрать языковые параметры и нажать кнопку «Далее».
В следующем окне нужно нажать на ссылку «Восстановление системы» в нижнем левом углу.
Далее зайдите в раздел «Поиск и устранение неисправностей». Здесь вы увидите 2 варианта для восстановления:
- Вернуть компьютер в исходное состояние. Будет произведен сброс к заводским настройкам с сохранением файлов пользователя или без. Этот инструмент мы уже рассматривали выше (способ 2).
- Дополнительные параметры. Как и на диске восстановления системы откроется список инструментов, с помощью которых можно вернуть работоспособность Windows с помощью точек восстановления, образа системы и т.д.
Мы рассмотрели основные способы восстановления Windows 10. Обычно их вполне достаточно чтобы вернуть систему в работоспособное состояние. Сюда можно было еще добавить чистую установку Windows, но это уже крайняя мера и к восстановлению системы имеет косвенное отношение.
 Если операционная система Windows начала сбоить, не спешите ее переустанавливать. Воспользуйтесь функцией восстановления, которая предоставляет возможность вернуть Виндовс к состоянию до возникновения ошибок или неполадок. Подробно рассмотрим, как запустить восстановление системы Windows 10, все существующие способы. Содержание
Зачем нужно восстанавливать систему
Для человека, который не сталкивался с необходимостью отката Windows к рабочему состоянию, этот вопрос имеет смысл. Операционная система не такая стабильная вещь, как многие думают, она может выйти из строя без вмешательства пользователя, тогда понадобится вернуть ее к исходному состоянию. Вот еще некоторые причины:
- неудачная установка драйвера или программы;
- сбой в системе;
- ошибка во время загрузки;
- черный экран или синий экран смерти.
Вот примерный список, когда может понадобится восстановление Windows 10 и расширять его можно очень долго, но в качестве базовых примеров, достаточно этого списка.
Все способы восстановления
Теперь рассмотрим все действующие способы восстановления Windows 10 актуальные на данный момент. Вы сможете детально их изучить и подобрать, какой именно подходит в вашем случае.
Заранее предупреждаю, что подразумевается, что ранее вы активировали эту функцию и создали точку отката, так как восстановление возможно только при таком раскладе.
Читайте также: Проблемы при восстановлении Windows и их решения
Через безопасный режим
Восстановление Windows 10 из безопасного режима — способ, который подходит в случаях, если не удается загрузить ОС в обычном режиме, но в safe mode все отлично. Следуйте алгоритму действий:
- Загрузите Винду в безопасном режиме.
-
Запустите командную строку от имени администратора. Для этого откройте Поиск Windows 10 и введите CMD, затем кликните по приложению консоли ПКМ и выберите «Запустить от имени администратора».

-
В командной строке введите команду
rstrui.exeи нажмите Enter.
- На экране отобразится окно восстановления системы.

-
Выберите пункт «Отметить другую точку восстановления».

- Нажмите кнопку «Далее».
- Выберите нужную точку восстановления и снова нажмите «Далее».
- Следуйте инструкциям на мониторе.
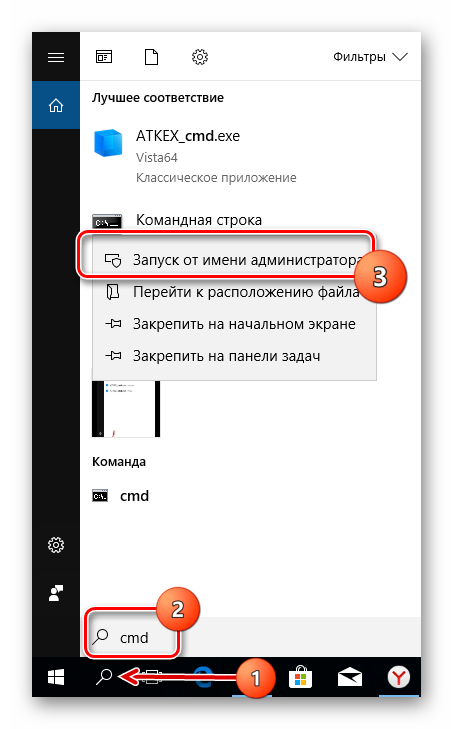
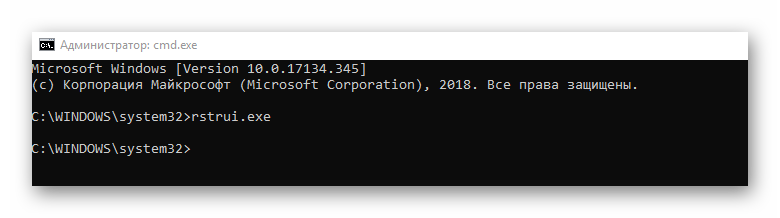
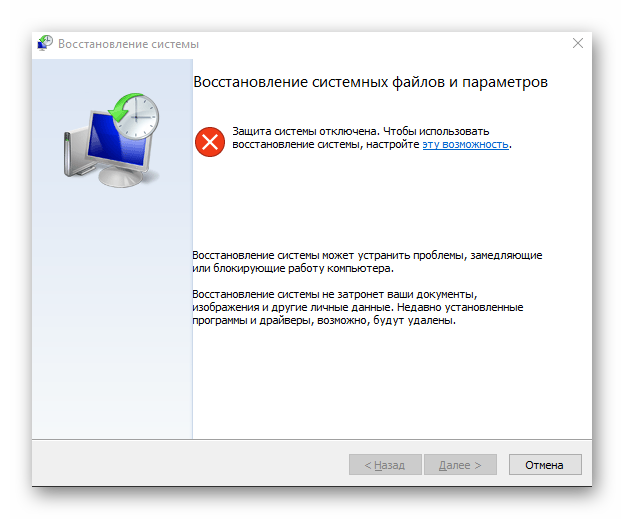
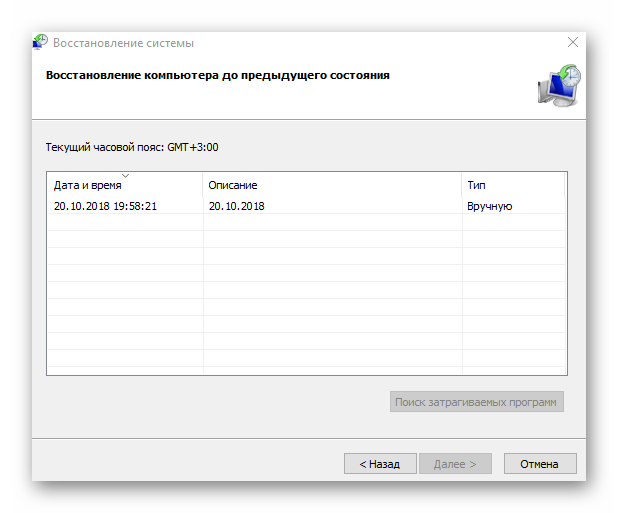
Можно сделать проще:
- В безопасном режиме откройте Панель управления.

- Выберите раздел «Система и безопасность».
-
Кликните на «История файлов».

-
Слева внизу кликните на «Восстановление».

-
На следующем экране нужно выбрать «Запуск восстановления системы».

- Дальше вы уже знаете, что делать.
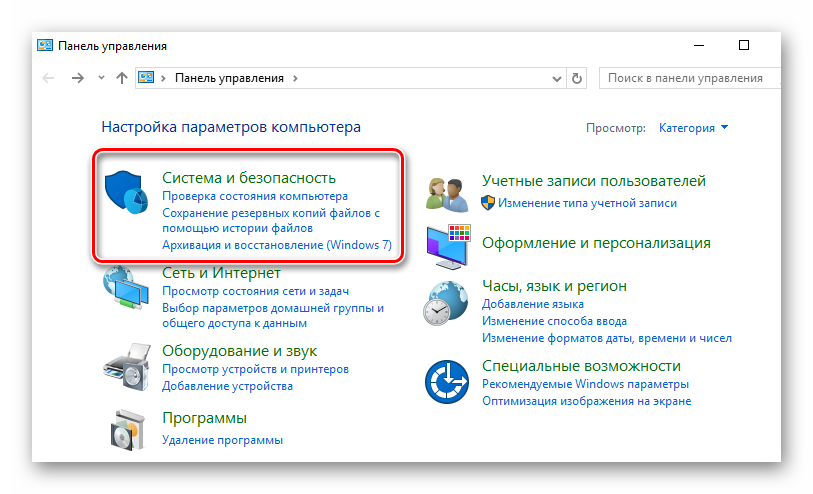
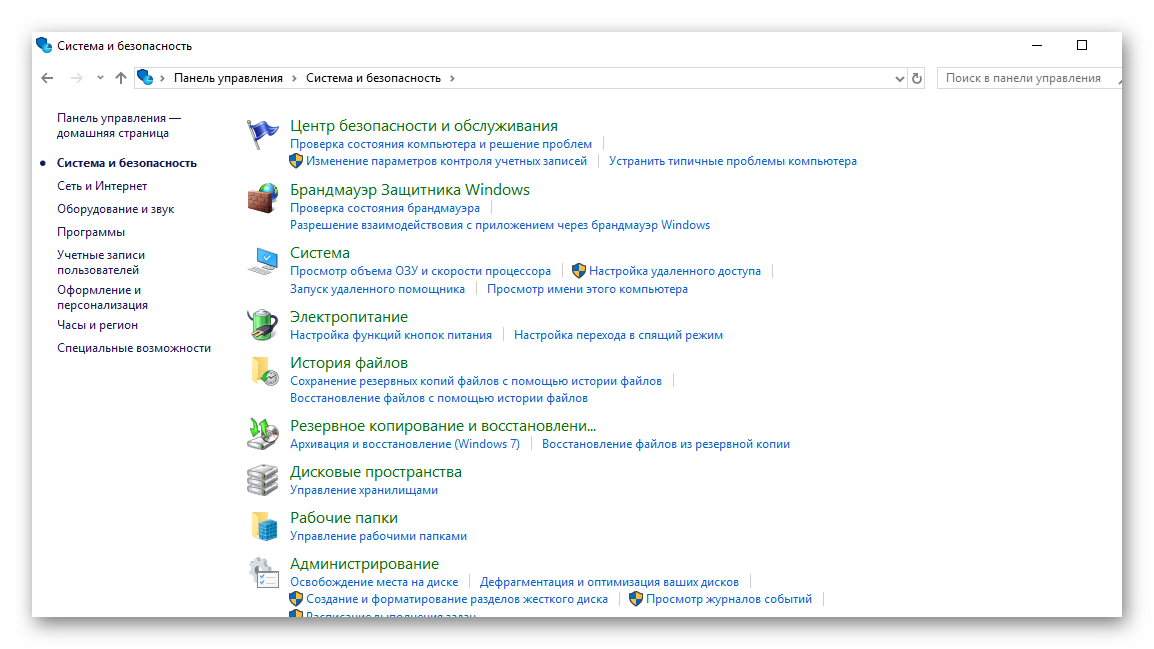
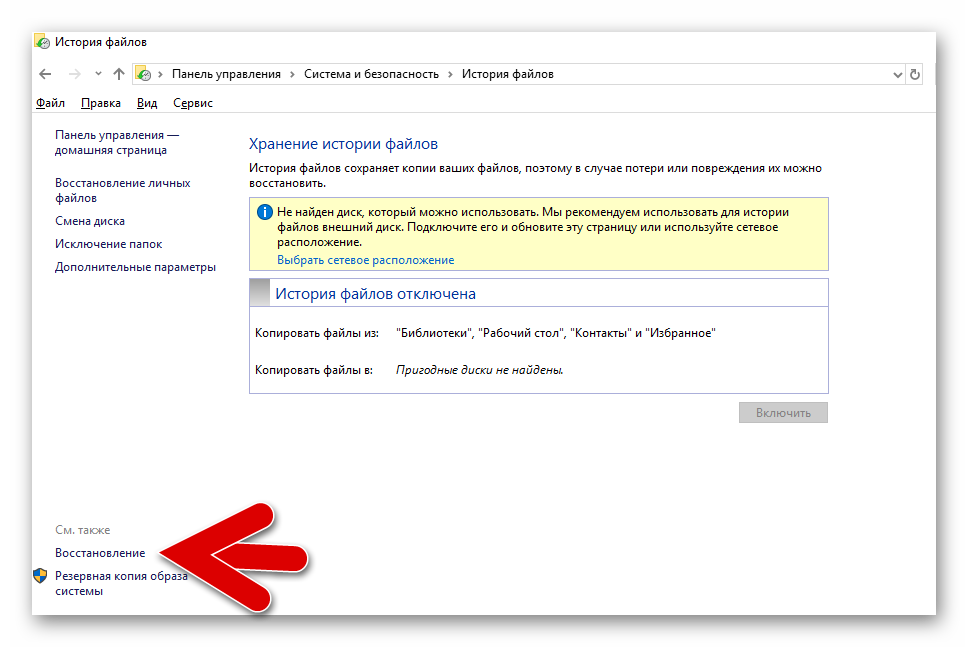
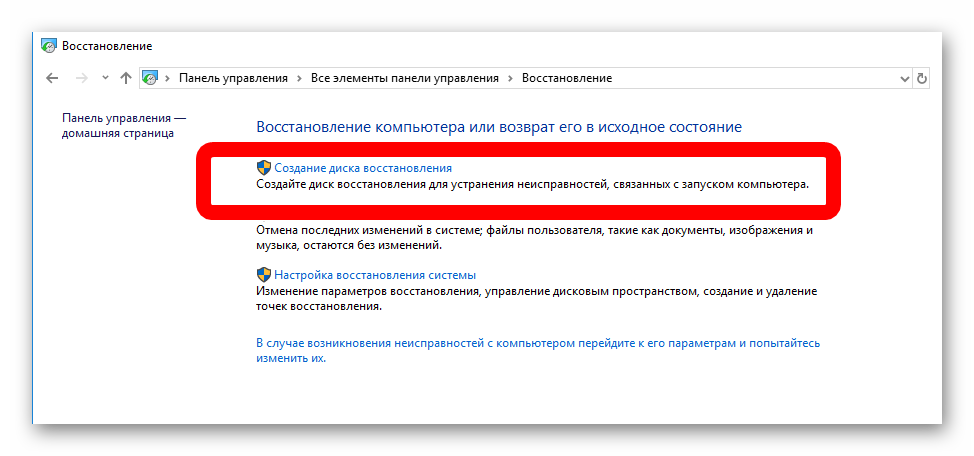
Читайте так же: Все способы запуска Windows 10 в безопасном режиме
Параметры
В Windows 10 появился дополнительный инструмент, позволяющий сбросить систему к исходному состоянию и сохранить пользовательские файлы, рассмотрим его подробнее:
- Нажмите сочетание клавиш Win+I.
-
Откройте раздел «Обновление и безопасность».

-
Слева выберите раздел «Восстановление».

- Нажмите кнопку «Начать».
- Выберите: сохранить все файлы или удалить их.
- Ожидайте завершение процесса.
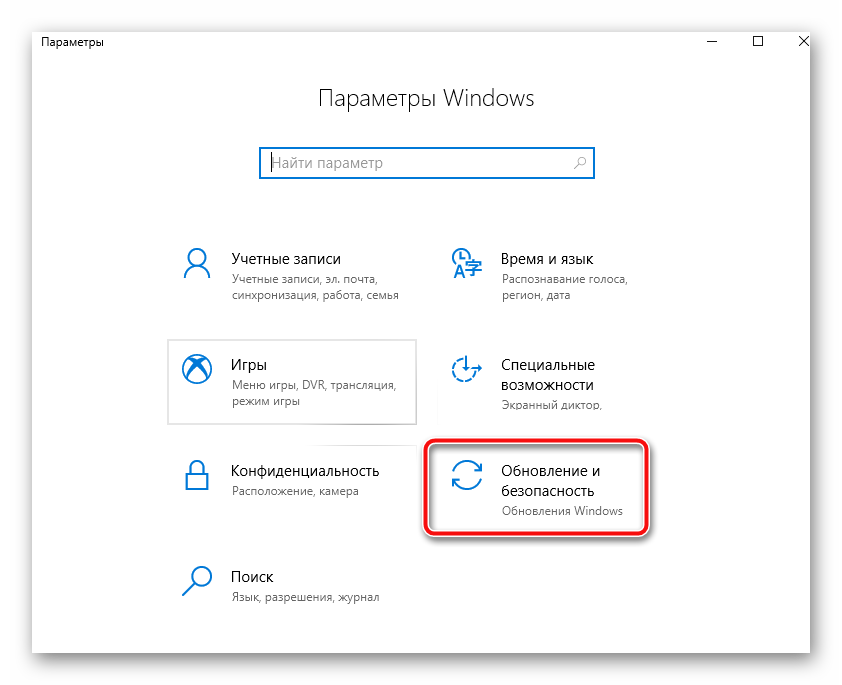
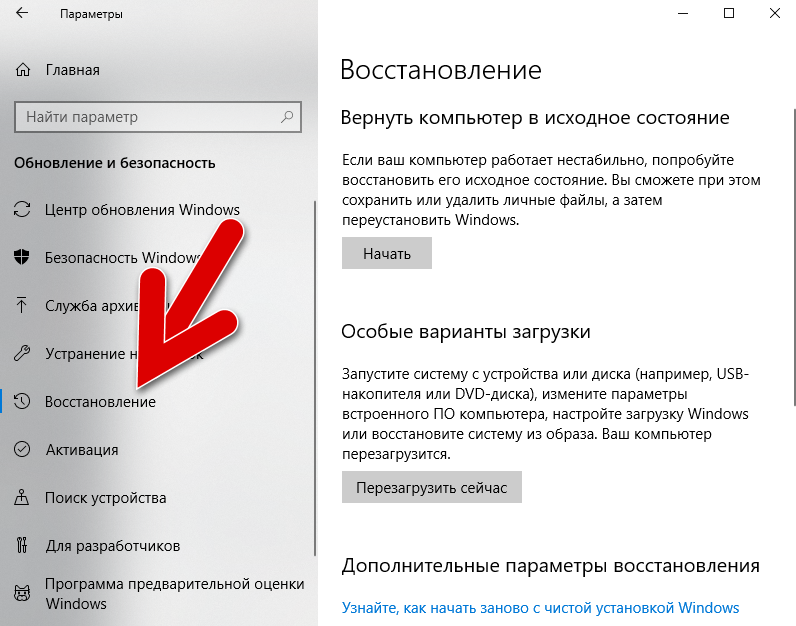
Командная строка
Восстановление системы через командную строку подразумевает восстановление загрузчика, если тот повредился. Чтобы точно понять, подходит ли вам этот метод, поясняю, что когда загрузчик нерабочий — система не запускается, возникают ошибки. Соответственно, если вам не удалось загрузить Windows 10, используйте этот способ. Однако учтите, что нужна флешка с записанным дистрибутив операционной системы или диск:
- Установите носитель с установщиком винды в ПК.
- Перезагрузите компьютер, если нужно, выставьте в БИОС, с какого устройства должна начаться загрузка.
-
Когда на экране отобразится окно «Установка Windows», внизу кликните на «Восстановление системы».

-
Выберите «Поиск и устранение неисправностей».

-
Кликните по пункту «Командная строка».

-
В консоли введите команду
bootrec.exe C:Windows, но вместо буквы «C» пропишите ту, на диске которой установлена Виндовс. - Нажмите клавишу Enter.
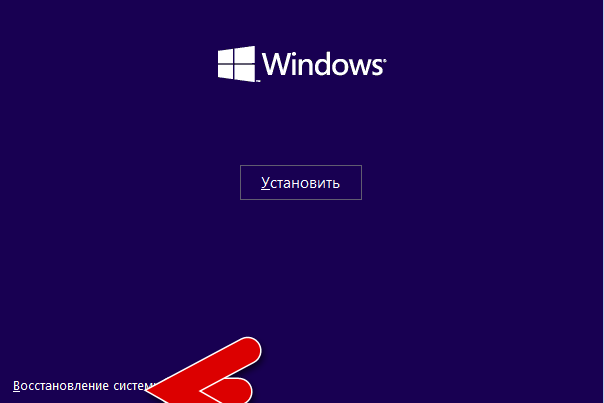
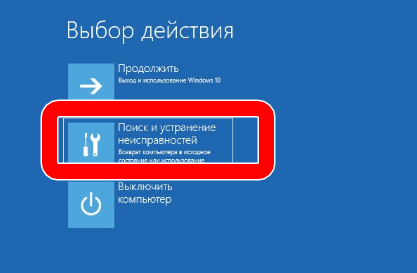
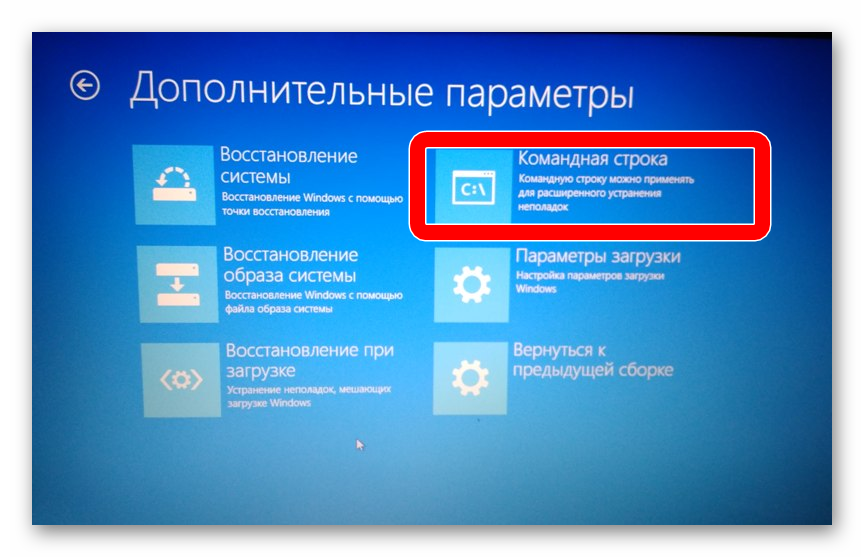
Если все хорошо, система оповестит об успешном восстановлении загрузочной записи.
Обратите внимание! Способ подходит для более продвинутых пользователей, которые разбираются в командах и знают буквы разделов свои жестких дисков.
Флешка или диск восстановления
Для того, чтобы воспользоваться данным методом, нужно создать диск восстановления системы Windows 10 или флешку, то есть, записать на них дистрибутив восстановления десятой винды. Для начала рассмотрим, как создать флешку или диск восстановления винды:
- Установите носитель в порт или дисковод компьютера.
- Откройте Панель управления.
-
Переключитесь на «Крупные значки».

-
Откройте «Восстановление».

-
Кликните на «Создание диска восстановления».

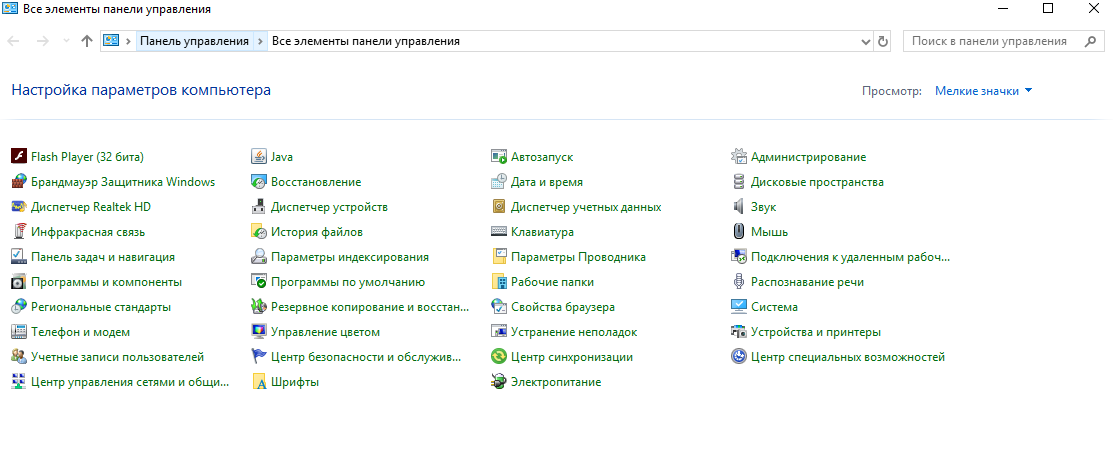


Далее следуйте инструкциям системы, чтобы завершить создания восстановительного накопителя.
Когда он готов, следует проделать следующее:
- Установите диск либо флешку в ПК.
- Перезагрузите компьютер и начните загрузку с только что вставленного носителя.
- Откроется среда восстановления.
- Выберите соответствующую функцию и следуйте подсказкам на экране.
Метод сработает, если ранее вы создали такую точку и теперь хотите вернуться к состоянию Windows во время ее создания. Делается это следующим образом:
- Выберите функцию перезагрузки ПК с нажатой клавишей SHIFT.
-
Выберите раздел «Диагностика».

-
Перейдите в «Дополнительные параметры».

- Кликните на «Восстановление системы».
- В открывшемся окне кликните на «Далее».
- Установите галочку на пункте «Показать другие точки».
- Выберите ту, которая нужна.
- Следуйте подсказкам мастера восстановления системы.
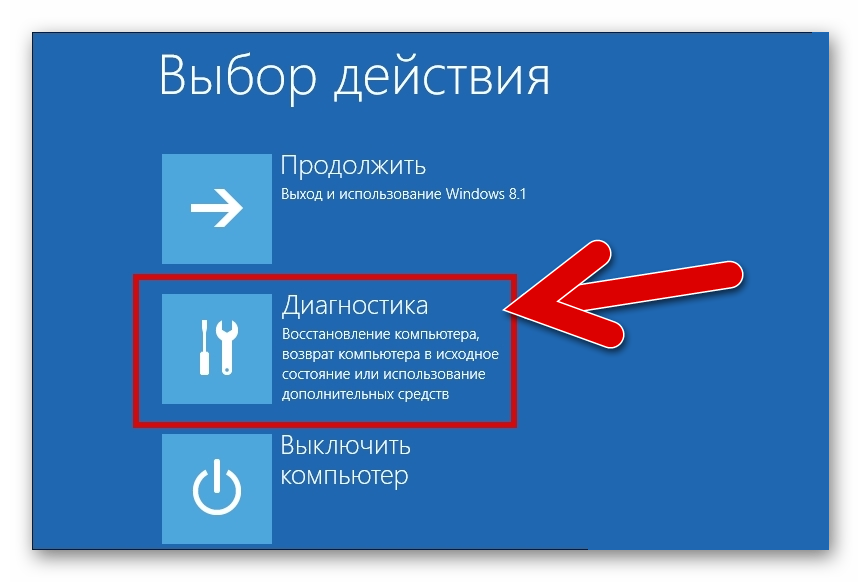
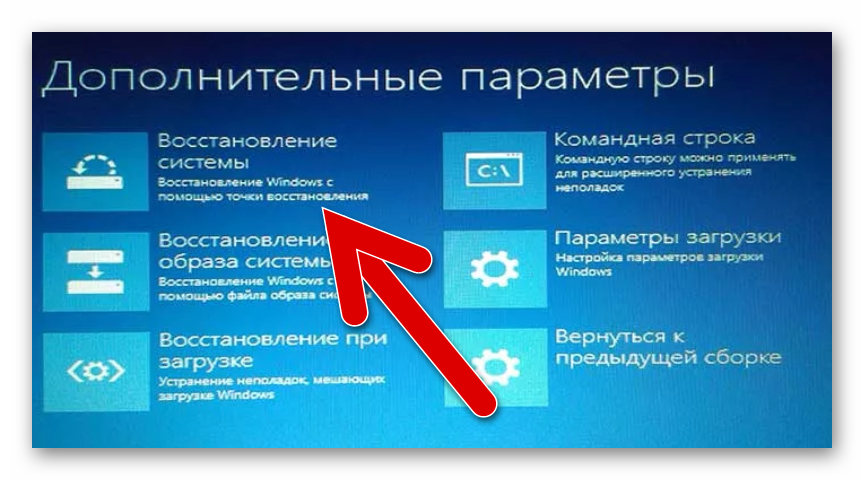
БИОС
Именно через BIOS восстановить Windows 10 не получится, так как там нет такой функции. Через него лишь можно выбрать с какого носителя должна загружаться системы, например, это может быть диск восстановления:
- Откройте БИОС.
- Перейдите в раздел «Boot».
- В первой строчке выберите с какого устройства загружаться.
- Нажмите F10 и перезагрузите компьютер.
Совет! Будьте аккуратны в биосе, изменение настроек может привести к неработоспособности компьютера.
История файлов
Данная функция появилась в Windows, начиная с восьмой версии. Ее суть в том, что на выбранном внешнем диске или сетевом каталоге сохраняются копии важных папок и файлов. Затем, в случае надобности, их можно восстановить.
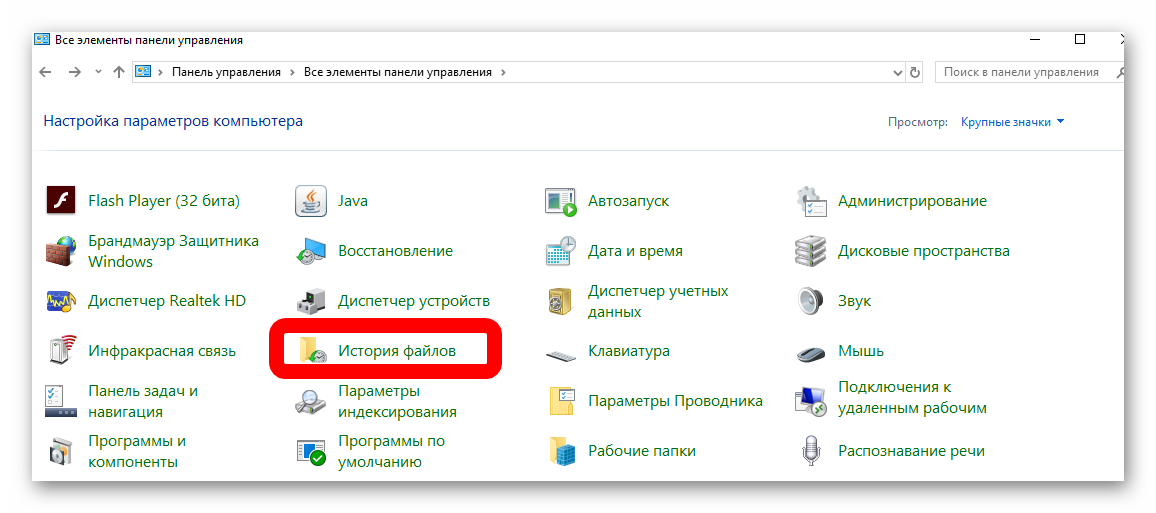
Найти функцию можно с панели управления, там она так и называется «История файлов». По сколько она не позволяет полностью восстановить систему, а лишь определенные файлы и папки, то здесь мы не будем ее полностью рассматривать. Ждите отдельную статью по этой функции.
Удаление обновлений
Один из методов восстановления системы к работоспособному состоянию — удаление последних обновлений. Используйте этот способ, если проблемы с WIndows начались после обновлений системы:
- Нажмите сочетание клавиш Win+I.
-
Выберите «Обновление и безопасность».

-
Слева кликните на «Центр обновлений Windows».

-
Выберите «Просмотр журнала обновлений».

-
Кликните на «Удалить обновления».

- По колонке с датами найдите последние обновления.
- Кликайте по ним ПКМ и выбирайте «Удалить».
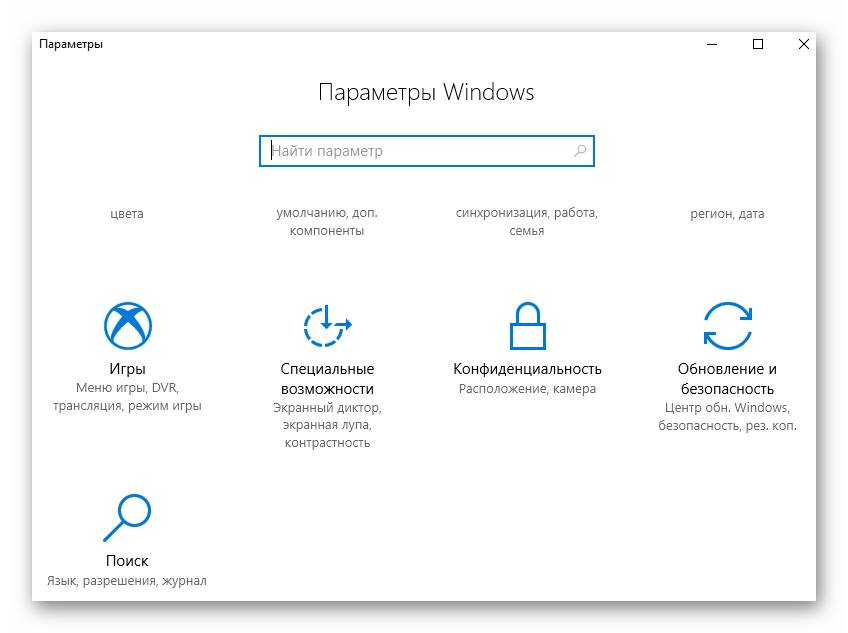
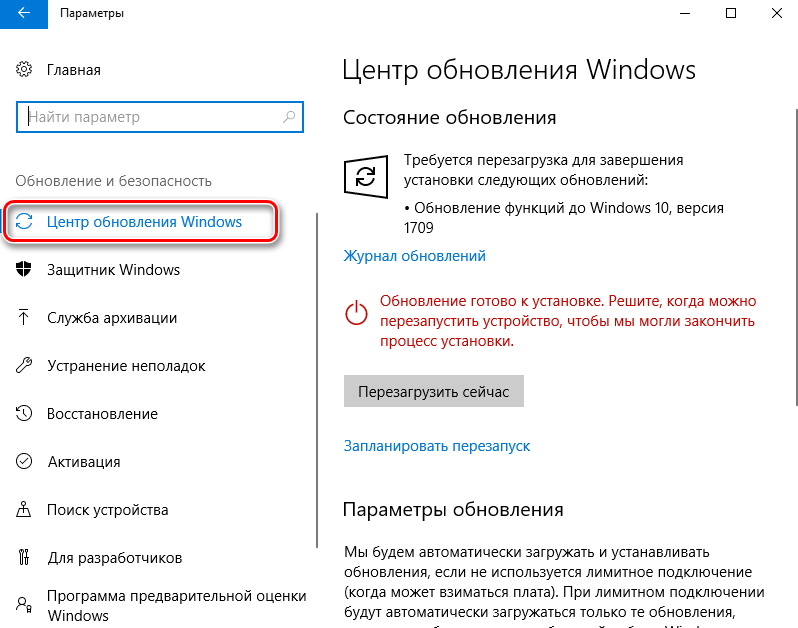
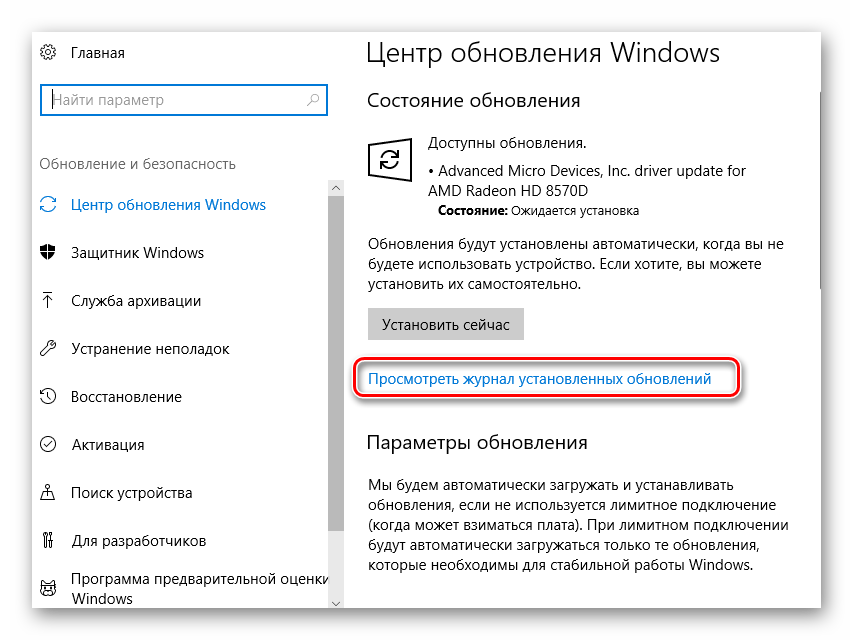
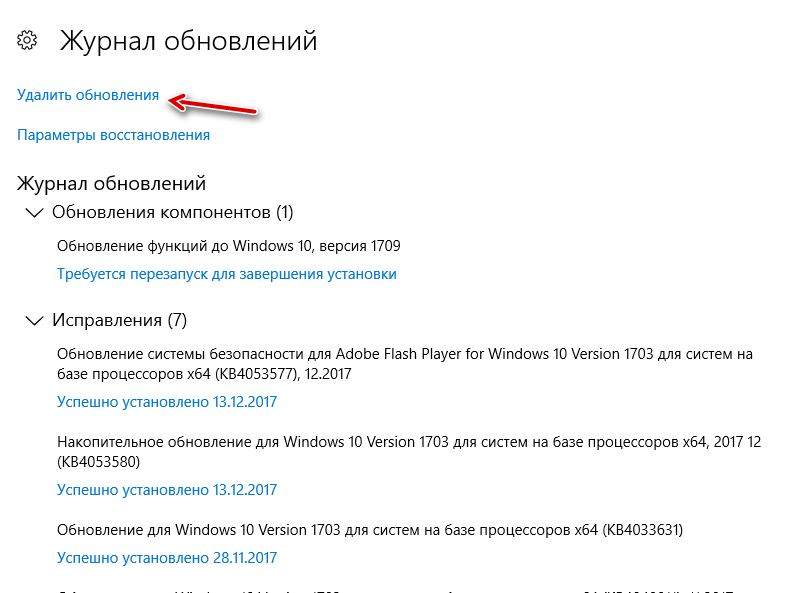
Как восстановить реестр
Директория сохранения реестра в Windows 10 — C:WindowsSystem32configRegBack.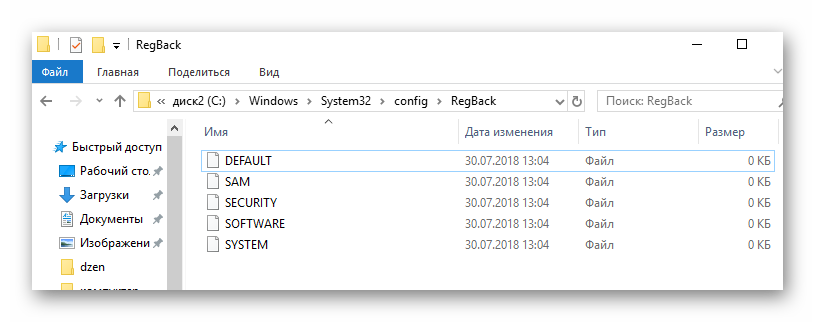 Соответственно, чтобы сделать копию, нужно скопировать ее содержимое. Когда понадобится, просто переместить все файлы в эту папке с заменой.
Обратите внимание! Для работы с этим разделом Виндовс нужны права администратора.
Ошибки при восстановлении системы
Случается, когда восстановление Windows сопровождается определенными ошибками. Рассмотрим наиболее частые из них.
Ошибка 0х80070005
Ошибка 0х80070005 во время восстановления системы Windows 10 сигнализирует о том, что присутствуют проблемы с правами доступа, подробнее читайте здесь.
Ошибка 0x80070003
Ошибка 0x80070003 при восстановлении системы Windows 10 возникает в разных случаях, например, слабый сигнал сети или конфликт файлов, компонентов системы. Решений данной проблемы смотрите здесь.
Ошибка 0x80070017
Если при восстановлении системы Windows 10 появилась ошибка 0x80070017, скорее всего повредились какие-то системные файлы, это наиболее частая причина. Подробнее об устранении ошибки читайте тут.
Ошибка 0x81000203
Ошибка программы восстановления системы 0x81000203 Windows 10 связана с компонентом «Восстановление системы». Устранить ее можно несколькими способами, подробнее о которых мы поговорим в отдельной статье.
Как вернуть ноутбук к заводским настройкам
У многих ноутбуков есть возможность откатиться к состоянию, которое было после выпуска с завода. Для каждой модели это делается по разному, поэтому мы не будем здесь описывать алгоритмы, а подготовим отдельную статью. Общий принцип таков, что необходимо перейти в БИОС и выбрать там определенные настройки.
Сколько по времени длится восстановление
Многие пользователи интересуются, сколько по времени длится восстановление Виндовс 10, на этот вопрос сложно точно ответить. Все зависит от метода, который будет использоваться и конкретного случая. В лучшем случае, на это уйдет от 10 до 30 минут, в худшем процесс затянется на несколько часов.
Что делать, если после восстановления появился черный экран
В случаях, когда восстановление системы windows 10 вызывает черный экран, точное решение проблемы подсказать невозможно. Это может быть проблема с установленными компонентами или драйверами.
Чтобы точно и гарантированно избавиться от проблемы, рекомендуем сделать полную переустановку Виндовс либо сделать откат на другую точку восстановления.
Читайте также:Появился черный экран после установки драйвера Nvidia
Не загружается Windows после восстановления
Если Windows 10 не загружается после восстановления системы, значит процедура прошла неудачно, следует ее повторить или воспользоваться другим способом. Если ничего не помогает, единственный метод — переустановка винды. Подробнее читайте в статье: Что делать, если не работает компьютер после восстановления
Сбился ключ активации после восстановления
Если после восстановления слетела активация Виндовс 10, ничего страшного, ее можно восстановить:
- Перейдите в Параметры Windows (Win+I).
-
Откройте раздел «Обновление и безопасность».
-
Слева кликните на «Активация».

- Кликните на «Изменить ключ продукта» и укажите свой лицензионный код.
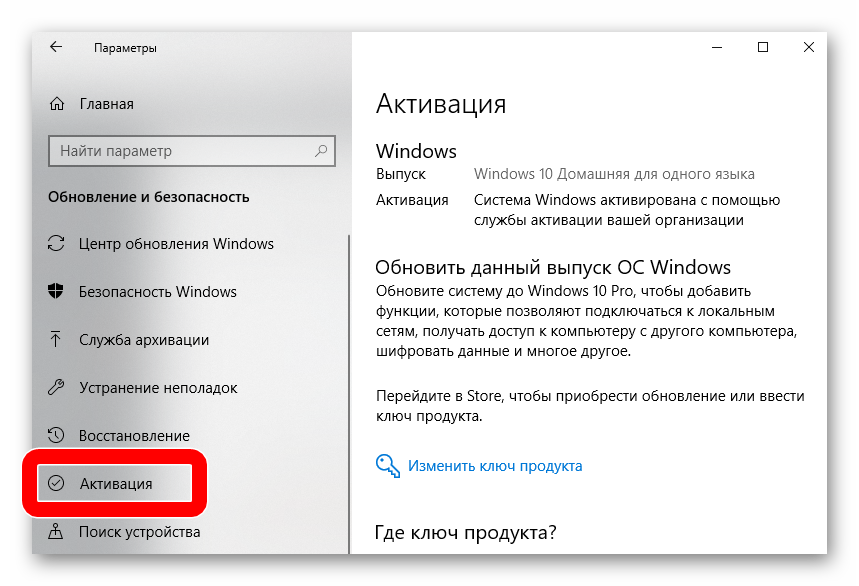
Читайте также: Как узнать ключ активации Windows 10
Восстанавливаем разрешение экрана
После восстановления Виндовс 10 могло сбиться разрешение экрана, тогда сделайте следующее:
- ПКМ кликните по рабочему столу.
-
Выберите пункт «Параметры экрана».

-
Во вкладке «Разрешение экрана» выберите нужное и сохраните.

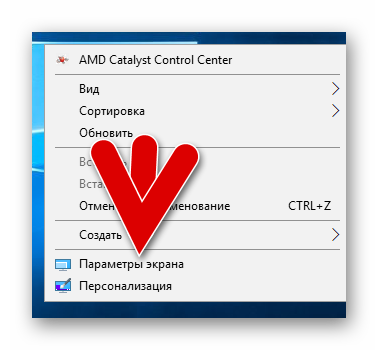
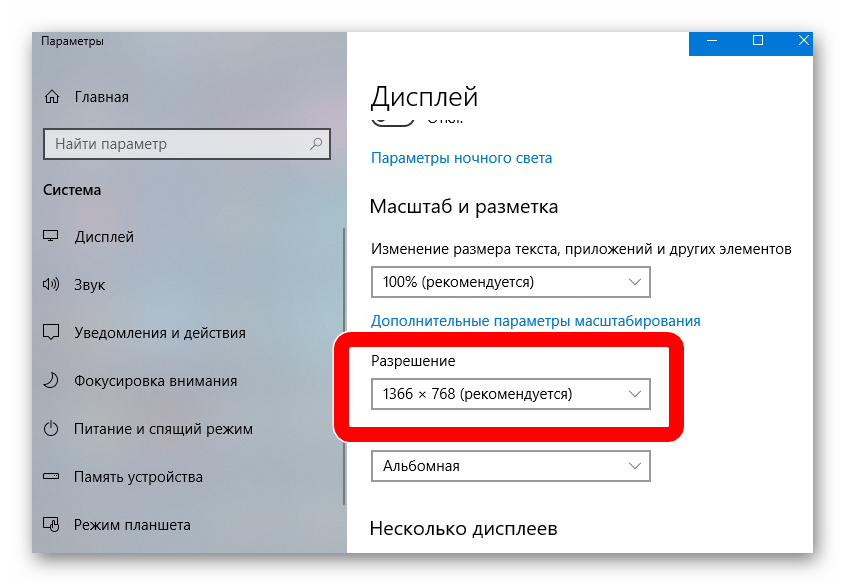
Теперь вы знаете, как запустить восстановление системы Windows 10, какие ошибки бывают. Существует сразу несколько способов вернуть винду в исходное состояние, выбирайте тот, что подходит больше всего. Используемые источники:
- https://masterservis24.ru/288-vosstanovlenie-windows-10.html
- https://compconfig.ru/winset/vosstanovlenie-windows-10.html
- https://kompukter.ru/kak-zapustit-vosstanovlenie-sistemy-windows-10/

03.12.2018Рубрика: Удаление и восстановление системыАвтор: Алексей Герус
Несмотря на свою надёжность в использовании и постоянную поддержку со стороны разработчика, операционная Windows подвержена разного рода уязвимостям. Это может быть как работа вирусов, так и некачественное программное обеспечение и драйверы. Любые сбои в работе могут привести к критическим повреждениям системы и Windows просто перестанет запускаться. Именно поэтому очень важно иметь инструменты для восстановления работоспособности ОС. Одним из средств для этой процедуры является диск восстановления.
- Создание диска восстановления Windows 10 в среде «Панели управления» на флешке
Видео: создание диска восстановления в Windows 10 - Создание диска восстановления Windows 10 на DVD
- Бесплатной утилитой от Microsoft
Видео: как создать загрузочную флешку программой Media Creation Tool
- Программой UltraISO
Hiren’s BootCD PE x64
Hiren’s BootCD остается одним из лучших дисков для восстановления Windows. Однако, в ноябре 2012 года этот инструмент перестал официально обновляться. Теперь надежная группа поклонников Hiren’s BootCD обновляет диск самыми последними и самыми мощными утилитами восстановления.
Hiren’s BootCD фокусируется на исправлении систем Windows. Спасательный диск содержит множество утилит, включая обнаружение вредоносных программ и руткитов, антивирусное сканирование, очистку временных файлов, резервное копирование данных и драйверов, аппаратное сканирование, сканирование разделов, формирование и сохранение образов, и даже взлом паролей. Вы также можете использовать загрузочный компакт-диск Hiren’s BootCD для перепрошивки BIOS или, при необходимости, CMOS.
Кроме того, чтобы идти в ногу со временем, Hiren’s BootCD теперь базируется в Windows 10 Preinstallation Environment (PE). PE — это облегченная версия операционной системы, которая в основном используется для поиска и устранения неисправностей и обычно сопровождается дополнительными инструментами восстановления и спасения.
Мне кажется, это лучший вариант. Тем более, что сейчас больше количество ноутбуков без приводов. А флешки есть у всех. Этот диск создать очень просто. В системе есть отдельная функция для этого.
Откройте поиск и начните вводить «восста…». В результатах поиска выберите пункт «Восстановление».
Выбираем пункт «Создание диска восстановления».
Откроется новое окно, в котором вы увидите описание возможностей такого диска, и единственный пункт настройки: «Выполнить резервное копирование системных файлов на диск восстановления». Я советую оставить галочку. Если отключить ее, то наш накопитель будет создан быстрее, но на него не будут скопированы необходимые системные файлы, которые могут пригодится нам для восстановления Windows 10. Благодаря этим файлам можно будет восстановить систему к исходному состоянию. Поврежденные системные файлы могут быть заменены теми, что будут записаны на накопитель.
На следующем этапе нужно подключить флешку к компьютеру, или ноутбуку. USB-накопитель должен быть минимум на 8 ГБ. Хотя у меня готовый диск занял 4.4 ГБ.
Вся информация которая находится на флешке будет удалена. Обязательно скопируйте нужные файлы в надежное место.
Выберите свой накопитель, и нажмите «Далее».
Появится уведомление, что с диска будет удалена вся информация и он будет отформатирован. Подтверждаем запись, и ждем пока закончится процесс создания диска восстановления.
По окончанию записи нажимаем на кнопку «Готово». Все, можно использовать эту флешку для восстановления Windows 10 (с той же разрядностью).
Вы можете хранить файлы на этом накопителе. Только не удаляйте те файлы, которые были записаны системой.
Можно для своих файлов создать отдельную папку, например.
Kyhi’s Recovery Drive
Kyhi’s Recovery Drive, также известный под громоздким названием Windows 10 Recovery Tools-Bootable PE Rescue Disk, представляет собой пользовательскую среду Windows 10 PE. В данном случае, пользователь TenForum Kyhi разработал среду Windows 10 PE, наполненную инструментами восстановления системы.
Kyhi’s Recovery Drive поставляется с огромным набором инструментов для удаления вирусов и вредоносного ПО, восстановления дисков, управления разделами и сканерами, работы в сети, удаленного просмотра и VNC, резервного копирования и восстановления образов и многое другое.
Kyhi’s Recovery Drive очень прост в использовании для многих пользователей. Среда восстановления выглядит точно так же, как установка Windows 10.
Создание загрузочного носителя разными способами
Диск восстановления — это лишь один из методов вернуть системе работоспособный вид. Однако если носитель создавался уже с дефектами в системных файлах, то проку от него не будет, а единственным способом для работы Windows будет полная переустановка ОС. Для этого потребуется носитель (лучше флешка) с чистым образом операционной системы. Windows для установки можно получить двумя основными способами: найти и скачать авторскую сборку в интернете или же воспользоваться бесплатной утилитой от Microsoft. А при наличии образа уже можно решать, каким способом его записать на носитель, так как вариантов масса: опять-таки стандартная утилита разработчика или сторонние приложения.
Бесплатной утилитой от Microsoft
Media Creation Tool — это специальное приложение от Microsoft, задачей которого является создание образов или загрузочных носителей операционной системы Windows 10. С его помощью можно сохранить образ на жёсткий диск, а затем его использовать для создания загрузочного носителя. Так можно записать файл на флешку сразу, обходя процесс записи на винчестер.
- Переходим на официальную страницу Microsoft для загрузки Media Creation Tool, нажимаем ссылку «Скачать средство сейчас» и сохраняем файл на компьютер. На официальной странице щёлкаем «Скачать средство сейчас»
- Запускаем программу и принимаем условия её использования. Для работы с приложением соглашаемся с условиями
- Выбираем пункт о создании установочного носителя и снова жмём «Далее». Выбираем пункт о создании установочного носителя и нажимаем «Далее»
- На странице выбора языка можно оставить установки без изменений, так как они будут взяты из нынешней Windows. Оставляем архитектуру и переходим на следующую страницу
- Затем выбираем носитель и нажимаем «Далее». Ставим выбор USB-устройство
- Подтверждаем выбор накопителя и нажимаем «Далее». Стоит отметить, что после этого начнётся процесс форматирования носителя и последующей записи на него файлов системы. Соответственно, все старые данные будут с неё стёрты безвозвратно. Правильно выбираем носитель и нажимаем «Далее»
- Ожидаем, пока программа создаст загрузочный носитель, после чего его можно будет использовать. В зависимости от скорости интернета процесс может занять от нескольких минут до нескольких часов.
Видео: как создать загрузочную флешку программой Media Creation Tool
Как создать установочную флешку для Windows при помощи специальных приложений
Если у вас уже есть образ операционной системы, то использование утилиты Media Creation Tool нецелесообразно, так как она записывает файлы не с компьютера, а с серверов Microsoft. Это создаёт лишнюю нагрузку на сеть, кроме того, может быть очень дорого, если ваше подключение лимитное. Потому для записи загрузочных носителей лучше использовать утилиты сторонних разработчиков, что не навязывают свои продукты вместе с программами.
Программой UltraISO
UltraISO — это очень «древняя» программа для работы с образами. Она умеет практически всё: записывать и создавать образы с дисков, проводить изменения внутри ISO-файлов и многое другое.
- Диск восстановления Windows 7, как создать и использовать
- Скачиваем, устанавливаем и запускаем программу.
- В диалоговом окне внизу, при помощи древа директорий находим необходимый файл-образ системы и дважды по нему щёлкаем, чтобы сделать активным для программы. В древе директорий снизу открываем файл образ для работы
- Далее в панели сверху открываем вкладку «Самозагрузка» и выбираем элемент «Записать образ жёсткого диска». Во вкладке «Самозагрузка» выбираем элемент «Записать образ жёсткого диска»
- Настраиваем фильтр Disk Drive, чтобы убедиться, что программа выбрала корректный флеш-накопитель, затем нажимаем «Записать». Проверяем параметры накопителя и нажимаем «Записать»
- После форматирования флешки и записи файлов, загрузочный носитель пригоден к использованию.
Утилитой Rufus
Rufus — это приложение из нового поколения записывающих программ. Интерфейс утилиты упрощён до минимума: пользователю необходимо лишь выбрать файл-образ, накопитель и нажать кнопку для запуска записи.
- Скачиваем и запускаем программу с официального сайта.
- В фильтре «Устройство» выбираем подключённую флешку.
- Через интерфейс «Выбрать» задаём путь к файлу-образу. Затем нажимаем кнопку «Старт». Настраиваем параметры записи и форматирования флеш-диска, затем нажимаем «Старт»
The Ultimate Boot CD
Как и Hiren’s BootCD, UBCD устраняет неполадки в системах Windows и Linux с помощью множества полезных утилит. Целью UBCD является «объединение как можно большего количества диагностических инструментов в один загрузочный CD».
UBCD является абсолютно бесплатным для скачивания, поэтому будьте осторожны с любым сайтом, пытающимся взять с вас за это плату.
Knoppix
Невозможно иметь список дисков для восстановления без включения в него дедушки всех дисков: Knoppix. Этот Linux Live CD предоставляет полностью функциональную операционную систему.
Операционная система Knoppix включает в себя около 1000 пакетов программного обеспечения для сканирования, включая инструменты поиска неисправностей, аппаратного анализа, восстановления данных, браузеры, инструменты манипуляции изображениями и медиаплееры.
DVD версия Knoppix известна как «Maxi» и объединяет в себе более 2 600 различных программных продуктов в 4,7 ГБ. Большинство программ, входящих в оба пакета Knoppix, являются либо свободными, либо открытыми.
Спасибо, что читаете! Подписывайтесь на мой канал в Telegram и Яндекс.Дзен. Только там последние обновления блога и новости мира информационных технологий.
Также, читайте меня в социальных сетях: Facebook, Twitter, VK, OK.
Использование загрузочной флешки или установочного диска
В отличие от диска восстановления, загрузочную флешку или установочный диск операционной системы можно использовать на любой версии “десятки”. Также они могут пригодиться для реанимации ОС. Вот, что мы для этого делаем:
- Выполняем загрузку с носителя в BIS/UEFI или BootMenu.
- Выбираем в качестве язык установки – русский.
- В окне с кнопкой “Установить” кликаем по пункту “Восстановление системы”.
- Таким образом, мы окажемся в той же самой Среде восстановления, что и в рассмотренном выше варианте (через диск восстановления).
Респект за пост! Спасибо за работу!
Хотите больше постов? Узнавать новости технологий? Читать обзоры на гаджеты? Для всего этого, а также для продвижения сайта, покупки нового дизайна и оплаты хостинга, мне необходима помощь от вас, преданные и благодарные читатели. Подробнее о донатах читайте на специальной странице.
Есть возможность стать патроном, чтобы ежемесячно поддерживать блог донатом, или воспользоваться Яндекс.Деньгами, WebMoney, QIWI или PayPal:
Заранее спасибо! Все собранные средства будут пущены на развитие сайта. Поддержка проекта является подарком владельцу сайта.
Видео по теме
Хорошая реклама
В этой инструкции подробно о том, как создать диск восстановления Windows 10, а также о том, как использовать загрузочную флешку или DVD с установочными файлами системы в качестве диска восстановления, если возникла такая необходимость. Также ниже присутствует видео, в котором все шаги показаны наглядно.
Диск восстановления Windows 10 способен помочь в случае самых различных проблем с системой: когда она не запускается, стала неправильно работать, требуется восстановить систему, выполнив сброс (возврат компьютера в исходное состояние) или использовав заранее созданную резервную копию Windows 10.
Во многих статьях на этом сайте есть упоминание диска восстановления, как одного из инструментов решения проблем с компьютером, а потому и было решено подготовить данный материал. Все инструкции, имеющие отношение к восстановлению запуска и работоспособности новой ОС вы можете найти в материале Восстановление Windows 10.
— Advertisement —
Hello! Windows 10 continues to increase its market penetration share. In fact, it is currently the most popular desktop operating system. However, some nostalgic people still use Windows 7. This is not recommended as it represents a security risk. Also, from users of other platforms. For that reason, today we will give you a practical tutorial. Come with us to see, how to install Windows 10 step by step.
Prerequisites
An important aspect of Microsoft, is that it still allows to download the ISO of Windows 10 in a legal and safe way. In fact, the process is free and you only have to purchase a license later to validate the product. An important aspect of Microsoft, is that it still allows to download the ISO of Windows 10 in a legal and safe way. In fact, the process is free and you only have to purchase a license later to validate the product. The most recent Windows 10 disk image can be downloaded from here.

Once the ISO is downloaded, you only have to create a Windows installation media. This is a procedure that we detail in this tutorial.
Setting up the computer to start the installation.
Every time we turn on the computer, it starts loading the installed operating system. It is usually loaded on the hard drive. Consequently, the system is predefined to boot from this device. However, in order to start the installation of Windows 10, it is imperative that the system is booted from the USB. Depending on the manufacturer, it will be necessary to enter the BIOS or UEFI to set this option. Also, some computers set to press a key to select a temporary boot medium. Please consult the manufacturer’s documentation to be sure.
Once the system starts loading, you must press any key to start the installation.

Preparing the installation of Windows 10
After a few seconds of loading, you will see the installation welcome screen. Once there, you must select the language to install, the currency and time format and the keyboard to use.

On the next screen please click on install now.

The wizard allows you to enter the product key at once. If not, you can continue the installation and activate the product later.

Now it is time to select the edition of Windows 10 to be installed.

Please accept the license.

Microsoft allows you to upgrade to a computer that is running some Windows system. But in this case, we will make a clean installation. With this in mind, select the option to Install Windows only. Please note that this will remove any files or apps you have installed. Go ahead and check these options for backing up in Windows 10.

Selecting the partition to install Windows 10
The wizard then displays the list of disks and partitions present on the computer. Consequently, a wide range of options is possible. For example, create, delete, extend or format partitions. However, in this example we will use the entire hard disk.

Installing Windows 10 on the selected partition
After selecting the partition, the operating system installation process will begin. This process will take a few minutes and will depend on the speed of the computer. In addition, the computer will reboot one or more times. Don’t worry, this is perfectly normal.

After a few moments, the assistant will start to start the services and prepare the devices.


After a few minutes the configuration of Cortana will begin. This is the virtual assistant that Microsoft introduces to Windows systems.


Now it’s time to set the region and type of keyboard for Windows. Optionally you can add a second keyboard layout.


In the next screen you must establish if you will use the system for personal or organizational use. This time we will use a personal account

Then enter your outlook account and password.


Optionally you can create a 4 digit pin to authenticate


The wizard offers to configure the feature your phone. At the moment, skip this option.

Now please set the location to save the files. By default, Windows will set OneDrive as the save method. However, I recommend that you start saving the files to the computer.

Finally, set general privacy options. You can calmly examine them one by one or go ahead. Since these options can be modified later.

After a few minutes, Windows will be ready for use.

Ultimately we have seen how to install Windows 10 step by step. I hope I have been clear enough. If you have any questions, let us know in the comment section. We are also open to any suggestions for topics you would like us to develop. See you later!