Recently we posted an exclusive tutorial for customizing Windows 7 System Properties:
Ultimate Guide for Customizing Windows 7 System Properties
In the above mentioned tutorial, we told you about a system file “systemcpl.dll” which contains the code of System Properties UI. You can edit the code and change or remove desired items in Windows 7 System Properties.
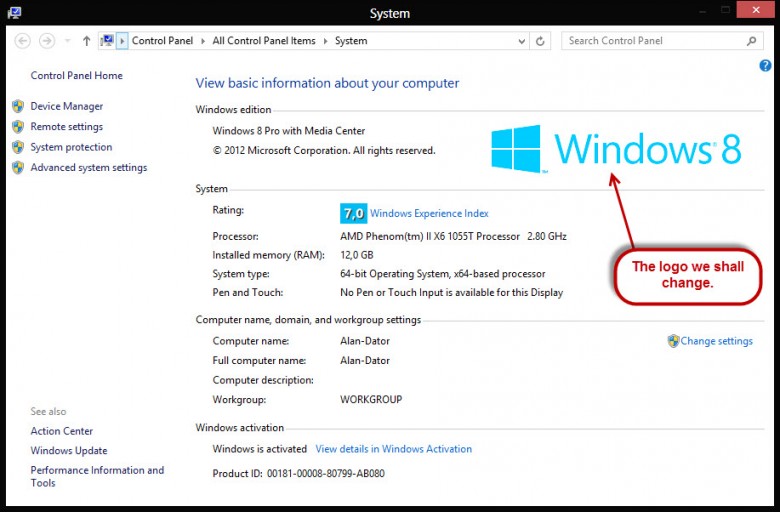
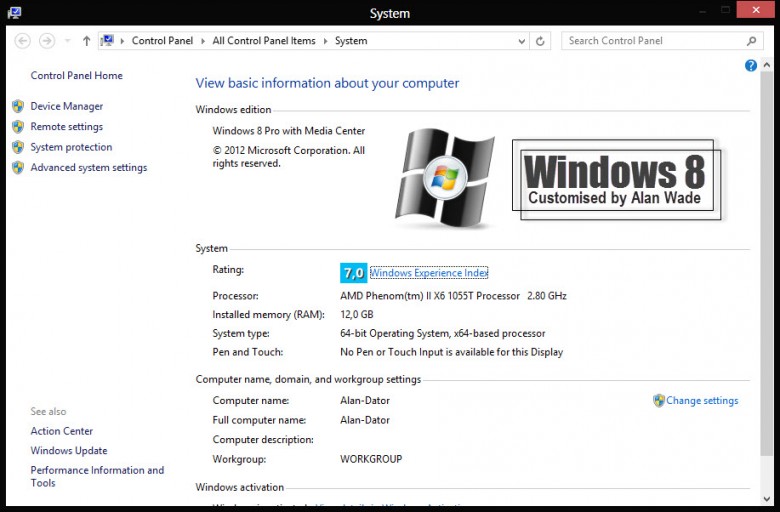
Today in this tutorial, we are going to tell you how to change or remove Windows logo from System Properties in Windows 7. Windows logo in System Properties is shown at the right-side of window in “Windows edition” section as shown in following image:
![]()
If you want to change the logo or remove the logo, this tutorial will help you.
You can customize or remove Windows logo in System Properties using following 2 methods:
- METHOD 1: By editing shellbrd.dll file
- METHOD 2: By editing systemcpl.dll file
First method will allow you to remove as well as change Windows logo but the second method will only allow you to remove Windows logo from System Properties.
We have tested these methods in Windows 7 but they should also work in Windows Vista and Windows 8.
METHOD 1: By Editing Shellbrd.dll File
“shellbrd.dll” file contains the Windows logo image which is shown in System Properties window. This file is present in “%windir%BrandingShellBrd” folder. Here %windir% represents “Windows” directory which can be found in the system drive where Windows is installed. In most of the cases its C:Windows.
1. First copy shellbrd.dll file from “ShellBrd” folder to some other location for example Desktop.
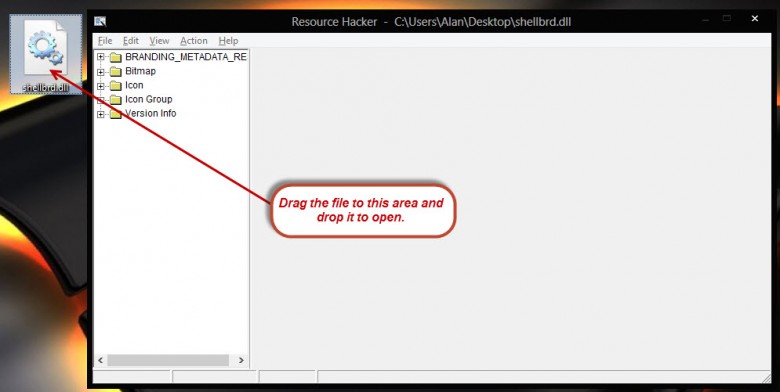
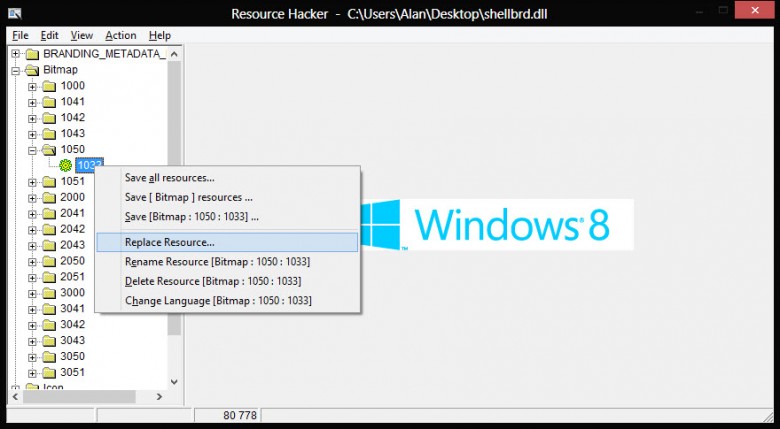
2. Now open the new file in Resource Hacker.
3. The Windows logo is stored in the file as a 32-bit BITMAP image in following locations:
Bitmap -> 1050, 2050 and 3050
![]()
4. If you want to replace the Windows logo with your own desired logo, replace the above mentioned 3 bitmaps with your desired 32-bit BMP file.
If you want to remove Windows logo, simply delete the above mentioned 3 keys by right-click on the key and select “Delete Resource” option.
PS: If you don’t know how to replace or remove resources in a file, check our exclusive Resource Hacker tutorial to learn more.
5. That’s it. Save the file and replace original file with it as mentioned in Step 7 of this tutorial.
METHOD 2: By Editing Systemcpl.dll File
You can also remove Windows logo from Windows 7 System Properties window by editing systemcpl.dll file and removing the code.
1. First open systemcpl.dll file in Resource Hacker and go to UIFILE -> 1001 key as mentioned in steps 1 and 2 of following tutorial:
Ultimate Guide for Customizing Windows 7 System Properties
2. To remove Windows logo, you just need to delete line number 133 containing following code:
<element id=”atom(WindowsEditionLogo)” layoutpos=”right” accessible=”true” accrole=”graphic” accname=”resstr(301)”/>
![]()
Or you can replace layoutpos=”right” with layoutpos=”none” in the above mentioned line to hide the logo.
3. That’s it. Click on “Compile Script” button and save the file.
4. Now replace original file with your new file using the step 7 of this tutorial.
That’s it. You’ll not need to restart or log off. Just open System Properties and get ready to see the desired changes.
You are here: Home » Windows 7 » How to Change or Remove Windows Logo from Windows 7 System Properties?
If you like to customize your Windows 7 or 8 computer then why stop when you get to the System Properties window? With a little imagination you can change the logo to any 32bit bitmap image or if you just want to remove the Windows logo you can do that also.
To be able to do this, we shall be editing a system file which we will have to take ownership of and backup. You will also need two little apps – Resource Hacker and PNGtoBMP32, the first app to hack the system file and the second to change a png image to 32bit bmp. The download links are here: Resource Hacker & PNGtoBMP32.
This tip will work in both Windows 7 and Windows 8. The instructions in this article are written for Windows 8 and the method may vary a little for Windows 7.
The default Windows 8 system properties logo. To open System Properties from your Start screen type Control and click on Control Panel then scroll down to and click on System.
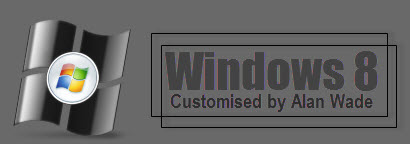
Next you need to do is design a png image that you want to use as your logo or just download one from the many sources available on the net. I say a png image because a bitmap by default is 24bit. When an 8bit alpha channel is added it becomes a 32bit but not so easy to make without Photoshop. The image can have any name you choose to give it.
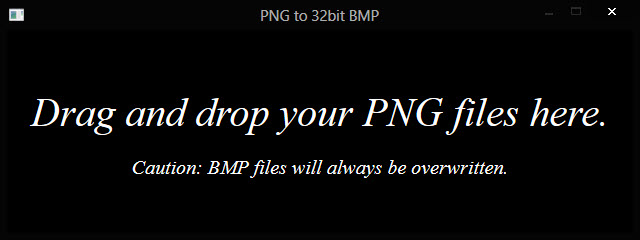
Next run the PNGtoBMP32 app. A thing to note here is to make sure both the PNGtoBMP32 app and the png image are in the same location, that way you can find the converted file very easily.
With the app open, just drag and drop your png image to where the dialogue tells you, your 32bit bmp is created instantly.
Should you want to double check, right click on the bmp and select Properties… the information under the ‘Details’ tab will then show you that it is the right bit depth.

Switch to your desktop if you are at the Start screen and navigate your way to the Windows folder (normally on your C drive) then look for a folder called Branding, click on that to open it.
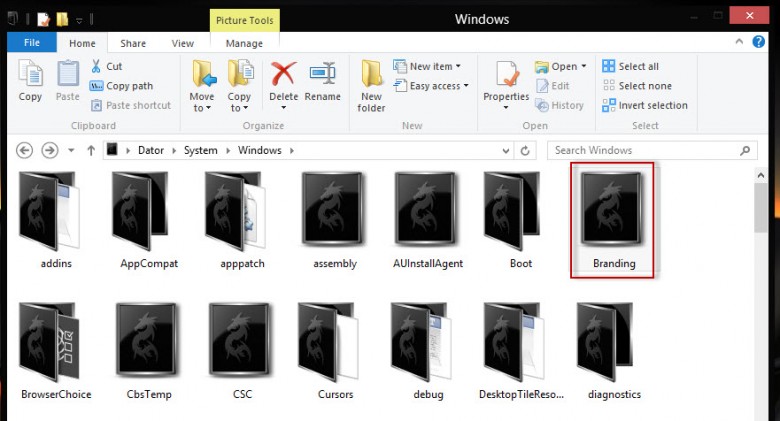
You will now see two folders, click on shellbrd to open it.

In the folder you will see a dll file called shellbrd, right click on it and select Properties.
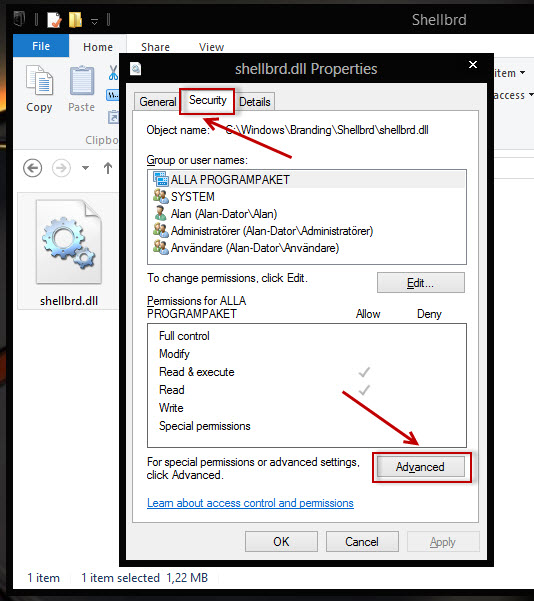
Select the Security tab then click on the Advanced button at the bottom.
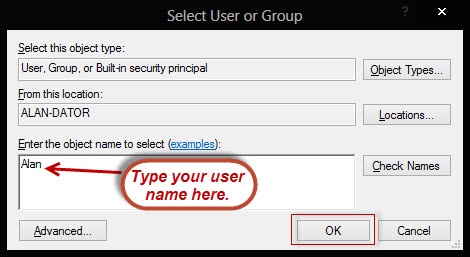
At the top of the window that opens click on Change.

Now type your user name into the text box and click on OK and another window will open. You may need to use an Admin account.
You will now be back at the Advanced Settings window again. Click OK to close the Window and now you are back to Properties window.
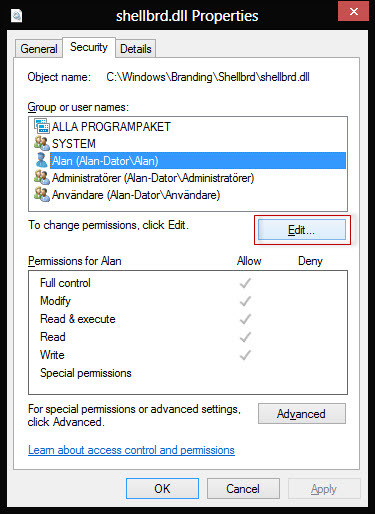
Click on the Edit button then highlight your user name and put a check mark in the Full Control check box and click OK.

You may get a warning at this point, just accept it and you have ownership of the shellbrd.dll file with full permissions.
Copy the shellbrd.dll file to your desktop by right clicking on the file and selecting copy then paste onto the desktop. Open Resource Hacker then just drag and drop the shellbrd.dll file into the blank area of Resource Hacker and it will load the files rescources.
There are THREE keys you need to edit which are all located under Bitmap, the first is at folder 1050, right click on the key 1033

Select Replace Resource.
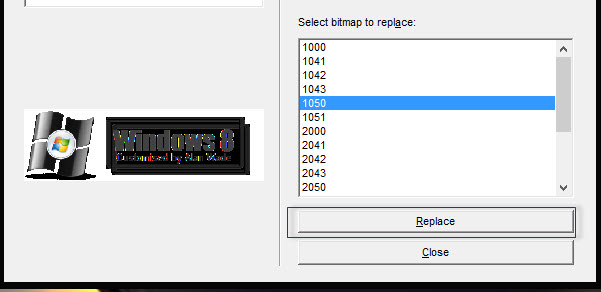
In the window that opens click on Open file with new bitmap and navigate to your 32bit bmp image. Click on the image then click on Open, now click on Replace.

Don’t worry if your image looks a little distorted or discolored, that’s the alpha layer and it will present itself properly.
Do the same in folders 2050 and 3050, the key numbers are the same.
Click on File then Save and Resource Hacker will save the newly hacked file and a copy of the original which will be aptly named shellbrd_original.dll.
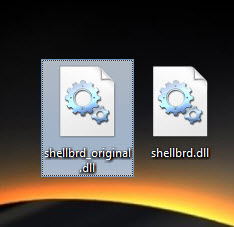
Make sure you have this backup file! If you don’t then make another copy from the original file in the shellbrd folder and save it somewhere other than your desktop.
Close Resource Hacker.
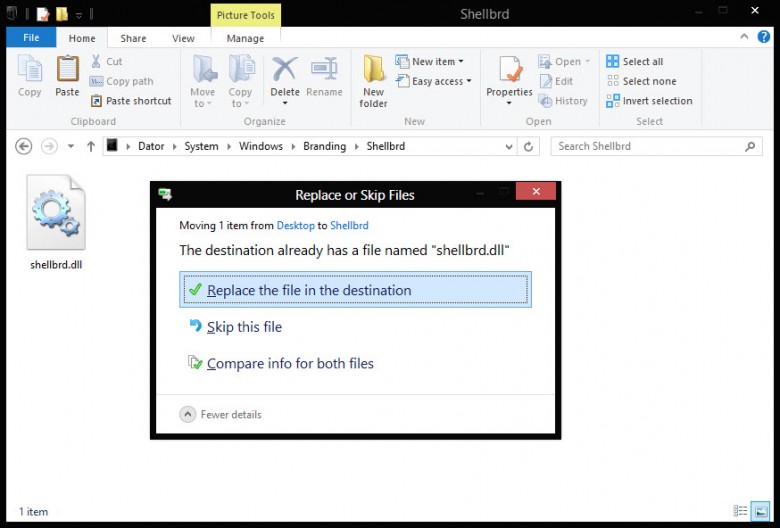
Drag the file shellbrd.dll from your desktop and drop into the shellbrd folder. Select Replace the file in the destination when asked then close the window.
Open System Properties again and check your work!
If you want to delete the logo and leave the area blank then instead of replacing the images in folders 1050, 2050 and 3050 right click on the key 1033 and select Delete Resource instead. This is quite a lengthy article but it took a lot longer to write than what it takes to actually make the changes.
Enjoy your customized System Properties window!
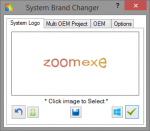
System Brand Changer — данное средство позволяет быстро и просто поменять логотип установленной операционной системы Windows, на компьютере пользователя. Программа имеет минималистический интерфейс, с минимально возможным количеством элементов управления. Несколько кнопок в приложении позволят буквально несколькими нажатиями мышки установить свой собственный логотип.
Для того, что бы начать пользоваться данным инструментом, пользователю, даже не потребуется инсталлировать данное ПО в систему. Достаточно просто запустить исполняемый файл, который предварительно должен быть, конечно, загружен на диск компьютера и тут же мы видим небольшое окно с интуитивно, но понятным интерфейсом, не смотря на отсутствие русского языка в нем.
Нажав на прежний, существующий логотип, в главном окне System Brand Changer, указываем на предварительно подготовленный графический файл, то есть изображение тогою, что мы хотим видеть как бренд. Далее давим на кнопку «применить», которую автор сделал в виде галочки и все готово — системное лого сменено. Кроме того, программа позволит поменять данные OEM (Original equipment manufacturer)— оригинального производителя вашего оборудования.
Немногочисленные опции позволят установить размер изображения. Так, пользователь сможет установить размер по умолчанию, оригинальный размер и свой собственный. К основным элементам управления и функциям можно добавить возможность произвести «Reset», то есть сброс параметров по умолчанию и возможность сохранить изображение в формате PNG.
Название приложения:
System Brand Changer
Операционная система:
Windows XP — 10
- 100
- 1
- 2
- 3
- 4
- 5
 и написали 0 комментариев.")

Похожие публикации
Tuesday, December 10, 2013
Windows 7 System Properties Logo Changer 0.6
Software & Tools
Tweet This
Bookmark this on Delicious
Windows 7 System Properties Logo Changer is a free tiny portable tool
that allows you to change your system properties logo in Windows 7.

———————————
———————————
Posted by
Windows Customs
at
10:05 PM
![]()
2
comments:
-

manpreet singh
said… -
plz send me software system properties changer
-
August 19, 2019 at 7:16 PM

-
manpreet singh
said… -
plz send me software system properties changer
-
August 19, 2019 at 7:16 PM
Post a Comment
Newer Post
Older Post
Home
![]()
![]()
![]()
![]()
![]()
Categories
-
7tsp Icon Pack
(138) -
AIMP Skins
(64) -
Animation Wallpaper Engine
(5) -
Boot Screen
(3) -
Collection Icons
(78) -
Cursor Skins
(32) -
DreamScene
(72) -
IDM Themes
(5) -
iPack Icon Pack
(107) -
Logon Screen
(90) -
Operating System
(28) -
Rainmeter Skins
(68) -
RocketDock Skins
(51) -
Software & Tools
(105) -
Start Orb Skins
(16) -
Third-Party Theme Patcher
(5) -
Wallpaper
(181) -
Winamp Skins
(24) -
WinRAR Themes
(34) -
WMP Skins
(18)
Visitor
Facebook Like
Followers
Support
- Facebook Page
- YouTube Channel
Archive
Popular Posts
-
How To Install Third-Party Theme On Windows 10 1703, 1709, 1803 & 1809
IF YOU NEVER USE THE CUSTOMS THEME BEFORE, YOU MUST PATCH YOUR SYSTEM FIRST!!! Please check your Windows Version first. Down…
-
Theme Resource Changer
Operating System: Windows 7 The days of editing dll’s to change themes are now gone…. Theme resource changer installed once on…
-
UltraUXThemePatcher
UltraUXThemePatcher v4.3.2 UltraUXThemePatcher modifies your system files so that third party themes can be used. You can download Windows…


Translate
Ever wanted to change the default windows logo in windows 7 system properties with your own custom one or with Apple’s logo. Its human nature that with time he tends to get bore with old things and same is happen with Windows users. Every day you see same windows interface with same folder icons, Windows themes, Wallpapers and default windows icons. But not many people think like that. They produce small utilizes for us so that we can customize the windowswith time to time. This will surely produce interest in windows and hence you can enjoy our work.
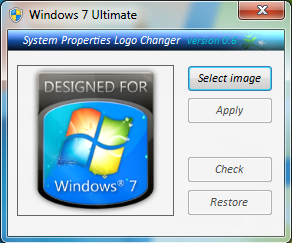
When you press windows logo + pause/break button, you will see Windows system properties box with all the information and default orb style logo. The way we are going to change the default orb style logo with our custom one is by using a small utility named as Windows 7 System Properties Logo Changer. This is a free utility and it changes the windows 7 properties logo with the help of some registry tweak. This software is fully test and used by us so don’t worry if you have any concerns.
![]()
How to Change Windows 7 System Properties Logo:
1. All you have to do is to download Windows 7 System Properties Logo Changer from the link given at the end of this post.
2. The file is in Zip format so you need Winzip in order to extract it.
3. After unzipping Right click on the Execute-able file and select “Run as Administrator” from the menu.
4. Now create your own logo or choose from a pre-build logos and click Apply button.
5. After that click the Check button or press windows logo + pause/break button to see the effect.
6. Don’t worry if you dont like the new logo you can always go back to the original log by pressing the Restore button.
Download: Windows 7 System Properties Logo Changer
