
Windows может не получать обновления, в том числе и устраняющие критические уязвимости в системе безопасности, по нескольким причинам. В этой статье мы рассмотрим все возможные причины и расскажем как устранить их.
1. Включите службу обновления Windows
Последние обновления Windows могут не загружаться на компьютер из-за того, что служба, отвечающая за их загрузку выключена. Первым делом необходимо убедиться в том, что она активна.
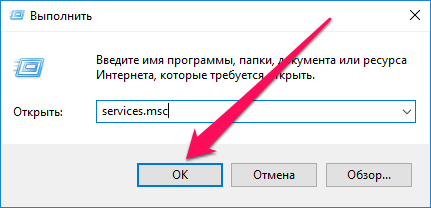
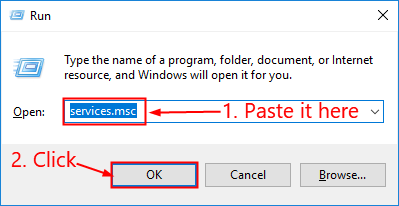
Шаг 1. Нажмите сочетание клавиш Win + R, введите в открывшемся окне команду services.msc и нажмите Enter.
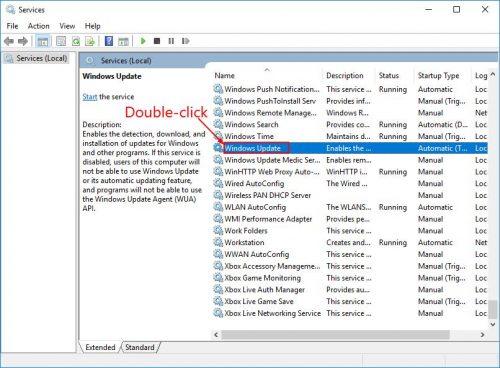
 Шаг 2. Найдите в списке служб строчку «Центр обновления Windows».
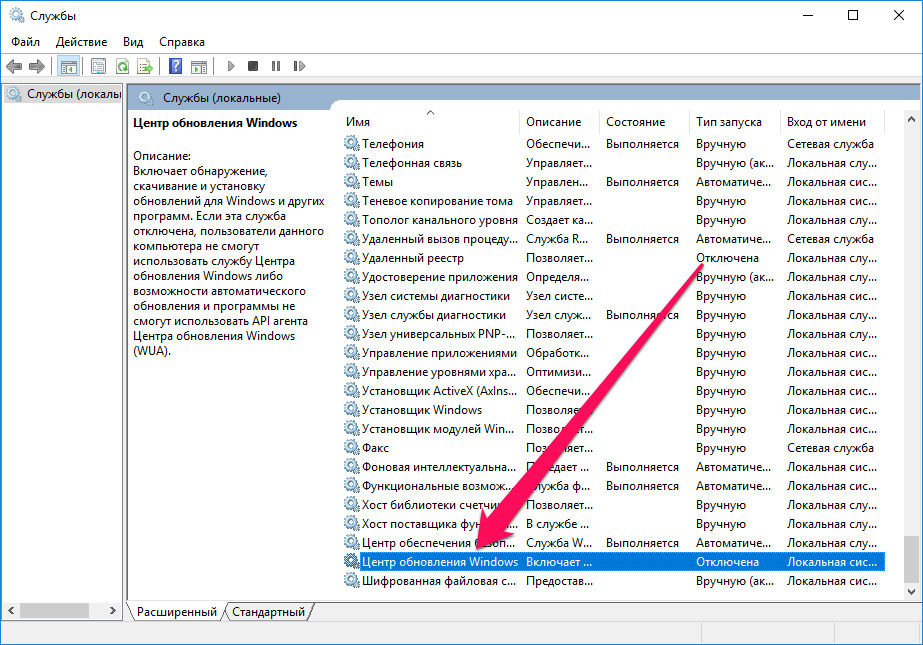 Шаг 3. Дважды щелкните по ней левой кнопкой мыши, после чего в графе «Тип запуска» выберите пункт «Автоматически».
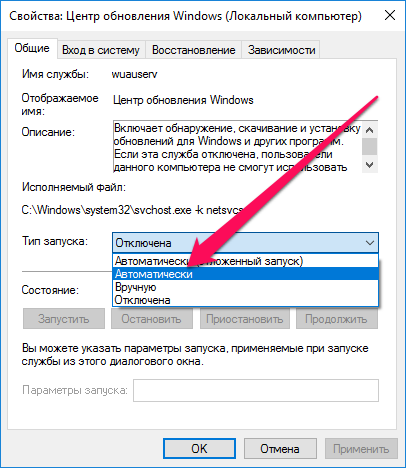 Шаг 4. Нажмите «Применить» для сохранения изменений.
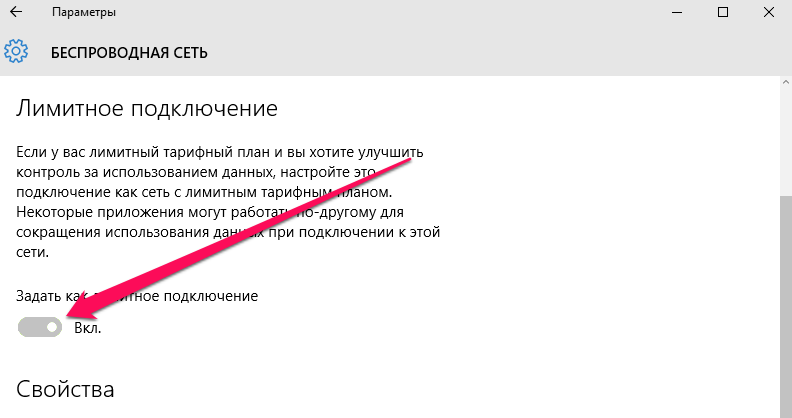
2. Уберите лимит с беспроводного подключения
Примечание: актуально только для Windows 10.
Данный способ подойдет только тем пользователям, которые подключаются к Сети посредством беспроводного соединения. В таком случае на беспроводное подключение может быть установлен лимит, запрещающий автоматическое обновление Windows. Для начала получения обновление и их последующей установки лимит необходимо снять.
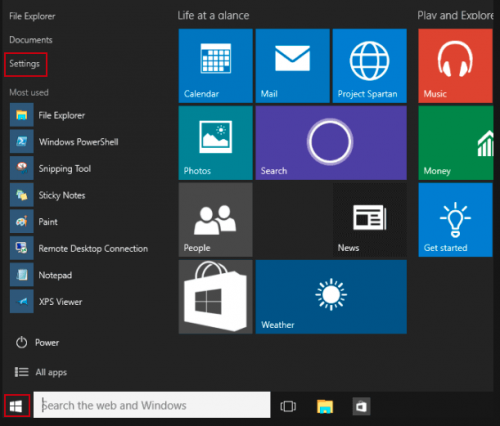
Шаг 1. Перейдите в меню «Пуск» и нажмите на «Параметры».
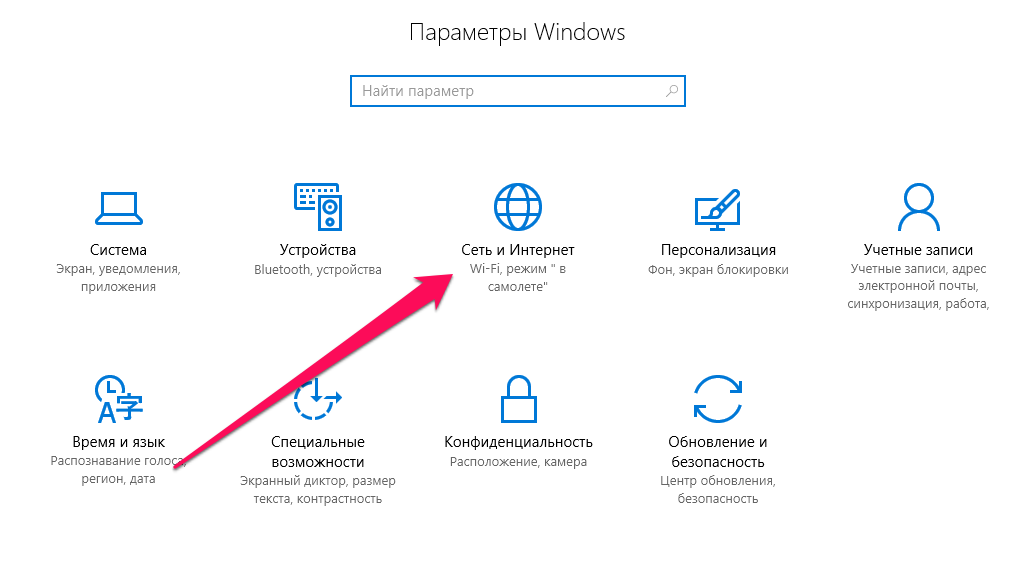 Шаг 2. Выберите раздел «Сеть и Интернет» → «Беспроводная сеть».
Шаг 3. Переведите переключатель «Задать как лимитное подключение» в неактивное положение.
3. Проверьте параметры групповой политики
С большой долей вероятности первые два способа вновь позволят вам получать обновления для своего компьютера под управлением Windows. Однако если этого не произошло, «копнуть» необходимо еще глубже. В сторону групповой политики системы.
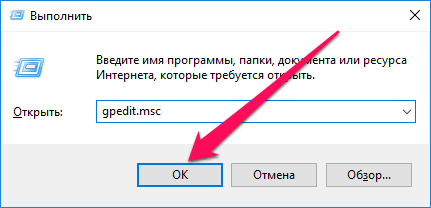
Шаг 1. Нажмите комбинацию клавиш Win + R, введите в открывшемся окне команду gpedit.msc и нажмите Enter.
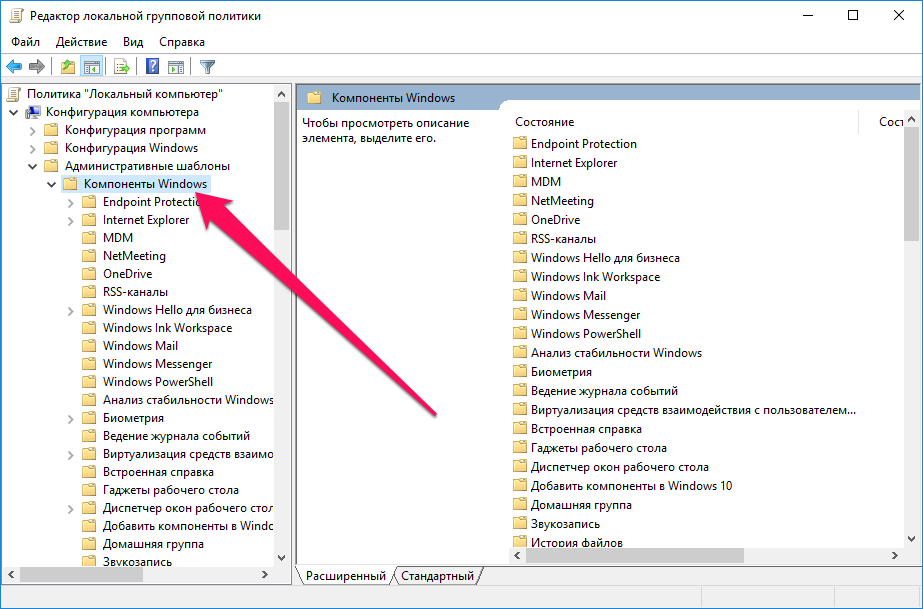
 Шаг 2. В открывшемся окне управления локальной группой политики перейдите выберите раздел «Конфигурация компьютера» → «Административные шаблоны» → «Компоненты Windows» → «Центр обновления Windows».
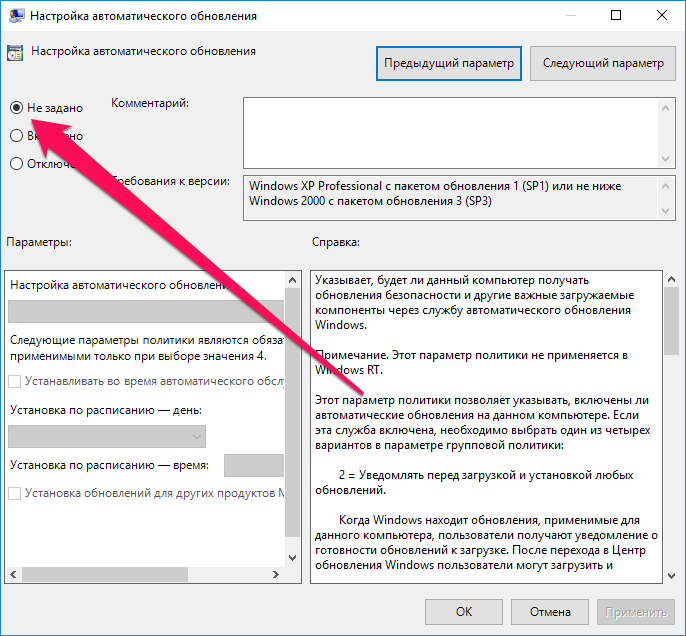
 Шаг 3. Дважды щелкните на параметр «Настройка автоматического обновления» в правой части утилиты.
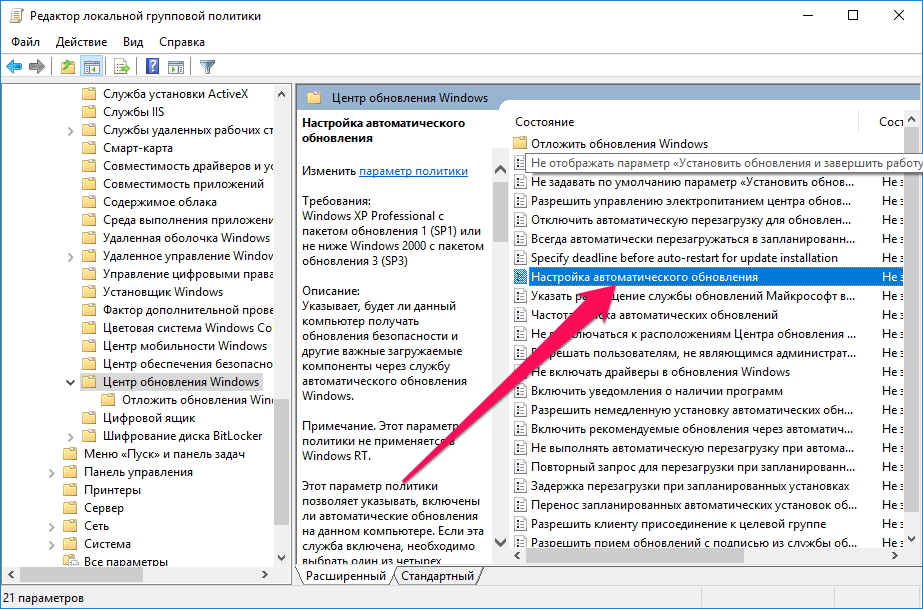 Шаг 4. Поставьте галочку на пункте «Не задано».
 Шаг 5. Нажмите «Применить» для сохранения изменений.
4. Проверьте файл hosts
Еще одной причиной по которой Windows не может загрузить последние обновления может являться блокировка серверов Microsoft в файле hosts. Проверить его очень просто.
Шаг 1. Перейдите в папку WindowsSystem32driversetc.
Шаг 2. Откройте файл hosts в любом текстовом редакторе, запущенном от имени администратора.
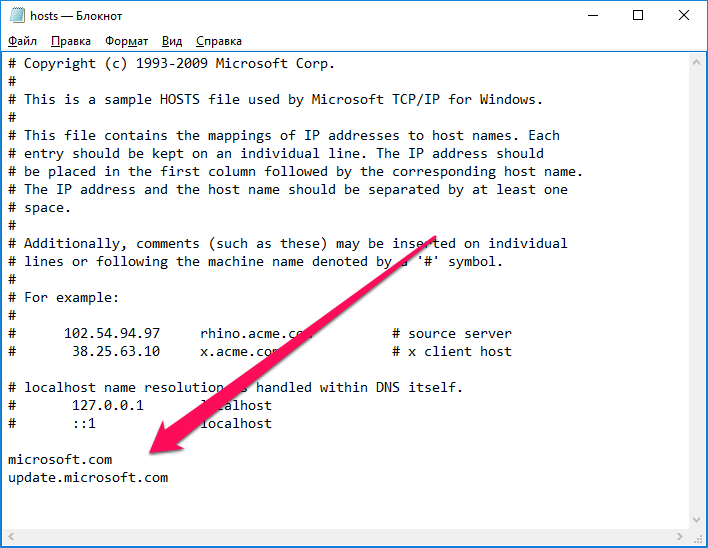 Шаг 3. Проверьте наличие в тексте файла hosts строчек, содержащих названия «windows» и «microsoft». Если такие есть, удалите их.
Шаг 4. Сохраните обновленный файл hosts.
Смотрите также:
- Как отключить автоматическое обновление Windows 10
- Как отключить DEP в Windows
- Бесплатный антивирус для Windows — какой выбрать
✅ Подписывайтесь на нас в Telegram, ВКонтакте, и Яндекс.Дзен.
INTRODUCTION
The Windows Update Web site provides security updates for Microsoft Windows operating systems. The Microsoft Update Web site provides these updates in addition to updates for other Microsoft programs, such as Microsoft Office. By default, your Microsoft Windows 2000-based, Microsoft Windows Server 2003-based or Microsoft Windows XP-based computer will access the Windows Update Web site. If you would like to receive updates for other Microsoft programs please perform the steps that are listed below.
More Information
I am currently using Windows Update. How can I access Microsoft Update?
To use Microsoft Update instead of Windows Update, follow these steps:
-
Visit the following Microsoft Web site:
http://update.microsoft.com/microsoftupdate
-
Click Start Now.
-
On the Review the license agreement page, click Continue.
-
Click Install.
Note You may not be prompted to install the Microsoft Update software if this software is already available on the computer.
After you successfully install the software, a Microsoft Update shortcut is added to the All Programs menu on the Start menu.
I am currently using Microsoft Update. How can I access Windows Update?
To stop using the Microsoft Update Web site and start using the Windows Update Web site, follow these steps:
-
On the Microsoft Update site, click Change Settings.
-
Scroll down the page, click to select the Disable Microsoft Update software and let me use Windows Update only check box, and then click Apply changes now.
-
You receive the following message:
Windows Automatic Updates will not be able to deliver updates from Microsoft Update Service.
Are you sure you want to continue?Click Yes.
For more information about a related topic, click the following article number to view the article in the Microsoft Knowledge Base:
327838 How to schedule automatic updates in Windows Server 2003, in Windows XP, and in Windows 2000
Need more help?
Microsoft has rolled out the Windows 11 preview build to the Insiders with a lot of new features and upgrades over its predecessor. However, there is no straightforward way to stop or turn off the automatic updates in Windows 11. So if you want to prevent your Windows 11 from getting updated, you might prefer to use a third-party tool.
Windows 11/10 offers less control over the updating behavior of the operating system than previous versions of Windows. You can not permanently turn off Windows Updates using the Control Panel or Settings app in Windows 11/10. Once you are connected to the internet, it checks for updates periodically and automatically installs if they find any, whether you like it or not. Sometimes a buggy update changes the whole settings, or some of the features stop working. If you want control over the update process, you can disable the Windows Update service. This requires you to open the Services manager, locate the Windows update service and change its startup parameter and status. You would then have to enable the service again whenever you want the operating system to check for updates. Although you can enable or disable Windows update from “services.msc,” it is a pretty convenient way for beginners.
Windows Update Blocker for Windows 11/10
“Windows Update Blocker” is a freeware tool from sordum that helps you quickly enable or disable Windows updates. This free tool allows you to completely disable or enable Automatic Updates on your Windows system with just a click. This is a portable utility that means that you can run it without installing it on your PC.
To enable or disable Windows Update on Windows 11/10, download this freeware application and extract its content using WinRAR or other archiver tools.
Note: A separate file is available for 32-bit and 64-bit operating systems, making sure you download the correct file.
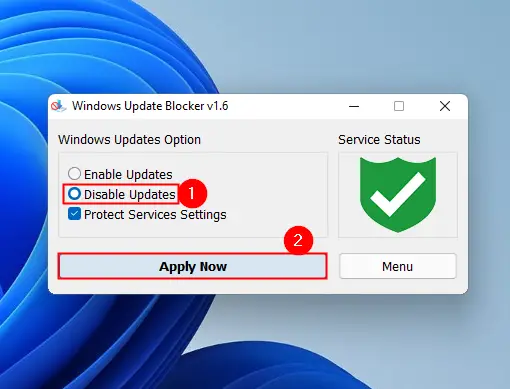
Now, double-click on the executable file to run it. To disable automatic updates, select the Disable Updates and then click on the Apply Now button.
Now, you will notice “Service Status” is turned red, which means you have successfully blocked the Windows Update service. To enable the Windows automatic update, rerun the app and select the Enable Updates option. Then click on the Apply Now button.
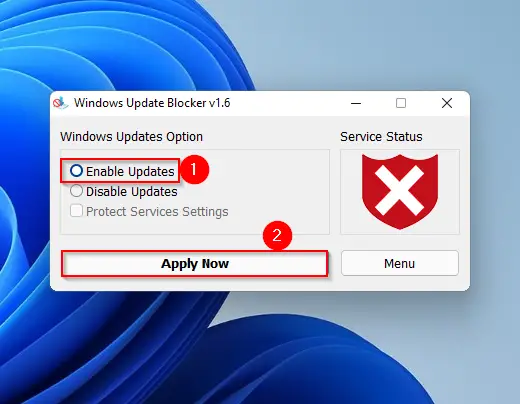
Now, the “Service Status” will turn green, which means automatic update successfully enabled.
Download Windows Update Blocker
Although Windows Update Blocker is compatible with Windows 10, Windows 8.1, Windows 8, Windows 7, Windows Vista, Windows XP (3264-bit), in our test, it is working fine on Windows 11, too. You can download this free and portable tool from its official website.
Those who don’t prefer to use a third-party tool can use the built-in methods. The inbuilt ways to disable the Windows 11 automatic update may be long, but it is still effective.
How to Permanently Disable Automatic Windows Updates through Windows Registry?
Windows Registry is an effective tool that allows configuring a lot of policies. This is basically for advanced users who know about the registry. A wrong modification in the registry values may make your Windows unbootable; hence before proceeding with steps, we recommend taking a full backup of the registry and creating a system restore point.
Windows Registry is the centralized database where Windows stores all its configurations and settings, including structures related to the update process. By altering the Registry settings, we can easily disable Windows Update permanently.
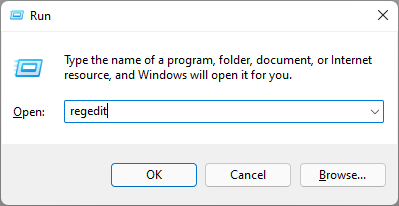
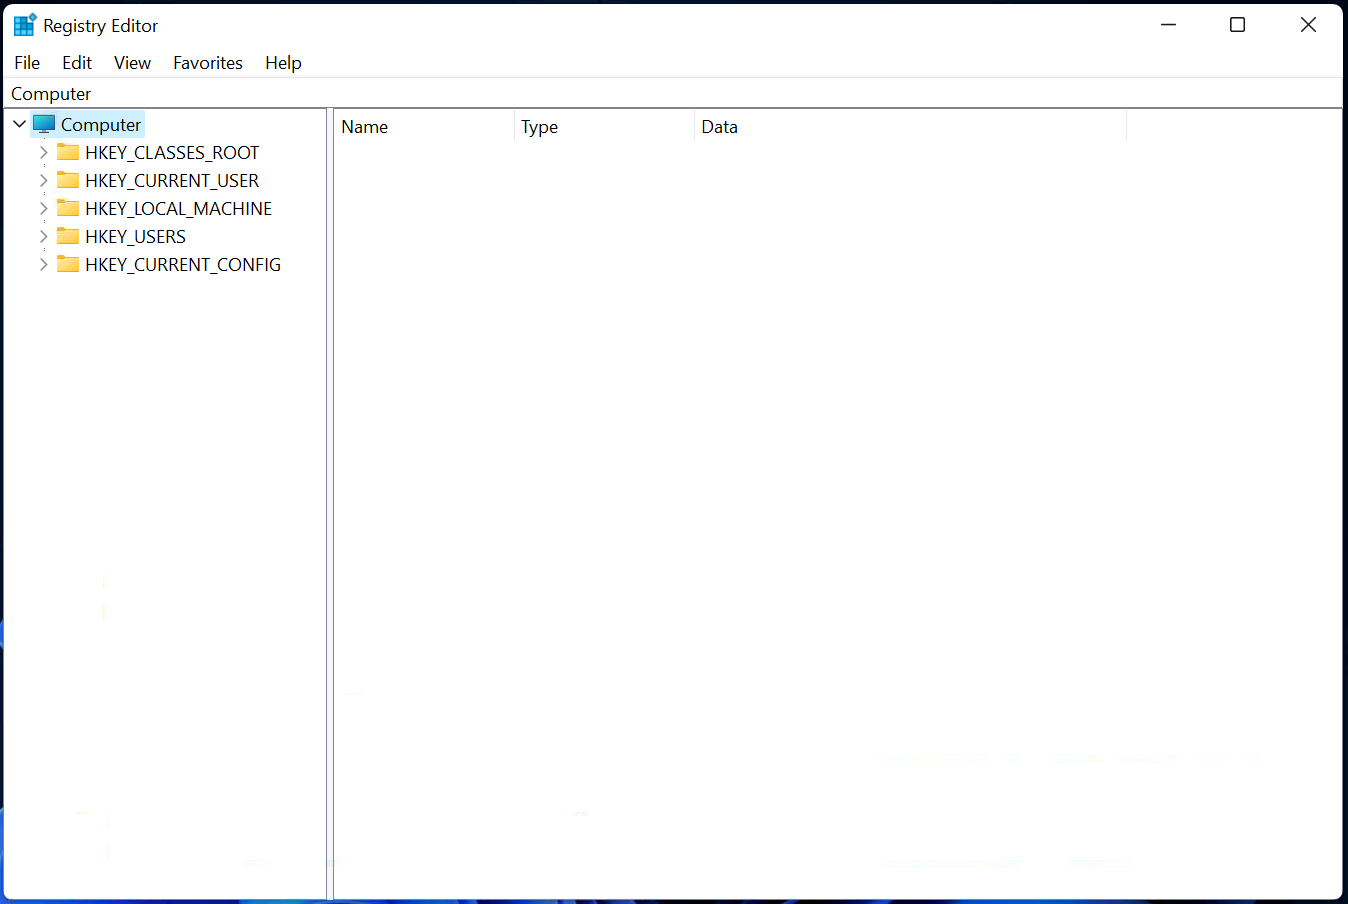
Step 1. Open the Registry Editor.
To open it, first press the Windows + R keys from the keyboard to access the Run dialog box. In the Run box, type regedit and then hit Enter from the keyboard.
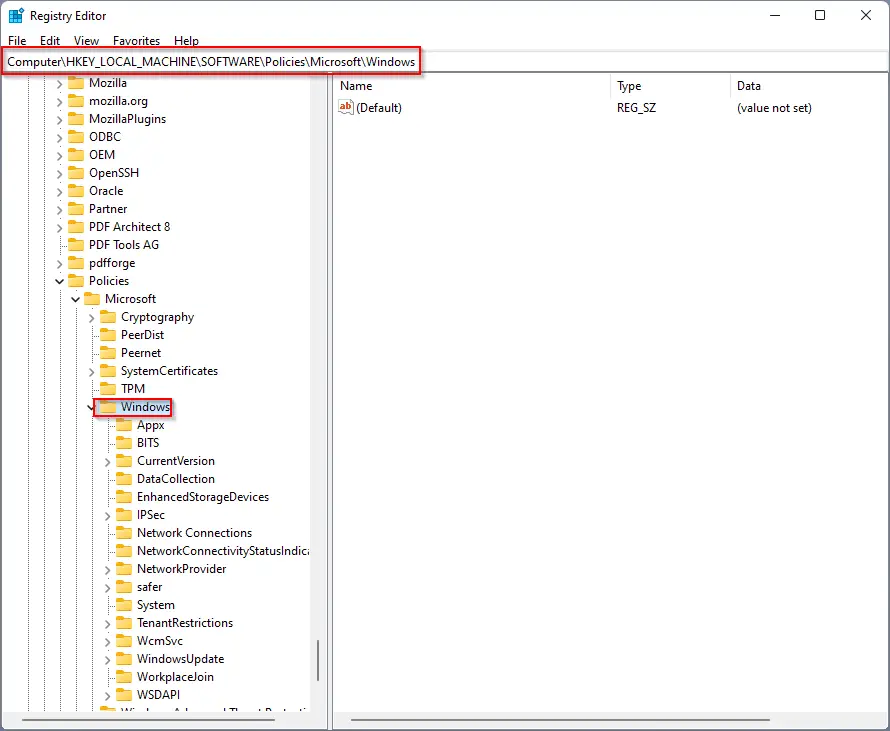
Step 2. In the Registry Editor window that opens, navigate to the following key from the left side pane:-
HKEY_LOCAL_MACHINESOFTWAREPoliciesMicrosoftWindows
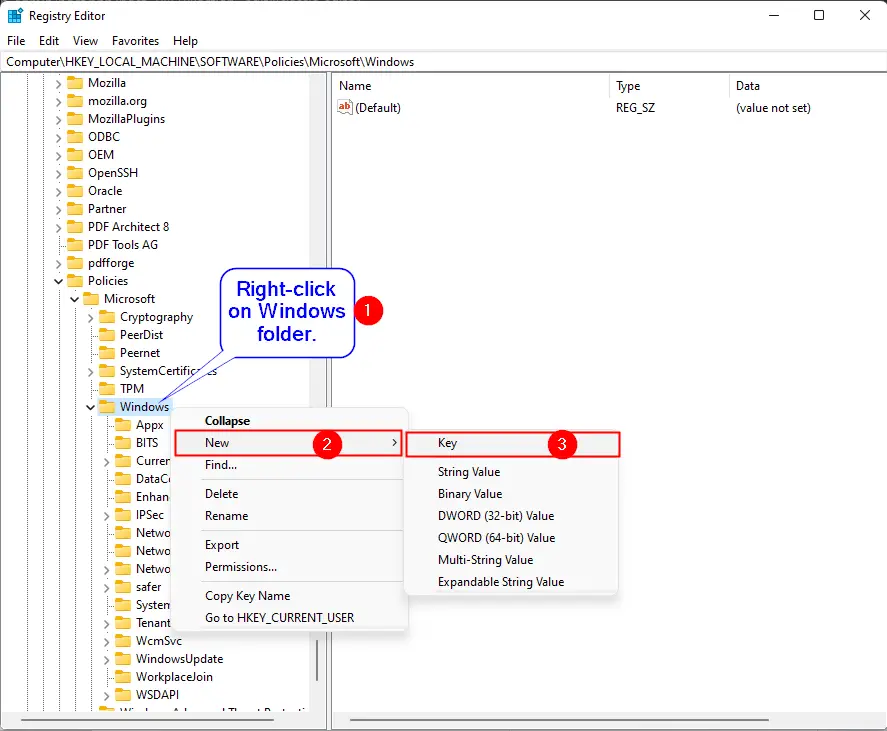
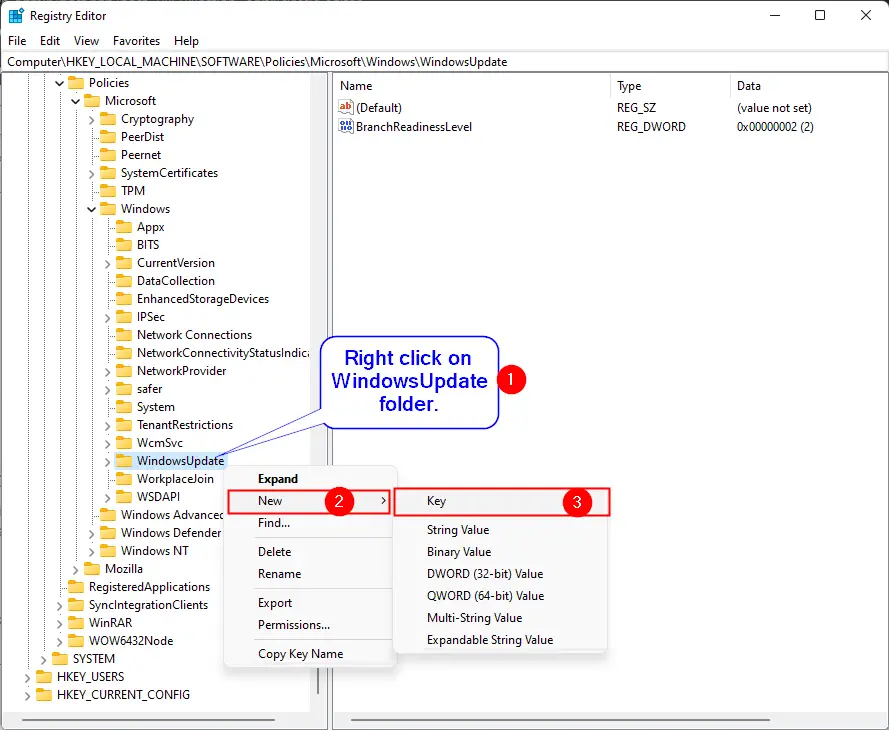
Step 3. Then perform a right-click on the “Windows” folder, select the New > Key options from the context menu. Name the newly created key as WindowsUpdate. If on your Windows PC, this key already exists, you can skip this step.
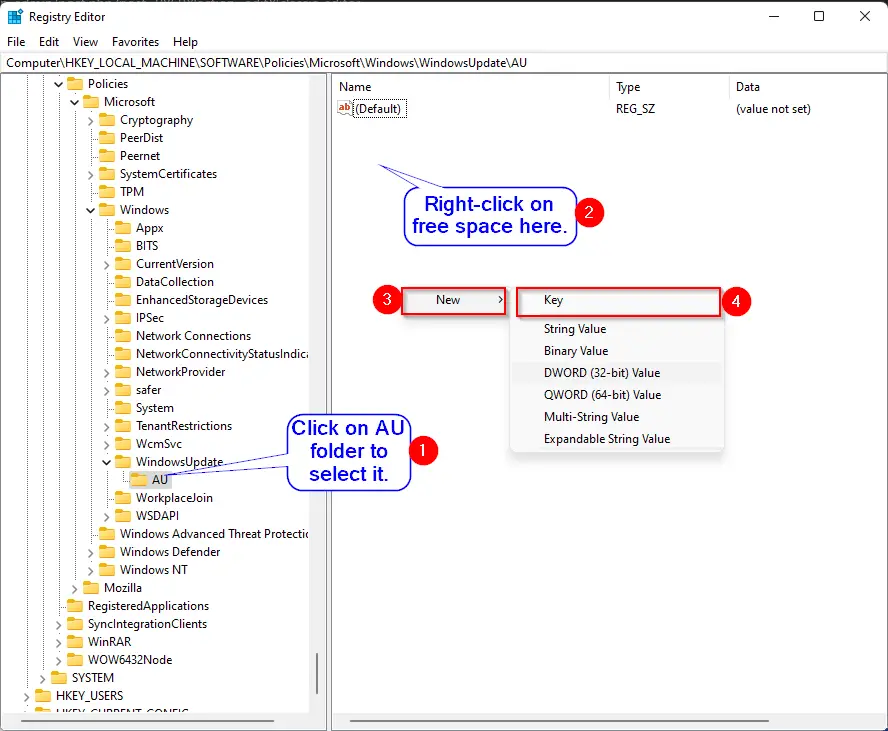
Step 4. Now, right-click on the “WindowsUpdate” key and then select the New > Key option. Name the newly created key as AU. You can skip this step also if the AU folder already exists under “WindowsUpdate.”
Step 5. Now select the AU folder by clicking on it, and on the right side pane, right-click on free space and select New and then DWORD (32-bit) Value option. Name it to NoAutoUpdate.
Step 6. Now double-click on “NoAutoUpdate” DWORD on the right side pane and change its value from “0” to “1.”

Step 7. Click OK.
Step 8. Reboot your PC.
Once you execute the above steps, the automatic Windows update process is disabled on your computer. However, you can always check updates manually from the Settings > Windows Update.
In the future, if you wish to continue with automatic update of Windows 11, open the registry editor and then navigate to the following key:-
ComputerHKEY_LOCAL_MACHINESOFTWAREPoliciesMicrosoftWindowsWindowsUpdateAU
Now, double-click on the NoAutoUpdate on the right side pane of the “AU” folder and set its “Value data” to “0.” That’s it. Windows automatic update is enabled on your computer.
How to Enable or Disable Automatic Windows Update using Command Prompt?
Using Command Prompt, you can enable or disable the automatic Windows update. To do that, use the following procedures:-
Step 1. Open the elevated command prompt.
Step 2. In the administrative command prompt, copy and paste the following texts:-
To disable Windows automatic update:-
sc config wuauserv start= disabled
To enable Windows automatic update:-
sc config wuauserv start= auto
You can quickly enable or disable Windows automatic update services using the above commands according to your needs.
How to Turn On or Turn Off Automatic Windows Update via Services?
Microsoft uses the Windows Update service to check for updates and then download & install if new updates are available to your Windows operating system. If you disable this service, Windows will stop checking for the latest updates. Enabling this service will invoke automatic updates on your PC.
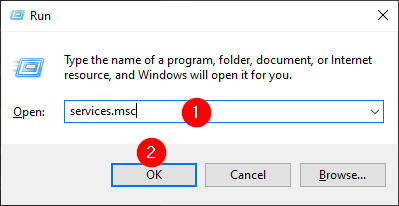
Step 1. Call the Run dialog box by pressing Windows + R key from the keyboard.
Step 2. In the Run box that opens, type services.msc and then hit Enter from the keyboard or click the OK button.
Step 3. In the “Services” window that appears after doing the above steps, find Windows Update from the list of services. Now, please double-click on it to open its Properties dialog box.
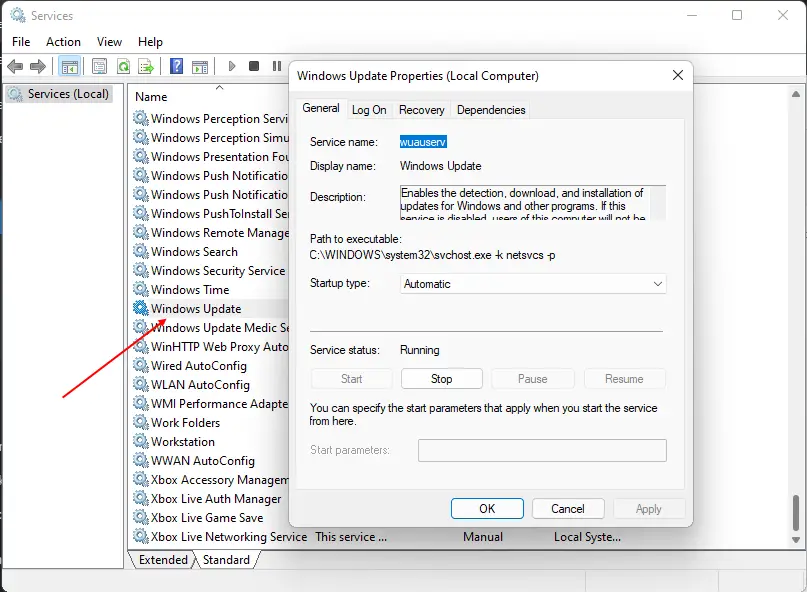
Step 4. On the “Windows Update Properties” dialog box, select Disabled from the “Startup type” drop-down menu.
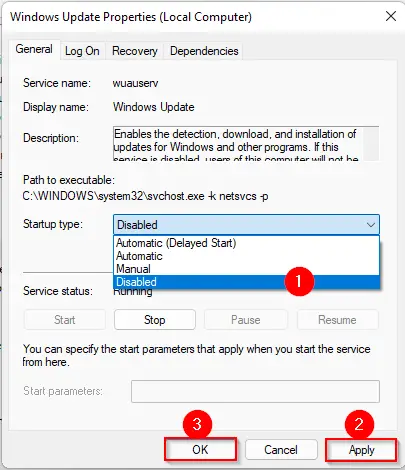
Step 5. Click Apply/OK.
After performing the above steps, Windows Update is disabled on your PC. If you would like to start it again, repeat the above steps, and in step 4, select the Automatic option from the “Startup type” drop-down menu. Then click Apply/OK.
How to Allow or Disallow Automatic Windows Update through Group Policy?
Using Group Policy on Windows 11, you can permanently disable the Windows update service.
Step 1. Open the Local Group Policy Editor.
To do that, first launch the Run dialog box by pressing Windows + R keys from the keyboard. Now typegpedit.msc in the Run box and then hit Enter from the keyboard.
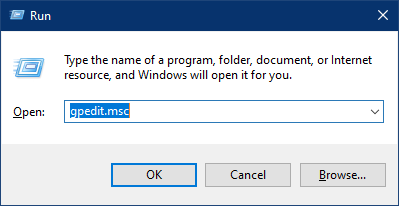
Step 2. Navigate to the following path under the Local Group Policy Editor window:-
Computer Configuration > Administrative Templates > Windows Components > Windows Update > Manage end user experience
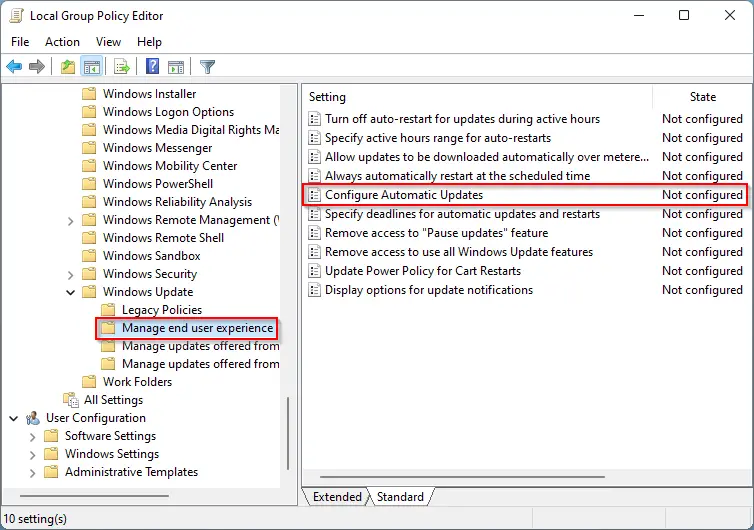
Step 3. On the right side of the “Manage end user experience” folder, double-click on the policy name Configure Automatic Updates.
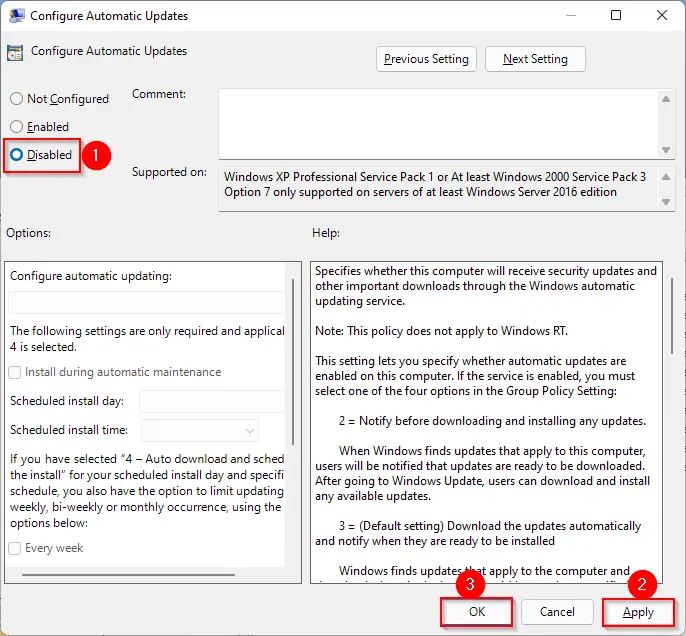
Step 4. Select the Disabled option.
Step 5. Click Apply.
Step 6. Click OK.
Step 7. Reboot your computer.
Now, you have completely turned off Windows automatic updates. If you wish to start it, repeat the above steps, and in step 4, select the Not Configured option.
Over the past few years, automation technology has put a huge impact on almost every industry. With the passage of time, it has become more intelligent and sophisticated – playing a crucial role in improving our daily lives from home to work.
When it comes to computer programs, the automation technology helps us enabling the complex processes. One good example of this is, “Automatic Updates” option in the Windows operating system.
Windows automatic update is a program in the Windows operating system that is accountable to automatically download and install important updates in Windows. The major aim of this program is to keep your device (computer system) secured and up to date.
Additionally, Windows auto update allows you to receive security updates and the latest fixes so that your computer system can stay protected and run efficiently.
So, if you are a Windows user and find Auto Update an interesting feature, here is a complete guide for you. This “How to” guide will teach you how to turn on Automatic Updates in Windows 10. We will also take a look at the pros and cons of enabling Windows automatic updates.
Enabling Automatic Updates in Windows 10
By default, Windows 10 automatically updates your computer. You just need to ensure that whether or not it is happening by following the instructions given below.
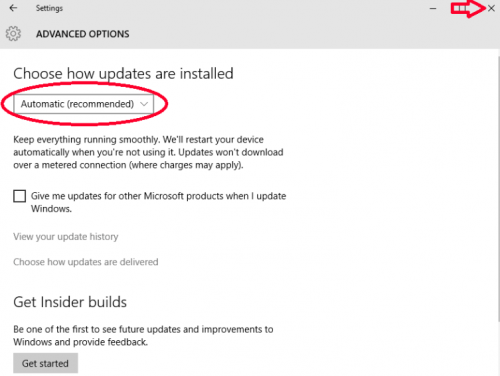
1. Go to the Start button, then Settings->Update & Security-> Windows Update.
2. Choose “Check for Updates” if you want to check the updates manually.
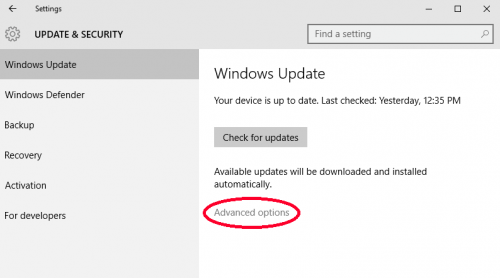
3. Next, select Advanced Options, and then under “Choose how updates are installed”, select Automatic (recommended).
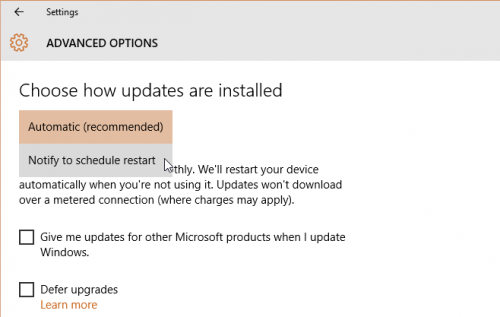
Congratulations! Your Windows 10 will now update automatically.
Pros & Cons of Enabling Windows Auto-update
Advantages
Security Updates
For every computer user, the security of their device and data is a primary concern. As Malware attacks and hackings are common scenes everywhere, it is crucial to opt for Security updates and fix security flaws if any.
Windows update feature helps you identify and fix various security flaws.
Operating System Updates
The operating system, Microsoft has been continuously working for the enhancement of their operating system. When you enable Windows auto update you get information on updates of software like security essentials, MS office, etc.
It would not be wrong to say that Auto updates help in preventing and fixing the problem and improve your overall experience.
Disadvantages
Although the majority of system updates will improve your computer’s performance some may do harm than good, especially those that do not update successfully. Moreover, these updates eat a large chunk of the internet data.
If for any reason, you want to hold off on an update, follow the steps given below.
How to Disable Automatic Windows Update
Unfortunately, in Windows 10, there is no option to turn off Windows updates from the Settings app and Control Panel. Don’t worry, we have the easiest method for you that will surely help you disable the Windows update service. To use that method, follow the steps given below.
1. Press Windows logo key and R key on your keyword simultaneously. It will open the run command. Now type “services.msc” in the open box and hit the OK button.
2. Now you will be on Services window, where you have to search for and double click on “Windows update”. It will take you to Windows Update Properties.
3. On Windows Update Properties, under the General tab, in Startup type, choose Disabled. Also, click on the Stop button in the option Service Status. When Stop option is gray, click on Apply and then OK. In order to better understand, follow the below screenshot.
4. Now restart your computer so that changes may take effect.
There are plenty of other ways to disable automatic Windows update but it is the easiest one.
Conclusion
In this “How to” post, we made you learn how to enable or disable automatic updates in Windows 10. If you have any doubt or query, feel free to ask in following comments. We will try our best to resolve your query as quickly as possible.
Updated: 02/07/2022 by

It’s important to keep your Windows computer up-to-date with any operating system or software updates. However, if necessary, you can pause or stop Windows updates in some versions of Windows. To enable or disable Windows updates, select your version of Windows below and follow the instructions.
Windows 10 and 11
Windows Update is automatically turned on in Windows 10 and Windows 11, and cannot be turned off for home users. Only enterprise users (Windows 10 and Windows 11 for business) can delay the installation of Windows updates.
Windows Vista, 7, and 8
- Open the Control Panel
- Under System and Security, click Turn automatic updating on or off in the Windows Update section.
- In the Important updates section (as shown below), click the down arrow and choose how you want Windows to download and install updates.
- Click OK to save the changes.

Tip
If the drop-down list in the Important updates section is greyed out, the Windows update settings are locked by an administrator. In this case, you cannot make any changes. Computers at a business or school often have an administrator lock on Windows updates, and other settings.
If you do not have a System and Security option in the Control Panel, follow these steps instead.
- In the Control Panel, open the Windows Update option.
- Click the Change settings option on the left side of the Windows Update window.
- In the Important updates section (as shown above), click the down arrow and choose how you want Windows to download and install updates.
- Click OK to save the changes.
Windows XP
- Open the Control Panel
- Open the System option.
- Click the Automatic Updates tab.
- Check or uncheck the option for Keep my computer up to date.
- If you are enabling this feature by checking this box, select one of the three settings on how you want to be notified for updates. We would recommend selecting the second option, Download the updates automatically and notify me when they are ready to be installed.
- Click Apply and OK to save the changes.
Windows 2000
- Open the Control Panel
- Open Automatic Updates.
- Check or uncheck the option for Keep my computer up to date.
- If you are enabling this feature by checking this box, select one of the three settings on how you want to be notified for updates. We would recommend selecting the second option, Download the updates automatically and notify me when they are ready to be installed.
- Click Apply and OK to save the changes.

How to Turn off Windows Updates in Windows 10
- You can do this using the Windows Update service. Via Control Panel > Administrative Tools, you can access Services.
- In the Services window, scroll down to Windows Update and turn off the process.
- To turn it off, right-click on the process, click on Properties and select Disabled.
How do I turn on my Windows Update service?
You can do this by going to Start and typing in services.msc in the search box. Next, press Enter and the Windows Services dialog will appear. Now scroll down until you see the Windows Update service, right-click on it and choose Stop.
How do I turn on Windows 10 update?
Steps to enable or disable Windows Update in Windows 10:
- Step 1: Lauch Run by Windows+R, type services.msc and tap OK.
- Step 2: Open Windows Update in the services.
- Step 3: Click the down arrow on the right of Startup type, choose Automatic (or Manual) in the list and hit OK to have Windows Update enabled.
How do I enable Windows 10 update in the registry?
Change Windows Update settings in Windows 10
- Open Registry Editor.
- Go to the following Registry key: HKEY_LOCAL_MACHINESOFTWAREMicrosoftWindowsCurrentVersionWindowsUpdateAuto Update. Tip: See how to jump to the desired Registry key with one click.
- Set the AUOptions DWORD value here to one of the following values:
- Restart your computer.
How do I enable Windows Update service in Windows 7?
Log in to the Windows 7 or Windows 8 guest operating system as an administrator. Click Start > Control Panel > System and Security > Turn automatic updating on or off. In the Important updates menu, select Never check for updates. Deselect Give me recommended updates the same way I receive important updates.
How do I enable Windows Update in the registry?
To use Registry Editor, follow these steps:
- Click Start, click Run, and then type regedit in the Open box.
- Locate and then click the following key in the registry: HKEY_LOCAL_MACHINESOFTWAREPoliciesMicrosoftWindowsWindowsUpdateAU.
- Add one of the following settings: Value name: NoAutoUpdate. Value data: 0 or 1.
How do I enable Windows Update from the command line?
Open the Run command (Win + R), in it type: services.msc and press enter. From the Services list which appears find the Windows Update service and open it. In ‘Startup Type’ (under the ‘General’ tab) change it to ‘Disabled’ Restart.
How do I find Windows Update in Windows 10?
Check for updates in Windows 10. Open Start Menu and click on Settings > Update & Security settings > Windows Update. Here, press on the Check for updates button. If any updates are available, they will be offered to you.
Are Windows 10 updates automatic?
Once you complete the steps, Windows 10 will stop downloading updates automatically. While automatic updates remains disabled, you can still download and install patches manually from Settings > Update & Security > Windows Update, and clicking the Check for updates button.
How do I turn on automatic updates?
To turn updates on or off, follow these steps:
- Open Google Play.
- Tap the hamburger icon (three horizontal lines) on the top-left.
- Tap Settings.
- Tap Auto-update apps.
- To disable automatic app updates, select Do not auto-update apps.
How do I know if Windows Update is enabled?
- Step 1: Open Windows Update Settings. Using the Windows 10 search bar in the bottom left search “Windows Update Settings” and select the systems settings link that populates.
- Step 2: Select Automatic Updates. Once in Windows Update Settings select “Advanced Options”. Ensure that Automatic is selected in the drop down.
How do I force Windows 10 to check for updates?
Open up the command prompt by hitting the Windows key and typing in cmd. Don’t hit enter. Right click and choose “Run as administrator.” Type (but do not enter yet) “wuauclt.exe /updatenow” — this is the command to force Windows Update to check for updates.
How do I enable Windows Update in group policy?
Change the Group Policy
- Press Win-R, type gpedit.msc , press Enter. This brings up the Local Group Policy Editor.
- Navigate the left pane as if it were File Explorer to. Computer Configuration > Administrative Templates > Windows Components > Windows Update > Defer Updates.
- Choose Select when Feature Updates are received.
How do I manually update Windows 7?
HOW TO MANUALLY CHECK FOR WINDOWS 7 UPDATES
- 110. Open the Windows Control Panel, and then click System and Security.
- 210. Click Windows Update.
- 310. In the left pane, click Check for Updates.
- 410. Click the link for any updates that you wish to install.
- 510. Select the updates that you want to install and click OK.
- 610. Click Install Updates.
- 710.
- 810.
How do I restart Windows Update service in Windows 7?
Restart the device again, and then turn Automatic Updates back on.
- Press the Windows key + X and choose Control Panel.
- Select Windows Update.
- Choose Change Settings.
- Change the settings for updates to Automatic.
- Choose OK.
- Restart the device.
How do I enable services MSC?
To open Windows Services, Run services.msc to open the Services Manager. Here you will be able to start, stop, disable, delay Windows Services. Let us see how to do this in a bit more detail. Right-click on your Start button to open the WinX Menu.
Where are Windows updates in the registry?
Windows Update uses an update agent that actually installs the updates. There are a number of registry keys located at HKEY_LOCAL_MACHINESOFTWAREPoliciesMicrosoftWindowsWindowsUpdateAU that control the automatic update agent. The first of these keys is the AUOptions key.
How do I know if WSUS is working?
WSUS Server Checks
- Check WSUS Service. The first thing you’ll want to do is check that WSUS is actually running and working as expected.
- Check IIS Service.
- Check Port Connectivity.
- Check Log Files.
- Check Windows Update Service.
- Check Port Connectivity.
- Check Group Policy.
- Check Log Files.
How do you update registry keys?
To make changes to the registry and export your changes to a .reg file, follow these steps:
- Click Start, click Run, type regedit in the Open box, and then click OK.
- Locate and then click the subkey that holds the registry item or items that you want to change.
- Click File, and then click Export.
How do I install Windows updates manually?
Windows 10
- Open Start – > Microsoft System Center -> Software Center.
- Go to the Updates section menu (left menu)
- Click Install All (top right button)
- After the updates have installed, restart the computer when prompted by the software.
How do I download Windows 10 updates manually?
Get the Windows 10 October 2018 Update
- If you want to install the update now, select Start > Settings > Update & Security > Windows Update , and then select Check for updates.
- If version 1809 isn’t offered automatically through Check for updates, you can get it manually through the Update Assistant.
Why can’t I run Windows Update?
“Windows Update cannot currently check for updates, because the service is not running. You may need to restart your computer.” Keep in mind, Windows Update isn’t only good for getting the latest Windows features and bug fixes. Following are few things you can try to fix your Windows Update issue.
How do I turn on automatic downloads?
Answer: To turn on Automatic Downloads on your iPhone or iPad, launch the Settings app and select Store. Then select which type of purchases you would like to enable for automatic downloads (music, apps, books are the options). You should also enable Automatic Downloads on your Mac.
How do I turn on automatic app updates?
Tap on iTunes & App Store. Then scroll all the way down towards the bottom until see Automatic Downloads. To turn on automatic app updates, tap in the white oval next to Updates. The apps will now update automatically.
How do I automatically update apps?
How to Enable Automatic App Updates in iOS
- Open the “Settings” app on the iPhone or iPad.
- Go to “iTunes & App Store”
- Under the ‘Automatic Downloads’ section, look for “Updates” and toggle that switch to the ON position.
- Exit out of Settings as usual.
Photo in the article by “Help smartphone” https://www.helpsmartphone.com/en/blog-phoneoperator-lebara-internet-activation-code