The windows black wrap (![]() : Tummennuskalvo) is an aftermarket part which can be ordered from the AMIS AUTO magazine for 299 mk. It can be used on Satsuma to add a black wrap to the rear and back windows. The wrap can be removed by right clicking the rear window.
: Tummennuskalvo) is an aftermarket part which can be ordered from the AMIS AUTO magazine for 299 mk. It can be used on Satsuma to add a black wrap to the rear and back windows. The wrap can be removed by right clicking the rear window.
The wrapped windows resemble that of the Ricochet and Svoboda 180 from the outside. However, the player can see out from the inside with a dark opaque tint. With the wrap applied, the rear window stickers are removed. Removing the wrap will re-apply the window stickers.
Trivia[]
- The wrap can be used an unlimited number times
- The wrap will fall out of the player’s hands upon successfully being applied to the car
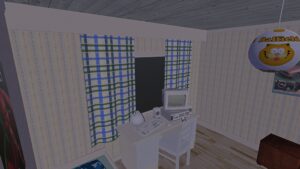
- There is an easter egg where you can use this wrap in your bedroom
The player’s bedroom window tinted
| Car parts | |
|---|---|
| Stock parts | Engine
Airfilter • Alternator • Battery • Block • Brake lining • Brake master cylinder • Camshaft • Camshaft gear • Carburator • Clutch cover plate • Clutch disc • Clutch lining • Clutch master cylinder • Clutch pressure plate • Crankshaft • Crankshaft pulley • Cylinder head • Distributor • Drive gear • Electrics • Engine plate • Flywheel • Fuel pump • Fuel strainer • Gearbox • Head gasket • Headers • Inspection cover • Main bearings • Oil filter • Oilpan • Pistons • Radiator • Radiator hoses • Rocker cover • Rocker shaft • Starter • Timing chain • Timing cover • Water pump • Water pump pulley Chassis and drivetrain Coil springs • Disc brakes • Drum brakes • Exhaust muffler • Exhaust pipe • Fuel tank • Fuel tank pipe • Gear linkage • Halfshafts • Hubcaps • Long coil springs • Shock absorbers • Spindles • Steering column • Steering rack • Steering rods • Struts • Sub frame • Trail arms • Wheels • Wishbones Body Bootlid • Bumpers • Doors • Fenders • Grille • Headlights • Hood • Mudflaps • Rear lights Interior Back panel • Clock gauge • Dashboard • Dashboard meters • Front seats • Gear stick • Handbrake • Radio • Rear seat • Stock steering wheel |
| GT parts | Grille GT • Rocker cover GT • GT steering wheel • Center console GT • GT wheels • RPM gauge (Other GT parts are available through parts catalog, see AMP GT parts) |
| Catalogue orders | Performance
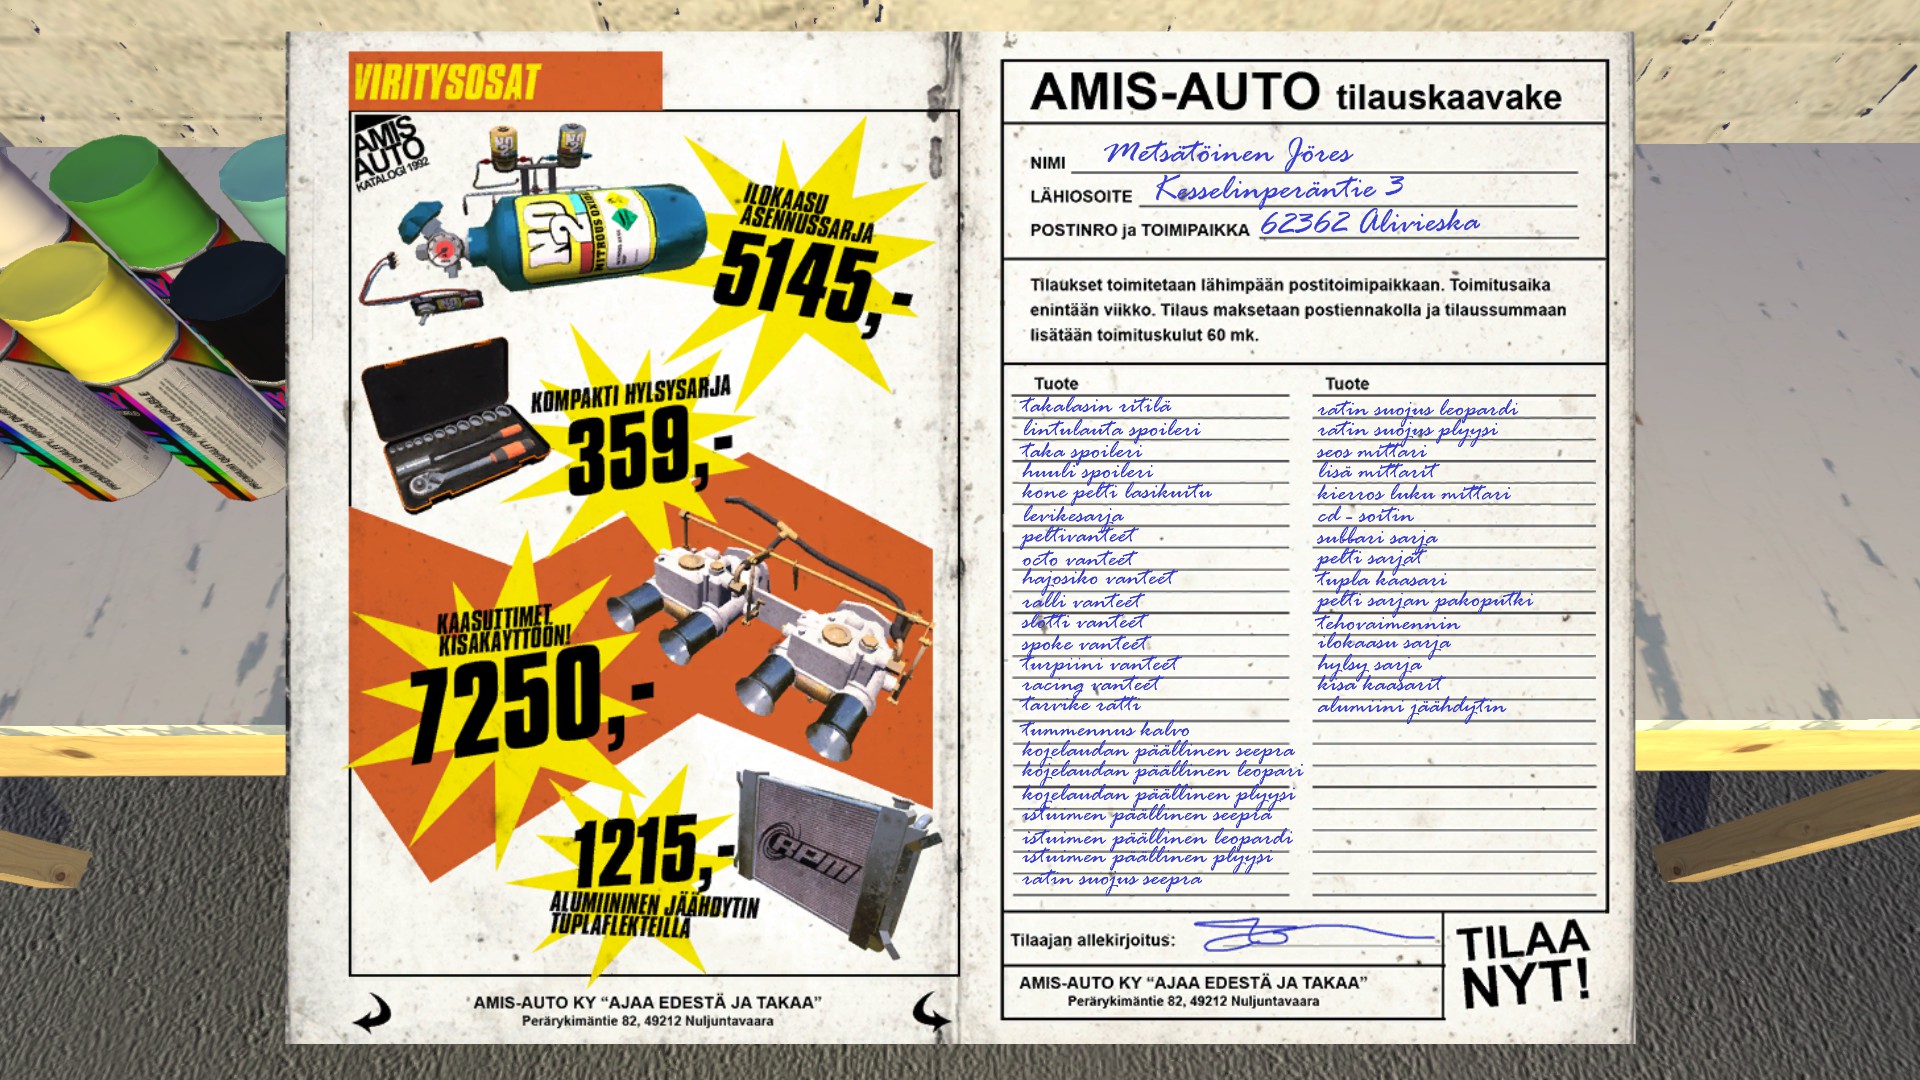
N2O bottle • N2O bottle holder • N2O button panel • N2O injectors • Racing carburators • Racing exhaust • Racing flywheel • Racing muffler • Racing radiator • Rally coil springs • Rally shock absorbers • Rally struts • Steel headers • Twin carburators Body Antennas • Body kit (Fender flare spoiler • Fender flare • Side skirt) • Exhaust dual tip • Fiberglass hood • Front spoiler • Marker lights • Rear spoiler • Rear wing • Window grille Interior Amplifier • Bucket seats • CD player • Dash covers • Extra gauges • Fuel mixture gauge • Racing harness • Rally steering wheel • Seat covers • Sport steering wheel • Subwoofers • Tachometer • Wheel covers • Windows black wrap |
| Miscellaneous parts | Alternator belt • Fire extinguisher holder • Fur dices • Light bulbs • Radar buster • Register plates • Roll cage • Spark plugs • Subwoofer panel • Turbo badge • Xmas lights |
Overview
This guide will show you how to build Satsuma.
§001 Preparation
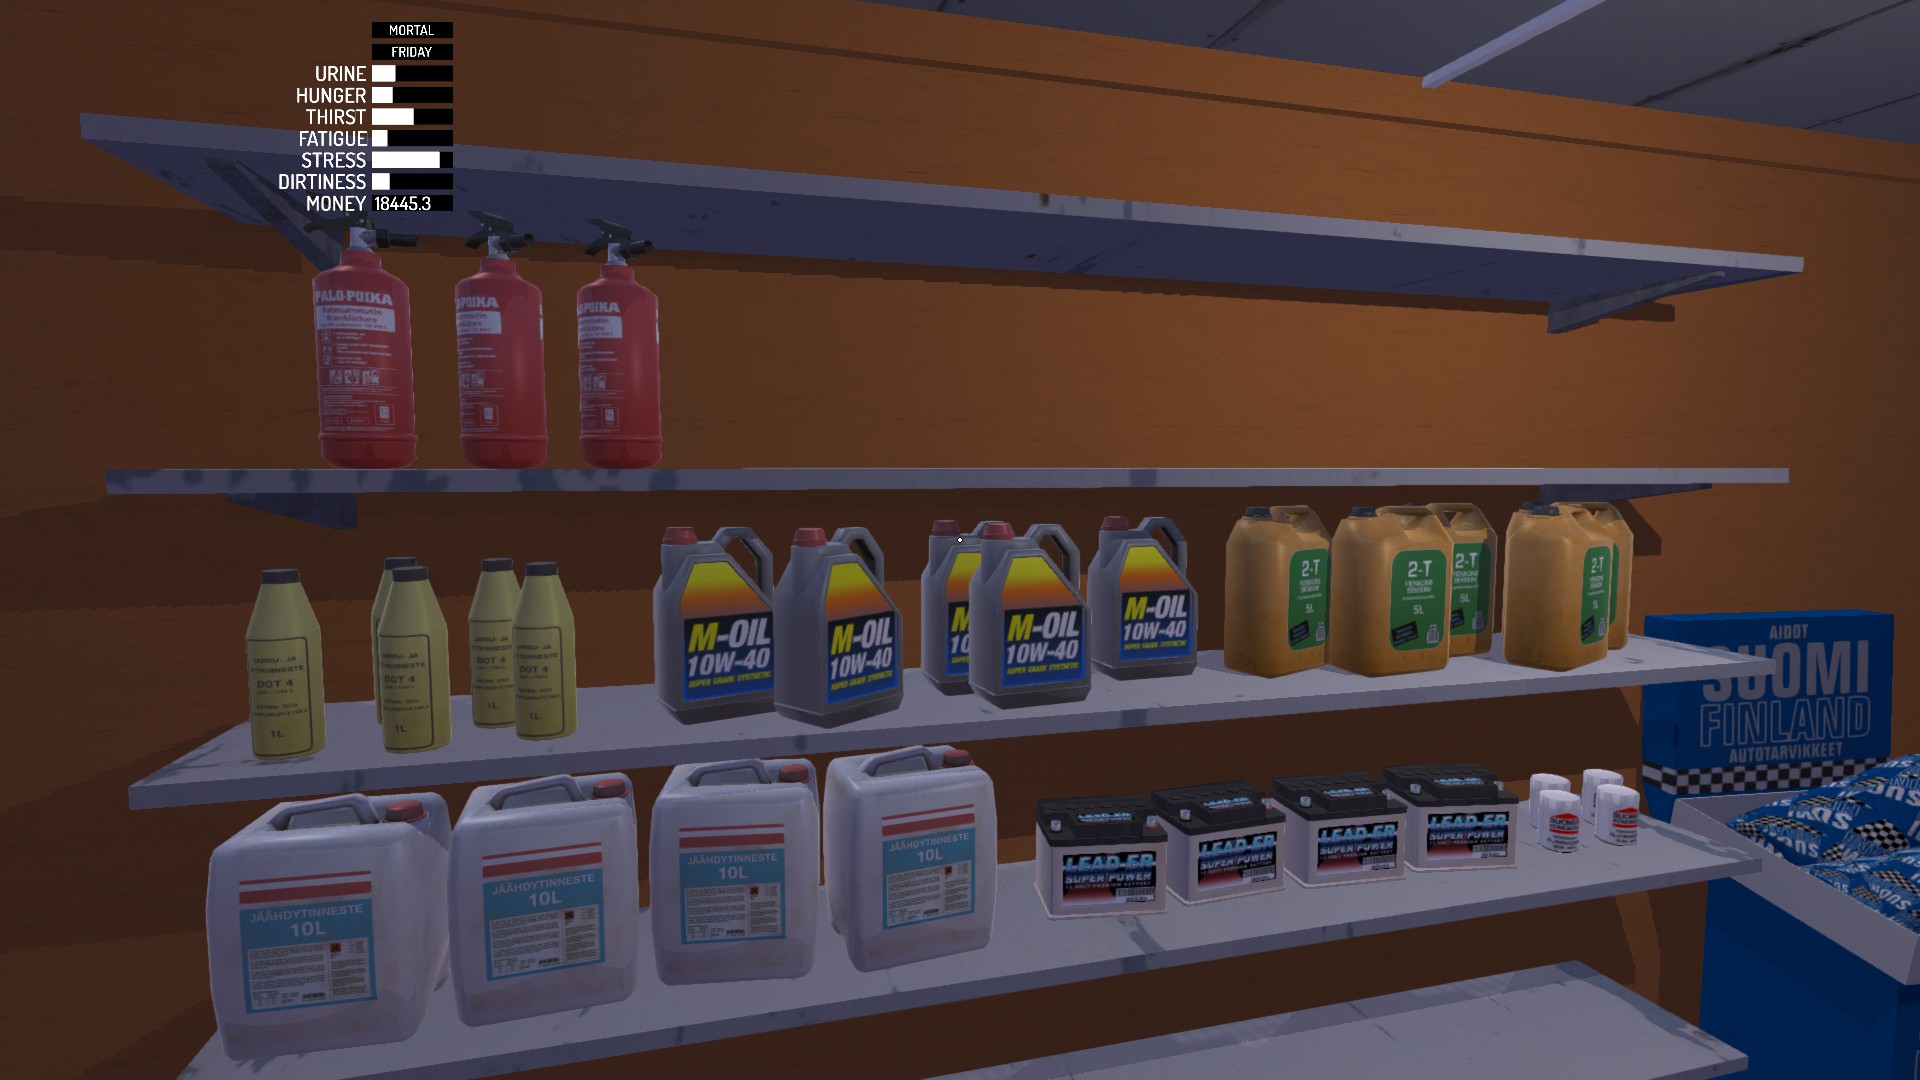
OK, so your first step is to earn some money and to go to the store in Peräjärvi. You can chop logs and bring them to one dude for 3200 mk, you can do trick with kilju (see this guide, but notice that you will need only 6 packages of sugar, not 9) or you can play ventti, but do it with caution. Store works daily from 8 to 20. You may also want to bring envelope to the store (see “Buying upgrades” section). You will need money to buy food and to pay bills as well. Additionally I would recommend to back up savefiles sometimes, because if you die, you die for good you have to start everything over (in hardmode).
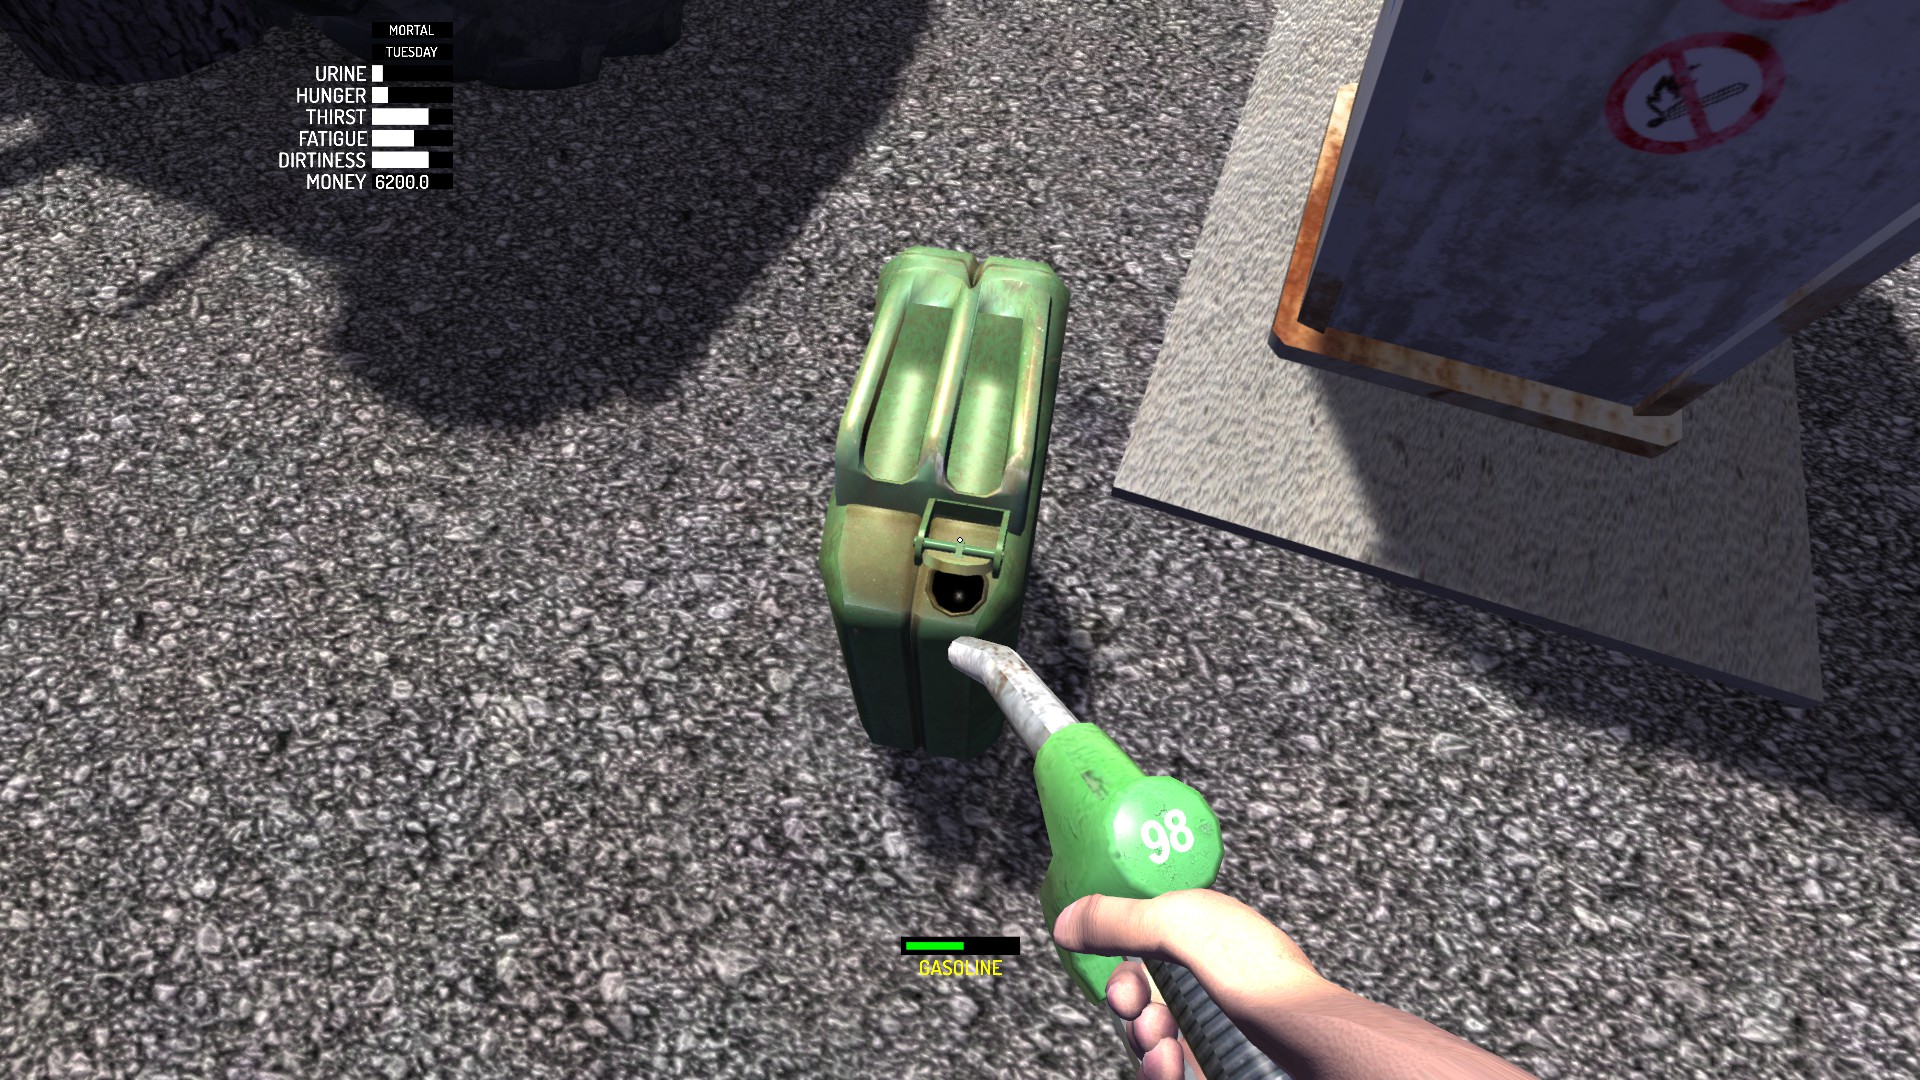
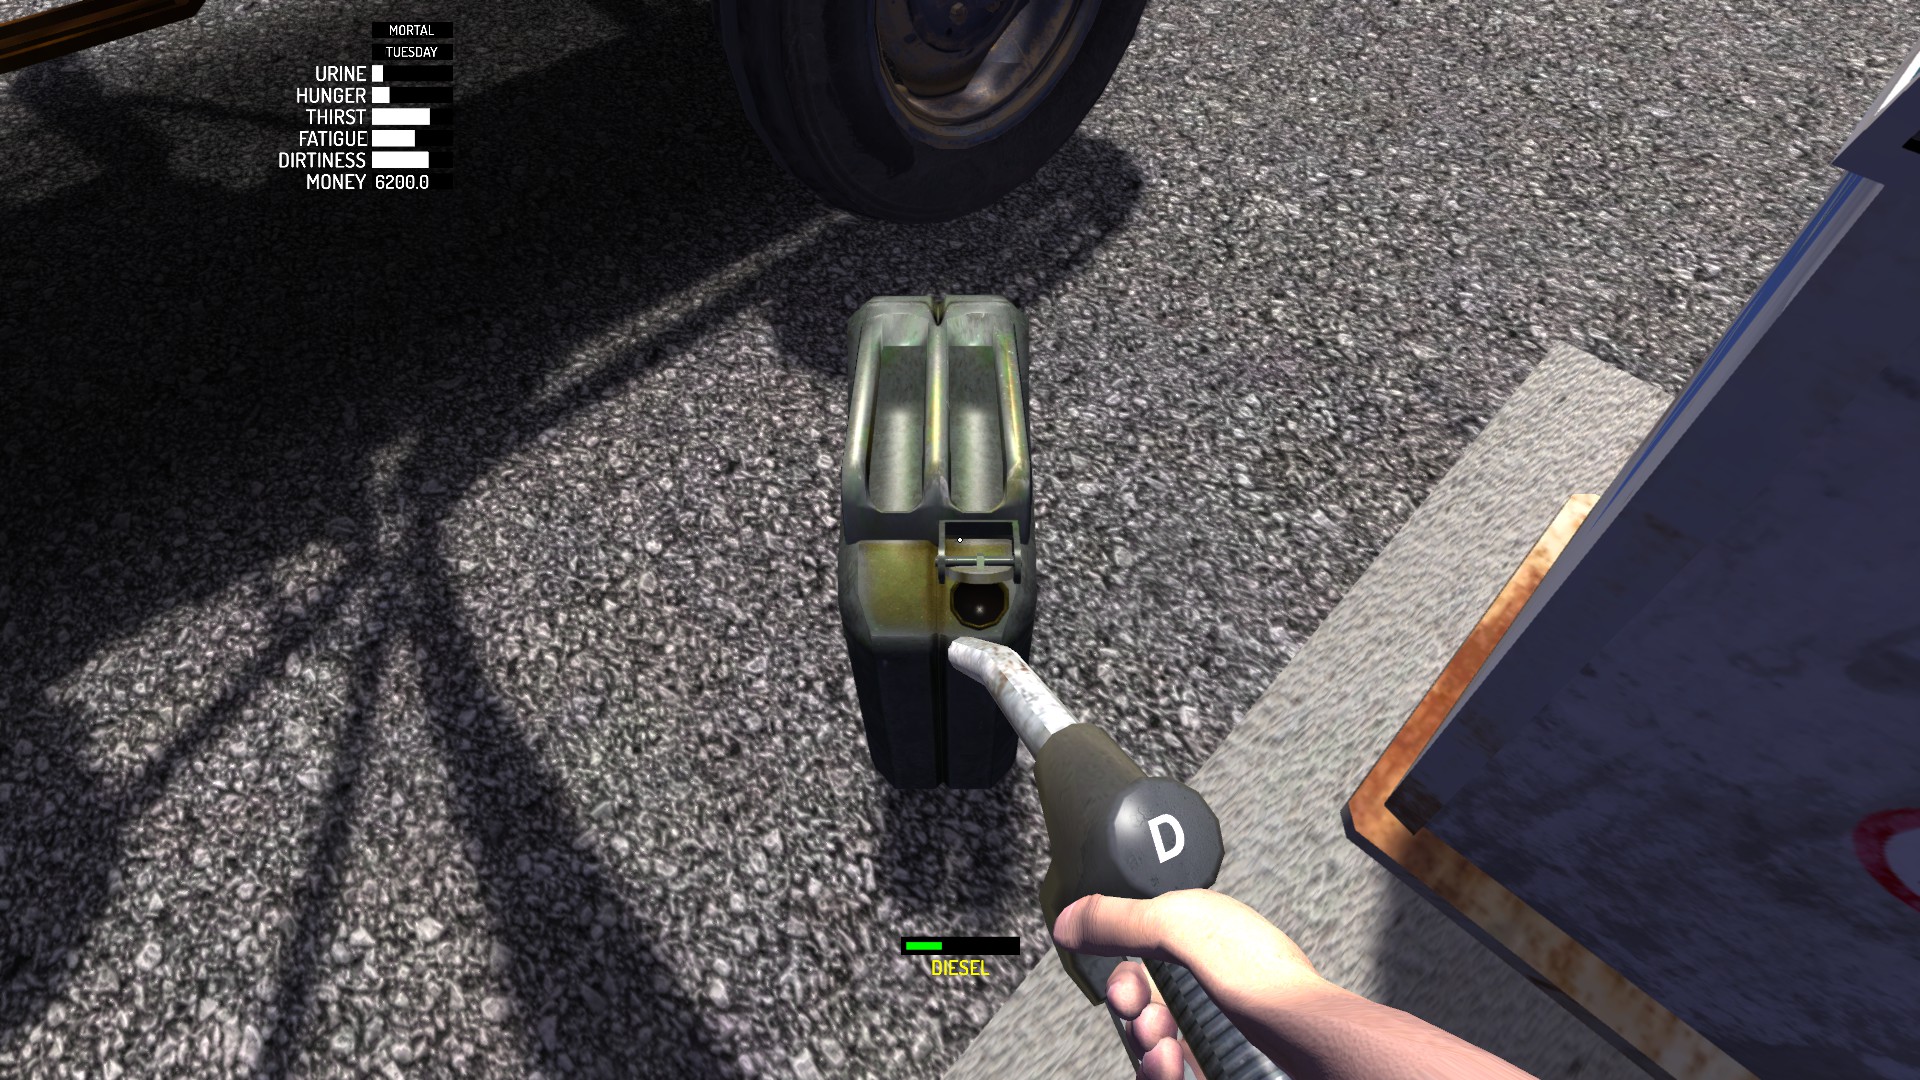
As you reach Peräjärvi, fill both jerrycans. Open jerrycans’ caps with Use button. Pour 98 into Gasoline jerrycan and D into Diesel jerrycan.
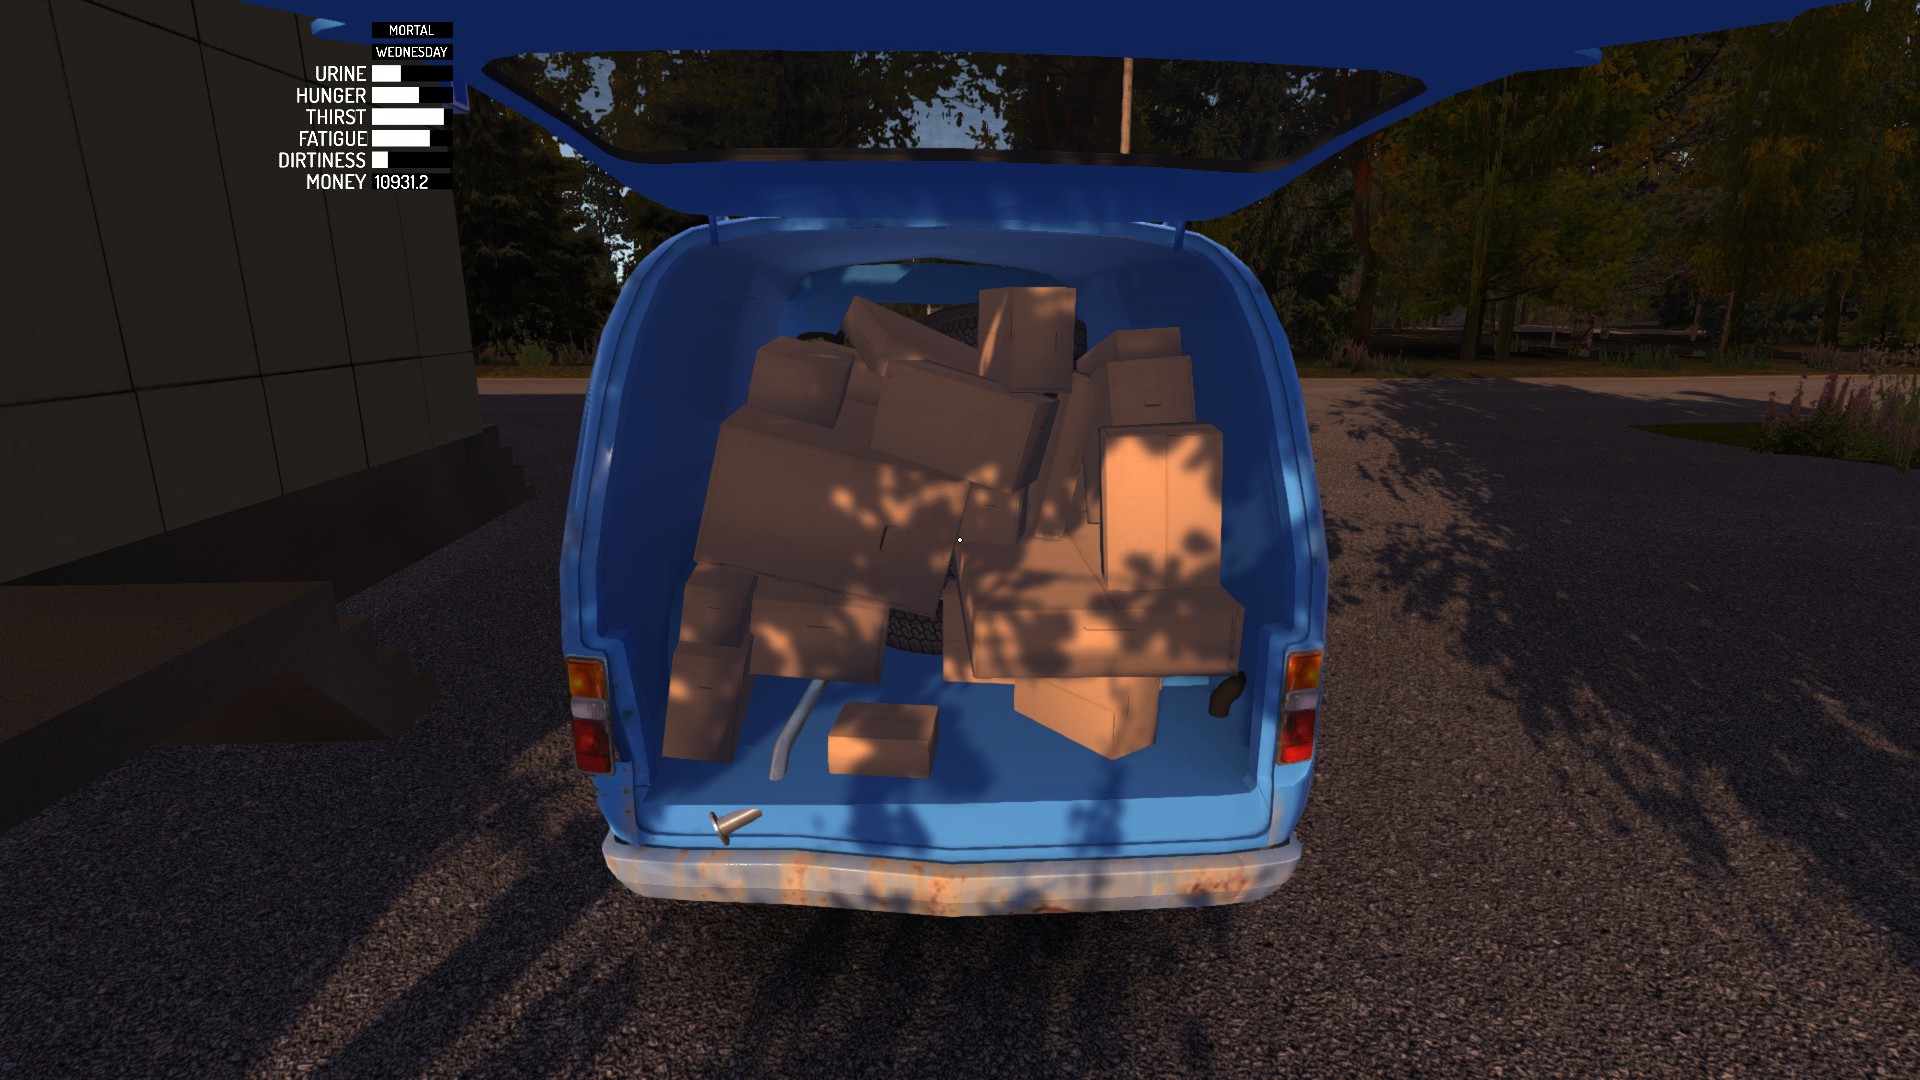
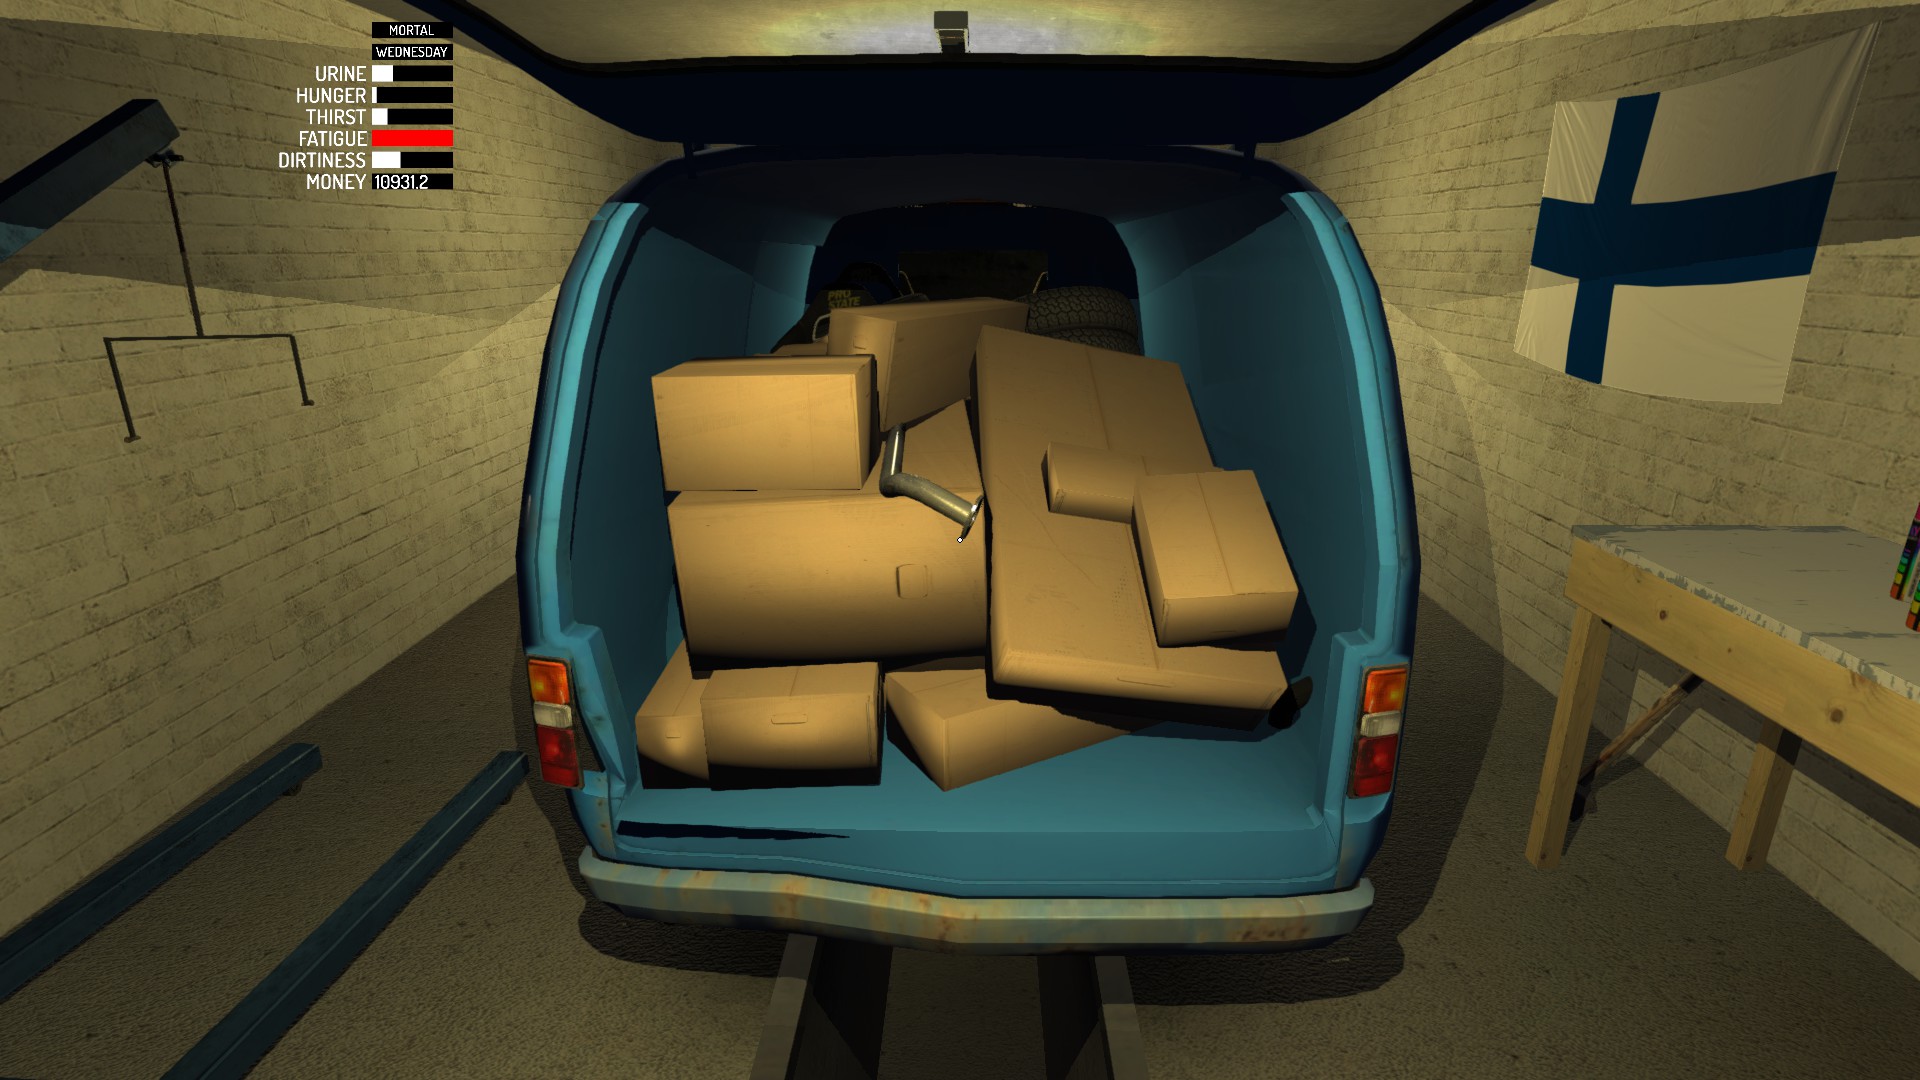
My suggestion to you is to save the game before buying stuff, because your bag with goods will unpack on game load, it is easier to move just one bag rather than 30 items to your home.
Fan belt
295 mk
Required for car
Fire extinguisher
249 mk
Required for rally[my-summer-car.wikia.com]
Brake / clutch fluid
35 mk
Required for car
Take many
Motor oil
149 mk
Required for car
Take many
Two stroke fuel
99 mk
Required for Jonnez ES and boat
Coolant
195 mk
Required for car
Take many
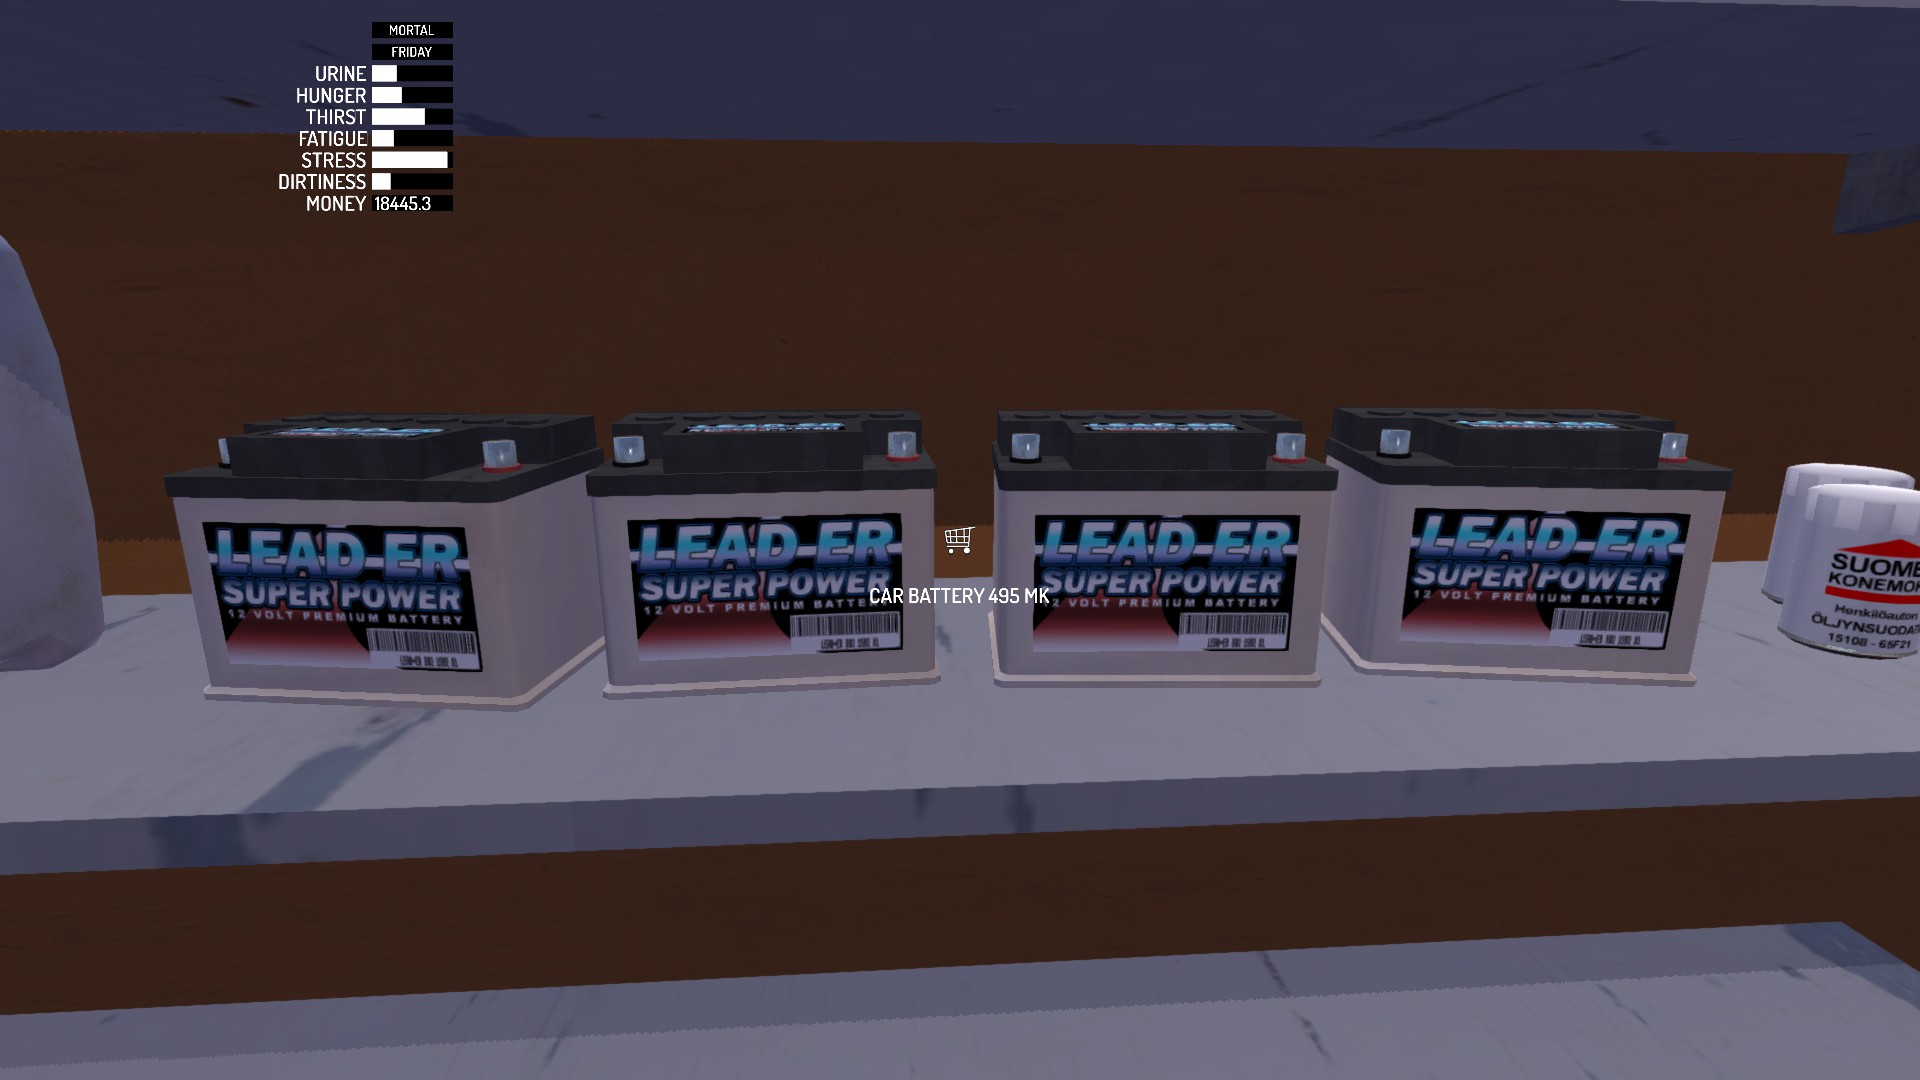
Car battery
495 mk
Strongly recommended as stock one is in bad condition
Take a few, but beware, they tend to lose charge and capacity over time
Oil filter
59 mk
Strongly recommended as stock one is in bad condition
Take many
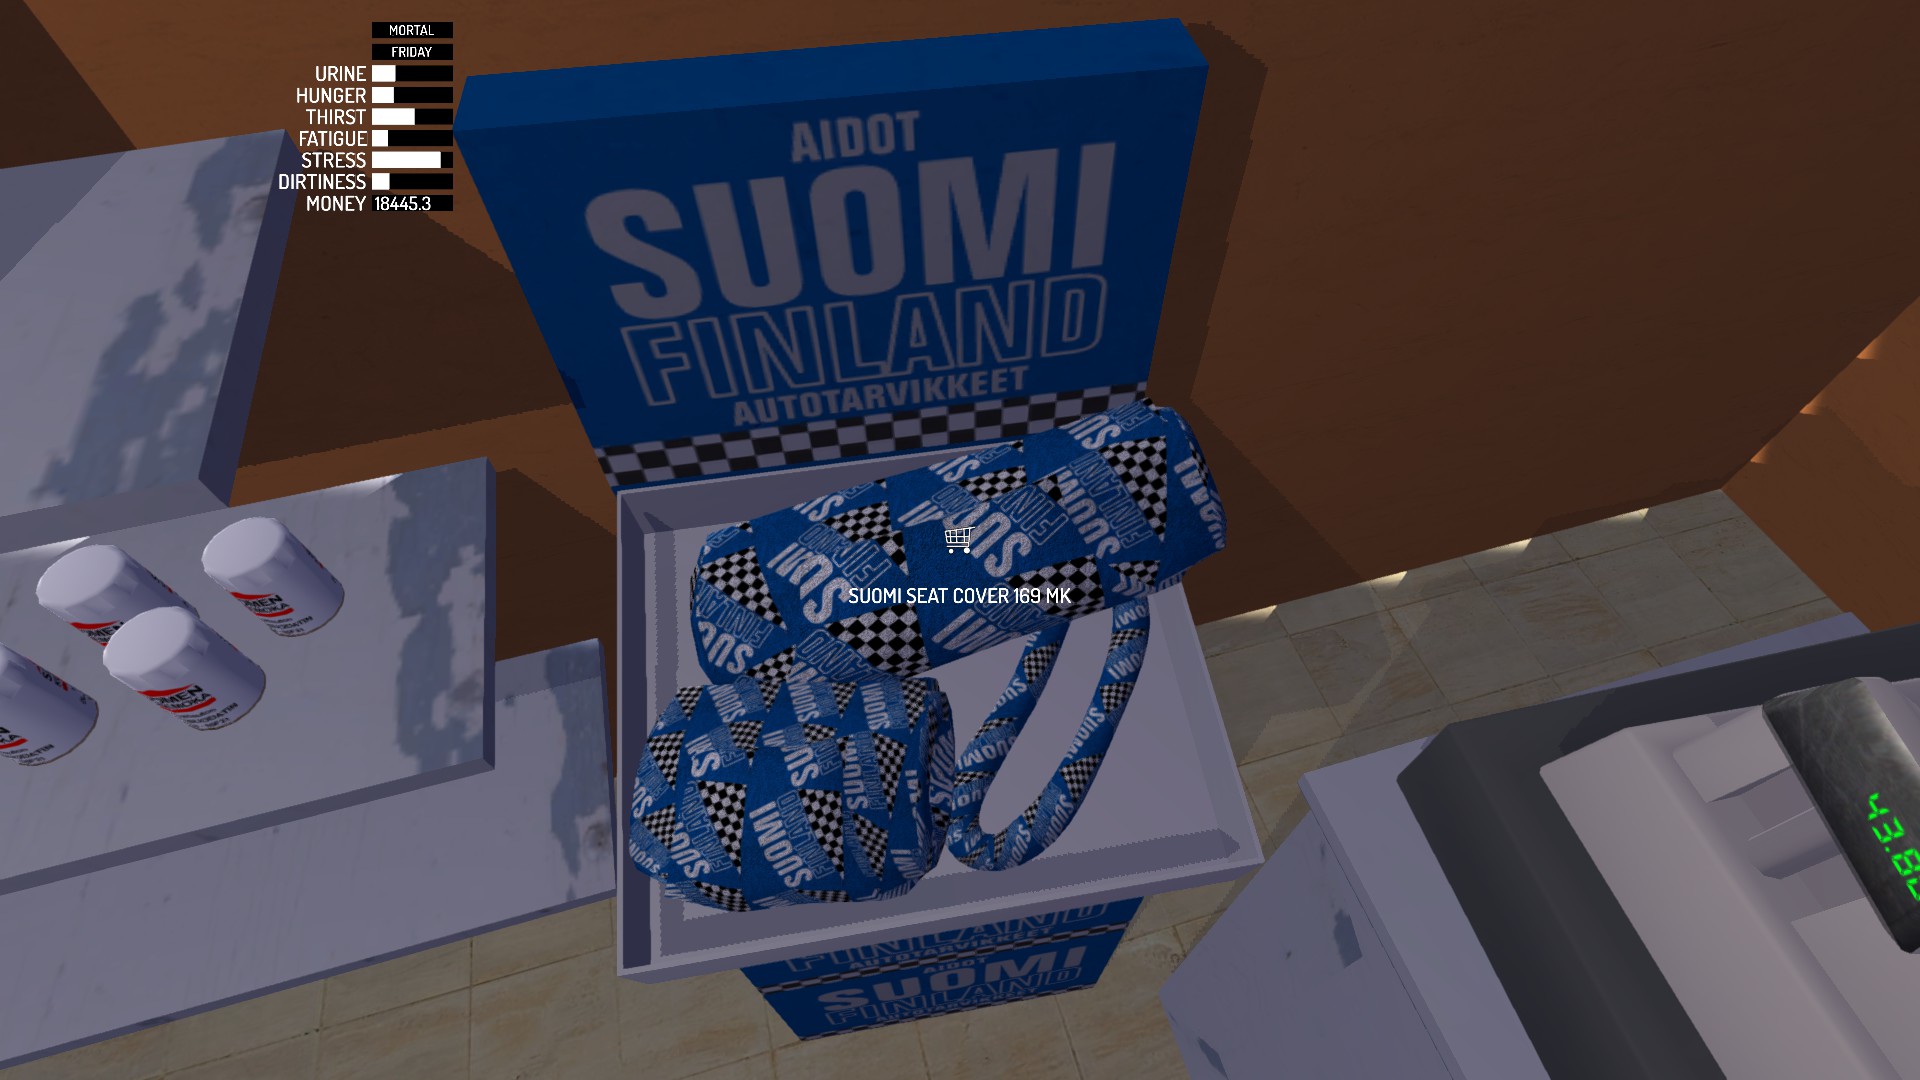
Suomi seat cover
169 mk
Decorative
Suomi dash cover
299 mk
Decorative
Suomi wheel cover
79 mk
Decorative
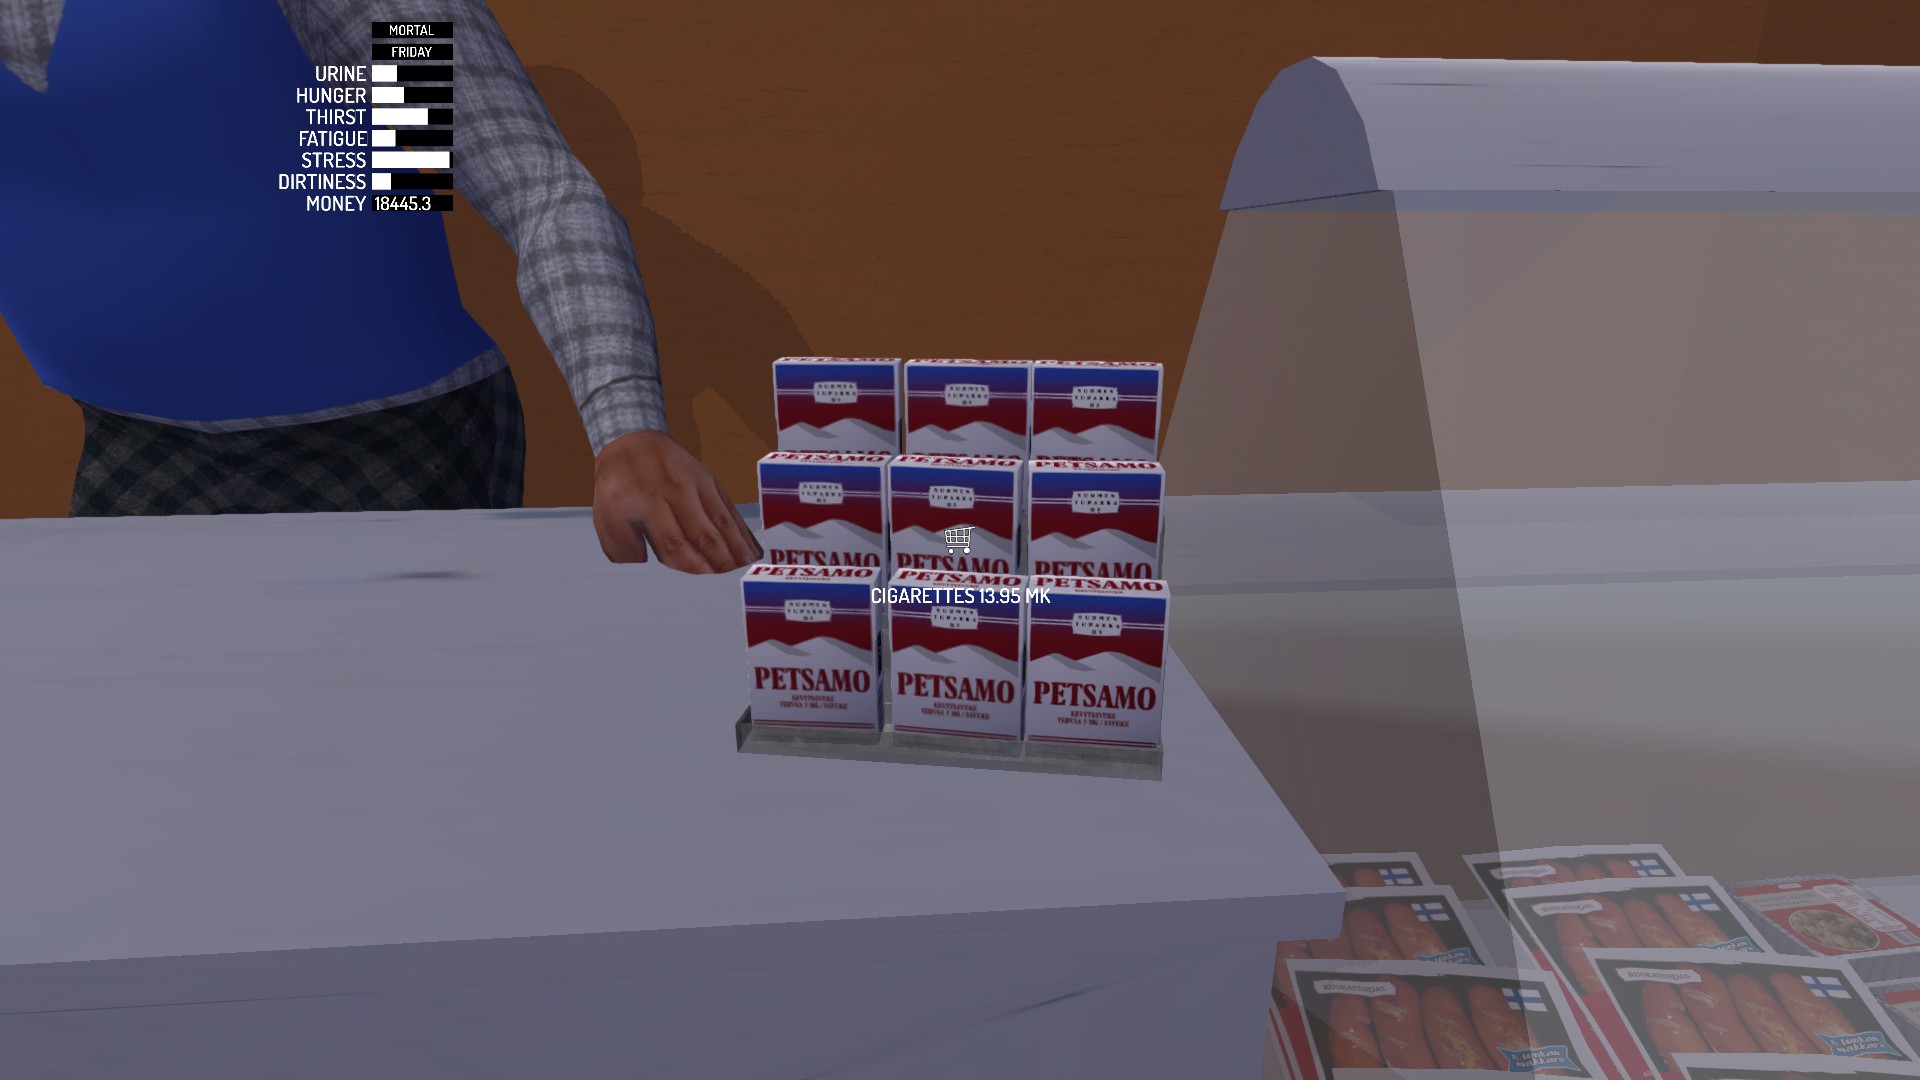
Cigarettes
13.95 mk
Reduce stress
Sausages
10.95 mk
Food[my-summer-car.wikia.com]
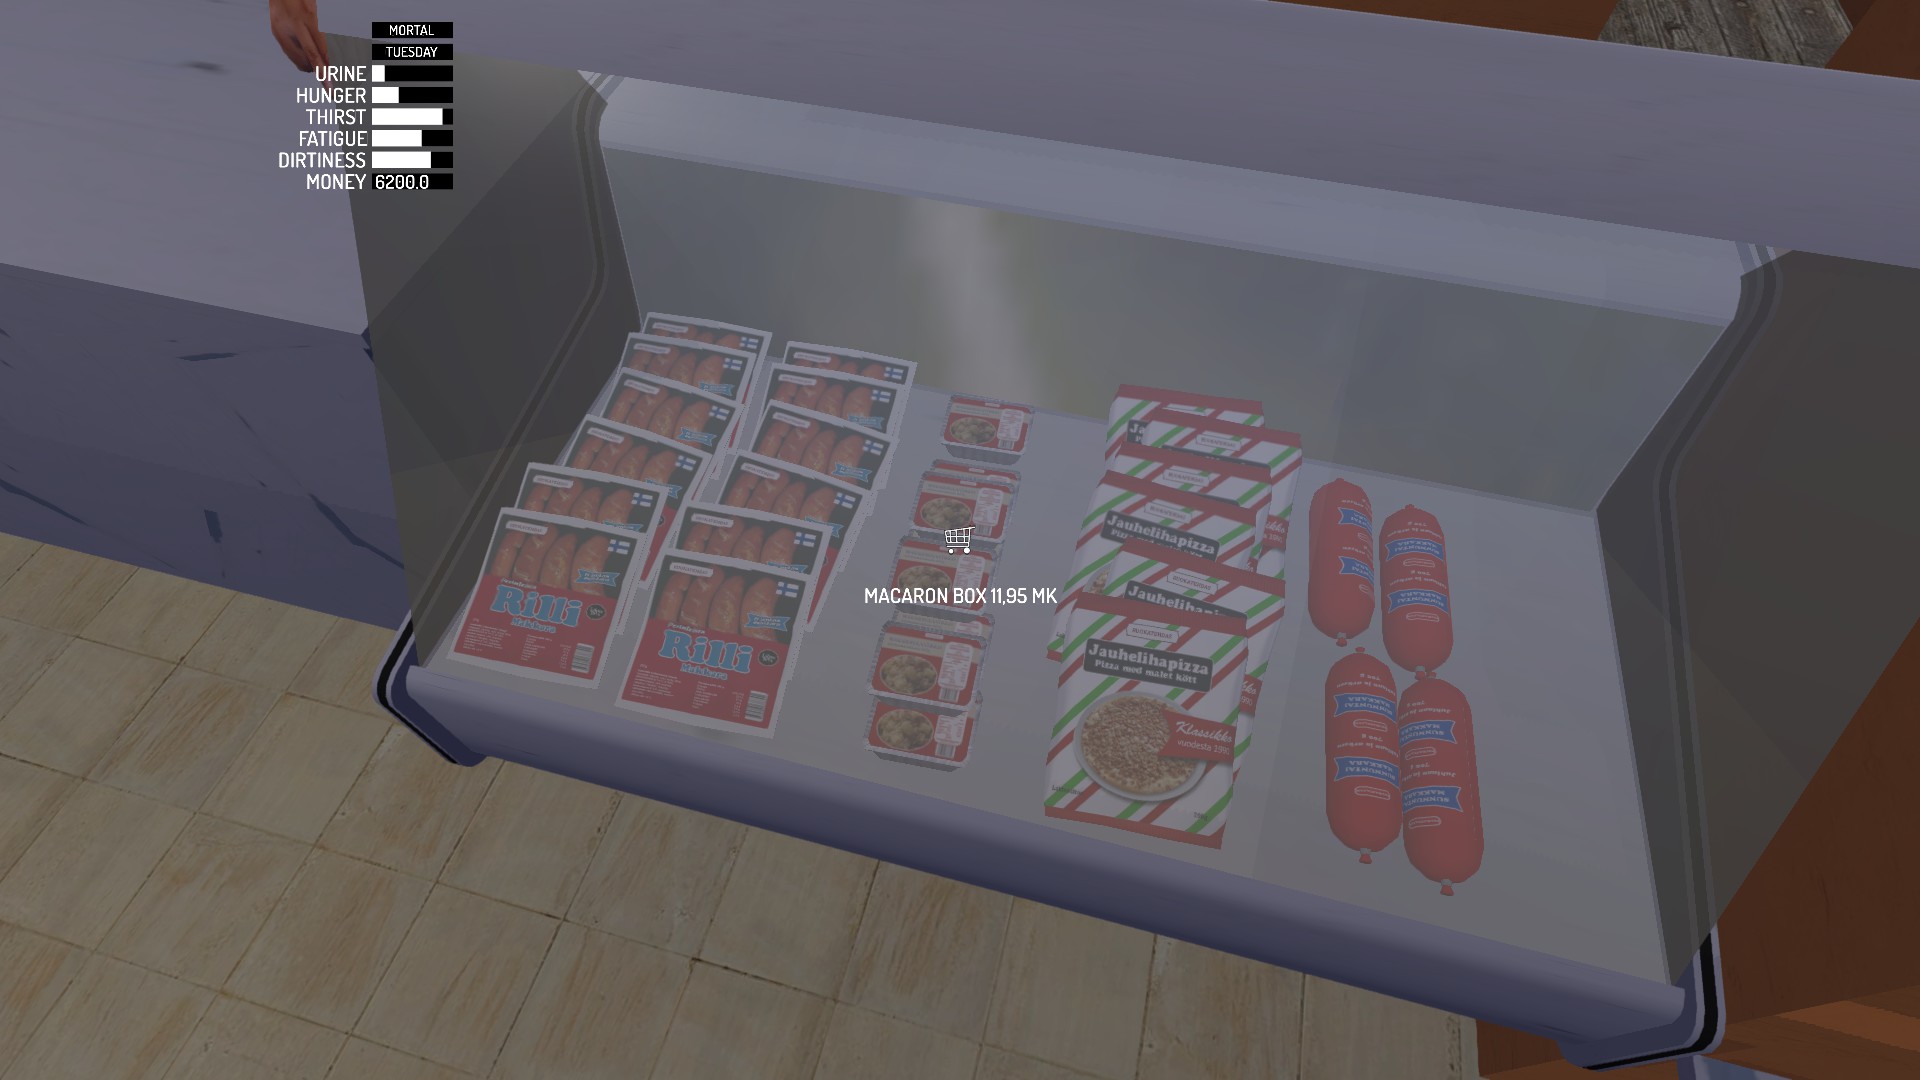
Macaron box
11.95 mk
Food[my-summer-car.wikia.com]
Pizza
9.95 mk
Food[my-summer-car.wikia.com]
Potato chips
14.95 mk
Food[my-summer-car.wikia.com]
Pizza
9.95 mk
Food[my-summer-car.wikia.com]
Juice concentrate
12.95 mk
Suddenly food[my-summer-car.wikia.com]
Beer case
149 mk
Drink[my-summer-car.wikia.com]
Milk
5.50 mk
Drink[my-summer-car.wikia.com]
Yeast
8.95 mk
Required for kilju (1 per bucket)
Sugar
6.95 mk
Required for kilju (6 per bucket)
Mosquito spray
32.95 mk
Temporary removes mosquito noise


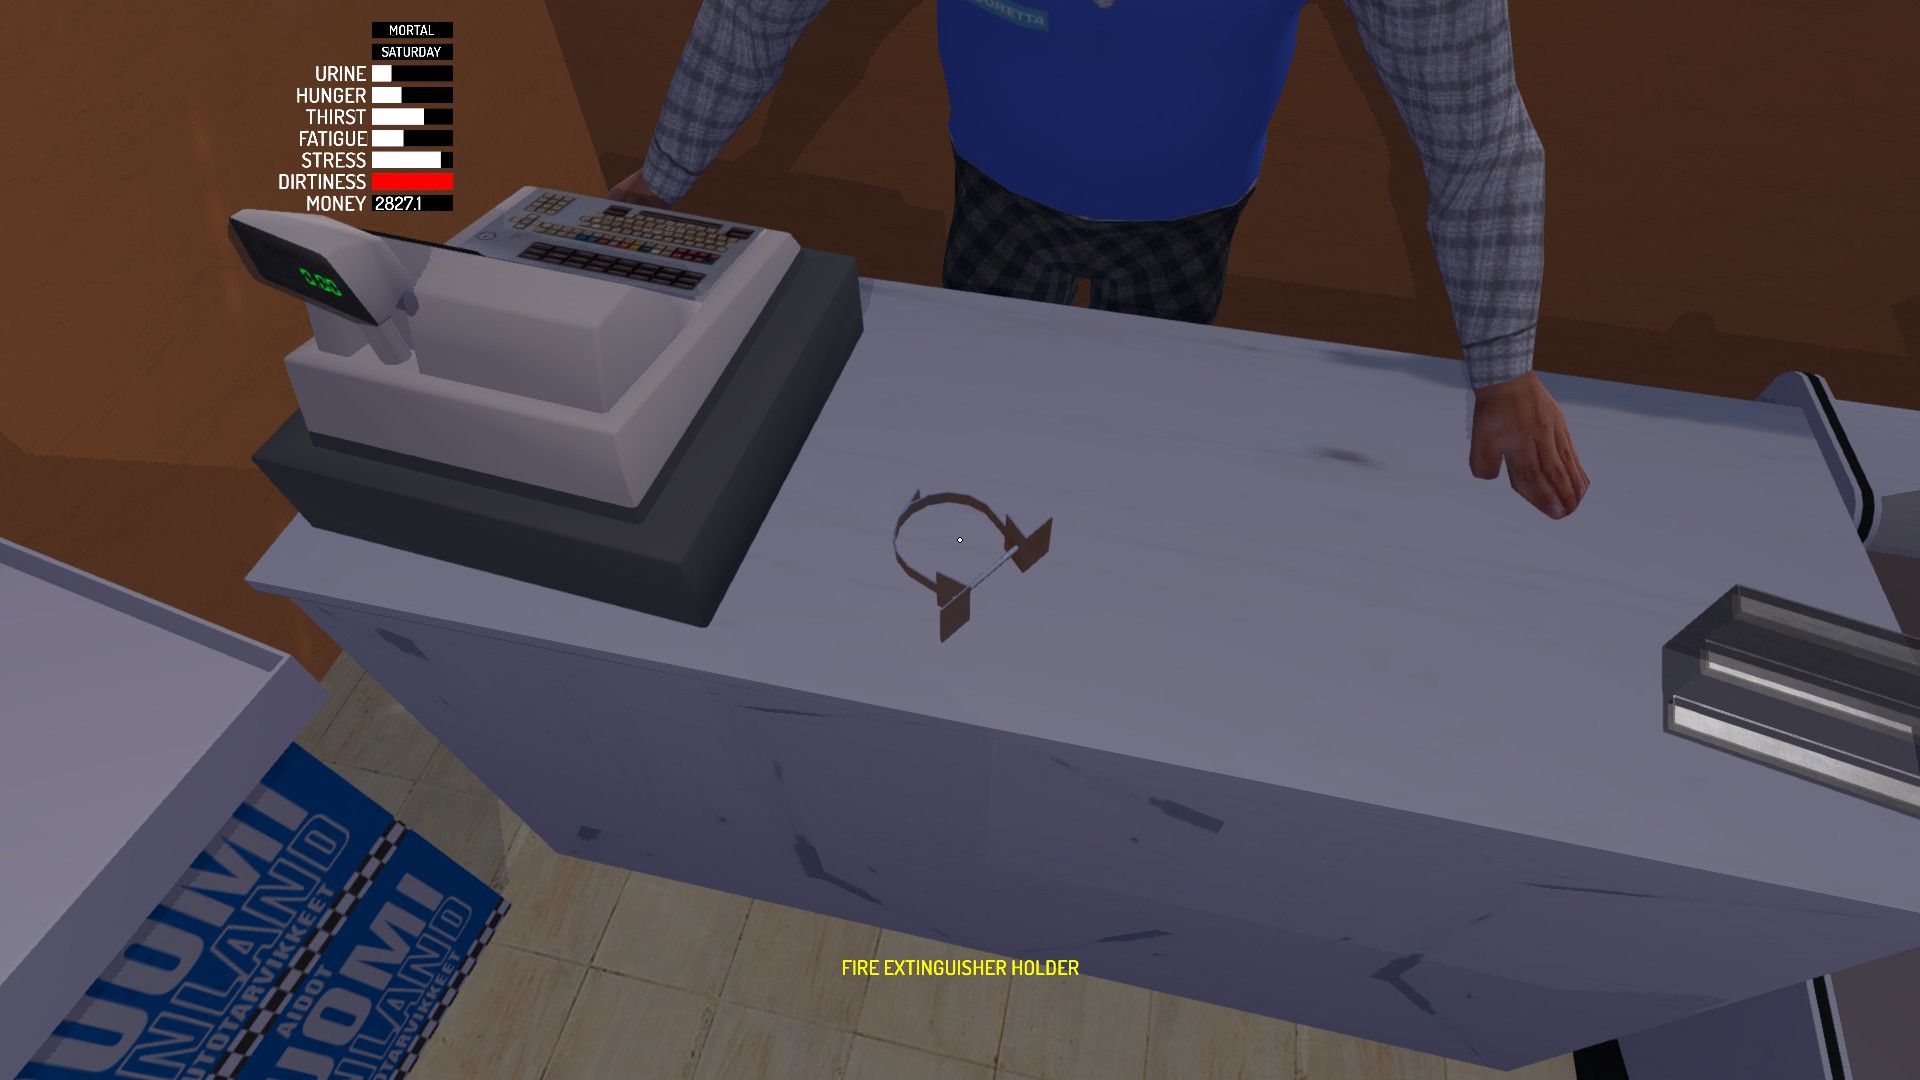
When you buy fire extinguisher for the first time, Teimo will give you fire extinguisher holder.
And as you put everything into your vehicle, you are almost ready to go home.

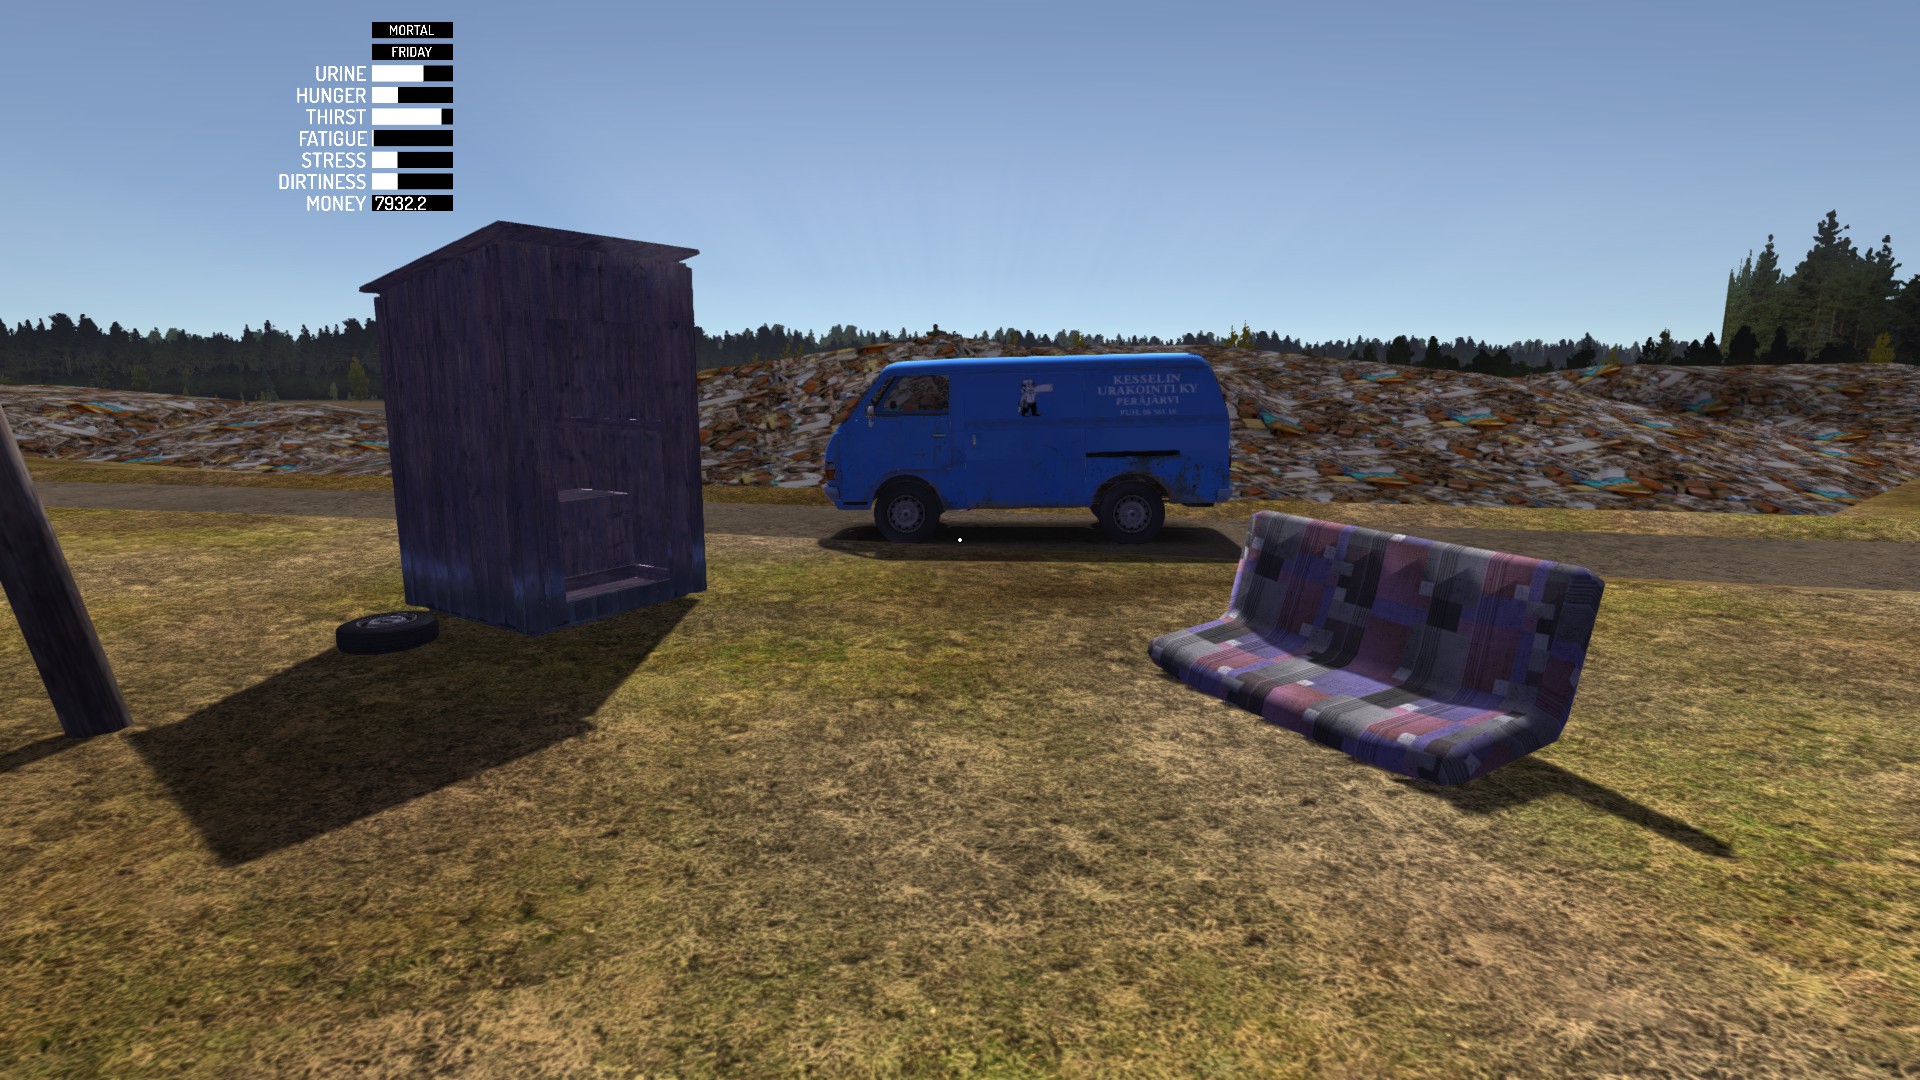
Also visit landfill site, there you can find 5th wheel and sofa (you can sleep on it).


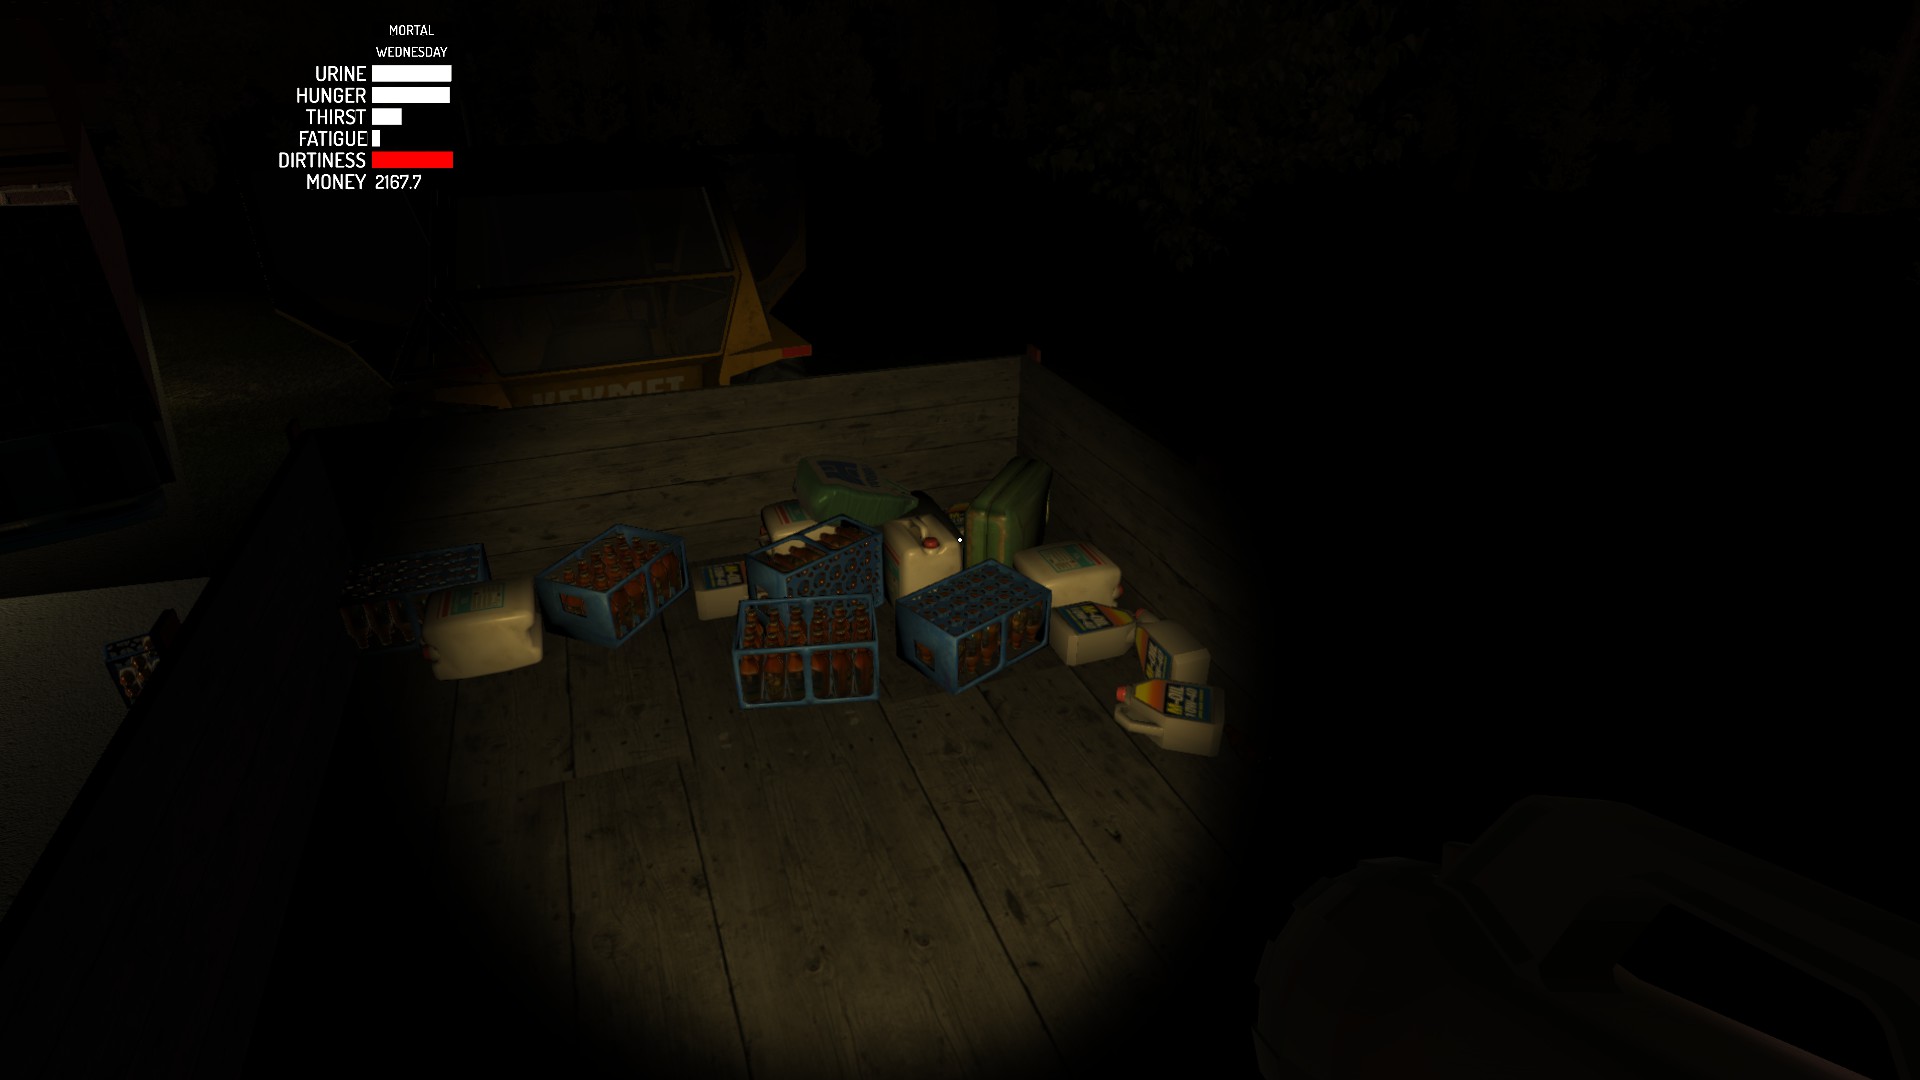
All items have successfully arrived!


During the game you may want to use MSCeditor (at least to check values).
Now we are ready to build the car!
§002 Preparing wheels
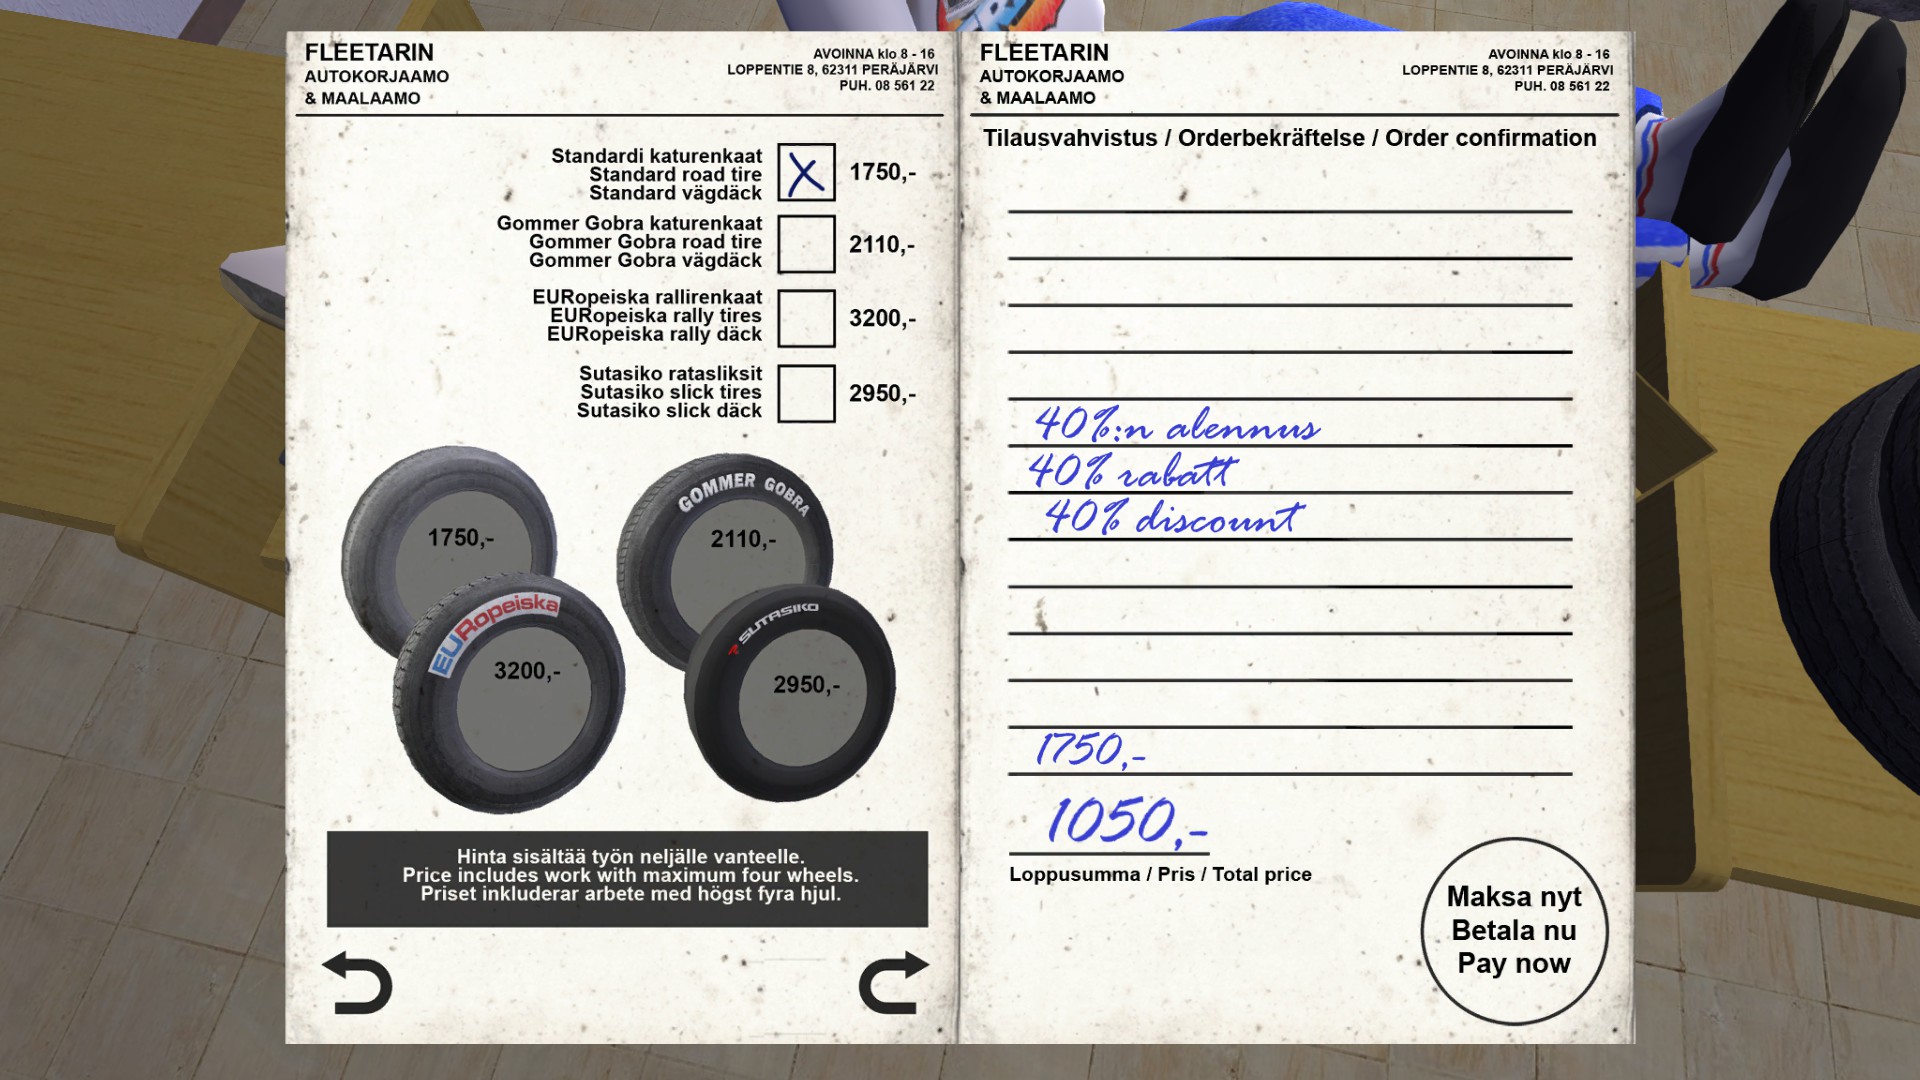
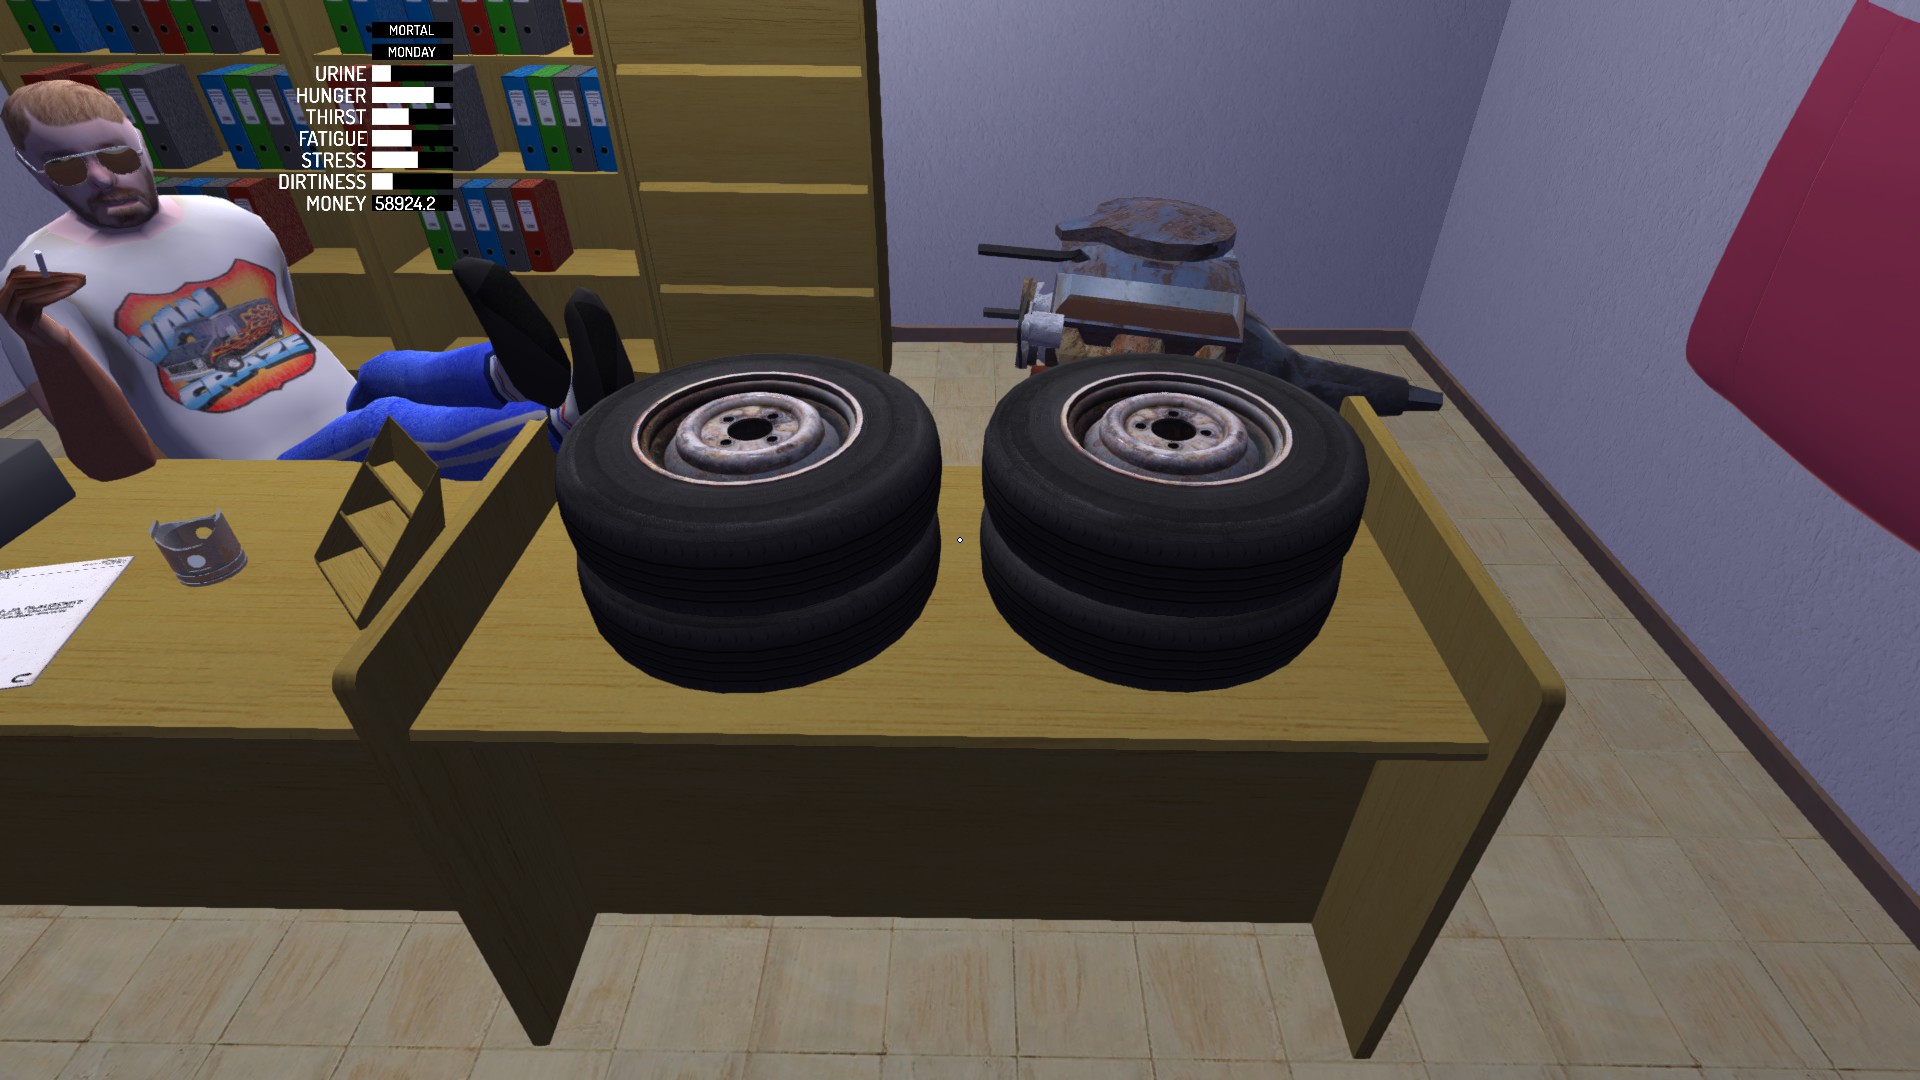
Stock wheels won’t pass car inspection because of bad tires. So you will need to change them at the Fleetari’s. Fleetari works from 8 to 16 on weekdays. He can repair maximum 4 wheels at a time, so for 5 wheels you have to visit him twice. However, 5th wheel is unnecessary, although wheels tend to wear and puncture. Only Standard or Gommer Gobra road tires will pass the inspection.
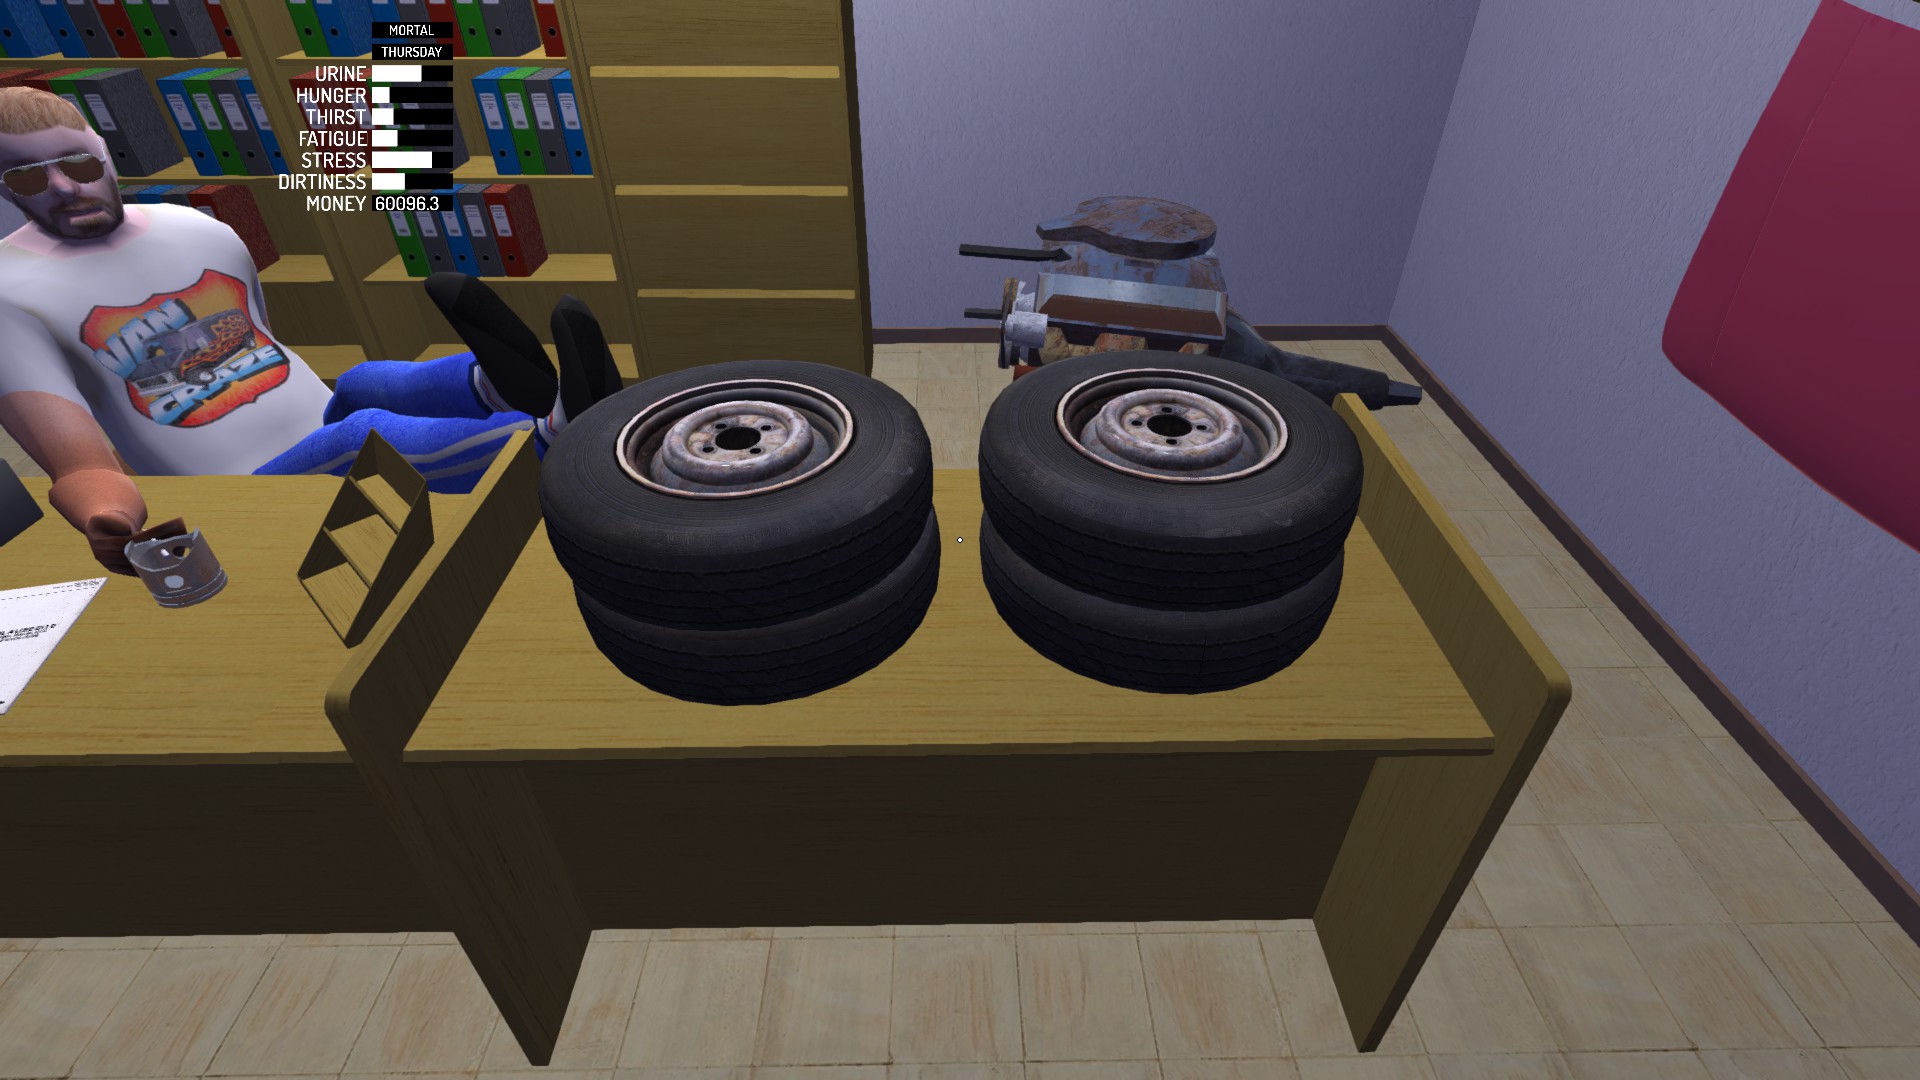
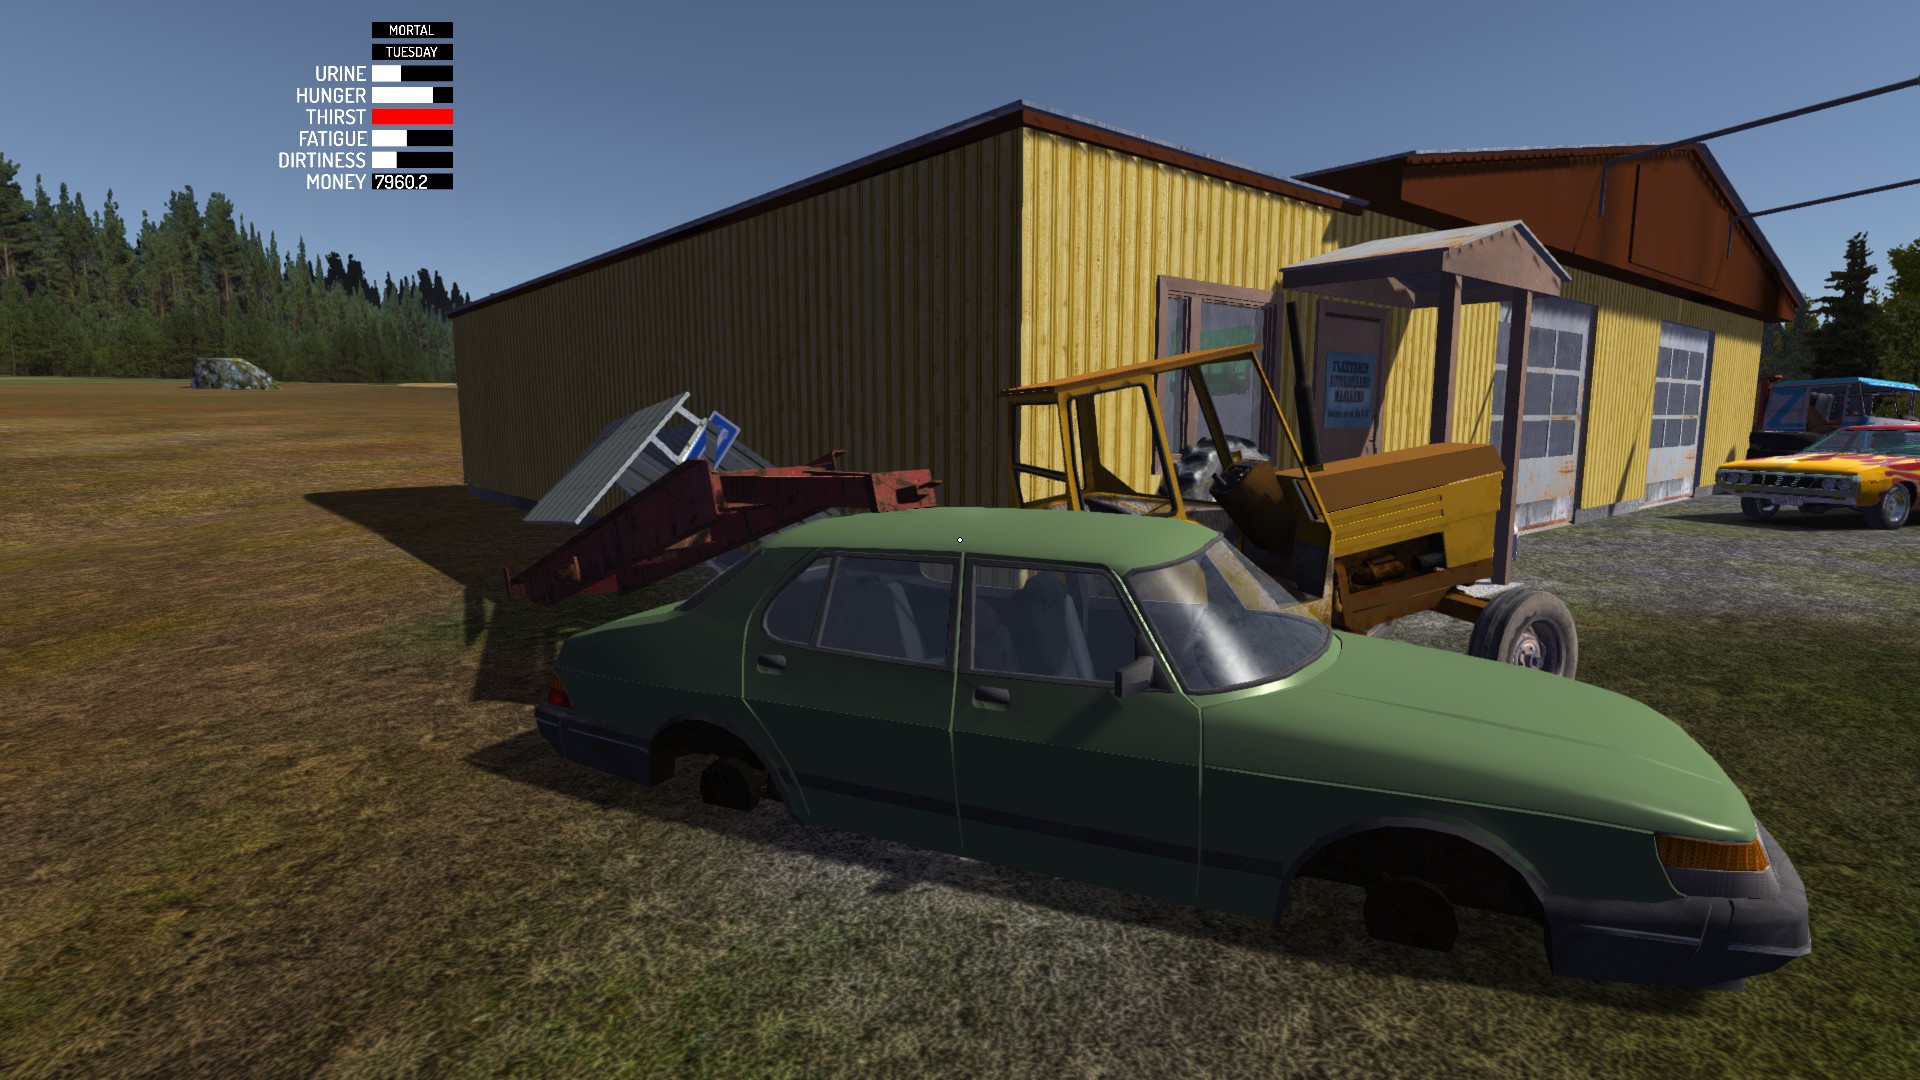
Also grab long coil springs. You can find them behind the green car body. Don’t use them before the car inspection, they will fail it!
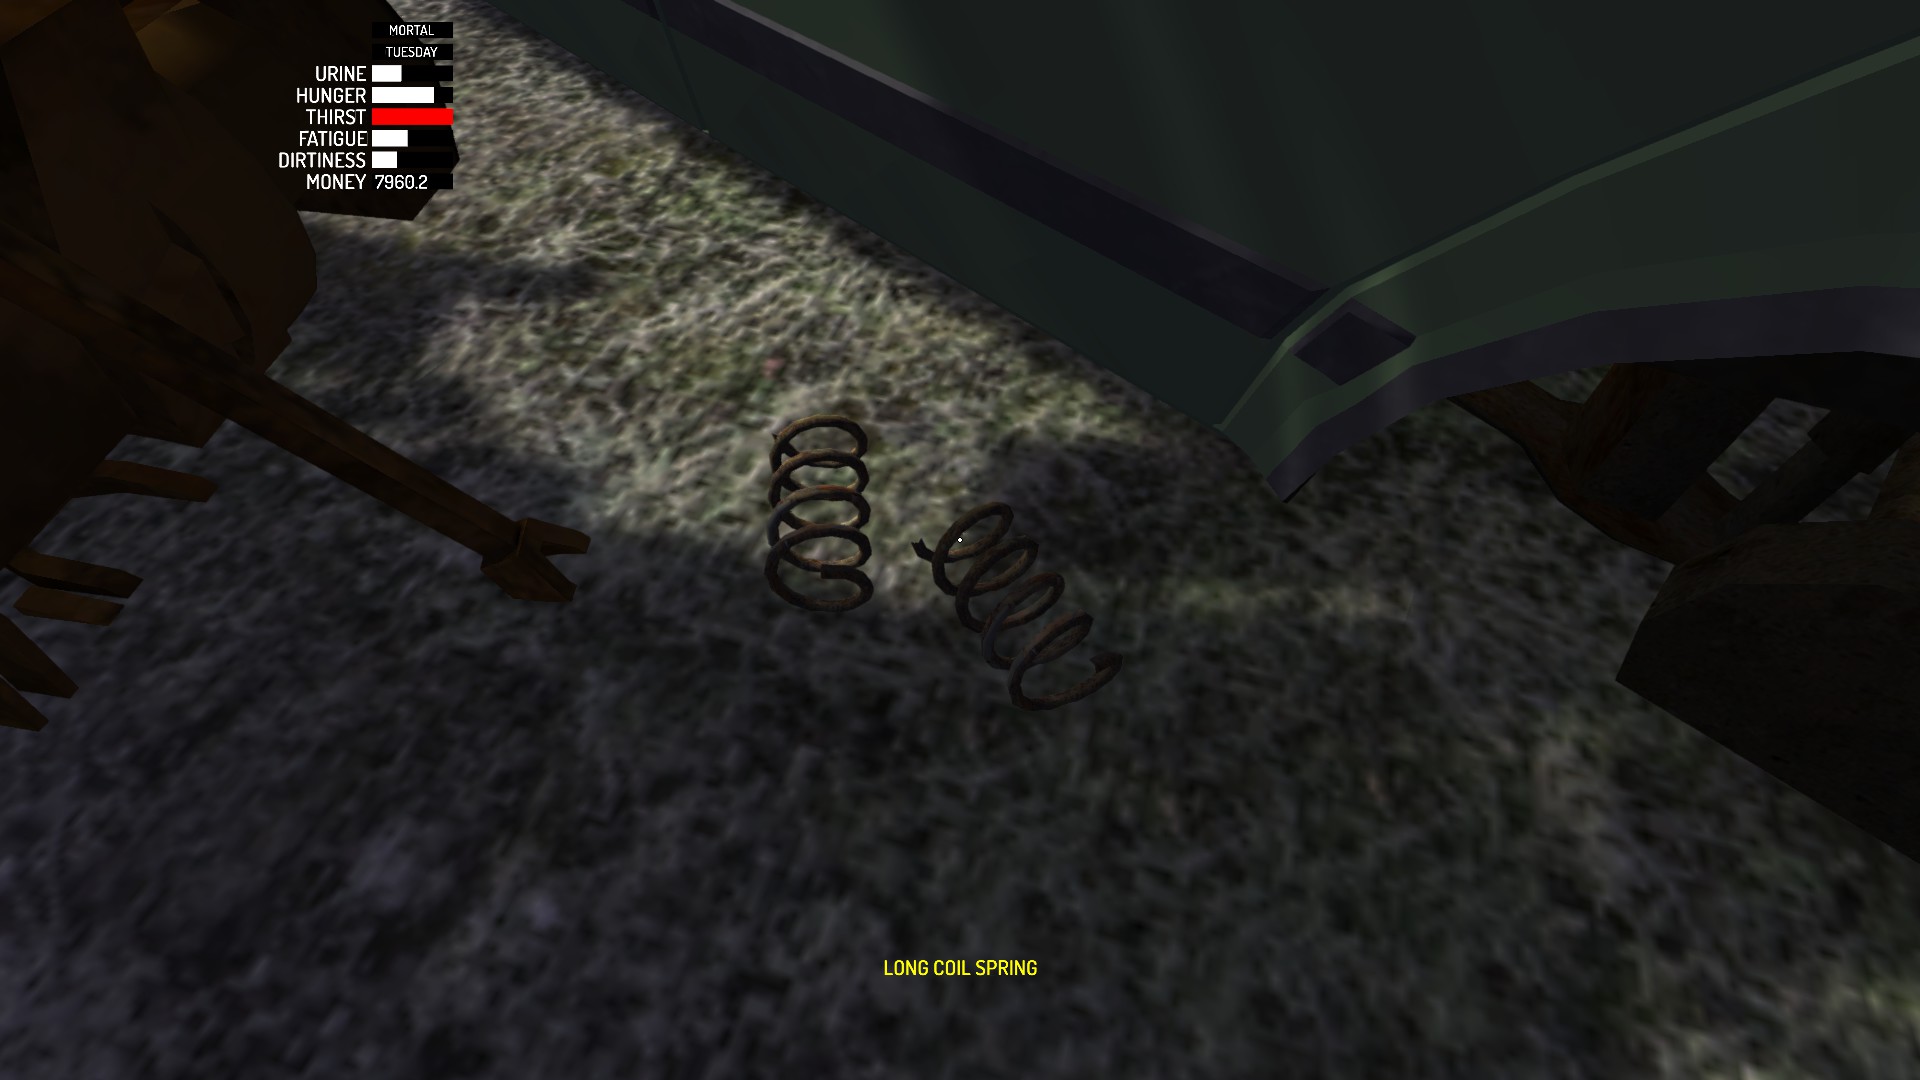
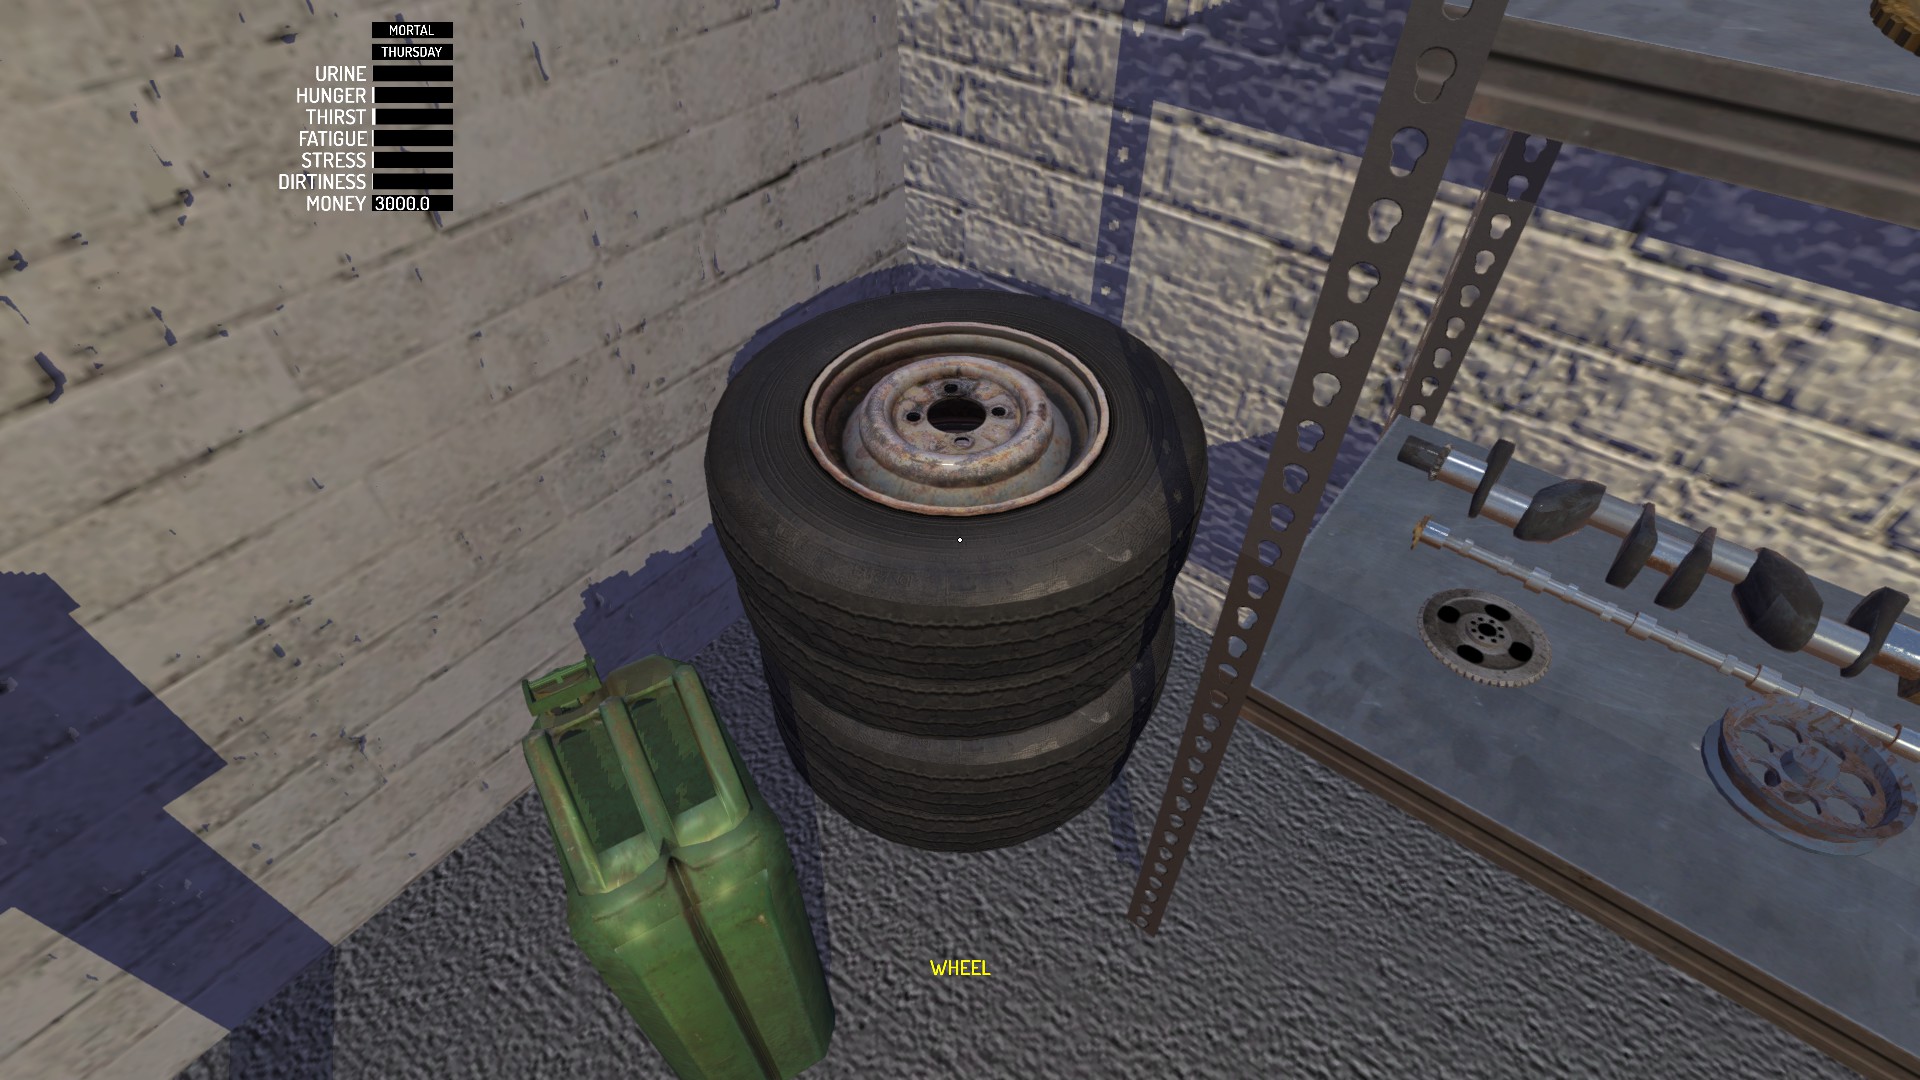
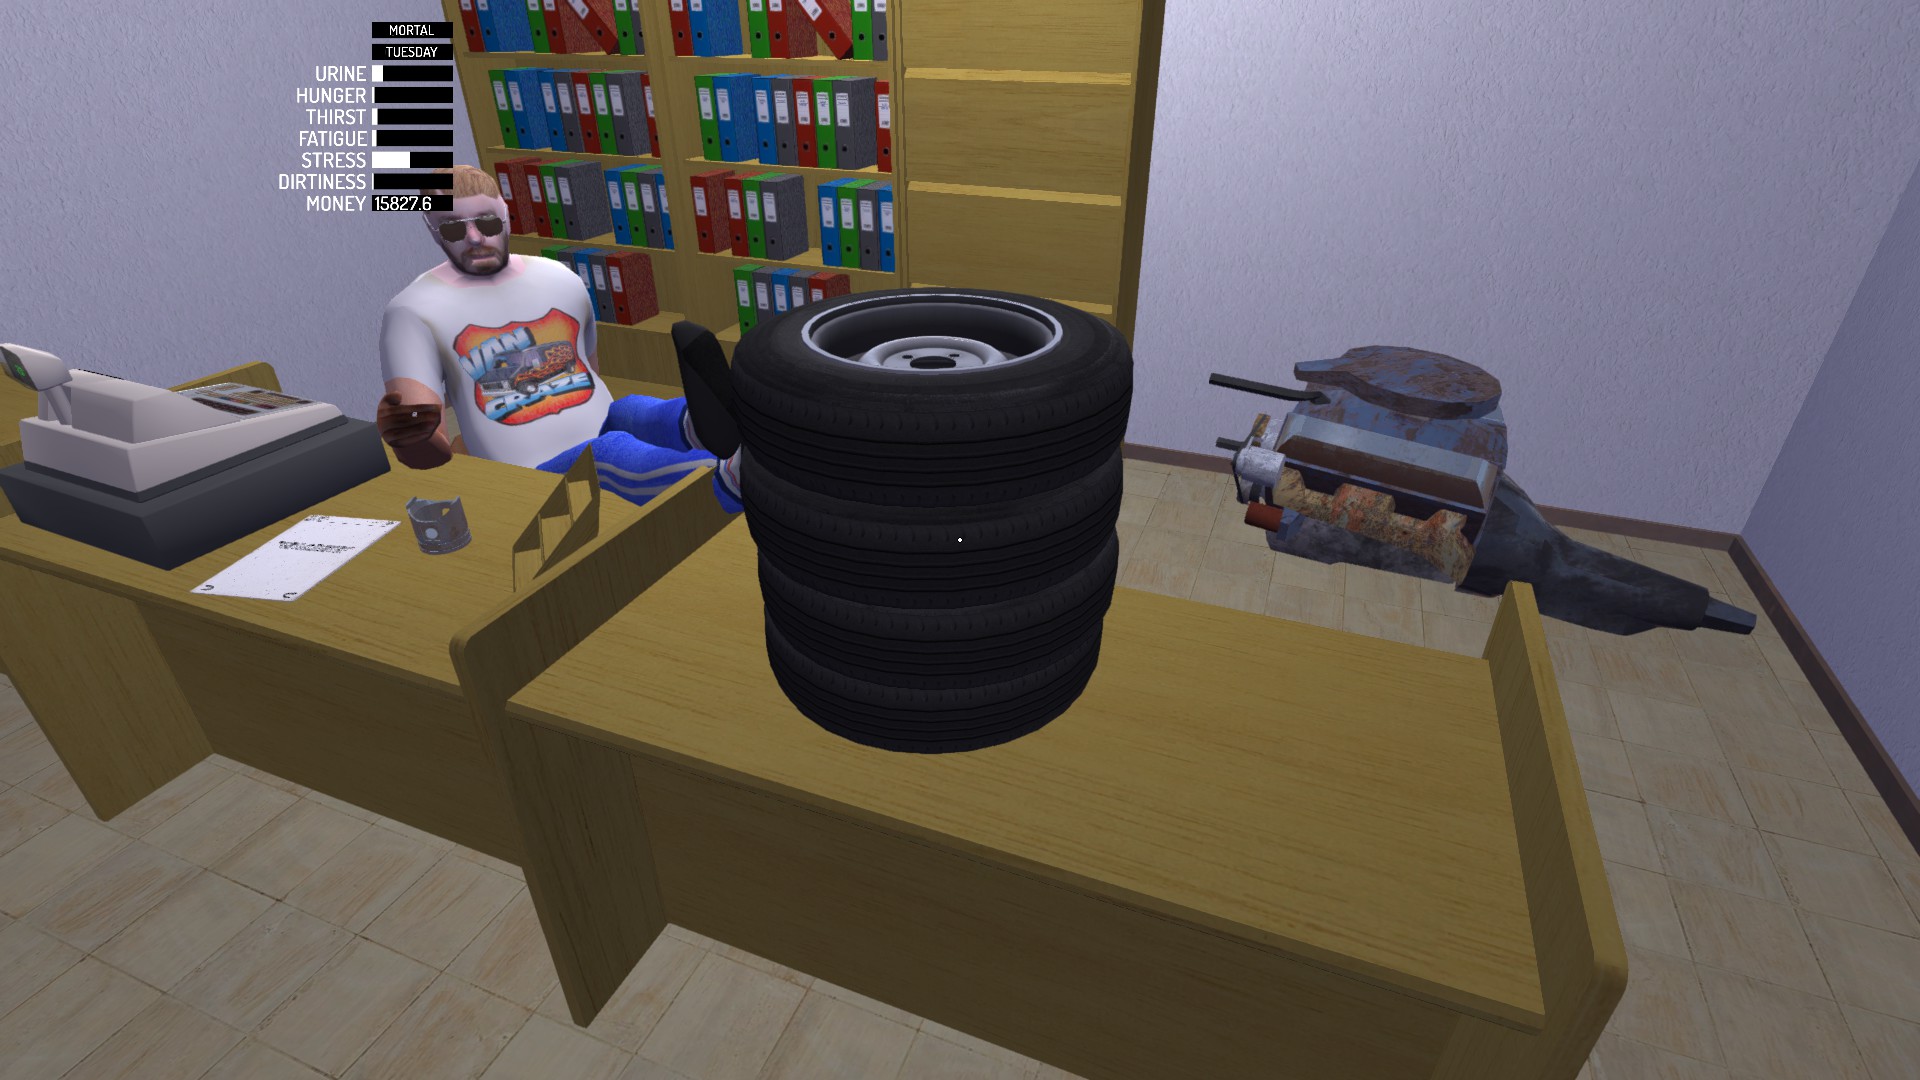
You will have to wait some time, so go home and start to build your car. Here are the wheels with the new tires by the way.
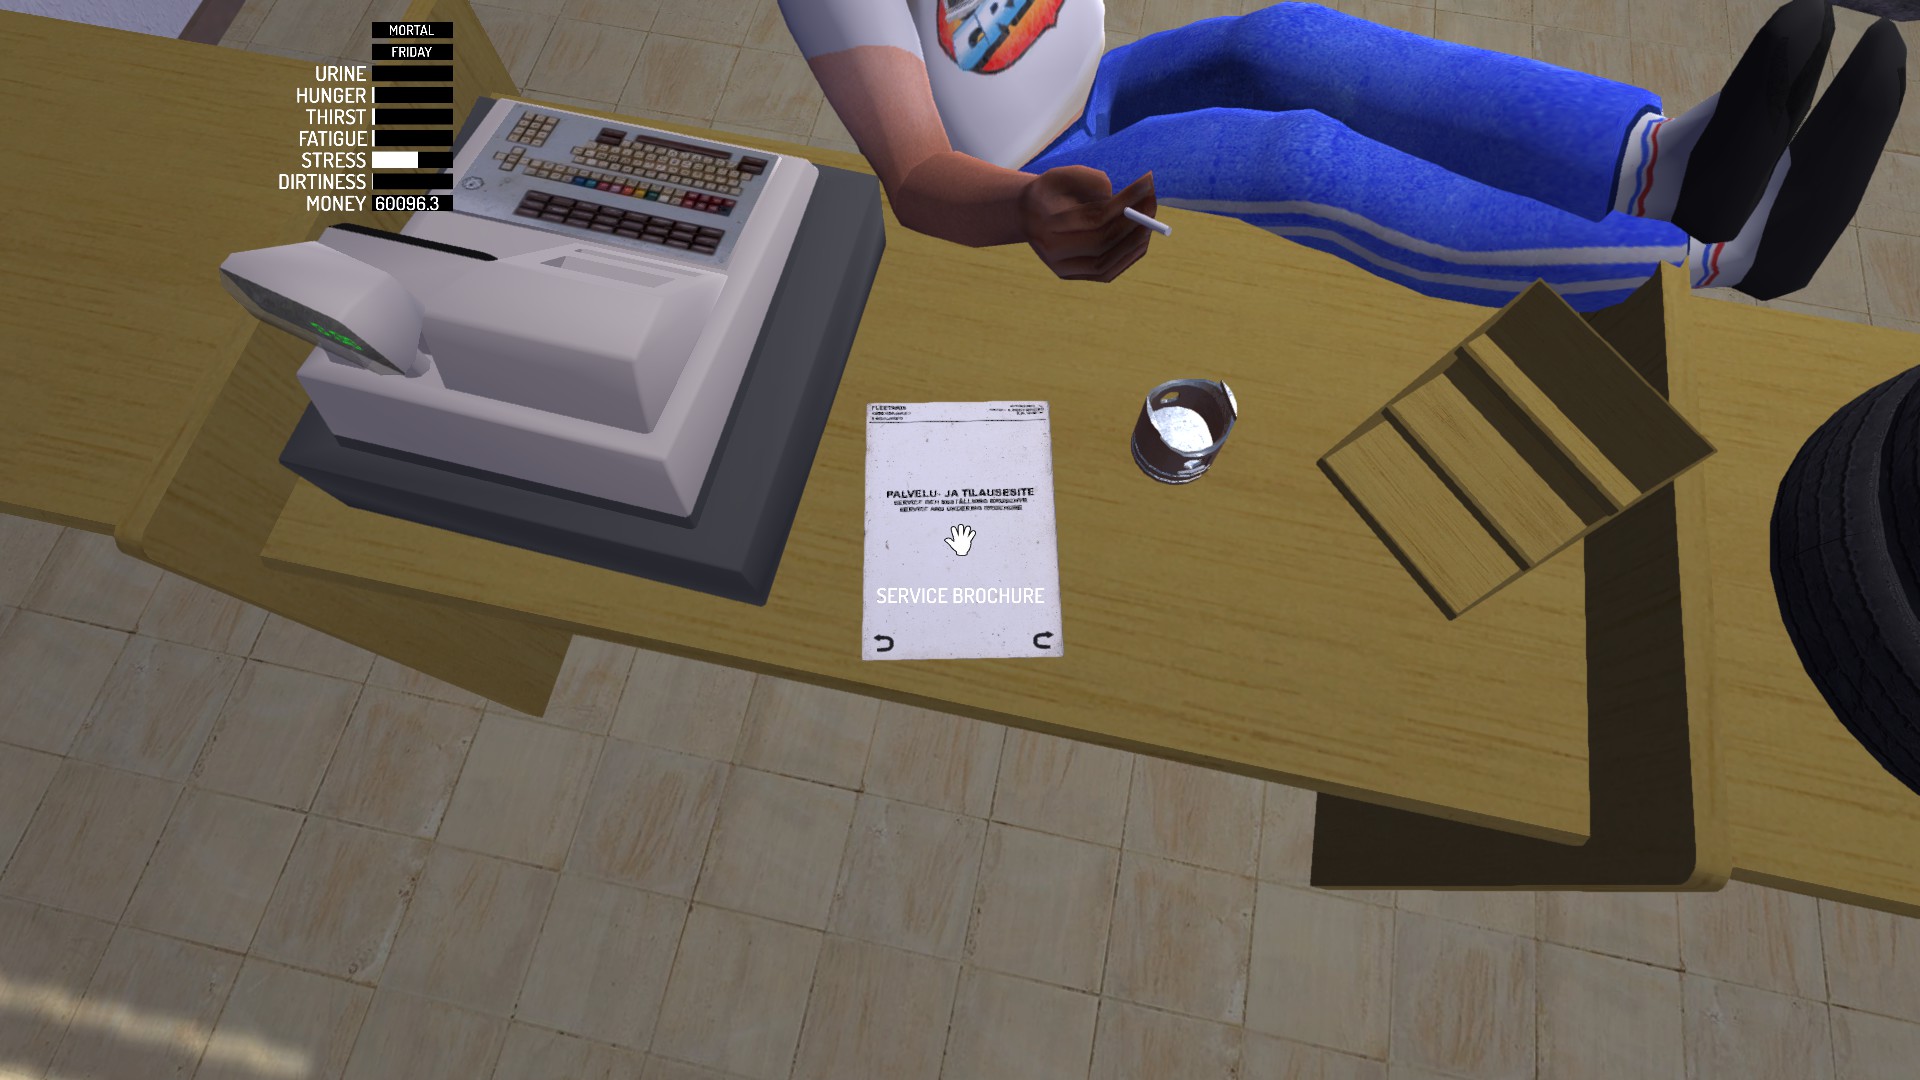
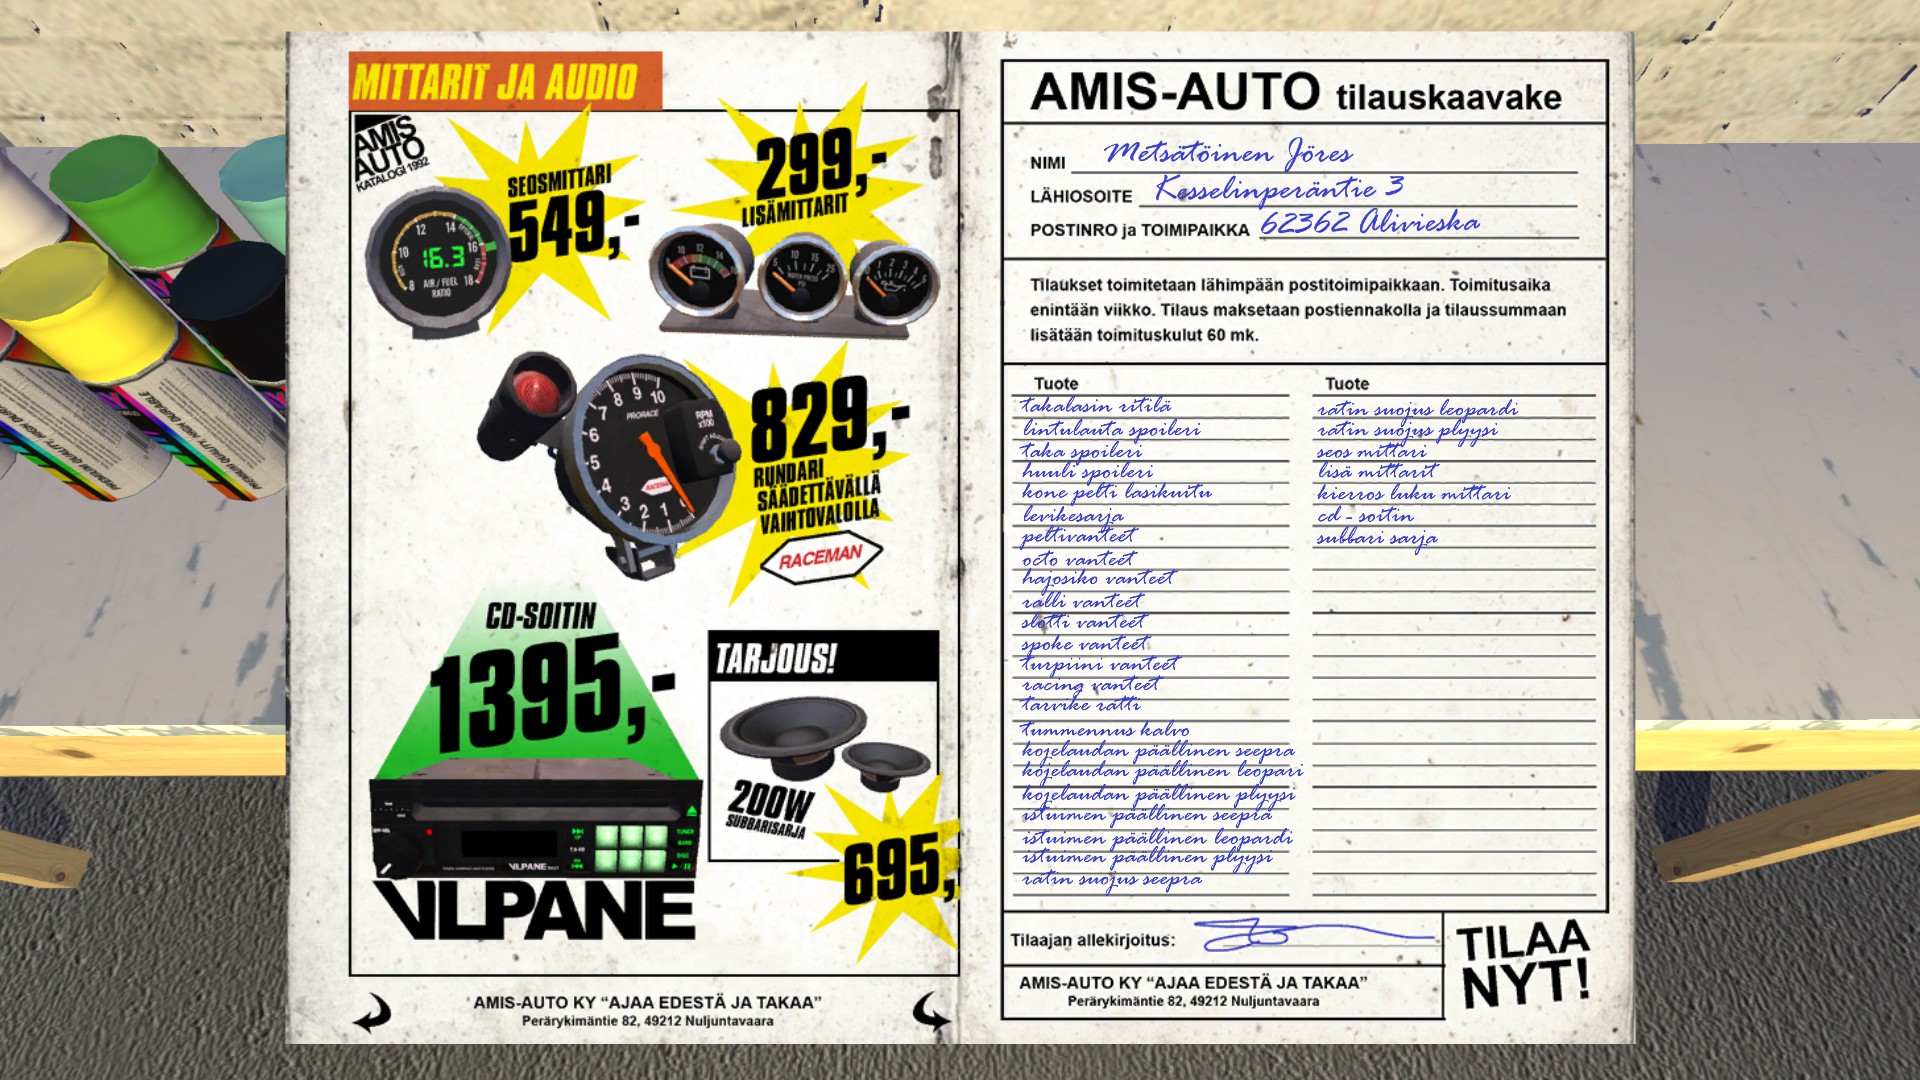
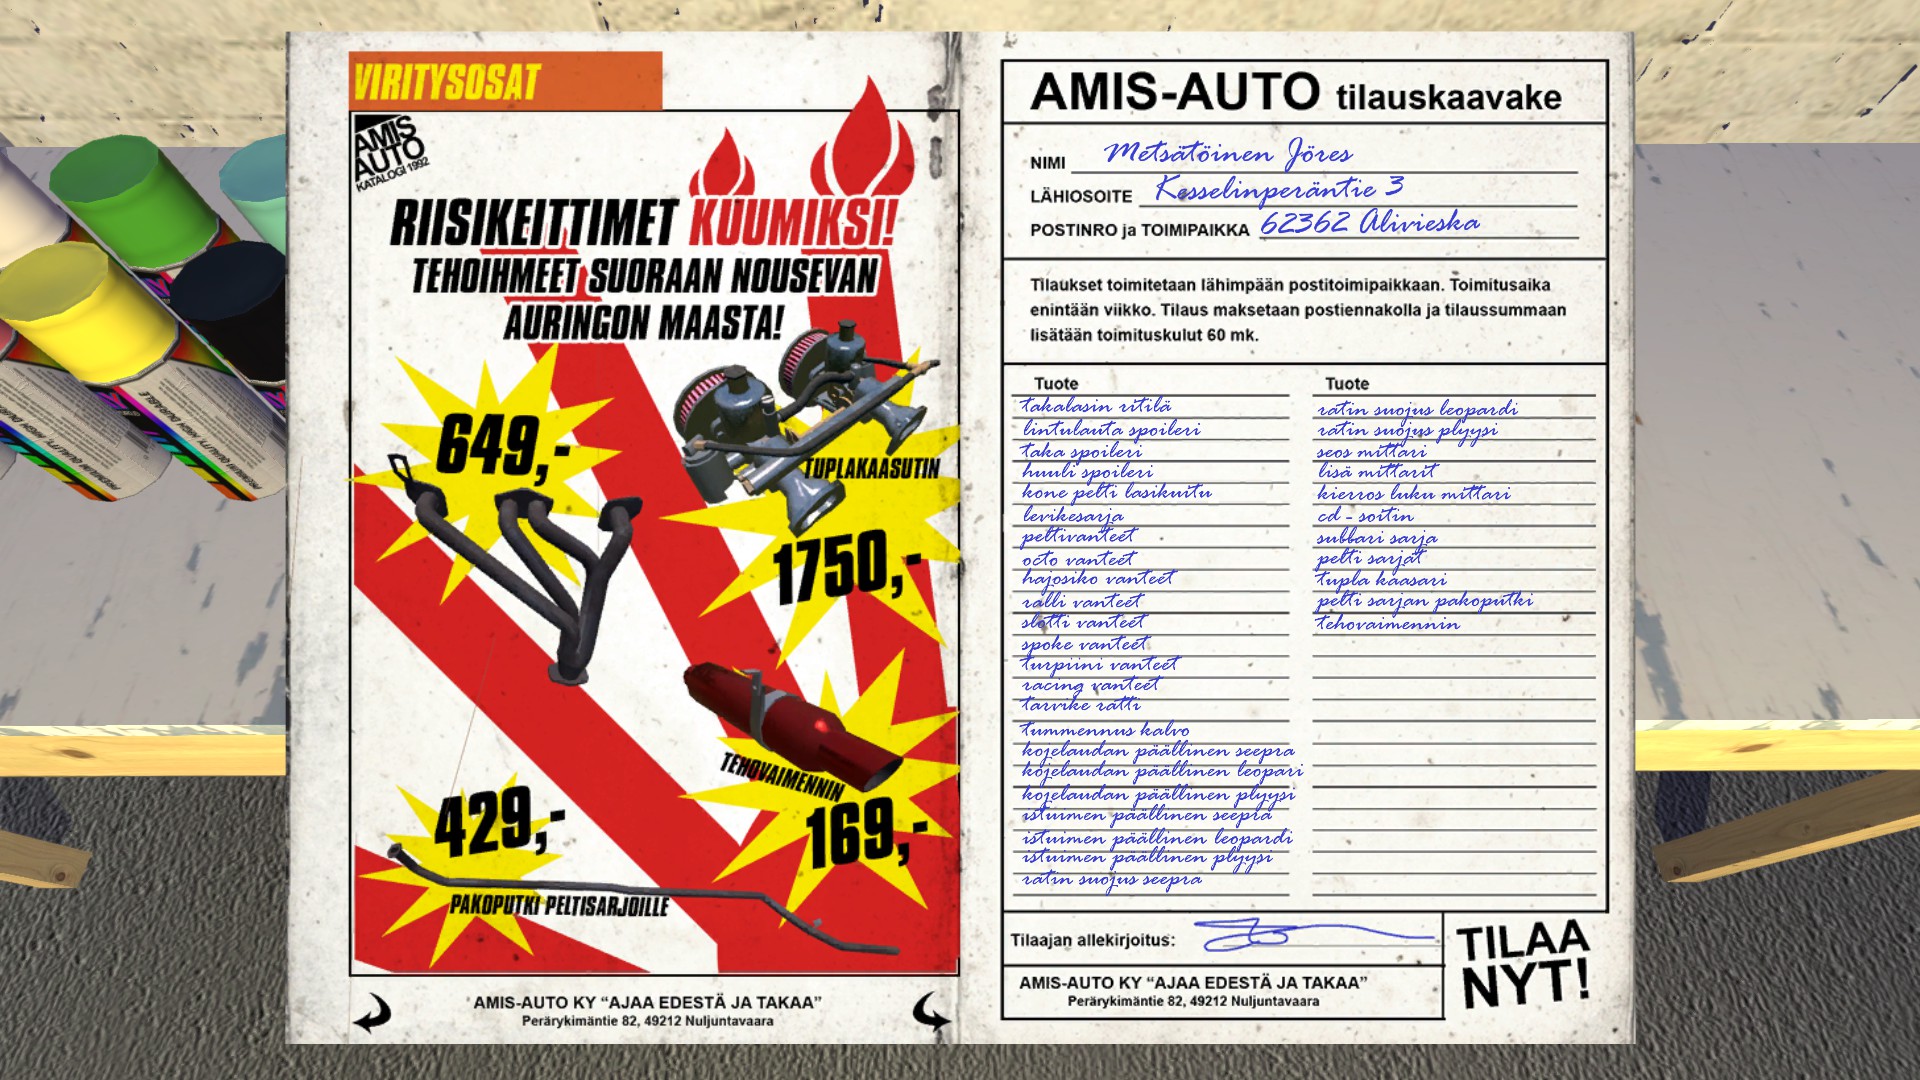
§003 Buying upgrades
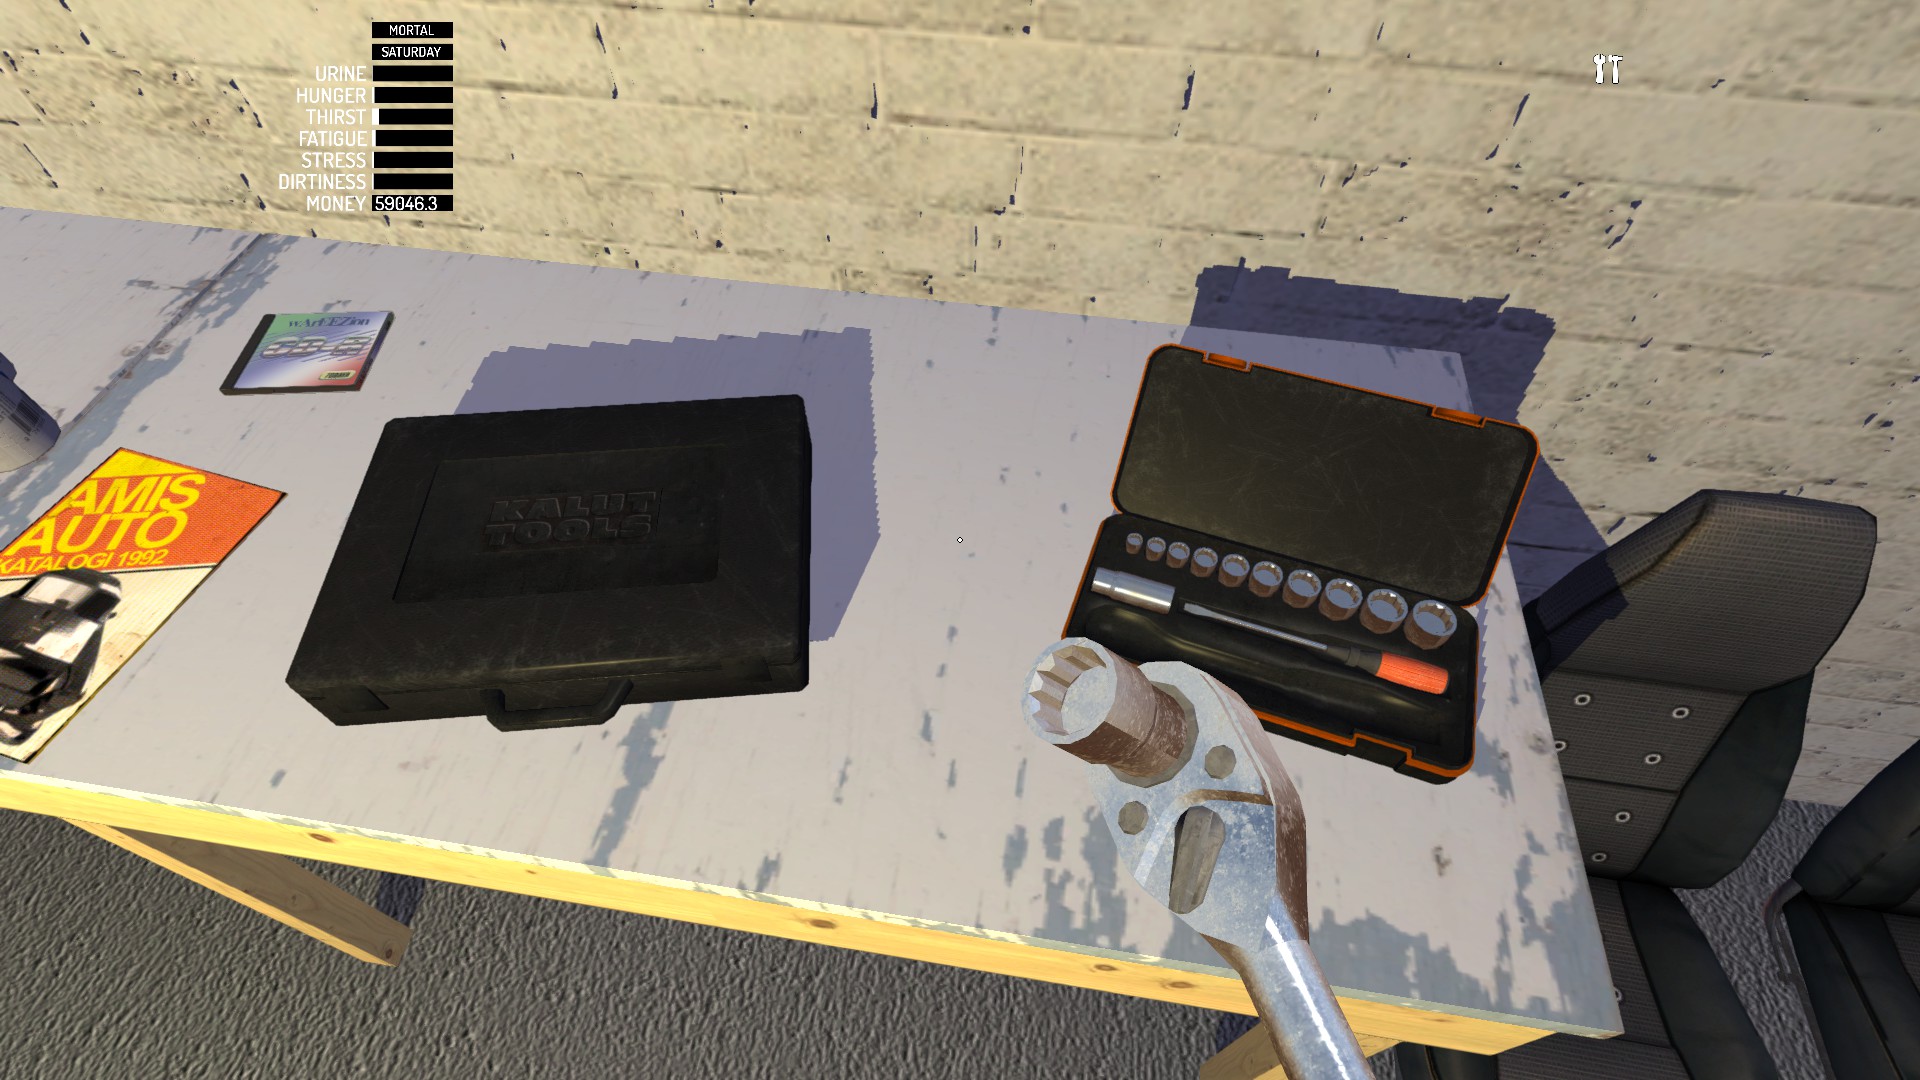
To buy upgrades you will need to go to catalog, select desired parts and bring envelope to Teimo’s. One thing you want earlier from this catalog is ratchet set as it makes dealing with bolts and nuts much faster (but you still will need stock tool box as well).
Attention! Some custom parts will fail car inspection[my-summer-car.wikia.com]! Buy now, put on later.
Rear spoiler
199 mk
Interchangeable with rear spoiler 2
Rear spoiler 2
329 mk
Interchangeable with rear spoiler
Front spoiler
249 mk
Interchangeable with fender flare spoiler
Fender flares and fender flare spoiler
1195 mk
Interchangeable with front spoiler
Rims
1205 mk
1895 mk
1950 mk
1975 mk
2200 mk
2310 mk
2545 mk
2590 mk
Rims go without any tires
Sport steering wheel
349 mk
Interchangeable with rally steering wheel
Windows black wrap
299 mk
Endless use
Dash cover zebra
295 mk
Interchangeable with other dash covers
Dash cover leopard
295 mk
Interchangeable with other dash covers
Dash cover plush
295 mk
Interchangeable with other dash covers
Seat cover zebra
139 mk
Interchangeable with other seat covers
Seat cover leopard
139 mk
Interchangeable with other seat covers
Seat cover plush
139 mk
Interchangeable with other seat covers
Wheel cover zebra
49 mk
Interchangeable with other wheel covers
Wheel cover leopard
49 mk
Interchangeable with other wheel covers
Wheel cover plush
49 mk
Interchangeable with other wheel covers
Fuel mixture gauge
549 mk
Twin carburetors
1750 mk
Interchangeable with racing carburetors
Racing carburetors
7250 mk
Interchangeable with twin carburetors
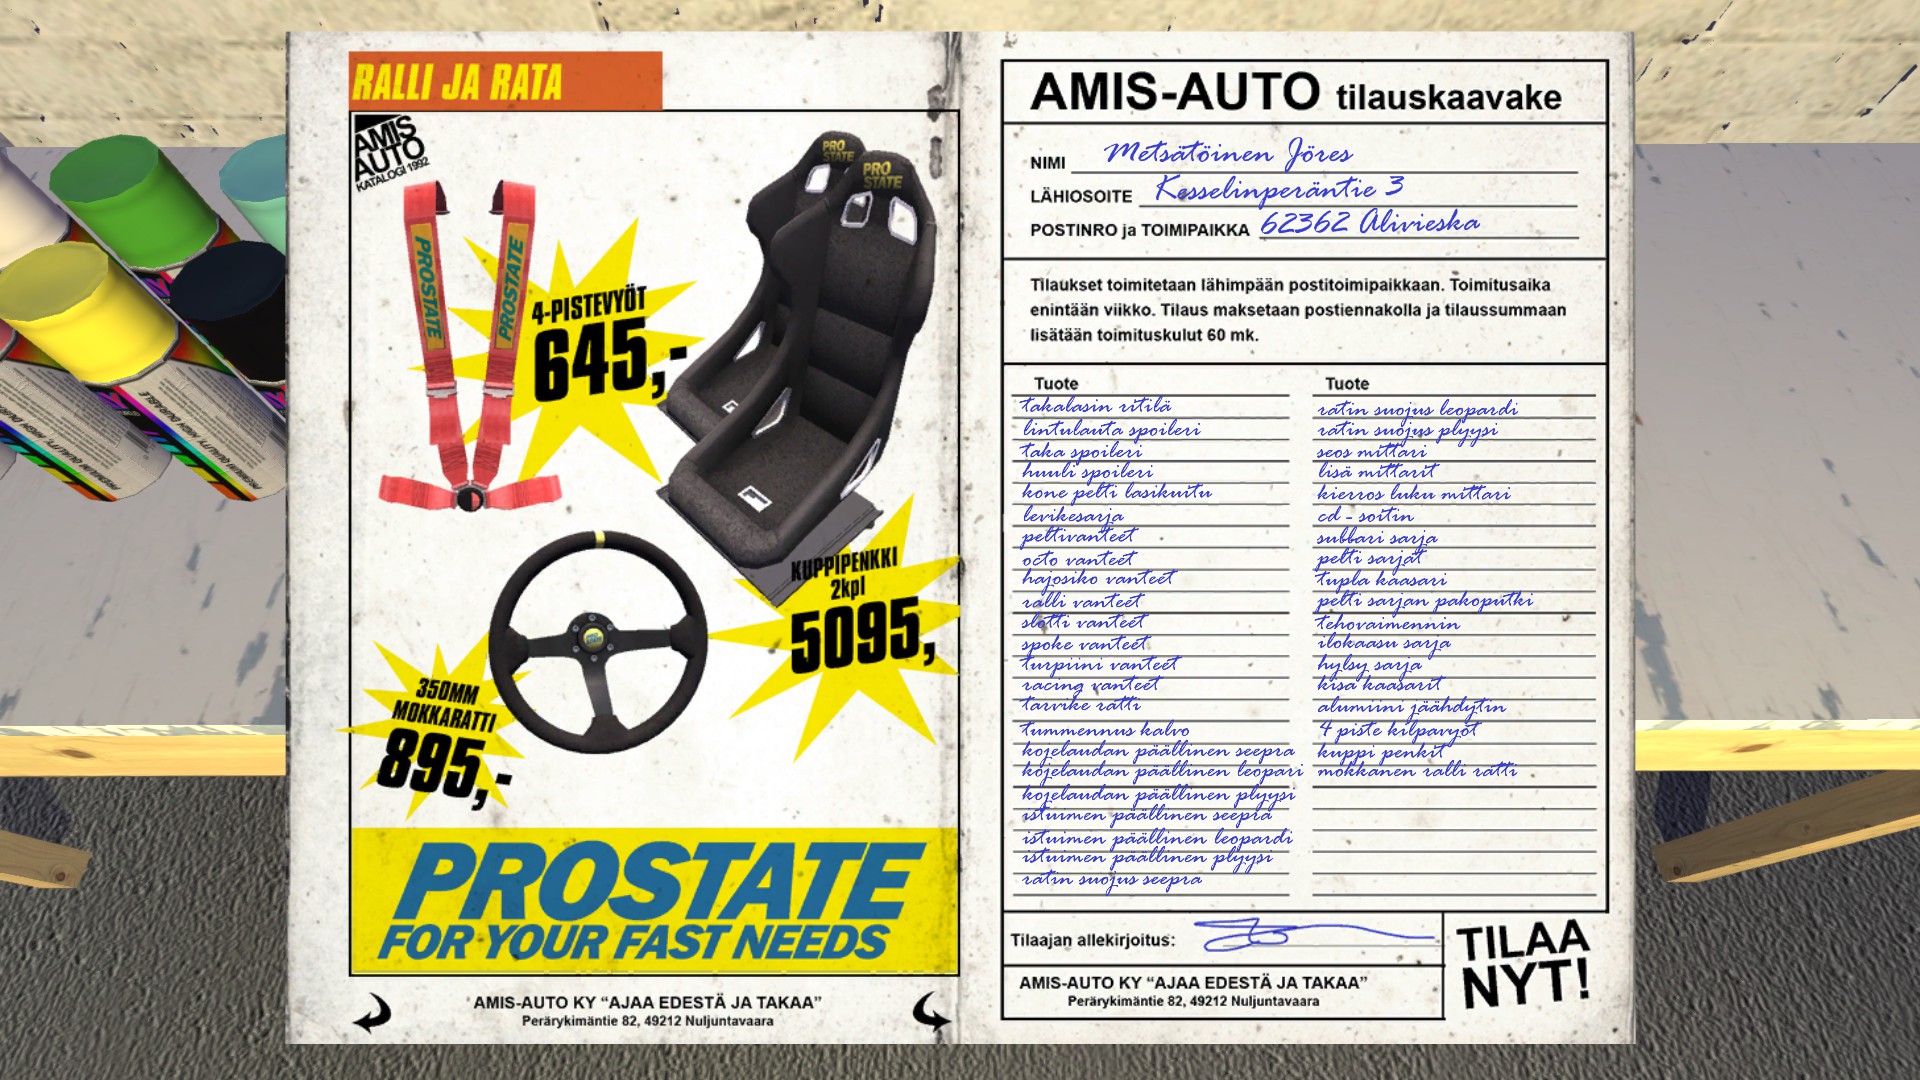
Racing harness
645 mk
Can be installed on roll cage only
Rally steering wheel
895 mk
Interchangeable with sport steering wheel
Rally suspension kit
9550 mk


After few days you will get a call that you can take your stuff.


Well… Better take the tractor.
As rims go without tires, you will need to bring them to Fleetari (4 maximum at a time). Choose any desired type.


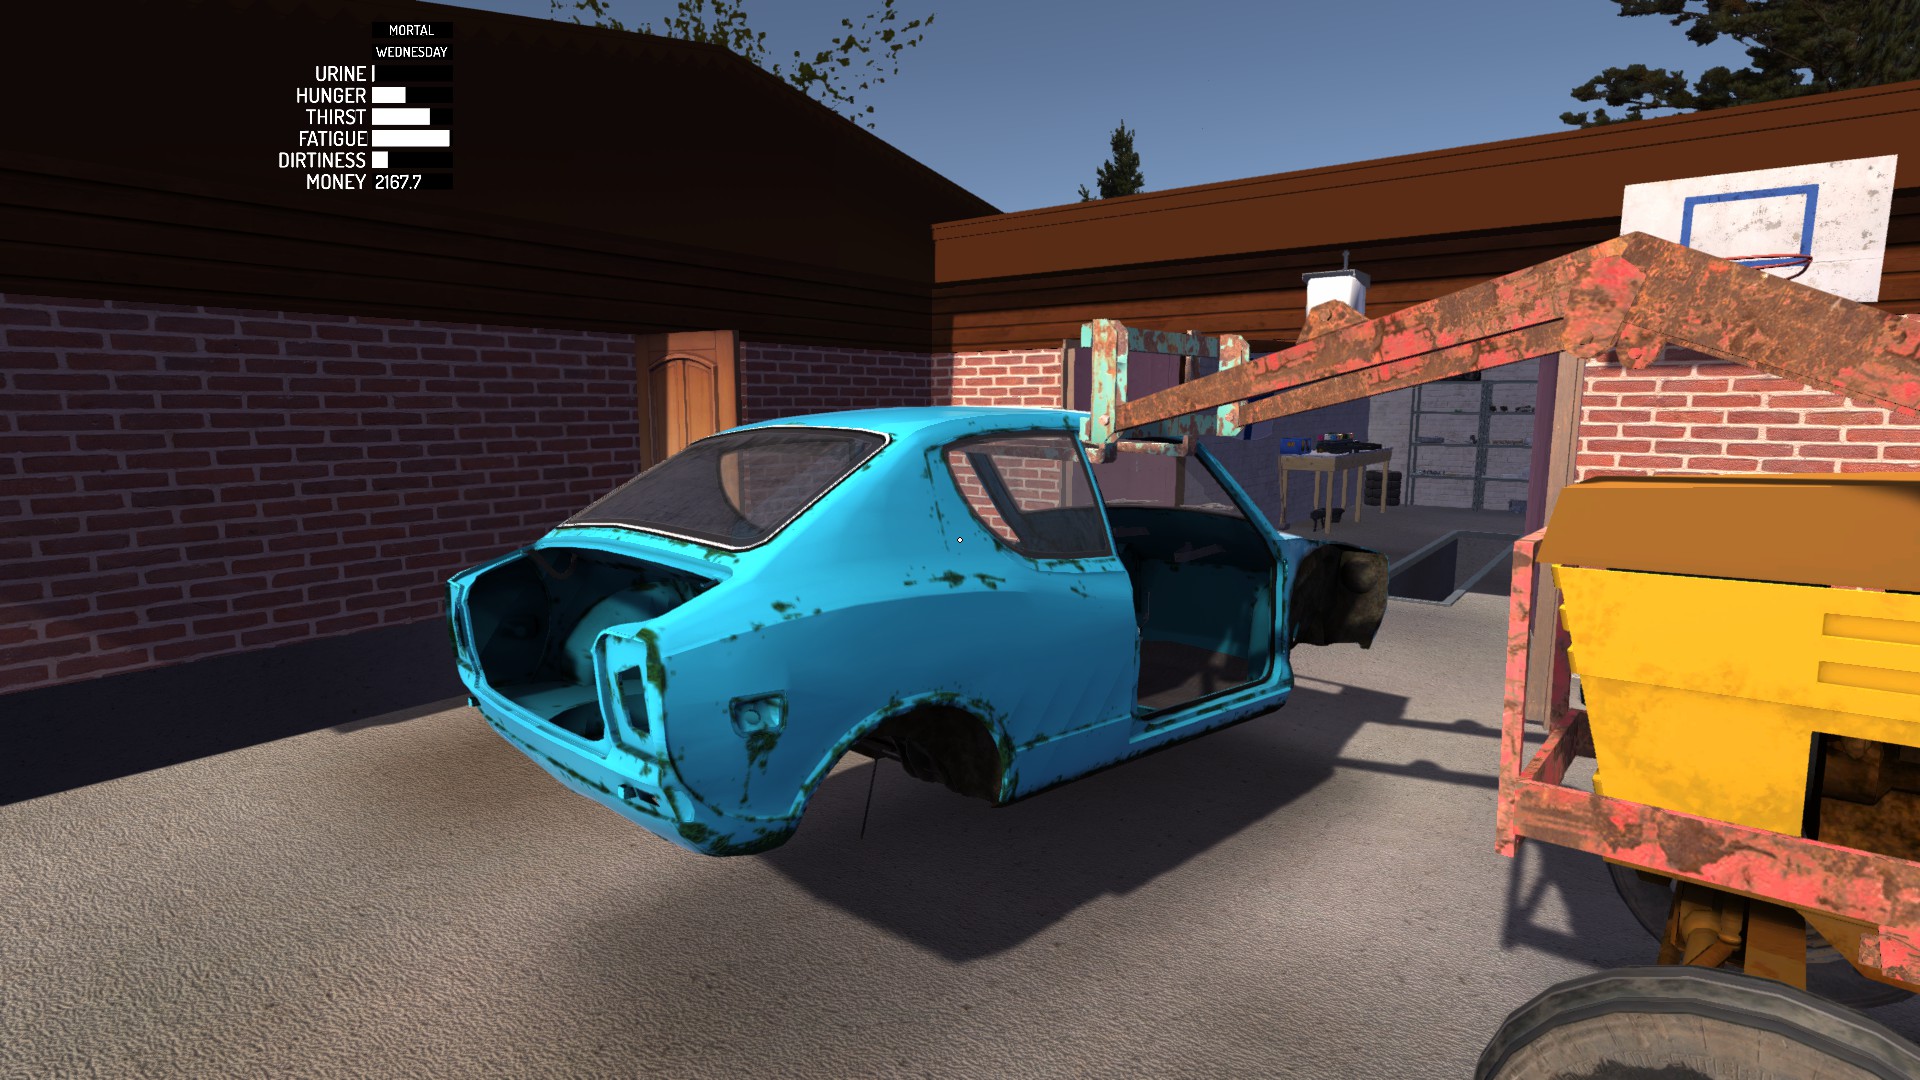
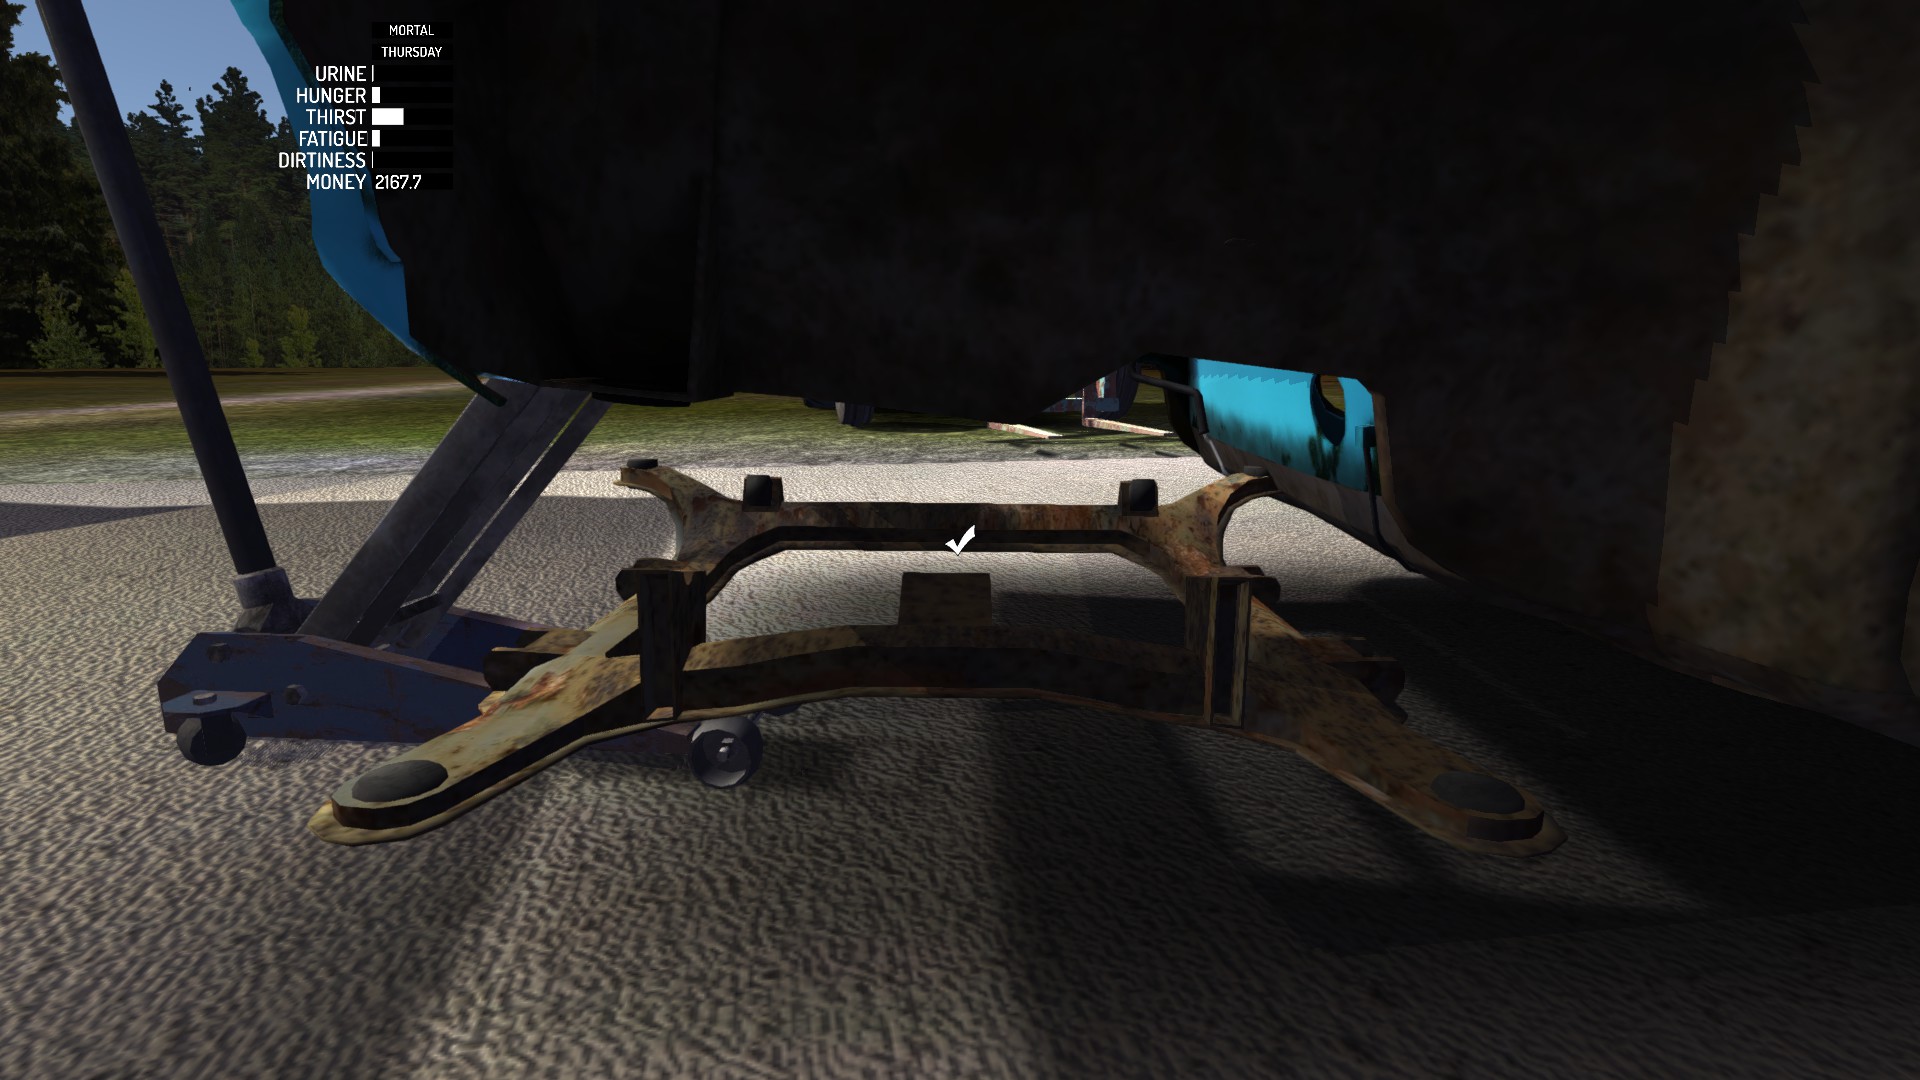
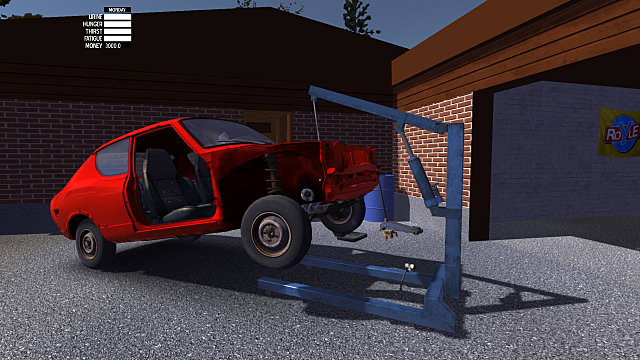
§004 Raising the body
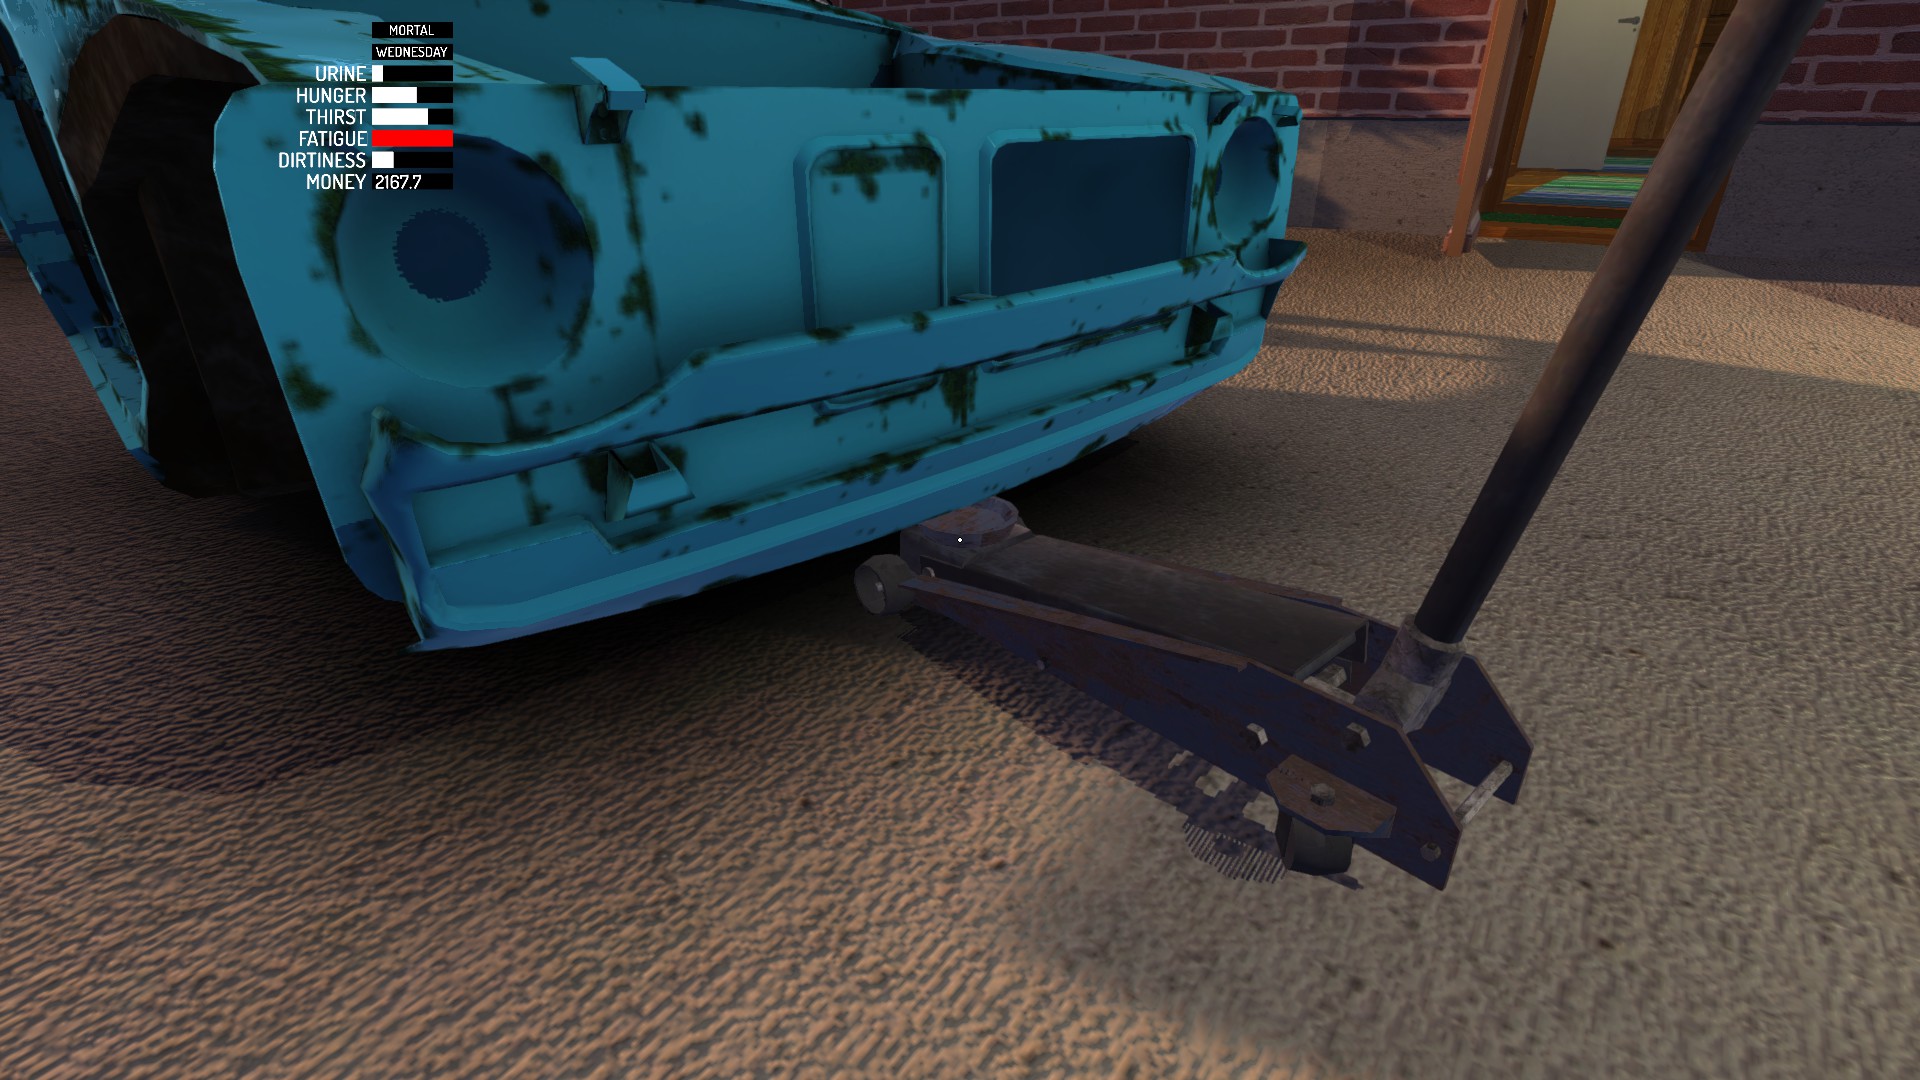
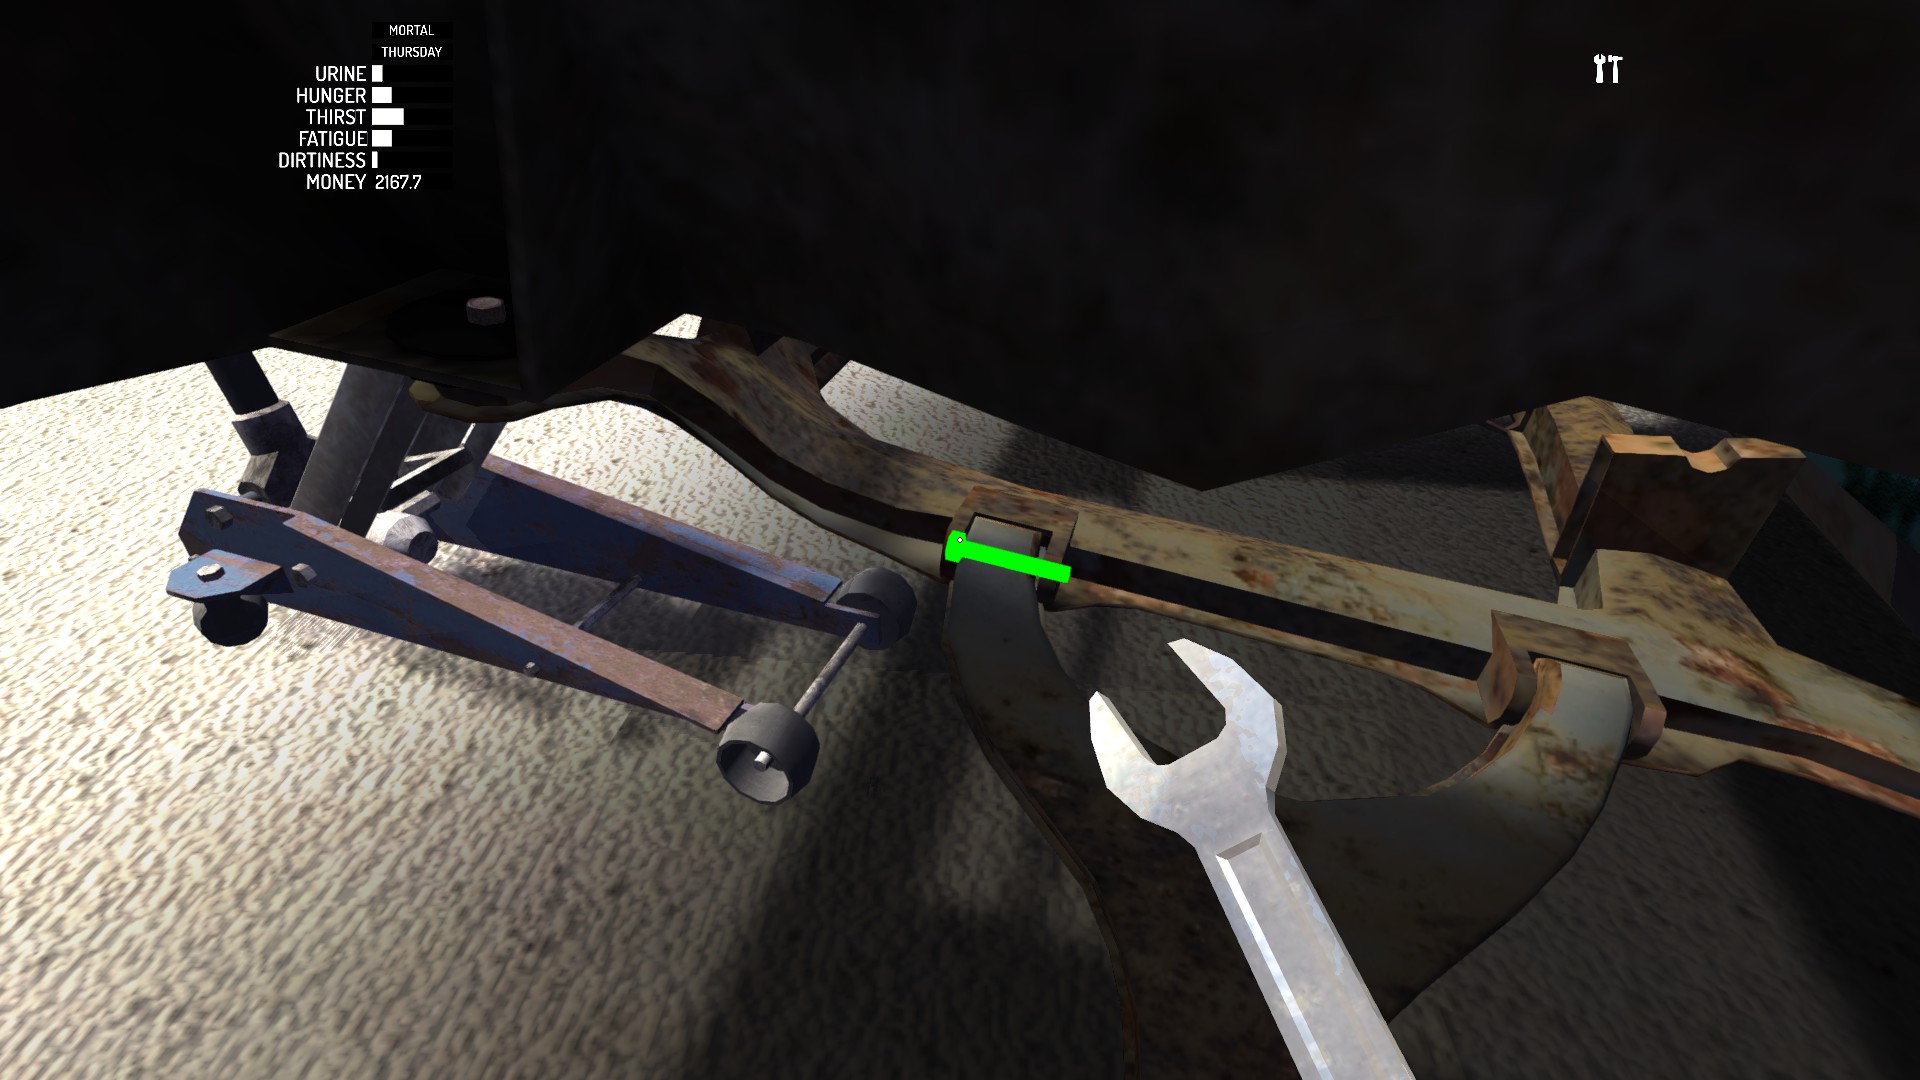
Place floor jack like on the screenshot and raise it with lever to the limit.


You always can try something exotic…
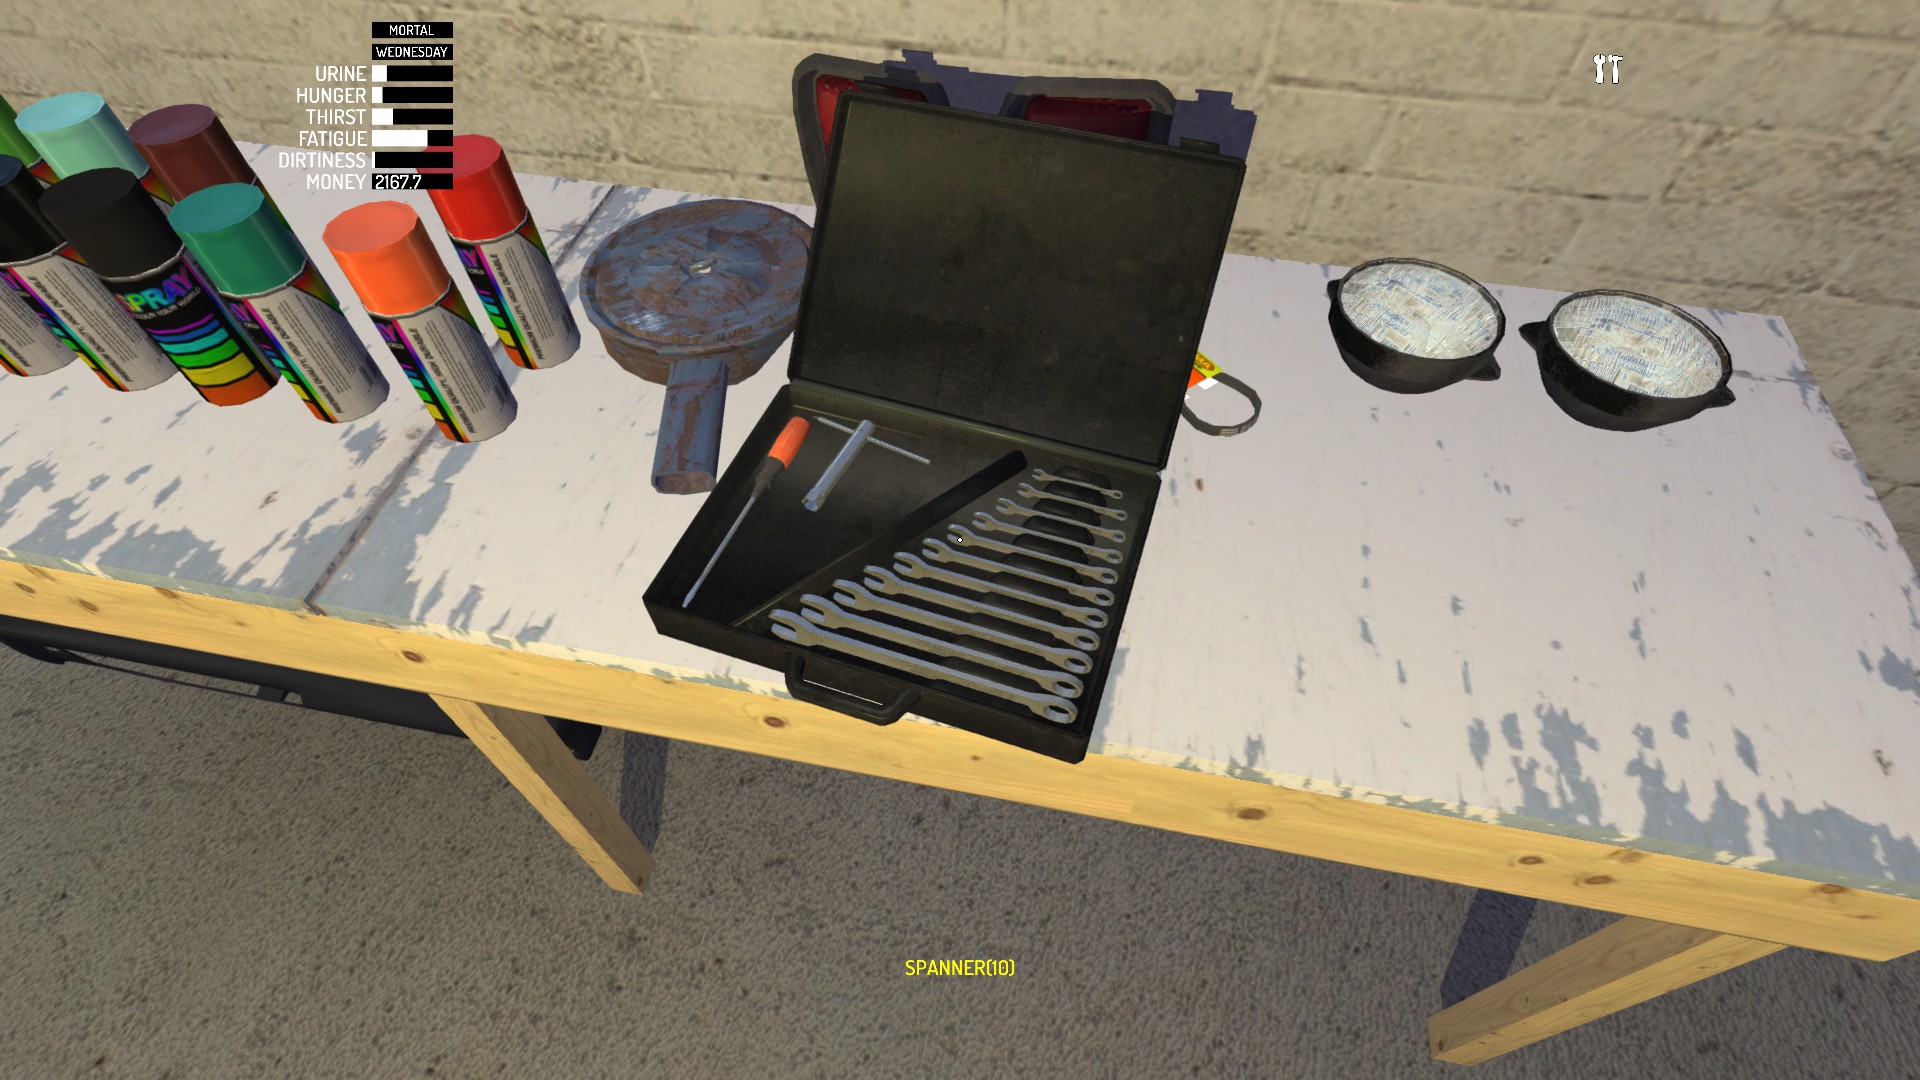
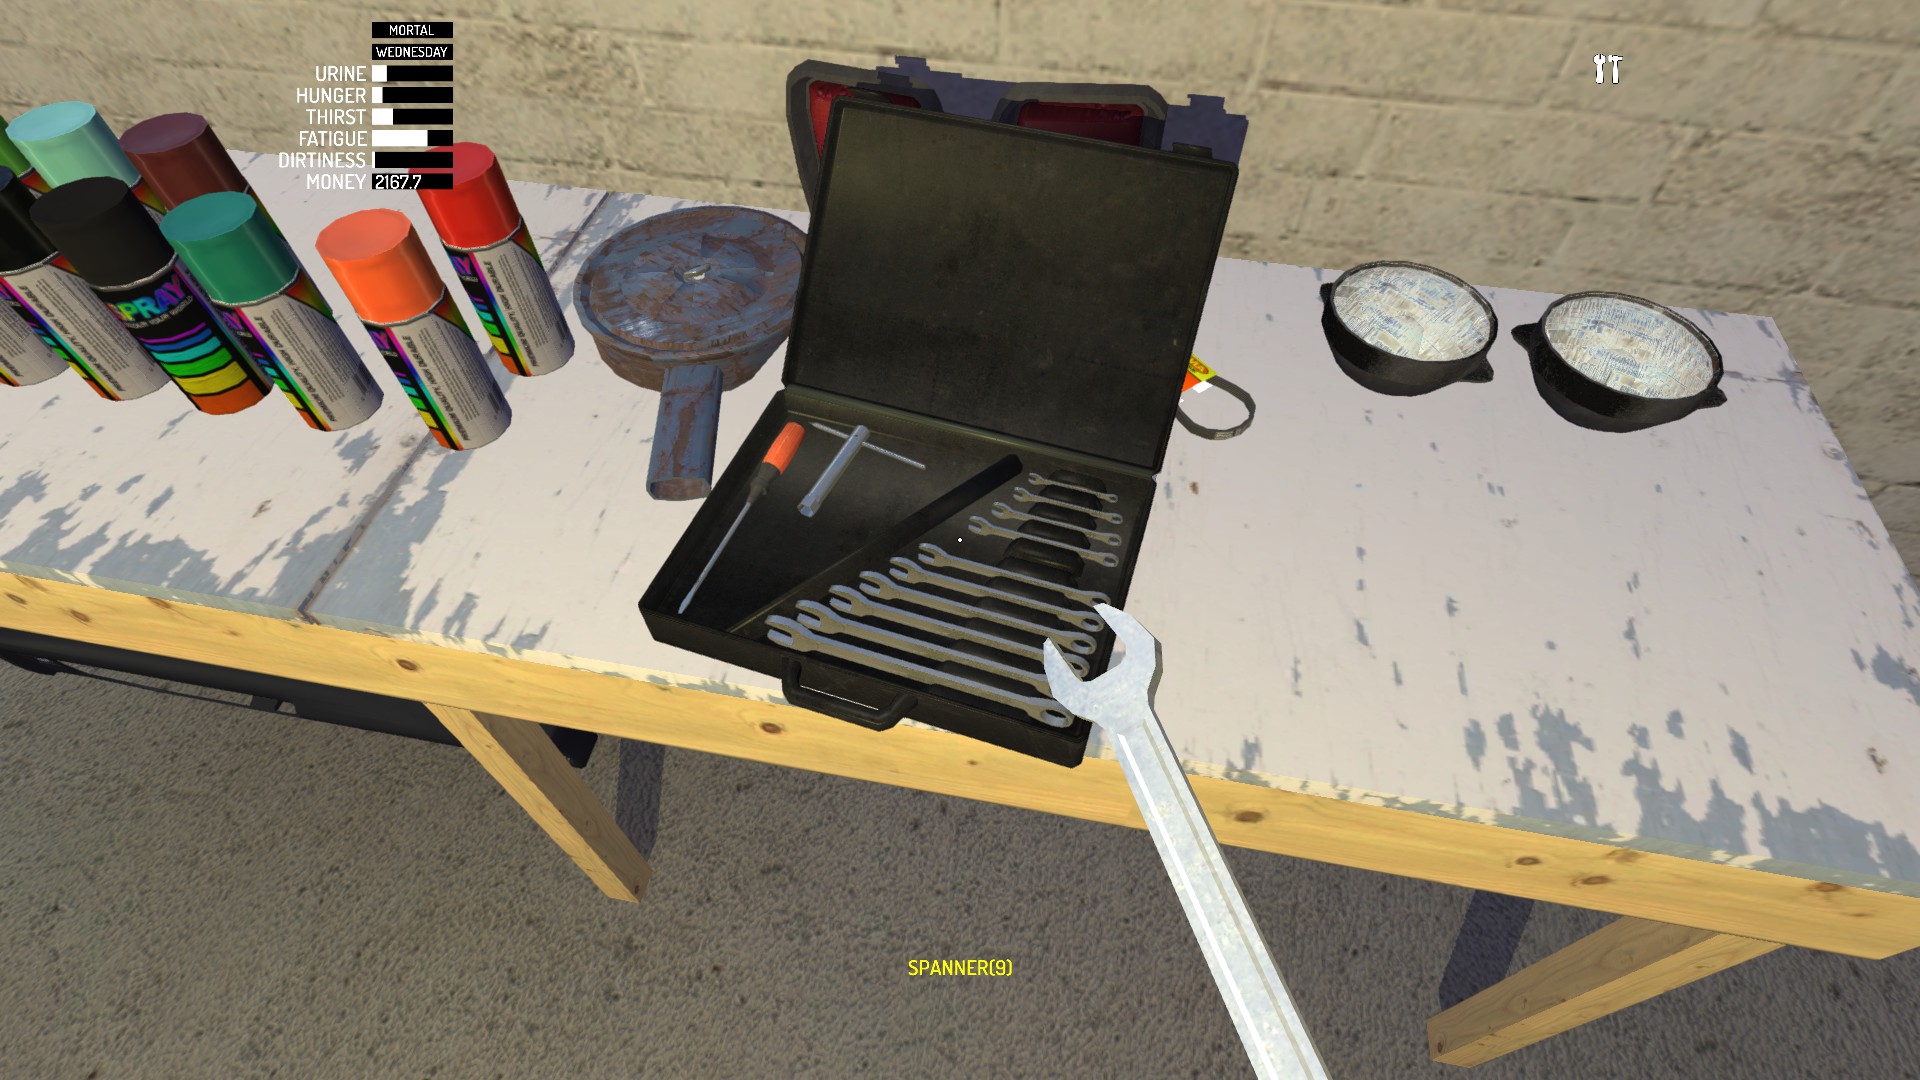
§005 Using tool box and putting parts on and off
To open tool box or ratchet set, hover the cursor to the place where it opens and press Use button.


Press 2 and click on what you need. Press 1 to hide the tool.


To tighten bolts and nuts with stock tool box scroll mouse wheel up, to unscrew scroll mouse wheel down.
Ratchet has 2 modes, 1st is to unscrew stuff, 2nd is to tighten. In any mode you can scroll mouse in any direction which makes using it very conveniently, because instead of scrolling into single direction you can just alternate between scroll up and scroll down. To switch between modes press Use button.

To put some part on click left mouse button (LMB), to put it off click right mouse button (RMB).
§006 Sub frame
Sub frame: 10 mm × 4.


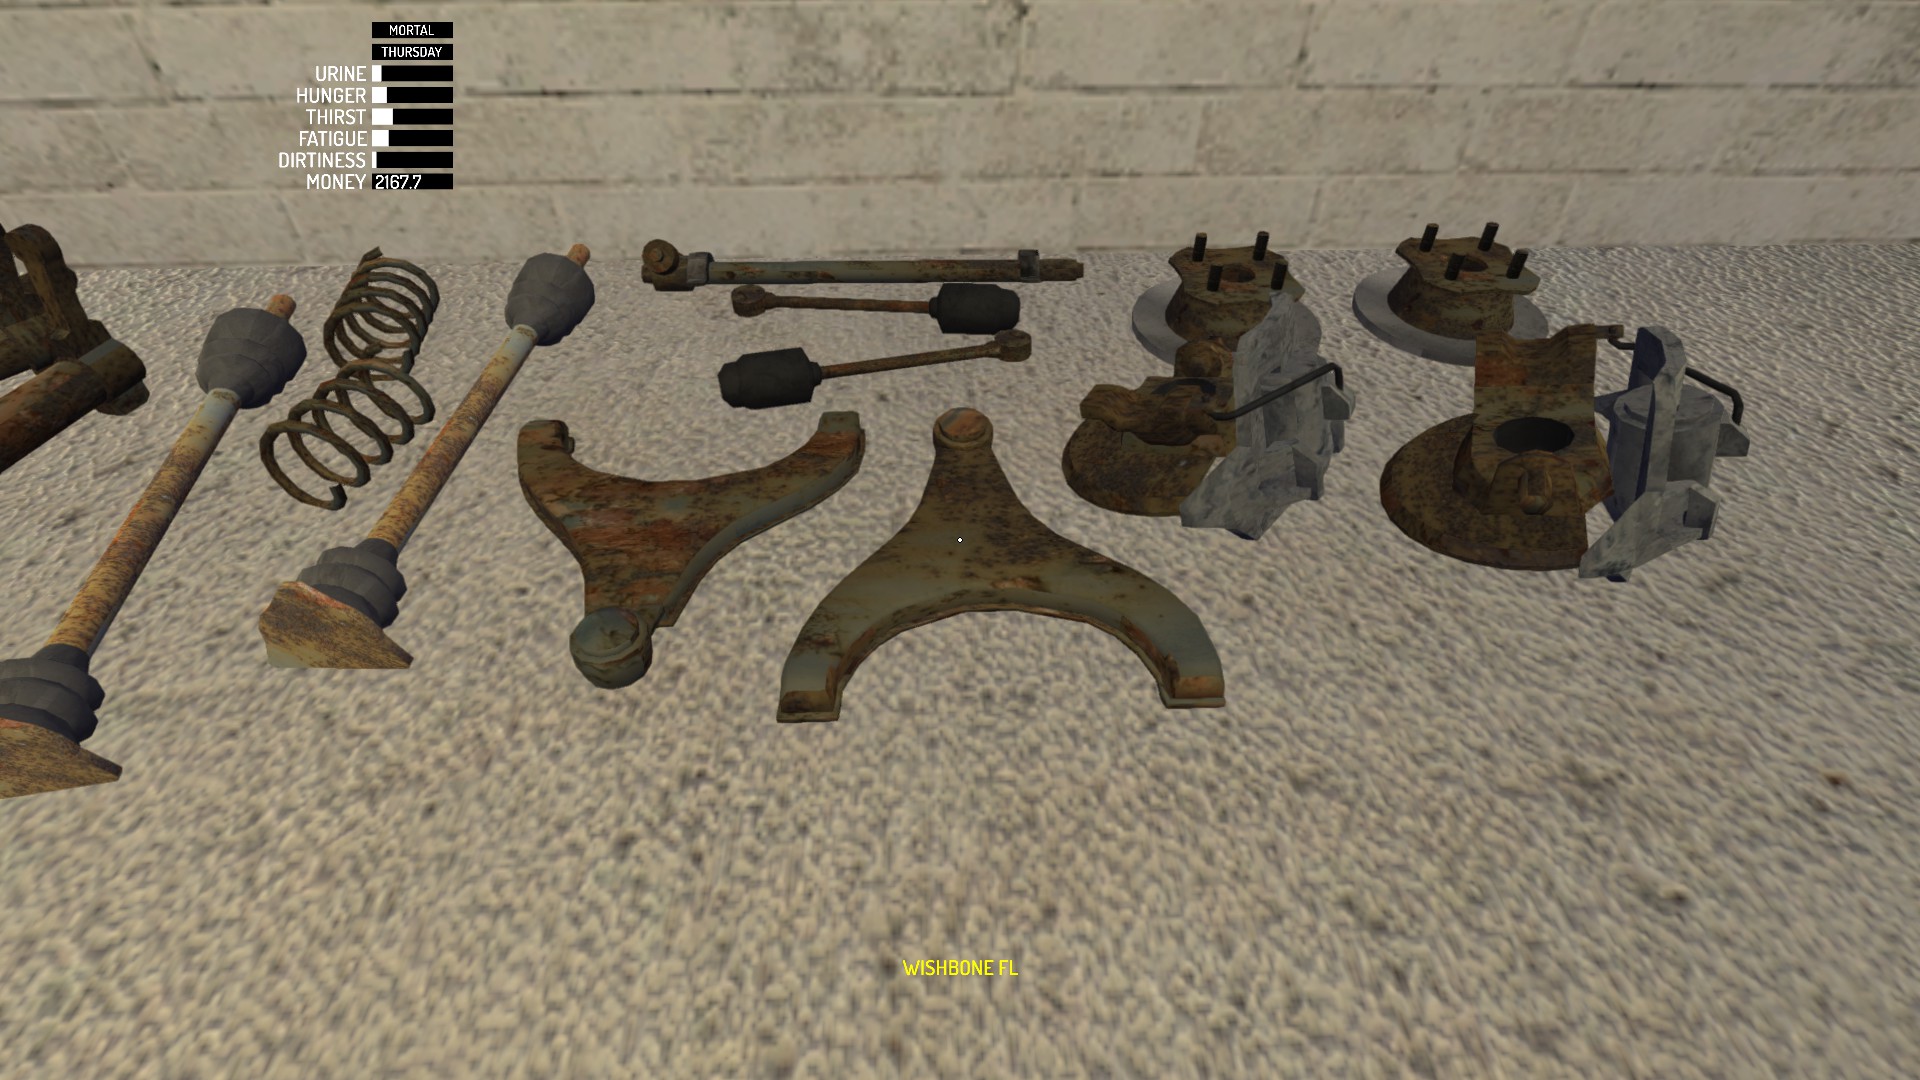
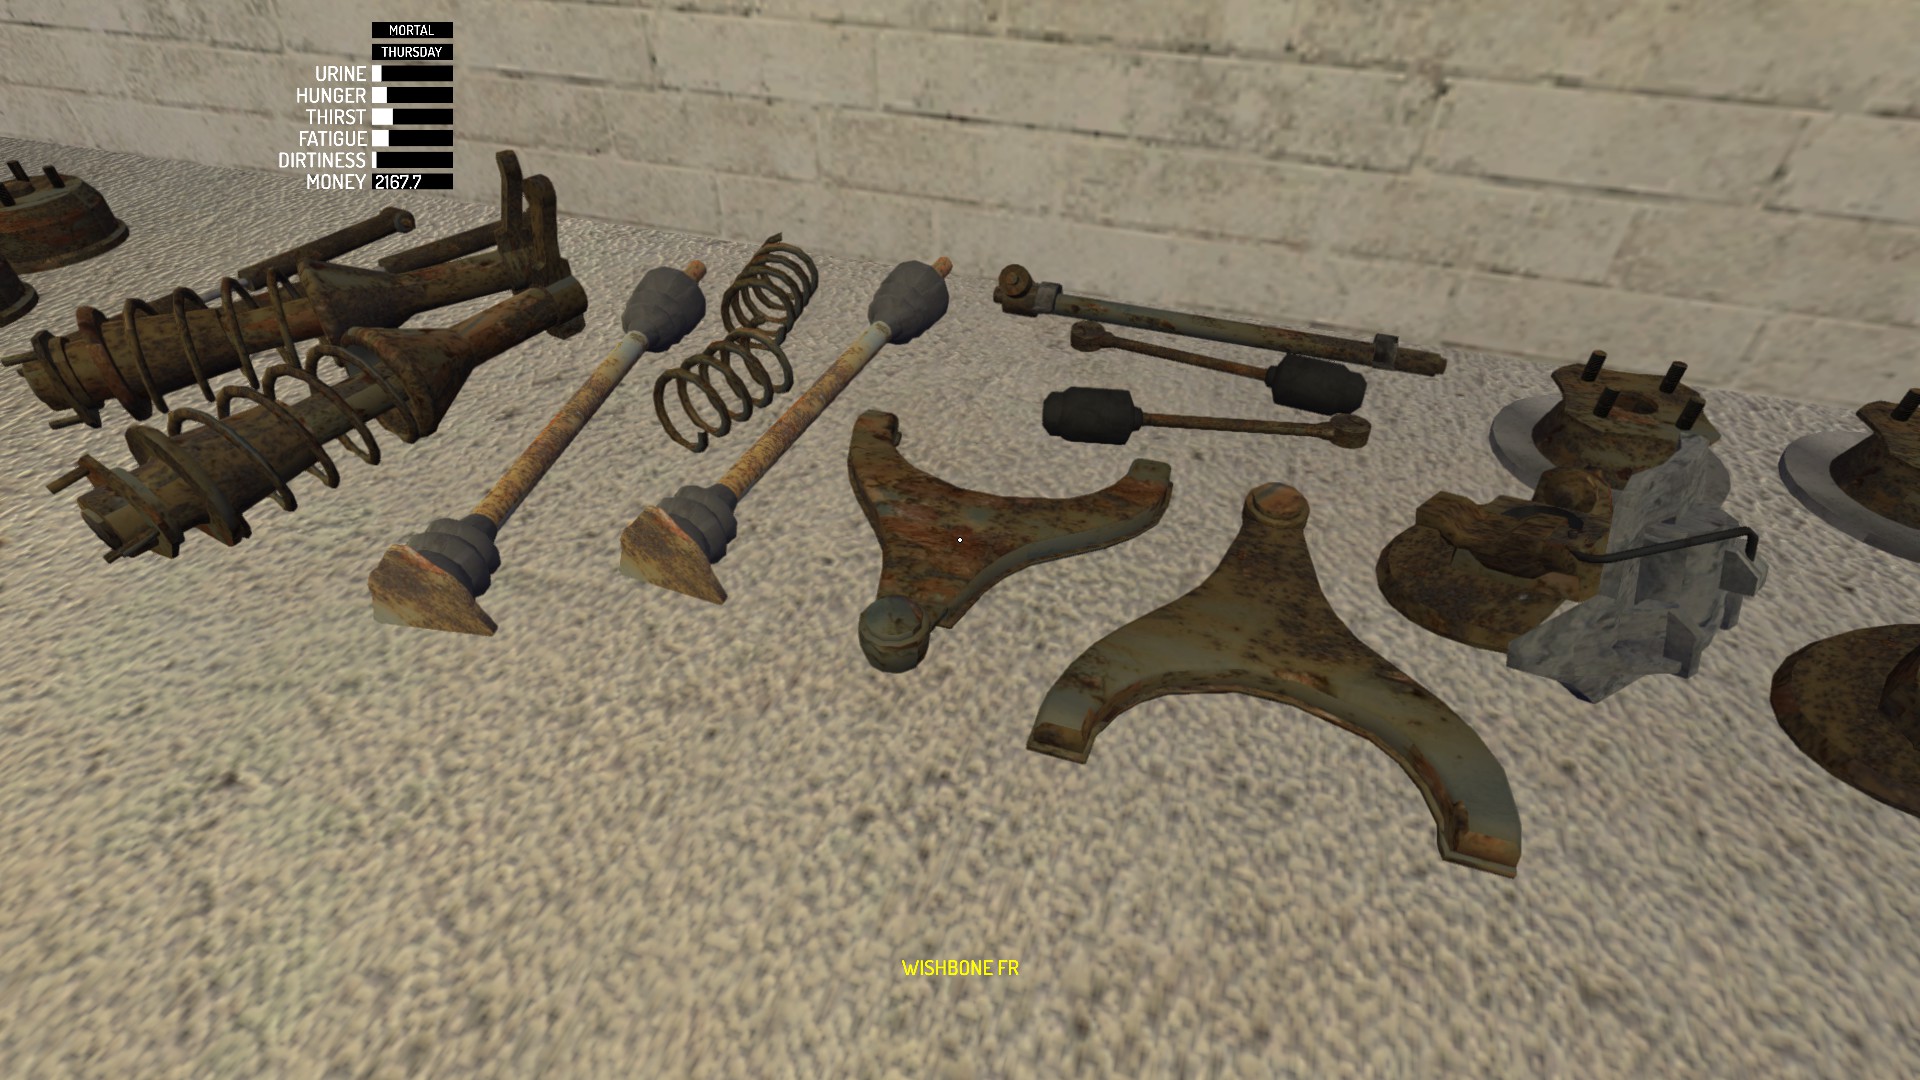
§007 Wishbones
Wishbone FL/FR: 10 mm × 2 (each).


§008 Spindles
Spindle FL/FR: 12 mm × 1 (each).


§009 Disc brakes
Put the disc brakes (2) on but do not tighten them yet!


§010 Halfshafts
Now put the halfshafts (2) on and only then tighten disc brakes (2): 14 mm × 1 (each).


§011 Steering rack
Steering rack: 9 mm × 4.


§012 Struts
Strut FL/FR: 9 mm × 4 (bottom, each).


10 mm × 3 (top, each).

§013 Steering rods
Steering rod FL/FR: 12 mm × 1 (each).


§014 Steering column
Steering column: 8 mm × 2.


§015 Moving to rear suspension
Just lower your floor jack and move it to rear part of the car.


§016 Trail arms
Trail arm RL/RR: 12 mm × 2 (each).


§017 Coil springs
Coil springs (2).


§018 Shock absorbers
Shock absorbers (2): 12 mm × 1 (top, each), 6 mm × 2 (bottom, each).


§019 Drum brakes
Drum brakes (2): 14 mm × 1 (each).


§020 Wheels
Wheels (4): 13 mm × 4 (each).


§021 Moving to the garage
Lower floor jack and gently push your car into the garage.


§022 Block
Take the block and put it on the table.

§023 Crankshaft
Crankshaft.


§024 Main bearings
Main bearings (3): 9 mm × 2 (each).


§025 Pistons
Pistons (4): 7 mm × 2 (each).


§026 Head gasket
Head gasket.


§027 Cylinder head
Cylinder head: 7 mm × 10.


§028 Headers
Headers: 8 mm × 5.


§029 Motor hoist
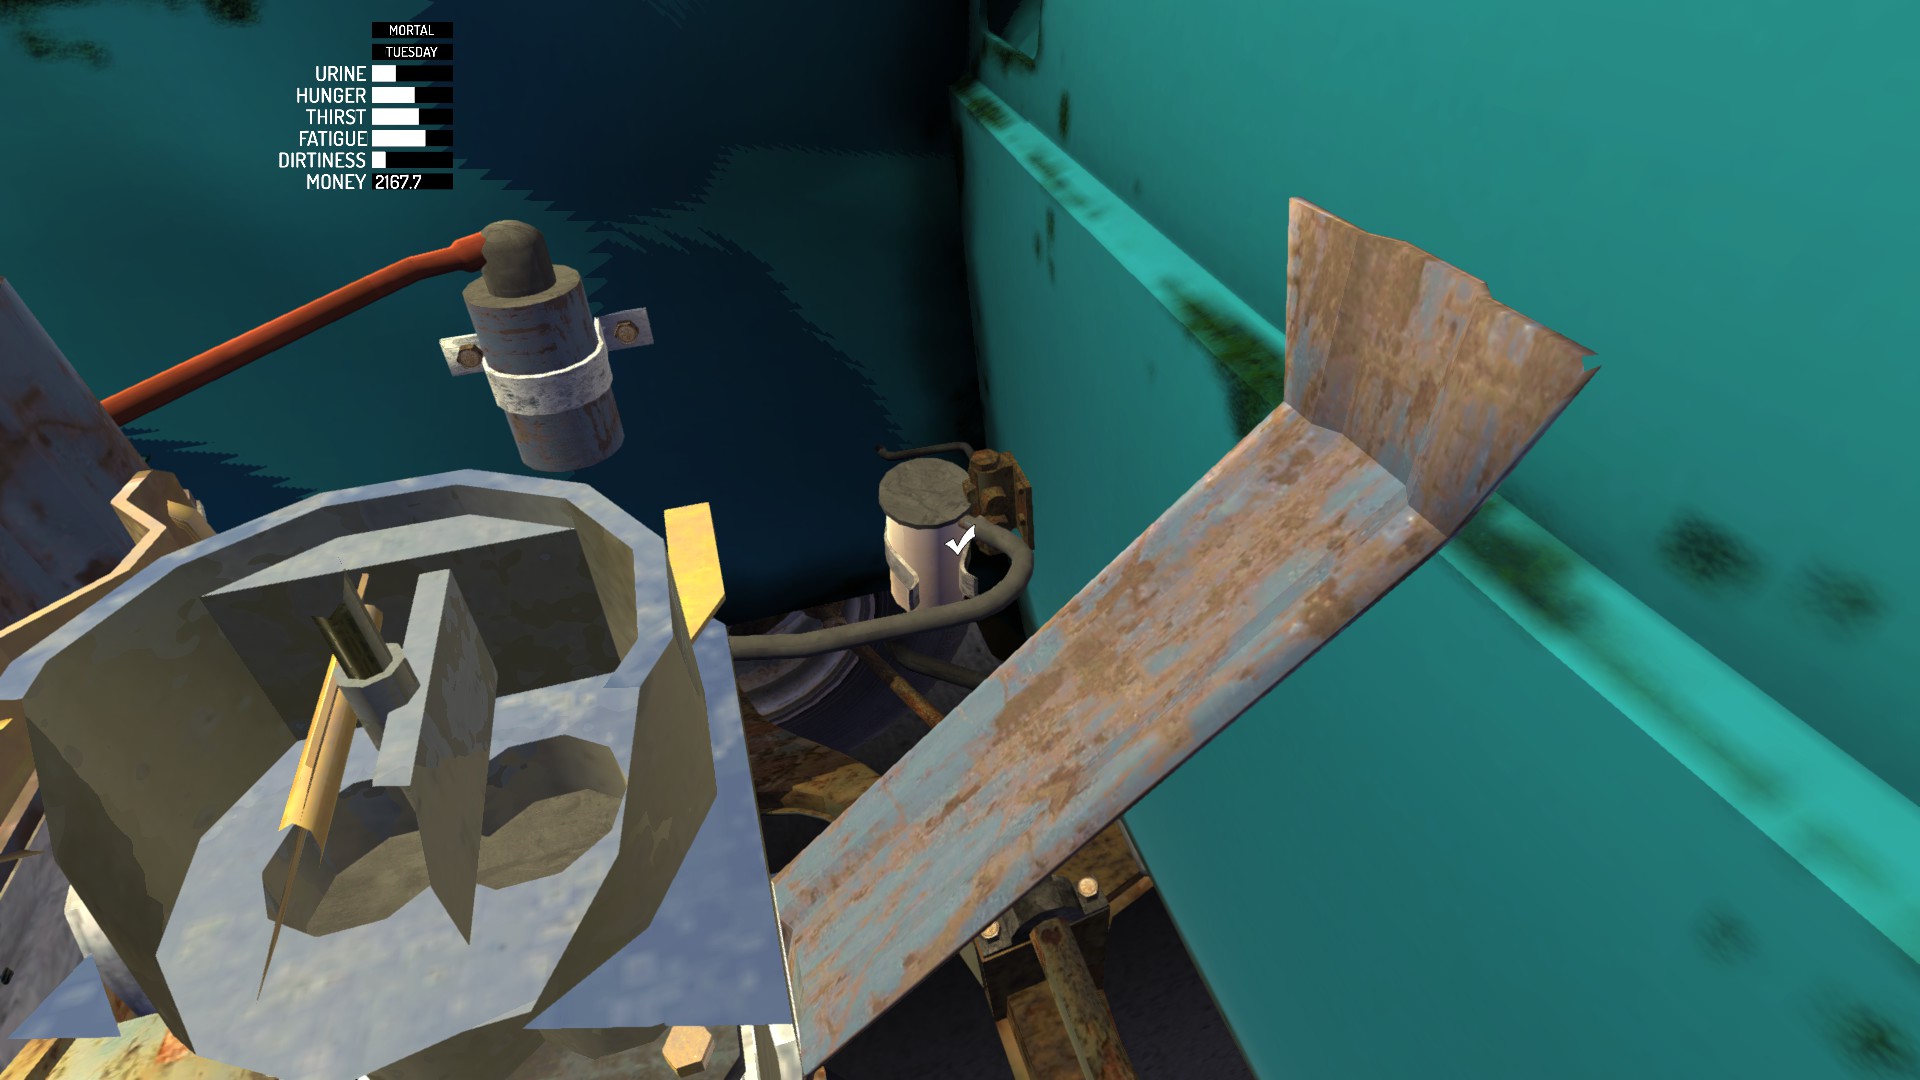
Place motor hoist like on the screenshot and fasten the engine to it: 10 mm × 2. Engine rotation is important! And as you tighten both bolts, the engine will take correct position.


§030 Carburetor
Carburetor: 8 mm × 4.


§031 Rocker shaft
Rocker shaft: 8 mm × 5.


Let’s tune the rocker shaft. Take the screwdriver.


There are 8 screws. Scroll each screw down at least 19 times (can be more) and then scroll it up 7 times exactly (
View post on imgur.com
[imgur.com]).

MSCeditor values:
Item
Key
Value
Value (Fleetari’s tuning)
rockershaft
rockershaftcyl1exhaust
7.7999978065
7
rockershaft
rockershaftcyl1intake
7.7999978065
7.9000000954
rockershaft
rockershaftcyl2exhaust
7.7999978065
7
rockershaft
rockershaftcyl2intake
7.7999978065
7.9000000954
rockershaft
rockershaftcyl3exhaust
7.7999978065
7
rockershaft
rockershaftcyl3intake
7.7999978065
7.9000000954
rockershaft
rockershaftcyl4exhaust
7.7999978065
7
rockershaft
rockershaftcyl4intake
7.7999978065
7.9000000954
Each turn changes in-game value by .6, bottom value is 12, top value is 1. When you scroll up, you decrease the value and vice versa.
More info about rocker shaft tuning.[my-summer-car.wikia.com]
§032 Rocker cover
Rocker cover: 7 mm × 6.


§033 Camshaft
Camshaft: 5 mm × 2.


§034 Camshaft gear
Camshaft gear: 10 mm × 1.


§035 Timing chain
Timing chain.


§036 Timing cover
Timing cover: 6 mm × 6.


§037 Water pump
Water pump: 7 mm × 5.


§038 Water pump pulley
Water pump pulley: 7 mm × 4.


§039 Crankshaft pulley
Crankshaft pulley: 11 mm × 1.


§040 Alternator
Alternator: 7 mm × 1 (top), 10 mm × 1 (bottom).


§041 Fan belt
Press 1 to hide the tool and shift the alternator with scroll up to the most left position so you could put the fan belt on.

Fan belt.


Adjust the alternator with mouse scroll wheel so that it just slightly touches the fan belt. We will calibrate it later. Notice that if the fan belt is too loose, the car won’t start at all!

Press 2, take the screwdriver and tighten the alternator.

§042 Engine plate
Engine plate.


§043 Starter
Starter: 7 mm × 2.


§044 Flywheel
Flywheel: 7 mm × 6.


§045 Clutch cover plate, clutch pressure plate, clutch disc
Attach clutch pressure plate to clutch cover plate.


Then attach clutch disc.


Then attach whole thing to the engine: 6 mm × 6.


§046 Oilpan
Oilpan: 7 mm × 8 and 13 mm × 1.


§047 Gearbox
Gearbox: 7 mm × 6 and 10 mm × 1.


§048 Drive gear
Drive gear: 6 mm × 7.


§049 Spark plugs
Tighten spark plugs with sparkplug wrench or sparkplug socket.


§050 Fuel pump
Fuel pump: 7 mm × 2.


§051 Distributor
Distributor: 6 mm × 1.


§052 Installing the engine
Move the hoist to the car. Lower the hoist and as soon as the engine will be in the proper position, bolts will appear: 11 mm × 3 (2 on front side and 1 on rear side). Note that they won’t appear until the engine is in the proper position. And if they don’t appear, slightly move the hoist. Be careful, because the engine can detach from the hoist.


Unscrew the engine from the hoist: 10 mm × 2. Raise the hoist and put it away.


Voilà!

§053 Battery
Even new batteries lose their charge and capacity over time and if battery is discharged you will want to charge it. There is the charger on the table.

Just bring battery to charger and drop it nearby.


High value on the charger means the battery is totally discharged.

No need to fully charge your battery, you just need enough power to start the car. Keep in mind that battery is disconnected from the charger on load so you will have to connect it again every time.

Then place it into the car.

§054 Electrics
Electrics: 8 mm × 2.


§055 Fuel strainer
Fuel strainer: 8 mm × 1.


§056 Radiator
Radiator: 7 mm × 4.


§057 Radiator hoses
Radiator hose 1.


Radiator hose 2.


Radiator hose 3.


§058 Oil filter
Press 1 to hide the tool and tighten oil filter with mouse scroll wheel. Just putting it on is not enough!


§059 Clutch master cylinder, brake master cylinder
Put both clutch master cylinder and brake master cylinder on: 8 mm × 2 (engine side, each), 9 mm × 1 (cabin side, each).


§060 Clutch lining
Clutch lining: 7 mm × 2. You can’t tighten it with ratchet!


§061 Brake lining
Brake lining: 7 mm × 8. You can’t tighten it with ratchet (except 1 bolt)!


Also tighten nuts: 7 mm × 4 (1 for each wheel). You can’t tighten them with ratchet!
Front ones look like this:

And rear ones like this:

§062 Fuel tank
Fuel tank: 11 mm × 7.


Also note this nut: 12 mm × 1. If you miss it, all fuel will leak. You can’t tighten it with ratchet!

§063 Halfshafts
Tighten the halfshafts to the engine: 9 mm × 3 (each).

§064 Gear linkage
Gear linkage: 5 mm × 3 (2 from the bottom and 1 from the top).


§065 Gear stick
Gear stick: 6 mm × 3.


§066 Hand brake
Hand brake: 8 mm × 4 (cabin side) and 5 mm × 1 (near the fuel tank).


§067 Exhaust pipe
Exhaust pipe: 7 mm × 3 (1 to the back and 2 to the engine).


§068 Exhaust muffler
Exhaust muffler: 7 mm × 1.


§069 Fuel tank pipe
Fuel tank pipe.


§070 Dashboard
Place dashboard and open the glove box with Use button: 10 mm × 2. Don’t close the glove box yet.


§071 Gauges, dashboard meters
Place the dashboard meters on the table.

Choose what you want to use: RPM gauge or clock gauge and tighten it: 7 mm × 2.


Now tighten the dashboard meters to the dashboard: 6 mm × 2.


Close the glove box.

§072 Seats
Seat rear: 9 mm × 2.


Seat driver and seat passenger: 9 mm × 4 (each).


§073 Back panels
Choose between back panel and subwoofer panel.


§074 Stock steering wheel
Stock steering wheel: 10 mm × 1.


§075 Radio
Radio.


§076 Fur dices
The most important part of the car. This is actually why we build it for.


§077 Headlights
Headlights (2): 7 mm × 2 (each).


§078 Grille
Grille: 6 mm × 2.


§079 Hood
Place the hood without tightening and open it with hood lock. Don’t close it after tightening because you will need it opened for air filter, fenders and liquids.


Now tighten the hood: 6 mm × 4.

§080 Bootlid
Place bootlid, open it and then tighten: 6 mm × 4.


§081 Airfilter
Air filter: 6 mm × 2.


§082 Doors
Door left/right: 10 mm × 4 (each).


§083 Fenders
Fender left/right: 5 mm × 5 (each). Note that the hood must be opened.


§084 Bumpers
Bumper front/rear: 8 mm × 2 (each).


§085 Rear lights
Rear light left/right.


§086 Coolant
Open radiator’s cap with mouse scroll wheel.

Take coolant and pour it in the radiator. It can be a bit tricky. Close radiator’s cap after that. Don’t throw the bottle out! It isn’t empty yet.


§087 Motor oil
Open rocker cover’s cap with mouse scroll wheel, pour motor oil in it and close the cap. The bottle also isn’t empty, don’t throw it out as well!


Later you can check the oil by pressing Use button on the dipstick.


§088 Brake fluid
Now open any of 2 brake master cylinder’s caps with mouse scroll wheel and pour brake fluid in it.


This bottle is empty, so get rid of it.

Now repeat your actions with the 2nd hole.


Then open clutch master cylinder’s cap and repeat. After doing this, note that the bottle isn’t empty, so keep it.


Remember to close caps.
§089 Gasoline
Open fuel cap with mouse scroll wheel.

Open jerrycan’s cap with Use button, pour the gasoline in and close fuel cap.


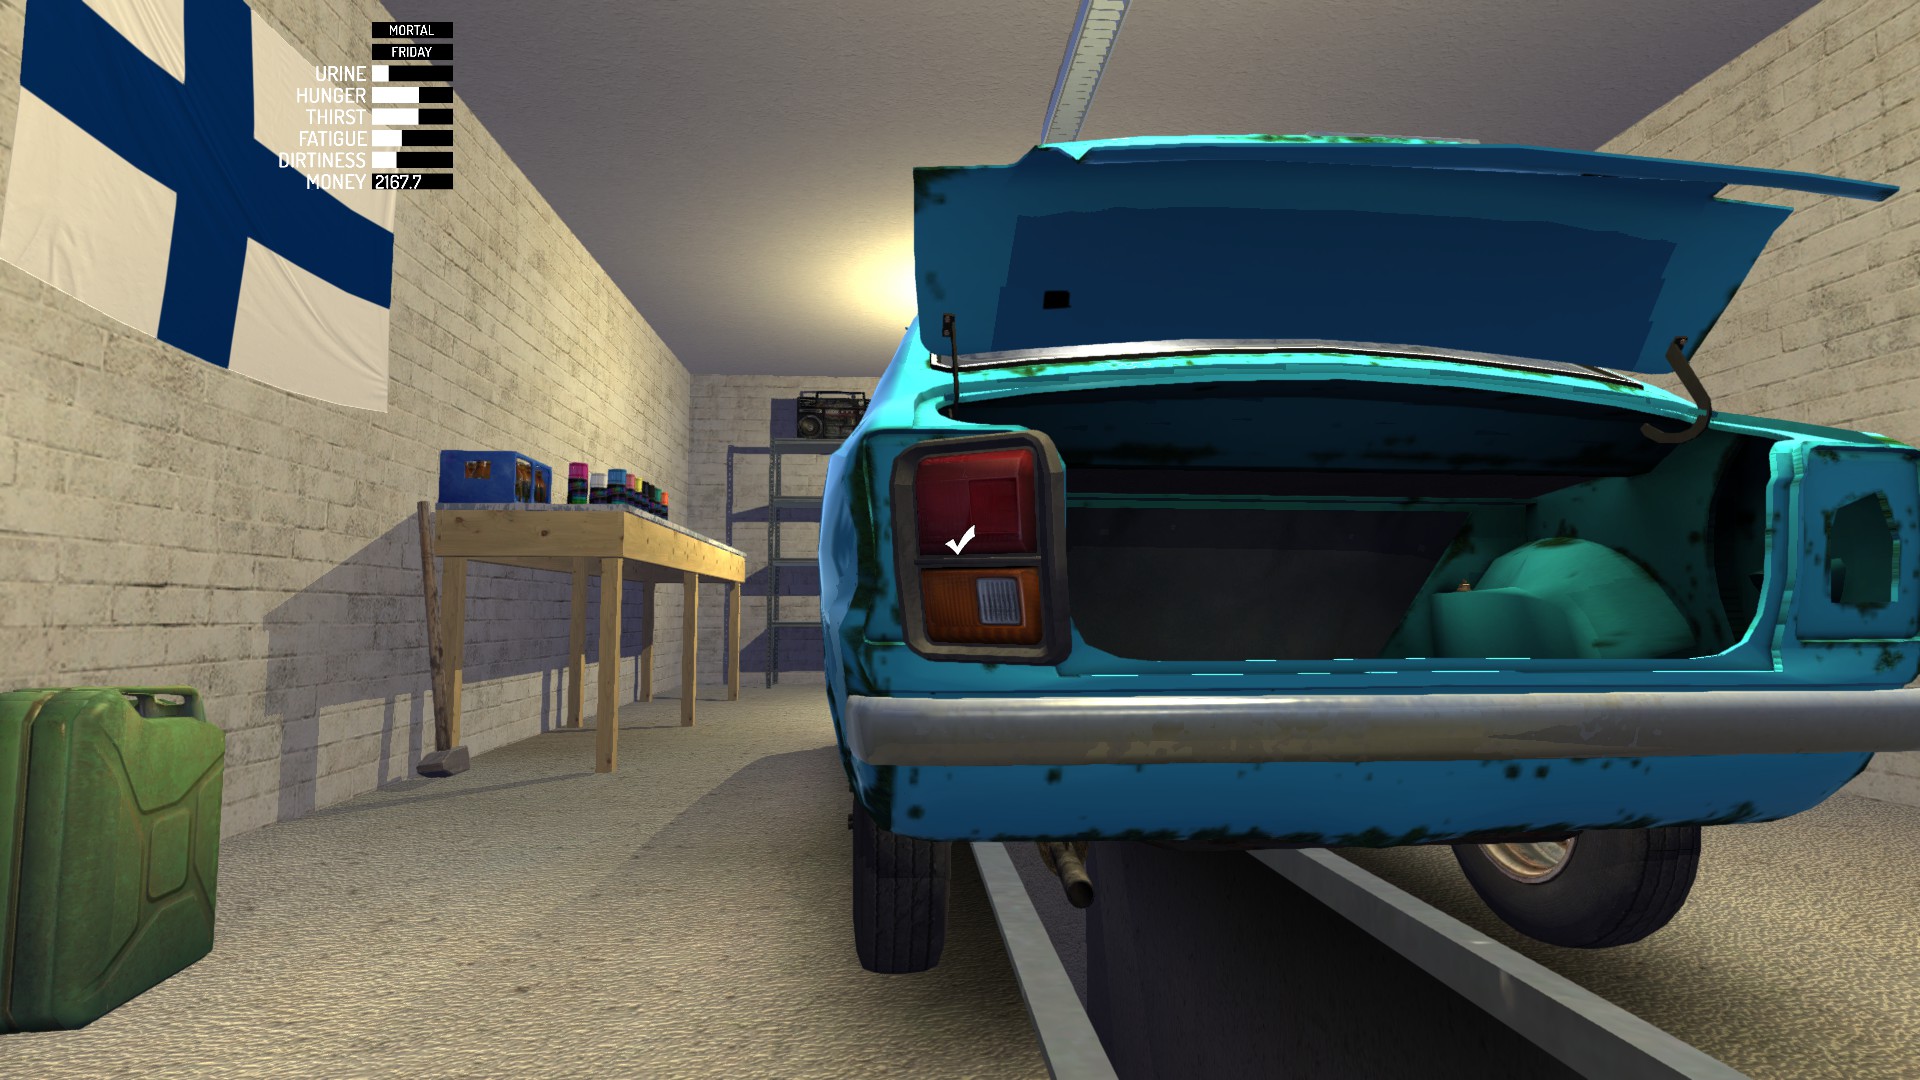
§090 Painting
Pick your color(s). There are 12 glossy and 1 matte (black) paints. You can determine them by caps.

Take any in the hand and press Use button.


§091 Hubcaps
Hubcap FL/FR/RL/RR.


§092 Front wheels tuning
Your front wheels are oriented most likely pretty bad at this point. So you will need to adjust the nut shown on the screenshot: 14 mm × 1 (each). In-game values ranges from -6 to 6 and changes by .1. So firstly turn the nut to the edge in any direction. You can’t do it with the ratchet! Notice that the nut can be turned endlessly, but the wheel stops rotating at some point. When the wheel is at the edge position, turn the nut in the opposite direction 60 times. Repeat for another wheel but if for example first time you were rotating up then down, now do it the other way.

MSCeditor values:
Item
Key
Value
Value (Fleetari’s tuning)
steeringrodfl
steeringrodflalignment
-0.000003472
0
steeringrodfr
steeringrodfralignment
0.000003472
0
§093 Starting the engine
Time to start your car. I would recommend to backup your save file before that. Hold LMB on the ignition and hold the Gas button at the same time.

Congratulations! Achievement is yours!
§094 Alternator tuning
Now the fan belt may squeak. Even if not, open your hood and take the screwdriver.
Loose the bolt once. No need to totally unscrew it.

Press 1 and loose the alternator until the fan belt starts to squeak and then pull the alternator back just once so that the fan belt stops squeaking. Don’t pull it too much or the fan belt will pop out! Then tighten the bolt and close the hood.

MSCeditor values:
alternator
alternatorrotation
6.9999866486
§095 Driving
Pull out the choke by holding LMB.

Your engine is cold and you need to heat it up. This is why we pulled out the choke. You want the temperature arrow to be in the middle position.

Rev the engine a bit to heat it up faster. Turn on the radio with scroll down if you wish.


You may also want to open the window with scroll up.

Some other switches.


As your engine is heated, push the choke in by holding RMB.

Buckle yourself up by drag-and-dropping the seat belt with LMB.


Release the hand brake by holding RMB.

Rev the engine on neutral gear to raise RPM (otherwise you most likely will stall), shift first or rear gear and drive.
§096 Warning triangle
For the car inspection you will need warning triangle. You can find it on your tractor, detach it with RMB and put it in the trunk.


§097 Car inspection
You may want to have tool box or ratchet set in your car, just in case.

Time to get our car through inspection[my-summer-car.wikia.com]. It will cost you 325 mk. Do it before upgrades[my-summer-car.wikia.com].


You can change inspection card’s language by clicking on the flag in the top right corner.


§098 Register plates
Register plates.


§099 Xmas lights
Xmas lights.


§100 Covers
Seat covers can only be put on stock seats and wheel covers can only be put on stock steering wheel!
Plush set.


Leopard set.


Zebra set.


Suomi set.


§101 Twin carburetors, racing carburetors
Remove air filter: 6 mm × 2. You don’t need it anymore.

Remove stock carburetor: 8 mm × 4.

Twin carburetors or racing carburetors: 8 mm × 4.


§102 Steel headers
Remove stock headers: 8 mm × 5.

Steel headers: 8 mm × 5.


§103 Racing exhaust
Remove stock exhaust pipe: 7 mm × 3 (2 to the engine and 1 to the back).


Racing exhaust: 7 mm × 3 (2 to the engine and 1 to the back).


§104 Racing muffler
Remove stock exhaust muffler: 7 mm × 1.

Racing muffler: 7 mm × 1.


§105 Racing radiator
Remove stock radiator: 7 mm × 4.

Racing radiator: 7 mm × 4.


Open radiator’s cap with mouse scroll wheel.

Fill radiator with the coolant and close the cap.

§106 N₂O kit
N₂O injectors: 5 mm × 2.


N₂O bottle holder: 7 mm × 2.


N₂O bottle.


Adjust pressure[my-summer-car.wikia.com] with mouse scroll wheel.

N₂O button panel. Don’t turn it on when you are igniting the engine or if it is cold![my-summer-car.wikia.com]


You can refill the bottle at the Fleetari’s for 510 mk.
§107 Bucket seats
Remove front seats (2): 9 mm × 4 (each).


Bucket seat driver: 9 mm × 4.


Bucket seat passenger: 9 mm × 4.


§108 Sport steering wheel, rally steering wheel
Remove stock steering wheel: 10 mm × 1.

Sport steering wheel or rally steering wheel: 10 mm × 1.


§109 CD player
Remove radio from dashboard. It can be a bit tricky.

CD player.


You can switch radio channels.

For more authenticity you will need some Finnish music. Take your music files and convert them into *.ogg files. You can use FFmpeg[www.ffmpeg.org] or just find some online converter. Rename converted files like “Track1”, “Track2”, “Track3” etc. and place them into this folder:
SteamsteamappscommonMy Summer CarRadio
Import the music into the game in the main menu.

There is also CD case in the kitchen. You can add up to 15 files on it. Do the same steps as for the radio, only this time folder is:
SteamsteamappscommonMy Summer CarCD
Additionally you can change CD and CD case covers (template is in this folder).

Open CD case with Use button and insert CD into CD player.


Switch between radio and CD.

You can also turn on next track or eject CD.


You can turn it off with scroll up.

§110 Subwoofers
Remove back panel.

Subwoofer panel.


Subwoofer left/right.


§111 Tachometer
Tachometer: 5 mm × 1.


You can change RPM at which red light starts to glow with mouse scroll. Default value is 7500 and it changes by 100. As for our
View post on imgur.com
[imgur.com], scroll down 10 times.


Open the glove box and remove dashboard meters: 6 mm × 2.


Replace RPM gauge with clock gauge as we have tachometer now: 7 mm × 2.


Fasten dashboard meters back to the dashboard and close the glove box: 6 mm × 2.


tachometer
tachometerrpmsetting
6500
§112 Fuel mixture gauge, carburetors tuning
Fuel mixture gauge.


Let’s tune our carburetor(s). If you have performance parts installed, you will want to have air/fuel ratio between 14.7 and 15.1. For stock parts you will want 14.[my-summer-car.wikia.com] As for stock carburetor or twin carburetors, it is easy to adjust them. Just take the screwdriver and turn the screw until you get desired value. Choke must be pushed in!


Racing carburetor adjustment[my-summer-car.wikia.com] is a bit more complicated. There are 4 screws instead of just 1. In-game value ranges from 10 to 22 and changes by .2. Scrolling up decreases in-game value but increases A/F ratio. Scroll each screw up at least 60 times (can be more) and then scroll it down 24 times exactly. This way you will have 14.75 A/F ratio. If you want some another value, turn each screw in unison. Scroll mouse wheel up to increase A/F ratio and scroll mouse wheel down to decrease it.

MSCeditor values:
Item
Key
Value (14.75 A/F ratio)
Value (Fleetari’s tuning, 13 A/F ratio)
carburator
carburatoridleadjust
14.7999954224
16.75
twincarburators
twincarburatorsidleadjust
14.7999954224
16.75
racingcarburators
racingcarburatorsadjust1
14.7999954224
16.75
racingcarburators
racingcarburatorsadjust2
14.7999954224
16.75
racingcarburators
racingcarburatorsadjust3
14.7999954224
16.75
racingcarburators
racingcarburatorsadjust4
14.7999954224
16.75
§113 Extra gauges
Extra gauges.


§114 Fire extinguisher
Fire extinguisher holder: 6 mm × 2.


Fire extinguisher.


To use it, detach it with RMB, take it and press Use button, then hold LMB.

§115 Windows black wrap
Windows black wrap.


You can remove it with RMB.

§116 Fiberglass hood
Open and remove stock hood: 6 mm × 4.


Fiberglass hood.


Lock 4 hood pins with Use button.

§117 Front spoiler, fender flare spoiler
Front spoiler or fender flare spoiler.


§118 Rear spoilers
Rear spoilers.


§119 Fender flares
Fender flare FL/FR/RL/RR.


§120 Window grille
Window grille.


§121 Rally struts
Raise your car’s front with car jack or floor jack. Remove front wheels (2): 13 mm × 4 (each).

Remove steering rods (2): 12 mm × 1 (each).


Remove stock struts (2): 9 mm × 4 (bottom, each), 10 mm × 3 (top, each).


Rally strut FL/FR: 10 mm × 3 (top, each), 9 mm × 4 (bottom, each).


Steering rod FL/FR: 12 mm × 1 (each).


Wheels (2): 13 mm × 4 (each).


§122 Rally shock absorbers, long coil springs, rally coil springs
Raise your car’s back with car jack or floor jack. Remove rear wheels (2): 13 mm × 4 (each).

Remove stock shock absorbers (2): 12 mm × 1 (top, each), 6 mm × 2 (bottom, each).


Remove stock coil springs (2).

Long coil springs or rally coil springs (2).


Rally shock absorbers (2): 6 mm × 2 (bottom, each), 12 mm × 1 (top, each).


Wheels (2): 13 mm × 4 (each).


§123 Roll cage, final gear change
Remove rear seat: 9 mm × 2. If you won’t remove it by yourself, Fleetari will leave it near his shop.

Go to the Fleetari’s and park your car like this:

For the racing harness you will need the roll cage.

By changing final gear you will change acceleration and maximum speed. A higher value will make the car accelerate faster, but will decrease its maximum speed. You will want 4.625 for rally[my-summer-car.wikia.com] and 3.7 for 200 km/h achievement. Default value is 4.286.


Here are all Fleetari’s services.


Now wait until Fleetari calls you and take your car back. However, if you missed the call or he didn’t call and it has passed more than 1 day, you can just go and check if your car is ready. You are also able to paint the roll cage.

MSCeditor values:
gearbox
gearboxfinalgearratio
3.7000000477
gearbox
gearboxfinalgearratio
4.2859997749
gearbox
gearboxfinalgearratio
4.625
§124 Racing harness
Racing harness: 8 mm × 4.


You can buckle up and unbuckle harness with LMB.


§125 Wheels
Replace wheels with desired ones: 13 mm × 4 (each).


Place spare wheel in the trunk. Notice that tire types differ in size.

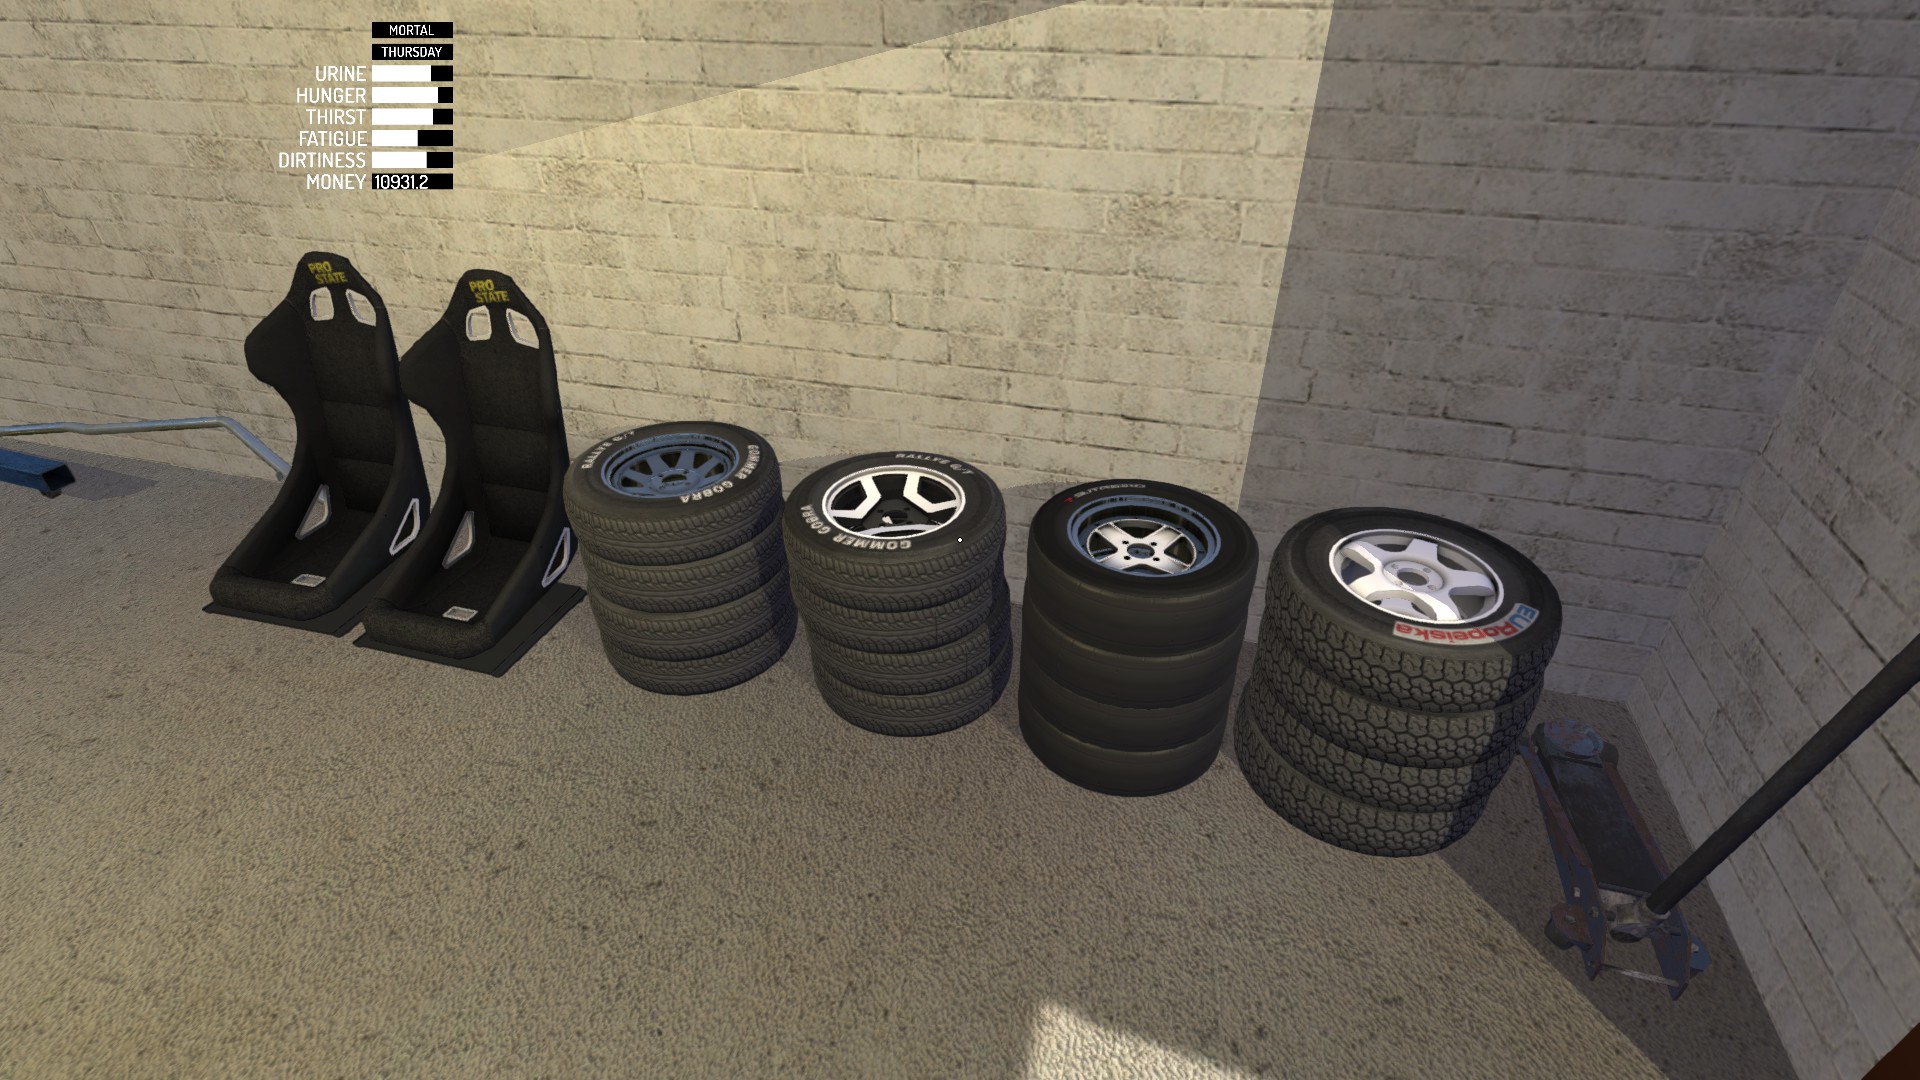
This is how all rims look like.


§126 MSCeditor checklist
rockershaft
rockershaftcyl1exhaust
7.7999978065
rockershaft
rockershaftcyl1intake
7.7999978065
rockershaft
rockershaftcyl2exhaust
7.7999978065
rockershaft
rockershaftcyl2intake
7.7999978065
rockershaft
rockershaftcyl3exhaust
7.7999978065
rockershaft
rockershaftcyl3intake
7.7999978065
rockershaft
rockershaftcyl4exhaust
7.7999978065
rockershaft
rockershaftcyl4intake
7.7999978065
steeringrodfl
steeringrodflalignment
-0.000003472
steeringrodfr
steeringrodfralignment
0.000003472
alternator
alternatorrotation
6.9999866486
carburator
carburatoridleadjust
14.7999954224
twincarburators
twincarburatorsidleadjust
14.7999954224
racingcarburators
racingcarburatorsadjust1
14.7999954224
racingcarburators
racingcarburatorsadjust2
14.7999954224
racingcarburators
racingcarburatorsadjust3
14.7999954224
racingcarburators
racingcarburatorsadjust4
14.7999954224
tachometer
tachometerrpmsetting
6500
Feedback
Any grammar and typo corrections will be very appreciated.
I am not your personal mechanic and I don’t know how to fix your car. Use forums or MSCeditor instead!
If you really want to thank or support me, buy my game.
[link]
There are several Easter Eggs in the game, here is a list of secrets hidden by the game’s developer
Railway tunnel
In the railway tunnel, at its end, you can find information written in Finnish, which means that “You are in the tunnel. Go home and sleep overnight“.

Finland independence day
On December 6, if you play My Summer Car, you may notice small changes such as Finland’s flags in the city and illuminated silo buildings and ski jumps.
You can change the date on your computer to see the Easter Egg.
Ghost near Ventti cabin
If you take a camera and go to Ventti, you’ll see the ruins of a burned house. At first glance, there is nothing strange about it, but if you take a picture with a camera after midnight, you will see a ghost on the print. The ghost revolves around the chimney.

Tinting windows at home
If you use a Windows black wrap on a window in a player’s room that has a bed to sleep on, you will darken the window pane.
To remove the dim, you need to reload the game save (saving the game does not cause the dim to stay forever)
Red spider
The red spider appears on the computer when you are using a non-original version of the game (or a game launched outside of Steam)

Video
Amistech Games released My Summer Car late last year, and quickly reached cult-hit status. In this simulation game, players must try to survive the Finnish summer and build their own car from various parts. The goal of the game is to persevere through harsh road conditions, while also being able to maintain your car’s integrity.
A lot of players have been frustrated with the complexity of building their first working car. After all — you only start with the room full of parts and no descriptions of how any of them fit together. Thankfully, Steam user Necronomicron has offered up some comprehensive advice on how to build a working car in My Summer Car. Here’s the rundown.
Building Your First Working Car in My Summer Car
Prepare before you try to build.
Since it will probably take a good bit of time both in and out of game to complete your first car, you will want to stock up on as many resources as you possibly can ahead of time. Necronomicron advised to first gather as much money as possible so that you can buy a fan belt, motor oil, and coolant.
All these things will be essential to get your car up and running, so it’s better to have them on hand before you start building.
Necromicon gives the following essential advice:
«…save the game before buying stuff, because your bag with goods will unpack on game load. It is easier to move just one bag rather than 20 items to your home.
I would recommend to buy everything on the left side of the store (which will cost 1,995 mk). However, you will need at least [one] fan belt, three brake/clutch fluids, one motor oil, [and] one coolant.»
He also suggests buying food and other supplies, since this will take awhile to build, and mother nature waits for no one.
| Part | Price |
|---|---|
| Fan Belt | 295 mk |
| Brake/Clutch Fluid | 35 mk |
| Motor Oil | 149 mk |
| Coolant | 195 mk |
Step One: Work on the Front Suspension
The first thing you need to do is jack the car up so you can work on the frame and underpinnings of the vehicle. To raise the body:
- Place the floor jack under the front bumper of the car.
- Use the lever to raise the floor jack (and the car) to its limit.
Once you’ve got the car jacked up, head over to the tool box. To use the tool box, hover your cursor to its opening and press «Use». You’ll need to come back here often to switch out tools as necessary. To get to a specific tool, press 2, then click on whichever one you need. Once you have it, press 1 to hide that tool.
Now it’s time to work on the front part of your car’s frame. Here’s the order in which you need to attach your parts (and what screws or bolts you need to use):
- Subframe, Wishbones, Spindles
- Attach sub frame with 10mm screws (x4)
- Attach front left (FL) and front right (FR) wishbones with 10mm screws (x2 each)
- Attach FL and FR spindles with 12mm screws (x1 each)
- Disc Brakes, Halfshafts
- Put on the 2 disc brakes, but do NOT tighten them.
- Put on the 2 halfshafts with 9mm screws (x3)
- Tighten the disc brakes with 14mm screws (x1 each)
- Steering Rack, Steering Rods, Struts
- Attach the steering rack with 9mm screws (x4)
- Put on FL/FR steering rods, but do NOT tighten
- Put on FL/FR struts, but do NOT tighten
- Tighten the steering rods with 12mm screws (x1 each) and a size 14 adjustment nut.
- Tighten the struts with 10mm screws (x3) on top, and 9mm screws (x4) on the bottom
- Front Wheels, Steering Column
- Attach the FL and FR wheel steels with 13mm screws (x4)
- Attach the steering column with 8mm screws (x2)
Step 2: Work on the Rear Suspension
The next major step in this process is putting together the rear suspension. So you’ll want to lower your frame and remove the floor jack. Move it to the rear bumper of the car, then jack the vehicle back up.
Once it’s up, you’ll need to add more parts in the following order:
- Trail Arms, Coil Springs, Shock Absorbers, Drum Brakes, Rear Wheels
- Attach rear left (RL) and rear right (RR) trail arms with 12mm screws (x2 each)
- Attach two coil strings (no screws needed)
- Attach two shock absorbers with 12mm screws (x1 each) on top, and 6mm screws (x2 each) on the bottom.
- Attach two drum brakes with 14mm screws (x1 each)
- Attach RL and RR wheel steel with 13mm screws (x4 each)

Step 3: Put Together the Engine
Now that you’ve got your rear suspension built, lower the floor jack and remove it. Push your car into the garage where you’ll complete the next several steps.
For right now, though, you’re going to set the car aside and focus on building your engine. Set the engine block on a spacious work table and build it out as follows:
- Block, Crankshaft, Main Bearings, Pistons
- Put the engine block on a table
- Attach the crankshaft (no screws needed)
- Attach main bearings 1, 2 and 3 with 9mm screws (x2 each)
- Attach pistons 1, 2, 3, and 4 with size 7 nuts (x2 each)
- Head Gasket, Cylinder Head, Headers, Motor Hoist
- Attach the head gasket (no screws needed)
- Attach the cylinder head with 7mm screws (x10)
- Attach the headers with 8mm screws (x5)
- Place the motor hoist on top of the engine
- Fasten the engine to the motor hoist with 10mm screws (x2)
- As you tighten each screw, the engine will align into the correct position.
- Carburetor, Rocker Shaft, Rocker Cover
- Attach the carburetor with 8mm screws (x4)
- Attach the rocker shaft with 8mm screws (x5)
- Don’t try to adjust the valvetrain just yet — we’ll do that later.
- Fasten the rocker cover with 7mm screws (x6)
- Camshaft, Camshaft Gear, Timing Belt, Timing Cover
- Attach the camshaft with 5mm screws (x2)
- Attach the camshaft gear with a 10mm screw (x1)
- Put on the timing belt (no screws needed)
- Attach the timing cover with 6mm screws (x6)
- Water Pump, Water Pump Pulley, Crankshaft Pulley
- Attach the water pump with 7mm screws (x5)
- Attach the water pump pulley with 7mm screws (x4)
- Attach the crankshaft pulley with an 11mm screw (x1)
- Alternator, Fan Belt
- Attach the alternator with a 7mm screw (x1) on top and a size 10 nut (x1) on the bottom.
- Attach the fan belt (no screws needed)
- Grab the screwdriver from the tool box.
- Using the mouse scroll wheel, adjust the alternator so it slightly touches the fan belt.
- Tighten the screw.
- Note: Later in the process, you’ll need to calibrate this part. If the fan belt is too loose, your car won’t start at all!
- Engine Plate, Starter, Flywheel
- Attach the engine plate (no screws needed)
- Attach the starter with 7mm screws (x2)
- Attach the flywheel with 7mm screws (x6)
- Clutch Cover Plate, Clutch Pressure Plate, Clutch Disc
- Put the clutch pressure plate into the clutch cover plate
- Put the clutch disc into the clutch pressure plate
- Attach the whole thing to the engine with 6mm screws (x6)
- Oilpan, Gearbox, Drive Gear
- Attach the oil pan with 7mm screws (x8) and a 13mm screw (x1)
- Attach the gearbox with 7mm screws (x6) and a 10mm screw (x1)
- Attach the drive gear with 6mm screws (x7)
- Spark Plugs, Fuel Pump, Distributor
- Tighten the spark plugs with the spark plug wrench
- Attach the fuel pump with 7mm screws (x2)
- Attach the distributor with a 6mm screw (x1)

Step 4: Install the Engine
Now comes a tricky part. You need to get the engine you just built into the car by hoisting it. Grab the hoist and use it to lift up the engine. Be careful, though! The engine can detach from the hoist if you aren’t paying attention.
Move the host over to the car, then lower it. As soon as the engine is in the proper position, bolts will appear — two 11mm bolts on the front side and one 11mm bolt on the rear side.
Once you’ve got the engine aligned properly, unscrew it from the hoist. Then raise the hoist again and put it away. Now you’re ready to start working on the guts of the car that will make it run!
Step 5: Work On Everything Under the Hood
It’s time to dig deep into your car building process and start making all the internal connections that will turn this hunk of metal from a collection of parts to a fully running vehicle. Here’s the order in which you need to build everything:
- Battery and Electrics
- Put the Battery in position next to the engine
- Attach the electrics to the engine compartment with 8mm screws (x2)
- Fuel Strainer, Radiator, Radiator Hoses, Oil Filter
- Attach the fuel strainer with an 8mm screw (x1)
- Attach the radiator with 7mm screws (x4)
- Attach radiator hose 1
- Attach radiator hose 2 to the engine block
- Attach radiator hose 3
- Tighten the oil filter with your hand (using the mouse scroll wheel)
- Note: Just putting the oil filter on is NOT enough
- Clutch Master Cylinder, Brake Master Cylinder
- Place the clutch master cylinder and the break master cylinder between the engine and the frame of the car using 8mm screws (x2) on the engine side and 9mm screws (x1 each) on the cabin side.
- Clutch Lining, Brake Lining
- Attach the clutch lining with 7mm screws (x2)
- Attach the brake lining with 7mm screws (x8)
- Tighten the nuts for each attached wheel with 7mm screws
The nuts you’re looking for on each wheel look like this:

- Fuel Tank, Halfshafts
- Attach the fuel tank with 11mm screws (x7)
- Pay close attention to the 12mm nut (x1) that you also need to attach this tank. If you miss it, all your fuel will leak.
- Tighten the halfshafts to the engine with 9mm screws (x3)
- Attach the fuel tank with 11mm screws (x7)
- Gear Linkage, Gear Stick, Handbrake
- Attach the gear linkage with 5mm screws (x3), two on the bottom and one on the top.
- Attach the gear stick with 6mm screws (x3)
- Attach the handbrake with 8mm screws (x4)
- Tighten the 5mm bolt near the fuel tank
- Exhaust Pipe, Exhaust Muffler, Fuel Tank Pipes
- Attach the exhaust pip with one 7mm screw on the back side and two 7mm screws on the engine side.
- Attach the exhaust muffler with a 7mm screw (x1)
- Attach the fuel tank pipe (no screws needed)
Step 6: Build Out the Car Interior
Finally! You’ve got a car that should be able to run on its own. But that’s pretty useless without a comfortable interior. So now it’s time to build out the inside of your summer ride.
- Dashboard, Dashboard Meters, Gauges
- Attach the dashboard with 10mm screws (x2)
- Set aside the meter display section of the dashboard.
- Arrange your dashboard meters on the table.
- Choose which meter you want to use (RPM gauge or clock gauge) and tighten it into the display with 7mm screws (x2)
- Attach the meter display to the dashboard with 6mm screws (x2)
- Seats, Back Panels
- Attach the rear seats with 9mm screws (x2)
- Choose whether you’d like to have a normal back panel or a subwoofer panel
- Insert your panel of choice (no screws needed)
- Attach the driver’s seat and passenger’s seat with 9mm screws (x4 each)
- Stock Steering Wheel, Radio
- Attach the stock steering wheel to the steering column with a 10mm screw (x1)
- Insert the radio into the dashboard

Step 7: Work on the Car Exterior
Now that you have seats and a steering wheel to make your car much more driveable, you’ll need to add all the external features like doors and headlights that will keep you rolling along.
- Headlights, Grille, Hood, Air Filter
- Insert the headlights into the front bumper and attach them with 7mm screws (x2 each)
- Attach the grill to the front bumper with 6mm screws (x2)
- Place the hood on top of the car without tightening it.
- Open the hood with hood lock.
- Tighten the hood with 6mm screws (x4), but do NOT close it. (It needs to stay open for later steps.)
- Insert and attach the air filter with 6mm screws (x2)
- Doors, Fenders, Bootlid
- Attach the left and right doors with 10mm screws (x4 each)
- Attach the left and right fenders with 5mm screws (x5 each)
- Place the bootlid on the trunk of the car, then tighten it with 6mm screws (x4)
- Bumpers, Rear Lights
- Attach the front and rear bumpers with 8mm screws (x2 each)
- Attach the left and right rear lights
- Liquids
- Open the radiator’s cap.
- Pour coolant into the radiator. (But DON’T throw the bottle out when you’re finished. It isn’t empty.)
- Open the rocker cover’s cap and pour motor oil in it. (Again, DON’T throw out the bottle, because it isn’t empty.)
- Open any of the two brake master cylinder caps and pour in brake fluid. (Do get rid of this bottle, because it’s empty.)
- Do the same with the second cylinder cap opening.
- Open the clutch master cylinder cap and repeat the process. (This time the bottle will NOT be empty.)
- Open the jerrycan and put gas in your gas tank.

Step 8: Adjust Your Wheels
You’re almost ready to go! But before you start zooming around, you need to make sure your wheels are up to snuff. The orientation of your front wheels is probably pretty messed up by now, so you’ll need to adjust the nut on the inside of each wheel (14mm).
- Turn the nut to its absolute limit.
- Note: The nut can turn infinitely, but after a certain point the wheel will stop rotating with it. This is how you know that it’s at its limit.
- When the wheel is at its limit, turn the nut in the opposite direction 60 times.
- Repeat for the other wheel.
Step 9: Paint Your Car
Time to customize your sweet summer ride! There are 12 glossy and 1 matte paints. So pick which one you want to use and pick it up. Press the «Use» button to paint your car with that color.

Step 10: Start Your Engine!
You’re getting so close to vehicular freedom that you can almost taste it. But you have adjust your fan belt and test everything out to make sure it’s running smoothly before you hit the road.
To start your car:
- Open your hood
- Get in the car and pull out the choke
- Hold LMB on the ignition
- Hold the gas
When you do this, the fan belt may squeak. Even if it doesn’t, you should adjust it by following the steps below:
- Hop out of the car and loosen the bolt once — but DON’T totally unscrew it
- Loosen the alternator until it squeaks
- Tighten it once so that it stops squeaking
- Tighten the bolt and close the hood
Step 11: Test Drive
Finally, the moment you’ve been waiting for. Time to see if your car can actually go anywhere.
Get back into the car. Your engine is probably still cold, which is why you pulled out the choke in a previous step — you need it to heat until the temperature arrow is in the middle position on the gauge. Rev the engine a bit to heat it up faster.
Once your engine is heated, push in the choke and drive! Hopefully everything is running smoothly and you don’t experience any sort of breakdown.

Step 12: Register Your Car
The last step in getting your car road-ready is going through a car inspection to make sure that vehicle isn’t a safety risk to your or anyone else. You can have your car inspected for 325 mk.
Once it passes inspection, register your plates. Now you’re ready to go! Drive your car to your heart’s content.
Step 13: Upgrade as Necessary
This last step is optional, but we’re willing to bet that you’ll take advantage of it at some point or another. Once you’ve built a base car, you can invest in upgrades that will pimp out your ride and make you the talk of your Finnish town. If you want to buy everything, you’ll need almost 30,000 mk. But if you only want to invest in a few pieces here and there, below is a full list of each part you can upgrade and how much it costs:
| Upgraded Part | Price |
|---|---|
| Window Grille | 219 mk |
| Rear Spoiler 2 | 329 mk |
| Rear Spoiler | 199 mk |
| Front Spoiler | 249 mk |
| Fender Flares and Fender Flare Spoiler | 1195 mk |
| Wheels Rally | 3249 mk |
| Wheels Spoke | 1519 mk |
| Wheels Hayosiko | 1575 mk |
| Wheels Racing | 3615 mk |
| Windows Black Wrap | 299 mk |
| Sport Steering Wheel | 349 mk |
| Dash Cover Zebra | 295 mk |
| Dash Cover Leopard | 295 mk |
| Dash Cover Plush | 295 mk |
| Seat Cover Zebra | 139 mk |
| Seat Cover Leopard | 139 mk |
| Seat Cover Plush | 139 mk |
| Wheel Cover Zebra | 49 mk |
| Wheel Cover Leopard | 49 mk |
| Fuel Mixture Gauge | 549 mk |
| Extra Gauges | 299 mk |
| Tachometer | 829 mk |
| CD Player | 1395 mk |
| Subwoofers | 695 mk |
| Steel Headers | 649 mk |
| Twin Carburators | 1750 mk |
| Racing Exhaust | 429 mk |
| Racing Muffler | 169 mk |
| Racing Radiator | 1215 mk |
| Racing Harness | 645 mk |
| Bucket Seats | 5095 mk |
| Rally Steering Wheel | 895 mk |
—
That wraps up our guide to building a working car in My Summer Car! Now that you can roam freely around the roads of your small Finland town, be sure to check out the rest of our My Summer Car guides for even more tips and tricks:
- How to Save Your Game in My Summer Car
- My Summer Car Guide: The Most Fun Way to Find the Shop
- My Summer Car Guide: How Do I Wash? By Using the Sauna!
Published Jul. 18th 2017
Управление на русском языке my summer car
Изначально можно настроить управление в меню игры!
Идти вперед (название в меню настроек: FORWARD): W
Идти назад (название в меню настроек: BACKWARD): S
Идти влево (название в меню настроек: LEFT): A
Идти вправо (название в меню настроек: RIGHT): D
Прыжок (название в меню настроек: JUMP): Space
Бег (название в меню настроек: RUN): Left Shift(необходимо задать кнопку вручную)
Сесть за руль (название в меню настроек: DRIVING MODE): Enter
Приблизить (название в меню настроек: ZOOM): Left Control(необходимо задать кнопку вручную)
Отрыть ящик с инструментами, взять пиво и много чего взять и использовать (название в меню настроек: USE ITEMS / EQUIP): F
Присесть (название в меню настроек: CROUCH): С
Нагнуться, в машине нагнуться влево (название в меню настроек: REACH): Q
Нагнуться вправо в машине (название в меню настроек: LEAN RIGHT): E
Ругнутся матом на финском языке (название в меню настроек: SWEAR): N
Пьяные речи/согласиться с мнением собеседника (название в меню настроек: DRUNK SPEECH): K
Бить рукой (название в меню настроек: HIT): H
Толкать машину (название в меню настроек: PUSH): J
Показать средний палец (название в меню настроек: FINGER): M
Справить нужду (название в меню настроек: URINATE): P
Голосовать на обочине (название в меню настроек: HITCHHIKE): O
Достать сигарету(название в меню настроек: SMOKING): I
Затянуть сигарету: удерживание клавиши I
Выбросить сигарету: двойное нажатие клавиши I
Завести машину: левой кнопкой нажать и держать Ignition, пока не заведется
Снять с ручника: правая кнопка мыши
Сменить режим руки/инструмент: 1/2
Закрутить/открутить фильтр, болты, вращать детали: Колесико мыши
Поднять/опустить домкрат : Левая/правая кнопка мыши
Повернуть налево (название в меню настроек: STEER LEFT): A
Повернуть направо (название в меню настроек: STEER RIGHT): D
Газ (название в меню настроек: THROTTLE): W
Тормоз (название в меню настроек: BRAKE): S
Сцепление (название в меню настроек: CLUTCH): X
Дернуть ручник (название в меню настроек: HANDBRAKE): Z
Повысить передачу (название в меню настроек: SHIFT UP): G
Понизить передачу (название в меню настроек: SHIFT DOWN): B
Повышенная/пониженная на грузовике и тракторе (название в меню настроек: RANGE): R
Включить фары (название в меню настроек: TOGGLE HIGH BEAM): L
Включить дворники (название в меню настроек: WIPERS MODE): K
Включить левый поворотник (название в меню настроек: TURN SIGNAL LEFT): SEMICOLON(переназначьте на другие клавиши)
Включить правый поворотник (название в меню настроек: TURN SIGNAL RIGHT): COLON(переназначьте на другие клавиши)
Активировать закись азота(название в меню настроек: BOOST): T
Меню: ESC/F1
Скрыть интерфейс: F2
Выключить зеркала: F3
Перезагрузить скин машины: F5
TV камера в машине: F9
Идти вперед название в меню настроек FORWARD W Идти назад название в меню настроек BACKWARD S Идти влево название в меню настроек LEFT A Идти вправо название в меню настроек RIGHT D Прыжок название в меню настроек JUMP Space Бег название в меню настроек RUN Left Shift необходимо задать кнопку вручную Сесть за руль название в меню настроек DRIVING MODE Enter Приблизить название в меню настроек ZOOM Left Control необходимо задать кнопку вручную Отрыть ящик с инструментами, взять пиво и много чего взять и использовать название в меню настроек USE ITEMS EQUIP F Присесть название в меню настроек CROUCH С Нагнуться, в машине нагнуться влево название в меню настроек REACH Q Нагнуться вправо в машине название в меню настроек LEAN RIGHT E Ругнутся матом на финском языке название в меню настроек SWEAR N Пьяные речи согласиться с мнением собеседника название в меню настроек DRUNK SPEECH K Бить рукой название в меню настроек HIT H Толкать машину название в меню настроек PUSH J Показать средний палец название в меню настроек FINGER M Справить нужду название в меню настроек URINATE P Голосовать на обочине название в меню настроек HITCHHIKE O Достать сигарету название в меню настроек SMOKING I Затянуть сигарету удерживание клавиши I Выбросить сигарету двойное нажатие клавиши I Завести машину левой кнопкой нажать и держать Ignition, пока не заведется Снять с ручника правая кнопка мыши Сменить режим руки инструмент 1 2 Закрутить открутить фильтр, болты, вращать детали Колесико мыши Поднять опустить домкрат Левая правая кнопка мыши.
M. vk. com
05.04.2018 11:58:37
2018-04-05 11:58:37
Источники:
Https://m. vk. com/topic-100636219_34036755
PLUGIN Актуальный русификатор текста My Summer Car / Russian language | RaceDepartment » /> » /> .keyword { color: red; } Управление на русском языке my summer car
PLUGIN Актуальный русификатор текста My Summer Car / Russian language 2.2.3
[PLUGIN] Актуальный русификатор текста My Summer Car / Russian language 2.2.3
English description:
What does this include? Updated Language Framework with ability to translate Sheets, Computer, Rally TV, intro, and final game scenes (I tried to contact the author from 10 July 2019). Since version 1.2.3C removed font replacing; NewFonts plugin that replaces 11 game fonts to individual fonts; ExtraTranslate plugin that translates what cannot translate using Language Framework; LFHUDFix plugin (currently located in the source) that correct text position on HUD; LFTTFix plugin that correct text position on Teletext, computer OS, and computer games; Textures plugin (currently located in the source), that replace 113 textures. If you want to use my plugins for translations into other languages — you can use them (with indication author of the plugin). Obviously, the target audience will read the installation method in the Russian description. Credits: jinnin0105 — author of Language Framework; Piotrulos and Fredrik — programming help; Madpavsam and KoshaTech — textures, _Nekit_ — correction of translation.
Описание на русском языке:
Данный русификатор переводит практически весь текст, при этом нацелен на работу как на основной ветке игры, так и на экспериментальной. Не переведено из текста из-за того, что вне юрисдикции Mod Loader’а (именно на его технологиях основан данный русификатор): окно «My Summer Car Configuration» и экран, где нужно нажимать «I UNDERSTAND».
Прошу Не перезаливать русификатор т. к. вы перезальете только первую версию и явно не сохраните мое описание.
Установка:
0. Данный русификатор является набором плагинов для Mod Loader‘а. Если он у вас установлен — переходим к следующему пункту. Если вы вообще не в курсе, что это такое — устанавливаем (тыкай на меня).
1. Копируем с заменой папку Assets и файлы ExtraTranslate. dll, LanguageFramework. dll, LFTTFix. dll и NewFonts. dll в папку Mods.
Благодарность:
Jinnin0105 — автор Language Framework;
Piotrulos и Fredrik — помощь в программировании;
Павел Самохвалов — автор текстур компьютерных игр и некоторых других текстур;
Данил Бусыгин — автор текстур бланков и некоторых других текстур. Его русификатор текстур (тыкай на меня);
Никита Романов — коррекция перевода.
Dll и NewFonts.
Www. racedepartment. com
12.06.2020 8:27:17
2020-06-12 08:27:17
Источники:
Https://www. racedepartment. com/downloads/plugin-%D0%90%D0%BA%D1%82%D1%83%D0%B0%D0%BB%D1%8C%D0%BD%D1%8B%D0%B9-%D1%80%D1%83%D1%81%D0%B8%D1%84%D0%B8%D0%BA%D0%B0%D1%82%D0%BE%D1%80-%D1%82%D0%B5%D0%BA%D1%81%D1%82%D0%B0-my-summer-car-russian-language.17118/
How to Build a Working Car in My Summer Car | My Summer Car » /> » /> .keyword { color: red; } Управление на русском языке my summer car
How to Build a Working Car in My Summer Car
How to Build a Working Car in My Summer Car
Amistech Games released My Summer Car late last year, and quickly reached cult-hit status. In this simulation game, players must try to survive the Finnish summer and build their own car from various parts. The goal of the game is to persevere through harsh road conditions, while also being able to maintain your car’s integrity.
A lot of players have been frustrated with the complexity of building their first working car. After all — you only start with the room full of parts and no descriptions of how any of them fit together. Thankfully, Steam user Necronomicron has offered up some comprehensive advice on how to build a working car in My Summer Car. Here’s the rundown.
Building Your First Working Car in My Summer Car
Prepare before you try to build.
Since it will probably take a good bit of time both in and out of game to complete your first car, you will want to stock up on as many resources as you possibly can ahead of time. Necronomicron advised to first gather as much money as possible so that you can buy a fan belt, motor oil, and coolant.
All these things will be essential to get your car up and running, so it’s better to have them on hand before you start building.
Necromicon gives the following essential advice:
«. save the game before buying stuff, because your bag with goods will unpack on game load. It is easier to move just one bag rather than 20 items to your home.
I would recommend to buy everything on the left side of the store (which will cost 1,995 mk). However, you will need at least [one] fan belt, three brake/clutch fluids, one motor oil, [and] one coolant.»
He also suggests buying food and other supplies, since this will take awhile to build, and mother nature waits for no one.
Part Price
| Fan Belt | 295 mk |
| Brake/Clutch Fluid | 35 mk |
| Motor Oil | 149 mk |
| Coolant | 195 mk |
Step One: Work on the Front Suspension
The first thing you need to do is jack the car up so you can work on the frame and underpinnings of the vehicle. To raise the body:
Place the floor jack under the front bumper of the car. Use the lever to raise the floor jack (and the car) to its limit.
Once you’ve got the car jacked up, head over to the tool box. To use the tool box, hover your cursor to its opening and press «Use». You’ll need to come back here often to switch out tools as necessary. To get to a specific tool, press 2, then click on whichever one you need. Once you have it, press 1 to hide that tool.
Now it’s time to work on the front part of your car’s frame. Here’s the order in which you need to attach your parts (and what screws or bolts you need to use):
- Subframe, Wishbones, Spindles
- Attach sub frame with 10mm screws (x4) Attach front left (FL) and front right (FR) wishbones with 10mm screws (x2 each) Attach FL and FR spindles with 12mm screws (x1 each)
- Put on the 2 disc brakes, but do NOT tighten them. Put on the 2 halfshafts with 9mm screws (x3) Tighten the disc brakes with 14mm screws (x1 each)
- Attach the steering rack with 9mm screws (x4) Put on FL/FR steering rods, but do NOT tighten Put on FL/FR struts, but do NOT tighten Tighten the steering rods with 12mm screws (x1 each) and a size 14 adjustment nut. Tighten the struts with 10mm screws (x3) on top, and 9mm screws (x4) on the bottom
- Attach the FL and FR wheel steels with 13mm screws (x4) Attach the steering column with 8mm screws (x2)
Step 2: Work on the Rear Suspension
The next major step in this process is putting together the rear suspension. So you’ll want to lower your frame and remove the floor jack. Move it to the rear bumper of the car, then jack the vehicle back up.
Once it’s up, you’ll need to add more parts in the following order:
- Trail Arms, Coil Springs, Shock Absorbers, Drum Brakes, Rear Wheels
- Attach rear left (RL) and rear right (RR) trail arms with 12mm screws (x2 each) Attach two coil strings (no screws needed) Attach two shock absorbers with 12mm screws (x1 each) on top, and 6mm screws (x2 each) on the bottom. Attach two drum brakes with 14mm screws (x1 each) Attach RL and RR wheel steel with 13mm screws (x4 each)
Step 3: Put Together the Engine
Now that you’ve got your rear suspension built, lower the floor jack and remove it. Push your car into the garage where you’ll complete the next several steps.
For right now, though, you’re going to set the car aside and focus on building your engine. Set the engine block on a spacious work table and build it out as follows:
- Block, Crankshaft, Main Bearings, Pistons
- Put the engine block on a table Attach the crankshaft (no screws needed) Attach main bearings 1, 2 and 3 with 9mm screws (x2 each) Attach pistons 1, 2, 3, and 4 with size 7 nuts (x2 each)
- Attach the head gasket (no screws needed) Attach the cylinder head with 7mm screws (x10) Attach the headers with 8mm screws (x5) Place the motor hoist on top of the engine Fasten the engine to the motor hoist with 10mm screws (x2)
- As you tighten each screw, the engine will align into the correct position.
- Attach the carburetor with 8mm screws (x4) Attach the rocker shaft with 8mm screws (x5) Don’t try to adjust the valvetrain just yet — we’ll do that later. Fasten the rocker cover with 7mm screws (x6)
- Attach the camshaft with 5mm screws (x2) Attach the camshaft gear with a 10mm screw (x1) Put on the timing belt (no screws needed) Attach the timing cover with 6mm screws (x6)
- Attach the water pump with 7mm screws (x5) Attach the water pump pulley with 7mm screws (x4) Attach the crankshaft pulley with an 11mm screw (x1)
- Attach the alternator with a 7mm screw (x1) on top and a size 10 nut (x1) on the bottom. Attach the fan belt (no screws needed) Grab the screwdriver from the tool box. Using the mouse scroll wheel, adjust the alternator so it slightly touches the fan belt. Tighten the screw.
- Note: Later in the process, you’ll need to calibrate this part. If the fan belt is too loose, your car won’t start at all!
- Attach the engine plate (no screws needed) Attach the starter with 7mm screws (x2) Attach the flywheel with 7mm screws (x6)
- Put the clutch pressure plate into the clutch cover plate Put the clutch disc into the clutch pressure plate Attach the whole thing to the engine with 6mm screws (x6)
- Attach the oil pan with 7mm screws (x8) and a 13mm screw (x1) Attach the gearbox with 7mm screws (x6) and a 10mm screw (x1) Attach the drive gear with 6mm screws (x7)
- Tighten the spark plugs with the spark plug wrench Attach the fuel pump with 7mm screws (x2) Attach the distributor with a 6mm screw (x1)
Step 4: Install the Engine
Now comes a tricky part. You need to get the engine you just built into the car by hoisting it. Grab the hoist and use it to lift up the engine. Be careful, though! The engine can detach from the hoist if you aren’t paying attention.
Move the host over to the car, then lower it. As soon as the engine is in the proper position, bolts will appear — two 11mm bolts on the front side and one 11mm bolt on the rear side.
Once you’ve got the engine aligned properly, unscrew it from the hoist. Then raise the hoist again and put it away. Now you’re ready to start working on the guts of the car that will make it run!
Step 5: Work On Everything Under the Hood
It’s time to dig deep into your car building process and start making all the internal connections that will turn this hunk of metal from a collection of parts to a fully running vehicle. Here’s the order in which you need to build everything:
- Battery and Electrics
- Put the Battery in position next to the engine Attach the electrics to the engine compartment with 8mm screws (x2)
- Attach the fuel strainer with an 8mm screw (x1) Attach the radiator with 7mm screws (x4) Attach radiator hose 1 Attach radiator hose 2 to the engine block Attach radiator hose 3 Tighten the oil filter with your hand (using the mouse scroll wheel)
- Note: Just putting the oil filter on is NOT enough
- Place the clutch master cylinder and the break master cylinder between the engine and the frame of the car using 8mm screws (x2) on the engine side and 9mm screws (x1 each) on the cabin side.
- Attach the clutch lining with 7mm screws (x2) Attach the brake lining with 7mm screws (x8) Tighten the nuts for each attached wheel with 7mm screws
The nuts you’re looking for on each wheel look like this:
- Fuel Tank, Halfshafts
- Attach the fuel tank with 11mm screws (x7)
- Pay close attention to the 12mm nut (x1) that you also need to attach this tank. If you miss it, all your fuel will leak.
- Attach the gear linkage with 5mm screws (x3), two on the bottom and one on the top. Attach the gear stick with 6mm screws (x3) Attach the handbrake with 8mm screws (x4) Tighten the 5mm bolt near the fuel tank
- Attach the exhaust pip with one 7mm screw on the back side and two 7mm screws on the engine side. Attach the exhaust muffler with a 7mm screw (x1) Attach the fuel tank pipe (no screws needed)
Step 6: Build Out the Car Interior
Finally! You’ve got a car that should be able to run on its own. But that’s pretty useless without a comfortable interior. So now it’s time to build out the inside of your summer ride.
- Dashboard, Dashboard Meters, Gauges
- Attach the dashboard with 10mm screws (x2) Set aside the meter display section of the dashboard. Arrange your dashboard meters on the table. Choose which meter you want to use (RPM gauge or clock gauge) and tighten it into the display with 7mm screws (x2) Attach the meter display to the dashboard with 6mm screws (x2)
- Attach the rear seats with 9mm screws (x2) Choose whether you’d like to have a normal back panel or a subwoofer panel Insert your panel of choice (no screws needed) Attach the driver’s seat and passenger’s seat with 9mm screws (x4 each)
- Attach the stock steering wheel to the steering column with a 10mm screw (x1) Insert the radio into the dashboard
Step 7: Work on the Car Exterior
Now that you have seats and a steering wheel to make your car much more driveable, you’ll need to add all the external features like doors and headlights that will keep you rolling along.
- Headlights, Grille, Hood, Air Filter
- Insert the headlights into the front bumper and attach them with 7mm screws (x2 each) Attach the grill to the front bumper with 6mm screws (x2) Place the hood on top of the car without tightening it. Open the hood with hood lock. Tighten the hood with 6mm screws (x4), but do NOT close it. (It needs to stay open for later steps.) Insert and attach the air filter with 6mm screws (x2)
- Attach the left and right doors with 10mm screws (x4 each) Attach the left and right fenders with 5mm screws (x5 each) Place the bootlid on the trunk of the car, then tighten it with 6mm screws (x4)
- Attach the front and rear bumpers with 8mm screws (x2 each) Attach the left and right rear lights
- Open the radiator’s cap. Pour coolant into the radiator. (But DON’T throw the bottle out when you’re finished. It isn’t empty.) Open the rocker cover’s cap and pour motor oil in it. (Again, DON’T throw out the bottle, because it isn’t empty.) Open any of the two brake master cylinder caps and pour in brake fluid. (Do get rid of this bottle, because it’s empty.) Do the same with the second cylinder cap opening. Open the clutch master cylinder cap and repeat the process. (This time the bottle will NOT be empty.) Open the jerrycan and put gas in your gas tank.
Step 8: Adjust Your Wheels
You’re almost ready to go! But before you start zooming around, you need to make sure your wheels are up to snuff. The orientation of your front wheels is probably pretty messed up by now, so you’ll need to adjust the nut on the inside of each wheel (14mm).
- Turn the nut to its absolute limit.
- Note: The nut can turn infinitely, but after a certain point the wheel will stop rotating with it. This is how you know that it’s at its limit.
Step 9: Paint Your Car
Time to customize your sweet summer ride! There are 12 glossy and 1 matte paints. So pick which one you want to use and pick it up. Press the «Use» button to paint your car with that color.
Step 10: Start Your Engine!
You’re getting so close to vehicular freedom that you can almost taste it. But you have adjust your fan belt and test everything out to make sure it’s running smoothly before you hit the road.
To start your car:
- Open your hood Get in the car and pull out the choke Hold LMB on the ignition Hold the gas
When you do this, the fan belt may squeak. Even if it doesn’t, you should adjust it by following the steps below:
- Hop out of the car and loosen the bolt once — but DON’T totally unscrew it Loosen the alternator until it squeaks Tighten it once so that it stops squeaking Tighten the bolt and close the hood
Step 11: Test Drive
Finally, the moment you’ve been waiting for. Time to see if your car can actually go anywhere.
Get back into the car. Your engine is probably still cold, which is why you pulled out the choke in a previous step — you need it to heat until the temperature arrow is in the middle position on the gauge. Rev the engine a bit to heat it up faster.
Once your engine is heated, push in the choke and drive! Hopefully everything is running smoothly and you don’t experience any sort of breakdown.
Step 12: Register Your Car
The last step in getting your car road-ready is going through a car inspection to make sure that vehicle isn’t a safety risk to your or anyone else. You can have your car inspected for 325 mk.
Once it passes inspection, register your plates. Now you’re ready to go! Drive your car to your heart’s content.
Step 13: Upgrade as Necessary
This last step is optional, but we’re willing to bet that you’ll take advantage of it at some point or another. Once you’ve built a base car, you can invest in upgrades that will pimp out your ride and make you the talk of your Finnish town. If you want to buy everything, you’ll need almost 30,000 mk. But if you only want to invest in a few pieces here and there, below is a full list of each part you can upgrade and how much it costs:
Upgraded PartPrice
| Window Grille | 219 mk |
| Rear Spoiler 2 | 329 mk |
| Rear Spoiler | 199 mk |
| Front Spoiler | 249 mk |
| Fender Flares and Fender Flare Spoiler | 1195 mk |
| Wheels Rally | 3249 mk |
| Wheels Spoke | 1519 mk |
| Wheels Hayosiko | 1575 mk |
| Wheels Racing | 3615 mk |
| Windows Black Wrap | 299 mk |
| Sport Steering Wheel | 349 mk |
| Dash Cover Zebra | 295 mk |
| Dash Cover Leopard | 295 mk |
| Dash Cover Plush | 295 mk |
| Seat Cover Zebra | 139 mk |
| Seat Cover Leopard | 139 mk |
| Seat Cover Plush | 139 mk |
| Wheel Cover Zebra | 49 mk |
| Wheel Cover Leopard | 49 mk |
| Fuel Mixture Gauge | 549 mk |
| Extra Gauges | 299 mk |
| Tachometer | 829 mk |
| CD Player | 1395 mk |
| Subwoofers | 695 mk |
| Steel Headers | 649 mk |
| Twin Carburators | 1750 mk |
| Racing Exhaust | 429 mk |
| Racing Muffler | 169 mk |
| Racing Radiator | 1215 mk |
| Racing Harness | 645 mk |
| Bucket Seats | 5095 mk |
| Rally Steering Wheel | 895 mk |
That wraps up our guide to building a working car in My Summer Car! Now that you can roam freely around the roads of your small Finland town, be sure to check out the rest of our My Summer Car guides for even more tips and tricks:
«. save the game before buying stuff, because your bag with goods will unpack on game load. It is easier to move just one bag rather than 20 items to your home. I would recommend to buy everything on the left side of the store (which will cost 1,995 mk). However, you will need at least [one] fan belt, three brake/clutch fluids, one motor oil, [and] one coolant.»
Building Your First Working Car in My Summer Car
Since it will probably take a good bit of time both in and out of game to complete your first car, you will want to stock up on as many resources as you possibly can ahead of time. Necronomicron advised to first gather as much money as possible so that you can buy a fan belt, motor oil, and coolant.
All these things will be essential to get your car up and running, so it’s better to have them on hand before you start building.
Necromicon gives the following essential advice:
«. save the game before buying stuff, because your bag with goods will unpack on game load. It is easier to move just one bag rather than 20 items to your home.
I would recommend to buy everything on the left side of the store (which will cost 1,995 mk). However, you will need at least [one] fan belt, three brake/clutch fluids, one motor oil, [and] one coolant.»
He also suggests buying food and other supplies, since this will take awhile to build, and mother nature waits for no one.
Part Price
| Fan Belt | 295 mk |
| Brake/Clutch Fluid | 35 mk |
| Motor Oil | 149 mk |
| Coolant | 195 mk |
Attach the steering rack with 9mm screws x4.
Www. gameskinny. com
05.05.2018 10:56:05
2018-05-05 10:56:05
Источники:
Https://www. gameskinny. com/dujob/how-to-build-a-working-car-in-my-summer-car
This is a simple texture mod which primarily aims to «clean» the filthy-looking windows of the Satsuma.
As a secondary function, and since I went into the process of editing texture files, I made several versions with tinted windows, mostly black, but there are a couple of other shades in there.
This mod requires some method of importing the texture files into your game or simply using the awesome Vehicle Texture Swap mod by FESilencer.
Assuming that you already know how to use a re-texture mod (see Vehicle Texture Swap as I said if you dont), you need to choose ONE and only ONE of the many different versions of Cleaner Windows for the Satsuma.
They ALL modify the same thing, you cannot mix and match them
. You are welcome to edit the files yourself using programs such as GIMP, Photoshop or any decent .DDS editor.
The texture files have been tested and actually work with a variety of other vehicles, including modded ones such as the Tangerine FZ-120 Pickup.
—> It is not just for the Satsuma.
Vehicles that are confirmed to be able to use these exact files are:
— Ferndale
— Gifu
— Hayosiko
— Kekmet
— Ruscko
— Satsuma (of course)
^All of the above can work with Vehicle Texture Swap.
Also:
— Tangerine
— EDM
^For these you need to do more than just use Vehicle Texture Swap. You basically need to replace the textures manually, with UAE or Texture Importer Tool, something like that.
Be aware that because of the because of the way the game’s graphics (lights and shadows) work, it is hard to get the windows to look right and I have noticed that there are weird light reflections on the «glass» that arent very realistic. I cannot do anything about that because this requires a lot more than a simple re-texture mod.
————————————————————————————————————————
For those that have trouble/dont know how to install this properly:
Go to Vehicle Texture Swap mod and follow the instructions there.
It will tell you exactly how to do this.
My files need to be inside the Satsuma folder from Vehicle Texture Swap. They should be on their own without any subfolders.
So the end result should be this:
ImagesVehicleTextureSwapSatsumawindows.tex
ImagesVehicleTextureSwapSatsumawindows_n.tex
ImagesVehicleTextureSwapSatsumawindows_pbr_rain.tex
———————————————————————————————————————
If someone needs a particular window tint, feel free to request it, just please understand that I am not skilled with GIMP, I am only an amateur, so I may or may not be willing to fulfill your request. Simple tint colors can be done though.
The mod will conflict with any other mod that modifies the following 3 files (for the Satsuma only):
windows.tex — windows_n.tex — windows_pbr_rain.tex
There are 2 main categories of the different variations:
1.
Normal Clear Windows
— These have just a little hint of dust on them, its a very subtle effect, and some may not even notice it. This is primarily to avoid the windows looking too transparent, in other words, it makes the windows more visible as glass.
I recommend variations in this folder.
2.
Crystal Clear Windows
— These are 100% clear with 0 dust on them, and they may look a bit too transparent. If you use those, I recommend the darker tints, especially Black Tint and Dark Black. This category are for those that want everything to be completely spotless, perhaps a bit on the OCD side.
The «I DONT NEED WINDOWS!!!» and «REAL MEN DRIVE WITH THEIR EYES CLOSED!!!» are mostly joke files. They make no sense as the former makes windows completely transparent (invisible) and the latter turns them completely black, like the black tint that you can apply to the back window in the vanilla unmodded game, but for ALL of them.
In short, its just for the lolz, dont take it seriously.
— [Q&A] —
Q: Why do this?
A: I was getting quite frustrated with the filthy-looking windows of the Satsuma that seem to ruin my otherwise clean-looking car, so I decided to «clean» them with this simple texture mod. Its honestly very surprising that there isnt a mod like this here on NexusMods.
Q: You have too many variations! What is this?!!?
A: This is only to satisfy more tastes and to preempt people asking for more.
Q: I found a mod somewhere that does the same thing but better, yours sucks. Why bother to upload?
A: As I said, I didnt find anything on NexusMods, if you found something better elsewhere, by all means download that one and let me know so I can enjoy it as well!

My Summer Car – это продвинутый симулятор сборки, тюнинга и обслуживания автомобиля с элементами выживания. Ниже представлен гайд по игре с основными вопросами, которые встречаются при прохождении.
- My Summer Car — управление в игре
- My Summer Car — таблица ключей
- My Singing Monsters — гайд по выведению монстров
- My Friend Pedro: прохождение сюжета
- My Friend Pedro: ранг S
Ошибка при запуске игры
- Отсутствие русских букв в пути игры и пути сохранения (Не должно быть, например: C:UsersМишаПупкинAppDataLocalLowAmistech);
- Может вылетать, если у вас МЕНЕЕ 4Gb оперативной памяти;
- Может не работать, если у вас встроенное в процессор видеоядро;
- Отключаем антивирус, рули, джойстики;
- Убеждаемся в том, что у вас установлены самые последние драйвера.
Почему не сохраняется игра?
- Моды;
- Антивирус (Безопасность Windows);
- В свойствах файлов сохранения не должна стоять галка “только для чтения”.
Не ходит персонаж
- Закрыть игру через диспетчер задач и запустить заново;
- Попробовать запустить игру через “mysummercar.exe” в папке с игрой;
- Установить готовое сохранение из обсуждений группы;
- Выставить такое же разрешение экрана в игре, как и на рабочем столе;
- Не использовать пиратскую версию игры. Если после удаления пиратской версии игры на лицензионной версии у вас эта проблема – переустанавливайте Windows;
- В редких случаях причиной является наличие Яндекс Браузера;
- Также причиной может быть неподходящая версия русификатора или мода.
Что делать, если пропали деревья или они странно выглядят (пропала прозрачность)?
Сбросить настройки по умолчанию для игры в GeForce Experience или его аналоге от AMD.
Как сохраниться?
Зайти в туалет и нажать на унитаз.
Почему показывает ровно 20 FPS?
Игровой счетчик FPS не показывает меньше 20, игра очень требовательна к процессору.
Отваливается торпеда, что делать?
Полностью открутить гайки, снять торпеду, поставить торпеду, закрутить гайки, поставить и прикрутить руль.
Не едет машина (фургон, трактор), вроде все снято, в настройках стоит только Auto clutch. Что делать?
Попробуйте изменить управление или отключить геймпад, меняйте управление в игре и читайте раздел управление.
Как включить отражения на машине?
При запуске игры в пункте Graphics quality поставить Better или выше. В игре, в настройках графики включить Reflection
Почему нет полиции?
Рандом.
Почему не спавнятся гонщики около магазина?
Рандом.
Где находятся потерянные вещи?
Провалившиеся под землю вещи находятся на свалке, возле фонарного столба. Просто потерянные вещи лежат там, где их потеряли.
Как добавить свою музыку? Где найти CD диск?
Добавить музыку в папку Radio в папке игры в формате OGG под названиями track1, … track100. Диск спавнится в комнате персонажа, если добавить музыку в папки CD1/2/3 (1 диск – 15 треков. Также нужно удалить папку CD, если она есть). Затем в главном меню нажать на “Import Files Music”.

Как установить моды
- Моды с автоматическим установщиком: скопировать “название_мода.exe” в папку с игрой, запустить исполняемый файл, поочередно четыре раза нажать на “Next”, по окончанию нажать на “Close”. Возможно понадобится удалить файл “meshsave.txt” из папки сохранения игры.
- Моды, заменяющие архивы assets: скопировать с заменой новые sharedassets1.assets и sharedassets2.assets в папку mysummercar_Data.
- Текстурные моды устанавливаются через Unity Assets Explorer.
- Плагины устанавливаются в папку ДокументыMySummerCarMods, для их работы обязательно должен быть установлен Mod Loader.
Как переводятся показатели персонажа, от чего можно умереть и как понижать показатели?
URINE – нужда (Кнопка для справления нужды: P); HUNGER – голод (Есть еду); THIRST – жажда (Пить, можно из-под крана на кухне); FATIGUE – усталость (Спать, пить кофе в пабе); STRESS – стресс (Париться в сауне, колоть дрова, находиться на острове с домиком, курить сигареты, ругаться на кнопку: N); DIRTINESS – грязность (Мыться под душем или в озере). Умереть можно от всего, кроме грязности и усталости.
Умираю и все сначала, как ожить дома?
При создании нового профиля убедиться, что не стоит ON напротив Permanent Death (8 пункт в правах).
Где достать колеса на машину при старте новой игры?
Колеса находятся на чердаке заброшенного дома возле механика, как по грунтовой дороге ехать в магазин по правой стороне. Чтобы забраться в дом используйте кувалду, чтобы снести входные двери. Лестница на чердак находится с правой стороны как только вы вошли в дом. Колеса на чердаке, и там же есть осы, на которые у ГГ аллергия. Поэтому лучше ехать ночью.
Где найти ремень? Как поставить, распаковать?
Ремень в магазине. Поставить помпу, шкив коленвала и генератор. Распаковывать не надо.
Как подцепить двигатель на подъемник?
Необходимо иметь блок, ГБЦ и выпускной коллектор. Поставить двигатель так, чтобы сторона со свечами смотрела на подъёмник, иначе болты не появятся. Закрутить на подъемнике болты на 10 (двигатель сдвинется). Немного поднять подъемник.
Зарядка показывает 12, но в машине нет электричества, почему?
Когда зарядка показывает 12 – это означает, что батарея полностью разряжена, зарядить такую батарею уже не выйдет.
При попытке поехать машина дергается и глохнет, что делать?
Прогреть машину до рабочей температуры(стрелка температуры должна быть посередине) и трогаться с 2-3 тысячи оборотов.
Слышен свист из-под капота и сзади раздаются хлопки (стреляет), что делать?
Свистит ремень генератора, скорее всего он просто не натянут, для его натяжения необходимо отодвинуть генератор максимально от блока и подвинуть на два шага к блоку. Также причиной свиста может быть вышедший из строя генератор и/или водяной насос. Хлопки раздаются из-за слишком бедной топливной смеси, для настройки необходимо иметь датчик смеси топлива, процесс настройки заключается в регулировании болта отверткой на карбюраторе, идеальное химическое соотношение – 14.7. Также причиной хлопков может послужить неправильное выставление распредвала.
Куда уходит бензин?
Нужно закрутить болт на бензобаке (ключ на 12)
Куда уходит масло?
Необходимо закрутить до конца масляный фильтр и проверить болты масляного поддона.
Как установить/поменять шины?
Положить механику на стол в СТО четыре колеса/диска и заказать замену. Если механик не меняет/не устанавливает шины – необходимо установить эти колеса/диски на машину, а затем снять их и сделать заказ заново.
Как заказать тюнинг?
Находите журнал (он лежит на столе в гараже или в доме, который можно выиграть в карты, если он выигран), нажимаете на него и выбираете какую-либо деталь, нажимаете в правом нижнем углу журнала, появится письмо, кидаете его в желтый почтовый ящик (просто провести мышью, без нажатия), который справа от входа в магазин, возвращаетесь домой, через полтора часа реального времени вам должны будут позвонить со словами “Your post order has arrived. You can pick it up from the store.” и можете смело ехать в магазин за деталями. Если письмо не появляется – значит вы уже сделали заказ(не дождались или потеряли письмо).
Где найти более высокие задние пружины?
Они находятся за трактором, который возле СТО.
Как установить 4х точечные ремни?
Необходимо иметь каркас безопасности(ставится в СТО) и гоночные сидения.
Как сдать машину в СТО?
Поставить машину перед воротами СТО, в заказ-наряде отметить то, что вам нужно сделать. После этого нажать на круглый штамп в левом нижнем углу листка, садимся в маслкар и едем домой. Через 20-40 минут реального времени (когда вы находитесь возле СТО – время останавливается, т.е. домой ехать обязательно. Ускорить это время возможно только с помощью редактора сохранений, как это сделать – написано в обсуждении этой группы, под названием “Читы”) вам позвонят со словами “Fleetari here! Your repair work is ready. Come here and get your stuff.”. Приезжаете и забирайте.
Почему в СТО нет механика?
В субботу и воскресенье он занимается организацией ралли.
Нужно ли менять масло?
Да. Также нужно менять и масляный фильтр. Чем темнее масло на щупе – тем больше оно загрязнено.
Как убрать вмятины на кузове?
Заказать ремонт нужных деталей в СТО.
Закипает машина, что делать?
Не крутить двигатель выше 5 тыс. оборотов.
Машина сама газует, что делать?
Проблема в использовании стандартного карбюратора без воздушного фильтра, заказывать ремонт сломанных деталей в СТО, предварительно положив карбюратор на стол.
Что нужно для участия в ралли и когда оно проводится?
Для участия в ралли машина должна быть зарегистрирована, т.е. иметь номера, также необходимо иметь каркас безопасности, 4х точечные ремни, раллийную резину и огнетушитель. Первый этап проходит в субботу, с 10 до 18. Место регистрации обозначено на карте в первом посте этой темы. После первого этапа машину необходимо поставить в зону обслуживания (самый ближний двор к месту старта первого этапа). Второй этап проводится в воскресенье, с 10 до 18, место старта находится там, где был финиш первого этапа.
Где найти GT тюнинг?
Около СТО, возле трамплинов, рядом с карьером или клубничным полем, около антенны, под мостом на трассе, на выезде в город, рядом с клубом, рядом с “неотмеченной трассой”.
Как включить дальний свет?
Нужно включить фары и нажать на клавиатуре L (по умолчанию).
Как установить гоночный тахометр и что там за кнопка?
Гоночный тахометр устанавливается на рулевую колонку и прикручивается одним болтом ключом на 5. Регулятор отвечает за то, на каких оборотах двигателя будет загораться красная лампочка, сигнализирующая, что пора переключать передачу. Настройка производится колесиком мыши.
Как пройти техосмотр и получить номера?
Для прохождения тех. осмотра необходимо иметь исправную тормозную систему(рабочая и стояночная); исправную систему освещения и световой сигнализации; знак аварийной остановки(находится на тракторе); исправную ходовую часть; исправное рулевое управление; исправную систему питания двигателя; исправную выхлопную систему; стандартные(не старые) шины или шины “Gommer Gobra”; бампера, двери, решетка радиатора и другие кузовные детали; исправное лобовое стекло; водительское сидение; спидометр; трансмиссию; рулевое колесо.
Допускается любой тюнинг, кроме четырёхдроссельного впуска, гоночного выпускного коллектора, гоночной выхлопной трубы, гоночного глушителя, раллийного рулевого колеса, раллийных и драговых шин.
После выключения зажигания в двигателе что-то стучит, в чем дело?
Это нормально, остывает выпускной коллектор.
Как натопить баню?
Для начала у печки с камнями снизу надо выкрутить на максимум обе крутилки. Затем, идем в предбанник, предварительно взяв ведерочко для воды. Ставим ведерко под кран в предбаннике и включаем левую ручку на кране. Возвращаемся обратно и ждем когда баня нагреется хотя бы до 40 градусов(градусник на стене, баня топится очень долго). Воду лить на камни при помощи черпака(F, чтобы воспользоваться черпаком, ЛКМ чтобы набрать воду, ПКМ, чтобы вылить воду на камни).
Как натопить баню, которая находится на острове?
Нарубить небольшое количество дров, закинуть их в печь и развести огонь(кнопка F). Воду в ведерко можно набрать в озере.
Как избавиться от ос в машине, которую можно выиграть в карты?
Машину необходимо утопить в воде или огнетушителем выгнать ос.
Как поехать на фургоне?
Заводите, зажигание находится слева под рулем, снимаете с ручника и включаете передачу.
Как поехать на маслкаре?
Единственный способ поехать на маслкаре – это отдать Satsum’у на ремонт в СТО.
Как ездить на маслкаре, чтобы его не заносило?
Включить вторую передачу и ехать не больше 40 миль в час.
Как включить заднюю передачу/поставить на паркинг на маслкаре?
Необходимо зажать кнопку тормоза и переключать передачи.
Как заправить маслкар?
Сзади под номером крышка.
Как поставить на колеса, завести и поехать на мопеде?
Для того, чтобы поднять его нужно ходить возле него, затем запрыгнуть на него сзади, войти в режим управления, наклониться влево, найти и нажать на “FUEL TAP”, наклониться вправо и несколько раз нажать на “IGNITION” (наклониться влево и убрать подножку (KICKSTAND), можно ехать.)
Как вернуть шланг ассенизатора на место?
Берем конец шланга и тянем его к месту, где он лежал. Появится указатель, нажимаем и он на месте.
Оторвался и упал в яму шланг ассенизатора, что делать?
Сохраниться и перезайти в игру.
Как запустить моторную лодку? И как начать движение?
Садитесь в лодку и поворачиваетесь к мотору. Слева от вас будет черная рукоять. Наводите на нее и зажимаете ЛКМ. Начинайте дергать ее и отпускаете ЛКМ. Процедуру повторять до тех пор, пока мотор не запустится. Правее троса запуска есть рычаг, воздействуя на который вы включаете “передачу”. Всего два варианта – вперед и назад.
Как пользоваться автобусом?
Сесть в автобус можно только на остановках, для того, чтобы автобус остановился необходимо находится возле знака автобусной остановки (остановка рядом с СТО и юго-восточная остановка) или в самой остановке(юго-западная остановка), возле магазина автобус останавливается в любом случае. Останавливается он только на остановках и только по требованию (красная кнопка сверху, при наведении появляется надпись “STOP BUS”).
Почему в доме нет света?
Необходимо оплатить электричество. Квитанция находится в красном почтовом ящике, неподалеку от дома. Иногда причиной может являться погодные условия.
Сгорел дом, как восстановить?
Только через редактор сохранений (подробнее в обсуждении “Читы”).
Что за оградительная лента и люди?
По субботам и воскресеньям проводится ралли, лента обозначает маршрут.
Можно ли промотать время в игре?
При каждом сохранении игры добавляется 2 часа. На время прибытия тюнинга и работу механика это не влияет.
Не меняется день недели, что делать?
Не сохраняться после 10 вечера, пока не поменяется день недели.
Где находится и как пользоваться камерой?
Камера находится в коттедже на острове. Для использования ее необходимо взять в руки, нажать на F, левая кнопка мыши – приближение, правая кнопка мыши – отдаление, средняя кнопка мыши – сделать фотографию. Фотография будет находится в изображениях Windows.
Пропала машина, а на ее месте осталась записка, что делать?
Вернуть механику его машину (маслкар) и отправляться на поиски своей машины (карту можно найти в обсуждении “Читы”).
Что будет, если не вернуть механику его машину?
Он угонит Satsum’у и оставит ее перевернутой в каком-то из лесов.
Что будет, если уехать, не заплатив за топливо?
Стоимость увеличится втрое.
Приехал в магазин ночью, как заправиться?/Закрыли в магазине, как выбраться?
Под прилавком продавца есть два переключателя. Один открывает дверь магазина на короткое время, другой включает заправку на короткое время.
Как приготовить еду на гриле?
Покупаем угли в магазине, насыпаем их в гриль и поджигаем. Ждем пока пламя уйдет и появится жар.
Как приготовить кофе?
Покупаем в магазине пакет кофе, на острове где коттедж есть кирпичный гриль на дровах. Кидаем туда дрова и поджигаем, берем чайник и открываем крышку. Переворачиваем пакет с кофе и насыпаем его в чайник до тех пор пока кофе не перестанет сыпаться. Потом набираем воды ( можно из под крана в доме или в озере просто опустив чайник) Закрываем крышку и кладем на огонь. Ждем пока вода внутри не станет черной. После этого ставим чайник на стол или на другую ровную поверхность и подносим чашку к носику чайника.
Как добыть мясо лося?
Спавнится он в вечернее и ночное время где есть знак, который указывает, что они могут здесь появится. Лучший способ – это ехать по шоссе пока вы их не поймаете. Убить их можно топором или сбить машиной. Потом берете топор в руки и начинаете забивать лося, возле него будет спавнится его мясо в количестве 8 штук.
Как приготовить мясо лося?
Берем мясо и ставим на гриль, который на углях. Дожидаемся пока появится жар и смело кладем жарится мясо.
Что за МРО топливо на заправке?
Это топливо для сельскохозяйственной техники ,если заправить им фургон или ассенизатор ,то получите весьма большой штраф.
Как купить алкоголь у водителя “Свободы”?
Чтобы купить алкоголь у водителя надо дождаться субботней вечеринки и ждать пока он приедет туда. После чего подойти к нему и нажать K (По умолчанию) и он предложит вам купить водки за 1000 марок. Также вы можете попробовать поторговаться нажимаю туже кнопку K, но если вы попытаетесь сильно снизить цену, то он может отказать вам в продаже. Вы можете украсть у него коробку, которая лежит на заднем сиденье, если найдете машину без своего хозяина.
Как включить/переключить текстовую трансляцию на телевизоре?
Для того чтобы переключить трансляцию возьмите в руки пульт и нажмите F (по умолчанию) и держа пульт в руках вводите цифры нужной программы на нумпаде.
Где найти шлем? Как снять шлем?
Шлем спавнится в комнате игрока. Нужно опустить камеру вниз и нажать F.
Почему нет продуктов магазине?
Продукты появляются каждый четверг. Также не стоит сохраняться в среду после 22:00.
Как проверить изношенность деталей?
- При изношенном на 90% и более коленвале машину начинает очень(очень) сильно трясти при заведенном двигателе;
- При изношенном на 90% и более поршне, он полностью теряет мощность, увеличивается количество дыма из выхлопной трубы, а оттенок дыма становится голубоватым, увеличивается расход масла. На двух поршнях машина может продолжать работу, на одном уже нет;
- При изношенной на 90% и более прокладке ГБЦ из-под нее будет идти дым, более стремительно пропадает охлаждающая жидкость и моторное масло;
- При изношенной на 90% и более свече(ах) зажигания начинают плавать обороты холостого хода и цилиндр(ы) постоянно теряет мощность.
Как узнать, когда сломается деталь?
- Коленвал просто выходит из строя, но этому предшествует очень сильная тряска машины;
- Из-за износа поршни не ломаются. Их можно сломать если на высоких оборотах понизить передачу, или вследствие перегрева, или неосторожного использования закиси азота;
- При выходе из строя прокладки ГБЦ резко поднимается топливная смесь и температура двигателя, резко падает давление охлаждающей жидкости и масла(горящая красная лампочка на приборной панели говорит о недостаточном давлении масла). Из выхлопной трубы будет идти белый дым и прокладка визуально будет торчать из-под ГБЦ;
- При выходе из строя коромысел клапанов будет слышно два стучащих звука. Визуально у коромысел пропадет несколько пружин, что можно выявить, просто сняв клапанную крышку;
- При выходе из строя коробки передач определенные или все передачи со скрежетом и эффектом нажатого сцепления будут сбрасываться на нейтраль;
- При выходе из строя водяной помпы поднимается топливная смесь, температура двигателя и давление охлаждающей жидкости, появится пищащий звук. Отличать поломку водяной помпы от поломки стартера или неправильно натянутого ремня генератора будет некрутящийся шкив водяной помпы;
- При выходе из строя генератора начнет падать заряд аккумулятора, появится пищащий звук. Рекомендуется не допускать полного разряда батареи, т.к. это приведет к полной ее негодности. Говорить о том, что неисправен именно генератор будет некрутящаяся шкив генератора;
- О том, что ремень генератора порван будет свидетельствовать падение заряда батареи и отсутствие самого ремня генератора. Также не рекомендуется допускать полного разряда батареи. Слишком быстрый износ ремня говорит о неправильной его натяжке. Для правильной натяжки генератор необходимо отодвинуть максимально от блока и подвинуть на два шага к блоку.
- При вышедшем из строя стартере, он будет издавать короткий, отличающийся от обычного звук при попытке завести двигатель.
- Батарея может быть разряжена вследствие неисправного генератора, отсутствия ремня генератора, а также использования электрических приборов при заглушенном двигателе. Симптомом разряженной батареи является незагорающаяся лампочка давления масла на приборной панели(красная лампочка) при повороте ключа в положение зажигания.
- От износа блок цилиндров и масляный поддон не ломаются, но могут быть сломаны вследствие понижения передачи на высоких оборотах или вследствие езды без моторного масла, и(или) без охлаждающей жидкости.
- От износа топливного насоса двигатель начинает вести себя неадекватно, стрелка тахометра начинает плавать и машина будет ехать рывками, когда износ будет на 0, то машина моментально глохнет и перестает заводится. На датчике соотношения воздуха к топливу, топливо будет показывать 0 или показания будут “плавать”.
Где находится фургон?
Сзади нашего дома есть дом дяди нашего персонажа, фургон спавнится утром или вечером возле его дома. Для того, чтобы взять ключи, надо постучать в дверь.
Где взять ассенизатор / грузовик?
Надо дождаться когда дядя будет сидеть днем перед своим домом, подойти к нему и ждать пока он выговорится о своей жизни. В конце он скажет, что мы можем взять ключ от грузовика в его прихожей.
Заходим к нему домой и справа на вешалке будет висеть наш ключ. Грузовик же стоит на центре переработки отходов в городе.
Транспорт дяди (фургон и грузовик) лучше не заправлять МРо, так как за это ему придёт штраф и он продаст свою технику, чтобы заплатить штраф.
![]()
Advanced search…
-
Latest reviews
-
Search mods
Log in
Register
-
News
-
Downloads
-
My Summer Car
-
MSC Textures
You should upgrade or use an alternative browser.
![]()
[PLUGIN] More stickerable windows
1.0.1
Login or Register an account to download this content
-
AuthorRoman266
-
Creation dateMar 22, 2017
-
-
Tags -
stickers
windows
-
-
Find the latest Fanatec products and deals here
Overview
Updates (8)
Reviews (6)
History
Discussion
Ask a question
Reviews (6)
History


This plugin add ability to add stickers on side rear windows and windshield.
How to install:
0. You need have Mod Loader
1. Copy with replace StickerableWindows.dll and Assets folder to Mod Loader mods folder
2. Copy new window_sticker.png in My Summer CarImages
My GitHub(source)
My other mods
Latest updates
-
1.0.1
Update for Mod Loader 0.3 -
1.0
Now it is plugin. -
Update for 04.09.2017
Update for 04.09.2017
Latest reviews
![]()
-
Zorik
-
4.00 star(s)
- Jul 11, 2018
- Version: 1.0.1
0
Downvote
![]()
-
ROMAN266 FANBOY
-
5.00 star(s)
- Jun 12, 2018
- Version: 1.0.1
![]()
0
Downvote
![]()
-
Sokoloft
-
5.00 star(s)
- Aug 17, 2017
- Version: 31.07.2017
![]()
Also you always can edit windows_pbo in sharedassets1, but stickers may added to other transport too..
0
Downvote
![]()
-
LuisMaster
-
5.00 star(s)
- Aug 16, 2017
- Version: 31.07.2017
![]()
0
Downvote
![]()
-
McNasty
-
5.00 star(s)
- Apr 22, 2017
- Version: 17.04.2017
![]()
(not my screen)
0
Downvote
![]()
-
y tho
-
5.00 star(s)
- Mar 23, 2017
- Version: 20.03.2017
0
Downvote
RaceDepartment Store
-
Fanatec ClubSport Shifter SQ V1.5
- RaceDepartment
- Oct 25, 2021
- Shifters / Others
-
Fanatec Podium Wheel Base DD2
-
5.00 star(s)
-
Featured
- RaceDepartment
- Oct 25, 2021
- Racing Wheels / Wheel Bases
-
-
Fanatec Boost Kit 180 (8Nm)
-
Featured
- RaceDepartment
- Oct 25, 2021
- Racing Wheels / Wheel Bases
-
News Articles Sidebar
-
More Teasing in iRacing Development Update
- Today at 00:00
12- Games
-
Ford joins forces with Red Bull F1 for 2026
- Yesterday at 11:53
12- F1 & Motorsport
-
Jerez coming to iRacing… soon™
- Thursday at 14:52
34- Games
-
Race against DLC you don’t own in rFactor 2
- Wednesday at 15:35
80- Games
-
The Crew Motorfest trailer — A Spiritual Successor To TDU?
- Wednesday at 00:00
32- Games
- Author
- Roman266
- Downloads
- 4,097
- File size
- 884.9 KB
- Views
- 13,064
- First release
- Mar 22, 2017
- Last update
- Oct 8, 2017
- User rating
-
4.83 star(s)
6 ratings
Get support
More mods from Roman266
-
![[PLUGIN] GAZ 24 Volga](data:image/svg+xml,%3Csvg%20xmlns='http://www.w3.org/2000/svg'%20viewBox='0%200%200%200'%3E%3C/svg%3E) [PLUGIN] GAZ 24 VolgaNew drivable car
[PLUGIN] GAZ 24 VolgaNew drivable car -
[PLUGIN] Актуальный русификатор текста My Summer Car / Russian languageBest basis for translation into other languages.
-
[PLUGIN] Clearance ToolAdjust ground clearance(level), wheel offset and camber for Satsuma.
-
[PLUGIN] Disable AllDisable almost all game objects for increase FPS. With the ability to enable in real time.
-
[PLUGIN] AutoloadSkip main menu to faster load game
Share this mod
Facebook
Twitter
Reddit
Pinterest
WhatsApp
Email
Link
-
News
-
Downloads
-
My Summer Car
-
MSC Textures