- Remove From My Forums
-
Question
-
Last night I upgraded my machine to Windows 8 Pro RTM.
Everything seemed to be going well, but then I tried to access a network share.
I get a window that says:
____________
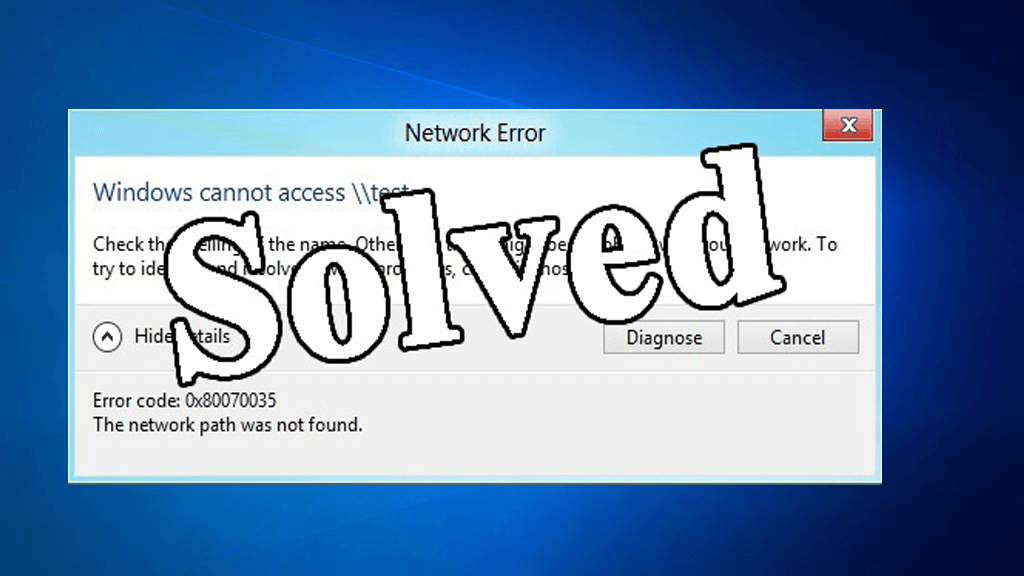
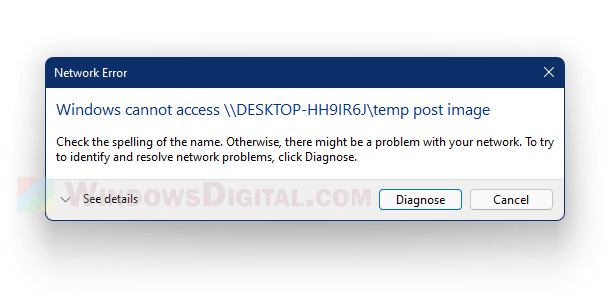
Network ErrorWindows cannot access \{server redacted}{path redacted}
Check the spelling of the name. Otherwise, there might be a problem with your network. To try to identify and resolve network problems, click Diagnose.
Error code: 0x80004005
Unspecified error____________
Clicking «Diagnose» doesn’t find any issues.
One of our networking guys had the same problem when he signed in to my machine. When I signed into his Windows 7 box I was able to access the network resources just fine — so it doesn’t seem to be a user account issue.
I can access some network resources but not others. For example, I can connect to Exchange, I can connect to our TFS server. I can even resolve the server name when I ping it. If I enter the IP of the server instead I get the same error.
My networking guys are stumped.
«We’re all in it together, kid.» — Harry Tuttle, Heating Engineer
Answers
-
A co-worker found the solution to this issue and shared it with me.
- Press Start button (Windows Flag)
- Type Control Panel
- Click Advanced sharing settings
- Under Domain select the Turn on network discovery radio button
- Click Save changes
Now try accessing the network share and you should be able to access it.
«We’re all in it together, kid.» — Harry Tuttle, Heating Engineer
-
Marked as answer by
Monday, November 5, 2012 7:47 PM
Are you the one getting the error code 0x80070035, while connecting your Windows 10 system to another computer? Looking for the fixes to get rid of the – Error code: 0x80070035. The network path was not found. Then read the article to follow the complete fixes.
Microsoft allows the Windows computer to share files between two systems connected to the same network. But some users are encountering the error when trying to share the files and data with each other.
Network Error
Windows cannot access \sharedNAS
check the spelling of the name otherwise there might be a problem with your network, to try identify and resolve network problems, click Diagnose.
Error code 0x80070035 The network path was not found.
Well, the 0x80070035 Windows 10 error is very irritating, and it is estimated is faced by the users due to antivirus or the Windows Defender Firewall blocks the system resources. So, apply the below-given solutions one by one to troubleshoot error code 0x80070035 The network path was not found.
How do I Fix Error Code 0x80070035 in Windows 10?
Solution 1: Turn off the Antivirus and Firewall
In order to turn off the Windows Defender Firewall, follow the below-given steps:
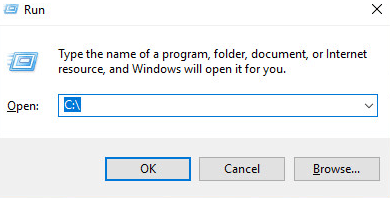
1: First you have to open the control panel, to do this press the Windows + R, and in the Run box type control panel then hit the Enter key.
2: From the list, click on the Windows Defender Firewall then from the left-hand side, click on the Turn Windows Defender Firewall on or off.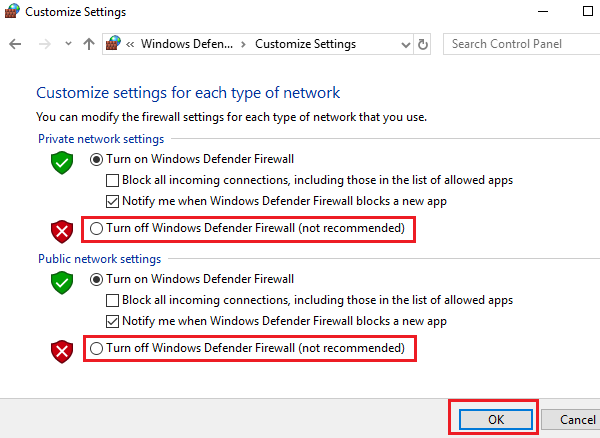
3: Now, you have to select the radio button present along with the Turn off Windows Defender Firewall (not recommended). You have to do this task for both the Private and Public network settings.
4: At last, click on the OK to save the settings and reboot your computer.
Solution 2: Check your Drive is Shared
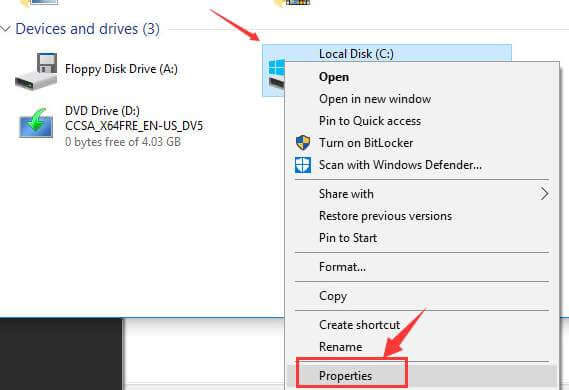
1: Right-click on the drive that you want to access and go to its Properties.
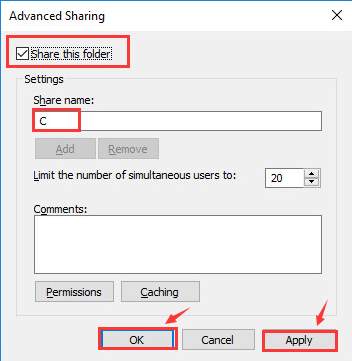
2: Now, navigate to the Sharing tab and verify if the network path displays Not Shared. After it, you have to click on the “Advanced Sharing” option.

3: From the Advanced sharing window, tick marks the box for “Share this folder”. Make sure that you have entered the correct drive name. At last, choose Apply and then Ok to save the modifications.
4: Next press Windows key + R > to open the command prompt > type the name of the folder > hit Enter. and you are able to access the folder without any error.
Solution 3: Try to Reinstall the Network Adapters as well as the hidden adapters
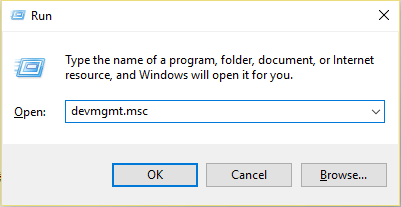
1: Again open the run dialogue box (Press Windows + R), type devmgmt.msc and press the Enter key. This will open up the Device Manager.
2: Now, click on the View tab present in the Device Manager window and check on the Show hidden devices.
3: You will see the hidden adapters, right-click on all the drivers, and uninstall them.
4: Reboot your computer and check for the issue.
Solution 4: Enable NetBIOS over TCP/IP
This solution worked for many users to fix the Windows 10 explorer network error 0x80070035 the network path was not found. So, follow the steps to enable the NetBIOS over TCP/IP.
1: Open the run box by pressing the Windows + R keys, in the run box you have to type the ncpa.cpl and press the Enter key. This will open up the properties of WiFi.
2: Right-click on the WiFi network and choose the Properties.
3: Now, double-click on the Internet Protocol Version 4 to open the properties.
4: Then, click on the Advanced and navigate to the WINS tab.

At last, from the NetBIOS setting, you have to select the radio button at “Enable NetBIOS over TCP/IP.” Then click on the OK to save the changes.
Solution 5: Delete all Windows Credentials
1: Go to the Control Panel of your system and choose the Credential Manager.
2: From the Windows Credential section, delete all the credentials and reboot your system.

3: If the system asks to enter all Windows credentials then reenter the credential.
I hope this works for you to fix the error code 0x80070035 in Windows 10. But if still struggling with the Windows 10 problem then head to the next solution.
Solution 6: Change the Network Security Settings
Follow the steps to carefully change the Network Security Settings.
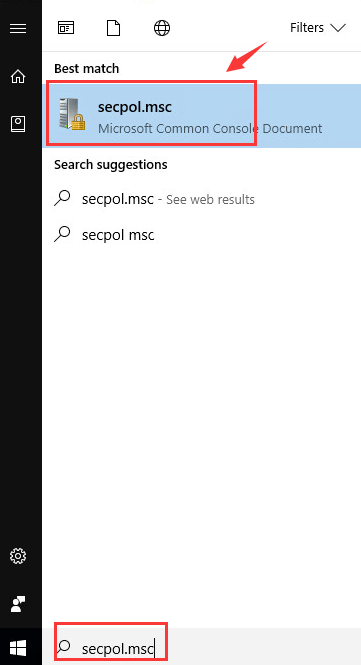
1: Open the run box (press Windows + R) and type secpol.msc then press the Enter key. This will open up the Local Security Policy window.
2: Go to the Local Policies >> Security Options.
3: From the right pane, you have to double-click and open the properties for Network security: LAN Manager Authentication Level.

4: At last, using the drop-down menu, choose the Send LM & NTLM-use NTLMv2 session security if negotiated.
Solution 7: Utilize Windows Command Prompt
1: Press Win + X and select the Command Prompt (Admin)
2: After it, simply run the given commands one-by-one and hit Enter after each
ipconfig /release
ipconfig /flushdns
ipconfig /renew
3: Restart the system and check for the issue. If you are still unable to solve the error code 0x80070035 then run the following command:
ipconfig /flushdns
nbtstat –r
netsh int ip reset
netsh winsock reset
At last, reboot your system check for the Windows cannot access check the spelling of the name error.
Solution 8: Enable Network Discovery
Many users confirmed that turning on the network discovery works for them to fix the error 0x80070035 Windows 10.
Follow the steps to do so:
1: Hit Win + R > and in the Run dialog box > type the command control panel and open it
2: Then click and open the Network and Sharing Center.
3: And on the left side in the menu > choose Change Advanced Sharing settings.
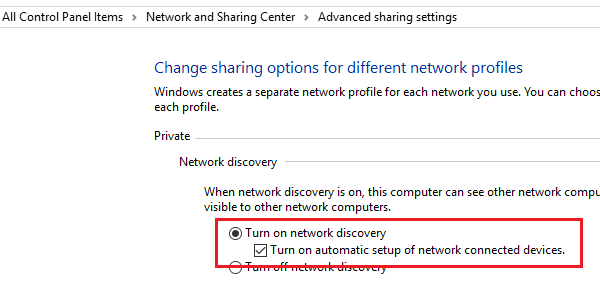
4: Next shift radio button to the option Turn on network discovery > checkmark the box that shows Turn on automatic setup of network-connected devices.
5: Lastly, restart your system
Solution 9: Add IPv4 protocol over TCP/IP
Open the run dialogue box (press Windows + R keys), in the run box type ncpa.cpl and press the Enter key.
Now, choose your connection and right-click on it then select Properties.
Find out the box for “The connection uses the following items” and then click on the “Internet Protocol (TCP/IP) Version 4” from the field.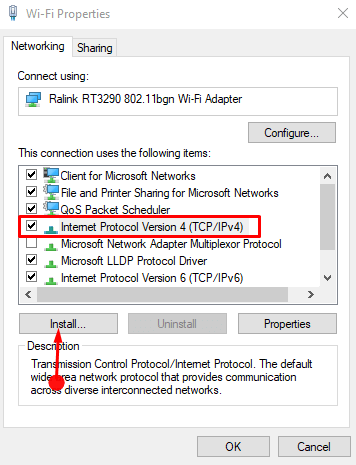
Hit the Install button.
Then, choose “Protocol” and click on Add on the Select Network Feature Type wizard.

When the Network Protocol pop up appears, select the Reliable Multicast Protocol then OK.
It is estimated after following the above-given fixes you are able to fix “check the spelling of the name otherwise there might be a problem with your network” error.
PEOPLE ALSO ASK:
1: What does Network path not found mean?
The network path is a location where one can store files, local paths, and others. But if in case your computer won’t find the file while trying to connect another computer in the same network then it shows the error message the network path not found. In simple words when your system cannot find the network path that is connected to.
There are many reasons responsible for the error code 0x80070035 the network path not found but the most common reason is the name of the computer in which you are trying to connect is long so try to shorten it. Despite this, there are other reasons as well like firewall, third-party antivirus programs, outdated network drivers, or the corrupted system files.
3: How Do I Fix Network Path Not Found Error?
Try the fixes like modify the network security settings, turn off the third-party antivirus or firewall programs, update the network drivers, reset TCP/IP, enable sharing on the remote device, and other given in the article here.
Make Your Windows PC/Laptop Error-Free
If after following the above-given fixes your system starts running slow, crashing, or freezing then it is suggested to scan your system with the PC Repair Tool.
This is an advanced repair utility that fixes various computer problems like stubborn Windows errors, protects your from virus/malware, DLL error, repair corrupt registry entries, and many other errors and issues in the Windows system.
This not only fixes errors but also optimizes the Windows PC performance.
Get PC Repair Tool, to improve Windows PC/laptop performance
Conclusion
It is estimated the article worked for you to fix the Error code 0x80070035, The network path was not found” in Windows 10.
Make sure to type the commands and follow the given solutions carefully, to avoid further issues.
If you are having any comments, suggestions, or queries regarding the one projected than feel free to share with us.
Good Luck..!

Always up to help others with their PC-related issues, Jack loves to write on subjects such as Windows 10, Xbox, and numerous technical things. In his free time, he loves to play with his dog “Bruno” and hang out with his friends.
When you open a shared folder in a local network, if you receive the following error: “Windows cannot access \DESKTOP-XXXXXXX shared folder – You do not have permission to access the shared folder. Contact your network administrator to request access” or “Check the spelling of the name. Otherwise, there might be a problem with your network“, try the solutions below.
First, check if you have properly turn on network discovery on the computer you share the folder from and on the computer you want to access the shared folder. Secondly, check if the computer you share the folder from has also turned on file sharing. For a detailed guide on how to enable (or disable) these options in Windows 11 or 10, follow the links below.
- How to Turn On Network Discovery and File Sharing in Windows 11
- How to Turn On Network Discovery and File Sharing in Windows 10
For a detailed guide on how to correctly share a folder from scratch on Windows 11 or 10, read: How to Share a Folder in Windows 11 / 10 Local Network Without Password
If you have done all the above and still getting the error, follow the solutions below. The screenshots in the instruction below were taken on Windows 11, but the steps are similar to that of Windows 10. You can follow the same steps for both Windows 11 and 10.
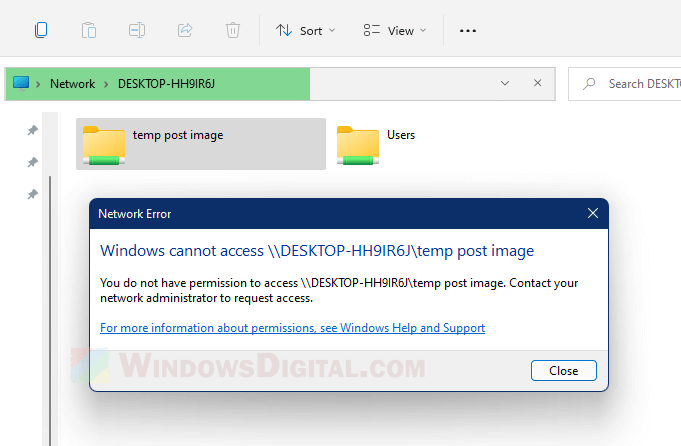
Fix: “Windows cannot access shared folder – You do not have permission” in Windows 11
In most cases, you get the “You do not have permission” network error message when you open a shared folder if the shared folder does not have the user (you use to access this folder) added to its “share with” list. Follow the steps below to re-configure the Share and Advanced Sharing options for the shared folder to add the user(s) you want to share the folder with and configure their permission levels.
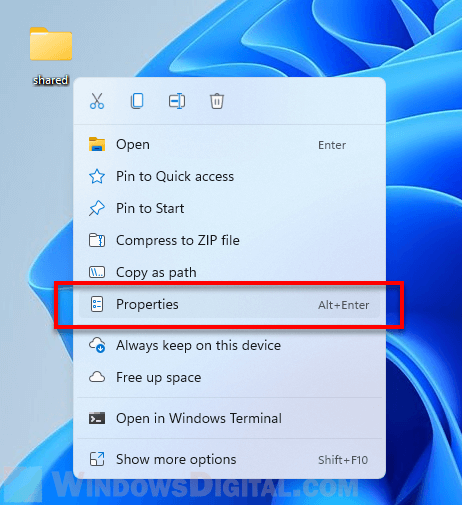
- On the computer you want to share the folder from, right-click on the folder you want to share, then select Properties.

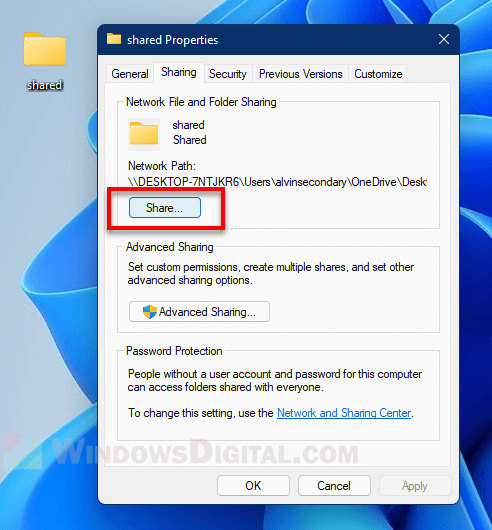
- In the Properties window, click on Sharing tab.
- Under Network File and Folder Sharing section, click on the Share button.

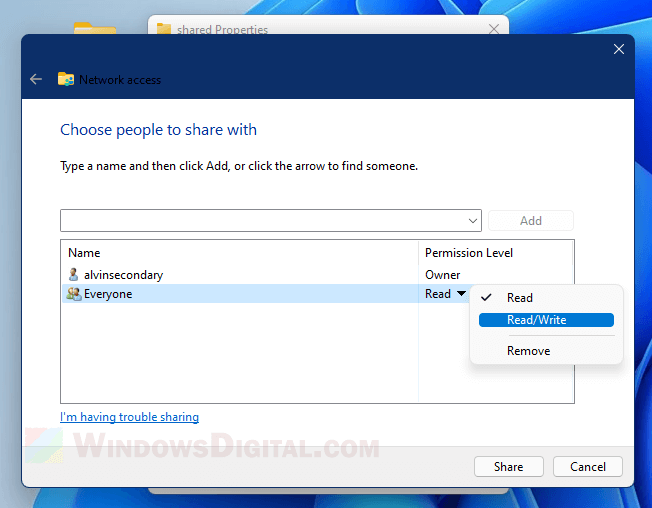
- In the “Choose people to share with” settings window, click on the drop-down menu and select the user (or create a new user) you want to share your folder with. If you are not sure about what user to add, you can select Everyone to share the folder with anyone that has access to the local network (not recommended if the computer is or will be connecting to a public network).

- Once the user is added, optionally, you can configure the permission level of the user. You can set the user to have Read only permission or both Read and Write permissions. The write permission means to allow the user to also edit, move or delete the files in the shared folder.

- Next, click Share to proceed.
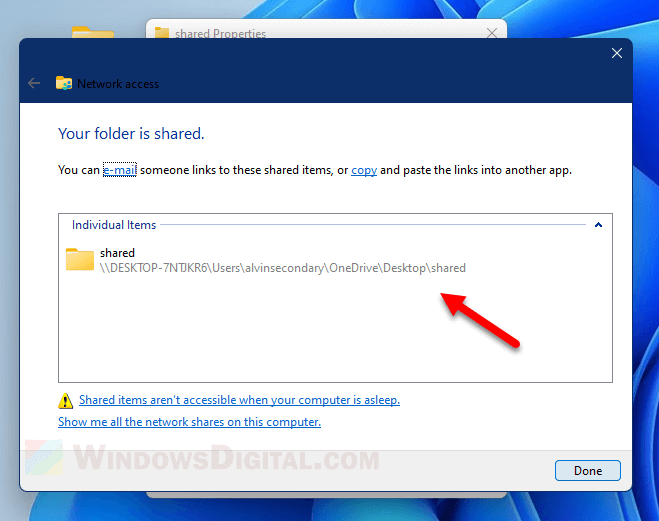
- On the next screen, you can copy the shared link and use it in the File Explorer address bar on another computer to access the shared folder. This step is optional if you can access the shared folder via the Network folder. Click Done to proceed.

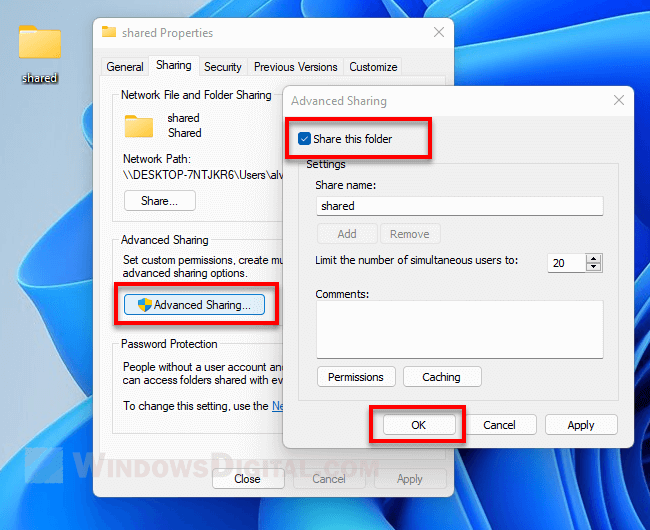
- Next, back to the properties window, click on the Advanced Sharing button.
- Tick the “Share this folder” checkbox.

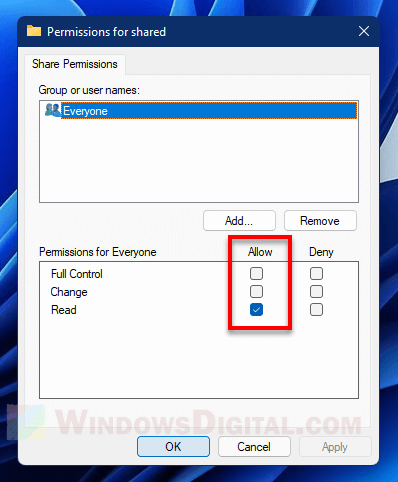
- Optionally, you can click on the Permissions button. From here, you can set the permissions for each user, whether to allow the users to have full control or read only over the shared folder.

- Click Apply, then OK to save the changes. Close the properties window and retry access to this shared folder again from another computer in the same local network.

Note that shared folders are not accessible when the computer where the shared folder is located at is in sleep or hibernation mode. Shared folders can only be accessed when Windows is actively running.
“Windows cannot access shared folder – Check the spelling of the name” Windows 11
Windows would prompt the error – “Check the spelling of the name” when you open a shared folder if the shared folder is not visible or no longer exist, the shared link is already outdated, or the shared folder is no longer being shared. It happens when a shared folder is no longer exist in the location where it was first shared or no longer set as shared.
It could of course also be due to incorrect shared link caused by spelling mistake or change in location of the shared folder commonly due to a recent move of the folder to another location.
Regardless of what causes the issue, the easiest solution to this issue is to re-configure the sharing options of the folder you want to share. If you have access to the computer which you want to share the folder from, follow the same steps in the instruction above (in the first part of this guide) to reconfigure the Share and Advanced Sharing settings for the shared folder to correctly share the folder again.
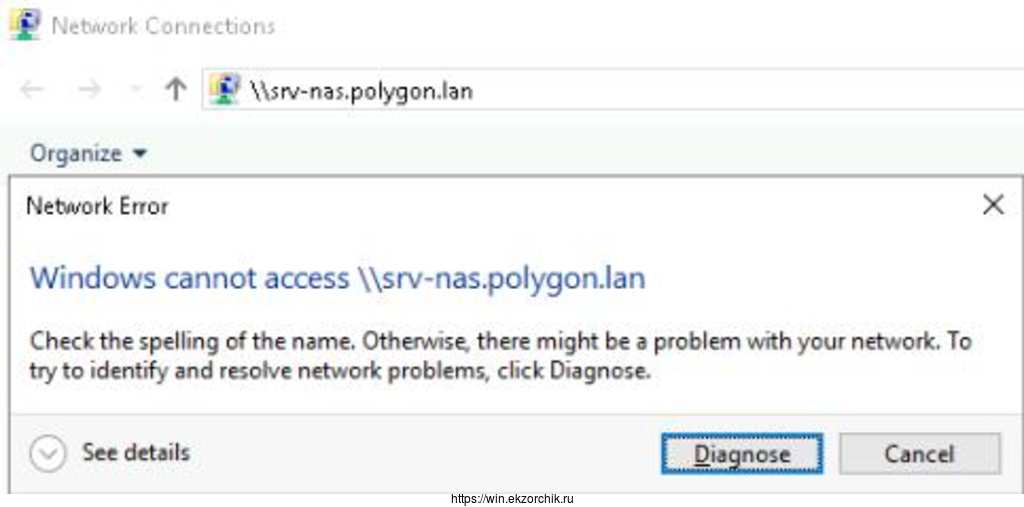
При проработке различных настроек на Windows Server 2019 Standard (Version 10.0.17763.2114) на тестовом полигоне Debian 10 + Proxmox 6 в своей локальной сети столкнулся, что не вижу свой ресурс на базе Samba 2.4.3 on Ubuntu 14.04.5 (моя локальная сетевая папка, где у меня лежат образа, софт, книги, видеоуроки). А данная система успешно работает, как виртуальная машина на HP MicroServer Gen8. При попытке обращения к нему по DNS имени (\srv-nas.polygon.lan) или же по IP адресу (\172.35.35.4) получаю сетевую ошибку вида:
Windows cannot access \srv-nas.polygon.lan
Check the spelling of the name. Otherwise, there might be a problem with your network. To try to identify and resolve network problem
На заметку: Если посмотреть See details то может быть код ошибки
Код ошибки 0x80070035 (Не найден сетевой путь)
Код ошибки 0x80004005 (Неопознанная ошибка)
Вот только данный ресурс работает и к нему я успешно обращаюсь, с Windows 7,10, Server 2012 R2, Ubuntu систем, а почему же для Windows Server 2019 нужно что-то еще?
Для начала проверяю конфигурационный файл smb.conf дабы убедиться, что я в нем ничего не запретил, ну мало ли:
|
1 2 3 4 5 6 7 8 9 10 11 12 13 14 15 16 17 18 19 20 21 22 23 24 25 26 27 |
ekzorchik@srv—nas:~$ cat /etc/samba/smb.conf | grep —v «^$» | grep —v «#» | grep —v «;» [global] workgroup = WORKGROUP server string = %h server (Samba, Ubuntu) dns proxy = no log file = /var/log/samba/log.%m max log size = 1000 syslog = 0 panic action = /usr/share/samba/panic—action %d server role = standalone server passdb backend = tdbsam obey pam restrictions = yes unix password sync = yes passwd program = /usr/bin/passwd %u passwd chat = *Entersnews*spassword:* %nn *Retypesnews*spassword:* %nn *passwordsupdatedssuccessfully* . pam password change = yes map to guest = bad password usershare allow guests = yes [nas] path = /nas guest ok = yes read only = no create mask = 0777 directory mask = 0777 hide files = /$RECYCLE.BIN/desktop.ini/lost+found/Thumbs.db/ acl allow execute always = true ekzorchik@srv—nas:~$ |
и вывода вижу, что доступ возможен как авторизацией так и гостем.
Чтобы включить авторизацию гостем с Windows Server 2019 нужно
Win + R -> gpedit.msc - Local Computer Policy - Computer Configuration - Administrative Templates - Network - Lanman Workstation
Enable insecure guest logons: Enable
На заметку: Все выше указанное можно сделать через правку реестра:
HKLMSYSTEMCurrentControlSetServicesLanmanWorkstationParameters
изменяем значение параметра AllowInsecureGuestAuth на 1
и нужно после перезагрузить сервер, либо
|
cmd.exe — Run as Administrator echo y | net stop LanmanWorkstation && echo y | net start LanmanWorkstation |
теперь мой сетевой диск успешно открывается

Итого в моем случаем дома авторизация на сетевой папке ни к чему и можно оставить так. Главное что я разобрал как получить доступ к нужной информации в локальной сети.
На этом я прощаюсь, с уважением автор блога Олло Александр aka ekzorchik.
I was able to access network PCs by entering ComputerName in windows explorer. This was working before until I tried it again a while ago (not sure when it stopped working). The error message is:
«Windows cannot access ComputerName check the spelling of the name, Otherwise, there might be a problem with your network. To try to identify and resolve network problems, click Diagnose.»
When I click Diagnose, it says it cannot identify the problem. But other PCs on the network can still access this computer.
Here are the things I tried:
- Accessing itself using its own computer name (MyComputerName)
- Using ip address instead of computer name
- Checked that the network adapter’s driver is up to date
- Enabling and disabling network discovery
- Pinging the computer name and ip address (its own or other PCs) works fine
- I was able to access the router’s console using internet browser. (
http://192.168.254.1) - I was able to view another PC running IIS using internet browser using both computer name (
http://OtherPc) and ip address (192.168.254.100) - Disabled firewall (windows firewall, no 3rd party firewall installed). Disabled virusscan.
P.S.
Internet connection is working fine.
The computer is running on windows 7
asked Jul 29, 2013 at 4:10
![]()
7
Old: You should use 2 slashes in Explorer when looking up the computer
name.
You should check the network connection type in windows 7. Enter this in explorer:
Control PanelNetwork and InternetNetwork and Sharing Center
Under your connection you are trying to use to access the PC, check under the name. If it is public network, you will need to change it to work or home.
answered Jul 29, 2013 at 4:13
![]()
KelzKelz
1013 bronze badges
8
On the computer you want to connect make sure that in Control PanelNetwork and InternetNetwork and Sharing CenterAdvanced sharing settings page that Network discovery and file/printer sharing is turned on for the profile its on (Its possible something in your network changed and now you’re set to a public network). This will turn on the services and open the ports. The computer connecting to it doesn’t need these enabled, it just needs to be able to see the computer. (Which is can, because you said you can ping it)
answered Jul 29, 2013 at 4:50
![]()
1
The error code 0x80070035 «Network path was not found» when trying to access a network computer with shared files, can be caused by a number of reasons, so in this guide you will find several methods to resolve the issue.

This tutorial contains step-by-step instructions to resolve the «network path no found error 0x80070035» in Windows 10.
«Windows cannot access \computer
Check the spelling of the name. Otherwise, there might be a problem with your network. To try to identify and resolve network problems click Diagnose.
Error Code: 0x80070035
The Network path was not found»
How to FIX: Network path not found – Error Code 0x80070035 on Windows 10.
In order to resolve error «0x80070035: The Network path was not found»:
Step 1. Make sure that you type the name of the network computer correctly.
Step 2. Ensure that both computers (your local and the network one), are connected on the same network.
Step 3. If you use the same account name to sign in to Windows on both computers, make sure that you also have the same password on the account on both computers. Additionally, if you have not set a password for the user who will have access to the shared files, proceed and specify one, because Windows 10 doesn’t allow the shared files to be accessed from users without a password.
Step 4. Verify that you have specified correctly the file sharing settings (shares, permissions) on the network computer with the shares, by following the instructions on this article: How to Share Folders & Files in Windows 10.
Method 1. Access the Network Computer using its IP Address instead of its Name.
Step 1. Find the IP Address of the Network Computer with the Shares.
On the computer with the shares, find its IP address by following the instructions below:
1. Go to Start ![]() > Settings
> Settings ![]() > Network & Internet.
> Network & Internet.
2. Select from the left pane the active Network connection (Ethernet or Wi-Fi), and click on the connection on the right.

3. In Network properties, scroll down and note the IPv4 address of the computer.

Step 2. Access the Network computer using its IP Address.
On the local computer, from where you want to access the shared folder:
1. Simultaneously press the Windows ![]() + R keys to open run command box.
+ R keys to open run command box.
2. Type \IPv4 Address of the network computer and press Enter. e.g. In this example, the IPv4 address is 10.0.2.15, so we have to type: \10.0.2.15

3. If you sill receive the error «Network path was not found», continue to Method 2 below.
Method 2. Change the Sharing Settings on both Computers.
Step 1. Check that the Network type (Private or Public), is the same on both PCs.
1. Go to Start ![]() > Settings
> Settings ![]() > Network & Internet.
> Network & Internet.
2. Click Status on the left and notice if the Network profile on both computers is the same (e.g. Private). *
* Note: If the network profile is not the same, click the Properties button and change it accordingly.

Step 2. Allow the Network Discovery and File Sharing.
1. Select from the left pane the active Network connection (Ethernet or Wi-Fi) and click Change advanced sharing options.

2. According the Network profile you have (Private or Public), expand its settings and…
a. Turn on network discovery on both PC’s.
b. Turn on file and printer sharing on the PC with the shares.
c. Click Save changes.

3. When done, restart both computers and then try to access the shares on the Network computer and if the problem persists, continue to the next method.
Method 3. Change the Startup Type of the Required Network Services to Automatic.
1. Simultaneously press the Windows ![]() + R keys to open run command box.
+ R keys to open run command box.
2. In run command box, type: services.msc and press Enter.

3. In Services panel, check that the following four (4) services are Running: *
-
- Function Discovery Provider Host (fdPHost)
- Function Discovery Resource Publication (FDResPub)
- SSDP Discovery
- UPnP Device Host
Note: If one of the above services is not running:
a. Right click on the service and click Properties.

b. Change the Startup type to Automatic and click OK.

4. Reboot the computer.
Method 4. Turn On the SMB 1.0/CIFS File Sharing Support.
On the Windows 10 machine (with the shared folders):
1. Navigate to Control Panel and open Programs and Features.

2. Click Turn Windows features on or off.

3. Check the SMB 1.0/CIFS File Sharing Support feature and click OK.

4. Restart the computer.
5. After restart, check if you can access the shared folder from the clients. *
* Additional help: If you are still unable to connect to the shared folder, try the following:
A. Temporarily disable the Antivirus and the Firewall protection on the PC with the shared folders and then try to access the shared folder from the client machine.
B. Install all available Windows updates, or uninstall the most recently installed update if the problem occurred after you installed an update.
That’s it! Which method worked for you?
Let me know if this guide has helped you by leaving your comment about your experience. Please like and share this guide to help others.
If this article was useful for you, please consider supporting us by making a donation. Even $1 can a make a huge difference for us in our effort to continue to help others while keeping this site free:

If you want to stay constantly protected from malware threats, existing and future ones, we recommend that you install Malwarebytes Anti-Malware PRO by clicking below (we
do earn a commision from sales generated from this link, but at no additional cost to you. We have experience with this software and we recommend it because it is helpful and useful):
Full household PC Protection — Protect up to 3 PCs with NEW Malwarebytes Anti-Malware Premium!
Hi I have a very weird error.
When I try to access a .exe on a network share, this is the error I get. I’m logged on as domain administrator.
Windows cannot access \servernamefile.exe Check the spelling of the name. I can open other files with no issues. .jpegs or excel files and so on but none of the executable’s will launch.
I can see the files and copy them to my desktop and run them fine. I created another shared folder on the same server under the same main folder with the exact same share permissions and I can start .exe files with no issue.
I have done a run as administrator to no avail. Also a start>run> \servernamesharefile.exe will give the same error.
I also copied a test.exe to a subfolder in the same share and it launched fine.
I did try some of the other hints off our forum initially. I tried network discovery, enable linked connections and a few other things to no avail.
The strange thing is I have seen a few clients get this error now and then then it cleared up but this time as Domain admin it is solid.
The other shares are working fine.
All of my shares live in a folder d:company sharesfolder 1, 2 and so on.
Any insight would be appreciated.
Thanks
Traveler